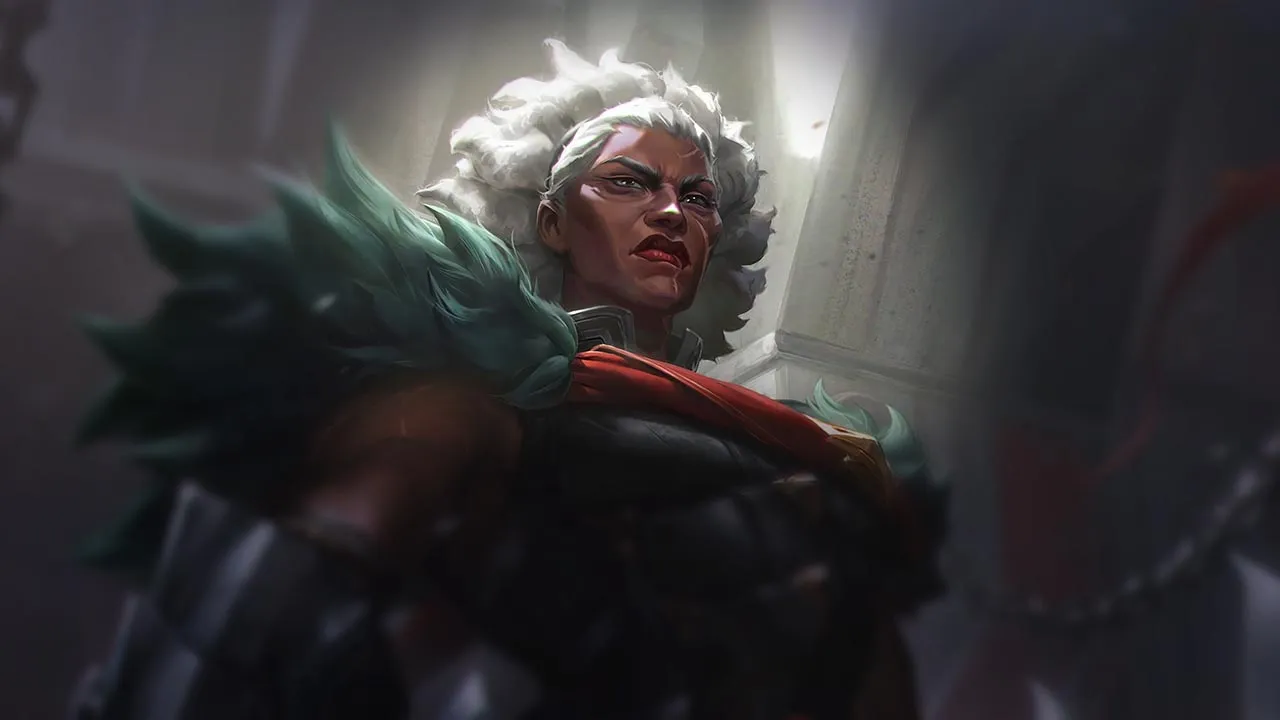































カウンターアングル
Ambessaとの対戦は、メカニクスで彼女を倒すだけでなく、彼女の戦闘ロジックを破壊することです。彼女のキットは特定の瞬間、つまり突入し、孤立させ、即座に不均衡を作り出すことに集中しています。その瞬間が失敗した場合、彼女は脆弱になります。最良のカウンターは、必ずしもレーンを支配する者ではありませんが、彼女が計画を実行するのを阻止する者です。彼女のエンゲージを阻止する方法を理解することは、彼女を倒そうとすることよりも重要です。

Baron Lane / Jungle fighterであるAmbessaは、持続ダメージを与えるためにmobilityと近接レンジの維持に依存しています。強力なkite、crowd control、または素早いburstを持つ構成は、彼女の有効性を制限する可能性があります。近接戦闘でのプレッシャーを維持できない場合、彼女の影響力は著しく低下します。
これらのチャンピオンは、こちらのビルドやプレイスタイルを真正面から上回る構成を持ち、レーン戦のコントロールとファームを極めて難しくする。彼らのスキルはこちらの主要な強みを無効化し、いつも通りのプランを実行しようとした瞬間に手痛い反撃を受けさせてくる。こうしたマッチアップでは、ミスを最小限に抑え、正面からの対決以外で解決策を探すことが重要になる。

あなたの戦闘ループ全体は、Cunning Sweep や Lacerate を使ったあとに Drakehound's Step のダッシュをつなげることに依存しています。しかし Poppy は Steadfast Presence でこれを完全に封じます。Poppy がこれを発動した瞬間、あなたのパッシブで滑ったり位置を変えたりしようとすると Poppy のバリアが発動し、あなたは足止めされてダメージを受け、パッシブで強化された攻撃も止められます。機動力を失うと、あなたはあらゆる脅威を失い、Poppy のハンマーの周りを踊るように動き回ることもできなくなります。
この相性により、あなたは非常に守りの姿勢を強いられます。Poppy はバリアを見てから発動して、あなたの Cunning Sweep の追撃や Lacerate の二連回転をキャンセルできるため、安全に minion wave を争うことはできません。壁の近くで捕まれば、Poppy はあなたを叩きつけ、パッシブのダッシュなしでは逃げられません。この lane priority の喪失により、Poppy は安全にスケールし、自由に roam してあなたの jungler の邪魔をできます。
生き残るには、本格的な trade に入る前に Poppy の Steadfast Presence を誘い出さなければなりません。ダッシュを発動させないように、Cunning Sweep は安全な距離から farm に使ってください。Poppy が防御用のリングを無駄撃ちしたら、Lacerate と Public Execution で攻撃できる短い隙ができます。それ以外のときは、Repudiation を温存して Poppy の壁叩きつけダメージを吸収し CC をブロックし、シールドが切れたらすぐに自分のタワーの方へ後退してください。

Olaf はあなたの仕留め手段を完全に封じることで、この matchup を支配します。Olaf が Ragnarok を発動した瞬間、Olaf は Public Execution のサプレッションと強制移動に対して完全に免疫になり、あなたの ult は自殺的なダッシュになります。ult の CC がなければ、あなたは Olaf の Berserker Rage と Vicious Strikes を相手に純粋な殴り合いを強いられます。これはステータスの勝負であり、Ambessa の低体力を仕留めるパターンでは数字の上で生き残れません。
Olaf がレベル 5 に到達すると、あなたはすべての lane priority を失います。Cunning Sweep で poke しようとすれば、Olaf は Undertow で反撃し、あなたを slow させて長い lane の端まで追い詰めます。長引く trade はどれも Olaf に Vicious Strikes を発動させて回復し直す機会を与えるため、安全に wave を争うことはできません。その結果、あなたはタワー下で farm を落とし、gold を失いながら dive の仕込みのリスクにさらされます。
Public Execution は、純粋な機動手段か、Ragnarok が切れたあとのフィニッシャーとしてのみ扱ってください。Olaf が突っ込んできたら、Drakehound's Step で垂直にダッシュして Undertow の斧を避け、Olaf の追撃の可能性を断ってください。Repudiation は、適当な poke ではなく、Reckless Swing の確定ダメージを吸収するために温存してください。Olaf が ult を使ったら、すぐに Lacerate の slow と後ろ向きの Drakehound's Step で disengage し、Olaf の免疫が切れてから初めて再 engage してください。

Jax は Counter Strike が、Drakehound's Step で強化されたあなたの通常攻撃をすべてブロックするため、あなたの trade パターンを完全にカウンターします。あなたのダメージループ全体とエネルギー回復は、Cunning Sweep や Lacerate のあとにこれらの強化攻撃を当てることに依存しているため、Jax はヘリコプターのような回転を発動するだけであなたの burst を無効化でき、同時に自分の Relentless Assault の攻撃速度を上げていけます。
この相性は、あなたの序盤の priority を奪い、wave のコントロールを手放すことを強います。Cunning Sweep で wave を減らそうとすれば、Jax は Leap Strike と Empower で即座に engage できます。Jax の回避を突破して反撃できないと分かっているからです。あなたは Drakehound's Step を防御的に使って逃げるしかなく、タワー下で minion の gold を失い続ける一方、Jax は安全に Grandmaster-at-Arms のパワースパイクまでスケールします。
生き残るには、メインのダメージを使わずに Counter Strike を誘い出さなければなりません。Jax が回転を始めたら、すぐに Drakehound's Step か Lacerate のダッシュを使って disengage し、後ろに下がりながら kite してください。Leap Strike で捕まった場合に burst を吸収しスタンをブロックするため、Repudiation を温存してください。Jax の回避の時間が完全に終わったときに初めて、Cunning Sweep と Public Execution で短い反撃を狙えます。

Volibear は、Frenzied Maul が Volibear を回復させあなたのコンボを上回るダメージを出すため、あなたの長引く skirmish を完全に封じます。Cunning Sweep と Lacerate で poke はできますが、Volibear の近接レンジにとどまると、Volibear にマークを付けられ、再び噛みつかれて Volibear が大きく回復してしまいます。生き残るには、Lacerate を使った直後に Drakehound's Step のダッシュで disengage し、Volibear の爪が二度当たる前に離れる必要があります。
Volibear のパッシブ The Relentless Storm は自然に wave を push し、Sky Splitter は trade 中の Volibear にシールドを与えます。正面からの消耗戦には勝てないため、あなたは自分のタワー付近で wave を freeze せざるを得ません。Volibear に大きな wave を crash させると、Volibear は Stormbringer であなたのタワーを無効化して楽に dive してきて、あなたの recall のタイミングを台無しにし、lane に閉じ込めます。
Volibear が Thundering Smash を発動している間は、決して engage しないでください。代わりに Repudiation を温存して、飛んでくるスタンをブロックし、最初のダメージを吸収してください。Lacerate が使えるときだけ trade し、発動した Drakehound's Step で後ろにダッシュして Volibear の追撃を断ってください。Volibear が wave を自分のタワー付近で freeze したら、通常攻撃で farm しに歩いて近づかず、Cunning Sweep の外縁を使って安全な距離から minion を確保してください。
これらのチャンピオンは、マッチアップ自体を絶望的にするわけではないが、対面で優位に立ちやすいツールを持っている。射程が長かったり、攻撃を受け止める力が高かったり、エンゲージへの対応手段が豊富だったりする。アプローチを調整し、戦闘を受け入れるタイミングを慎重に選ぶ必要がある。

Darius は Hemorrhage のおかげで長引く trade を支配するため、純粋な殴り合いは Ambessa にとって致命的です。この matchup全体は、Decimate にどう対応するかにかかっています。Darius が外側の刃を当てると、Darius は回復してパッシブをスタックします。しかし Ambessa は、Cunning Sweep か Lacerate を使ったあとに Drakehound's Step を使って、Darius の内側の柄の部分へ直接ダッシュでき、Darius の回復を完全に無効化してダメージも最小限に抑えられます。
Apprehend で lane の先まで続く致命的な追撃に引き込まれる可能性があるため、考えなしに wave を push してはいけません。Darius が Hemorrhage を最大までスタックしにくい、自分のタワーの近くで trade してください。Darius にフルの Decimate を当てられるという一度のミスが早い recall を強い、体力を削られたあなたに対して、Darius は wave を freeze したり、Noxian Guillotine で簡単な dive を狙ったりできるようになります。
ダッシュで前に出て仕掛けるのは絶対にやめてください。代わりに、歩いて近づいて Darius の Decimate を誘い、すぐに Lacerate を使って Drakehound's Step を発動させ、Darius の内側の円へ滑り込んでください。先に Apprehend で引き寄せられてしまったら、すばやく Repudiation を使って Crippling Strike を吸収し slow をブロックし、安全に disengage してください。Hemorrhage が 4 スタックの状態で捕まったら、Public Execution を防御的に使って Darius をサプレッションし、クールダウンが戻って逃げるまでの時間を稼いでください。

Sett は、Cunning Sweep と Lacerate による素早いコンボが Sett の grit バーを急速にチャージするため、長引く殴り合いで力を発揮します。burst で倒そうとしても、Sett の Pit Grit による体力回復と Haymaker の大きなシールドが、あなたの最初の優位を打ち消します。Sett があなたの前から当たるダメージを簡単に吸収し、Sett の中央の一撃から逃げられなければ壊滅的な確定ダメージで反撃してくるため、この matchup は不利です。
Cunning Sweep を使うために前へ出るたびに Sett の Facebreaker で引き寄せられる可能性があるため、闇雲に wave を争うことはできません。この脅威により、あなたは自分のタワー下で守りに回り、序盤の wave コントロールを犠牲にすることを強いられます。ダッシュなしで Sett に捕まると、Sett は Knuckle Down で追いかけてきて、大きな lane のプレッシャーを生み、あなたの jungler はトップを無視するか、The Show Stopper でダブルキルされるリスクを取ることになります。
all-in を生き延びるには、Drakehound's Step のチャージを必ず 1 つ残しておく必要があります。trade 中にパッシブのダッシュを使い切らないでください。代わりに、Sett が Haymaker を使うのを待ってください。Sett の grit バーが満タンになってシールドが展開されたのが見えた瞬間に、Drakehound's Step のダッシュを横方向に使って、確定ダメージの中心から滑り出てください。Sett が Facebreaker で引き寄せてきたら、すぐに Repudiation を先行入力してスタンを吸収し、Sett のシールドが減衰するまで disengage してください。

この matchup は、Malphite の Ground Slam があなたのパッシブループを直接カウンターすることで決まります。Cunning Sweep や Lacerate を使うたびに、あなたは Drakehound's Step で素早くダッシュして強化された通常攻撃を連続で繰り出すことに依存しています。しかし Ground Slam の大きな攻撃速度低下は、あなたのアニメーション速度を完全に止めてしまいます。これによりエネルギーを素早く取り戻せなくなり、動きが鈍くなって、スピード感のあるアサシンのコンボを実行できなくなります。
これを標準的な burst lane として戦うことはできません。Malphite は Seismic Shard でずっとあなたの体力を削りながら、Granite Shield であなたの反撃を吸収します。Ground Slam のせいで素早い trade に勝てないため、思いのままに wave を crash させる力を失います。lane は厳しい消耗戦になり、きれいに recall するのが難しくなります。さらに、あなたの体力が下がりすぎると、Malphite の Unstoppable Force が常に dive の脅威になります。
この消耗戦を生き延びるには、純粋な lethality の rush をやめて、序盤の魔法防御と体力回復を重視するビルドに切り替えてください。lane では、タイミングよく張った Repudiation のシールドで Seismic Shard の追尾ダメージを吸収することを狙ってください。Malphite の Ground Slam が使える間は、Drakehound's Step を使った攻撃を仕掛けないでください。Malphite が minion に無駄撃ちしたら、すぐに Lacerate で Malphite を slow させ、フルコンボを叩き込んでください。

Renekton の怒りで強化された Ruthless Predator があなたの体力を削り取り、一瞬で拘束するため、Renekton は序盤の skirmish を支配します。あなたの trade 力は Cunning Sweep と Drakehound's Step をつなげることに依存しているため、ダッシュの途中でスタンされるとリズムが崩れます。この matchup 全体は、Repudiation のタイミングを合わせて Renekton のスタンを吸収しブロックできるかにかかっています。そうでなければ、Renekton の純粋な burst があなたの基本的な防御ステータスを簡単に圧倒します。
Renekton の fury バーが赤いときは、不用意に wave を争うことはできません。Renekton がスタンを温存していると、あなたはタワー下での farm を強いられ、前に出るたびに Cull the Meek で体力を削られます。Ruthless Predator をブロックできなければ、早い recall を強いられて貴重な gold を失い、Renekton に大きな wave を crash され、dive や roam をするための完全な priority を与えてしまいます。
Renekton の fury が高く、Slice and Dice が使えるときは、Cunning Sweep で仕掛けてはいけません。代わりに Renekton のダッシュを誘い、武器が Ruthless Predator で光った瞬間に Repudiation を発動してスタンをブロックしてください。シールドがクールダウン中なら、Renekton の二連ダッシュの範囲外で安全にプレイしてください。シールドなしでスタンされたら、trade を立て直そうとせず、すぐに Lacerate と後ろ向きの Drakehound's Step で disengage してください。

Irelia は Bladesurge で wave の中を舞うように動き、Ionian Fervor のスタックを溜めてあなたを DPS で上回ることで力を発揮します。この lane は完全に Flawless Duet を中心に回ります。Irelia がスタンを当てれば、Bladesurge を無料でリセットでき、長引くデュエルで簡単に勝ちます。しかし Ambessa は Repudiation を使ってスタンを吸収することでこの機動力の衝突をひっくり返せます。そうなると Irelia はスキルがクールダウン中でリセットがなく、脆弱になります。
Irelia が Bladesurge をリセットできる minion がいるときは、wave を争うことはできません。Irelia は Flawless Duet を狙い続けます。Repudiation のシールドのタイミングを外すと、タワー下で大きな物理ダメージを受けるか、早い recall を強いられます。Irelia のスタンをブロックできれば、Irelia の攻撃的な姿勢は崩れ、致命的な dive のリスクなしに Cunning Sweep と Lacerate で安全に wave を処理できます。
Irelia の Flawless Duet が発動している間は、Public Execution で仕掛けたり Drakehound's Step で前に飛び込んだりしないでください。距離を保ち、Irelia のパッシブのスタックを確認してください。Irelia が最初の刃を展開したら、指を Repudiation の上に構えておいてください。2 本目の刃が飛んだ瞬間に使って、スタンを無効化します。タイミングを外してマークされたら、すぐに Lacerate で Irelia を slow させ、ダッシュで安全な場所へ逃げてください。Irelia に kill を渡すくらいなら、wave を諦めてください。

Fiora は Riposte があなたの主力の crowd control を完全に無効化できるため、明確に有利です。Public Execution や Cunning Sweep の2撃目を読まれやすいタイミングで使うと、Fiora はあなたの stun を弾き返して自分の stun を返してきます。そうなると、Duelist's Dance の vital に対してあなたは無力です。あなたの機動力は Drakehound's Step に頼っているため、trade 中に Fiora の Bladework の slow を受けると、立ち位置も大きく崩れます。
この matchup では、あなたは守勢に回らされます。wave を押しすぎると、追い詰められて倒される危険があります。Fiora は Lunge で絶えずあなたの vital を poke し、あなたが minion を叩きに前へ出るたびに、体力を大きく削る trade を狙ってきます。Fiora が自分の tower 付近で wave を freeze した場合、Cunning Sweep を使うと Riposte による counter-all-in をまともに受けてしまうため、安全に wave を壊せません。その結果、Fiora に lane の主導権を完全に握られます。
生き残るには、壁沿いに立って Duelist's Dance の vital を隠し、Fiora が Lunge で vital を発生させにくくする必要があります。Public Execution で仕掛けるのは絶対に避けてください。代わりに Drakehound's Step の dash で Fiora の周りを動き回り、Cunning Sweep Slam を撃つ構えを見せて Riposte を誘ってください。Fiora が誘いに乗ってこない場合は、Repudiation を温存して Bladework の burst を吸収し、すぐに Lacerate で slow を入れて追撃を遅らせながら離脱してください。
その他のマッチアップ
このマッチアップは何よりもまず実行力の勝負であり、両者ともに優位を取れる現実的な手段を持っている。重要なスキルを一つ避けられるか、エンゲージを正しく読めるか、あるいはたった一つの位置取りのミスが、勝敗を分けることもある。マッチアップを理解し、行動すべき瞬間を見極める力がとりわけ重要になる。

この matchup は、高速で動き回る mobility の決闘で、Yone の Mortal Steel の3回目の cast に対して、あなたがどう防御で対応するかで決まります。Yone は Soul Unbound で tornado を使って trade を始めますが、あなたがその仕掛けを無効化できるかどうかが勝敗を分けます。Repudiation で Yone の knockup を防げば、Yone の trade の勢いを完全に止められ、cooldown が戻る前に Cunning Sweep で素早く反撃して Yone を不利な状況に追い込めます。
trade の主導権は、誰が駆け引きに成功するかで大きく入れ替わります。Yone の tornado が使える状態のときは、反応できるように wave への圧力を少し譲る必要があります。Yone の crowd control を吸収できれば、体力の少ない Yone を最初の spirit body に戻し、minion wave をすぐに支配できます。さらに大きな体力差も作れるため、Yone は落ち着いて farm できなくなります。
単なる farm 中に Repudiation を使うのは絶対にやめてください。この shield は、Yone が Mortal Steel の knockup を持って前に dash してくる瞬間のために温存します。Yone が Soul Unbound を発動したら、動く方向を見極めて、ボタンに指をかけて待ちます。tornado が飛んできたら shield を発動して衝撃を吸収し、すぐに Drakehound's Step で前に dash して、Cunning Sweep と Lacerate の combo をフルで決めてください。shield のタイミングを外したらすぐに下がり、Public Execution を防御的に使ってください。

この決闘は、Mordekaiser の直線状の危険範囲をどう避けるかでほぼ決まります。Mordekaiser の素のダメージは、Obliterate が孤立した対象に当たると大きく跳ね上がるため、生き残れるかどうかは mobility にかかっています。Drakehound's Step を発動して横にずれれば、Mordekaiser の主力の burst を完全に無効化できます。もし被弾すると、Mordekaiser の passive の Darkness Rise が発動してあなたの体力をみるみる溶かし、この skill matchup は完全に Mordekaiser 有利になります。
Mordekaiser の slam が外れると、wave の主導権は大きく動きます。Obliterate を誘って回避できれば、Mordekaiser の lane への圧力は消え、あなたは wave を crash させたり、Cunning Sweep で trade を仕掛けたりできます。ただし、dash が使えない間に Death's Grasp で引き寄せられると、後退するか Repudiation を防御的に使うしかなくなります。その結果、minion を取り合う機会を失い、重要な tower の優先権も譲ることになります。
Obliterate による孤立したダメージを避けるため、常に自分の minion の近くに立ちつつ、すぐ動ける状態を保ってください。Cunning Sweep の外側の縁で poke し、Mordekaiser が mace を振り上げた瞬間に、Drakehound's Step を横向きに発動します。Death's Grasp の引き寄せを吸収するために、Repudiation を温存しておいてください。Realm of Death に閉じ込められたら、逃げようとせず、mobility を活かして skillshot を避けることだけに集中し、持続時間が終わるのを待ってください。

この matchup は、Gwen の Snip Snip! を中心とした、細かい位置取りだけの決闘です。Gwen は scissors の中心線にある true damage に大きく頼って短い trade に勝つため、Ambessa の mobility が最大の武器になります。Cunning Sweep か Lacerate をつないで Drakehound's Step を発動すれば、Gwen が切りつけた瞬間に、横や Gwen の背後へ即座に dash できます。これにより、Gwen の主な burst と回復の手段を完全に無効化できます。
Gwen の scissors の中心を避けられないと、wave の主導権は完全に Gwen に移ります。Gwen は一度当てれば、Hallowed Mist で安全を確保しながら楽に wave を押せるため、あなたは自分の turret の下まで下げられます。逆に、Snip Snip! の最中にあなたが Gwen の背後に回り込めれば、Gwen の trade 力は消えます。その間に wave を freeze し、Gwen の体力を大きく削り、scale される前に危険な recall へ追い込めます。
勝つには、dash で仕掛けないでください。歩いて近づき、Gwen に Snip Snip! の animation を始めさせて誘ってください。Gwen が切りつけた瞬間に Cunning Sweep を撃ち、Drakehound's Step の dash で Gwen の model をすり抜けます。Skip 'n Slash で強化された攻撃のダメージを吸収したり、Gwen が ultimate を使ってきたときに Needlework の slow を防いだりするため、Repudiation を温存してください。dash のタイミングを外したら、すぐに離脱してください。

この matchup は、Camille の Hookshot を中心とした、反射神経の勝負で、勝敗が大きく分かれます。Camille が壁から自分を飛ばしてくるとき、攻撃の圧力のすべては、stun を当てて Precision Protocol を安全に準備することにかかっています。Ambessa には Repudiation という完璧な答えがあり、この crowd control を完全に防げます。stun を無効化すれば、Camille は逃げ場がないまま無防備になり、すぐに Cunning Sweep で反撃できます。
防御手段を使い間違えたほうが、lane の物理的な空間の主導権を失います。Repudiation で防御に成功すると、Camille はあなたの minion wave の奥で無防備になり、退きながら Lacerate の大ダメージを受けます。逆に、あなたが shield を早く無駄にすると、Camille は Tactical Sweep の slow を自由に狙えるようになり、致命的な Hookshot の dive の準備ができて、jungler が合流するまであなたを足止めできるようになります。
Tactical Sweep の単なる poke を吸収するために Repudiation を使うのは絶対にやめてください。代わりに Drakehound's Step の dash で、Camille の外側の cone の内側か外側にすり抜けてください。shield は、Camille が壁に張り付いてあなたに向かって飛んでくる瞬間のためだけに温存します。Camille があなたの shield を誘うだけで仕掛けてこない場合は、すぐに下がり、cooldown が戻るまで守りに徹してください。crowd control を防げる状態でない限り、The Hextech Ultimatum による正面からの engage には耐えられないからです。

この matchup は、射程の拒否と反応的な mobility が入り乱れる、不安定な駆け引きです。Jayce は cannon 形態の To the Skies! であなたを少しずつ削り、Transform Mercury Cannon で切り替えて burst を狙います。しかし Ambessa は、Drakehound's Step で skillshot の軌道から dash して抜けることで、この poke を完全に無効化できます。Jayce が Thundering Blow の knockback で離脱しようとしたら、cooldown の短い dash で即座に再度 engage でき、Jayce の長い cooldown を咎められます。
Jayce の視界を切り、見えないまま To the Skies! を撃たせて mana を無駄にさせるには、brush の近くに位置取ることが重要です。最初の blast を避けられないと、tower の下まで押し込まれ、Jayce に wave を支配されたまま体力を失い続けます。逆に、うまく避け続ければ、自分の turret の近くで wave を freeze でき、Jayce の gold を枯らして、Cunning Sweep が活きる危険な近接距離に Jayce を追い込めます。
常に minion wave から離れて立ち、Lacerate で発動した Drakehound's Step の dash で To the Skies! を横にかわして、Jayce の遠距離 poke を誘ってください。Jayce が慌てて Thundering Blow で押し返そうとしたら、hammer 形態の cooldown が戻る前に、Public Execution か別の dash ですぐに距離を詰めて追撃してください。序盤に大きく削られたら、Repudiation を温存して Lightning Field のダメージを防ぎながら、安全な場所まで下がってください。

この matchup は、Garen の silence をいかに無効化して spell-weaving を維持できるかで決まります。Garen は Decisive Strike であなたの mobility を止め、Drakehound's Step の発動を妨げようとします。Repudiation のタイミングを合わせて silence を防げば、Garen の burst を吸収でき、Cunning Sweep で反撃する隙が生まれ、Garen の攻めを有利な trade に変えられます。
これらの駆け引きの成否が、そのまま wave の主導権と圧力を決めます。silence を防げば、Garen は守りに回らざるを得なくなり、passive の Perseverance も無効化できます。しかし Garen にあなたの shield を誘われると、silence を受けている間に Judgment で armor を削られ、Demacian Justice による execution を受ける危険があり、高くつく後退を強いられて tower の優先権も手放すことになります。
Garen の動きをよく見てください。Garen が Decisive Strike を発動したら、逃げずにその場で踏みとどまってください。strike の animation が始まった瞬間に Repudiation を発動して、攻撃を吸収します。すぐに Cunning Sweep の外側の縁で追撃し、Drakehound's Step で位置を調整してください。先に silence を受けてしまったら、Lacerate で Garen の追撃を slow させながら離脱し、Garen の Courage の shield とダメージ軽減が終わるまで Public Execution を遅らせてください。

この matchup は、純粋な動きの速さで競う決闘です。Yasuo は Sweeping Blade で minion の間を舞うように動きますが、Drakehound's Step があれば Yasuo の dash に1歩ずつ合わせられます。決定的に重要なのは、Yasuo の Wind Wall があなたにはまったく役に立たないことです。あなたの主なダメージ手段である Cunning Sweep と Lacerate は、projectile ではなく近接攻撃なので、Yasuo の防御 barrier を完全に無視して、その上から打ち倒せます。
Yasuo は wave の上で Steel Tempest を絶えず溜め、tornado であなたを脅かそうとします。3撃目が使える状態になると危険範囲が広がり、あなたは Drakehound's Step を防御的に使わされます。しかし、Wind Wall では Lacerate や Cunning Sweep を防げないため、Yasuo はあなたに対して簡単には離脱も wave の freeze もできません。その結果、minion wave のたびに、たった1度のミスが致命的な trade につながる、不安定な場面になります。
自分の体力の少ない minion から離れて立ち、Yasuo の Sweeping Blade の逃げ道を制限して、Yasuo に正面から戦わせてください。常に Repudiation を温存して、3回目の Steel Tempest の tornado や ultimate の Last Breath を吸収し、Yasuo の crowd control を無効化してください。Yasuo に遠くから poke で削られたら、Drakehound's Step の dash で brush に滑り込んで視界を切り、その後 Public Execution で距離を詰めてとどめを刺してください。

この lane は純粋な反射神経の試験で、Riven の素早い dash と、あなたの Drakehound's Step の dash がぶつかります。Riven は Broken Wings と Ki Burst をつないであなたを足止めしながら Runic Blade を溜めます。しかし、Repudiation は最強の妨害手段です。この shield のタイミングを合わせて Riven の主力の burst を吸収し、crowd control を防げば、互角の小競り合いを完全にあなた有利に変えられます。
どちらも wave を簡単には freeze できない、休みなく続く高速の trade になると思ってください。Repudiation を序盤に無駄にすると、Riven はすぐに Blade of the Exile で trade を強要し、あなたを wave から押し出して優先権を握ります。逆に、Riven の knockup を parry できれば、Cunning Sweep で追い詰めることができ、Riven は Valor を防御的に使わされて、recall のタイミングの主導権もあなたが完全に握れます。
Repudiation で trade を始めるのは絶対にやめてください。代わりに Cunning Sweep で先手を取り、Drakehound's Step で Riven の位置取りに合わせてください。Riven の Q の cast をよく見てください。Broken Wings の3撃目の準備をしたときや、Ki Burst のために接近してきたときは、すぐに shield を発動してください。Valor で shield を誘い出された場合は、すぐに Lacerate で slow を入れて後退し、cooldown が戻るのを待ってからもう一度前に出てください。
その他のマッチアップ
これらのチャンピオンは、こちらの主要な強みに効果的に対応するのが難しく、より自由に対面を組み立てることができる。プレッシャーをかけて有利な交換を引き出す手段は複数あることが多い。相手が態勢を立て直す時間を与えるのではなく、この優位を活かして主導権を握ろう。

Ambessa は序盤を完全に支配します。Nasus の Soul Eater による sustain では、Ambessa の積極的な trade に追いつけないからです。Cunning Sweep の外側の縁で Nasus を harass すれば、Nasus は守りに回らざるを得ません。Nasus が Wither で離脱しようとしても、Drakehound's Step の dash は slow の影響を受けないため、Ambessa は movement speed の低下を完全にすり抜けて、Nasus に張り付き続けられます。
この力関係が、厳密な wave 管理を決めます。序盤の wave を slow push して、大きな wave を Nasus の turret の下で crash させ、Nasus が Siphoning Strike の stack のために last-hit しようとする間に、Cunning Sweep と Lacerate で poke できます。序盤にこの stack を取らせなければ、Nasus の scale の山場が遅れ、Nasus は tower の下に閉じ込められたままになり、あなたは完全に自由に動けます。
序盤は自分の turret の近くで wave を freeze し、Nasus を Spirit Fire の範囲まで歩いて来させてください。Nasus が Siphoning Strike の stack のために前に出てきたら、すぐに Cunning Sweep で攻撃し、Drakehound's Step を発動して前に dash してください。Repudiation は、Nasus の反撃の strike を吸収するか、Wither を防ぐために温存してください。Nasus が Fury of the Sands を発動したら、長い決闘には踏み込まず、代わりに Public Execution で Nasus を suppress して位置を調整し、ultimate が切れるまで離脱してください。

Ambessa はこの matchup を完全に支配します。passive の Drakehound's Step が短く頻繁な dash を提供し、Aatrox の予告のある strike である The Darkin Blade に完璧に対抗できるからです。Aatrox が sweetspot を合わせようとするたびに、Ambessa は Cunning Sweep か Lacerate を cast してすぐに位置を調整でき、Aatrox の knockup 範囲から完全に抜け出しながら、高い攻撃圧力を保てます。Aatrox には Ambessa を捉えるだけの速さがありません。
この mobility の優位が、体力を削り合うすべての trade を決めます。The Darkin Blade の最初の2つの sweetspot を外すと、Aatrox は all-in に対して非常に無防備になるため、Aatrox は簡単には wave を crash させたり、あなたを zone したりできません。あなたは絶えず wave を削り、Aatrox を自分の turret の下に追い込めます。Infernal Chains を無駄にした時点で、dive も狙えます。Deathbringer Stance による Aatrox の sustain では、受けるダメージの大きさを補えません。
この lane を完璧にこなすには、dash で仕掛けるのは絶対にやめてください。歩いて近づき、Aatrox の最初の The Darkin Blade を誘ってください。Drakehound's Step を反応的に使って横に避け、Cunning Sweep で返します。捕まった場合に備えて、Repudiation は Infernal Chains の引き寄せを防ぐために温存してください。Aatrox が World Ender を発動しても、慌てて後退せず、mobility を活かして Aatrox の攻撃の合間を縫って動き、Public Execution を遅らせてとどめを刺してください。

Ambessa はこの matchup を支配します。Mini Gnar は、Ambessa の執拗な mobility に対して距離を保てないからです。Cunning Sweep か Lacerate を cast するたびに、Drakehound's Step が素早い dash を提供し、Gnar の Boomerang Throw の slow や Hop による後退を完全にすり抜けられます。そのため Gnar に素早く張り付き、Rage Gene で頑丈な Mega Gnar 形態に変身される前に、もろい体力を削り切れます。
この力関係は、Gnar が普段持っている遠距離 harass の優位を奪います。Gnar はあなたの dash の射程を警戒せざるを得ず、あなたは簡単に wave の状態を操れます。Gnar が minion に Hyper を stack するために前に出てきたら、すぐに trade を仕掛けられます。序盤の体力の優位を確保でき、Gnar は最悪のタイミングで recall させられ、tower への圧力も無効化されます。もろい Mini 状態の Gnar が安全に farm することも決してできなくなります。
Gnar の rage bar が低いときに engage を仕掛けてください。そうすれば、戦闘の途中で変身されません。Cunning Sweep から始め、Drakehound's Step の dash で距離を詰めて、Slam の追撃を発動します。Repudiation は、Boomerang Throw の slow を防ぐため、または Gnar が変身してきた場合の Boulder Toss の stun を吸収するために温存してください。Gnar が Hop で逃げようとしたら、すぐに Public Execution で合わせて足止めし、とどめを刺してください。

この matchup は、Urgot が Disdain を使って trade を決めようとするかどうかが焦点です。Urgot があなたを flip しようと前に dash してきたとき、Repudiation が最強の対抗手段になります。衝撃を吸収するタイミングで発動すれば、displacement と stun を防ぎ、Urgot の shield の生成も無効化して、すぐに反撃できます。flip がなければ、Urgot は Echoing Flames の passive を何度も発動させるのが難しく、動けなくなった Urgot の体力を Cunning Sweep で削り取れます。
Urgot が flip で脅せなくなった時点で、Urgot の lane での支配力は崩れます。Disdain を防ぐことで trade に勝ち続けられるため、あなたが wave の位置を決められ、Urgot は Purge で遠くから farm するしかなくなります。これによって大きな体力差が生まれ、大きな minion wave を crash させたり、余裕を持って recall のタイミングを確保したりできます。Urgot は tower の下で守りに回らされ、gold を失い続け、jungler を手助けすることもできなくなります。
常に Urgot の正面の弧の近くに位置取って dash を誘ってください。ただし、自分の dash は何も考えずに使わないでください。Urgot の突進の animation が始まったのが見えたときのために、Repudiation を温存しておいてください。Urgot が先に Corrosive Charge で slow を入れようとしてきた場合は、Lacerate で位置を調整して角度を保ち、防御用の shield を無駄にしないでください。block のタイミングを外して flip されてしまった場合は、すぐに Public Execution を発動して戦況をひっくり返し、Purge に削り切られる前にとどめを刺してください。

Teemo は Toxic Shot で遠くからあなたを harass し、Blinding Dart であなたの強化された passive の攻撃を無効化します。しかし、Teemo には強力な escape がないため、非常に狙われやすいです。Cunning Sweep と Lacerate をつなげて Drakehound's Step の dash を何度も発動すれば、Teemo の射程を簡単にすり抜けられます。blind されても、mobility があるので Teemo に張り付き続けられ、Public Execution でとどめを刺せます。
序盤、Teemo は毒であなたを zone しようとし、あなたは minion を集めながら Repudiation でダメージを吸収させられます。しかし Public Execution を習得した瞬間、lane の力関係は逆転します。あなたが突然距離を詰めてくるという脅威があるため、Teemo は安全に Noxious Trap を設置したり harass したりできなくなります。この scout は自分の turret の下に閉じ込められ、map への圧力も無効化されます。
trade 中に Teemo の Blinding Dart が当たっても、慌てないでください。自分が blind 状態のまま、強化された Drakehound's Step の攻撃を空振りさせて無駄にするのではなく、dash を使って Cunning Sweep と Lacerate の位置を調整し、最大のダメージを狙ってください。debuff が切れるのを待つ間、Repudiation を温存して毒の tick を吸収させます。視界が戻ったら、溜めておいた passive の strike を解き放ち、Teemo が Move Quick で逃げる前に Public Execution でキルを確保してください。

Ambessa はこの matchup を支配します。高い mobility で Ornn の読みやすいパターンをすり抜けられるからです。Ornn は Searing Charge を地形に当てたり、Call of the Forge God のタイミングを合わせてあなたを足止めしたりすることに頼っていますが、Repudiation が完璧な対抗手段になります。knockup を吸収して burst を防ぐことで、この tank から crowd control を奪えます。Ornn は長引く trade に対して無防備になり、Drakehound's Step の dash は slow の cooldown よりも間合いで上回ります。
この力関係により、Ornn は守りに徹した受け身の lane 状態に追い込まれます。前に出ればあなたに dash で詰められるため、Ornn は安全に Volcanic Rupture で wave を争うことも、Bellows Breath で trade することもできません。重要な Searing Charge の knockup を防げば、Ornn は逃げ場を失います。そのため、好きなときに wave を freeze したり、大きな wave を crash させて turret の plate を削ったりできます。その間、Ornn は無力なまま tower の下に座っているしかありません。
この作戦を実行するには、Repudiation を攻撃的に無駄使いせず、Ornn の crowd control のためだけに温存してください。Ornn が Call of the Forge God を cast したら、戻ってくる ram が当たるのを待ってから shield を発動するか、Searing Charge で壁に向かって突進した瞬間に発動します。Cunning Sweep で poke して削り、Bellows Breath の息を避けるために、常に Drakehound's Step で斜めに dash してください。Ornn が逃げようとしたら、Public Execution でキルを確保してください。

Kayle が序盤で狙われやすいのは、Divine Ascent で進化する前の近接状態が弱いからです。Kayle は Radiant Blast と Celestial Blessing で kite しようとしますが、あなたの執拗な mobility からは逃げられません。Cunning Sweep と Lacerate をつなげると、Drakehound's Step の dash が連続して発動し、簡単に距離を詰められます。射程を得る前の Kayle には、この張り付くような攻撃的な圧力に耐えるための素の防御 stat も序盤の手段も、単純に足りません。
この mobility の差により、minion wave を完全に支配できます。slow push を簡単に作ることができ、Kayle はただ見ているしかないか、Cunning Sweep の素早い engage で倒される危険を冒すしかなくなります。Kayle は自分の turret の下で細々とした分を確保するためだけに Starfire Spellblade を無駄にさせられます。dive や強い zone の脅威が続くことで、Kayle の gold と経験値は完全に枯渇し、重要な ascension の閾値が遅れ、あなたは序盤のリードを確保できます。
Kayle の経験値を奪うために、敵の caster minion と Kayle の間に攻撃的に位置取ってください。Kayle が Radiant Blast で離脱しようとしたら、すぐに Repudiation を発動して slow の projectile を防ぎ、Kayle の反撃の poke を吸収してください。Public Execution は、Kayle が自分に cast した Divine Judgment が切れる瞬間のために温存し、invulnerability が消えた直後に suppress してください。誤って push しすぎてしまった場合は、次の wave を自分の turret の近くで freeze して、Kayle を危険な深い位置に誘い込んでください。

Ambessa はこの matchup を支配します。mobility が Sion の主な脅威を完全に無効化するからです。Sion が Decimating Smash の channel を始めた瞬間、Cunning Sweep か Lacerate を cast した後に Drakehound's Step を発動すれば、楽に危険範囲から dash で抜けられます。強力な knock-up を避けることで、Sion の主な crowd control とダメージを奪い、あなたの執拗な counter-engage に対して Sion は完全に無防備になります。
この力関係により、wave の状態と trade のペースの主導権を完全に握れます。Sion は、Decimating Smash を channel して minion を処理しようとすると厳しく咎められるため、安全にはそれができません。slow push を簡単に作って dive したり turret に圧力をかけたりでき、Sion が Soul Furnace であなたの burst を吸収しようと必死になるほど mana が急速に枯渇します。その結果、最悪のタイミングで recall を強いられ、tower の plate も失います。
これを完璧にこなすには、常に Sion の射程内に漂いつつ、Cunning Sweep か Lacerate のどちらかを温存してください。すべての ability を一度に使い切らないようにしてください。Sion が強力な strike の構えを始めるのを待ってから、Drakehound's Step を発動して軌道から滑り出ます。Sion が Unstoppable Onslaught で逃げたり engage したりしてきたら、Repudiation の shield のタイミングを合わせて衝撃を吸収し、すぐに Public Execution で追撃してキルを確保してください。
その他のマッチアップ
これらのチャンピオンは、こちらのビルドやプレイスタイルを真正面から上回る構成を持ち、レーン戦のコントロールとファームを極めて難しくする。彼らのスキルはこちらの主要な強みを無効化し、いつも通りのプランを実行しようとした瞬間に手痛い反撃を受けさせてくる。こうしたマッチアップでは、ミスを最小限に抑え、正面からの対決以外で解決策を探すことが重要になる。

Ambessa は、Cunning Sweep と Lacerate を Drakehound's Step の dash とつなげて、ターゲットを burst で倒すことに頼っています。しかし、Warwick はこの burst パターンを完全に無効化します。Warwick の Primal Howl は大幅なダメージ軽減を与えてあなたの最初のコンボを吸収し、Warwick の Eternal Hunger の回復は体力が減るほど強まるため、あなたの高いエネルギーコストでは、正面からのどんなデュエルでも簡単に out-sustain されてしまいます。
この構造的な不利により、序盤の Scuttle Crab を争うことも、Warwick の jungle 領域に invade することも完全にできなくなります。river で Warwick と遭遇すると、体力を削られている場合は Warwick の Blood Hunt のせいで逃げるのが極めて難しく、Jaws of the Beast があなたの Drakehound's Step の dash に食らいついて、機動力が役に立たなくなり、マッププライオリティを失います。
river で 1v1 の skirmish を仕掛けてはいけません。Warwick が Infinite Duress で飛びかかってきたら、すぐに Repudiation をバッファして、suppress の初撃を吸収し、シールドを得てください。Public Execution は、壁を越えて逃げるための手段、または味方がすでに強力な CC を入れている場合にだけ Warwick を execute するための手段として厳密に温存し、代わりに camp を素早く clear することに集中してください。
Olaf はあなたの ult の有用性を完全に無効化します。Olaf が Ragnarok を発動すると、CC 無効によって Public Execution で Olaf を拘束できず、Cunning Sweep の 2 回目の発動によるノックアップも無視されます。あなたのキットはスペーシングと burst のためにこれらの displacement に頼っているので、Olaf の ult はあなたの主力の手段を意味のないアニメーションに変え、Olaf は Undertow のスローで楽々と距離を詰められます。
river でもあなた自身の jungle でも、Olaf との正面の 1v1 skirmish では対抗できません。Scuttle Crab で Olaf と出会ったら、譲るしかありません。序盤の objective を巡って Olaf と戦おうとすると、Olaf が Vicious Strikes を発動して、あなたのダメージを out-sustain します。Olaf の容赦ない前進プレッシャーによって、あなたは受け身にならざるを得ず、序盤のニュートラルなプライオリティを手放し、あなたの lane の味方は Olaf の止められない gank に対して無防備になります。
Olaf の Ragnarok が使える状態のときに、Public Execution で仕掛けてはいけません。代わりに、Olaf が前進してきたら、Lacerate と Drakehound's Step を組み合わせて、薄い壁を越えて後方へ dash してください。Repudiation は、Olaf の Reckless Swing の確定ダメージ、または最初の Undertow の斧のスローを吸収するために特に温存してください。Olaf が ult を発動したら、すぐに戦いを中止し、パッシブの dash を使って、CC 無効が切れるまで kite して離れてください。再エンゲージを考えるのはそのあとです。

Rammus は jungle におけるあなたの最悪の天敵です。Rammus の Defensive Ball Curl が、発動頻度の高いあなたのパッシブ Drakehound's Step を、あなたに不利に作用させるからです。dash して強化されたオートアタックを叩き込むたびに、Rammus のアーマーに当たってあなた自身の体力バーが溶けていきます。さらに悪いことに、Rammus の Frenzying Taunt はこの防御状態の間あなたに Rammus を攻撃させるため、Cunning Sweep で動き回ることも逃げることも完全にできなくなります。
このマッチアップは、あなたの序盤の jungle のテンポとニュートラルな objective の争いを台無しにします。Scuttle Crab を争うとき、Rammus は Powerball で Cunning Sweep や Lacerate の予備動作を簡単に中断できます。counter-jungle しようとしても、Rammus はマップを素早くローテーションするので、あなたが狙っている対象の目の前であなたを拘束できます。どの段階でも安全に Rammus とデュエルできないため、あなたの lane の味方は重要な序盤の jungle プレッシャーを失い、その間 Rammus は安全にアーマーを scale させます。
最優先は、Repudiation を温存して Rammus の Frenzying Taunt を吸収するか、Powerball の勢いを止めることです。Rammus の Defensive Ball Curl が発動中は、Drakehound's Step で仕掛けてはいけません。代わりに歩いて離れるか、離れた位置から Lacerate を使って Rammus を遅くしてください。Rammus があなたの味方にエンゲージしてきたら、Public Execution を使うのは Rammus の防御の瞬間が終わるのを待ってからにしてください。捕まった場合は、素のアタックスピードよりアーマー貫通のステータスを優先してビルドし、Rammus のパッシブの反射を耐えてください。
あなたの攻撃の流れはすべて、Cunning Sweep や Lacerate を使ったあとに Drakehound's Step を発動させることに頼っています。しかし、Poppy は Steadfast Presence でこの機動力を完全に無効化します。Poppy のバリアの中でパッシブの dash をしようとした瞬間、あなたは即座にノックダウンされ、グラウンド状態になり、大きなダメージを受けます。このやり取りひとつであなたの流れるようなコンボは奪われ、あなたは完全に無防備になり、位置取りの修正もターゲットへの張り付きもできなくなります。
jungle では、このマッチアップはあなたの skirmish のポテンシャルを台無しにします。Poppy は何の咎めもなくあなたの camp に invade できるため、Rift Scuttlers やニュートラルな objective を正面から争うことはできません。Poppy のバリアがある状態で Drakehound's Step を使って逃げたり仕掛けたりしようとすると、自分でスタンを招くだけです。これにより river のコントロールを譲らざるを得ず、序盤のマッププレッシャーを直接犠牲にして、あなたの lane の味方が Poppy の gank にさらされます。
生き残るには、Poppy を動く危険地帯のように扱わなければなりません。Poppy が防御バリアを使える状態のときは、Cunning Sweep で仕掛けてはいけません。代わりに、dash ではなく歩くことで Drakehound's Step の発動を遅らせてください。Repudiation は温存して Poppy のノックバックのダメージを吸収し、Public Execution を使うのは Steadfast Presence を誘い出したあとだけにしてください。Poppy がそれを発動したら、すぐにスキルを使うのをやめ、通常の歩きによる経路取りで disengage してください。
その他のマッチアップ
これらのチャンピオンは、マッチアップ自体を絶望的にするわけではないが、対面で優位に立ちやすいツールを持っている。射程が長かったり、攻撃を受け止める力が高かったり、エンゲージへの対応手段が豊富だったりする。アプローチを調整し、戦闘を受け入れるタイミングを慎重に選ぶ必要がある。

Graves が明確に有利です。Graves の Quickdraw で Cunning Sweep の sweet spot から楽々と dash で抜け出せるからです。そうすることで、Graves は強烈な二段目の叩きつけを避けるだけでなく、True Grit のアーマーもスタックし、あなたの物理 burst を軽減します。New Destiny によるレンジのベーシックアタックで、Graves は簡単にあなたを kite でき、パッシブの dash がなければ、あなたは Graves に張り付くのに苦労します。
この力関係により、特に Scuttle Crab の周辺では、序盤の jungle の skirmish があなたにとって非常に危険になります。Graves があなたの clear に割り込んできたら、Smoke Screen を使って Drakehound's Step のターゲティングを妨害できます。Graves はあなたの体力バーを少しずつ削り、camp のプライオリティを譲らせるか、あなたが gap-closer を使い切ったあとに Collateral Damage で処刑される致命的なデュエルのリスクを負わせてきます。
生き残って流れを変えるには、Cunning Sweep で仕掛けてはいけません。代わりに、歩いて近づくか Lacerate を使って、Graves に先に慌てて Quickdraw を使わせてください。Repudiation を使える状態にしておいて、End of the Line による Graves の衝撃の大きい burst や、Smoke Screen の盲目効果を吸収してください。壁の近くで戦う場合は、戻ってくる Graves の火薬樽がすぐに爆発しないように位置取りをし、Graves のアーマーのスタックが切れてから初めて Public Execution で拘束してください。

Tryndamere は、Battle Fury によるクリティカルの純粋なダメージのおかげで、jungle での正面からの長いデュエルを支配します。正面から殴り合おうとすると、Tryndamere の絶え間ないオートアタックによって、あなたの防御手段はすぐに吐き出させられます。Tryndamere を chunk できたとしても、Undying Rage が Public Execution の execute ダメージを完全に無効にします。あなたの唯一の救いは、Tryndamere の ult 中に Lacerate と Drakehound's Step を使って動き回って出し抜くことです。
Tryndamere の素の DPS に匹敵できないため、序盤に Scuttle Crab を争ったり Tryndamere の camp に invade したりする自由を失います。Tryndamere の fury が高い状態で捕まると、Spinning Slash で Tryndamere があなたに張り付き、防御的に Repudiation を使わされます。この受け身の姿勢のせいで、序盤の jungle プレッシャーを譲らざるを得ないことが多く、あなたが安全な clear に専念する間、あなたの lane の味方はより安全にプレイすることになります。
Tryndamere が Spinning Slash で仕掛けてきたら、すぐに Public Execution を使ってはいけません。代わりに Lacerate を発動して Tryndamere を遅くし、続けて Drakehound's Step の dash で距離を作ってください。Repudiation は、Tryndamere の最初のクリティカルの burst を吸収するか、背を向けているときの Mocking Shout のスローを防ぐために温存してください。Tryndamere が Undying Rage を発動したら、jungle モンスターや minion にパッシブで強化された攻撃を当てながら dash し続けて離れ、Tryndamere の 5 秒間の不死を時間切れまで稼いでください。

Lillia はこの jungle のデュエルを支配します。Blooming Blows のスタックで得るボーナス移動速度のおかげで、Cunning Sweep の外縁を楽々とかわして動き回れ、あなたの主力のダメージとノックアップが非常に当てにくくなるからです。Lilting Lullaby に対して Repudiation のタイミングを完璧に合わせれば Lillia の睡眠のお膳立てを軽減する手段はありますが、Lillia の絶え間ない機動力のせいで、フルの攻撃ローテーションを当てるのは困難な戦いになります。
この力関係により、Lillia は開けた river の skirmish であなたを簡単に kite できるため、あなたは守りの farm パターンに追い込まれます。Lillia が遠くから Swirlseed を当てれば、安全に Lilting Lullaby を発動して、あなたに Repudiation を使わせるか kill を取れます。ニュートラルな objective を正面から争うのに常に苦労し、あなたの lane の味方が collapse して Lillia を拘束してくれない限り、序盤の crab のプライオリティを失います。
生き残って勝つには、Lillia の Blooming Blows が最大スタックの間は、Public Execution で仕掛けてはいけません。代わりに、茂みで待ち伏せし、Lacerate で強いスローをかけてください。Repudiation は、Lilting Lullaby の眠気インジケーターが睡眠に変わるちょうどその瞬間のために厳密に温存してください。Lillia が最初の Cunning Sweep を kite してかわしてきたら、追いかけるのではなく、すぐに Drakehound's Step で後方へ dash して disengage してください。
Darius はこの jungle のマッチアップを自然に支配します。Hemorrhage のスタックが長いデュエルを punish し、Decimate が大きな sustain を与えるからです。Ambessa には元々の回復がないため、消耗戦には勝てません。デュエルはすべてあなたの反応速度にかかっています。Darius がスイングしたときに Drakehound's Step を使って、Darius の内側のリングへ直接 dash し、Darius から回復と最大ダメージの両方を奪わなければなりません。
jungle では、この力関係により、序盤の scuttle の争いや invade があなたにとって非常にリスクの高いものになります。Darius に Apprehend で捕まると、Darius は簡単に Hemorrhage をスタックさせ、あなたの flash を強制的に使わせます。トレードに失敗すれば、objective のプライオリティを手放すか、早い recall を強いられ、clear が遅れ、あなたの lane の味方は Darius の高ダメージの gank に対して無防備になります。
dash で仕掛けてはいけません。代わりに、Lacerate で skirmish を始めて Darius を遅くし、Decimate の予備動作に入らせてください。Darius の斧が円を描いた瞬間、Drakehound's Step を発動して Darius のモデルのすぐ近くへ dash してください。Repudiation を使って、Crippling Strike のダメージを吸収するか、Apprehend の displacement を防いでください。Darius が 5 スタックに達してしまったら、すぐに disengage してください。必要なら Public Execution を防御的に使って壁を越えて逃げてください。

Kindred は Dance of Arrows と Wolf's Frenzy によるレンジの優位があるため、Cunning Sweep を当てるのが極めて困難です。しかし、このマッチアップを決めるのは ult のやり取りです。Ambessa は、減少した体力に基づく高ダメージのフィニッシャーとして Public Execution に頼っています。この execute を早く使いすぎると、Kindred は Lamb's Respite を置くだけで、あなたの ult を完全に無意味にし、あなたは死を拒むゾーンの中に取り残されて逃げ場がなくなります。
Kindred はレンジを絶えず悪用してあなたを camp から kite で追い出し、Wolf's Frenzy を使ってマークを巡る序盤の skirmish を支配します。river での正面の 1v1 は取れません。Drakehound's Step をスタックさせる前に、Mounting Dread にあなたの体力を削り取られるからです。これにより序盤の Scuttle Crab を譲らざるを得ず、あなたのレベル 5 の spike が遅れ、Kindred にマップコントロールと無料のマークを与えてしまいます。
Public Execution で skirmish を仕掛けてはいけません。代わりに、Lacerate と Cunning Sweep で Kindred の体力を削って Lamb's Respite を誘い出してください。Kindred が慌てて ult を使ったら、Drakehound's Step の dash で円の外に出るか、回復フェーズが終わったときの burst を吸収するように Repudiation のタイミングを合わせてください。Kindred が ult を使うのを拒むなら、あなたの ult は温存して、Kindred のゾーンが消えたまさにその瞬間に kill を確実に取ってください。
Gwen は自然とあなたより scale します。Gwen が Hallowed Mist を上手く置けば、Cunning Sweep の外縁の sweet spot を受けなくなるからです。jungle での正面の長いデュエルでは、Gwen の継続的な Snip Snip! と A Thousand Cuts の割合体力回復が組み合わさり、あなたが Gwen を burst で倒すより速くあなたの体力バーを溶かします。特に Gwen が Needlework を使えるようになるとそうなります。
このマッチアップの力関係により、Gwen に out-clear や out-scale される前に、序盤のリードを確保しなければなりません。Gwen のスタックが溜まっている場合、孤立した Scuttle Crab を安全に争うことはできません。Skip 'n Slash で Public Execution を簡単に回避したり、Gwen の霧の中で位置を取り直したりできるからです。序盤の jungle プレッシャーを失うと、Gwen はニュートラルな objective をより速く確保し、あなたの lane の味方は Gwen の scale する脅威に対して無防備になります。
勝つには、Gwen が無防備な最初の clear の間に、序盤の skirmish を強制しなければなりません。Gwen の Hallowed Mist が発動中は、Public Execution で仕掛けてはいけません。代わりに、Gwen のゾーンの中へ歩いて入るか、先に誘い出してください。Repudiation は、Snip Snip! の最後の重い一振り、または Needlework のスローをかける針を吸収するために特に温存してください。skirmish がうまくいかなかった場合は、Drakehound's Step と Lacerate を組み合わせて、地形を越えて素早く dash で逃げてください。
このマッチアップは、Jax の Counter Strike が Drakehound's Step を完全に封じる点にかかっています。Ambessa の戦闘ループ全体は、パッシブで強化されたベーシックアタックを当てて burst ダメージを出し、重要なエネルギーを回復することに頼っています。Jax が回避を発動すると、Cunning Sweep と Lacerate による強化された攻撃はダメージが 0 になり、エネルギーも回復できず、あなたはリソースが完全に枯渇した状態で Jax のスタンを受ける羽目になります。
jungle では、このやり取りにより、序盤の river の skirmish とニュートラルな camp が非常に危険になります。Jax は Leap Strike で距離を詰めて、攻撃的にあなたの領域に invade し、あなたを撤退させることができます。Jax に対抗しようとしても、タイミングの良い Counter Strike があなたの反撃を無効にし、エネルギーを使い果たした状態にされ、scuttle crab を譲るか、隣接する lane へのプレッシャーを諦めることになります。
Jax の invade を耐えるには、パッシブの使い方を律しなければなりません。Jax が Leap Strike でエンゲージしてきたら、すぐに Drakehound's Step の dash を使って後方か横へ kite し、Counter Strike が発動している間は攻撃しないでください。Repudiation は温存して、Jax のスタンのダメージを吸収し、CC を防いでください。Jax のヘリコプターのような回転が終わったら、短い猶予の間に Cunning Sweep と Lacerate で反撃できます。Public Execution でとどめを刺すのは、Jax の防御用 cooldown が切れたあとだけにしてください。
Mordekaiser は Realm of Death を解放すると、この jungle のマッチアップを支配します。Mordekaiser の異次元の中では、閉ざされた空間のせいで、Darkness Rise を発動して維持するのが非常に簡単になります。このパッシブのオーラダメージと移動速度ボーナスは、Drakehound's Step を使って Mordekaiser を kite するあなたの能力を完全に無効化します。Mordekaiser は簡単にあなたを stat-check し、直接の孤立したデュエルで仕掛けようとする試みをすべて punish します。
この力関係により、river や objective 周辺での skirmish の自由が大きく制限されます。Mordekaiser が近くにいる場合、Death's Grasp 一発で致命的なエンゲージに引きずり込まれるため、ニュートラルな camp を安全に争ったり scuttle crab を確保したりできません。Mordekaiser があなたの gank を妨害すれば、あなたや lane の味方を孤立させ、あなたのマッププレッシャーを止めて、守りの farm パターンに追い込めます。
生き残るには、スペーシングを極めなければなりません。Drakehound's Step で仕掛けてはいけません。これらの dash は Obliterate を避けるために温存してください。Repudiation は、Mordekaiser の孤立状態でのダメージを吸収するか、Death's Grasp の引き寄せを防ぐために特に温存してください。Realm of Death に引きずり込まれたら、すぐに Lacerate で Mordekaiser を遅くし、dash を使って境界の周りを kite してください。Cunning Sweep の外縁で poke し、アリーナが消えるまで時間を稼いでください。
その他のマッチアップ
このマッチアップは何よりもまず実行力の勝負であり、両者ともに優位を取れる現実的な手段を持っている。重要なスキルを一つ避けられるか、エンゲージを正しく読めるか、あるいはたった一つの位置取りのミスが、勝敗を分けることもある。マッチアップを理解し、行動すべき瞬間を見極める力がとりわけ重要になる。

この jungle のデュエルは、たった 1 つの反応の猶予にすべてがかかっています。Vi は、Vault Breaker のチャージで戦いを仕掛け、Denting Blows であなたのアーマーを削り、あなたを拘束することに頼っています。しかし、Ambessa には Repudiation という完璧な counter 手段があります。タイミングよく使えば、あなたのシールドが衝撃を吸収してノックバックを完全に無効にし、Vi の主力のエンゲージ手段を大きな反撃の爆発に変えて、skirmish の流れを一瞬で変えます。
お互いに同じようなペースで camp を clear するため、Scuttle Crab を巡る序盤の river の skirmish や、深い jungle への invade は非常に不安定です。Vi が Vault Breaker を外すか、Vault Breaker を受け流されると、Vi は Denting Blows を簡単に発動できず、Blast Shield もスタックできません。これにより Vi は守りに回るか、ult の Cease and Desist に頼らざるを得ませんが、これもタイミングよく Public Execution を使えば outplay でき、戦況をひっくり返せます。
Relentless Force の単なる poke を防ぐために Repudiation を無駄にしてはいけません。Vi が Vault Breaker を放つ瞬間のためだけに温存してください。Vi がチャージを保持してあなたのシールドを誘おうとしたら、Drakehound's Step を使って Vi の軌道から横へ dash して外れてください。Vi がレベル 5 になったら、Cease and Desist で仕掛けてくると想定してください。すぐに Public Execution を使って応じ、Vi の止められない状態に対抗して、硬直のアニメーション中に叩き潰してください。

この jungle のマッチアップは、どちらの assassin にも元々の優位がない、極めて激しい機動力のデュエルです。力関係の全体は、Kayn が Blade's Reach を使ってパッシブのエネルギーを集めなければならないという点を軸に動きます。Ambessa は Drakehound's Step を使って Kayn の直線の斬撃から dash で抜け出すことで、Kayn の安全なレンジ poke の主な供給源を完全に無効にし、変身ポイントを枯渇させ、強力な Umbral Trespass の発動を妨げます。
序盤の jungle の skirmish で Blade's Reach を避けそこなうと、Kayn は安全にパッシブをスタックし、早い段階で Rhaast や Shadow Assassin に変身して、マッププレッシャーを一瞬で傾けてしまいます。しかし、Ambessa が Kayn のスキルを誘うことに成功すれば、Kayn は攻撃的な角度を探す代わりに、Shadow Step を防御的に使って壁を抜けて逃げざるを得なくなります。この形態の獲得の遅れは、Kayn の中盤の teamfight への貢献を大きく弱めます。
camp を争うときは、Kayn が Blade's Reach の予備動作に入るちょうどその瞬間に Drakehound's Step を発動できるよう、常に Cunning Sweep か Lacerate を温存してください。dash で仕掛けてはいけません。Kayn の予兆を待ってください。Kayn が Shadow Step で壁に入ることに成功したら、通路の中央付近に位置取りをして、Kayn に長い出口を強い、Kayn が振り向いて戦おうとしたら、すぐに Repudiation を使って Reaping Slash の burst を吸収してください。

この jungle のマッチアップは、反応型の防御による緊張感のある心理戦が軸です。どのデュエルの結果も、Nocturne の Shroud of Darkness にどう対処するかにかかっています。Nocturne がスペルシールドであなたの重い Public Execution を吸収すると、あなたは主力の execute ダメージとエネルギーリセットの手段を失います。逆に、あなたの Repudiation は Nocturne の Unspeakable Horror への直接の回答であり、フィアーの CC を無効にできます。
river や jungle の camp での skirmish は、非常に不安定なにらみ合いになります。Repudiation を早く無駄にしすぎると、Nocturne は Duskbringer で自由にあなたを追い詰め、テザーを完成させます。Nocturne が Shroud of Darkness を温存している場合、Crab を確実に確保することも counter-gank を実行することもできません。jungle のプレッシャーは、先に相手の防御手段を引き出した側に完全に傾き、objective の戦いは緊張度の高い心理戦になります。
Nocturne が Unspeakable Horror を発動したら、慌てて dash で逃げたくなる衝動をこらえてください。代わりに、射程内に留まり、テザーが完成する直前に Repudiation のタイミングを合わせて、フィアーを吸収し衝撃波を放ってください。Public Execution でデュエルを仕掛けてはいけません。まず Cunning Sweep の外縁か Lacerate の 2 連続で、Nocturne の Shroud of Darkness を使わせてください。ult を放つのは、Nocturne の紫のシールドが消えてからだけにしてください。

このデュエルは、ミイラの CC に対して防御の反応をどう合わせるかにかかっています。あなたの Repudiation は、飛んでくる Bandage Toss を 1 回、完璧に吸収して無効にでき、Amumu の主力の gap-closer とスタンを奪えます。しかし、Curse of the Sad Mummy の広大で即座に発生する範囲をすり抜けたり逃げたりするための元々の手段はなく、捕まると Amumu の継続的な Despair と Tantrum のダメージに対して非常に無防備になります。
river や skirmish の最中は、このやり取りが誰がペースを握るかを決めます。シールドのタイミングを誤って Bandage Toss に捕まると、ミイラは簡単にあなたを自分のチームの中へ引きずり込んで Curse of the Sad Mummy を放ちます。早すぎるエンゲージは拘束されることを意味するため、ニュートラルなスポーン地点の周りでは守りに回らざるを得ませんが、ブロックに成功すれば Public Execution で counter-engage できます。
skirmish に勝つには、Amumu の ult が使える間は、Public Execution で仕掛けてはいけません。代わりに、Drakehound's Step を使って Amumu のメレーレンジの周りを動き回り、Bandage Toss を誘って Repudiation のブロックを発動させてください。Curse of the Sad Mummy があなたの frontline に使われたら、すぐに Cunning Sweep で Amumu を拘束し、味方から離れた位置を保ったまま Lacerate でとどめを刺してください。

この jungle のマッチアップは、一瞬の反応がすべてを左右する高速の機動力のデュエルです。Lee Sin は Sonic Wave を当てて仕掛けたり仕留めたりすることに頼っていますが、最終的に流れを左右する要素は Repudiation のタイミングの合わせ方です。Dragon's Rage を読めば、Lee Sin のキックの displacement を完全に吸収でき、Lee Sin は近距離で無防備になり、そこでは Drakehound's Step の dash で Safeguard による Lee Sin の逃走の試みを簡単に出し抜けます。
jungle では、この操作面の膠着により、どちらも無謀な invade を強行できません。river の crab 周辺の skirmish や序盤の skirmish は極めて緊張感があり、先に重要なスキルを外した側がプレッシャーを失います。Lee Sin の Dragon's Rage に対して Repudiation のタイミングを誤ると、Lee Sin はあなたを蹴り飛ばし、objective を確保して逃げます。逆に、Lee Sin のキックを防げば Lee Sin の勢いが止まり、2v2 の skirmish の流れが変わって、ニュートラルモンスターのコントロールを確保できます。
Lee Sin とデュエルするときは、Sonic Wave や Tempest のダメージを防ぐために Repudiation を早く無駄にしてはいけません。代わりに、Drakehound's Step と Lacerate を使って Lee Sin の skillshot の周りを動き回り、シールドは Dragon's Rage のアニメーションのためだけに温存してください。Lee Sin が Safeguard を使って dash で逃げようとしたら、すぐに Public Execution で拘束して逃走ルートを断ってください。タイミングを外したら、すぐに撤退し、cooldown が戻るのを待ってから改めて争ってください。

この序盤の jungle のデュエルは、Xin Zhao の CC への反応がすべてです。Xin Zhao が Audacious Charge でエンゲージすると、すぐに Three Talon Strike の準備を始めます。何も考えずに Cunning Sweep と Lacerate を回すと、Xin Zhao の 3 撃目のノックアップがあなたのパッシブの dash を妨害します。しかし、Repudiation を使ってまさにその 3 撃目を吸収して防げば、Xin Zhao のデュエルでの可能性を完全に無効にし、Xin Zhao の主力の攻撃手段をあなたのシールドと反撃ダメージに変えられます。
お互いに序盤の river を支配したいため、最初の Scuttle Crab や序盤の counter-jungle で、動線が必ずぶつかります。Xin Zhao のノックアップを防げないと、Xin Zhao が優位に立ち、あなたの Flash を強制するか、そのまま倒して、邪魔されないマッププレッシャーを得ます。逆に、この操作面のやり取りに勝てば、ニュートラルな camp を確保でき、Xin Zhao の cooldown の長いスキルが戻るまでの間、Xin Zhao の camp に自由に invade できます。
戦闘中は Xin Zhao のベーシックアタックを数えてください。Xin Zhao が Three Talon Strike を発動したら、Drakehound's Step と Lacerate で kite しながら最初の 2 撃を数えてください。Repudiation は Xin Zhao の 3 撃目のためだけに温存してください。Xin Zhao があなたのシールドを誘うために攻撃を遅らせてきたら、Xin Zhao のバフが切れるまで Cunning Sweep の外縁を使って距離を保ってください。シールドのタイミングを誤ってノックアップされた場合は、すぐに Public Execution を使って Xin Zhao を suppress し、基本スキルの cooldown をリセットして生き延びてください。
その他のマッチアップ
これらのチャンピオンは、こちらの主要な強みに効果的に対応するのが難しく、より自由に対面を組み立てることができる。プレッシャーをかけて有利な交換を引き出す手段は複数あることが多い。相手が態勢を立て直す時間を与えるのではなく、この優位を活かして主導権を握ろう。

この jungle のマッチアップは、Pantheon の最初の burst のお膳立てに反応できるかどうかにかかっています。Pantheon が Shield Vault で仕掛けようとしたとき、タイミングよく使った Repudiation はスタンを完全に吸収し、Pantheon の追撃ダメージからも守ります。この仕掛けを無効にすることで、Pantheon が強化された Mortal Will のコンボを簡単にスタックさせたり実行したりするのを防ぎ、Pantheon の攻撃的な dive を、ダメージが劇的に落ち込む非常に無防備な隙に変えます。
Pantheon の主力の CC を無効にする手段を持っているので、恐れることなく積極的に Scuttle Crab を争い、Pantheon の jungle の camp に invade できます。あなたが近くをうろつく限り、Pantheon は安全に objective を確保することも、孤立した skirmish に勝つこともできません。Pantheon が Grand Starfall を使って他の lane に影響を与えようとしても、あなたの優れたデュエル能力のおかげで効果的に counter-gank でき、Pantheon のマップを横断するローテーションを直接の損失に変えられます。
Pantheon の Comet Spear の poke を防ぐために Repudiation を無駄にしてはいけません。このシールドに指をかけておくのは、Pantheon の Shield Vault のジャンプのアニメーションのためだけにしてください。Pantheon が慌てて Aegis Assault を展開して、あなたの正面からのダメージを防ごうとしたら、Lacerate か Cunning Sweep を使ったあとすぐに Drakehound's Step を発動して、Pantheon のシールドの真後ろへ dash してください。これで Pantheon の方向性のある防御をすり抜け、Pantheon がチャネルに縛られている間に体力を削り取れます。

あなたの序盤の jungle でのデュエル能力は Shyvana を完全に上回ります。Shyvana が Dragon's Descent を得る前は、Shyvana の clear は読みやすく、戦闘面のポテンシャルも低いです。Cunning Sweep と Drakehound's Step の dash をつなげれば、Shyvana の Flame Breath と Burnout のゾーンの周りを簡単に動き回れ、Shyvana が Fury of the Dragonborn のスタックを溜める前に、序盤の弱い skirmish を punish できます。
序盤の 1v1 を支配しているので、積極的に Shyvana の camp に invade して、Fury of the Dragonborn のスタック獲得を遅らせられます。Shyvana は scuttle crab と camp のプライオリティを譲らざるを得ず、安全に自分の jungle を farm できません。このプレッシャーは Shyvana がパッシブの fury を生み出す能力を制限し、ult の spike を大きく遅らせ、Shyvana の lane の味方をあなたの序盤の gank に対して完全に無防備にします。
最初のローテーションで、Shyvana の red buff か blue buff に積極的に invade してください。Shyvana が反撃してきたら、Cunning Sweep で仕掛け、続けて Drakehound's Step の機動力で Shyvana の Flame Breath の弾を避けてください。Repudiation は、Shyvana の強化された Twin Bite の burst を防ぐためだけに温存してください。Shyvana が Dragon's Descent を発動して逃げたり形勢を逆転させたりしたら、すぐに Public Execution で counter-engage し、空中で suppress して kill を確実に取ってください。

Ambessa は、Ekko の主力のセットアップに対して強烈なカウンターとなるため、このジャングルの matchup で圧倒します。Ekko が Parallel Convergence のスタンを発動させようとしても、あなたの Repudiation がバーストを吸収し、CC を完全に無効化します。さらに、Ambessa の Public Execution は確実なサプレッションで Ekko を拘束し、Ekko が Chronobreak を発動して逃げたり回復したりするのを防ぐため、Ekko の読みやすい暗殺の試みは致命的な罠に変わります。
ジャングルでは、この有利が川エリアの完全な支配につながります。Ekko はあなたのキットに対して孤立したデュエルに勝てないため、中立オブジェクトを安全に争ったり Scuttle Crab を巡って戦ったりできません。Ekko が防御のために出す Parallel Convergence はすべて Ekko 自身に不利に働くと分かっているので、Ekko のキャンプに積極的にインベードできます。このプレッシャーで Ekko はファームを譲らざるを得ず、常に遅れたままで、あなたの lane にプレッシャーをかけることもできません。
Ekko と戦うときは、Repudiation を序盤で無駄にせず、Ekko の Parallel Convergence のバブルがあなたに発動する瞬間のために温存し、シールド破壊とスタンを吸収してください。Ekko のホログラムの位置を常に把握しておきましょう。Ekko の体力が半分を下回ったら、すぐに Public Execution を放ってサプレッションをかけてください。これで Ekko は Chronobreak をまったく使えなくなり、Ekko が戦いをリセットする前に確実に仕留められます。

Jarvan IV は Cataclysm の中にターゲットを閉じ込めて戦いに勝つため、Ambessa は大きな有利を持ちます。Drakehound's Step はあらゆるアビリティの後にダッシュを与えるので、Jarvan IV のアリーナの壁を楽々と飛び越えられます。Cunning Sweep や Lacerate を使えばこのパッシブの跳躍が即座に発動し、Jarvan IV は自分の ult の中に閉じ込められたまま、あなたは余裕をもって位置を取り直し、安全な場所から Jarvan IV を切り刻めます。
このやり取りにより、オブジェクト争いや川での戦いにおける Jarvan IV のプレッシャーは完全に価値を失います。Jarvan IV はあなたを拘束できないので、有利な地形を確保したり、あなたが counter-gank したときにきれいな gank を決めたりできません。Jarvan IV の主力のエンゲージ手段が封じられているため、あなたのチームはすべての Scuttle Crab とエピックモンスターを自信を持って争えます。Jarvan IV は ult を温存するか、完全に無駄にするリスクを負うしかなく、テンポが崩れます。
オブジェクトへのインベードやオブジェクト争いのとき、Jarvan IV が Demacian Standard と Dragon Strike で仕掛けてきても慌てないでください。Repudiation を温存して Jarvan IV の最初のバーストを吸収し、追加の CC もブロックしてから、すぐに Lacerate か Cunning Sweep を使いましょう。これで、Jarvan IV が Cataclysm を出したまさにその瞬間に Drakehound's Step が使える状態になります。すぐにリングの外へダッシュし、Jarvan IV が自分のバリアの中に閉じ込められている間に、Jarvan IV か後衛に Public Execution を放って戦況をひっくり返しましょう。

Ambessa の Drakehound's Step による高テンポのダッシュが Master Yi に選択を迫るため、Ambessa はこのデュエルを支配します。Master Yi は Alpha Strike であなたのダメージを回避したいのですが、これは簡単に誘い出せます。Master Yi が再びターゲット可能になった瞬間、逃げ場はなく、Double Strike を重ねられたり Highlander で追いかけられたりする前に、Public Execution で即座にサプレッションできます。
ジャングルでは、このプレッシャーが Master Yi のファームの速度を完全に狂わせます。Master Yi はあなたの Drakehound's Step が真価を発揮する壁の近くで安全に戦えないため、Master Yi のキャンプに積極的にインベードできます。きれいにキャンプを取らせないことで、Master Yi の Highlander によるパワースパイクを遅らせられます。Master Yi が争おうとするたびに捕まって倒されるリスクがあるため、Master Yi は守りに回らざるを得ず、序盤の中立オブジェクトと川の支配を明け渡すことになります。
skirmish を始めるときは、Cunning Sweep と Lacerate から入って Master Yi の体力を削ってください。早い段階で ult を使い切ってはいけません。代わりに Master Yi のキャラクターモデルをよく見て、Master Yi が外縁の攻撃を避けるために Alpha Strike を発動した瞬間に、着地地点にカーソルを合わせておきましょう。Master Yi が再び現れたらすぐに Public Execution を放って拘束してください。Master Yi が Meditate でダメージを軽減しようとしても、サプレッションがそのチャネリングを即座に中断します。

Viego のデュエルでの強さは、Spectral Maw を当ててターゲットを拘束し、Blade of the Ruined King をスタックさせることにかかっています。Ambessa は Repudiation で飛んでくるスタンを防ぎ、最初のダメージを吸収することで、この仕掛けを完全に無効化します。CC を封じられた Viego は安全に trade できず、Ambessa は Cunning Sweep とパッシブのダッシュで素早く主導権を握れます。
この matchup の力関係により、Ambessa は川での skirmish やジャングルへのインベードで絶対的な優先権を得ます。あなたのブロックの脅威があるため Viego は無防備になり、キャンプを直接争えず、守りに回らざるを得ません。序盤のペースを握り、Scuttle Crab を確保でき、Viego に Harrowed Path を逃走のために無駄遣いさせることで、Viego からゴールドを奪い、マップへのプレッシャーを抑えられます。
これらの戦いを制するには、Viego のスタンのために Repudiation を温存しなければなりません。Spectral Maw のチャージモーションを見て、Viego が放つ瞬間にシールドを発動してください。Viego が Harrowed Path で隠れたり逃げたりしようとしたら、Lacerate でその一帯を薙ぎ払ってスローをかけて位置を割り出し、Cunning Sweep と Drakehound's Step で追撃しましょう。Viego が Heartbreaker を使って逃げようとした場合は、すぐに Public Execution で処刑してください。
その他のマッチアップ
これらのアイテムを購入すると、このチャンピオンの影響力を抑えられます。





| マッチアップ | 判定 | 有利度 | 勝率 | ピック率 |
|---|---|---|---|---|
| Poppy | ハードカウンター | +3 | 49.4% | 1.8% |
| Olaf | ハードカウンター | +2 | 52.0% | 1.0% |
| Jax | ハードカウンター | +2 | 50.6% | 3.6% |
| Volibear | ハードカウンター | +2 | 48.2% | 8.7% |
| Malphite | 不利なマッチアップ | +1 | 54.2% | 8.2% |
| Vayne | 不利なマッチアップ | +1 | 52.1% | 1.7% |
| Fiora | 不利なマッチアップ | +1 | 50.4% | 3.7% |
| Sett | 不利なマッチアップ | +1 | 50.4% | 8.3% |
| Darius | 不利なマッチアップ | +1 | 49.5% | 14.8% |
| Renekton | 不利なマッチアップ | +1 | 48.7% | 3.1% |
| Irelia | 不利なマッチアップ | +1 | 48.5% | 1.4% |
| Rumble | 不利なマッチアップ | +1 | 48.1% | 1.9% |
| Heimerdinger | 不利なマッチアップ | +1 | — | — |
| Warwick | 不利なマッチアップ | +1 | — | — |
| Shen | スキル次第のマッチアップ | ±0 | 54.9% | 2.9% |
| K'Santé | スキル次第のマッチアップ | ±0 | 51.4% | 7.4% |
| Mordekaiser | スキル次第のマッチアップ | ±0 | 51.3% | 11.5% |
| Gwen | スキル次第のマッチアップ | ±0 | 50.5% | 3.4% |
| Kennen | スキル次第のマッチアップ | ±0 | 50.5% | 2.5% |
| Yone | スキル次第のマッチアップ | ±0 | 50.4% | 5.9% |
| Riven | スキル次第のマッチアップ | ±0 | 50.3% | 1.7% |
| Jayce | スキル次第のマッチアップ | ±0 | 50.2% | 4.8% |
| Wukong | スキル次第のマッチアップ | ±0 | 50.1% | 1.6% |
| Camille | スキル次第のマッチアップ | ±0 | 48.9% | 2.1% |
| Vladimir | スキル次第のマッチアップ | ±0 | 48.7% | 1.0% |
| Garen | スキル次第のマッチアップ | ±0 | 48.7% | 12.1% |
| Tryndamere | スキル次第のマッチアップ | ±0 | 45.9% | 2.5% |
| Yasuo | スキル次第のマッチアップ | ±0 | 45.5% | 1.8% |
| Akali | スキル次第のマッチアップ | ±0 | — | — |
| Gragas | スキル次第のマッチアップ | ±0 | — | — |
| Pantheon | スキル次第のマッチアップ | ±0 | — | — |
| Teemo | 有利なマッチアップ | −1 | 53.4% | 4.9% |
| Singed | 有利なマッチアップ | −1 | 51.5% | 1.3% |
| Ornn | 有利なマッチアップ | −1 | 51.1% | 1.9% |
| Dr. Mundo | 有利なマッチアップ | −1 | 50.5% | 6.5% |
| Smolder | 有利なマッチアップ | −1 | 50.4% | 1.4% |
| Cho'Gath | 有利なマッチアップ | −1 | 50.1% | 9.0% |
| Gnar | 有利なマッチアップ | −1 | 50.0% | 3.3% |
| Aatrox | 有利なマッチアップ | −1 | 49.6% | 7.0% |
| Urgot | 有利なマッチアップ | −1 | 48.9% | 3.8% |
| Nasus | 有利なマッチアップ | −1 | 46.4% | 5.6% |
| Graves | 有利なマッチアップ | −1 | — | — |
| Jarvan IV | 有利なマッチアップ | −1 | — | — |
| Maokai | 有利なマッチアップ | −1 | — | — |
| Ryze | 有利なマッチアップ | −1 | — | — |
| Skarner | 有利なマッチアップ | −1 | — | — |
| Swain | 有利なマッチアップ | −1 | — | — |
| Kayle | 有利なマッチアップ | −2 | 50.2% | 2.1% |
| Sion | 有利なマッチアップ | −2 | 49.9% | 2.5% |
有利度:Wild Rift Coreの公式判定(−3〜+3)で、各行に記載されたチャンピオンの視点から見た値です。勝率とピック率:このロールにおける相手チャンピオン自身の数値 — Wild Rift CN · Challenger、Patch 7.3c。直接対決の勝率ではありません。
| マッチアップ | 判定 | 有利度 | 勝率 | ピック率 |
|---|---|---|---|---|
| Poppy | ハードカウンター | +3 | — | — |
| Rammus | ハードカウンター | +2 | 55.3% | 4.6% |
| Olaf | ハードカウンター | +2 | 51.8% | 1.8% |
| Warwick | ハードカウンター | +2 | 51.0% | 2.0% |
| Taliyah | ハードカウンター | +2 | — | — |
| Lillia | 不利なマッチアップ | +1 | 53.3% | 3.0% |
| Gwen | 不利なマッチアップ | +1 | 52.8% | 2.6% |
| Kindred | 不利なマッチアップ | +1 | 50.7% | 2.4% |
| Darius | 不利なマッチアップ | +1 | 50.4% | 6.5% |
| Jax | 不利なマッチアップ | +1 | 49.8% | 1.9% |
| Tryndamere | 不利なマッチアップ | +1 | 48.8% | 8.6% |
| Volibear | 不利なマッチアップ | +1 | 48.4% | 4.5% |
| Graves | 不利なマッチアップ | +1 | 47.9% | 7.3% |
| Mordekaiser | 不利なマッチアップ | +1 | — | — |
| Nilah | 不利なマッチアップ | +1 | — | — |
| Amumu | スキル次第のマッチアップ | ±0 | 56.5% | 2.7% |
| Skarner | スキル次第のマッチアップ | ±0 | 53.9% | 1.6% |
| Nocturne | スキル次第のマッチアップ | ±0 | 52.5% | 6.6% |
| Kayn | スキル次第のマッチアップ | ±0 | 51.6% | 6.9% |
| Xin Zhao | スキル次第のマッチアップ | ±0 | 50.6% | 9.0% |
| Wukong | スキル次第のマッチアップ | ±0 | 49.6% | 3.4% |
| Vi | スキル次第のマッチアップ | ±0 | 49.0% | 4.8% |
| Yone | スキル次第のマッチアップ | ±0 | 48.7% | 2.7% |
| Riven | スキル次第のマッチアップ | ±0 | 48.6% | 1.3% |
| Lee Sin | スキル次第のマッチアップ | ±0 | 46.9% | 12.4% |
| Camille | スキル次第のマッチアップ | ±0 | — | — |
| Shen | 有利なマッチアップ | −1 | 54.9% | 1.4% |
| Ekko | 有利なマッチアップ | −1 | 54.0% | 7.3% |
| Jarvan IV | 有利なマッチアップ | −1 | 52.4% | 7.3% |
| Fiddlesticks | 有利なマッチアップ | −1 | 51.6% | 1.8% |
| Zed | 有利なマッチアップ | −1 | 51.4% | 2.6% |
| Pantheon | 有利なマッチアップ | −1 | 51.0% | 6.1% |
| Cho'Gath | 有利なマッチアップ | −1 | 50.7% | 8.3% |
| Diana | 有利なマッチアップ | −1 | 50.3% | 1.4% |
| Kha'Zix | 有利なマッチアップ | −1 | 50.1% | 5.3% |
| Nidalee | 有利なマッチアップ | −1 | 50.1% | 2.3% |
| Talon | 有利なマッチアップ | −1 | 50.0% | 3.0% |
| Hecarim | 有利なマッチアップ | −1 | 49.6% | 1.8% |
| Rengar | 有利なマッチアップ | −1 | 48.8% | 2.2% |
| Fizz | 有利なマッチアップ | −1 | 48.5% | 1.8% |
| Master Yi | 有利なマッチアップ | −1 | 48.0% | 9.8% |
| Viego | 有利なマッチアップ | −1 | 46.3% | 4.2% |
| Shyvana | 有利なマッチアップ | −1 | 45.2% | 2.8% |
| Gragas | 有利なマッチアップ | −1 | — | — |
| Maokai | 有利なマッチアップ | −1 | — | — |
| Nunu & Willump | 有利なマッチアップ | −2 | 53.1% | 1.9% |
| Evelynn | 有利なマッチアップ | −2 | 48.7% | 2.0% |
| Aatrox | 有利なマッチアップ | −2 | 44.9% | 1.1% |
有利度:Wild Rift Coreの公式判定(−3〜+3)で、各行に記載されたチャンピオンの視点から見た値です。勝率とピック率:このロールにおける相手チャンピオン自身の数値 — Wild Rift CN · Challenger、Patch 7.3c。直接対決の勝率ではありません。
Ambessaとの対戦は、メカニクスで彼女を倒すだけでなく、彼女の戦闘ロジックを破壊することです。彼女のキットは特定の瞬間、つまり突入し、孤立させ、即座に不均衡を作り出すことに集中しています。その瞬間が失敗した場合、彼女は脆弱になります。最良のカウンターは、必ずしもレーンを支配する者ではありませんが、彼女が計画を実行するのを阻止する者です。彼女のエンゲージを阻止する方法を理解することは、彼女を倒そうとすることよりも重要です。
Ambessaに対する効果的なカウンターは、2つの側面から攻めます。1つはターゲットへのアクセスを阻止すること(カイト、ポーク、コントロール)、もう1つは彼女の最初のエンゲージを生き延びること(スタシス、サステイン、タンク性能)です。彼女がコミットした後に罰を与えるチャンピオンは特に危険です。なぜなら、彼女には信頼できるエスケープがないからです。パッチは、アクセスしやすい防御ツールでこれらのプロファイルを強化します。
これらのプロファイルは、Ambessaが最適な条件でターゲットに到達するのを防ぎます。彼女を距離に保ち、リソースを枯渇させることで、最適ではないエンゲージを強制します。最終的にコミットしたとき、彼女は弱体化し、ミスする余地なく到着します。これは、彼女の実行ベースのテンポを完全に混乱させます。
チャンピオンの適応方法. 正面から強制するのではなく、予期せぬエンゲージの角度を探してください。
これらのチャンピオンはAmbessaのエンゲージを直接罰します。彼女たちのバーストと機動力により、即座に戦闘を転換できます。Ambessaがすぐに倒せない場合、彼女は維持できない戦いに陥ります。これにより、すべてのエンゲージが危険になり、レーンとチームファイトの両方での彼女の選択肢が制限されます。
チャンピオンの適応方法. 長引くデュエルを避け、アルティメットのタイミングを考慮してプレイしてください。
これらのプロファイルは最初のエンゲージを吸収し、彼女のオールインの価値を低下させます。彼女たちの生存能力と遅延能力により、Ambessaは迅速なアドバンテージを生み出すことができません。彼女のバーストがなくなると、彼女はプレッシャーを失い、パワーバランスが完全にシフトします。
チャンピオンの適応方法. タンクに無理に突っ込むのではなく、より脆い敵をターゲットにしてください。
Rivenは、Ambessaのすべてのエンゲージを即座のデュエルに変えます。彼女の機動力とバーストにより、孤立が完了する前に即座に対応できます。これにより、Ambessaはより慎重にプレイし、直接的なトレードを避ける必要があります。
一番いいのは、彼女のエンゲージの価値を下げることです。これには、カイト、クラウドコントロール、防御ツールが関わってきます。もし彼女がターゲットを孤立させられない場合、あるいはそのターゲットが生き残った場合、彼女のインパクトは即座に失われます。目標は必ずしも彼女を倒すことではなく、彼女のオールインを無駄にすることです。