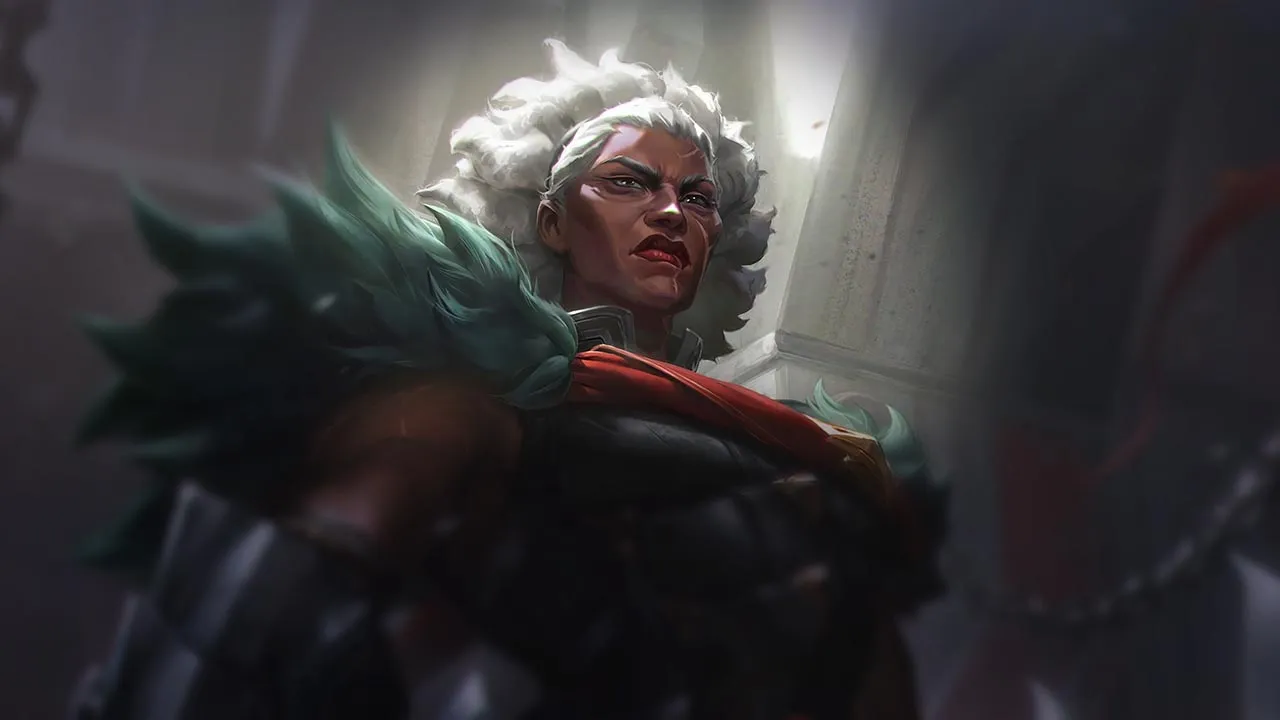
Ambessa, seorang fighter Baron Lane / Jungle, mengandalkan mobility dan tetap berada dalam jarak dekat untuk memberikan sustained damage. Komposisi dengan kite yang kuat, crowd control, atau burst cepat dapat membatasi efektivitasnya. Jika dia tidak dapat mempertahankan pressure dalam pertarungan jarak dekat, dampaknya akan turun drastis.
★ TOP · JUNGLETier S
DMG
UTIL
TANK
DIFF
Win52.7%#20 · ↑1pt
Pick1.8%#31
Ban1.0%#78
Panduan counter Ambessa Wild Rift
Hard Counters
4
Champion ini punya build dan gaya bermain yang langsung mengungguli milikmu, sehingga mengontrol lane dan farming jadi sangat sulit. Kemampuan mereka bisa menetralkan kekuatan utamamu atau menghukummu begitu kamu mencoba menjalankan rencana permainan biasa. Di matchup seperti ini, tujuannya biasanya adalah meminimalkan kesalahan dan mencari cara menang di luar konfrontasi langsung.
Counter kerasMundur amanYour entire combat loop relies on chaining Drakehound's Step dashes after casting Cunning Sweep or Lacerate. However, Poppy completely shuts this down with Steadfast Presence. The moment she activates it, any attempt to drift or reposition via your passive triggers her barrier, grounding you, dealing damage, and stopping your passive-empowered attacks. Without your mobility, you lose all threat and can't dance around her hammer.Build Poppy →Lihat detail
Poppy
Kenapa
Your entire combat loop relies on chaining Drakehound's Step dashes after casting Cunning Sweep or Lacerate. However, Poppy completely shuts this down with Steadfast Presence. The moment she activates it, any attempt to drift or reposition via your passive triggers her barrier, grounding you, dealing damage, and stopping your passive-empowered attacks. Without your mobility, you lose all threat and can't dance around her hammer.
Dampak di lane
This interaction forces you into a highly defensive posture. You cannot safely contest the minion wave because she can reactively pop her barrier to cancel your Cunning Sweep follow-up or Lacerate double-spin. If you get caught near a wall, she will slam you, and without your passive dashes, you cannot escape. This loss of lane priority means she safely scales and can freely roam to disrupt your jungler.
Cara bermain
To survive, you must bait out her Steadfast Presence before committing to any real trade. Use Cunning Sweep to farm from a safe distance without triggering the dash. If she wastes her defensive ring, you have a brief window to strike with Lacerate and Public Execution. Otherwise, hold Repudiation to absorb her wall-slam damage and block her crowd control, then immediately retreat toward your turret when your shield expires.
Mundur amanUltimateOlaf dominates this matchup by completely shutting down your execution tool. The moment he activates Ragnarok, he gains total immunity to the suppression and displacement of your Public Execution, turning your ultimate into a suicidal dash. Without your ultimate's crowd control, you are forced into a pure brawl against his Berserker Rage and Vicious Strikes, a stat check that Ambessa's low-health execution pattern cannot mathematically survive.Build Olaf →Lihat detail
Olaf
Kenapa
Olaf dominates this matchup by completely shutting down your execution tool. The moment he activates Ragnarok, he gains total immunity to the suppression and displacement of your Public Execution, turning your ultimate into a suicidal dash. Without your ultimate's crowd control, you are forced into a pure brawl against his Berserker Rage and Vicious Strikes, a stat check that Ambessa's low-health execution pattern cannot mathematically survive.
Dampak di lane
You lose all lane priority once Olaf reaches level five. If you attempt to poke with Cunning Sweep, he will retaliate with Undertow, slowing you down and running you down the long lane. You cannot safely contest waves because any extended trade allows him to trigger Vicious Strikes and heal back up. This forces you to drop farm under tower, bleeding gold while risking dive setups.
Cara bermain
Treat your Public Execution strictly as a mobility tool or a finisher after Ragnarok expires. When Olaf rushes you, use Drakehound's Step to dash perpendicular to dodge Undertow axes, cutting his chase potential. Save Repudiation specifically to absorb the true damage of Reckless Swing rather than random poke. If he pops his ultimate, immediately disengage using Lacerate's slow paired with a backward Drakehound's Step, and only re-engage once his immunity fades.
Mundur amanMekanikJax completely counters your trading pattern because Counter Strike blocks every single one of your Drakehound's Step empowered basic attacks. Since your entire damage loop and energy restoration rely on landing these enhanced strikes after casting Cunning Sweep or Lacerate, Jax can simply activate his helicopter spin to nullify your burst while ramping up his own Relentless Assault attack speed.Build Jax →Lihat detail
Jax
Kenapa
Jax completely counters your trading pattern because Counter Strike blocks every single one of your Drakehound's Step empowered basic attacks. Since your entire damage loop and energy restoration rely on landing these enhanced strikes after casting Cunning Sweep or Lacerate, Jax can simply activate his helicopter spin to nullify your burst while ramping up his own Relentless Assault attack speed.
Dampak di lane
This interaction strips away your early priority, forcing you to surrender wave control. If you attempt to thin the wave with Cunning Sweep, Jax can instantly engage with Leap Strike and Empower, knowing you cannot fight back through his dodge. You are forced to utilize Drakehound's Step defensively to escape, bleeding minion gold under your turret while Jax scales safely into his Grandmaster-at-Arms power spikes.
Cara bermain
To survive, you must bait out Counter Strike without committing your main damage. When Jax initiates his spin, immediately use the dash from Drakehound's Step or Lacerate to disengage and kite backwards. Hold Repudiation to absorb the burst and block the stun if he catches you with Leap Strike. Only when his dodge window is completely closed can you look for a short retaliation using Cunning Sweep and Public Execution.
Mundur amanDuelVolibear completely shuts down your extended skirmishes because Frenzied Maul heals him and out-damages your combos. While Cunning Sweep and Lacerate allow you to poke, staying in his melee range lets him mark you and bite again for massive healing. To survive, you must rely on the dash from Drakehound's Step immediately after using Lacerate to disengage before his claws can strike twice.Build Volibear →Lihat detail
Volibear
Kenapa
Volibear completely shuts down your extended skirmishes because Frenzied Maul heals him and out-damages your combos. While Cunning Sweep and Lacerate allow you to poke, staying in his melee range lets him mark you and bite again for massive healing. To survive, you must rely on the dash from Drakehound's Step immediately after using Lacerate to disengage before his claws can strike twice.
Dampak di lane
Volibear's passive The Relentless Storm naturally pushes the wave while Sky Splitter shields him during trades. Since you cannot win a direct war of attrition, you are forced to freeze the wave near your turret. If you let him crash massive waves, he will use Stormbringer to disable your tower and dive you easily, ruining your recall timings and locking you in your lane.
Cara bermain
Never engage when Volibear has Thundering Smash active; instead, hold Repudiation to block his incoming stun and absorb the initial damage. Only trade when Lacerate is available, using the triggered Drakehound's Step to dash backward and break his pursuit. If he freezes the wave near his tower, do not walk up to farm with basic attacks; use the outer edge of Cunning Sweep to secure minions from a safe distance.
Champion ini punya tool yang umumnya memberi mereka keunggulan dalam pertarungan, tanpa membuat matchup-nya benar-benar mustahil. Mereka mungkin punya jarak lebih jauh, lebih tahan terhadap seranganmu, atau lebih banyak cara merespons engage-mu. Kamu perlu menyesuaikan pendekatan dan memilih dengan cermat kapan menerima pertarungan.
MenghindarTradeDarius dominates extended trades due to Hemorrhage, making raw brawls fatal for Ambessa. The entire matchup hinges on how you respond to Decimate. If Darius lands the outer blade, he heals and stacks his passive. However, Ambessa can use Drakehound's Step after casting Cunning Sweep or Lacerate to dash directly into Darius's inner handle, completely neutralizing his healing and minimizing his damage.Build Darius →Lihat detail
Darius
Kenapa
Darius dominates extended trades due to Hemorrhage, making raw brawls fatal for Ambessa. The entire matchup hinges on how you respond to Decimate. If Darius lands the outer blade, he heals and stacks his passive. However, Ambessa can use Drakehound's Step after casting Cunning Sweep or Lacerate to dash directly into Darius's inner handle, completely neutralizing his healing and minimizing his damage.
Dampak di lane
You cannot mindlessly shove the wave because Apprehend can pull you into a long, lethal chase down the lane. Trade near your tower where Darius cannot easily stack Hemorrhage to maximum. A single misstep that lets him land a full Decimate forces an early recall, letting Darius freeze the wave or threaten an easy dive with Noxian Guillotine once you are chunked.
Cara bermain
Never initiate with your dash forward. Instead, walk up to bait his Decimate, then immediately trigger Drakehound's Step by casting Lacerate to slide inside his inner circle. If Darius manages to pull you with Apprehend first, quickly cast Repudiation to absorb his Crippling Strike and block the slow, allowing you to safely disengage. If you get caught with four Hemorrhage stacks, use Public Execution defensively to suppress him and buy time for your cooldowns to escape.
MenghindarPerisaiSett thrives in prolonged brawls because your quick-strike combos with Cunning Sweep and Lacerate rapidly charge his grit bar. When you attempt to burst him down, his Pit Grit health regeneration and the massive shield from Haymaker negate your initial advantage. The matchup is unfavorable because Sett can easily absorb your front-loaded damage and retaliate with devastating true damage if you cannot escape his central strike.Build Sett →Lihat detail
Sett
Kenapa
Sett thrives in prolonged brawls because your quick-strike combos with Cunning Sweep and Lacerate rapidly charge his grit bar. When you attempt to burst him down, his Pit Grit health regeneration and the massive shield from Haymaker negate your initial advantage. The matchup is unfavorable because Sett can easily absorb your front-loaded damage and retaliate with devastating true damage if you cannot escape his central strike.
Dampak di lane
You cannot contest the wave blindly, as Sett's Facebreaker can pull you in whenever you step up to use Cunning Sweep. This threat forces you to play defensively under your turret, sacrificing early wave control. If Sett catches you without your dash, his Knuckle Down allows him to run you down, creating immense lane pressure that forces your jungler to ignore top or risk a double kill to The Show Stopper.
Cara bermain
To survive all-ins, you must absolutely hold one charge of Drakehound's Step. Never deplete your passive dashes during a trade; instead, wait for Sett to cast Haymaker. The moment you see his grit bar full and his shield deploy, use your Drakehound's Step dash laterally to slide out of the true damage center. If he pulls you with Facebreaker, immediately buffer Repudiation to absorb the stun, then disengage until his shield decays.
SlowPokeThis matchup is dictated by how Malphite's Ground Slam directly counters your passive loop. Every time you cast Cunning Sweep or Lacerate, you rely on Drakehound's Step to quickly dash and unleash rapid, empowered basic attacks. However, Ground Slam's massive attack speed reduction completely freezes your animation speed. This prevents you from quickly reclaiming energy, leaving you sluggish and unable to execute your fast-paced assassin combos.Build Malphite →Lihat detail
Malphite
Kenapa
This matchup is dictated by how Malphite's Ground Slam directly counters your passive loop. Every time you cast Cunning Sweep or Lacerate, you rely on Drakehound's Step to quickly dash and unleash rapid, empowered basic attacks. However, Ground Slam's massive attack speed reduction completely freezes your animation speed. This prevents you from quickly reclaiming energy, leaving you sluggish and unable to execute your fast-paced assassin combos.
Dampak di lane
You cannot play this as a standard burst lane. Malphite will constantly chip away at your health using Seismic Shard while absorbing your retaliation with Granite Shield. Because Ground Slam prevents you from winning quick trades, you lose the power to crash waves at will. This turns the lane into a grueling war of attrition where securing clean recalls becomes difficult, and his Unstoppable Force constantly threatens dives if you drop too low.
Cara bermain
To survive this war of attrition, abandon your pure lethality rush and pivot your build toward early magic resistance and health regeneration. In lane, look to absorb the tracking damage of Seismic Shard with a well-timed Repudiation shield. Never commit your Drakehound's Step attacks while his Ground Slam is available. If he wastes it on minions, immediately use Lacerate to slow him and execute your full combo.
PerisaiTradeRenekton dominates early skirmishes because his fury-infused Ruthless Predator shreds your health bar and locks you down instantly. Since your trading power relies on chaining Cunning Sweep and Drakehound's Step, getting stunned mid-dash ruins your rhythm. The entire matchup hinges on whether you can time Repudiation to absorb and block his stun, as his raw burst otherwise easily overwhelms your basic defensive stats.Build Renekton →Lihat detail
Renekton
Kenapa
Renekton dominates early skirmishes because his fury-infused Ruthless Predator shreds your health bar and locks you down instantly. Since your trading power relies on chaining Cunning Sweep and Drakehound's Step, getting stunned mid-dash ruins your rhythm. The entire matchup hinges on whether you can time Repudiation to absorb and block his stun, as his raw burst otherwise easily overwhelms your basic defensive stats.
Dampak di lane
You cannot contest waves carelessly when his fury bar is red. If Renekton holds his stun, he forces you to farm under tower, chipping away your health with Cull the Meek whenever you step up. If you fail to block Ruthless Predator, you are forced into an early recall, losing valuable gold and letting him crash massive waves, which gives him total priority to dive or roam.
Cara bermain
Never initiate with Cunning Sweep when Renekton has high fury and his Slice and Dice is available. Instead, bait his dash, and the millisecond his weapon glows for Ruthless Predator, activate Repudiation to block the stun. If your shield is on cooldown, play safely out of his double-dash range. If you get stunned without your shield, disengage immediately using Lacerate and a Drakehound's Step backward rather than trying to salvage the trade.
PerisaiTradeIrelia thrives on dancing through your wave with Bladesurge, generating Ionian Fervor stacks to out-dps you. This lane revolves entirely around her Flawless Duet. If she stuns you, she gets a free Bladesurge reset and easily wins the extended duel. However, Ambessa can turn this mobility clash around by using Repudiation to absorb the stun, leaving Irelia vulnerable without her reset once her abilities are on cooldown.Build Irelia →Lihat detail
Irelia
Kenapa
Irelia thrives on dancing through your wave with Bladesurge, generating Ionian Fervor stacks to out-dps you. This lane revolves entirely around her Flawless Duet. If she stuns you, she gets a free Bladesurge reset and easily wins the extended duel. However, Ambessa can turn this mobility clash around by using Repudiation to absorb the stun, leaving Irelia vulnerable without her reset once her abilities are on cooldown.
Dampak di lane
When Irelia has minions to reset Bladesurge on, you cannot contest the wave. She will constantly fish for Flawless Duet. Missing your Repudiation shield timing means taking massive physical damage under tower or being forced into an early recall. If you successfully block her stun, her aggressive posture collapses, allowing you to safely clear with Cunning Sweep and Lacerate without risking a lethal dive.
Cara bermain
Never initiate with Public Execution or jump forward with Drakehound's Step when her Flawless Duet is active. Keep your distance and monitor her passive stacks. When she deploys her first blade, hover your finger over Repudiation. Cast it the moment the second blade flies to negate the stun. If you misstime this and get marked, immediately use Lacerate to slow her and dash away to safety, giving up the wave rather than giving her a kill.
MekanikMenghindarFiora holds a distinct advantage because her Riposte can completely neutralize your primary crowd control. If you cast Public Execution or the second strike of Cunning Sweep in a predictable manner, she will deflect your stun and return her own, leaving you helpless against her Duelist's Dance vitals. Since your mobility relies on Drakehound's Step, her Bladework slow can also severely cripple your positioning during trades.Build Fiora →Lihat detail
Fiora
Kenapa
Fiora holds a distinct advantage because her Riposte can completely neutralize your primary crowd control. If you cast Public Execution or the second strike of Cunning Sweep in a predictable manner, she will deflect your stun and return her own, leaving you helpless against her Duelist's Dance vitals. Since your mobility relies on Drakehound's Step, her Bladework slow can also severely cripple your positioning during trades.
Dampak di lane
This matchup forces you onto the defensive, where pushing the wave too far exposes you to deadly run-downs. Fiora will constantly use Lunge to poke your vitals, threatening massive health trades whenever you step forward to hit minions. If she freezes near her tower, you cannot safely break it because casting Cunning Sweep leaves you highly vulnerable to a Riposte counter-all-in, giving her total lane priority.
Cara bermain
To survive, you must hug the walls to conceal your Duelist's Dance vitals, making it harder for Fiora to trigger them with Lunge. Never initiate with Public Execution; instead, use Drakehound's Step dashes to dance around her, baiting her Riposte with the threat of your Cunning Sweep Slam. If she refuses to bite, hold Repudiation to absorb her Bladework burst and disengage immediately using Lacerate to slow her pursuit.
Matchup ini terutama soal duel eksekusi: kedua champion punya cara nyata untuk unggul. Satu skill penting yang di-dodge, engage yang diantisipasi dengan tepat, atau satu kesalahan positioning saja bisa menentukan siapa yang menang. Memahami matchup dan mengenali momen yang tepat untuk bertindak sangat penting di sini.
MenghindarMekanikThis matchup is a high-speed duel of mobility, dictated by how you manage your defensive response to his third cast of Mortal Steel. While Yone relies on Soul Unbound to initiate trades with his tornado, your ability to negate his setup determines the winner. Blocking his knockup with Repudiation completely denies his trade momentum, leaving him vulnerable to a swift Cunning Sweep counter-offensive before his cooldowns recover.Build Yone →Lihat detail
Yone
Kenapa
This matchup is a high-speed duel of mobility, dictated by how you manage your defensive response to his third cast of Mortal Steel. While Yone relies on Soul Unbound to initiate trades with his tornado, your ability to negate his setup determines the winner. Blocking his knockup with Repudiation completely denies his trade momentum, leaving him vulnerable to a swift Cunning Sweep counter-offensive before his cooldowns recover.
Dampak di lane
Trade priority swings wildly depending on who bluffs successfully. When Yone has his tornado ready, you must concede minor wave pressure to ensure you can react. If you absorb his crowd control, you can force him back to his starting spirit body with low health, gaining immediate control over the minion wave and creating a massive health lead that prevents him from farming comfortably.
Cara bermain
Never waste Repudiation during simple farming. Hold this shield specifically for the moment Yone dashes forward with his Mortal Steel knockup. When he activates Soul Unbound, track his movement direction and prepare your finger on the button; as the tornado flies, trigger your shield to absorb the impact, then instantly dash forward with Drakehound's Step to execute a full Cunning Sweep and Lacerate combo. If you miss-time the shield, retreat immediately and use Public Execution defensively.
MenghindarPerisaiThis duel is entirely dictated by how you navigate Mordekaiser's linear threat zone. Since his raw damage spikes dramatically when Obliterate strikes an isolated target, your survivability relies on mobility. By triggering Drakehound's Step to slide laterally, you completely negate his primary burst. If you get hit, his passive Darkness Rise activates, melting your health pool and turning this skill matchup entirely in his favor.Build Mordekaiser →Lihat detail
Mordekaiser
Kenapa
This duel is entirely dictated by how you navigate Mordekaiser's linear threat zone. Since his raw damage spikes dramatically when Obliterate strikes an isolated target, your survivability relies on mobility. By triggering Drakehound's Step to slide laterally, you completely negate his primary burst. If you get hit, his passive Darkness Rise activates, melting your health pool and turning this skill matchup entirely in his favor.
Dampak di lane
Missed slams from Mordekaiser completely shift wave control. When you successfully bait and dodge Obliterate, his lane pressure vanishes, allowing you to crash waves or force trades with Cunning Sweep. However, if he pulls you in with Death's Grasp while your dash is down, you are forced to retreat or burn Repudiation defensively, sacrificing your turn to contest minions and yielding crucial tower priority.
Cara bermain
Always stand near your own minions to avoid isolated Obliterate damage, but remain ready to move. Use the outer edge of Cunning Sweep to poke, then instantly trigger Drakehound's Step sideways the moment he raises his mace. Keep Repudiation ready specifically to absorb his Death's Grasp pull. If he traps you in Realm of Death, focus purely on dodging his skillshots rather than running away, waiting out the duration with your mobility.
MenghindarTradeThis matchup is a pure duel of micro-positioning centered on Gwen's Snip Snip!. Since Gwen relies heavily on the center-line true damage of her scissors to win short trades, Ambessa's mobility is her greatest asset. By linking Cunning Sweep or Lacerate to activate Drakehound's Step, you can instantly dash laterally or behind Gwen as soon as she snips, completely neutralizing her main source of burst and healing.Build Gwen →Lihat detail
Gwen
Kenapa
This matchup is a pure duel of micro-positioning centered on Gwen's Snip Snip!. Since Gwen relies heavily on the center-line true damage of her scissors to win short trades, Ambessa's mobility is her greatest asset. By linking Cunning Sweep or Lacerate to activate Drakehound's Step, you can instantly dash laterally or behind Gwen as soon as she snips, completely neutralizing her main source of burst and healing.
Dampak di lane
Failing to dodge the center of Gwen's scissors shifts wave control entirely to her. A successful hit lets Gwen push easily using Hallowed Mist for safety, forcing you under your turret. Conversely, when you slip behind her during Snip Snip!, her trade power evaporates. This allows you to freeze the wave, chunk her health bar, and pressure her into taking risky recalls before she can scale.
Cara bermain
To win, never initiate with your dash. Walk up to bait Gwen into starting her Snip Snip! animation. The moment she clips, cast Cunning Sweep and use the Drakehound's Step dash to slide through her model. Hold Repudiation to absorb the damage of her Skip 'n Slash empowered attacks or to block the slow from Needlework if she commits her ultimate. If you miss your dash timing, disengage immediately.
PerisaiMobilitasThis matchup is a high-stakes duel of reflexes centered on Camille's Hookshot. When she launches herself off the wall, her entire offensive pressure relies on landing that stun to safely prime Precision Protocol. Ambessa has the perfect answer in Repudiation, which can block the crowd control entirely. If you negate this stun, Camille is left vulnerable without an escape, allowing you to counter-attack immediately with Cunning Sweep.Build Camille →Lihat detail
Camille
Kenapa
This matchup is a high-stakes duel of reflexes centered on Camille's Hookshot. When she launches herself off the wall, her entire offensive pressure relies on landing that stun to safely prime Precision Protocol. Ambessa has the perfect answer in Repudiation, which can block the crowd control entirely. If you negate this stun, Camille is left vulnerable without an escape, allowing you to counter-attack immediately with Cunning Sweep.
Dampak di lane
Whichever fighter misuses their defensive tool loses control over the lane's physical space. A successful block with Repudiation leaves Camille exposed deep in your minion wave, forcing her to take heavy damage from Lacerate while retreating. Conversely, if you waste your shield prematurely, Camille can freely fish for Tactical Sweep slows to setup a lethal Hookshot dive, locking you down for her jungler.
Cara bermain
Never cast Repudiation to absorb simple poke from Tactical Sweep; instead, use Drakehound's Step dashes to slip inside or outside of Camille's outer cone. Hold your shield exclusively for the moment she clings to a wall and launches toward you. If she baits your shield without committing, immediately back off and play defensively until its cooldown returns, as you cannot survive a raw The Hextech Ultimatum engage without your crowd control block active.
MobilitasMenghindarThis matchup is a volatile dance of range denial and reactive mobility. Jayce wants to whittle you down with his cannon-form To the Skies! before switching with Transform Mercury Cannon to burst you. However, Ambessa can completely neutralize this poke by using Drakehound's Step to dash out of his skillshot path. Once Jayce attempts to disengage using the knockback from Thundering Blow, your low-cooldown dashes allow you to immediately re-engage and punish his long cooldowns.Build Jayce →Lihat detail
Jayce
Kenapa
This matchup is a volatile dance of range denial and reactive mobility. Jayce wants to whittle you down with his cannon-form To the Skies! before switching with Transform Mercury Cannon to burst you. However, Ambessa can completely neutralize this poke by using Drakehound's Step to dash out of his skillshot path. Once Jayce attempts to disengage using the knockback from Thundering Blow, your low-cooldown dashes allow you to immediately re-engage and punish his long cooldowns.
Dampak di lane
Positioning near the brush is vital to break Jayce's vision and force him to waste his mana on blind To the Skies! shots. If you fail to dodge his initial blast, you will be shoved under tower, bleeding health while he controls the wave. Conversely, successful dodges allow you to freeze the wave near your turret, starving him of gold and forcing him into risky melee ranges where your Cunning Sweep excels.
Cara bermain
Always bait Jayce's ranged poke by stepping out of your minion wave, using the dash from Drakehound's Step triggered by Lacerate to side-step To the Skies!. If he panics and uses Thundering Blow to push you away, immediately follow up with Public Execution or another dash to close the gap before his hammer form cooldowns reset. If you get chunked early, hold Repudiation to block his Lightning Field damage while retreating to safety.
PerisaiTradeThis matchup is defined by how effectively you neutralize Garen's silence to maintain your spell-weaving. Garen relies on his Decisive Strike to shut down your mobility and prevent you from triggering Drakehound's Step. By timing Repudiation to block his silence, you absorb his burst and gain the window to retaliate with Cunning Sweep, turning his aggressive charge into a favorable trade.Build Garen →Lihat detail
Garen
Kenapa
This matchup is defined by how effectively you neutralize Garen's silence to maintain your spell-weaving. Garen relies on his Decisive Strike to shut down your mobility and prevent you from triggering Drakehound's Step. By timing Repudiation to block his silence, you absorb his burst and gain the window to retaliate with Cunning Sweep, turning his aggressive charge into a favorable trade.
Dampak di lane
Your success in these interactions directly dictates wave control and pressure. When you block his silence, you force Garen to play defensively, neutralizing his passive Perseverance. However, if he baits your shield, his Judgment will shred your armor while you are silenced, leaving you vulnerable to an execution by Demacian Justice and forcing a costly retreat that surrenders tower priority.
Cara bermain
Watch Garen's movement closely; when he activates Decisive Strike, hold your ground instead of fleeing. Trigger Repudiation right as his strike animation begins to absorb the blow. Immediately follow up with the outer edge of Cunning Sweep, using Drakehound's Step to reposition. If you get silenced first, disengage using Lacerate to slow his pursuit, and delay your Public Execution until his Courage shield and damage reduction end.
MekanikPerisaiThis matchup is a high-speed duel of pure movement. While Yasuo relies on Sweeping Blade to dance through minions, your Drakehound's Step allows you to match his dashes step for step. Crucially, his Wind Wall is completely useless against you. Because all your primary damage tools—Cunning Sweep and Lacerate—are melee strikes rather than projectiles, you can ignore his defensive barrier entirely and strike him down right through it.Build Yasuo →Lihat detail
Yasuo
Kenapa
This matchup is a high-speed duel of pure movement. While Yasuo relies on Sweeping Blade to dance through minions, your Drakehound's Step allows you to match his dashes step for step. Crucially, his Wind Wall is completely useless against you. Because all your primary damage tools—Cunning Sweep and Lacerate—are melee strikes rather than projectiles, you can ignore his defensive barrier entirely and strike him down right through it.
Dampak di lane
Yasuo will constantly try to charge Steel Tempest on the wave to threaten you with a tornado. When he has his third strike ready, his threat zone expands, forcing you to use Drakehound's Step defensively. However, because his Wind Wall cannot mitigate Lacerate or Cunning Sweep, he cannot easily disengage or freeze the wave against you, turning every minion wave into a volatile zone where single missteps lead to lethal trades.
Cara bermain
Position yourself away from your own low-health minions to limit Yasuo's Sweeping Blade escape routes, forcing him to fight you directly. Always hold Repudiation to absorb his third Steel Tempest tornado or his ultimate, Last Breath, negating his crowd control. If he manages to poke you down from a distance, use your Drakehound's Step dashes to slip into the brush to break his vision, then close the gap with Public Execution to finish him.
MekanikPerisaiThis lane is a pure test of reflexes, pitting Riven's rapid dashes against your Drakehound's Step dashes. Riven relies on chaining Broken Wings and Ki Burst to lock you down while stacking Runic Blade. However, your Repudiation is the ultimate spoiler. By timing this shield to absorb her main burst and block her crowd control, you turn an even skirmish completely in your favor.Build Riven →Lihat detail
Riven
Kenapa
This lane is a pure test of reflexes, pitting Riven's rapid dashes against your Drakehound's Step dashes. Riven relies on chaining Broken Wings and Ki Burst to lock you down while stacking Runic Blade. However, your Repudiation is the ultimate spoiler. By timing this shield to absorb her main burst and block her crowd control, you turn an even skirmish completely in your favor.
Dampak di lane
Expect relentless, high-speed trading where neither of you can easily freeze the wave. If you waste Repudiation early, Riven will immediately force a trade with Blade of the Exile, pushing you off the wave and securing priority. Conversely, successfully parrying her knockup lets you chase her down with Cunning Sweep, forcing her to use Valor defensively and giving you complete control over recall timings.
Cara bermain
Never initiate trades with Repudiation; instead, lead with Cunning Sweep and use Drakehound's Step to match her positioning. Watch her Q casts closely. When she prepares the third strike of Broken Wings, or dashes in close for Ki Burst, immediately activate your shield. If she baits your shield out with Valor, immediately retreat with Lacerate to slow her and wait for your cooldowns to return before stepping up again.
Champion ini biasanya kesulitan merespons kekuatan utamamu, sehingga kamu bisa menghadapi pertarungan dengan lebih leluasa. Kamu sering punya banyak cara untuk menekan mereka dan memaksa trade yang menguntungkan. Manfaatkan keunggulan ini untuk mendikte tempo, bukan memberi mereka waktu untuk kembali nyaman.
Tekanan awalWave clearAmbessa completely dominates the early game because Nasus's Soul Eater sustain cannot match her aggressive trading. By harassing him with the outer edge of Cunning Sweep, she forces him to play defensively. When Nasus tries to disengage using Wither, Ambessa can bypass the movement speed cripple entirely because Drakehound's Step provides dashes that ignore slow penalties, allowing her to stay on top of him.Build Nasus →Lihat detail
Nasus
Kenapa
Ambessa completely dominates the early game because Nasus's Soul Eater sustain cannot match her aggressive trading. By harassing him with the outer edge of Cunning Sweep, she forces him to play defensively. When Nasus tries to disengage using Wither, Ambessa can bypass the movement speed cripple entirely because Drakehound's Step provides dashes that ignore slow penalties, allowing her to stay on top of him.
Dampak di lane
This dynamic dictates strict wave control. You can slow push the early waves to crash a massive wave under his turret, then use Cunning Sweep and Lacerate to poke him while he tries to last-hit for Siphoning Strike stacks. Denying him these stacks early delays his scaling spike, keeping him trapped under his tower and giving you total freedom.
Cara bermain
Keep the wave frozen near your turret early on to force Nasus to walk up into Spirit Fire range. If he steps forward to stack Siphoning Strike, immediately strike him with Cunning Sweep and activate Drakehound's Step to dash forward. Save Repudiation to absorb his retaliatory strike or to block Wither. If Nasus activates Fury of the Sands, do not commit to a long duel; instead, use Public Execution to suppress him, reposition, and disengage until his ultimate expires.
MobilitasPosisiMenghindarAmbessa completely dominates this matchup because her passive, Drakehound's Step, provides short, frequent dashes that perfectly counter Aatrox's telegraphed strike, The Darkin Blade. Every time Aatrox attempts to line up his sweetspots, Ambessa can trigger a quick reposition by casting Cunning Sweep or Lacerate, sliding completely out of his knockup zones while maintaining high offensive pressure. Aatrox simply lacks the speed to pin her down.Build Aatrox →Lihat detail
Aatrox
Kenapa
Ambessa completely dominates this matchup because her passive, Drakehound's Step, provides short, frequent dashes that perfectly counter Aatrox's telegraphed strike, The Darkin Blade. Every time Aatrox attempts to line up his sweetspots, Ambessa can trigger a quick reposition by casting Cunning Sweep or Lacerate, sliding completely out of his knockup zones while maintaining high offensive pressure. Aatrox simply lacks the speed to pin her down.
Dampak di lane
This mobility advantage dictates every single health trade. Aatrox cannot easily crash waves or zone you, as missing his first two sweetspots of The Darkin Blade leaves him incredibly vulnerable to an all-in. You can constantly thin the wave and force him under his turret, threatening a dive once his Infernal Chains is wasted. His sustain from Deathbringer Stance cannot offset the sheer volume of damage he takes.
Cara bermain
To execute this lane flawlessly, never initiate with your dash; instead, walk up to bait his first The Darkin Blade. Use Drakehound's Step reactively to dodge sideways, then respond with Cunning Sweep. Save Repudiation specifically to block the pull from Infernal Chains if you get caught. When Aatrox activates World Ender, do not panic-retreat; use your mobility to weave around his strikes, delaying your Public Execution to execute him.
MobilitasCooldownAmbessa dominates this matchup because Mini Gnar cannot maintain his spacing against her relentless mobility. Every time you cast Cunning Sweep or Lacerate, Drakehound's Step provides a swift dash that completely bypasses his Boomerang Throw slow and Hop retreat. This allows you to rapidly stick to him and deplete his fragile health pool before his Rage Gene can transition him into the tanky Mega Gnar form.Build Gnar →Lihat detail
Gnar
Kenapa
Ambessa dominates this matchup because Mini Gnar cannot maintain his spacing against her relentless mobility. Every time you cast Cunning Sweep or Lacerate, Drakehound's Step provides a swift dash that completely bypasses his Boomerang Throw slow and Hop retreat. This allows you to rapidly stick to him and deplete his fragile health pool before his Rage Gene can transition him into the tanky Mega Gnar form.
Dampak di lane
This dynamic strips Gnar of his usual ranged harassment advantage. He is forced to respect your dash range, meaning you can easily control the wave state. If he steps up to stack Hyper on minions, you can instantly initiate a trade. You will secure early health leads that force him into terrible recall timings, neutralizing his tower pressure and preventing him from ever safely farming in his vulnerable Mini state.
Cara bermain
Trigger your engage when Gnar's rage bar is low, ensuring he cannot transform mid-fight. Start with Cunning Sweep, using the Drakehound's Step dash to close the gap and trigger the Slam follow-up. Save Repudiation specifically to block his Boomerang Throw slow or to absorb the stun from Boulder Toss if he manages to transform. If he attempts to escape with Hop, immediately match it with Public Execution to lock him down and finish him off.
PerisaiMenghindarThis matchup revolves around Urgot's attempt to execute his trade using Disdain. When he dashes forward to flip you, your Repudiation acts as the ultimate counter-measure. By timing it to absorb the impact, you block the displacement and stun, negate his shield creation, and immediately retaliate. Without his flip, Urgot cannot easily trigger multiple Echoing Flames passives, allowing your Cunning Sweep to shred his health bar while he is stuck in place.Build Urgot →Lihat detail
Urgot
Kenapa
This matchup revolves around Urgot's attempt to execute his trade using Disdain. When he dashes forward to flip you, your Repudiation acts as the ultimate counter-measure. By timing it to absorb the impact, you block the displacement and stun, negate his shield creation, and immediately retaliate. Without his flip, Urgot cannot easily trigger multiple Echoing Flames passives, allowing your Cunning Sweep to shred his health bar while he is stuck in place.
Dampak di lane
Urgot's lane dominance collapses once he cannot threaten you with his flip. Because you consistently win trades by blocking Disdain, you dictate wave placement, forcing him to farm from a distance with Purge. This creates massive health differentials, allowing you to crash large minion waves and secure free recall timings. Urgot is forced to play defensively under tower, bleeding gold and losing the ability to assist his jungler.
Cara bermain
Position yourself constantly near Urgot’s front arc to bait his dash, but never commit your own dashes mindlessly. Keep Repudiation ready specifically for when you see his charge animation begin. If he tries to slow you with Corrosive Charge first, use Lacerate to reposition and maintain your angle without wasting your defensive shield. Should you mistime your block and get flipped, immediately activate Public Execution to turn the battle around and execute him before his Purge wears you down.
MobilitasAll-inTeemo relies on Toxic Shot to harass you from afar and uses Blinding Dart to nullify your empowered passive attacks. However, his lack of hard escape makes him highly vulnerable. By chaining Cunning Sweep and Lacerate, you trigger multiple Drakehound's Step dashes to easily bypass his range. Even if you are blinded, your mobility ensures you stay glued to him until you can unleash Public Execution for the finish.Build Teemo →Lihat detail
Teemo
Kenapa
Teemo relies on Toxic Shot to harass you from afar and uses Blinding Dart to nullify your empowered passive attacks. However, his lack of hard escape makes him highly vulnerable. By chaining Cunning Sweep and Lacerate, you trigger multiple Drakehound's Step dashes to easily bypass his range. Even if you are blinded, your mobility ensures you stay glued to him until you can unleash Public Execution for the finish.
Dampak di lane
Early on, Teemo will try to zone you with poison, forcing you to use Repudiation to absorb damage while collecting minions. But the moment you unlock Public Execution, the lane dynamic flips. Your threat of a sudden gap-close restricts his ability to safely plant Noxious Trap or harass you, trapping the scout under his own turret and neutralizing his map pressure.
Cara bermain
When trading, do not panic if Teemo hits you with Blinding Dart. Instead of wasting your empowered Drakehound's Step attacks into his blind, use the dash to position Cunning Sweep and Lacerate for maximum damage. Hold Repudiation to absorb his poison ticks while waiting out the debuff. Once your vision clears, unleash your accumulated passive strikes and secure the kill with Public Execution before he can run away with Move Quick.
MenghindarPerisaiAmbessa dominates this matchup because her high mobility bypasses Ornn's predictable patterns. While Ornn relies on hitting Searing Charge against terrain or timing his Call of the Forge God to lock you down, your Repudiation acts as a perfect counter. By absorbing his knockups and shielding his burst, you strip the tank of his crowd control, leaving him vulnerable to extended trades where Drakehound's Step out-spaces his slow cooldowns.Build Ornn →Lihat detail
Ornn
Kenapa
Ambessa dominates this matchup because her high mobility bypasses Ornn's predictable patterns. While Ornn relies on hitting Searing Charge against terrain or timing his Call of the Forge God to lock you down, your Repudiation acts as a perfect counter. By absorbing his knockups and shielding his burst, you strip the tank of his crowd control, leaving him vulnerable to extended trades where Drakehound's Step out-spaces his slow cooldowns.
Dampak di lane
This interaction forces Ornn into a defensive, passive lane state. He cannot safely contest the wave with Volcanic Rupture or trade with Bellows Breath because any forward movement allows you to dash in. When you block his crucial Searing Charge knockup, he is left without escape, allowing you to freeze the wave at will or crash giant waves to chip his turret plates while he sits helplessly under tower.
Cara bermain
To execute this plan, never waste Repudiation aggressively; hold it strictly for his crowd control. When Ornn casts Call of the Forge God, wait for the return ram to strike before activating your shield, or trigger it the moment he charges a wall with Searing Charge. Use Cunning Sweep to poke him down, and always dash diagonally with Drakehound's Step to avoid the breath from Bellows Breath. If he attempts to escape, secure the kill with Public Execution.
Tekanan awalDiveKayle's early vulnerability stems from her weak melee state before Divine Ascent evolves. She relies on Radiant Blast and Celestial Blessing to kite, but she cannot escape your relentless mobility. By chaining Cunning Sweep and Lacerate, you trigger successive Drakehound's Step dashes that easily close the gap. Kayle simply lacks the raw defensive stats and early tools to survive this constant sticky aggression before she unlocks her range.Build Kayle →Lihat detail
Kayle
Kenapa
Kayle's early vulnerability stems from her weak melee state before Divine Ascent evolves. She relies on Radiant Blast and Celestial Blessing to kite, but she cannot escape your relentless mobility. By chaining Cunning Sweep and Lacerate, you trigger successive Drakehound's Step dashes that easily close the gap. Kayle simply lacks the raw defensive stats and early tools to survive this constant sticky aggression before she unlocks her range.
Dampak di lane
This mobility mismatch gives you absolute dominion over the minion waves. You can easily establish a slow push, forcing Kayle to watch helplessly or risk dying to a rapid Cunning Sweep engagement. She is forced to waste Starfire Spellblade just to secure scraps under her turret. This constant threat of dive or heavy zoning completely starves her of gold and experience, delaying her crucial ascension thresholds while securing you an early lead.
Cara bermain
Position yourself aggressively between the enemy caster minions and Kayle to deny her experience. When she tries to disengage with Radiant Blast, immediately activate Repudiation to block the slowing projectile and absorb her counter-poke. Save Public Execution for the moment her self-cast Divine Judgment expires, ensuring you suppress her immediately after her invulnerability fades. If you accidentally push too fast, freeze the next wave near your turret to force her into deep, lethal territory.
MenghindarTrue damageAmbessa dominates this matchup because her mobility completely neutralizes Sion's primary threat. The moment Sion begins channeling Decimating Smash, you can activate Drakehound's Step after casting Cunning Sweep or Lacerate to effortlessly dash out of the danger zone. By dodging his heavy knock-up, you strip him of his main crowd control and damage, leaving him entirely defenseless against your relentless counter-engage.Build Sion →Lihat detail
Sion
Kenapa
Ambessa dominates this matchup because her mobility completely neutralizes Sion's primary threat. The moment Sion begins channeling Decimating Smash, you can activate Drakehound's Step after casting Cunning Sweep or Lacerate to effortlessly dash out of the danger zone. By dodging his heavy knock-up, you strip him of his main crowd control and damage, leaving him entirely defenseless against your relentless counter-engage.
Dampak di lane
This interaction grants you complete authority over wave states and trade pacing. Sion cannot safely channel Decimating Smash to clear minions without being severely punished. You can easily establish a slow push and dive or pressure his turret, as his desperate attempts to absorb your bursts with Soul Furnace will quickly deplete his mana pool, forcing him into terrible recall timings and loss of tower plates.
Cara bermain
To execute this perfectly, always hover within Sion's range and hold onto either Cunning Sweep or Lacerate. Avoid burning all your abilities at once; instead, wait for him to start anchoring his heavy strike before triggering Drakehound's Step to slide out of his path. If he attempts to escape or engage with Unstoppable Onslaught, time your Repudiation shield to absorb the impact, then immediately follow up with Public Execution to secure the kill.
Champion ini punya build dan gaya bermain yang langsung mengungguli milikmu, sehingga mengontrol lane dan farming jadi sangat sulit. Kemampuan mereka bisa menetralkan kekuatan utamamu atau menghukummu begitu kamu mencoba menjalankan rencana permainan biasa. Di matchup seperti ini, tujuannya biasanya adalah meminimalkan kesalahan dan mencari cara menang di luar konfrontasi langsung.
SustainMundur amanAmbessa relies on chaining Cunning Sweep and Lacerate alongside Drakehound's Step dashes to burst targets down. However, Warwick completely nullifies this burst pattern. His Primal Howl grants immense damage reduction that absorbs your initial combo, while his Eternal Hunger healing ramps up as his health drops, allowing him to easily out-sustain your high energy costs in any direct duel.Build Warwick →Lihat detail
Warwick
Kenapa
Ambessa relies on chaining Cunning Sweep and Lacerate alongside Drakehound's Step dashes to burst targets down. However, Warwick completely nullifies this burst pattern. His Primal Howl grants immense damage reduction that absorbs your initial combo, while his Eternal Hunger healing ramps up as his health drops, allowing him to easily out-sustain your high energy costs in any direct duel.
Dampak di lane
This structural disadvantage completely locks you out of contesting early Scuttle Crabs or invading his jungle territory. If you run into Warwick in the river, his Blood Hunt makes running away extremely difficult if you are chipped down, and his Jaws of the Beast will latch onto your Drakehound's Step dashes, rendering your mobility useless and costing you map priority.
Cara bermain
Never initiate a 1v1 skirmish in the river. If Warwick jumps on you with Infinite Duress, immediately buffer Repudiation to absorb the suppression's initial impact and gain the shield. Save your Public Execution strictly as a tool to escape over walls or to execute him only if an ally has already applied heavy crowd control, focusing instead on clearing camps quickly.
Kebal CCTrue damageOlaf completely neutralizes your ultimate utility. When he activates Ragnarok, his crowd control immunity prevents you from locking him down with Public Execution, and he ignores the knock-up from the second cast of Cunning Sweep. Since your kit relies on these displacements to space and burst, his ultimate turns your main tools into useless animations, letting him close the distance effortlessly with Undertow's slow.Build Olaf →Lihat detail
Olaf
Kenapa
Olaf completely neutralizes your ultimate utility. When he activates Ragnarok, his crowd control immunity prevents you from locking him down with Public Execution, and he ignores the knock-up from the second cast of Cunning Sweep. Since your kit relies on these displacements to space and burst, his ultimate turns your main tools into useless animations, letting him close the distance effortlessly with Undertow's slow.
Dampak di lane
You cannot contest Olaf in direct 1v1 skirmishes in the river or your own jungle. If you meet him at Scuttle Crab, you must yield. Attempting to fight him over early objectives will result in him popping Vicious Strikes to out-sustain your damage. His relentless forward pressure forces you into a reactive state, giving up early neutral priority and leaving your laners vulnerable to his unstoppable ganks.
Cara bermain
Never initiate with Public Execution when Ragnarok is available. Instead, use Lacerate combined with Drakehound's Step to dash backward over thin walls when he advances. Save Repudiation specifically to absorb his Reckless Swing true damage or the initial Undertow axe slow. If he triggers his ultimate, immediately abort the fight, using your passive dashes to kite away until his CC immunity expires before even considering a re-engagement.
Crowd controlRammus is your absolute worst nightmare in the jungle because his Defensive Ball Curl actively turns your high-frequency passive, Drakehound's Step, against you. Every time you dash and strike with your empowered auto-attacks, you melt your own health bar against his armor. To make matters worse, his Frenzying Taunt forces you to attack him during this defensive state, completely disabling your ability to maneuver with Cunning Sweep or escape.Build Rammus →Lihat detail
Rammus
Kenapa
Rammus is your absolute worst nightmare in the jungle because his Defensive Ball Curl actively turns your high-frequency passive, Drakehound's Step, against you. Every time you dash and strike with your empowered auto-attacks, you melt your own health bar against his armor. To make matters worse, his Frenzying Taunt forces you to attack him during this defensive state, completely disabling your ability to maneuver with Cunning Sweep or escape.
Dampak di lane
This matchup ruins your early jungle tempo and neutral objective contests. When contesting the Scuttle Crab, Rammus can easily interrupt your Cunning Sweep or Lacerate wind-ups using Powerball. If you attempt to counter-jungle, his rapid map rotations mean he can lock you down under your own target's nose. You cannot safely duel him at any stage, meaning your lanes lose crucial early jungle pressure while he safely scales his armor.
Cara bermain
Your absolute priority is holding Repudiation to absorb his Frenzying Taunt or stop his Powerball momentum. Never initiate with Drakehound's Step if his Defensive Ball Curl is active; instead, walk away or use Lacerate from a distance to slow him down. If he initiates on your allies, wait out his defensive spike before committing your Public Execution. If caught, prioritize building armor penetration stats over raw attack speed to survive his passive reflect.
InterupsiAnti-dashYour entire offensive flow relies on triggering Drakehound's Step after casting Cunning Sweep or Lacerate. However, Poppy completely neutralizes this mobility with Steadfast Presence. The moment you attempt any passive dash within her barrier, you are instantly knocked down, grounded, and heavily damaged. This single interaction strips away your fluid combos, leaving you completely vulnerable and unable to reposition or stick to your target.Build Poppy →Lihat detail
Poppy
Kenapa
Your entire offensive flow relies on triggering Drakehound's Step after casting Cunning Sweep or Lacerate. However, Poppy completely neutralizes this mobility with Steadfast Presence. The moment you attempt any passive dash within her barrier, you are instantly knocked down, grounded, and heavily damaged. This single interaction strips away your fluid combos, leaving you completely vulnerable and unable to reposition or stick to your target.
Dampak di lane
In the jungle, this matchup ruins your skirmishing potential. You cannot contest Rift Scuttlers or neutral objectives head-on, as Poppy can invade your camps with impunity. Trying to escape or initiate with Drakehound's Step only results in a self-inflicted stun if her barrier is up. This forces you to concede river control, directly sacrificing early map pressure and leaving your laners exposed to her ganks.
Cara bermain
To survive, you must treat Poppy like a moving hazard zone. Never initiate with Cunning Sweep if she has her defensive barrier ready; instead, delay your Drakehound's Step triggers by walking rather than dashing. Hold Repudiation to absorb her knockback damage, and only commit your Public Execution after you have baited out Steadfast Presence. If she activates it, immediately stop casting abilities and rely on basic walking pathing to disengage.
Champion ini punya tool yang umumnya memberi mereka keunggulan dalam pertarungan, tanpa membuat matchup-nya benar-benar mustahil. Mereka mungkin punya jarak lebih jauh, lebih tahan terhadap seranganmu, atau lebih banyak cara merespons engage-mu. Kamu perlu menyesuaikan pendekatan dan memilih dengan cermat kapan menerima pertarungan.
ArmorGraves holds a clear advantage because his Quickdraw allows him to effortlessly dash out of your Cunning Sweep sweet spot. By doing so, he not only avoids the devastating secondary slam but also stacks True Grit armor, mitigating your physical burst. His ranged basic attacks from New Destiny let him kite you down easily while you struggle to stick to him without your passive dashes.Build Graves →Lihat detail
Graves
Kenapa
Graves holds a clear advantage because his Quickdraw allows him to effortlessly dash out of your Cunning Sweep sweet spot. By doing so, he not only avoids the devastating secondary slam but also stacks True Grit armor, mitigating your physical burst. His ranged basic attacks from New Destiny let him kite you down easily while you struggle to stick to him without your passive dashes.
Dampak di lane
This dynamic makes early jungle skirmishes highly dangerous for you, especially around the Scuttle Crabs. If Graves intercepts your clear, he can deploy Smoke Screen to disrupt your Drakehound's Step targeting. He will slowly chip away at your health bar, forcing you to concede camp priority or risk a fatal duel where his Collateral Damage executes you after you have wasted your gap-closers.
Cara bermain
To survive and turn the tides, never initiate with Cunning Sweep. Instead, walk up or use Lacerate to force him to panic-cast Quickdraw first. Keep your Repudiation active to absorb his high-impact burst from End of the Line or the blinding effect of Smoke Screen. If you fight near walls, position yourself so his returning powder keg doesn't detonate instantly, then lock him down with Public Execution only after his armor stacks decay.
UltimateMobilitasTryndamere dominates direct, sustained duels in the jungle due to the raw critical strike damage from Battle Fury. If you attempt a head-on brawl, his constant auto-attacks will quickly force out your defensive options. Even if you chunk him down, Undying Rage completely nullifies your execution damage from Public Execution. Your only saving grace is using Lacerate and Drakehound's Step to outmaneuver him during his ultimate.Build Tryndamere →Lihat detail
Tryndamere
Kenapa
Tryndamere dominates direct, sustained duels in the jungle due to the raw critical strike damage from Battle Fury. If you attempt a head-on brawl, his constant auto-attacks will quickly force out your defensive options. Even if you chunk him down, Undying Rage completely nullifies your execution damage from Public Execution. Your only saving grace is using Lacerate and Drakehound's Step to outmaneuver him during his ultimate.
Dampak di lane
Because you cannot match his raw DPS, you lose the freedom to contest scuttle crabs or invade his camps early on. If he catches you with high fury, his Spinning Slash allows him to stick to you, forcing a defensive Repudiation. This passive stance means you will often have to concede early jungle pressure, forcing your lanes to play safer while you focus on safe clearing.
Cara bermain
When Tryndamere initiates with Spinning Slash, do not immediately use Public Execution. Instead, trigger Lacerate to slow him, followed by a dash from Drakehound's Step to create distance. Save Repudiation to absorb his initial high-crit burst or block the slow from Mocking Shout if your back is turned. Once he activates Undying Rage, continually dash away using your passive-empowered strikes on jungle monsters or minions to stall out his five seconds of immortality.
MobilitasKebal CCLillia dominates this jungle duel because the bonus movement speed she gains from stacking Blooming Blows allows her to effortlessly dance around the outer edge of your Cunning Sweep, rendering your main damage and knock-up highly unreliable. While you have the tools to mitigate her sleep setup by timing Repudiation perfectly against Lilting Lullaby, her constant mobility makes landing your full offensive rotation an uphill battle.Build Lillia →Lihat detail
Lillia
Kenapa
Lillia dominates this jungle duel because the bonus movement speed she gains from stacking Blooming Blows allows her to effortlessly dance around the outer edge of your Cunning Sweep, rendering your main damage and knock-up highly unreliable. While you have the tools to mitigate her sleep setup by timing Repudiation perfectly against Lilting Lullaby, her constant mobility makes landing your full offensive rotation an uphill battle.
Dampak di lane
This dynamic forces you into a defensive farming pattern, as Lillia can easily kite you out in open river skirmishes. If she lands Swirlseed from afar, she can safely trigger Lilting Lullaby to force your Repudiation or secure a kill. You will constantly struggle to contest neutral objectives directly, losing early crab priority unless your lanes collapse to lock her down.
Cara bermain
To survive and win, never initiate with Public Execution while she has max stacks of Blooming Blows. Instead, wait in brush to ambush her, using Lacerate to apply a heavy slow. Save Repudiation strictly for the exact moment the drowsy indicator from Lilting Lullaby is about to turn into sleep. If she manages to kite your initial Cunning Sweep, immediately use Drakehound's Step to dash backward and disengage rather than chasing her down.
TradeMenghindarDarius naturally dominates this jungle matchup because his Hemorrhage stacks punish extended duels, while Decimate provides massive sustain. Because Ambessa lacks innate healing, she cannot win a war of attrition. The duel hinges entirely on your reaction time: you must use Drakehound's Step to dash directly into his inner ring when he swings, denying him both the heal and his maximum damage threshold.Build Darius →Lihat detail
Darius
Kenapa
Darius naturally dominates this jungle matchup because his Hemorrhage stacks punish extended duels, while Decimate provides massive sustain. Because Ambessa lacks innate healing, she cannot win a war of attrition. The duel hinges entirely on your reaction time: you must use Drakehound's Step to dash directly into his inner ring when he swings, denying him both the heal and his maximum damage threshold.
Dampak di lane
In the jungle, this power dynamic makes early scuttle contests and invades highly risky for you. If Darius catches you with Apprehend, he can easily stack Hemorrhage and force your flash. A failed trade means giving up objective priority or being forced into an early recall, which slows down your clear and leaves your laners vulnerable to his high-damage ganks.
Cara bermain
Never initiate with your dash. Instead, start skirmishes with Lacerate to slow him, forcing him to wind up Decimate. The moment his axe circles, trigger Drakehound's Step to dash close to his model. Use Repudiation to absorb the damage from Crippling Strike or block the displacement of Apprehend. If he successfully reaches five stacks, disengage immediately using Public Execution defensively if necessary to escape over a wall.
KitingEksekusiKindred's ranged advantage with Dance of Arrows and Wolf's Frenzy makes it extremely hard to land Cunning Sweep. However, the matchup is defined by the ultimate interaction. Ambessa relies on Public Execution as a high-damage finisher based on missing health. If you commit to this execution too early, Kindred simply drops Lamb's Respite, rendering your ultimate completely useless and leaving you stranded inside their death-defying zone with no escape.Build Kindred →Lihat detail
Kindred
Kenapa
Kindred's ranged advantage with Dance of Arrows and Wolf's Frenzy makes it extremely hard to land Cunning Sweep. However, the matchup is defined by the ultimate interaction. Ambessa relies on Public Execution as a high-damage finisher based on missing health. If you commit to this execution too early, Kindred simply drops Lamb's Respite, rendering your ultimate completely useless and leaving you stranded inside their death-defying zone with no escape.
Dampak di lane
Kindred will constantly abuse their range to kite you out of your camps, utilizing Wolf's Frenzy to dominate early skirmishes over marks. You cannot take direct 1v1 fights in the river because Mounting Dread will shred you before you can stack Drakehound's Step. This forces you to concede early Scuttle Crabs, slowing down your level 5 spike and giving Kindred map control and free marks.
Cara bermain
Never initiate skirmishes with Public Execution. Instead, bait out Lamb's Respite by using Lacerate and Cunning Sweep to chip away at their health. Once they panic-cast their ultimate, use the dash from Drakehound's Step to step outside the circle, or time Repudiation to absorb the burst when the healing phase ends. If they refuse to drop their ultimate, save yours to secure the kill the exact millisecond their zone disappears.
True damageTekanan petaGwen naturally outscales you because her Hallowed Mist makes her immune to the outer-edge sweet spot of your Cunning Sweep if she positions it well. In direct, extended jungle duels, her continuous Snip Snip! combined with the percentage health healing from A Thousand Cuts simply melts your health bar faster than you can burst her down, especially once she gets access to Needlework.Build Gwen →Lihat detail
Gwen
Kenapa
Gwen naturally outscales you because her Hallowed Mist makes her immune to the outer-edge sweet spot of your Cunning Sweep if she positions it well. In direct, extended jungle duels, her continuous Snip Snip! combined with the percentage health healing from A Thousand Cuts simply melts your health bar faster than you can burst her down, especially once she gets access to Needlework.
Dampak di lane
This matchup dynamic forces you to secure early leads before Gwen out-clears and out-scales you. You cannot safely contest isolated Scuttle Crabs if she has her stacks ready, as her Skip 'n Slash allows her to easily dodge your Public Execution or reposition inside her mist. Losing early jungle pressure means she will secure neutral objectives faster, leaving your lanes vulnerable to her scaling threat.
Cara bermain
To win, you must force early skirmishes during her first clear when she is vulnerable. Never initiate with Public Execution while her Hallowed Mist is active; instead, walk into her zone or bait it out first. Save Repudiation specifically to absorb the final, heavy snip of her Snip Snip! or the slowing needles of Needlework. If a skirmish goes wrong, use Drakehound's Step combined with Lacerate to quickly dash away over terrain.
MenghindarScalingThis matchup hinges on how Jax's Counter Strike completely shuts down Drakehound's Step. Ambessa’s entire combat loop relies on landing her passive-empowered basic attacks to deal burst damage and recover vital energy. When Jax activates his evasion, your empowered strikes from Cunning Sweep and Lacerate do zero damage and fail to restore your energy, leaving you completely starved of resources while setup for his stun.Build Jax →Lihat detail
Jax
Kenapa
This matchup hinges on how Jax's Counter Strike completely shuts down Drakehound's Step. Ambessa’s entire combat loop relies on landing her passive-empowered basic attacks to deal burst damage and recover vital energy. When Jax activates his evasion, your empowered strikes from Cunning Sweep and Lacerate do zero damage and fail to restore your energy, leaving you completely starved of resources while setup for his stun.
Dampak di lane
In the jungle, this interaction makes early river skirmishes and neutral camps highly dangerous. Jax can aggressively invade your territory, using Leap Strike to close the gap and forcing you to retreat. If you attempt to contest him, a well-timed Counter Strike negates your retaliation, leaving you with depleted energy and forcing you to yield scuttle crabs or give up pressure on adjacent lanes.
Cara bermain
To survive his invades, you must discipline your passive usage. When Jax engages with Leap Strike, immediately use the dash from Drakehound's Step to kite backwards or sideways, refusing to attack while Counter Strike is active. Hold Repudiation to absorb his stun damage and block the crowd control. Once his helicopter spin ends, you have a brief window to strike back with Cunning Sweep and Lacerate, using Public Execution to finish him off only after his defensive cooldown is spent.
Pick-offPerisaiMordekaiser dominates this jungle matchup once he unlocks Realm of Death. Inside his pocket dimension, the confined space makes it incredibly easy for him to trigger and maintain Darkness Rise. The passive's aura damage and movement speed bonus completely neutralize your ability to kite him using Drakehound's Step. He easily stat-checks you, punishing any attempt to engage him in a direct, isolated duel.Build Mordekaiser →Lihat detail
Mordekaiser
Kenapa
Mordekaiser dominates this jungle matchup once he unlocks Realm of Death. Inside his pocket dimension, the confined space makes it incredibly easy for him to trigger and maintain Darkness Rise. The passive's aura damage and movement speed bonus completely neutralize your ability to kite him using Drakehound's Step. He easily stat-checks you, punishing any attempt to engage him in a direct, isolated duel.
Dampak di lane
This dynamic severely limits your skirmishing freedom in the river and around objectives. You cannot safely contest neutral camps or secure scuttle crabs if he is nearby, as a single Death's Grasp can pull you into a lethal engagement. If he intercepts your ganks, he can isolate you or your laner, stalling your map pressure and forcing you into a defensive farming pattern.
Cara bermain
To survive, you must master your spacing. Never initiate with Drakehound's Step; save these dashes to dodge Obliterate. Hold Repudiation specifically to absorb his isolated damage or block the pull of Death's Grasp. If he drags you into Realm of Death, immediately use Lacerate to slow him, then use your dash to kite around the boundary. Poke with the outer edge of Cunning Sweep and stall until the arena fades.
Matchup ini terutama soal duel eksekusi: kedua champion punya cara nyata untuk unggul. Satu skill penting yang di-dodge, engage yang diantisipasi dengan tepat, atau satu kesalahan positioning saja bisa menentukan siapa yang menang. Memahami matchup dan mengenali momen yang tepat untuk bertindak sangat penting di sini.
Kebal CCDuelThis jungle duel hinges entirely on a single reactionary window. Vi relies on the charge of her Vault Breaker to initiate fights, strip your armor with Denting Blows, and lock you down. However, Ambessa possesses the perfect counter-tool with Repudiation. Timed correctly, your shield absorbs the impact and completely negates the knockback, turning her primary engagement tool into a massive retaliatory blast that swings the skirmish instantly.Build Vi →Lihat detail
Vi
Kenapa
This jungle duel hinges entirely on a single reactionary window. Vi relies on the charge of her Vault Breaker to initiate fights, strip your armor with Denting Blows, and lock you down. However, Ambessa possesses the perfect counter-tool with Repudiation. Timed correctly, your shield absorbs the impact and completely negates the knockback, turning her primary engagement tool into a massive retaliatory blast that swings the skirmish instantly.
Dampak di lane
Since both of you clear camps at a similar pace, early river skirmishes for the Scuttle Crab or deep jungle invasions are incredibly volatile. If Vi misses or gets her Vault Breaker parried, she cannot easily trigger Denting Blows or stack Blast Shield. This forces her to play defensively or rely on her ultimate, Cease and Desist, which you can also outplay with a well-timed Public Execution to turn the fight.
Cara bermain
Do not waste Repudiation to block simple Relentless Force pokes; keep it exclusively for the moment Vi releases her Vault Breaker. If she tries to bait your shield by holding her charge, use Drakehound's Step to dash laterally out of her trajectory. When she reaches level five, expect her to initiate with Cease and Desist; respond immediately by casting Public Execution to match her unstoppable state and crush her during her recovery animation.
Pertarungan kecilTekanan petaThis jungle matchup is a high-octane mobility duel where neither assassin holds an inherent advantage. The entire dynamic revolves around Kayn's need to collect passive energy using Blade's Reach. By utilizing Drakehound's Step to dash out of his linear slash, Ambessa completely nullifies his main source of safe ranged poke, starving him of his transformation points and preventing him from activating his devastating Umbral Trespass.Build Kayn →Lihat detail
Kayn
Kenapa
This jungle matchup is a high-octane mobility duel where neither assassin holds an inherent advantage. The entire dynamic revolves around Kayn's need to collect passive energy using Blade's Reach. By utilizing Drakehound's Step to dash out of his linear slash, Ambessa completely nullifies his main source of safe ranged poke, starving him of his transformation points and preventing him from activating his devastating Umbral Trespass.
Dampak di lane
In the early jungle skirmishes, failing to dodge Blade's Reach allows Kayn to safely stack his passive and transform early into Rhaast or Shadow Assassin, instantly swinging the map pressure. However, when Ambessa successfully baits his skills, Kayn is forced to use Shadow Step defensively to escape through walls rather than finding aggressive angles. This delay in his form acquisition severely weakens his mid-game teamfight contribution.
Cara bermain
When contesting camps, always save Cunning Sweep or Lacerate to trigger Drakehound's Step the exact moment Kayn winds up Blade's Reach. Never initiate with your dash; wait for his telegraph. If Kayn manages to enter a wall with Shadow Step, position yourself near the center of the path to force him into a longer exit, and use Repudiation immediately to absorb the burst from Reaping Slash if he attempts to turn and fight.
Crowd controlVisionThis jungle matchup centers on a tense mind game of reactive defenses. The outcome of any duel hinges on how you navigate Nocturne's Shroud of Darkness. If he absorbs your heavy-hitting Public Execution with his spell shield, you lose your primary source of execution damage and energy reset. Conversely, your Repudiation is a direct answer to his Unspeakable Horror, allowing you to negate his fear CC.Build Nocturne →Lihat detail
Nocturne
Kenapa
This jungle matchup centers on a tense mind game of reactive defenses. The outcome of any duel hinges on how you navigate Nocturne's Shroud of Darkness. If he absorbs your heavy-hitting Public Execution with his spell shield, you lose your primary source of execution damage and energy reset. Conversely, your Repudiation is a direct answer to his Unspeakable Horror, allowing you to negate his fear CC.
Dampak di lane
Skirmishes in the river and jungle camps become highly volatile stare-downs. Wasting Repudiation too early invites Nocturne to freely run you down with Duskbringer and complete his tether. If he holds Shroud of Darkness, you cannot reliably secure Crab or execute counter-ganks. The jungle pressure swings entirely to whoever forces the other's defensive tool first, turning objective fights into high-stakes psychological battles.
Cara bermain
When Nocturne activates Unspeakable Horror, resist the urge to panic-dash away. Instead, stay in range and time your Repudiation right before the tether completes to absorb the fear and unleash the shockwave. Never initiate a duel with Public Execution. Force his Shroud of Darkness first by using the outer edge of Cunning Sweep or a double Lacerate. Only unleash your ultimate once his purple shield has dissolved.
TeamfightKebal CCThis duel hinges on how you match your defensive reaction against the mummy's crowd control. Your Repudiation can perfectly absorb and negate one incoming Bandage Toss, stripping away his primary gap-closer and stun. However, you have no natural tool to bypass or escape the massive, instant radius of Curse of the Sad Mummy, which leaves you highly vulnerable to his continuous Despair and Tantrum damage if caught.Build Amumu →Lihat detail
Amumu
Kenapa
This duel hinges on how you match your defensive reaction against the mummy's crowd control. Your Repudiation can perfectly absorb and negate one incoming Bandage Toss, stripping away his primary gap-closer and stun. However, you have no natural tool to bypass or escape the massive, instant radius of Curse of the Sad Mummy, which leaves you highly vulnerable to his continuous Despair and Tantrum damage if caught.
Dampak di lane
In the river and during skirmishes, this interaction dictates who controls the pace. If you mistime your shield and get caught by Bandage Toss, the mummy will easily drag you into his team to unleash Curse of the Sad Mummy. This forces you to play defensively around neutral spawns, as a premature engage means getting locked down, while a successful block allows you to counter-engage with Public Execution.
Cara bermain
To win the skirmishes, never initiate with Public Execution while his ultimate is available. Instead, use Drakehound's Step to dance around his melee range, baiting out Bandage Toss to trigger your Repudiation block. Once Curse of the Sad Mummy is expended on your frontline, immediately lock him down with Cunning Sweep and finish him off with Lacerate while staying spread from your allies.
DuelKebal CCThis jungle matchup is a high-speed mobility duel entirely dictated by split-second reactions. Lee Sin relies on landing Sonic Wave to initiate or execute, but the ultimate swing factor is how you time Repudiation. If you anticipate his Dragon's Rage, you can completely absorb the displacement of his kick, leaving him vulnerable at close range where your Drakehound's Step dashes can easily outmaneuver his attempts to escape with Safeguard.Build Lee Sin →Lihat detail
Lee Sin
Kenapa
This jungle matchup is a high-speed mobility duel entirely dictated by split-second reactions. Lee Sin relies on landing Sonic Wave to initiate or execute, but the ultimate swing factor is how you time Repudiation. If you anticipate his Dragon's Rage, you can completely absorb the displacement of his kick, leaving him vulnerable at close range where your Drakehound's Step dashes can easily outmaneuver his attempts to escape with Safeguard.
Dampak di lane
In the jungle, this mechanical deadlock prevents either of you from forcing reckless invades. Skirmishes around river crab or early skirmishes are incredibly tense; whoever misses their key spell first loses pressure. If you mistime Repudiation against his Dragon's Rage, Lee Sin will launch you away, secure the objective, and escape. Conversely, blocking his kick halts his momentum, turning the tide of 2v2 skirmishes and securing neutral monster control.
Cara bermain
When dueling Lee Sin, never waste Repudiation early to block his Sonic Wave or Tempest damage. Instead, use Drakehound's Step and Lacerate to dance around his skillshots, saving your shield specifically for the animation of Dragon's Rage. If he tries to dash away using Safeguard, immediately lock him down with Public Execution to shut down his escape routes. If you miss your timing, retreat instantly and wait for your cooldowns to recover before contesting.
PerisaiDuelThis early-game jungle duel revolves entirely around reacting to Xin Zhao's crowd control. When he engages with Audacious Charge, he immediately begins priming Three Talon Strike. If you blindly cycle Cunning Sweep and Lacerate, his third strike knock-up will disrupt your passive dashes. However, utilizing Repudiation to absorb and block that precise third strike completely neutralizes his duel potential, turning his primary offensive tool into your shield and counter-damage.Build Xin Zhao →Lihat detail
Xin Zhao
Kenapa
This early-game jungle duel revolves entirely around reacting to Xin Zhao's crowd control. When he engages with Audacious Charge, he immediately begins priming Three Talon Strike. If you blindly cycle Cunning Sweep and Lacerate, his third strike knock-up will disrupt your passive dashes. However, utilizing Repudiation to absorb and block that precise third strike completely neutralizes his duel potential, turning his primary offensive tool into your shield and counter-damage.
Dampak di lane
Because both of you want to dominate the river early, your pathing will inevitably collide at the first Scuttle Crab or during early counter-jungling. If you fail to block his knock-up, Xin Zhao gains the upper hand, forcing your Flash or killing you outright, which gives him uncontested map pressure. Conversely, winning this mechanical exchange allows you to secure the neutral camps and freely invade his camps while his high-cooldown skills recover.
Cara bermain
Track Xin Zhao's basic attacks during combat. Once he activates Three Talon Strike, count his first two strikes while kiting with Drakehound's Step and Lacerate. Hold Repudiation specifically for his third strike. If he delays his attacks to bait your shield, use Cunning Sweep's outer edge to keep your distance until his buff expires. If you mistime your shield and get knocked up, immediately use Public Execution to suppress him and reset your basic cooldowns to survive.
Champion ini biasanya kesulitan merespons kekuatan utamamu, sehingga kamu bisa menghadapi pertarungan dengan lebih leluasa. Kamu sering punya banyak cara untuk menekan mereka dan memaksa trade yang menguntungkan. Manfaatkan keunggulan ini untuk mendikte tempo, bukan memberi mereka waktu untuk kembali nyaman.
Kebal CCTekanan awalThis jungle matchup hinges on your ability to react to Pantheon's initial burst setup. When he attempts to initiate with Shield Vault, a well-timed Repudiation completely absorbs the stun and shields his follow-up damage. By negating this initiation, you prevent him from easily stacking or executing his empowered Mortal Will combo, turning his aggressive dive into a highly vulnerable window where his damage dramatically plummets.Build Pantheon →Lihat detail
Pantheon
Kenapa
This jungle matchup hinges on your ability to react to Pantheon's initial burst setup. When he attempts to initiate with Shield Vault, a well-timed Repudiation completely absorbs the stun and shields his follow-up damage. By negating this initiation, you prevent him from easily stacking or executing his empowered Mortal Will combo, turning his aggressive dive into a highly vulnerable window where his damage dramatically plummets.
Dampak di lane
Because you hold the tools to negate his main crowd control, you can aggressively contest the Scuttle Crabs and invade his jungle camps without fear. Pantheon cannot safely secure objectives or win isolated skirmishes if you hover near. Even when he attempts to impact other lanes using Grand Starfall, your superior dueling power allows you to counter-gank effectively, converting his cross-map rotations into direct losses.
Cara bermain
Never waste Repudiation to block his Comet Spear poke; keep your finger on this shield exclusively for his Shield Vault jump animation. If he panics and deploys Aegis Assault to block your frontal damage, immediately trigger Drakehound's Step after casting Lacerate or Cunning Sweep to dash directly behind his shield. This allows you to bypass his directional defense and shred his health pool while he is locked in his channel.
Tekanan petaKontrol areaYour early jungle dueling completely outclasses Shyvana. Before she gains Dragon's Descent, her clear is predictable and her combat potential is low. By chaining Cunning Sweep with the dashes from Drakehound's Step, you can easily dance around her Flame Breath and Burnout zone, punishing her weak early skirmishing before she can accumulate any Fury of the Dragonborn stacks.Build Shyvana →Lihat detail
Shyvana
Kenapa
Your early jungle dueling completely outclasses Shyvana. Before she gains Dragon's Descent, her clear is predictable and her combat potential is low. By chaining Cunning Sweep with the dashes from Drakehound's Step, you can easily dance around her Flame Breath and Burnout zone, punishing her weak early skirmishing before she can accumulate any Fury of the Dragonborn stacks.
Dampak di lane
Because you dominate the early 1v1, you can aggressively invade her camps to delay her Fury of the Dragonborn stacking. Shyvana is forced to concede scuttle crabs and camp priority, meaning she cannot safely farm her jungle. This pressure limits her ability to generate passive fury, pushing her ultimate spikes far back and leaving her lanes completely vulnerable to your early ganks.
Cara bermain
Actively invade her red or blue buff during the first rotation. If she tries to fight back, use Cunning Sweep to initiate, then use the mobility of Drakehound's Step to dodge her Flame Breath projectile. Hold Repudiation specifically to block her empowered Twin Bite burst. If she manages to activate Dragon's Descent to escape or turn, counter-engage immediately with Public Execution to suppress her mid-flight and secure the kill.
MobilitasKebal CCAmbessa dominates this jungle matchup by hard-countering Ekko's primary setup. When Ekko attempts to trigger his Parallel Convergence stun, your Repudiation absorbs the burst and negates the crowd control completely. Furthermore, her Public Execution provides a reliable suppression that locks him down, preventing him from activating Chronobreak to escape or heal, turning his predictable assassination attempts into lethal traps.Build Ekko →Lihat detail
Ekko
Kenapa
Ambessa dominates this jungle matchup by hard-countering Ekko's primary setup. When Ekko attempts to trigger his Parallel Convergence stun, your Repudiation absorbs the burst and negates the crowd control completely. Furthermore, her Public Execution provides a reliable suppression that locks him down, preventing him from activating Chronobreak to escape or heal, turning his predictable assassination attempts into lethal traps.
Dampak di lane
In the jungle, this advantage translates to total river dominance. Ekko cannot safely contest neutral objectives or battle for Scuttle Crabs, as he cannot win isolated duels against your kit. You can aggressively invade his camps, knowing that any defensive Parallel Convergence he drops will be turned against him. This pressure forces him to concede farm, keeping him permanently behind and unable to pressure your lanes.
Cara bermain
When fighting Ekko, never waste Repudiation early; hold it specifically for the moment his Parallel Convergence bubble activates on you to absorb the shield-break and stun. Constantly track the position of his hologram. Once his health drops below half, immediately unleash Public Execution to suppress him. This prevents him from using Chronobreak entirely, ensuring a clean execution before he can reset the fight.
Bertahan hidupKebal CCAmbessa holds a massive advantage because Jarvan IV relies on confining targets within Cataclysm to win fights. Since Drakehound's Step grants you a dash after every ability, you effortlessly hop over the walls of his arena. Using Cunning Sweep or Lacerate instantly triggers this passive leap, leaving him trapped inside his own ultimate while you easily reposition to shred him from safety.Build Jarvan IV →Lihat detail
Jarvan IV
Kenapa
Ambessa holds a massive advantage because Jarvan IV relies on confining targets within Cataclysm to win fights. Since Drakehound's Step grants you a dash after every ability, you effortlessly hop over the walls of his arena. Using Cunning Sweep or Lacerate instantly triggers this passive leap, leaving him trapped inside his own ultimate while you easily reposition to shred him from safety.
Dampak di lane
This interaction completely devalues Jarvan IV's pressure during objective skirmishes and river fights. He cannot lock you down, which prevents him from securing favorable terrain control or executing clean ganks when you counter-gank. Because his primary engagement tool is neutralized, your team can contest every Scuttle Crab and epic monster with confidence. He is forced to hold his ultimate or risk wasting it entirely, ruining his tempo.
Cara bermain
When invading or contesting objectives, never panic when Jarvan IV initiates with Demacian Standard and Dragon Strike. Save Repudiation to absorb his initial burst and block any secondary crowd control, then immediately cast Lacerate or Cunning Sweep. This guarantees you have Drakehound's Step ready the exact millisecond he drops Cataclysm. Dash out of the ring immediately, then turn the fight around by unleashing Public Execution on him or his backline while he is stuck in his own barrier.
Tak tertargetCrowd controlAmbessa dominates this duel because her high-tempo dashes from Drakehound's Step force Master Yi to make a choice. He wants to dodge your damage with Alpha Strike, but you can easily bait this out. The moment he becomes targetable again, he has no escape, allowing you to instantly suppress him with Public Execution before he can stack Double Strike or run you down with Highlander.Build Master Yi →Lihat detail
Master Yi
Kenapa
Ambessa dominates this duel because her high-tempo dashes from Drakehound's Step force Master Yi to make a choice. He wants to dodge your damage with Alpha Strike, but you can easily bait this out. The moment he becomes targetable again, he has no escape, allowing you to instantly suppress him with Public Execution before he can stack Double Strike or run you down with Highlander.
Dampak di lane
In the jungle, this pressure completely disrupts Master Yi's farming speed. You can aggressively invade his camps, as he cannot safely fight you near walls where your Drakehound's Step thrives. By denying him clean camps, you delay his Highlander power spike. He is forced to play defensively, surrendering early neutral objectives and river control because he risks getting caught and executed every time he tries to contest.
Cara bermain
When initiating a skirmish, start with Cunning Sweep and Lacerate to chip his health down. Do not commit your ultimate early. Instead, watch his character model closely; the instant he activates Alpha Strike to dodge your outer-edge strike, hover your cursor over his landing location. As soon as he reappears, immediately cast Public Execution to lock him down. If he tries to mitigate the damage using Meditate, your suppression will immediately interrupt his channel.
DuelEksekusiViego's dueling power hinges on landing Spectral Maw to lock down targets and stack up Blade of the Ruined King. Ambessa neutralizes this initiation entirely by using Repudiation to block the incoming stun and absorb the initial damage. Denied his crowd control, Viego cannot safely trade, allowing Ambessa to quickly gain the upper hand using Cunning Sweep and her passive dashes.Build Viego →Lihat detail
Viego
Kenapa
Viego's dueling power hinges on landing Spectral Maw to lock down targets and stack up Blade of the Ruined King. Ambessa neutralizes this initiation entirely by using Repudiation to block the incoming stun and absorb the initial damage. Denied his crowd control, Viego cannot safely trade, allowing Ambessa to quickly gain the upper hand using Cunning Sweep and her passive dashes.
Dampak di lane
This matchup dynamic secures Ambessa absolute priority during river skirmishes and jungle invasions. Viego is forced to play defensively, unable to contest camps directly because the threat of your block makes him vulnerable. You can dictate the pace of the early game, securing Scuttle Crabs and forcing him to waste Harrowed Path to escape, which starves him of gold and limits his map pressure.
Cara bermain
To dominate these encounters, you must hold Repudiation specifically for Viego's stun. Watch for the charge animation of Spectral Maw and trigger your shield right as he releases it. If Viego attempts to hide or escape using Harrowed Path, sweep the area with Lacerate to slow and locate him, then pursue with Cunning Sweep and Drakehound's Step. Should he attempt to escape using Heartbreaker, execute him instantly with Public Execution.
Keunggulan: vonis kanonis Wild Rift Core (−3 hingga +3), dilihat dari sudut pandang champion yang disebut di baris tersebut. Win rate dan pick rate: angka milik lawan sendiri di role ini — Wild Rift CN · Challenger, Patch 7.3b. Bukan win rate head-to-head.
Keunggulan: vonis kanonis Wild Rift Core (−3 hingga +3), dilihat dari sudut pandang champion yang disebut di baris tersebut. Win rate dan pick rate: angka milik lawan sendiri di role ini — Wild Rift CN · Challenger, Patch 7.3b. Bukan win rate head-to-head.
Cara counter champion ini
Sudut counter
Bermain melawan Ambessa bukan hanya tentang mengalahkannya secara mekanik, tetapi tentang mematahkan logika bertarungnya. Kemampuannya berpusat pada satu momen spesifik: masuk, mengisolasi, dan menciptakan ketidakseimbangan instan. Jika momen itu gagal, dia menjadi rentan. Lawan terbaik bukanlah yang mendominasi lane, tetapi yang mencegahnya menjalankan rencananya. Memahami cara menolak serangannya lebih penting daripada mencoba membunuhnya.
Konteks Patch
Lawan efektif melawan Ambessa mengeksploitasi dua sudut: baik dengan mencegah aksesnya ke target (kite, poke, control), atau dengan selamat dari serangan awalnya (stasis, sustain, tankiness). Champion yang menghukumnya setelah dia berkomitmen sangat berbahaya, karena dia tidak memiliki pelarian yang dapat diandalkan. Patch ini memperkuat profil ini dengan alat pertahanan yang mudah diakses.
Baca cepat
Dia kalah jika serangannya tidak menciptakan keuntungan instan.
Alat pertahanan sangat mengurangi dampaknya.
Kiting dan kontrol mematahkan rencana permainannya.
Arketipe counter
Kite dan poke
Profil ini mencegah Ambessa mencapai targetnya dalam kondisi optimal. Dengan menjaganya pada jarak dan menguras sumber dayanya, mereka memaksa serangan yang suboptimal. Ketika dia akhirnya berkomitmen, dia tiba dalam keadaan lemah dan tanpa ruang untuk kesalahan. Ini sepenuhnya mengganggu tempo berbasis eksekusinya.
Bagaimana champion beradaptasi. Cari sudut serangan tak terduga daripada memaksa secara frontal.
Duelis eksplosif
Champion ini secara langsung menghukum serangan Ambessa. Burst dan mobilitas mereka memungkinkan mereka untuk membalikkan pertarungan secara instan. Jika Ambessa tidak segera membunuh, dia berakhir dalam pertarungan yang tidak dapat dia pertahankan. Ini membuat setiap serangan berisiko dan membatasi pilihannya baik di lane maupun dalam teamfight.
Bagaimana champion beradaptasi. Hindari duel berkepanjangan dan bermainlah di sekitar waktu ultimate.
Tank dan sustain
Profil ini menyerap serangan awal dan mengurangi nilai all-in-nya. Kemampuan bertahan dan menunda mereka mencegah Ambessa menciptakan keuntungan cepat. Begitu burst-nya hilang, dia kehilangan tekanan, sepenuhnya menggeser keseimbangan kekuatan.
Riven mengubah setiap serangan Ambessa menjadi duel instan. Mobilitas dan burst-nya memungkinkannya merespons secara instan, seringkali sebelum isolasi selesai. Ini memaksa Ambessa untuk bermain jauh lebih hati-hati dan menghindari pertukaran langsung.
Kesalahan umum melawannya
Kesalahan umum melawannya
Meremehkan burst awalnya.
Menyebar dan menawarkan target yang terisolasi.
Menggunakan crowd control terlalu dini.
Mengabaikan waktu ultimate-nya.
Tidak membangun item defensif.
Catatan Pelatih
Prioritasmu adalah bertahan dari serangannya.
Seorang Ambessa tidak berguna setelah R-nya adalah kekalahan Ambessa.
FAQ
Apa cara terbaik untuk melawannya?
Cara terbaik adalah mengurangi nilai serangannya. Ini melibatkan kiting, crowd control, dan alat bertahan. Jika dia tidak bisa mengisolasi target atau jika target itu bertahan, dampaknya langsung hilang. Tujuannya bukan untuk membunuhnya, tetapi untuk membuat semua serangannya sia-sia.