September 2026 · Patch 7.2d
Mage · MID · SUPPORT

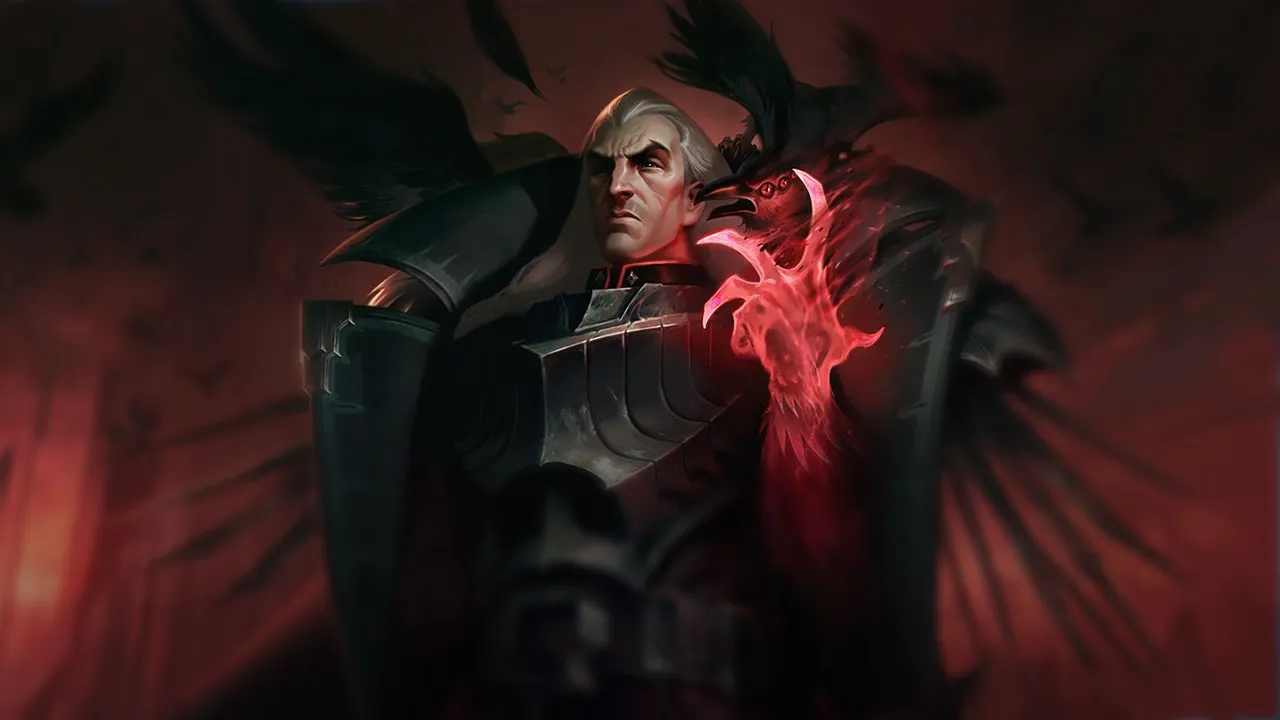
Panduan counter Swain Wild Rift

Swain di-counter oleh komposisi long-range poke yang menghindari tentacles dan zona drain miliknya. Champion yang dapat melakukan engage sebelum dia mengaktifkan ultimate-nya atau menahan sustain miliknya melalui anti-heal akan mengurangi efektivitasnya. Gerakannya yang lambat membuatnya rentan terhadap reposisi musuh.

★ MID · SUPPORT Tier S
DMG
UTIL
TANK
DIFF
Win 52.9% #19 · ↓0pt
Pick 4.8% #16
Ban 6.2% #38

Panduan counter Swain Wild Rift ★ Counter Sheet

Tidak Menguntungkan

12

Champion ini punya tool yang umumnya memberi mereka keunggulan dalam pertarungan, tanpa membuat matchup-nya benar-benar mustahil. Mereka mungkin punya jarak lebih jauh, lebih tahan terhadap seranganmu, atau lebih banyak cara merespons engage-mu. Kamu perlu menyesuaikan pendekatan dan memilih dengan cermat kapan menerima pertarungan.

Lux

Lux

spacingkiteanti_engage Lux dictates this matchup entirely through her superior range. Her Lucent Singularity and Light Binding allow her to harass you from a distance where your Nevermove simply cannot reach. Because you cannot reliably root her, you are starved of souls for your Ravenous Flock, preventing you from scaling your maximum health. This distance safety also means activating Demonic Ascension is useless, as she remains completely out of your draining aura. Lihat detail
Lux

Kenapa

Lux dictates this matchup entirely through her superior range. Her Lucent Singularity and Light Binding allow her to harass you from a distance where your Nevermove simply cannot reach. Because you cannot reliably root her, you are starved of souls for your Ravenous Flock, preventing you from scaling your maximum health. This distance safety also means activating Demonic Ascension is useless, as she remains completely out of your draining aura.

Dampak di lane

You will constantly find yourself pushed under turret. Lux can easily clear waves and poke you simultaneously using Lucent Singularity, forcing you to spend mana on Death's Hand just to secure last hits rather than trading. Your health pool will slowly dwindle under her constant Illumination procs, leading to forced, unfavorable recall timings. This constant mid-lane pressure denies you any map priority, locking you down while she threatens with Final Spark.

Cara bermain

To survive this lane, you must adopt a strict lateral movement pattern to bait and dodge her Light Binding. Never walk directly toward her; instead, focus on farming and wait for her to waste her crowd control. If she misses her root, you have a brief window to step forward and place Vision of Empire to slow her, allowing you to close the gap. Keep your distance when her Prismatic Barrier is active, and only trigger Demonic Ascension if she makes the mistake of stepping too close.

Profil lengkap →
Ziggs

Ziggs

dodge_skillssustain_under_pressure Ziggs holds a massive range advantage that neutralizes your healing engine. By clearing waves from afar with Bouncing Bomb, he completely avoids the radius of Demonic Ascension. Since he never has to step into your drain zone to secure farm, you are starved of the passive healing that keeps you alive in skirmishes, turning this into a battle of attrition you cannot easily win. Lihat detail
Ziggs

Kenapa

Ziggs holds a massive range advantage that neutralizes your healing engine. By clearing waves from afar with Bouncing Bomb, he completely avoids the radius of Demonic Ascension. Since he never has to step into your drain zone to secure farm, you are starved of the passive healing that keeps you alive in skirmishes, turning this into a battle of attrition you cannot easily win.

Dampak di lane

Expect to spend the laning phase shoved under your turret. Ziggs will constantly spam Bouncing Bomb and Hexplosive Minefield to erase waves, leaving you struggling to match his push. If you attempt to roam or take a poorly timed recall, his Satchel Charge will quickly execute your tower plates, forcing you to play defensively and sacrificing your early map pressure.

Cara bermain

Focus entirely on managing the wave near your tower without letting it crash fully. Use Nevermove to catch Ziggs only when he steps up to auto-attack with Short Fuse, following up with Vision of Empire to slow him for a gank. If he retreats, save Demonic Ascension; do not waste your ultimate trying to force a fight he can easily disengage from using Satchel Charge.

Profil lengkap →
Viktor

Viktor

spacingshove_pressure This matchup is dictated by Viktor's superior reach and zone control. While you want to close the distance, his Hextech Ray constantly pokes you from safety. More importantly, your ultimate, Demonic Ascension, is heavily countered by his Gravity Field. The moment you transform and try to run him down, he drops the zone in your path, forcing you to take a long detour and wasting your crucial drain uptime. Lihat detail
Viktor

Kenapa

This matchup is dictated by Viktor's superior reach and zone control. While you want to close the distance, his Hextech Ray constantly pokes you from safety. More importantly, your ultimate, Demonic Ascension, is heavily countered by his Gravity Field. The moment you transform and try to run him down, he drops the zone in your path, forcing you to take a long detour and wasting your crucial drain uptime.

Dampak di lane

Viktor's rapid waveclear with Hextech Ray forces you to spend most of the early game farming under your turret. Attempting to freeze or contest the wave dynamic is risky, as his Siphon Power shield negates your Death's Hand retaliation. This constant pressure limits your map rotations, forcing you to prioritize wave management over early skirmishes while slowly bleeding tower plates if you cannot match his push.

Cara bermain

To survive this lane, prioritize lane discipline over aggressive trades. Use Death's Hand strictly to prevent the wave from crashing too fast, and conserve your mana. Never activate Demonic Ascension while Viktor still holds Gravity Field, as he will instantly neutralize your ultimate. Instead, fish for catches with Nevermove when he mispositions to use Siphon Power, and use Vision of Empire from afar to disrupt his recalls or assist your jungler without leaving your tower.

Profil lengkap →
Yone

Yone

spacingdodge_skills Yone's Soul Unbound completely neutralizes your primary self-defense, Nevermove. He can easily dodge the returning root or cleanse it entirely by snapping back to his body. Without the snare to trigger Ravenous Flock, you cannot keep him at bay. He will easily close the gap using the third strike of Mortal Steel and shred you with the mixed physical and magic damage of Way of the Hunter. Lihat detail
Yone

Kenapa

Yone's Soul Unbound completely neutralizes your primary self-defense, Nevermove. He can easily dodge the returning root or cleanse it entirely by snapping back to his body. Without the snare to trigger Ravenous Flock, you cannot keep him at bay. He will easily close the gap using the third strike of Mortal Steel and shred you with the mixed physical and magic damage of Way of the Hunter.

Dampak di lane

You cannot safely contest the wave near the center of the lane. Stepping up to clear minions with Death's Hand exposes you to sudden engages, especially since Yone can mitigate your counter-poke with his Spirit Cleave shield. This constant threat forces you under your turret, slowly chipping away at your health bar and leaving you unable to assist your jungler when Yone roams freely.

Cara bermain

Never cast Nevermove proactively. Keep this crucial spell ready as a deterrent; Yone is much less likely to dive you if he has to fear a point-blank root. When he activates Soul Unbound, immediately drop Vision of Empire on his tethered physical body. This forces him to choose between taking heavy damage upon his return or cutting his engage short. If he uses Fate Sealed, activate Demonic Ascension immediately to survive his burst.

Profil lengkap →
Syndra

Syndra

spacingdodge_skills Your entire game plan revolves around draining enemies closely, but Syndra completely counters this with her defensive kit. The moment you activate Demonic Ascension to start healing and dealing sustained damage, she can immediately respond with Scatter the Weak. This pushes you far outside your ultimate's drain radius, effectively wasting its duration and leaving you extremely vulnerable once your transformation expires. Lihat detail
Syndra

Kenapa

Your entire game plan revolves around draining enemies closely, but Syndra completely counters this with her defensive kit. The moment you activate Demonic Ascension to start healing and dealing sustained damage, she can immediately respond with Scatter the Weak. This pushes you far outside your ultimate's drain radius, effectively wasting its duration and leaving you extremely vulnerable once your transformation expires.

Dampak di lane

Because she can effortlessly disengage your all-ins, Syndra dictates the lane tempo. She will constantly harass you with Dark Sphere and Force of Will while you try to farm with Death's Hand. You cannot easily contest her wave clear without taking heavy poke, forcing you into defensive recall timings. This keeps you pinned under your tower, unable to assist your jungler or secure priority.

Cara bermain

To survive, you must bait out Scatter the Weak before committing your ultimate. Position yourself slightly off-center from her Dark Sphere placements to make her stun harder to land. Hold your Nevermove and only cast it when she walks forward to throw a Force of Will. If she wastes her knockback, that is your immediate green light to activate Demonic Ascension and force a close-quarters trade.

Profil lengkap →
Yasuo

Yasuo

spacingbait_shields Yasuo's Wind Wall completely shuts down your offensive threat by blocking both the initial and returning paths of Nevermove. Because your entire crowd control and soul-harvesting engine via Ravenous Flock relies on landing this claw, a single well-timed wall leaves you completely exposed. Without the threat of your root, Yasuo can easily bypass Death's Hand poke and dash directly onto you. Lihat detail
Yasuo

Kenapa

Yasuo's Wind Wall completely shuts down your offensive threat by blocking both the initial and returning paths of Nevermove. Because your entire crowd control and soul-harvesting engine via Ravenous Flock relies on landing this claw, a single well-timed wall leaves you completely exposed. Without the threat of your root, Yasuo can easily bypass Death's Hand poke and dash directly onto you.

Dampak di lane

This defensive barrier forces you into a passive posture where you cannot step up to contest waves. Yasuo will constantly dash through minions with Sweeping Blade to pop his Way of the Wanderer shield, knowing you cannot punish him if Nevermove is blocked. Missed roots mean fewer soul fragments, delaying your health scaling and leaving you vulnerable to a dive via Last Breath if you get chipped down.

Cara bermain

To survive, you must hold Nevermove like a loaded weapon. Never throw it proactively unless Yasuo has already wasted his Wind Wall on a stray Death's Hand. If he dashes aggressively with Sweeping Blade, drop Vision of Empire directly on yourself to slow his retreat and force him to choose between taking damage or burning his wall. If he blocks your root, immediately retreat under your turret and wait out the long barrier cooldown before stepping up again.

Profil lengkap →
Aurelion Sol

Aurelion Sol

safe_farmoutscale Swain's complete lack of mobility makes him a sitting duck inside Aurelion Sol's Singularity. Whenever you try to force a fight with Demonic Ascension, the Star Forger can drop his gravitational black hole directly on you. Because you cannot quickly escape its pull, Aurelion Sol can channel Breath of Light with impunity, farming massive Stardust stacks off your ultimate’s duration while easily out-ranging your Death's Hand. Lihat detail
Aurelion Sol

Kenapa

Swain's complete lack of mobility makes him a sitting duck inside Aurelion Sol's Singularity. Whenever you try to force a fight with Demonic Ascension, the Star Forger can drop his gravitational black hole directly on you. Because you cannot quickly escape its pull, Aurelion Sol can channel Breath of Light with impunity, farming massive Stardust stacks off your ultimate’s duration while easily out-ranging your Death's Hand.

Dampak di lane

This dynamic neutralizes your early aggression. Aurelion Sol easily matches your wave clear by dropping Singularity on your minions, forcing you to use Death's Hand under pressure. Because Nevermove is too slow to stop his Astral Flight mid-flight, you cannot punish his roams or lock him down for trades. This turns the mid lane into a passive farming zone where his Stardust stacks grow unchecked while you struggle to crash waves.

Cara bermain

To survive this scaling matchup, you must discipline your wave management. Never activate Demonic Ascension unless Aurelion Sol has already wasted Singularity on the wave. Instead, use Death's Hand solely to freeze the minions near your turret, forcing him to overextend to farm. If he attempts to channel Breath of Light on the wave, punish him with Nevermove. Use Vision of Empire to scout his Astral Flight roams and immediately hard-shove to punish his absence.

Profil lengkap →
Irelia

Irelia

dodge_skillshotsdps_race This matchup hinges on the interaction between your CC and her mobility. When Irelia uses a Bladesurge reset on a dying minion to dodge your Nevermove, she completely neutralizes your Ravenous Flock healing. Without that crucial burst of passive sustain, you are left defenseless at close range against her fully stacked Ionian Fervor basic attacks, which quickly shred your health pool. Lihat detail
Irelia

Kenapa

This matchup hinges on the interaction between your CC and her mobility. When Irelia uses a Bladesurge reset on a dying minion to dodge your Nevermove, she completely neutralizes your Ravenous Flock healing. Without that crucial burst of passive sustain, you are left defenseless at close range against her fully stacked Ionian Fervor basic attacks, which quickly shred your health pool.

Dampak di lane

Expect Irelia to constantly prep the minion wave to create jump points. If she baits out your Nevermove, she immediately gains complete wave control, forcing you under tower where she can dive you with Vanguard's Edge. Any trade where you miss your root means giving up mid-lane priority, forcing you to use Vision of Empire just to scout her roams rather than securing passive stacks.

Cara bermain

You must never cast Nevermove proactively while Irelia has low-health minions nearby to dash to. Instead, hold the ability and punish her with Death's Hand when she approaches to last-hit. If she initiates with Flawless Duet or Vanguard's Edge, wait for her to finish her Bladesurge dash onto you before throwing your root point-blank. Once she is rooted, immediately back off to deny her sustained auto-attacks and use Demonic Ascension only to survive her burst under your turret.

Profil lengkap →

Matchup lainnya

Skill Matchups

10

Matchup ini terutama soal duel eksekusi: kedua champion punya cara nyata untuk unggul. Satu skill penting yang di-dodge, engage yang diantisipasi dengan tepat, atau satu kesalahan positioning saja bisa menentukan siapa yang menang. Memahami matchup dan mengenali momen yang tepat untuk bertindak sangat penting di sini.

Ryze

Ryze

kitingsustained_dps This matchup revolves around a spacing battle during ultimate activations. While your Demonic Ascension provides immense health drain, Ryze combats this by cycling Spell Flux and Overload to trigger sudden bursts of movement speed. This allows him to dance just outside your ultimate's aura while continuously chipping away at your health bar, turning the fight into a pure test of micro-spacing and healing against his sustained magic damage. Lihat detail
Ryze

Kenapa

This matchup revolves around a spacing battle during ultimate activations. While your Demonic Ascension provides immense health drain, Ryze combats this by cycling Spell Flux and Overload to trigger sudden bursts of movement speed. This allows him to dance just outside your ultimate's aura while continuously chipping away at your health bar, turning the fight into a pure test of micro-spacing and healing against his sustained magic damage.

Dampak di lane

Trading in this lane is a battle of attrition. Ryze will constantly attempt to spread Spell Flux through your minions to poke you from safety, while you rely on Ravenous Flock pulls and Death's Hand to match his wave clear. Because both of you possess high sustain and wave pressure, neither champion can easily force a recall, meaning the lane often remains locked in Mid, delaying roam timers and keeping both junglers focused on breaking the stalemate.

Cara bermain

To win this, you must hold Nevermove specifically for when Ryze advances to spread Spell Flux or when he triggers his Overload speed boost. Do not activate Demonic Ascension preemptively; wait until he commits his Rune Prison to root you, then immediately counter with your ultimate and use Vision of Empire behind him to slow his escape path. If he successfully kited your ultimate, immediately disengage and focus on clearing waves to rebuild your soul stacks.

Profil lengkap →
Veigar

Veigar

spacingcooldown_windows This matchup is a battle of spatial control. Swain wants to run down enemies with Demonic Ascension, but Veigar's Event Horizon completely negates this aggressive approach. If you get trapped inside the cage, you cannot close the distance to drain Veigar, leaving you vulnerable to Dark Matter and a devastating Primordial Burst. Your ability to sustain depends entirely on navigating around his cage. Lihat detail
Veigar

Kenapa

This matchup is a battle of spatial control. Swain wants to run down enemies with Demonic Ascension, but Veigar's Event Horizon completely negates this aggressive approach. If you get trapped inside the cage, you cannot close the distance to drain Veigar, leaving you vulnerable to Dark Matter and a devastating Primordial Burst. Your ability to sustain depends entirely on navigating around his cage.

Dampak di lane

Throughout the laning phase, Veigar aims to farm with Baleful Strike to stack Phenomenal Evil Power safely. You must use Nevermove to disrupt his rhythm, but missing it leaves you open to an immediate Event Horizon counter-attack. The lane remains neutral until one of you overextends; a trapped Swain is easily burst down, whereas a Veigar without his cage cannot stop your raw health drain.

Cara bermain

To win this, never activate Demonic Ascension proactively unless Veigar has already wasted Event Horizon. Position yourself diagonally from him to make landing Nevermove easier while baiting out his cage. If you do get trapped inside the perimeter, do not panic-walk into the stun boundary; instead, use the internal space to dodge Dark Matter and cast Vision of Empire to slow his follow-up, waiting out the cage before re-engaging.

Profil lengkap →
Corki

Corki

sustainteamfights This matchup is a battle of attrition centered on Corki's mobility versus your ultimate's zone. While Swain relies on pulling Corki with Nevermove to trigger Ravenous Flock and sustain, Corki easily negates your ultimate pressure. The moment you activate Demonic Ascension, Corki can react with Valkyrie to dash out of your drain range, completely cutting off your health regeneration and leaving you vulnerable. Lihat detail
Corki

Kenapa

This matchup is a battle of attrition centered on Corki's mobility versus your ultimate's zone. While Swain relies on pulling Corki with Nevermove to trigger Ravenous Flock and sustain, Corki easily negates your ultimate pressure. The moment you activate Demonic Ascension, Corki can react with Valkyrie to dash out of your drain range, completely cutting off your health regeneration and leaving you vulnerable.

Dampak di lane

Laning revolves around managing the distance between Corki's long-range Phosphorus Bomb or Missile Barrage poke and your short-range Death's Hand. Because Corki matches your wave clear using Gatling Gun, you cannot easily force him under tower. The lane remains even until someone missteps; if you fail to pin him down before he acquires his Special Delivery package, he will easily out-roam you and pressure other lanes.

Cara bermain

To win this duel, never initiate with Demonic Ascension while Corki has Valkyrie available. Instead, fish for trades using Nevermove to pull him in with Ravenous Flock, forcing him to panic-dash. Once his mobility is down, you can safely unleash your ultimate. When he retrieves his package, use Vision of Empire to scout his pathing and slow his Special Delivery approach, keeping yourself safe from the high-damage burning trail.

Profil lengkap →

Matchup lainnya

Menguntungkan

26

Champion ini biasanya kesulitan merespons kekuatan utamamu, sehingga kamu bisa menghadapi pertarungan dengan lebih leluasa. Kamu sering punya banyak cara untuk menekan mereka dan memaksa trade yang menguntungkan. Manfaatkan keunggulan ini untuk mendikte tempo, bukan memberi mereka waktu untuk kembali nyaman.

Ahri

Ahri

sustainteamfight This matchup is a battle of attrition where Swain holds the upper hand. While Ahri relies on Orb of Deception and Essence Theft to poke and sustain, she lacks the raw burst to pierce through Demonic Ascension. When you activate your ultimate, her entire offensive pressure evaporates; she cannot outdamage your constant draining and is forced to burn Spirit Rush charges defensively just to escape your zone of influence. Lihat detail
Ahri

Kenapa

This matchup is a battle of attrition where Swain holds the upper hand. While Ahri relies on Orb of Deception and Essence Theft to poke and sustain, she lacks the raw burst to pierce through Demonic Ascension. When you activate your ultimate, her entire offensive pressure evaporates; she cannot outdamage your constant draining and is forced to burn Spirit Rush charges defensively just to escape your zone of influence.

Dampak di lane

Because Ahri cannot easily kill you, the lane revolves around minion management. You can constantly shove her under turret with Death's Hand, neutralizing her roaming potential. Her Orb of Deception forces her to choose between matching your push or trading. If she tries to trade, your Ravenous Flock passive keeps your health pool too high for her to setup a dive, locking her in mid lane and protecting your side lanes.

Cara bermain

Keep your distance to make dodging Charm easier, and always hold Nevermove until she commits to a forward movement or dashes. If she attempts to trade with Fox-Fire, pull her with Ravenous Flock to trigger your healing. Should she bait out your Demonic Ascension and escape with Spirit Rush, immediately back off to your turret and use Vision of Empire from safety to scout her potential roams until your ultimate is back online.

Profil lengkap →
Diana

Diana

sustainteamfight Diana relies on marking you with Crescent Strike to dive in with Lunar Rush and unleash Moonfall. However, her burst is entirely countered by Demonic Ascension, which instantly grants you bonus health to absorb her combo. Once her cooldowns are spent, Diana has no escape and cannot match your continuous healing from Ravenous Flock and close-range spam of Death's Hand during an extended duel. Lihat detail
Diana

Kenapa

Diana relies on marking you with Crescent Strike to dive in with Lunar Rush and unleash Moonfall. However, her burst is entirely countered by Demonic Ascension, which instantly grants you bonus health to absorb her combo. Once her cooldowns are spent, Diana has no escape and cannot match your continuous healing from Ravenous Flock and close-range spam of Death's Hand during an extended duel.

Dampak di lane

This matchup shifts the lane pressure entirely in your favor once you reach level five. Since Diana cannot burst you down, her aggressive trades backfire, forcing her to play defensively or risk dying. This gives you total control over the wave state. You can shove her under turret repeatedly, forcing her to waste mana on Pale Cascade to farm, while you look to impact the side lanes.

Cara bermain

Position yourself slightly behind your minions to make her Crescent Strike predictable. Hold Nevermove until she commits with Lunar Rush; since she dashes directly to you, landing your root is guaranteed, letting you pull her with Ravenous Flock. If she roams to avoid your pressure, don't blindly follow her into unwarded areas. Instead, use Vision of Empire to scout her path or delay her, then hard-shove the wave to punish her tower.

Profil lengkap →
Zed

Zed

armor_rushultimate_timing Zed relies entirely on executing you with his Death Mark combo, but your ultimate completely shuts down his assassination window. Activating Demonic Ascension instantly inflates your health pool, and pulling him or his clones with Ravenous Flock provides continuous healing. Because Death Mark's pop damage scales off how much damage Zed inflicts during the mark, your massive health spike and constant healing easily nullify his burst. Lihat detail
Zed

Kenapa

Zed relies entirely on executing you with his Death Mark combo, but your ultimate completely shuts down his assassination window. Activating Demonic Ascension instantly inflates your health pool, and pulling him or his clones with Ravenous Flock provides continuous healing. Because Death Mark's pop damage scales off how much damage Zed inflicts during the mark, your massive health spike and constant healing easily nullify his burst.

Dampak di lane

Zed is forced into a defensive posture, unable to threaten you under your tower. Whenever he approaches the wave to trigger Contempt for the Weak on minions, you can punish him with a point-blank Death's Hand. This pressure forces him to burn Living Shadow just to escape or clear from range with Razor Shuriken, preventing him from roaming to side lanes and locking him in mid.

Cara bermain

Never throw Nevermove blindly while Zed has Living Shadow available, as he will easily dodge it. Instead, hold your crowd control for his ultimate. When Zed casts Death Mark, he always reappears directly behind you. Cast Nevermove behind your own back the split second he lands to guarantee an instant root, then pull him with Ravenous Flock, activate Demonic Ascension, and blast him with Death's Hand to turn his dive into a self-trap.

Profil lengkap →
Pyke

Pyke

sustainexecution_denial Pyke relies entirely on bringing your health low enough to execute you with Death from Below. However, the moment he leaps to cast his ultimate, your activation of Demonic Ascension grants you an instantaneous health surge. This sudden burst of maximum and current health instantly pulls you out of his execution threshold, completely wasting his ultimate reset and leaving him vulnerable at close range. Lihat detail
Pyke

Kenapa

Pyke relies entirely on bringing your health low enough to execute you with Death from Below. However, the moment he leaps to cast his ultimate, your activation of Demonic Ascension grants you an instantaneous health surge. This sudden burst of maximum and current health instantly pulls you out of his execution threshold, completely wasting his ultimate reset and leaving him vulnerable at close range.

Dampak di lane

Before level five, Pyke attempts to fish for hooks with Bone Skewer or stun you with Phantom Undertow to set up trades. Because he lacks wave clear, you can easily shove him under turret. Once you both unlock your ultimates, Pyke loses all kill pressure in lane. He is forced to abandon the mid lane to roam with Ghostwater Dive, leaving you free to secure plates.

Cara bermain

Always hold onto Nevermove when Pyke approaches. If he charges Bone Skewer, cast it directly in his path to interrupt him, then trigger Ravenous Flock to pull him. During all-ins, bait his Death from Below by letting your health drop slightly, then reactively activate Demonic Ascension to deny his reset. If he disappears with Ghostwater Dive, immediately alert your side lanes and use Vision of Empire to scout the river.

Profil lengkap →
Mel

Mel

outscalinghealth_advantage Mel's kit relies on zoning but lacks the explosive burst to delete you or the mobility to disengage once you close the gap. When you activate Demonic Ascension, she is trapped in your drain radius. This helplessness turns Mel into an easy target for Nevermove, letting you pull her with Ravenous Flock repeatedly to stack permanent health while healing back any poke she managed to land. Lihat detail
Mel

Kenapa

Mel's kit relies on zoning but lacks the explosive burst to delete you or the mobility to disengage once you close the gap. When you activate Demonic Ascension, she is trapped in your drain radius. This helplessness turns Mel into an easy target for Nevermove, letting you pull her with Ravenous Flock repeatedly to stack permanent health while healing back any poke she managed to land.

Dampak di lane

Because Mel cannot threaten your life bar quickly, you dictate the minion waves. By maintaining a slow push, you force her to use her spells on minions rather than poking you. When she steps up to clear, you can easily fish for Nevermove or scout her rotations with Vision of Empire. You will constantly hold mid priority, allowing you to sustain through her minor trades.

Cara bermain

Slow-push the first three waves to build a minion cushion, then freeze near your turret to force Mel to overextend. Once she steps past the midway line, fish for Nevermove. If it lands, immediately deploy Vision of Empire behind her, activate Demonic Ascension, and run her down with Death's Hand. If she flashes away, do not chase blindly; simply reset the wave and repeat the freeze, knowing she has no tools to break it safely.

Profil lengkap →
Malphite

Malphite

sustain_heavyanti_engage Malphite relies on poking you down with Seismic Shard before executing a lethal burst with Unstoppable Force. However, Swain completely neutralizes this game plan. Whenever Malphite commits his full combo, activating Demonic Ascension instantly negates his burst by draining his health. Furthermore, you easily bypass his Granite Shield during trades, constantly generating soul fragments with Ravenous Flock and Nevermove to out-sustain him over any long engagement. Lihat detail
Malphite

Kenapa

Malphite relies on poking you down with Seismic Shard before executing a lethal burst with Unstoppable Force. However, Swain completely neutralizes this game plan. Whenever Malphite commits his full combo, activating Demonic Ascension instantly negates his burst by draining his health. Furthermore, you easily bypass his Granite Shield during trades, constantly generating soul fragments with Ravenous Flock and Nevermove to out-sustain him over any long engagement.

Dampak di lane

This matchup turns the mid lane into a slow squeeze. Malphite cannot match your wave clear once you use Death's Hand to shove, forcing him under turret where his Granite Shield is constantly broken by Vision of Empire. Since his mana pool drains quickly trying to poke you, his recall timings are terrible. You will secure early priority, letting you move first to skirmishes while he remains stuck clearing.

Cara bermain

To secure this advantage, shift your early purchases toward heavy magic penetration and raw health rather than rushing traditional flat AP. In lane, always hold Nevermove until Malphite uses Seismic Shard; the movement speed steal makes him move in a predictable straight line to close the gap, making your root easy to land. If he plays passively, cast Vision of Empire deep in his jungle to steal camps or track his jungler while keeping him pinned.

Profil lengkap →
Teemo

Teemo

easy_ccburst_down Teemo's short auto-attack range is his downfall here. To apply his Toxic Shot poison, he is forced to step directly into the optimal range of your Nevermove. Since Swain relies entirely on spellcasting, Teemo's Blinding Dart is completely useless, failing to mitigate any damage from Death's Hand or your ultimate, Demonic Ascension. You hold all the cards in trades because his main defensive tool cannot stop your magic output. Lihat detail
Teemo

Kenapa

Teemo's short auto-attack range is his downfall here. To apply his Toxic Shot poison, he is forced to step directly into the optimal range of your Nevermove. Since Swain relies entirely on spellcasting, Teemo's Blinding Dart is completely useless, failing to mitigate any damage from Death's Hand or your ultimate, Demonic Ascension. You hold all the cards in trades because his main defensive tool cannot stop your magic output.

Dampak di lane

Because Teemo cannot safely blind your primary damage, you can easily zone him off the minion wave. Every time he steps up to farm, he risks getting pulled by Ravenous Flock. This constant threat restricts his Move Quick rotations, keeping him pinned under his turret. Consequently, Teemo loses the ability to safely place Noxious Trap around the river, securing your mid-lane priority and freeing you to assist your jungler.

Cara bermain

Position yourself slightly behind your own melee minions to bait Teemo into stepping forward to poke you. Keep a constant eye out for his shimmer if he uses Guerrilla Warfare, and immediately throw Vision of Empire to reveal and slow him. Hold onto Nevermove until he commits to an auto-attack animation; his locked stance makes him an incredibly easy target to root, pull, and burst down with Demonic Ascension.

Profil lengkap →

Matchup lainnya

Items to Counter Swain

Buy these items to reduce this champion's effectiveness in your games.

Morellonomicon
Morellonomicon
Bâton du vide
Bâton du vide
Coiffe de Rabadon
Coiffe de Rabadon
Étreinte démoniaque
Étreinte démoniaque

Cara counter champion ini

Sudut counter

Melawan Swain tidak hanya soal memilih champion yang bisa membunuhnya dengan cepat. Logika sebenarnya adalah memutus durasi pertarungannya: hentikan dia menahan target di dalam R-nya, paksa dia menggunakan Stasis secara defensif, lalu tinggalkan zonanya sebelum dia menggunakan kembali Q dan E. Di midlane, assassin mobile yang sudah ada di data bisa menghukumnya sebelum itemnya jadi, sementara beberapa champion kontrol bisa mencegahnya mengubah wave netral menjadi rotasi sungai. Swain terutama kesulitan ketika musuh menentukan waktu pasti pertukaran dan menolak pertarungan panjang di mana sustain-nya menjadi berharga.

Konteks Patch

Counter terbaik Swain menyerang salah satu dari tiga ketergantungannya: akses ke target, durasi ultimate, atau stabilitas sebelum item pertamanya. Jika dia melewatkan E yang kembali, dia sering kekurangan kontrol yang dibutuhkan untuk maju. Jika dia mengaktifkan R terlalu dini dan musuh pergi, dia kehilangan celah terbesarnya. Dan jika assassin atau champion yang bisa mengganggu waveclear-nya menekannya, dia terlambat datang ke objektif di mana dia seharusnya bersinar.

Baca cepat

  • Paksa R-nya, mundur, lalu masuk kembali ketika Stasis atau ultimate tidak bisa lagi melindungi masuknya dia.
  • Jangan tetap bergerombol di koridor jungle: Swain menang ketika banyak target diperlambat atau terkuras pada saat yang bersamaan.
  • Menghukum early game-nya lebih bisa diandalkan daripada mencoba membunuhnya selama timing game mid terkuatnya.

Arketipe counter

Assassin mobile yang memutus timing-nya

Matchup ini bekerja melawan Swain karena mereka bisa memilih jendela waktu singkat, menyerangnya sebelum R-nya menjadi berharga, lalu menghindari tinggal di dalam zona terkuras. Swain ingin pertarungan berlanjut; champion ini ingin menciptakan rotasi cepat, memaksa Stasis atau Flash, lalu pergi atau reset. Mobilitas mereka juga membuat E yang kembali lebih sulit mendarat: jika Swain melewatkan kontrol itu, dia sering kehilangan izin untuk maju dan akhirnya menderita akibat wave atau roam musuh.

Bagaimana champion beradaptasi. Swain harus menerima lane yang kurang ambisius, menahan E untuk masuk yang sebenarnya alih-alih poke, dan membeli Stasis lebih awal. Tujuannya bukan untuk memenangkan setiap trade, tetapi untuk mencapai objektif pertama tanpa memberikan terlalu banyak tempo.

Duelist dan mid yang menolak kontrol zona miliknya

Champion ini tidak melawan Swain dengan cara yang sama seperti assassin murni. Mereka menyulitkannya karena mereka bisa memperebutkan ruang alih-alih hanya menderita R-nya. Yasuo bisa mengurangi nilai sudut spell tertentu dan mengancam Swain di dalam wave, Diana bisa terlibat secara brutal jika Swain menggunakan E terlalu dini, dan Lissandra bisa memutus ritme pertarungan dengan kontrolnya. Dalam matchup ini, Swain kalah ketika dia memberikan inisiatif sebelum membangun zonanya.

Bagaimana champion beradaptasi. Swain harus bermain di sekitar wave, menghindari membuang E ke ruang kosong, dan menunggu lawan terlalu dalam berkomitmen. Semakin dia menyimpan spell untuk menjawab kontak, semakin sulit R-nya untuk diabaikan.

Mage yang menguntungkan Swain masih perlu dikonversi dengan bersih

Champion ini tampak menguntungkan bagi Swain karena mereka sering memberinya lane yang lebih mudah dibaca dan ancaman eksekusi yang tidak terlalu langsung. Tetapi kesalahannya adalah berpikir matchup ini menang sendiri. Jika mereka menjaga jarak, mengontrol wave, atau menghukum kurangnya mobilitasnya dengan setup mereka sendiri, Swain bisa berakhir farming tanpa konversi. Kondisi kemenangannya yang sebenarnya adalah mengubah stabilitas lane atau prioritas menjadi skirmish sungai, bukan sekadar bertahan dari mid.

Bagaimana champion beradaptasi. Swain harus mencari sudut E setelah musuh menggunakan spell, lalu bergerak menuju objektif bersama jungler-nya. Matchup yang menguntungkan hanya penting jika itu menciptakan keunggulan zona atau tempo.

Prioritas matchup

Fizz

Fizz adalah matchup prioritas untuk dijelaskan karena dia menyerang tepat pada titik lemah Swain MID: timing sebelum R, Stasis, dan item menstabilkan champion. Jika Swain menggunakan E untuk poke atau mendorong tanpa visi samping, Fizz bisa memaksa trade singkat, meninggalkan zona terkuras, dan mengancam kill sebelum pertarungan menjadi panjang. Untuk Swain, keputusan kuncinya adalah menolak trade yang tidak perlu, menahan sumber daya untuk masuk yang sebenarnya dari Fizz, dan bermain objektif hanya dengan Stasis atau Flash tersedia.

Katarina

Katarina layak mendapat perhatian khusus karena matchup ini bukan hanya soal lane. Swain bisa menahan wave tertentu, tetapi jika Katarina menemukan reset di sungai atau botlane, tempo-nya dengan cepat melampaui kemampuan Swain untuk mengontrol pusat. Swain harus menggunakan W untuk membaca rotasi, ping lebih awal, dan menahan E untuk menginterupsi atau menghukum masuk yang buruk. Tujuannya bukan hanya untuk bertahan dari mid: tetapi untuk menghentikan Katarina mengubah peta sebelum Swain mencapai game mid-nya.

Kesalahan umum melawannya

Kesalahan umum melawannya

  • Tetap berada di dalam R-nya setelah memaksa aktivasi, alih-alih mundur selama beberapa detik dan memutus seluruh jendelanya.
  • Berkumpul di koridor objektif tanpa visi, memberikan Swain E yang mudah dan banyak target untuk dikuras.
  • Terlibat dengan Swain tanpa rencana untuk Stasis-nya: jika semua burst habis sebelum itu, dia sering kembali dengan waktu yang cukup untuk membalikkan pertarungan.
  • Membiarkan Swain mencapai Rylai secara gratis, lalu kesulitan untuk keluar dari zonanya sesudahnya.
  • Mengubah pertarungan yang menguntungkan menjadi Swain dengan permainan yang sudah dimenangkan: bahkan champion yang mengalahkannya di lane pun bisa kalah jika mereka memberinya pertarungan objektif yang panjang.

Catatan Pelatih

  • Jawaban terbaik untuk Swain seringkali bergantung pada waktu: paksa ultimate-nya, pergi, lalu kembali. Banyak pemain kalah karena mereka menganggap R-nya sebagai tantangan yang harus mereka menangkan segera.
  • Melawan Swain, perhatikan ruang di atas segalanya. Jika dia melawanmu di area sempit dengan Stasis siap, kamu memainkan permainannya. Jika dia harus berjalan ke arahmu di tanah terbuka, dia kehilangan banyak ancaman.

FAQ

Bagaimana cara mengalahkan Swain di midlane?

Untuk mengalahkan Swain mid, kamu harus menghindari memberinya pertarungan panjang yang dia inginkan. Hukumlah E yang meleset, paksa R-nya tanpa bertahan di dalamnya, dan mainkan di sekitar waktu Stasis-nya. Assassin yang mobile bisa menyerangnya sebelum itemnya jadi, tetapi bahkan dengan pertarungan yang menguntungkan, kamu harus menghentikan Swain mengubah sungai. Jika dia mencapai Dragon secara gratis dengan R dan Stasis tersedia, lane yang dimenangkan bisa cepat kehilangan nilainya.

Mengapa assassin berbahaya bagi Swain?

Assassin berbahaya karena mereka mengurangi pertarungan menjadi jendela waktu yang singkat. Swain ingin menyiapkan R, melambatkan dengan Rylai, mengulang Q, dan memaksa musuh untuk bertahan. Assassin yang mobile malah bisa masuk, memaksa Flash atau Stasis, lalu pergi sebelum pengurasan menjadi menentukan. Pertarungan menjadi lebih sulit jika Swain menyia-nyiakan E untuk poke, karena dia kehilangan alat utamanya untuk menjawab masuknya assassin.

Haruskah kamu mengabaikan Swain selama ultimate-nya?

Kamu tidak selalu harus mengabaikannya, tetapi kamu harus menghindari memberinya persis apa yang dia inginkan. Jika Swain sudah mengaktifkan R dan timmu bisa mundur, tinggalkan perlambatan Rylai, atau tunggu Stasis, itu seringkali lebih baik daripada menginvestasikan segalanya di dalam zonanya. Namun, jika dia terisolasi, tidak punya Stasis, atau terlalu maju, burst yang terkoordinasi bisa menghukumnya sebelum dia mendapatkan nilai dari durasi ultimate-nya.

Apakah pertarungan yang menguntungkan cukup untuk menetralkan Swain?

Tidak. Pertarungan yang menguntungkan membantu memperlambatnya, tetapi Swain bisa tetap berguna jika permainan ditentukan oleh objektif yang dikumpulkan. Tujuan sebenarnya adalah menyangkal tempo-nya: paksa dia menggunakan R jauh dari objektif, ambil visi sebelum dia, dan hindari koridor di mana dia bisa mengenai banyak champion. Jika kamu memenangkan lane tetapi memberinya pertarungan Dragon yang ketat, kamu mengembalikan Swain ke skenario terbaiknya.