
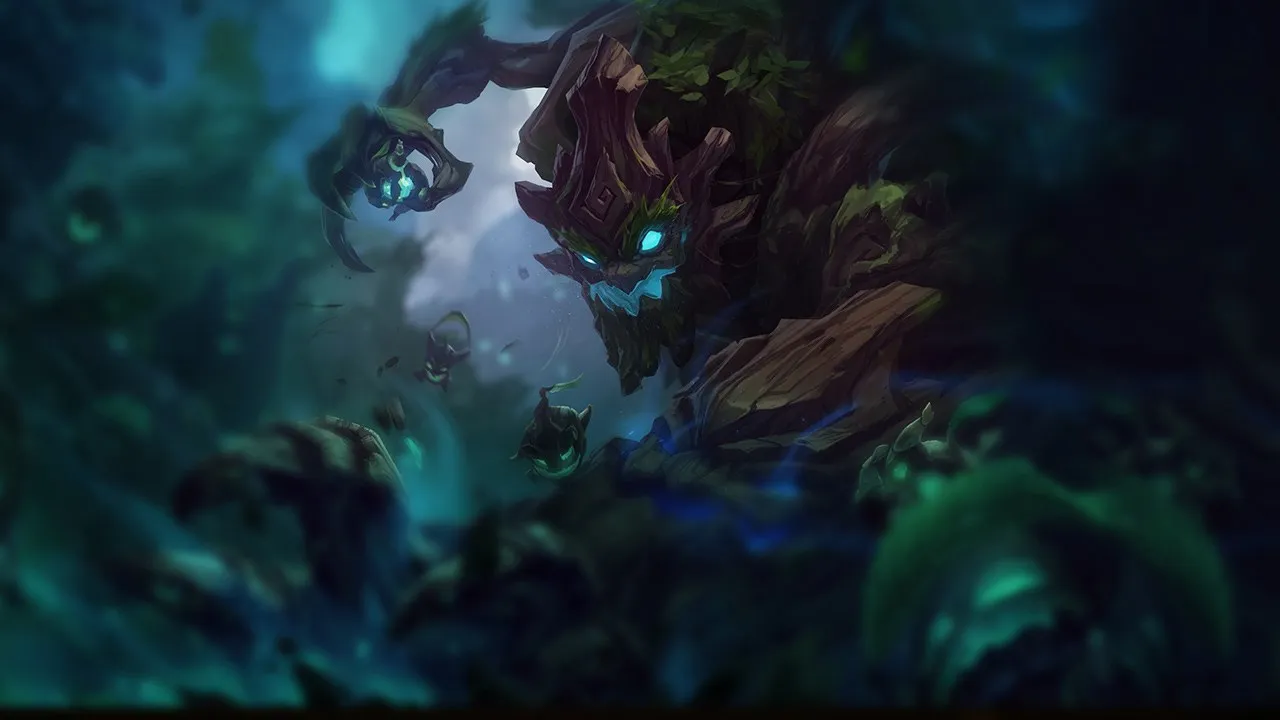
Panduan counter Maokai Wild Rift
Hard Counters
4Champion ini punya build dan gaya bermain yang langsung mengungguli milikmu, sehingga mengontrol lane dan farming jadi sangat sulit. Kemampuan mereka bisa menetralkan kekuatan utamamu atau menghukummu begitu kamu mencoba menjalankan rencana permainan biasa. Di matchup seperti ini, tujuannya biasanya adalah meminimalkan kesalahan dan mencari cara menang di luar konfrontasi langsung.

Milio+2
Milio completely shuts down your entire teamfight presence because his Breath of Life immediately cleanses the roots from your Nature's Grasp, rendering your ultimate useless. During the laning phase, whenever you try to engage with Twisted Advance, Milio can interrupt your follow-up with Ultra Mega Fire Kick or mitigate your trade with Warm Hugs and Cozy Campfire, keeping his ADC safe and healthy while you absorb poke.
Build Milio →
Lihat detail
Kenapa
Milio completely shuts down your entire teamfight presence because his Breath of Life immediately cleanses the roots from your Nature's Grasp, rendering your ultimate useless. During the laning phase, whenever you try to engage with Twisted Advance, Milio can interrupt your follow-up with Ultra Mega Fire Kick or mitigate your trade with Warm Hugs and Cozy Campfire, keeping his ADC safe and healthy while you absorb poke.
Dampak di lane
This matchup forces you into an extremely passive defensive stance. Milio's Fired Up! allows his ADC to poke you down relentlessly whenever you walk up to step on the wave or trigger Sap Magic. You cannot sustain through their constant ranged harassment, meaning you will lose lane priority, get pushed under tower, and be unable to assist your jungler because you are stuck conserving health.
Cara bermain
To survive, you must play around Milio's cooldowns instead of blindly engaging. Use Sapling Toss exclusively from the bushes to scout and chip away at their health without exposing yourself. Never initiate with Nature's Grasp unless you have seen Milio waste Breath of Life first. If your bot lane gets pushed in, focus on using Bramble Smash to peel their aggressive trades under your tower rather than looking for deep, risky plays.

Senna+2
Senna completely neutralizes your engage tools by exploiting her superior range. Whenever you attempt to step up to lock her down with Twisted Advance, she can easily react with Last Embrace to root you before you enter your targeting circle. This allows her to constantly harvest souls from your large hit box using her basic attacks and Piercing Darkness, keeping you low while staying perfectly safe.
Build Senna →
Lihat detail
Kenapa
Senna completely neutralizes your engage tools by exploiting her superior range. Whenever you attempt to step up to lock her down with Twisted Advance, she can easily react with Last Embrace to root you before you enter your targeting circle. This allows her to constantly harvest souls from your large hit box using her basic attacks and Piercing Darkness, keeping you low while staying perfectly safe.
Dampak di lane
This range disparity forces you under your turret, as throwing Sapling Toss into bushes does little to deter her when she can heal the damage with Piercing Darkness. Your health bar is constantly chipped away, preventing you from safely using Sap Magic on minions. Consequently, you lose all priority, making it impossible to assist your jungler near the river or contest vision without risking a swift death.
Cara bermain
To survive, you must abandon any hopes of aggressive lane engages. Stay out of her basic attack range and only step forward when Last Embrace is on cooldown. Use Sapling Toss to scout lane bushes rather than to poke, preventing her from using Curse of the Black Mist to ambush you. If you get chunked, wait for her to push, then look for a flash-cast Twisted Advance followed by Bramble Smash to shove her under your turret.

Morgana+2
Your entire engage pattern is structurally countered by Morgana. The moment you cast Twisted Advance to initiate, she can instantly react with Black Shield on your target. This entirely absorbs the magic damage and negates your root, leaving you stranded deep in enemy range. With no crowd control applied, you become an easy, immobile target for her Dark Binding and Tormented Shadow follow-up.
Build Morgana →
Lihat detail
Kenapa
Your entire engage pattern is structurally countered by Morgana. The moment you cast Twisted Advance to initiate, she can instantly react with Black Shield on your target. This entirely absorbs the magic damage and negates your root, leaving you stranded deep in enemy range. With no crowd control applied, you become an easy, immobile target for her Dark Binding and Tormented Shadow follow-up.
Dampak di lane
This interaction forces you into a passive state, giving Morgana free reign to poke you down with Tormented Shadow. You cannot contest brush control because casting Sapling Toss in bushes is easily bypassed. If you attempt to step up to trigger Sap Magic on minions, you risk getting locked down by Dark Binding, allowing her to push you under tower and secure easy plate damage.
Cara bermain
Never initiate with Twisted Advance while Black Shield is available. Instead, throw Sapling Toss into her path to force an early, panicked shield. Once her long cooldown is active, you have a brief window to engage. If you get caught by Dark Binding, immediately use Bramble Smash to push away their follow-up, and focus on hitting minions to proc Sap Magic to survive the poke.
Matchup lainnya

Tidak Menguntungkan
7Champion ini punya tool yang umumnya memberi mereka keunggulan dalam pertarungan, tanpa membuat matchup-nya benar-benar mustahil. Mereka mungkin punya jarak lebih jauh, lebih tahan terhadap seranganmu, atau lebih banyak cara merespons engage-mu. Kamu perlu menyesuaikan pendekatan dan memilih dengan cermat kapan menerima pertarungan.

Braum+1
Braum hard-counters your primary teamfight tool. When you cast Nature's Grasp, Braum can immediately raise Unbreakable in the direction of the oncoming roots, absorbing the projectile entirely and shielding his allies behind him. Furthermore, if you attempt to lock down his ADC with Twisted Advance, Braum can quickly jump to them using Stand Behind Me and counter-engage with Winter's Bite, leading to rapid Concussive Blows stuns on you.
Build Braum →
Lihat detail
Kenapa
Braum hard-counters your primary teamfight tool. When you cast Nature's Grasp, Braum can immediately raise Unbreakable in the direction of the oncoming roots, absorbing the projectile entirely and shielding his allies behind him. Furthermore, if you attempt to lock down his ADC with Twisted Advance, Braum can quickly jump to them using Stand Behind Me and counter-engage with Winter's Bite, leading to rapid Concussive Blows stuns on you.
Dampak di lane
This defensive synergy makes aggressive tower dives or forward engages highly risky. You cannot easily pressure their ADC because any trade you start allows Braum to stack Concussive Blows with his basic attacks and Winter's Bite, turning your engage into a self-stun. Consequently, you are forced to play defensively, losing control over the lane bushes where your Sapling Toss would normally establish vision and zoning pressure.
Cara bermain
To survive and thrive, shift your focus to peeling rather than initiating. Hold Nature's Grasp until Braum has already committed his Unbreakable in a skirmish, or flank from an angle where his shield cannot cover his entire backline. If he jumps forward with Stand Behind Me, use Bramble Smash to knock him away before he can apply Concussive Blows. Keep using Sap Magic to sustain through his poke, staying safely behind your minions to dodge his slow.

Sona+1
Sona naturally dominates this matchup over time because her Aria of Perseverance easily nullifies your Sap Magic sustain while her Hymn of Valor chips away at your health bar from safety. You cannot afford a passive lane where she scales freely. Your only window to shift the balance is capitalizing on an early all-in using Twisted Advance before her constant defensive auras make her carry unkillable.
Build Sona →
Lihat detail
Kenapa
Sona naturally dominates this matchup over time because her Aria of Perseverance easily nullifies your Sap Magic sustain while her Hymn of Valor chips away at your health bar from safety. You cannot afford a passive lane where she scales freely. Your only window to shift the balance is capitalizing on an early all-in using Twisted Advance before her constant defensive auras make her carry unkillable.
Dampak di lane
This dynamic forces you into a defensive stance near your turret, bleeding health whenever you try to walk up. Sona will constantly pressure your ADC with Hymn of Valor and use Song of Celerity to escape your slow-moving Sapling Toss. If you fail to trigger a decisive fight early, you will be forced to recall prematurely, losing tower plating and giving Sona free reign to scale.
Cara bermain
Use the lane bushes to hide your approach, tossing a high-damage Sapling Toss inside them to deter her from warding. The moment Sona steps forward to trigger her Power Chord with Hymn of Valor, instantly lock her down with Twisted Advance, then immediately follow up with Bramble Smash to push her back toward your ally. If she reaches level five, do not engage blindly; wait for her to waste Crescendo or use Nature's Grasp to lock her down from afar first.

Pyke+1
Pyke dominates this matchup through high mobility and lethal crowd control, but you possess a precise counter-measure. While Pyke relies on Ghostwater Dive and Phantom Undertow to slip behind your ADC and setup stuns, your Bramble Smash can knock him back mid-dash. Properly reacting to Phantom Undertow completely cancels his stun trajectory, turning his aggressive dive into an overextended disaster before he can execute with Death from Below.
Build Pyke →
Lihat detail
Kenapa
Pyke dominates this matchup through high mobility and lethal crowd control, but you possess a precise counter-measure. While Pyke relies on Ghostwater Dive and Phantom Undertow to slip behind your ADC and setup stuns, your Bramble Smash can knock him back mid-dash. Properly reacting to Phantom Undertow completely cancels his stun trajectory, turning his aggressive dive into an overextended disaster before he can execute with Death from Below.
Dampak di lane
Pyke's constant threat forces your ADC to play defensively near your tower, giving Pyke's team lane priority. If Pyke lands Bone Skewer, you must immediately peel rather than engaging his ADC. Because Pyke heals back poke with Gift of the Drowned Ones, trading health is highly inefficient for you. Missing your Bramble Smash timing gives Pyke a free lane to roam and snowball other lanes.
Cara bermain
Stand slightly ahead of your carry to intercept Bone Skewer with Sap Magic's healing, but never initiate with Twisted Advance while Pyke's dash is up. Hold Bramble Smash specifically to disrupt Phantom Undertow when Pyke dashes inward. If Pyke successfully slips past you and triggers the stun, immediately throw Sapling Toss into the nearest brush to track his Ghostwater Dive escape route, preventing him from cleanly resetting his health.

Nami+1
Your main engage tool, Twisted Advance, becomes a trap against a skilled Nami. Because its travel path is completely predictable, Nami can easily pre-cast Aqua Prison directly onto her ally as soon as you launch yourself. The moment you arrive to root them, you are immediately bubbled, preventing you from following up with Bramble Smash and leaving you isolated under heavy counter-fire.
Build Nami →
Lihat detail
Kenapa
Your main engage tool, Twisted Advance, becomes a trap against a skilled Nami. Because its travel path is completely predictable, Nami can easily pre-cast Aqua Prison directly onto her ally as soon as you launch yourself. The moment you arrive to root them, you are immediately bubbled, preventing you from following up with Bramble Smash and leaving you isolated under heavy counter-fire.
Dampak di lane
This defensive safety net allows Nami to dictate the lane's pace. She can freely step forward to poke you and your marksman with Ebb and Flow and Tidecaller's Blessing without fearing a sudden engage. You are forced to play defensively near your turret, bleeding minion control and giving up river priority because stepping up to contest space invites an easy, punishing bubble.
Cara bermain
To survive, shift your focus to bush control using Sapling Toss to zone Nami and limit her poke angles. Never initiate with Twisted Advance unless you have clearly seen her waste Aqua Prison. Instead, walk up threateningly to bait her bubble, then sidestep it. If you must engage, lead with Nature's Grasp from the fog of war to force her Tidal Wave first, ensuring she cannot easily coordinate her crowd control.
Matchup lainnya

Skill Matchups
7Matchup ini terutama soal duel eksekusi: kedua champion punya cara nyata untuk unggul. Satu skill penting yang di-dodge, engage yang diantisipasi dengan tepat, atau satu kesalahan positioning saja bisa menentukan siapa yang menang. Memahami matchup dan mengenali momen yang tepat untuk bertindak sangat penting di sini.

Galio±0
This matchup revolves around the timing of your primary engage. When you lock onto the enemy marksman with Twisted Advance, you become predictable. Galio can pre-buffer Justice Punch directly toward his ally. The moment you emerge from your roots, his charge collides with you, interrupting your planned follow-up with Bramble Smash and leaving you exposed to a devastating Shield of Durand taunt instead of securing the trade.
Build Galio →
Lihat detail
Kenapa
This matchup revolves around the timing of your primary engage. When you lock onto the enemy marksman with Twisted Advance, you become predictable. Galio can pre-buffer Justice Punch directly toward his ally. The moment you emerge from your roots, his charge collides with you, interrupting your planned follow-up with Bramble Smash and leaving you exposed to a devastating Shield of Durand taunt instead of securing the trade.
Dampak di lane
Because of this threat, blind aggression is heavily punished, turning the lane into a tense stand-off. You cannot simply force fights, meaning the wave state remains neutral unless Galio wastes his crowd control. If you initiate poorly, your marksman cannot follow up, leading to chunks of health lost to Winds of War. Conversely, securing bush control with Sapling Toss keeps Galio's engage at bay, stabilizing the lane's pressure.
Cara bermain
To win this mental game, position yourself near the lane bushes to toss enhanced Sapling Toss seeds, forcing Galio to choose between taking damage or using Shield of Durand to absorb it. Never lead with Twisted Advance on the carry unless you see Galio waste Justice Punch first. Instead, fish for a peel opportunity: wait for Galio to slide forward, interrupt his charge with a well-timed Bramble Smash, and then counter-engage with Nature's Grasp once his defensive options are exhausted.

Leona±0
This matchup is a pure battle of reaction times centered on the engage. When Leona throws her Zenith Blade to lock onto your ADC, you can activate Twisted Advance on a minion or Leona herself. Because Maokai becomes untargetable during his dash, you can completely negate her root and jump directly onto her instead, neutralizing her Shield of Daybreak threat before she can lock down your carry.
Build Leona →
Lihat detail
Kenapa
This matchup is a pure battle of reaction times centered on the engage. When Leona throws her Zenith Blade to lock onto your ADC, you can activate Twisted Advance on a minion or Leona herself. Because Maokai becomes untargetable during his dash, you can completely negate her root and jump directly onto her instead, neutralizing her Shield of Daybreak threat before she can lock down your carry.
Dampak di lane
Laning phase turns into a tense stand-off where neither support wants to trigger their primary engage tool first. If Leona misses Zenith Blade, she is left vulnerable with only Eclipse for defense, allowing you to push the wave with Sapling Toss and poke her down. Conversely, if you waste Bramble Smash prematurely, Leona will immediately jump in, using Shield of Daybreak to secure a deadly trade under your tower.
Cara bermain
Position yourself parallel to your carry to bait Leona's Zenith Blade, but keep Twisted Advance ready to dodge it. If she successfully initiates on your ADC, use Bramble Smash instantly to knock her away before she can apply Shield of Daybreak. Should you fall behind, throw Sapling Toss into the lane brushes to track her movements and zone her out, reserving Nature's Grasp to disengage her Solar Flare lock-downs.

Thresh±0
This matchup is a pure test of reflexes centered on your initiation tools. The entire lane revolves around how you respond to Death Sentence. Because Twisted Advance grants a brief window of untargetability, you can buffer it to completely dodge the stun of Thresh's hook mid-air while diving his AD carry. If you mistime this, Flay easily interrupts your follow-up, leaving you trapped inside The Box.
Build Thresh →
Lihat detail
Kenapa
This matchup is a pure test of reflexes centered on your initiation tools. The entire lane revolves around how you respond to Death Sentence. Because Twisted Advance grants a brief window of untargetability, you can buffer it to completely dodge the stun of Thresh's hook mid-air while diving his AD carry. If you mistime this, Flay easily interrupts your follow-up, leaving you trapped inside The Box.
Dampak di lane
Bush control dictates the pace here. Thresh wants to fish for hooks from the lane bushes, but your Sapling Toss denies this vision completely. When Death Sentence is on cooldown, you gain a twenty-second window to pressure with Bramble Smash trades. However, a well-placed Dark Passage can instantly rescue his ADC from your Nature's Grasp, turning potential kills into neutral disengages.
Cara bermain
Never initiate with Twisted Advance if Thresh is holding both Death Sentence and Flay, as he will easily peel you off. Instead, bait his hook by walking near the wave, and activate Twisted Advance the moment you see the chain wind up to bypass the CC. If you get hooked first, immediately use Bramble Smash to push Thresh away, preventing him from flaying your ADC into his lane partner.

Janna±0
This matchup is a pure battle of reaction times centered on your engage. When you cast Twisted Advance, you become untargetable, briefly dodging Janna's self-peel. However, a skilled Janna will pre-cast Howling Gale and release the whirlwind the exact millisecond you reappear to knock you up, preventing you from securing the knockback with Bramble Smash. This delicate interaction dictates whether your lane-initiations succeed or fail.
Build Janna →
Lihat detail
Kenapa
This matchup is a pure battle of reaction times centered on your engage. When you cast Twisted Advance, you become untargetable, briefly dodging Janna's self-peel. However, a skilled Janna will pre-cast Howling Gale and release the whirlwind the exact millisecond you reappear to knock you up, preventing you from securing the knockback with Bramble Smash. This delicate interaction dictates whether your lane-initiations succeed or fail.
Dampak di lane
Because of this tight mechanical loop, early skirmishes are incredibly tense. If Janna misses her Howling Gale timing, her ADC takes a full crowd-control chain under your brush-charged Sapling Toss, leading to heavy health loss or a forced recall. Conversely, if she denies your Twisted Advance entry, you are left stranded deep in enemy territory, exposed to poke from Zephyr and basic attacks without any way to quickly disengage.
Cara bermain
Do not mindlessly buffer your Twisted Advance from plain sight. Instead, use the bush to throw Sapling Toss, forcing Janna to either waste her Eye of the Storm shield or position defensively. Watch for her to release Howling Gale to poke or clear; the moment that whirlwind is on cooldown, you have a guaranteed window to engage. If she holds her tornado, fake an approach to bait her reaction, then use Nature's Grasp from fog of war to force her Monsoon early.

Soraka±0
This even matchup revolves entirely around how you initiate trades. Whenever you attempt to lock down Soraka's carry with Twisted Advance, she will instantly drop Equinox beneath them. This silences you the moment you arrive, preventing you from chaining Bramble Smash to shove the target back. Left helpless inside her zone, you will inevitably trigger her root, turning your aggressive engage into a deadly trap.
Build Soraka →
Lihat detail
Kenapa
This even matchup revolves entirely around how you initiate trades. Whenever you attempt to lock down Soraka's carry with Twisted Advance, she will instantly drop Equinox beneath them. This silences you the moment you arrive, preventing you from chaining Bramble Smash to shove the target back. Left helpless inside her zone, you will inevitably trigger her root, turning your aggressive engage into a deadly trap.
Dampak di lane
Because of this interaction, blind aggression leads to disaster. You cannot simply dive in whenever your cooldowns are up, as Soraka will negate your burst and heal her partner back up with Astral Infusion. This neutralizes your early lane pressure, forcing passive posturing. The lane becomes a tense waiting game where premature engages bleed your health pool, while successful baits allow you to secure crucial summoner spells or kills.
Cara bermain
To bypass this counter-engage, adjust your target selection. Instead of targeting her marksman, look to lock down Soraka herself with Twisted Advance. If she uses Equinox defensively on herself, she cannot protect her carry. Alternatively, throw Sapling Toss into bushes to zone her out, forcing her to misposition or waste Starcall. Only commit your full Nature's Grasp once her silence zone is down, ensuring your team can follow up without being immediately interrupted.
Matchup lainnya


Menguntungkan
15Champion ini biasanya kesulitan merespons kekuatan utamamu, sehingga kamu bisa menghadapi pertarungan dengan lebih leluasa. Kamu sering punya banyak cara untuk menekan mereka dan memaksa trade yang menguntungkan. Manfaatkan keunggulan ini untuk mendikte tempo, bukan memberi mereka waktu untuk kembali nyaman.

Bard−1
This matchup is heavily in your favor because Bard relies on Cosmic Binding to peel himself or punish aggressive steps. By timing Twisted Advance, you become completely untargetable, effortlessly dodging his only hard crowd control while flying straight to him. Once you bypass his stun, you can easily reposition behind him to cast Bramble Smash, knocking him back into your ADC for an inescapable lock-down sequence.
Build Bard →
Lihat detail
Kenapa
This matchup is heavily in your favor because Bard relies on Cosmic Binding to peel himself or punish aggressive steps. By timing Twisted Advance, you become completely untargetable, effortlessly dodging his only hard crowd control while flying straight to him. Once you bypass his stun, you can easily reposition behind him to cast Bramble Smash, knocking him back into your ADC for an inescapable lock-down sequence.
Dampak di lane
Bard's ranged harassment with Traveler’s Call and his lane sustain from Caretaker’s Shrine become irrelevant when he cannot step up to poke. Because your engage is guaranteed, the enemy duo must concede wave control, allowing you to crash waves and dive them or secure deep vision. Bard is forced to abandon his roaming plans, as leaving his ADC alone means an instant dive under their own tower.
Cara bermain
Position yourself constantly in the lane bushes to boost the damage of Sapling Toss and deny Bard's vision. Never initiate with Twisted Advance if Bard is hugging a wall, as he might bait you into an easy stun. Instead, walk up threateningly to force his Cosmic Binding, reactively dodge it with your untargetability, and then disrupt his retreat path. If he attempts to escape through a Magical Journey, throw a sapling inside and wait at the exit to catch him.

Alistar−1
Maokai dominates this matchup because a well-timed Bramble Smash completely shuts down Alistar's primary engage by knocking him back mid-Headbutt. Even when Alistar manages to trigger a trade, Maokai's Sap Magic out-sustains the healing from Triumphant Roar. This interaction neutralizes Alistar's threat, forcing him into passive play where he cannot easily peel or initiate.
Build Alistar →
Lihat detail
Kenapa
Maokai dominates this matchup because a well-timed Bramble Smash completely shuts down Alistar's primary engage by knocking him back mid-Headbutt. Even when Alistar manages to trigger a trade, Maokai's Sap Magic out-sustains the healing from Triumphant Roar. This interaction neutralizes Alistar's threat, forcing him into passive play where he cannot easily peel or initiate.
Dampak di lane
This shutdown potential shifts the lane momentum entirely in your favor. Alistar is forced to play defensively, meaning your AD carry can push waves safely without fear of sudden combos. Since Alistar cannot easily disengage without taking heavy damage, your health lead translates into early tower pressure. You can freely control the lane bushes using Sapling Toss, forcing Alistar and his carry into awkward, exposed positions.
Cara bermain
Position yourself slightly ahead of your carry, baiting Alistar to cast Headbutt. Keep your finger on Bramble Smash to reactively interrupt his leap. If Alistar activates Unbreakable Will, do not waste Twisted Advance or Nature's Grasp on him; instead, redirect your crowd control onto his carry. Only use Sapling Toss in the lane bushes to scout his positioning and prevent him from finding a flanking angle.

Blitzcrank−1
Maokai completely neutralizes Blitzcrank's primary threat because of how Twisted Advance interacts with Rocket Grab. By timing Twisted Advance right as the hook is about to connect, you become briefly untargetable, causing Rocket Grab to completely whiff while you seamlessly root the enemy AD carry or Blitzcrank himself. Even if you get pulled, Sap Magic and Bramble Smash allow you to instantly turn the pull into a favorable close-range brawl.
Build Blitzcrank →
Lihat detail
Kenapa
Maokai completely neutralizes Blitzcrank's primary threat because of how Twisted Advance interacts with Rocket Grab. By timing Twisted Advance right as the hook is about to connect, you become briefly untargetable, causing Rocket Grab to completely whiff while you seamlessly root the enemy AD carry or Blitzcrank himself. Even if you get pulled, Sap Magic and Bramble Smash allow you to instantly turn the pull into a favorable close-range brawl.
Dampak di lane
This interaction shifts lane pressure entirely in your favor, stripping Blitzcrank of his zoning power. Since you do not fear Rocket Grab, you can control the bush line using Sapling Toss to spot his movements. Your presence prevents the enemy duo from freezing the wave or zoning your marksman, because any hook attempt from Blitzcrank risks pulling an angry, self-healing tank directly into their faces or getting him counter-engaged.
Cara bermain
To execute this flawlessly, always stand slightly ahead of your carry to bait Rocket Grab. If Blitzcrank activates Overdrive to run you down, do not panic. Hold Twisted Advance until his arm actually fires to dodge it in mid-air, then immediately follow up with Bramble Smash to push him away from your marksman or knock his carry closer to yours. If you miss the timing and get grabbed, immediately retaliate with Bramble Smash to disrupt Power Fist, then trigger Sap Magic to sustain through their burst.

Karma−1
Karma relies heavily on the sudden burst of speed from Inspire to kite and space her opponents. However, your Twisted Advance is a guaranteed, point-and-click engage that she cannot dodge or outrun. The moment she steps up to poke with Inner Flame, you can instantly lock her down, rendering her defensive shield speed-boost useless and opening her up for a devastating follow-up.
Build Karma →
Lihat detail
Kenapa
Karma relies heavily on the sudden burst of speed from Inspire to kite and space her opponents. However, your Twisted Advance is a guaranteed, point-and-click engage that she cannot dodge or outrun. The moment she steps up to poke with Inner Flame, you can instantly lock her down, rendering her defensive shield speed-boost useless and opening her up for a devastating follow-up.
Dampak di lane
This interaction completely shifts the lane pressure. Karma is forced to play extremely defensively, fearing the threat of your crowd control. She cannot safely step forward to poke with Inner Flame or charge her Mantra passive. This concedes bush control entirely to your Sapling Toss, allowing your duo to dictate the wave state, zone her out, and crash waves to secure early plate damage.
Cara bermain
To execute this, occupy the lane bushes and use Sapling Toss to deny her the vision she needs to poke safely. Wait for her to walk up to cast Inner Flame before launching yourself with Twisted Advance. If she attempts to tether you with Focused Resolve, immediately follow up with Bramble Smash to knock her away and break the link, while using Sap Magic on your next basic attack to heal off any residual damage.

Rakan−1
Maokai commands this matchup because his Bramble Smash acts as a hard stop to Rakan's entire initiation kit. Whenever Rakan attempts to jump in with Grand Entrance, a well-timed Bramble Smash knocks him out of the air before his knock-up can land. This leaves Rakan isolated deep in your territory, unable to protect his carry or easily escape with Battle Dance.
Build Rakan →
Lihat detail
Kenapa
Maokai commands this matchup because his Bramble Smash acts as a hard stop to Rakan's entire initiation kit. Whenever Rakan attempts to jump in with Grand Entrance, a well-timed Bramble Smash knocks him out of the air before his knock-up can land. This leaves Rakan isolated deep in your territory, unable to protect his carry or easily escape with Battle Dance.
Dampak di lane
This interaction completely shifts the trading dynamic in your favor. Rakan cannot safely walk up to poke with Gleaming Quill or look for aggressive skirmishes, forcing him to play passively behind his minion wave. You can freely control the lane bushes with Sapling Toss, denying them vision and safety, while forcing early recalls from the enemy duo who can no longer pressure your tower.
Cara bermain
To execute this flawlessly, never throw out Bramble Smash proactively for poke. Stand parallel to your ADC and react exclusively to Rakan's forward dash. If he manages to activate The Quickness, do not panic; lock him down immediately with Twisted Advance to burn his ultimate's duration, then follow up with Nature's Grasp to prevent his Battle Dance retreat. Keep a Sapling Toss in the lane brush to spot his flank angles.

Lux−2
Maokai completely dictates the pace here because Twisted Advance provides a reliable bypass to Lux's primary defense. When Lux throws out Light Binding to zone or peel, you can activate Twisted Advance to become untargetable, phasing right through her root. This completely neutralizes her safety, delivering you directly onto her fragile hitbox where Bramble Smash ensures she cannot escape.
Build Lux →
Lihat detail
Kenapa
Maokai completely dictates the pace here because Twisted Advance provides a reliable bypass to Lux's primary defense. When Lux throws out Light Binding to zone or peel, you can activate Twisted Advance to become untargetable, phasing right through her root. This completely neutralizes her safety, delivering you directly onto her fragile hitbox where Bramble Smash ensures she cannot escape.
Dampak di lane
This interaction forces Lux to play extremely defensively, neutralizing her usual aggressive Lucent Singularity poke. She cannot step forward to pressure your wave or shield her marksman with Prismatic Barrier without risking an instant, fatal engage. If she wastes her root, you immediately walk up and zone her out of experience range, securing complete control over the bush line.
Cara bermain
Position yourself inside the lane brushes to launch Sapling Toss, forcing Lux to choose between face-checking or wasting her Lucent Singularity for vision. Never initiate with Twisted Advance at long range while her Light Binding is ready, allowing you to reactively dodge it during its travel time. If you get caught by her root first, immediately use Nature's Grasp to block her Final Spark combo.

Rell−1
This matchup is highly advantageous for you because Rell's primary engage relies entirely on her telegraphed jump. By reacting quickly, you can use Bramble Smash to knock her back mid-air, completely canceling her jump and preventing her crowd control from hitting your carry. This disruption leaves Rell stranded in her dismounted, slowed form, turning her aggressive attempt into an easy target for your AD carry to punish.
Build Rell →
Lihat detail
Kenapa
This matchup is highly advantageous for you because Rell's primary engage relies entirely on her telegraphed jump. By reacting quickly, you can use Bramble Smash to knock her back mid-air, completely canceling her jump and preventing her crowd control from hitting your carry. This disruption leaves Rell stranded in her dismounted, slowed form, turning her aggressive attempt into an easy target for your AD carry to punish.
Dampak di lane
Knowing you can cancel her jump neutralizes Rell's lane presence entirely. She cannot safely step up to contest the wave, allowing you to secure brush control using Sapling Toss. Because she is forced to play defensively, your carry can safely farm or freeze the wave, while Rell is starved of her support item stacks and bleed health trying to walk up for relic shield executes.
Cara bermain
Your primary rule is to hold Bramble Smash exclusively to counter her jump; never use it to poke or clear waves. Position yourself slightly ahead of your carry to intercept her trajectory. If Rell hesitates and plays passively, use Sapling Toss to scout and control the side bushes, then lock down her partner with Twisted Advance once Rell's jump is on cooldown. If you miss your timing, immediately cast Nature's Grasp to disengage.

Nautilus−1
This lane favors you because you can completely neutralize Nautilus's primary engage tool. Whenever he lands Dredge Line on your marksman, he relies on pulling himself in to chain Staggering Blow and Riptide. By timing Bramble Smash as he travels, you knock him back and break his combo, leaving him stranded. This turn of events lets you easily turn the fight while your Sap Magic keeps you healthy.
Build Nautilus →
Lihat detail
Kenapa
This lane favors you because you can completely neutralize Nautilus's primary engage tool. Whenever he lands Dredge Line on your marksman, he relies on pulling himself in to chain Staggering Blow and Riptide. By timing Bramble Smash as he travels, you knock him back and break his combo, leaving him stranded. This turn of events lets you easily turn the fight while your Sap Magic keeps you healthy.
Dampak di lane
Nautilus's threat of a flash-engage is minimized, giving your duo full control over the lane brushes. You can safely toss Sapling Toss into the bushes to scout his positioning and chip away at his shield, Titan's Wrath. Because he cannot safely walk up to secure minions without risking a counter-engage via Twisted Advance, you can force his duo under tower and delay his crucial recall timings.
Cara bermain
Position yourself slightly offset from your carry, inviting Nautilus to throw Dredge Line. Never waste Bramble Smash offensively; keep it ready solely to disrupt him mid-flight. If he targets you instead, welcome the hook, trigger Sap Magic to absorb the burst, and immediately cast Twisted Advance on his carry to shut down their damage follow-up. When they try to retreat, lock the lane down with Nature's Grasp to guarantee the kill.

Yuumi−2
Yuumi relies on You and Me! to stay safe, but Maokai bypasses this safety entirely. Because she is bound to an ally, targeting her anchor with Twisted Advance guarantees a point-and-click root on the host. This locks down her entire platform, rendering her inability to be targeted useless since she cannot safely detach to trigger Bop 'n' Block or reposition without running straight into a follow-up Bramble Smash.
Build Yuumi →
Lihat detail
Kenapa
Yuumi relies on You and Me! to stay safe, but Maokai bypasses this safety entirely. Because she is bound to an ally, targeting her anchor with Twisted Advance guarantees a point-and-click root on the host. This locks down her entire platform, rendering her inability to be targeted useless since she cannot safely detach to trigger Bop 'n' Block or reposition without running straight into a follow-up Bramble Smash.
Dampak di lane
The threat of Maokai's engage completely stifles Yuumi's lane presence. She cannot step out to poke with basic attacks for mana, and her host must play incredibly far back. This grants Maokai free bush control, allowing him to endlessly zone with Sapling Toss. The enemy duo is forced to concede lane priority and hemorrhage gold under tower, unable to trade effectively against your sustain.
Cara bermain
Position yourself aggressively in the lane bushes to deny Yuumi any opportunity to land Prowling Projectile. Hold Twisted Advance specifically for when her host steps up to last-hit, or immediately when she attempts to detach for Bop 'n' Block. Once you root her anchor, use Bramble Smash to knock them back into your bushes, where your pre-placed Sapling Toss will do maximum damage. If she casts Final Chapter, use Nature's Grasp to disengage or lock them down completely.
Matchup lainnya






Hard Counters
3Champion ini punya build dan gaya bermain yang langsung mengungguli milikmu, sehingga mengontrol lane dan farming jadi sangat sulit. Kemampuan mereka bisa menetralkan kekuatan utamamu atau menghukummu begitu kamu mencoba menjalankan rencana permainan biasa. Di matchup seperti ini, tujuannya biasanya adalah meminimalkan kesalahan dan mencari cara menang di luar konfrontasi langsung.

Gwen+2
Gwen is a nightmare for Maokai because her passive A Thousand Cuts melts through your high health pool. To make matters worse, her Hallowed Mist completely negates your ranged tools, allowing her to ignore Sapling Toss and shrug off Nature's Grasp if cast from outside her circle. This neutralizes your crowd control threat before you can even close the gap.
Build Gwen →
Lihat detail
Kenapa
Gwen is a nightmare for Maokai because her passive A Thousand Cuts melts through your high health pool. To make matters worse, her Hallowed Mist completely negates your ranged tools, allowing her to ignore Sapling Toss and shrug off Nature's Grasp if cast from outside her circle. This neutralizes your crowd control threat before you can even close the gap.
Dampak di lane
In the jungle, you cannot contest Gwen in direct skirmishes. If she finds you in the river, her Skip 'n Slash and Snip Snip! will quickly force you off your camps. Because Hallowed Mist grants her immunity to your long-range setups, securing objectives becomes extremely difficult as she can block your Nature's Grasp, stripping your team of your signature teamfight utility.
Cara bermain
To survive, never initiate with Nature's Grasp from afar if her Hallowed Mist is active. Instead, bait her mist out first, or bypass it entirely by using Twisted Advance to root her directly inside her protective zone. Once inside, immediately use Bramble Smash to knock her away from her own center of safety or to interrupt her Needlework casts.

Olaf+3
Olaf represents a massive structural hurdle because his *Ragnarok* completely nullifies your entire utility kit. Once he activates his ultimate, your *Twisted Advance* cannot root him, your *Bramble Smash* fails to peel him away, and his immunity lets him ignore the slow and root of *Nature's Grasp* entirely. He can freely run you down while utilizing *Berserker Rage* to out-dps you as his health drops.
Build Olaf →
Lihat detail
Kenapa
Olaf represents a massive structural hurdle because his *Ragnarok* completely nullifies your entire utility kit. Once he activates his ultimate, your *Twisted Advance* cannot root him, your *Bramble Smash* fails to peel him away, and his immunity lets him ignore the slow and root of *Nature's Grasp* entirely. He can freely run you down while utilizing *Berserker Rage* to out-dps you as his health drops.
Dampak di lane
This matchup strips away your ability to contest active neutral objectives or defend your camps. If Olaf catches you in the river, you cannot peel him off, making invades incredibly deadly. You are forced to cede scuttle crab priority and must drop *Sapling Toss* into bushes to scout his positioning rather than using them to speed up your clear, severely delaying your level power spikes.
Cara bermain
Your survival relies entirely on tracking the cooldown of *Ragnarok*. In skirmishes, never commit your primary spells like *Nature's Grasp* or *Twisted Advance* until his ultimate is depleted. If he activates it, immediately retreat, using *Sapling Toss* to slow his approaching teammates. Only turn back to peel with *Bramble Smash* once his ultimate expires and his vulnerability to your crowd control returns.

Mordekaiser+2
Mordekaiser completely neutralizes your team-oriented crowd control by using Realm of Death to banish you from the fight. While Maokai excels at using Twisted Advance and Nature's Grasp to protect allies, this isolation forces a direct duel. Inside his arena, you cannot withstand his Darkness Rise aura or dodge Obliterate, turning your utility into a useless kit while your carries are left completely unprotected.
Build Mordekaiser →
Lihat detail
Kenapa
Mordekaiser completely neutralizes your team-oriented crowd control by using Realm of Death to banish you from the fight. While Maokai excels at using Twisted Advance and Nature's Grasp to protect allies, this isolation forces a direct duel. Inside his arena, you cannot withstand his Darkness Rise aura or dodge Obliterate, turning your utility into a useless kit while your carries are left completely unprotected.
Dampak di lane
During jungle skirmishes and neutral objective contests, Mordekaiser's threat of isolation dictates the map tempo. If you try to secure the river with Sapling Toss, he can simply walk through with Indestructible and pull you with Death's Grasp. This constant threat forces you to cede early Rift Scuttlers and neutral objectives, as any direct engagement near the pits results in you being dragged away, leaving your team vulnerable.
Cara bermain
To survive this matchup, never initiate with Twisted Advance if Mordekaiser has Realm of Death available, as this puts you directly in his ultimate range. Instead, stay back and use Sapling Toss to scout bushes. If he pulls you with Death's Grasp, immediately use Bramble Smash to push him away and disengage. If you do get trapped in his ultimate, focus purely on survival by using Sap Magic heals and stalling with Twisted Advance to dodge his Obliterate.
Tidak Menguntungkan
8Champion ini punya tool yang umumnya memberi mereka keunggulan dalam pertarungan, tanpa membuat matchup-nya benar-benar mustahil. Mereka mungkin punya jarak lebih jauh, lebih tahan terhadap seranganmu, atau lebih banyak cara merespons engage-mu. Kamu perlu menyesuaikan pendekatan dan memilih dengan cermat kapan menerima pertarungan.

Pantheon+1
Pantheon dominates the early map tempo with the semi-global threat of Grand Starfall and aggressive jungle skirmishes fueled by Mortal Will. While he easily out-bursts you, your strength lies in matching his high-impact rotations. If you track him correctly, you can use the untargetability of Twisted Advance to follow him through his landing or lock him down immediately when he engages on your allies with Shield Vault.
Build Pantheon →
Lihat detail
Kenapa
Pantheon dominates the early map tempo with the semi-global threat of Grand Starfall and aggressive jungle skirmishes fueled by Mortal Will. While he easily out-bursts you, your strength lies in matching his high-impact rotations. If you track him correctly, you can use the untargetability of Twisted Advance to follow him through his landing or lock him down immediately when he engages on your allies with Shield Vault.
Dampak di lane
This matchup turns the jungle into a race against the clock. Pantheon will secure early priority to setup ganks, forcing you to use Sapling Toss defensively to track his river movements. If he finds successful roams with his ultimate while you are clearing camps, the map pressure becomes overwhelming. Every objective fight is decided by how quickly you can respond to his aggressive dives before he can deploy Aegis Assault.
Cara bermain
Never initiate blindly. Save Twisted Advance specifically for the moment Pantheon commits his jump. If he attempts to dive a lane with Grand Starfall, path toward the crash zone and buffer Twisted Advance onto him the instant he appears, following up with Bramble Smash to push him under tower or away from your carry. Should he block your damage with Aegis Assault, reposition behind him to disrupt his channel with Nature's Grasp.

Nidalee+1
Nidalee outpaces Maokai in clearing speed, exerting heavy pressure across the map. However, you possess the specific tools to neutralize her assassination attempts. By placing Sapling Toss in her path, you can block incoming Javelin Toss spears, while a perfectly timed Twisted Advance makes you untargetable, completely dodging her follow-up Pounce engage when she tries to execute you in cougar form.
Build Nidalee →
Lihat detail
Kenapa
Nidalee outpaces Maokai in clearing speed, exerting heavy pressure across the map. However, you possess the specific tools to neutralize her assassination attempts. By placing Sapling Toss in her path, you can block incoming Javelin Toss spears, while a perfectly timed Twisted Advance makes you untargetable, completely dodging her follow-up Pounce engage when she tries to execute you in cougar form.
Dampak di lane
This speed disparity means Nidalee will often secure double scuttle crabs or invade your camps while you are still clearing. If she lands a spear from fog of war, you are forced to retreat, giving up neutral objectives. However, if you keep her spotted, your team can safely collapse on her, turning her aggressive counter-jungling into a death trap.
Cara bermain
Prioritize throwing Sapling Toss into choke points and bushes near your jungle entrances to spot her early and block Javelin Toss mid-flight. Never use Twisted Advance to initiate a fight on her unless you know her Pounce is on cooldown; instead, hold it as a defensive tool to follow her mobility or dodge her jump entirely. If she invades, ping your laners and use Bramble Smash to peel her away from you.

Dr. Mundo+1
Your entire jungle identity relies on locking down targets, but Dr. Mundo completely neutralizes your engage. His passive, Goes Where He Pleases, absorbs the root from Twisted Advance or the snare of Nature's Grasp, turning your primary tools into a self-inflicted health loss. Without reliable crowd control to halt his advance, Mundo can shrug off your initial lockdown and charge straight into your vulnerable backline.
Build Dr. Mundo →
Lihat detail
Kenapa
Your entire jungle identity relies on locking down targets, but Dr. Mundo completely neutralizes your engage. His passive, Goes Where He Pleases, absorbs the root from Twisted Advance or the snare of Nature's Grasp, turning your primary tools into a self-inflicted health loss. Without reliable crowd control to halt his advance, Mundo can shrug off your initial lockdown and charge straight into your vulnerable backline.
Dampak di lane
In jungle skirmishes and river fights, this interaction shifts the power balance entirely. You cannot easily peel Mundo off your allies during early crab contests or dragon fights. When you try to secure objectives, his Infected Bonesaw poke combined with his immunity means he can safely contest your camp clears or disrupt your team's setup. If you attempt to fight him 1v1 in the river, his Maximum Dosage outlasts your Sap Magic healing.
Cara bermain
To survive this matchup, you must coordinate with your laners to pop Goes Where He Pleases before committing your main crowd control. Use the knockback from Bramble Smash to break his spell shield from a safe distance, then actively step on his dropped canister to prevent him from recovering health and reducing his cooldown. Save Twisted Advance strictly for following up after his passive is down, or bypass Mundo entirely to dive his backline while your teammates distract him.

Volibear+1
Volibear wins raw skirmishes through The Relentless Storm and Frenzied Maul healing, making direct jungle duels unfavorable. However, Maokai can disrupt his tempo. By timing Twisted Advance perfectly, you can become untargetable to dodge the high-impact burst and shield of Sky Splitter, or use Bramble Smash to knock Volibear back right as he charges with Thundering Smash, neutralizing his engage.
Build Volibear →
Lihat detail
Kenapa
Volibear wins raw skirmishes through The Relentless Storm and Frenzied Maul healing, making direct jungle duels unfavorable. However, Maokai can disrupt his tempo. By timing Twisted Advance perfectly, you can become untargetable to dodge the high-impact burst and shield of Sky Splitter, or use Bramble Smash to knock Volibear back right as he charges with Thundering Smash, neutralizing his engage.
Dampak di lane
This interaction shapes jungle skirmishes and crab contests. If Volibear lands his full combo, his Stormbringer dive threat forces you off your camps and neutral objectives. When you successfully deny his Thundering Smash stun or dodge Sky Splitter, you prevent him from marking you with Frenzied Maul. This keeps your health high enough to contest objectives and prevents him from invading and snowballing the early game.
Cara bermain
Never initiate with Twisted Advance when Volibear has his cooldowns up. Instead, bait his Thundering Smash run, and react instantly with Bramble Smash to peel him off. If he casts Sky Splitter to shield himself and slow you, immediately use Twisted Advance on a nearby monster or Volibear himself to bypass the lightning strike. If you misplay this cycle and get marked by Frenzied Maul, immediately retreat using Sapling Toss to slow his pursuit.

Warwick+1
Warwick dominates direct jungle duels because his Eternal Hunger and Jaws of the Beast grant him massive, continuous healing that easily outlasts your own Sap Magic passive. However, you possess the perfect tools to disrupt his ultimate. If Warwick targets an ally with Infinite Duress, you can immediately cancel the suppression using Bramble Smash. Alternatively, timing your Twisted Advance perfectly allows you to completely dodge his incoming leap.
Build Warwick →
Lihat detail
Kenapa
Warwick dominates direct jungle duels because his Eternal Hunger and Jaws of the Beast grant him massive, continuous healing that easily outlasts your own Sap Magic passive. However, you possess the perfect tools to disrupt his ultimate. If Warwick targets an ally with Infinite Duress, you can immediately cancel the suppression using Bramble Smash. Alternatively, timing your Twisted Advance perfectly allows you to completely dodge his incoming leap.
Dampak di lane
You cannot match Warwick in early river skirmishes, as his Blood Hunt makes tracking low-health allies dangerous and grants him map priority. He will attempt to invade your camps, relying on Primal Howl to shrug off your damage while healing back up. This forces you to play defensively, using Sapling Toss to secure brush vision, conceding early crab contests to prevent giving away cheap kills.
Cara bermain
Prioritize early anti-healing items to directly reduce the massive regeneration Warwick gets from Eternal Hunger. During skirmishes, never waste your crowd control. Hold Bramble Smash specifically to peel teammates the moment they are suppressed by Infinite Duress. If Warwick targets you instead, react instantly with Twisted Advance during his leap animation to become untargetable, causing his ultimate to fail completely while positioning you perfectly to counter-engage with Nature's Grasp.

Xin Zhao+1
Xin Zhao dominates the early skirmishes because of his superior dueling power, but you have the perfect tool to disrupt his rhythm. When he engages with Audacious Charge and activates Three Talon Strike to knock you up, your Bramble Smash can push him away right before his third strike lands. This interaction denies his crowd control and wastes his main damage window, though his passive healing from Determination still gives him the edge in prolonged fights.
Build Xin Zhao →
Lihat detail
Kenapa
Xin Zhao dominates the early skirmishes because of his superior dueling power, but you have the perfect tool to disrupt his rhythm. When he engages with Audacious Charge and activates Three Talon Strike to knock you up, your Bramble Smash can push him away right before his third strike lands. This interaction denies his crowd control and wastes his main damage window, though his passive healing from Determination still gives him the edge in prolonged fights.
Dampak di lane
This dynamic makes early Scuttle Crab contests highly risky for you, as Xin Zhao can easily force fights in the river. If you fail to interrupt Three Talon Strike, he will secure first blood or force your Flash, leaving your lanes vulnerable to his aggressive ganks. Your clear is slower, meaning you will often find yourself reacting to his moves rather than setting the pace of the map.
Cara bermain
Do not contest the river blindly; instead, track his starting camp and path to the opposite side to secure a safe farm. When you must clash, hold Bramble Smash strictly for his third strike of Three Talon Strike, rather than using it to clear camps or start the fight. If he activates Crescent Guard to block your allies' damage, use Twisted Advance to dive inside his arena and lock him down for your team.
Matchup lainnya


Skill Matchups
21Matchup ini terutama soal duel eksekusi: kedua champion punya cara nyata untuk unggul. Satu skill penting yang di-dodge, engage yang diantisipasi dengan tepat, atau satu kesalahan positioning saja bisa menentukan siapa yang menang. Memahami matchup dan mengenali momen yang tepat untuk bertindak sangat penting di sini.

Jarvan IV±0
This jungle duel is a pure utility clash centered around teamfight impact. The outcome depends entirely on how Maokai's Twisted Advance interacts with Jarvan IV's Demacian Standard and Dragon Strike combo. Since Twisted Advance grants Maokai brief untargetability, he can completely negate Jarvan's main engage and knockup, leaving the Demacian prince vulnerable without his primary mobility tool and armor shred.
Build Jarvan IV →
Lihat detail
Kenapa
This jungle duel is a pure utility clash centered around teamfight impact. The outcome depends entirely on how Maokai's Twisted Advance interacts with Jarvan IV's Demacian Standard and Dragon Strike combo. Since Twisted Advance grants Maokai brief untargetability, he can completely negate Jarvan's main engage and knockup, leaving the Demacian prince vulnerable without his primary mobility tool and armor shred.
Dampak di lane
In the jungle, this interaction dictates who secures early crabs and neutralizes gank pressure. If you successfully dodge his flag-and-drag, Jarvan IV loses his escape route and armor reduction, turning his aggressive invade into a death trap. However, if he baits out Twisted Advance with Golden Aegis and catches you afterward, his Cataclysm will trap you, forcing you to use Nature's Grasp defensively rather than to secure objectives.
Cara bermain
Never initiate fights with Twisted Advance when Jarvan IV has his flag up. Instead, throw Sapling Toss into bushes to track his movement, and walk forward to bait his engage. Keep your finger on Twisted Advance and react only when you see the animation of Demacian Standard dropping. Once you successfully dodge his knockup, immediately follow up with Bramble Smash to shove him away from his flag or lock him down for your team, then drop Nature's Grasp to seal his escape routes.

Kayn±0
This jungle duel is a battle of pacing and transformation. Your ability to lock Kayn down mid-dash using Twisted Advance can completely disrupt his skirmishing, especially when he tries to slip away with Shadow Step. However, once The Darkin Scythe allows him to unlock Rhaast, the dynamic shifts. Rhaast excels in prolonged team fights, turning Maokai's high maximum health into a massive healing source.
Build Kayn →
Lihat detail
Kenapa
This jungle duel is a battle of pacing and transformation. Your ability to lock Kayn down mid-dash using Twisted Advance can completely disrupt his skirmishing, especially when he tries to slip away with Shadow Step. However, once The Darkin Scythe allows him to unlock Rhaast, the dynamic shifts. Rhaast excels in prolonged team fights, turning Maokai's high maximum health into a massive healing source.
Dampak di lane
In the early game, utilizing Sapling Toss near walls limits his creative ganking angles and tracks his movement. But as the match progresses toward major neutral objectives, Kayn will aggressively hunt for red orbs. If you allow him to freely stack his passive off you, his rapid transformation will dominate the mid-game map pressure and objective control.
Cara bermain
During team fights, never initiate on Rhaast directly, as your massive health bar only feeds his healing. Instead, hold Twisted Advance to interrupt him immediately when he uses Reaping Slash to dive your backline. Follow up with Bramble Smash to knock him backwards, preventing him from activating Umbral Trespass on your squishy allies. If he infects a teammate, position to peel the moment he exits.

Wukong±0
This jungle matchup is a pure battle of disruption and positioning during team skirmishes. Wukong wants to dive your backline with Nimbus Strike and disrupt everyone with Cyclone. However, Maokai has the perfect tools to neutralize this threat. Your Bramble Smash can push the spinning monkey away, saving your allies, while Sapling Toss acts as an excellent scouting tool to reveal Wukong when he tries to escape or ambush using Warrior Trickster.
Build Wukong →
Lihat detail
Kenapa
This jungle matchup is a pure battle of disruption and positioning during team skirmishes. Wukong wants to dive your backline with Nimbus Strike and disrupt everyone with Cyclone. However, Maokai has the perfect tools to neutralize this threat. Your Bramble Smash can push the spinning monkey away, saving your allies, while Sapling Toss acts as an excellent scouting tool to reveal Wukong when he tries to escape or ambush using Warrior Trickster.
Dampak di lane
Because both junglers excel at team fighting, early skirmishes around Rift Herald and Dragon are incredibly tense. Wukong leverages Stone Skin to thrive in multi-target fights, meaning you cannot easily burst him down. If you fail to track him, his flank with Warrior Trickster can decimate your laners. This forces a slower, more defensive jungle tempo where objective control depends heavily on who secures superior vision and positioning first.
Cara bermain
To win this clash, never initiate with Twisted Advance on Wukong if he has his team behind him. Instead, stay near your primary damage dealers. Hold Bramble Smash exclusively to interrupt the momentum of his Cyclone the moment he engages. If he attempts to escape or bait you with his clone, throw Sapling Toss into the adjacent brush to gain vision. If you get caught out of position, use Nature's Grasp to zone his team and disengage.

Kindred±0
This jungle matchup is a direct contest between Kindred's slippery mobility and your absolute lockdown. Kindred thrives by using *Dance of Arrows* within *Wolf's Frenzy* to kite you indefinitely. However, your *Twisted Advance* completely neutralizes this playstyle. This point-and-click root stops her in her tracks, preventing her from dancing away and opening a perfect window for your team to burst her down.
Build Kindred →
Lihat detail
Kenapa
This jungle matchup is a direct contest between Kindred's slippery mobility and your absolute lockdown. Kindred thrives by using *Dance of Arrows* within *Wolf's Frenzy* to kite you indefinitely. However, your *Twisted Advance* completely neutralizes this playstyle. This point-and-click root stops her in her tracks, preventing her from dancing away and opening a perfect window for your team to burst her down.
Dampak di lane
This dynamic shapes the entire map pressure, particularly around hunts for the *Mark of the Kindred*. You must secure brush vision using *Sapling Toss* to spot her invades early. In skirmishes, her fear of your *Twisted Advance* limits her aggressive positioning. If you lock her down before she sets up, her jungle pressure collapses; if she kites you, she secures the river.
Cara bermain
In teamfights, focus entirely on your positioning relative to her marksman range. Do not blindly engage; instead, wait for Kindred to commit her *Dance of Arrows* forward. Once she does, immediately lock her down with *Twisted Advance*. Follow up with *Bramble Smash* to knock her back, ideally pushing her out of her own *Lamb's Respite* safety circle. Use *Sapling Toss* in bushes to prevent her from resetting her cooldowns out of sight.

Vi±0
This matchup is a pure contest of reaction times and spell timing. Vi relies heavily on Vault Breaker to initiate her burst and trigger Denting Blows. As Maokai, you hold the tools to negate her primary entry; a perfectly timed Bramble Smash can knock her out of her dash mid-air, while a reactive Twisted Advance makes you temporarily untargetable, causing her punch to whiff entirely and leaving her vulnerable.
Build Vi →
Lihat detail
Kenapa
This matchup is a pure contest of reaction times and spell timing. Vi relies heavily on Vault Breaker to initiate her burst and trigger Denting Blows. As Maokai, you hold the tools to negate her primary entry; a perfectly timed Bramble Smash can knock her out of her dash mid-air, while a reactive Twisted Advance makes you temporarily untargetable, causing her punch to whiff entirely and leaving her vulnerable.
Dampak di lane
In the jungle, this interaction dictates who controls the river and early objectives. If Vi misses her Vault Breaker or gets interrupted, she cannot easily stack Blast Shield or trigger Denting Blows, neutering her dueling power. This allows you to secure Scuttle Crabs and contest her camps. However, if she successfully lands her punch, her burst will force you to retreat, giving her full priority.
Cara bermain
Never waste Bramble Smash while clearing camps near Vi; keep it ready for her inevitable approach. When you see her charging Vault Breaker, stand your ground and time your Bramble Smash to knock her back at the exact moment she dashes. Alternatively, hover your finger over Twisted Advance to dodge her charge. If she targets you with Cease and Desist, prepare Nature's Grasp behind you to root her the instant she lands.

Viego±0
This jungle matchup hinges entirely on Viego's ability to trigger Sovereign's Domination. While Viego tries to weave through skirmishes using Harrowed Path to ambush your allies, Maokai holds the perfect tool to shut down his resets. Nature's Grasp acts as a massive wall that halts Viego's advance, preventing him from reaching wounded teammates. If Viego cannot land Heartbreaker on a low-health target because of your roots, his assassination potential crumbles.
Build Viego →
Lihat detail
Kenapa
This jungle matchup hinges entirely on Viego's ability to trigger Sovereign's Domination. While Viego tries to weave through skirmishes using Harrowed Path to ambush your allies, Maokai holds the perfect tool to shut down his resets. Nature's Grasp acts as a massive wall that halts Viego's advance, preventing him from reaching wounded teammates. If Viego cannot land Heartbreaker on a low-health target because of your roots, his assassination potential crumbles.
Dampak di lane
Around objectives, Viego's presence forces you to monitor his positioning near walls where Harrowed Path grants him camouflage. Since this is an even matchup, neutral fights are decided by who strikes first. If you waste Twisted Advance on their frontline, Viego will bypass you to execute your backline. Failing to block his entrance means your team gets wiped by cascading Sovereign's Domination resets, sacrificing map control.
Cara bermain
To win this, never launch Nature's Grasp blindly at the start of a teamfight. Instead, stand between Viego's camouflaged Harrowed Path zone and your lowest-HP ally. Hold Twisted Advance specifically to lock him down the moment he charges Spectral Maw. If Viego manages to bypass your crowd control and triggers Sovereign's Domination, immediately use Bramble Smash to knock him back during his brief vulnerability window.

Riven±0
This jungle matchup hinges entirely on timing your crowd control against her mobility. Riven relies on chaining her Broken Wings to stack Runic Blade and trigger her knockup. However, Maokai holds the perfect tool to break this flow. By buffering Bramble Smash exactly during the animation of her third Broken Wings strike, you cancel her knockup entirely, leaving her vulnerable with her main damage source on cooldown.
Build Riven →
Lihat detail
Kenapa
This jungle matchup hinges entirely on timing your crowd control against her mobility. Riven relies on chaining her Broken Wings to stack Runic Blade and trigger her knockup. However, Maokai holds the perfect tool to break this flow. By buffering Bramble Smash exactly during the animation of her third Broken Wings strike, you cancel her knockup entirely, leaving her vulnerable with her main damage source on cooldown.
Dampak di lane
Successfully disrupting this combo completely dictates who wins early river skirmishes and objective contests. If you deny her third strike, Riven loses her primary engagement tool, forcing her to rely on Ki Burst or Valor to escape. This allows you to secure the Scuttle Crab or transition into a counter-gank. Missing this timing, however, lets her shred your health pool and dominate the jungle quadrant.
Cara bermain
Never initiate a duel with Bramble Smash; always save it as a reactive tool. When contesting camps, lead with Twisted Advance to lock her down, then throw a Sapling Toss into the nearby brush to secure vision. Watch her swing count carefully. The moment you see her flip for the final cast of Broken Wings, immediately trigger Bramble Smash to knock her back. If she activates Blade of the Exile, back off using Nature's Grasp to disengage and waste her ultimate's duration.

Nunu & Willump±0
This jungle duel is a pure contest of objective execution and disruption. Nunu & Willump rely heavily on the momentum of Biggest Snowball Ever! to initiate skirmishes, alongside Consume to instantly secure neutral monsters. However, Maokai holds the tools to shut down this movement. By timing Bramble Smash perfectly, you can collapse his snowball before impact, or utilize the untargetability of Twisted Advance to completely bypass the knockup.
Build Nunu & Willump →
Lihat detail
Kenapa
This jungle duel is a pure contest of objective execution and disruption. Nunu & Willump rely heavily on the momentum of Biggest Snowball Ever! to initiate skirmishes, alongside Consume to instantly secure neutral monsters. However, Maokai holds the tools to shut down this movement. By timing Bramble Smash perfectly, you can collapse his snowball before impact, or utilize the untargetability of Twisted Advance to completely bypass the knockup.
Dampak di lane
The jungle phase revolves around a high-stakes race to secure epic monsters. Nunu & Willump's Consume gives them a massive advantage in raw securing power, forcing you to play around vision rather than raw damage races. If you fail to track his pathing, his ganking speed will overwhelm your lanes. However, your ability to deny his entry into pits neutralizes his objective threat, turning teamfights into chaotic standoffs.
Cara bermain
Prioritize throwing Sapling Toss deep into the river brush to spot Biggest Snowball Ever! before it gains maximum speed. Never commit Bramble Smash early in a skirmish; save it exclusively to interrupt his rolling charge or to knock him away from the epic monster pit. If Nunu & Willump begin channeling Absolute Zero, immediately cast Twisted Advance to root them in place, allowing your team to escape the blast zone while you shrug off the damage.
Matchup lainnya









Menguntungkan
18Champion ini biasanya kesulitan merespons kekuatan utamamu, sehingga kamu bisa menghadapi pertarungan dengan lebih leluasa. Kamu sering punya banyak cara untuk menekan mereka dan memaksa trade yang menguntungkan. Manfaatkan keunggulan ini untuk mendikte tempo, bukan memberi mereka waktu untuk kembali nyaman.

Hecarim−1
Maokai completely shut downs Hecarim's high-speed initiations. When Hecarim charges with Devastating Charge, a well-timed Bramble Smash knocks him back mid-dash, instantly killing his momentum and damage. Furthermore, you can use Twisted Advance to become untargetable, perfectly dodging the fear and damage of Onslaught of Shadows. This makes Hecarim's aggressive dives useless, shifting the control of skirmishes heavily in your favor.
Build Hecarim →
Lihat detail
Kenapa
Maokai completely shut downs Hecarim's high-speed initiations. When Hecarim charges with Devastating Charge, a well-timed Bramble Smash knocks him back mid-dash, instantly killing his momentum and damage. Furthermore, you can use Twisted Advance to become untargetable, perfectly dodging the fear and damage of Onslaught of Shadows. This makes Hecarim's aggressive dives useless, shifting the control of skirmishes heavily in your favor.
Dampak di lane
In the jungle, this matchup changes how teamfights and river skirmishes play out. Hecarim cannot freely flank or dive your backline because your presence alone threatens to halt his charge. By placing Sapling Toss in bushes near objectives, you reveal his approach and chip his health down before he can stack Warpath. Your ability to lock him down prevents him from healing continuously with Spirit of Dread.
Cara bermain
To win, never waste Bramble Smash during teamfights; hold it specifically for the moment Hecarim activates Devastating Charge and runs at your team. If he targets you with Onslaught of Shadows, react quickly with Twisted Advance on a nearby enemy or Hecarim himself to bypass the crowd control. If he avoids you to dive elsewhere, use Nature's Grasp across the lane to block his escape routes and force him into your crowd control.

Kha'Zix−1
Maokai dictates the jungle's pace because Sapling Toss completely neutralizes Kha'Zix's reliance on brush play. By tossing your explosive saplings into crucial choke points, you constantly reveal him and deny his ability to reset Unseen Threat. Without this passive damage injection, his burst potential drops significantly, preventing him from securing the quick kills he needs to snowball.
Build Kha'Zix →
Lihat detail
Kenapa
Maokai dictates the jungle's pace because Sapling Toss completely neutralizes Kha'Zix's reliance on brush play. By tossing your explosive saplings into crucial choke points, you constantly reveal him and deny his ability to reset Unseen Threat. Without this passive damage injection, his burst potential drops significantly, preventing him from securing the quick kills he needs to snowball.
Dampak di lane
This vision dominance shifts the jungle dynamic entirely. Kha'Zix cannot safely ambush you or invade your camps, as your saplings turn every brush into a hazard. Since he cannot easily isolate you, his Taste Their Fear loses its lethal edge. You easily stall his early pressure, securing neutral objectives safely behind a wall of zone control, forcing him to take desperate, sub-optimal paths.
Cara bermain
Do not seek direct 1v1 duels in the open jungle. Instead, focus on controlling key river brushes with Sapling Toss before objectives spawn. If Kha'Zix attempts a desperate Leap onto your squishy allies, immediately lock him down with Twisted Advance, then use Bramble Smash to push him away from them. Save Nature's Grasp to zone him out of teamfights entirely, leaving him starved of isolation resets.

Lee Sin−1
You hold a massive advantage in the jungle because your crowd control completely shuts down Lee Sin's high-mobility assassination attempts. The defining interaction occurs when he connects with Sonic Wave. Instead of panicking, you can time Twisted Advance to become untargetable right as he dashes toward you. This entirely negates his main damage source while root-locking him in place, leaving him incredibly vulnerable.
Build Lee Sin →
Lihat detail
Kenapa
You hold a massive advantage in the jungle because your crowd control completely shuts down Lee Sin's high-mobility assassination attempts. The defining interaction occurs when he connects with Sonic Wave. Instead of panicking, you can time Twisted Advance to become untargetable right as he dashes toward you. This entirely negates his main damage source while root-locking him in place, leaving him incredibly vulnerable.
Dampak di lane
This matchup dynamic strips Lee Sin of his early-game invading power, forcing him to play defensively in his own jungle. Whenever he tries to force a skirmish near the river or during neutral objectives, your ability to cancel his mobility prevents him from executing his signature Dragon's Rage plays. He cannot snowball, which drastically reduces his team's early map pressure.
Cara bermain
When contesting scuttle crabs or objectives, always position yourself at the front of your team and throw Sapling Toss into bushes to scout Lee Sin's approach. Never initiate with Twisted Advance; instead, hold it specifically to react to his Sonic Wave dash. Once you root him mid-dash, immediately follow up with Bramble Smash to knock him back into your allies, preventing him from escaping with Safeguard.

Lillia−1
Lillia relies on stacking movement speed from Blooming Blows to dance around fights and apply Dream-Laden Bough. However, Maokai completely shuts down this skirmishing style. Since Twisted Advance is a guaranteed, point-and-click root, Lillia cannot use her high velocity to dodge it. This inevitable lockdown completely stops her momentum, leaving her highly vulnerable to a follow-up Nature's Grasp and quick burst.
Build Lillia →
Lihat detail
Kenapa
Lillia relies on stacking movement speed from Blooming Blows to dance around fights and apply Dream-Laden Bough. However, Maokai completely shuts down this skirmishing style. Since Twisted Advance is a guaranteed, point-and-click root, Lillia cannot use her high velocity to dodge it. This inevitable lockdown completely stops her momentum, leaving her highly vulnerable to a follow-up Nature's Grasp and quick burst.
Dampak di lane
During jungle skirmishes and neutral objective contests, Lillia's ability to safely poke with Swirlseed and run away is severely restricted. Your presence alone forces her to position defensively, preventing her from freely stacking Blooming Blows on camps or teammates. If she attempts to contest scuttle crabs or invades, your point-and-click target acquisition ensures she cannot escape once she steps past her frontline, shifting river control heavily in your favor.
Cara bermain
Position yourself in narrow jungle corridors where Lillia has less room to maneuver. Do not waste Twisted Advance early; wait for her to approach to hit Blooming Blows or Watch Out! Eep!. The moment she commits to her dash, lock her down with Twisted Advance, then immediately cast Nature's Grasp behind her to block her escape route. Use Bramble Smash to knock her back into your ultimate's roots if she tries to cleanse or run.

Nocturne−1
Maokai naturally blunts Nocturne's high-tempo assassination attempts. Even when Paranoia shrouds the map in darkness, Maokai's Sapling Toss provides crucial vision of nearby bushes to spot incoming flanks. Once Nocturne commits to his dive, Twisted Advance offers point-and-click crowd control that bypasses his mobility, while Bramble Smash can immediately knock him back to prevent his fear tether from connecting.
Build Nocturne →
Lihat detail
Kenapa
Maokai naturally blunts Nocturne's high-tempo assassination attempts. Even when Paranoia shrouds the map in darkness, Maokai's Sapling Toss provides crucial vision of nearby bushes to spot incoming flanks. Once Nocturne commits to his dive, Twisted Advance offers point-and-click crowd control that bypasses his mobility, while Bramble Smash can immediately knock him back to prevent his fear tether from connecting.
Dampak di lane
This matchup shifts the jungle dynamic heavily toward defensive counter-ganking. Nocturne cannot freely dive your laners because your presence in the river denies his execution threshold. Whenever he attempts to lock onto an ally, your ability to quickly peel him off completely ruins his tempo. Furthermore, his Shroud of Darkness is easily popped by your low-cooldown spells, leaving him highly vulnerable to counter-engages during early skirmishes.
Cara bermain
Position yourself constantly between Nocturne's expected angle of approach and your squishiest carry. When navigating near objectives, throw Sapling Toss into choke-point bushes to maintain vision boundaries before Paranoia begins. Never initiate with Twisted Advance; instead, hold it specifically to react to his ultimate flight. If he activates Shroud of Darkness, trigger your passive Sap Magic with basic attacks to outsustain him while waiting for his spell shield to expire.

Shyvana−1
Maokai naturally stifles Shyvana's primary teamfight entry because his Bramble Smash can directly interrupt and knock her back mid-flight during Dragon's Descent. Since her ultimate is her only reliable tool to close the gap and initiate fights, denying this initial impact completely stalls her dive potential, leaving her vulnerable to your team's follow-up while her Burnout and Flame Breath fail to reach their high-value targets.
Build Shyvana →
Lihat detail
Kenapa
Maokai naturally stifles Shyvana's primary teamfight entry because his Bramble Smash can directly interrupt and knock her back mid-flight during Dragon's Descent. Since her ultimate is her only reliable tool to close the gap and initiate fights, denying this initial impact completely stalls her dive potential, leaving her vulnerable to your team's follow-up while her Burnout and Flame Breath fail to reach their high-value targets.
Dampak di lane
This interaction shifts the power balance heavily around Epic Monsters, where Shyvana desperately wants to stack her Fury of the Dragonborn. By controlling the choke points with Sapling Toss, you force her to reveal her position or commit Dragon's Descent prematurely. If she attempts to force a steal, your ability to deny her landing zone completely shuts down her objective contest, giving your team free neutrals.
Cara bermain
Position yourself as a physical wall between Shyvana and your backline during objective dances. Never waste Bramble Smash on her human form; hold this specific ability and react to her ultimate animation. The moment she casts Dragon's Descent, use your knockback to swat her away mid-air, then immediately follow up with Twisted Advance to root her in place, ensuring she cannot stick to your allies with Burnout.

Talon−1
Talon's jungle dominance relies on using Assassin's Path to ignore terrain and escape bad situations. However, Maokai holds a massive advantage because Twisted Advance is an unavoidable, point-and-click root. This completely shuts down Talon's ability to hop over walls, locking him in place mid-cast or forcing him to fight a tanky opponent he cannot burst down, especially when Sap Magic constantly keeps your health bar high.
Build Talon →
Lihat detail
Kenapa
Talon's jungle dominance relies on using Assassin's Path to ignore terrain and escape bad situations. However, Maokai holds a massive advantage because Twisted Advance is an unavoidable, point-and-click root. This completely shuts down Talon's ability to hop over walls, locking him in place mid-cast or forcing him to fight a tanky opponent he cannot burst down, especially when Sap Magic constantly keeps your health bar high.
Dampak di lane
This interaction completely shifts the jungle pressure. Talon cannot safely counter-jungle or flank your laners because any face-to-face encounter near walls becomes lethal for him. If he attempts a risky gank, your counter-gank with Nature's Grasp and Sapling Toss traps him in the river corridors. He loses his map-wide snowball potential, transforming his aggressive rotations into highly risky maneuvers where any mistake leads to his death.
Cara bermain
To exploit this, always scout jungle choke points by throwing Sapling Toss into bushes where Talon might prepare a flank. Never initiate a fight with Twisted Advance if he is near an unbroken wall; instead, walk up, use Bramble Smash to knock him away from the terrain, and only trigger your point-and-click root when he attempts to cast Assassin's Path. If he uses Shadow Assault to go invisible, patient positioning allows you to lock him down the moment he reappears.

Twitch−1
Twitch relies entirely on the stealth of Ambush to secure early map pressure and surprise ganks, but your kit completely neutralizes this tool. By tossing Sapling Toss into common choke points and brush, you reveal him before he can reposition. Once exposed, Twitch lacks any natural mobility or dashes, leaving him extremely vulnerable to your point-and-click Twisted Advance which immediately shuts down any attempt at kiting.
Build Twitch →
Lihat detail
Kenapa
Twitch relies entirely on the stealth of Ambush to secure early map pressure and surprise ganks, but your kit completely neutralizes this tool. By tossing Sapling Toss into common choke points and brush, you reveal him before he can reposition. Once exposed, Twitch lacks any natural mobility or dashes, leaving him extremely vulnerable to your point-and-click Twisted Advance which immediately shuts down any attempt at kiting.
Dampak di lane
This interaction strips Twitch of his primary weapon: the terror of invisible ganks. Because you can scout river entrances with Sapling Toss, your laners can play aggressively without fear. Twitch is forced to farm his camps slowly, unable to snowball through Ambush. This delay in his scaling allows you to secure early neutral objectives with Nature's Grasp, suffocating his jungle presence.
Cara bermain
When contesting camps or objectives, always seed the surrounding bushes with Sapling Toss to intercept Twitch's approach. Never initiate a fight with Twisted Advance if Twitch is missing from the map; hold it specifically to lock him down the moment Ambush ends. If he activates Spray and Pray, immediately use Bramble Smash to push him back, disrupting his ultimate's piercing trajectory and saving your teammates.

Master Yi−2
Master Yi relies entirely on Alpha Strike to dodge crowd control and shred targets. As Maokai, you hold the ultimate counter: your Twisted Advance is a point-and-click root that cannot miss once he reappears. By waiting out his initial jump, you can instantly chain Twisted Advance into Nature's Grasp, stripping away his Highlander mobility and leaving him completely exposed before he can stack Double Strike.
Build Master Yi →
Lihat detail
Kenapa
Master Yi relies entirely on Alpha Strike to dodge crowd control and shred targets. As Maokai, you hold the ultimate counter: your Twisted Advance is a point-and-click root that cannot miss once he reappears. By waiting out his initial jump, you can instantly chain Twisted Advance into Nature's Grasp, stripping away his Highlander mobility and leaving him completely exposed before he can stack Double Strike.
Dampak di lane
This dynamic completely shifts control of neutral objectives and river skirmishes in your favor. Master Yi cannot safely contest Epic Monsters or secure Scuttle Crabs because your crowd control shuts down his dueling potential. Whenever he tries to power-farm or force a gank, your ability to lock him down in skirmishes prevents him from getting the resets required to extend Highlander, neutralizing his presence across the map.
Cara bermain
During skirmishes, never initiate with Twisted Advance while Master Yi still has Alpha Strike available. Instead, throw Sapling Toss into nearby brush to slow him or secure vision, and bait him into committing. The moment his Alpha Strike animation finishes and he reappears, immediately lock him down with Twisted Advance, then follow up with Bramble Smash to disrupt any attempt to channel Meditate, finishing with Nature's Grasp to secure the kill.

Rengar−2
This jungle matchup favors you heavily because your Sapling Toss completely shuts down Rengar's Unseen Predator. By throwing saplings into the brush, you reveal him and trigger early damage, preventing him from leaping out to ambush you or your laners. Without the element of surprise from the bushes, his Savagery-driven burst is severely mitigated, turning his primary hunting grounds into a hazard zone.
Build Rengar →
Lihat detail
Kenapa
This jungle matchup favors you heavily because your Sapling Toss completely shuts down Rengar's Unseen Predator. By throwing saplings into the brush, you reveal him and trigger early damage, preventing him from leaping out to ambush you or your laners. Without the element of surprise from the bushes, his Savagery-driven burst is severely mitigated, turning his primary hunting grounds into a hazard zone.
Dampak di lane
In the river and around neutral pits, your control is absolute. Rengar cannot safely contest scuttle crabs or set up counter-ganks when you constantly zone him out of the bushes. If he tries to force an engage with Thrill of the Hunt, your Nature's Grasp covers the entire corridor, trapping him mid-leap or forcing him to waste a empowered Battle Roar just to cleanse the root.
Cara bermain
Always secure brush priority by tossing Sapling Toss ahead of your path, especially near the red buff and river bushes. If Rengar jumps onto you, immediately use Bramble Smash to knock him away and interrupt his auto-attack reset, then follow up with Twisted Advance to lock him down. Never face-check without an active sapling; instead, force him to initiate fights on your terms where his Unseen Predator is entirely useless.

Tryndamere−1
Maokai naturally neutralizes Tryndamere's jungle threat because his crowd control directly counters the barbarian's ultimate safety net. When Tryndamere triggers Undying Rage to survive fatal damage, Maokai can immediately lock him down. By chaining Twisted Advance into Nature's Grasp, you deny him any ability to auto-attack or heal with Bloodlust, rendering his five seconds of immortality entirely useless while your team safely kites him out.
Build Tryndamere →
Lihat detail
Kenapa
Maokai naturally neutralizes Tryndamere's jungle threat because his crowd control directly counters the barbarian's ultimate safety net. When Tryndamere triggers Undying Rage to survive fatal damage, Maokai can immediately lock him down. By chaining Twisted Advance into Nature's Grasp, you deny him any ability to auto-attack or heal with Bloodlust, rendering his five seconds of immortality entirely useless while your team safely kites him out.
Dampak di lane
In the jungle, this interaction shifts all skirmish priority to you. Tryndamere cannot safely invade your camps or dive your laners because your peeling tools shut down his aggressive Spinning Slash entries. During major objective fights, his pressure is completely neutralized; he is forced to play passively or risk getting locked down and killed the moment his ultimate expires, giving your team free reign over the neutral objectives.
Cara bermain
To execute this perfectly, never waste your primary crowd control early in a fight. When Tryndamere engages with Spinning Slash, use Bramble Smash to knock him back and check his fury bar. Once he drops low and activates Undying Rage, immediately cast Twisted Advance followed by Nature's Grasp. This precise sequence keeps him rooted for the entire duration of his ultimate, ensuring he dies immediately as his invincibility fades without having dealt any damage.
Matchup lainnya






Hard Counters
9Champion ini punya build dan gaya bermain yang langsung mengungguli milikmu, sehingga mengontrol lane dan farming jadi sangat sulit. Kemampuan mereka bisa menetralkan kekuatan utamamu atau menghukummu begitu kamu mencoba menjalankan rencana permainan biasa. Di matchup seperti ini, tujuannya biasanya adalah meminimalkan kesalahan dan mencari cara menang di luar konfrontasi langsung.
Olaf+3
Olaf completely neutralizes your defensive toolkit once he reaches level 5. The moment he activates Ragnarok, he becomes entirely immune to the crowd control from Twisted Advance, Bramble Smash, and Nature's Grasp. Without your roots and knockbacks to keep him at bay, Olaf can easily run you down using the slow from Undertow and the unstoppable true damage of Reckless Swing.
Build Olaf →
Lihat detail
Kenapa
Olaf completely neutralizes your defensive toolkit once he reaches level 5. The moment he activates Ragnarok, he becomes entirely immune to the crowd control from Twisted Advance, Bramble Smash, and Nature's Grasp. Without your roots and knockbacks to keep him at bay, Olaf can easily run you down using the slow from Undertow and the unstoppable true damage of Reckless Swing.
Dampak di lane
This interaction forces you into a permanent defensive posture where stepping past the river is extremely dangerous. If the wave crashes near Olaf's tower, he can easily run you down the entire length of the lane. You cannot contest short trades because his Berserker Rage and Vicious Strikes will out-heal your passive Sap Magic sustain, slowly forcing you into unfavorable recalls.
Cara bermain
To survive, you must keep the minion wave frozen right outside your turret range. Use Sapling Toss inside the bushes to thin the wave safely from afar without pushing it. If Olaf activates Ragnarok, do not waste Twisted Advance or Nature's Grasp defensively; instead, immediately walk backward and use Bramble Smash only after his ultimate expires to push him under your tower.
Mordekaiser+2
Mordekaiser completely shuts down your defensive setup once he unlocks his ultimate. When he drags you into the Realm of Death, you are instantly cut off from any pre-placed bushes containing your Sapling Toss. Inside this isolated arena, his Darkness Rise aura will inevitably activate, constantly melting your health pool while you lack the raw damage to break through his Indestructible shield.
Build Mordekaiser →
Lihat detail
Kenapa
Mordekaiser completely shuts down your defensive setup once he unlocks his ultimate. When he drags you into the Realm of Death, you are instantly cut off from any pre-placed bushes containing your Sapling Toss. Inside this isolated arena, his Darkness Rise aura will inevitably activate, constantly melting your health pool while you lack the raw damage to break through his Indestructible shield.
Dampak di lane
This matchup forces you into an extremely passive defensive posture under your own turret. You cannot contest wave control because a single Death's Grasp pull sets up an easy Obliterate that chunks your health. Once he gets his ultimate, stepping past the river is a death sentence, as he will trap you in his death realm, leaving your turret vulnerable to heavy plate pressure.
Cara bermain
To survive, rush magic resistance immediately to blunt his passive aura. During trades, never use Twisted Advance offensively; instead, hold it to dodge his Obliterate slam by timing your untargetability perfectly. If he pulls you with Death's Grasp, immediately use Bramble Smash to push him away and disengage. When trapped in Realm of Death, focus solely on running in circles and using Sap Magic to heal, stalling until the arena fades.

Vayne+2
Vayne completely neutralizes your engage potential in the Top lane. Whenever you try to lock her down with Twisted Advance, she can instantly react with Condemn, pushing you back before you can follow up with Bramble Smash. This failed approach leaves you completely exposed to her ranged harassment, allowing her to easily trigger Silver Bolts true damage through basic attacks and Tumble, bypassing your innate tankiness.
Build Vayne →
Lihat detail
Kenapa
Vayne completely neutralizes your engage potential in the Top lane. Whenever you try to lock her down with Twisted Advance, she can instantly react with Condemn, pushing you back before you can follow up with Bramble Smash. This failed approach leaves you completely exposed to her ranged harassment, allowing her to easily trigger Silver Bolts true damage through basic attacks and Tumble, bypassing your innate tankiness.
Dampak di lane
Because you cannot threaten her, Vayne dictates the wave's state from level one. You will find yourself pinned under your own turret, struggling to secure last hits while taking constant poke from her ranged attacks. This constant harassment forces early recalls, bleeding your gold income and letting her chip away at your tower plates. You lose all priority, meaning you cannot assist with early River skirmishes without sacrificing your entire lane.
Cara bermain
Survival means giving up unnecessary gold to preserve your health bar. Stand far back from the wave, using Sapling Toss in the lane bushes to safely farm or slow her advance. Never initiate with Twisted Advance unless your jungler is physically in the lane to bait her Condemn first. Position yourself strictly in the center of the lane, avoiding the walls so she cannot stun you, and use Bramble Smash defensively to shove her away when she attempts to Tumble forward.
Volibear+2
Volibear completely dominates prolonged trades because Frenzied Maul applies a mark making subsequent bites heal him while dealing massive damage. Since Maokai relies on slower, spell-triggered healing from Sap Magic, you cannot match this repetitive brawling power. If he charges with Thundering Smash, your only reliable response is disrupting his momentum immediately with Bramble Smash to prevent him from stacking The Relentless Storm and sustaining the fight.
Build Volibear →
Lihat detail
Kenapa
Volibear completely dominates prolonged trades because Frenzied Maul applies a mark making subsequent bites heal him while dealing massive damage. Since Maokai relies on slower, spell-triggered healing from Sap Magic, you cannot match this repetitive brawling power. If he charges with Thundering Smash, your only reliable response is disrupting his momentum immediately with Bramble Smash to prevent him from stacking The Relentless Storm and sustaining the fight.
Dampak di lane
This matchup forces you into a permanent defensive posture where you must surrender lane priority. You cannot contest the wave directly, as Volibear will use Sky Splitter to shield himself while trading, pushing you back. You are forced to let the minions crash and rely on Bramble Smash to secure last hits under your turret. This leaves you vulnerable to dives once he unlocks Stormbringer, while preventing you from assisting your jungler.
Cara bermain
To survive, never use Twisted Advance offensively unless your jungler is actively ganking. Instead, hold your Bramble Smash specifically to knock Volibear away the moment he activates Thundering Smash to stun you. Use Sapling Toss in the river brush to spot dives early. If he freezes the wave or threatens you under tower with Stormbringer, use Nature's Grasp defensively to clear the minions quickly and root him mid-leap, preserving your turret and your life.
Matchup lainnya


Tidak Menguntungkan
17Champion ini punya tool yang umumnya memberi mereka keunggulan dalam pertarungan, tanpa membuat matchup-nya benar-benar mustahil. Mereka mungkin punya jarak lebih jauh, lebih tahan terhadap seranganmu, atau lebih banyak cara merespons engage-mu. Kamu perlu menyesuaikan pendekatan dan memilih dengan cermat kapan menerima pertarungan.

Sett+1
Sett excels at continuous brawling thanks to his Pit Grit sustain and heavy punches from Knuckle Down. Maokai struggles to match this raw DPS, making direct trades highly unfavorable. However, Maokai's passive Sap Magic allows him to heal back some damage, turning the lane into a battle of attrition. The core dynamic relies on Maokai using Bramble Smash to actively disrupt Sett's combo, specifically interrupting Facebreaker or pushing Sett away to dodge the center of Haymaker.
Build Sett →
Lihat detail
Kenapa
Sett excels at continuous brawling thanks to his Pit Grit sustain and heavy punches from Knuckle Down. Maokai struggles to match this raw DPS, making direct trades highly unfavorable. However, Maokai's passive Sap Magic allows him to heal back some damage, turning the lane into a battle of attrition. The core dynamic relies on Maokai using Bramble Smash to actively disrupt Sett's combo, specifically interrupting Facebreaker or pushing Sett away to dodge the center of Haymaker.
Dampak di lane
Because Sett constantly threatens to pull you in with Facebreaker and slam you with The Show Stopper, you will find yourself pushed under tower frequently. Trading health is dangerous because Sett's Haymaker shield negates your counter-burst. If you waste Bramble Smash, Sett will immediately zone you from the minion wave. You must accept losing minor gold to keep your health bar high enough to prevent easy dives.
Cara bermain
Never use Bramble Smash offensively; hold it strictly to react to Sett's animations. When you see Sett charging Haymaker, immediately cast Bramble Smash to shove him away, ensuring you step out of the central true-damage zone. If he grabs you with Facebreaker, use Twisted Advance to root him and reposition behind him, or throw Sapling Toss into the lane bushes to slow his pursuit. If Sett manages to execute The Show Stopper, immediately disengage until his grit bar decays.

Nasus+1
This matchup is a race against time. You lack the raw damage to stop Nasus from endlessly stacking Siphoning Strike on minions, and his passive Soul Eater easily shrugs off your poke from Sapling Toss. However, Nasus has no natural escape tools. This makes him highly susceptible to your point-and-click Twisted Advance, which serves as an inescapable anchor to set up clean, lethal ganks with your jungler before he outscales you.
Build Nasus →
Lihat detail
Kenapa
This matchup is a race against time. You lack the raw damage to stop Nasus from endlessly stacking Siphoning Strike on minions, and his passive Soul Eater easily shrugs off your poke from Sapling Toss. However, Nasus has no natural escape tools. This makes him highly susceptible to your point-and-click Twisted Advance, which serves as an inescapable anchor to set up clean, lethal ganks with your jungler before he outscales you.
Dampak di lane
The lane naturally slows down as Nasus focuses solely on last-hitting. If you push blindly, he will freeze near his turret, using Spirit Fire to match your wave clear when needed. Since you cannot kill him solo once he gets Fury of the Sands, staying top too long yields diminishing returns. Your real impact is decided by how quickly you can abandon this lane to secure map objectives while Nasus remains isolated.
Cara bermain
Let the wave bounce toward your side of the map to stretch the lane. When your jungler approaches, initiate with Twisted Advance to lock Nasus down, then immediately reposition with Bramble Smash to knock him back toward your ally, bypassing his Wither slow. If you are left alone, do not force trades. Instead, use Nature's Grasp from the river to lock down the mid lane or secure neutral objectives while Nasus is busy stacking his Q.

Yone+1
While Maokai excels at early control, Yone's dual-damage scaling from Way of the Hunter and low-cooldown Mortal Steel inevitably outpaces your tankiness. However, the matchup pivots on a precise interaction: when Yone projects himself with Soul Unbound, you can time Twisted Advance to ride his snapback animation. This guarantees you follow him all the way to his anchor point, securing a deep, inescapable root.
Build Yone →
Lihat detail
Kenapa
While Maokai excels at early control, Yone's dual-damage scaling from Way of the Hunter and low-cooldown Mortal Steel inevitably outpaces your tankiness. However, the matchup pivots on a precise interaction: when Yone projects himself with Soul Unbound, you can time Twisted Advance to ride his snapback animation. This guarantees you follow him all the way to his anchor point, securing a deep, inescapable root.
Dampak di lane
Because Yone's Spirit Cleave chips away your health while shielding him, you cannot contest his push early on. You will find yourself trapped under tower, farming with Bramble Smash to keep the wave from crashing too fast. Failing to manage your Sap Magic heals during his Soul Unbound trades means giving up turret plates, letting him accelerate his items and take over the sidelane.
Cara bermain
Position yourself strictly near your tower's edge, forcing Yone to dive if he wants to trade with Mortal Steel. Always hold Twisted Advance when his Soul Unbound is active; do not panic-cast it. Wait for the tether duration to nearly end, then cast it to lock him down under your turret. If he freezes the wave out of reach, use Sapling Toss in the bushes to safely secure minions.

Rumble+1
Rumble's relentless magic damage over time constantly threatens your health bar, making traditional trading highly risky. However, his high-frequency spell casting acts as a double-edged sword. Every button Rumble presses directly accelerates the cooldown of Sap Magic. This constant charging allows you to frequently trigger your empowered basic attacks, turning his aggressive pressure into a reliable engine for your own lane survival.
Build Rumble →
Lihat detail
Kenapa
Rumble's relentless magic damage over time constantly threatens your health bar, making traditional trading highly risky. However, his high-frequency spell casting acts as a double-edged sword. Every button Rumble presses directly accelerates the cooldown of Sap Magic. This constant charging allows you to frequently trigger your empowered basic attacks, turning his aggressive pressure into a reliable engine for your own lane survival.
Dampak di lane
This matchup forces you to play defensively under your turret, as you will constantly be pushed in. Initiating trades with Twisted Advance is dangerous because you cannot match his sustained output. Instead, expect to bleed some minion gold while using Bramble Smash to keep him from trapping you against the wall. The lane becomes a battle of attrition where your main goal is staying healthy enough to prevent dives.
Cara bermain
Delay your armor purchases to rush early magic resistance, prioritizing pure survival over utility. When Rumble approaches to harass, do not panic; walk up to land your Sap Magic attack on a minion or on him to recover, then immediately disengage using Bramble Smash to push him away. Toss your Sapling Toss into the lane bushes to scout his positioning and slow his advances, keeping Nature's Grasp ready to lock him down if your jungler rotates.

Vladimir+1
Vladimir's kit makes him a frustrating wall for Maokai. Whenever you attempt to lock him down using Twisted Advance or catch him from afar with Nature's Grasp, he can easily dissolve into Sanguine Pool to completely negate your crowd control. Because his Transfusion consistently restores his health, any chip damage you manage to sneak in with Bramble Smash is quickly erased, allowing him to outscale you effortlessly.
Build Vladimir →
Lihat detail
Kenapa
Vladimir's kit makes him a frustrating wall for Maokai. Whenever you attempt to lock him down using Twisted Advance or catch him from afar with Nature's Grasp, he can easily dissolve into Sanguine Pool to completely negate your crowd control. Because his Transfusion consistently restores his health, any chip damage you manage to sneak in with Bramble Smash is quickly erased, allowing him to outscale you effortlessly.
Dampak di lane
You cannot threaten Vladimir with solo kills, which gives him free rein to slow-push waves or harass you under tower. While Sapling Toss can help you check bushes or secure some farm, you will find yourself bled out of resources if you stay in lane too long. Eventually, his scaling advantage forces you to abandon the top lane to find value elsewhere before he becomes completely unkillable.
Cara bermain
Stop trying to fight him directly. Instead, use Bramble Smash to quickly clear waves and look for roam opportunities. Hold your Twisted Advance specifically to peel for yourself if he attempts an aggressive dive under your turret. When the wave is pushed, immediately leave the lane to assist your team with Nature's Grasp in river skirmishes, leveraging your superior teamfighting utility while Vladimir is busy farming his lane.

Poppy+1
This matchup is dictated by how Poppy's anti-dash barrier hard-counters Twisted Advance. Whenever you attempt to initiate a trade or lock her down, activating your root will trigger her defensive zone, knocking you out of the air and leaving you grounded. Because your primary engage tool is neutralized instantly, you cannot easily trigger Sap Magic on her or reposition her with Bramble Smash without taking heavy counter-damage.
Build Poppy →
Lihat detail
Kenapa
This matchup is dictated by how Poppy's anti-dash barrier hard-counters Twisted Advance. Whenever you attempt to initiate a trade or lock her down, activating your root will trigger her defensive zone, knocking you out of the air and leaving you grounded. Because your primary engage tool is neutralized instantly, you cannot easily trigger Sap Magic on her or reposition her with Bramble Smash without taking heavy counter-damage.
Dampak di lane
In the lane, this interaction strips away your offensive pressure, forcing you to play defensively near your turret. Trying to force trades results in lost health bars and premature recalls, giving Poppy free reign over wave manipulation. You will find yourself trapped under your own tower, forced to use Sapling Toss to secure distant minions, which rapidly drains your mana pool and concedes top-side river priority to her team.
Cara bermain
To survive, maintain a strict positioning rule: stay in the middle of the lane, far from walls to deny her stun. Never initiate with Twisted Advance unless you see her anti-dash circle on cooldown. Instead, walk up to farm, and use Bramble Smash defensively to push her away if she charges. If she dives you under turret, cast Nature's Grasp to lock her down, then immediately follow up with Twisted Advance only after her barrier fades.
Matchup lainnya




Skill Matchups
15Matchup ini terutama soal duel eksekusi: kedua champion punya cara nyata untuk unggul. Satu skill penting yang di-dodge, engage yang diantisipasi dengan tepat, atau satu kesalahan positioning saja bisa menentukan siapa yang menang. Memahami matchup dan mengenali momen yang tepat untuk bertindak sangat penting di sini.

Gnar±0
This matchup revolves around Gnar's ability to poke you down from range in his Mini form. The turning point lies in the timing of Gnar's Boomerang Throw. If you cast Twisted Advance right as his projectile leaves his hand, you completely dodge the slow and the damage of the boomerang while closing the gap to root him. This leaves Mini Gnar extremely vulnerable to your follow-up crowd control.
Build Gnar →
Lihat detail
Kenapa
This matchup revolves around Gnar's ability to poke you down from range in his Mini form. The turning point lies in the timing of Gnar's Boomerang Throw. If you cast Twisted Advance right as his projectile leaves his hand, you completely dodge the slow and the damage of the boomerang while closing the gap to root him. This leaves Mini Gnar extremely vulnerable to your follow-up crowd control.
Dampak di lane
Because Mini Gnar wants to constantly harass you, he will naturally push the lane with his basic attacks. By keeping the wave frozen near your turret, you force Gnar to overextend to farm. If he steps up to poke, your ability to jump on him with Twisted Advance makes him an easy target for your jungler. If you fail to control the wave, you will get poked down under your own tower.
Cara bermain
Stand near your caster minions to lure Gnar into using Boomerang Throw to farm and poke. The moment you see him throw it, react instantly with Twisted Advance to bypass the projectile, then follow up with Bramble Smash to knock him backward into your wave. If Gnar is about to transform via Rage Gene into Mega Gnar, disengage immediately and use Sapling Toss to slow his advance, holding your engage tools until he shrinks back to his fragile Mini form.

Renekton±0
This lane is an intense battle of reaction times centered on Renekton's mobility. Renekton wants to use Slice and Dice to gap-close and immediately lock you down with a fury-infused Ruthless Predator. However, if you react quickly, your Bramble Smash can interrupt his dash mid-air or push him away before he can apply his stun, completely neutralizing his trade potential and leaving him vulnerable.
Build Renekton →
Lihat detail
Kenapa
This lane is an intense battle of reaction times centered on Renekton's mobility. Renekton wants to use Slice and Dice to gap-close and immediately lock you down with a fury-infused Ruthless Predator. However, if you react quickly, your Bramble Smash can interrupt his dash mid-air or push him away before he can apply his stun, completely neutralizing his trade potential and leaving him vulnerable.
Dampak di lane
When you successfully deny his engage, Renekton loses control over the wave as his main escape is on cooldown. You can then use Sapling Toss to secure the brush and prevent him from building Reign of Anger on minions. Failing this reaction, however, means taking a heavy Cull the Meek combo, forcing you to play defensively under tower while he builds a massive health advantage.
Cara bermain
Always hover near your caster minions and keep your finger on Bramble Smash. Never waste this ability to clear waves; only use it when Renekton commits his first Slice and Dice forward. If you miss the timing and get stunned by Ruthless Predator, do not panic. Wait out the stun, then immediately use Twisted Advance to root him as he tries to dash back, allowing your Sap Magic to heal back the lost health during the trade.

Urgot±0
This matchup is a pure contest of execution centered around Urgot's attempt to engage with Disdain and Maokai's response. While Urgot wants to land his flip to trigger Echoing Flames and melt you with Purge, Maokai possesses the perfect counter. By timing Twisted Advance correctly, you become untargetable, completely dodging the projection and putting yourself in a prime position to disrupt him.
Build Urgot →
Lihat detail
Kenapa
This matchup is a pure contest of execution centered around Urgot's attempt to engage with Disdain and Maokai's response. While Urgot wants to land his flip to trigger Echoing Flames and melt you with Purge, Maokai possesses the perfect counter. By timing Twisted Advance correctly, you become untargetable, completely dodging the projection and putting yourself in a prime position to disrupt him.
Dampak di lane
Urgot's ranged advantage with Echoing Flames allows him to slowly push and poke, forcing you to play around your tower. However, if he misses Disdain because you buffered Twisted Advance, his safety vanishes. A successful dodge lets you lock him down with Bramble Smash, neutralizing his Purge damage. This prevents him from establishing a freeze and allows you to crash waves safely without getting executed by Fear Beyond Death.
Cara bermain
Position yourself just outside Urgot's auto-attack range, baiting his forward dash. Never use Twisted Advance proactively to close the distance; hold it strictly to react when you see the startup animation of Disdain. If you misstime it and get flipped, immediately use Bramble Smash to push him away, preventing him from circling you to proc his passive legs, then retreat to heal up using Sap Magic on the incoming minion wave.
Jarvan IV±0
This Top lane matchup is a pure test of reaction speed, turning into a war of attrition. Jarvan IV relies heavily on landing his Demacian Standard and Dragon Strike combo to shred your armor and win short trades. However, Maokai has the perfect tool to neutralize this threat: timing Twisted Advance right as he jumps allows you to bypass the knockup entirely, leaving him vulnerable while you heal with Sap Magic.
Build Jarvan IV →
Lihat detail
Kenapa
This Top lane matchup is a pure test of reaction speed, turning into a war of attrition. Jarvan IV relies heavily on landing his Demacian Standard and Dragon Strike combo to shred your armor and win short trades. However, Maokai has the perfect tool to neutralize this threat: timing Twisted Advance right as he jumps allows you to bypass the knockup entirely, leaving him vulnerable while you heal with Sap Magic.
Dampak di lane
Because both of you possess high sustain and defensive tools, neither champion can easily force a direct dive or quick kill. If Jarvan IV misses his knockup, his armor shred from Dragon Strike is wasted, allowing you to lock him down with Bramble Smash and control the wave. However, if he baits out your Twisted Advance first, his Cataclysm can easily trap you without an escape, forcing an early recall and giving him massive turret pressure.
Cara bermain
Never initiate trades with Twisted Advance; you must hold it exclusively as a defensive reaction to his Demacian Standard drop. When Jarvan IV positions aggressively to combo, press your root to dodge the knockup, then immediately follow up with Bramble Smash to push him away before his Martial Cadence passive can strike you. If he traps you inside Cataclysm, use Nature's Grasp to zone him out of his own arena, keeping yourself alive until your Sap Magic passive is ready to restore your health.

Ornn±0
Ornn wants to dictate fights with Call of the Forge God, but Maokai has the perfect counter. By timing Twisted Advance onto Ornn right as the ram returns, Maokai becomes untargetable and completely evades the massive second knock-up. Without this crucial crowd control, Ornn's trade potential falls flat. However, if Maokai wastes Twisted Advance too early, Ornn easily triggers Brittle with Bellows Breath and wins the duel.
Build Ornn →
Lihat detail
Kenapa
Ornn wants to dictate fights with Call of the Forge God, but Maokai has the perfect counter. By timing Twisted Advance onto Ornn right as the ram returns, Maokai becomes untargetable and completely evades the massive second knock-up. Without this crucial crowd control, Ornn's trade potential falls flat. However, if Maokai wastes Twisted Advance too early, Ornn easily triggers Brittle with Bellows Breath and wins the duel.
Dampak di lane
This interaction turns post-level five skirmishes into a tense game of patience. Neither tank can easily burst down the other, leading to long sustain battles where Maokai uses Sap Magic to offset Ornn's Bellows Breath poke. If Ornn misses his Searing Charge knock-up against a wall, Maokai can punish him near the turret. However, mismanaging your cooldowns allows Ornn to safely scale and forge items.
Cara bermain
Position yourself away from the Volcanic Rupture pillar to deny Ornn an easy Searing Charge angle. During his ultimate, do not panic: track the incoming ram and press Twisted Advance directly onto Ornn just as he prepares to headbutt it. If you misstime this and get knocked up, immediately use Bramble Smash to push him away and disengage. Save Sapling Toss to scout the river brush.

Yasuo±0
Yasuo relies on his mobility through Sweeping Blade and his Wind Wall to nullify your ranged tools. While his Wind Wall easily deletes your Sapling Toss and can completely negate Nature's Grasp if he reacts quickly, he cannot dodge Twisted Advance. This point-and-click root bypasses his wind barrier entirely, allowing you to lock him down and setup a guaranteed Bramble Smash to peel him off or trade back.
Build Yasuo →
Lihat detail
Kenapa
Yasuo relies on his mobility through Sweeping Blade and his Wind Wall to nullify your ranged tools. While his Wind Wall easily deletes your Sapling Toss and can completely negate Nature's Grasp if he reacts quickly, he cannot dodge Twisted Advance. This point-and-click root bypasses his wind barrier entirely, allowing you to lock him down and setup a guaranteed Bramble Smash to peel him off or trade back.
Dampak di lane
Yasuo will constantly dash through minions using Sweeping Blade to stack Steel Tempest and poke you under your tower. Because your Sapling Toss is easily blocked in lane, your wave clear is slower, leaving you vulnerable to heavy push. Trades are highly dynamic: if you let him break your Sap Magic passive shield without trading back, he slowly chips away at your health bar while maintaining lane priority.
Cara bermain
Position yourself near your own dying minions to bait his Sweeping Blade, but never cast Sapling Toss while his Wind Wall is off cooldown. Hold Twisted Advance until he attempts to throw a Steel Tempest tornado; using your dash during his cast animation dodges the knockup entirely. Once you root him behind his barrier, use Bramble Smash to push him under your turret or disrupt his pathing back to safety.
Riven±0
This matchup is a pure test of reflexes centered on Riven's third cast of Broken Wings. Her entire trade pattern relies on landing that final knockup to chain into Ki Burst. By timing your Bramble Smash exactly as she leaps, you can swat her out of the air. Canceling this third strike completely neutralizes her burst, leaving her without her primary damage tool while your Sap Magic keeps you healthy.
Build Riven →
Lihat detail
Kenapa
This matchup is a pure test of reflexes centered on Riven's third cast of Broken Wings. Her entire trade pattern relies on landing that final knockup to chain into Ki Burst. By timing your Bramble Smash exactly as she leaps, you can swat her out of the air. Canceling this third strike completely neutralizes her burst, leaving her without her primary damage tool while your Sap Magic keeps you healthy.
Dampak di lane
Missing your interrupt timing means Riven will chunk your health bar, force you under tower, and easily dictate the wave state with her superior mobility. However, successfully stopping her combo flips the lane's pressure. Riven cannot safely contest minions once Broken Wings is on cooldown, allowing you to slow-push waves or secure safe recalls without fearing an all-in from her Blade of the Exile.
Cara bermain
Never initiate trades with Bramble Smash; hold it exclusively to react to her third leap. When Riven initiates with Valor to close the gap, use Twisted Advance to root her through her initial strikes, then immediately prepare to time your knockback. If you mistime the interrupt and get chunked, retreat immediately using Sapling Toss in the river brush to secure your retreat path while waiting for your passive Sap Magic to heal you back up.

Singed±0
This lane is a pure contest of execution centered on how you handle Singed's attempts to displace you. While he relies on Poison Trail to clear and proxy, his only way to punish you directly is with Fling. By timing your Bramble Smash perfectly as he runs at you, you can knock him back mid-animation. This denies his throw entirely, keeping you safe from his toxic trail.
Build Singed →
Lihat detail
Kenapa
This lane is a pure contest of execution centered on how you handle Singed's attempts to displace you. While he relies on Poison Trail to clear and proxy, his only way to punish you directly is with Fling. By timing your Bramble Smash perfectly as he runs at you, you can knock him back mid-animation. This denies his throw entirely, keeping you safe from his toxic trail.
Dampak di lane
Successfully executing this interrupt dictates who controls the minion waves. Missing your knockback means getting tossed behind Singed, taking massive damage, and losing all lane priority. Conversely, stopping his Fling allows you to match his wave clear safely. You can keep the lane frozen near your turret, utilizing Sap Magic to out-sustain his mana pool while preventing him from easily proxying behind your tower.
Cara bermain
Never waste Bramble Smash on the minion wave; keep it exclusively to react when Singed activates Noxious Slipstream to rush you. When he pops Insanity Potion to force a trade, do not chase him into his toxic cloud. Instead, toss a Sapling Toss into the lane bushes to slow his approach, and use Twisted Advance only to root him under your own turret if he attempts an aggressive flip.
Matchup lainnya


Menguntungkan
7Champion ini biasanya kesulitan merespons kekuatan utamamu, sehingga kamu bisa menghadapi pertarungan dengan lebih leluasa. Kamu sering punya banyak cara untuk menekan mereka dan memaksa trade yang menguntungkan. Manfaatkan keunggulan ini untuk mendikte tempo, bukan memberi mereka waktu untuk kembali nyaman.

Shen−1
This matchup revolves around neutralizing Shen's global presence. Since Shen relies heavily on Stand United to turn fights across the map, Maokai holds all the cards. With both Bramble Smash and Twisted Advance at your disposal, you can instantly cancel his ultimate channel. If he tries to teleport away right in front of you, your crowd control guarantees he stays stuck in the top lane while wasting his longest cooldown.
Build Shen →
Lihat detail
Kenapa
This matchup revolves around neutralizing Shen's global presence. Since Shen relies heavily on Stand United to turn fights across the map, Maokai holds all the cards. With both Bramble Smash and Twisted Advance at your disposal, you can instantly cancel his ultimate channel. If he tries to teleport away right in front of you, your crowd control guarantees he stays stuck in the top lane while wasting his longest cooldown.
Dampak di lane
Knowing you can cancel Stand United shifts the pressure entirely onto Shen. He cannot safely ultimate from his tower if you have wave priority. If he plays passively to protect his channel, you can easily stack waves, chip his tower, or use Sapling Toss to secure deep jungle vision. His inability to leave without losing his turret or his ultimate tempo gives you complete control over the map's objective timings.
Cara bermain
Keep a constant eye on the map, but never lose focus on Shen's positioning. Always hold either Twisted Advance or Bramble Smash when you suspect an ally needs saving elsewhere; do not waste both on simple wave clearing. If Shen dashes away with Shadow Dash to channel Stand United from a distance, immediately use Twisted Advance to follow his escape and interrupt him. If he successfully teleports because you were out of range, immediately lock down his tower and take plates.

Teemo−1
Teemo relies on Toxic Shot to poke Maokai out, but Maokai's Sap Magic neutralizes this poison damage over time. Once Teemo steps up to apply Blinding Dart, Maokai can instantly close the gap with Twisted Advance. Because Teemo is exceptionally squishy and lacks hard escape tools outside of Move Quick, this targeted root leaves him completely exposed to a devastating Bramble Smash knockback.
Build Teemo →
Lihat detail
Kenapa
Teemo relies on Toxic Shot to poke Maokai out, but Maokai's Sap Magic neutralizes this poison damage over time. Once Teemo steps up to apply Blinding Dart, Maokai can instantly close the gap with Twisted Advance. Because Teemo is exceptionally squishy and lacks hard escape tools outside of Move Quick, this targeted root leaves him completely exposed to a devastating Bramble Smash knockback.
Dampak di lane
Teemo cannot freely freeze or harass you under your turret. By keeping the minion wave close to your side, you force Teemo to overextend. Since he is highly vulnerable to ganks, holding the wave near your tower makes him terrified of your Twisted Advance engage. His Guerrilla Warfare becomes useless as your Sapling Toss can easily reveal and damage him in the lane bushes, stripping away his safety.
Cara bermain
Let Teemo push the first wave while you absorb the initial Toxic Shot poke, immediately healing it back with Sap Magic autos. Never chase him blindly through the bushes; instead, toss a Sapling Toss into them to trigger his Noxious Trap or reveal his Guerrilla Warfare camouflage. Once your jungler approaches, lock him down with Twisted Advance, then position yourself to throw him backward using Bramble Smash. If he retreats, block his escape path using Nature's Grasp.

Sion−1
This matchup heavily favors you because you possess the perfect tool to shut down Sion's primary source of pressure. Whenever Sion channels Decimating Smash to clear the wave or trade, you can instantly cancel it with Bramble Smash. By denying his main damage tool and waveclear, you render his defensive Soul Furnace shield useless for retaliation, leaving him with no reliable way to contest your presence.
Build Sion →
Lihat detail
Kenapa
This matchup heavily favors you because you possess the perfect tool to shut down Sion's primary source of pressure. Whenever Sion channels Decimating Smash to clear the wave or trade, you can instantly cancel it with Bramble Smash. By denying his main damage tool and waveclear, you render his defensive Soul Furnace shield useless for retaliation, leaving him with no reliable way to contest your presence.
Dampak di lane
In practice, this interaction gives you absolute control over the wave state. Sion cannot safely execute his slow-push strategy, meaning you can easily freeze the lane near your turret or force him under his own. Since he cannot charge his primary skill, his health trades are consistently terrible, allowing you to force early recalls and delay his permanent health stacking from Glory in Death.
Cara bermain
To execute this flawlessly, never use Bramble Smash proactively to poke. Always hold it specifically to react to his Decimating Smash channel. If he tries to step back and charge it from a distance, use Twisted Advance to close the gap and immediately follow up with the knockback. Keep Sapling Toss in the lane bushes to spot any sneaky charge attempts from out of vision, and use Sap Magic to heal back any minor damage from his Roar of the Slayer.
Tryndamere−1
This matchup is a battle of attrition where your passive healing rivals his Fury-fueled recovery. While Tryndamere relies on Battle Fury and Bloodlust to outsustain you, his entire offensive threat relies on sticking to you during Undying Rage. You hold the upper hand because your crowd control completely neutralizes his ultimate. By chaining Twisted Advance, Bramble Smash, and Nature's Grasp, you can effortlessly stall out his invulnerability window.
Build Tryndamere →
Lihat detail
Kenapa
This matchup is a battle of attrition where your passive healing rivals his Fury-fueled recovery. While Tryndamere relies on Battle Fury and Bloodlust to outsustain you, his entire offensive threat relies on sticking to you during Undying Rage. You hold the upper hand because your crowd control completely neutralizes his ultimate. By chaining Twisted Advance, Bramble Smash, and Nature's Grasp, you can effortlessly stall out his invulnerability window.
Dampak di lane
Tryndamere cannot easily dive you or force you out of lane. Your Sap Magic keeps your health high during his short trades, meaning he must constantly use Bloodlust and deplete his critical strike chance just to stay healthy. This loss of Fury prevents him from building lane priority or threatening your tower. Consequently, you dictate the recall timings, forcing him to stay under tower while you easily secure river vision.
Cara bermain
Never waste Twisted Advance or Bramble Smash when Tryndamere has high Fury and his dash available. Instead, let him initiate with Spinning Slash. When he commits and activates Undying Rage, immediately root him with Twisted Advance, walk behind him, and use Bramble Smash to push him backward. If he flashes or resets his dash, cast Nature's Grasp to seal his fate. Keep Sapling Toss in the river bushes to spot any incoming assistance.
Matchup lainnya


Item untuk melawan Maokai
Beli item ini untuk mengurangi efektivitas champion ini di pertandinganmu.



| Matchup | Vonis | Keunggulan | Win rate | Pick rate |
|---|---|---|---|---|
| Morgana | Hard Counters | +2 | 51.0% | 6.6% |
| Zilean | Hard Counters | +2 | 50.4% | 1.2% |
| Senna | Hard Counters | +2 | 49.3% | 7.8% |
| Milio | Hard Counters | +2 | 49.1% | 4.5% |
| Braum | Tidak Menguntungkan | +1 | 52.9% | 4.6% |
| Sona | Tidak Menguntungkan | +1 | 52.4% | 4.4% |
| Nami | Tidak Menguntungkan | +1 | 50.5% | 4.7% |
| Zyra | Tidak Menguntungkan | +1 | 50.5% | 4.9% |
| Sett | Tidak Menguntungkan | +1 | 50.3% | 1.7% |
| Pyke | Tidak Menguntungkan | +1 | 49.9% | 3.8% |
| Poppy | Tidak Menguntungkan | +1 | — | — |
| Leona | Skill Matchups | ±0 | 51.9% | 10.3% |
| Thresh | Skill Matchups | ±0 | 51.1% | 15.3% |
| Soraka | Skill Matchups | ±0 | 51.1% | 5.0% |
| Janna | Skill Matchups | ±0 | 51.0% | 3.1% |
| Galio | Skill Matchups | ±0 | 50.6% | 2.7% |
| Lulu | Skill Matchups | ±0 | 48.9% | 10.5% |
| Swain | Skill Matchups | ±0 | 46.4% | 3.1% |
| Hwei | Menguntungkan | −1 | 52.9% | 1.4% |
| Malphite | Menguntungkan | −1 | 51.7% | 8.8% |
| Rell | Menguntungkan | −1 | 50.9% | 3.7% |
| Karma | Menguntungkan | −1 | 49.9% | 4.8% |
| Seraphine | Menguntungkan | −1 | 49.8% | 6.0% |
| Blitzcrank | Menguntungkan | −1 | 49.8% | 6.6% |
| Rakan | Menguntungkan | −1 | 49.8% | 2.8% |
| Alistar | Menguntungkan | −1 | 49.5% | 4.0% |
| Nautilus | Menguntungkan | −1 | 49.3% | 13.0% |
| Veigar | Menguntungkan | −1 | 48.1% | 2.7% |
| Bard | Menguntungkan | −1 | — | — |
| Cho'Gath | Menguntungkan | −1 | — | — |
| Vel'Koz | Menguntungkan | −2 | 49.7% | 1.6% |
| Lux | Menguntungkan | −2 | 49.3% | 7.7% |
| Yuumi | Menguntungkan | −2 | 47.9% | 9.8% |
Keunggulan: vonis kanonis Wild Rift Core (−3 hingga +3), dilihat dari sudut pandang champion yang disebut di baris tersebut. Win rate dan pick rate: angka milik lawan sendiri di role ini — Wild Rift CN · Challenger, Patch 7.3b. Bukan win rate head-to-head.
| Matchup | Vonis | Keunggulan | Win rate | Pick rate |
|---|---|---|---|---|
| Olaf | Hard Counters | +3 | 52.4% | 1.7% |
| Gwen | Hard Counters | +2 | 52.9% | 2.4% |
| Mordekaiser | Hard Counters | +2 | — | — |
| Ambessa | Tidak Menguntungkan | +1 | 53.7% | 1.2% |
| Dr. Mundo | Tidak Menguntungkan | +1 | 51.5% | 1.9% |
| Xin Zhao | Tidak Menguntungkan | +1 | 51.1% | 8.6% |
| Nidalee | Tidak Menguntungkan | +1 | 50.9% | 2.3% |
| Pantheon | Tidak Menguntungkan | +1 | 50.8% | 6.1% |
| Darius | Tidak Menguntungkan | +1 | 50.3% | 6.4% |
| Warwick | Tidak Menguntungkan | +1 | 50.2% | 2.0% |
| Volibear | Tidak Menguntungkan | +1 | 48.4% | 4.4% |
| Rammus | Skill Matchups | ±0 | 56.6% | 4.4% |
| Amumu | Skill Matchups | ±0 | 55.4% | 2.7% |
| Skarner | Skill Matchups | ±0 | 54.0% | 1.8% |
| Nunu & Willump | Skill Matchups | ±0 | 53.2% | 1.7% |
| Jarvan IV | Skill Matchups | ±0 | 52.3% | 7.2% |
| Fiddlesticks | Skill Matchups | ±0 | 52.0% | 1.8% |
| Kindred | Skill Matchups | ±0 | 51.6% | 2.3% |
| Kayn | Skill Matchups | ±0 | 51.5% | 7.0% |
| Zed | Skill Matchups | ±0 | 51.2% | 2.6% |
| Jax | Skill Matchups | ±0 | 49.9% | 1.9% |
| Cho'Gath | Skill Matchups | ±0 | 49.9% | 8.3% |
| Vi | Skill Matchups | ±0 | 49.7% | 4.9% |
| Wukong | Skill Matchups | ±0 | 49.1% | 3.3% |
| Yone | Skill Matchups | ±0 | 48.5% | 3.0% |
| Riven | Skill Matchups | ±0 | 48.4% | 1.3% |
| Graves | Skill Matchups | ±0 | 47.9% | 6.8% |
| Viego | Skill Matchups | ±0 | 45.7% | 4.4% |
| Gragas | Skill Matchups | ±0 | — | — |
| Nautilus | Skill Matchups | ±0 | — | — |
| Nilah | Skill Matchups | ±0 | — | — |
| Poppy | Skill Matchups | ±0 | — | — |
| Shen | Menguntungkan | −1 | 55.0% | 1.6% |
| Ekko | Menguntungkan | −1 | 53.6% | 7.4% |
| Lillia | Menguntungkan | −1 | 53.1% | 2.9% |
| Nocturne | Menguntungkan | −1 | 52.6% | 6.9% |
| Talon | Menguntungkan | −1 | 51.2% | 2.7% |
| Hecarim | Menguntungkan | −1 | 51.1% | 1.7% |
| Kha'Zix | Menguntungkan | −1 | 51.0% | 4.7% |
| Diana | Menguntungkan | −1 | 49.7% | 1.5% |
| Fizz | Menguntungkan | −1 | 48.9% | 1.8% |
| Tryndamere | Menguntungkan | −1 | 48.7% | 9.6% |
| Lee Sin | Menguntungkan | −1 | 47.2% | 12.5% |
| Aatrox | Menguntungkan | −1 | 46.7% | 1.1% |
| Twitch | Menguntungkan | −1 | 46.6% | 2.3% |
| Shyvana | Menguntungkan | −1 | 46.3% | 3.1% |
| Camille | Menguntungkan | −1 | — | — |
| Rengar | Menguntungkan | −2 | 49.5% | 2.1% |
| Evelynn | Menguntungkan | −2 | 48.0% | 2.1% |
| Master Yi | Menguntungkan | −2 | 47.3% | 9.8% |
Keunggulan: vonis kanonis Wild Rift Core (−3 hingga +3), dilihat dari sudut pandang champion yang disebut di baris tersebut. Win rate dan pick rate: angka milik lawan sendiri di role ini — Wild Rift CN · Challenger, Patch 7.3b. Bukan win rate head-to-head.
| Matchup | Vonis | Keunggulan | Win rate | Pick rate |
|---|---|---|---|---|
| Olaf | Hard Counters | +3 | — | — |
| Vayne | Hard Counters | +2 | 51.5% | 1.7% |
| Mordekaiser | Hard Counters | +2 | 51.0% | 11.0% |
| Gwen | Hard Counters | +2 | 50.7% | 3.5% |
| Fiora | Hard Counters | +2 | 49.9% | 3.5% |
| Dr. Mundo | Hard Counters | +2 | 49.9% | 6.8% |
| Darius | Hard Counters | +2 | 49.7% | 14.5% |
| Volibear | Hard Counters | +2 | 48.6% | 9.0% |
| Ryze | Hard Counters | +2 | — | — |
| Ambessa | Tidak Menguntungkan | +1 | 52.1% | 1.8% |
| K'Santé | Tidak Menguntungkan | +1 | 51.5% | 7.2% |
| Cho'Gath | Tidak Menguntungkan | +1 | 50.4% | 9.4% |
| Aatrox | Tidak Menguntungkan | +1 | 50.4% | 6.6% |
| Sett | Tidak Menguntungkan | +1 | 50.3% | 8.7% |
| Jax | Tidak Menguntungkan | +1 | 50.2% | 3.6% |
| Yone | Tidak Menguntungkan | +1 | 50.2% | 6.2% |
| Poppy | Tidak Menguntungkan | +1 | 49.5% | 1.7% |
| Rumble | Tidak Menguntungkan | +1 | 49.5% | 1.9% |
| Garen | Tidak Menguntungkan | +1 | 48.8% | 11.9% |
| Irelia | Tidak Menguntungkan | +1 | 48.1% | 1.4% |
| Nasus | Tidak Menguntungkan | +1 | 46.6% | 5.5% |
| Graves | Tidak Menguntungkan | +1 | — | — |
| Heimerdinger | Tidak Menguntungkan | +1 | — | — |
| Swain | Tidak Menguntungkan | +1 | — | — |
| Vladimir | Tidak Menguntungkan | +1 | — | — |
| Warwick | Tidak Menguntungkan | +1 | — | — |
| Malphite | Skill Matchups | ±0 | 54.8% | 7.8% |
| Singed | Skill Matchups | ±0 | 52.7% | 1.3% |
| Ornn | Skill Matchups | ±0 | 51.2% | 1.9% |
| Gnar | Skill Matchups | ±0 | 51.1% | 3.2% |
| Kennen | Skill Matchups | ±0 | 50.4% | 2.4% |
| Riven | Skill Matchups | ±0 | 49.7% | 1.6% |
| Kayle | Skill Matchups | ±0 | 49.5% | 1.9% |
| Wukong | Skill Matchups | ±0 | 49.4% | 1.7% |
| Urgot | Skill Matchups | ±0 | 48.8% | 3.7% |
| Renekton | Skill Matchups | ±0 | 48.1% | 3.3% |
| Camille | Skill Matchups | ±0 | 47.7% | 2.2% |
| Yasuo | Skill Matchups | ±0 | 45.9% | 2.1% |
| Gragas | Skill Matchups | ±0 | — | — |
| Jarvan IV | Skill Matchups | ±0 | — | — |
| Skarner | Skill Matchups | ±0 | — | — |
| Shen | Menguntungkan | −1 | 55.5% | 2.8% |
| Teemo | Menguntungkan | −1 | 53.1% | 4.7% |
| Sion | Menguntungkan | −1 | 49.8% | 2.8% |
| Jayce | Menguntungkan | −1 | 49.6% | 5.2% |
| Tryndamere | Menguntungkan | −1 | 45.5% | 2.7% |
| Akali | Menguntungkan | −1 | — | — |
| Pantheon | Menguntungkan | −1 | — | — |
Keunggulan: vonis kanonis Wild Rift Core (−3 hingga +3), dilihat dari sudut pandang champion yang disebut di baris tersebut. Win rate dan pick rate: angka milik lawan sendiri di role ini — Wild Rift CN · Challenger, Patch 7.3b. Bukan win rate head-to-head.