
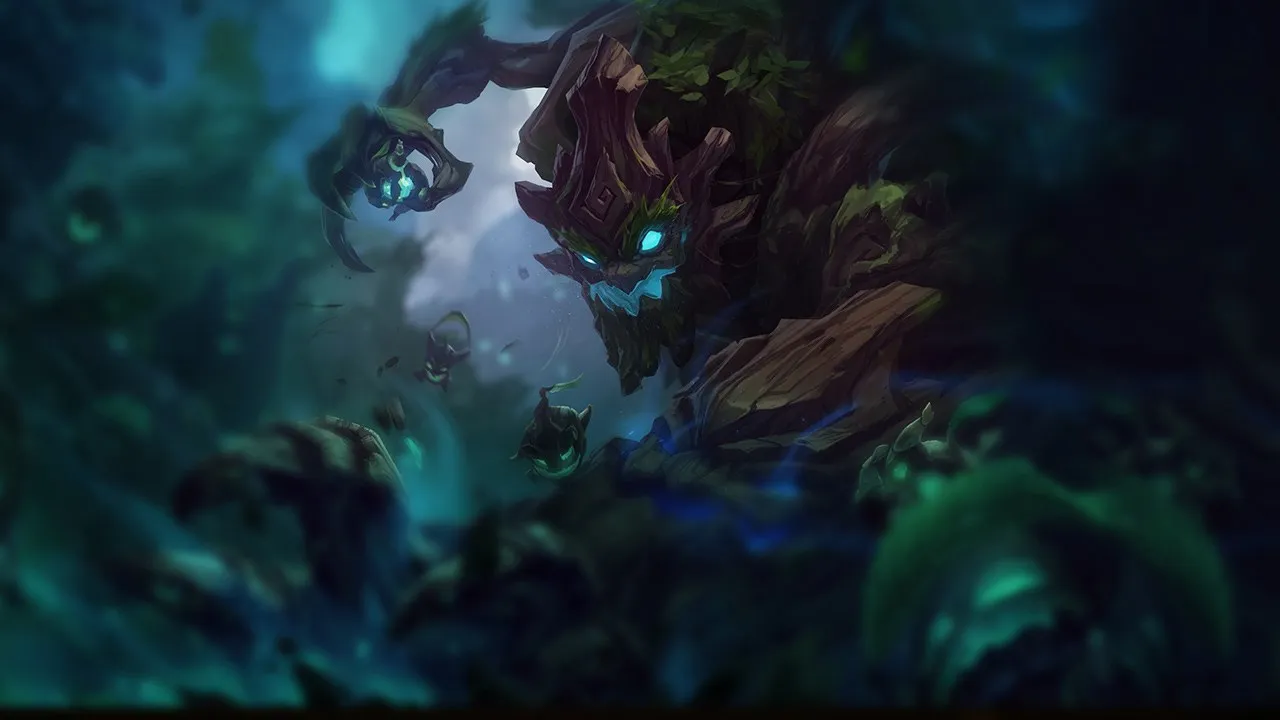
Guia de counters de Maokai Wild Rift
Hard Counters
4Esses campeões têm uma build e um estilo de jogo que superam diretamente o seu, o que pode tornar o controle da lane e o farm extremamente difíceis. As habilidades deles podem neutralizar seus principais pontos fortes ou te punir assim que você tenta jogar do seu jeito de sempre. Nesses matchups, o objetivo costuma ser reduzir os erros e buscar soluções fora do confronto direto.

Milio+2
Milio neutraliza completamente sua presença nas teamfights, porque a Breath of Life dele limpa imediatamente os roots da sua Nature's Grasp, tornando sua ultimate inútil. Durante a laning phase, sempre que você tenta engajar com Twisted Advance, Milio pode interromper seu follow-up com Ultra Mega Fire Kick ou mitigar seu trade com Warm Hugs e Cozy Campfire, mantendo o ADC dele seguro e saudável enquanto você absorve poke.
Build de Milio →
Ver detalhes
Por quê
Milio neutraliza completamente sua presença nas teamfights, porque a Breath of Life dele limpa imediatamente os roots da sua Nature's Grasp, tornando sua ultimate inútil. Durante a laning phase, sempre que você tenta engajar com Twisted Advance, Milio pode interromper seu follow-up com Ultra Mega Fire Kick ou mitigar seu trade com Warm Hugs e Cozy Campfire, mantendo o ADC dele seguro e saudável enquanto você absorve poke.
Impacto na lane
Esse matchup te força a uma postura extremamente passiva e defensiva. Fired Up! de Milio permite que o ADC dele te dê poke sem parar sempre que você se aproxima para pisar na wave ou ativar Sap Magic. Você não consegue sustain contra o assédio constante à distância deles, o que significa que você vai perder prioridade de lane, ser empurrado para debaixo da torre e ficar incapaz de ajudar seu jungler porque está preso conservando vida.
Como jogar
Para sobreviver, você precisa jogar em torno dos cooldowns de Milio em vez de engajar às cegas. Use Sapling Toss exclusivamente a partir dos bushes para fazer scout e desgastar a vida deles sem se expor. Nunca inicie com Nature's Grasp a menos que tenha visto Milio gastar Breath of Life primeiro. Se sua bot lane for empurrada, foque em usar Bramble Smash para peelar os trades agressivos deles debaixo da sua torre, em vez de procurar plays profundos e arriscados.

Senna+2
Senna neutraliza completamente suas ferramentas de engage explorando o alcance superior dela. Sempre que você tenta avançar para prendê-la com Twisted Advance, ela pode reagir facilmente com Last Embrace para te dar root antes que você entre no círculo de alvo da sua habilidade. Isso permite que ela colha almas constantemente da sua hit box grande usando os basic attacks dela e Piercing Darkness, te mantendo com pouca vida enquanto permanece perfeitamente segura.
Build de Senna →
Ver detalhes
Por quê
Senna neutraliza completamente suas ferramentas de engage explorando o alcance superior dela. Sempre que você tenta avançar para prendê-la com Twisted Advance, ela pode reagir facilmente com Last Embrace para te dar root antes que você entre no círculo de alvo da sua habilidade. Isso permite que ela colha almas constantemente da sua hit box grande usando os basic attacks dela e Piercing Darkness, te mantendo com pouca vida enquanto permanece perfeitamente segura.
Impacto na lane
Essa disparidade de alcance te força para debaixo da sua torre, já que jogar Sapling Toss nos bushes faz pouco para dissuadi-la quando ela pode curar o dano com Piercing Darkness. Sua vida é desgastada constantemente, te impedindo de usar Sap Magic nos minions com segurança. Consequentemente, você perde toda a prioridade, tornando impossível ajudar seu jungler perto do river ou contestar vision sem arriscar uma morte rápida.
Como jogar
Para sobreviver, você precisa abandonar qualquer esperança de engages agressivos na lane. Fique fora do alcance de basic attack dela e só avance quando Last Embrace estiver em cooldown. Use Sapling Toss para fazer scout dos bushes da lane em vez de dar poke, evitando que ela use Curse of the Black Mist para te emboscar. Se você levar dano pesado, espere ela avançar, depois procure um Twisted Advance com flash seguido de Bramble Smash para empurrá-la para debaixo da sua torre.

Morgana+2
Todo o seu padrão de engage sofre counter estrutural de Morgana. No momento em que você usa Twisted Advance para iniciar, ela pode reagir instantaneamente com Black Shield no seu alvo. Isso absorve completamente o dano mágico e anula seu root, deixando você preso no fundo do alcance inimigo. Sem nenhum CC aplicado, você se torna um alvo fácil e imóvel para o Dark Binding dela e o follow-up de Tormented Shadow.
Build de Morgana →
Ver detalhes
Por quê
Todo o seu padrão de engage sofre counter estrutural de Morgana. No momento em que você usa Twisted Advance para iniciar, ela pode reagir instantaneamente com Black Shield no seu alvo. Isso absorve completamente o dano mágico e anula seu root, deixando você preso no fundo do alcance inimigo. Sem nenhum CC aplicado, você se torna um alvo fácil e imóvel para o Dark Binding dela e o follow-up de Tormented Shadow.
Impacto na lane
Essa interação te força a um estado passivo, dando a Morgana liberdade total para fazer poke em você com Tormented Shadow. Você não consegue contestar o controle de bush porque jogar Sapling Toss nos bushes é facilmente contornado. Se você tentar avançar para ativar Sap Magic em minions, corre o risco de ser travado pelo Dark Binding, permitindo que ela te empurre para debaixo da tower e garanta dano fácil nas plates.
Como jogar
Nunca inicie com Twisted Advance enquanto Black Shield estiver disponível. Em vez disso, jogue Sapling Toss no caminho dela para forçar um shield antecipado e apressado. Assim que o cooldown longo dela estiver ativo, você tem uma breve janela para engajar. Se você for pego pelo Dark Binding, use Bramble Smash imediatamente para empurrar o follow-up deles para longe, e foque em acertar minions para procar Sap Magic e sobreviver ao poke.
Outros matchups

Desfavoráveis
7Esses campeões têm ferramentas que geralmente dão a eles vantagem no confronto, sem tornar o matchup impossível de jogar. Eles podem ter mais alcance, mais capacidade de aguentar sua ofensiva ou mais formas de responder aos seus engajamentos. Você vai precisar adaptar sua abordagem e escolher com cuidado os momentos em que aceita a luta.

Braum+1
Braum dá hard counter na sua principal ferramenta de teamfight. Quando você usa Nature's Grasp, Braum pode imediatamente levantar Unbreakable na direção dos roots que vêm, absorvendo o projétil por completo e protegendo os aliados atrás dele. Além disso, se você tentar travar o ADC dele com Twisted Advance, Braum pode saltar rapidamente até ele usando Stand Behind Me e fazer counter-engage com Winter's Bite, levando a stuns rápidos de Concussive Blows em você.
Build de Braum →
Ver detalhes
Por quê
Braum dá hard counter na sua principal ferramenta de teamfight. Quando você usa Nature's Grasp, Braum pode imediatamente levantar Unbreakable na direção dos roots que vêm, absorvendo o projétil por completo e protegendo os aliados atrás dele. Além disso, se você tentar travar o ADC dele com Twisted Advance, Braum pode saltar rapidamente até ele usando Stand Behind Me e fazer counter-engage com Winter's Bite, levando a stuns rápidos de Concussive Blows em você.
Impacto na lane
Essa sinergia defensiva torna dives agressivos na tower ou engages para frente extremamente arriscados. Você não consegue pressionar facilmente o ADC deles porque qualquer trade que você inicia permite que Braum empilhe Concussive Blows com os ataques básicos dele e Winter's Bite, transformando seu engage em um auto-stun. Consequentemente, você é forçado a jogar defensivamente, perdendo o controle dos bushes da lane onde seu Sapling Toss normalmente estabeleceria visão e pressão de zoneamento.
Como jogar
Para sobreviver e prosperar, mude seu foco para peel em vez de iniciar. Guarde Nature's Grasp até Braum já ter comprometido o Unbreakable em um skirmish, ou flanqueie por um ângulo onde o shield dele não consiga cobrir todo o backline. Se ele saltar para frente com Stand Behind Me, use Bramble Smash para empurrá-lo antes que ele consiga aplicar Concussive Blows. Continue usando Sap Magic para sustain contra o poke dele, ficando protegido atrás dos seus minions para dodgear o slow dele.

Sona+1
Sona naturalmente domina esse matchup com o tempo porque a Aria of Perseverance dela anula facilmente seu sustain de Sap Magic, enquanto a Hymn of Valor dela desgasta sua barra de vida com segurança. Você não pode se dar ao luxo de uma lane passiva onde ela escala livremente. Sua única janela para virar o equilíbrio é aproveitar um all-in antecipado usando Twisted Advance antes que as auras defensivas constantes dela tornem o carry dela impossível de matar.
Build de Sona →
Ver detalhes
Por quê
Sona naturalmente domina esse matchup com o tempo porque a Aria of Perseverance dela anula facilmente seu sustain de Sap Magic, enquanto a Hymn of Valor dela desgasta sua barra de vida com segurança. Você não pode se dar ao luxo de uma lane passiva onde ela escala livremente. Sua única janela para virar o equilíbrio é aproveitar um all-in antecipado usando Twisted Advance antes que as auras defensivas constantes dela tornem o carry dela impossível de matar.
Impacto na lane
Essa dinâmica te força a uma postura defensiva perto da sua turret, perdendo vida sempre que você tenta avançar. Sona vai pressionar constantemente seu ADC com Hymn of Valor e usar Song of Celerity para escapar do seu Sapling Toss, que é lento. Se você não conseguir provocar uma fight decisiva no início, será forçado a recall prematuramente, perdendo plates da tower e dando a Sona liberdade total para escalar.
Como jogar
Use os bushes da lane para esconder sua aproximação, jogando um Sapling Toss de alto dano dentro deles para desencorajá-la de wardear. No momento em que Sona avançar para ativar o Power Chord dela com Hymn of Valor, trave-a instantaneamente com Twisted Advance, depois siga imediatamente com Bramble Smash para empurrá-la de volta em direção ao seu aliado. Se ela alcançar o nível cinco, não engaje no escuro; espere ela gastar Crescendo ou use Nature's Grasp para travá-la de longe primeiro.

Pyke+1
Pyke domina esse matchup através de alta mobilidade e CC letal, mas você possui uma contramedida precisa. Enquanto Pyke depende de Ghostwater Dive e Phantom Undertow para deslizar atrás do seu ADC e preparar stuns, seu Bramble Smash pode empurrá-lo para trás no meio do dash. Reagir corretamente ao Phantom Undertow cancela completamente a trajetória do stun dele, transformando o dive agressivo dele em um desastre de overextend antes que ele consiga executar com Death from Below.
Build de Pyke →
Ver detalhes
Por quê
Pyke domina esse matchup através de alta mobilidade e CC letal, mas você possui uma contramedida precisa. Enquanto Pyke depende de Ghostwater Dive e Phantom Undertow para deslizar atrás do seu ADC e preparar stuns, seu Bramble Smash pode empurrá-lo para trás no meio do dash. Reagir corretamente ao Phantom Undertow cancela completamente a trajetória do stun dele, transformando o dive agressivo dele em um desastre de overextend antes que ele consiga executar com Death from Below.
Impacto na lane
A ameaça constante de Pyke força seu ADC a jogar defensivamente perto da sua tower, dando ao time de Pyke prioridade de lane. Se Pyke acertar Bone Skewer, você deve fazer peel imediatamente em vez de engajar o ADC dele. Como Pyke cura de volta o poke com Gift of the Drowned Ones, trocar vida é altamente ineficiente para você. Errar o timing do seu Bramble Smash dá a Pyke uma lane livre para roam e snowball em outras lanes.
Como jogar
Fique um pouco na frente do seu carry para interceptar Bone Skewer com a cura de Sap Magic, mas nunca inicie com Twisted Advance enquanto o dash de Pyke estiver disponível. Guarde Bramble Smash especificamente para interromper Phantom Undertow quando Pyke avançar para dentro. Se Pyke conseguir passar por você e ativar o stun, jogue imediatamente Sapling Toss no brush mais próximo para rastrear a rota de fuga do Ghostwater Dive dele, evitando que ele resete a vida dele de forma limpa.

Nami+1
Sua principal ferramenta de engage, Twisted Advance, se torna uma armadilha contra uma Nami habilidosa. Como o trajeto dela é completamente previsível, Nami pode facilmente pré-castar Aqua Prison diretamente no aliado dela assim que você se lança. No momento em que você chega para dar root neles, você é imediatamente bolhado, impedindo que você siga com Bramble Smash e deixando você isolado sob fogo pesado de counter.
Build de Nami →
Ver detalhes
Por quê
Sua principal ferramenta de engage, Twisted Advance, se torna uma armadilha contra uma Nami habilidosa. Como o trajeto dela é completamente previsível, Nami pode facilmente pré-castar Aqua Prison diretamente no aliado dela assim que você se lança. No momento em que você chega para dar root neles, você é imediatamente bolhado, impedindo que você siga com Bramble Smash e deixando você isolado sob fogo pesado de counter.
Impacto na lane
Essa rede de segurança defensiva permite que Nami dite o ritmo da lane. Ela pode avançar livremente para fazer poke em você e no seu marksman com Ebb and Flow e Tidecaller's Blessing sem temer um engage repentino. Você é forçado a jogar defensivamente perto da sua turret, perdendo controle de minions e cedendo prioridade de river, porque avançar para contestar espaço convida uma bolha fácil e punitiva.
Como jogar
Para sobreviver, mude seu foco para controle de bush usando Sapling Toss para zonear Nami e limitar os ângulos de poke dela. Nunca inicie com Twisted Advance a menos que você tenha visto claramente ela gastar Aqua Prison. Em vez disso, avance de forma ameaçadora para baitar a bolha dela, depois desvie. Se precisar engajar, comece com Nature's Grasp saindo do fog of war para forçar o Tidal Wave dela primeiro, garantindo que ela não consiga coordenar facilmente o CC dela.
Outros matchups

Skill Matchups
7Esses confrontos são, acima de tudo, duelos de execução: os dois campeões têm formas reais de levar vantagem. Uma habilidade importante esquivada, um engajamento bem antecipado ou um erro de posicionamento podem ser suficientes para decidir o duelo. Conhecer o matchup e reconhecer as janelas de ação certas faz toda a diferença.

Galio±0
Esse matchup gira em torno do timing do seu engage principal. Quando você trava no marksman inimigo com Twisted Advance, você se torna previsível. Galio pode preparar Justice Punch de antemão diretamente em direção ao aliado dele. No momento em que você emerge das suas roots, a carga dele colide com você, interrompendo seu follow-up planejado com Bramble Smash e deixando você exposto a um taunt devastador de Shield of Durand em vez de garantir o trade.
Build de Galio →
Ver detalhes
Por quê
Esse matchup gira em torno do timing do seu engage principal. Quando você trava no marksman inimigo com Twisted Advance, você se torna previsível. Galio pode preparar Justice Punch de antemão diretamente em direção ao aliado dele. No momento em que você emerge das suas roots, a carga dele colide com você, interrompendo seu follow-up planejado com Bramble Smash e deixando você exposto a um taunt devastador de Shield of Durand em vez de garantir o trade.
Impacto na lane
Por causa dessa ameaça, agressão no escuro é fortemente punida, transformando a lane num impasse tenso. Você não pode simplesmente forçar fights, o que significa que o estado da wave permanece neutro a menos que Galio gaste o CC dele. Se você iniciar mal, seu marksman não consegue seguir com o follow-up, levando a perdas grandes de vida para Winds of War. Por outro lado, garantir o controle de bush com Sapling Toss mantém o engage de Galio afastado, estabilizando a pressão da lane.
Como jogar
Para ganhar esse jogo mental, posicione-se perto dos bushes da lane para jogar sementes de Sapling Toss aprimoradas, forçando Galio a escolher entre levar dano ou usar Shield of Durand para absorvê-lo. Nunca comece com Twisted Advance no carry a menos que você veja Galio gastar Justice Punch primeiro. Em vez disso, procure uma oportunidade de peel: espere Galio avançar deslizando, interrompa a carga dele com um Bramble Smash bem cronometrado, e depois faça counter-engage com Nature's Grasp assim que as opções defensivas dele estiverem esgotadas.

Leona±0
Esse matchup é uma pura batalha de tempo de reação centrada no engage. Quando Leona joga o Zenith Blade dela para travar no seu ADC, você pode ativar Twisted Advance em um minion ou na própria Leona. Como Maokai se torna intargetável durante o dash dele, você pode anular completamente o root dela e saltar diretamente nela, neutralizando a ameaça do Shield of Daybreak dela antes que ela consiga travar o seu carry.
Build de Leona →
Ver detalhes
Por quê
Esse matchup é uma pura batalha de tempo de reação centrada no engage. Quando Leona joga o Zenith Blade dela para travar no seu ADC, você pode ativar Twisted Advance em um minion ou na própria Leona. Como Maokai se torna intargetável durante o dash dele, você pode anular completamente o root dela e saltar diretamente nela, neutralizando a ameaça do Shield of Daybreak dela antes que ela consiga travar o seu carry.
Impacto na lane
A fase de lane se transforma num impasse tenso onde nenhum dos dois suportes quer ativar a ferramenta principal de engage primeiro. Se Leona errar o Zenith Blade, ela fica vulnerável, com apenas Eclipse para defesa, permitindo que você empurre a wave com Sapling Toss e dê poke nela. Por outro lado, se você gastar Bramble Smash prematuramente, Leona vai saltar imediatamente, usando Shield of Daybreak para garantir um trade mortal debaixo da sua tower.
Como jogar
Posicione-se paralelo ao seu carry para baitar o Zenith Blade de Leona, mas mantenha Twisted Advance pronto para desviar. Se ela conseguir iniciar no seu ADC, use Bramble Smash instantaneamente para empurrá-la antes que ela consiga aplicar Shield of Daybreak. Se você ficar atrás, jogue Sapling Toss nos brushes da lane para rastrear os movimentos dela e zoneá-la, reservando Nature's Grasp para desengajar dos lockdowns de Solar Flare dela.

Thresh±0
Esse matchup é um puro teste de reflexos centrado nas suas ferramentas de iniciação. A lane inteira gira em torno de como você responde ao Death Sentence. Como Twisted Advance concede uma breve janela de intargetabilidade, você pode usá-lo no timing certo para desviar completamente do stun do hook de Thresh no meio do ar enquanto divea o AD carry dele. Se você errar o timing disso, Flay interrompe facilmente seu follow-up, deixando você preso dentro de The Box.
Build de Thresh →
Ver detalhes
Por quê
Esse matchup é um puro teste de reflexos centrado nas suas ferramentas de iniciação. A lane inteira gira em torno de como você responde ao Death Sentence. Como Twisted Advance concede uma breve janela de intargetabilidade, você pode usá-lo no timing certo para desviar completamente do stun do hook de Thresh no meio do ar enquanto divea o AD carry dele. Se você errar o timing disso, Flay interrompe facilmente seu follow-up, deixando você preso dentro de The Box.
Impacto na lane
O controle de bush dita o ritmo aqui. Thresh quer pescar hooks dos bushes da lane, mas seu Sapling Toss nega essa visão completamente. Quando Death Sentence está em cooldown, você ganha uma janela de vinte segundos para pressionar com trades de Bramble Smash. Porém, um Dark Passage bem posicionado pode resgatar instantaneamente o ADC dele do seu Nature's Grasp, transformando abates potenciais em desengages neutros.
Como jogar
Nunca inicie com Twisted Advance se Thresh estiver guardando tanto o Death Sentence quanto o Flay, pois ele vai te dar peel facilmente. Em vez disso, baite o hook dele caminhando perto da wave, e ative Twisted Advance no momento em que você vir a corrente sendo preparada para contornar o CC. Se você for pego pelo hook primeiro, use Bramble Smash imediatamente para empurrar Thresh para longe, evitando que ele jogue seu ADC com o Flay na direção do parceiro de lane dele.

Janna±0
Esse matchup é uma pura batalha de tempo de reação centrada no seu engage. Quando você usa Twisted Advance, você se torna intargetável, desviando brevemente do self-peel de Janna. Porém, uma Janna habilidosa vai pré-castar Howling Gale e liberar o redemoinho exatamente no milissegundo em que você reaparece para te dar knock-up, impedindo que você garanta o knockback com Bramble Smash. Essa interação delicada dita se suas iniciações de lane têm sucesso ou falham.
Build de Janna →
Ver detalhes
Por quê
Esse matchup é uma pura batalha de tempo de reação centrada no seu engage. Quando você usa Twisted Advance, você se torna intargetável, desviando brevemente do self-peel de Janna. Porém, uma Janna habilidosa vai pré-castar Howling Gale e liberar o redemoinho exatamente no milissegundo em que você reaparece para te dar knock-up, impedindo que você garanta o knockback com Bramble Smash. Essa interação delicada dita se suas iniciações de lane têm sucesso ou falham.
Impacto na lane
Por causa desse loop mecânico apertado, os skirmishes iniciais são incrivelmente tensos. Se Janna errar o timing do Howling Gale, o ADC dela leva uma cadeia completa de CC sob o seu Sapling Toss carregado no bush, levando a uma grande perda de vida ou a um recall forçado. Por outro lado, se ela negar sua entrada de Twisted Advance, você fica preso no fundo do território inimigo, exposto ao poke de Zephyr e aos ataques básicos sem nenhuma forma de desengajar rapidamente.
Como jogar
Não use Twisted Advance de forma descuidada à vista de todos. Em vez disso, use o bush para jogar Sapling Toss, forçando Janna a gastar o shield de Eye of the Storm ou a se posicionar defensivamente. Fique atento para ela liberar Howling Gale para dar poke ou fazer clear; no momento em que esse redemoinho estiver em cooldown, você tem uma janela garantida para engajar. Se ela guardar o tornado dela, finja uma aproximação para baitar a reação dela, depois use Nature's Grasp saindo do fog of war para forçar o Monsoon dela antes da hora.

Soraka±0
Esse matchup equilibrado gira inteiramente em torno de como você inicia os trades. Sempre que você tentar travar o carry de Soraka com Twisted Advance, ela vai soltar instantaneamente Equinox debaixo deles. Isso te silencia no momento em que você chega, impedindo que você encadeie Bramble Smash para empurrar o alvo. Deixado sem defesa dentro da zona dela, você inevitavelmente vai ativar o root dela, transformando seu engage agressivo em uma armadilha mortal.
Build de Soraka →
Ver detalhes
Por quê
Esse matchup equilibrado gira inteiramente em torno de como você inicia os trades. Sempre que você tentar travar o carry de Soraka com Twisted Advance, ela vai soltar instantaneamente Equinox debaixo deles. Isso te silencia no momento em que você chega, impedindo que você encadeie Bramble Smash para empurrar o alvo. Deixado sem defesa dentro da zona dela, você inevitavelmente vai ativar o root dela, transformando seu engage agressivo em uma armadilha mortal.
Impacto na lane
Por causa dessa interação, agressão no escuro leva ao desastre. Você não pode simplesmente divear sempre que seus cooldowns estiverem disponíveis, já que Soraka vai anular seu burst e curar o parceiro dela de volta com Astral Infusion. Isso neutraliza sua pressão de lane inicial, forçando uma postura passiva. A lane se torna um jogo tenso de espera, onde engages prematuros drenam sua reserva de vida, enquanto baits bem-sucedidos permitem que você garanta summoner spells ou abates cruciais.
Como jogar
Para contornar esse counter-engage, ajuste sua seleção de alvo. Em vez de alvejar o marksman dela, procure travar a própria Soraka com Twisted Advance. Se ela usar Equinox defensivamente em si mesma, ela não consegue proteger o carry dela. Alternativamente, jogue Sapling Toss nos bushes para zoneá-la, forçando-a a se posicionar mal ou a gastar Starcall. Só comprometa totalmente seu Nature's Grasp depois que a zona de silêncio dela estiver em cooldown, garantindo que seu time possa seguir com o follow-up sem ser interrompido imediatamente.
Outros matchups


Favoráveis
15Esses campeões geralmente têm dificuldade para responder às suas principais forças, o que te dá mais liberdade para abordar o confronto. Você costuma ter várias formas de pressioná-los e forçar trocas a seu favor. Aproveite essa vantagem para impor seu ritmo, em vez de dar tempo para eles se estabilizarem.

Bard−1
Esse matchup é fortemente a seu favor porque Bard depende de Cosmic Binding para se dar peel ou punir avanços agressivos. Cronometrando Twisted Advance, você se torna completamente intargetável, desviando sem esforço do único CC duro dele enquanto voa direto até ele. Depois de contornar o stun dele, você pode facilmente se reposicionar atrás dele para usar Bramble Smash, empurrando-o na direção do seu ADC para uma sequência de lockdown inescapável.
Build de Bard →
Ver detalhes
Por quê
Esse matchup é fortemente a seu favor porque Bard depende de Cosmic Binding para se dar peel ou punir avanços agressivos. Cronometrando Twisted Advance, você se torna completamente intargetável, desviando sem esforço do único CC duro dele enquanto voa direto até ele. Depois de contornar o stun dele, você pode facilmente se reposicionar atrás dele para usar Bramble Smash, empurrando-o na direção do seu ADC para uma sequência de lockdown inescapável.
Impacto na lane
O harassment à distância de Bard com Traveler's Call e o sustain de lane dele vindo de Caretaker's Shrine se tornam irrelevantes quando ele não consegue avançar para dar poke. Como seu engage é garantido, a dupla inimiga precisa ceder o controle da wave, permitindo que você faça crash nas waves e dive neles ou garanta visão profunda. Bard é forçado a abandonar os planos de roam dele, já que deixar o ADC dele sozinho significa um dive instantâneo debaixo da própria tower.
Como jogar
Posicione-se constantemente nos bushes da lane para aumentar o dano do Sapling Toss e negar a visão de Bard. Nunca inicie com Twisted Advance se Bard estiver colado numa parede, pois ele pode te baitar para um stun fácil. Em vez disso, avance de forma ameaçadora para forçar o Cosmic Binding dele, desvie reativamente com sua intargetabilidade, e depois interrompa a rota de fuga dele. Se ele tentar escapar por uma Magical Journey, jogue uma sapling dentro e espere na saída para pegá-lo.

Alistar−1
Maokai domina esse matchup porque um Bramble Smash bem cronometrado trava completamente o engage principal de Alistar, empurrando-o no meio do Headbutt. Mesmo quando Alistar consegue ativar um trade, o Sap Magic de Maokai supera em sustain a cura de Triumphant Roar. Essa interação neutraliza a ameaça de Alistar, forçando-o a um jogo passivo onde ele não consegue fazer peel ou iniciar facilmente.
Build de Alistar →
Ver detalhes
Por quê
Maokai domina esse matchup porque um Bramble Smash bem cronometrado trava completamente o engage principal de Alistar, empurrando-o no meio do Headbutt. Mesmo quando Alistar consegue ativar um trade, o Sap Magic de Maokai supera em sustain a cura de Triumphant Roar. Essa interação neutraliza a ameaça de Alistar, forçando-o a um jogo passivo onde ele não consegue fazer peel ou iniciar facilmente.
Impacto na lane
Esse potencial de shutdown muda o momentum da lane inteiramente a seu favor. Alistar é forçado a jogar defensivamente, o que significa que seu AD carry pode empurrar waves com segurança sem medo de combos repentinos. Como Alistar não consegue desengajar facilmente sem levar dano pesado, sua vantagem de vida se traduz em pressão de tower antecipada. Você pode controlar livremente os bushes da lane usando Sapling Toss, forçando Alistar e o carry dele a posições desconfortáveis e expostas.
Como jogar
Posicione-se um pouco na frente do seu carry, baitando Alistar para usar Headbutt. Mantenha o dedo em Bramble Smash para interromper reativamente o salto dele. Se Alistar ativar Unbreakable Will, não gaste Twisted Advance ou Nature's Grasp nele; em vez disso, redirecione seu CC para o carry dele. Use Sapling Toss apenas nos bushes da lane para escotar o posicionamento dele e evitar que ele encontre um ângulo de flanco.

Blitzcrank−1
Maokai neutraliza completamente a principal ameaça de Blitzcrank por causa de como Twisted Advance interage com Rocket Grab. Cronometrando Twisted Advance exatamente quando o hook está prestes a conectar, você se torna brevemente intargetável, fazendo Rocket Grab errar completamente enquanto você dá root sem esforço no AD carry inimigo ou no próprio Blitzcrank. Mesmo que você seja puxado, Sap Magic e Bramble Smash permitem que você transforme instantaneamente o pull em uma briga favorável de curta distância.
Build de Blitzcrank →
Ver detalhes
Por quê
Maokai neutraliza completamente a principal ameaça de Blitzcrank por causa de como Twisted Advance interage com Rocket Grab. Cronometrando Twisted Advance exatamente quando o hook está prestes a conectar, você se torna brevemente intargetável, fazendo Rocket Grab errar completamente enquanto você dá root sem esforço no AD carry inimigo ou no próprio Blitzcrank. Mesmo que você seja puxado, Sap Magic e Bramble Smash permitem que você transforme instantaneamente o pull em uma briga favorável de curta distância.
Impacto na lane
Essa interação muda a pressão de lane inteiramente a seu favor, tirando de Blitzcrank o poder de zoneamento dele. Como você não teme Rocket Grab, você pode controlar a linha de bushes usando Sapling Toss para flagrar os movimentos dele. Sua presença impede que a dupla inimiga congele a wave ou zoneie seu marksman, porque qualquer tentativa de hook de Blitzcrank arrisca puxar um tank irritado e com self-heal diretamente para a cara deles ou fazê-lo sofrer um counter-engage.
Como jogar
Para executar isso perfeitamente, sempre fique um pouco na frente do seu carry para baitar Rocket Grab. Se Blitzcrank ativar Overdrive para te alcançar, não entre em pânico. Guarde Twisted Advance até o braço dele de fato disparar para desviar no meio do ar, depois siga imediatamente com Bramble Smash para empurrá-lo para longe do seu marksman ou empurrar o carry dele mais perto do seu. Se você errar o timing e for pego, retalie imediatamente com Bramble Smash para interromper Power Fist, depois ative Sap Magic para sustain contra o burst deles.

Karma−1
Karma depende fortemente do aumento repentino de velocidade de Inspire para dar kite e espaçar os oponentes dela. Porém, seu Twisted Advance é um engage garantido, point-and-click, que ela não consegue desviar ou ultrapassar correndo. No momento em que ela avançar para dar poke com Inner Flame, você pode travá-la instantaneamente, tornando inútil o boost de velocidade do shield defensivo dela e abrindo-a para um follow-up devastador.
Build de Karma →
Ver detalhes
Por quê
Karma depende fortemente do aumento repentino de velocidade de Inspire para dar kite e espaçar os oponentes dela. Porém, seu Twisted Advance é um engage garantido, point-and-click, que ela não consegue desviar ou ultrapassar correndo. No momento em que ela avançar para dar poke com Inner Flame, você pode travá-la instantaneamente, tornando inútil o boost de velocidade do shield defensivo dela e abrindo-a para um follow-up devastador.
Impacto na lane
Essa interação muda completamente a pressão da lane. Karma é forçada a jogar extremamente na defensiva, temendo a ameaça do seu CC. Ela não pode avançar com segurança para dar poke com Inner Flame ou carregar a passiva Mantra dela. Isso cede o controle de bush totalmente para o seu Sapling Toss, permitindo que sua dupla dite o estado da wave, zoneie ela, e dê crash nas waves para garantir dano antecipado nas plates.
Como jogar
Para executar isso, ocupe os bushes da lane e use Sapling Toss para negar a visão de que ela precisa para dar poke com segurança. Espere ela avançar para usar Inner Flame antes de se lançar com Twisted Advance. Se ela tentar te prender com Focused Resolve, siga imediatamente com Bramble Smash para empurrá-la e quebrar o link, enquanto usa Sap Magic no seu próximo ataque básico para curar qualquer dano residual.

Rakan−1
Maokai domina esse matchup porque o Bramble Smash dele age como uma parada dura para todo o kit de iniciação de Rakan. Sempre que Rakan tentar saltar com Grand Entrance, um Bramble Smash bem cronometrado o empurra do ar antes que o knock-up dele consiga acertar. Isso deixa Rakan isolado no fundo do seu território, incapaz de proteger o carry dele ou de escapar facilmente com Battle Dance.
Build de Rakan →
Ver detalhes
Por quê
Maokai domina esse matchup porque o Bramble Smash dele age como uma parada dura para todo o kit de iniciação de Rakan. Sempre que Rakan tentar saltar com Grand Entrance, um Bramble Smash bem cronometrado o empurra do ar antes que o knock-up dele consiga acertar. Isso deixa Rakan isolado no fundo do seu território, incapaz de proteger o carry dele ou de escapar facilmente com Battle Dance.
Impacto na lane
Essa interação muda completamente a dinâmica de trade a seu favor. Rakan não pode avançar com segurança para dar poke com Gleaming Quill ou procurar skirmishes agressivos, forçando-o a jogar passivamente atrás da wave de minions dele. Você pode controlar livremente os bushes da lane com Sapling Toss, negando visão e segurança a eles, enquanto força recalls antecipados da dupla inimiga, que não consegue mais pressionar sua tower.
Como jogar
Para executar isso perfeitamente, nunca jogue Bramble Smash proativamente para dar poke. Fique paralelo ao seu ADC e reaja exclusivamente ao dash para frente de Rakan. Se ele conseguir ativar The Quickness, não entre em pânico; trave-o imediatamente com Twisted Advance para queimar a duração da ultimate dele, depois siga com Nature's Grasp para impedir a retirada dele com Battle Dance. Mantenha um Sapling Toss no brush da lane para flagrar os ângulos de flanco dele.

Lux−2
Maokai dita completamente o ritmo aqui porque Twisted Advance oferece uma forma confiável de contornar a principal defesa de Lux. Quando Lux joga Light Binding para zonear ou dar peel, você pode ativar Twisted Advance para se tornar intargetável, atravessando o root dela direto. Isso neutraliza completamente a segurança dela, te entregando diretamente na hitbox frágil dela, onde Bramble Smash garante que ela não consiga escapar.
Build de Lux →
Ver detalhes
Por quê
Maokai dita completamente o ritmo aqui porque Twisted Advance oferece uma forma confiável de contornar a principal defesa de Lux. Quando Lux joga Light Binding para zonear ou dar peel, você pode ativar Twisted Advance para se tornar intargetável, atravessando o root dela direto. Isso neutraliza completamente a segurança dela, te entregando diretamente na hitbox frágil dela, onde Bramble Smash garante que ela não consiga escapar.
Impacto na lane
Essa interação força Lux a jogar extremamente na defensiva, neutralizando o poke agressivo habitual dela com Lucent Singularity. Ela não pode avançar para pressionar sua wave ou proteger o marksman dela com Prismatic Barrier sem arriscar um engage instantâneo e fatal. Se ela gastar o root dela, você avança imediatamente e a zoneia fora do alcance de experiência, garantindo controle completo sobre a linha de bushes.
Como jogar
Posicione-se dentro dos brushes da lane para lançar Sapling Toss, forçando Lux a escolher entre fazer face-check ou gastar o Lucent Singularity dela para ter visão. Nunca inicie com Twisted Advance a longa distância enquanto o Light Binding dela estiver disponível, para que você consiga desviar reativamente durante o trajeto dele. Se você for pego pelo root dela primeiro, use Nature's Grasp imediatamente para bloquear o combo de Final Spark dela.

Rell−1
Esse matchup é altamente vantajoso para você porque o engage principal de Rell depende inteiramente do salto telegrafado dela. Reagindo rápido, você pode usar Bramble Smash para empurrá-la no meio do ar, cancelando completamente o salto dela e impedindo que o CC dela acerte seu carry. Essa interrupção deixa Rell presa na forma desmontada e lentificada dela, transformando a tentativa agressiva dela num alvo fácil para seu AD carry punir.
Build de Rell →
Ver detalhes
Por quê
Esse matchup é altamente vantajoso para você porque o engage principal de Rell depende inteiramente do salto telegrafado dela. Reagindo rápido, você pode usar Bramble Smash para empurrá-la no meio do ar, cancelando completamente o salto dela e impedindo que o CC dela acerte seu carry. Essa interrupção deixa Rell presa na forma desmontada e lentificada dela, transformando a tentativa agressiva dela num alvo fácil para seu AD carry punir.
Impacto na lane
Saber que você pode cancelar o salto dela neutraliza completamente a presença de lane de Rell. Ela não pode avançar com segurança para contestar a wave, permitindo que você garanta o controle de bush usando Sapling Toss. Como ela é forçada a jogar defensivamente, seu carry pode farmar ou congelar a wave com segurança, enquanto Rell fica privada dos stacks do item de suporte dela e perde vida tentando avançar para executar com o relic shield.
Como jogar
Sua regra principal é guardar Bramble Smash exclusivamente para counterar o salto dela; nunca use para dar poke ou fazer clear de waves. Posicione-se um pouco na frente do seu carry para interceptar a trajetória dela. Se Rell hesitar e jogar passivamente, use Sapling Toss para escotar e controlar os bushes laterais, depois trave o parceiro dela com Twisted Advance assim que o salto de Rell estiver em cooldown. Se você errar o timing, use Nature's Grasp imediatamente para desengajar.

Nautilus−1
Essa lane favorece você porque você consegue neutralizar completamente a principal ferramenta de engage de Nautilus. Sempre que ele acertar Dredge Line no seu marksman, ele depende de se puxar para encadear Staggering Blow e Riptide. Cronometrando Bramble Smash enquanto ele viaja, você o empurra e quebra o combo dele, deixando-o preso. Essa virada permite que você vire a fight facilmente enquanto seu Sap Magic te mantém saudável.
Build de Nautilus →
Ver detalhes
Por quê
Essa lane favorece você porque você consegue neutralizar completamente a principal ferramenta de engage de Nautilus. Sempre que ele acertar Dredge Line no seu marksman, ele depende de se puxar para encadear Staggering Blow e Riptide. Cronometrando Bramble Smash enquanto ele viaja, você o empurra e quebra o combo dele, deixando-o preso. Essa virada permite que você vire a fight facilmente enquanto seu Sap Magic te mantém saudável.
Impacto na lane
A ameaça de um flash-engage de Nautilus é minimizada, dando à sua dupla controle total sobre os bushes da lane. Você pode jogar Sapling Toss com segurança nos bushes para escotar o posicionamento dele e desgastar o shield dele, Titan's Wrath. Como ele não pode avançar com segurança para garantir minions sem arriscar um counter-engage via Twisted Advance, você pode forçar a dupla dele debaixo da tower e atrasar os timings cruciais de recall dele.
Como jogar
Posicione-se um pouco deslocado do seu carry, convidando Nautilus a jogar Dredge Line. Nunca gaste Bramble Smash ofensivamente; mantenha pronto apenas para interromper ele no meio do voo. Se ele te alvejar em vez disso, aceite o hook, ative Sap Magic para absorver o burst, e use Twisted Advance imediatamente no carry dele para travar o follow-up de dano deles. Quando eles tentarem recuar, trave a lane com Nature's Grasp para garantir o abate.

Yuumi−2
Yuumi depende de You and Me! para ficar segura, mas Maokai contorna essa segurança completamente. Como ela fica ligada a um aliado, alvejar a âncora dela com Twisted Advance garante um root point-and-click no hospedeiro. Isso trava toda a plataforma dela, tornando inútil a incapacidade dela de ser alvejada, já que ela não pode se desconectar com segurança para ativar Bop 'n' Block ou se reposicionar sem correr direto para um Bramble Smash de follow-up.
Build de Yuumi →
Ver detalhes
Por quê
Yuumi depende de You and Me! para ficar segura, mas Maokai contorna essa segurança completamente. Como ela fica ligada a um aliado, alvejar a âncora dela com Twisted Advance garante um root point-and-click no hospedeiro. Isso trava toda a plataforma dela, tornando inútil a incapacidade dela de ser alvejada, já que ela não pode se desconectar com segurança para ativar Bop 'n' Block ou se reposicionar sem correr direto para um Bramble Smash de follow-up.
Impacto na lane
A ameaça do engage de Maokai sufoca completamente a presença de lane de Yuumi. Ela não pode saltar para dar poke com ataques básicos por mana, e o hospedeiro dela precisa jogar incrivelmente recuado. Isso dá a Maokai controle de bush livre, permitindo que ele zoneie sem parar com Sapling Toss. A dupla inimiga é forçada a ceder prioridade de lane e sangrar gold debaixo da tower, incapaz de trocar de forma eficaz contra seu sustain.
Como jogar
Posicione-se agressivamente nos bushes da lane para negar a Yuumi qualquer oportunidade de acertar Prowling Projectile. Guarde Twisted Advance especificamente para quando o hospedeiro dela avançar para dar last hit, ou imediatamente quando ela tentar se desconectar para Bop 'n' Block. Assim que você der root na âncora dela, use Bramble Smash para empurrá-los para dentro dos seus bushes, onde seu Sapling Toss pré-posicionado vai causar dano máximo. Se ela usar Final Chapter, use Nature's Grasp para desengajar ou travá-los completamente.
Outros matchups






Hard Counters
3Esses campeões têm uma build e um estilo de jogo que superam diretamente o seu, o que pode tornar o controle da lane e o farm extremamente difíceis. As habilidades deles podem neutralizar seus principais pontos fortes ou te punir assim que você tenta jogar do seu jeito de sempre. Nesses matchups, o objetivo costuma ser reduzir os erros e buscar soluções fora do confronto direto.

Gwen+2
Gwen é um pesadelo para o Maokai porque a passiva dela, A Thousand Cuts, derrete sua vida alta rapidamente. Para piorar, Hallowed Mist anula completamente suas ferramentas de longo alcance, permitindo que ela ignore Sapling Toss e sacuda Nature's Grasp se lançado de fora do círculo dela. Isso neutraliza sua ameaça de crowd control antes mesmo de você conseguir se aproximar.
Build de Gwen →
Ver detalhes
Por quê
Gwen é um pesadelo para o Maokai porque a passiva dela, A Thousand Cuts, derrete sua vida alta rapidamente. Para piorar, Hallowed Mist anula completamente suas ferramentas de longo alcance, permitindo que ela ignore Sapling Toss e sacuda Nature's Grasp se lançado de fora do círculo dela. Isso neutraliza sua ameaça de crowd control antes mesmo de você conseguir se aproximar.
Impacto na lane
Na jungle, você não consegue disputar com a Gwen em escaramuças diretas. Se ela te encontrar no rio, Skip 'n Slash e Snip Snip! vão rapidamente te expulsar dos seus camps. Como Hallowed Mist dá a ela imunidade contra suas armadilhas de longo alcance, garantir objetivos se torna extremamente difícil, já que ela pode bloquear seu Nature's Grasp, tirando do seu time a utilidade de teamfight que é sua marca registrada.
Como jogar
Para sobreviver, nunca inicie com Nature's Grasp a distância se o Hallowed Mist dela estiver ativo. Em vez disso, provoque para forçá-la a gastar a névoa antes, ou contorne-a completamente usando Twisted Advance para enraizá-la diretamente dentro da própria zona de proteção dela. Uma vez lá dentro, use imediatamente Bramble Smash para empurrá-la para fora do próprio centro de segurança ou para interromper os lançamentos de Needlework dela.

Olaf+3
Olaf representa um obstáculo estrutural enorme porque *Ragnarok* anula completamente todo o seu kit de utilidade. Quando ele ativa a ultimate, seu *Twisted Advance* não consegue enraizá-lo, seu *Bramble Smash* falha em afastá-lo e a imunidade dele faz com que ele ignore completamente a lentidão e o enraizamento de *Nature's Grasp*. Ele pode te perseguir livremente enquanto usa *Berserker Rage* para superar seu dps conforme a vida dele cai.
Build de Olaf →
Ver detalhes
Por quê
Olaf representa um obstáculo estrutural enorme porque *Ragnarok* anula completamente todo o seu kit de utilidade. Quando ele ativa a ultimate, seu *Twisted Advance* não consegue enraizá-lo, seu *Bramble Smash* falha em afastá-lo e a imunidade dele faz com que ele ignore completamente a lentidão e o enraizamento de *Nature's Grasp*. Ele pode te perseguir livremente enquanto usa *Berserker Rage* para superar seu dps conforme a vida dele cai.
Impacto na lane
Esse matchup tira sua capacidade de disputar objetivos neutros ativos ou defender seus camps. Se o Olaf te pegar no rio, você não consegue afastá-lo, o que torna as invasões extremamente letais. Você é forçado a ceder a prioridade do scuttle crab e precisa jogar *Sapling Toss* nos bushes para escanear a posição dele em vez de usá-lo para acelerar seu clear, atrasando severamente seus picos de poder por nível.
Como jogar
Sua sobrevivência depende inteiramente de rastrear o cooldown de *Ragnarok*. Em escaramuças, nunca use suas habilidades principais como *Nature's Grasp* ou *Twisted Advance* até a ultimate dele se esgotar. Se ele a ativar, recue imediatamente, usando *Sapling Toss* para desacelerar os aliados dele que estiverem se aproximando. Só volte para afastá-lo com *Bramble Smash* depois que a ultimate dele expirar e a vulnerabilidade dele ao seu crowd control retornar.

Mordekaiser+2
Mordekaiser neutraliza completamente seu crowd control orientado para o time ao usar Realm of Death para te banir da luta. Enquanto o Maokai se destaca usando Twisted Advance e Nature's Grasp para proteger os aliados, esse isolamento força um duelo direto. Dentro da arena dele, você não consegue resistir à aura de Darkness Rise nem esquivar de Obliterate, transformando sua utilidade em um kit inútil enquanto seus carries ficam completamente desprotegidos.
Build de Mordekaiser →
Ver detalhes
Por quê
Mordekaiser neutraliza completamente seu crowd control orientado para o time ao usar Realm of Death para te banir da luta. Enquanto o Maokai se destaca usando Twisted Advance e Nature's Grasp para proteger os aliados, esse isolamento força um duelo direto. Dentro da arena dele, você não consegue resistir à aura de Darkness Rise nem esquivar de Obliterate, transformando sua utilidade em um kit inútil enquanto seus carries ficam completamente desprotegidos.
Impacto na lane
Durante escaramuças na jungle e disputas por objetivos neutros, a ameaça de isolamento do Mordekaiser dita o ritmo do mapa. Se você tentar garantir o rio com Sapling Toss, ele pode simplesmente avançar com Indestructible e te puxar com Death's Grasp. Essa ameaça constante te força a ceder os Rift Scuttlers iniciais e os objetivos neutros, já que qualquer confronto direto perto dos poços resulta em você sendo arrastado para longe, deixando seu time vulnerável.
Como jogar
Para sobreviver a esse matchup, nunca inicie com Twisted Advance se o Mordekaiser tiver Realm of Death disponível, pois isso te coloca diretamente no alcance da ultimate dele. Em vez disso, fique atrás e use Sapling Toss para escanear os bushes. Se ele te puxar com Death's Grasp, use imediatamente Bramble Smash para empurrá-lo e se desengajar. Se você acabar ficando preso na ultimate dele, foque puramente na sobrevivência usando as curas de Sap Magic e ganhando tempo com Twisted Advance para esquivar de Obliterate.
Desfavoráveis
8Esses campeões têm ferramentas que geralmente dão a eles vantagem no confronto, sem tornar o matchup impossível de jogar. Eles podem ter mais alcance, mais capacidade de aguentar sua ofensiva ou mais formas de responder aos seus engajamentos. Você vai precisar adaptar sua abordagem e escolher com cuidado os momentos em que aceita a luta.

Pantheon+1
Pantheon domina o ritmo inicial do mapa com a ameaça semi-global de Grand Starfall e escaramuças agressivas na jungle alimentadas por Mortal Will. Embora ele te supere facilmente em burst, sua força está em acompanhar as rotações de alto impacto dele. Se você rastreá-lo corretamente, pode usar a imunidade a ser alvo de Twisted Advance para segui-lo durante o pouso dele ou prendê-lo imediatamente quando ele engajar seus aliados com Shield Vault.
Build de Pantheon →
Ver detalhes
Por quê
Pantheon domina o ritmo inicial do mapa com a ameaça semi-global de Grand Starfall e escaramuças agressivas na jungle alimentadas por Mortal Will. Embora ele te supere facilmente em burst, sua força está em acompanhar as rotações de alto impacto dele. Se você rastreá-lo corretamente, pode usar a imunidade a ser alvo de Twisted Advance para segui-lo durante o pouso dele ou prendê-lo imediatamente quando ele engajar seus aliados com Shield Vault.
Impacto na lane
Esse matchup transforma a jungle em uma corrida contra o tempo. Pantheon vai garantir prioridade logo no início para preparar ganks, forçando você a usar Sapling Toss defensivamente para rastrear os movimentos dele no rio. Se ele conseguir roams bem-sucedidos com a ultimate enquanto você está limpando camps, a pressão no mapa se torna avassaladora. Toda luta por objetivo é decidida pela rapidez com que você consegue responder aos dives agressivos dele antes que ele consiga usar Aegis Assault.
Como jogar
Nunca inicie no escuro. Guarde Twisted Advance especificamente para o momento em que o Pantheon se comprometer com o salto. Se ele tentar dar dive em uma lane com Grand Starfall, se mova em direção à zona de queda e dê buffer em Twisted Advance nele no instante em que ele aparecer, seguindo com Bramble Smash para empurrá-lo embaixo da torre ou para longe do seu carry. Se ele bloquear seu dano com Aegis Assault, reposicione-se atrás dele para interromper o channel com Nature's Grasp.

Nidalee+1
Nidalee supera o Maokai em velocidade de clear, exercendo forte pressão por todo o mapa. No entanto, você possui as ferramentas específicas para neutralizar as tentativas de assassinato dela. Ao posicionar Sapling Toss no caminho dela, você pode bloquear as lanças de Javelin Toss que vêm na sua direção, enquanto um Twisted Advance bem cronometrado te torna impossível de ser alvo, esquivando completamente do engage seguinte de Pounce quando ela tenta te executar na forma de puma.
Build de Nidalee →
Ver detalhes
Por quê
Nidalee supera o Maokai em velocidade de clear, exercendo forte pressão por todo o mapa. No entanto, você possui as ferramentas específicas para neutralizar as tentativas de assassinato dela. Ao posicionar Sapling Toss no caminho dela, você pode bloquear as lanças de Javelin Toss que vêm na sua direção, enquanto um Twisted Advance bem cronometrado te torna impossível de ser alvo, esquivando completamente do engage seguinte de Pounce quando ela tenta te executar na forma de puma.
Impacto na lane
Essa diferença de velocidade significa que a Nidalee vai frequentemente garantir os dois scuttle crabs ou invadir seus camps enquanto você ainda está dando clear. Se ela acertar uma lança saindo do fog of war, você é forçado a recuar, cedendo objetivos neutros. No entanto, se você mantiver ela revelada, seu time pode convergir com segurança sobre ela, transformando o counter-jungle agressivo dela em uma armadilha mortal.
Como jogar
Priorize jogar Sapling Toss em pontos de estrangulamento e bushes perto das entradas da sua jungle para detectá-la logo e bloquear Javelin Toss em pleno voo. Nunca use Twisted Advance para iniciar uma luta contra ela, a menos que você saiba que Pounce está em cooldown; em vez disso, guarde-o como ferramenta defensiva para acompanhar a mobilidade dela ou esquivar completamente do salto dela. Se ela invadir, avise seus laners com ping e use Bramble Smash para afastá-la de você.

Dr. Mundo+1
Toda a sua identidade na jungle depende de prender alvos, mas Dr. Mundo neutraliza completamente o seu engage. A passiva dele, Goes Where He Pleases, absorve a raiz de Twisted Advance ou a prisão de Nature's Grasp, transformando suas ferramentas principais em uma perda de vida autoinfligida. Sem crowd control confiável para deter o avanço dele, Mundo pode sacudir sua imobilização inicial e avançar direto para o seu backline vulnerável.
Build de Dr. Mundo →
Ver detalhes
Por quê
Toda a sua identidade na jungle depende de prender alvos, mas Dr. Mundo neutraliza completamente o seu engage. A passiva dele, Goes Where He Pleases, absorve a raiz de Twisted Advance ou a prisão de Nature's Grasp, transformando suas ferramentas principais em uma perda de vida autoinfligida. Sem crowd control confiável para deter o avanço dele, Mundo pode sacudir sua imobilização inicial e avançar direto para o seu backline vulnerável.
Impacto na lane
Em escaramuças na jungle e lutas no rio, essa interação muda completamente o equilíbrio de poder. Você não consegue afastar facilmente o Mundo dos seus aliados durante as disputas iniciais de crab ou nas lutas de dragão. Quando você tenta garantir objetivos, o poke de Infected Bonesaw combinado com a imunidade dele significa que ele pode disputar com segurança seus clears de camp ou perturbar o setup do seu time. Se você tentar lutar 1x1 contra ele no rio, Maximum Dosage faz com que ele aguente mais tempo que a cura do seu Sap Magic.
Como jogar
Para sobreviver a esse matchup, você precisa se coordenar com seus laners para estourar Goes Where He Pleases antes de usar seu crowd control principal. Use o knockback de Bramble Smash para quebrar o escudo dele a uma distância segura, depois pise ativamente no cilindro que ele soltou para impedir que ele recupere vida e reduza o cooldown. Guarde Twisted Advance estritamente para seguir o combo depois que a passiva dele estiver desativada, ou contorne o Mundo completamente para dar dive no backline dele enquanto seus companheiros de time o distraem.

Volibear+1
Volibear vence escaramuças diretas graças à cura de The Relentless Storm e Frenzied Maul, tornando duelos diretos na jungle desfavoráveis. No entanto, o Maokai pode perturbar o ritmo dele. Ao cronometrar Twisted Advance perfeitamente, você fica impossível de ser alvo para esquivar do burst de alto impacto e do escudo de Sky Splitter, ou pode usar Bramble Smash para empurrar o Volibear para trás bem quando ele avançar com Thundering Smash, neutralizando o engage dele.
Build de Volibear →
Ver detalhes
Por quê
Volibear vence escaramuças diretas graças à cura de The Relentless Storm e Frenzied Maul, tornando duelos diretos na jungle desfavoráveis. No entanto, o Maokai pode perturbar o ritmo dele. Ao cronometrar Twisted Advance perfeitamente, você fica impossível de ser alvo para esquivar do burst de alto impacto e do escudo de Sky Splitter, ou pode usar Bramble Smash para empurrar o Volibear para trás bem quando ele avançar com Thundering Smash, neutralizando o engage dele.
Impacto na lane
Essa interação molda as escaramuças na jungle e as disputas de crab. Se o Volibear acertar o combo completo, a ameaça de dive de Stormbringer te expulsa dos seus camps e dos objetivos neutros. Quando você nega com sucesso o stun de Thundering Smash ou esquiva de Sky Splitter, você impede que ele te marque com Frenzied Maul. Isso mantém sua vida alta o suficiente para disputar objetivos e impede que ele invada e cresça no início de jogo.
Como jogar
Nunca inicie com Twisted Advance quando o Volibear tiver as habilidades disponíveis. Em vez disso, provoque a corrida de Thundering Smash dele e reaja instantaneamente com Bramble Smash para afastá-lo. Se ele lançar Sky Splitter para se proteger e te desacelerar, use imediatamente Twisted Advance em um monstro próximo ou no próprio Volibear para contornar o raio. Se você errar esse ciclo e for marcado por Frenzied Maul, recue imediatamente usando Sapling Toss para desacelerar a perseguição dele.

Warwick+1
Warwick domina duelos diretos na jungle porque Eternal Hunger e Jaws of the Beast dão a ele uma cura massiva e contínua que supera facilmente a sua passiva Sap Magic. No entanto, você possui as ferramentas perfeitas para perturbar a ultimate dele. Se o Warwick escolher como alvo um aliado com Infinite Duress, você pode cancelar imediatamente a supressão usando Bramble Smash. Como alternativa, cronometrar perfeitamente seu Twisted Advance permite que você esquive completamente do salto dele.
Build de Warwick →
Ver detalhes
Por quê
Warwick domina duelos diretos na jungle porque Eternal Hunger e Jaws of the Beast dão a ele uma cura massiva e contínua que supera facilmente a sua passiva Sap Magic. No entanto, você possui as ferramentas perfeitas para perturbar a ultimate dele. Se o Warwick escolher como alvo um aliado com Infinite Duress, você pode cancelar imediatamente a supressão usando Bramble Smash. Como alternativa, cronometrar perfeitamente seu Twisted Advance permite que você esquive completamente do salto dele.
Impacto na lane
Você não consegue igualar o Warwick em escaramuças iniciais no rio, já que Blood Hunt torna perigoso rastrear aliados com pouca vida e dá a ele prioridade no mapa. Ele vai tentar invadir seus camps, contando com Primal Howl para sacudir seu dano enquanto se recupera. Isso força você a jogar na defensiva, usando Sapling Toss para garantir visão nos bushes, cedendo as disputas iniciais de crab para evitar dar abates fáceis.
Como jogar
Priorize itens anti-cura desde o início para reduzir diretamente a regeneração massiva que o Warwick ganha de Eternal Hunger. Durante escaramuças, nunca desperdice seu crowd control. Guarde Bramble Smash especificamente para afastar companheiros de time no momento em que forem suprimidos por Infinite Duress. Se o Warwick escolher você como alvo, reaja instantaneamente com Twisted Advance durante a animação do salto dele para ficar impossível de ser alvo, fazendo a ultimate dele falhar completamente enquanto te posiciona perfeitamente para contra-engajar com Nature's Grasp.

Xin Zhao+1
Xin Zhao domina as escaramuças iniciais por causa do poder de duelo superior dele, mas você tem a ferramenta perfeita para perturbar o ritmo dele. Quando ele engajar com Audacious Charge e ativar Three Talon Strike para te derrubar, seu Bramble Smash pode empurrá-lo para longe bem antes do terceiro golpe acertar. Essa interação nega o crowd control dele e desperdiça a principal janela de dano dele, embora a cura passiva de Determination ainda dê a ele vantagem em lutas prolongadas.
Build de Xin Zhao →
Ver detalhes
Por quê
Xin Zhao domina as escaramuças iniciais por causa do poder de duelo superior dele, mas você tem a ferramenta perfeita para perturbar o ritmo dele. Quando ele engajar com Audacious Charge e ativar Three Talon Strike para te derrubar, seu Bramble Smash pode empurrá-lo para longe bem antes do terceiro golpe acertar. Essa interação nega o crowd control dele e desperdiça a principal janela de dano dele, embora a cura passiva de Determination ainda dê a ele vantagem em lutas prolongadas.
Impacto na lane
Essa dinâmica torna as disputas iniciais de Scuttle Crab bastante arriscadas para você, já que o Xin Zhao pode facilmente forçar lutas no rio. Se você não conseguir interromper Three Talon Strike, ele vai garantir o primeiro abate ou forçar seu Flash, deixando suas lanes vulneráveis aos ganks agressivos dele. Seu clear é mais lento, o que significa que você frequentemente vai se ver reagindo aos movimentos dele em vez de ditar o ritmo do mapa.
Como jogar
Não dispute o rio no escuro; em vez disso, rastreie o camp inicial dele e caminhe para o lado oposto a fim de garantir um farm seguro. Quando precisar entrar em confronto, guarde Bramble Smash estritamente para o terceiro golpe de Three Talon Strike, em vez de usá-lo para limpar camps ou iniciar a luta. Se ele ativar Crescent Guard para bloquear o dano dos seus aliados, use Twisted Advance para entrar na arena dele e prendê-lo para seu time.
Outros matchups


Skill Matchups
21Esses confrontos são, acima de tudo, duelos de execução: os dois campeões têm formas reais de levar vantagem. Uma habilidade importante esquivada, um engajamento bem antecipado ou um erro de posicionamento podem ser suficientes para decidir o duelo. Conhecer o matchup e reconhecer as janelas de ação certas faz toda a diferença.

Jarvan IV±0
Esse duelo na jungle é um puro confronto de utilidade centrado no impacto em teamfight. O resultado depende inteiramente de como Twisted Advance do Maokai interage com o combo de Demacian Standard e Dragon Strike do Jarvan IV. Como Twisted Advance dá ao Maokai uma breve imunidade a ser alvo, ele pode anular completamente o principal engage e o knockup do Jarvan, deixando o príncipe demaciano vulnerável sem sua principal ferramenta de mobilidade e redução de armadura.
Build de Jarvan IV →
Ver detalhes
Por quê
Esse duelo na jungle é um puro confronto de utilidade centrado no impacto em teamfight. O resultado depende inteiramente de como Twisted Advance do Maokai interage com o combo de Demacian Standard e Dragon Strike do Jarvan IV. Como Twisted Advance dá ao Maokai uma breve imunidade a ser alvo, ele pode anular completamente o principal engage e o knockup do Jarvan, deixando o príncipe demaciano vulnerável sem sua principal ferramenta de mobilidade e redução de armadura.
Impacto na lane
Na jungle, essa interação determina quem garante os crabs iniciais e neutraliza a pressão de gank. Se você conseguir esquivar com sucesso do combo de bandeira e puxão dele, Jarvan IV perde sua rota de fuga e a redução de armadura, transformando a invasão agressiva dele em uma armadilha mortal. No entanto, se ele provocar para gastar seu Twisted Advance com Golden Aegis e te pegar depois, Cataclysm dele vai te prender, forçando você a usar Nature's Grasp na defensiva em vez de garantir objetivos.
Como jogar
Nunca inicie lutas com Twisted Advance quando o Jarvan IV tiver a bandeira ativa. Em vez disso, jogue Sapling Toss nos bushes para rastrear o movimento dele e avance para provocar o engage dele. Mantenha o dedo em Twisted Advance e reaja somente quando vir a animação de Demacian Standard sendo lançado. Depois de esquivar com sucesso do knockup dele, siga imediatamente com Bramble Smash para empurrá-lo para longe da bandeira dele ou prendê-lo para o seu time, depois use Nature's Grasp para fechar as rotas de fuga dele.

Kayn±0
Esse duelo na jungle é uma batalha de ritmo e transformação. Sua capacidade de prender o Kayn em pleno dash usando Twisted Advance pode perturbar completamente as escaramuças dele, especialmente quando ele tenta escapar com Shadow Step. No entanto, assim que The Darkin Scythe permite que ele destrave Rhaast, a dinâmica muda. Rhaast se destaca em teamfights prolongadas, transformando a alta vida máxima do Maokai em uma fonte massiva de cura.
Build de Kayn →
Ver detalhes
Por quê
Esse duelo na jungle é uma batalha de ritmo e transformação. Sua capacidade de prender o Kayn em pleno dash usando Twisted Advance pode perturbar completamente as escaramuças dele, especialmente quando ele tenta escapar com Shadow Step. No entanto, assim que The Darkin Scythe permite que ele destrave Rhaast, a dinâmica muda. Rhaast se destaca em teamfights prolongadas, transformando a alta vida máxima do Maokai em uma fonte massiva de cura.
Impacto na lane
No início de jogo, usar Sapling Toss perto de paredes limita os ângulos criativos de gank dele e rastreia o movimento dele. Mas conforme a partida avança para os principais objetivos neutros, o Kayn vai caçar agressivamente por orbes vermelhos. Se você permitir que ele acumule a passiva livremente em você, a transformação rápida dele vai dominar a pressão no mapa e o controle de objetivos no meio de jogo.
Como jogar
Durante teamfights, nunca inicie diretamente no Rhaast, já que sua vida massiva só alimenta a cura dele. Em vez disso, guarde Twisted Advance para interrompê-lo imediatamente quando ele usar Reaping Slash para dar dive no seu backline. Siga com Bramble Smash para empurrá-lo para trás, impedindo que ele ative Umbral Trespass nos seus aliados frágeis. Se ele infectar um companheiro de time, posicione-se para afastá-lo no momento em que ele saltar para fora.

Wukong±0
Esse matchup na jungle é uma pura batalha de perturbação e posicionamento durante escaramuças em grupo. Wukong quer dar dive no seu backline com Nimbus Strike e perturbar todo mundo com Cyclone. No entanto, o Maokai tem as ferramentas perfeitas para neutralizar essa ameaça. Seu Bramble Smash pode empurrar o macaco giratório para longe, salvando seus aliados, enquanto Sapling Toss funciona como uma excelente ferramenta de escaneamento para revelar o Wukong quando ele tenta escapar ou armar uma emboscada usando Warrior Trickster.
Build de Wukong →
Ver detalhes
Por quê
Esse matchup na jungle é uma pura batalha de perturbação e posicionamento durante escaramuças em grupo. Wukong quer dar dive no seu backline com Nimbus Strike e perturbar todo mundo com Cyclone. No entanto, o Maokai tem as ferramentas perfeitas para neutralizar essa ameaça. Seu Bramble Smash pode empurrar o macaco giratório para longe, salvando seus aliados, enquanto Sapling Toss funciona como uma excelente ferramenta de escaneamento para revelar o Wukong quando ele tenta escapar ou armar uma emboscada usando Warrior Trickster.
Impacto na lane
Como os dois junglers se destacam em teamfight, as escaramuças iniciais perto de Rift Herald e do Dragão são incrivelmente tensas. Wukong aproveita Stone Skin para prosperar em lutas contra múltiplos alvos, o que significa que você não consegue eliminá-lo facilmente com burst. Se você não conseguir rastreá-lo, o flanco dele com Warrior Trickster pode devastar seus laners. Isso força um ritmo de jungle mais lento e defensivo, onde o controle de objetivos depende fortemente de quem garante visão e posicionamento superiores primeiro.
Como jogar
Para vencer esse confronto, nunca inicie com Twisted Advance no Wukong se o time dele estiver por trás. Em vez disso, fique perto dos seus principais causadores de dano. Guarde Bramble Smash exclusivamente para interromper o momentum de Cyclone dele no instante em que ele engajar. Se ele tentar escapar ou te enganar com o clone dele, jogue Sapling Toss no bush adjacente para ganhar visão. Se você for pego fora de posição, use Nature's Grasp para manter o time dele afastado e se desengajar.

Kindred±0
Esse matchup na jungle é uma disputa direta entre a mobilidade escorregadia de Kindred e sua imobilização absoluta. Kindred prospera usando *Dance of Arrows* dentro de *Wolf's Frenzy* para fazer kite em você indefinidamente. No entanto, seu *Twisted Advance* neutraliza completamente esse estilo de jogo. Esse enraizamento de alvo garantido a interrompe no lugar, impedindo que ela escape dançando e abrindo uma janela perfeita para seu time eliminá-la com burst.
Build de Kindred →
Ver detalhes
Por quê
Esse matchup na jungle é uma disputa direta entre a mobilidade escorregadia de Kindred e sua imobilização absoluta. Kindred prospera usando *Dance of Arrows* dentro de *Wolf's Frenzy* para fazer kite em você indefinidamente. No entanto, seu *Twisted Advance* neutraliza completamente esse estilo de jogo. Esse enraizamento de alvo garantido a interrompe no lugar, impedindo que ela escape dançando e abrindo uma janela perfeita para seu time eliminá-la com burst.
Impacto na lane
Essa dinâmica molda toda a pressão no mapa, principalmente em torno das caçadas pela *Mark of the Kindred*. Você precisa garantir visão nos bushes usando *Sapling Toss* para detectar as invasões dela com antecedência. Em escaramuças, o medo dela de *Twisted Advance* limita o posicionamento agressivo dela. Se você a prender antes que ela se prepare, a pressão dela na jungle entra em colapso; se ela conseguir fazer kite em você, ela garante o rio.
Como jogar
Em teamfights, foque inteiramente no seu posicionamento em relação ao alcance de atiradora dela. Não engaje no escuro; em vez disso, espere a Kindred se comprometer avançando com *Dance of Arrows*. Quando ela fizer isso, prenda-a imediatamente com *Twisted Advance*. Siga com *Bramble Smash* para empurrá-la para trás, idealmente tirando-a do próprio círculo de segurança de *Lamb's Respite*. Use *Sapling Toss* nos bushes para impedir que ela resete os cooldowns fora de visão.

Vi±0
Esse matchup é uma pura disputa de tempo de reação e cronometragem de habilidades. Vi depende fortemente de Vault Breaker para iniciar o burst dela e ativar Denting Blows. Como Maokai, você tem as ferramentas para anular a entrada principal dela; um Bramble Smash perfeitamente cronometrado pode derrubá-la do dash em pleno ar, enquanto um Twisted Advance reativo te torna temporariamente impossível de ser alvo, fazendo o golpe dela errar completamente e deixando-a vulnerável.
Build de Vi →
Ver detalhes
Por quê
Esse matchup é uma pura disputa de tempo de reação e cronometragem de habilidades. Vi depende fortemente de Vault Breaker para iniciar o burst dela e ativar Denting Blows. Como Maokai, você tem as ferramentas para anular a entrada principal dela; um Bramble Smash perfeitamente cronometrado pode derrubá-la do dash em pleno ar, enquanto um Twisted Advance reativo te torna temporariamente impossível de ser alvo, fazendo o golpe dela errar completamente e deixando-a vulnerável.
Impacto na lane
Na jungle, essa interação determina quem controla o rio e os objetivos iniciais. Se a Vi errar Vault Breaker ou for interrompida, ela não consegue acumular Blast Shield facilmente nem ativar Denting Blows, o que anula o poder de duelo dela. Isso permite que você garanta os Scuttle Crabs e dispute os camps dela. No entanto, se ela acertar o golpe com sucesso, o burst dela vai te forçar a recuar, dando a ela prioridade total.
Como jogar
Nunca desperdice Bramble Smash enquanto limpa camps perto da Vi; mantenha-o pronto para a aproximação inevitável dela. Quando você a vir carregando Vault Breaker, mantenha posição e cronometre seu Bramble Smash para empurrá-la no exato momento em que ela avançar. Como alternativa, mantenha o dedo sobre Twisted Advance para esquivar da carga dela. Se ela escolher você como alvo com Cease and Desist, prepare Nature's Grasp atrás de você para enraizá-la no instante em que ela pousar.

Viego±0
Esse matchup na jungle depende inteiramente da capacidade do Viego de ativar Sovereign's Domination. Enquanto Viego tenta se infiltrar em escaramuças usando Harrowed Path para emboscar seus aliados, o Maokai tem a ferramenta perfeita para travar os resets dele. Nature's Grasp funciona como uma parede massiva que detém o avanço do Viego, impedindo-o de alcançar companheiros feridos. Se o Viego não conseguir acertar Heartbreaker em um alvo com pouca vida por causa das suas raízes, o potencial de assassinato dele se desmorona.
Build de Viego →
Ver detalhes
Por quê
Esse matchup na jungle depende inteiramente da capacidade do Viego de ativar Sovereign's Domination. Enquanto Viego tenta se infiltrar em escaramuças usando Harrowed Path para emboscar seus aliados, o Maokai tem a ferramenta perfeita para travar os resets dele. Nature's Grasp funciona como uma parede massiva que detém o avanço do Viego, impedindo-o de alcançar companheiros feridos. Se o Viego não conseguir acertar Heartbreaker em um alvo com pouca vida por causa das suas raízes, o potencial de assassinato dele se desmorona.
Impacto na lane
Perto de objetivos, a presença do Viego te força a monitorar a posição dele perto de paredes, onde Harrowed Path dá camuflagem a ele. Como esse é um matchup equilibrado, as lutas neutras são decididas por quem ataca primeiro. Se você desperdiçar Twisted Advance no frontline do time dele, Viego vai contorná-lo para executar seu backline. Não bloquear a entrada dele significa que seu time é aniquilado por resets em cascata de Sovereign's Domination, sacrificando o controle de mapa.
Como jogar
Para vencer isso, nunca lance Nature's Grasp no escuro no início de uma teamfight. Em vez disso, fique entre a zona camuflada de Harrowed Path do Viego e seu aliado com menos vida. Guarde Twisted Advance especificamente para prendê-lo no momento em que ele carregar Spectral Maw. Se o Viego conseguir contornar seu crowd control e ativar Sovereign's Domination, use imediatamente Bramble Smash para empurrá-lo durante a breve janela de vulnerabilidade dele.

Riven±0
Esse matchup na jungle depende inteiramente de cronometrar seu crowd control contra a mobilidade dela. Riven depende de encadear Broken Wings para acumular Runic Blade e ativar o knockup dela. No entanto, o Maokai tem a ferramenta perfeita para quebrar esse fluxo. Ao dar buffer em Bramble Smash exatamente durante a animação do terceiro golpe de Broken Wings dela, você cancela completamente o knockup dela, deixando-a vulnerável com a principal fonte de dano em cooldown.
Build de Riven →
Ver detalhes
Por quê
Esse matchup na jungle depende inteiramente de cronometrar seu crowd control contra a mobilidade dela. Riven depende de encadear Broken Wings para acumular Runic Blade e ativar o knockup dela. No entanto, o Maokai tem a ferramenta perfeita para quebrar esse fluxo. Ao dar buffer em Bramble Smash exatamente durante a animação do terceiro golpe de Broken Wings dela, você cancela completamente o knockup dela, deixando-a vulnerável com a principal fonte de dano em cooldown.
Impacto na lane
Perturbar esse combo com sucesso determina completamente quem vence as escaramuças iniciais no rio e as disputas de objetivo. Se você negar o terceiro golpe dela, Riven perde sua principal ferramenta de engage, forçando-a a depender de Ki Burst ou Valor para escapar. Isso permite que você garanta o Scuttle Crab ou faça a transição para um counter-gank. Errar essa cronometragem, no entanto, deixa ela destruir sua vida e dominar o quadrante da jungle.
Como jogar
Nunca inicie um duelo com Bramble Smash; sempre guarde-o como ferramenta reativa. Ao disputar camps, comece com Twisted Advance para prendê-la, depois jogue um Sapling Toss no bush próximo para garantir visão. Observe com cuidado a contagem de golpes dela. No momento em que você vir ela girar para o lançamento final de Broken Wings, ative imediatamente Bramble Smash para empurrá-la para trás. Se ela ativar Blade of the Exile, recue usando Nature's Grasp para se desengajar e desperdiçar a duração da ultimate dela.

Nunu & Willump±0
Esse duelo na jungle é uma pura disputa de execução de objetivos e perturbação. Nunu & Willump dependem fortemente do momentum de Biggest Snowball Ever! para iniciar escaramuças, junto com Consume para garantir monstros neutros instantaneamente. No entanto, o Maokai tem as ferramentas para travar esse movimento. Ao cronometrar Bramble Smash perfeitamente, você pode destruir a bola de neve dele antes do impacto, ou usar a imunidade a ser alvo de Twisted Advance para contornar completamente o knockup.
Build de Nunu & Willump →
Ver detalhes
Por quê
Esse duelo na jungle é uma pura disputa de execução de objetivos e perturbação. Nunu & Willump dependem fortemente do momentum de Biggest Snowball Ever! para iniciar escaramuças, junto com Consume para garantir monstros neutros instantaneamente. No entanto, o Maokai tem as ferramentas para travar esse movimento. Ao cronometrar Bramble Smash perfeitamente, você pode destruir a bola de neve dele antes do impacto, ou usar a imunidade a ser alvo de Twisted Advance para contornar completamente o knockup.
Impacto na lane
A fase de jungle gira em torno de uma corrida de alto risco para garantir monstros épicos. Consume de Nunu & Willump dá a eles uma vantagem massiva em poder bruto de garantir objetivos, forçando você a jogar em torno de visão em vez de corridas de dano bruto. Se você não conseguir rastrear o caminho dele, a velocidade de gank dele vai sobrecarregar suas lanes. No entanto, sua capacidade de negar a entrada dele nos poços neutraliza a ameaça dele nos objetivos, transformando teamfights em impasses caóticos.
Como jogar
Priorize jogar Sapling Toss bem no fundo do bush do rio para detectar Biggest Snowball Ever! antes que ganhe velocidade máxima. Nunca use Bramble Smash cedo demais em uma escaramuça; guarde-o exclusivamente para interromper a carga rolante dele ou para empurrá-lo para longe do poço do monstro épico. Se Nunu & Willump começarem a canalizar Absolute Zero, lance imediatamente Twisted Advance para enraizá-los no lugar, permitindo que seu time escape da zona de explosão enquanto você sacode o dano.
Outros matchups









Favoráveis
18Esses campeões geralmente têm dificuldade para responder às suas principais forças, o que te dá mais liberdade para abordar o confronto. Você costuma ter várias formas de pressioná-los e forçar trocas a seu favor. Aproveite essa vantagem para impor seu ritmo, em vez de dar tempo para eles se estabilizarem.

Hecarim−1
Maokai trava completamente as iniciações em alta velocidade de Hecarim. Quando Hecarim avança com Devastating Charge, um Bramble Smash bem cronometrado o empurra para trás em pleno dash, matando instantaneamente o momentum e o dano dele. Além disso, você pode usar Twisted Advance para ficar impossível de ser alvo, esquivando perfeitamente do medo e do dano de Onslaught of Shadows. Isso torna os dives agressivos de Hecarim inúteis, deslocando fortemente o controle das escaramuças a seu favor.
Build de Hecarim →
Ver detalhes
Por quê
Maokai trava completamente as iniciações em alta velocidade de Hecarim. Quando Hecarim avança com Devastating Charge, um Bramble Smash bem cronometrado o empurra para trás em pleno dash, matando instantaneamente o momentum e o dano dele. Além disso, você pode usar Twisted Advance para ficar impossível de ser alvo, esquivando perfeitamente do medo e do dano de Onslaught of Shadows. Isso torna os dives agressivos de Hecarim inúteis, deslocando fortemente o controle das escaramuças a seu favor.
Impacto na lane
Na jungle, esse matchup muda como as teamfights e as escaramuças no rio se desenrolam. Hecarim não consegue flanquear ou dar dive no seu backline livremente, porque sua simples presença ameaça deter a carga dele. Ao posicionar Sapling Toss nos bushes perto de objetivos, você revela a aproximação dele e desgasta a vida dele antes que ele consiga acumular Warpath. Sua capacidade de prendê-lo impede que ele se cure continuamente com Spirit of Dread.
Como jogar
Para vencer, nunca desperdice Bramble Smash durante teamfights; guarde-o especificamente para o momento em que Hecarim ativar Devastating Charge e correr em direção ao seu time. Se ele escolher você como alvo com Onslaught of Shadows, reaja rapidamente com Twisted Advance em um inimigo próximo ou no próprio Hecarim para contornar o crowd control. Se ele te evitar para dar dive em outro lugar, use Nature's Grasp atravessando a lane para bloquear as rotas de fuga dele e forçá-lo para dentro do seu crowd control.

Kha'Zix−1
Maokai dita o ritmo da jungle porque Sapling Toss neutraliza completamente a dependência que Kha'Zix tem de jogar nos bushes. Ao jogar suas mudas explosivas em pontos de estrangulamento cruciais, você revela ele constantemente e nega a capacidade dele de resetar Unseen Threat. Sem essa injeção de dano passivo, o potencial de burst dele cai significativamente, impedindo-o de garantir os abates rápidos que ele precisa para crescer.
Build de Kha'Zix →
Ver detalhes
Por quê
Maokai dita o ritmo da jungle porque Sapling Toss neutraliza completamente a dependência que Kha'Zix tem de jogar nos bushes. Ao jogar suas mudas explosivas em pontos de estrangulamento cruciais, você revela ele constantemente e nega a capacidade dele de resetar Unseen Threat. Sem essa injeção de dano passivo, o potencial de burst dele cai significativamente, impedindo-o de garantir os abates rápidos que ele precisa para crescer.
Impacto na lane
Esse domínio de visão muda completamente a dinâmica da jungle. Kha'Zix não consegue emboscar você com segurança nem invadir seus camps, já que suas mudas transformam todo bush em um risco. Como ele não consegue te isolar facilmente, Taste Their Fear perde o fio letal. Você trava facilmente a pressão inicial dele, garantindo objetivos neutros com segurança atrás de uma parede de controle de zona, forçando-o a tomar caminhos desesperados e abaixo do ideal.
Como jogar
Não busque duelos 1x1 diretos na jungle aberta. Em vez disso, foque em controlar os bushes-chave do rio com Sapling Toss antes dos objetivos nascerem. Se Kha'Zix tentar um Leap desesperado em cima dos seus aliados frágeis, prenda-o imediatamente com Twisted Advance, depois use Bramble Smash para afastá-lo deles. Guarde Nature's Grasp para mantê-lo completamente fora das teamfights, deixando-o sem os resets de isolamento.

Lee Sin−1
Você tem uma vantagem enorme na jungle porque seu crowd control trava completamente as tentativas de assassinato de alta mobilidade de Lee Sin. A interação decisiva acontece quando ele acerta Sonic Wave. Em vez de entrar em pânico, você pode cronometrar Twisted Advance para ficar impossível de ser alvo bem quando ele avançar em sua direção. Isso anula completamente a principal fonte de dano dele enquanto o prende com raiz no lugar, deixando-o incrivelmente vulnerável.
Build de Lee Sin →
Ver detalhes
Por quê
Você tem uma vantagem enorme na jungle porque seu crowd control trava completamente as tentativas de assassinato de alta mobilidade de Lee Sin. A interação decisiva acontece quando ele acerta Sonic Wave. Em vez de entrar em pânico, você pode cronometrar Twisted Advance para ficar impossível de ser alvo bem quando ele avançar em sua direção. Isso anula completamente a principal fonte de dano dele enquanto o prende com raiz no lugar, deixando-o incrivelmente vulnerável.
Impacto na lane
Essa dinâmica de matchup retira do Lee Sin o poder de invasão do início de jogo, forçando-o a jogar na defensiva dentro da própria jungle. Sempre que ele tentar forçar uma escaramuça perto do rio ou durante objetivos neutros, sua capacidade de cancelar a mobilidade dele impede que ele execute suas jogadas características de Dragon's Rage. Ele não consegue crescer, o que reduz drasticamente a pressão inicial do time dele no mapa.
Como jogar
Ao disputar scuttle crabs ou objetivos, sempre se posicione na frente do seu time e jogue Sapling Toss nos bushes para escanear a aproximação do Lee Sin. Nunca inicie com Twisted Advance; em vez disso, guarde-o especificamente para reagir ao dash de Sonic Wave dele. Depois de enraizá-lo em pleno dash, siga imediatamente com Bramble Smash para empurrá-lo de volta para os seus aliados, impedindo que ele escape com Safeguard.

Lillia−1
Lillia depende de acumular velocidade de movimento com Blooming Blows para dançar em torno das lutas e aplicar Dream-Laden Bough. No entanto, Maokai trava completamente esse estilo de escaramuça. Como Twisted Advance é uma raiz garantida de alvo direto, Lillia não consegue usar a alta velocidade dela para esquivar. Essa imobilização inevitável para completamente o momentum dela, deixando-a altamente vulnerável a um Nature's Grasp seguinte e a um burst rápido.
Build de Lillia →
Ver detalhes
Por quê
Lillia depende de acumular velocidade de movimento com Blooming Blows para dançar em torno das lutas e aplicar Dream-Laden Bough. No entanto, Maokai trava completamente esse estilo de escaramuça. Como Twisted Advance é uma raiz garantida de alvo direto, Lillia não consegue usar a alta velocidade dela para esquivar. Essa imobilização inevitável para completamente o momentum dela, deixando-a altamente vulnerável a um Nature's Grasp seguinte e a um burst rápido.
Impacto na lane
Durante escaramuças na jungle e disputas por objetivos neutros, a capacidade da Lillia de dar poke com segurança usando Swirlseed e fugir é severamente limitada. Sua simples presença a força a se posicionar defensivamente, impedindo que ela acumule Blooming Blows livremente em camps ou companheiros de time. Se ela tentar disputar scuttle crabs ou invadir, sua captura de alvo direto garante que ela não consiga escapar depois de passar do frontline dela, deslocando fortemente o controle do rio a seu favor.
Como jogar
Posicione-se em corredores estreitos da jungle onde a Lillia tem menos espaço para se mover. Não desperdice Twisted Advance cedo demais; espere ela se aproximar para acertar Blooming Blows ou Watch Out! Eep!. No momento em que ela se comprometer com o dash, prenda-a com Twisted Advance, depois lance imediatamente Nature's Grasp atrás dela para bloquear a rota de fuga. Use Bramble Smash para empurrá-la de volta para as raízes da sua ultimate se ela tentar limpar o efeito ou fugir.

Nocturne−1
Maokai naturalmente amortece as tentativas de assassinato em alto ritmo de Nocturne. Mesmo quando Paranoia cobre o mapa em escuridão, Sapling Toss do Maokai oferece visão crucial dos bushes próximos para detectar flancos chegando. Quando Nocturne se compromete com o dive, Twisted Advance oferece crowd control de alvo direto que contorna a mobilidade dele, enquanto Bramble Smash pode empurrá-lo para trás imediatamente para impedir que o laço de medo dele conecte.
Build de Nocturne →
Ver detalhes
Por quê
Maokai naturalmente amortece as tentativas de assassinato em alto ritmo de Nocturne. Mesmo quando Paranoia cobre o mapa em escuridão, Sapling Toss do Maokai oferece visão crucial dos bushes próximos para detectar flancos chegando. Quando Nocturne se compromete com o dive, Twisted Advance oferece crowd control de alvo direto que contorna a mobilidade dele, enquanto Bramble Smash pode empurrá-lo para trás imediatamente para impedir que o laço de medo dele conecte.
Impacto na lane
Esse matchup desloca fortemente a dinâmica da jungle para o counter-gank defensivo. Nocturne não consegue dar dive livremente nos seus laners porque sua presença no rio nega o limiar de execução dele. Sempre que ele tentar se fixar em um aliado, sua capacidade de afastá-lo rapidamente arruína completamente o ritmo dele. Além disso, Shroud of Darkness dele é facilmente estourado pelas suas habilidades de cooldown baixo, deixando-o altamente vulnerável a contra-engages durante escaramuças iniciais.
Como jogar
Posicione-se constantemente entre o ângulo de aproximação esperado de Nocturne e seu carry mais frágil. Ao navegar perto de objetivos, jogue Sapling Toss nos bushes de estrangulamento para manter os limites de visão antes de Paranoia começar. Nunca inicie com Twisted Advance; em vez disso, guarde-o especificamente para reagir ao voo da ultimate dele. Se ele ativar Shroud of Darkness, ative sua passiva Sap Magic com ataques básicos para superá-lo em sustentação enquanto espera o escudo dele expirar.

Shyvana−1
Maokai naturalmente sufoca a entrada principal de Shyvana em teamfight, porque Bramble Smash dele pode interromper diretamente e empurrá-la para trás em pleno voo durante Dragon's Descent. Como a ultimate dela é a única ferramenta confiável para fechar a distância e iniciar lutas, negar esse impacto inicial trava completamente o potencial de dive dela, deixando-a vulnerável ao follow-up do seu time enquanto Burnout e Flame Breath dela falham em alcançar os alvos de alto valor.
Build de Shyvana →
Ver detalhes
Por quê
Maokai naturalmente sufoca a entrada principal de Shyvana em teamfight, porque Bramble Smash dele pode interromper diretamente e empurrá-la para trás em pleno voo durante Dragon's Descent. Como a ultimate dela é a única ferramenta confiável para fechar a distância e iniciar lutas, negar esse impacto inicial trava completamente o potencial de dive dela, deixando-a vulnerável ao follow-up do seu time enquanto Burnout e Flame Breath dela falham em alcançar os alvos de alto valor.
Impacto na lane
Essa interação desloca fortemente o equilíbrio de poder em torno dos Monstros Épicos, onde Shyvana quer desesperadamente acumular Fury of the Dragonborn. Ao controlar os pontos de estrangulamento com Sapling Toss, você a força a revelar a posição dela ou a usar Dragon's Descent prematuramente. Se ela tentar forçar um roubo, sua capacidade de negar a zona de pouso dela trava completamente a disputa de objetivo dela, dando ao seu time neutros de graça.
Como jogar
Posicione-se como uma parede física entre Shyvana e seu backline durante as disputas de objetivo. Nunca desperdice Bramble Smash na forma humana dela; guarde essa habilidade específica e reaja à animação da ultimate dela. No momento em que ela lançar Dragon's Descent, use seu knockback para derrubá-la em pleno ar, depois siga imediatamente com Twisted Advance para enraizá-la no lugar, garantindo que ela não consiga ficar colada nos seus aliados com Burnout.

Talon−1
O domínio de Talon na jungle depende de usar Assassin's Path para ignorar o terreno e escapar de situações ruins. No entanto, Maokai tem uma vantagem enorme porque Twisted Advance é uma raiz de alvo direto inevitável. Isso trava completamente a capacidade de Talon de saltar paredes, prendendo-o no lugar em pleno lançamento ou forçando-o a lutar contra um oponente tanque que ele não consegue eliminar com burst, principalmente quando Sap Magic mantém sua vida constantemente alta.
Build de Talon →
Ver detalhes
Por quê
O domínio de Talon na jungle depende de usar Assassin's Path para ignorar o terreno e escapar de situações ruins. No entanto, Maokai tem uma vantagem enorme porque Twisted Advance é uma raiz de alvo direto inevitável. Isso trava completamente a capacidade de Talon de saltar paredes, prendendo-o no lugar em pleno lançamento ou forçando-o a lutar contra um oponente tanque que ele não consegue eliminar com burst, principalmente quando Sap Magic mantém sua vida constantemente alta.
Impacto na lane
Essa interação muda completamente a pressão na jungle. Talon não consegue fazer counter-jungle com segurança nem flanquear seus laners, porque qualquer encontro cara a cara perto de paredes se torna letal para ele. Se ele tentar um gank arriscado, seu counter-gank com Nature's Grasp e Sapling Toss o prende nos corredores do rio. Ele perde o potencial de crescimento no mapa todo, transformando as rotações agressivas dele em manobras altamente arriscadas, onde qualquer erro leva à morte dele.
Como jogar
Para explorar isso, sempre escaneie os pontos de estrangulamento da jungle jogando Sapling Toss nos bushes onde Talon pode preparar um flanco. Nunca inicie uma luta com Twisted Advance se ele estiver perto de uma parede intacta; em vez disso, avance, use Bramble Smash para afastá-lo do terreno, e só ative sua raiz de alvo direto quando ele tentar lançar Assassin's Path. Se ele usar Shadow Assault para ficar invisível, um posicionamento paciente permite que você o prenda no momento em que ele reaparecer.

Twitch−1
Twitch depende inteiramente da furtividade de Ambush para garantir pressão inicial no mapa e ganks surpresa, mas seu kit neutraliza completamente essa ferramenta. Ao jogar Sapling Toss nos pontos de estrangulamento e bushes comuns, você revela ele antes que consiga se reposicionar. Uma vez exposto, Twitch não tem mobilidade natural nem dashes, deixando-o extremamente vulnerável ao seu Twisted Advance de alvo direto, que trava imediatamente qualquer tentativa de kite.
Build de Twitch →
Ver detalhes
Por quê
Twitch depende inteiramente da furtividade de Ambush para garantir pressão inicial no mapa e ganks surpresa, mas seu kit neutraliza completamente essa ferramenta. Ao jogar Sapling Toss nos pontos de estrangulamento e bushes comuns, você revela ele antes que consiga se reposicionar. Uma vez exposto, Twitch não tem mobilidade natural nem dashes, deixando-o extremamente vulnerável ao seu Twisted Advance de alvo direto, que trava imediatamente qualquer tentativa de kite.
Impacto na lane
Essa interação tira de Twitch sua principal arma: o terror dos ganks invisíveis. Como você pode escanear as entradas do rio com Sapling Toss, seus laners podem jogar agressivamente sem medo. Twitch é forçado a farmar os camps dele lentamente, incapaz de crescer através de Ambush. Esse atraso no crescimento dele permite que você garanta objetivos neutros iniciais com Nature's Grasp, sufocando a presença dele na jungle.
Como jogar
Ao disputar camps ou objetivos, sempre semeie os bushes ao redor com Sapling Toss para interceptar a aproximação de Twitch. Nunca inicie uma luta com Twisted Advance se Twitch estiver ausente do mapa; guarde-o especificamente para prendê-lo no momento em que Ambush terminar. Se ele ativar Spray and Pray, use imediatamente Bramble Smash para empurrá-lo para trás, perturbando a trajetória perfurante da ultimate dele e salvando seus companheiros de time.

Master Yi−2
Master Yi depende inteiramente de Alpha Strike para esquivar de crowd control e destruir alvos. Como Maokai, você tem o counter definitivo: seu Twisted Advance é uma raiz de alvo direto que não pode errar depois que ele reaparece. Ao esperar o salto inicial dele passar, você pode encadear instantaneamente Twisted Advance em Nature's Grasp, retirando a mobilidade de Highlander dele e deixando-o completamente exposto antes que ele consiga acumular Double Strike.
Build de Master Yi →
Ver detalhes
Por quê
Master Yi depende inteiramente de Alpha Strike para esquivar de crowd control e destruir alvos. Como Maokai, você tem o counter definitivo: seu Twisted Advance é uma raiz de alvo direto que não pode errar depois que ele reaparece. Ao esperar o salto inicial dele passar, você pode encadear instantaneamente Twisted Advance em Nature's Grasp, retirando a mobilidade de Highlander dele e deixando-o completamente exposto antes que ele consiga acumular Double Strike.
Impacto na lane
Essa dinâmica muda completamente o controle de objetivos neutros e escaramuças no rio a seu favor. Master Yi não consegue disputar Monstros Épicos com segurança nem garantir Scuttle Crabs, porque seu crowd control trava o potencial de duelo dele. Sempre que ele tentar fazer power farm ou forçar um gank, sua capacidade de prendê-lo em escaramuças impede que ele consiga os resets necessários para estender Highlander, neutralizando a presença dele pelo mapa.
Como jogar
Durante escaramuças, nunca inicie com Twisted Advance enquanto Master Yi ainda tiver Alpha Strike disponível. Em vez disso, jogue Sapling Toss no bush próximo para desacelerá-lo ou garantir visão, e provoque-o para se comprometer. No momento em que a animação de Alpha Strike dele terminar e ele reaparecer, prenda-o imediatamente com Twisted Advance, depois siga com Bramble Smash para perturbar qualquer tentativa de canalizar Meditate, finalizando com Nature's Grasp para garantir o abate.

Rengar−2
Esse matchup na jungle favorece fortemente você, porque seu Sapling Toss trava completamente Unseen Predator de Rengar. Ao jogar mudas nos bushes, você revela ele e ativa dano antecipado, impedindo que ele salte para emboscar você ou seus laners. Sem o elemento surpresa dos bushes, o burst dele impulsionado por Savagery é severamente reduzido, transformando o principal território de caça dele em uma zona de risco.
Build de Rengar →
Ver detalhes
Por quê
Esse matchup na jungle favorece fortemente você, porque seu Sapling Toss trava completamente Unseen Predator de Rengar. Ao jogar mudas nos bushes, você revela ele e ativa dano antecipado, impedindo que ele salte para emboscar você ou seus laners. Sem o elemento surpresa dos bushes, o burst dele impulsionado por Savagery é severamente reduzido, transformando o principal território de caça dele em uma zona de risco.
Impacto na lane
No rio e em torno dos poços neutros, seu controle é absoluto. Rengar não consegue disputar scuttle crabs com segurança nem montar counter-ganks quando você o mantém constantemente fora dos bushes. Se ele tentar forçar um engage com Thrill of the Hunt, seu Nature's Grasp cobre o corredor inteiro, prendendo-o em pleno salto ou forçando-o a desperdiçar um Battle Roar potencializado só para limpar a raiz.
Como jogar
Sempre garanta a prioridade dos bushes jogando Sapling Toss à frente do seu caminho, especialmente perto do buff vermelho e dos bushes do rio. Se Rengar saltar em você, use imediatamente Bramble Smash para empurrá-lo e interromper o reset de ataque básico dele, depois siga com Twisted Advance para prendê-lo. Nunca faça face-check sem uma muda ativa; em vez disso, force-o a iniciar lutas nos seus termos, onde Unseen Predator dele é completamente inútil.

Tryndamere−1
Maokai neutraliza naturalmente a ameaça de Tryndamere na jungle, porque o crowd control dele é o counter direto da rede de segurança da ultimate do bárbaro. Quando Tryndamere ativa Undying Rage para sobreviver a dano fatal, Maokai pode prendê-lo imediatamente. Ao encadear Twisted Advance em Nature's Grasp, você nega a ele qualquer capacidade de usar ataque básico ou se curar com Bloodlust, tornando os 5 segundos de imortalidade dele completamente inúteis enquanto seu time faz kite nele com segurança.
Build de Tryndamere →
Ver detalhes
Por quê
Maokai neutraliza naturalmente a ameaça de Tryndamere na jungle, porque o crowd control dele é o counter direto da rede de segurança da ultimate do bárbaro. Quando Tryndamere ativa Undying Rage para sobreviver a dano fatal, Maokai pode prendê-lo imediatamente. Ao encadear Twisted Advance em Nature's Grasp, você nega a ele qualquer capacidade de usar ataque básico ou se curar com Bloodlust, tornando os 5 segundos de imortalidade dele completamente inúteis enquanto seu time faz kite nele com segurança.
Impacto na lane
Na jungle, essa interação desloca toda a prioridade de escaramuça para você. Tryndamere não consegue invadir seus camps com segurança nem dar dive nos seus laners, porque suas ferramentas de afastamento travam as entradas agressivas de Spinning Slash dele. Durante lutas por objetivos importantes, a pressão dele é completamente neutralizada; ele é forçado a jogar passivamente ou arriscar ser preso e morto no momento em que a ultimate dele expirar, dando ao seu time controle total sobre os objetivos neutros.
Como jogar
Para executar isso perfeitamente, nunca desperdice seu crowd control principal no início de uma luta. Quando Tryndamere engajar com Spinning Slash, use Bramble Smash para empurrá-lo e verificar a barra de furor dele. Quando ele cair para pouca vida e ativar Undying Rage, lance imediatamente Twisted Advance seguido de Nature's Grasp. Essa sequência precisa o mantém enraizado durante toda a duração da ultimate dele, garantindo que ele morra imediatamente quando a invencibilidade dele acabar, sem ter causado dano nenhum.
Outros matchups






Hard Counters
9Esses campeões têm uma build e um estilo de jogo que superam diretamente o seu, o que pode tornar o controle da lane e o farm extremamente difíceis. As habilidades deles podem neutralizar seus principais pontos fortes ou te punir assim que você tenta jogar do seu jeito de sempre. Nesses matchups, o objetivo costuma ser reduzir os erros e buscar soluções fora do confronto direto.
Olaf+3
Olaf neutraliza completamente seu kit defensivo a partir do nível 5. No momento em que ele ativa Ragnarok, torna-se totalmente imune ao crowd control de Twisted Advance, Bramble Smash e Nature's Grasp. Sem suas raízes e empurrões para mantê-lo afastado, Olaf consegue facilmente alcançar você usando a lentidão de Undertow e o dano verdadeiro imparável de Reckless Swing.
Build de Olaf →
Ver detalhes
Por quê
Olaf neutraliza completamente seu kit defensivo a partir do nível 5. No momento em que ele ativa Ragnarok, torna-se totalmente imune ao crowd control de Twisted Advance, Bramble Smash e Nature's Grasp. Sem suas raízes e empurrões para mantê-lo afastado, Olaf consegue facilmente alcançar você usando a lentidão de Undertow e o dano verdadeiro imparável de Reckless Swing.
Impacto na lane
Essa interação força você a uma postura defensiva permanente, em que atravessar o rio é extremamente perigoso. Se a wave estourar perto da torre do Olaf, ele consegue facilmente alcançar você por toda a extensão da lane. Você não pode disputar trocas curtas, porque Berserker Rage e Vicious Strikes dele vão curar mais do que sua sustentação passiva de Sap Magic, forçando lentamente recalls desfavoráveis.
Como jogar
Para sobreviver, mantenha a wave de minions congelada bem fora do alcance da sua torre. Use Sapling Toss dentro dos arbustos para reduzir a wave com segurança a distância, sem empurrá-la. Se Olaf ativar Ragnarok, não gaste Twisted Advance ou Nature's Grasp defensivamente; em vez disso, recue imediatamente e use Bramble Smash somente depois que a ultimate dele expirar, para empurrá-lo para debaixo da sua torre.
Mordekaiser+2
Mordekaiser neutraliza completamente sua configuração defensiva a partir do momento em que desbloqueia a ultimate dele. Quando ele arrasta você para o Realm of Death, você fica instantaneamente isolado de qualquer arbusto onde tenha posicionado Sapling Toss. Dentro dessa arena isolada, a aura de Darkness Rise dele inevitavelmente se ativa, derretendo constantemente sua barra de vida, enquanto você não tem dano bruto suficiente para romper o escudo de Indestructible dele.
Build de Mordekaiser →
Ver detalhes
Por quê
Mordekaiser neutraliza completamente sua configuração defensiva a partir do momento em que desbloqueia a ultimate dele. Quando ele arrasta você para o Realm of Death, você fica instantaneamente isolado de qualquer arbusto onde tenha posicionado Sapling Toss. Dentro dessa arena isolada, a aura de Darkness Rise dele inevitavelmente se ativa, derretendo constantemente sua barra de vida, enquanto você não tem dano bruto suficiente para romper o escudo de Indestructible dele.
Impacto na lane
Esse matchup força você a uma postura defensiva extremamente passiva sob a sua própria torre. Você não pode disputar o controle da wave, porque um único puxão de Death's Grasp monta um Obliterate fácil que consome boa parte da sua vida. Depois que ele consegue a ultimate, atravessar o rio é uma sentença de morte, já que ele vai te prender no reino da morte dele, deixando sua torre vulnerável a uma pressão pesada sobre as placas.
Como jogar
Para sobreviver, priorize resistência mágica desde o início da partida para suavizar a aura passiva dele. Durante as trocas, nunca use Twisted Advance de forma ofensiva; em vez disso, guarde-o para esquivar do golpe de Obliterate, cronometrando sua intargetabilidade com perfeição. Se ele puxar você com Death's Grasp, use Bramble Smash imediatamente para empurrá-lo e se desengajar. Quando estiver preso no Realm of Death, foque apenas em correr em círculos e usar Sap Magic para curar, aguentando até a arena acabar.

Vayne+2
Vayne neutraliza completamente seu potencial de engage na Top lane. Sempre que você tenta travá-la com Twisted Advance, ela consegue reagir instantaneamente com Condemn, empurrando você para trás antes que consiga seguir com Bramble Smash. Essa aproximação frustrada deixa você completamente exposto ao harassment à distância dela, permitindo que ela acione facilmente o dano verdadeiro de Silver Bolts através de ataques básicos e Tumble, contornando sua resistência inata.
Build de Vayne →
Ver detalhes
Por quê
Vayne neutraliza completamente seu potencial de engage na Top lane. Sempre que você tenta travá-la com Twisted Advance, ela consegue reagir instantaneamente com Condemn, empurrando você para trás antes que consiga seguir com Bramble Smash. Essa aproximação frustrada deixa você completamente exposto ao harassment à distância dela, permitindo que ela acione facilmente o dano verdadeiro de Silver Bolts através de ataques básicos e Tumble, contornando sua resistência inata.
Impacto na lane
Como você não consegue ameaçá-la, Vayne dita o estado da wave desde o nível um. Você vai se ver encurralado sob a própria torre, lutando para garantir os last hits enquanto recebe poke constante dos ataques à distância dela. Esse harassment constante força recalls precoces, sangrando sua renda de ouro e deixando ela desgastar as placas da sua torre. Você perde toda a prioridade, o que significa que não pode ajudar em skirmishes iniciais no rio sem sacrificar a lane inteira.
Como jogar
Sobreviver significa abrir mão de ouro desnecessário para preservar sua barra de vida. Fique bem atrás da wave, usando Sapling Toss nos arbustos da lane para farmar com segurança ou reduzir o avanço dela. Nunca inicie com Twisted Advance a menos que seu jungler esteja fisicamente na lane para atrair o Condemn dela primeiro. Posicione-se estritamente no centro da lane, evitando as paredes para que ela não consiga te atordoar, e use Bramble Smash defensivamente para empurrá-la quando ela tentar avançar com Tumble.
Volibear+2
Volibear domina completamente trocas prolongadas, porque Frenzied Maul aplica uma marca que faz as mordidas seguintes curarem ele enquanto causam dano massivo. Como Maokai depende da cura mais lenta e acionada por habilidade de Sap Magic, você não consegue acompanhar esse poder de combate corpo a corpo repetitivo. Se ele avançar com Thundering Smash, sua única resposta confiável é interromper o impulso dele imediatamente com Bramble Smash, para impedir que ele acumule The Relentless Storm e sustente a luta.
Build de Volibear →
Ver detalhes
Por quê
Volibear domina completamente trocas prolongadas, porque Frenzied Maul aplica uma marca que faz as mordidas seguintes curarem ele enquanto causam dano massivo. Como Maokai depende da cura mais lenta e acionada por habilidade de Sap Magic, você não consegue acompanhar esse poder de combate corpo a corpo repetitivo. Se ele avançar com Thundering Smash, sua única resposta confiável é interromper o impulso dele imediatamente com Bramble Smash, para impedir que ele acumule The Relentless Storm e sustente a luta.
Impacto na lane
Esse matchup força você a uma postura defensiva permanente, na qual precisa abrir mão da prioridade de lane. Você não pode disputar a wave diretamente, já que Volibear vai usar Sky Splitter para se proteger durante as trocas, empurrando você para trás. Você é forçado a deixar os minions estourarem na torre e depender de Bramble Smash para garantir os last hits sob a sua torre. Isso deixa você vulnerável a dives depois que ele desbloquear Stormbringer, além de impedir que você ajude seu jungler.
Como jogar
Para sobreviver, nunca use Twisted Advance ofensivamente, a menos que seu jungler esteja ativamente fazendo um gank. Em vez disso, guarde seu Bramble Smash especificamente para empurrar Volibear no momento em que ele ativar Thundering Smash para te atordoar. Use Sapling Toss no arbusto do rio para detectar dives com antecedência. Se ele congelar a wave ou ameaçar você sob a torre com Stormbringer, use Nature's Grasp defensivamente para limpar os minions rapidamente e enraizá-lo no meio do salto, preservando sua torre e sua vida.
Outros matchups


Desfavoráveis
17Esses campeões têm ferramentas que geralmente dão a eles vantagem no confronto, sem tornar o matchup impossível de jogar. Eles podem ter mais alcance, mais capacidade de aguentar sua ofensiva ou mais formas de responder aos seus engajamentos. Você vai precisar adaptar sua abordagem e escolher com cuidado os momentos em que aceita a luta.

Sett+1
Sett se destaca em combates corpo a corpo contínuos graças à sustentação de Pit Grit e aos golpes pesados de Knuckle Down. Maokai tem dificuldade para acompanhar esse DPS bruto, o que torna as trocas diretas bastante desfavoráveis. Porém, a passiva Sap Magic de Maokai permite recuperar parte do dano, transformando a lane em uma batalha de atrito. A dinâmica central depende de Maokai usar Bramble Smash para interromper ativamente o combo de Sett, especificamente cortando Facebreaker ou empurrando Sett para esquivar do centro de Haymaker.
Build de Sett →
Ver detalhes
Por quê
Sett se destaca em combates corpo a corpo contínuos graças à sustentação de Pit Grit e aos golpes pesados de Knuckle Down. Maokai tem dificuldade para acompanhar esse DPS bruto, o que torna as trocas diretas bastante desfavoráveis. Porém, a passiva Sap Magic de Maokai permite recuperar parte do dano, transformando a lane em uma batalha de atrito. A dinâmica central depende de Maokai usar Bramble Smash para interromper ativamente o combo de Sett, especificamente cortando Facebreaker ou empurrando Sett para esquivar do centro de Haymaker.
Impacto na lane
Como Sett ameaça constantemente puxar você com Facebreaker e bater com The Show Stopper, você vai se ver empurrado para sob a torre com frequência. Trocar vida é perigoso, porque o escudo de Haymaker de Sett anula o seu contra-burst. Se você gastar Bramble Smash sem necessidade, Sett vai te isolar da wave de minions imediatamente. Você precisa aceitar perder um pouco de ouro para manter sua barra de vida alta o suficiente e evitar dives fáceis.
Como jogar
Nunca use Bramble Smash ofensivamente; guarde-o estritamente para reagir às animações de Sett. Quando ver Sett carregando Haymaker, use Bramble Smash imediatamente para empurrá-lo, garantindo que você saia da zona central de dano verdadeiro. Se ele te agarrar com Facebreaker, use Twisted Advance para enraizá-lo e se reposicionar atrás dele, ou lance Sapling Toss nos arbustos da lane para reduzir a perseguição dele. Se Sett conseguir executar The Show Stopper, desengaje imediatamente até a barra de grit dele decair.

Nasus+1
Esse matchup é uma corrida contra o tempo. Você não tem dano bruto suficiente para impedir que Nasus acumule Siphoning Strike infinitamente em minions, e a passiva Soul Eater dele absorve facilmente o poke do seu Sapling Toss. Porém, Nasus não tem nenhuma ferramenta natural de fuga. Isso o torna altamente vulnerável ao seu Twisted Advance de alvo automático, que serve como uma ancoragem inescapável para montar ganks limpos e letais com seu jungler antes que ele escale demais.
Build de Nasus →
Ver detalhes
Por quê
Esse matchup é uma corrida contra o tempo. Você não tem dano bruto suficiente para impedir que Nasus acumule Siphoning Strike infinitamente em minions, e a passiva Soul Eater dele absorve facilmente o poke do seu Sapling Toss. Porém, Nasus não tem nenhuma ferramenta natural de fuga. Isso o torna altamente vulnerável ao seu Twisted Advance de alvo automático, que serve como uma ancoragem inescapável para montar ganks limpos e letais com seu jungler antes que ele escale demais.
Impacto na lane
A lane naturalmente desacelera, já que Nasus foca exclusivamente em last hits. Se você empurrar sem pensar, ele vai congelar perto da própria torre, usando Spirit Fire para igualar seu wave clear quando necessário. Como você não consegue derrotá-lo em um abate solo depois que ele conseguir Fury of the Sands, ficar na top lane por muito tempo rende retornos cada vez menores. Seu impacto real é decidido por quão rápido você consegue abandonar essa lane para garantir objetivos do mapa enquanto Nasus permanece isolado.
Como jogar
Deixe a wave quicar para o seu lado do mapa para esticar a lane. Quando seu jungler se aproximar, inicie com Twisted Advance para travar Nasus, depois reposicione-se imediatamente com Bramble Smash para empurrá-lo em direção ao seu aliado, contornando a lentidão de Wither dele. Se você ficar sozinho, não force trocas. Em vez disso, use Nature's Grasp a partir do rio para travar a mid lane ou garantir objetivos neutros enquanto Nasus está ocupado acumulando o Q dele.

Yone+1
Enquanto Maokai se destaca no controle no início de jogo, o escalonamento de dano duplo de Yone vindo de Way of the Hunter e o Mortal Steel de recarga baixa inevitavelmente superam sua resistência. Porém, o matchup gira em torno de uma interação precisa: quando Yone se projeta com Soul Unbound, você pode cronometrar Twisted Advance para acompanhar a animação de retorno dele. Isso garante que você o siga até o ponto de ancoragem dele, garantindo uma raiz profunda e inescapável.
Build de Yone →
Ver detalhes
Por quê
Enquanto Maokai se destaca no controle no início de jogo, o escalonamento de dano duplo de Yone vindo de Way of the Hunter e o Mortal Steel de recarga baixa inevitavelmente superam sua resistência. Porém, o matchup gira em torno de uma interação precisa: quando Yone se projeta com Soul Unbound, você pode cronometrar Twisted Advance para acompanhar a animação de retorno dele. Isso garante que você o siga até o ponto de ancoragem dele, garantindo uma raiz profunda e inescapável.
Impacto na lane
Como Spirit Cleave de Yone desgasta sua vida enquanto o protege com um escudo, você não consegue disputar o avanço dele no início. Você vai se ver preso sob a torre, farmando com Bramble Smash para impedir que a wave estoure rápido demais. Não gerenciar bem as curas de Sap Magic durante as trocas de Soul Unbound dele significa abrir mão das placas da torre, deixando ele acelerar os itens e dominar a sidelane.
Como jogar
Posicione-se estritamente perto da borda da sua torre, forçando Yone a dar dive se quiser trocar com Mortal Steel. Sempre guarde Twisted Advance quando Soul Unbound dele estiver ativo; não lance por pânico. Espere a duração da conexão quase terminar, então lance para travá-lo sob a sua torre. Se ele congelar a wave fora de alcance, use Sapling Toss nos arbustos para garantir minions com segurança.

Rumble+1
O dano mágico contínuo e implacável de Rumble ameaça constantemente sua barra de vida, tornando as trocas tradicionais bastante arriscadas. Porém, o uso frequente de habilidades dele funciona como uma faca de dois gumes. Cada botão que Rumble aperta acelera diretamente a recarga de Sap Magic. Esse carregamento constante permite que você acione seus ataques básicos aprimorados com frequência, transformando a pressão agressiva dele em um motor confiável para a sua própria sobrevivência na lane.
Build de Rumble →
Ver detalhes
Por quê
O dano mágico contínuo e implacável de Rumble ameaça constantemente sua barra de vida, tornando as trocas tradicionais bastante arriscadas. Porém, o uso frequente de habilidades dele funciona como uma faca de dois gumes. Cada botão que Rumble aperta acelera diretamente a recarga de Sap Magic. Esse carregamento constante permite que você acione seus ataques básicos aprimorados com frequência, transformando a pressão agressiva dele em um motor confiável para a sua própria sobrevivência na lane.
Impacto na lane
Esse matchup força você a jogar defensivamente sob a sua torre, já que você será constantemente empurrado para dentro. Iniciar trocas com Twisted Advance é perigoso, porque você não consegue acompanhar o dano sustentado dele. Em vez disso, espere perder algum ouro de minions enquanto usa Bramble Smash para impedir que ele te prenda contra a parede. A lane se torna uma batalha de atrito em que seu principal objetivo é manter a vida alta o suficiente para evitar dives.
Como jogar
Atrase a compra de armadura para priorizar resistência mágica no início, priorizando sobrevivência pura em vez de utilidade. Quando Rumble se aproximar para fazer harassment, não entre em pânico; avance para acertar seu ataque de Sap Magic em um minion ou nele para se recuperar, depois desengaje imediatamente usando Bramble Smash para empurrá-lo. Lance Sapling Toss nos arbustos da lane para escanear a posição dele e reduzir os avanços, mantendo Nature's Grasp pronto para travá-lo se seu jungler rotacionar.

Vladimir+1
O kit de Vladimir faz dele um obstáculo frustrante para Maokai. Sempre que você tenta travá-lo com Twisted Advance ou pegá-lo à distância com Nature's Grasp, ele consegue facilmente se dissolver em Sanguine Pool para anular completamente seu crowd control. Como Transfusion dele restaura a vida constantemente, qualquer dano que você consiga aplicar com Bramble Smash é rapidamente apagado, permitindo que ele escale acima de você sem esforço.
Build de Vladimir →
Ver detalhes
Por quê
O kit de Vladimir faz dele um obstáculo frustrante para Maokai. Sempre que você tenta travá-lo com Twisted Advance ou pegá-lo à distância com Nature's Grasp, ele consegue facilmente se dissolver em Sanguine Pool para anular completamente seu crowd control. Como Transfusion dele restaura a vida constantemente, qualquer dano que você consiga aplicar com Bramble Smash é rapidamente apagado, permitindo que ele escale acima de você sem esforço.
Impacto na lane
Você não consegue ameaçar Vladimir com abates solo, o que dá a ele liberdade total para empurrar lentamente as waves ou fazer harassment em você sob a torre. Embora Sapling Toss possa ajudar a checar arbustos ou garantir algum farm, você vai se ver sem recursos se ficar muito tempo na lane. Eventualmente, a vantagem de escalonamento dele força você a abandonar a top lane para gerar valor em outro lugar, antes que ele se torne completamente impossível de matar.
Como jogar
Pare de tentar lutar com ele diretamente. Em vez disso, use Bramble Smash para limpar waves rapidamente e procurar oportunidades de roam. Guarde seu Twisted Advance especificamente para se proteger caso ele tente um dive agressivo sob sua torre. Quando a wave for empurrada, saia da lane imediatamente para ajudar seu time com Nature's Grasp em skirmishes no rio, aproveitando sua utilidade superior em teamfights enquanto Vladimir está ocupado farmando a lane dele.

Poppy+1
Esse matchup é dominado pela forma como a barreira anti-dash de Poppy é o hard counter de Twisted Advance. Sempre que você tenta iniciar uma troca ou travá-la, ativar sua raiz vai acionar a zona defensiva dela, derrubando você do ar e deixando você preso no chão. Como sua principal ferramenta de engage é neutralizada instantaneamente, você não consegue facilmente acionar Sap Magic nela ou reposicioná-la com Bramble Smash sem sofrer um contra-dano pesado.
Build de Poppy →
Ver detalhes
Por quê
Esse matchup é dominado pela forma como a barreira anti-dash de Poppy é o hard counter de Twisted Advance. Sempre que você tenta iniciar uma troca ou travá-la, ativar sua raiz vai acionar a zona defensiva dela, derrubando você do ar e deixando você preso no chão. Como sua principal ferramenta de engage é neutralizada instantaneamente, você não consegue facilmente acionar Sap Magic nela ou reposicioná-la com Bramble Smash sem sofrer um contra-dano pesado.
Impacto na lane
Na lane, essa interação retira sua pressão ofensiva, forçando você a jogar defensivamente perto da sua torre. Tentar forçar trocas resulta em perda de vida e recalls prematuros, dando a Poppy liberdade total sobre a manipulação da wave. Você vai se ver presa sob a própria torre, forçada a usar Sapling Toss para garantir minions distantes, o que drena rapidamente sua barra de mana e cede a prioridade do rio do lado top para o time dela.
Como jogar
Para sobreviver, mantenha uma regra estrita de posicionamento: fique no meio da lane, longe das paredes, para negar o stun dela. Nunca inicie com Twisted Advance a menos que veja o círculo anti-dash dela em recarga. Em vez disso, avance para farmar, e use Bramble Smash defensivamente para empurrá-la se ela avançar. Se ela der dive em você sob a torre, lance Nature's Grasp para travá-la, depois siga imediatamente com Twisted Advance somente depois que a barreira dela desaparecer.
Outros matchups




Skill Matchups
15Esses confrontos são, acima de tudo, duelos de execução: os dois campeões têm formas reais de levar vantagem. Uma habilidade importante esquivada, um engajamento bem antecipado ou um erro de posicionamento podem ser suficientes para decidir o duelo. Conhecer o matchup e reconhecer as janelas de ação certas faz toda a diferença.

Gnar±0
Esse matchup gira em torno da capacidade de Gnar de dar poke em você à distância na forma Mini. O ponto decisivo está no timing do Boomerang Throw de Gnar. Se você lançar Twisted Advance exatamente quando o projétil sai da mão dele, você esquiva completamente da lentidão e do dano do bumerangue enquanto fecha a distância para enraizá-lo. Isso deixa Mini Gnar extremamente vulnerável ao seu crowd control de acompanhamento.
Build de Gnar →
Ver detalhes
Por quê
Esse matchup gira em torno da capacidade de Gnar de dar poke em você à distância na forma Mini. O ponto decisivo está no timing do Boomerang Throw de Gnar. Se você lançar Twisted Advance exatamente quando o projétil sai da mão dele, você esquiva completamente da lentidão e do dano do bumerangue enquanto fecha a distância para enraizá-lo. Isso deixa Mini Gnar extremamente vulnerável ao seu crowd control de acompanhamento.
Impacto na lane
Como Mini Gnar quer fazer harassment em você constantemente, ele vai naturalmente empurrar a lane com os ataques básicos. Ao manter a wave congelada perto da sua torre, você força Gnar a se expor demais para farmar. Se ele avançar para dar poke, sua capacidade de saltar nele com Twisted Advance o torna um alvo fácil para seu jungler. Se você não conseguir controlar a wave, vai acabar levando poke sob a própria torre.
Como jogar
Fique perto dos seus minions caster para atrair Gnar a usar Boomerang Throw para farmar e dar poke. No momento em que ele lançar, reaja instantaneamente com Twisted Advance para contornar o projétil, depois siga com Bramble Smash para empurrá-lo para dentro da sua wave. Se Gnar estiver prestes a se transformar via Rage Gene em Mega Gnar, desengaje imediatamente e use Sapling Toss para reduzir o avanço dele, guardando suas ferramentas de engage até ele voltar à frágil forma Mini.

Renekton±0
Essa lane é uma batalha intensa de tempo de reação centrada na mobilidade de Renekton. Renekton quer usar Slice and Dice para fechar a distância e travar você imediatamente com um Ruthless Predator carregado de fúria. Porém, se você reagir rápido, seu Bramble Smash pode interromper o dash dele no meio do ar ou empurrá-lo antes que ele consiga aplicar o stun, neutralizando completamente o potencial de troca dele e deixando-o vulnerável.
Build de Renekton →
Ver detalhes
Por quê
Essa lane é uma batalha intensa de tempo de reação centrada na mobilidade de Renekton. Renekton quer usar Slice and Dice para fechar a distância e travar você imediatamente com um Ruthless Predator carregado de fúria. Porém, se você reagir rápido, seu Bramble Smash pode interromper o dash dele no meio do ar ou empurrá-lo antes que ele consiga aplicar o stun, neutralizando completamente o potencial de troca dele e deixando-o vulnerável.
Impacto na lane
Quando você consegue negar o engage dele com sucesso, Renekton perde o controle da wave, já que a principal ferramenta de fuga dele fica em recarga. Você pode então usar Sapling Toss para garantir o arbusto e impedir que ele acumule Reign of Anger em minions. Falhar nessa reação, porém, significa levar um combo pesado de Cull the Meek, forçando você a jogar defensivamente sob a torre enquanto ele constrói uma vantagem massiva de vida.
Como jogar
Sempre fique perto dos seus minions caster e mantenha o dedo em Bramble Smash. Nunca gaste essa habilidade para limpar waves; use apenas quando Renekton se comprometer com o primeiro Slice and Dice para frente. Se você errar o timing e for atordoado por Ruthless Predator, não entre em pânico. Espere o stun passar, depois use Twisted Advance imediatamente para enraizá-lo quando ele tentar voltar com o dash, permitindo que seu Sap Magic recupere a vida perdida durante a troca.

Urgot±0
Esse matchup é uma disputa pura de execução centrada na tentativa de Urgot de engajar com Disdain e na resposta de Maokai. Enquanto Urgot quer acertar o giro para acionar Echoing Flames e te derreter com Purge, Maokai tem o counter perfeito. Cronometrando Twisted Advance corretamente, você fica intargetável, esquivando completamente da projeção e se colocando em posição ideal para interrompê-lo.
Build de Urgot →
Ver detalhes
Por quê
Esse matchup é uma disputa pura de execução centrada na tentativa de Urgot de engajar com Disdain e na resposta de Maokai. Enquanto Urgot quer acertar o giro para acionar Echoing Flames e te derreter com Purge, Maokai tem o counter perfeito. Cronometrando Twisted Advance corretamente, você fica intargetável, esquivando completamente da projeção e se colocando em posição ideal para interrompê-lo.
Impacto na lane
A vantagem de alcance de Urgot com Echoing Flames permite que ele empurre e dê poke lentamente, forçando você a jogar perto da sua torre. Porém, se ele errar Disdain porque você já havia preparado Twisted Advance, a segurança dele desaparece. Uma esquiva bem-sucedida permite que você o trave com Bramble Smash, neutralizando o dano de Purge dele. Isso impede que ele estabeleça um freeze e permite que você estoure waves com segurança sem ser executado por Fear Beyond Death.
Como jogar
Posicione-se bem fora do alcance de ataque básico de Urgot, atraindo o dash dele para frente. Nunca use Twisted Advance proativamente para fechar a distância; guarde-o estritamente para reagir quando ver a animação de início de Disdain. Se você errar o timing e for jogado para o alto, use Bramble Smash imediatamente para empurrá-lo, impedindo que ele circule em volta de você para ativar as pernas passivas dele, depois recue para se curar usando Sap Magic na wave de minions que estiver chegando.
Jarvan IV±0
Esse matchup na top lane é um teste puro de velocidade de reação, que se transforma em uma guerra de atrito. Jarvan IV depende fortemente de acertar o combo de Demacian Standard e Dragon Strike para destruir sua armadura e vencer trocas curtas. Porém, Maokai tem a ferramenta perfeita para neutralizar essa ameaça: cronometrar Twisted Advance exatamente quando ele saltar permite contornar completamente o knockup, deixando-o vulnerável enquanto você se cura com Sap Magic.
Build de Jarvan IV →
Ver detalhes
Por quê
Esse matchup na top lane é um teste puro de velocidade de reação, que se transforma em uma guerra de atrito. Jarvan IV depende fortemente de acertar o combo de Demacian Standard e Dragon Strike para destruir sua armadura e vencer trocas curtas. Porém, Maokai tem a ferramenta perfeita para neutralizar essa ameaça: cronometrar Twisted Advance exatamente quando ele saltar permite contornar completamente o knockup, deixando-o vulnerável enquanto você se cura com Sap Magic.
Impacto na lane
Como ambos têm alta sustentação e ferramentas defensivas, nenhum dos dois campeões consegue forçar facilmente um dive direto ou um abate rápido. Se Jarvan IV errar o knockup, a redução de armadura de Dragon Strike é desperdiçada, permitindo que você o trave com Bramble Smash e controle a wave. Porém, se ele atrair seu Twisted Advance primeiro, Cataclysm dele pode facilmente te prender sem fuga, forçando um recall precoce e dando a ele uma pressão massiva sobre a torre.
Como jogar
Nunca inicie trocas com Twisted Advance; guarde-o exclusivamente como reação defensiva à queda de Demacian Standard dele. Quando Jarvan IV se posicionar agressivamente para fazer o combo, use sua raiz para esquivar do knockup, depois siga imediatamente com Bramble Smash para empurrá-lo antes que a passiva Martial Cadence dele consiga te acertar. Se ele te prender dentro de Cataclysm, use Nature's Grasp para afastá-lo dentro da própria arena, mantendo-se vivo até que sua passiva Sap Magic esteja pronta para restaurar sua vida.

Ornn±0
Ornn quer dominar as lutas com Call of the Forge God, mas Maokai tem o counter perfeito. Cronometrando Twisted Advance em Ornn exatamente quando o carneiro retorna, Maokai fica intargetável e evita completamente o segundo knock-up massivo. Sem esse crowd control crucial, o potencial de troca de Ornn fica nulo. Porém, se Maokai gastar Twisted Advance muito cedo, Ornn aciona Brittle facilmente com Bellows Breath e vence o duelo.
Build de Ornn →
Ver detalhes
Por quê
Ornn quer dominar as lutas com Call of the Forge God, mas Maokai tem o counter perfeito. Cronometrando Twisted Advance em Ornn exatamente quando o carneiro retorna, Maokai fica intargetável e evita completamente o segundo knock-up massivo. Sem esse crowd control crucial, o potencial de troca de Ornn fica nulo. Porém, se Maokai gastar Twisted Advance muito cedo, Ornn aciona Brittle facilmente com Bellows Breath e vence o duelo.
Impacto na lane
Essa interação transforma os skirmishes pós-nível cinco em um jogo tenso de paciência. Nenhum dos dois tanques consegue facilmente dar burst no outro, levando a longas batalhas de sustentação em que Maokai usa Sap Magic para compensar o poke de Bellows Breath de Ornn. Se Ornn errar o knock-up de Searing Charge contra uma parede, Maokai pode puni-lo perto da torre. Porém, administrar mal suas recargas permite que Ornn escale com segurança e forje itens.
Como jogar
Posicione-se longe do pilar de Volcanic Rupture para negar a Ornn um ângulo fácil de Searing Charge. Durante a ultimate dele, não entre em pânico: acompanhe o carneiro se aproximando e use Twisted Advance diretamente em Ornn no momento em que ele se preparar para dar a cabeçada. Se você errar o timing e for lançado para o alto, use Bramble Smash imediatamente para empurrá-lo e se desengajar. Guarde Sapling Toss para escanear o arbusto do rio.

Yasuo±0
Yasuo depende da mobilidade de Sweeping Blade e do Wind Wall dele para anular suas ferramentas à distância. Embora o Wind Wall dele apague facilmente seu Sapling Toss e possa anular completamente Nature's Grasp se ele reagir rápido, ele não consegue esquivar de Twisted Advance. Essa raiz de alvo automático contorna totalmente a barreira de vento dele, permitindo que você o trave e monte um Bramble Smash garantido para afastá-lo ou devolver a troca.
Build de Yasuo →
Ver detalhes
Por quê
Yasuo depende da mobilidade de Sweeping Blade e do Wind Wall dele para anular suas ferramentas à distância. Embora o Wind Wall dele apague facilmente seu Sapling Toss e possa anular completamente Nature's Grasp se ele reagir rápido, ele não consegue esquivar de Twisted Advance. Essa raiz de alvo automático contorna totalmente a barreira de vento dele, permitindo que você o trave e monte um Bramble Smash garantido para afastá-lo ou devolver a troca.
Impacto na lane
Yasuo vai avançar constantemente através dos minions usando Sweeping Blade para acumular Steel Tempest e dar poke em você sob a sua torre. Como seu Sapling Toss é facilmente bloqueado na lane, seu wave clear fica mais lento, deixando você vulnerável a um empurrão pesado. As trocas são bastante dinâmicas: se você deixar ele quebrar o escudo passivo de Sap Magic sem devolver a troca, ele vai desgastar lentamente sua barra de vida enquanto mantém a prioridade de lane.
Como jogar
Posicione-se perto dos seus próprios minions quase morrendo para atrair o Sweeping Blade dele, mas nunca lance Sapling Toss enquanto o Wind Wall dele estiver fora de recarga. Guarde Twisted Advance até ele tentar lançar um tornado de Steel Tempest; usar seu dash durante a animação de lançamento dele esquiva completamente do knockup. Depois de enraizá-lo atrás da barreira dele, use Bramble Smash para empurrá-lo sob a sua torre ou dificultar o caminho de volta dele para a segurança.
Riven±0
Esse matchup é um teste puro de reflexos centrado no terceiro lançamento de Broken Wings de Riven. Todo o padrão de troca dela depende de acertar esse knockup final para encadear com Ki Burst. Cronometrando seu Bramble Smash exatamente quando ela saltar, você consegue derrubá-la do ar. Cancelar esse terceiro golpe neutraliza completamente o burst dela, deixando-a sem sua principal ferramenta de dano enquanto seu Sap Magic mantém você saudável.
Build de Riven →
Ver detalhes
Por quê
Esse matchup é um teste puro de reflexos centrado no terceiro lançamento de Broken Wings de Riven. Todo o padrão de troca dela depende de acertar esse knockup final para encadear com Ki Burst. Cronometrando seu Bramble Smash exatamente quando ela saltar, você consegue derrubá-la do ar. Cancelar esse terceiro golpe neutraliza completamente o burst dela, deixando-a sem sua principal ferramenta de dano enquanto seu Sap Magic mantém você saudável.
Impacto na lane
Errar o timing da interrupção significa que Riven vai consumir boa parte da sua vida, te forçar sob a torre e ditar facilmente o estado da wave com a mobilidade superior dela. Porém, interromper o combo dela com sucesso inverte a pressão da lane. Riven não consegue disputar minions com segurança depois que Broken Wings entra em recarga, permitindo que você empurre waves lentamente ou garanta recalls seguros sem temer um all-in do Blade of the Exile dela.
Como jogar
Nunca inicie trocas com Bramble Smash; guarde-o exclusivamente para reagir ao terceiro salto dela. Quando Riven iniciar com Valor para fechar a distância, use Twisted Advance para enraizá-la durante os golpes iniciais dela, depois prepare-se imediatamente para cronometrar seu empurrão. Se você errar o timing da interrupção e perder muita vida, recue imediatamente usando Sapling Toss no arbusto do rio para garantir sua rota de fuga enquanto espera sua passiva Sap Magic te curar de volta.

Singed±0
Essa lane é uma disputa pura de execução centrada em como você lida com as tentativas de Singed de deslocar você. Enquanto ele depende de Poison Trail para limpar waves e fazer proxy, a única forma dele te punir diretamente é com Fling. Cronometrando seu Bramble Smash perfeitamente quando ele correr em sua direção, você consegue empurrá-lo no meio da animação. Isso nega completamente o arremesso dele, mantendo você seguro do rastro tóxico dele.
Build de Singed →
Ver detalhes
Por quê
Essa lane é uma disputa pura de execução centrada em como você lida com as tentativas de Singed de deslocar você. Enquanto ele depende de Poison Trail para limpar waves e fazer proxy, a única forma dele te punir diretamente é com Fling. Cronometrando seu Bramble Smash perfeitamente quando ele correr em sua direção, você consegue empurrá-lo no meio da animação. Isso nega completamente o arremesso dele, mantendo você seguro do rastro tóxico dele.
Impacto na lane
Executar essa interrupção com sucesso decide quem controla as waves de minions. Errar seu empurrão significa ser arremessado atrás de Singed, levar dano massivo e perder toda a prioridade de lane. Por outro lado, parar o Fling dele permite que você acompanhe o wave clear dele com segurança. Você pode manter a lane congelada perto da sua torre, usando Sap Magic para superar a sustentação de mana dele enquanto impede que ele faça proxy facilmente atrás da sua torre.
Como jogar
Nunca gaste Bramble Smash na wave de minions; guarde-o exclusivamente para reagir quando Singed ativar Noxious Slipstream para avançar em você. Quando ele usar Insanity Potion para forçar uma troca, não o persiga para dentro da nuvem tóxica dele. Em vez disso, lance Sapling Toss nos arbustos da lane para reduzir a aproximação dele, e use Twisted Advance apenas para enraizá-lo sob a própria torre se ele tentar um giro agressivo.
Outros matchups


Favoráveis
7Esses campeões geralmente têm dificuldade para responder às suas principais forças, o que te dá mais liberdade para abordar o confronto. Você costuma ter várias formas de pressioná-los e forçar trocas a seu favor. Aproveite essa vantagem para impor seu ritmo, em vez de dar tempo para eles se estabilizarem.

Shen−1
Esse matchup gira em torno de neutralizar a presença global de Shen. Como Shen depende fortemente de Stand United para virar lutas pelo mapa, Maokai tem todas as cartas na mão. Com Bramble Smash e Twisted Advance disponíveis, você pode cancelar instantaneamente a canalização da ultimate dele. Se ele tentar teleportar bem na sua frente, seu crowd control garante que ele fique preso na top lane enquanto desperdiça a recarga mais longa dele.
Build de Shen →
Ver detalhes
Por quê
Esse matchup gira em torno de neutralizar a presença global de Shen. Como Shen depende fortemente de Stand United para virar lutas pelo mapa, Maokai tem todas as cartas na mão. Com Bramble Smash e Twisted Advance disponíveis, você pode cancelar instantaneamente a canalização da ultimate dele. Se ele tentar teleportar bem na sua frente, seu crowd control garante que ele fique preso na top lane enquanto desperdiça a recarga mais longa dele.
Impacto na lane
Saber que você pode cancelar Stand United transfere toda a pressão para Shen. Ele não pode usar a ultimate com segurança a partir da própria torre se você tiver prioridade de wave. Se ele jogar passivamente para proteger a canalização, você pode facilmente acumular waves, desgastar a torre dele, ou usar Sapling Toss para garantir visão profunda na jungle. A incapacidade dele de sair sem perder a torre ou o tempo da ultimate dá a você controle total sobre as lutas por objetivos no mapa.
Como jogar
Mantenha o mapa sempre em vista, mas nunca perca o foco no posicionamento de Shen. Sempre guarde Twisted Advance ou Bramble Smash quando suspeitar que um aliado precisa de ajuda em outro lugar; não gaste os dois apenas limpando a wave. Se Shen se afastar com Shadow Dash para canalizar Stand United a distância, use Twisted Advance imediatamente para seguir a fuga dele e interrompê-lo. Se ele conseguir teleportar porque você estava fora de alcance, trave a torre dele imediatamente e tire placas.

Teemo−1
Teemo depende de Toxic Shot para dar poke em Maokai, mas o Sap Magic de Maokai neutraliza esse dano de veneno contínuo. Quando Teemo avança para aplicar Blinding Dart, Maokai pode fechar a distância instantaneamente com Twisted Advance. Como Teemo é excepcionalmente frágil e não tem ferramentas de fuga fortes além de Move Quick, essa raiz direcionada deixa ele completamente exposto a um empurrão devastador de Bramble Smash.
Build de Teemo →
Ver detalhes
Por quê
Teemo depende de Toxic Shot para dar poke em Maokai, mas o Sap Magic de Maokai neutraliza esse dano de veneno contínuo. Quando Teemo avança para aplicar Blinding Dart, Maokai pode fechar a distância instantaneamente com Twisted Advance. Como Teemo é excepcionalmente frágil e não tem ferramentas de fuga fortes além de Move Quick, essa raiz direcionada deixa ele completamente exposto a um empurrão devastador de Bramble Smash.
Impacto na lane
Teemo não consegue congelar ou fazer harassment livremente em você sob a sua torre. Ao manter a wave de minions perto do seu lado, você força Teemo a se expor demais. Como ele é altamente vulnerável a ganks, manter a wave perto da sua torre o deixa aterrorizado com o engage do seu Twisted Advance. O Guerrilla Warfare dele se torna inútil, já que seu Sapling Toss pode facilmente revelá-lo e causar dano a ele nos arbustos da lane, retirando a segurança dele.
Como jogar
Deixe Teemo empurrar a primeira wave enquanto você absorve o poke inicial de Toxic Shot, curando imediatamente com ataques básicos de Sap Magic. Nunca o persiga cegamente pelos arbustos; em vez disso, lance Sapling Toss neles para acionar a Noxious Trap dele ou revelar a camuflagem de Guerrilla Warfare. Quando seu jungler se aproximar, trave-o com Twisted Advance, depois se posicione para empurrá-lo para trás usando Bramble Smash. Se ele recuar, bloqueie a rota de fuga dele usando Nature's Grasp.

Sion−1
Esse matchup favorece bastante você, porque você tem a ferramenta perfeita para neutralizar a principal fonte de pressão de Sion. Sempre que Sion canalizar Decimating Smash para limpar a wave ou trocar, você pode cancelar instantaneamente com Bramble Smash. Ao negar a principal ferramenta de dano e wave clear dele, você torna o escudo defensivo de Soul Furnace inútil para retaliação, deixando-o sem nenhuma forma confiável de disputar sua presença.
Build de Sion →
Ver detalhes
Por quê
Esse matchup favorece bastante você, porque você tem a ferramenta perfeita para neutralizar a principal fonte de pressão de Sion. Sempre que Sion canalizar Decimating Smash para limpar a wave ou trocar, você pode cancelar instantaneamente com Bramble Smash. Ao negar a principal ferramenta de dano e wave clear dele, você torna o escudo defensivo de Soul Furnace inútil para retaliação, deixando-o sem nenhuma forma confiável de disputar sua presença.
Impacto na lane
Na prática, essa interação dá a você controle absoluto sobre o estado da wave. Sion não consegue executar com segurança a estratégia de empurrar lentamente, o que significa que você pode facilmente congelar a lane perto da sua torre ou forçá-lo sob a própria torre dele. Como ele não consegue carregar a habilidade principal, as trocas de vida dele são consistentemente péssimas, permitindo que você force recalls precoces e atrase o acúmulo permanente de vida dele vindo de Glory in Death.
Como jogar
Para executar isso perfeitamente, nunca use Bramble Smash proativamente para dar poke. Sempre guarde-o especificamente para reagir à canalização de Decimating Smash dele. Se ele tentar recuar e carregar a distância, use Twisted Advance para fechar a distância e siga imediatamente com o empurrão. Mantenha Sapling Toss nos arbustos da lane para detectar qualquer tentativa furtiva de carregamento fora de visão, e use Sap Magic para curar qualquer dano menor do Roar of the Slayer dele.
Tryndamere−1
Esse matchup é uma batalha de atrito em que sua cura passiva rivaliza com a recuperação dele alimentada por Fury. Enquanto Tryndamere depende de Battle Fury e Bloodlust para superar sua sustentação, toda a ameaça ofensiva dele depende de ficar colado em você durante Undying Rage. Você tem a vantagem, porque seu crowd control neutraliza completamente a ultimate dele. Encadeando Twisted Advance, Bramble Smash e Nature's Grasp, você consegue segurar a janela de invulnerabilidade dele sem esforço.
Build de Tryndamere →
Ver detalhes
Por quê
Esse matchup é uma batalha de atrito em que sua cura passiva rivaliza com a recuperação dele alimentada por Fury. Enquanto Tryndamere depende de Battle Fury e Bloodlust para superar sua sustentação, toda a ameaça ofensiva dele depende de ficar colado em você durante Undying Rage. Você tem a vantagem, porque seu crowd control neutraliza completamente a ultimate dele. Encadeando Twisted Advance, Bramble Smash e Nature's Grasp, você consegue segurar a janela de invulnerabilidade dele sem esforço.
Impacto na lane
Tryndamere não consegue facilmente dar dive em você ou forçá-lo a sair da lane. Seu Sap Magic mantém sua vida alta durante as trocas curtas dele, o que significa que ele precisa usar Bloodlust constantemente e esgotar a chance de crítico só para se manter saudável. Essa perda de Fury impede que ele construa prioridade de lane ou ameace sua torre. Consequentemente, você dita o timing dos recalls, forçando-o a ficar sob a torre enquanto você garante facilmente a visão do rio.
Como jogar
Nunca gaste Twisted Advance ou Bramble Smash quando Tryndamere tiver Fury alta e o dash disponível. Em vez disso, deixe ele iniciar com Spinning Slash. Quando ele se comprometer e ativar Undying Rage, enraize-o imediatamente com Twisted Advance, posicione-se atrás dele, e use Bramble Smash para empurrá-lo para trás. Se ele usar flash ou resetar o dash, lance Nature's Grasp para selar o destino dele. Mantenha Sapling Toss nos arbustos do rio para detectar qualquer ajuda chegando.
Outros matchups


Itens contra Maokai
Compre estes itens para reduzir a eficácia deste campeão nas suas partidas.



| Matchup | Veredito | Vantagem | Taxa de vitória | Taxa de escolha |
|---|---|---|---|---|
| Morgana | Hard Counters | +2 | 51.0% | 6.6% |
| Zilean | Hard Counters | +2 | 50.4% | 1.2% |
| Senna | Hard Counters | +2 | 49.3% | 7.8% |
| Milio | Hard Counters | +2 | 49.1% | 4.5% |
| Braum | Desfavoráveis | +1 | 52.9% | 4.6% |
| Sona | Desfavoráveis | +1 | 52.4% | 4.4% |
| Nami | Desfavoráveis | +1 | 50.5% | 4.7% |
| Zyra | Desfavoráveis | +1 | 50.5% | 4.9% |
| Sett | Desfavoráveis | +1 | 50.3% | 1.7% |
| Pyke | Desfavoráveis | +1 | 49.9% | 3.8% |
| Poppy | Desfavoráveis | +1 | — | — |
| Leona | Skill Matchups | ±0 | 51.9% | 10.3% |
| Thresh | Skill Matchups | ±0 | 51.1% | 15.3% |
| Soraka | Skill Matchups | ±0 | 51.1% | 5.0% |
| Janna | Skill Matchups | ±0 | 51.0% | 3.1% |
| Galio | Skill Matchups | ±0 | 50.6% | 2.7% |
| Lulu | Skill Matchups | ±0 | 48.9% | 10.5% |
| Swain | Skill Matchups | ±0 | 46.4% | 3.1% |
| Hwei | Favoráveis | −1 | 52.9% | 1.4% |
| Malphite | Favoráveis | −1 | 51.7% | 8.8% |
| Rell | Favoráveis | −1 | 50.9% | 3.7% |
| Karma | Favoráveis | −1 | 49.9% | 4.8% |
| Seraphine | Favoráveis | −1 | 49.8% | 6.0% |
| Blitzcrank | Favoráveis | −1 | 49.8% | 6.6% |
| Rakan | Favoráveis | −1 | 49.8% | 2.8% |
| Alistar | Favoráveis | −1 | 49.5% | 4.0% |
| Nautilus | Favoráveis | −1 | 49.3% | 13.0% |
| Veigar | Favoráveis | −1 | 48.1% | 2.7% |
| Bard | Favoráveis | −1 | — | — |
| Cho'Gath | Favoráveis | −1 | — | — |
| Vel'Koz | Favoráveis | −2 | 49.7% | 1.6% |
| Lux | Favoráveis | −2 | 49.3% | 7.7% |
| Yuumi | Favoráveis | −2 | 47.9% | 9.8% |
Vantagem: veredito canônico do Wild Rift Core (−3 a +3), do ponto de vista do campeão citado na linha. Taxa de vitória e taxa de escolha: as do próprio adversário nessa função — Wild Rift CN · Challenger, Patch 7.3b. Não é uma taxa de vitória do confronto direto.
| Matchup | Veredito | Vantagem | Taxa de vitória | Taxa de escolha |
|---|---|---|---|---|
| Olaf | Hard Counters | +3 | 52.4% | 1.7% |
| Gwen | Hard Counters | +2 | 52.9% | 2.4% |
| Mordekaiser | Hard Counters | +2 | — | — |
| Ambessa | Desfavoráveis | +1 | 53.7% | 1.2% |
| Dr. Mundo | Desfavoráveis | +1 | 51.5% | 1.9% |
| Xin Zhao | Desfavoráveis | +1 | 51.1% | 8.6% |
| Nidalee | Desfavoráveis | +1 | 50.9% | 2.3% |
| Pantheon | Desfavoráveis | +1 | 50.8% | 6.1% |
| Darius | Desfavoráveis | +1 | 50.3% | 6.4% |
| Warwick | Desfavoráveis | +1 | 50.2% | 2.0% |
| Volibear | Desfavoráveis | +1 | 48.4% | 4.4% |
| Rammus | Skill Matchups | ±0 | 56.6% | 4.4% |
| Amumu | Skill Matchups | ±0 | 55.4% | 2.7% |
| Skarner | Skill Matchups | ±0 | 54.0% | 1.8% |
| Nunu & Willump | Skill Matchups | ±0 | 53.2% | 1.7% |
| Jarvan IV | Skill Matchups | ±0 | 52.3% | 7.2% |
| Fiddlesticks | Skill Matchups | ±0 | 52.0% | 1.8% |
| Kindred | Skill Matchups | ±0 | 51.6% | 2.3% |
| Kayn | Skill Matchups | ±0 | 51.5% | 7.0% |
| Zed | Skill Matchups | ±0 | 51.2% | 2.6% |
| Jax | Skill Matchups | ±0 | 49.9% | 1.9% |
| Cho'Gath | Skill Matchups | ±0 | 49.9% | 8.3% |
| Vi | Skill Matchups | ±0 | 49.7% | 4.9% |
| Wukong | Skill Matchups | ±0 | 49.1% | 3.3% |
| Yone | Skill Matchups | ±0 | 48.5% | 3.0% |
| Riven | Skill Matchups | ±0 | 48.4% | 1.3% |
| Graves | Skill Matchups | ±0 | 47.9% | 6.8% |
| Viego | Skill Matchups | ±0 | 45.7% | 4.4% |
| Gragas | Skill Matchups | ±0 | — | — |
| Nautilus | Skill Matchups | ±0 | — | — |
| Nilah | Skill Matchups | ±0 | — | — |
| Poppy | Skill Matchups | ±0 | — | — |
| Shen | Favoráveis | −1 | 55.0% | 1.6% |
| Ekko | Favoráveis | −1 | 53.6% | 7.4% |
| Lillia | Favoráveis | −1 | 53.1% | 2.9% |
| Nocturne | Favoráveis | −1 | 52.6% | 6.9% |
| Talon | Favoráveis | −1 | 51.2% | 2.7% |
| Hecarim | Favoráveis | −1 | 51.1% | 1.7% |
| Kha'Zix | Favoráveis | −1 | 51.0% | 4.7% |
| Diana | Favoráveis | −1 | 49.7% | 1.5% |
| Fizz | Favoráveis | −1 | 48.9% | 1.8% |
| Tryndamere | Favoráveis | −1 | 48.7% | 9.6% |
| Lee Sin | Favoráveis | −1 | 47.2% | 12.5% |
| Aatrox | Favoráveis | −1 | 46.7% | 1.1% |
| Twitch | Favoráveis | −1 | 46.6% | 2.3% |
| Shyvana | Favoráveis | −1 | 46.3% | 3.1% |
| Camille | Favoráveis | −1 | — | — |
| Rengar | Favoráveis | −2 | 49.5% | 2.1% |
| Evelynn | Favoráveis | −2 | 48.0% | 2.1% |
| Master Yi | Favoráveis | −2 | 47.3% | 9.8% |
Vantagem: veredito canônico do Wild Rift Core (−3 a +3), do ponto de vista do campeão citado na linha. Taxa de vitória e taxa de escolha: as do próprio adversário nessa função — Wild Rift CN · Challenger, Patch 7.3b. Não é uma taxa de vitória do confronto direto.
| Matchup | Veredito | Vantagem | Taxa de vitória | Taxa de escolha |
|---|---|---|---|---|
| Olaf | Hard Counters | +3 | — | — |
| Vayne | Hard Counters | +2 | 51.5% | 1.7% |
| Mordekaiser | Hard Counters | +2 | 51.0% | 11.0% |
| Gwen | Hard Counters | +2 | 50.7% | 3.5% |
| Fiora | Hard Counters | +2 | 49.9% | 3.5% |
| Dr. Mundo | Hard Counters | +2 | 49.9% | 6.8% |
| Darius | Hard Counters | +2 | 49.7% | 14.5% |
| Volibear | Hard Counters | +2 | 48.6% | 9.0% |
| Ryze | Hard Counters | +2 | — | — |
| Ambessa | Desfavoráveis | +1 | 52.1% | 1.8% |
| K'Santé | Desfavoráveis | +1 | 51.5% | 7.2% |
| Cho'Gath | Desfavoráveis | +1 | 50.4% | 9.4% |
| Aatrox | Desfavoráveis | +1 | 50.4% | 6.6% |
| Sett | Desfavoráveis | +1 | 50.3% | 8.7% |
| Jax | Desfavoráveis | +1 | 50.2% | 3.6% |
| Yone | Desfavoráveis | +1 | 50.2% | 6.2% |
| Poppy | Desfavoráveis | +1 | 49.5% | 1.7% |
| Rumble | Desfavoráveis | +1 | 49.5% | 1.9% |
| Garen | Desfavoráveis | +1 | 48.8% | 11.9% |
| Irelia | Desfavoráveis | +1 | 48.1% | 1.4% |
| Nasus | Desfavoráveis | +1 | 46.6% | 5.5% |
| Graves | Desfavoráveis | +1 | — | — |
| Heimerdinger | Desfavoráveis | +1 | — | — |
| Swain | Desfavoráveis | +1 | — | — |
| Vladimir | Desfavoráveis | +1 | — | — |
| Warwick | Desfavoráveis | +1 | — | — |
| Malphite | Skill Matchups | ±0 | 54.8% | 7.8% |
| Singed | Skill Matchups | ±0 | 52.7% | 1.3% |
| Ornn | Skill Matchups | ±0 | 51.2% | 1.9% |
| Gnar | Skill Matchups | ±0 | 51.1% | 3.2% |
| Kennen | Skill Matchups | ±0 | 50.4% | 2.4% |
| Riven | Skill Matchups | ±0 | 49.7% | 1.6% |
| Kayle | Skill Matchups | ±0 | 49.5% | 1.9% |
| Wukong | Skill Matchups | ±0 | 49.4% | 1.7% |
| Urgot | Skill Matchups | ±0 | 48.8% | 3.7% |
| Renekton | Skill Matchups | ±0 | 48.1% | 3.3% |
| Camille | Skill Matchups | ±0 | 47.7% | 2.2% |
| Yasuo | Skill Matchups | ±0 | 45.9% | 2.1% |
| Gragas | Skill Matchups | ±0 | — | — |
| Jarvan IV | Skill Matchups | ±0 | — | — |
| Skarner | Skill Matchups | ±0 | — | — |
| Shen | Favoráveis | −1 | 55.5% | 2.8% |
| Teemo | Favoráveis | −1 | 53.1% | 4.7% |
| Sion | Favoráveis | −1 | 49.8% | 2.8% |
| Jayce | Favoráveis | −1 | 49.6% | 5.2% |
| Tryndamere | Favoráveis | −1 | 45.5% | 2.7% |
| Akali | Favoráveis | −1 | — | — |
| Pantheon | Favoráveis | −1 | — | — |
Vantagem: veredito canônico do Wild Rift Core (−3 a +3), do ponto de vista do campeão citado na linha. Taxa de vitória e taxa de escolha: as do próprio adversário nessa função — Wild Rift CN · Challenger, Patch 7.3b. Não é uma taxa de vitória do confronto direto.