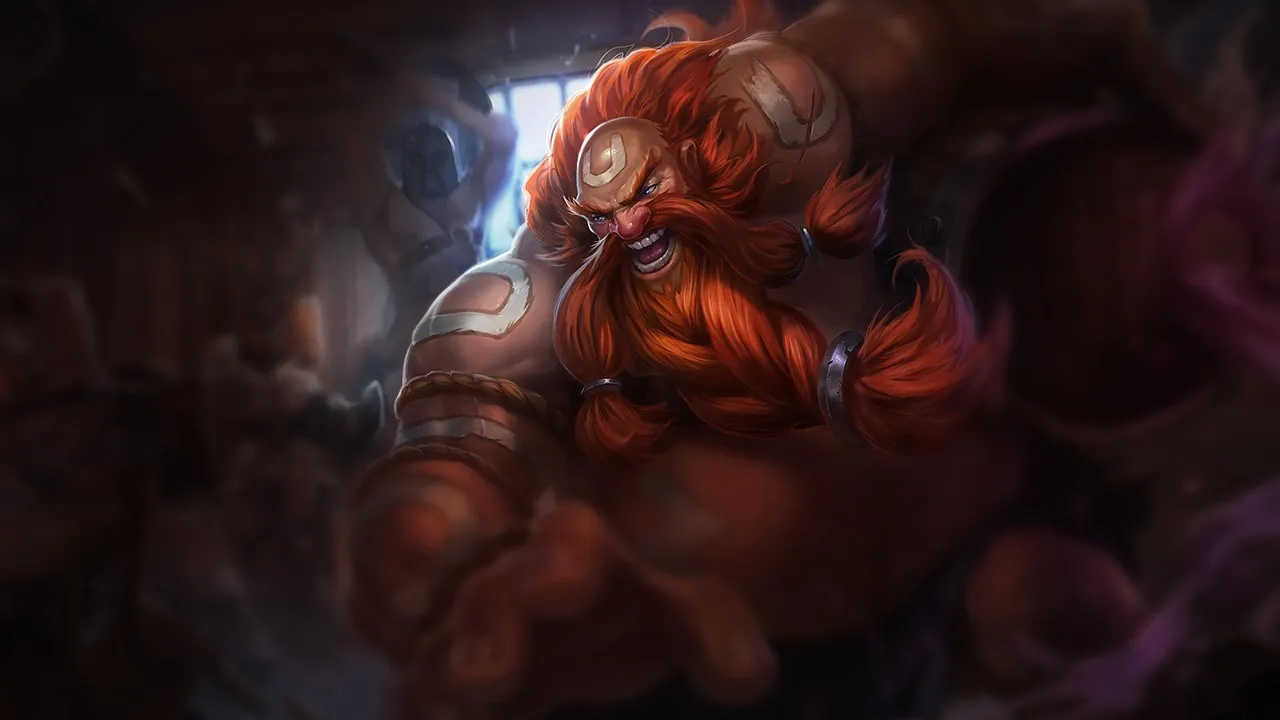
Gragas sofre quando os inimigos evitam suas crowd control zones ou punem seus engages. Composições focadas em kiting, poke constante ou alta mobility reduzem a eficácia de seus combos. Sem contato direto ou lutas agrupadas, seu potencial de engage e desorganização cai.
★ JUNGLE · TOPTier A
DANO
UTIL
TANK
DIFF
Guia de counters de Gragas Wild Rift
Hard Counters
1
Esses campeões têm uma build e um estilo de jogo que superam diretamente o seu, o que pode tornar o controle da lane e o farm extremamente difíceis. As habilidades deles podem neutralizar seus principais pontos fortes ou te punir assim que você tenta jogar do seu jeito de sempre. Nesses matchups, o objetivo costuma ser reduzir os erros e buscar soluções fora do confronto direto.
Counter forteDesengajarOlaf neutraliza completamente todo o kit defensivo do Gragas. Gragas depende de empurrar inimigos para longe ou stunar eles para escapar de trocas ruins. Porém, quando Olaf ativa Ragnarok, ele se torna completamente imune ao deslocamento de Explosive Cask e ao stun de Body Slam. Sem essas ferramentas de crowd control, Olaf consegue correr atrás do Gragas com Undertow e destroçá-lo usando Reckless Swing e Berserker Rage.Build de Olaf →Ver detalhes
Olaf
Por quê
Olaf neutraliza completamente todo o kit defensivo do Gragas. Gragas depende de empurrar inimigos para longe ou stunar eles para escapar de trocas ruins. Porém, quando Olaf ativa Ragnarok, ele se torna completamente imune ao deslocamento de Explosive Cask e ao stun de Body Slam. Sem essas ferramentas de crowd control, Olaf consegue correr atrás do Gragas com Undertow e destroçá-lo usando Reckless Swing e Berserker Rage.
Impacto na lane
Esse desequilíbrio estrutural te força a uma postura altamente defensiva. Você não consegue contestar a prioridade de wave porque avançar além da proteção da sua torre te expõe a uma perseguição fatal. Trocar vida é perigoso; se você tentar dar poke com Barrel Roll, Olaf pode simplesmente ignorar o slow durante Ragnarok e forçar um all-in. Essa ameaça constante te trava debaixo da torre, cedendo as placas no início.
Como jogar
Para sobreviver a essa ofensiva, seu posicionamento é sua tábua de salvação absoluta. Você precisa ficar colado na sua torre e nunca usar Body Slam ofensivamente, a menos que a ultimate do Olaf esteja em cooldown. Use Barrel Roll estritamente para afinar as waves de minions que estão chegando a uma distância segura, ativando Happy Hour para sustentar sua vida. Se o Olaf congelar a wave perto da torre dele, não avance; em vez disso, espere ele dar push, usando Drunken Rage para absorver dano.
Esses campeões têm ferramentas que geralmente dão a eles vantagem no confronto, sem tornar o matchup impossível de jogar. Eles podem ter mais alcance, mais capacidade de aguentar sua ofensiva ou mais formas de responder aos seus engajamentos. Você vai precisar adaptar sua abordagem e escolher com cuidado os momentos em que aceita a luta.
DesengajarDano mágicoMordekaiser vence em confrontos brutos de stats quando Darkness Rise está ativo, especialmente se ele puxar o Gragas com Death's Grasp. Porém, Gragas pode sobreviver ao isolamento de Realm of Death porque Explosive Cask oferece a ferramenta perfeita para empurrar o Mordekaiser para longe, desperdiçando o temporizador da ultimate dele. Se você lutar de frente com ele sem usar esse desengajamento específico, o dano mágico contínuo e o escudo Indestructible dele vão sobrecarregar sua resistência.Build de Mordekaiser →Ver detalhes
Mordekaiser
Por quê
Mordekaiser vence em confrontos brutos de stats quando Darkness Rise está ativo, especialmente se ele puxar o Gragas com Death's Grasp. Porém, Gragas pode sobreviver ao isolamento de Realm of Death porque Explosive Cask oferece a ferramenta perfeita para empurrar o Mordekaiser para longe, desperdiçando o temporizador da ultimate dele. Se você lutar de frente com ele sem usar esse desengajamento específico, o dano mágico contínuo e o escudo Indestructible dele vão sobrecarregar sua resistência.
Impacto na lane
Essa dinâmica transforma a lane em uma batalha de contenção de wave. Mordekaiser vai dar push constantemente com Obliterate e tentar forçar trocas. Você não consegue contestar ele em escaramuças longas, o que significa que você precisa ceder a prioridade no início e farmar debaixo da torre. Se ele conseguir provocar o uso do seu Body Slam antes de te arrastar para Realm of Death, você perde sua única forma confiável de escape, levando a um dive fácil ou a um recall forçado.
Como jogar
Mantenha distância e dê poke com Barrel Roll para ativar a cura de Happy Hour. Nunca use Body Slam de forma agressiva, a menos que o Mordekaiser tenha acabado de errar Death's Grasp. Quando ele inevitavelmente ativar Realm of Death, não entre em pânico. Lance imediatamente Explosive Cask para empurrá-lo para o lado oposto da arena, depois use Drunken Rage para mitigar qualquer dano residual enquanto você espera o tempo passar. Se você errar a direção do knockback, use Body Slam para dashar através dele e criar distância.
DesengajarPosicionamentoO scaling da Gwen e a ameaça de dano verdadeiro dela tornam esse um matchup difícil conforme o jogo avança. Embora você consiga escapar facilmente dos cortes de Snip Snip! e do slow de Needlework usando Body Slam para dashar para longe com segurança, você simplesmente não consegue igualar o DPS dela. Em qualquer escaramuça prolongada, a passiva A Thousand Cuts e o dano destruidor dela vão facilmente atravessar sua redução de dano de Drunken Rage.Build de Gwen →Ver detalhes
Gwen
Por quê
O scaling da Gwen e a ameaça de dano verdadeiro dela tornam esse um matchup difícil conforme o jogo avança. Embora você consiga escapar facilmente dos cortes de Snip Snip! e do slow de Needlework usando Body Slam para dashar para longe com segurança, você simplesmente não consegue igualar o DPS dela. Em qualquer escaramuça prolongada, a passiva A Thousand Cuts e o dano destruidor dela vão facilmente atravessar sua redução de dano de Drunken Rage.
Impacto na lane
Essa dinâmica te força a uma postura defensiva, onde Gwen dita o ritmo da wave. Ela vai procurar constantemente stackar Snip Snip! nos minions e dashar para frente com Skip 'n Slash. Se você for pego muito avançado, corre o risco de ser alcançado pelo Needlework dela. Você frequentemente vai precisar ceder o controle de lane no início, farmando com segurança à distância usando Barrel Roll.
Como jogar
Para sobreviver, você precisa disciplinar seu posicionamento e guardar Body Slam estritamente para desengajar quando ela usar Skip 'n Slash para encurtar a distância. Nunca use seu dash ofensivamente. Se ela ativar Hallowed Mist, recue imediatamente para anular o buff defensivo dela. Use Drunken Rage para absorver o burst inicial dela, e conte com Explosive Cask para empurrá-la para longe se ela comprometer Needlework para te caçar.
DesengajarTrocasA pressão física implacável de Sett com Pit Grit e Knuckle Down torna as trocas prolongadas letais para Gragas. Esse matchup gira inteiramente em torno de negar o engajamento dele. Enquanto Sett quer puxar você com Facebreaker, seu Body Slam serve como o contra-engajamento perfeito. Você pode usar o dash dele para escapar do alcance do puxão, ou interromper a preparação do golpe de escudo Haymaker dele, empurrando-o para trás e evitando que o dano verdadeiro do centro te acerte.Build de Sett →Ver detalhes
Sett
Por quê
A pressão física implacável de Sett com Pit Grit e Knuckle Down torna as trocas prolongadas letais para Gragas. Esse matchup gira inteiramente em torno de negar o engajamento dele. Enquanto Sett quer puxar você com Facebreaker, seu Body Slam serve como o contra-engajamento perfeito. Você pode usar o dash dele para escapar do alcance do puxão, ou interromper a preparação do golpe de escudo Haymaker dele, empurrando-o para trás e evitando que o dano verdadeiro do centro te acerte.
Impacto na lane
Como Sett é excelente em zonear você com a ameaça de The Show Stopper, você vai constantemente se encontrar empurrado para debaixo da torre. Se você desperdiçar Body Slam de forma ofensiva, Sett vai imediatamente te punir com Facebreaker e consumir sua barra de vida, forçando recuos antecipados que custam ouro crucial. Seu controle de wave permanece puramente defensivo, usando Barrel Roll para farmar com segurança a distância enquanto depende de Happy Hour para sustentar durante o poke inevitável dele.
Como jogar
Nunca inicie trocas com seu dash. Mantenha Body Slam estritamente em espera; se Sett ativar Knuckle Down e correr em sua direção, recue e use Barrel Roll para reduzir o avanço dele. Caso ele consiga te puxar com Facebreaker, use Body Slam imediatamente para se desengajar, ou use-o para interrompê-lo quando você vir a barra de Grit dele no máximo durante Haymaker. Se ele te agarrar com The Show Stopper, use Drunken Rage antes para mitigar o dano massivo de pouso.
SustentaçãoEsquivaA pressão à distância de Jayce torna esse matchup difícil, mas você tem as ferramentas para sobreviver. O poke constante dele à distância pode ser neutralizado pela sua passiva Happy Hour, que mantém sua barra de vida saudável. O ponto decisivo dessa lane ocorre quando Jayce tenta saltar em você com To the Skies!; você pode imediatamente interromper o mergulho dele e trocar de volta pesadamente cronometrando seu Body Slam no exato momento em que ele avança.Build de Jayce →Ver detalhes
Jayce
Por quê
A pressão à distância de Jayce torna esse matchup difícil, mas você tem as ferramentas para sobreviver. O poke constante dele à distância pode ser neutralizado pela sua passiva Happy Hour, que mantém sua barra de vida saudável. O ponto decisivo dessa lane ocorre quando Jayce tenta saltar em você com To the Skies!; você pode imediatamente interromper o mergulho dele e trocar de volta pesadamente cronometrando seu Body Slam no exato momento em que ele avança.
Impacto na lane
Espere passar os níveis iniciais empurrado para debaixo da sua torre, cedendo prioridade enquanto Jayce controla a wave. Ele vai tentar quebrar as placas da sua torre e forçar recuos antecipados. No entanto, como você pode mitigar esse dano, você pode impedir que ele ganhe vantagem. Essa lane se torna um teste de paciência em que você troca sua presença inicial no mapa por uma torre perfeitamente preservada, mantendo Jayce preso na lane de cima.
Como jogar
Fique atrás dos seus minions para dificultar que Jayce acerte os shockblasts dele, e use Barrel Roll apenas para garantir minions que estão quase morrendo a uma distância segura. Nunca use Body Slam de forma agressiva; você deve guardar essa habilidade estritamente para interromper o To the Skies! dele. Se você levar muito dano, ative Drunken Rage para absorver o burst dele, farme com segurança sob a torre, e espere o cooldown da transformação dele acabar antes de procurar retaliar.
SustentaçãoPressão no mapaVayne utiliza a prioridade à distância dela e *Tumble* para acionar repetidamente o dano verdadeiro de *Silver Bolts* em você. Como *Condemn* pode facilmente interromper seu *Body Slam* em pleno voo, trocar diretamente é muito arriscado. Sua ferramenta principal para se manter nessa lane é *Happy Hour*, que te cura após usar *Barrel Roll* para farmar, compensando o poke constante de dano físico e verdadeiro dela.Build de Vayne →Ver detalhes
Vayne
Por quê
Vayne utiliza a prioridade à distância dela e *Tumble* para acionar repetidamente o dano verdadeiro de *Silver Bolts* em você. Como *Condemn* pode facilmente interromper seu *Body Slam* em pleno voo, trocar diretamente é muito arriscado. Sua ferramenta principal para se manter nessa lane é *Happy Hour*, que te cura após usar *Barrel Roll* para farmar, compensando o poke constante de dano físico e verdadeiro dela.
Impacto na lane
Você vai passar a maior parte do início do jogo preso debaixo da sua torre, perdendo minions enquanto Vayne quebra livremente as placas da sua torre. Sua barra de vida vai ficar constantemente por volta da metade por causa do harass implacável dela, tornando recuos prematuros prováveis se você não conseguir esquivar dos ataques aprimorados por *Tumble* dela. No entanto, o posicionamento agressivo dela para ativar *Silver Bolts* naturalmente empurra a wave, deixando-a bastante vulnerável a ganks antecipados.
Como jogar
Fique perto da segurança da sua torre e use *Barrel Roll* da distância máxima para garantir minions quase morrendo, ativando *Drunken Rage* apenas quando você não conseguir evitar um terceiro golpe de *Silver Bolts*. Nunca inicie com *Body Slam* a menos que Vayne já tenha desperdiçado *Condemn*. Em vez disso, mantenha sua posição e espere ela se expor demais, então use *Explosive Cask* atrás dela para arremessá-la direto para dentro do alcance da sua torre ou para garantir um abate fácil para seu jungler que está chegando.
PosicionamentoDesengajarYone naturalmente te supera conforme a partida avança porque Way of the Hunter e Mortal Steel escalam incrivelmente bem para o final de jogo. No entanto, você possui uma resposta mecânica enorme à agressão dele. Um Body Slam cronometrado perfeitamente pode neutralizar a pressão ofensiva dele interrompendo a fase de retorno do Soul Unbound ou a animação de preparação da ultimate dele, Fate Sealed, usando o próprio ímpeto dele contra ele mesmo.Build de Yone →Ver detalhes
Yone
Por quê
Yone naturalmente te supera conforme a partida avança porque Way of the Hunter e Mortal Steel escalam incrivelmente bem para o final de jogo. No entanto, você possui uma resposta mecânica enorme à agressão dele. Um Body Slam cronometrado perfeitamente pode neutralizar a pressão ofensiva dele interrompendo a fase de retorno do Soul Unbound ou a animação de preparação da ultimate dele, Fate Sealed, usando o próprio ímpeto dele contra ele mesmo.
Impacto na lane
Yone vai constantemente procurar empurrar a wave com Mortal Steel e Spirit Cleave, forçando você para debaixo da torre enquanto usa Soul Unbound para trocar com segurança. Se você não reagir ao dash dele, ele vai desgastar sua barra de vida, garantir uma vantagem enorme de ouro, e facilmente te dive. Essa pressão te força a depender de Happy Hour para sobreviver, sacrificando prioridade e deixando-o circular livremente pelo mapa.
Como jogar
Fique perto dos seus minions atiradores para atraí-lo a uma trajetória previsível de Soul Unbound. Nunca desperdice Body Slam para limpar waves; você deve guardar essa habilidade especificamente para colidir com ele quando ele usar Fate Sealed ou tentar voltar rapidamente para o clone espiritual dele. Se ele errar o terceiro uso de Mortal Steel, use imediatamente Barrel Roll para reduzi-lo e ative Drunken Rage para mitigar o contra-ataque dele antes de se desengajar.
DesengajarSustentaçãoVolibear se destaca em duelos prolongados porque *Frenzied Maul* o cura repetidamente em alvos marcados, enquanto *Sky Splitter* concede um escudo a ele. Enquanto *Happy Hour* mantém sua barra de vida cheia, você não consegue igualar a recuperação bruta dele se ele fechar a distância. O matchup depende de impedir que ele te morda duas vezes, o que significa que você deve neutralizar a corrida de *Thundering Smash* dele antes que ele consiga te travar.Build de Volibear →Ver detalhes
Volibear
Por quê
Volibear se destaca em duelos prolongados porque *Frenzied Maul* o cura repetidamente em alvos marcados, enquanto *Sky Splitter* concede um escudo a ele. Enquanto *Happy Hour* mantém sua barra de vida cheia, você não consegue igualar a recuperação bruta dele se ele fechar a distância. O matchup depende de impedir que ele te morda duas vezes, o que significa que você deve neutralizar a corrida de *Thundering Smash* dele antes que ele consiga te travar.
Impacto na lane
Como a passiva de Volibear, *The Relentless Storm*, constantemente ativa relâmpagos em cadeia, ele vai naturalmente empurrar os minions em sua direção. Isso te dá uma vantagem enorme de controle de wave, permitindo que você congele a wave perto da sua torre. Evite trocar vida perto do meio da lane; ser pego pelo stun dele te torna vulnerável a um dive de torre com *Stormbringer*, o que anula completamente sua vantagem defensiva.
Como jogar
Você deve absolutamente guardar *Body Slam* como ferramenta defensiva. Sempre que Volibear ativar *Thundering Smash* para correr em sua direção, cronometre seu *Body Slam* diretamente na carga dele para interromper o ímpeto dele e se desengajar com segurança antes que ele consiga usar *Frenzied Maul*. Se ele conseguir usar *Sky Splitter* em você, ative *Drunken Rage* imediatamente para absorver o burst. Use *Barrel Roll* estritamente para reduzir o avanço dele, e use *Explosive Cask* para empurrá-lo para longe se ele tentar dive com *Stormbringer*.
Esses confrontos são, acima de tudo, duelos de execução: os dois campeões têm formas reais de levar vantagem. Uma habilidade importante esquivada, um engajamento bem antecipado ou um erro de posicionamento podem ser suficientes para decidir o duelo. Conhecer o matchup e reconhecer as janelas de ação certas faz toda a diferença.
EscalamentoPressão no inícioEssa lane é um puro teste de ritmo. Enquanto Nasus depende de Wither para montar perseguições e te caçar, seu Body Slam neutraliza completamente essa lentidão, permitindo que você escape para a segurança instantaneamente. No entanto, seus cooldowns altos significam que você não pode assediá-lo constantemente. Nasus vai empilhar Siphoning Strike livremente e se sustentar através do seu poke usando Soul Eater, transformando isso em um relógio correndo contra você, em que não é fácil negar o escalonamento dele.Build de Nasus →Ver detalhes
Nasus
Por quê
Essa lane é um puro teste de ritmo. Enquanto Nasus depende de Wither para montar perseguições e te caçar, seu Body Slam neutraliza completamente essa lentidão, permitindo que você escape para a segurança instantaneamente. No entanto, seus cooldowns altos significam que você não pode assediá-lo constantemente. Nasus vai empilhar Siphoning Strike livremente e se sustentar através do seu poke usando Soul Eater, transformando isso em um relógio correndo contra você, em que não é fácil negar o escalonamento dele.
Impacto na lane
Como você não consegue matá-lo sozinho depois que ele conseguir resistência mágica, o estado da wave é tudo. Deixar a wave quicar para o lado dele permite que ele empilhe Siphoning Strike com segurança para sempre. Você deve usar Barrel Roll para reduzir os avanços dele ou manter congelamentos. Se você não conseguir gerenciar as waves, Nasus eventualmente vai usar Fury of the Sands, ignorar seu dano, e te dive ou tomar sua torre.
Como jogar
Guarde Body Slam exclusivamente como ferramenta de desengajamento; nunca o use para iniciar trocas a menos que Nasus já tenha desperdiçado Wither. Quando ele ativar Fury of the Sands, use imediatamente Explosive Cask para empurrá-lo para longe e resetar a luta. Se ele tentar congelar perto da própria torre, combine a cura de Happy Hour com Drunken Rage para absorver o dano de Spirit Fire dele enquanto força a wave a estourar com seus barris, impedindo que ele empilhe confortavelmente.
InterrupçãoDesengajarEssa lane é um puro teste de reflexos centrado no Disdain de Urgot. Enquanto Urgot depende de acertar esse flip para ativar Purge e orbitar você com Echoing Flames, Gragas tem a ferramenta perfeita para pará-lo. Um Body Slam bem cronometrado cancela completamente o ímpeto do Disdain, anulando tanto o deslocamento quanto o escudo dele. Errar esse timing permite que Urgot consuma sua barra de vida até o alcance de Fear Beyond Death.Build de Urgot →Ver detalhes
Urgot
Por quê
Essa lane é um puro teste de reflexos centrado no Disdain de Urgot. Enquanto Urgot depende de acertar esse flip para ativar Purge e orbitar você com Echoing Flames, Gragas tem a ferramenta perfeita para pará-lo. Um Body Slam bem cronometrado cancela completamente o ímpeto do Disdain, anulando tanto o deslocamento quanto o escudo dele. Errar esse timing permite que Urgot consuma sua barra de vida até o alcance de Fear Beyond Death.
Impacto na lane
Como ambos os campeões possuem excelente limpeza de wave, a lane permanece relativamente estática até alguém errar. Urgot vai tentar te desgastar com Corrosive Charge para preparar o engajamento dele. Se você interromper com sucesso o Disdain, Urgot fica vulnerável sem o escudo dele, permitindo que você se afaste ou troque de volta com Drunken Rage. Perder sua janela de lançamento, no entanto, força você a usar Explosive Cask defensivamente para evitar ser executado.
Como jogar
Nunca inicie trocas com Body Slam enquanto Urgot tiver Disdain disponível. Em vez disso, use Barrel Roll para farmar e reduzir o movimento dele, atraindo-o a usar o dash dele. Fique um pouco atrás dos seus minions para dificultar que ele acerte o Corrosive Charge. Se ele avançar, reaja instantaneamente com seu próprio slam para travá-lo em colisão. Caso você erre essa interrupção, canalize imediatamente Drunken Rage para mitigar o dano de Purge que está chegando enquanto recua em direção à sua torre.
SustentaçãoEssa lane funciona como uma pura guerra de desgaste porque a passiva de Malphite, Granite Shield, é diretamente neutralizada pelo seu próprio Happy Hour. Toda vez que Malphite tenta desgastar sua vida usando Seismic Shard, sua cura passiva restaura a vida perdida. Como nenhum dos dois consegue facilmente romper as ferramentas defensivas do outro, o matchup rapidamente se transforma em uma lane de farm estável e não violenta, em que abates solo são raros.Build de Malphite →Ver detalhes
Malphite
Por quê
Essa lane funciona como uma pura guerra de desgaste porque a passiva de Malphite, Granite Shield, é diretamente neutralizada pelo seu próprio Happy Hour. Toda vez que Malphite tenta desgastar sua vida usando Seismic Shard, sua cura passiva restaura a vida perdida. Como nenhum dos dois consegue facilmente romper as ferramentas defensivas do outro, o matchup rapidamente se transforma em uma lane de farm estável e não violenta, em que abates solo são raros.
Impacto na lane
Já que trocar ativamente não gera pressão real de abate, controlar as waves de minions se torna seu objetivo principal. Malphite vai usar Ground Slam e Thunderclap para empurrar as waves, forçando você a igualar a velocidade de limpeza dele usando Barrel Roll. Se você deixar ele estourar waves livremente, ele ganha timings fáceis de recuo. Manter os minions perto do centro da lane impede que ele circule pelo mapa com Unstoppable Force.
Como jogar
Para gerenciar essa lane com eficácia, sempre ative Drunken Rage quando você vir ele usando Seismic Shard para mitigar o dano mágico inicial. Nunca use Barrel Roll contra ele enquanto o Granite Shield dele estiver ativo; em vez disso, use-o para garantir minions distantes ou para atrasar o timer de regeneração do escudo dele. Por fim, guarde Body Slam defensivamente para se desengajar instantaneamente se ele tentar fechar a distância com Thunderclap ativo, mantendo uma distância segura de farm.
InterrupçãoEssa lane é uma pura batalha de desgaste em que Gragas depende de Happy Hour para igualar a resistência inata de Ornn. Toda a dinâmica gira em torno de como você usa Body Slam. Como Ornn precisa completar Bellows Breath para aplicar Brittle ou conectar Searing Charge com um pilar para um knock-up, um Body Slam bem cronometrado pode interromper ambas as animações em pleno cast, neutralizando completamente o poder de troca dele.Build de Ornn →Ver detalhes
Ornn
Por quê
Essa lane é uma pura batalha de desgaste em que Gragas depende de Happy Hour para igualar a resistência inata de Ornn. Toda a dinâmica gira em torno de como você usa Body Slam. Como Ornn precisa completar Bellows Breath para aplicar Brittle ou conectar Searing Charge com um pilar para um knock-up, um Body Slam bem cronometrado pode interromper ambas as animações em pleno cast, neutralizando completamente o poder de troca dele.
Impacto na lane
Consequentemente, a fase de lane se torna uma prova de resistência. Nenhum dos dois consegue facilmente forçar um dive, o que significa que o estado da wave permanece relativamente estável. No entanto, se você desperdiçar Body Slam, Ornn vai imediatamente procurar te zonear com Volcanic Rupture e Searing Charge. Ganhar trocas permite que você desgaste lentamente a barra de vida dele enquanto Happy Hour mantém a sua saudável, forçando Ornn a forjar defensivamente.
Como jogar
Nunca inicie trocas com Body Slam; em vez disso, mantenha-o pronto como ferramenta reativa. Quando Ornn começar a soltar fogo com Bellows Breath, carregue nele imediatamente com Body Slam para interromper o tick final antes que ele consiga te bater com a palma. Se ele errar Volcanic Rupture, você tem uma breve janela para poke com Barrel Roll e garantir last hits. Use Drunken Rage para absorver o impacto de Call of the Forge God se você não conseguir esquivar dele.
InterrupçãoTrocasEsse matchup de habilidades gira inteiramente em torno da interação entre seu Body Slam e o Bladesurge de Irelia. Irelia quer avançar pelos minions para empilhar Ionian Fervor e fechar a distância. No entanto, Body Slam tem prioridade; cronometrá-lo para colidir com ela no meio do Bladesurge cancela o dash dela, nega o reset dela, e coloca a principal ferramenta de mobilidade dela em um cooldown longo, deixando-a completamente exposta ao seu contra-ataque.Build de Irelia →Ver detalhes
Irelia
Por quê
Esse matchup de habilidades gira inteiramente em torno da interação entre seu Body Slam e o Bladesurge de Irelia. Irelia quer avançar pelos minions para empilhar Ionian Fervor e fechar a distância. No entanto, Body Slam tem prioridade; cronometrá-lo para colidir com ela no meio do Bladesurge cancela o dash dela, nega o reset dela, e coloca a principal ferramenta de mobilidade dela em um cooldown longo, deixando-a completamente exposta ao seu contra-ataque.
Impacto na lane
Como Irelia constantemente procura preparar minions com pouca vida para resets de Bladesurge, o estado da wave dita a tensão da lane. Você não pode simplesmente usar Barrel Roll para empurrar, já que uma wave maior dá a ela mais alvos de dash para atrair seu Body Slam. Errar sua interrupção permite que ela empilhe Ionian Fervor e corra atrás de você, enquanto acertá-la força ela a jogar defensivamente ou desperdiçar Defiant Dance para sobreviver.
Como jogar
Posicione-se diretamente ao lado dos seus próprios minions com pouca vida, forçando Irelia a avançar direto para a sua hitbox se ela quiser garantir o last hit. Nunca inicie trocas com Body Slam; em vez disso, guarde-o exclusivamente para reagir ao Bladesurge dela. Se ela conseguir te marcar com Flawless Duet ou Vanguard's Edge, canalize imediatamente Drunken Rage para mitigar o burst que está chegando enquanto você se prepara para interromper o avanço inevitável dela.
InterrupçãoTrocasEsse matchup de habilidades é definido pela sua capacidade de negar a mobilidade agressiva de Riven. Toda a lane depende de uma única microinteração: usar Body Slam para colidir com Riven durante o terceiro uso de Broken Wings dela. Interromper esse golpe aéreo anula completamente o knock-up principal dela e nega o ataque imediato potencializado por Runic Blade, deixando-a vulnerável e incapaz de escapar do seu contra-burst.Build de Riven →Ver detalhes
Riven
Por quê
Esse matchup de habilidades é definido pela sua capacidade de negar a mobilidade agressiva de Riven. Toda a lane depende de uma única microinteração: usar Body Slam para colidir com Riven durante o terceiro uso de Broken Wings dela. Interromper esse golpe aéreo anula completamente o knock-up principal dela e nega o ataque imediato potencializado por Runic Blade, deixando-a vulnerável e incapaz de escapar do seu contra-burst.
Impacto na lane
Consequentemente, as fases de troca se tornam um jogo de espera de alto risco. Riven não pode forçar waves às cegas debaixo da sua torre porque fazer isso a expõe a um travamento letal. Ela vai tentar atrair sua fuga usando Valor ou te stunar primeiro com Ki Burst. Se você mantiver suas ferramentas defensivas prontas, o estado da wave permanece neutro; se você errar o timing da sua interrupção, ela vai ativar Blade of the Exile e te caçar.
Como jogar
Para vencer isso, adote um estilo de jogo estritamente reativo. Farme com segurança usando Barrel Roll e nunca inicie trocas com Body Slam. Em vez disso, guarde essa carga especificamente para o terceiro salto de Broken Wings dela. Quando ela avançar, canalize imediatamente Drunken Rage para mitigar o burst físico inicial dela, então lance seu agarrão no milissegundo em que ela estiver no ar. Se você errar o timing e for stunado, use imediatamente Explosive Cask para empurrá-la para longe e se desengajar.
DesengajarTrocasEssa lane é um teste constante de tempo de reação, centrado inteiramente em como você responde às iniciações de Renekton. Renekton depende de Slice and Dice para fechar a distância e te travar instantaneamente com um Ruthless Predator de fúria alta. No entanto, seu Body Slam tem a propriedade única de interromper o dash dele no meio do ar. Se você cronometrar essa colisão corretamente, ele fica preso sem o stun dele, incapaz de ativar o burst dele.Build de Renekton →Ver detalhes
Renekton
Por quê
Essa lane é um teste constante de tempo de reação, centrado inteiramente em como você responde às iniciações de Renekton. Renekton depende de Slice and Dice para fechar a distância e te travar instantaneamente com um Ruthless Predator de fúria alta. No entanto, seu Body Slam tem a propriedade única de interromper o dash dele no meio do ar. Se você cronometrar essa colisão corretamente, ele fica preso sem o stun dele, incapaz de ativar o burst dele.
Impacto na lane
Bloquear o dash dele com sucesso dita completamente a pressão da wave e os resultados das trocas. Quando você interrompe Slice and Dice, Renekton é forçado a recuar, permitindo que você use Barrel Roll para consumir a vida dele e garantir a prioridade da wave. Se você errar o timing, ele vai despedaçar sua barra de vida, te forçar para debaixo da torre, e facilmente te dive quando ele ativar Dominus para gerar fúria massiva.
Como jogar
Você nunca deve usar Body Slam agressivamente a menos que o Slice and Dice de Renekton esteja em cooldown. Fique perto dos seus minions atiradores e espere o movimento de avanço dele. Se ele avançar, reaja instantaneamente com sua própria carga. Se você errar, beba imediatamente com Drunken Rage para mitigar o burst que está chegando, ative Happy Hour para recuperar um pouco de vida, e use Explosive Cask para se desengajar e empurrá-lo para longe antes que ele consiga acertar o combo completo dele.
DesengajarEsse matchup de habilidades gira em torno de como você lida com o deslocamento agressivo de K'Sante. Enquanto K'Sante quer te desgastar com Ntofo Strikes e te arrastar por uma parede usando All Out, seu kit tem a resposta perfeita. O fator decisivo é Explosive Cask: no momento em que K'Sante te isola com All Out, você pode detonar sua ultimate para empurrá-lo para longe, neutralizando a janela de alto dano dele.Build de K'Santé →Ver detalhes
K'Santé
Por quê
Esse matchup de habilidades gira em torno de como você lida com o deslocamento agressivo de K'Sante. Enquanto K'Sante quer te desgastar com Ntofo Strikes e te arrastar por uma parede usando All Out, seu kit tem a resposta perfeita. O fator decisivo é Explosive Cask: no momento em que K'Sante te isola com All Out, você pode detonar sua ultimate para empurrá-lo para longe, neutralizando a janela de alto dano dele.
Impacto na lane
No início da lane, as trocas são rápidas e explosivas. Você pode se sustentar através do poke de Ntofo Strikes usando Happy Hour, enquanto usa Drunken Rage para mitigar o burst de Dauntless Instinct, a passiva dele. No entanto, ficar muito perto de paredes faz de você um alvo fácil para All Out. Um único erro no seu posicionamento perto do terreno pode levar a um dive mortal, transformando um estado de wave que seria estável em um abate repentino para K'Sante.
Como jogar
Para ter sucesso, sempre mantenha uma distância segura de recantos e paredes de rio para negar a K'Sante um ângulo fácil para a ultimate dele. Fique de olho nos contadores de Ntofo Strikes dele; quando o terceiro golpe dele estiver pronto, prepare-se para esquivar para o lado ou interromper o dash dele com um Body Slam bem cronometrado. Mais importante, nunca desperdice Explosive Cask preventivamente. Guarde essa habilidade crucial especificamente para se desengajar imediatamente depois que ele se comprometer com All Out, resetando a luta nos seus próprios termos.
SustentaçãoAll-inTeemo depende do harass constante de *Toxic Shot* e *Blinding Dart* para negar seu farm. Felizmente, sua passiva *Happy Hour* contra-ataca diretamente esse dano ao longo do tempo, te curando através dos ticks de veneno. O ponto de virada chega quando você destrava *Explosive Cask*. A falta de ferramentas de fuga forte de Teemo o torna incrivelmente vulnerável a ser lançado para fora da zona segura dele direto para o seu alcance de burst.Build de Teemo →Ver detalhes
Teemo
Por quê
Teemo depende do harass constante de *Toxic Shot* e *Blinding Dart* para negar seu farm. Felizmente, sua passiva *Happy Hour* contra-ataca diretamente esse dano ao longo do tempo, te curando através dos ticks de veneno. O ponto de virada chega quando você destrava *Explosive Cask*. A falta de ferramentas de fuga forte de Teemo o torna incrivelmente vulnerável a ser lançado para fora da zona segura dele direto para o seu alcance de burst.
Impacto na lane
Durante os níveis iniciais, Teemo vai facilmente empurrar a wave e tentar cobrir a lane com *Noxious Trap*. Você deve ceder a prioridade antecipada, usando *Barrel Roll* para garantir minions a uma distância segura. Uma vez que você obtiver sua ultimate, a ameaça de um all-in interrompe completamente o posicionamento agressivo dele, impedindo-o de colocar cogumelos com segurança perto da sua torre ou de abusar da camuflagem de *Guerrilla Warfare* dele.
Como jogar
Maximize a cura de *Happy Hour* espaçando seus usos de habilidades em vez de usá-las em sequência. Ao trocar, espere a duração de *Blinding Dart* passar antes de executar seu ataque potencializado por *Drunken Rage*. Para garantir um abate, use *Explosive Cask* atrás de Teemo para perturbar o posicionamento dele e empurrá-lo em sua direção, então siga imediatamente com *Body Slam* para travá-lo antes que ele consiga ativar *Move Quick*.
SustentaçãoEscalamentoEssa lane gira em torno de uma batalha de desgaste em que nenhum dos lados consegue facilmente forçar um recuo. Sua passiva Happy Hour permite que você iguale a cura que Vladimir recebe de Transfusion, neutralizando o poke dele. No entanto, executar um abate decisivo é incrivelmente difícil; sempre que você se compromete com Body Slam ou tenta deslocá-lo com Explosive Cask, ele pode simplesmente se dissolver em Sanguine Pool para anular seu burst e escapar com segurança.Build de Vladimir →Ver detalhes
Vladimir
Por quê
Essa lane gira em torno de uma batalha de desgaste em que nenhum dos lados consegue facilmente forçar um recuo. Sua passiva Happy Hour permite que você iguale a cura que Vladimir recebe de Transfusion, neutralizando o poke dele. No entanto, executar um abate decisivo é incrivelmente difícil; sempre que você se compromete com Body Slam ou tenta deslocá-lo com Explosive Cask, ele pode simplesmente se dissolver em Sanguine Pool para anular seu burst e escapar com segurança.
Impacto na lane
Como abates diretos são raros, a lane se torna inteiramente sobre posicionamento de minions. Você não pode permitir que Vladimir congele livremente a wave perto da torre dele, já que ele vai escalar com segurança enquanto te zoneia com Tides of Blood. Você deve usar Barrel Roll para igualar a limpeza de wave dele, mantendo os minions centralizados. Uma wave mal gerenciada força você a se expor demais, deixando-o exposto aos all-ins de Hemoplague dele quando sua passiva estiver em cooldown.
Como jogar
Para ter sucesso, jogue em torno dos recursos de Vladimir. Inicie trocas curtas apenas com Body Slam e Drunken Rage imediatamente depois que ele desperdiçar o Transfusion potencializado dele em um minion. Se ele guardar a barra carmesim dele, recue. Para atrair Sanguine Pool, use um Barrel Roll ameaçador em vez de se comprometer com sua ultimate. Se ele escapar e ganhar uma vantagem de vida, foque inteiramente em farmar com suas habilidades a distância até que seu Happy Hour restaure sua rede de segurança.
InterrupçãoTrocasEsse matchup é uma pura batalha de reflexos centrada na iniciação de Pantheon. Toda a lane depende de se você consegue reagir ao Shield Vault dele. Se você usar Body Slam diretamente no salto dele, você vai derrubá-lo do ar, anulando completamente o stun dele e impedindo que ele descarregue um combo de Mortal Will totalmente carregado em você. Errar esse timing deixa ele trocar de graça atrás de Aegis Assault.Build de Pantheon →Ver detalhes
Pantheon
Por quê
Esse matchup é uma pura batalha de reflexos centrada na iniciação de Pantheon. Toda a lane depende de se você consegue reagir ao Shield Vault dele. Se você usar Body Slam diretamente no salto dele, você vai derrubá-lo do ar, anulando completamente o stun dele e impedindo que ele descarregue um combo de Mortal Will totalmente carregado em você. Errar esse timing deixa ele trocar de graça atrás de Aegis Assault.
Impacto na lane
Quando você interrompe consistentemente o dash dele, Pantheon perde sua principal ferramenta para consumir sua barra de vida, permitindo que você se sustente através de qualquer poke usando Happy Hour. No entanto, se ele conseguir te stunar com sucesso, ele facilmente bloqueia sua retaliação com Aegis Assault enquanto empurra a wave. Essa dinâmica dita quem controla as waves de minions e quem é forçado a recuar antecipadamente sob pressão pesada.
Como jogar
Nunca use Body Slam ofensivamente a menos que o Shield Vault de Pantheon esteja em cooldown. Mantenha distância e atraia o salto dele avançando quando seu próprio dash estiver pronto. Se ele iniciar, use seu E diretamente nele para interromper o salto dele por colisão, então imediatamente use um Barrel Roll atrás dele para contornar o escudo direcional dele. Se você errar o timing do seu dash e for stunado, ative Drunken Rage instantaneamente para mitigar o burst que está chegando.
Esses campeões geralmente têm dificuldade para responder às suas principais forças, o que te dá mais liberdade para abordar o confronto. Você costuma ter várias formas de pressioná-los e forçar trocas a seu favor. Aproveite essa vantagem para impor seu ritmo, em vez de dar tempo para eles se estabilizarem.
InterrupçãoProteçãoGragas domina esse matchup porque ele consegue anular completamente o principal dano e ferramenta de controle de grupo de Sion, Decimating Smash. Sempre que Sion carrega o machado gigante dele, Gragas pode imediatamente interromper com Body Slam. Interrompendo esse canal instantaneamente, você nega a principal ferramenta de limpeza de wave e troca de Sion, deixando-o vulnerável enquanto a habilidade principal dele entra em cooldown total.Build de Sion →Ver detalhes
Sion
Por quê
Gragas domina esse matchup porque ele consegue anular completamente o principal dano e ferramenta de controle de grupo de Sion, Decimating Smash. Sempre que Sion carrega o machado gigante dele, Gragas pode imediatamente interromper com Body Slam. Interrompendo esse canal instantaneamente, você nega a principal ferramenta de limpeza de wave e troca de Sion, deixando-o vulnerável enquanto a habilidade principal dele entra em cooldown total.
Impacto na lane
Como Sion não consegue carregar Decimating Smash com segurança sem ser interrompido, ele perde a capacidade de contestar a wave. Você pode congelar com facilidade enquanto estoura o escudo Soul Furnace dele com ataques potencializados por Barrel Roll e Drunken Rage. Sem a principal limpeza de wave dele, Sion é forçado a farmar debaixo da torre, perdendo ouro e toda a prioridade, o que neutraliza completamente o escalonamento inicial dele e remove qualquer ameaça de proxy.
Como jogar
Sua regra de ouro é nunca usar Body Slam agressivamente a menos que Sion já tenha começado a carregar Decimating Smash. Fique perto dos seus minions para atraí-lo a carregar, então avance instantaneamente para cancelá-lo. Siga com Drunken Rage e um slow de Barrel Roll para ganhar a troca de forma limpa. Se Sion tentar escapar ou engajar com Unstoppable Onslaught, use seu Explosive Cask atrás dele para perturbar o trajeto dele e mantê-lo isolado.
InterrupçãoPressão no mapaGragas tem uma vantagem enorme nessa lane porque a pressão global característica de Shen depende inteiramente de um canal que você pode interromper sem esforço. Sempre que Shen tenta dar um escudo e se teleportar para um aliado usando Stand United, seu Body Slam ou Explosive Cask pode cancelar o cast instantaneamente. Isso anula completamente a ultimate dele, deixando o time dele sem o escudo enquanto o mantém preso sob sua pressão de lane.Build de Shen →Ver detalhes
Shen
Por quê
Gragas tem uma vantagem enorme nessa lane porque a pressão global característica de Shen depende inteiramente de um canal que você pode interromper sem esforço. Sempre que Shen tenta dar um escudo e se teleportar para um aliado usando Stand United, seu Body Slam ou Explosive Cask pode cancelar o cast instantaneamente. Isso anula completamente a ultimate dele, deixando o time dele sem o escudo enquanto o mantém preso sob sua pressão de lane.
Impacto na lane
Essa interação neutraliza o principal impacto de mapa de Shen a seu favor. Shen não pode se teleportar livremente, permitindo que você dite o ritmo da wave. Você pode constantemente empurrar com Barrel Roll e consumi-lo com poke, forçando-o a escolher entre perder a torre dele para seu empurrão implacável ou deixar os aliados dele morrerem porque o Stand United dele está constantemente ameaçado pelo seu controle de grupo.
Como jogar
Para executar isso perfeitamente, sempre guarde Body Slam ou Explosive Cask uma vez que Shen alcance o nível cinco. Nunca use as duas habilidades simultaneamente durante trocas, garantindo que você sempre tenha uma ferramenta pronta para parar a ultimate dele. Se Shen recuar em direção à torre dele para usar Stand United fora do alcance de corpo a corpo, reaja instantaneamente usando Explosive Cask para interrompê-lo de longe. Quando ele usar Spirit's Refuge para bloquear seus ataques básicos, simplesmente mitigue a retaliação dele com Drunken Rage.
DesengajarKiteGragas naturalmente domina esse matchup porque todo o kit dele é construído para fechar as janelas ofensivas de Tryndamere. Sempre que Tryndamere ativa Undying Rage para sobreviver a uma troca letal, você pode neutralizar instantaneamente os cinco segundos de imortalidade dele. Um Explosive Cask bem colocado o arremessa para longe, enquanto um Barrel Roll persistente o mantém lento e incapaz de fechar a distância, tornando a ultimate dele completamente inútil.Build de Tryndamere →Ver detalhes
Tryndamere
Por quê
Gragas naturalmente domina esse matchup porque todo o kit dele é construído para fechar as janelas ofensivas de Tryndamere. Sempre que Tryndamere ativa Undying Rage para sobreviver a uma troca letal, você pode neutralizar instantaneamente os cinco segundos de imortalidade dele. Um Explosive Cask bem colocado o arremessa para longe, enquanto um Barrel Roll persistente o mantém lento e incapaz de fechar a distância, tornando a ultimate dele completamente inútil.
Impacto na lane
Essa utilidade defensiva retira de Tryndamere a pressão usual de split-push e o potencial de dive. Ele não pode estourar waves com segurança nem ameaçar sua torre porque dive em um Gragas com Explosive Cask e Body Slam prontos é suicídio. Você controla o ritmo das trocas de vida, recuperando facilmente qualquer vida perdida através de Happy Hour enquanto mantém a wave de minions congelada com segurança perto da sua torre.
Como jogar
Para executar isso perfeitamente, sempre guarde Body Slam para contra-atacar a iniciação de Spinning Slash dele; nunca o use agressivamente a menos que o dash dele esteja em cooldown. Quando ele ativar Undying Rage, use imediatamente Explosive Cask para empurrá-lo para trás, então siga com Barrel Roll para reduzir a duração restante do buff dele a uma distância segura. Se você acidentalmente desperdiçar sua ultimate antecipadamente, ative imediatamente Drunken Rage e recue para sua torre para sobreviver à invulnerabilidade temporária dele.
Contra-iniciaçãoTrocasGragas tem uma vantagem enorme porque ele neutraliza completamente a principal ameaça ofensiva de Jax. Sempre que Jax tenta iniciar uma troca usando Leap Strike enquanto gira Counter Strike, você pode interromper o salto dele no meio do ar usando Body Slam diretamente nele. Isso interrompe imediatamente o ímpeto dele, impede que ele acerte o stun, e deixa a principal ferramenta defensiva dele completamente desperdiçada em um engajamento fracassado.Build de Jax →Ver detalhes
Jax
Por quê
Gragas tem uma vantagem enorme porque ele neutraliza completamente a principal ameaça ofensiva de Jax. Sempre que Jax tenta iniciar uma troca usando Leap Strike enquanto gira Counter Strike, você pode interromper o salto dele no meio do ar usando Body Slam diretamente nele. Isso interrompe imediatamente o ímpeto dele, impede que ele acerte o stun, e deixa a principal ferramenta defensiva dele completamente desperdiçada em um engajamento fracassado.
Impacto na lane
Essa interação muda completamente a dinâmica de lane a seu favor, já que Jax não pode executar trocas curtas com segurança nem empilhar Relentless Assault em você. Você pode controlar a wave com facilidade, forçando Jax a escolher entre perder CS debaixo da torre dele ou levar dano pesado de Barrel Roll. Como Jax não pode te pressionar com Leap Strike, você comanda o ritmo da lane, forçando recuos antecipados e atrasando os picos de escalonamento dele.
Como jogar
Sua regra de ouro é nunca desperdiçar Body Slam em waves de minions. Guarde essa habilidade especificamente para quando Jax ativar Counter Strike ou começar a animação de Leap Strike dele. No momento em que ele saltar, use Body Slam diretamente nele para empurrá-lo para trás, então siga imediatamente com Drunken Rage e Barrel Roll para uma troca altamente favorável antes de recuar. Se você errar o timing, use Explosive Cask para empurrá-lo para longe e se desengajar.
All-inBola de neveKayle é incrivelmente vulnerável nos níveis iniciais antes que Divine Ascent conceda a ela ataques à distância. Gragas pode explorar essa fraqueza usando Body Slam para fechar a distância e travá-la, seguido por um golpe pesado de Drunken Rage. Como o padrão de burst de Gragas é tão rápido, ele pode consumir a barra de vida dela ou executá-la completamente antes que ela tenha tempo de reação para usar Divine Judgment em si mesma.Build de Kayle →Ver detalhes
Kayle
Por quê
Kayle é incrivelmente vulnerável nos níveis iniciais antes que Divine Ascent conceda a ela ataques à distância. Gragas pode explorar essa fraqueza usando Body Slam para fechar a distância e travá-la, seguido por um golpe pesado de Drunken Rage. Como o padrão de burst de Gragas é tão rápido, ele pode consumir a barra de vida dela ou executá-la completamente antes que ela tenha tempo de reação para usar Divine Judgment em si mesma.
Impacto na lane
Você dita o posicionamento da wave desde o primeiro minuto. Kayle deve escolher entre perder farm ou levar dano pesado de Barrel Roll sempre que se aproximar para garantir minions com Starfire Spellblade. Essa ameaça constante força ela a jogar bem recuada, permitindo que você empurre lentamente waves enormes debaixo da torre dela, garanta recuos gratuitos, e circule pelo mapa para ajudar seu jungler enquanto ela luta para limpar debaixo da torre.
Como jogar
Assedie Kayle com Barrel Roll no início para forçá-la a usar Celestial Blessing para se curar, drenando a mana dela. Uma vez que ela esteja abaixo da metade da vida, espere ela avançar para garantir um last hit, então execute um combo rápido de Body Slam seguido por Drunken Rage. Se ela alcançar o nível cinco, não se exponha com trocas lentas; em vez disso, use Explosive Cask para empurrá-la para longe da torre dela ou interrompê-la antes que ela consiga ativar Divine Judgment, garantindo um abate limpo.
Esses campeões têm uma build e um estilo de jogo que superam diretamente o seu, o que pode tornar o controle da lane e o farm extremamente difíceis. As habilidades deles podem neutralizar seus principais pontos fortes ou te punir assim que você tenta jogar do seu jeito de sempre. Nesses matchups, o objetivo costuma ser reduzir os erros e buscar soluções fora do confronto direto.
Counter forteSobrevivênciaOlaf representa um matchup pesadelo para Gragas no jungle por causa de como Ragnarok neutraliza completamente seu kit. Normalmente, você depende de Body Slam para peelar ou engajar, e de Explosive Cask para desorganizar teamfights. Depois que Olaf ativa a ultimate dele, ele ignora todo deslocamento e stuns, te alcançando com os machados de Undertow enquanto desgasta sua barra de vida com Reckless Swing e o lifesteal de Vicious Strikes.Build de Olaf →Ver detalhes
Olaf
Por quê
Olaf representa um matchup pesadelo para Gragas no jungle por causa de como Ragnarok neutraliza completamente seu kit. Normalmente, você depende de Body Slam para peelar ou engajar, e de Explosive Cask para desorganizar teamfights. Depois que Olaf ativa a ultimate dele, ele ignora todo deslocamento e stuns, te alcançando com os machados de Undertow enquanto desgasta sua barra de vida com Reckless Swing e o lifesteal de Vicious Strikes.
Impacto na lane
No jungle, essa dinâmica tira seu poder de duelo e sua pressão. Você não consegue contestar scuttle crabs ou objetivos neutros diretamente se Olaf estiver por perto, já que ele simplesmente atravessa os slows da sua Barrel Roll. Se ele invadir, você é forçado a recuar imediatamente porque seu Body Slam defensivo não vai parar a carga dele quando ele estiver enraivecido. Isso concede prioridade inicial de mapa, deixando seus laners vulneráveis aos ganks rápidos e imparáveis dele.
Como jogar
Para sobreviver, você precisa rastrear a localização de Olaf e o caminho dele para o lado oposto do mapa. Durante skirmishes, nunca inicie com Explosive Cask se a ultimate dele estiver disponível. Em vez disso, provoque a Ragnarok fazendo poke com Barrel Roll a uma distância segura, usando Drunken Rage para absorver o dano verdadeiro dele de Reckless Swing. Espere a imunidade a crowd control dele acabar completamente antes de se comprometer com seu Body Slam para peelar para seus carregadores assim que os machados dele pararem de voar.
Esses campeões têm ferramentas que geralmente dão a eles vantagem no confronto, sem tornar o matchup impossível de jogar. Eles podem ter mais alcance, mais capacidade de aguentar sua ofensiva ou mais formas de responder aos seus engajamentos. Você vai precisar adaptar sua abordagem e escolher com cuidado os momentos em que aceita a luta.
Contra-iniciaçãoProteçãoA passiva de Dr. Mundo, Goes Where He Pleases, é um counter fundamental para sua principal ferramenta defensiva e ofensiva. Quando você tenta peelar ou iniciar com Explosive Cask, ele simplesmente absorve o deslocamento, levando dano menor enquanto ignora completamente o knockback. Isso permite que ele atravesse direto a sua disrupção, tornando seu principal crowd control inútil e deixando você incapaz de proteger seus carregadores ou isolá-lo durante skirmishes.Build de Dr. Mundo →Ver detalhes
Dr. Mundo
Por quê
A passiva de Dr. Mundo, Goes Where He Pleases, é um counter fundamental para sua principal ferramenta defensiva e ofensiva. Quando você tenta peelar ou iniciar com Explosive Cask, ele simplesmente absorve o deslocamento, levando dano menor enquanto ignora completamente o knockback. Isso permite que ele atravesse direto a sua disrupção, tornando seu principal crowd control inútil e deixando você incapaz de proteger seus carregadores ou isolá-lo durante skirmishes.
Impacto na lane
Em skirmishes de jungle e disputas de river, essa interação tira sua ameaça. Você não consegue garantir objetivos ou proteger suas lanes com confiabilidade porque Dr. Mundo consegue ignorar o Body Slam e te alcançar com os slows de Infected Bonesaw. Se você tentar igualar o clear dele, a Blunt Force Trauma dele supera a sustentação de Happy Hour, forçando você a conceder a prioridade inicial dos crabs e jogar de forma reativa sob a ameaça do dive de Maximum Dosage dele.
Como jogar
Para sobreviver, você precisa ajustar seu posicionamento ficando atrás da sua linha de frente, usando Barrel Roll a distância para estourar o frasco dele primeiro. Nunca lance Explosive Cask ou se comprometa com Body Slam enquanto Goes Where He Pleases estiver ativa. Espere um aliado acionar a passiva dele, ou provoque-a você mesmo com um barril de alcance máximo, antes de tentar qualquer deslocamento. Se ele ativar Maximum Dosage, use Drunken Rage para mitigar o dano físico dele e se desengajar imediatamente.
MobilidadeEsquivaAs stacks da passiva de Lillia, de Blooming Blows, concedem a ela uma velocidade de movimento enorme, permitindo que ela dance facilmente ao redor e esquive da sua Barrel Roll. Como sua principal ferramenta de zoneamento e slow fica inútil pela dança constante dela, você vai ter dificuldade para travá-la. A queimadura de Dream-Laden Bough dela também consome sua sustentação de Happy Hour, transformando isso em uma perseguição altamente móvel e frustrante que você não consegue ganhar facilmente.Build de Lillia →Ver detalhes
Lillia
Por quê
As stacks da passiva de Lillia, de Blooming Blows, concedem a ela uma velocidade de movimento enorme, permitindo que ela dance facilmente ao redor e esquive da sua Barrel Roll. Como sua principal ferramenta de zoneamento e slow fica inútil pela dança constante dela, você vai ter dificuldade para travá-la. A queimadura de Dream-Laden Bough dela também consome sua sustentação de Happy Hour, transformando isso em uma perseguição altamente móvel e frustrante que você não consegue ganhar facilmente.
Impacto na lane
No jungle, essa diferença de mobilidade significa que Lillia consegue facilmente superar seu clear e garantir scuttle crabs te kitando. Se você a contestar diretamente no river, a Swirlseed dela consegue aplicar Dream-Laden Bough a distância, montando a Lilting Lullaby para te adormecer antes mesmo que você consiga chegar no alcance para usar Body Slam. Isso te força a um padrão de farm defensivo, sacrificando o controle neutro inicial.
Como jogar
Para sobreviver a esse matchup, nunca jogue sua Barrel Roll às cegas enquanto ela tiver o máximo de stacks. Em vez disso, guarde seus cooldowns e espere ela se comprometer com Watch Out! Eep!, que a trava brevemente no lugar, tornando-a um alvo perfeito para Body Slam. Ao contestar objetivos, use Explosive Cask na defensiva para se desengajar e empurrá-la para longe em vez de tentar começar uma luta, já que persegui-la é uma armadilha mortal garantida.
KiteMobilidadeGraves dita o ritmo das skirmishes de jungle porque os ataques básicos à distância dele vindos de New Destiny te desgastam constantemente com segurança. O problema principal está na sua ferramenta de iniciação: Graves consegue reagir com um dash de Quickdraw para escapar facilmente do raio da sua Barrel Roll. Sem acertar aquele slow inicial, você não consegue fechar a distância com confiabilidade para acertar Body Slam, ficando kitável e incapaz de garantir o travamento sem gastar Flash.Build de Graves →Ver detalhes
Graves
Por quê
Graves dita o ritmo das skirmishes de jungle porque os ataques básicos à distância dele vindos de New Destiny te desgastam constantemente com segurança. O problema principal está na sua ferramenta de iniciação: Graves consegue reagir com um dash de Quickdraw para escapar facilmente do raio da sua Barrel Roll. Sem acertar aquele slow inicial, você não consegue fechar a distância com confiabilidade para acertar Body Slam, ficando kitável e incapaz de garantir o travamento sem gastar Flash.
Impacto na lane
Essa diferença de mobilidade torna contestar camps no river altamente arriscado. Se Graves invadir seu jungle, a Smoke Screen dele combinada com End of the Line nas paredes consegue te forçar a saída dos seus camps. Como você não consegue trocar de volta com confiabilidade sem ser kitado, você frequentemente vai se ver forçado a abrir mão dos Scuttle Crabs, ficando atrás em ouro e ritmo inicial, o que reduz sua pressão nas side lanes.
Como jogar
Para sobreviver e counterar isso, nunca abra com Barrel Roll. Em vez disso, posicione-se perto de paredes sólidas onde Graves possa tentar quicar a End of the Line, mas use Drunken Rage antecipadamente para absorver o burst dele. Guarde seu Body Slam até ele se comprometer com Quickdraw de forma ofensiva ou defensiva. Se você precisar engajar, use Explosive Cask para empurrá-lo para trás, para dentro do seu time ou diretamente para o seu alcance corpo a corpo, forçando o dash dele antes de você se comprometer com seu CC principal.
Tempo de recargaVisãoNocturne dita as skirmishes de jungle porque sua Shroud of Darkness é um counter forte para seu crowd control de alto impacto. Quando você tenta peelar ou engajar com Body Slam ou Explosive Cask, um spell shield reativo anula completamente o deslocamento. Isso não só desperdiça suas principais ferramentas defensivas e ofensivas, como também aciona o buff de velocidade de ataque de Nocturne, permitindo que ele te alcance facilmente com Duskbringer e Unspeakable Horror.Build de Nocturne →Ver detalhes
Nocturne
Por quê
Nocturne dita as skirmishes de jungle porque sua Shroud of Darkness é um counter forte para seu crowd control de alto impacto. Quando você tenta peelar ou engajar com Body Slam ou Explosive Cask, um spell shield reativo anula completamente o deslocamento. Isso não só desperdiça suas principais ferramentas defensivas e ofensivas, como também aciona o buff de velocidade de ataque de Nocturne, permitindo que ele te alcance facilmente com Duskbringer e Unspeakable Horror.
Impacto na lane
No river e nos corredores de jungle, você não consegue contestar Scuttle Crabs ou invadir com segurança enquanto o spell shield dele estiver ativo. Se vocês se enfrentarem em situações de 1x1, você é forçado a jogar de forma extremamente passiva, cedendo prioridade. Quando Nocturne ganha Paranoia, suas lanes ficam em risco constante porque você não consegue fazer contra-gank com eficácia; se você chegar atrasado, a Shroud of Darkness dele vai bloquear seu peel, te deixando incapaz de salvar seus aliados.
Como jogar
Para sobreviver a esse matchup, nunca abra com Body Slam ou Explosive Cask. Em vez disso, jogue uma Barrel Roll de alcance máximo para provocar a Shroud of Darkness a distância, ou ative Drunken Rage para absorver o burst inicial dele enquanto o escudo dele decai. Se ele iniciar com Paranoia e te ligar com Unspeakable Horror, afaste-se usando a cura passiva de Happy Hour para sobreviver à duração do medo antes de voltar a lançar suas habilidades de deslocamento somente depois que o escudo dele tiver expirado.
Esses confrontos são, acima de tudo, duelos de execução: os dois campeões têm formas reais de levar vantagem. Uma habilidade importante esquivada, um engajamento bem antecipado ou um erro de posicionamento podem ser suficientes para decidir o duelo. Conhecer o matchup e reconhecer as janelas de ação certas faz toda a diferença.
DesengajarEscaramuçasEsse matchup de jungle gira inteiramente em torno da interação crítica entre seu Body Slam e a Lunar Rush de Diana. Quando Diana alveja um aliado ou você com o dash dela, você consegue anular completamente o engage dela cronometrando sua carga para derrubá-la no ar. Como a mobilidade dela depende fortemente de resetar a Lunar Rush através das marcas de Crescent Strike, interromper o primeiro dash dela nega a entrada dela e coloca sua principal ferramenta de aproximação em cooldown total.Build de Diana →Ver detalhes
Diana
Por quê
Esse matchup de jungle gira inteiramente em torno da interação crítica entre seu Body Slam e a Lunar Rush de Diana. Quando Diana alveja um aliado ou você com o dash dela, você consegue anular completamente o engage dela cronometrando sua carga para derrubá-la no ar. Como a mobilidade dela depende fortemente de resetar a Lunar Rush através das marcas de Crescent Strike, interromper o primeiro dash dela nega a entrada dela e coloca sua principal ferramenta de aproximação em cooldown total.
Impacto na lane
No jungle, essa verificação mecânica dita como as skirmishes e as disputas de objetivos neutros se desenrolam. Parar o dash dela com sucesso impede que ela puxe seu time junto com Moonfall, neutralizando o impacto dela em teamfights. Porém, se você gastar Body Slam na defensiva ou errar, Diana vai destruir imediatamente seu backline. Isso transforma todo encontro no river em um impasse de alto risco, em que quem se comprometer primeiro com a habilidade principal perde a pressão de mapa.
Como jogar
Como Gragas, você precisa exercer paciência extrema durante as skirmishes. Nunca inicie com Body Slam quando Diana estiver por perto; em vez disso, guarde essa habilidade especificamente para reagir à animação de Lunar Rush dela. Se ela errar Crescent Strike, você tem uma breve janela para jogar de forma agressiva com Barrel Roll e Drunken Rage. Se você errar a interrupção e ela acertar Moonfall, use Explosive Cask imediatamente para se desengajar e empurrá-la para longe dos seus aliados vulneráveis antes que o burst dela aconteça.
DesengajarLutas em equipeEsse confronto de jungle é um teste puro de tempo de reação centrado em disrupção de teamfight. Amumu depende de acertar Bandage Toss para dar dive no seu time e soltar uma Curse of the Sad Mummy devastadora. Porém, Gragas possui a ferramenta de counter definitiva: seu Explosive Cask consegue mandar Amumu para longe dos seus aliados no meio do dash ou bem na hora em que ele aterrissa, arruinando completamente a montagem massiva de crowd control dele e deixando-o isolado.Build de Amumu →Ver detalhes
Amumu
Por quê
Esse confronto de jungle é um teste puro de tempo de reação centrado em disrupção de teamfight. Amumu depende de acertar Bandage Toss para dar dive no seu time e soltar uma Curse of the Sad Mummy devastadora. Porém, Gragas possui a ferramenta de counter definitiva: seu Explosive Cask consegue mandar Amumu para longe dos seus aliados no meio do dash ou bem na hora em que ele aterrissa, arruinando completamente a montagem massiva de crowd control dele e deixando-o isolado.
Impacto na lane
No jungle, essa dinâmica impede que Amumu force skirmishes livremente. Durante as disputas de objetivos iniciais, Amumu não consegue engajar às cegas porque você consegue peelá-lo facilmente com Body Slam. Se Amumu tentar travar seus carregadores, sua ameaça de deslocamento o força a atrasar o engage. Isso cria um impasse tenso em que nenhum dos junglers consegue se comprometer facilmente, transformando as lutas neutras em uma batalha de posicionamento paciente.
Como jogar
Para ganhar isso, você precisa guardar seu Explosive Cask estritamente para desengajar na defensiva. Nunca o gaste para abrir uma luta. Fique um pouco atrás dos seus carregadores principais para interceptar Amumu. No momento em que ele lançar uma Bandage Toss, prepare sua mira. Se ele conectar, jogue instantaneamente sua ultimate diretamente em cima dele ou um pouco adiante dele para empurrá-lo para longe dos alvos dele antes que ele consiga acionar Curse of the Sad Mummy. Se falhar, use Body Slam para bloquear o caminho dele.
PicksProteçãoEsse matchup é um embate puro de burst decidido por micro-interações no river e nos camps. Kha'Zix prospera isolando você para soltar uma Taste Their Fear devastadora, potencializada por Unseen Threat. Porém, Gragas consegue neutralizar completamente essa abertura letal cronometrando Drunken Rage. Absorver com sucesso a janela de burst principal dele muda a pressão, forçando o predador do void a lutar sem sua principal fonte de dano.Build de Kha'Zix →Ver detalhes
Kha'Zix
Por quê
Esse matchup é um embate puro de burst decidido por micro-interações no river e nos camps. Kha'Zix prospera isolando você para soltar uma Taste Their Fear devastadora, potencializada por Unseen Threat. Porém, Gragas consegue neutralizar completamente essa abertura letal cronometrando Drunken Rage. Absorver com sucesso a janela de burst principal dele muda a pressão, forçando o predador do void a lutar sem sua principal fonte de dano.
Impacto na lane
As skirmishes de jungle sobre os Scuttle Crabs e os confrontos iniciais ditam o momentum do mapa. Não conseguir mitigar o burst dele significa que você vai ser forçado a sair dos seus camps, cedendo prioridade e deixando ele pressionar seus laners. Por outro lado, manter sua posição e absorver o dano isolado dele mantém sua barra de vida alta, protegendo seus camps neutros e neutralizando o potencial de snowball inicial dele.
Como jogar
Nunca gaste Drunken Rage limpando camps se você não tiver visão dele. No momento em que Kha'Zix iniciar com Leap, canalize imediatamente Drunken Rage para absorver a Taste Their Fear isolada dele. Se ele se comprometer, use Body Slam para interromper o ritmo dele, seguindo com Barrel Roll para garantir a troca. Se ele ativar Void Assault para resetar a passiva dele, recue em direção a monstros aliados ou minions para quebrar o isolamento dele.
Pressão no inícioMobilidadeEsse matchup de jungle é completamente decidido por como você cronometra seu Body Slam contra a mobilidade de Lee Sin. Como o burst principal dele depende do segundo cast de Sonic Wave para executar alvos, seu Body Slam age como um counter perfeito. Colidir com ele no meio do dash cancela completamente o dano do dash dele e impede que ele garanta abates facilmente, neutralizando instantaneamente o potencial de assassinato dele no início do jogo.Build de Lee Sin →Ver detalhes
Lee Sin
Por quê
Esse matchup de jungle é completamente decidido por como você cronometra seu Body Slam contra a mobilidade de Lee Sin. Como o burst principal dele depende do segundo cast de Sonic Wave para executar alvos, seu Body Slam age como um counter perfeito. Colidir com ele no meio do dash cancela completamente o dano do dash dele e impede que ele garanta abates facilmente, neutralizando instantaneamente o potencial de assassinato dele no início do jogo.
Impacto na lane
Em skirmishes ativas e disputas de objetivos, essa interação define quem controla o river. Se você guardar seu crowd control, Lee Sin não consegue dar dive confortavelmente nos seus aliados ou se comprometer com uma jogada de Dragon's Rage. Porém, se você gastar Body Slam prematuramente, ele vai explorar imediatamente essa janela para te destruir com Sonic Wave, forçando você a sair do seu próprio jungle e sacrificando a prioridade dos scuttles.
Como jogar
Nunca inicie uma skirmish com Body Slam se Lee Sin tiver a Sonic Wave disponível. Em vez disso, use Barrel Roll para fazer slow na aproximação dele e carregue Drunken Rage para absorver o burst inicial dele. Fique diretamente em cima do seu aliado com pouca vida ou de si mesmo quando a primeira marca acertar. No momento em que ele acionar o segundo voo, lance Body Slam diretamente no caminho dele para derrubá-lo do ar. Se você errar o timing, desengaje imediatamente usando Explosive Cask para empurrá-lo para longe e resetar.
EscaramuçasControle de grupoEsse matchup de jungle gira em torno de velocidades de execução explosivas. Viego depende de acionar Sovereign's Domination durante skirmishes para se curar e virar o jogo, mas ele é inerentemente frágil. Gragas consegue contornar completamente esse loop de sustentação. Combinando Drunken Rage com Body Slam e Explosive Cask, você consegue fazer burst nele de vida cheia a zero, removendo a capacidade dele de sequestrar os corpos dos seus aliados antes mesmo que a passiva dele ative.Build de Viego →Ver detalhes
Viego
Por quê
Esse matchup de jungle gira em torno de velocidades de execução explosivas. Viego depende de acionar Sovereign's Domination durante skirmishes para se curar e virar o jogo, mas ele é inerentemente frágil. Gragas consegue contornar completamente esse loop de sustentação. Combinando Drunken Rage com Body Slam e Explosive Cask, você consegue fazer burst nele de vida cheia a zero, removendo a capacidade dele de sequestrar os corpos dos seus aliados antes mesmo que a passiva dele ative.
Impacto na lane
As skirmishes de jungle são decididas em fração de segundo. Se Viego usar Harrowed Path para navegar pelas paredes do jungle, você precisa rastrear a camuflagem dele. Quando ele se comprometer com Spectral Maw, um stun errado o deixa incrivelmente vulnerável. Se você não conseguir fazer burst nele antes que ele encontre um alvo com pouca vida para Heartbreaker, ele vai dar snowball na skirmish, custando às suas lanes prioridade vital e controle de mapa.
Como jogar
Nunca inicie às cegas quando os cooldowns de Viego estiverem disponíveis. Guarde Body Slam para interromper o dash de Spectral Maw dele no ar, neutralizando o principal crowd control dele. Se ele tentar escapar ou executar um aliado com Heartbreaker, lance Explosive Cask para deslocá-lo para longe do alvo. Se você errar sua Barrel Roll e falhar o burst inicial, desengaje imediatamente usando a cura de Happy Hour para sobreviver até seus cooldowns voltarem.
InterrupçãoEscaramuçasEsse matchup de jungle gira em torno de neutralizar o lifesteal implacável de Warwick vindo de Eternal Hunger e Jaws of the Beast. Enquanto Warwick domina skirmishes prolongadas através da cura com pouca vida, Gragas possui a ferramenta perfeita para desligar a ultimate dele. Um Body Slam bem cronometrado consegue interromper no ar o salto de Infinite Duress de Warwick, anulando completamente a supressão dele e parando a cura massiva dele antes que ele consiga consumir sua barra de vida.Build de Warwick →Ver detalhes
Warwick
Por quê
Esse matchup de jungle gira em torno de neutralizar o lifesteal implacável de Warwick vindo de Eternal Hunger e Jaws of the Beast. Enquanto Warwick domina skirmishes prolongadas através da cura com pouca vida, Gragas possui a ferramenta perfeita para desligar a ultimate dele. Um Body Slam bem cronometrado consegue interromper no ar o salto de Infinite Duress de Warwick, anulando completamente a supressão dele e parando a cura massiva dele antes que ele consiga consumir sua barra de vida.
Impacto na lane
Como você consegue cancelar a principal ferramenta de engajamento dele, Warwick não consegue forçar skirmishes facilmente em você nos Scuttle Crabs ou durante os objetivos neutros iniciais. Porém, se você gastar seu crowd control, a Blood Hunt dele permite que ele te alcance e abuse da sustentação superior dele. Essa tensão transforma todo duelo no river em um jogo de espera de alto risco, em que quem se comprometer primeiro com a ferramenta de movimento principal perde toda a pressão.
Como jogar
Nunca inicie uma luta contra Warwick com Body Slam. Em vez disso, use Barrel Roll para fazer slow na aproximação dele e mantenha distância com ataques básicos amplificados por Drunken Rage. Guarde seu Body Slam exclusivamente para reagir ao salto de Infinite Duress dele ou para peelá-lo de um aliado. Se ele tentar canalizar a ultimate dele, bata diretamente nele para quebrar a supressão. Se você errar essa interrupção crucial, desengaje imediatamente usando Explosive Cask para empurrá-lo para longe.
DesengajarEscaramuçasEsse confronto na jungle é uma dança delicada de posicionamento centrada em Parallel Convergence de Ekko. Enquanto Ekko busca te imobilizar ou garantir um escudo usando sua zona temporal, sua principal ferramenta é Explosive Cask. Ao detonar esse barril corretamente, você consegue literalmente expulsar Ekko do próprio círculo de Parallel Convergence antes que o atordoamento dele dispare, transformando sua principal ferramenta de engage em uma recarga desperdiçada.Build de Ekko →Ver detalhes
Ekko
Por quê
Esse confronto na jungle é uma dança delicada de posicionamento centrada em Parallel Convergence de Ekko. Enquanto Ekko busca te imobilizar ou garantir um escudo usando sua zona temporal, sua principal ferramenta é Explosive Cask. Ao detonar esse barril corretamente, você consegue literalmente expulsar Ekko do próprio círculo de Parallel Convergence antes que o atordoamento dele dispare, transformando sua principal ferramenta de engage em uma recarga desperdiçada.
Impacto na lane
Na jungle, essa interação dita completamente as escaramuças por objetivos e os combates no rio. Se Ekko acertar Parallel Convergence e ativar sua Z-Drive Resonance, o burst dele pode derreter sua barra de vida e forçar uma retirada precoce. Porém, interromper a entrada dele com um Body Slam bem cronometrado ou com um deslocamento o obriga a depender de Chronobreak na defensiva, neutralizando sua pressão no mapa e cedendo o controle do Scuttle Crab para você.
Como jogar
Para vencer essa batalha de execução, nunca desperdice Explosive Cask para começar uma luta. Mantenha distância quando ouvir o clone dele conjurar Parallel Convergence, e direcione sua ultimate exatamente para o centro da zona no momento em que ele usar Phase Dive para saltar para dentro dela. Se sua ultimate estiver em recarga, use Body Slam para responder ao dash dele, e então se desengaje imediatamente usando a redução de velocidade de Barrel Roll para esperar o escudo temporal dele acabar.
SustentaçãoPressão no inícioNos confrontos iniciais da jungle, esse matchup é decidido por como você lida com o burst repentino de Pantheon. Quando ele ativa Mortal Will para potencializar seu Comet Spear, ele espera arrancar um grande pedaço da sua vida instantaneamente. Porém, ativar Drunken Rage bem no momento em que ele avança permite absorver o grosso do dano físico dele, transformando uma troca letal em uma troca equilibrada e sobrevivível antes de você se desengajar.Build de Pantheon →Ver detalhes
Pantheon
Por quê
Nos confrontos iniciais da jungle, esse matchup é decidido por como você lida com o burst repentino de Pantheon. Quando ele ativa Mortal Will para potencializar seu Comet Spear, ele espera arrancar um grande pedaço da sua vida instantaneamente. Porém, ativar Drunken Rage bem no momento em que ele avança permite absorver o grosso do dano físico dele, transformando uma troca letal em uma troca equilibrada e sobrevivível antes de você se desengajar.
Impacto na lane
Essa dinâmica força uma dança tensa e lenta em torno dos primeiros Scuttle Crabs e acampamentos neutros. Se você errar o momento da sua redução de dano, Pantheon garante um abate fácil, crescendo nas rotas com Grand Starfall. Se você conseguir parar o avanço inicial dele, a velocidade de clear dele diminui, impedindo que ele invada sua jungle e o obrigando a perder tempo esperando suas recargas voltarem.
Como jogar
Fique de olho na barra da passiva de Pantheon. Quando ele tiver cargas completas de Mortal Will, prepare-se para canalizar Drunken Rage imediatamente se ele iniciar com Shield Vault. Nunca comece com Body Slam enquanto Aegis Assault estiver disponível, pois ele vai bloquear seu dano de retaliação. Em vez disso, use Barrel Roll para reduzir a velocidade da fuga dele, esperando o escudo defensivo acabar antes de usar toda a sua rotação de controle de grupo.
Esses campeões geralmente têm dificuldade para responder às suas principais forças, o que te dá mais liberdade para abordar o confronto. Você costuma ter várias formas de pressioná-los e forçar trocas a seu favor. Aproveite essa vantagem para impor seu ritmo, em vez de dar tempo para eles se estabilizarem.
Contra-iniciaçãoControle de grupoGragas domina esse duelo na jungle porque seu Body Slam neutraliza completamente a principal ferramenta de engage de Vi, Vault Breaker. Sempre que Vi tenta carregar e avançar com o dash para iniciar ou escapar, um Body Slam bem cronometrado colide com ela no ar, cancelando o recuo dela e deixando-a parada. Sem o avanço de distância e o controle de grupo inicial de Vault Breaker, a capacidade dela de acumular cargas de Denting Blows ou usar Blast Shield é seriamente atrasada.Build de Vi →Ver detalhes
Vi
Por quê
Gragas domina esse duelo na jungle porque seu Body Slam neutraliza completamente a principal ferramenta de engage de Vi, Vault Breaker. Sempre que Vi tenta carregar e avançar com o dash para iniciar ou escapar, um Body Slam bem cronometrado colide com ela no ar, cancelando o recuo dela e deixando-a parada. Sem o avanço de distância e o controle de grupo inicial de Vault Breaker, a capacidade dela de acumular cargas de Denting Blows ou usar Blast Shield é seriamente atrasada.
Impacto na lane
Essa interação retira completamente o poder de gank e a pressão sobre objetivos de Vi. Ao disputar Scuttle Crabs ou em escaramuças iniciais, ela não consegue forçar lutas com segurança. Se ela tentar iniciar em cima dos seus jogadores de rota, você consegue afastá-la sem esforço, transformando os ganks de alto impacto dela em desastres de contra-gank. Essa neutralização a obriga a farmar de forma passiva, dando a você liberdade total sobre os movimentos iniciais do mapa.
Como jogar
Para executar isso perfeitamente, nunca use Body Slam de forma proativa ao limpar acampamentos perto de Vi. Em vez disso, fique rodeando seus jogadores de rota e guarde Body Slam especificamente para reagir à carga de Vault Breaker dela. Se ela te imobilizar com Cease and Desist, espere a animação imparável terminar, e então solte Explosive Cask imediatamente para deslocá-la para longe dos alvos dela enquanto usa Drunken Rage para absorver o burst seguinte de Relentless Force.
Lutas em equipeControle de áreaGragas controla esse confronto na jungle naturalmente porque sua ultimate neutraliza completamente a principal ameaça de Shyvana. Quando ela tenta iniciar uma teamfight ou disputa de objetivo com Dragon's Descent, você pode reagir imediatamente com Explosive Cask. Isso a intercepta no ar, espalhando-a para longe do seu time. Sem o engage na forma de dragão, ela fica fácil de kitar, tornando Burnout e Twin Bite inúteis.Build de Shyvana →Ver detalhes
Shyvana
Por quê
Gragas controla esse confronto na jungle naturalmente porque sua ultimate neutraliza completamente a principal ameaça de Shyvana. Quando ela tenta iniciar uma teamfight ou disputa de objetivo com Dragon's Descent, você pode reagir imediatamente com Explosive Cask. Isso a intercepta no ar, espalhando-a para longe do seu time. Sem o engage na forma de dragão, ela fica fácil de kitar, tornando Burnout e Twin Bite inúteis.
Impacto na lane
Esse matchup muda a forma como os objetivos neutros são disputados. Shyvana depende de acumular cargas de Fury of the Dragonborn e forçar engages fortes. Como você consegue parar o dive dela, o time dela não consegue dar sequência fácil às iniciações. Isso a obriga a jogar de forma passiva, permitindo que você garanta os Scuttle Crabs e dispute os acampamentos dela com segurança, usando Barrel Roll para reduzir a velocidade dela e Drunken Rage para absorver o poke de Flame Breath.
Como jogar
Sua prioridade absoluta é guardar Explosive Cask durante as teamfights; nunca o desperdice em poke aleatório se Shyvana tiver a ultimate dela disponível. Posicione-se um pouco atrás da sua linha de frente, esperando ela usar Dragon's Descent. No momento em que ela voar, jogue seu barril diretamente no caminho de aterrissagem dela para redirecioná-la. Se ela te pegar desprevenido no rio com Burnout, use Body Slam na defensiva para criar distância enquanto ativa Happy Hour para se manter saudável.
ProteçãoSobrevivênciaEsse matchup é determinado pela sua capacidade de negar o burst de Talon em escaramuças rápidas. Quando Talon te marca ou marca um aliado com Noxian Diplomacy, você pode interceptar o dash dele no ar com Body Slam. Esse bloqueio físico interrompe completamente o impulso dele e o impede de acertar o ataque básico necessário para ativar o dano de sangramento letal de Blade's End, deixando-o vulnerável e sem rota de fuga.Build de Talon →Ver detalhes
Talon
Por quê
Esse matchup é determinado pela sua capacidade de negar o burst de Talon em escaramuças rápidas. Quando Talon te marca ou marca um aliado com Noxian Diplomacy, você pode interceptar o dash dele no ar com Body Slam. Esse bloqueio físico interrompe completamente o impulso dele e o impede de acertar o ataque básico necessário para ativar o dano de sangramento letal de Blade's End, deixando-o vulnerável e sem rota de fuga.
Impacto na lane
Como você tem esse counter mecânico, Talon não consegue disputar o rio ou invadir seus acampamentos livremente. Sua presença transforma as tentativas de flanco dele via Assassin's Path em missões suicidas. Ao neutralizar a ameaça de gank inicial dele, você o obriga a farmar passivamente, o que reduz drasticamente o potencial dele de crescer rápido e alivia uma pressão enorme sobre seus jogadores de rota, garantindo prioridade crucial no mapa no início de jogo.
Como jogar
Nunca inicie escaramuças com Body Slam; em vez disso, use Barrel Roll para reduzir a velocidade dele e forçá-lo a se comprometer. Guarde seu dash especificamente para interromper o Noxian Diplomacy dele. Ative Drunken Rage assim que ver Rake sendo lançado para mitigar o burst inicial recebido. Se ele tentar fugir pulando um muro usando Assassin's Path, use Explosive Cask para empurrá-lo de volta para o seu time antes que ele atravesse o terreno.
Contra-iniciaçãoMobilidadeHecarim depende fortemente de ganhar velocidade com Devastating Charge para iniciar lutas e aumentar o AD de Warpath. Porém, seu Body Slam age como uma parada forçada para o impulso dele. Ao colidir diretamente com a carga dele, você anula completamente o recuo dele e o deixa exposto no meio do caminho, neutralizando a principal ferramenta de engage dele antes que ele comece a acumular cargas de Rampage ou se curar com Spirit of Dread.Build de Hecarim →Ver detalhes
Hecarim
Por quê
Hecarim depende fortemente de ganhar velocidade com Devastating Charge para iniciar lutas e aumentar o AD de Warpath. Porém, seu Body Slam age como uma parada forçada para o impulso dele. Ao colidir diretamente com a carga dele, você anula completamente o recuo dele e o deixa exposto no meio do caminho, neutralizando a principal ferramenta de engage dele antes que ele comece a acumular cargas de Rampage ou se curar com Spirit of Dread.
Impacto na lane
Essa interação deixa o confronto na jungle bastante a seu favor durante escaramuças iniciais e disputas no rio. Hecarim não consegue executar ganks com segurança se você estiver fazendo contra-gank, já que você sempre consegue afastá-lo dos seus jogadores de rota. Como Devastating Charge dele é neutralizado, ele perde sua principal ferramenta para garantir os Scuttle Crabs ou escapar das suas invasões, obrigando-o a farmar passivamente enquanto você dita o ritmo do mapa.
Como jogar
Em escaramuças, nunca use Body Slam de forma proativa para engajar em Hecarim. Em vez disso, guarde a habilidade e fique perto dos seus aliados vulneráveis. Espere Hecarim ativar Devastating Charge e disparar para frente, então se posicione diretamente no caminho dele e acerte o Body Slam. Se ele tentar contornar você com Onslaught of Shadows, jogue Explosive Cask imediatamente para empurrá-lo para longe do seu time, e então reduza a velocidade dele usando Barrel Roll.
ProteçãoPosicionamentoGragas neutraliza naturalmente os padrões agressivos de dive de Kayn, anulando completamente o impacto da ultimate dele. Quando Kayn infesta um dos seus aliados usando Umbral Trespass, o ponto e o momento de saída dele são totalmente previsíveis. Ao preparar Explosive Cask bem no momento em que Kayn emerge, você consegue empurrá-lo instantaneamente para longe do seu aliado vulnerável, negando a cura dele via Rhaast ou o burst de assassinato da forma Shadow Assassin.Build de Kayn →Ver detalhes
Kayn
Por quê
Gragas neutraliza naturalmente os padrões agressivos de dive de Kayn, anulando completamente o impacto da ultimate dele. Quando Kayn infesta um dos seus aliados usando Umbral Trespass, o ponto e o momento de saída dele são totalmente previsíveis. Ao preparar Explosive Cask bem no momento em que Kayn emerge, você consegue empurrá-lo instantaneamente para longe do seu aliado vulnerável, negando a cura dele via Rhaast ou o burst de assassinato da forma Shadow Assassin.
Impacto na lane
Essa interação muda bastante a dinâmica das escaramuças a seu favor durante as lutas por objetivos do meio de jogo. Kayn não consegue flanquear sua retaguarda com segurança usando Shadow Step porque sua presença o obriga a jogar na defensiva. Se ele tentar forçar um engage, sua capacidade de negar o Umbral Trespass dele significa que o time dele perde seu principal iniciador ou executor, dando ao seu time pressão livre e garantindo objetivos neutros mais fáceis.
Como jogar
Para executar isso perfeitamente, nunca desperdice Explosive Cask no início das teamfights. Fique de olho no aliado marcado por Umbral Trespass. No momento em que o indicador do hospedeiro estiver perto de expirar, direcione sua ultimate um pouco atrás do seu aliado para lançar Kayn para dentro do seu time ou para longe, contra uma parede. Além disso, guarde Body Slam para interromper o dash de Reaping Slash dele, impedindo-o de limpar seus acampamentos rapidamente ou de escapar por cima de muros.
ProteçãoControle de grupoEsse matchup favorece bastante você por causa de uma interação direta entre as ultimates. Kindred depende de Lamb's Respite para sobreviver a burst letal e virar lutas. Porém, seu Explosive Cask age como o counter definitivo, permitindo empurrar Kindred ou os aliados dele para fora da zona segura instantaneamente. Isso anula completamente a invulnerabilidade dele, transformando o santuário defensivo em uma armadilha mortal que seus aliados conseguem limpar facilmente.Build de Kindred →Ver detalhes
Kindred
Por quê
Esse matchup favorece bastante você por causa de uma interação direta entre as ultimates. Kindred depende de Lamb's Respite para sobreviver a burst letal e virar lutas. Porém, seu Explosive Cask age como o counter definitivo, permitindo empurrar Kindred ou os aliados dele para fora da zona segura instantaneamente. Isso anula completamente a invulnerabilidade dele, transformando o santuário defensivo em uma armadilha mortal que seus aliados conseguem limpar facilmente.
Impacto na lane
Na jungle, essa interação muda a dinâmica de poder durante disputas de objetivo e escaramuças. Kindred não consegue forçar monstros neutros ou invadir seus acampamentos com segurança porque não pode contar com a ultimate para se salvar. Sempre que uma luta estoura por uma Mark of the Kindred, sua presença o obriga a jogar de forma extremamente passiva, já que usar Wolf's Frenzy ou dar dive com Dance of Arrows carrega um risco enorme de ser deslocado e burstado.
Como jogar
Para garantir essa vantagem, nunca jogue Explosive Cask no início de uma teamfight. Prepare Drunken Rage para absorver o dano inicial de Mounting Dread, e use Body Slam para interromper os dashes de Dance of Arrows deles. Quando Kindred entrar em pânico e ativar Lamb's Respite, direcione seu barril exatamente para o centro do círculo para empurrá-los para fora. Se você errar o posicionamento da sua ultimate por acidente, recue imediatamente e espere suas recargas voltarem em vez de lutar dentro da zona de cura deles.
ProteçãoEscaramuçasGragas tem a vantagem nesse confronto na jungle porque consegue neutralizar sistematicamente a principal ferramenta de engage de Jax. Jax depende fortemente de saltar com Leap Strike enquanto canaliza Counter Strike para garantir um atordoamento e ativar seu Relentless Assault. Porém, um Body Slam bem cronometrado interrompe Jax completamente no ar, empurrando-o para trás e mantendo Gragas fora do raio do atordoamento enquanto a defesa dele se desperdiça.Build de Jax →Ver detalhes
Jax
Por quê
Gragas tem a vantagem nesse confronto na jungle porque consegue neutralizar sistematicamente a principal ferramenta de engage de Jax. Jax depende fortemente de saltar com Leap Strike enquanto canaliza Counter Strike para garantir um atordoamento e ativar seu Relentless Assault. Porém, um Body Slam bem cronometrado interrompe Jax completamente no ar, empurrando-o para trás e mantendo Gragas fora do raio do atordoamento enquanto a defesa dele se desperdiça.
Impacto na lane
No rio e nos corredores da jungle, essa interação dita o ritmo das escaramuças. Jax não consegue disputar os Scuttle Crabs ou invadir seus acampamentos com segurança porque não consegue forçar uma troca favorável. Toda vez que ele tenta saltar em você, você se desengaja limpamente, deixando-o exposto com a longa recarga da defesa dele gasta. Isso permite que você garanta os objetivos neutros iniciais enquanto Jax é obrigado a recuar.
Como jogar
Nunca inicie uma escaramuça com Body Slam se Jax tiver as habilidades disponíveis. Em vez disso, isque o engage dele dando poke com Barrel Roll ou carregando Drunken Rage. No momento em que Jax se comprometer com Leap Strike, reaja instantaneamente com Body Slam para interromper o salto dele. Quando Counter Strike dele terminar e entrar em recarga, retalie imediatamente com Explosive Cask para deslocá-lo ainda mais ou dar burst nele enquanto a janela defensiva dele estiver totalmente ausente.
Dano mágicoContra-iniciaçãoEsse confronto na jungle é muito determinado por como você neutraliza a principal ferramenta de gank de Rammus. Como Powerball precisa de um caminho livre e sem interrupção para acertar o alvo, seu Body Slam age como um counter-disengage perfeito. Ao jogar seu corpo diretamente contra a rolada dele, você interrompe completamente o impulso dele, impedindo que ele chegue perto o suficiente para usar Frenzying Taunt nos seus carregadores.Build de Rammus →Ver detalhes
Rammus
Por quê
Esse confronto na jungle é muito determinado por como você neutraliza a principal ferramenta de gank de Rammus. Como Powerball precisa de um caminho livre e sem interrupção para acertar o alvo, seu Body Slam age como um counter-disengage perfeito. Ao jogar seu corpo diretamente contra a rolada dele, você interrompe completamente o impulso dele, impedindo que ele chegue perto o suficiente para usar Frenzying Taunt nos seus carregadores.
Impacto na lane
Em escaramuças pelo rio ou durante contra-ganks, Rammus perde toda a proatividade. Ele não consegue iniciar lutas com sucesso porque sua presença ameaça cancelar a rolada dele instantaneamente. Isso neutraliza a pressão dele na jungle, obrigando-o a desperdiçar Defensive Ball Curl em posições ruins. Você controla o ritmo das lutas neutras, tornando a alta defesa física dele inútil, já que ele não consegue forçar trocas.
Como jogar
Nunca use Body Slam de forma proativa para começar uma luta quando Rammus estiver por perto. Em vez disso, posicione-se como um escudo humano entre ele e seus aliados vulneráveis. Guarde essa habilidade estritamente para bloquear o Powerball dele. Se ele tentar contorná-lo saltando por cima com Soaring Slam, use Explosive Cask imediatamente para empurrá-lo para longe do seu time, isolando-o enquanto você se recupera usando Happy Hour.
Dano explosivoPressão no inícioEsse confronto na jungle pende bastante a seu favor por causa de como Gragas interrompe a mobilidade de Nidalee. Sempre que Nidalee tenta saltar com Pounce para te executar com Takedown, um Body Slam bem cronometrado cancela completamente o impulso dela para frente. Como ela depende de acertar o salto na forma de puma para entregar o burst, interromper esse dash a deixa extremamente frágil e indefesa no meio da sua jungle.Build de Nidalee →Ver detalhes
Nidalee
Por quê
Esse confronto na jungle pende bastante a seu favor por causa de como Gragas interrompe a mobilidade de Nidalee. Sempre que Nidalee tenta saltar com Pounce para te executar com Takedown, um Body Slam bem cronometrado cancela completamente o impulso dela para frente. Como ela depende de acertar o salto na forma de puma para entregar o burst, interromper esse dash a deixa extremamente frágil e indefesa no meio da sua jungle.
Impacto na lane
No rio e nos corredores da jungle, essa interação neutraliza o estilo de jogo agressivo e invasivo de Nidalee. Ela não consegue disputar os Scuttle Crabs ou roubar seus acampamentos com segurança porque saltar em você é uma sentença de morte. O poder de escaramuça inicial dela é totalmente neutralizado; se ela errar Javelin Toss / Takedown, ela não consegue te expulsar dos acampamentos, garantindo que você mantenha a prioridade na jungle e nos objetivos neutros sem precisar temer o contra-jungle de alto ritmo típico dela.
Como jogar
Nunca inicie uma escaramuça jogando Body Slam no escuro. Em vez disso, limpe seus acampamentos usando Drunken Rage para mitigar qualquer poke de lança de Javelin Toss / Takedown. Quando Nidalee te marcar e usar Pounce para mergulhar em você, ative Body Slam imediatamente no caminho dela para atordoá-la no meio do salto. Complete com Explosive Cask para empurrá-la para longe da rota de fuga dela, garantindo um abate fácil.
ProteçãoLutas em equipeEsse matchup é extremamente favorável porque você tem a resposta definitiva para a principal ameaça de Wukong em teamfights. Quando Wukong inicia com Nimbus Strike e ativa Cyclone para lançar seu time para o alto, um Explosive Cask bem posicionado anula completamente a ultimate dele, empurrando-o bem longe dos seus aliados. Sem a disrupção do duplo lançamento ao alto, o dano de Wukong e a armadura de Stone Skin são facilmente ignorados pela sua retaguarda.Build de Wukong →Ver detalhes
Wukong
Por quê
Esse matchup é extremamente favorável porque você tem a resposta definitiva para a principal ameaça de Wukong em teamfights. Quando Wukong inicia com Nimbus Strike e ativa Cyclone para lançar seu time para o alto, um Explosive Cask bem posicionado anula completamente a ultimate dele, empurrando-o bem longe dos seus aliados. Sem a disrupção do duplo lançamento ao alto, o dano de Wukong e a armadura de Stone Skin são facilmente ignorados pela sua retaguarda.
Impacto na lane
Durante escaramuças iniciais e disputas por objetivos neutros, Wukong não consegue forçar engages facilmente. Sempre que ele tenta usar o clone com Warrior Trickster para se reposicionar e flanquear, seu controle de zona com Barrel Roll reduz a velocidade da aproximação dele. Ao neutralizar o principal engage dele, você garante prioridade no Rift Herald e nos Dragões, obrigando Wukong a farmar passivamente, onde a taxa de vitória mais baixa e o scaling ruim dele limitam o impacto no final de jogo.
Como jogar
Não desperdice Explosive Cask para começar lutas. Guarde-o sempre especificamente para o momento em que Wukong conjurar Cyclone. Se ele usar Warrior Trickster para iscar suas habilidades, prepare seu Drunken Rage para absorver o burst de Golden Staff que vier, e então retalie com Body Slam. Se você errar o momento da sua ultimate e Wukong conseguir lançar seus aliados frágeis para o alto, bloqueie com o corpo o caminho de sequência dele imediatamente para ganhar tempo para seus carregadores se reposicionarem.
ProteçãoInterrupçãoMaster Yi depende totalmente da velocidade de ataque bruta e da imunidade a redução de velocidade de Highlander para destroçar alvos em escaramuças. Porém, Gragas neutraliza completamente essa janela ofensiva. Ao lançar Explosive Cask diretamente em Master Yi assim que ele ativar a ultimate, você consegue empurrá-lo bem longe dos seus aliados. Esse deslocamento forçado desperdiça os segundos preciosos de Highlander, retirando a principal ameaça de combate dele antes que ele consiga acertar um único golpe.Build de Master Yi →Ver detalhes
Master Yi
Por quê
Master Yi depende totalmente da velocidade de ataque bruta e da imunidade a redução de velocidade de Highlander para destroçar alvos em escaramuças. Porém, Gragas neutraliza completamente essa janela ofensiva. Ao lançar Explosive Cask diretamente em Master Yi assim que ele ativar a ultimate, você consegue empurrá-lo bem longe dos seus aliados. Esse deslocamento forçado desperdiça os segundos preciosos de Highlander, retirando a principal ameaça de combate dele antes que ele consiga acertar um único golpe.
Impacto na lane
Na jungle, essa interação muda toda a pressão sobre objetivos neutros a seu favor. Master Yi não consegue disputar monstros épicos com segurança porque sua ameaça de desengajar torna Highlander inútil. Se ele tentar forçar uma entrada, um deslocamento bem cronometrado arruína o engage dele, deixando-o vulnerável a contra-ataques. Isso o obriga a um estilo de farm passivo, dando um alívio para suas rotas e permitindo que você garanta o controle do mapa no início de jogo.
Como jogar
Nunca inicie uma luta com Explosive Cask quando Master Yi estiver por perto. Em vez disso, limpe acampamentos usando Barrel Roll e Drunken Rage, e guarde Body Slam para se posicionar. Reserve sua ultimate especificamente para o Highlander dele. Espere ele se comprometer primeiro com Alpha Strike; como ele reaparece perto do alvo, você pode jogar Explosive Cask imediatamente no local onde ele reaparecer para empurrá-lo para longe. Se você errar, use Drunken Rage imediatamente para mitigar o dano verdadeiro de Wuju Style enquanto recua.
Contra-iniciaçãoEscaramuçasGragas tem uma vantagem clara em escaramuças porque Body Slam anula completamente o principal avanço de distância de Xin Zhao, Audacious Charge. Ao cronometrar seu dash para colidir com o dele, você interrompe o impulso dele no ar. Isso o impede de ficar colado nos seus aliados, tornando impossível executar os três ataques básicos necessários para que Three Talon Strike ative seu lançamento ao alto.Build de Xin Zhao →Ver detalhes
Xin Zhao
Por quê
Gragas tem uma vantagem clara em escaramuças porque Body Slam anula completamente o principal avanço de distância de Xin Zhao, Audacious Charge. Ao cronometrar seu dash para colidir com o dele, você interrompe o impulso dele no ar. Isso o impede de ficar colado nos seus aliados, tornando impossível executar os três ataques básicos necessários para que Three Talon Strike ative seu lançamento ao alto.
Impacto na lane
Em escaramuças no rio ou lutas em torno de objetivos neutros, essa interação neutraliza a pressão inicial de Xin Zhao. Ele não consegue forçar ganks ou invasões bem-sucedidas se você o seguir de perto, já que o engage dele é totalmente previsível. Se ele tentar dar dive nos seus jogadores de rota, sua proteção imediata o deixa isolado, transformando as jogadas agressivas dele em abates gratuitos para o seu time.
Como jogar
Durante as lutas, nunca inicie com Body Slam se Xin Zhao tiver Audacious Charge disponível. Fique perto dos seus carregadores vulneráveis e espere ele se comprometer. No momento em que ele começar a animação do dash, intercepte-o imediatamente. Se você errar o momento e for lançado ao alto por Three Talon Strike, use Explosive Cask para empurrá-lo para longe, resetando a luta enquanto você se cura usando Happy Hour.
ProteçãoPosicionamentoGragas neutraliza naturalmente o estilo agressivo de escaramuça de Tryndamere na jungle. Enquanto Tryndamere depende de Battle Fury para acumular cargas de acerto crítico e de Spinning Slash para ficar colado nos alvos, Gragas tem várias ferramentas para pará-lo. O counter definitivo é Explosive Cask, que neutraliza completamente Undying Rage. Ao empurrar Tryndamere para longe bem no momento em que ele ativa a ultimate, Gragas o obriga a gastar a invulnerabilidade voltando correndo em vez de causar dano.Build de Tryndamere →Ver detalhes
Tryndamere
Por quê
Gragas neutraliza naturalmente o estilo agressivo de escaramuça de Tryndamere na jungle. Enquanto Tryndamere depende de Battle Fury para acumular cargas de acerto crítico e de Spinning Slash para ficar colado nos alvos, Gragas tem várias ferramentas para pará-lo. O counter definitivo é Explosive Cask, que neutraliza completamente Undying Rage. Ao empurrar Tryndamere para longe bem no momento em que ele ativa a ultimate, Gragas o obriga a gastar a invulnerabilidade voltando correndo em vez de causar dano.
Impacto na lane
Essa interação dita o ritmo das escaramuças na jungle e das lutas por objetivo. Tryndamere não consegue se comprometer com invasões profundas ou forçar duelos com segurança sabendo que o Undying Rage dele pode se tornar inútil. Sua presença o impede de dar dive livremente nos seus jogadores de rota sob a torre. Sempre que uma luta estoura por acampamentos neutros, sua capacidade de desengajar a ultimate dele muda a dinâmica de poder, transformando a janela de invencibilidade cara dele em um enorme desperdício de recarga.
Como jogar
Durante as escaramuças, nunca inicie com Explosive Cask. Em vez disso, use Barrel Roll para reduzir a velocidade da aproximação dele e Drunken Rage para absorver os acertos críticos iniciais de Battle Fury. Guarde Body Slam para responder ao Spinning Slash dele se ele tentar fechar a distância. No momento em que Tryndamere ficar com a vida baixa e ativar Undying Rage, lance Explosive Cask bem debaixo dele para empurrá-lo para longe. Isso desperdiça toda a duração da invencibilidade dele, deixando-o vulnerável e fácil de finalizar.
Controle de grupoGragas neutraliza naturalmente o kit inteiro de Fiddlesticks porque suas ferramentas de deslocamento neutralizam completamente as canalizações do espantalho. Quando Fiddlesticks tenta se curar e causar dano com Bountiful Harvest, um Body Slam rápido cancela a canalização imediatamente. Além disso, se Fiddlesticks saltar com um devastador Crowstorm, Gragas pode usar Explosive Cask para empurrá-lo para longe do time, desperdiçando o enorme dano em área da ultimate dele.Build de Fiddlesticks →Ver detalhes
Fiddlesticks
Por quê
Gragas neutraliza naturalmente o kit inteiro de Fiddlesticks porque suas ferramentas de deslocamento neutralizam completamente as canalizações do espantalho. Quando Fiddlesticks tenta se curar e causar dano com Bountiful Harvest, um Body Slam rápido cancela a canalização imediatamente. Além disso, se Fiddlesticks saltar com um devastador Crowstorm, Gragas pode usar Explosive Cask para empurrá-lo para longe do time, desperdiçando o enorme dano em área da ultimate dele.
Impacto na lane
Essa interação obriga Fiddlesticks a uma rota de jungle defensiva. Ele não consegue disputar os Scuttle Crabs nem entrar em escaramuças no início porque interromper o Bountiful Harvest dele o deixa extremamente frágil e incapaz de ganhar duelos. Durante as teamfights do meio de jogo, a ameaça constante do seu Explosive Cask impede Fiddlesticks de executar flancos limpos, obrigando-o a atrasar a ultimate ou a ver sua principal ferramenta de engage ser completamente neutralizada.
Como jogar
Para dominar esse matchup, nunca inicie com Body Slam quando Fiddlesticks tiver o dreno de vida disponível; em vez disso, avance usando Drunken Rage para mitigar dano, e guarde o dash para interromper Bountiful Harvest no momento em que ele começar. Durante as grandes teamfights, fique posicionado perto dos seus carregadores em vez de correr atrás de abates, guardando Explosive Cask especificamente para afastar Fiddlesticks no milissegundo em que ele se teleportar com Crowstorm.
Vantagem: veredito canônico do Wild Rift Core (−3 a +3), do ponto de vista do campeão citado na linha. Taxa de vitória e taxa de escolha: as do próprio adversário nessa função — Wild Rift CN · Challenger, Patch 7.3b. Não é uma taxa de vitória do confronto direto.
Vantagem: veredito canônico do Wild Rift Core (−3 a +3), do ponto de vista do campeão citado na linha. Taxa de vitória e taxa de escolha: as do próprio adversário nessa função — Wild Rift CN · Challenger, Patch 7.3b. Não é uma taxa de vitória do confronto direto.
Como counterar este campeão
Ângulo de counter
O Gragas não é neutralizado apenas por estatísticas brutas ou dano explosivo, mas por campeões que atrapalham o momento em que ele inicia o combate. Seu kit depende de janelas de oportunidade precisas: E para iniciar o combate, R para se reposicionar. Campeões capazes de ignorar ou punir essas janelas reduzem drasticamente o impacto dele. Entender seus contra-ataques significa entender como seus ângulos de ataque são neutralizados.
Contexto do patch
Os contra-ataques do Gragas exploram principalmente duas fraquezas: sua dependência dos tempos de recarga e sua necessidade de ângulos. Campeões agressivos no início da partida ou aqueles resistentes ao seu dano explosivo o forçam a adotar um estilo de jogo defensivo. Além disso, escolhas de campeões capazes de acompanhar ou punir após sua investida tornam cada erro muito caro.
Leitura rápida
Aproveite os longos tempos de recarga dele.
Impedir que ele aproveite os ângulos laterais.
Sobreviva à sua investida inicial.
Arquétipos de counter
Lutadores resistentes
Esses campeões ignoram parcialmente o “burst” de Gragas e conseguem continuar avançando após o início do combate por parte dele. Sua capacidade de resistência ou robustez reduz o impacto de seus combos, forçando Gragas a recuar após iniciar o combate. Eles também podem punir imediatamente um E errado ou uma ultimate mal utilizada.
Como o campeão deve se adaptar. Concentre-se mais em ataques rápidos do que em combates prolongados e evite confrontos demorados.
Junglers agressivos no início do jogo
Esses campeões impõem um ritmo que o Gragas não consegue acompanhar no início da partida. Eles conseguem invadir, forçar confrontos antes que ele consiga usar seus ataques decisivos e impedir que ele obtenha recursos. Sua mobilidade também lhes permite evitar ou punir as tentativas de ataque dele.
Como o campeão deve se adaptar. Domine o início da partida e evite confrontos diretos.
Carregadores difíceis de encontrar
Esses campeões conseguem se esquivar ou sobreviver ao seu dano explosivo e, em seguida, puni-lo durante os tempos de recarga. Sua mobilidade ou alcance os tornam difíceis de alcançar, reduzindo o valor de suas escolhas.
Lee Sin representa um confronto dinâmico em que Gragas precisa aceitar perder o ritmo inicial. Lee Sin pode invadir, forçar duelos e se esquivar de combos graças à sua mobilidade. O segredo é sobreviver até a partida contra mid, quando Gragas pode recuperar o controle por meio de escolhas estratégicas.
Erros comuns contra ele
Erros comuns contra ele
Ativando o Gragas sem tempos de recarga.
Subestimar os ângulos de flanco dele.
Estão se agrupando em pontos estratégicos contra ele.
Não punir seus erros.
Ignorando o momento certo para usar sua habilidade definitiva.
Notas do coach
Se o E dele for usado, é uma oportunidade de contra-ataque.
Esteja sempre atento ao Flash-R.
FAQ
Por que o Gragas me derrota com tanta facilidade?
Porque você provavelmente estará isolado ou mal posicionado. O Gragas é excelente em punir erros individuais. Se você estiver muito à frente ou afastado, ele pode encadear um combo rapidamente. O segredo é permanecer agrupado e manter as habilidades de mobilidade à disposição para se esquivar do ataque inicial dele.
Como você evita a habilidade definitiva dele?
Você precisa antecipar as ações, em vez de apenas reagir. É fundamental manter um “dash” ou um “Flash” à disposição. Posicione-se de forma a evitar ficar isolado facilmente. Nas lutas, evite espaços apertados, onde a habilidade definitiva dele é mais eficaz.
Ele começa bem?
Não exatamente. O Gragas depende do nível 5 e dos picos de itens. Antes disso, ele fica vulnerável a invasões e a junglers agressivos. É fundamental explorar essa fraqueza.
Quando você deve puni-lo?
Depois de errar um E ou uma ultimate. Essas habilidades têm tempos de recarga longos e, sem elas, o Gragas perde muita pressão. Esse é o momento perfeito para iniciar o combate ou conquistar objetivos.