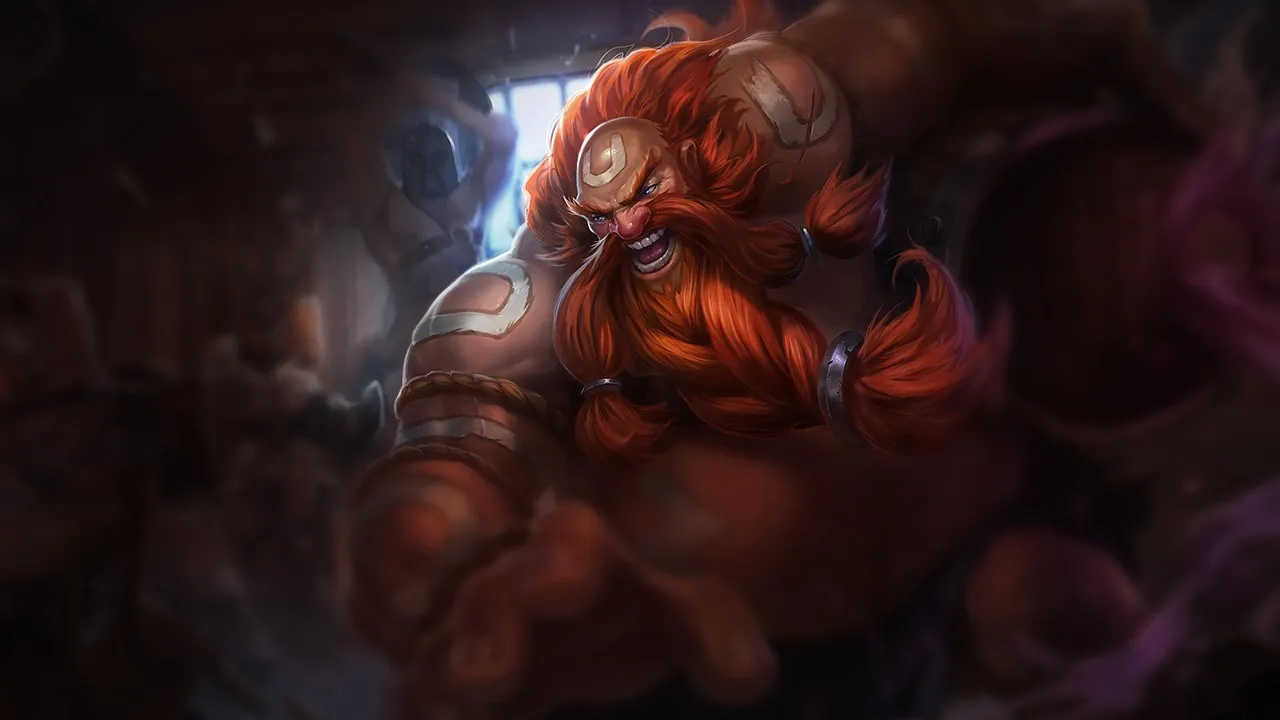
Gragas tut sich schwer, wenn Gegner seinen CC-Zonen ausweichen oder seine Engages bestrafen. Kompositionen, die auf Kiting, konstantem Poke oder hoher Mobilität basieren, verringern die Effektivität seiner Combos. Ohne direkten Kontakt oder gruppierte Kämpfe sinkt sein Engage- und Disruption-Potenzial.
★ JUNGLE · TOPTier A
SCHADEN
UTIL
TANK
DIFF
Gragas Wild Rift Counter-Guide
Hard Counters
1
Diese Champions haben ein Build und einen Spielstil, der deinen direkt überlegen ist, was die Kontrolle der Lane und das Farmen extrem schwierig machen kann. Ihr Kit kann deine Kernstärken neutralisieren oder dich bestrafen, sobald du versuchst, deinen gewohnten Spielplan umzusetzen. In diesen Matchups geht es oft darum, Fehler zu minimieren und nach Wegen zu suchen, außerhalb der direkten Konfrontation zu gewinnen.
Harter KonterRückzugOlaf completely neutralizes Gragas's entire defensive kit. Gragas relies on knocking enemies away or stunning them to escape bad trades. However, once Olaf activates Ragnarok, he becomes completely immune to the displacement of Explosive Cask and the stun of Body Slam. Without these crowd control tools, Olaf can run Gragas down with Undertow and shred him using Reckless Swing and Berserker Rage.Olaf Build →Details ansehen
Olaf
Warum
Olaf completely neutralizes Gragas's entire defensive kit. Gragas relies on knocking enemies away or stunning them to escape bad trades. However, once Olaf activates Ragnarok, he becomes completely immune to the displacement of Explosive Cask and the stun of Body Slam. Without these crowd control tools, Olaf can run Gragas down with Undertow and shred him using Reckless Swing and Berserker Rage.
Lane-Einfluss
This structural mismatch forces you into a highly defensive posture. You cannot contest wave priority because stepping up past your tower's protection exposes you to a fatal chase. Trading health is dangerous; if you try to poke with Barrel Roll, Olaf can simply shrug off the slow during Ragnarok and force an all-in. This constant threat locks you under turret, conceding early plates.
Wie man spielt
To survive this onslaught, your positioning is your absolute lifeline. You must hug your turret and never use Body Slam offensively unless Olaf's ultimate is down. Use Barrel Roll strictly to thin the incoming minion waves from a safe distance, triggering Happy Hour to sustain your health. If Olaf freezes the wave near his tower, do not walk up; instead, wait for him to push, using Drunken Rage to absorb damage.
Diese Champions haben Werkzeuge, die ihnen im Kampf meist einen Vorteil verschaffen, ohne das Matchup unspielbar zu machen. Sie haben vielleicht mehr Reichweite, können deine Offensive besser abfangen oder haben mehr Möglichkeiten, auf deine Engages zu reagieren. Du musst deine Herangehensweise anpassen und sorgfältig die Momente wählen, in denen du den Kampf annimmst.
RückzugMagieschadenMordekaiser wins raw stat-checks once Darkness Rise is active, especially if he pulls Gragas in with Death's Grasp. However, Gragas can survive the isolation of Realm of Death because Explosive Cask provides the perfect tool to knock Mordekaiser away, wasting his ultimate's timer. If you fight him head-on without utilizing this specific disengage, his continuous magic damage and Indestructible shield will overwhelm your tankiness.Mordekaiser Build →Details ansehen
Mordekaiser
Warum
Mordekaiser wins raw stat-checks once Darkness Rise is active, especially if he pulls Gragas in with Death's Grasp. However, Gragas can survive the isolation of Realm of Death because Explosive Cask provides the perfect tool to knock Mordekaiser away, wasting his ultimate's timer. If you fight him head-on without utilizing this specific disengage, his continuous magic damage and Indestructible shield will overwhelm your tankiness.
Lane-Einfluss
This dynamic turns the lane into a battle of wave containment. Mordekaiser will constantly push with Obliterate and try to force trades. You cannot contest him in long skirmishes, meaning you must surrender early priority and farm under turret. If he manages to bait out your Body Slam before dragging you into the Realm of Death, you lose your only reliable escape, leading to an easy dive or a forced recall.
Wie man spielt
Keep your distance and poke with Barrel Roll to trigger Happy Hour healing. Never use Body Slam aggressively unless Mordekaiser has just missed Death's Grasp. When he inevitably activates Realm of Death, do not panic. Immediately cast Explosive Cask to blast him to the opposite side of the arena, then use Drunken Rage to mitigate any residual damage while you run down the clock. If you mess up the knockback direction, use Body Slam to dash through him to create distance.
RückzugPositionierungGwen's scaling and true damage threat make this a tough matchup as the game goes on. While you can easily escape her Snip Snip! cuts and the slow of Needlework by using Body Slam to dash away safely, you simply cannot match her DPS. In any prolonged skirmish, her A Thousand Cuts passive and shredding damage will easily pierce through your Drunken Rage damage reduction.Gwen Build →Details ansehen
Gwen
Warum
Gwen's scaling and true damage threat make this a tough matchup as the game goes on. While you can easily escape her Snip Snip! cuts and the slow of Needlework by using Body Slam to dash away safely, you simply cannot match her DPS. In any prolonged skirmish, her A Thousand Cuts passive and shredding damage will easily pierce through your Drunken Rage damage reduction.
Lane-Einfluss
This dynamic forces you into a defensive posture where Gwen dictates the wave's tempo. She will constantly look to stack Snip Snip! on minions and dash forward with Skip 'n Slash. If you get caught too far up, you risk being run down by her Needlework. You will often have to concede early lane control, farming safely from a distance using Barrel Roll.
Wie man spielt
To survive, you must discipline your positioning and hold Body Slam strictly for disengaging when she uses Skip 'n Slash to close the distance. Never use your dash offensively. If she activates Hallowed Mist, back off immediately to nullify her defensive buff. Use Drunken Rage to absorb her initial burst, and rely on Explosive Cask to blast her away if she commits Needlework to hunt you down.
RückzugTradesSett's relentless physical pressure from Pit Grit and Knuckle Down makes extended trades lethal for Gragas. This matchup revolves entirely around denying his engage. While Sett wants to pull you in with Facebreaker, your Body Slam serves as the perfect counter-engage. You can use its dash to escape his pull range, or disrupt his massive Haymaker shield-slam windup by knocking him back and preventing the true damage center from hitting you.Sett Build →Details ansehen
Sett
Warum
Sett's relentless physical pressure from Pit Grit and Knuckle Down makes extended trades lethal for Gragas. This matchup revolves entirely around denying his engage. While Sett wants to pull you in with Facebreaker, your Body Slam serves as the perfect counter-engage. You can use its dash to escape his pull range, or disrupt his massive Haymaker shield-slam windup by knocking him back and preventing the true damage center from hitting you.
Lane-Einfluss
Because Sett excels at zoning you with the threat of The Show Stopper, you will constantly find yourself pushed under turret. If you waste Body Slam offensively, Sett will immediately punish you with Facebreaker and chunk your health bar, forcing early recalls that cost crucial gold. Your wave control remains purely defensive, using Barrel Roll to farm safely from a distance while relying on Happy Hour to sustain through his inevitable poke.
Wie man spielt
Never initiate trades with your dash. Keep Body Slam strictly on standby; if Sett activates Knuckle Down and runs at you, back away and throw a Barrel Roll to slow his advance. Should he manage to pull you with Facebreaker, immediately buffer Body Slam to disengage, or use it to interrupt him when you see his Grit bar maxed out during Haymaker. If he grabs you with The Show Stopper, use Drunken Rage beforehand to mitigate the massive landing damage.
RegenerationAusweichenJayce's ranged pressure makes this matchup tough, but you have the tools to survive. His constant poke from distance can be neutralized by your Happy Hour passive, which keeps your health bar healthy. The defining point of this lane occurs when Jayce attempts to jump on you with To the Skies!; you can immediately interrupt his dive and trade back heavily by timing your Body Slam right as he leaps forward.Jayce Build →Details ansehen
Jayce
Warum
Jayce's ranged pressure makes this matchup tough, but you have the tools to survive. His constant poke from distance can be neutralized by your Happy Hour passive, which keeps your health bar healthy. The defining point of this lane occurs when Jayce attempts to jump on you with To the Skies!; you can immediately interrupt his dive and trade back heavily by timing your Body Slam right as he leaps forward.
Lane-Einfluss
Expect to spend the early levels pushed under your turret, conceding priority while Jayce controls the wave. He will try to chip your tower plates and force early recalls. However, because you can mitigate this damage, you can prevent him from snowballing. This lane becomes a test of patience where you trade your early map presence for a perfectly preserved tower, keeping Jayce stuck top lane.
Wie man spielt
Stand behind your minions to make it harder for Jayce to land his shockblasts, and use Barrel Roll only to secure dying minions from a safe distance. Never use Body Slam aggressively; you must hold this ability strictly to buffer his To the Skies!. If you get chunked too low, activate Drunken Rage to absorb his incoming burst, farm safely under tower, and wait for his transformation cooldowns before looking to retaliate.
RegenerationKartendruckVayne utilizes her ranged priority and *Tumble* to repeatedly trigger *Silver Bolts* true damage on you. Because her *Condemn* can easily interrupt your *Body Slam* mid-flight, direct trading is highly risky. Your primary tool for staying in this lane is *Happy Hour*, which heals you up after casting *Barrel Roll* to farm, offsetting her constant physical and true damage poke.Vayne Build →Details ansehen
Vayne
Warum
Vayne utilizes her ranged priority and *Tumble* to repeatedly trigger *Silver Bolts* true damage on you. Because her *Condemn* can easily interrupt your *Body Slam* mid-flight, direct trading is highly risky. Your primary tool for staying in this lane is *Happy Hour*, which heals you up after casting *Barrel Roll* to farm, offsetting her constant physical and true damage poke.
Lane-Einfluss
You will spend most of the early game trapped under your turret, bleeding minions while Vayne freely chips away at your tower's plating. Your health pool will constantly hover around half due to her relentless harass, making premature recalls likely if you fail to dodge her *Tumble* enhanced attacks. However, her aggressive positioning to proc *Silver Bolts* naturally pushes the wave, leaving her highly susceptible to early ganks.
Wie man spielt
Hug your turret's safety and use *Barrel Roll* from maximum range to secure dying minions, activating *Drunken Rage* only when you cannot avoid a third *Silver Bolts* strike. Never initiate with *Body Slam* unless Vayne has already wasted *Condemn*. Instead, hold your position and wait for her to overextend, then launch *Explosive Cask* behind her to fling her directly into your tower's range or to secure an easy kill for your approaching jungler.
PositionierungRückzugYone naturally outpaces you as the match progresses because Way of the Hunter and Mortal Steel scale incredibly well into the late game. However, you possess a massive mechanical answer to his aggression. A perfectly timed Body Slam can shut down his offensive pressure by interrupting either the return phase of his Soul Unbound or the wind-up animation of his ultimate, Fate Sealed, turning his own forward momentum against him.Yone Build →Details ansehen
Yone
Warum
Yone naturally outpaces you as the match progresses because Way of the Hunter and Mortal Steel scale incredibly well into the late game. However, you possess a massive mechanical answer to his aggression. A perfectly timed Body Slam can shut down his offensive pressure by interrupting either the return phase of his Soul Unbound or the wind-up animation of his ultimate, Fate Sealed, turning his own forward momentum against him.
Lane-Einfluss
Yone will constantly look to shove the wave with Mortal Steel and Spirit Cleave, forcing you under tower while using Soul Unbound to trade safely. If you fail to react to his dash, he will whittle down your health bar, secure a massive gold lead, and easily dive you. This pressure forces you to rely on Happy Hour to survive, sacrificing priority and letting him roam freely.
Wie man spielt
Stand near your caster minions to lure him into a predictable Soul Unbound trajectory. Never waste Body Slam to clear waves; you must hold this ability specifically to collide with him when he casts Fate Sealed or tries to snap back to his spirit clone. If he misses his third Mortal Steel cast, immediately roll a Barrel Roll to slow him down and activate Drunken Rage to mitigate his counter-attack before disengaging.
RückzugRegenerationVolibear excels in extended duels because *Frenzied Maul* heals him repeatedly on marked targets, while *Sky Splitter* grants him a shield. While *Happy Hour* keeps your health pool topped up, you cannot match his raw recovery if he closes the gap. The matchup hinges on preventing him from biting you twice, meaning you must neutralize his *Thundering Smash* sprint before he can lock you down.Volibear Build →Details ansehen
Volibear
Warum
Volibear excels in extended duels because *Frenzied Maul* heals him repeatedly on marked targets, while *Sky Splitter* grants him a shield. While *Happy Hour* keeps your health pool topped up, you cannot match his raw recovery if he closes the gap. The matchup hinges on preventing him from biting you twice, meaning you must neutralize his *Thundering Smash* sprint before he can lock you down.
Lane-Einfluss
Because Volibear's passive *The Relentless Storm* constantly triggers chain lightning, he will naturally push the minions toward you. This gives you a massive wave control advantage, allowing you to freeze the wave near your turret. Avoid trading health near the middle of the lane; getting caught by his stun makes you vulnerable to a turret dive with *Stormbringer*, which disables your defensive advantage entirely.
Wie man spielt
You must absolutely hold *Body Slam* as a defensive tool. Whenever Volibear activates *Thundering Smash* to run at you, time your *Body Slam* directly into his charge to interrupt his momentum and disengage safely before he can cast *Frenzied Maul*. If he manages to drop *Sky Splitter* on you, activate *Drunken Rage* immediately to absorb the burst. Use *Barrel Roll* strictly to slow his advance, and throw *Explosive Cask* to knock him away if he attempts to dive with *Stormbringer*.
Diese Matchups sind vor allem Duelle der Ausführung: Beide Champions haben glaubwürdige Wege, die Oberhand zu gewinnen. Eine wichtige ausgewichene Fähigkeit, ein richtig antizipierter Engage oder ein einziger Positionierungsfehler können reichen, um das Duell zu entscheiden. Das Matchup zu kennen und die richtigen Fenster zum Handeln zu erkennen, ist hier besonders wichtig.
SkalierungFrüher DruckThis lane is a pure test of tempo. While Nasus relies on Wither to setup chases and run you down, your Body Slam completely neutralizes this slow, allowing you to slide back to safety instantly. However, your high cooldowns mean you cannot constantly harass him. Nasus will freely stack Siphoning Strike and sustain through your poke using Soul Eater, turning this into a ticking clock where you cannot easily deny his scaling.Nasus Build →Details ansehen
Nasus
Warum
This lane is a pure test of tempo. While Nasus relies on Wither to setup chases and run you down, your Body Slam completely neutralizes this slow, allowing you to slide back to safety instantly. However, your high cooldowns mean you cannot constantly harass him. Nasus will freely stack Siphoning Strike and sustain through your poke using Soul Eater, turning this into a ticking clock where you cannot easily deny his scaling.
Lane-Einfluss
Because you cannot kill him solo once he gets some magic resist, wave state is everything. Letting the wave bounce to his side allows him to safely stack Siphoning Strike forever. You must use Barrel Roll to slow down his pushes or hold freezes. If you fail to manage the waves, Nasus will eventually press Fury of the Sands, ignore your damage, and dive you or take your turret.
Wie man spielt
Hold onto Body Slam exclusively as a disengage tool; never use it to initiate trades unless Nasus has already wasted Wither. When he activates Fury of the Sands, immediately use Explosive Cask to knock him away and reset the fight. If he tries to freeze near his turret, combine Happy Hour healing with Drunken Rage to absorb his Spirit Fire damage while forcing the wave to crash with your barrels, preventing him from stacking comfortably.
UnterbrechungRückzugThis lane is a pure test of reflexes centered on Urgot's Disdain. While Urgot relies on landing this flip to trigger Purge and orbit you with Echoing Flames, Gragas has the perfect tool to stop him. A well-timed Body Slam completely cancels the forward momentum of Disdain, negating both his displacement and his shield. Failing this timing allows Urgot to chunk your health bar down to Fear Beyond Death range.Urgot Build →Details ansehen
Urgot
Warum
This lane is a pure test of reflexes centered on Urgot's Disdain. While Urgot relies on landing this flip to trigger Purge and orbit you with Echoing Flames, Gragas has the perfect tool to stop him. A well-timed Body Slam completely cancels the forward momentum of Disdain, negating both his displacement and his shield. Failing this timing allows Urgot to chunk your health bar down to Fear Beyond Death range.
Lane-Einfluss
Because both champions possess excellent wave clear, the lane remains relatively static until someone missteps. Urgot will try to poke you down with Corrosive Charge to set up his engage. If you successfully interrupt Disdain, Urgot is left vulnerable without his shield, allowing you to walk away or trade back with Drunken Rage. Missing your launch window, however, forces you to burn Explosive Cask defensively to avoid being executed.
Wie man spielt
Never initiate trades with Body Slam while Urgot has Disdain available. Instead, use Barrel Roll to farm and slow his movement, baiting him into committing his dash. Stand slightly behind your minions to make his Corrosive Charge harder to land. If he charges forward, react instantly with your own slam to collision-lock him. Should you miss this interrupt, immediately channel Drunken Rage to mitigate the incoming Purge damage while retreating toward your turret.
RegenerationThis lane operates as a pure war of attrition because Malphite's passive Granite Shield is directly neutralized by your own Happy Hour. Every time Malphite tries to chip away at your health using Seismic Shard, your passive healing restores the lost health. Because neither of you can easily break through the other's defensive tools, the matchup quickly devolves into a stable, non-violent farming lane where solo kills are rare.Malphite Build →Details ansehen
Malphite
Warum
This lane operates as a pure war of attrition because Malphite's passive Granite Shield is directly neutralized by your own Happy Hour. Every time Malphite tries to chip away at your health using Seismic Shard, your passive healing restores the lost health. Because neither of you can easily break through the other's defensive tools, the matchup quickly devolves into a stable, non-violent farming lane where solo kills are rare.
Lane-Einfluss
Since active trading yields no real kill pressure, controlling the minion waves becomes your primary objective. Malphite will use Ground Slam and Thunderclap to shove the waves, forcing you to match his clear speed using Barrel Roll. If you let him crash waves freely, he gains easy recall timings. Keeping the minions near the center of the lane prevents him from roaming with Unstoppable Force.
Wie man spielt
To manage this lane effectively, always activate Drunken Rage when you see him casting Seismic Shard to mitigate its initial magic damage. Never throw Barrel Roll at him while his Granite Shield is active; instead, use it to secure distant minions or to delay his shield's regeneration timer. Finally, hold Body Slam defensively to instantly disengage if he attempts to close the distance with Thunderclap active, maintaining a safe farming distance.
UnterbrechungThis lane is a pure battle of attrition where Gragas relies on Happy Hour to match Ornn's innate tankiness. The entire dynamic revolves around how you use Body Slam. Because Ornn needs to complete Bellows Breath to apply Brittle or connect Searing Charge to a pillar for a knock-up, a well-timed Body Slam can interrupt both animations mid-cast, completely neutralizing his trading power.Ornn Build →Details ansehen
Ornn
Warum
This lane is a pure battle of attrition where Gragas relies on Happy Hour to match Ornn's innate tankiness. The entire dynamic revolves around how you use Body Slam. Because Ornn needs to complete Bellows Breath to apply Brittle or connect Searing Charge to a pillar for a knock-up, a well-timed Body Slam can interrupt both animations mid-cast, completely neutralizing his trading power.
Lane-Einfluss
Consequently, the laning phase becomes an endurance match. Neither of you can easily force a dive, meaning the wave state remains relatively stable. However, if you waste Body Slam, Ornn will immediately look to zone you with Volcanic Rupture and Searing Charge. Winning trades allows you to slowly chip away at his health bar while Happy Hour keeps yours healthy, forcing Ornn to forge defensively.
Wie man spielt
Never initiate trades with Body Slam; instead, keep it ready as a reactive tool. When Ornn starts breathing fire with Bellows Breath, immediately charge him with Body Slam to disrupt the final tick before he can clap you. If he misses Volcanic Rupture, you have a brief window to poke him with Barrel Roll and secure last hits. Use Drunken Rage to absorb the impact of Call of the Forge God if you cannot dodge it.
UnterbrechungTradesThis skill matchup revolves entirely around the interaction between your Body Slam and Irelia's Bladesurge. Irelia wants to dash through minions to stack Ionian Fervor and close the distance. However, Body Slam has priority; timing it to collide with her mid-Bladesurge cancels her dash, denies her reset, and puts her primary mobility tool on a long cooldown, leaving her completely exposed to your counter-attack.Irelia Build →Details ansehen
Irelia
Warum
This skill matchup revolves entirely around the interaction between your Body Slam and Irelia's Bladesurge. Irelia wants to dash through minions to stack Ionian Fervor and close the distance. However, Body Slam has priority; timing it to collide with her mid-Bladesurge cancels her dash, denies her reset, and puts her primary mobility tool on a long cooldown, leaving her completely exposed to your counter-attack.
Lane-Einfluss
Because Irelia constantly looks to prep low-health minions for Bladesurge resets, the wave state dictates the lane's tension. You cannot blindly throw Barrel Roll to push, as a larger wave gives her more dash targets to bait your Body Slam. Missing your interrupt allows her to stack Ionian Fervor and run you down, whereas landing it forces her to play defensively or waste Defiant Dance to survive.
Wie man spielt
Position yourself directly adjacent to your own low-health minions, forcing Irelia to dash directly into your hitbox if she wants to last-hit. Never initiate trades with Body Slam; instead, hold it exclusively to react to her Bladesurge. If she manages to mark you with Flawless Duet or Vanguard's Edge, immediately channel Drunken Rage to mitigate her incoming burst while you prepare to disrupt her inevitable follow-up dash.
UnterbrechungTradesThis skill matchup is defined by your ability to deny Riven's aggressive mobility. The entire lane hinges on a single micro-interaction: using Body Slam to collide with Riven during her third Broken Wings cast. Interrupting this aerial strike completely negates her primary knockup and denies her the immediate Runic Blade empowered attack, leaving her vulnerable and unable to escape your counter-burst.Riven Build →Details ansehen
Riven
Warum
This skill matchup is defined by your ability to deny Riven's aggressive mobility. The entire lane hinges on a single micro-interaction: using Body Slam to collide with Riven during her third Broken Wings cast. Interrupting this aerial strike completely negates her primary knockup and denies her the immediate Runic Blade empowered attack, leaving her vulnerable and unable to escape your counter-burst.
Lane-Einfluss
Consequently, trading phases become a high-stakes waiting game. Riven cannot blindly force waves under your tower because doing so exposes her to a lethal lockup. She will try to bait your escape using Valor or stun you with Ki Burst first. If you keep your defensive tools ready, the wave state remains neutral; if you misstime your disruption, she will activate Blade of the Exile and run you down.
Wie man spielt
To win this, adopt a strictly reactive playstyle. Farm from safety using Barrel Roll and never initiate trades with Body Slam. Instead, hold this charge specifically for her third Broken Wings jump. When she dashes forward, immediately channel Drunken Rage to mitigate her initial physical burst, then launch your tackle the millisecond she is airborne. If you misplay the timing and get stunned, immediately throw Explosive Cask to push her away and disengage.
RückzugTradesThis lane is a constant test of reaction times, centered entirely on how you respond to Renekton's initiations. Renekton relies on Slice and Dice to close the distance and instantly lock you down with a high-fury Ruthless Predator. However, your Body Slam has the unique property of interrupting his dash mid-air. If you time this collision correctly, he is left stranded without his stun, unable to trigger his burst.Renekton Build →Details ansehen
Renekton
Warum
This lane is a constant test of reaction times, centered entirely on how you respond to Renekton's initiations. Renekton relies on Slice and Dice to close the distance and instantly lock you down with a high-fury Ruthless Predator. However, your Body Slam has the unique property of interrupting his dash mid-air. If you time this collision correctly, he is left stranded without his stun, unable to trigger his burst.
Lane-Einfluss
Successfully blocking his dash completely dictates the wave's pressure and trade outcomes. When you interrupt Slice and Dice, Renekton is forced to retreat, allowing you to use Barrel Roll to chunk him and secure the wave priority. If you mess up the timing, he will shred your health bar, force you under tower, and easily dive you once he activates Dominus to generate massive fury.
Wie man spielt
You must never use Body Slam aggressively unless Renekton's Slice and Dice is on cooldown. Stand near your caster minions and wait for his forward movement. If he dashes, react instantly with your own charge. If you miss, immediately drink with Drunken Rage to mitigate the incoming burst, trigger Happy Hour to recover some health, and use Explosive Cask to disengage and push him away before he can land his full combo.
RückzugThis skill matchup revolves around how you handle K'Sante's aggressive displacement. While K'Sante wants to wear you down with Ntofo Strikes and drag you through a wall using All Out, your kit has the perfect answer. The deciding factor is Explosive Cask: the moment K'Sante isolates you with All Out, you can detonate your ultimate to blast him away, neutralizing his high-damage window.K'Santé Build →Details ansehen
K'Santé
Warum
This skill matchup revolves around how you handle K'Sante's aggressive displacement. While K'Sante wants to wear you down with Ntofo Strikes and drag you through a wall using All Out, your kit has the perfect answer. The deciding factor is Explosive Cask: the moment K'Sante isolates you with All Out, you can detonate your ultimate to blast him away, neutralizing his high-damage window.
Lane-Einfluss
In the early lane, trades are short and explosive. You can sustain through Ntofo Strikes poke using Happy Hour, while using Drunken Rage to mitigate his passive's Dauntless Instinct burst. However, standing too close to walls makes you an easy target for All Out. A single mistake in your positioning near the terrain can lead to a deadly dive, turning an otherwise stable wave state into a sudden kill for K'Sante.
Wie man spielt
To succeed, always keep a safe distance from the alcove and river walls to deny K'Sante an easy angle for his ultimate. Keep a close eye on his Ntofo Strikes stacks; when his third strike is ready, prepare to dodge sideways or disrupt his dash with a well-timed Body Slam. Most importantly, never waste Explosive Cask preemptively. Hold this crucial spell specifically to disengage immediately after he commits to All Out, resetting the fight on your own terms.
RegenerationAll-inTeemo relies on constant *Toxic Shot* harass and *Blinding Dart* to deny your farm. Fortunately, your *Happy Hour* passive directly counters this damage-over-time by healing you through the poison ticks. This turning point arrives when you unlock *Explosive Cask*. Teemo's lack of hard escape tools makes him incredibly vulnerable to being launched out of his safe zone directly into your burst range.Teemo Build →Details ansehen
Teemo
Warum
Teemo relies on constant *Toxic Shot* harass and *Blinding Dart* to deny your farm. Fortunately, your *Happy Hour* passive directly counters this damage-over-time by healing you through the poison ticks. This turning point arrives when you unlock *Explosive Cask*. Teemo's lack of hard escape tools makes him incredibly vulnerable to being launched out of his safe zone directly into your burst range.
Lane-Einfluss
During the early levels, Teemo will easily push the wave and try to carpet the lane with *Noxious Trap*. You must yield early priority, using *Barrel Roll* to secure minions from a safe distance. Once you obtain your ultimate, the threat of an all-in completely halts his aggressive positioning, preventing him from safely placing mushrooms near your turret or abusing his *Guerrilla Warfare* camouflage.
Wie man spielt
Maximize your *Happy Hour* healing by spacing out your spell casts rather than spamming them. When trading, wait out the duration of *Blinding Dart* before executing your empowered *Drunken Rage* attack. To secure a kill, throw *Explosive Cask* behind Teemo to disrupt his positioning and knock him toward you, then immediately follow up with *Body Slam* to lock him down before he can activate *Move Quick*.
RegenerationSkalierungThis lane revolves around a battle of attrition where neither side can easily force a recall. Your Happy Hour passive allows you to match the healing Vladimir gets from Transfusion, neutralizing his poke. However, executing a decisive kill is incredibly difficult; whenever you commit with Body Slam or try to displace him with Explosive Cask, he can simply dissolve into Sanguine Pool to nullify your burst and escape safely.Vladimir Build →Details ansehen
Vladimir
Warum
This lane revolves around a battle of attrition where neither side can easily force a recall. Your Happy Hour passive allows you to match the healing Vladimir gets from Transfusion, neutralizing his poke. However, executing a decisive kill is incredibly difficult; whenever you commit with Body Slam or try to displace him with Explosive Cask, he can simply dissolve into Sanguine Pool to nullify your burst and escape safely.
Lane-Einfluss
Because direct kills are rare, the lane becomes entirely about minion positioning. You cannot allow Vladimir to freely freeze the wave near his turret, as he will safely scale while zoning you with Tides of Blood. You must use Barrel Roll to match his wave clear, keeping the minions centered. A poorly managed wave forces you to overextend, exposing you to his Hemoplague all-ins when your passive is on cooldown.
Wie man spielt
To succeed, play around Vladimir’s resources. Only initiate short trades with Body Slam and Drunken Rage immediately after he wastes his empowered Transfusion on a minion. If he holds his crimson bar, back off. To bait out Sanguine Pool, throw a threatening Barrel Roll rather than committing your ultimate. If he slips away and gains a health advantage, focus entirely on farming with your abilities from a distance until your Happy Hour restores your safety net.
UnterbrechungTradesThis matchup is a pure battle of reflexes centered on Pantheon's initiation. The entire lane hinges on whether you can react to his Shield Vault. If you buffer Body Slam directly into his leap, you will knock him out of the air, completely negating his stun and preventing him from discharging a fully stacked Mortal Will combo on you. Missing this timing lets him trade for free behind Aegis Assault.Pantheon Build →Details ansehen
Pantheon
Warum
This matchup is a pure battle of reflexes centered on Pantheon's initiation. The entire lane hinges on whether you can react to his Shield Vault. If you buffer Body Slam directly into his leap, you will knock him out of the air, completely negating his stun and preventing him from discharging a fully stacked Mortal Will combo on you. Missing this timing lets him trade for free behind Aegis Assault.
Lane-Einfluss
When you consistently interrupt his dash, Pantheon loses his main tool to chunk your health bar, allowing you to sustain through any poke using Happy Hour. However, if he successfully stuns you, he easily blocks your retaliation with Aegis Assault while pushing the wave. This dynamic dictates who controls the minion waves and who is forced to recall early under heavy pressure.
Wie man spielt
Never use Body Slam offensively unless Pantheon's Shield Vault is on cooldown. Keep your distance and bait his jump by stepping forward when your own dash is ready. If he initiates, cast your E directly at him to collision-interrupt his leap, then immediately roll a Barrel Roll behind him to bypass his directional shield. If you misstime your dash and get stunned, activate Drunken Rage instantly to mitigate his incoming burst.
Diese Champions tun sich meist schwer, auf deine Hauptstärken zu reagieren, was dir mehr Freiheit im Matchup gibt. Du hast oft mehrere Möglichkeiten, sie unter Druck zu setzen und Trades zu deinen Gunsten zu erzwingen. Nutze diesen Vorteil, um das Tempo zu bestimmen, statt ihnen Zeit zu geben, wieder in eine komfortable Position zu kommen.
UnterbrechungSchutzGragas dominates this matchup because he can completely negate Sion's primary damage and crowd control tool, Decimating Smash. Whenever Sion winds up his giant axe, Gragas can immediately shut it down using Body Slam. By interrupting this channel instantly, you deny Sion's main wave clear and trading tool, leaving him vulnerable while his main spell is put on a full cooldown.Sion Build →Details ansehen
Sion
Warum
Gragas dominates this matchup because he can completely negate Sion's primary damage and crowd control tool, Decimating Smash. Whenever Sion winds up his giant axe, Gragas can immediately shut it down using Body Slam. By interrupting this channel instantly, you deny Sion's main wave clear and trading tool, leaving him vulnerable while his main spell is put on a full cooldown.
Lane-Einfluss
Since Sion cannot safely charge Decimating Smash without getting interrupted, he loses the ability to contest the wave. You can freeze easily while popping his Soul Furnace shield with Barrel Roll and Drunken Rage empowered attacks. Without his main waveclear, Sion is forced to farm under turret, bleeding gold and losing all priority, which completely neutralizes his early scaling and removes any threat of proxying.
Wie man spielt
Your golden rule is to never use Body Slam aggressively unless Sion has already started charging Decimating Smash. Stand near your minions to bait his queue, then instantly dash in to cancel it. Follow up with Drunken Rage and a slow from Barrel Roll to win the trade cleanly. If Sion attempts to escape or engage with Unstoppable Onslaught, throw your Explosive Cask behind him to disrupt his pathing and keep him isolated.
UnterbrechungKartendruckGragas holds a massive advantage in this lane because Shen's signature global pressure relies entirely on a channel that you can effortlessly disrupt. Whenever Shen attempts to shield and teleport to an ally using Stand United, your Body Slam or Explosive Cask can instantly cancel the cast. This completely negates his ultimate ability, leaving his team stranded without his shield while keeping him trapped under your lane pressure.Shen Build →Details ansehen
Shen
Warum
Gragas holds a massive advantage in this lane because Shen's signature global pressure relies entirely on a channel that you can effortlessly disrupt. Whenever Shen attempts to shield and teleport to an ally using Stand United, your Body Slam or Explosive Cask can instantly cancel the cast. This completely negates his ultimate ability, leaving his team stranded without his shield while keeping him trapped under your lane pressure.
Lane-Einfluss
This interaction neutralizes Shen's primary map impact to your benefit. Shen cannot freely teleport away, allowing you to dictate the wave tempo. You can constantly shove with Barrel Roll and poke him down, forcing him to choose between losing his turret to your relentless push or letting his allies die because his Stand United is constantly threatened by your crowd control.
Wie man spielt
To execute this perfectly, always hold onto either Body Slam or Explosive Cask once Shen reaches level five. Never use both abilities simultaneously during trades, ensuring you always have a tool ready to stop his ultimate. If Shen retreats toward his tower to cast Stand United out of melee range, react instantly by throwing Explosive Cask to interrupt him from afar. When he deploys Spirit's Refuge to block your basic attacks, simply mitigate his retaliation with Drunken Rage.
RückzugKitenGragas naturally dominates this matchup because his entire kit is built to shut down Tryndamere's offensive windows. Whenever Tryndamere activates Undying Rage to survive a lethal trade, you can instantly neutralize his five seconds of immortality. A well-placed Explosive Cask hurls him away, while a lingering Barrel Roll keeps him slowed and unable to close the gap, rendering his ultimate completely useless.Tryndamere Build →Details ansehen
Tryndamere
Warum
Gragas naturally dominates this matchup because his entire kit is built to shut down Tryndamere's offensive windows. Whenever Tryndamere activates Undying Rage to survive a lethal trade, you can instantly neutralize his five seconds of immortality. A well-placed Explosive Cask hurls him away, while a lingering Barrel Roll keeps him slowed and unable to close the gap, rendering his ultimate completely useless.
Lane-Einfluss
This defensive utility strips Tryndamere of his usual split-push pressure and dive potential. He cannot safely crash waves or threaten your turret because diving a Gragas with Explosive Cask and Body Slam ready is suicide. You control the pace of health trades, easily recovering any lost health through Happy Hour while keeping the minion wave safely frozen near your turret.
Wie man spielt
To execute this perfectly, always hold Body Slam to counter his Spinning Slash initiate; never use it aggressively unless his dash is on cooldown. When he activates Undying Rage, immediately throw Explosive Cask to knock him backward, then follow up with Barrel Roll to decay his remaining buff duration from a safe distance. If you accidentally waste your ultimate early, immediately activate Drunken Rage and retreat to your tower to survive his temporary invulnerability.
Konter-EngageTradesGragas holds a massive advantage because he completely neutralizes Jax's primary offensive threat. Whenever Jax attempts to initiate a trade using Leap Strike while spinning Counter Strike, you can interrupt his jump mid-air by buffering Body Slam directly into him. This immediately halts his momentum, prevents him from landing the stun, and leaves his primary defensive tool completely wasted on a failed engage.Jax Build →Details ansehen
Jax
Warum
Gragas holds a massive advantage because he completely neutralizes Jax's primary offensive threat. Whenever Jax attempts to initiate a trade using Leap Strike while spinning Counter Strike, you can interrupt his jump mid-air by buffering Body Slam directly into him. This immediately halts his momentum, prevents him from landing the stun, and leaves his primary defensive tool completely wasted on a failed engage.
Lane-Einfluss
This interaction completely shifts the laning dynamic in your favor, as Jax cannot safely execute short trades or stack Relentless Assault on you. You can easily control the wave, forcing Jax to choose between losing CS under his turret or taking heavy damage from Barrel Roll. Because Jax cannot pressure you with Leap Strike, you command the lane's pace, forcing early recalls and delaying his scaling spikes.
Wie man spielt
Your golden rule is to never waste Body Slam on minion waves. Hold this ability specifically for when Jax activates Counter Strike or begins his Leap Strike animation. The moment he jumps, cast Body Slam directly at him to knock him back, then immediately follow up with Drunken Rage and Barrel Roll for a highly favorable trade before stepping back. If you misplay the timing, use Explosive Cask to knock him away and disengage.
All-inSchneeballKayle is incredibly vulnerable in the early levels before Divine Ascent grants her ranged attacks. Gragas can exploit this weakness by using Body Slam to gap-close and lock her down, followed by a heavy Drunken Rage strike. Because Gragas's burst pattern is so fast, he can chunk her health bar or outright execute her before she has the reaction time to self-cast Divine Judgment.Kayle Build →Details ansehen
Kayle
Warum
Kayle is incredibly vulnerable in the early levels before Divine Ascent grants her ranged attacks. Gragas can exploit this weakness by using Body Slam to gap-close and lock her down, followed by a heavy Drunken Rage strike. Because Gragas's burst pattern is so fast, he can chunk her health bar or outright execute her before she has the reaction time to self-cast Divine Judgment.
Lane-Einfluss
You dictate the wave's positioning from the first minute. Kayle must choose between losing farm or taking heavy damage from Barrel Roll whenever she approaches to secure minions with Starfire Spellblade. This constant threat forces her to play far back, allowing you to slow-push massive waves under her tower, secure free recalls, and roam to help your jungler while she struggles to clear under turret.
Wie man spielt
Harass Kayle with Barrel Roll early to force her to use Celestial Blessing for healing, draining her mana. Once she is below half health, wait for her to step up for a last hit, then execute a fast Body Slam into Drunken Rage combo. If she reaches level five, do not bait yourself with slow trades; instead, use Explosive Cask to knock her away from her tower or disrupt her before she can activate Divine Judgment, guaranteeing a clean kill.
Diese Champions haben ein Build und einen Spielstil, der deinen direkt überlegen ist, was die Kontrolle der Lane und das Farmen extrem schwierig machen kann. Ihr Kit kann deine Kernstärken neutralisieren oder dich bestrafen, sobald du versuchst, deinen gewohnten Spielplan umzusetzen. In diesen Matchups geht es oft darum, Fehler zu minimieren und nach Wegen zu suchen, außerhalb der direkten Konfrontation zu gewinnen.
Harter KonterÜberlebenOlaf represents a nightmare matchup for Gragas in the jungle because of how Ragnarok completely neutralizes your kit. Normally, you rely on Body Slam to peel or engage, and Explosive Cask to disorganize teamfights. Once Olaf activates his ultimate, he ignores all displacement and stuns, running you down with Undertow axes while shredding your health bar with Reckless Swing and Vicious Strikes lifesteal.Olaf Build →Details ansehen
Olaf
Warum
Olaf represents a nightmare matchup for Gragas in the jungle because of how Ragnarok completely neutralizes your kit. Normally, you rely on Body Slam to peel or engage, and Explosive Cask to disorganize teamfights. Once Olaf activates his ultimate, he ignores all displacement and stuns, running you down with Undertow axes while shredding your health bar with Reckless Swing and Vicious Strikes lifesteal.
Lane-Einfluss
In the jungle, this dynamic strips away your dueling power and pressure. You cannot contest scuttle crabs or neutral objectives directly if Olaf is nearby, as he can simply walk through your Barrel Roll slows. If he invades, you are forced to retreat immediately because your defensive Body Slam won't stop his charge once he is angry. This concedes early map priority, leaving your laners vulnerable to his fast, unstoppable ganks.
Wie man spielt
To survive, you must track Olaf's location and path to the opposite side of the map. During skirmishes, never initiate with Explosive Cask if his ultimate is available. Instead, bait out Ragnarok by poking with Barrel Roll from a safe distance, using Drunken Rage to absorb his true damage from Reckless Swing. Wait out his crowd control immunity entirely before committing your Body Slam to peel for your carries once his axes stop flying.
Diese Champions haben Werkzeuge, die ihnen im Kampf meist einen Vorteil verschaffen, ohne das Matchup unspielbar zu machen. Sie haben vielleicht mehr Reichweite, können deine Offensive besser abfangen oder haben mehr Möglichkeiten, auf deine Engages zu reagieren. Du musst deine Herangehensweise anpassen und sorgfältig die Momente wählen, in denen du den Kampf annimmst.
Konter-EngageSchutzDr. Mundo's passive, Goes Where He Pleases, fundamentally counters your primary defensive and offensive tool. When you attempt to peel or initiate with Explosive Cask, he simply absorbs the displacement, taking minor damage while ignoring the knockback completely. This allows him to walk straight through your disruption, rendering your primary crowd control useless and leaving you unable to protect your carries or isolate him during skirmishes.Dr. Mundo Build →Details ansehen
Dr. Mundo
Warum
Dr. Mundo's passive, Goes Where He Pleases, fundamentally counters your primary defensive and offensive tool. When you attempt to peel or initiate with Explosive Cask, he simply absorbs the displacement, taking minor damage while ignoring the knockback completely. This allows him to walk straight through your disruption, rendering your primary crowd control useless and leaving you unable to protect your carries or isolate him during skirmishes.
Lane-Einfluss
In jungle skirmishes and river contests, this interaction strips away your threat. You cannot reliably secure objectives or protect your lanes because Dr. Mundo can ignore Body Slam and run you down with Infected Bonesaw slows. If you try to match his clear, his Blunt Force Trauma outpaces your Happy Hour sustain, forcing you to concede early crab priority and play reactively under threat of his Maximum Dosage dive.
Wie man spielt
To survive, you must adjust your positioning by remaining behind your front line, using Barrel Roll from a distance to pop his canister first. Never launch Explosive Cask or commit with Body Slam while Goes Where He Pleases is active. Wait for an ally to trigger his passive, or bait it yourself with a max-range barrel, before attempting any displacement. If he activates Maximum Dosage, use Drunken Rage to mitigate his physical damage and disengage immediately.
MobilitätAusweichenLillia's passive stacks from Blooming Blows grant her massive movement speed, allowing her to easily dance around and dodge your Barrel Roll. Since your main tool for zoning and slowing is rendered ineffective by her constant dancing, you will struggle to lock her down. Her Dream-Laden Bough burn also eats through your Happy Hour sustain, turning this into a highly mobile, frustrating chase you cannot easily win.Lillia Build →Details ansehen
Lillia
Warum
Lillia's passive stacks from Blooming Blows grant her massive movement speed, allowing her to easily dance around and dodge your Barrel Roll. Since your main tool for zoning and slowing is rendered ineffective by her constant dancing, you will struggle to lock her down. Her Dream-Laden Bough burn also eats through your Happy Hour sustain, turning this into a highly mobile, frustrating chase you cannot easily win.
Lane-Einfluss
In the jungle, this mobility gap means Lillia can easily outpace your clear and secure scuttle crabs by kiting you. If you contest her directly in the river, her Swirlseed can apply Dream-Laden Bough from afar, setting up Lilting Lullaby to put you to sleep before you can even get in range for Body Slam. This forces you into a defensive farming pattern, sacrificing early neutral control.
Wie man spielt
To survive this matchup, never throw your Barrel Roll blindly while she has maximum stacks. Instead, hold your cooldowns and wait for her to commit with Watch Out! Eep!, which briefly locks her in place, making her a perfect target for Body Slam. When contesting objectives, use Explosive Cask defensively to disengage and knock her away rather than trying to start a fight, as chasing her down is a guaranteed death trap.
KitenMobilitätGraves dictates the pace of jungle skirmishes because his ranged basic attacks from New Destiny constantly chip away at you from safety. The main issue lies in your initiation tool: Graves can reactive-dash with Quickdraw to effortlessly slide out of your Barrel Roll radius. Without landing that initial slow, you cannot reliably close the distance to land Body Slam, leaving you kiteable and unable to secure lockdown without burning Flash.Graves Build →Details ansehen
Graves
Warum
Graves dictates the pace of jungle skirmishes because his ranged basic attacks from New Destiny constantly chip away at you from safety. The main issue lies in your initiation tool: Graves can reactive-dash with Quickdraw to effortlessly slide out of your Barrel Roll radius. Without landing that initial slow, you cannot reliably close the distance to land Body Slam, leaving you kiteable and unable to secure lockdown without burning Flash.
Lane-Einfluss
This mobility mismatch makes contesting camps in the river highly risky. If Graves invades your jungle, his Smoke Screen combined with End of the Line off walls can force you out of your camps. Because you cannot reliably trade back without being kited, you will often find yourself forced to yield Scuttle Crabs, falling behind in early gold and tempo, which reduces your pressure on side lanes.
Wie man spielt
To survive and counter this, never lead with Barrel Roll. Instead, position yourself near solid walls where Graves might try to bounce End of the Line, but use Drunken Rage early to absorb his burst. Hold your Body Slam until he commits his Quickdraw offensively or defensively. If you must engage, use Explosive Cask to knock him backward into your team or directly into your melee range, forcing his dash before you commit your main CC.
AbklingzeitenSichtNocturne dictates the jungle skirmishes because his Shroud of Darkness is a hard counter to your high-impact crowd control. When you attempt to peel or engage with Body Slam or Explosive Cask, a reactive spell shield completely nullifies the displacement. This not only wastes your primary defensive and offensive tools but also triggers Nocturne's attack speed buff, allowing him to easily run you down with Duskbringer and Unspeakable Horror.Nocturne Build →Details ansehen
Nocturne
Warum
Nocturne dictates the jungle skirmishes because his Shroud of Darkness is a hard counter to your high-impact crowd control. When you attempt to peel or engage with Body Slam or Explosive Cask, a reactive spell shield completely nullifies the displacement. This not only wastes your primary defensive and offensive tools but also triggers Nocturne's attack speed buff, allowing him to easily run you down with Duskbringer and Unspeakable Horror.
Lane-Einfluss
In the river and jungle corridors, you cannot safely contest Scuttle Crabs or invade when his spell shield is up. If you clash in 1v1 situations, you are forced to play incredibly passively, giving up priority. Once Nocturne gains Paranoia, your lanes are at constant risk because you cannot counter-gank effectively; if you arrive late, his Shroud of Darkness will block your peel, rendering you unable to save your allies.
Wie man spielt
To survive this matchup, never lead with Body Slam or Explosive Cask. Instead, throw a max-range Barrel Roll to bait out Shroud of Darkness from a distance, or activate Drunken Rage to absorb his initial burst while his shield decays. If he initiates with Paranoia and links you with Unspeakable Horror, walk away using your Happy Hour passive heal to survive the fear duration before turning to launch your displacement spells only after his shield has expired.
Diese Matchups sind vor allem Duelle der Ausführung: Beide Champions haben glaubwürdige Wege, die Oberhand zu gewinnen. Eine wichtige ausgewichene Fähigkeit, ein richtig antizipierter Engage oder ein einziger Positionierungsfehler können reichen, um das Duell zu entscheiden. Das Matchup zu kennen und die richtigen Fenster zum Handeln zu erkennen, ist hier besonders wichtig.
RückzugScharmützelThis jungle matchup centers entirely on the critical interaction between your Body Slam and Diana's Lunar Rush. When Diana targets an ally or you with her dash, you can completely negate her engage by timing your charge to knock her down mid-air. Because her mobility relies heavily on resetting Lunar Rush via Crescent Strike marks, interrupting her first dash denies her entry and puts her primary gap-closer on its full cooldown.Diana Build →Details ansehen
Diana
Warum
This jungle matchup centers entirely on the critical interaction between your Body Slam and Diana's Lunar Rush. When Diana targets an ally or you with her dash, you can completely negate her engage by timing your charge to knock her down mid-air. Because her mobility relies heavily on resetting Lunar Rush via Crescent Strike marks, interrupting her first dash denies her entry and puts her primary gap-closer on its full cooldown.
Lane-Einfluss
In the jungle, this mechanical check dictates how skirmishes and neutral objective contests unfold. Successfully stopping her dash prevents her from pulling your team together with Moonfall, neutralizing her teamfight impact. However, if you waste Body Slam defensively or miss, Diana will immediately shred your backline. This turns every river encounter into a high-stakes standoff where whoever commits their primary spell first loses the map pressure.
Wie man spielt
As Gragas, you must exercise extreme patience during skirmishes. Never initiate with Body Slam when Diana is nearby; instead, hold this ability specifically to react to her Lunar Rush animation. If she misses Crescent Strike, you have a brief window to play aggressively with Barrel Roll and Drunken Rage. If you misplay the interrupt and she lands Moonfall, use Explosive Cask immediately to disengage and blow her away from your vulnerable allies before her burst lands.
RückzugTeamfightsThis jungle match is a pure test of reaction times centered on teamfight disruption. Amumu relies on landing Bandage Toss to dive into your team and unleash a devastating Curse of the Sad Mummy. However, Gragas possesses the ultimate counter-tool: your Explosive Cask can blast Amumu far away from your allies mid-dash or right as he lands, completely ruining his massive crowd control setup and leaving him isolated.Amumu Build →Details ansehen
Amumu
Warum
This jungle match is a pure test of reaction times centered on teamfight disruption. Amumu relies on landing Bandage Toss to dive into your team and unleash a devastating Curse of the Sad Mummy. However, Gragas possesses the ultimate counter-tool: your Explosive Cask can blast Amumu far away from your allies mid-dash or right as he lands, completely ruining his massive crowd control setup and leaving him isolated.
Lane-Einfluss
In the jungle, this dynamic prevents Amumu from freely forcing skirmishes. During early objective contests, Amumu cannot blindly engage because you can easily peel him off with Body Slam. If Amumu attempts to lock down your carries, your threat of displacement forces him to delay his engage. This creates a tense standoff where neither jungler can easily commit, turning neutral fights into a battle of patient positioning.
Wie man spielt
To win this, you must hold your Explosive Cask strictly for defensive disengagement. Never waste it to open a fight. Stand slightly behind your primary carries to intercept Amumu. The moment he launches a Bandage Toss, prepare your aim. If he connects, instantly throw your ultimate directly on top of or slightly ahead of him to blow him away from his targets before he can trigger Curse of the Sad Mummy. If it fails, use Body Slam to block his path.
PicksSchutzThis matchup is a pure burst clash decided by micro-interactions in the river and camps. Kha'Zix thrives on isolating you to unleash a devastating Taste Their Fear empowered by Unseen Threat. However, Gragas can completely neutralize this lethal opener by timing Drunken Rage. Successfully absorbing his primary burst window shifts the pressure, forcing the void predator to fight without his main damage source.Kha'Zix Build →Details ansehen
Kha'Zix
Warum
This matchup is a pure burst clash decided by micro-interactions in the river and camps. Kha'Zix thrives on isolating you to unleash a devastating Taste Their Fear empowered by Unseen Threat. However, Gragas can completely neutralize this lethal opener by timing Drunken Rage. Successfully absorbing his primary burst window shifts the pressure, forcing the void predator to fight without his main damage source.
Lane-Einfluss
Jungle skirmishes over Scuttle Crabs and early skirmishes dictate the map's momentum. Failing to mitigate his burst means you will be forced out of your camps, conceding priority and letting him pressure your laners. Conversely, holding your ground and absorbing his isolated damage keeps your health bar high, protecting your neutral camps and neutralizing his early-game snowball potential.
Wie man spielt
Never waste Drunken Rage on camp clearing if you lack vision of him. The moment Kha'Zix initiates with Leap, immediately channel Drunken Rage to soak his isolated Taste Their Fear. Should he commit, use Body Slam to disrupt his rhythm, following up with Barrel Roll to secure the trade. If he activates Void Assault to reset his passive, pull back toward allied monsters or minions to break his isolation.
Früher DruckMobilitätThis jungle matchup is entirely dictated by how you time your Body Slam against Lee Sin's mobility. Because his primary burst relies on the second cast of Sonic Wave to execute targets, your Body Slam acts as a perfect counter. Colliding with him mid-dash completely cancels his dash damage and prevents him from easily securing kills, neutralising his early-game assassination potential instantly.Lee Sin Build →Details ansehen
Lee Sin
Warum
This jungle matchup is entirely dictated by how you time your Body Slam against Lee Sin's mobility. Because his primary burst relies on the second cast of Sonic Wave to execute targets, your Body Slam acts as a perfect counter. Colliding with him mid-dash completely cancels his dash damage and prevents him from easily securing kills, neutralising his early-game assassination potential instantly.
Lane-Einfluss
In active skirmishes and objective contests, this interaction defines who controls the river. If you hold your crowd control, Lee Sin cannot comfortably dive your allies or commit to a Dragon's Rage play. However, if you waste Body Slam prematurely, he will immediately exploit that window to burst you down with Sonic Wave, forcing you out of your own jungle and sacrificing scuttle priority.
Wie man spielt
Never initiate a skirmish with Body Slam if Lee Sin has his Sonic Wave available. Instead, use Barrel Roll to slow his approach and charge Drunken Rage to absorb his initial burst. Stand directly on top of your low-health ally or yourself when the first mark lands. The moment he triggers the second flight, cast Body Slam directly into his path to knock him out of the air. If you mistime this, immediately disengage using Explosive Cask to knock him away and reset.
ScharmützelMassenkontrolleThis jungle matchup revolves around explosive execution speeds. Viego relies on triggering Sovereign's Domination during skirmishes to heal and turn the tide, but he is inherently fragile. Gragas can completely bypass this sustain loop. By combining Drunken Rage with Body Slam and Explosive Cask, you can burst him from full to zero, removing his ability to hijack your allies' bodies before his passive can even activate.Viego Build →Details ansehen
Viego
Warum
This jungle matchup revolves around explosive execution speeds. Viego relies on triggering Sovereign's Domination during skirmishes to heal and turn the tide, but he is inherently fragile. Gragas can completely bypass this sustain loop. By combining Drunken Rage with Body Slam and Explosive Cask, you can burst him from full to zero, removing his ability to hijack your allies' bodies before his passive can even activate.
Lane-Einfluss
Jungle skirmishes are decided in fractions of a second. If Viego uses Harrowed Path to navigate the jungle walls, you must track his camouflage. When he commits with Spectral Maw, a missed stun leaves him incredibly vulnerable. If you fail to burst him down before he finds a low-health target for Heartbreaker, he will snowball the skirmish, costing your lanes vital priority and map control.
Wie man spielt
Never initiate blindly when Viego's cooldowns are up. Hold Body Slam to interrupt his Spectral Maw dash mid-air, neutralizing his main crowd control. If he attempts to escape or execute an ally with Heartbreaker, launch Explosive Cask to displace him away from his target. Should you miss your Barrel Roll and fail the initial burst, immediately disengage using Happy Hour healing to survive until your cooldowns return.
UnterbrechungScharmützelThis jungle matchup revolves around neutralizing Warwick's relentless life steal from Eternal Hunger and Jaws of the Beast. While Warwick dominates prolonged skirmishes through low-health healing, Gragas possesses the perfect tool to shut down his ultimate. A well-timed Body Slam can mid-air interrupt Warwick's Infinite Duress leap, completely negating his suppression and stopping his massive self-healing before he can chew through your health bar.Warwick Build →Details ansehen
Warwick
Warum
This jungle matchup revolves around neutralizing Warwick's relentless life steal from Eternal Hunger and Jaws of the Beast. While Warwick dominates prolonged skirmishes through low-health healing, Gragas possesses the perfect tool to shut down his ultimate. A well-timed Body Slam can mid-air interrupt Warwick's Infinite Duress leap, completely negating his suppression and stopping his massive self-healing before he can chew through your health bar.
Lane-Einfluss
Because you can cancel his primary engagement tool, Warwick cannot easily force skirmishes on you at Scuttle Crabs or during early neutral objectives. However, if you waste your crowd control, his Blood Hunt allows him to run you down and abuse his superior sustain. This tension turns every river duel into a high-stakes waiting game where whoever commits their primary movement tool first loses all pressure.
Wie man spielt
Never initiate a fight against Warwick with Body Slam. Instead, use Barrel Roll to slow his approach and space with auto-attacks amplified by Drunken Rage. Hold your Body Slam exclusively to react to his Infinite Duress leap or to peel him off an ally. If he tries to channel his ultimate, slam directly into him to break the suppression. If you miss this crucial interrupt, immediately disengage using Explosive Cask to blow him away.
RückzugScharmützelThis jungle matchup is a delicate dance of positioning centered around Ekko's Parallel Convergence. While Ekko seeks to lock you down or secure a shield using his temporal zone, your ultimate tool is Explosive Cask. By detonating this barrel correctly, you can physically blast Ekko out of his own Parallel Convergence circle before his stun can detonate, turning his primary engage tool into a wasted cooldown.Ekko Build →Details ansehen
Ekko
Warum
This jungle matchup is a delicate dance of positioning centered around Ekko's Parallel Convergence. While Ekko seeks to lock you down or secure a shield using his temporal zone, your ultimate tool is Explosive Cask. By detonating this barrel correctly, you can physically blast Ekko out of his own Parallel Convergence circle before his stun can detonate, turning his primary engage tool into a wasted cooldown.
Lane-Einfluss
In the jungle, this interaction completely dictates objective skirmishes and river fights. If Ekko successfully lands Parallel Convergence and triggers his Z-Drive Resonance, his burst can melt your health bar and force a premature retreat. However, disrupting his entry with a well-timed Body Slam or displacement forces him to rely on Chronobreak defensively, neutralizing his map pressure and yielding scuttle control to you.
Wie man spielt
To win this execution battle, never waste Explosive Cask to start a fight. Keep your distance when you hear his clone cast Parallel Convergence, and aim your ultimate directly at the center of his zone the moment he uses Phase Dive to jump inside. If your ultimate is on cooldown, use Body Slam to counter his dash, then immediately disengage using the slow from Barrel Roll to wait out his temporal shield.
RegenerationFrüher DruckIn early jungle clashes, this matchup is decided by how you handle Pantheon's sudden burst. When he activates Mortal Will to power up his Comet Spear, he expects to chunk you instantly. However, activating Drunken Rage right as he leaps in allows you to absorb the brunt of his physical damage, turning a lethal trade into an even, survivable exchange before you disengage.Pantheon Build →Details ansehen
Pantheon
Warum
In early jungle clashes, this matchup is decided by how you handle Pantheon's sudden burst. When he activates Mortal Will to power up his Comet Spear, he expects to chunk you instantly. However, activating Drunken Rage right as he leaps in allows you to absorb the brunt of his physical damage, turning a lethal trade into an even, survivable exchange before you disengage.
Lane-Einfluss
This dynamic forces a tense, slow-paced dance around early Scuttle Crabs and neutral camps. If you fail to time your damage reduction, Pantheon secures an easy kill, snowballing his lanes with Grand Starfall. If you successfully parry his initial thrust, his clear speed slows down, preventing him from invading your jungle and forcing him to waste time waiting for his cooldowns to recover.
Wie man spielt
Keep your eyes on Pantheon's passive bar. When he has full stacks of Mortal Will, prepare to channel Drunken Rage immediately if he initiates with Shield Vault. Never lead with Body Slam while his Aegis Assault is available, as he will block your retaliatory damage. Instead, use Barrel Roll to slow his retreat, waiting out his defensive shield before committing your full crowd control rotation.
Diese Champions tun sich meist schwer, auf deine Hauptstärken zu reagieren, was dir mehr Freiheit im Matchup gibt. Du hast oft mehrere Möglichkeiten, sie unter Druck zu setzen und Trades zu deinen Gunsten zu erzwingen. Nutze diesen Vorteil, um das Tempo zu bestimmen, statt ihnen Zeit zu geben, wieder in eine komfortable Position zu kommen.
Konter-EngageMassenkontrolleGragas dominates this jungle duel because his Body Slam completely shuts down Vi's core engage tool, Vault Breaker. Whenever Vi attempts to charge and dash forward to initiate or escape, a well-timed Body Slam collides with her mid-air, canceling her knockback and leaving her stranded. Without the gap-closer and initial crowd control from Vault Breaker, her ability to stack Denting Blows or deploy Blast Shield is severely delayed.Vi Build →Details ansehen
Vi
Warum
Gragas dominates this jungle duel because his Body Slam completely shuts down Vi's core engage tool, Vault Breaker. Whenever Vi attempts to charge and dash forward to initiate or escape, a well-timed Body Slam collides with her mid-air, canceling her knockback and leaving her stranded. Without the gap-closer and initial crowd control from Vault Breaker, her ability to stack Denting Blows or deploy Blast Shield is severely delayed.
Lane-Einfluss
This interaction completely strips Vi of her ganking power and objective pressure. When contesting Scuttle Crabs or during early skirmishes, she cannot safely force fights. If she tries to initiate on your laners, you can effortlessly peel her off, turning her high-impact ganks into counter-gank disasters. This neutralization forces her into a passive farming style, giving you free rein over early map movements.
Wie man spielt
To execute this perfectly, never use Body Slam proactively when clearing camps near Vi. Instead, hover your laners and hold Body Slam specifically to react to her Vault Breaker charge. If she locks you down with Cease and Desist, wait out the unstoppable animation, then immediately drop Explosive Cask to displace her away from her targets while using Drunken Rage to soak her subsequent Relentless Force burst.
TeamfightsZonenkontrolleGragas inherently controls this jungle matchup because his ultimate completely neutralizes Shyvana's main threat. When she attempts to initiate a teamfight or objective contest with Dragon's Descent, you can immediately react with Explosive Cask. This intercepts her mid-air, scattering her away from your team. Without her dragon-form engage, she is easily kited, rendering her Burnout and Twin Bite useless.Shyvana Build →Details ansehen
Shyvana
Warum
Gragas inherently controls this jungle matchup because his ultimate completely neutralizes Shyvana's main threat. When she attempts to initiate a teamfight or objective contest with Dragon's Descent, you can immediately react with Explosive Cask. This intercepts her mid-air, scattering her away from your team. Without her dragon-form engage, she is easily kited, rendering her Burnout and Twin Bite useless.
Lane-Einfluss
This matchup changes how neutral objectives are contested. Shyvana relies on accumulating stacks for Fury of the Dragonborn and forcing hard engages. Because you can stop her dive, her team cannot easily follow up on her initiations. This forces her to play passively, allowing you to secure Scuttle Crabs and contest her camps safely using Barrel Roll to slow her and Drunken Rage to absorb her Flame Breath poke.
Wie man spielt
Your absolute priority is to hold onto Explosive Cask during teamfights; never waste it for random poke if Shyvana has her ultimate ready. Position yourself slightly behind your frontline, waiting for her to launch Dragon's Descent. The moment she flies, throw your barrel directly at her landing path to redirect her. If she catches you off-guard in the river with Burnout, use Body Slam defensively to create distance while triggering Happy Hour to stay healthy.
SchutzÜberlebenThis matchup is dictated by your ability to deny Talon's burst during quick skirmishes. When Talon targets you or an ally with Noxian Diplomacy, you can intercept his dash mid-air with Body Slam. This physical block completely halts his momentum and prevents him from landing the auto-attack required to trigger the lethal bleeding damage from Blade's End, leaving him vulnerable with no escape.Talon Build →Details ansehen
Talon
Warum
This matchup is dictated by your ability to deny Talon's burst during quick skirmishes. When Talon targets you or an ally with Noxian Diplomacy, you can intercept his dash mid-air with Body Slam. This physical block completely halts his momentum and prevents him from landing the auto-attack required to trigger the lethal bleeding damage from Blade's End, leaving him vulnerable with no escape.
Lane-Einfluss
Because you hold this mechanical counter, Talon cannot freely contest the river or invade your camps. Your presence turns his flanking attempts via Assassin's Path into suicide missions. By neutralising his early ganking threat, you force him to farm passively, which drastically reduces his snow-balling potential and relieves enormous pressure from your laners, securing crucial early map priority.
Wie man spielt
Never initiate skirmishes with Body Slam; instead, use Barrel Roll to slow him down and force him to commit. Hold your dash specifically to disrupt his Noxian Diplomacy. Activate Drunken Rage as soon as you see Rake flying out to mitigate the initial incoming burst. If he attempts to flee over a wall using Assassin's Path, deploy Explosive Cask to blast him back into your team before he clears the terrain.
Konter-EngageMobilitätHecarim relies heavily on building up speed with Devastating Charge to initiate fights and boost his Warpath AD. However, your Body Slam acts as a hard stop to his momentum. By colliding directly into his incoming charge, you completely negate his knockback and leave him stranded in the open, neutralizing his primary engagement tool before he can start stacking Rampage or healing with Spirit of Dread.Hecarim Build →Details ansehen
Hecarim
Warum
Hecarim relies heavily on building up speed with Devastating Charge to initiate fights and boost his Warpath AD. However, your Body Slam acts as a hard stop to his momentum. By colliding directly into his incoming charge, you completely negate his knockback and leave him stranded in the open, neutralizing his primary engagement tool before he can start stacking Rampage or healing with Spirit of Dread.
Lane-Einfluss
This interaction turns the jungle matchup heavily in your favor during early skirmishes and river contests. Hecarim cannot safely execute ganks if you are counter-ganking, as you can always peel him off your laners. Because his Devastating Charge is neutralized, he loses his primary tool to secure scuttle crabs or escape your invades, forcing him to farm passively while you dictate the map's pace.
Wie man spielt
In skirmishes, never use Body Slam proactively to engage on Hecarim. Instead, hold the ability and hover near your vulnerable allies. Wait for Hecarim to activate Devastating Charge and sprint forward, then position yourself directly in his path and body slam him. If he tries to bypass you with Onslaught of Shadows, immediately throw Explosive Cask to blast him away from your team, then slow him down using Barrel Roll.
SchutzPositionierungGragas naturally counters Kayn's aggressive dive patterns by completely neutralizing his ultimate's impact. When Kayn infests one of your allies using Umbral Trespass, his exit point and timing are entirely predictable. By buffering Explosive Cask right at the moment Kayn emerges, you can instantly blast him away from your vulnerable teammate, denying his healing from Rhaast or his assassination burst from the Shadow Assassin form.Kayn Build →Details ansehen
Kayn
Warum
Gragas naturally counters Kayn's aggressive dive patterns by completely neutralizing his ultimate's impact. When Kayn infests one of your allies using Umbral Trespass, his exit point and timing are entirely predictable. By buffering Explosive Cask right at the moment Kayn emerges, you can instantly blast him away from your vulnerable teammate, denying his healing from Rhaast or his assassination burst from the Shadow Assassin form.
Lane-Einfluss
This interaction shifts the skirmish dynamic heavily in your favor during mid-game objective fights. Kayn cannot safely flank your backline using Shadow Step because your presence forces him to play defensively. If he attempts to force an engagement, your ability to deny his Umbral Trespass means his team loses their primary initiator or executioner, granting your team free pressure and securing easier neutral objectives.
Wie man spielt
To execute this flawlessly, never waste Explosive Cask early in teamfights. Keep your eyes on the ally targeted by Umbral Trespass. As soon as the host indicator is about to expire, aim your ultimate slightly behind your ally to launch Kayn deep into your team or away into a wall. Additionally, hold Body Slam to interrupt his Reaping Slash dash, preventing him from stack-clearing your camps or escaping over walls.
SchutzMassenkontrolleThis matchup heavily favors you because of a direct ultimate interaction. Kindred relies on Lamb's Respite to survive lethal burst and turn fights around. However, your Explosive Cask acts as the ultimate counter-tool, allowing you to instantly knock Kindred or their allies out of their safe zone. This completely nullifies their invulnerability, transforming their defensive sanctuary into a death trap for your teammates to clean up easily.Kindred Build →Details ansehen
Kindred
Warum
This matchup heavily favors you because of a direct ultimate interaction. Kindred relies on Lamb's Respite to survive lethal burst and turn fights around. However, your Explosive Cask acts as the ultimate counter-tool, allowing you to instantly knock Kindred or their allies out of their safe zone. This completely nullifies their invulnerability, transforming their defensive sanctuary into a death trap for your teammates to clean up easily.
Lane-Einfluss
In the jungle, this interaction shifts the power dynamic during objective contests and skirmishes. Kindred cannot safely force neutral monsters or invade your camps because they cannot rely on their ultimate to bail them out. Whenever a fight breaks out over a Mark of the Kindred, your presence forces them to play extremely passively, as placing Wolf's Frenzy or diving with Dance of Arrows carries a massive risk of being displaced and burst down.
Wie man spielt
To secure this advantage, never throw Explosive Cask early in a teamfight. Prime your Drunken Rage to absorb their initial Mounting Dread damage, and use Body Slam to stop their Dance of Arrows dashes. Once Kindred panics and activates Lamb's Respite, aim your barrel precisely at the center of the circle to blast them outward. If you accidentally misplace your ultimate, immediately back off and wait for your cooldowns rather than fighting inside their healing zone.
SchutzScharmützelGragas holds the upper hand in the jungle because he can systematically shut down Jax's primary engagement tool. Jax relies heavily on jumping in with Leap Strike while channeling Counter Strike to secure a stun and trigger his Relentless Assault. However, a well-timed Body Slam completely interrupts Jax mid-air, knocking him back and keeping Gragas safely out of the stun radius while his defense wastes away.Jax Build →Details ansehen
Jax
Warum
Gragas holds the upper hand in the jungle because he can systematically shut down Jax's primary engagement tool. Jax relies heavily on jumping in with Leap Strike while channeling Counter Strike to secure a stun and trigger his Relentless Assault. However, a well-timed Body Slam completely interrupts Jax mid-air, knocking him back and keeping Gragas safely out of the stun radius while his defense wastes away.
Lane-Einfluss
In the river and jungle corridors, this interaction dictates the pace of skirmishes. Jax cannot safely contest Scuttle Crabs or invade your camps because he cannot force a favorable trade. Every time he attempts to jump you, you disengage cleanly, leaving him exposed with his long defense cooldowns spent. This allows you to secure early neutral objectives while Jax is forced to retreat.
Wie man spielt
Never initiate a skirmish with Body Slam if Jax has his abilities up. Instead, bait his engage by poking with Barrel Roll or charging Drunken Rage. The moment Jax commits with Leap Strike, react instantly with Body Slam to disrupt his jump. Once his Counter Strike ends and is on cooldown, immediately retaliate with Explosive Cask to displace him further or burst him down while his defensive window is completely gone.
MagieschadenKonter-EngageThis jungle matchup is heavily dictated by how you shut down Rammus's primary ganking tool. Because Powerball requires a clear, uninterrupted path to hit its target, your Body Slam acts as a perfect counter-disengage. By throwing your body directly into his roll, you completely stop his momentum, preventing him from ever getting close enough to use Frenzying Taunt on your carries.Rammus Build →Details ansehen
Rammus
Warum
This jungle matchup is heavily dictated by how you shut down Rammus's primary ganking tool. Because Powerball requires a clear, uninterrupted path to hit its target, your Body Slam acts as a perfect counter-disengage. By throwing your body directly into his roll, you completely stop his momentum, preventing him from ever getting close enough to use Frenzying Taunt on your carries.
Lane-Einfluss
During skirmishes around the river or during counter-ganks, Rammus loses all proactivity. He cannot successfully initiate fights because your presence threatens to cancel his roll instantly. This neutralizes his jungle pressure, forcing him to waste Defensive Ball Curl in bad positions. You control the pace of neutral fights, rendering his high physical defense useless since he cannot force trades.
Wie man spielt
Never use Body Slam proactively to start a fight when Rammus is hovering. Instead, position yourself as a human shield between him and your vulnerable teammates. Hold this ability strictly to block his Powerball. If he attempts to bypass you by jumping over with Soaring Slam, immediately deploy Explosive Cask to blast him away from your team, isolating him while you sustain back up using Happy Hour.
BurstFrüher DruckThis jungle matchup swings heavily in your favor because of how Gragas halts Nidalee's mobility. Whenever Nidalee attempts to leap in with Pounce to execute you with Takedown, a well-timed Body Slam completely cancels her forward momentum. Because she relies on landing her cougar form jump to deliver her burst, interrupting this dash leaves her extremely squishy and defenseless in the middle of your jungle.Nidalee Build →Details ansehen
Nidalee
Warum
This jungle matchup swings heavily in your favor because of how Gragas halts Nidalee's mobility. Whenever Nidalee attempts to leap in with Pounce to execute you with Takedown, a well-timed Body Slam completely cancels her forward momentum. Because she relies on landing her cougar form jump to deliver her burst, interrupting this dash leaves her extremely squishy and defenseless in the middle of your jungle.
Lane-Einfluss
In the river and jungle corridors, this interaction shuts down Nidalee’s aggressive invading playstyle. She cannot safely contest Scuttle Crabs or steal your camps because jumping at you is a death sentence. Her early skirmishing power is entirely neutralized; if she misses Javelin Toss / Takedown, she cannot force you off camps, ensuring you secure jungle priority and neutral objectives without fearing her typical high-tempo counter-jungling.
Wie man spielt
Never initiate a skirmish by blindly throwing out Body Slam. Instead, clear your camps while using Drunken Rage to mitigate any spear poke from Javelin Toss / Takedown. When Nidalee marks you and uses Pounce to dive in, immediately activate Body Slam directly into her path to stun her mid-leap. Follow up with Explosive Cask to knock her away from her escape route, securing an easy kill.
SchutzTeamfightsThis matchup is highly favorable because you hold the ultimate answer to Wukong's primary teamfight threat. When Wukong initiates with Nimbus Strike and activates Cyclone to knock up your team, a well-placed Explosive Cask completely nullifies his ultimate by blasting him far away from your allies. Without his double-knockup disruption, Wukong's damage and armor from Stone Skin are easily ignored by your backline.Wukong Build →Details ansehen
Wukong
Warum
This matchup is highly favorable because you hold the ultimate answer to Wukong's primary teamfight threat. When Wukong initiates with Nimbus Strike and activates Cyclone to knock up your team, a well-placed Explosive Cask completely nullifies his ultimate by blasting him far away from your allies. Without his double-knockup disruption, Wukong's damage and armor from Stone Skin are easily ignored by your backline.
Lane-Einfluss
During early skirmishes and neutral objective contests, Wukong cannot easily force engagements. Whenever he attempts to clone with Warrior Trickster to reposition for a flank, your zone control with Barrel Roll slows his approach. By neutralizing his main engage, you secure priority at Rift Herald and Dragons, forcing Wukong into passive farming where his lower win rate and poor scaling limit his late-game impact.
Wie man spielt
Do not waste Explosive Cask to start fights. Always hold it specifically for the moment Wukong casts Cyclone. If he uses Warrior Trickster to bait your spells, buffer your Drunken Rage to absorb his incoming Golden Staff burst, then retaliate with Body Slam. If you mistime your ultimate and Wukong manages to knock up your squishies, immediately body-block his follow-up path to buy time for your carries to reposition.
SchutzUnterbrechungMaster Yi relies entirely on the raw attack speed and slow immunity of Highlander to shred targets in skirmishes. However, Gragas completely neutralizes this offensive window. By launching Explosive Cask directly at Master Yi as soon as he activates his ultimate, you can blast him far away from your allies. This forced displacement wastes the precious seconds of Highlander, stripping away his primary combat threat before he can land a single blow.Master Yi Build →Details ansehen
Master Yi
Warum
Master Yi relies entirely on the raw attack speed and slow immunity of Highlander to shred targets in skirmishes. However, Gragas completely neutralizes this offensive window. By launching Explosive Cask directly at Master Yi as soon as he activates his ultimate, you can blast him far away from your allies. This forced displacement wastes the precious seconds of Highlander, stripping away his primary combat threat before he can land a single blow.
Lane-Einfluss
In the jungle, this interaction shifts all neutral objective pressure in your favor. Master Yi cannot safely contest epic monsters because your disengage threat renders his Highlander useless. If he attempts to force an entry, a well-timed displacement ruins his engage, leaving him vulnerable to counter-attacks. This forces him into a passive farming style, giving your lanes breathing room and allowing you to secure early map control.
Wie man spielt
Never initiate a fight with Explosive Cask when Master Yi is nearby. Instead, clear camps using Barrel Roll and Drunken Rage, and save Body Slam to position yourself. Hold your ultimate specifically for his Highlander. Wait for him to commit with Alpha Strike first; since he reappears near his target, you can immediately throw Explosive Cask at his landing spot to blow him away. If you miss, immediately use Drunken Rage to mitigate his Wuju Style true damage while retreating.
Konter-EngageScharmützelGragas holds a clear advantage in skirmishes because Body Slam completely negates Xin Zhao's primary gap-closer, Audacious Charge. By timing your dash to collide with his, you stop his momentum mid-air. This prevents him from sticking to your allies, making it impossible for him to execute the three auto-attacks needed for Three Talon Strike to trigger its knockup.Xin Zhao Build →Details ansehen
Xin Zhao
Warum
Gragas holds a clear advantage in skirmishes because Body Slam completely negates Xin Zhao's primary gap-closer, Audacious Charge. By timing your dash to collide with his, you stop his momentum mid-air. This prevents him from sticking to your allies, making it impossible for him to execute the three auto-attacks needed for Three Talon Strike to trigger its knockup.
Lane-Einfluss
In river skirmishes or fights around neutral objectives, this interaction neutralizes Xin Zhao's early pressure. He cannot force successful ganks or invades if you shadow him, as his engage is entirely predictable. If he attempts to dive your laners, your immediate peel leaves him stranded, turning his aggressive plays into free kills for your team.
Wie man spielt
During fights, never initiate with Body Slam if Xin Zhao has Audacious Charge available. Hover near your vulnerable carries and wait for him to commit. The moment he begins his dash animation, intercept him immediately. If you misstime it and get knocked up by Three Talon Strike, use Explosive Cask to blow him away, resetting the fight while you heal using Happy Hour.
SchutzPositionierungGragas naturally counters Tryndamere's aggressive skirmishing in the jungle. While Tryndamere relies on Battle Fury to stack critical strikes and Spinning Slash to stick to targets, Gragas has multiple tools to stop him. The ultimate counter is Explosive Cask, which completely neutralizes Undying Rage. By tossing Tryndamere away right as he activates his ultimate, Gragas forces him to spend his invulnerability running back instead of dealing damage.Tryndamere Build →Details ansehen
Tryndamere
Warum
Gragas naturally counters Tryndamere's aggressive skirmishing in the jungle. While Tryndamere relies on Battle Fury to stack critical strikes and Spinning Slash to stick to targets, Gragas has multiple tools to stop him. The ultimate counter is Explosive Cask, which completely neutralizes Undying Rage. By tossing Tryndamere away right as he activates his ultimate, Gragas forces him to spend his invulnerability running back instead of dealing damage.
Lane-Einfluss
This interaction dictates the pace of jungle skirmishes and objective fights. Tryndamere cannot safely commit to deep invades or force duels knowing his Undying Rage can be rendered useless. Your presence prevents him from freely diving your laners under tower. Whenever a fight breaks out over neutral camps, your ability to disengage his ultimate shifts the power dynamic, turning his expensive invincibility window into a massive waste of cooldown.
Wie man spielt
During skirmishes, never initiate with Explosive Cask. Instead, use Barrel Roll to slow his approach and Drunken Rage to absorb his initial Battle Fury critical strikes. Hold Body Slam to counter his Spinning Slash if he tries to close the gap. The moment Tryndamere drops low and activates Undying Rage, launch Explosive Cask directly under him to blast him away. This wastes his entire invincibility duration, leaving him vulnerable and easy to finish off.
MassenkontrolleGragas naturally neutralizes Fiddlesticks's entire kit because his displacement tools completely shut down the scarecrow's channelings. When Fiddlesticks tries to heal and deal damage with Bountiful Harvest, a quick Body Slam immediately cancels the channel. Furthermore, should Fiddlesticks jump in with a devastating Crowstorm, Gragas can deploy Explosive Cask to blast him away from the team, wasting his ultimate's massive area-of-effect damage.Fiddlesticks Build →Details ansehen
Fiddlesticks
Warum
Gragas naturally neutralizes Fiddlesticks's entire kit because his displacement tools completely shut down the scarecrow's channelings. When Fiddlesticks tries to heal and deal damage with Bountiful Harvest, a quick Body Slam immediately cancels the channel. Furthermore, should Fiddlesticks jump in with a devastating Crowstorm, Gragas can deploy Explosive Cask to blast him away from the team, wasting his ultimate's massive area-of-effect damage.
Lane-Einfluss
This interaction forces Fiddlesticks into a defensive jungle route. He cannot contest scuttle crabs or skirmish early on because interrupting his Bountiful Harvest leaves him incredibly squishy and unable to win duels. During mid-game teamfights, the constant threat of your Explosive Cask prevents Fiddlesticks from executing clean flanks, forcing him to delay his ultimate or watch his primary engage tool get completely neutralized.
Wie man spielt
To dominate this matchup, never initiate with Body Slam when Fiddlesticks has his health drain available; instead, walk up using Drunken Rage to mitigate damage, and save the dash to disrupt Bountiful Harvest the moment it starts. During major teamfights, position yourself near your carries rather than chasing kills, holding Explosive Cask specifically to peel Fiddlesticks away the millisecond he teleports in with Crowstorm.
Vorteil: kanonisches Urteil von Wild Rift Core (−3 bis +3), aus Sicht des in der Zeile genannten Champions. Siegrate und Pickrate: die eigenen Werte des Gegners in dieser Rolle — Wild Rift CN · Challenger, Patch 7.3b. Keine Siegrate im direkten Duell.
Vorteil: kanonisches Urteil von Wild Rift Core (−3 bis +3), aus Sicht des in der Zeile genannten Champions. Siegrate und Pickrate: die eigenen Werte des Gegners in dieser Rolle — Wild Rift CN · Challenger, Patch 7.3b. Keine Siegrate im direkten Duell.
Wie man diesen Champion kontert
Konter-Winkel
Gragas wird nicht durch reine Stats oder Burst allein gekontert, sondern durch Champions, die sein Timing für den Engage stören. Sein Kit basiert auf präzisen Fenstern: E zum Engagen, R zum Neupositionieren. Champions, die diese Fenster ignorieren oder bestrafen können, reduzieren seinen Einfluss drastisch. Seine Konter zu verstehen bedeutet zu verstehen, wie seine Winkel neutralisiert werden.
Patch-Kontext
Gragass Konter nutzen hauptsächlich zwei Schwächen aus: seine Abhängigkeit von Cooldowns und sein Bedürfnis nach Winkeln. Frühe aggressive Champions oder solche, die gegen seinen Burst resistent sind, zwingen ihn in ein defensives Spiel. Zusätzlich machen Picks, die nach seinem Engage folgen oder ihn bestrafen können, jeden Fehler sehr kostspielig.
Schnell gelesen
Bestrafe seine langen Cooldowns.
Verhindere seine Flankenwinkel.
Überlebe seinen anfänglichen Burst.
Konter-Archetypen
Robuste Bruiser
Diese Champions ignorieren Gragass Burst teilweise und können nach seinem Engage weiter vorrücken. Ihr Sustain oder ihre Tankiness reduziert den Einfluss seiner Combos und zwingt Gragas, sich nach dem Engage zurückzuziehen. Sie können auch einen verfehlten E oder einen schlecht genutzten Ultimate sofort bestrafen.
Wie sich der Champion anpasst. Spiele eher auf Picks als auf lange Kämpfe und vermeide ausgedehnte Auseinandersetzungen.
Frühe aggressive Jungler
Diese Champions erzwingen ein Tempo, das Gragas früh nicht mithalten kann. Sie können invaden, Kämpfe vor seinen Spikes erzwingen und ihm Ressourcen entziehen. Ihre Mobilität erlaubt es ihnen auch, seinen Engages auszuweichen oder diese zu bestrafen.
Wie sich der Champion anpasst. Sichere das frühe Spiel und vermeide direkte Kämpfe.
Ausweichende Carries
Diese Champions können seinen Burst ausweichen oder überleben und ihn dann während seiner Cooldowns bestrafen. Ihre Mobilität oder Reichweite macht sie schwer fassbar, was den Wert seiner Picks reduziert.
Lee Sin stellt ein dynamisches Matchup dar, bei dem Gragas akzeptieren muss, frühes Tempo zu verlieren. Lee Sin kann invaden, Duelle erzwingen und Combos mit Mobilität ausweichen. Der Schlüssel ist, bis zum mid-Spiel zu überleben, wo Gragas durch Picks die Kontrolle zurückgewinnen kann.
Häufige Fehler gegen ihn
Häufige Fehler gegen ihn
Gragas angreifen, wenn er keine Cooldowns hat.
Seine Flankenwinkel unterschätzen.
In Engpässen gegen ihn zu gruppieren.
Seine Fehler nicht zu bestrafen.
Sein Ultimate-Timing ignorieren.
Coach-Notizen
Wenn seine E benutzt wird, ist das ein Fenster für Strafen.
Flash-R immer antizipieren.
FAQ
Warum killt mich Gragas so leicht?
Weil du wahrscheinlich isoliert oder schlecht positioniert bist. Gragas ist darin gut, individuelle Fehler zu bestrafen. Wenn du zu weit vorne oder getrennt bist, kann er dich schnell kombinieren. Der Schlüssel ist, gruppiert zu bleiben und Mobilitätstools bereit zu halten, um seinen Engage auszuweichen.
Wie weicht man seiner Ultimate aus?
Du musst antizipieren, statt zu reagieren. Einen Dash oder Flash verfügbar zu halten, ist der Schlüssel. Positioniere dich so, dass du nicht leicht isoliert wirst. In Kämpfen vermeide enge Räume, wo seine Ultimate am effektivsten ist.
Ist er früh stark?
Nicht besonders. Gragas verlässt sich auf Level 5 und Item-Spikes. Davor ist er anfällig für Invades und aggressive Jungler. Diese Schwäche auszunutzen, ist entscheidend.
Wann sollte man ihn bestrafen?
Nach einer verpassten E oder Ultimate. Diese Fähigkeiten haben lange Cooldowns, und ohne sie verliert Gragas viel Druck. Das ist der perfekte Zeitpunkt, um zu engagieren oder Objectives zu nehmen.