
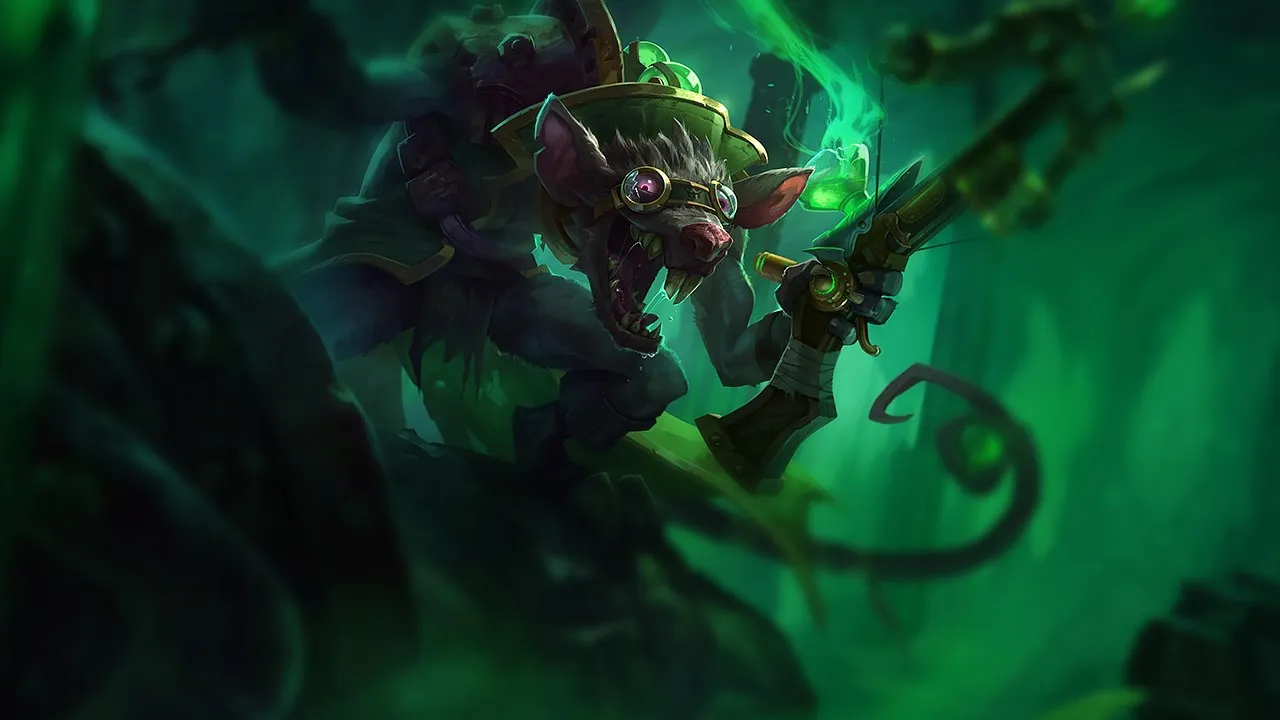
Twitch Wild Rift Counter-Guide
Hard Counters
10Diese Champions haben ein Build und einen Spielstil, der deinen direkt überlegen ist, was die Kontrolle der Lane und das Farmen extrem schwierig machen kann. Ihr Kit kann deine Kernstärken neutralisieren oder dich bestrafen, sobald du versuchst, deinen gewohnten Spielplan umzusetzen. In diesen Matchups geht es oft darum, Fehler zu minimieren und nach Wegen zu suchen, außerhalb der direkten Konfrontation zu gewinnen.

Tristana+2
Tristana completely dominates Twitch early on by weaponizing her superior burst speed. The moment she jumps forward with Rocket Jump, she attaches Explosive Charge and activates Rapid Fire to detonate it almost instantly. Twitch's damage profile is slow and back-loaded; he needs to apply Deadly Venom over time, meaning he cannot stack and trigger Contaminate fast enough to match her sudden lethal burst.
Tristana Build →
Details ansehen
Warum
Tristana completely dominates Twitch early on by weaponizing her superior burst speed. The moment she jumps forward with Rocket Jump, she attaches Explosive Charge and activates Rapid Fire to detonate it almost instantly. Twitch's damage profile is slow and back-loaded; he needs to apply Deadly Venom over time, meaning he cannot stack and trigger Contaminate fast enough to match her sudden lethal burst.
Lane-Einfluss
This massive disparity in burst potential strips you of any early lane priority. You cannot step up to contest the wave because a single misposition invites an immediate Rocket Jump engage. Under your own turret, Tristana can easily chip away at your health bar by placing Explosive Charge on the tower, forcing you to forfeit gold to avoid the splash damage.
Wie man spielt
To survive this lane, you must use Ambush defensively to drop target lock when she prepares to jump. If she initiates with Rocket Jump, immediately throw Venom Cask directly onto her landing spot to slow her down, then retreat. Do not try to trade back with Contaminate unless her jump is on cooldown. If she successfully attaches Explosive Charge, walk away instantly to prevent her from getting the auto-attacks required to maximize the blast damage.

Kalista+2
Twitch's damage takes time to ramp up, but Kalista completely denies him that luxury. Her constant micro-dashes from Martial Poise allow her to effortlessly dodge your Venom Cask and stay glued to you. Since you lack immediate burst, she will quickly stack spears inside you during any duel, using Rend to rip through your health pool and execute you long before Spray and Pray can scale.
Kalista Build →
Details ansehen
Warum
Twitch's damage takes time to ramp up, but Kalista completely denies him that luxury. Her constant micro-dashes from Martial Poise allow her to effortlessly dodge your Venom Cask and stay glued to you. Since you lack immediate burst, she will quickly stack spears inside you during any duel, using Rend to rip through your health pool and execute you long before Spray and Pray can scale.
Lane-Einfluss
Because of this threat, you are entirely locked out of early wave control. Kalista will push you under tower or freeze the wave to zone you out. If you step up to farm, she will use Pierce to transfer Rend stacks onto you through dying minions, forcing heavy health trades. This constant pressure means you will bleed gold, lose plates, and cannot roam to help secure objectives.
Wie man spielt
To survive, you must prioritize defensive wave management. Let the minions crash and farm safely under tower using Contaminate to secure lasthits. Never use Ambush offensively; instead, hold it as a defensive tool to slip away into stealth when she activates Fate's Call. If you get frozen out, immediately yield the gold, stay in experience range, and wait for your team to break the freeze rather than risking a fatal chase.

Draven+2
Draven completely dominates the early game by leveraging Spinning Axe to out-damage your passive Deadly Venom stacks. The true danger lies in his ability to freeze the wave near his turret. Once the lane is frozen, Draven can activate Blood Rush to instantly close the gap and chunk your health bar whenever you attempt to secure a minion, leaving you with no trading tools to retaliate.
Draven Build →
Details ansehen
Warum
Draven completely dominates the early game by leveraging Spinning Axe to out-damage your passive Deadly Venom stacks. The true danger lies in his ability to freeze the wave near his turret. Once the lane is frozen, Draven can activate Blood Rush to instantly close the gap and chunk your health bar whenever you attempt to secure a minion, leaving you with no trading tools to retaliate.
Lane-Einfluss
This matchup forces you into a defensive posture from the very first wave. If you try to contest the push, you risk getting chunked or killed, which triggers League of Draven and immediately snowballs the lane. You will constantly trail in gold, struggle to match his recall timings, and find yourself trapped under your own turret, unable to help your jungler contest the bottom river.
Wie man spielt
To survive, you must abandon any hope of aggressive trades. Use Venom Cask from maximum range to secure dying minions without stepping into his auto-attack range. Always hold Ambush as a pure defensive tool to escape his Stand Aside or to retreat when he activates his movement speed. If he successfully freezes the wave, do not walk up; instead, stay within experience range and wait for the lane to naturally bounce back.

Lucian+2
Lucian completely shuts down your early game by abusing Lightslinger. Every time you step up to farm and begin stacking Deadly Venom, Lucian can immediately retaliate with Piercing Light followed by two rapid passive strikes. This explosive short-trade potential outclasses your slow poison buildup, meaning you cannot trade auto-attacks effectively when his abilities are available to trigger those double-shots.
Lucian Build →
Details ansehen
Warum
Lucian completely shuts down your early game by abusing Lightslinger. Every time you step up to farm and begin stacking Deadly Venom, Lucian can immediately retaliate with Piercing Light followed by two rapid passive strikes. This explosive short-trade potential outclasses your slow poison buildup, meaning you cannot trade auto-attacks effectively when his abilities are available to trigger those double-shots.
Lane-Einfluss
This interaction forces you under your turret early on. Lucian will constantly pressure you with Piercing Light through the minion wave, threatening to chase you down with Relentless Pursuit if your health drops too low. You will fall behind in gold and experience as you surrender wave control, while your support is forced to play defensively, neutralizing any early dragon side pressure.
Wie man spielt
To survive, use Venom Cask from max range to secure dying minions and slow Lucian if he attempts a forward Relentless Pursuit. Do not initiate trades; instead, use Ambush defensively to safely soak experience or drop aggro. Your major opportunity arrives when you unlock Spray and Pray. Activate it from maximum distance to stack Deadly Venom and trigger Contaminate while staying entirely out of Lucian's Lightslinger trade range.

Samira+2
Your entire teamfight presence relies on Spray and Pray, but Samira completely neutralizes this with a single cast of Blade Whirl. By deleting your piercing bolts mid-air, she denies both your ultimate's damage and your ability to stack Deadly Venom from a safe distance. Once your ultimate is wasted, she immediately closes the gap with Wild Rush, turning your range advantage into a deadly close-quarters execution.
Samira Build →
Details ansehen
Warum
Your entire teamfight presence relies on Spray and Pray, but Samira completely neutralizes this with a single cast of Blade Whirl. By deleting your piercing bolts mid-air, she denies both your ultimate's damage and your ability to stack Deadly Venom from a safe distance. Once your ultimate is wasted, she immediately closes the gap with Wild Rush, turning your range advantage into a deadly close-quarters execution.
Lane-Einfluss
Because you cannot contest her directly, Samira dictates wave priority. She can safely farm with Flair and threaten to trigger Daredevil Impulse if you step up to clear. You are forced to farm under tower, bleeding gold. Any attempt to trade back using Venom Cask and Contaminate is easily negated by her mobility, meaning you enter mid-game skirmishes severely behind in gold and map presence.
Wie man spielt
Never open a fight with Spray and Pray while her defensive option is up. Instead, use Ambush to position flanking angles, then bait Blade Whirl using basic attacks or Venom Cask. Only activate your ultimate once her projectile shield is on cooldown. If she jumps on you with Wild Rush, do not try to out-duel her; immediately disengage and wait for her style stacks from Daredevil Impulse to decay before looking for a Contaminate execute.

Yunara+2
Yunara completely neutralizes your ultimate power spike. The moment you activate Spray and Pray to fire your piercing bolts in a straight line, she can easily reposition using Kanmei's Steps or execute a swift dash with Untouchable Shadow when empowered by Transcend One's Self. By dodging your linear projectiles, she immediately retaliates with heavy mixed critical damage, winning every direct trade before your poison can ramp up.
Yunara Build →
Details ansehen
Warum
Yunara completely neutralizes your ultimate power spike. The moment you activate Spray and Pray to fire your piercing bolts in a straight line, she can easily reposition using Kanmei's Steps or execute a swift dash with Untouchable Shadow when empowered by Transcend One's Self. By dodging your linear projectiles, she immediately retaliates with heavy mixed critical damage, winning every direct trade before your poison can ramp up.
Lane-Einfluss
This mobility advantage destroys your ability to control the wave's tempo. Yunara pushes aggressively by activating Cultivation of Spirit, forcing you to farm under turret. Attempting to catch her off guard with Ambush usually fails, as she can quickly slow your approach using Arc of Judgment. You are constantly forced to concede lane pressure, resulting in poor recall timings and letting her chip away at your tower.
Wie man spielt
To survive this matchup, never activate Spray and Pray until you see Yunara waste Kanmei's Steps. Play defensively from maximum range, using Venom Cask to apply Deadly Venom stacks on minions to secure last hits safely. If she initiates with Transcend One's Self, do not stand your ground to fight with Contaminate; instead, immediately trigger Ambush to retreat toward the safety of your tower.

Caitlyn+2
Caitlyn completely suffocates Twitch's weak early game by placing Yordle Snap Trap lines across the lane. Because Twitch lacks any leap or dash to bypass these hazards, he is forced to step into her massive auto-attack range or trigger a trap, which immediately grants her a guaranteed Headshot. This constant zone denial starves Twitch of gold, delaying the critical item spikes needed for his Spray and Pray teamfight phase.
Caitlyn Build →
Details ansehen
Warum
Caitlyn completely suffocates Twitch's weak early game by placing Yordle Snap Trap lines across the lane. Because Twitch lacks any leap or dash to bypass these hazards, he is forced to step into her massive auto-attack range or trigger a trap, which immediately grants her a guaranteed Headshot. This constant zone denial starves Twitch of gold, delaying the critical item spikes needed for his Spray and Pray teamfight phase.
Lane-Einfluss
Under constant threat of Piltover Peacemaker pushing the wave, you will find yourself permanently shoved under turret. Caitlyn will use this priority to layer Yordle Snap Trap instances directly under your tower, restricting your movement and forcing you to drop cs. Every attempt to trade back with Venom Cask is easily neutralized by her 90 Caliber Net, leaving you chunked, low on health, and unable to support your jungler.
Wie man spielt
Do not try to force trades with Contaminate early on. Instead, use Ambush defensively to drop minion aggro and sneak up to collect safe farm from the brush. If Caitlyn wastes her 90 Caliber Net aggressively, that is your only cue to throw Venom Cask and look for a short trade. If you get completely zoned out, abandon the outer turret early rather than dying, and wait to farm safely near your inner turret until you unlock Spray and Pray.

Miss Fortune+2
Your main tool for offensive setups or defensive retreats, Ambush, is completely neutralized by Miss Fortune's Make It Rain. The wide, immediate area-of-effect slow of her rain easily clips you, instantly revealing your stealth or stripping your movement speed bonus. Furthermore, her passive Love Tap combined with Double Up bounces forces you into a passive stance, as you cannot safely trade hits with her early on.
Miss Fortune Build →
Details ansehen
Warum
Your main tool for offensive setups or defensive retreats, Ambush, is completely neutralized by Miss Fortune's Make It Rain. The wide, immediate area-of-effect slow of her rain easily clips you, instantly revealing your stealth or stripping your movement speed bonus. Furthermore, her passive Love Tap combined with Double Up bounces forces you into a passive stance, as you cannot safely trade hits with her early on.
Lane-Einfluss
Miss Fortune constantly shoves you under turret using Make It Rain and Double Up bounces off your low-health minions. This relentless push prevents you from matching her wave clear, leaving you trapped under your tower losing gold. Because you cannot use Ambush to flank her, she controls the lane tempo entirely, keeping you low on health and unable to rotate to help your team secure early drakes.
Wie man spielt
To survive this onslaught, you must concede early priority and keep the minion wave frozen just outside your turret's range. Stand far to the side of your dying minions to deny her easy Double Up bounces. Never activate Ambush while her Make It Rain is off cooldown; instead, hold it strictly to dodge her Bullet Time or to reposition after she commits her slow. Use Venom Cask and Contaminate solely to secure farming from a safe distance.

Varus+2
Twitch relies on the stealth of Ambush to close the distance and execute surprise trades, but Varus completely negates this pressure with Chain of Corruption. The moment you break camouflage, Varus can instantly bind you in place, leaving you entirely defenseless. This lockdown allows him to freely stack Blighted Quiver and detonate those marks with Piercing Arrow or Hail of Arrows before you can retaliate with Spray and Pray.
Varus Build →
Details ansehen
Warum
Twitch relies on the stealth of Ambush to close the distance and execute surprise trades, but Varus completely negates this pressure with Chain of Corruption. The moment you break camouflage, Varus can instantly bind you in place, leaving you entirely defenseless. This lockdown allows him to freely stack Blighted Quiver and detonate those marks with Piercing Arrow or Hail of Arrows before you can retaliate with Spray and Pray.
Lane-Einfluss
This dynamic forces you onto the defensive from the opening waves. Varus easily dictates wave control, shoving you under turret with Piercing Arrow while using Hail of Arrows to restrict your movement and penalize your healing. You cannot contest farm or initiate short trades, as stepping past your caster minions invites a devastating Chain of Corruption that will cost you your Flash or your life.
Wie man spielt
To survive, adopt an extremely conservative positioning rule: stay behind your minion wave and use Venom Cask solely to slow incoming waves and farm from a safe distance. Never use Ambush to engage proactively. Treat Varus's ultimate as an invisible barrier; only activate Spray and Pray from max range once his ultimate has missed. If he holds his crowd control, remain hidden and let your frontlane absorb the initial threat.
Andere Matchups
Ungünstig
10Diese Champions haben Werkzeuge, die ihnen im Kampf meist einen Vorteil verschaffen, ohne das Matchup unspielbar zu machen. Sie haben vielleicht mehr Reichweite, können deine Offensive besser abfangen oder haben mehr Möglichkeiten, auf deine Engages zu reagieren. Du musst deine Herangehensweise anpassen und sorgfältig die Momente wählen, in denen du den Kampf annimmst.

Ashe+1
Ashe directly counters your flanking potential because her Hawkshot can scout out and reveal you right when you attempt to set up with Ambush. This vision advantage, combined with the threat of her Enchanted Crystal Arrow, prevents you from safely finding the perfect angle to open up with Spray and Pray. You cannot easily rely on stealth to bypass her line of sight, as her global utility exposes your pathing.
Ashe Build →
Details ansehen
Warum
Ashe directly counters your flanking potential because her Hawkshot can scout out and reveal you right when you attempt to set up with Ambush. This vision advantage, combined with the threat of her Enchanted Crystal Arrow, prevents you from safely finding the perfect angle to open up with Spray and Pray. You cannot easily rely on stealth to bypass her line of sight, as her global utility exposes your pathing.
Lane-Einfluss
Because you constantly risk being revealed, you must concede early priority. Ashe will use Volley to poke you down and push the wave, forcing you under turret. If you try to trade back with Venom Cask and Contaminate, her Frost Shot slows you down, making it impossible to disengage safely. This pressure keeps you pinned, denying you the freedom to roam and assist your jungler with invisible skirmishes.
Wie man spielt
To survive, never cast Ambush while standing in standard lane brushes where Hawkshot is likely to be sent. Wait for Ashe to waste her Enchanted Crystal Arrow on your teammates before you reveal yourself. When farming, stay behind your minions to block Volley. If she misses her arrow, immediately throw Venom Cask to slow her down, stack your Deadly Venom with basic attacks, and execute with Contaminate before she can stack Ranger's Focus.

Corki+1
Corki naturally out-scales you in mixed burst damage, but the true danger lies in his ability to neutralize your stealth. If you try to slip away or setup a flank with Ambush, Corki can shut down your escape or initiation instantly. His Phosphorus Bomb grants brief vision upon impact, revealing you in the target area and leaving you exposed to his high-damage Gatling Gun and Missile Barrage follow-up.
Corki Build →
Details ansehen
Warum
Corki naturally out-scales you in mixed burst damage, but the true danger lies in his ability to neutralize your stealth. If you try to slip away or setup a flank with Ambush, Corki can shut down your escape or initiation instantly. His Phosphorus Bomb grants brief vision upon impact, revealing you in the target area and leaving you exposed to his high-damage Gatling Gun and Missile Barrage follow-up.
Lane-Einfluss
Because your stealth is unsafe, you cannot easily trade health using Ambush to surprise him. Corki will push waves effortlessly with Hextech Munitions and Valkyrie, forcing you under tower. If you lose control of the minion wave, he will pocket you under your turret, poking you down with Missile Barrage while forcing you to use Contaminate just to secure farm, bleeding your mana and gold.
Wie man spielt
To survive, prioritize strict wave management. Keep the minions just outside your turret range to prevent Corki from easily aiming Phosphorus Bomb at you. Never cast Ambush defensively while standing inside his wave-clear zone; instead, wait for him to waste Phosphorus Bomb on minions before trying to trade. Apply Deadly Venom stacks with Venom Cask from safety, and only pull the trigger with Contaminate when his Valkyrie is on its long cooldown.

Akshan+1
Akshan completely neutralizes your stealth-based lane safety. When you try to reposition with Ambush, he can match your camouflage using Going Rogue, turning your offensive setup into a deadly trap. His burst from Heroic Swing is far too fast, melting your health bar before you can accumulate Deadly Venom stacks.
Akshan Build →
Details ansehen
Warum
Akshan completely neutralizes your stealth-based lane safety. When you try to reposition with Ambush, he can match your camouflage using Going Rogue, turning your offensive setup into a deadly trap. His burst from Heroic Swing is far too fast, melting your health bar before you can accumulate Deadly Venom stacks.
Lane-Einfluss
This matchup forces you into an extremely passive defensive posture. You cannot walk up to clear waves or use Venom Cask without risking Akshan instantly swinging in. Furthermore, attempting to roam is highly dangerous; his Going Rogue movement speed towards targets allows him to hunt you down in the river. This results in lost wave priority, forcing you to farm under your turret while he pressures the map.
Wie man spielt
Treat Ambush strictly as a defensive tool to escape his sightlines rather than an initiation tool. When Akshan goes missing, resist the urge to follow him blindly through the river; instead, push the wave to deny him gold and only rotate when your support can escort you. During skirmishes, wait for him to commit his Heroic Swing onto a wall before you reveal yourself to unleash Spray and Pray from maximum distance.

Xayah+1
The matchup heavily favors Xayah due to her ultimate defense against your primary damage window. When you activate Spray and Pray to pierce her from distance, Xayah can immediately trigger Featherstorm, becoming untargetable and completely neutralizing your ultimate's duration. Once she lands, she easily repositions her feathers to pull them back with Bladecaller, locking you down while you are left without your range steroid.
Xayah Build →
Details ansehen
Warum
The matchup heavily favors Xayah due to her ultimate defense against your primary damage window. When you activate Spray and Pray to pierce her from distance, Xayah can immediately trigger Featherstorm, becoming untargetable and completely neutralizing your ultimate's duration. Once she lands, she easily repositions her feathers to pull them back with Bladecaller, locking you down while you are left without your range steroid.
Lane-Einfluss
Before unlocking ultimates, you must play defensively around her Clean Cuts. Every time Xayah uses Double Daggers, the resulting feathers on the ground restrict your positioning, forcing you to farm passively near your turret. Trading is dangerous because her Deadly Plumage out-dpses your Deadly Venom stacks. Once both reach level five, your kill pressure drops significantly because you cannot blindly engage with Ambush without risking a deadly counter-engage.
Wie man spielt
To survive, adopt a patient baiting strategy. Never initiate a fight with Spray and Pray while her ultimate is available. Instead, use Ambush to flank, throw Venom Cask to slow her down, and force her to panic-cast Featherstorm using basic attacks. Once she takes flight, immediately step sideways to avoid the landing cone, then commit your ultimate only after she lands and tries to recall her feathers with Bladecaller. If she holds her ultimate, settle for short Contaminate trades and retreat.

Ezreal+1
This matchup is highly unfavorable because Ezreal possesses the perfect tool to deny your assassination attempts. Whenever you attempt to surprise him by exiting Ambush, he can instantly react with Arcane Shift to blink back to safety. This immediate disengage prevents you from stacking Deadly Venom with your basic attacks, completely neutralizing your burst potential before you can trigger a high-damage Contaminate.
Ezreal Build →
Details ansehen
Warum
This matchup is highly unfavorable because Ezreal possesses the perfect tool to deny your assassination attempts. Whenever you attempt to surprise him by exiting Ambush, he can instantly react with Arcane Shift to blink back to safety. This immediate disengage prevents you from stacking Deadly Venom with your basic attacks, completely neutralizing your burst potential before you can trigger a high-damage Contaminate.
Lane-Einfluss
You cannot reliably initiate short trades, forcing you into a defensive posture. Ezreal will constantly pressure your health bar from distance using Mystic Shot and Essence Flux. This constant harass denies you wave control, pushing you under your turret where you must focus entirely on secure farming. If you lose track of him in the river, his roam potential increases while you remain pinned down.
Wie man spielt
To survive this lane, prioritize vision control in the lane bushes and river to track his movements. Never activate Ambush offensively unless you have seen Ezreal waste Arcane Shift forward. Use Venom Cask from a safe distance to slow approaching waves and farm under tower without taking poke. If he initiates with Trueshot Barrage, quickly step aside and hold your Spray and Pray until his escape tool is guaranteed to be on cooldown.

Kai'Sa+1
Twitch thrives on sneaking up on targets, but Kai'Sa is uniquely equipped to turn his surprise attacks against him. The moment you break Ambush, she can immediately react with Supercharge to reposition, avoiding your initial burst while charging her own attack speed. Isolated from minions, Twitch takes the full brunt of her upgraded Icathian Rain, which rapidly triggers Second Skin to melt your health bar before Contaminate can reach maximum stacks.
Kai'Sa Build →
Details ansehen
Warum
Twitch thrives on sneaking up on targets, but Kai'Sa is uniquely equipped to turn his surprise attacks against him. The moment you break Ambush, she can immediately react with Supercharge to reposition, avoiding your initial burst while charging her own attack speed. Isolated from minions, Twitch takes the full brunt of her upgraded Icathian Rain, which rapidly triggers Second Skin to melt your health bar before Contaminate can reach maximum stacks.
Lane-Einfluss
This threat forces you into a highly defensive posture where proactive trades are extremely risky. You cannot use Ambush offensively unless Kai'Sa has already wasted her key cooldowns. Wave control becomes survival; you must stay glued to your minion wave to distribute the missiles from Icathian Rain. Stepping away from your minions invites an immediate Killer Instinct engage that you cannot out-damage.
Wie man spielt
To survive and scale, play the patience game. Only initiate with Ambush when she has already spent Supercharge to clear waves, or when you have a massive allied minion wave to absorb Icathian Rain. If she initiates with Killer Instinct, throw Venom Cask directly at your feet to slow her advance, then activate Spray and Pray to pierce through her from a safe distance, finishing with Contaminate only when Deadly Venom is fully stacked.

Jhin+1
Jhin capitalizes on Twitch's weak early game by constantly shoving waves with Dancing Grenade. This bounces through your minions, rapidly thinning them while forcing you under tower. To make matters worse, Jhin can secure control over the lane bushes by placing Captive Audience traps, which restricts your movement and prevents you from setting up effective stealth engagements using Ambush.
Jhin Build →
Details ansehen
Warum
Jhin capitalizes on Twitch's weak early game by constantly shoving waves with Dancing Grenade. This bounces through your minions, rapidly thinning them while forcing you under tower. To make matters worse, Jhin can secure control over the lane bushes by placing Captive Audience traps, which restricts your movement and prevents you from setting up effective stealth engagements using Ambush.
Lane-Einfluss
Because you are constantly pushed to your turret, you will struggle to stack Deadly Venom on Jhin. This permanent pressure means you lose priority for early skirmishes, and Jhin can freely fish for roots with Deadly Flourish whenever you step up to last-hit. If you drop too low under your tower, Jhin easily sets up Curtain Call from a safe distance to execute you.
Wie man spielt
Focus entirely on matching Jhin's push without taking unnecessary poke. Use Venom Cask on the incoming minion wave to slow its advance and clear from safety. Never use Ambush aggressively if Jhin has active Captive Audience traps in the lane bushes, as triggering one reveals you and invites a Deadly Flourish root. Save Contaminate to secure contested last-hits under turret, and wait for Spray and Pray to fight him from maximum range, safely outside his Whisper fourth-shot threat zone.
Andere Matchups



Skill Matchups
4Diese Matchups sind vor allem Duelle der Ausführung: Beide Champions haben glaubwürdige Wege, die Oberhand zu gewinnen. Eine wichtige ausgewichene Fähigkeit, ein richtig antizipierter Engage oder ein einziger Positionierungsfehler können reichen, um das Duell zu entscheiden. Das Matchup zu kennen und die richtigen Fenster zum Handeln zu erkennen, ist hier besonders wichtig.

Zeri±0
This matchup is a pure test of execution centered on mobility and stealth. Your primary tool to initiate trades is Ambush, which lets you sneak up on Zeri and bypass her frontal Burst Fire poke. However, if you trigger this fight near any river or jungle walls, Zeri will immediately disengage by sliding over the terrain with Spark Surge, completely neutralizing your surprise advantage.
Zeri Build →
Details ansehen
Warum
This matchup is a pure test of execution centered on mobility and stealth. Your primary tool to initiate trades is Ambush, which lets you sneak up on Zeri and bypass her frontal Burst Fire poke. However, if you trigger this fight near any river or jungle walls, Zeri will immediately disengage by sliding over the terrain with Spark Surge, completely neutralizing your surprise advantage.
Lane-Einfluss
Because Zeri can dash away from danger, securing direct kills in lane is incredibly difficult unless she mispositions. This safety shifts the lane dynamic toward a farming stalemate where both of you scale heavily. To break this deadlock, you must leverage your stealth to find roam windows. Pushing the wave with Venom Cask and Contaminate grants you the freedom to disappear into the river.
Wie man spielt
When planning an assassination, position yourself away from the walls to block her escape routes. If you activate Ambush and find her near a wall, do not commit your ultimate, Spray and Pray, immediately. Instead, force her to use Spark Surge first. If she escapes, immediately pivot to a mid-lane roam or secure vision rather than chasing her. Always throw Venom Cask behind her to slow her down before she reaches any terrain.

Vayne±0
This even match pits Vayne’s peerless single-target dueling against your superior teamfight damage. The entire dynamic revolves around how you break stealth. When you exit Ambush to trade, Vayne can instantly buffer Condemn to shove you away. This single defensive knockback completely neutralizes your initial attack speed burst, preventing you from stacking Deadly Venom and leaving you unable to land a high-damage Contaminate.
Vayne Build →
Details ansehen
Warum
This even match pits Vayne’s peerless single-target dueling against your superior teamfight damage. The entire dynamic revolves around how you break stealth. When you exit Ambush to trade, Vayne can instantly buffer Condemn to shove you away. This single defensive knockback completely neutralizes your initial attack speed burst, preventing you from stacking Deadly Venom and leaving you unable to land a high-damage Contaminate.
Lane-Einfluss
Because Vayne holds the ultimate disengage tool, you cannot easily force short trades near walls where Condemn threatens a deadly stun. If she plays aggressively with Tumble and Silver Bolts, you are forced to play defensively under tower. This pressure delays your scaling and prevents you from flanking with Spray and Pray, forcing you to focus entirely on safe farm until she wastes her crowd control.
Wie man spielt
To win this execution battle, always stay in the middle of the lane, far from terrain to negate her stun potential. Never open with Ambush directly next to her. Instead, activate Spray and Pray from maximum range to bypass her knockback distance, or wait until she wastes Condemn on your support. If she rolls forward with Tumble, throw Venom Cask to slow her advance, allowing you to safely stack your poison from afar.
Andere Matchups


Hard Counters
29Diese Champions haben ein Build und einen Spielstil, der deinen direkt überlegen ist, was die Kontrolle der Lane und das Farmen extrem schwierig machen kann. Ihr Kit kann deine Kernstärken neutralisieren oder dich bestrafen, sobald du versuchst, deinen gewohnten Spielplan umzusetzen. In diesen Matchups geht es oft darum, Fehler zu minimieren und nach Wegen zu suchen, außerhalb der direkten Konfrontation zu gewinnen.

Mordekaiser+2
When you exit Ambush and activate Spray and Pray to burst Mordekaiser, he can instantly negate your entire initial damage spike using the massive shield from Indestructible. This completely neutralizes your surprise advantage. Once your piercing bolts fail to pierce his shield, he easily turns the fight around, using Death's Grasp to pull you in and Obliterate to crush you while his Darkness Rise aura drains your health.
Mordekaiser Build →
Details ansehen
Warum
When you exit Ambush and activate Spray and Pray to burst Mordekaiser, he can instantly negate your entire initial damage spike using the massive shield from Indestructible. This completely neutralizes your surprise advantage. Once your piercing bolts fail to pierce his shield, he easily turns the fight around, using Death's Grasp to pull you in and Obliterate to crush you while his Darkness Rise aura drains your health.
Lane-Einfluss
Because you cannot quickly assassinate him in the river or during counter-ganks, you lose the freedom to contest scuttle crabs or neutral objectives directly. If he invades your jungle, you are forced to retreat; a single confrontation inside his Realm of Death means certain death since you cannot kite him. This structural disadvantage pins you down, forcing your laners to play defensively as Mordekaiser exerts massive map pressure.
Wie man spielt
Pivot your build towards sustained tank-shredding items rather than raw flat damage, allowing you to fight through his high health pool. Never initiate with Spray and Pray while his Indestructible is available; instead, bait it out by poking with Venom Cask and basic attacks from maximum range. If he corners you with Realm of Death, focus purely on dodging Obliterate with your movement speed from Ambush rather than trying to out-damage his shield.

Master Yi+2
Twitch is completely defenseless once Master Yi triggers Highlander. The immunity to slows renders Twitch's Venom Cask completely useless for self-peel. Furthermore, Master Yi can easily time Alpha Strike to dodge the piercing bolts of Spray and Pray while simultaneously closing the gap. Without any hard crowd control or innate dashes, Twitch becomes an easy target in the jungle once spotted.
Master Yi Build →
Details ansehen
Warum
Twitch is completely defenseless once Master Yi triggers Highlander. The immunity to slows renders Twitch's Venom Cask completely useless for self-peel. Furthermore, Master Yi can easily time Alpha Strike to dodge the piercing bolts of Spray and Pray while simultaneously closing the gap. Without any hard crowd control or innate dashes, Twitch becomes an easy target in the jungle once spotted.
Lane-Einfluss
This matchup completely paralyzes Twitch's early jungle pathing and aggressive Ambush plays. Master Yi can freely invade your camps, knowing he wins any direct duel. If you try to secure scuttle crabs or gank overextended lanes, Master Yi can counter-gank and clean up with Highlander resets. You are forced into a defensive, reactive posture, yielding early objective control to avoid giving him early kills.
Wie man spielt
To survive, never use Ambush aggressively unless Master Yi is visible on the other side of the map. Keep your distance and wait for him to commit Alpha Strike onto an ally before activating Spray and Pray, ensuring your ultimate shots actually land. If he targets you directly, delay your Venom Cask and Contaminate until his Highlander expires, or use the terrain to break vision before he can lock his Alpha Strike onto you.

Jax+2
Your entire teamfight presence relies on lining up enemies with Spray and Pray. However, Jax acts as a hard counter because his Counter Strike completely evades all of your piercing ultimate bolts, rendering your ultimate's massive damage output entirely useless. If you open fire while his evasion is active, you waste your most critical damage window while giving him a free path to close the distance.
Jax Build →
Details ansehen
Warum
Your entire teamfight presence relies on lining up enemies with Spray and Pray. However, Jax acts as a hard counter because his Counter Strike completely evades all of your piercing ultimate bolts, rendering your ultimate's massive damage output entirely useless. If you open fire while his evasion is active, you waste your most critical damage window while giving him a free path to close the distance.
Lane-Einfluss
In the jungle, Jax actively invades or contests Scuttle Crabs knowing you cannot fight him directly. Whenever you try to gank or secure objectives, he can jump on you with Leap Strike and force you out. This constant pressure limits your ability to safely farm with Contaminate or set up surprise plays with Ambush, forcing your laners to play defensively as you concede early map control.
Wie man spielt
Never activate Spray and Pray the moment you exit Ambush if Jax is nearby. Instead, use Venom Cask from maximum range to slow him and bait out his Counter Strike or Leap Strike. Keep your distance and wait out those two crucial seconds of his evasion before committing your ultimate. If he manages to jump on you before using his defensive tool, immediately disengage and rely on your allies to peel him off.

Kha'Zix+2
In the isolated corridors of the jungle, you are the ultimate prey. Kha'Zix thrives on finding you alone, using Taste Their Fear to deal massive isolated damage that obliterates your fragile health bar instantly. Your DPS relies on slowly stacking Deadly Venom and finding the space to pierce him with Spray and Pray, but his upfront burst kills you long before your ultimate can ramp up its damage.
Kha'Zix Build →
Details ansehen
Warum
In the isolated corridors of the jungle, you are the ultimate prey. Kha'Zix thrives on finding you alone, using Taste Their Fear to deal massive isolated damage that obliterates your fragile health bar instantly. Your DPS relies on slowly stacking Deadly Venom and finding the space to pierce him with Spray and Pray, but his upfront burst kills you long before your ultimate can ramp up its damage.
Lane-Einfluss
This threat forces you into a paranoid pathing cycle. You cannot contest neutral camps or secure scuttle crabs freely because Kha'Zix can jump from a bush with Leap and execute you. Since you must constantly yield your own camps to avoid dying, your lanes suffer from a complete lack of early gank pressure while you struggle to secure basic gold, leaving your lanes vulnerable to his active map presence.
Wie man spielt
To survive, you must use Ambush defensively rather than to seek fights. Never enter your own jungle blind; throw Venom Cask into bushes to check for danger or slow his approach if he jumps you. If he initiates with Leap, immediately run toward your nearest teammate while activating Spray and Pray to fight back only under tower protection. If he corners you, prioritize escape over trying to stack Contaminate.

Jarvan IV+2
Your vulnerability in this matchup stems directly from your lack of mobility when Jarvan IV decides to engage. Because you have no dashes to leap over terrain, his Cataclysm creates an inescapable death trap for you. Even if you attempt to use Ambush to sneak away, the immediate wall generation and his knock-up combo via Demacian Standard and Dragon Strike will reliably reveal and crush you before you can stack Deadly Venom.
Jarvan IV Build →
Details ansehen
Warum
Your vulnerability in this matchup stems directly from your lack of mobility when Jarvan IV decides to engage. Because you have no dashes to leap over terrain, his Cataclysm creates an inescapable death trap for you. Even if you attempt to use Ambush to sneak away, the immediate wall generation and his knock-up combo via Demacian Standard and Dragon Strike will reliably reveal and crush you before you can stack Deadly Venom.
Lane-Einfluss
Jarvan IV will ruthlessly exploit his early pressure to invade your jungle camps and disrupt your initial clears. If he intercepts you near the Scuttle Crab, his Golden Aegis slow combined with passive damage from Martial Cadence makes early dueling impossible. This constant threat forces you to concede river control, delaying your gold income and forcing your laners to play defensively because you cannot safely counter-gank his aggressive level-two transitions.
Wie man spielt
To survive, you must weaponize the stealth of Ambush defensively rather than using it to initiate fights. Never show yourself on the map until you spot Jarvan IV elsewhere, or until he wastes his Demacian Standard and Dragon Strike bridge. If he surprises you, drop Venom Cask directly at your feet to delay his advance, and only activate Spray and Pray from maximum range behind thick walls so his Cataclysm cannot target you directly.

Rammus+3
This matchup is a nightmare because your entire offensive identity backfires against Rammus. When you activate Spray and Pray, your massive attack speed and piercing physical bolts turn into a self-destructive trap. Rammus activates Defensive Ball Curl, reflecting immense damage back at you for every single hit. If he catches you with Frenzying Taunt, you are forced to rapidly shred your own health bar with no way to stop.
Rammus Build →
Details ansehen
Warum
This matchup is a nightmare because your entire offensive identity backfires against Rammus. When you activate Spray and Pray, your massive attack speed and piercing physical bolts turn into a self-destructive trap. Rammus activates Defensive Ball Curl, reflecting immense damage back at you for every single hit. If he catches you with Frenzying Taunt, you are forced to rapidly shred your own health bar with no way to stop.
Lane-Einfluss
In the jungle, this interaction strips away your early map pressure and skirmishing power. Rammus can confidently invade your camps or counter-gank, using Powerball to close the gap and Soaring Slam to disrupt your positioning. You cannot contest neutral objectives directly because any teamfight threat you pose is neutralized; Rammus simply stands in front of your piercing ultimate, turning your main teamfight tool into a hazard for your own survival.
Wie man spielt
To survive, you must play like a patient assassin. Never break Ambush near Rammus unless his Defensive Ball Curl has already expired. Throw Venom Cask ahead of his Powerball to break his momentum before he reaches you. If he targets your allies, hold Spray and Pray and focus other enemies from maximum range, only using Contaminate to execute low-health targets once his defensive buff ends.

Lee Sin+2
Lee Sin completely shuts down your survival tool. Your entire safety net relies on entering stealth with Ambush, but Lee Sin's Tempest provides true sight of any invisible target it hits. Once he reveals you in your own jungle, you are a sitting duck. He can easily land Sonic Wave on you, using his high early-game burst to delete you before you can stack Deadly Venom or trigger Contaminate.
Lee Sin Build →
Details ansehen
Warum
Lee Sin completely shuts down your survival tool. Your entire safety net relies on entering stealth with Ambush, but Lee Sin's Tempest provides true sight of any invisible target it hits. Once he reveals you in your own jungle, you are a sitting duck. He can easily land Sonic Wave on you, using his high early-game burst to delete you before you can stack Deadly Venom or trigger Contaminate.
Lane-Einfluss
Expect relentless aggression in your jungle starting from level two. Lee Sin will actively hunt you, using Safeguard to jump walls and steal your camps. This constant invasion pressure forces you to abandon your own camps, severely delaying your gold generation. If you try to fight back, his Flurry gives him a massive attack speed advantage, forcing you to play defensively and giving up control of the early neutral objectives.
Wie man spielt
To survive, you must track his starting location and path to the opposite side of the map. Place defensive wards at your jungle entrances to spot his invades early. If he jumps on you, immediately throw Venom Cask to slow his approach and run toward your nearest tower. Never initiate with Ambush if you suspect he is near, as he will just react with Tempest. Focus entirely on safe farming until you can unlock Spray and Pray for teamfights.

Fiddlesticks+2
Your stealth-based jungle pressure is entirely neutralized because Fiddlesticks places A Harmless Scarecrow effigies at key choke points, exposing you during Ambush. Once revealed, you lose the element of surprise, allowing him to immediately channel Crowstorm from behind walls and delete your fragile health bar with massive area damage before you can stack Deadly Venom.
Fiddlesticks Build →
Details ansehen
Warum
Your stealth-based jungle pressure is entirely neutralized because Fiddlesticks places A Harmless Scarecrow effigies at key choke points, exposing you during Ambush. Once revealed, you lose the element of surprise, allowing him to immediately channel Crowstorm from behind walls and delete your fragile health bar with massive area damage before you can stack Deadly Venom.
Lane-Einfluss
Because you cannot rely on stealth to bypass common warding spots, your ganking routes become incredibly predictable. Fiddlesticks secures absolute control over the river brush, meaning you risk getting counter-ganked or ambushed in your own jungle. Every attempt to contest objectives or clear camps near the river becomes highly dangerous, forcing you to play defensively and giving him free reign to pressure lanes.
Wie man spielt
Never enter a brush or cross the river with Ambush without having a teammate sweep it first. Keep your distance from walls where Fiddlesticks might be hiding to channel Crowstorm. If he jumps on you, immediately use Venom Cask to slow his chase, and run rather than trying to trade with Contaminate, as his Bountiful Harvest will easily out-heal your poison damage. Always path away from his effigies.

Nidalee+2
Your safety in the jungle relies entirely on the stealth of Ambush, but Nidalee completely neutralizes this tool. By placing Bushwhack traps along high-traffic choke points and camp entries, she easily reveals your position. Once stepped on, you are fully exposed, allowing her to easily land a long-range Javelin Toss from the fog of war, triggering her hunt mechanic to quickly burst you down.
Nidalee Build →
Details ansehen
Warum
Your safety in the jungle relies entirely on the stealth of Ambush, but Nidalee completely neutralizes this tool. By placing Bushwhack traps along high-traffic choke points and camp entries, she easily reveals your position. Once stepped on, you are fully exposed, allowing her to easily land a long-range Javelin Toss from the fog of war, triggering her hunt mechanic to quickly burst you down.
Lane-Einfluss
This matchup forces you into defensive pathing, stripping away your early gank pressure. If Nidalee tracks your camps, she will invade aggressively. Triggering a trap means losing half your health bar or burning a summoner spell before even starting a camp. This constant threat delays your Contaminate clears, keeps you low on health, and concedes free river priority to her for early skirmishes.
Wie man spielt
Never activate Ambush blindly to traverse the river; assume every brush contains Bushwhack traps. Track Nidalee's starting side to mirror her pathing on the opposite side of the map, avoiding direct confrontation. If you must cross the river, use Venom Cask to check brushes or take wider, unconventional paths around standard choke points. If she catches you with a Javelin Toss, immediately disengage rather than trying to stack Deadly Venom.

Talon+2
Twitch's reliance on Ambush to navigate the jungle safely is completely negated by Talon's hunting tools. Once Talon tracks your rotation, he can jump walls using Assassin's Path to cut you off. The moment you are spotted, his high-damage combo of Noxian Diplomacy and Shadow Assault instantly deletes your fragile health bar before you can even stack Deadly Venom or retaliate with Spray and Pray.
Talon Build →
Details ansehen
Warum
Twitch's reliance on Ambush to navigate the jungle safely is completely negated by Talon's hunting tools. Once Talon tracks your rotation, he can jump walls using Assassin's Path to cut you off. The moment you are spotted, his high-damage combo of Noxian Diplomacy and Shadow Assault instantly deletes your fragile health bar before you can even stack Deadly Venom or retaliate with Spray and Pray.
Lane-Einfluss
You lose all freedom to contest neutral objectives or invade early. Talon's ability to hop over terrain means your camps are never secure, forcing you into defensive, predictable pathing. If he catches you in the river, a single Rake slowing you allows him to trigger Blade's End for an easy kill, instantly giving his lanes massive pressure while you are stuck waiting for respawn timers.
Wie man spielt
Never enter the river without vision of Talon, and always hold Ambush until he commits his own mobility. If he jumps on you, immediately drop Venom Cask at your feet to slow his follow-up and buy time to run. When fighting over objectives, wait for Talon to reveal himself and exhaust Shadow Assault on your teammates before you activate Spray and Pray from maximum distance to safely apply Contaminate stacks.

Riven+2
Riven completely dominates the jungle matchups due to her extreme mobility. Her Broken Wings and Valor allow her to rapidly cross the distance between you, leaving Twitch no time to safely accumulate stacks of Deadly Venom. Because she can lock you down with Ki Burst instantly, you will find yourself burst down and forced to use flash before your Contaminate can even deal meaningful damage.
Riven Build →
Details ansehen
Warum
Riven completely dominates the jungle matchups due to her extreme mobility. Her Broken Wings and Valor allow her to rapidly cross the distance between you, leaving Twitch no time to safely accumulate stacks of Deadly Venom. Because she can lock you down with Ki Burst instantly, you will find yourself burst down and forced to use flash before your Contaminate can even deal meaningful damage.
Lane-Einfluss
This gap-closing threat completely warps your pathing. Riven can invade your camps with impunity, knowing that if she catches you in the river, your Venom Cask won't slow her enough to escape her high-damage combos. You are forced to concede early scuttle crabs and play defensively under your own jungle camps, which heavily delays your Spray and Pray power spike and sacrifices early pressure for your laners.
Wie man spielt
To survive, you must weaponize Ambush defensively rather than offensively. Never enter unwarded jungle quadrants without scouting with Venom Cask first. If Riven activates Blade of the Exile, immediately drop your plans to fight and slide into stealth to relocate. Keep deep wards in her jungle to track her Broken Wings usage; if she uses them to clear a camp, only then can you safely contest nearby areas or cross the map.

Rengar+2
Rengar directly neutralizes your main survival tool because Thrill of the Hunt grants him absolute vision of you even while you are active in Ambush. This interaction completely strips away your element of surprise. Once he detects your position, his Unseen Predator passive allows him to leap directly onto you from afar, unleashing a fatal Savagery sequence that deletes your fragile health bar before you can even trigger Spray and Pray.
Rengar Build →
Details ansehen
Warum
Rengar directly neutralizes your main survival tool because Thrill of the Hunt grants him absolute vision of you even while you are active in Ambush. This interaction completely strips away your element of surprise. Once he detects your position, his Unseen Predator passive allows him to leap directly onto you from afar, unleashing a fatal Savagery sequence that deletes your fragile health bar before you can even trigger Spray and Pray.
Lane-Einfluss
This matchup completely paralyzes your jungle clearing and invasion patterns. You cannot safely contest any camps or scuttle crabs near brush lines because Rengar can strike from Unseen Predator. Every time he activates Thrill of the Hunt, you are forced to retreat deep behind your turrets, giving up control of the river. This constant threat of an instant ambush prevents you from supporting your laners, yielding total map pressure to him.
Wie man spielt
To survive, you must delay entering your jungle until your team provides deep vision. Never activate Ambush reactively once you hear his ultimate sound; instead, immediately drop Venom Cask at your feet to slow his incoming leap and position yourself strictly behind your tankiest ally. Keep Contaminate ready to secure quick jungle camps from a safe distance, and never attempt to duel him without your team blocking his jump path.

Nilah+2
Nilah is a nightmare in the jungle because her Jubilant Veil completely negates the piercing bolts of your Spray and Pray. While you rely on that ultimate range to shred targets from afar, she can simply activate her shroud to ignore your auto-attacks, close the distance instantly with Slipstream, and shred you with Formless Blade. This interaction completely strips away your ranged advantage in skirmishes.
Nilah Build →
Details ansehen
Warum
Nilah is a nightmare in the jungle because her Jubilant Veil completely negates the piercing bolts of your Spray and Pray. While you rely on that ultimate range to shred targets from afar, she can simply activate her shroud to ignore your auto-attacks, close the distance instantly with Slipstream, and shred you with Formless Blade. This interaction completely strips away your ranged advantage in skirmishes.
Lane-Einfluss
You cannot contest River Scuttlers or epic monsters if Nilah is nearby. If she catches you in your own jungle, she will force a fight, knowing Jubilant Veil protects her from your Ambush openers. Any attempt to burst her down with Contaminate fails because you cannot stack Deadly Venom through her active dodge, leaving you starved of gold and forced to concede early neutral objectives.
Wie man spielt
Never open a fight from Ambush with Spray and Pray if her Jubilant Veil is off cooldown. Instead, throw Venom Cask from max range to bait out her defensive shroud. Only when her shroud vanishes or is used on an ally can you safely reveal yourself to stack Deadly Venom and execute with Contaminate. If she dashes toward you with Slipstream, immediately fall back.

Vi+2
Vi completely nullifies the element of surprise from your Ambush using her ultimate Cease and Desist. The moment you break stealth to activate Spray and Pray, she can target you directly without any chance of missing. This unstoppable crowd control leaves you completely vulnerable to her follow-up with Vault Breaker and Relentless Force, bursting you down before you can stack Deadly Venom.
Vi Build →
Details ansehen
Warum
Vi completely nullifies the element of surprise from your Ambush using her ultimate Cease and Desist. The moment you break stealth to activate Spray and Pray, she can target you directly without any chance of missing. This unstoppable crowd control leaves you completely vulnerable to her follow-up with Vault Breaker and Relentless Force, bursting you down before you can stack Deadly Venom.
Lane-Einfluss
In the jungle, this constant threat entirely paralyzes your map rotations. You cannot safely contest early river objectives or attempt counter-jungling. If Vi catches you in transition, her Vault Breaker combined with Denting Blows shreds your health bar, forcing immediate recalls. You lose all tempo, conceding neutral objectives to Vi while your lanes suffer from your lack of pressure.
Wie man spielt
To survive, you must never reveal yourself first during skirmishes. Wait patiently for your team to bait out Vi's Vault Breaker or force her to commit Cease and Desist on another target before you break Ambush. Throw Venom Cask from maximum range to slow her advance if she charges your way. If she holds her ultimate specifically for you, remain hidden and accept playing as a late-fight cleanup tool.

Tryndamere+2
Tryndamere completely shuts down your ranged advantage by instantly closing the gap with Spinning Slash. Once he is on top of you, attempting to flee triggers Mocking Shout, reducing your physical damage and applying a massive slow that prevents you from escaping. Even if you try to slip away using Ambush, his physical tracking and rapid gap-closer leave you exposed and vulnerable in your own jungle camps.
Tryndamere Build →
Details ansehen
Warum
Tryndamere completely shuts down your ranged advantage by instantly closing the gap with Spinning Slash. Once he is on top of you, attempting to flee triggers Mocking Shout, reducing your physical damage and applying a massive slow that prevents you from escaping. Even if you try to slip away using Ambush, his physical tracking and rapid gap-closer leave you exposed and vulnerable in your own jungle camps.
Lane-Einfluss
This matchup completely ruins your early clearing safety, as Tryndamere can aggressively invade your camps knowing you cannot duel him. You are forced to constantly watch your back, delaying your Contaminate stacks because you must respect his high critical strikes from Battle Fury. This pressure forces you to concede your red or blue buffs, severely delaying your level power spikes and hurting your team's early objective control.
Wie man spielt
To survive, you must alter your jungle routing to avoid direct encounters. Never use Ambush offensively if you do not know where he is; keep it to escape over walls or reposition. If he jumps on you with Spinning Slash, immediately throw Venom Cask at your feet to slow him down before he can apply Mocking Shout. Finally, never commit your Spray and Pray while his Undying Rage is available, as he will easily survive your burst.

Warwick+2
The jungle dynamic is heavily tilted because Warwick's Blood Hunt completely nullifies your primary survival tool, Ambush. When your health drops below half, his passive scent-tracking reveals your movement direction even while invisible, removing your ability to sneak away or reposition. Furthermore, his raw sustain from Eternal Hunger and Jaws of the Beast means you can never win an isolated duel if he catches you out.
Warwick Build →
Details ansehen
Warum
The jungle dynamic is heavily tilted because Warwick's Blood Hunt completely nullifies your primary survival tool, Ambush. When your health drops below half, his passive scent-tracking reveals your movement direction even while invisible, removing your ability to sneak away or reposition. Furthermore, his raw sustain from Eternal Hunger and Jaws of the Beast means you can never win an isolated duel if he catches you out.
Lane-Einfluss
You cannot farm your camps safely once you are wounded, as the global scent trail invites a swift counter-jungle invasion. If Warwick catches you with Infinite Duress, you are immediately suppressed and burst down before Contaminate can stack up. This constant threat forces you into highly defensive pathing, giving Warwick free reign over early Scuttle Crabs and forcing your lanes to play without active jungle pressure.
Wie man spielt
Always track Warwick's starting location to path on the opposite side of the map. If you drop low while clearing, recall immediately rather than risking a final camp, preventing Blood Hunt from giving away your location. Save your Venom Cask defensively to slow his approach if he runs at you, and never activate Spray and Pray unless he has already wasted Primal Howl, as his damage reduction will soak your entire ultimate.

Nocturne+2
Nocturne fundamentally shuts down your teamfight presence with one button. When he activates Paranoia, the map-wide nearsight completely strips away your vision, which prevents you from targeting anyone with Spray and Pray. Even if you position perfectly, you cannot utilize your ultimate's massive attack range because you simply cannot see your targets, rendering your primary damage window completely useless while he dives you.
Nocturne Build →
Details ansehen
Warum
Nocturne fundamentally shuts down your teamfight presence with one button. When he activates Paranoia, the map-wide nearsight completely strips away your vision, which prevents you from targeting anyone with Spray and Pray. Even if you position perfectly, you cannot utilize your ultimate's massive attack range because you simply cannot see your targets, rendering your primary damage window completely useless while he dives you.
Lane-Einfluss
In the jungle, this threat paralyzes your ganking phases. As soon as Nocturne reaches level five, any attempt to use Ambush for a sidelane flank is instantly countered by Paranoia, allowing him to dive your target or collapse on you. You cannot safely contest neutral objectives or scuttle crabs because his Duskbringer speed and Unspeakable Horror fear will easily overwhelm you in any direct duel.
Wie man spielt
Your survival hinges on tracking Nocturne's ultimate cooldown religiously. Never initiate a fight with Ambush or activate Spray and Pray until Paranoia has been cast elsewhere. If he targets you directly, use Venom Cask at your feet to slow his approach, but do not waste Contaminate on his Shroud of Darkness spell shield. If he triggers his blackout, immediately retreat toward your closest ally to share vision and wait out the darkness.

Zed+2
Zed represents an absolute nightmare in the jungle due to his ability to completely ignore your frontline. Even if you initiate with Ambush, Zed can instantly close the gap using Living Shadow. Once he targets you with Death Mark, his follow-up combo of Razor Shuriken and Shadow Slash guarantees an instant execution, especially when Contempt for the Weak triggers on your low health pool.
Zed Build →
Details ansehen
Warum
Zed represents an absolute nightmare in the jungle due to his ability to completely ignore your frontline. Even if you initiate with Ambush, Zed can instantly close the gap using Living Shadow. Once he targets you with Death Mark, his follow-up combo of Razor Shuriken and Shadow Slash guarantees an instant execution, especially when Contempt for the Weak triggers on your low health pool.
Lane-Einfluss
You cannot safely contest neutral objectives or invade because Zed's assassination pressure forces you into extremely passive jungle routing. Initiating fights with Spray and Pray becomes incredibly risky, as revealing your position allows Zed to immediately counter-engage. This constant threat delays your item spikes, giving Zed total control over river skirmishes and leaving your lanes vulnerable to his high-tempo ganks.
Wie man spielt
To survive, you must rush an early Guardian Angel to withstand the lethal pop of Death Mark. When skirmishing, never open with Ambush too close to him; instead, wait until Zed commits his Living Shadow elsewhere before joining the fight. If he marks you, rely on Guardian Angel to survive his burst, then retaliate with Venom Cask and Contaminate once his shadows have expired.
Andere Matchups











Ungünstig
13Diese Champions haben Werkzeuge, die ihnen im Kampf meist einen Vorteil verschaffen, ohne das Matchup unspielbar zu machen. Sie haben vielleicht mehr Reichweite, können deine Offensive besser abfangen oder haben mehr Möglichkeiten, auf deine Engages zu reagieren. Du musst deine Herangehensweise anpassen und sorgfältig die Momente wählen, in denen du den Kampf annimmst.
Andere Matchups













Skill Matchups
5Diese Matchups sind vor allem Duelle der Ausführung: Beide Champions haben glaubwürdige Wege, die Oberhand zu gewinnen. Eine wichtige ausgewichene Fähigkeit, ein richtig antizipierter Engage oder ein einziger Positionierungsfehler können reichen, um das Duell zu entscheiden. Das Matchup zu kennen und die richtigen Fenster zum Handeln zu erkennen, ist hier besonders wichtig.
Andere Matchups





Günstig
1Diese Champions tun sich meist schwer, auf deine Hauptstärken zu reagieren, was dir mehr Freiheit im Matchup gibt. Du hast oft mehrere Möglichkeiten, sie unter Druck zu setzen und Trades zu deinen Gunsten zu erzwingen. Nutze diesen Vorteil, um das Tempo zu bestimmen, statt ihnen Zeit zu geben, wieder in eine komfortable Position zu kommen.
Andere Matchups

Items gegen Twitch
Kaufe diese Gegenstände, um die Wirkung dieses Champions in deinen Spielen zu senken.


| Matchup | Urteil | Vorteil | Siegrate | Pickrate |
|---|---|---|---|---|
| Varus | Hard Counters | +2 | 51.3% | 5.8% |
| Samira | Hard Counters | +2 | 51.1% | 10.9% |
| Kalista | Hard Counters | +2 | 50.9% | 5.8% |
| Yunara | Hard Counters | +2 | 50.0% | 9.4% |
| Caitlyn | Hard Counters | +2 | 49.7% | 16.4% |
| Tristana | Hard Counters | +2 | 49.0% | 11.2% |
| Miss Fortune | Hard Counters | +2 | 48.7% | 12.3% |
| Lucian | Hard Counters | +2 | 47.4% | 3.2% |
| Draven | Hard Counters | +2 | 46.8% | 5.2% |
| Nilah | Hard Counters | +2 | — | — |
| Ashe | Ungünstig | +1 | 53.2% | 8.6% |
| Kog'Maw | Ungünstig | +1 | 52.3% | 2.5% |
| Jinx | Ungünstig | +1 | 50.8% | 13.2% |
| Xayah | Ungünstig | +1 | 50.4% | 5.0% |
| Kai'Sa | Ungünstig | +1 | 50.1% | 16.4% |
| Ezreal | Ungünstig | +1 | 49.7% | 7.4% |
| Jhin | Ungünstig | +1 | 49.5% | 18.8% |
| Sivir | Ungünstig | +1 | 48.9% | 3.3% |
| Akshan | Ungünstig | +1 | — | — |
| Corki | Ungünstig | +1 | — | — |
| Smolder | Skill Matchups | ±0 | 52.6% | 8.0% |
| Senna | Skill Matchups | ±0 | 51.0% | 1.5% |
| Zeri | Skill Matchups | ±0 | 49.9% | 1.3% |
| Vayne | Skill Matchups | ±0 | 48.9% | 6.3% |
Vorteil: kanonisches Urteil von Wild Rift Core (−3 bis +3), aus Sicht des in der Zeile genannten Champions. Siegrate und Pickrate: die eigenen Werte des Gegners in dieser Rolle — Wild Rift CN · Challenger, Patch 7.3b. Keine Siegrate im direkten Duell.
| Matchup | Urteil | Vorteil | Siegrate | Pickrate |
|---|---|---|---|---|
| Rammus | Hard Counters | +3 | 57.0% | 4.7% |
| Amumu | Hard Counters | +2 | 55.6% | 2.9% |
| Ekko | Hard Counters | +2 | 53.4% | 7.3% |
| Lillia | Hard Counters | +2 | 53.2% | 2.9% |
| Gwen | Hard Counters | +2 | 53.2% | 2.5% |
| Nocturne | Hard Counters | +2 | 52.6% | 7.5% |
| Fiddlesticks | Hard Counters | +2 | 52.3% | 1.9% |
| Jarvan IV | Hard Counters | +2 | 51.9% | 7.1% |
| Hecarim | Hard Counters | +2 | 51.4% | 1.7% |
| Zed | Hard Counters | +2 | 51.4% | 2.5% |
| Talon | Hard Counters | +2 | 51.3% | 2.7% |
| Kayn | Hard Counters | +2 | 51.2% | 7.0% |
| Nidalee | Hard Counters | +2 | 51.1% | 2.2% |
| Kha'Zix | Hard Counters | +2 | 50.9% | 4.5% |
| Xin Zhao | Hard Counters | +2 | 50.7% | 8.6% |
| Diana | Hard Counters | +2 | 50.5% | 1.5% |
| Warwick | Hard Counters | +2 | 50.4% | 2.0% |
| Riven | Hard Counters | +2 | 49.8% | 1.4% |
| Vi | Hard Counters | +2 | 49.7% | 5.0% |
| Jax | Hard Counters | +2 | 49.6% | 2.0% |
| Wukong | Hard Counters | +2 | 49.4% | 3.2% |
| Evelynn | Hard Counters | +2 | 49.4% | 2.2% |
| Tryndamere | Hard Counters | +2 | 48.9% | 9.7% |
| Fizz | Hard Counters | +2 | 48.9% | 1.8% |
| Rengar | Hard Counters | +2 | 48.6% | 2.1% |
| Lee Sin | Hard Counters | +2 | 46.9% | 12.2% |
| Master Yi | Hard Counters | +2 | 46.8% | 9.8% |
| Mordekaiser | Hard Counters | +2 | — | — |
| Nilah | Hard Counters | +2 | — | — |
| Skarner | Ungünstig | +1 | 55.1% | 1.7% |
| Nunu & Willump | Ungünstig | +1 | 52.6% | 1.8% |
| Olaf | Ungünstig | +1 | 51.8% | 1.6% |
| Cho'Gath | Ungünstig | +1 | 50.4% | 8.5% |
| Kindred | Ungünstig | +1 | 50.3% | 2.2% |
| Pantheon | Ungünstig | +1 | 50.0% | 5.8% |
| Volibear | Ungünstig | +1 | 48.7% | 4.1% |
| Yone | Ungünstig | +1 | 48.7% | 3.0% |
| Viego | Ungünstig | +1 | 46.3% | 4.4% |
| Camille | Ungünstig | +1 | — | — |
| Gragas | Ungünstig | +1 | — | — |
| Maokai | Ungünstig | +1 | — | — |
| Nautilus | Ungünstig | +1 | — | — |
| Dr. Mundo | Skill Matchups | ±0 | 51.5% | 2.0% |
| Graves | Skill Matchups | ±0 | 47.3% | 6.8% |
| Shyvana | Skill Matchups | ±0 | 46.2% | 3.2% |
| Aatrox | Skill Matchups | ±0 | 45.0% | 1.0% |
| Poppy | Skill Matchups | ±0 | — | — |
| Darius | Günstig | −1 | 49.7% | 6.4% |
Vorteil: kanonisches Urteil von Wild Rift Core (−3 bis +3), aus Sicht des in der Zeile genannten Champions. Siegrate und Pickrate: die eigenen Werte des Gegners in dieser Rolle — Wild Rift CN · Challenger, Patch 7.3b. Keine Siegrate im direkten Duell.