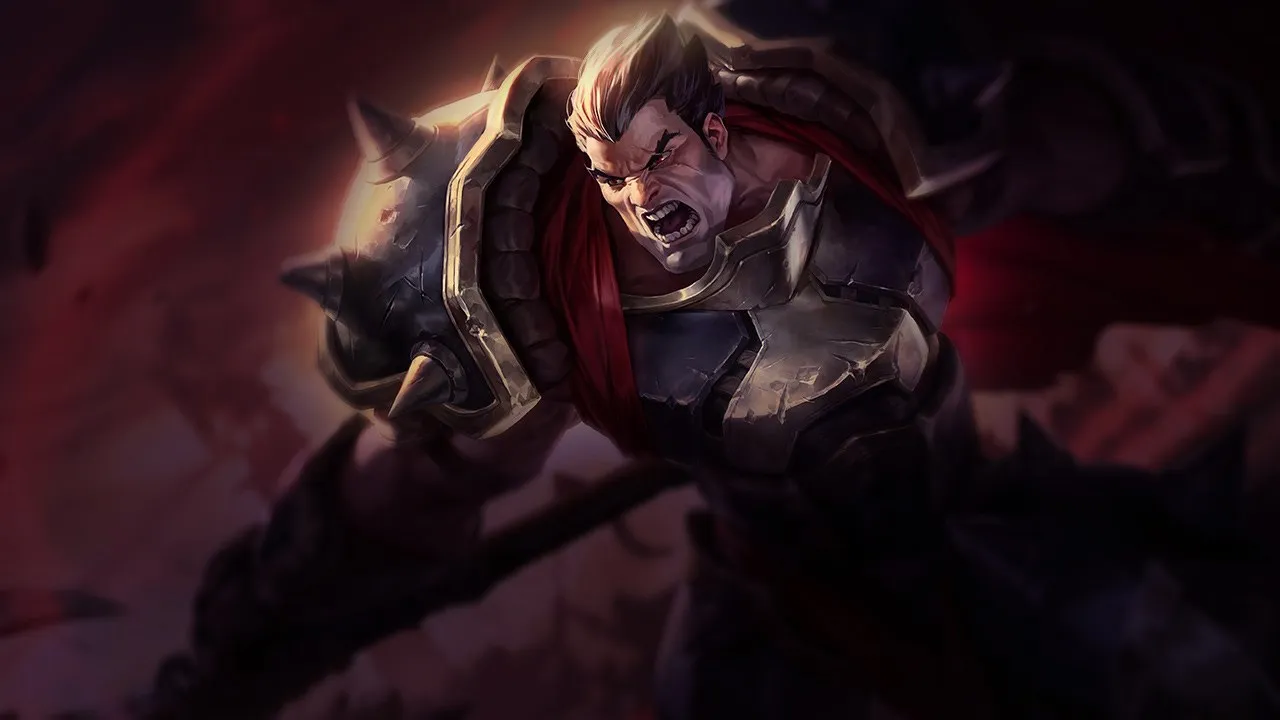
Darius hat Probleme gegen Teamkompositionen, die auf Distanz bleiben und längere Kämpfe vermeiden. Poke, hohe mobility und kite-Strategien verhindern, dass er seine Passive auflädt, und verringern sein snowball-Potenzial. Seine Abhängigkeit vom Nahkampf ist seine größte strukturelle Schwäche.
★ TOP · JUNGLETier A
SCHADEN
UTIL
TANK
DIFF
Win49.7%#56 · ↑4pt
Pick14.5%#1
Ban12.8%#17
Darius Wild Rift Counter-Guide
Hard Counters
3
Diese Champions haben ein Build und einen Spielstil, der deinen direkt überlegen ist, was die Kontrolle der Lane und das Farmen extrem schwierig machen kann. Ihr Kit kann deine Kernstärken neutralisieren oder dich bestrafen, sobald du versuchst, deinen gewohnten Spielplan umzusetzen. In diesen Matchups geht es oft darum, Fehler zu minimieren und nach Wegen zu suchen, außerhalb der direkten Konfrontation zu gewinnen.
PositionierungSichtVayne holds a massive mechanical advantage that neutralizes your kit. Whenever you attempt to close the distance and pull her in with Apprehend, she can instantly react with Condemn to repel you, or use Tumble to dodge your reach entirely. Combined with Night Hunter chasing you down and Silver Bolts melting your health with true damage, you cannot fight her in the open.Vayne Build →Details ansehen
Vayne
Warum
Vayne holds a massive mechanical advantage that neutralizes your kit. Whenever you attempt to close the distance and pull her in with Apprehend, she can instantly react with Condemn to repel you, or use Tumble to dodge your reach entirely. Combined with Night Hunter chasing you down and Silver Bolts melting your health with true damage, you cannot fight her in the open.
Lane-Einfluss
You will be starved of gold and forced to concede early wave control. Walking up to last-hit invites constant harassment from her ranged basic attacks, triggering Silver Bolts to chunk your health. If she freezes the wave near her turret, you are completely zoned, as stepping forward without cover invites an easy Condemn into a wall, leading to a fatal Final Hour chase.
Wie man spielt
Survival depends entirely on mastering the lane bushes. Duck inside them constantly to break her vision, forcing her to ward or lose target lock for her auto-attacks. Never use Apprehend proactively while her Condemn is available; instead, hold it to threaten her. If she wastes her knockback, you have a brief window to strike. Otherwise, focus on using the outer edge of Decimate to secure minions from relative safety and sustain.
Diese Champions haben Werkzeuge, die ihnen im Kampf meist einen Vorteil verschaffen, ohne das Matchup unspielbar zu machen. Sie haben vielleicht mehr Reichweite, können deine Offensive besser abfangen oder haben mehr Möglichkeiten, auf deine Engages zu reagieren. Du musst deine Herangehensweise anpassen und sorgfältig die Momente wählen, in denen du den Kampf annimmst.
SchildeRückzugJax has the upper hand because his Counter Strike completely denies your basic attacks and Crippling Strike, halting your Hemorrhage stacks. Since his passive Relentless Assault ramps up his attack speed rapidly, a straight auto-attack duel is suicidal. Your saving grace is that Counter Strike cannot block Decimate, allowing you to bypass his evasion if you space correctly.Jax Build →Details ansehen
Jax
Warum
Jax has the upper hand because his Counter Strike completely denies your basic attacks and Crippling Strike, halting your Hemorrhage stacks. Since his passive Relentless Assault ramps up his attack speed rapidly, a straight auto-attack duel is suicidal. Your saving grace is that Counter Strike cannot block Decimate, allowing you to bypass his evasion if you space correctly.
Lane-Einfluss
Jax will constantly threaten to jump on you with Leap Strike when his Counter Strike is ready, forcing you to play defensively near your turret. You cannot easily freeze the wave because if he activates his Evasion, you must retreat, giving up priority. Trades are short and sharp; if he blocks your Crippling Strike, you lose the trade immediately and risk being chased down by his Grandmaster-at-Arms passive.
Wie man spielt
When Jax activates Counter Strike to stun you, do not run away immediately in a straight line. Instead, swing Decimate while he is spinning his lantern. This guarantees the outer-edge blade damage and heals you, bypassing his physical dodge. Save Apprehend for after his Leap Strike is spent; if he tries to disengage after a trade, pull him back to force a longer fight once his defensive cooldown is gone, allowing you to finally stack Hemorrhage and execute with Noxian Guillotine.
SchildeÜberlebenFiora holds the upper hand because her Riposte completely neutralizes your two most impactful tools: the displacement of Apprehend and the execution damage of Noxian Guillotine. While you want to stack Hemorrhage through prolonged trades, her Duelist's Dance and Lunge allow her to strike vitals and chip away your health before you can safely land the outer edge of Decimate.Fiora Build →Details ansehen
Fiora
Warum
Fiora holds the upper hand because her Riposte completely neutralizes your two most impactful tools: the displacement of Apprehend and the execution damage of Noxian Guillotine. While you want to stack Hemorrhage through prolonged trades, her Duelist's Dance and Lunge allow her to strike vitals and chip away your health before you can safely land the outer edge of Decimate.
Lane-Einfluss
Every trade becomes a high-stakes waiting game where you cannot commit to an all-in unless Riposte is down. If you blindly throw out Apprehend, Fiora will stun you, reset her vitals with Grand Challenge, and easily shred you. This forces you to play defensively near your turret, ceding early wave control and making it difficult to stack Hemorrhage to reach your Noxian Might power spike.
Wie man spielt
To win, you must bait out her parry. Walk up and use Crippling Strike to slow her, then walk with her instead of immediately casting Apprehend. Force her to guess when your hook or Noxian Guillotine is coming. If she wastes Riposte, you have a clear window to strike with the outer ring of Decimate and stack Hemorrhage to maximum. If she triggers Grand Challenge, hug a wall immediately to deny her the final vital.
PicksPokeJayce dominates this lane by abusing his range advantage with Transform Mercury Cannon to poke you down. Your only tool to force a trade is Apprehend, but if you throw it out blindly, Jayce will simply swap to hammer form and use Thundering Blow to swat you away. This interaction completely neutralizes your engage, leaving you slow and vulnerable to his ranged harass.Jayce Build →Details ansehen
Jayce
Warum
Jayce dominates this lane by abusing his range advantage with Transform Mercury Cannon to poke you down. Your only tool to force a trade is Apprehend, but if you throw it out blindly, Jayce will simply swap to hammer form and use Thundering Blow to swat you away. This interaction completely neutralizes your engage, leaving you slow and vulnerable to his ranged harass.
Lane-Einfluss
This constant threat of being disengaged forces you to play defensively near your turret. Jayce will control the minion waves, using Lightning Field to push while poking you with accelerated projectiles. If you waste Apprehend and get knocked back, you cannot stack Hemorrhage, costing you massive health. You will find yourself trapped under tower, losing gold and unable to help your jungler.
Wie man spielt
To survive, you must discipline yourself to never cast Apprehend first. Instead, position defensively and invite Jayce to initiate. When he gets greedy and leaps onto you with the hammer version of To the Skies!, wait out his Thundering Blow knockback. The moment you are pushed away, instantly use Apprehend to pull him back. Follow up with Crippling Strike to slow him, guarantee the outer edge of Decimate, and stack Hemorrhage for an unexpected Noxian Guillotine execute.
MassenkontrolleRegenerationTeemo's ranged advantage allows him to constantly apply Toxic Shot from safety, chipping away at your health while you attempt to farm. The core of this unfavorable matchup lies in how Blinding Dart completely neutralizes your passive. When you pull him in with Apprehend, a well-timed blind prevents you from landing Crippling Strike or basic attacks, rendering you unable to build Hemorrhage stacks to trigger Noxian Might.Teemo Build →Details ansehen
Teemo
Warum
Teemo's ranged advantage allows him to constantly apply Toxic Shot from safety, chipping away at your health while you attempt to farm. The core of this unfavorable matchup lies in how Blinding Dart completely neutralizes your passive. When you pull him in with Apprehend, a well-timed blind prevents you from landing Crippling Strike or basic attacks, rendering you unable to build Hemorrhage stacks to trigger Noxian Might.
Lane-Einfluss
This range discrepancy forces you to surrender early wave control, as stepping up to hit minions invites free harass. You will find yourself bleeding gold under your turret, struggling to find clean recall timings. If you get impatient and fish for Apprehend, missing it means Teemo can chase you down the lane with Move Quick, while his Noxious Trap mushrooms later secure the brush, eliminating your ability to ambush him.
Wie man spielt
To survive, pivot your build toward early magic resistance and health instead of rushing raw damage. During skirmishes, when you pull Teemo with Apprehend, do not immediately trigger Crippling Strike. He will panic-cast Blinding Dart. Patiently walk alongside him during the blind duration, using Decimate to heal, and only unleash your basic attacks and Crippling Strike once the visual blind effect fades to guarantee your Hemorrhage stacks.
HinrichtungPicksTryndamere's Battle Fury grants him lethal early critical strikes that can bypass your Hemorrhage stacks. While you can win short trades with Decimate, his Undying Rage completely neutralizes the execution power of your Noxian Guillotine. The matchup hinges on this ultimate interaction: if you execute too early, he survives and kills you; you must survive his five seconds of invincibility.Tryndamere Build →Details ansehen
Tryndamere
Warum
Tryndamere's Battle Fury grants him lethal early critical strikes that can bypass your Hemorrhage stacks. While you can win short trades with Decimate, his Undying Rage completely neutralizes the execution power of your Noxian Guillotine. The matchup hinges on this ultimate interaction: if you execute too early, he survives and kills you; you must survive his five seconds of invincibility.
Lane-Einfluss
Tryndamere will constantly hit the wave to stack fury, using Spinning Slash to trade or retreat. If you let him build this resource, his health sustain from Bloodlust makes your Decimate poke irrelevant. Once both reach level five, the lane becomes a deadly waiting game under your turret, where a single mistimed trade allows him to dive you safely using his invulnerability.
Wie man spielt
To survive his ultimate, never initiate trades with Apprehend. Instead, stack Hemorrhage normally, and the moment he triggers Undying Rage, immediately reset your auto-attack with Crippling Strike to decay his movement speed. Use Apprehend right after to pull him back and cancel his Spinning Slash escape or chase. Run away to waste his five-second immortality window, and only cast Noxian Guillotine as his buff expires. If dived, hug the turret and focus on these crowd controls.
TarnungMobilitätThis matchup hinges entirely on how Akali uses Shuriken Flip to deny your main healing source. Whenever you wind up Decimate to stack Hemorrhage, she can easily flip backward, completely escaping the outer blade's damage and heal. Denied this crucial sustain and your passive progression, you are left vulnerable while she retains the option to recast her shuriken and dash back onto you with an empowered Assassin's Mark.Akali Build →Details ansehen
Akali
Warum
This matchup hinges entirely on how Akali uses Shuriken Flip to deny your main healing source. Whenever you wind up Decimate to stack Hemorrhage, she can easily flip backward, completely escaping the outer blade's damage and heal. Denied this crucial sustain and your passive progression, you are left vulnerable while she retains the option to recast her shuriken and dash back onto you with an empowered Assassin's Mark.
Lane-Einfluss
Because you cannot reliably land the outer ring of Decimate, trading health becomes highly disadvantageous. Akali will constantly poke you with Five Point Strike and slip into Twilight Shroud to drop minion aggro and block your Apprehend. You are forced to concede wave control, sitting under your tower to avoid being whittled down into the execution threshold of her Perfect Execution.
Wie man spielt
To survive, never initiate trades with Decimate. Instead, walk up to last-hit and wait for Akali to waste Shuriken Flip offensively or to clear minions. The moment that tool is down, hook her in with Apprehend, immediately slow her with Crippling Strike to prevent her from escaping, and only then swing your axe. If she hides in Twilight Shroud, immediately retreat toward your minions to deny her the space to proc Assassin's Mark.
CC-ImmunitätRegenerationDarius relies on spacing with Apprehend and the slow from Crippling Strike to set up the outer-ring hit of Decimate. However, once Olaf reaches level five and activates Ragnarok, he becomes completely immune to these crowd control tools. Combined with his passive Berserker Rage and Vicious Strikes, Olaf can simply run you down, ignoring your displacement and slows to win the raw stat-check duel.Olaf Build →Details ansehen
Olaf
Warum
Darius relies on spacing with Apprehend and the slow from Crippling Strike to set up the outer-ring hit of Decimate. However, once Olaf reaches level five and activates Ragnarok, he becomes completely immune to these crowd control tools. Combined with his passive Berserker Rage and Vicious Strikes, Olaf can simply run you down, ignoring your displacement and slows to win the raw stat-check duel.
Lane-Einfluss
Before level five, you can contest Olaf by dodging Undertow and landing Decimate. But once Ragnarok is available, you lose the threat of your pull under tower, forcing you to play defensively. If Olaf freezes near his turret, you cannot safely break it because any extended trade allows him to pop his ultimate and chase you down the long lane. This traps you top, surrendering early priority.
Wie man spielt
Never initiate a trade with Apprehend once Olaf has his ultimate. Instead, save both Apprehend and Crippling Strike until Ragnarok expires or use them strictly before he activates it to bait its early usage. If he activates his ultimate, immediately retreat toward your tower. Only commit your Noxian Guillotine if you can execute him before his Berserker Rage and Vicious Strikes lifesteal outpaces your Hemorrhage damage.
Diese Matchups sind vor allem Duelle der Ausführung: Beide Champions haben glaubwürdige Wege, die Oberhand zu gewinnen. Eine wichtige ausgewichene Fähigkeit, ein richtig antizipierter Engage oder ein einziger Positionierungsfehler können reichen, um das Duell zu entscheiden. Das Matchup zu kennen und die richtigen Fenster zum Handeln zu erkennen, ist hier besonders wichtig.
PositionierungKitenRegenerationThis matchup is a pure battle of micro-spacing where every trade hinges on a crucial movement interaction. Darius relies on hitting the outer edge of Decimate to sustain and quickly stack Hemorrhage. To deny this, Aatrox constantly holds Umbral Dash to slip backward out of your axe’s reach. If he successfully dodges the blade, you lose both your healing and your passive momentum, leaving you vulnerable to The Darkin Blade counter-attacks.Aatrox Build →Details ansehen
Aatrox
Warum
This matchup is a pure battle of micro-spacing where every trade hinges on a crucial movement interaction. Darius relies on hitting the outer edge of Decimate to sustain and quickly stack Hemorrhage. To deny this, Aatrox constantly holds Umbral Dash to slip backward out of your axe’s reach. If he successfully dodges the blade, you lose both your healing and your passive momentum, leaving you vulnerable to The Darkin Blade counter-attacks.
Lane-Einfluss
Neither juggernaut can easily freeze the wave without risking a lethal trade. If Aatrox baits out your Decimate and dashes away, he immediately gains lane priority, using Infernal Chains to lock you down for a full combo. Conversely, if you catch him mid-dash with Apprehend, you pull him into close quarters where your Crippling Strike guarantees five stacks, forcing him to surrender tower pressure or face Noxian Guillotine.
Wie man spielt
To win this positioning duel, never lead your trades with Decimate. Instead, walk up to threaten him with basic attacks and Crippling Strike. Force Aatrox to panic-cast Umbral Dash defensively to escape. The moment he commits his dash backward, immediately use Apprehend to drag him back into your melee range, ensuring your axe sweep connects perfectly. If you miss your pull while his dash is up, immediately retreat to avoid his sweetspots.
SchildeAbsoluter SchadenThis lane is a high-stakes duel where Hemorrhage directly fuels Sett's Grit meter. As you stack your passive, Sett prepares to unleash Haymaker for a massive shield and burst. The fight is decided by a split-second interaction: if you can bypass his central true damage zone, your Noxian Guillotine will easily tear through his remaining health once his temporary shield decays.Sett Build →Details ansehen
Sett
Warum
This lane is a high-stakes duel where Hemorrhage directly fuels Sett's Grit meter. As you stack your passive, Sett prepares to unleash Haymaker for a massive shield and burst. The fight is decided by a split-second interaction: if you can bypass his central true damage zone, your Noxian Guillotine will easily tear through his remaining health once his temporary shield decays.
Lane-Einfluss
Every trade in this lane carries lethal risk, forcing both of you to fight for wave control with extreme caution. Whichever juggernaut missteps and gets pulled by Facebreaker or Apprehend is forced into a deadly all-in. Neither of you can safely roam or assist your jungler if you lose the health lead, meaning a single execution error permanently surrenders top lane priority.
Wie man spielt
During extended trades, never use Apprehend just for damage. Keep it ready for when Sett charges his Haymaker. The moment you see him wind up, quickly sidestep the center line or use Apprehend to pull and displace him, forcing his true damage to miss. Once his shield quickly decays, immediately dunk him with Noxian Guillotine. If you get stunned by Facebreaker first, delay your ultimate until you can safely reposition.
PositionierungMassenkontrolleThis lane is an absolute battle of spacing and precise timing. Yone relies on Soul Unbound to initiate trades from a safe distance and dodge your outer Decimate blade. Because Darius needs extended fights to fully stack Hemorrhage, the matchup hinges entirely on whether you can punish Yone's forced return trajectory rather than letting him poke you down and escape freely.Yone Build →Details ansehen
Yone
Warum
This lane is an absolute battle of spacing and precise timing. Yone relies on Soul Unbound to initiate trades from a safe distance and dodge your outer Decimate blade. Because Darius needs extended fights to fully stack Hemorrhage, the matchup hinges entirely on whether you can punish Yone's forced return trajectory rather than letting him poke you down and escape freely.
Lane-Einfluss
The entire lane rhythm revolves around Yone's spirit form. If you fail to contest his return anchor, Yone will slowly chip away your health bar while maintaining easy wave control. However, a single successful catch instantly flips the pressure, allowing you to freeze the lane, force an unfavorable recall, or zone him off minion gold entirely while threatening a lethal all-in.
Wie man spielt
When Yone activates Soul Unbound, do not chase his spirit. Instead, immediately walk toward his tethered physical body. Track the timer carefully, and just as he is about to snap back, cast Apprehend at his starting location. This pulls him right into your range, preventing his escape and letting you chain Crippling Strike to secure Hemorrhage stacks. If he casts Fate Sealed defensively, side-step it.
PicksThis matchup is a constant tug-of-war between Mini Gnar's ranged poking and Darius's lethal execution power. Mini Gnar relies on *Rage Gene* to stay safe, spacing you with *Boomerang Throw* and *Hyper* movement speed. However, his fragility is his downfall. If you pull him with *Apprehend* while *Hop* is unavailable, he lacks the defense to survive your *Hemorrhage* stacks and eventual *Noxian Guillotine*.Gnar Build →Details ansehen
Gnar
Warum
This matchup is a constant tug-of-war between Mini Gnar's ranged poking and Darius's lethal execution power. Mini Gnar relies on *Rage Gene* to stay safe, spacing you with *Boomerang Throw* and *Hyper* movement speed. However, his fragility is his downfall. If you pull him with *Apprehend* while *Hop* is unavailable, he lacks the defense to survive your *Hemorrhage* stacks and eventual *Noxian Guillotine*.
Lane-Einfluss
The wave flow shifts dramatically based on Gnar's rage bar. When he is Mini, he will slowly chip away at your health bar, forcing you to give up some early CS to avoid feeding his *Hyper* passive. Once his *Rage Gene* triggers Mega Gnar, the lane dynamic flips; he becomes a tanky melee threat, making direct trades dangerous near walls due to *Boulder Toss*, yet easier to hit with *Decimate*.
Wie man spielt
Do not waste *Apprehend* while Gnar has *Hop* ready, as he will easily bounce away and kite you. Instead, walk up menacingly to bait his jump, or wait for him to use it aggressively. The moment *Hop* is on cooldown, hook him in, reset your auto-attack with *Crippling Strike*, and heal with the outer edge of *Decimate*. If he transforms into Mega Gnar, stay away from walls to deny *Boulder Toss* stuns.
RegenerationTradesThis even matchup is a pure war of attrition decided by healing windows. Volibear relies on hitting you twice with Frenzied Maul to trigger a massive heal and chunk your health pool. Because your Hemorrhage inflicts heavy damage over time, Volibear wants to stay glued to you. If he gets that second bite, he out-sustains your passive, but you can completely deny this rhythm by kiting his marks.Volibear Build →Details ansehen
Volibear
Warum
This even matchup is a pure war of attrition decided by healing windows. Volibear relies on hitting you twice with Frenzied Maul to trigger a massive heal and chunk your health pool. Because your Hemorrhage inflicts heavy damage over time, Volibear wants to stay glued to you. If he gets that second bite, he out-sustains your passive, but you can completely deny this rhythm by kiting his marks.
Lane-Einfluss
Trading is constant, and neither of you can easily force the other out without a major misplay. When Volibear shields himself with Sky Splitter, you must avoid trading until it decays. Missing your Decimate blade edge gives him the green light to dive you with Stormbringer. If you manage to stall his Frenzied Maul mark, you dictate the wave position and force him to use Thundering Smash defensively.
Wie man spielt
The moment Volibear bites you with Frenzied Maul, immediately hit him with Crippling Strike and walk backward. This heavy slow prevents him from chasing you down for the second, empowered bite before the mark expires. Hold Apprehend specifically to pull him back in after his Sky Splitter shield disappears, or to disrupt his Thundering Smash sprint. If you get stunned early, use Decimate to heal back the initial burst as you retreat.
MobilitätPositionierungThis matchup is a pure execution race where your passives collide. Irelia wants to stack Ionian Fervor on the wave before jumping on you, while you need to stack Hemorrhage to trigger Noxian Might. The entire lane hinges on whether she can use Bladesurge to dodge into your inner handle during Decimate, denying your healing and outer blade damage while putting herself in prime position to shred you.Irelia Build →Details ansehen
Irelia
Warum
This matchup is a pure execution race where your passives collide. Irelia wants to stack Ionian Fervor on the wave before jumping on you, while you need to stack Hemorrhage to trigger Noxian Might. The entire lane hinges on whether she can use Bladesurge to dodge into your inner handle during Decimate, denying your healing and outer blade damage while putting herself in prime position to shred you.
Lane-Einfluss
The wave state dictates the pressure. When your minions are dying, Irelia gains massive threat because she can reset Bladesurge to dance around you and dodge your skillshots. If you push mindlessly, you hand her the perfect runway to stack her passive and out-trade you. A single missed Decimate on a crashing wave completely ruins your health bar and forces a terrible recall, giving her free tower pressure.
Wie man spielt
Never cast Decimate proactively when your own minions are low; instead, wait for her to commit Bladesurge to a target, then swing. Use Apprehend to disrupt her dash mid-air, which cancels her reset and leaves her stranded without mobility. If she parries your burst with Defiant Dance, hold Noxian Guillotine until the physical damage reduction channel ends, then execute her before she can stack Ionian Fervor to full power.
Diese Champions tun sich meist schwer, auf deine Hauptstärken zu reagieren, was dir mehr Freiheit im Matchup gibt. Du hast oft mehrere Möglichkeiten, sie unter Druck zu setzen und Trades zu deinen Gunsten zu erzwingen. Nutze diesen Vorteil, um das Tempo zu bestimmen, statt ihnen Zeit zu geben, wieder in eine komfortable Position zu kommen.
AusweichenTradesThis matchup revolves around a high-stakes spacing war. Ambessa relies on Drakehound's Step to dash inside the inner handle of your Decimate, aiming to deny your healing and prevent Hemorrhage stacks. However, because you possess Apprehend to interrupt her movement and Crippling Strike to cripple her mobility, you hold the tools to control the distance and force extended trades where your passive easily overpowers her.Ambessa Build →Details ansehen
Ambessa
Warum
This matchup revolves around a high-stakes spacing war. Ambessa relies on Drakehound's Step to dash inside the inner handle of your Decimate, aiming to deny your healing and prevent Hemorrhage stacks. However, because you possess Apprehend to interrupt her movement and Crippling Strike to cripple her mobility, you hold the tools to control the distance and force extended trades where your passive easily overpowers her.
Lane-Einfluss
During the laning phase, this dynamic prevents Ambessa from securing easy short trades. If she attempts to clear waves with Cunning Sweep, she risks being pulled. You can freeze the wave near your turret, forcing her to choose between losing gold or stepping up. When she tries to poke with Lacerate, any misstep allows you to lock her down, rapidly building stacks toward Noxian Guillotine while her low base durability makes mistakes lethal.
Wie man spielt
To secure your advantage, never initiate trades with Decimate. Instead, walk up to strike her with Crippling Strike first, slowing her down so she cannot easily react with Drakehound's Step. Save Apprehend specifically to pull her back if she tries to dash away or to cancel her Cunning Sweep animation. If she activates Repudiation to block your slow, delay your Noxian Guillotine until the brief shield decays to guarantee the execution.
TradesHinrichtungDarius naturally dominates Garen because Garen's passive Perseverance requires him to avoid damage, which is impossible against your lingering Hemorrhage bleed. While Garen relies on quick bursts with Decisive Strike and Judgment, your strength lies in prolonged fights. Once Garen's spin ends, his damage drops significantly, leaving him completely vulnerable to your high sustained damage and the healing from Decimate.Garen Build →Details ansehen
Garen
Warum
Darius naturally dominates Garen because Garen's passive Perseverance requires him to avoid damage, which is impossible against your lingering Hemorrhage bleed. While Garen relies on quick bursts with Decisive Strike and Judgment, your strength lies in prolonged fights. Once Garen's spin ends, his damage drops significantly, leaving him completely vulnerable to your high sustained damage and the healing from Decimate.
Lane-Einfluss
This matchup turns into a constant pressure game where you dictate the wave. By constantly ticking Hemorrhage on Garen, you disable his passive regeneration, forcing him to lose gold or take heavy damage. He cannot safely contest the wave when his Judgment is on cooldown. You can easily freeze the lane near your turret, denying him farm and threatening a lethal run-down with Noxian Guillotine if he overextends.
Wie man spielt
When Garen initiates with Decisive Strike and spins with Judgment, do not panic; simply walk with him while striking back. The moment his spin ends and he attempts to retreat to safety, immediately use Apprehend to pull him back in. Follow up with Crippling Strike to slow his escape, stack your Hemorrhage to maximum, and execute him with Noxian Guillotine. Never waste your pull while his spin is active.
TradesRückzugDarius dominates this duel through sustained threat, but Camille can nullify your main trade tool. When you cast Decimate, she will look to use Hookshot to grapple away or cast The Hextech Ultimatum to jump over your outer blade. If she successfully dodges this sweet spot, she denies you both the heal and the crucial Hemorrhage bleed stacks, turning an otherwise winning trade into a dangerous stalemate.Camille Build →Details ansehen
Camille
Warum
Darius dominates this duel through sustained threat, but Camille can nullify your main trade tool. When you cast Decimate, she will look to use Hookshot to grapple away or cast The Hextech Ultimatum to jump over your outer blade. If she successfully dodges this sweet spot, she denies you both the heal and the crucial Hemorrhage bleed stacks, turning an otherwise winning trade into a dangerous stalemate.
Lane-Einfluss
This dynamic forces a tense waiting game where you command the wave's positioning. Since you win extended fights, Camille is forced to play defensively, attempting to farm with Tactical Sweep. If she wastes Hookshot offensively, she immediately loses all safety, allowing you to freeze the wave near your turret and deny her gold, or force her to recall under heavy tower pressure.
Wie man spielt
Never initiate trades by opening with Decimate. Instead, walk up to trigger her Adaptive Defenses shield, then use Apprehend to pull her back when she tries to retreat. Only cast Decimate when her Hookshot is on cooldown, or immediately after she lands from Wall Dive. If she uses The Hextech Ultimatum to dodge your swing, delay your Noxian Guillotine until her brief invulnerability ends to guarantee the execution.
DuellPositionierungDarius dominates this matchup because his raw physical pressure outpaces Mordekaiser's sustained magic damage. Even when isolated within Realm of Death, you hold the definitive trump card. By perfectly spacing Decimate so the outer blade strikes Mordekaiser, you trigger a massive heal that completely negates the ticking aura of Darkness Rise. Since Hemorrhage stacks continuously during these extended duels, your Noxian Guillotine will easily execute him before his shield can save him.Mordekaiser Build →Details ansehen
Mordekaiser
Warum
Darius dominates this matchup because his raw physical pressure outpaces Mordekaiser's sustained magic damage. Even when isolated within Realm of Death, you hold the definitive trump card. By perfectly spacing Decimate so the outer blade strikes Mordekaiser, you trigger a massive heal that completely negates the ticking aura of Darkness Rise. Since Hemorrhage stacks continuously during these extended duels, your Noxian Guillotine will easily execute him before his shield can save him.
Lane-Einfluss
This advantage allows you to aggressively freeze the wave near your turret, forcing Mordekaiser to step up and risk an all-in. If he attempts to farm with Obliterate, his isolated damage is wasted on minions, leaving him vulnerable. You can constantly threaten Apprehend to pull him into long, punishing trades. This pressure forces him into bad recall timings, granting you plating gold and preventing him from assisting his jungler.
Wie man spielt
To secure your lead, never cast Decimate defensively or too early in his Realm of Death. Walk alongside Mordekaiser to match his movement, holding your Q until he locks himself into the cast animation of Obliterate or Death's Grasp. This lock-in guarantees your outer blade lands perfectly. If you miss-space and hit with the handle, immediately reset the fight using Crippling Strike's slow to disengage, then wait for your cooldowns before re-engaging.
CC-ImmunitätFarmenWhile Dr. Mundo relies on Goes Where He Pleases to shrug off crowd control, Darius easily bait-and-pops this spell shield using Apprehend. This interaction leaves Dr. Mundo vulnerable to extended trades where Hemorrhage out-sustains his natural regeneration. By stepping on his dropped canister, you deny Dr. Mundo his health recovery while building Hemorrhage stacks, turning his passive defense into an offensive opening for your Noxian Might.Dr. Mundo Build →Details ansehen
Dr. Mundo
Warum
While Dr. Mundo relies on Goes Where He Pleases to shrug off crowd control, Darius easily bait-and-pops this spell shield using Apprehend. This interaction leaves Dr. Mundo vulnerable to extended trades where Hemorrhage out-sustains his natural regeneration. By stepping on his dropped canister, you deny Dr. Mundo his health recovery while building Hemorrhage stacks, turning his passive defense into an offensive opening for your Noxian Might.
Lane-Einfluss
Since Dr. Mundo must throw Infected Bonesaw from a distance to farm, you can easily control the wave near your tower. This forces him to walk up to collect minions or risk losing gold. Once he steps forward, your threat of pulling him past the minion line prevents him from safely using Heart Zapper to clear waves, giving you permanent lane priority and letting you freeze at will.
Wie man spielt
Position yourself aggressively between Dr. Mundo and his caster minions. Pull him with Apprehend to instantly shatter his shield, then immediately walk over the dropped canister to destroy it before he can reach it. Hold Decimate until he uses Maximum Dosage; the healing from your outer blade will easily match his ultimate's health regeneration. If you miss the canister, back off momentarily to let Hemorrhage bleed him out rather than forcing a dry chase.
Früher DruckAusweichenDarius naturally crushes Gwen in early skirmishes because her scaling requires items to match his passive. When Gwen initiates with Skip 'n Slash, she relies on landing the center of Snip Snip! to melt your health pool with true damage. By side-stepping this central burst, you strip away her healing from A Thousand Cuts, allowing Hemorrhage to stack freely and trigger Noxian Might for an easy execution.Gwen Build →Details ansehen
Gwen
Warum
Darius naturally crushes Gwen in early skirmishes because her scaling requires items to match his passive. When Gwen initiates with Skip 'n Slash, she relies on landing the center of Snip Snip! to melt your health pool with true damage. By side-stepping this central burst, you strip away her healing from A Thousand Cuts, allowing Hemorrhage to stack freely and trigger Noxian Might for an easy execution.
Lane-Einfluss
You dictate the wave's tempo from level one. Gwen must constantly step up to stack her scissors on minions, exposing herself to Apprehend. Since her Hallowed Mist offers no protection against your melee threat, she is forced to concede priority. You can freeze the wave near your turret, forcing her to choose between losing gold or taking massive trades where Crippling Strike prevents her escape.
Wie man spielt
Never initiate with Apprehend; hold it until Gwen attempts to escape with Skip 'n Slash. During trades, orbit closely around her to easily walk out of the center line of Snip Snip!. If she retaliates with Needlework, use that locked casting animation to guarantee your outer axe sweep from Decimate lands, restoring your health while maintaining your stack count. If you miss your heal, pull back immediately until your cooldowns refresh.
RüstungFarmenDarius dominates this matchup because his passive Hemorrhage completely nullifies Malphite's Granite Shield. The lingering bleed damage from your attacks prevents his shield from regenerating, keeping him vulnerable. Even if Malphite uses Ground Slam to cripple your attack speed, your raw physical damage from Decimate and true damage from Noxian Guillotine will easily bypass his armor scaling, making his defensive itemization ineffective against you over longer skirmishes.Malphite Build →Details ansehen
Malphite
Warum
Darius dominates this matchup because his passive Hemorrhage completely nullifies Malphite's Granite Shield. The lingering bleed damage from your attacks prevents his shield from regenerating, keeping him vulnerable. Even if Malphite uses Ground Slam to cripple your attack speed, your raw physical damage from Decimate and true damage from Noxian Guillotine will easily bypass his armor scaling, making his defensive itemization ineffective against you over longer skirmishes.
Lane-Einfluss
You control the pace of this lane through absolute wave control. By freezing the minions near your turret, you force Malphite to overextend for farm. He must waste mana using Seismic Shard to last-hit or expose himself to your Apprehend. Since he cannot safely clear waves without taking massive damage, you can deny him gold, build a massive minion lead, and crash huge waves to dive him under his tower.
Wie man spielt
To secure your advantage, constantly clip Malphite with the outer edge of Decimate to keep his Granite Shield down. Do not initiate with Apprehend; instead, walk up to use basic attacks and reset them with Crippling Strike. Save Apprehend to pull him back when he attempts to flee using the movement speed stolen by his Seismic Shard. If he tries to escape or turn with Unstoppable Force, stack Hemorrhage immediately to execute him.
TradesRenekton relies on quick, bursty trades by dashing in, stunning you, and dashing away. However, his power budget is heavily tied to his Fury-empowered Ruthless Predator and Cull the Meek. Once those are spent, he has no sustained damage. By interrupting his escape dash, Slice and Dice, with your Apprehend, you prevent him from retreating, forcing him into a prolonged brawl where your Hemorrhage stacks will easily overwhelm him.Renekton Build →Details ansehen
Renekton
Warum
Renekton relies on quick, bursty trades by dashing in, stunning you, and dashing away. However, his power budget is heavily tied to his Fury-empowered Ruthless Predator and Cull the Meek. Once those are spent, he has no sustained damage. By interrupting his escape dash, Slice and Dice, with your Apprehend, you prevent him from retreating, forcing him into a prolonged brawl where your Hemorrhage stacks will easily overwhelm him.
Lane-Einfluss
This dynamic forces Renekton to play incredibly passively, as he cannot safely step up to generate Fury with Reign of Anger. If he tries to thin the wave with Cull the Meek, he exposes himself to a deadly freeze. You can easily hold the wave near your tower, denying him the space needed to utilize Slice and Dice safely. Any attempt he makes to trade will cost him massive health bars or his Flash.
Wie man spielt
Never waste Apprehend to initiate. Walk up to last-hit and bait his forward dash. When Renekton strikes with Ruthless Predator and attempts to dash away using his second Slice and Dice, cast Apprehend to drag him back. Immediately follow up with Crippling Strike to slow him down, then spin with Decimate to heal while stacking Hemorrhage. If he activates Dominus, do not panic; stack your passive and execute him with Noxian Guillotine once he is low.
MassenkontrolleHinrichtungDarius dominates this matchup because he can completely nullify Urgot's primary defensive and offensive tool. When Urgot winds up his *Disdain* to dash, flip, and shield himself, Darius can reactively pull him out of the air using *Apprehend*. Canceling this dash leaves Urgot incredibly vulnerable, preventing his shield from absorbing damage and stopping his passive *Echoing Flames* from firing off easily from behind you.Urgot Build →Details ansehen
Urgot
Warum
Darius dominates this matchup because he can completely nullify Urgot's primary defensive and offensive tool. When Urgot winds up his *Disdain* to dash, flip, and shield himself, Darius can reactively pull him out of the air using *Apprehend*. Canceling this dash leaves Urgot incredibly vulnerable, preventing his shield from absorbing damage and stopping his passive *Echoing Flames* from firing off easily from behind you.
Lane-Einfluss
Because you hold this disengage check, Urgot is forced to play defensively, fearing a lethal pull under your tower. You can easily slow-push waves to force him to farm with *Corrosive Charge*. This pressure allows you to walk up, land a healing *Decimate* on his outer edge, and control the lane rhythm. Urgot cannot trade back with *Purge* effectively if he cannot lock you down first.
Wie man spielt
Position yourself slightly to the side of your minion wave, baiting Urgot into aiming his *Disdain* forward. Always hold onto *Apprehend* specifically for this animation; never use it to initiate a trade unless he has already wasted his dash. If you successfully disrupt his dash, immediately reset your auto-attack with *Crippling Strike*, stack your *Hemorrhage*, and finish him with *Noxian Guillotine* before his *Fear Beyond Death* can execute you.
CC-ImmunitätFarmenDarius naturally dominates this matchup because Ornn's defensive scaling cannot match your early-game raw damage. While *Bellows Breath* allows Ornn to temporarily shrug off your crowd control and apply Brittle, its massive cooldown leaves him completely exposed. Once his fire breath fades, his lack of mobility makes him a sitting duck for *Hemorrhage* stacking, turning his tank stats into a massive healing pool for your *Decimate*.Ornn Build →Details ansehen
Ornn
Warum
Darius naturally dominates this matchup because Ornn's defensive scaling cannot match your early-game raw damage. While *Bellows Breath* allows Ornn to temporarily shrug off your crowd control and apply Brittle, its massive cooldown leaves him completely exposed. Once his fire breath fades, his lack of mobility makes him a sitting duck for *Hemorrhage* stacking, turning his tank stats into a massive healing pool for your *Decimate*.
Lane-Einfluss
You command total control over the minion waves from level one. Ornn is forced to bleed farm, desperately using *Volcanic Rupture* to secure minions from a distance. Any attempt by him to walk up and contest the wave results in devastating trades. This constant pressure locks him under tower, bleeding gold, and prevents him from easily utilizing *Living Forge* without risking a lethal dive under *Noxian Guillotine*.
Wie man spielt
Never initiate trades with *Apprehend*. Instead, bait out Ornn's *Bellows Breath* by walking forward, and wait for both his shield and unstoppable status to expire. The moment his breath ends, pull him back with *Apprehend* to prevent his escape via *Searing Charge*. If he tries to knock you up using *Volcanic Rupture* and *Searing Charge*, step aside from the pillar, slow him with *Crippling Strike*, and execute him with *Noxian Guillotine*.
Absoluter SchadenDuellThis matchup hinges entirely on how K'Santé's ultimate backfires against your kit. When K'Santé activates All Out, he sacrifices his own maximum health and resistances for offensive power. For Darius, this is a massive gift. His reduced defensive pool means your Hemorrhage stacks quickly melt his remaining health, bringing him instantly into the execution threshold of Noxian Guillotine.K'Santé Build →Details ansehen
K'Santé
Warum
This matchup hinges entirely on how K'Santé's ultimate backfires against your kit. When K'Santé activates All Out, he sacrifices his own maximum health and resistances for offensive power. For Darius, this is a massive gift. His reduced defensive pool means your Hemorrhage stacks quickly melt his remaining health, bringing him instantly into the execution threshold of Noxian Guillotine.
Lane-Einfluss
K'Santé is forced to play defensively early, relying on Ntofo Strikes to farm from a distance. Because he cannot win extended trades against Hemorrhage, you command total control over the wave. You can easily freeze near your turret, forcing him to overextend. If he uses Footwork offensively or gets caught, he risks losing half his health bar, completely destroying his lane pressure.
Wie man spielt
Do not waste Apprehend while his Path Maker is active, as its damage reduction and crowd control immunity will negate your engage. Instead, walk up to apply slow with Crippling Strike and land Decimate. Force him to panic and trigger All Out. The moment he transforms, hit him with your full combo to rapidly stack Hemorrhage. Once he is marked, immediately unleash Noxian Guillotine before he can escape with Footwork.
SchildeTradesDarius naturally dominates this matchup because Shen cannot match your sustained damage in extended duels as the game progresses. While Ki Barrier and Twilight Assault grant him short-term trades, he relies heavily on Spirit's Refuge to block your auto-attacks. Since your passive Hemorrhage requires consecutive hits to trigger Noxian Might, his defensive zone is his only real protection. Once that zone expires or you bypass it, his dueling power falls off drastically.Shen Build →Details ansehen
Shen
Warum
Darius naturally dominates this matchup because Shen cannot match your sustained damage in extended duels as the game progresses. While Ki Barrier and Twilight Assault grant him short-term trades, he relies heavily on Spirit's Refuge to block your auto-attacks. Since your passive Hemorrhage requires consecutive hits to trigger Noxian Might, his defensive zone is his only real protection. Once that zone expires or you bypass it, his dueling power falls off drastically.
Lane-Einfluss
In lane, you dictate the wave state because Shen cannot contest your push without risking a lethal pull from Apprehend. This pressure forces him to make a costly choice: stay to defend his tower or use Stand United to help his team, leaving you to demolish his turret. If he dashes forward with Shadow Dash, he exposes himself to a devastating counter-engage where Decimate easily heals back his initial burst.
Wie man spielt
To secure your advantage, never waste your attacks when Shen deploys his protective zone. The moment he activates Spirit's Refuge, immediately walk out of the zone instead of mindlessly attacking. Position yourself to block his retreat, then resume applying Hemorrhage stacks with basic attacks and Crippling Strike once the field vanishes. If he tries to escape, pull him back with Apprehend to guarantee a fatal Noxian Guillotine.
WellenräumungFrüher DruckDarius dominates this matchup early because Nasus relies entirely on approaching the wave to stack Siphoning Strike. Since Nasus has no escape tools, any attempt to last-hit allows you to apply Hemorrhage stacks. If he tries to sustain with Soul Eater, you can easily pull him back with Apprehend, preventing him from ever scaling safely.Nasus Build →Details ansehen
Nasus
Warum
Darius dominates this matchup early because Nasus relies entirely on approaching the wave to stack Siphoning Strike. Since Nasus has no escape tools, any attempt to last-hit allows you to apply Hemorrhage stacks. If he tries to sustain with Soul Eater, you can easily pull him back with Apprehend, preventing him from ever scaling safely.
Lane-Einfluss
By denying Nasus his stacks, you stunt his mid-game spike. Keeping the minions near your turret forces him into a desperate position where using Spirit Fire to farm will only push the wave further to you. This freeze starves him of gold and stacks, making him useless in teamfights while you maintain absolute priority and massive tower pressure.
Wie man spielt
Position yourself aggressively between Nasus and your dying minions. Walk up to threaten him with Decimate whenever he approaches, but save Apprehend specifically for when he commits to a Siphoning Strike animation. If he uses Wither to escape, reset with Crippling Strike to slow him back. If you accidentally push the wave, crash it quickly under his tower and let it bounce back.
Früher DruckDiveDarius holds a massive early advantage before Kayle unlocks the ranged power of her Divine Ascent. She relies on Starfire Spellblade to farm from safety, but cannot survive close-range brawls. Your goal is to apply Hemorrhage stacks rapidly. This immense damage pressure forces her to panic-cast Divine Judgment defensively. Once her invulnerability shield expires, she is completely defenseless against your Noxian Guillotine.Kayle Build →Details ansehen
Kayle
Warum
Darius holds a massive early advantage before Kayle unlocks the ranged power of her Divine Ascent. She relies on Starfire Spellblade to farm from safety, but cannot survive close-range brawls. Your goal is to apply Hemorrhage stacks rapidly. This immense damage pressure forces her to panic-cast Divine Judgment defensively. Once her invulnerability shield expires, she is completely defenseless against your Noxian Guillotine.
Lane-Einfluss
Because Kayle must play passive, you can easily freeze the wave near your turret. She will attempt to break freezes using Radiant Blast, but doing so exposes her to deadly run-downs. Keeping the minions on your side deprives her of gold, delays her scaling milestones, and allows you to trade heavily. Slow-pushing and diving her under her own tower becomes trivial once you establish health supremacy.
Wie man spielt
Do not initiate fights by blindly throwing out Apprehend. Instead, walk up to her when she tries to farm, or catch her after she uses Celestial Blessing to flee. Apply Crippling Strike to slow her down, spin with the outer edge of Decimate, and stack Hemorrhage. When she panics and triggers Divine Judgment, do not press your ultimate. Wait out the golden shield, keep auto-attacking, and then execute her with Noxian Guillotine.
UnterbrechungFarmenThis matchup heavily favors you because Sion's entire trading pattern and wave clear rely on channeling Decimating Smash. By saving Apprehend to cancel his swing mid-charge, you completely shut down his primary damage and crowd control. Without this tool, Sion has no way to prevent you from running him down with Crippling Strike and stacking Hemorrhage, turning his defensive lane into a free lane for you.Sion Build →Details ansehen
Sion
Warum
This matchup heavily favors you because Sion's entire trading pattern and wave clear rely on channeling Decimating Smash. By saving Apprehend to cancel his swing mid-charge, you completely shut down his primary damage and crowd control. Without this tool, Sion has no way to prevent you from running him down with Crippling Strike and stacking Hemorrhage, turning his defensive lane into a free lane for you.
Lane-Einfluss
You dictate the wave completely from level one. Sion is forced to farm from safety using Roar of the Slayer, which rapidly drains his mana. Whenever he attempts to contest the melee minions with Decimating Smash, your threat of a pull forces him to release it early or get punished. This grants you total control over freeze setups and easy dive opportunities when his Soul Furnace is down.
Wie man spielt
Never initiate trades with Apprehend; instead, walk up to Sion and apply pressure with Crippling Strike and Decimate. Force him to channel Decimating Smash defensively, then immediately pull him to cancel the swing. If he flees using Unstoppable Onslaught, let him go and crash the wave to deny him gold. Lastly, when you execute him with Noxian Guillotine, immediately move away to easily kite his Glory in Death passive.
Diese Champions haben ein Build und einen Spielstil, der deinen direkt überlegen ist, was die Kontrolle der Lane und das Farmen extrem schwierig machen kann. Ihr Kit kann deine Kernstärken neutralisieren oder dich bestrafen, sobald du versuchst, deinen gewohnten Spielplan umzusetzen. In diesen Matchups geht es oft darum, Fehler zu minimieren und nach Wegen zu suchen, außerhalb der direkten Konfrontation zu gewinnen.
KitenHinrichtungKindred completely dominates this jungle matchup by exploiting your lack of mobility. Whenever you attempt to close the distance, they use Dance of Arrows to hop away, maintaining a safe range while applying Mounting Dread to slow your approach. Even if you manage to stack Hemorrhage and cast Noxian Guillotine, Kindred can instantly cast Lamb's Respite to deny your execution and survive.Kindred Build →Details ansehen
Kindred
Warum
Kindred completely dominates this jungle matchup by exploiting your lack of mobility. Whenever you attempt to close the distance, they use Dance of Arrows to hop away, maintaining a safe range while applying Mounting Dread to slow your approach. Even if you manage to stack Hemorrhage and cast Noxian Guillotine, Kindred can instantly cast Lamb's Respite to deny your execution and survive.
Lane-Einfluss
In the jungle, this dynamic makes contesting neutral camps and marks highly punishing. Kindred will drop Wolf's Frenzy to secure skirmish control, forcing you to take massive damage if you try to hit them with Decimate. You are forced to surrender active map pressure, as getting caught in the river means being chased down and executed by their ranged attacks without any realistic way to turn the fight.
Wie man spielt
To survive, you must play around blind spots and never chase Kindred in open areas. Only initiate a fight if you can ambush them from a bush, landing a surprise Apprehend followed immediately by Crippling Strike to prevent them from dashing away instantly. If they activate Lamb's Respite, do not waste your Noxian Guillotine inside the circle; instead, time your Decimate to hit the outer edge right as the healing zone expires to secure the kill.
KitenMobilitätLillia completely neutralizes your offensive threat by stacking movement speed from Blooming Blows. Because she is constantly sprinting around you, landing the outer healing edge of your Decimate becomes a mathematical nightmare. She can easily weave in and out of your range, applying Dream-Laden Bough while effortlessly dodging your blade, leaving you with only the weak handle damage and zero healing during skirmishes.Lillia Build →Details ansehen
Lillia
Warum
Lillia completely neutralizes your offensive threat by stacking movement speed from Blooming Blows. Because she is constantly sprinting around you, landing the outer healing edge of your Decimate becomes a mathematical nightmare. She can easily weave in and out of your range, applying Dream-Laden Bough while effortlessly dodging your blade, leaving you with only the weak handle damage and zero healing during skirmishes.
Lane-Einfluss
In the jungle, this disparity ruins your early pressure and neutral camp contests. You cannot duel her at Scuttle Crab because she will kite you endlessly using Swirlseed to slow you before putting you to sleep with Lilting Lullaby. If you attempt to invade, she easily escapes or turns the fight. This forces you into a passive clearing style, conceding early river control and leaving your laners vulnerable to her high-speed ganks.
Wie man spielt
Your survival hinges on holding Apprehend. Never lead with it; instead, wait for her to commit her dash from Watch Out! Eep! which momentarily locks her in place. The instant she lands, pull her in with Apprehend, immediately reset your attack with Crippling Strike to decay her momentum, and only then use Decimate when she is heavily slowed. If she manages to trigger Lilting Lullaby, immediately retreat toward your nearest turret or wall to prevent her from executing her full combo.
Diese Champions haben Werkzeuge, die ihnen im Kampf meist einen Vorteil verschaffen, ohne das Matchup unspielbar zu machen. Sie haben vielleicht mehr Reichweite, können deine Offensive besser abfangen oder haben mehr Möglichkeiten, auf deine Engages zu reagieren. Du musst deine Herangehensweise anpassen und sorgfältig die Momente wählen, in denen du den Kampf annimmst.
PicksKartendruckThis matchup is defined by how Kha'Zix exploits your isolation. In the open river, his Taste Their Fear deals devastating isolated damage, bursting you down before you can stack Hemorrhage. While you excel in extended fights, his initial burst from Unseen Threat coupled with stealth from Void Assault prevents you from landing the outer edge of Decimate to heal, leaving you dead before you can retaliate.Kha'Zix Build →Details ansehen
Kha'Zix
Warum
This matchup is defined by how Kha'Zix exploits your isolation. In the open river, his Taste Their Fear deals devastating isolated damage, bursting you down before you can stack Hemorrhage. While you excel in extended fights, his initial burst from Unseen Threat coupled with stealth from Void Assault prevents you from landing the outer edge of Decimate to heal, leaving you dead before you can retaliate.
Lane-Einfluss
You lose the freedom to contest Scuttle Crabs or invade blindly. Walking alone through the river becomes a massive liability, as Kha'Zix can use Leap to ambush you. This forces you to concede early river priority and play defensively around your camps. If you get caught isolated, you will be forced to burn flash or die, giving him total control over the early neutral objectives.
Wie man spielt
Never fight Kha'Zix in the open river. When clearing, pull camps like Raptors or Krugs slightly outward so you can fight him while standing next to them, neutralizing his isolated Taste Their Fear damage. If he initiates with Leap, immediately pull him with Apprehend to disrupt his momentum, then apply Crippling Strike to slow him down. If he uses Void Assault to reposition, focus on staying near any active target to avoid isolation until you can execute him with Noxian Guillotine.
SchildeFrüher DruckThis jungle matchup heavily favors Pantheon due to how easily his Aegis Assault nullifies your primary threat tools. A well-timed shield can completely block the damage from your Noxian Guillotine or deny the healing sweep of your Decimate. Because you rely on landing that outer axe blade to survive his heavy Mortal Will empowered Shield Vault burst, this single defensive tool shuts down your sustain and execution power.Pantheon Build →Details ansehen
Pantheon
Warum
This jungle matchup heavily favors Pantheon due to how easily his Aegis Assault nullifies your primary threat tools. A well-timed shield can completely block the damage from your Noxian Guillotine or deny the healing sweep of your Decimate. Because you rely on landing that outer axe blade to survive his heavy Mortal Will empowered Shield Vault burst, this single defensive tool shuts down your sustain and execution power.
Lane-Einfluss
During early jungle skirmishes over Scuttle Crabs or during invades, Pantheon dictates the pace. His quick Shield Vault into Comet Spear combo forces you into defensive posturing. If he successfully predicts and blocks your retaliatory Decimate with his shield, you lose the trade entirely. This forces you to concede camps, ruins your clearing speed, and leaves you too low to contest neutral monsters safely.
Wie man spielt
Never cast Noxian Guillotine while his shield is active. Focus on stacking Hemorrhage using basic attacks and Crippling Strike to force him into using Aegis Assault defensively. The moment he raises his shield, interrupt the canalization or displace him by casting Apprehend, allowing you to walk behind him or land the outer edge of your Decimate. If he pokes from afar with Comet Spear, prioritize clearing camps near brush to break his vision and avoid his sudden leap.
KitenMassenkontrolleGraves dictates the pace of every skirmish because of his superior mobility and vision denial. When you attempt to close the gap, he easily slides away with Quickdraw. More importantly, if you try to swing Decimate to restore your health, he will drop Smoke Screen on you. This blind prevents you from properly spacing the outer edge of your axe, leaving you with no healing and an incomplete Hemorrhage stack.Graves Build →Details ansehen
Graves
Warum
Graves dictates the pace of every skirmish because of his superior mobility and vision denial. When you attempt to close the gap, he easily slides away with Quickdraw. More importantly, if you try to swing Decimate to restore your health, he will drop Smoke Screen on you. This blind prevents you from properly spacing the outer edge of your axe, leaving you with no healing and an incomplete Hemorrhage stack.
Lane-Einfluss
Inside the jungle and around neutral river camps, Graves constantly threatens your health pool. He can clear camps efficiently while keeping his armor high, meaning you cannot easily duel him. If you encounter him near walls, his End of the Line detonates instantly, forcing you to retreat. You will find yourself constantly giving up early Scuttle Crabs because chasing him into the river invites endless kiting and vision loss.
Wie man spielt
To survive this matchup, you must hold Apprehend until Graves commits his Quickdraw dash. If he blinds you with Smoke Screen, do not panic-cast Decimate; instead, walk out of the dark zone immediately to regain your bearings before attempting to swing. When fighting near terrain, position yourself away from solid walls to minimize the recoil damage of End of the Line. If he uses Collateral Damage to escape, let him go rather than chasing blindly.
SchildeScharmützelJax completely disrupts your combat rhythm in skirmishes. The duel revolves around Counter Strike, which blocks your basic attacks and entirely negates Crippling Strike. Because you cannot land these hits, you fail to build Hemorrhage stacks, locking you out of Noxian Might. Without your passive's massive AD boost, Jax's Relentless Assault and Empower will quickly shred you before you can ramp up.Jax Build →Details ansehen
Jax
Warum
Jax completely disrupts your combat rhythm in skirmishes. The duel revolves around Counter Strike, which blocks your basic attacks and entirely negates Crippling Strike. Because you cannot land these hits, you fail to build Hemorrhage stacks, locking you out of Noxian Might. Without your passive's massive AD boost, Jax's Relentless Assault and Empower will quickly shred you before you can ramp up.
Lane-Einfluss
This interaction makes contesting river objectives and early Scuttle Crabs extremely hazardous. If Jax finds you in the river, he can force a fight knowing his evasion window protects him from your main damage source. You cannot easily invade his camps because he can use Leap Strike to escape or close the gap when you waste Apprehend, converting your pressure into defense.
Wie man spielt
To win these duels, you must bait out Counter Strike before committing. When Jax activates his helicopter spin, use Apprehend to pull and displace him, delaying his stun while you walk out of its radius. Alternatively, use Decimate to hit him from outer range during his evasion to get your heal. Never activate Crippling Strike until his defensive spin ends, ensuring your attack reset actually stacks Hemorrhage.
SchildeMassenkontrolleNocturne holds the upper hand in direct jungle duels because his Shroud of Darkness completely nullifies your Apprehend. If he successfully absorbs your pull, he gains a massive attack speed boost while tethering you with Unspeakable Horror. Once the fear triggers, you are left unable to stack Hemorrhage or position the blade of Decimate, allowing him to shred you on his Duskbringer trail.Nocturne Build →Details ansehen
Nocturne
Warum
Nocturne holds the upper hand in direct jungle duels because his Shroud of Darkness completely nullifies your Apprehend. If he successfully absorbs your pull, he gains a massive attack speed boost while tethering you with Unspeakable Horror. Once the fear triggers, you are left unable to stack Hemorrhage or position the blade of Decimate, allowing him to shred you on his Duskbringer trail.
Lane-Einfluss
This interaction forces you to play defensively during early river skirmishes and camp contests. You cannot blindly contest Scuttle Crabs or invade, as his Paranoia allows him to bypass your vision and jump you. If you get caught and feared, you lose your jungle priority, giving Nocturne free reign to power-farm with Umbra Blades while your laners suffer from his global map pressure.
Wie man spielt
To survive and win these skirmishes, you must bait out Shroud of Darkness before using your key crowd control. Start the fight with basic attacks and Crippling Strike to slow him down. Hold your Apprehend until his spell shield expires or use it to interrupt his pursuit if he misses his Duskbringer. If Unspeakable Horror is channeled on you, immediately walk in a straight line to break the tether before the fear triggers, saving Decimate for the moment you are safe to heal.
CC-ImmunitätDuellOlaf dominates direct skirmishes because Ragnarok completely negates the utility of your Apprehend and Crippling Strike. Without these tools to space or disengage, you are forced into a brutal face-to-face brawl. Olaf's low-health scaling from Berserker Rage combined with the lifesteal from Vicious Strikes allows him to shred you with Reckless Swing faster than you can stack Hemorrhage for a lethal Noxian Guillotine.Olaf Build →Details ansehen
Olaf
Warum
Olaf dominates direct skirmishes because Ragnarok completely negates the utility of your Apprehend and Crippling Strike. Without these tools to space or disengage, you are forced into a brutal face-to-face brawl. Olaf's low-health scaling from Berserker Rage combined with the lifesteal from Vicious Strikes allows him to shred you with Reckless Swing faster than you can stack Hemorrhage for a lethal Noxian Guillotine.
Lane-Einfluss
This matchup strips away your early river dominance, making scuttle crab contests and jungle invasions highly hazardous. If Olaf catches you with an initial Undertow, his ability to run you down without fear of retaliation forces you to play defensively. You will often have to yield early objective control and rely on lane assistance, as losing a 1v1 means giving up entire jungle quadrants.
Wie man spielt
Never seek isolated duels while his ultimate is active. When he charges with Ragnarok, save Apprehend and Crippling Strike completely; casting them only self-stuns you during their animations while doing nothing to slow him down. Instead, focus entirely on landing the outer edge of Decimate to heal and sustain through his burst while retreating. If you miss this crucial heal, instantly flash away rather than trying to fight his raw DPS.
Diese Matchups sind vor allem Duelle der Ausführung: Beide Champions haben glaubwürdige Wege, die Oberhand zu gewinnen. Eine wichtige ausgewichene Fähigkeit, ein richtig antizipierter Engage oder ein einziger Positionierungsfehler können reichen, um das Duell zu entscheiden. Das Matchup zu kennen und die richtigen Fenster zum Handeln zu erkennen, ist hier besonders wichtig.
MobilitätScharmützelThis jungle matchup is a constant test of tracking. Kayn relies on Shadow Step to phase through terrain, allowing him to bypass your direct pressure and steal camps. However, when forced into a direct duel, his Reaping Slash brings him right into your preferred range. If you manage to space correctly and strike him with the outer edge of Decimate during his dash, Hemorrhage will quickly overwhelm him.Kayn Build →Details ansehen
Kayn
Warum
This jungle matchup is a constant test of tracking. Kayn relies on Shadow Step to phase through terrain, allowing him to bypass your direct pressure and steal camps. However, when forced into a direct duel, his Reaping Slash brings him right into your preferred range. If you manage to space correctly and strike him with the outer edge of Decimate during his dash, Hemorrhage will quickly overwhelm him.
Lane-Einfluss
Kayn's ability to slip through walls forces you to constantly secure your jungle entrances. He will attempt to steal your raptors or krugs and escape before you can react. If you catch him in your jungle without his terrain walk, you can trap him. Forcing an early Umbral Trespass or a clean kill drastically reduces his form transformation speed, keeping your lanes safe.
Wie man spielt
Never initiate a fight by throwing out Apprehend blindly. Save this pull to drag Kayn back when he attempts to escape through a wall with Shadow Step or immediately after he finishes his Reaping Slash dash. When he infects you with Umbral Trespass, charge your Decimate the split-second he emerges to guarantee the outer-edge heal. Use Crippling Strike to reset your attacks and stack Hemorrhage before he can react.
KitenThis matchup is a brutal battle of recovery and timing where Hemorrhage and Bloodlust constantly trade advantages. While Tryndamere relies on Battle Fury to ramp up his critical threat and heal back your damage, your goal is to stack Hemorrhage to trigger Noxian Might. The entire duel hinges on how you respond when he activates Undying Rage, as his temporary immortality can completely nullify your Noxian Guillotine if timed poorly.Tryndamere Build →Details ansehen
Tryndamere
Warum
This matchup is a brutal battle of recovery and timing where Hemorrhage and Bloodlust constantly trade advantages. While Tryndamere relies on Battle Fury to ramp up his critical threat and heal back your damage, your goal is to stack Hemorrhage to trigger Noxian Might. The entire duel hinges on how you respond when he activates Undying Rage, as his temporary immortality can completely nullify your Noxian Guillotine if timed poorly.
Lane-Einfluss
In the jungle, skirmishes over camps and river objectives turn into prolonged duels of attrition. Tryndamere will use Spinning Slash to initiate or escape, forcing you to sweep the edge of Decimate perfectly to sustain yourself. If you waste your pull early, he can freely chase you down with Mocking Shout. Neutralizing his health bar only forces his ultimate, delaying the actual kill and testing your patience during teamfight collapses.
Wie man spielt
To win the duel, you must save your crowd control for his ultimate window. The moment Tryndamere activates Undying Rage, do not use Noxian Guillotine. Instead, immediately strike him with Crippling Strike to decay his movement speed, and walk away. If he uses Spinning Slash to close the gap, immediately pull him back with Apprehend. By kiting him for those critical five seconds, you waste his immortality, leaving him completely vulnerable to a final bleed tick or execute.
DuellUnterbrechungThis jungle matchup is a tense battle of timing centered entirely on Vi's mobility versus your displacement tool. While Vi relies on Vault Breaker to initiate skirmishes or escape over walls, the entire duel hinges on Apprehend. If you interrupt her Vault Breaker mid-charge, you strip away her primary escape and repositioning tool, leaving her vulnerable to Hemorrhage stacks. However, if she lands it, she triggers Denting Blows and gains the upper hand.Vi Build →Details ansehen
Vi
Warum
This jungle matchup is a tense battle of timing centered entirely on Vi's mobility versus your displacement tool. While Vi relies on Vault Breaker to initiate skirmishes or escape over walls, the entire duel hinges on Apprehend. If you interrupt her Vault Breaker mid-charge, you strip away her primary escape and repositioning tool, leaving her vulnerable to Hemorrhage stacks. However, if she lands it, she triggers Denting Blows and gains the upper hand.
Lane-Einfluss
Since this is a jungle matchup, early skirmishes over scuttle crabs or river vision dictate the pace. A missed Apprehend gives Vi the green light to dive your laners with Cease and Desist or safely farm her camps. Conversely, successfully canceling her dash in the river secures you the neutral objective, forces her to burn flash, and heavily delays her Blast Shield scaling, shifting jungle pressure entirely in your favor.
Wie man spielt
Never initiate a fight by opening with Apprehend. Instead, walk up with Crippling Strike to slow her, forcing her to either fight or charge Vault Breaker to escape. Keep your eyes on her character model; the moment she starts pulling back her fist to charge her dash, pull her immediately. If she bypasses this dynamic by targeting you directly with Cease and Desist, prepare to hit Decimate the exact millisecond her ultimate animation ends to heal back her burst.
SchildeScharmützelThis jungle duel is a relentless battle of recovery where Darius relies on Hemorrhage stacks and Decimate heals to outlast Volibear's repeated Frenzied Maul bites. Because both champions thrive in drawn-out skirmishes, the winner is decided by who optimizes their defensive windows. Specifically, Volibear's power spike during fights relies on landing Sky Splitter for its massive shield, which can completely absorb Darius's execution pressure from Noxian Guillotine.Volibear Build →Details ansehen
Volibear
Warum
This jungle duel is a relentless battle of recovery where Darius relies on Hemorrhage stacks and Decimate heals to outlast Volibear's repeated Frenzied Maul bites. Because both champions thrive in drawn-out skirmishes, the winner is decided by who optimizes their defensive windows. Specifically, Volibear's power spike during fights relies on landing Sky Splitter for its massive shield, which can completely absorb Darius's execution pressure from Noxian Guillotine.
Lane-Einfluss
In the jungle, this matchup dictates map control through high-stakes 1v1s over Scuttle Crabs or during counter-ganks. Since neither champion can easily escape once committed, missing a critical spell means giving up absolute jungle priority. If Volibear gets his shield and double Frenzied Maul heal, Darius is forced out of his own camps, whereas a successful disruption secures neutral objectives and allows Darius to snowball through early river skirmishes.
Wie man spielt
To win the 1v1, never initiate with Apprehend. Keep this tool ready for the exact moment Volibear casts Sky Splitter. As soon as you see the lightning indicator on the ground, use Apprehend to drag him out of his own circle, denying him both the shield and the lightning damage. While his shield is down and his Thundering Smash is on cooldown, immediately retaliate with Crippling Strike to slow him, guaranteeing an outer-ring hit of Decimate to stack Hemorrhage and secure the execution with Noxian Guillotine.
MechanikScharmützelThis jungle matchup is a high-stakes mind game centered on Warrior Trickster. Wukong's primary goal is to bait your Decimate or absorb your Noxian Guillotine using his clone. If he successfully intercepts these crucial spells, you forfeit your healing and ultimate reset. Conversely, if you force him to deploy his decoy early, your passive Hemorrhage stacks will easily melt through the bonus armor of Stone Skin.Wukong Build →Details ansehen
Wukong
Warum
This jungle matchup is a high-stakes mind game centered on Warrior Trickster. Wukong's primary goal is to bait your Decimate or absorb your Noxian Guillotine using his clone. If he successfully intercepts these crucial spells, you forfeit your healing and ultimate reset. Conversely, if you force him to deploy his decoy early, your passive Hemorrhage stacks will easily melt through the bonus armor of Stone Skin.
Lane-Einfluss
River skirmishes and jungle duels hinge entirely on who blinks first during these cooldown windows. When Wukong initiates with Nimbus Strike and disrupts you with Cyclone, committing your main damage too early is disastrous. Missing your outer axe on a clone strips away your dueling power, forcing you to cede control of neutral camps and leaving your lanes vulnerable to his flanking maneuvers.
Wie man spielt
To outplay the monkey king, never lead with Decimate. Apply pressure first with basic attacks and Crippling Strike to force his hand. Save your Apprehend to pull him back in only after he emerges from the invisibility of Warrior Trickster. If you suspect he has cloned, delay your Noxian Guillotine and track his movement; securing five stacks of Hemorrhage on the real target guarantees you win the extended skirmish.
RegenerationHinrichtungThis jungle duel revolves entirely around a razor-thin health margin. Warwick relies on Eternal Hunger to survive at low health, baiting you into prolonged skirmishes where his healing spikes. However, Darius possesses the ultimate counter-mechanism: Noxian Guillotine. Because your ultimate deals true damage scaling with his missing health, you can completely bypass his low-HP sustain, cutting him down before his recovery kicks in.Warwick Build →Details ansehen
Warwick
Warum
This jungle duel revolves entirely around a razor-thin health margin. Warwick relies on Eternal Hunger to survive at low health, baiting you into prolonged skirmishes where his healing spikes. However, Darius possesses the ultimate counter-mechanism: Noxian Guillotine. Because your ultimate deals true damage scaling with his missing health, you can completely bypass his low-HP sustain, cutting him down before his recovery kicks in.
Lane-Einfluss
In the jungle, this tension means neither of you can easily secure crabs or invade without risking a lethal 1v1. When contesting camps, Warwick will try to drag out fights, using Jaws of the Beast to match your movement and stay healthy. If you fail to execute him quickly, his Blood Hunt passive triggers, turning a close duel into a swift disaster that forces you out of your own jungle.
Wie man spielt
To win, you must stack Hemorrhage carefully using Crippling Strike and Decimate while keeping him at arm's length. Never cast Noxian Guillotine while his Primal Howl damage reduction is active; wait out the fear, then strike. If Warwick initiates with Infinite Duress, survive the suppression, pull him back with Apprehend to interrupt his momentum, and immediately unleash your full execution combo before his claws can heal him back to safety.
ScharmützelDuellIn this jungle duel, Gwen's Hallowed Mist offers her zero protection because you thrive in melee range where you can easily pull her back with Apprehend. However, you cannot afford to drag out the skirmish. If you fail to trigger Noxian Might quickly, her relentless Snip Snip! coupled with the percent-health damage of A Thousand Cuts will shred your health bar faster than you can heal with Decimate.Gwen Build →Details ansehen
Gwen
Warum
In this jungle duel, Gwen's Hallowed Mist offers her zero protection because you thrive in melee range where you can easily pull her back with Apprehend. However, you cannot afford to drag out the skirmish. If you fail to trigger Noxian Might quickly, her relentless Snip Snip! coupled with the percent-health damage of A Thousand Cuts will shred your health bar faster than you can heal with Decimate.
Lane-Einfluss
This scaling dynamic dictates early jungle pathing and objective contestation. You hold the upper hand in early Scuttle Crab duels and level 3 skirmishes where your early stacks dominate. However, as the game progresses, Gwen's clearing speed accelerates dramatically. If you do not secure an early lead before she unlocks Needlework, she will safely farm her jungle, leaving you unable to contest objectives without risking a swift demise to her true damage cuts.
Wie man spielt
To win this duel, you must actively bait her Skip 'n Slash before committing your abilities. Never initiate with Apprehend; instead, walk up to her, strike with Crippling Strike, and save your pull to catch her when she tries to dash away. If she starts channeling a fully stacked Snip Snip!, immediately use the outer edge of Decimate while moving sideways to dodge her center snips, ensuring you stack Hemorrhage rapidly for a fatal Noxian Guillotine.
RückzugFrüher DruckThis jungle duel is a high-stakes mechanical dance centered on your healing and execution thresholds. While your Hemorrhage stacks can overpower Lee Sin in extended skirmishes, his mobility allows him to dictate the pace. The matchup hinges entirely on Dragon's Rage; a well-timed kick can launch you away during your Decimate windup to deny crucial healing, or displace you mid-air to completely disrupt your Noxian Guillotine execution.Lee Sin Build →Details ansehen
Lee Sin
Warum
This jungle duel is a high-stakes mechanical dance centered on your healing and execution thresholds. While your Hemorrhage stacks can overpower Lee Sin in extended skirmishes, his mobility allows him to dictate the pace. The matchup hinges entirely on Dragon's Rage; a well-timed kick can launch you away during your Decimate windup to deny crucial healing, or displace you mid-air to completely disrupt your Noxian Guillotine execution.
Lane-Einfluss
Jungle skirmishes around Epic Monsters and Scuttle Crabs are incredibly volatile. If Lee Sin has his ultimate available, you cannot mindlessly invade or force objectives, as he can disengage the fight instantly. His Safeguard and Sonic Wave give him superior terrain traversal, meaning any health trade you lose to a denied Decimate forces you to concede your camps or drop priority, directly impacting your gold income and map pressure.
Wie man spielt
Never initiate a fight with Decimate if Lee Sin has Dragon's Rage ready. Instead, stack Hemorrhage using Crippling Strike and basic attacks first. Force him to use his ultimate defensively to create space. If he kicks you away, use Apprehend immediately to pull him back in as soon as the displacement ends. Save your Noxian Guillotine until his safeguard options are exhausted or when he is locked in his Sonic Wave dash animation.
Früher DruckScharmützelThis jungle duel revolves around surviving Xin Zhao's explosive entry. When Xin Zhao jumps in with Audacious Charge and unleashes Three Talon Strike, he seeks to burst you down before you can react. However, if you endure this initial crowd control, your passive Hemorrhage becomes the deciding factor. Once you survive his knockup, the duel shifts heavily in your favor as you stack your bleed.Xin Zhao Build →Details ansehen
Xin Zhao
Warum
This jungle duel revolves around surviving Xin Zhao's explosive entry. When Xin Zhao jumps in with Audacious Charge and unleashes Three Talon Strike, he seeks to burst you down before you can react. However, if you endure this initial crowd control, your passive Hemorrhage becomes the deciding factor. Once you survive his knockup, the duel shifts heavily in your favor as you stack your bleed.
Lane-Einfluss
In the jungle, this parity forces highly calculated skirmishes around the Scuttle Crabs or during early invades. Neither of you can blindly force an encounter. If Xin Zhao misses Wind Becomes Lightning, his dueling threat drops, allowing you to invade. Conversely, if he catches you while Decimate is down, he will invade your camps, disrupting your clear and forcing your lanes to play defensively to avoid his ganks.
Wie man spielt
Do not panic when Xin Zhao engages with Audacious Charge. Hold your Decimate until after he finishes his Three Talon Strike knockup; using it too early guarantees he will dodge the outer blade by staying on top of you. Once you are knocked up and land, immediately pull him back with Apprehend if he tries to disengage, then use Crippling Strike to slow him, ensuring you hit the outer edge of Decimate to heal and secure five Hemorrhage stacks for Noxian Guillotine.
AusweichenDuellThis jungle matchup is a tense duel of reflexes centered entirely on how Master Yi uses Alpha Strike. When you swing Decimate, he can become untargetable to dodge the outer blade, denying your healing and a stack of Hemorrhage. If he successfully evades this critical swing, his passive Double Strike combined with Wuju Style will easily shred your health bar before you can reach Noxian Might.Master Yi Build →Details ansehen
Master Yi
Warum
This jungle matchup is a tense duel of reflexes centered entirely on how Master Yi uses Alpha Strike. When you swing Decimate, he can become untargetable to dodge the outer blade, denying your healing and a stack of Hemorrhage. If he successfully evades this critical swing, his passive Double Strike combined with Wuju Style will easily shred your health bar before you can reach Noxian Might.
Lane-Einfluss
In the jungle, this mechanical check dictates who controls the river and neutral objectives. You cannot blindly invade or force Scuttle Crab fights because a premature Decimate invitation gives Master Yi the green light to engage. If he forces your flash or secures an early kill by dodging your main heal, he will run away with the game using Highlander, completely taking over your camps.
Wie man spielt
To win these skirmishes, you must hold your Decimate. Start the fight with auto-attacks and Crippling Strike to slow him down. If he panics and activates Alpha Strike to close the distance or dodge a phantom threat, wait for him to reappear, pull him back with Apprehend, and only then execute your Decimate to guarantee the outer ring hits. If he channels Meditate, immediately interrupt it with Apprehend to stop his healing.
Diese Champions tun sich meist schwer, auf deine Hauptstärken zu reagieren, was dir mehr Freiheit im Matchup gibt. Du hast oft mehrere Möglichkeiten, sie unter Druck zu setzen und Trades zu deinen Gunsten zu erzwingen. Nutze diesen Vorteil, um das Tempo zu bestimmen, statt ihnen Zeit zu geben, wieder in eine komfortable Position zu kommen.
TradesAusweichenDarius holds a distinct advantage in jungle skirmishes because his Hemorrhage stacks quickly overpower Ambessa in extended duels. The confrontation hinges entirely on Decimate. To survive your raw damage, Ambessa is forced to use Drakehound's Step to dash inside your outer blade limit. Denying her this inner safety ensures you land the heal and outer-edge damage, easily setting up an unstoppable Noxian Guillotine.Ambessa Build →Details ansehen
Ambessa
Warum
Darius holds a distinct advantage in jungle skirmishes because his Hemorrhage stacks quickly overpower Ambessa in extended duels. The confrontation hinges entirely on Decimate. To survive your raw damage, Ambessa is forced to use Drakehound's Step to dash inside your outer blade limit. Denying her this inner safety ensures you land the heal and outer-edge damage, easily setting up an unstoppable Noxian Guillotine.
Lane-Einfluss
This matchup dynamic dictates complete dominance over jungle camps and neutral objectives. Ambessa cannot safely contest the Scuttle Crab or Epic Monsters when your health pool is constantly replenished. Your invades become oppressive; if she attempts to defend her camps, she must perfectly execute her dashes. A single failed prediction on her Drakehound's Step allows you to heal off Decimate, turning her jungle into your personal territory.
Wie man spielt
Never lead your engage with Decimate. Begin skirmishes with basic attacks and Crippling Strike to severely decay her movement speed. Watch her movement carefully; once she activates Drakehound's Step to close the gap, immediately use Apprehend to pull her back and reposition yourself to land the outer edge of your blade. Holding your healing tool until she has exhausted her mobility ensures you always dictate the spacing, leaving her completely vulnerable to Noxian Guillotine.
Früher DruckKartendruckShyvana's early game is highly vulnerable due to her complete lack of crowd control. Since she cannot stop you from sticking to her, you can aggressively invade her camps. If you catch her, you easily apply five stacks of Hemorrhage. Her Burnout offers movement speed but no escape from Apprehend, meaning she cannot disengage once pulled in, ensuring you win any direct duel before she can stack Fury of the Dragonborn.Shyvana Build →Details ansehen
Shyvana
Warum
Shyvana's early game is highly vulnerable due to her complete lack of crowd control. Since she cannot stop you from sticking to her, you can aggressively invade her camps. If you catch her, you easily apply five stacks of Hemorrhage. Her Burnout offers movement speed but no escape from Apprehend, meaning she cannot disengage once pulled in, ensuring you win any direct duel before she can stack Fury of the Dragonborn.
Lane-Einfluss
This matchup turns the jungle into a relentless hunt where you dictate the tempo. Shyvana desperately wants to power-farm to stack Fury of the Dragonborn, but your constant invasion forces her to abandon her camps or die trying to defend them. By stealing her monsters, you delay her Dragon's Descent, neutralizing her teamfight presence while you secure early neutral objectives with the threat of your Noxian Guillotine.
Wie man spielt
Start by warding her raptors or blue buff to track her pathing. When you invade, wait for her to waste Burnout on camp clearing before engaging. Do not initiate with Apprehend; instead, walk up, slow her with Crippling Strike, and save your pull for when she attempts to flee. If she manages to turn with Flame Breath, use the outer edge of Decimate to heal through her damage and secure the execution with Noxian Guillotine.
DuellScharmützelDarius completely dominates Viego in any extended duel because Viego cannot match the raw power of Hemorrhage. While Viego relies on landing Spectral Maw to set up his burst, you can easily dodge the stun or interrupt his dash. Once you avoid that crowd control, you can freely stack your passive, and Viego's Blade of the Ruined King simply lacks the burst to execute you before Noxian Guillotine is ready.Viego Build →Details ansehen
Viego
Warum
Darius completely dominates Viego in any extended duel because Viego cannot match the raw power of Hemorrhage. While Viego relies on landing Spectral Maw to set up his burst, you can easily dodge the stun or interrupt his dash. Once you avoid that crowd control, you can freely stack your passive, and Viego's Blade of the Ruined King simply lacks the burst to execute you before Noxian Guillotine is ready.
Lane-Einfluss
This matchup translates into relentless jungle pressure. You can confidently invade Viego's camps, forcing him to abandon his farm or die. Because Viego needs walls to utilize the camouflage from Harrowed Path, you can easily corner him in tight spaces. Forcing him out of his own jungle deprives his lanes of early gank support, securing objective priority across the map while he struggles to gather souls for Sovereign's Domination.
Wie man spielt
When invading, track Viego's Spectral Maw. Do not throw your Apprehend randomly; hold it to pull him back if he tries to dash away or to cancel his stun charge. If he hides inside Harrowed Path, sweep with Decimate to reveal him and heal up. Should he attempt to turn the fight with Heartbreaker, apply Crippling Strike immediately to ruin his mobility, allowing you to reach five stacks and execute him.
RüstungAbsoluter SchadenRammus relies entirely on stacking armor to reflect physical damage back at you. However, Darius naturally counters this defense. The passive armor penetration granted by your Apprehend completely undermines his Defensive Ball Curl bonuses. Furthermore, once you stack Hemorrhage, your Noxian Guillotine deals massive true damage that ignores his bolstered defensive stats, turning his tankiness into a liability during direct jungle duels.Rammus Build →Details ansehen
Rammus
Warum
Rammus relies entirely on stacking armor to reflect physical damage back at you. However, Darius naturally counters this defense. The passive armor penetration granted by your Apprehend completely undermines his Defensive Ball Curl bonuses. Furthermore, once you stack Hemorrhage, your Noxian Guillotine deals massive true damage that ignores his bolstered defensive stats, turning his tankiness into a liability during direct jungle duels.
Lane-Einfluss
This matchup allows you to invade Rammus aggressively. He cannot contest you at camps because his slow clear makes him vulnerable to your early power. If he attempts to escape with Powerball, you can pull him back. Your ability to shred him means he must concede river priority and Scuttle Crabs, drastically limiting his map pressure and forcing him to take suboptimal, desperate ganks.
Wie man spielt
When fighting Rammus, save Apprehend to cancel his Powerball escape or interrupt his charge before he reaches your allies. When he activates Defensive Ball Curl, do not panic; use Crippling Strike and Decimate to quickly apply Hemorrhage stacks. Once you reach maximum stacks, immediately unleash Noxian Guillotine to execute him through his temporary defenses. If he targets you with Frenzying Taunt, let your passive damage tick up while waiting to strike back.
MobilitätHinrichtungYou hold a massive advantage in direct skirmishes because your Apprehend completely shuts down Ekko's primary mobility tool, Phase Dive. By pulling him mid-dash, you prevent him from easily triggering his Z-Drive Resonance burst. This sudden disruption leaves him vulnerable to rapid stacks of Hemorrhage, forcing him to panic-cast Chronobreak purely for survival rather than using it to deal massive return damage.Ekko Build →Details ansehen
Ekko
Warum
You hold a massive advantage in direct skirmishes because your Apprehend completely shuts down Ekko's primary mobility tool, Phase Dive. By pulling him mid-dash, you prevent him from easily triggering his Z-Drive Resonance burst. This sudden disruption leaves him vulnerable to rapid stacks of Hemorrhage, forcing him to panic-cast Chronobreak purely for survival rather than using it to deal massive return damage.
Lane-Einfluss
This interaction transforms the river and neutral camps into a danger zone for Ekko. You can fearlessly invade his jungle, knowing he cannot comfortably trade or escape if caught. When skirmishing over objectives, Ekko is forced to play extremely passively, delaying his item spikes. If he tries to set up a stun with Parallel Convergence, your threat of a pull keeps him at a distance, securing you priority.
Wie man spielt
Never initiate a fight by wasting Apprehend. Instead, walk up to Ekko, slowing him with Crippling Strike and hitting him with the outer edge of Decimate. Save your hook strictly for the moment he activates Phase Dive to dash away or jump on you. Position yourself between him and his hologram, making it easy to predict his retreat path. Once you cancel his dash, follow up immediately to stack Hemorrhage and force an early Chronobreak.
Früher DruckTarnungDarius completely dominates the early jungle phase because Evelynn lacks any dueling power before she unlocks Demon Shade and Last Caress. If she tries to clear, you can walk straight into her camps. Her Hate Spike and Allure cannot burst you down, and you can easily stack Hemorrhage during these prolonged early skirmishes, leaving her with no escape or response.Evelynn Build →Details ansehen
Evelynn
Warum
Darius completely dominates the early jungle phase because Evelynn lacks any dueling power before she unlocks Demon Shade and Last Caress. If she tries to clear, you can walk straight into her camps. Her Hate Spike and Allure cannot burst you down, and you can easily stack Hemorrhage during these prolonged early skirmishes, leaving her with no escape or response.
Lane-Einfluss
By invading her early camps, you disrupt her pathing and delay her access to Demon Shade. Since she cannot contest you without her ultimate, she is forced to give up her camps or die trying to defend them. This denies her the gold needed for her assassin spikes, rendering her map pressure non-existent and securing early neutral control for your laners.
Wie man spielt
Start by taking your first buff quickly, then immediately march into her side of the jungle. Track her starting position and catch her at her second buff. If she marks you with Allure, do not retreat; instead, use Apprehend to pull her in before the charm triggers, then execute her with Crippling Strike and Decimate. If she manages to escape using Last Caress, immediately take her remaining camps to permanently starve her.
MobilitätUnterbrechungThis matchup tilts heavily in your favor because you can completely deny Talon's signature mobility. While he relies on Assassin's Path to slip over walls and escape fights, your Apprehend acts as a hard stop. Snatching him out of his wall-vault animation leaves him stranded in melee range. Without his escape, he cannot survive a prolonged duel against Hemorrhage stacks, especially once you trigger Noxian Might.Talon Build →Details ansehen
Talon
Warum
This matchup tilts heavily in your favor because you can completely deny Talon's signature mobility. While he relies on Assassin's Path to slip over walls and escape fights, your Apprehend acts as a hard stop. Snatching him out of his wall-vault animation leaves him stranded in melee range. Without his escape, he cannot survive a prolonged duel against Hemorrhage stacks, especially once you trigger Noxian Might.
Lane-Einfluss
In the jungle, this interaction strips Talon of his safety when contesting Scuttle Crabs or invading your camps. He cannot safely face-check or cross paths with you near walls, forcing him to take inefficient, longer pathings. If you catch him attempting to clear with Rake, your threat of pulling him mid-vault prevents him from securing neutral objectives, severely delaying his lethality spikes and bleeding his jungle pressure.
Wie man spielt
Position yourself closely to the terrain Talon is likely to hop over when contesting objectives. Never open a skirmish with Apprehend; instead, initiate with Crippling Strike to slow his movement, followed by Decimate. Save your hook exclusively for the moment he panics and activates Assassin's Path to vault away. If he tries to vanish using Shadow Assault, delay your actions slightly and prepare to pull him back the instant his silhouette approaches a wall.
VerlangsamungMobilitätDarius dominates the jungle skirmishes because Hecarim relies on high movement speed to fuel his attack damage via Warpath. When Hecarim charges in with Devastating Charge, hitting him with Crippling Strike immediately neutralizes his momentum. This severe slow instantly tanks his bonus AD, leaving his Rampage sweeps incredibly weak. Without his speed-to-damage conversion, Hecarim cannot match your sustained damage in a direct duel.Hecarim Build →Details ansehen
Hecarim
Warum
Darius dominates the jungle skirmishes because Hecarim relies on high movement speed to fuel his attack damage via Warpath. When Hecarim charges in with Devastating Charge, hitting him with Crippling Strike immediately neutralizes his momentum. This severe slow instantly tanks his bonus AD, leaving his Rampage sweeps incredibly weak. Without his speed-to-damage conversion, Hecarim cannot match your sustained damage in a direct duel.
Lane-Einfluss
This interaction gives you absolute dominance during early scuttle crab contests and jungle invasions. Since Hecarim relies on Spirit of Dread to sustain through fights, you can easily out-damage his healing by stacking Hemorrhage. Because he cannot safely duel you near camps, he is forced to concede priority, delaying his gold generation and preventing him from using Onslaught of Shadows to gank lanes with maximum momentum.
Wie man spielt
Position yourself directly between Hecarim and his nearest escape path when contesting camps. Hold Apprehend to disrupt his Devastating Charge mid-flight, or to pull him back if he tries to leap away with Onslaught of Shadows. Once he is close, auto-attack and immediately reset with Crippling Strike to crush his movement speed and passive damage. Finish him with Noxian Guillotine once Hemorrhage is fully stacked, ensuring you hit the outer edge of Decimate to stay healthy during the duel.
UnterbrechungZonenkontrolleDarius dominates this jungle duel because his Apprehend completely shuts down Nunu & Willump's primary engage tool. Whenever Nunu rolls in with Biggest Snowball Ever!, a well-timed pull cancels the charge instantly, leaving him vulnerable. Without the knock-up setup, Nunu cannot trigger Call of the Freljord effectively in 1v1s, allowing you to easily stack Hemorrhage during his long cooldown windows.Nunu & Willump Build →Details ansehen
Nunu & Willump
Warum
Darius dominates this jungle duel because his Apprehend completely shuts down Nunu & Willump's primary engage tool. Whenever Nunu rolls in with Biggest Snowball Ever!, a well-timed pull cancels the charge instantly, leaving him vulnerable. Without the knock-up setup, Nunu cannot trigger Call of the Freljord effectively in 1v1s, allowing you to easily stack Hemorrhage during his long cooldown windows.
Lane-Einfluss
This interaction shifts the early jungle pressure entirely in your favor. Nunu relies on fast-paced map rotations, but knowing you can negate his gank momentum makes his invades incredibly risky. When he fails a Biggest Snowball Ever! gank due to your counter-gank intervention, he loses his clear speed advantage, enabling you to steal camps and secure Scuttle Crabs while his crowd control is on cooldown.
Wie man spielt
Never use Apprehend to initiate a skirmish against Nunu. Always hold it as a reactive counter-tool. When you spot him rolling a snowball towards you or an ally, face him directly and pull him out of it. If he attempts to escape or channel Absolute Zero to shield himself, use that same pull to disrupt the channel, then immediately follow up with Crippling Strike and a outer-edge Decimate to stack your passive before executing with Noxian Guillotine.
ScharmützelJarvan IV relies on locking down targets with Cataclysm, but trapping you in his arena plays directly into your hands. Instead of securing a kill, he forces a close-quarters brawl where he cannot escape your basic attacks. This allows you to rapidly stack Hemorrhage. Once you reach maximum stacks inside his own wall, Noxian Might ensures you easily execute him with Noxian Guillotine.Jarvan IV Build →Details ansehen
Jarvan IV
Warum
Jarvan IV relies on locking down targets with Cataclysm, but trapping you in his arena plays directly into your hands. Instead of securing a kill, he forces a close-quarters brawl where he cannot escape your basic attacks. This allows you to rapidly stack Hemorrhage. Once you reach maximum stacks inside his own wall, Noxian Might ensures you easily execute him with Noxian Guillotine.
Lane-Einfluss
This interaction completely dictates river skirmishes and objective contests. Jarvan IV cannot safely contest Scuttle Crabs or initiate fights in the jungle, as his primary engagement tool becomes his own death trap. You hold immense pressure during counter-ganks; if he dives your laners, your arrival guarantees a turning point, forcing him to abandon his own jungle.
Wie man spielt
When he initiates with Cataclysm, do not panic and waste your Flash. Instead, use Crippling Strike immediately to slow him, keeping him in range. Position yourself near the edge of his arena to ensure the outer blade of Decimate strikes him for maximum damage and healing. Always hold Apprehend to pull him back if he tries to escape over his wall using Demacian Standard and Dragon Strike.
ScharmützelMordekaiser's Realm of Death is his ultimate tool to isolate targets, but against Darius, it backfires completely. By pulling Darius into a mandatory, enclosed 1v1, Mordekaiser guarantees that Darius can safely build max stacks of Hemorrhage. Without external interference, Darius easily reaches Noxian Might and executes Mordekaiser with Noxian Guillotine before Indestructible can generate a shield large enough to absorb the true damage.Mordekaiser Build →Details ansehen
Mordekaiser
Warum
Mordekaiser's Realm of Death is his ultimate tool to isolate targets, but against Darius, it backfires completely. By pulling Darius into a mandatory, enclosed 1v1, Mordekaiser guarantees that Darius can safely build max stacks of Hemorrhage. Without external interference, Darius easily reaches Noxian Might and executes Mordekaiser with Noxian Guillotine before Indestructible can generate a shield large enough to absorb the true damage.
Lane-Einfluss
This matchup dynamic changes how jungle skirmishes over objectives play out. Since Mordekaiser cannot safely use Realm of Death on you without risking his own life, he is forced to target your allies or hold his ultimate. This grants you immense zone control during river fights, as you can aggressively search for him, knowing that any forced duel in the jungle corridors plays directly into your hands.
Wie man spielt
When fighting Mordekaiser, save Apprehend to pull him back if he tries to disengage after feeling the pressure of your Hemorrhage stacks. If he opens with Death's Grasp, use Decimate immediately to heal from the outer edge while he is in animation lock. Should he trap you in Realm of Death, do not panic; immediately reset your auto-attack with Crippling Strike to speed up your stacks and prepare Noxian Guillotine for the moment his Indestructible shield decays.
Vorteil: kanonisches Urteil von Wild Rift Core (−3 bis +3), aus Sicht des in der Zeile genannten Champions. Siegrate und Pickrate: die eigenen Werte des Gegners in dieser Rolle — Wild Rift CN · Challenger, Patch 7.3b. Keine Siegrate im direkten Duell.
Vorteil: kanonisches Urteil von Wild Rift Core (−3 bis +3), aus Sicht des in der Zeile genannten Champions. Siegrate und Pickrate: die eigenen Werte des Gegners in dieser Rolle — Wild Rift CN · Challenger, Patch 7.3b. Keine Siegrate im direkten Duell.
Wie man diesen Champion kontert
Konter-Winkel
Darius verliert nicht nur gegen stärkere Duellanten, sondern hauptsächlich gegen Champions, die seine Kernmechanik brechen: das Aufstapeln und Aufrechterhalten von Kontakt. Konter sind nicht nur Lane-Gewinner, sondern diejenigen, die ihn daran hindern, sein Spiel zu spielen. Das Verständnis dieser Profile hilft dabei, Situationen zu antizipieren, in denen er ineffektiv wird, auch ohne direkt unterlegen zu sein.
Patch-Kontext
Darius-Konter nutzen entweder seinen langsamen Engage oder seine Abhängigkeit von langen Trades aus. Fernkampf- oder sehr mobile Picks verweigern ihm das Stacking, während einige Bruiser ihn aussustainen und ausspielen können. Der gemeinsame Nenner ist seine Unfähigkeit, sein Tempo aufzuzwingen.
Schnell gelesen
Fernkämpfer verweigern ihm den Zugang zu Kämpfen.
Mobile Champions weichen seinen Stacks aus.
Duellanten können seine Trades gegen ihn wenden.
Konter-Archetypen
Ranged Kite
Diese Champions hindern Darius daran, in seinen Kampfzyklus einzutreten. Sie spielen auf Distanz, kontrollieren Wellen und bestrafen jeden Anflug. Ohne Zugang zu Zielen kann Darius nicht stacken oder sustainen, was seine Win Condition komplett zunichtemacht.
Wie sich der Champion anpasst. Spiele die Wave, warte auf Fehler und nutze Ghost nur für garantierte All-Ins.
Mechanische Duellanten
Sie können Stacks sustainen oder vermeiden und ihn ausspielen. Ihre Fähigkeit, seine Timings zu dodgen oder zu bestrafen, macht Trades selbst früh unzuverlässig.
Fiora bricht Dariuss Muster komplett. Sie kann wichtige Fähigkeiten dodgen und seine Engages bestrafen. Das Duell wird zu einem Präzisionswettbewerb statt zu einem reinen Kraftvergleich.
Häufige Fehler gegen ihn
Häufige Fehler gegen ihn
Erzwingen von langen Trades gegen Darius.
Ignorieren seines Execution Thresholds.
Schlechtes Spacing Management.
Öffnungen für E lassen.
Gruppieren ohne Kontrolle.
Coach-Notizen
Spiel nicht sein Spiel.
Brich sein Tempo, nicht nur das Duell.
FAQ
Warum ist Darius schwach gegen Fernkämpfer?
Weil er seine Ziele nicht leicht erreichen kann. Sein Kit hängt von anhaltendem Kontakt ab, und ohne diesen kann er keine Stapel aufbauen oder aufrechterhalten. Fernkämpfer kontrollieren die Distanz und neutralisieren seinen Einfluss.
Kann er Fiora schlagen?
Ja, aber nur, wenn Fiora Fehler macht. Das Matchup ist sehr anspruchsvoll und hängt vom Timing der Fähigkeiten ab. Auf hohem Niveau ist es normalerweise ungünstig.
Wie bestraft man ihn auf der Lane?
Indem man die Distanz managt und lange Trades vermeidet. Du musst sein Tempo brechen und ihm niemals erlauben, Stapel zu erreichen.
Was ist seine wahre Schwäche?
Sein Zugang zu Zielen. Wenn er nicht in Kämpfe eingreifen kann, wird er nutzlos.