August 2026 · Patch 7.2d
Assassin · MID · JUNGLE

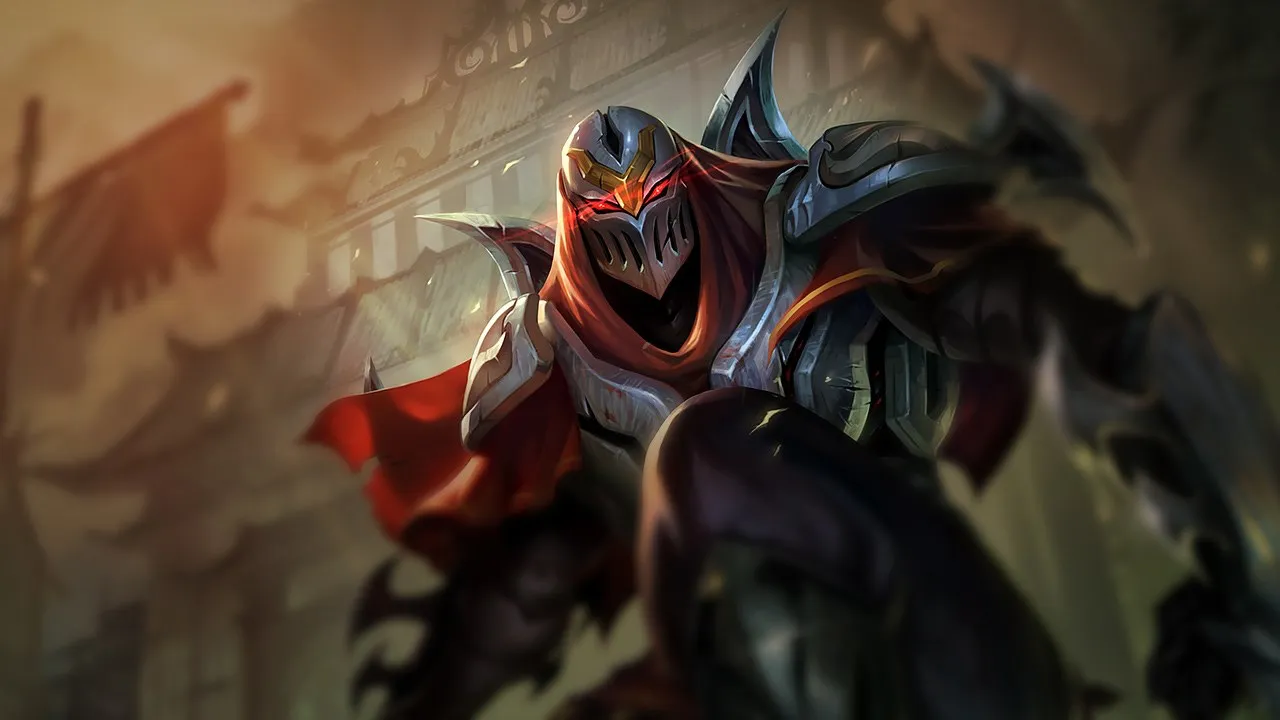
Zed Wild Rift Counter-Guide

Zed tut sich schwer gegen Carries mit invulnerabilities oder shields, die seine Exekutionen zunichtemachen. Hoher sustain oder anti-death Effekte verringern seinen Assassination-Impact. Gute vision in seinen Roaming-Zonen reduziert pick Gelegenheiten.

★ MID · JUNGLE Tier S+
SCHADEN
UTIL
TANK
DIFF
Win 49.4% #65 · ↑5pt
Pick 3.7% #19
Ban 1.8% #70

Zed Wild Rift Counter-Guide ★ Counter Sheet

Hard Counters

2

Diese Champions haben ein Build und einen Spielstil, der deinen direkt überlegen ist, was die Kontrolle der Lane und das Farmen extrem schwierig machen kann. Ihr Kit kann deine Kernstärken neutralisieren oder dich bestrafen, sobald du versuchst, deinen gewohnten Spielplan umzusetzen. In diesen Matchups geht es oft darum, Fehler zu minimieren und nach Wegen zu suchen, außerhalb der direkten Konfrontation zu gewinnen.

Malphite

Malphite

ad_counterburst_negation Zed's reliance on physical burst is completely neutralized by Malphite's structural design. His high base armor, bolstered by the passive armor multiplier of Thunderclap, renders him virtually immune to the delayed pop of Death Mark. Even if you land multiple Razor Shuriken and Shadow Slash strikes during your ultimate window, his Granite Shield absorbs the initial impact, severely mitigating the final mark trigger. Details ansehen
Malphite

Warum

Zed's reliance on physical burst is completely neutralized by Malphite's structural design. His high base armor, bolstered by the passive armor multiplier of Thunderclap, renders him virtually immune to the delayed pop of Death Mark. Even if you land multiple Razor Shuriken and Shadow Slash strikes during your ultimate window, his Granite Shield absorbs the initial impact, severely mitigating the final mark trigger.

Lane-Einfluss

Trading with Malphite is a losing battle. He will shrug off your Living Shadow harass and retaliate with Seismic Shard, stealing your movement speed to prevent you from disengaging. If you attempt to trigger Contempt for the Weak with melee attacks, his Ground Slam cripples your attack speed. You are forced to use Razor Shuriken purely to last-hit from safety, giving up mid-lane priority.

Wie man spielt

Abandon all lane-kill pressure and pivot your build path immediately toward armor penetration and wave clearance. Save Living Shadow as an escape tool to dodge his Unstoppable Force rather than using it for aggressive poke. If he freezes, use Razor Shuriken to farm from range. Once he reaches his ultimate, stay at maximum range; if he misses Unstoppable Force, that is your cue to shove and roam.

Vollständiges Profil →
Lissandra

Lissandra

hard_counterdive_defense Lissandra's kit completely shuts down your assassination attempts. When you initiate with Death Mark, she can immediately self-cast Frozen Tomb, neutralizing your entire burst window and leaving you stationary. As you emerge from your ultimate, she easily chains Ring of Frost to lock you down under her own terms, turning your primary offensive tool into a self-inflicted death trap. Details ansehen
Lissandra

Warum

Lissandra's kit completely shuts down your assassination attempts. When you initiate with Death Mark, she can immediately self-cast Frozen Tomb, neutralizing your entire burst window and leaving you stationary. As you emerge from your ultimate, she easily chains Ring of Frost to lock you down under her own terms, turning your primary offensive tool into a self-inflicted death trap.

Lane-Einfluss

This matchup forces you into defensive passivity once both of you reach ultimate status. Lissandra will constantly shove waves using Ice Shard, leaving you to farm under turret using Razor Shuriken and Contempt for the Weak. Because you cannot threaten her with an all-in, she gains free priority to roam using Glacial Path, while you are stuck trying to match her clear without wasting Living Shadow.

Wie man spielt

You must bait her defensive tools before committing. Use Living Shadow combined with Shadow Slash and Razor Shuriken to poke her from a safe distance, attempting to force her to use Glacial Path defensively. Never initiate with Death Mark unless Frozen Tomb is confirmed on cooldown. If she holds her ultimate, focus your efforts on roaming to side lanes or coordinating with your jungler to trigger her self-cast defensively before you commit your own high-damage resources.

Vollständiges Profil →

Ungünstig

8

Diese Champions haben Werkzeuge, die ihnen im Kampf meist einen Vorteil verschaffen, ohne das Matchup unspielbar zu machen. Sie haben vielleicht mehr Reichweite, können deine Offensive besser abfangen oder haben mehr Möglichkeiten, auf deine Engages zu reagieren. Du musst deine Herangehensweise anpassen und sorgfältig die Momente wählen, in denen du den Kampf annimmst.

Irelia

Irelia

predictive_defenseall_in The matchup is dictated by how easily Irelia can neutralize your ultimate. When you cast Death Mark, she knows exactly where you will land. By channeling Defiant Dance right at that moment, she absorbs the impact of your triple Razor Shuriken combo. This mitigation completely defuses your burst, wasting your energy pool and leaving you defenseless against her immediate physical counter-attack. Details ansehen
Irelia

Warum

The matchup is dictated by how easily Irelia can neutralize your ultimate. When you cast Death Mark, she knows exactly where you will land. By channeling Defiant Dance right at that moment, she absorbs the impact of your triple Razor Shuriken combo. This mitigation completely defuses your burst, wasting your energy pool and leaving you defenseless against her immediate physical counter-attack.

Lane-Einfluss

In the lane, this dynamic forces you to play defensively. You cannot simply jump in with Living Shadow and Shadow Slash because she can quickly clear minions with Bladesurge, stack Ionian Fervor, and turn the trade. If you waste your shadow energy, she will lock you down with Flawless Duet and force you to retreat to your tower, losing priority and allowing her to roam freely.

Wie man spielt

To survive, you must bait out her defensive abilities before committing your ultimate. Poke her down from a distance using Razor Shuriken and Living Shadow to force her to use Defiant Dance early. If she holds it, hold your Death Mark too. When you do engage, use the mobility of Living Shadow to dodge her Flawless Duet stun, then wait out her defensive channel before finishing her off.

Vollständiges Profil →

Andere Matchups

Skill Matchups

18

Diese Matchups sind vor allem Duelle der Ausführung: Beide Champions haben glaubwürdige Wege, die Oberhand zu gewinnen. Eine wichtige ausgewichene Fähigkeit, ein richtig antizipierter Engage oder ein einziger Positionierungsfehler können reichen, um das Duell zu entscheiden. Das Matchup zu kennen und die richtigen Fenster zum Handeln zu erkennen, ist hier besonders wichtig.

Ahri

Ahri

assassinreaction_time This matchup is a pure duel of reactions centered around Zed's ultimate. While you can poke her down with *Living Shadow* into *Razor Shuriken*, the entire lane swings on *Death Mark*. Ahri has a guaranteed counter: she can buffer *Charm* directly behind herself the moment you land. If she hits this, your burst is neutralized; if she misses or you bait it, she has no protection against your high physical damage. Details ansehen
Ahri

Warum

This matchup is a pure duel of reactions centered around Zed's ultimate. While you can poke her down with *Living Shadow* into *Razor Shuriken*, the entire lane swings on *Death Mark*. Ahri has a guaranteed counter: she can buffer *Charm* directly behind herself the moment you land. If she hits this, your burst is neutralized; if she misses or you bait it, she has no protection against your high physical damage.

Lane-Einfluss

Before level five, Ahri uses *Orb of Deception* to shove waves and heal with *Essence Theft*, forcing you to farm under turret using *Razor Shuriken*. Once both ultimates are unlocked, passive play is punished. You cannot blindly initiate with *Death Mark* because of her *Charm* threat, and she cannot step up too aggressively without risking a sudden trade. It becomes a tense stand-off where executing a single combo determines lane priority.

Wie man spielt

To win this duel, you must manipulate her cooldowns. Never initiate with *Death Mark* while her *Charm* is available unless you have placed a *Living Shadow* far away beforehand. Press *Death Mark*, and the microsecond you emerge, immediately reactivate your *Living Shadow* to swap places and dodge her buffered heart. Once her main crowd control is wasted, use your *Razor Shuriken* and *Shadow Slash* to execute her while her *Spirit Rush* is on cooldown.

Vollständiges Profil →
Akali

Akali

shroud_playoutplay This duel is dictated by how you manage your ultimate against her stealth. When you unleash Death Mark, Akali will instantly deploy Twilight Shroud to vanish. This completely denies you the ability to land basic attacks or Shadow Slash to ramp up your mark's pop damage. Without target visibility, your entire offensive window evaporates, turning your main kill tool into a wasted cooldown. Details ansehen
Akali

Warum

This duel is dictated by how you manage your ultimate against her stealth. When you unleash Death Mark, Akali will instantly deploy Twilight Shroud to vanish. This completely denies you the ability to land basic attacks or Shadow Slash to ramp up your mark's pop damage. Without target visibility, your entire offensive window evaporates, turning your main kill tool into a wasted cooldown.

Lane-Einfluss

Before level five, you must fight for wave control using Razor Shuriken to poke her down while avoiding her Five Point Strike. Once both of you unlock your ultimates, the lane becomes a high-stakes standoff. You cannot dive or commit with Living Shadow because Akali can retaliate with Perfect Execution if she knows your shadow swap is unavailable. Minion waves are often cleared from a safe distance.

Wie man spielt

To win this mental game, never initiate a trade with Death Mark while her Twilight Shroud is active. Instead, use Living Shadow combined with Shadow Slash and Razor Shuriken to chip away her health and force her to hide. Once her smoke screen dissipates, you have a brief twenty-second window to strike. If she hits you with Shuriken Flip, swap to your shadow to throw off her dash before counter-attacking.

Vollständiges Profil →
Kayle

Kayle

assassininvulnerability This matchup is a pure test of nerves centered around the interaction of your ultimates. While your high physical burst can easily shred Kayle's fragile base stats, her Divine Judgment is the ultimate countermeasure. If she casts it just before your Death Mark detonates, she completely negates the accumulated damage, turning an apparent assassination into a wasted cooldown that leaves you highly vulnerable. Details ansehen
Kayle

Warum

This matchup is a pure test of nerves centered around the interaction of your ultimates. While your high physical burst can easily shred Kayle's fragile base stats, her Divine Judgment is the ultimate countermeasure. If she casts it just before your Death Mark detonates, she completely negates the accumulated damage, turning an apparent assassination into a wasted cooldown that leaves you highly vulnerable.

Lane-Einfluss

Before level five, you can freely pressure Kayle with Living Shadow and Razor Shuriken combos since her ranged farming relies heavily on Starfire Spellblade. Once both of you unlock your ultimates, the lane halts. You cannot blindly dive her under tower, as her invulnerability easily turns dives into double kills, allowing her to scale safely towards her ranged power spikes.

Wie man spielt

To win this mental game, never lead with Death Mark when she is at full health. Instead, chip her down with Living Shadow combined with Shadow Slash and Razor Shuriken. Force her to choose between burning Divine Judgment early to survive your basic poke or dying to your passive Contempt for the Weak. If you must ultimate, immediately swap back to your shadow to wait out her invulnerability before landing your triple shurikens.

Vollständiges Profil →

Andere Matchups

Günstig

20

Diese Champions tun sich meist schwer, auf deine Hauptstärken zu reagieren, was dir mehr Freiheit im Matchup gibt. Du hast oft mehrere Möglichkeiten, sie unter Druck zu setzen und Trades zu deinen Gunsten zu erzwingen. Nutze diesen Vorteil, um das Tempo zu bestimmen, statt ihnen Zeit zu geben, wieder in eine komfortable Position zu kommen.

Aurelion Sol

Aurelion Sol

assassin_divedodge_ult Zed completely dominates this matchup because Death Mark serves as a flawless counter to Aurelion Sol's telegraphed kit. When the star dragon casts Falling Star, you can reactively trigger Death Mark to become untargetable, completely nullifying the stun. Upon reappearing directly behind him, Aurelion Sol's frontal channel, Breath of Light, is aimed in the wrong direction, leaving him entirely defenseless against your sudden burst. Details ansehen
Aurelion Sol

Warum

Zed completely dominates this matchup because Death Mark serves as a flawless counter to Aurelion Sol's telegraphed kit. When the star dragon casts Falling Star, you can reactively trigger Death Mark to become untargetable, completely nullifying the stun. Upon reappearing directly behind him, Aurelion Sol's frontal channel, Breath of Light, is aimed in the wrong direction, leaving him entirely defenseless against your sudden burst.

Lane-Einfluss

Before level five, Aurelion Sol tries to stack Cosmic Creator using Singularity. However, once you unlock your ultimate, the dynamic completely shifts. He can no longer channel Breath of Light to clear waves without putting himself in lethal range. This forces him to play extremely far back, sacrificing his stacking speed, and allowing you to freely control the wave, secure easy recall timings, or pressure his tower.

Wie man spielt

Never initiate with your ultimate preemptively; hold Death Mark strictly to react to his Falling Star. If he attempts to escape using Astral Flight, quickly deploy Living Shadow to close the gap before marking him. When trading, wait for him to channel Breath of Light, as he becomes semi-stationary. This is your cue to land a guaranteed double Razor Shuriken and Shadow Slash combo, followed by Contempt for the Weak auto-attacks to secure the execution.

Vollständiges Profil →
Brand

Brand

defenseitemization_shift Brand is a sitting duck once his main self-peel is gone. He relies on marking you with Blaze to trigger the stun on Sear. Because Death Mark makes you untargetable, you can consistently bypass the projectile of Sear when he tries to peel you off. Without this crowd control, Brand's complete lack of mobility makes him unable to escape your raw burst damage. Details ansehen
Brand

Warum

Brand is a sitting duck once his main self-peel is gone. He relies on marking you with Blaze to trigger the stun on Sear. Because Death Mark makes you untargetable, you can consistently bypass the projectile of Sear when he tries to peel you off. Without this crowd control, Brand's complete lack of mobility makes him unable to escape your raw burst damage.

Lane-Einfluss

Before unlocking your ultimate, you must tolerate Brand pushing the wave with Pillar of Flame and spreading Conflagration. Keep your health high by farming with Razor Shuriken from a safe distance. Once you reach level five, the threat of your all-in completely paralyzes him. Brand can no longer step up to aggressively clear waves without risking a lethal encounter, forcing him to play defensively near his turret.

Wie man spielt

Initiate trades using Living Shadow combined with Shadow Slash and Razor Shuriken to chip away at his health. When you commit, never open with Death Mark immediately unless he has already wasted his stun. Instead, walk at him or use your shadow swap to force him to panic-cast Sear. The moment you see the projectile animation of Sear, activate Death Mark to phase through it, landing directly behind him to trigger Contempt for the Weak.

Vollständiges Profil →
Kassadin

Kassadin

physical_damagedodge_timing Zed dominates this matchup because Kassadin’s passive Void Stone only generates a magic shield, leaving him completely exposed to Zed's physical burst. Since Kassadin is melee, you can constantly harass him with Razor Shuriken and Living Shadow combos. The lane's core revolves around Death Mark: Kassadin is forced to immediately use Riftwalk the moment you reappear to dodge your double Razor Shuriken follow-up, or face instant execution. Details ansehen
Kassadin

Warum

Zed dominates this matchup because Kassadin’s passive Void Stone only generates a magic shield, leaving him completely exposed to Zed's physical burst. Since Kassadin is melee, you can constantly harass him with Razor Shuriken and Living Shadow combos. The lane's core revolves around Death Mark: Kassadin is forced to immediately use Riftwalk the moment you reappear to dodge your double Razor Shuriken follow-up, or face instant execution.

Lane-Einfluss

This physical advantage translates into total lane dominance from the first levels. Kassadin cannot contest the wave without taking heavy damage. His Null Sphere cannot mitigate your physical poke, forcing him to farm under turret and bleed gold. You will easily secure mid priority, enabling you to pressure his tower or dive him once his mana pool limits his defensive Riftwalk casts.

Wie man spielt

To convert this advantage, rush heavy physical lethality items to completely bypass his natural armor scaling. During an all-in, do not throw your Razor Shuriken immediately after Death Mark ends. Anticipate his panic Riftwalk and hold your shurikens for a split second, or use Living Shadow to follow his blink and trigger Contempt for the Weak with an auto-attack once his magic shield fails to protect him.

Vollständiges Profil →
Lux

Lux

mobilitydodgeburst Lux relies entirely on landing Light Binding to survive your dive and setup her own Lucent Singularity and Final Spark. As Zed, you can easily bypass this crowd control. By activating Living Shadow to swap positions or timing Death Mark to become untargetable, you completely bypass her only defensive tool, exposing her fragile health bar to your full physical burst. Details ansehen
Lux

Warum

Lux relies entirely on landing Light Binding to survive your dive and setup her own Lucent Singularity and Final Spark. As Zed, you can easily bypass this crowd control. By activating Living Shadow to swap positions or timing Death Mark to become untargetable, you completely bypass her only defensive tool, exposing her fragile health bar to your full physical burst.

Lane-Einfluss

This matchup dynamic forces Lux to play extremely passively, giving you absolute control over the minion wave. She cannot step up to harass you with Illumination without risking a lethal trade. You can easily maintain high health, crash waves at will, and secure clean recall timings. If she misses a single Light Binding, she is forced to abandon her tower and concede all mid priority.

Wie man spielt

Walk aggressively toward Lux to bait out Light Binding. Do not use Living Shadow offensively until she throws her snare. Once she casts it, react instantly by blinking over it with Living Shadow or dodging through her with Death Mark. Follow up with Shadow Slash to slow her, then land multiple Razor Shuriken while Prismatic Barrier is down. If you fail the dodge, retreat immediately to wait for your shadow cooldown.

Vollständiges Profil →
Seraphine

Seraphine

dodge_mechanicarmor_rush This matchup heavily favors you because Seraphine relies on highly predictable, slow-moving projectiles to defend herself. Both Encore and Beat Drop are easily reactable. By timing your Death Mark just as she launches either of these spells, you completely bypass her crowd control, appearing directly behind her fragile frame to execute a fatal burst combo with Razor Shuriken and Shadow Slash. Details ansehen
Seraphine

Warum

This matchup heavily favors you because Seraphine relies on highly predictable, slow-moving projectiles to defend herself. Both Encore and Beat Drop are easily reactable. By timing your Death Mark just as she launches either of these spells, you completely bypass her crowd control, appearing directly behind her fragile frame to execute a fatal burst combo with Razor Shuriken and Shadow Slash.

Lane-Einfluss

During the early levels, you must tolerate her long-range poke from High Note and Stage Presence. However, once you unlock your ultimate, the entire lane pressure flips. She cannot safely step up to clear waves with her passive because stepping past her caster minions puts her in range of your Living Shadow gap-close, forcing her to constantly cower near her turret and bleed gold.

Wie man spielt

To secure this advantage, shift your build path towards heavy, flat physical penetration early on to completely negate the shield from Surround Sound. In lane, never initiate with Death Mark if she has her double-cast passive ready. Instead, poke her down with Living Shadow combined with Razor Shuriken. Once she panics and casts Encore or Beat Drop to disengage, reactively press your ultimate to dodge the projectile and trigger Contempt for the Weak.

Vollständiges Profil →
Teemo

Teemo

stasis_rushblind_timing Teemo's primary defense relies on Blinding Dart to negate physical basic attacks, but this tool is completely useless against your spell-based assault. By combining Living Shadow with Razor Shuriken and Shadow Slash, you can safely whittle down his health from a distance. Once he is low enough, Death Mark allows you to close the gap and execute him, as your primary damage comes from your abilities rather than basic attacks. Details ansehen
Teemo

Warum

Teemo's primary defense relies on Blinding Dart to negate physical basic attacks, but this tool is completely useless against your spell-based assault. By combining Living Shadow with Razor Shuriken and Shadow Slash, you can safely whittle down his health from a distance. Once he is low enough, Death Mark allows you to close the gap and execute him, as your primary damage comes from your abilities rather than basic attacks.

Lane-Einfluss

Early on, Teemo will harass you with Toxic Shot, using Move Quick to escape. However, the dynamic shifts dramatically once you unlock your basic ability combo. Because he lacks any hard crowd control or shields, he cannot contest the minion wave without risking half his health to your ranged shadows. This pressure forces him to play defensively, preventing him from establishing control with Noxious Trap in the lane.

Wie man spielt

Prioritize pure physical penetration and burst over utility to ensure your combos instantly delete him before he can react with Guerrilla Warfare. During trades, throw your Razor Shuriken and Shadow Slash from your Living Shadow to drop his health. When you commit with Death Mark, do not immediately auto-attack if he uses Blinding Dart; wait out the short duration of the blind before applying Contempt for the Weak to secure the kill.

Vollständiges Profil →
Twisted Fate

Twisted Fate

untargetableburst_threat This matchup is heavily in your favor because Twisted Fate's sole defensive tool, the Gold Card from Pick a Card, is completely neutralized by Death Mark. When he throws the yellow projectile, your ultimate makes you untargetable, erasing his only self-peel. You then reappear right behind him, leaving him completely defenseless against your high-damage physical burst. Details ansehen
Twisted Fate

Warum

This matchup is heavily in your favor because Twisted Fate's sole defensive tool, the Gold Card from Pick a Card, is completely neutralized by Death Mark. When he throws the yellow projectile, your ultimate makes you untargetable, erasing his only self-peel. You then reappear right behind him, leaving him completely defenseless against your high-damage physical burst.

Lane-Einfluss

Because of this threat, Twisted Fate must play with extreme caution, restricting his ability to harass you. He will often resort to clearing waves from afar using Wild Cards. This passive playstyle allows you to control the lane tempo. You can safely position to poke him down using Living Shadow combined with Razor Shuriken and Shadow Slash, ultimately preventing him from finding opportunities to roam with Destiny.

Wie man spielt

To execute this perfectly, never initiate with Death Mark while his Pick a Card is off cooldown unless you are baiting it. Walk within range and wait for the gold card animation to start. The exact millisecond the projectile is in flight, cast your ultimate to dodge it. Once you reappear, immediately follow up with Shadow Slash and multiple Razor Shuriken hits, finishing him off with an auto-attack to trigger Contempt for the Weak.

Vollständiges Profil →
Veigar

Veigar

defensetiming Zed holds a massive advantage because Death Mark completely invalidates Veigar's primary self-peel. When Veigar drops Event Horizon to zone you out, you can simply activate Death Mark to blink straight past the cage's perimeter, landing safely behind him while completely avoiding the stun. This forces Veigar to play defensively, as his high-damage Dark Matter and Primordial Burst become incredibly easy to dodge once you are in close quarters. Details ansehen
Veigar

Warum

Zed holds a massive advantage because Death Mark completely invalidates Veigar's primary self-peel. When Veigar drops Event Horizon to zone you out, you can simply activate Death Mark to blink straight past the cage's perimeter, landing safely behind him while completely avoiding the stun. This forces Veigar to play defensively, as his high-damage Dark Matter and Primordial Burst become incredibly easy to dodge once you are in close quarters.

Lane-Einfluss

This interaction dictates the lane pressure. Veigar cannot safely step up to stack Phenomenal Evil Power on you or clear waves with Baleful Strike without risking a lethal dive. Since you can bypass his cage, Veigar is forced to clear waves from extreme range under his tower, granting you absolute mid priority. You can easily trade health by using Living Shadow and Shadow Slash to slow him, then landing Razor Shuriken before forcing him out of lane.

Wie man spielt

Do not waste Living Shadow aggressively if Veigar still has Event Horizon available, as you need your mobility to punish him. Walk forward to bait out his cage. Once he places Event Horizon, immediately cast Death Mark to bypass the stun, then follow up with Shadow Slash and Razor Shuriken to trigger Contempt for the Weak. If he holds his cage, chunk him down with safe shadow combos from a distance until he is low enough to execute.

Vollständiges Profil →
Ziggs

Ziggs

dive_targetdodge_skillshots Ziggs wants to keep you at bay with Bouncing Bomb and clear waves from safety, relying entirely on Satchel Charge to blast himself away or knock you back if you get close. However, Zed completely neutralizes this safety net. By casting Death Mark, you become untargetable and bypass the blast, or you can instantly close the gap after his self-peel displacement using Living Shadow to finish him off. Details ansehen
Ziggs

Warum

Ziggs wants to keep you at bay with Bouncing Bomb and clear waves from safety, relying entirely on Satchel Charge to blast himself away or knock you back if you get close. However, Zed completely neutralizes this safety net. By casting Death Mark, you become untargetable and bypass the blast, or you can instantly close the gap after his self-peel displacement using Living Shadow to finish him off.

Lane-Einfluss

In the early levels, you will take some poke from Bouncing Bomb and Short Fuse while trying to last-hit. However, once you unlock your mobility, Ziggs is forced to play extremely far back, conceding control of the wave. He cannot safely use Satchel Charge to execute your tower because stepping up to use it exposes him to an instant, lethal dive.

Wie man spielt

Position yourself diagonally to the wave to force Ziggs to choose between hitting you or the minions with Bouncing Bomb. Never initiate with Living Shadow unless you know his Satchel Charge is on cooldown. Instead, walk up to threaten him, trigger Death Mark when he panics, and use Living Shadow to follow his displacement or swap back to safety if he attempts to retreat through his own Hexplosive Minefield.

Vollständiges Profil →
Mel

Mel

burst_trademobility_advantage Mel relies heavily on her ranged zone control to keep melee targets at bay, but your kit renders this defense obsolete. By utilizing Living Shadow, you instantly bypass her threat range to initiate trades. When she attempts to peel you off with her defensive spells, activating Death Mark grants you the perfect untargetable frame to dodge them entirely, leaving her completely vulnerable to your high-damage follow-up. Details ansehen
Mel

Warum

Mel relies heavily on her ranged zone control to keep melee targets at bay, but your kit renders this defense obsolete. By utilizing Living Shadow, you instantly bypass her threat range to initiate trades. When she attempts to peel you off with her defensive spells, activating Death Mark grants you the perfect untargetable frame to dodge them entirely, leaving her completely vulnerable to your high-damage follow-up.

Lane-Einfluss

This absolute mobility advantage forces Mel to play exceptionally far back, conceding wave control. She cannot safely use her ranged abilities to poke you down without risking a sudden, lethal all-in. Consequently, you dictate the pace of the lane, easily securing priority. If she attempts to contest the wave, a single successful trade puts her in range for Contempt for the Weak to secure an easy under-tower execution.

Wie man spielt

To exploit this, avoid throwing Living Shadow randomly; hold it to threaten her whenever she steps up to farm. Walk forward to bait her defensive spells, then react instantly with Living Shadow to close the gap, immediately buffering Death Mark to slip past her crowd control. Upon reappearing, unleash Shadow Slash and a double Razor Shuriken, finishing with a basic attack to proc Contempt for the Weak.

Vollständiges Profil →
Syndra

Syndra

untargetabilitydodge_mechanics This matchup swings heavily in your favor due to how Death Mark interacts with Unleashed Power. Since Syndra relies on a single massive burst of damage from her ultimate to execute targets, your ability to become untargetable at the exact moment she casts it completely neutralizes her win condition. She cannot burst you down if you reactively dodge her entire sphere payload, leaving her extremely vulnerable. Details ansehen
Syndra

Warum

This matchup swings heavily in your favor due to how Death Mark interacts with Unleashed Power. Since Syndra relies on a single massive burst of damage from her ultimate to execute targets, your ability to become untargetable at the exact moment she casts it completely neutralizes her win condition. She cannot burst you down if you reactively dodge her entire sphere payload, leaving her extremely vulnerable.

Lane-Einfluss

Before level five, you must endure her ranged poke from Dark Sphere. However, once you unlock your ultimate, the lane dynamic completely reverses. Syndra is forced to play incredibly defensively, holding onto Scatter the Weak out of sheer terror. If she wastes her knockback to clear waves or poke, you can instantly close the distance with Living Shadow and execute her, giving you total control over the mid lane priority.

Wie man spielt

To secure the kill, poke her down to half health using your Living Shadow, Shadow Slash, and Razor Shuriken combo. When committing, never lead with Death Mark if her Scatter the Weak is active, as she will stun you the millisecond you reappear. Instead, bait her crowd control, or use your ultimate reactively the moment you see the animation of Unleashed Power begin, guaranteeing you dodge her burst and finish her off with Contempt for the Weak.

Vollständiges Profil →
Varus

Varus

assassin_threatdodge_timingexhaust_utility Varus lacks any natural mobility to escape your burst, relying solely on Chain of Corruption to stop dives. The entire matchup hinges on this interaction: the moment he casts his ultimate to peel you off, you can activate Death Mark to bypass the projectile entirely. By dodging his only crowd control, you land right behind his vulnerable, immobile frame, making him an incredibly easy target for your Razor Shuriken and Shadow Slash burst. Details ansehen
Varus

Warum

Varus lacks any natural mobility to escape your burst, relying solely on Chain of Corruption to stop dives. The entire matchup hinges on this interaction: the moment he casts his ultimate to peel you off, you can activate Death Mark to bypass the projectile entirely. By dodging his only crowd control, you land right behind his vulnerable, immobile frame, making him an incredibly easy target for your Razor Shuriken and Shadow Slash burst.

Lane-Einfluss

Before reaching level five, expect Varus to harass you with Piercing Arrow and Hail of Arrows while trying to shove the wave. However, once your ultimate is available, the lane dynamic flips instantly. The constant threat of your all-in forces him to play extremely defensively under his tower. He cannot safely step up to secure plates or poke, granting you complete control over lane priority and forcing him into a passive state.

Wie man spielt

When executing your offensive, never initiate directly with Death Mark unless he has already wasted Chain of Corruption. Instead, throw a clone with Living Shadow to close the gap or poke him down with Razor Shuriken. Walk up to him and force him to panic-cast his ultimate. The instant you see the animation of his vine starting, press your ultimate to dodge it, land behind him, and execute him with Contempt for the Weak enhanced basic attacks.

Vollständiges Profil →

Andere Matchups

Items to Counter Zed

Buy these items to reduce this champion's effectiveness in your games.

Stasis Enchant
Stasis Enchant
Plated Steelcaps
Plated Steelcaps
Frozen Heart
Frozen Heart
Randuin's Omen
Randuin's Omen
Guardian Angel
Guardian Angel

Wie man diesen Champion kontert

Konter-Winkel

Zed zu kontern, geht es nicht nur darum, seine Ultimate zu überleben. Das eigentliche Ziel ist es, die Sequenz zu durchbrechen, die Death Mark belohnt: verwehre ihm sein Wave-Setup, limitiere seine Wandwinkel, halte eine Crowd Control oder ein defensives Werkzeug für seine Rückkehr bereit und bestrafe dann seine fehlende Präsenz, sobald seine Schatten aufgebraucht sind. Die Champions, die bereits als schwierig für ihn identifiziert wurden, teilen oft eine Sache: Sie geben ihm kein einfaches, unbewegliches, isoliertes Ziel. Manche absorbieren seinen Burst, andere kontrollieren ihn, wenn er raus will, und wieder andere zwingen ihn in einen Rhythmus, den er nicht kontrolliert. Gegen Zed ist Teamdisziplin genauso wichtig wie das individuelle Matchup.

Patch-Kontext

Zed hat am meisten Probleme mit Antworten, die ihn daran hindern, den ersten Kontakt in einen sauberen Kill zu verwandeln. Überlebt sein Ziel Death Mark, muss er W defensiv einsetzen oder Crowd Control wartet an seinem Rückkehrpunkt, sinkt sein Druck stark ab. Ungünstige Matchups gewinnen nicht alle auf die gleiche Weise: Manche bestrafen ihn in der Lane mit direktem Stun, andere neutralisieren seinen All-In durch natürliche Zähigkeit oder Unverwundbarkeit, und wieder andere können seinen Burst gegen ihn wenden. Der Schlüssel ist, ihm niemals ein freies Ziel vor einem Objective zu geben.

Schnell gelesen

  • Spare ein defensives Werkzeug für den Death Mark-Pop auf, nicht für den ersten Poke.
  • Zeds W zu bestrafen ist oft wichtiger als seine Ultimate zu bestrafen: Ohne Schatten verliert Zed sowohl Bedrohung als auch Exit.
  • Zed dazu zu zwingen, von vorne zu spielen, reduziert seinen Wert erheblich, besonders in der Nähe von Objectives, wo er Wandwinkel sucht.

Konter-Archetypen

Gezielte Kontrolle und Bestrafung des Rückkehrpunkts

Zed will den exakten Moment wählen, in dem er eintritt und austritt. Champions mit zuverlässiger Kontrolle brechen dieses Prinzip, da sie ihren Stun, Lockdown oder ihre defensive Antwort für den Moment aufheben können, in dem er vorhersehbar wird: nach Death Mark, in der Nähe seines Schattens oder an seinem Ziel. Das zwingt ihn, langsamer zu spielen, W zum Ausweichen statt zum Bedrohen zu verwenden und weniger lohnende Engages einzugehen. Selbst wenn er seine Combo landet, besteht die Gefahr, dass er das Ende der Sequenz nicht mehr kontrolliert.

Wie sich der Champion anpasst. Zed muss zuerst einen wichtigen Spell erzwingen oder einen schlechten Einsatz von Crowd Control ködern. Er kann auch mehr durch Shadow Poke, Wave Pressure und Roams spielen, anstatt nach einem direkten All-In auf ein Ziel zu suchen, das auf ihn wartet.

Burst-Überleben und natürliche defensive Puffer

Zed will, dass sein erster großer Zyklus einen Kill oder zumindest einen wichtigen Summoner Spell erzeugt. Champions, die Rüstung kaufen, Burst absorbieren oder die Explosion verzögern können, machen dieses Fenster weitaus weniger entscheidend. Das Problem für Zed ist nicht nur mangelnder Schaden: Jeder fehlgeschlagene All-In kostet ihn Tempo, Energie, einen Schatten und oft Lane-Druck. Wenn der Gegner überlebt, kann er die Welle pushen oder sich seinem Team anschließen, während Zed auf Cooldowns wartet.

Wie sich der Champion anpasst. Zed muss Tunnelblick auf ein Ziel vermeiden, das nicht sterben wird. Er sollte Druck auf Seiten-Lanes verlagern, defensive Ressourcen vor Objectives erzwingen und weniger geschützte Carries anstatt des haltbarsten mid-Matchups wählen.

Mobile Duelle und Schattenbestrafung

Manche Matchups überleben mehr als nur: Sie machen Zeds Sequenz instabil. Mit Mobilität, Dodges oder unmittelbarer Rückkehrbedrohung können sie einen Teil der Combo vermeiden, einen übermäßig aggressiven Schatten bestrafen oder das Duell drehen, sobald Zed keine Werkzeuge mehr hat. Das zwingt Zed, präziser mit dem Timing zu sein und das Verschwenden von Shurikens zu vermeiden. Wenn er den ersten Teil der Combo verfehlt, hat er oft nicht mehr genug Druck, um das Ziel zu beenden, ohne sich selbst zu exponieren.

Wie sich der Champion anpasst. Zed muss geduldiger spielen, W aufbewahren, um gegnerische Bewegung zu kontern, und All-Ins ohne Information vermeiden. Gegen dieses Profil ist es oft wichtiger, Setup-Poke zu landen, als sofort nach dem Kill zu suchen, sobald Death Mark zurückkehrt.

Prioritäts-Matchups

Lissandra

Lissandra ist eines der prägendsten Matchups gegen Zed, da sie auf seinen Commit warten kann, anstatt beim ersten Poke in Panik zu geraten. Ihr Wert liegt darin, Death Mark in eine Falle zu verwandeln: Wenn Zed eintritt, ohne ihre Werkzeuge zu erzwingen, kann sie ihn aussperren, wenn er beenden oder raus will. Für Zed erfordert dieses Matchup, um Waves, Vision und Baiting zu spielen, nicht um rohe mechanische Duelle.

Malphite

Malphite schafft ein anderes Problem: Er senkt den Burst-Wert und bringt eine Engage-Bedrohung mit, der Zed nicht direkt gegenübertreten will. Selbst wenn Zed manchmal woanders ein Ziel finden kann, wird das Matchup gefährlich, wenn Malphite Gruppierung erzwingt und Zed in eine bereits kontrollierte Zone eintreten lässt. Die richtige Anpassung ist, den Zyklus nicht an einem zu haltbaren Ziel zu verschwenden und nach Rotationen zu suchen, bevor Malphite den Kampf kontrolliert.

Häufige Fehler gegen ihn

Häufige Fehler gegen ihn

  • Verwende Stasis Enchant zu früh, vor Death Mark, und lass Zed seinen echten Engage ein paar Sekunden später nehmen.
  • Folge ihm in den Nebel des Krieges ohne Side-Vision, besonders wenn sein W verfügbar ist.

  • Lane pushen, ohne seinen Level 5 zu respektieren, und ihm dann einen freien Roam-Winkel geben.

  • Jede Crowd Control für gegnerischen Engage aufsparen, anstatt eine für Zeds Rückkehr oder Exit zu reservieren.
  • Nur Schaden bauen, wenn das Spiel früh Rüstung oder ein Verzögerungstool erfordert.

Coach-Notizen

  • Gegen Zed, spiel nicht nur um deine Lebensleiste: spiel um seine Cooldowns. Sobald sein Schatten benutzt wurde, ohne einen Kill zu bedrohen, öffnet sich das Fenster, um vorzugehen, zu pushen oder Vision zu nehmen.
  • Die beste Team-Kontermaßnahme ist, sein Ziel weniger isoliert zu machen. Ein Carry, der etwas weiter hinten steht, ein support, der bereit ist zu peelen, und eine Ward an der Wand sind oft genug, um seinen Engage in einen Fehler zu verwandeln.

FAQ

Was ist der beste Weg, um Zed in der Lane zu überleben?

Der beste Weg ist, die Wave und seine Cooldowns zu kontrollieren, anstatt einfach wegzurennen. Wenn du zu wenig Leben hast, kann Zed ab Level 5 den Death Mark bedrohen; wenn du ohne Vision pushst, kann er woanders verschwinden und snowballen. Halte eine Antwort für seinen echten Commit bereit, respektiere sein W und vermeide es, ohne Informationen über seine Position in der Nähe einer Wand zu stehen.

Sollte man gegen Zed immer Stasis Enchant kaufen?

Auf fragilen Carries ist Stasis Enchant oft die direkteste Antwort, aber sie reicht nicht allein aus. Wenn du sie zu früh einsetzt oder dein Team Zed danach nicht bestrafen kann, verzögerst du nur das Problem. Sie muss mit guter Positionierung, Flank-Vision und Crowd Control gepaart werden, die bereitsteht, sobald Zed versucht auszubrechen.

Warum fühlt sich Zed bei schlechter Vision stärker an?

Zed profitiert stark vom Nebel des Krieges, da seine Schatten ihm Winkel geben, die Carries nicht rechtzeitig berechnen können. Wenn jungle-Engages und Wände um Objectives nicht gewarded sind, kann er das Ziel, die Distanz und das Burst-Timing wählen. Mit guter Vision muss er oft von vorne angreifen, was seine Entscheidungen viel vorhersehbarer und bestrafbarer macht.

Wie bestraft man einen Zed, der bereits vorne liegt?

Ein gefeedeter Zed möchte jede Rotation in einen Pick verwandeln. Um ihn zu bestrafen, reduziere isolierte Bewegungen, gruppiere dich um wichtige Waves und bereite die Antwort auf seinen Ausbruch vor, anstatt ihn zu jagen. Gib ihm kein kostenloses Side-Lane-Duell ohne Vision. Wenn sein Engage nicht sofort tötet, wird sein Shutdown oft während seiner Cooldowns wieder gutmachbar.



























































































