septiembre de 2026 · Patch 7.2d
Assassin · MID · JUNGLE

Guía de counters de Zed Wild Rift

Zed sufre contra carries con invulnerabilidades o shields que anulan sus ejecuciones. Los efectos de alto sustain o anti-death reducen su impacto de asesinato. Una buena vision en sus zonas de rotación reduce las oportunidades de pick.

★ MID · JUNGLE Tier S+
DAÑO
UTIL
TANK
DIFF
Win 49.5% #60 · ↑7pt
Pick 3.8% #19
Ban 1.6% #75

Guía de counters de Zed Wild Rift ★ Counter Sheet

Tabla de emparejamientos
Emparejamiento Veredicto Ventaja Tasa de victorias Tasa de selección
Lissandra Contras Difíciles +2 49.8% 4.0%
Malphite Contras Difíciles +2
Pantheon Contras Difíciles +2
Swain Desfavorables +1 53.7% 4.6%
Annie Desfavorables +1 50.6% 2.2%
Vladimir Desfavorables +1 49.5% 5.1%
Cho'Gath Desfavorables +1
Gragas Desfavorables +1
Irelia Desfavorables +1
Karma Desfavorables +1
Rumble Desfavorables +1
Tristana Desfavorables +1
Zilean Desfavorables +1
Ahri Matchups de Habilidad ±0 51.8% 5.0%
Kennen Matchups de Habilidad ±0 51.4% 1.6%
Kayle Matchups de Habilidad ±0 51.2% 1.0%
Diana Matchups de Habilidad ±0 50.8% 1.4%
Taliyah Matchups de Habilidad ±0 50.7% 2.8%
Yone Matchups de Habilidad ±0 50.6% 5.2%
Aurora Matchups de Habilidad ±0 49.9% 3.8%
Ekko Matchups de Habilidad ±0 49.6% 2.9%
Vex Matchups de Habilidad ±0 49.1% 2.2%
Yasuo Matchups de Habilidad ±0 48.8% 10.6%
Fizz Matchups de Habilidad ±0 48.6% 1.9%
Ryze Matchups de Habilidad ±0 48.1% 2.9%
Akali Matchups de Habilidad ±0 45.0% 2.5%
Akshan Matchups de Habilidad ±0
Lucian Matchups de Habilidad ±0
Morgana Favorables −1 52.3% 6.2%
Zyra Favorables −1 51.7% 2.8%
Orianna Favorables −1 51.3% 4.7%
Viktor Favorables −1 48.6% 3.3%
Corki Favorables −1
Kai'Sa Favorables −1
Syndra Favorables −2 52.8% 13.2%
Twisted Fate Favorables −2 52.2% 7.5%
Teemo Favorables −2 52.1% 1.8%
Brand Favorables −2 51.0% 9.3%
Aurelion Sol Favorables −2 50.5% 6.8%
Vel'Koz Favorables −2 50.4% 3.4%
Kassadin Favorables −2 49.0% 1.6%
Lux Favorables −2 48.9% 5.6%
Ziggs Favorables −2 48.5% 6.0%
Veigar Favorables −2 47.5% 9.7%
Mel Favorables −2 45.7% 7.8%
Seraphine Favorables −2
Varus Favorables −2
Norra Favorables −3 48.1% 1.4%

Edge: Wild Rift Core canonical verdict (−3 to +3), shown from the point of view of the champion named in the row. Win rate and pick rate: the opponent's own rate in this role — Wild Rift CN · Challenger, Patch 7.2d. Not a head-to-head win rate.

Contras Difíciles

3

Estos campeones tienen una build y un estilo de juego que superan directamente al tuyo, lo que puede hacer que controlar la línea y farmear sea extremadamente difícil. Sus habilidades pueden neutralizar tus principales fortalezas o castigarte en cuanto intentas jugar tu plan habitual. En estos matchups, el objetivo suele ser minimizar errores y buscar soluciones fuera del enfrentamiento directo.

Malphite

Malphite+2

ad counterburst negation Zed's reliance on physical burst is completely neutralized by Malphite's structural design. His high base armor, bolstered by the passive armor multiplier of Thunderclap, renders him virtually immune to the delayed pop of Death Mark. Even if you land multiple Razor Shuriken and Shadow Slash strikes during your ultimate window, his Granite Shield absorbs the initial impact, severely mitigating the final mark trigger. Ver detalles
Malphite

Por qué

Zed's reliance on physical burst is completely neutralized by Malphite's structural design. His high base armor, bolstered by the passive armor multiplier of Thunderclap, renders him virtually immune to the delayed pop of Death Mark. Even if you land multiple Razor Shuriken and Shadow Slash strikes during your ultimate window, his Granite Shield absorbs the initial impact, severely mitigating the final mark trigger.

Impacto en la línea

Trading with Malphite is a losing battle. He will shrug off your Living Shadow harass and retaliate with Seismic Shard, stealing your movement speed to prevent you from disengaging. If you attempt to trigger Contempt for the Weak with melee attacks, his Ground Slam cripples your attack speed. You are forced to use Razor Shuriken purely to last-hit from safety, giving up mid-lane priority.

Cómo jugar

Abandon all lane-kill pressure and pivot your build path immediately toward armor penetration and wave clearance. Save Living Shadow as an escape tool to dodge his Unstoppable Force rather than using it for aggressive poke. If he freezes, use Razor Shuriken to farm from range. Once he reaches his ultimate, stay at maximum range; if he misses Unstoppable Force, that is your cue to shove and roam.

Ficha completa →
Lissandra

Lissandra+2

hard counterdive defense Lissandra's kit completely shuts down your assassination attempts. When you initiate with Death Mark, she can immediately self-cast Frozen Tomb, neutralizing your entire burst window and leaving you stationary. As you emerge from your ultimate, she easily chains Ring of Frost to lock you down under her own terms, turning your primary offensive tool into a self-inflicted death trap. Ver detalles
Lissandra

Por qué

Lissandra's kit completely shuts down your assassination attempts. When you initiate with Death Mark, she can immediately self-cast Frozen Tomb, neutralizing your entire burst window and leaving you stationary. As you emerge from your ultimate, she easily chains Ring of Frost to lock you down under her own terms, turning your primary offensive tool into a self-inflicted death trap.

Impacto en la línea

This matchup forces you into defensive passivity once both of you reach ultimate status. Lissandra will constantly shove waves using Ice Shard, leaving you to farm under turret using Razor Shuriken and Contempt for the Weak. Because you cannot threaten her with an all-in, she gains free priority to roam using Glacial Path, while you are stuck trying to match her clear without wasting Living Shadow.

Cómo jugar

You must bait her defensive tools before committing. Use Living Shadow combined with Shadow Slash and Razor Shuriken to poke her from a safe distance, attempting to force her to use Glacial Path defensively. Never initiate with Death Mark unless Frozen Tomb is confirmed on cooldown. If she holds her ultimate, focus your efforts on roaming to side lanes or coordinating with your jungler to trigger her self-cast defensively before you commit your own high-damage resources.

Ficha completa →

Otros emparejamientos

Desfavorables

10

Estos campeones tienen herramientas que generalmente les dan ventaja en el enfrentamiento, sin llegar a hacer el matchup injugable. Pueden tener más alcance, mejor capacidad para aguantar tu ofensiva o más formas de responder a tus engagements. Tendrás que adaptar tu enfoque y elegir con cuidado los momentos en los que aceptas el combate.

Irelia

Irelia+1

predictive defenseall in The matchup is dictated by how easily Irelia can neutralize your ultimate. When you cast Death Mark, she knows exactly where you will land. By channeling Defiant Dance right at that moment, she absorbs the impact of your triple Razor Shuriken combo. This mitigation completely defuses your burst, wasting your energy pool and leaving you defenseless against her immediate physical counter-attack. Ver detalles
Irelia

Por qué

The matchup is dictated by how easily Irelia can neutralize your ultimate. When you cast Death Mark, she knows exactly where you will land. By channeling Defiant Dance right at that moment, she absorbs the impact of your triple Razor Shuriken combo. This mitigation completely defuses your burst, wasting your energy pool and leaving you defenseless against her immediate physical counter-attack.

Impacto en la línea

In the lane, this dynamic forces you to play defensively. You cannot simply jump in with Living Shadow and Shadow Slash because she can quickly clear minions with Bladesurge, stack Ionian Fervor, and turn the trade. If you waste your shadow energy, she will lock you down with Flawless Duet and force you to retreat to your tower, losing priority and allowing her to roam freely.

Cómo jugar

To survive, you must bait out her defensive abilities before committing your ultimate. Poke her down from a distance using Razor Shuriken and Living Shadow to force her to use Defiant Dance early. If she holds it, hold your Death Mark too. When you do engage, use the mobility of Living Shadow to dodge her Flawless Duet stun, then wait out her defensive channel before finishing her off.

Ficha completa →

Otros emparejamientos

Matchups de Habilidad

15

Estos enfrentamientos son sobre todo duelos de ejecución: ambos campeones tienen formas reales de tomar la ventaja. Esquivar una habilidad clave, anticipar bien un engagement o un simple error de posicionamiento puede inclinar el duelo hacia un lado. Conocer el matchup y reconocer las ventanas de acción correctas es especialmente importante aquí.

Ahri

Ahri±0

assassinreaction time This matchup is a pure duel of reactions centered around Zed's ultimate. While you can poke her down with *Living Shadow* into *Razor Shuriken*, the entire lane swings on *Death Mark*. Ahri has a guaranteed counter: she can buffer *Charm* directly behind herself the moment you land. If she hits this, your burst is neutralized; if she misses or you bait it, she has no protection against your high physical damage. Ver detalles
Ahri

Por qué

This matchup is a pure duel of reactions centered around Zed's ultimate. While you can poke her down with *Living Shadow* into *Razor Shuriken*, the entire lane swings on *Death Mark*. Ahri has a guaranteed counter: she can buffer *Charm* directly behind herself the moment you land. If she hits this, your burst is neutralized; if she misses or you bait it, she has no protection against your high physical damage.

Impacto en la línea

Before level five, Ahri uses *Orb of Deception* to shove waves and heal with *Essence Theft*, forcing you to farm under turret using *Razor Shuriken*. Once both ultimates are unlocked, passive play is punished. You cannot blindly initiate with *Death Mark* because of her *Charm* threat, and she cannot step up too aggressively without risking a sudden trade. It becomes a tense stand-off where executing a single combo determines lane priority.

Cómo jugar

To win this duel, you must manipulate her cooldowns. Never initiate with *Death Mark* while her *Charm* is available unless you have placed a *Living Shadow* far away beforehand. Press *Death Mark*, and the microsecond you emerge, immediately reactivate your *Living Shadow* to swap places and dodge her buffered heart. Once her main crowd control is wasted, use your *Razor Shuriken* and *Shadow Slash* to execute her while her *Spirit Rush* is on cooldown.

Ficha completa →
Akali

Akali±0

shroud playoutplay This duel is dictated by how you manage your ultimate against her stealth. When you unleash Death Mark, Akali will instantly deploy Twilight Shroud to vanish. This completely denies you the ability to land basic attacks or Shadow Slash to ramp up your mark's pop damage. Without target visibility, your entire offensive window evaporates, turning your main kill tool into a wasted cooldown. Ver detalles
Akali

Por qué

This duel is dictated by how you manage your ultimate against her stealth. When you unleash Death Mark, Akali will instantly deploy Twilight Shroud to vanish. This completely denies you the ability to land basic attacks or Shadow Slash to ramp up your mark's pop damage. Without target visibility, your entire offensive window evaporates, turning your main kill tool into a wasted cooldown.

Impacto en la línea

Before level five, you must fight for wave control using Razor Shuriken to poke her down while avoiding her Five Point Strike. Once both of you unlock your ultimates, the lane becomes a high-stakes standoff. You cannot dive or commit with Living Shadow because Akali can retaliate with Perfect Execution if she knows your shadow swap is unavailable. Minion waves are often cleared from a safe distance.

Cómo jugar

To win this mental game, never initiate a trade with Death Mark while her Twilight Shroud is active. Instead, use Living Shadow combined with Shadow Slash and Razor Shuriken to chip away her health and force her to hide. Once her smoke screen dissipates, you have a brief twenty-second window to strike. If she hits you with Shuriken Flip, swap to your shadow to throw off her dash before counter-attacking.

Ficha completa →
Kayle

Kayle±0

assassininvulnerability This matchup is a pure test of nerves centered around the interaction of your ultimates. While your high physical burst can easily shred Kayle's fragile base stats, her Divine Judgment is the ultimate countermeasure. If she casts it just before your Death Mark detonates, she completely negates the accumulated damage, turning an apparent assassination into a wasted cooldown that leaves you highly vulnerable. Ver detalles
Kayle

Por qué

This matchup is a pure test of nerves centered around the interaction of your ultimates. While your high physical burst can easily shred Kayle's fragile base stats, her Divine Judgment is the ultimate countermeasure. If she casts it just before your Death Mark detonates, she completely negates the accumulated damage, turning an apparent assassination into a wasted cooldown that leaves you highly vulnerable.

Impacto en la línea

Before level five, you can freely pressure Kayle with Living Shadow and Razor Shuriken combos since her ranged farming relies heavily on Starfire Spellblade. Once both of you unlock your ultimates, the lane halts. You cannot blindly dive her under tower, as her invulnerability easily turns dives into double kills, allowing her to scale safely towards her ranged power spikes.

Cómo jugar

To win this mental game, never lead with Death Mark when she is at full health. Instead, chip her down with Living Shadow combined with Shadow Slash and Razor Shuriken. Force her to choose between burning Divine Judgment early to survive your basic poke or dying to your passive Contempt for the Weak. If you must ultimate, immediately swap back to your shadow to wait out her invulnerability before landing your triple shurikens.

Ficha completa →

Otros emparejamientos

Favorables

20

Estos campeones suelen tener problemas para responder a tus principales fortalezas, lo que te permite afrontar el enfrentamiento con más libertad. Normalmente tienes varias formas de presionarlos y forzar intercambios a tu favor. Aprovecha esta ventaja para imponer tu ritmo en lugar de darles tiempo para volver a una posición cómoda.

Aurelion Sol

Aurelion Sol−2

assassin divedodge ult Zed completely dominates this matchup because Death Mark serves as a flawless counter to Aurelion Sol's telegraphed kit. When the star dragon casts Falling Star, you can reactively trigger Death Mark to become untargetable, completely nullifying the stun. Upon reappearing directly behind him, Aurelion Sol's frontal channel, Breath of Light, is aimed in the wrong direction, leaving him entirely defenseless against your sudden burst. Ver detalles
Aurelion Sol

Por qué

Zed completely dominates this matchup because Death Mark serves as a flawless counter to Aurelion Sol's telegraphed kit. When the star dragon casts Falling Star, you can reactively trigger Death Mark to become untargetable, completely nullifying the stun. Upon reappearing directly behind him, Aurelion Sol's frontal channel, Breath of Light, is aimed in the wrong direction, leaving him entirely defenseless against your sudden burst.

Impacto en la línea

Before level five, Aurelion Sol tries to stack Cosmic Creator using Singularity. However, once you unlock your ultimate, the dynamic completely shifts. He can no longer channel Breath of Light to clear waves without putting himself in lethal range. This forces him to play extremely far back, sacrificing his stacking speed, and allowing you to freely control the wave, secure easy recall timings, or pressure his tower.

Cómo jugar

Never initiate with your ultimate preemptively; hold Death Mark strictly to react to his Falling Star. If he attempts to escape using Astral Flight, quickly deploy Living Shadow to close the gap before marking him. When trading, wait for him to channel Breath of Light, as he becomes semi-stationary. This is your cue to land a guaranteed double Razor Shuriken and Shadow Slash combo, followed by Contempt for the Weak auto-attacks to secure the execution.

Ficha completa →
Brand

Brand−2

defenseitemization shift Brand is a sitting duck once his main self-peel is gone. He relies on marking you with Blaze to trigger the stun on Sear. Because Death Mark makes you untargetable, you can consistently bypass the projectile of Sear when he tries to peel you off. Without this crowd control, Brand's complete lack of mobility makes him unable to escape your raw burst damage. Ver detalles
Brand

Por qué

Brand is a sitting duck once his main self-peel is gone. He relies on marking you with Blaze to trigger the stun on Sear. Because Death Mark makes you untargetable, you can consistently bypass the projectile of Sear when he tries to peel you off. Without this crowd control, Brand's complete lack of mobility makes him unable to escape your raw burst damage.

Impacto en la línea

Before unlocking your ultimate, you must tolerate Brand pushing the wave with Pillar of Flame and spreading Conflagration. Keep your health high by farming with Razor Shuriken from a safe distance. Once you reach level five, the threat of your all-in completely paralyzes him. Brand can no longer step up to aggressively clear waves without risking a lethal encounter, forcing him to play defensively near his turret.

Cómo jugar

Initiate trades using Living Shadow combined with Shadow Slash and Razor Shuriken to chip away at his health. When you commit, never open with Death Mark immediately unless he has already wasted his stun. Instead, walk at him or use your shadow swap to force him to panic-cast Sear. The moment you see the projectile animation of Sear, activate Death Mark to phase through it, landing directly behind him to trigger Contempt for the Weak.

Ficha completa →
Kassadin

Kassadin−2

physical damagedodge timing Zed dominates this matchup because Kassadin’s passive Void Stone only generates a magic shield, leaving him completely exposed to Zed's physical burst. Since Kassadin is melee, you can constantly harass him with Razor Shuriken and Living Shadow combos. The lane's core revolves around Death Mark: Kassadin is forced to immediately use Riftwalk the moment you reappear to dodge your double Razor Shuriken follow-up, or face instant execution. Ver detalles
Kassadin

Por qué

Zed dominates this matchup because Kassadin’s passive Void Stone only generates a magic shield, leaving him completely exposed to Zed's physical burst. Since Kassadin is melee, you can constantly harass him with Razor Shuriken and Living Shadow combos. The lane's core revolves around Death Mark: Kassadin is forced to immediately use Riftwalk the moment you reappear to dodge your double Razor Shuriken follow-up, or face instant execution.

Impacto en la línea

This physical advantage translates into total lane dominance from the first levels. Kassadin cannot contest the wave without taking heavy damage. His Null Sphere cannot mitigate your physical poke, forcing him to farm under turret and bleed gold. You will easily secure mid priority, enabling you to pressure his tower or dive him once his mana pool limits his defensive Riftwalk casts.

Cómo jugar

To convert this advantage, rush heavy physical lethality items to completely bypass his natural armor scaling. During an all-in, do not throw your Razor Shuriken immediately after Death Mark ends. Anticipate his panic Riftwalk and hold your shurikens for a split second, or use Living Shadow to follow his blink and trigger Contempt for the Weak with an auto-attack once his magic shield fails to protect him.

Ficha completa →
Lux

Lux−2

mobilitydodgeburst Lux relies entirely on landing Light Binding to survive your dive and setup her own Lucent Singularity and Final Spark. As Zed, you can easily bypass this crowd control. By activating Living Shadow to swap positions or timing Death Mark to become untargetable, you completely bypass her only defensive tool, exposing her fragile health bar to your full physical burst. Ver detalles
Lux

Por qué

Lux relies entirely on landing Light Binding to survive your dive and setup her own Lucent Singularity and Final Spark. As Zed, you can easily bypass this crowd control. By activating Living Shadow to swap positions or timing Death Mark to become untargetable, you completely bypass her only defensive tool, exposing her fragile health bar to your full physical burst.

Impacto en la línea

This matchup dynamic forces Lux to play extremely passively, giving you absolute control over the minion wave. She cannot step up to harass you with Illumination without risking a lethal trade. You can easily maintain high health, crash waves at will, and secure clean recall timings. If she misses a single Light Binding, she is forced to abandon her tower and concede all mid priority.

Cómo jugar

Walk aggressively toward Lux to bait out Light Binding. Do not use Living Shadow offensively until she throws her snare. Once she casts it, react instantly by blinking over it with Living Shadow or dodging through her with Death Mark. Follow up with Shadow Slash to slow her, then land multiple Razor Shuriken while Prismatic Barrier is down. If you fail the dodge, retreat immediately to wait for your shadow cooldown.

Ficha completa →
Seraphine

Seraphine−2

dodge mechanicarmor rush This matchup heavily favors you because Seraphine relies on highly predictable, slow-moving projectiles to defend herself. Both Encore and Beat Drop are easily reactable. By timing your Death Mark just as she launches either of these spells, you completely bypass her crowd control, appearing directly behind her fragile frame to execute a fatal burst combo with Razor Shuriken and Shadow Slash. Ver detalles
Seraphine

Por qué

This matchup heavily favors you because Seraphine relies on highly predictable, slow-moving projectiles to defend herself. Both Encore and Beat Drop are easily reactable. By timing your Death Mark just as she launches either of these spells, you completely bypass her crowd control, appearing directly behind her fragile frame to execute a fatal burst combo with Razor Shuriken and Shadow Slash.

Impacto en la línea

During the early levels, you must tolerate her long-range poke from High Note and Stage Presence. However, once you unlock your ultimate, the entire lane pressure flips. She cannot safely step up to clear waves with her passive because stepping past her caster minions puts her in range of your Living Shadow gap-close, forcing her to constantly cower near her turret and bleed gold.

Cómo jugar

To secure this advantage, shift your build path towards heavy, flat physical penetration early on to completely negate the shield from Surround Sound. In lane, never initiate with Death Mark if she has her double-cast passive ready. Instead, poke her down with Living Shadow combined with Razor Shuriken. Once she panics and casts Encore or Beat Drop to disengage, reactively press your ultimate to dodge the projectile and trigger Contempt for the Weak.

Ficha completa →
Teemo

Teemo−2

stasis rushblind timing Teemo's primary defense relies on Blinding Dart to negate physical basic attacks, but this tool is completely useless against your spell-based assault. By combining Living Shadow with Razor Shuriken and Shadow Slash, you can safely whittle down his health from a distance. Once he is low enough, Death Mark allows you to close the gap and execute him, as your primary damage comes from your abilities rather than basic attacks. Ver detalles
Teemo

Por qué

Teemo's primary defense relies on Blinding Dart to negate physical basic attacks, but this tool is completely useless against your spell-based assault. By combining Living Shadow with Razor Shuriken and Shadow Slash, you can safely whittle down his health from a distance. Once he is low enough, Death Mark allows you to close the gap and execute him, as your primary damage comes from your abilities rather than basic attacks.

Impacto en la línea

Early on, Teemo will harass you with Toxic Shot, using Move Quick to escape. However, the dynamic shifts dramatically once you unlock your basic ability combo. Because he lacks any hard crowd control or shields, he cannot contest the minion wave without risking half his health to your ranged shadows. This pressure forces him to play defensively, preventing him from establishing control with Noxious Trap in the lane.

Cómo jugar

Prioritize pure physical penetration and burst over utility to ensure your combos instantly delete him before he can react with Guerrilla Warfare. During trades, throw your Razor Shuriken and Shadow Slash from your Living Shadow to drop his health. When you commit with Death Mark, do not immediately auto-attack if he uses Blinding Dart; wait out the short duration of the blind before applying Contempt for the Weak to secure the kill.

Ficha completa →
Twisted Fate

Twisted Fate−2

untargetableburst threat This matchup is heavily in your favor because Twisted Fate's sole defensive tool, the Gold Card from Pick a Card, is completely neutralized by Death Mark. When he throws the yellow projectile, your ultimate makes you untargetable, erasing his only self-peel. You then reappear right behind him, leaving him completely defenseless against your high-damage physical burst. Ver detalles
Twisted Fate

Por qué

This matchup is heavily in your favor because Twisted Fate's sole defensive tool, the Gold Card from Pick a Card, is completely neutralized by Death Mark. When he throws the yellow projectile, your ultimate makes you untargetable, erasing his only self-peel. You then reappear right behind him, leaving him completely defenseless against your high-damage physical burst.

Impacto en la línea

Because of this threat, Twisted Fate must play with extreme caution, restricting his ability to harass you. He will often resort to clearing waves from afar using Wild Cards. This passive playstyle allows you to control the lane tempo. You can safely position to poke him down using Living Shadow combined with Razor Shuriken and Shadow Slash, ultimately preventing him from finding opportunities to roam with Destiny.

Cómo jugar

To execute this perfectly, never initiate with Death Mark while his Pick a Card is off cooldown unless you are baiting it. Walk within range and wait for the gold card animation to start. The exact millisecond the projectile is in flight, cast your ultimate to dodge it. Once you reappear, immediately follow up with Shadow Slash and multiple Razor Shuriken hits, finishing him off with an auto-attack to trigger Contempt for the Weak.

Ficha completa →
Veigar

Veigar−2

defensetiming Zed holds a massive advantage because Death Mark completely invalidates Veigar's primary self-peel. When Veigar drops Event Horizon to zone you out, you can simply activate Death Mark to blink straight past the cage's perimeter, landing safely behind him while completely avoiding the stun. This forces Veigar to play defensively, as his high-damage Dark Matter and Primordial Burst become incredibly easy to dodge once you are in close quarters. Ver detalles
Veigar

Por qué

Zed holds a massive advantage because Death Mark completely invalidates Veigar's primary self-peel. When Veigar drops Event Horizon to zone you out, you can simply activate Death Mark to blink straight past the cage's perimeter, landing safely behind him while completely avoiding the stun. This forces Veigar to play defensively, as his high-damage Dark Matter and Primordial Burst become incredibly easy to dodge once you are in close quarters.

Impacto en la línea

This interaction dictates the lane pressure. Veigar cannot safely step up to stack Phenomenal Evil Power on you or clear waves with Baleful Strike without risking a lethal dive. Since you can bypass his cage, Veigar is forced to clear waves from extreme range under his tower, granting you absolute mid priority. You can easily trade health by using Living Shadow and Shadow Slash to slow him, then landing Razor Shuriken before forcing him out of lane.

Cómo jugar

Do not waste Living Shadow aggressively if Veigar still has Event Horizon available, as you need your mobility to punish him. Walk forward to bait out his cage. Once he places Event Horizon, immediately cast Death Mark to bypass the stun, then follow up with Shadow Slash and Razor Shuriken to trigger Contempt for the Weak. If he holds his cage, chunk him down with safe shadow combos from a distance until he is low enough to execute.

Ficha completa →
Ziggs

Ziggs−2

dive targetdodge skillshots Ziggs wants to keep you at bay with Bouncing Bomb and clear waves from safety, relying entirely on Satchel Charge to blast himself away or knock you back if you get close. However, Zed completely neutralizes this safety net. By casting Death Mark, you become untargetable and bypass the blast, or you can instantly close the gap after his self-peel displacement using Living Shadow to finish him off. Ver detalles
Ziggs

Por qué

Ziggs wants to keep you at bay with Bouncing Bomb and clear waves from safety, relying entirely on Satchel Charge to blast himself away or knock you back if you get close. However, Zed completely neutralizes this safety net. By casting Death Mark, you become untargetable and bypass the blast, or you can instantly close the gap after his self-peel displacement using Living Shadow to finish him off.

Impacto en la línea

In the early levels, you will take some poke from Bouncing Bomb and Short Fuse while trying to last-hit. However, once you unlock your mobility, Ziggs is forced to play extremely far back, conceding control of the wave. He cannot safely use Satchel Charge to execute your tower because stepping up to use it exposes him to an instant, lethal dive.

Cómo jugar

Position yourself diagonally to the wave to force Ziggs to choose between hitting you or the minions with Bouncing Bomb. Never initiate with Living Shadow unless you know his Satchel Charge is on cooldown. Instead, walk up to threaten him, trigger Death Mark when he panics, and use Living Shadow to follow his displacement or swap back to safety if he attempts to retreat through his own Hexplosive Minefield.

Ficha completa →
Mel

Mel−2

burst trademobility advantage Mel relies heavily on her ranged zone control to keep melee targets at bay, but your kit renders this defense obsolete. By utilizing Living Shadow, you instantly bypass her threat range to initiate trades. When she attempts to peel you off with her defensive spells, activating Death Mark grants you the perfect untargetable frame to dodge them entirely, leaving her completely vulnerable to your high-damage follow-up. Ver detalles
Mel

Por qué

Mel relies heavily on her ranged zone control to keep melee targets at bay, but your kit renders this defense obsolete. By utilizing Living Shadow, you instantly bypass her threat range to initiate trades. When she attempts to peel you off with her defensive spells, activating Death Mark grants you the perfect untargetable frame to dodge them entirely, leaving her completely vulnerable to your high-damage follow-up.

Impacto en la línea

This absolute mobility advantage forces Mel to play exceptionally far back, conceding wave control. She cannot safely use her ranged abilities to poke you down without risking a sudden, lethal all-in. Consequently, you dictate the pace of the lane, easily securing priority. If she attempts to contest the wave, a single successful trade puts her in range for Contempt for the Weak to secure an easy under-tower execution.

Cómo jugar

To exploit this, avoid throwing Living Shadow randomly; hold it to threaten her whenever she steps up to farm. Walk forward to bait her defensive spells, then react instantly with Living Shadow to close the gap, immediately buffering Death Mark to slip past her crowd control. Upon reappearing, unleash Shadow Slash and a double Razor Shuriken, finishing with a basic attack to proc Contempt for the Weak.

Ficha completa →
Syndra

Syndra−2

untargetabilitydodge mechanics This matchup swings heavily in your favor due to how Death Mark interacts with Unleashed Power. Since Syndra relies on a single massive burst of damage from her ultimate to execute targets, your ability to become untargetable at the exact moment she casts it completely neutralizes her win condition. She cannot burst you down if you reactively dodge her entire sphere payload, leaving her extremely vulnerable. Ver detalles
Syndra

Por qué

This matchup swings heavily in your favor due to how Death Mark interacts with Unleashed Power. Since Syndra relies on a single massive burst of damage from her ultimate to execute targets, your ability to become untargetable at the exact moment she casts it completely neutralizes her win condition. She cannot burst you down if you reactively dodge her entire sphere payload, leaving her extremely vulnerable.

Impacto en la línea

Before level five, you must endure her ranged poke from Dark Sphere. However, once you unlock your ultimate, the lane dynamic completely reverses. Syndra is forced to play incredibly defensively, holding onto Scatter the Weak out of sheer terror. If she wastes her knockback to clear waves or poke, you can instantly close the distance with Living Shadow and execute her, giving you total control over the mid lane priority.

Cómo jugar

To secure the kill, poke her down to half health using your Living Shadow, Shadow Slash, and Razor Shuriken combo. When committing, never lead with Death Mark if her Scatter the Weak is active, as she will stun you the millisecond you reappear. Instead, bait her crowd control, or use your ultimate reactively the moment you see the animation of Unleashed Power begin, guaranteeing you dodge her burst and finish her off with Contempt for the Weak.

Ficha completa →
Varus

Varus−2

assassin threatdodge timingexhaust utility Varus lacks any natural mobility to escape your burst, relying solely on Chain of Corruption to stop dives. The entire matchup hinges on this interaction: the moment he casts his ultimate to peel you off, you can activate Death Mark to bypass the projectile entirely. By dodging his only crowd control, you land right behind his vulnerable, immobile frame, making him an incredibly easy target for your Razor Shuriken and Shadow Slash burst. Ver detalles
Varus

Por qué

Varus lacks any natural mobility to escape your burst, relying solely on Chain of Corruption to stop dives. The entire matchup hinges on this interaction: the moment he casts his ultimate to peel you off, you can activate Death Mark to bypass the projectile entirely. By dodging his only crowd control, you land right behind his vulnerable, immobile frame, making him an incredibly easy target for your Razor Shuriken and Shadow Slash burst.

Impacto en la línea

Before reaching level five, expect Varus to harass you with Piercing Arrow and Hail of Arrows while trying to shove the wave. However, once your ultimate is available, the lane dynamic flips instantly. The constant threat of your all-in forces him to play extremely defensively under his tower. He cannot safely step up to secure plates or poke, granting you complete control over lane priority and forcing him into a passive state.

Cómo jugar

When executing your offensive, never initiate directly with Death Mark unless he has already wasted Chain of Corruption. Instead, throw a clone with Living Shadow to close the gap or poke him down with Razor Shuriken. Walk up to him and force him to panic-cast his ultimate. The instant you see the animation of his vine starting, press your ultimate to dodge it, land behind him, and execute him with Contempt for the Weak enhanced basic attacks.

Ficha completa →

Otros emparejamientos

Items to Counter Zed

Buy these items to reduce this champion's effectiveness in your games.

Stasis Enchant
Stasis Enchant
Plated Steelcaps
Plated Steelcaps
Frozen Heart
Frozen Heart
Randuin's Omen
Randuin's Omen
Guardian Angel
Guardian Angel

Cómo contrarrestar a este campeón

Ángulo de contra

Hacer counter a Zed no consiste solo en sobrevivir a su ultimate. El objetivo real es romper la secuencia que hace que Death Mark sea rentable: denegar su control de oleadas, limitar sus ángulos de pared, guardar un crowd control o herramienta defensiva para su regreso, y luego castigar su falta de presencia una vez que use sus sombras. Los campeones ya identificados como difíciles para él suelen compartir una cosa: no le dan un objetivo simple, inmóvil y aislado. Algunos absorben su burst, otros lo controlan cuando quiere salir y otros lo obligan a entablar combate en un ritmo que él no controla. Contra Zed, la disciplina de equipo importa tanto como el matchup individual.

Contexto del parche

Zed sufre más contra respuestas que le impiden convertir el primer contacto en una baja limpia. Si su objetivo sobrevive a Death Mark, si tiene que usar la W de forma defensiva o si hay crowd control esperando en su punto de retorno, su presión cae drásticamente. Los matchups desfavorables no ganan todos de la misma manera: algunos lo castigan en lane con un aturdimiento directo, otros neutralizan su all-in mediante durabilidad natural o invulnerabilidad, y otros pueden devolverle su burst. La clave es no darle nunca un objetivo gratis antes de un objetivo.

Lectura rápida

  • Guarda una herramienta defensiva para la detonación de Death Mark, no para el primer poke.
  • Castigar su W suele ser más importante que castigar su ultimate: sin sombra, Zed pierde tanto la amenaza como la salida.
  • Obligar a Zed a jugar de frente reduce enormemente su valor, especialmente alrededor de los objectives donde busca ángulos basados en muros.

Arquetipos de contra

Control dirigido y castigo en el punto de retorno

Zed quiere elegir el momento exacto en el que entra y sale. Los campeones con un control fiable rompen ese principio porque pueden guardar su aturdimiento, inmovilización o respuesta defensiva para el momento en que se vuelve predecible: después de Death Mark, cerca de su sombra o sobre su objetivo. Esto le obliga a jugar más lento, gastar la W para esquivar en lugar de amenazar y realizar engages menos rentables. Incluso si acierta su combo, el peligro es que ya no controla el final de la secuencia.

Cómo se adapta el campeón. Zed debe forzar primero un hechizo clave o provocar un mal uso del control de masas. También puede jugar más a través del poke con sombras, la presión de oleadas y los roams en lugar de buscar un all-in directo sobre un objetivo que le está esperando.

Supervivencia al burst y compra defensiva natural

Zed quiere que su primer ciclo importante genere una baja o al menos un hechizo de invocador clave. Los campeones que pueden comprar armadura, absorber el burst o retrasar la explosión hacen que esa ventana sea mucho menos decisiva. El problema para Zed no es solo la falta de daño: cada all-in fallido le cuesta tempo, energía, una sombra y, a menudo, presión de lane. Cuando el oponente sobrevive, puede empujar la oleada o unirse a su equipo mientras Zed espera sus cooldowns.

Cómo se adapta el campeón. Zed debe evitar la visión de túnel sobre un objetivo que no va a morir. Debe mover la presión hacia las side lanes, forzar recursos defensivos antes de los objectives y elegir carries menos protegidos en lugar del matchup de Mid Lane más duradero.

Duelo móvil y castigo de sombras

Algunos matchups hacen algo más que sobrevivir: hacen que la secuencia de Zed sea inestable. Con movilidad, esquives o una amenaza de retorno inmediata, pueden evitar parte del combo, castigar una sombra demasiado agresiva o dar la vuelta al duelo una vez que Zed se queda sin herramientas. Esto obliga a Zed a ser más preciso con los tiempos y a evitar desperdiciar shurikens. Si falla la primera parte del combo, a menudo ya no tiene suficiente presión para rematar al objetivo sin exponerse.

Cómo se adapta el campeón. Zed debe jugar con más paciencia, guardar la W para responder al movimiento enemigo y evitar los all-ins sin información. Contra este perfil, asestar poke de preparación suele ser más importante que buscar la baja tan pronto como Death Mark vuelva a estar disponible.

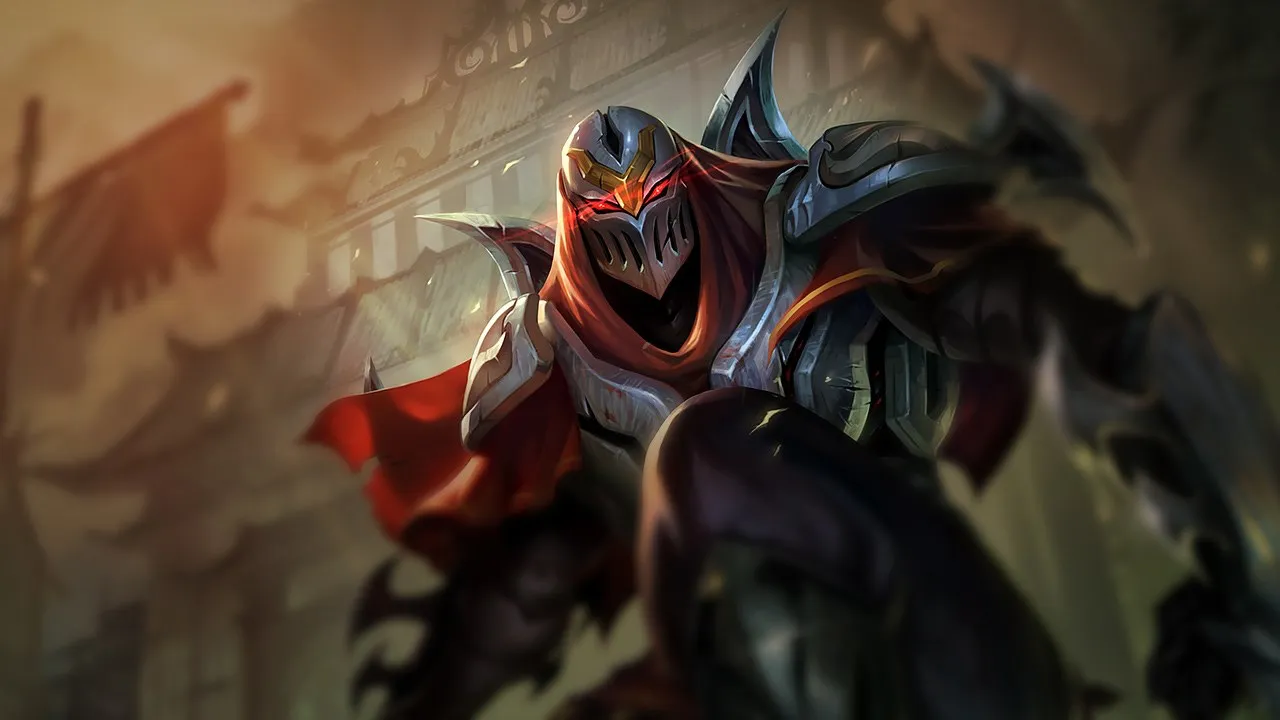
Emparejamientos prioritarios

Lissandra

Lissandra es uno de los matchups más definitorios contra Zed porque puede esperar a que él se comprometa en lugar de entrar en pánico al primer poke. Su valor reside en convertir Death Mark en una trampa: si Zed entra sin forzar sus herramientas, puede quedar inmovilizado cuando quiera rematar o salir. Para Zed, este matchup requiere jugar alrededor de la oleada, la visión y el bait, no en torno al duelo mecánico puro.

Malphite

Malphite crea un problema diferente: reduce el valor del burst al tiempo que aporta una amenaza de engage a la que Zed no quiere enfrentarse directamente. Aunque Zed a veces pueda encontrar un objetivo en otra parte, el matchup se vuelve peligroso cuando Malphite fuerza a agruparse y hace que Zed entre en una zona ya controlada. La adaptación correcta es no desperdiciar el ciclo en un objetivo demasiado duradero y buscar rotaciones antes de que Malphite bloquee la pelea.

Errores comunes en su contra

Errores comunes en su contra

  • Usar Stasis Enchant demasiado pronto, antes de Death Mark, y permitir que Zed realice su engage real unos segundos después.
  • Seguirle en la niebla de guerra sin visión lateral, especialmente cuando su W está disponible.

  • Empujar la lane sin respetar su nivel 5, dándole un ángulo de roam gratuito.
  • Guardar todo el control de masas para el engage aliado en lugar de reservar uno para el retorno o la salida de Zed.
  • Comprar solo daño cuando la partida requiere armadura temprana o una herramienta de retraso.

Notas del coach

  • Contra Zed, no juegues solo alrededor de tu barra de vida: juega alrededor de sus cooldowns. Una vez que usa su sombra sin amenazar con una baja, se abre la ventana para dar un paso adelante, empujar o ganar visión.
  • El mejor counterplay en equipo es hacer que su objetivo esté menos aislado. Un carry posicionado un poco más atrás, un Support listo para hacer peel y un ward en el ángulo del muro suelen ser suficientes para convertir su engage en un error.

FAQ

¿Cuál es la mejor manera de sobrevivir a Zed en lane?

La mejor manera es controlar la oleada y sus cooldowns en lugar de simplemente retroceder. Si te quedas con poca vida, Zed puede amenazar con Death Mark desde el nivel 5; si empujas sin visión, puede desaparecer y hacer snowball en otra parte. Guarda una respuesta para cuando se comprometa de verdad, respeta su W y evita estar cerca de un muro sin información sobre su posición.


¿Se debe comprar siempre Stasis Enchant contra Zed?

En carries frágiles, Stasis Enchant suele ser la respuesta más directa, pero no basta por sí sola. Si lo usas demasiado pronto o sin que tu equipo pueda castigar a Zed después, solo retrasas el problema. Debe combinarse con un buen posicionamiento, visión en los flancos y control de masas listo para el momento en que Zed intente salir.

¿Por qué Zed parece más fuerte cuando la visión es deficiente?

Zed se beneficia enormemente de la niebla de guerra porque sus sombras le dan ángulos que los carries no pueden calcular a tiempo. Cuando las entradas de la Jungle y los muros alrededor de los objectives no tienen wards, él puede elegir el objetivo, la distancia y el timing del burst. Con buena visión, a menudo tiene que entrar de frente, lo que hace que sus decisiones sean mucho más predecibles y castigables.

¿Cómo castigar a un Zed que ya va por delante?

Un Zed fed quiere convertir cada rotación en un pick. Para castigarlo, reduce el movimiento aislado, agrúpate alrededor de las oleadas importantes y prepara la respuesta a su salida en lugar de perseguirlo. No le des un duelo gratis en side-lane sin visión. Si su engage no mata de inmediato, su shutdown suele ser recuperable durante sus cooldowns.



























































































