septiembre de 2026 · Patch 7.2d
Mage · MID · SUPPORT

Guía de counters de Swain Wild Rift

Swain es contrarrestado por composiciones de poke de largo alcance que evitan sus tentáculos y su zona de drain. Los campeones que pueden iniciar un engage antes de que active su ultimate o que resisten su sustain mediante anti-heal reducen su efectividad. Su lentitud lo hace vulnerable al reposicionamiento enemigo.

★ MID · SUPPORT Tier S
DAÑO
UTIL
TANK
DIFF
Win 53.7% #11 · ↑5pt
Pick 4.6% #16
Ban 6.3% #37

Guía de counters de Swain Wild Rift ★ Counter Sheet

Tabla de emparejamientos
Emparejamiento Veredicto Ventaja Tasa de victorias Tasa de selección
Syndra Desfavorables +1 52.8% 13.2%
Brand Desfavorables +1 51.0% 9.3%
Yone Desfavorables +1 50.6% 5.2%
Aurelion Sol Desfavorables +1 50.5% 6.8%
Vel'Koz Desfavorables +1 50.4% 3.4%
Lux Desfavorables +1 48.9% 5.6%
Yasuo Desfavorables +1 48.8% 10.6%
Viktor Desfavorables +1 48.6% 3.3%
Ziggs Desfavorables +1 48.5% 6.0%
Norra Desfavorables +1 48.1% 1.4%
Jayce Desfavorables +1 47.2% 1.4%
Irelia Desfavorables +1
Pantheon Desfavorables +1
Zoe Desfavorables +1
Zyra Matchups de Habilidad ±0 51.7% 2.8%
Taliyah Matchups de Habilidad ±0 50.7% 2.8%
Katarina Matchups de Habilidad ±0 48.5% 1.7%
Ryze Matchups de Habilidad ±0 48.1% 2.9%
Veigar Matchups de Habilidad ±0 47.5% 9.7%
Corki Matchups de Habilidad ±0
Kai'Sa Matchups de Habilidad ±0
Seraphine Matchups de Habilidad ±0
Morgana Favorables −1 52.3% 6.2%
Ahri Favorables −1 51.8% 5.0%
Kennen Favorables −1 51.4% 1.6%
Orianna Favorables −1 51.3% 4.7%
Galio Favorables −1 51.3% 11.2%
Kayle Favorables −1 51.2% 1.0%
Annie Favorables −1 50.6% 2.2%
Aurora Favorables −1 49.9% 3.8%
Lissandra Favorables −1 49.8% 4.0%
Heimerdinger Favorables −1 49.6% 1.4%
Ekko Favorables −1 49.6% 2.9%
Vladimir Favorables −1 49.5% 5.1%
Zed Favorables −1 49.5% 3.8%
Vex Favorables −1 49.1% 2.2%
Kassadin Favorables −1 49.0% 1.6%
Fizz Favorables −1 48.6% 1.9%
Akali Favorables −1 45.0% 2.5%
Akshan Favorables −1
Karma Favorables −1
Rumble Favorables −1
Talon Favorables −1
Teemo Favorables −2 52.1% 1.8%
Diana Favorables −2 50.8% 1.4%
Mel Favorables −2 45.7% 7.8%
Malphite Favorables −2
Pyke Favorables −2

Edge: Wild Rift Core canonical verdict (−3 to +3), shown from the point of view of the champion named in the row. Win rate and pick rate: the opponent's own rate in this role — Wild Rift CN · Challenger, Patch 7.2d. Not a head-to-head win rate.

Desfavorables

14

Estos campeones tienen herramientas que generalmente les dan ventaja en el enfrentamiento, sin llegar a hacer el matchup injugable. Pueden tener más alcance, mejor capacidad para aguantar tu ofensiva o más formas de responder a tus engagements. Tendrás que adaptar tu enfoque y elegir con cuidado los momentos en los que aceptas el combate.

Lux

Lux+1

spacingkiteanti engage Lux dictates this matchup entirely through her superior range. Her Lucent Singularity and Light Binding allow her to harass you from a distance where your Nevermove simply cannot reach. Because you cannot reliably root her, you are starved of souls for your Ravenous Flock, preventing you from scaling your maximum health. This distance safety also means activating Demonic Ascension is useless, as she remains completely out of your draining aura. Ver detalles
Lux

Por qué

Lux dictates this matchup entirely through her superior range. Her Lucent Singularity and Light Binding allow her to harass you from a distance where your Nevermove simply cannot reach. Because you cannot reliably root her, you are starved of souls for your Ravenous Flock, preventing you from scaling your maximum health. This distance safety also means activating Demonic Ascension is useless, as she remains completely out of your draining aura.

Impacto en la línea

You will constantly find yourself pushed under turret. Lux can easily clear waves and poke you simultaneously using Lucent Singularity, forcing you to spend mana on Death's Hand just to secure last hits rather than trading. Your health pool will slowly dwindle under her constant Illumination procs, leading to forced, unfavorable recall timings. This constant mid-lane pressure denies you any map priority, locking you down while she threatens with Final Spark.

Cómo jugar

To survive this lane, you must adopt a strict lateral movement pattern to bait and dodge her Light Binding. Never walk directly toward her; instead, focus on farming and wait for her to waste her crowd control. If she misses her root, you have a brief window to step forward and place Vision of Empire to slow her, allowing you to close the gap. Keep your distance when her Prismatic Barrier is active, and only trigger Demonic Ascension if she makes the mistake of stepping too close.

Ficha completa →
Ziggs

Ziggs+1

dodge skillssustain under pressure Ziggs holds a massive range advantage that neutralizes your healing engine. By clearing waves from afar with Bouncing Bomb, he completely avoids the radius of Demonic Ascension. Since he never has to step into your drain zone to secure farm, you are starved of the passive healing that keeps you alive in skirmishes, turning this into a battle of attrition you cannot easily win. Ver detalles
Ziggs

Por qué

Ziggs holds a massive range advantage that neutralizes your healing engine. By clearing waves from afar with Bouncing Bomb, he completely avoids the radius of Demonic Ascension. Since he never has to step into your drain zone to secure farm, you are starved of the passive healing that keeps you alive in skirmishes, turning this into a battle of attrition you cannot easily win.

Impacto en la línea

Expect to spend the laning phase shoved under your turret. Ziggs will constantly spam Bouncing Bomb and Hexplosive Minefield to erase waves, leaving you struggling to match his push. If you attempt to roam or take a poorly timed recall, his Satchel Charge will quickly execute your tower plates, forcing you to play defensively and sacrificing your early map pressure.

Cómo jugar

Focus entirely on managing the wave near your tower without letting it crash fully. Use Nevermove to catch Ziggs only when he steps up to auto-attack with Short Fuse, following up with Vision of Empire to slow him for a gank. If he retreats, save Demonic Ascension; do not waste your ultimate trying to force a fight he can easily disengage from using Satchel Charge.

Ficha completa →
Viktor

Viktor+1

spacingshove pressure This matchup is dictated by Viktor's superior reach and zone control. While you want to close the distance, his Hextech Ray constantly pokes you from safety. More importantly, your ultimate, Demonic Ascension, is heavily countered by his Gravity Field. The moment you transform and try to run him down, he drops the zone in your path, forcing you to take a long detour and wasting your crucial drain uptime. Ver detalles
Viktor

Por qué

This matchup is dictated by Viktor's superior reach and zone control. While you want to close the distance, his Hextech Ray constantly pokes you from safety. More importantly, your ultimate, Demonic Ascension, is heavily countered by his Gravity Field. The moment you transform and try to run him down, he drops the zone in your path, forcing you to take a long detour and wasting your crucial drain uptime.

Impacto en la línea

Viktor's rapid waveclear with Hextech Ray forces you to spend most of the early game farming under your turret. Attempting to freeze or contest the wave dynamic is risky, as his Siphon Power shield negates your Death's Hand retaliation. This constant pressure limits your map rotations, forcing you to prioritize wave management over early skirmishes while slowly bleeding tower plates if you cannot match his push.

Cómo jugar

To survive this lane, prioritize lane discipline over aggressive trades. Use Death's Hand strictly to prevent the wave from crashing too fast, and conserve your mana. Never activate Demonic Ascension while Viktor still holds Gravity Field, as he will instantly neutralize your ultimate. Instead, fish for catches with Nevermove when he mispositions to use Siphon Power, and use Vision of Empire from afar to disrupt his recalls or assist your jungler without leaving your tower.

Ficha completa →
Yone

Yone+1

spacingdodge skills Yone's Soul Unbound completely neutralizes your primary self-defense, Nevermove. He can easily dodge the returning root or cleanse it entirely by snapping back to his body. Without the snare to trigger Ravenous Flock, you cannot keep him at bay. He will easily close the gap using the third strike of Mortal Steel and shred you with the mixed physical and magic damage of Way of the Hunter. Ver detalles
Yone

Por qué

Yone's Soul Unbound completely neutralizes your primary self-defense, Nevermove. He can easily dodge the returning root or cleanse it entirely by snapping back to his body. Without the snare to trigger Ravenous Flock, you cannot keep him at bay. He will easily close the gap using the third strike of Mortal Steel and shred you with the mixed physical and magic damage of Way of the Hunter.

Impacto en la línea

You cannot safely contest the wave near the center of the lane. Stepping up to clear minions with Death's Hand exposes you to sudden engages, especially since Yone can mitigate your counter-poke with his Spirit Cleave shield. This constant threat forces you under your turret, slowly chipping away at your health bar and leaving you unable to assist your jungler when Yone roams freely.

Cómo jugar

Never cast Nevermove proactively. Keep this crucial spell ready as a deterrent; Yone is much less likely to dive you if he has to fear a point-blank root. When he activates Soul Unbound, immediately drop Vision of Empire on his tethered physical body. This forces him to choose between taking heavy damage upon his return or cutting his engage short. If he uses Fate Sealed, activate Demonic Ascension immediately to survive his burst.

Ficha completa →
Syndra

Syndra+1

spacingdodge skills Your entire game plan revolves around draining enemies closely, but Syndra completely counters this with her defensive kit. The moment you activate Demonic Ascension to start healing and dealing sustained damage, she can immediately respond with Scatter the Weak. This pushes you far outside your ultimate's drain radius, effectively wasting its duration and leaving you extremely vulnerable once your transformation expires. Ver detalles
Syndra

Por qué

Your entire game plan revolves around draining enemies closely, but Syndra completely counters this with her defensive kit. The moment you activate Demonic Ascension to start healing and dealing sustained damage, she can immediately respond with Scatter the Weak. This pushes you far outside your ultimate's drain radius, effectively wasting its duration and leaving you extremely vulnerable once your transformation expires.

Impacto en la línea

Because she can effortlessly disengage your all-ins, Syndra dictates the lane tempo. She will constantly harass you with Dark Sphere and Force of Will while you try to farm with Death's Hand. You cannot easily contest her wave clear without taking heavy poke, forcing you into defensive recall timings. This keeps you pinned under your tower, unable to assist your jungler or secure priority.

Cómo jugar

To survive, you must bait out Scatter the Weak before committing your ultimate. Position yourself slightly off-center from her Dark Sphere placements to make her stun harder to land. Hold your Nevermove and only cast it when she walks forward to throw a Force of Will. If she wastes her knockback, that is your immediate green light to activate Demonic Ascension and force a close-quarters trade.

Ficha completa →
Yasuo

Yasuo+1

spacingbait shields Yasuo's Wind Wall completely shuts down your offensive threat by blocking both the initial and returning paths of Nevermove. Because your entire crowd control and soul-harvesting engine via Ravenous Flock relies on landing this claw, a single well-timed wall leaves you completely exposed. Without the threat of your root, Yasuo can easily bypass Death's Hand poke and dash directly onto you. Ver detalles
Yasuo

Por qué

Yasuo's Wind Wall completely shuts down your offensive threat by blocking both the initial and returning paths of Nevermove. Because your entire crowd control and soul-harvesting engine via Ravenous Flock relies on landing this claw, a single well-timed wall leaves you completely exposed. Without the threat of your root, Yasuo can easily bypass Death's Hand poke and dash directly onto you.

Impacto en la línea

This defensive barrier forces you into a passive posture where you cannot step up to contest waves. Yasuo will constantly dash through minions with Sweeping Blade to pop his Way of the Wanderer shield, knowing you cannot punish him if Nevermove is blocked. Missed roots mean fewer soul fragments, delaying your health scaling and leaving you vulnerable to a dive via Last Breath if you get chipped down.

Cómo jugar

To survive, you must hold Nevermove like a loaded weapon. Never throw it proactively unless Yasuo has already wasted his Wind Wall on a stray Death's Hand. If he dashes aggressively with Sweeping Blade, drop Vision of Empire directly on yourself to slow his retreat and force him to choose between taking damage or burning his wall. If he blocks your root, immediately retreat under your turret and wait out the long barrier cooldown before stepping up again.

Ficha completa →
Aurelion Sol

Aurelion Sol+1

safe farmoutscale Swain's complete lack of mobility makes him a sitting duck inside Aurelion Sol's Singularity. Whenever you try to force a fight with Demonic Ascension, the Star Forger can drop his gravitational black hole directly on you. Because you cannot quickly escape its pull, Aurelion Sol can channel Breath of Light with impunity, farming massive Stardust stacks off your ultimate’s duration while easily out-ranging your Death's Hand. Ver detalles
Aurelion Sol

Por qué

Swain's complete lack of mobility makes him a sitting duck inside Aurelion Sol's Singularity. Whenever you try to force a fight with Demonic Ascension, the Star Forger can drop his gravitational black hole directly on you. Because you cannot quickly escape its pull, Aurelion Sol can channel Breath of Light with impunity, farming massive Stardust stacks off your ultimate’s duration while easily out-ranging your Death's Hand.

Impacto en la línea

This dynamic neutralizes your early aggression. Aurelion Sol easily matches your wave clear by dropping Singularity on your minions, forcing you to use Death's Hand under pressure. Because Nevermove is too slow to stop his Astral Flight mid-flight, you cannot punish his roams or lock him down for trades. This turns the mid lane into a passive farming zone where his Stardust stacks grow unchecked while you struggle to crash waves.

Cómo jugar

To survive this scaling matchup, you must discipline your wave management. Never activate Demonic Ascension unless Aurelion Sol has already wasted Singularity on the wave. Instead, use Death's Hand solely to freeze the minions near your turret, forcing him to overextend to farm. If he attempts to channel Breath of Light on the wave, punish him with Nevermove. Use Vision of Empire to scout his Astral Flight roams and immediately hard-shove to punish his absence.

Ficha completa →
Irelia

Irelia+1

dodge skillshotsdps race This matchup hinges on the interaction between your CC and her mobility. When Irelia uses a Bladesurge reset on a dying minion to dodge your Nevermove, she completely neutralizes your Ravenous Flock healing. Without that crucial burst of passive sustain, you are left defenseless at close range against her fully stacked Ionian Fervor basic attacks, which quickly shred your health pool. Ver detalles
Irelia

Por qué

This matchup hinges on the interaction between your CC and her mobility. When Irelia uses a Bladesurge reset on a dying minion to dodge your Nevermove, she completely neutralizes your Ravenous Flock healing. Without that crucial burst of passive sustain, you are left defenseless at close range against her fully stacked Ionian Fervor basic attacks, which quickly shred your health pool.

Impacto en la línea

Expect Irelia to constantly prep the minion wave to create jump points. If she baits out your Nevermove, she immediately gains complete wave control, forcing you under tower where she can dive you with Vanguard's Edge. Any trade where you miss your root means giving up mid-lane priority, forcing you to use Vision of Empire just to scout her roams rather than securing passive stacks.

Cómo jugar

You must never cast Nevermove proactively while Irelia has low-health minions nearby to dash to. Instead, hold the ability and punish her with Death's Hand when she approaches to last-hit. If she initiates with Flawless Duet or Vanguard's Edge, wait for her to finish her Bladesurge dash onto you before throwing your root point-blank. Once she is rooted, immediately back off to deny her sustained auto-attacks and use Demonic Ascension only to survive her burst under your turret.

Ficha completa →

Otros emparejamientos

Matchups de Habilidad

8

Estos enfrentamientos son sobre todo duelos de ejecución: ambos campeones tienen formas reales de tomar la ventaja. Esquivar una habilidad clave, anticipar bien un engagement o un simple error de posicionamiento puede inclinar el duelo hacia un lado. Conocer el matchup y reconocer las ventanas de acción correctas es especialmente importante aquí.

Ryze

Ryze±0

kitingsustained dps This matchup revolves around a spacing battle during ultimate activations. While your Demonic Ascension provides immense health drain, Ryze combats this by cycling Spell Flux and Overload to trigger sudden bursts of movement speed. This allows him to dance just outside your ultimate's aura while continuously chipping away at your health bar, turning the fight into a pure test of micro-spacing and healing against his sustained magic damage. Ver detalles
Ryze

Por qué

This matchup revolves around a spacing battle during ultimate activations. While your Demonic Ascension provides immense health drain, Ryze combats this by cycling Spell Flux and Overload to trigger sudden bursts of movement speed. This allows him to dance just outside your ultimate's aura while continuously chipping away at your health bar, turning the fight into a pure test of micro-spacing and healing against his sustained magic damage.

Impacto en la línea

Trading in this lane is a battle of attrition. Ryze will constantly attempt to spread Spell Flux through your minions to poke you from safety, while you rely on Ravenous Flock pulls and Death's Hand to match his wave clear. Because both of you possess high sustain and wave pressure, neither champion can easily force a recall, meaning the lane often remains locked in Mid, delaying roam timers and keeping both junglers focused on breaking the stalemate.

Cómo jugar

To win this, you must hold Nevermove specifically for when Ryze advances to spread Spell Flux or when he triggers his Overload speed boost. Do not activate Demonic Ascension preemptively; wait until he commits his Rune Prison to root you, then immediately counter with your ultimate and use Vision of Empire behind him to slow his escape path. If he successfully kited your ultimate, immediately disengage and focus on clearing waves to rebuild your soul stacks.

Ficha completa →
Veigar

Veigar±0

spacingcooldown windows This matchup is a battle of spatial control. Swain wants to run down enemies with Demonic Ascension, but Veigar's Event Horizon completely negates this aggressive approach. If you get trapped inside the cage, you cannot close the distance to drain Veigar, leaving you vulnerable to Dark Matter and a devastating Primordial Burst. Your ability to sustain depends entirely on navigating around his cage. Ver detalles
Veigar

Por qué

This matchup is a battle of spatial control. Swain wants to run down enemies with Demonic Ascension, but Veigar's Event Horizon completely negates this aggressive approach. If you get trapped inside the cage, you cannot close the distance to drain Veigar, leaving you vulnerable to Dark Matter and a devastating Primordial Burst. Your ability to sustain depends entirely on navigating around his cage.

Impacto en la línea

Throughout the laning phase, Veigar aims to farm with Baleful Strike to stack Phenomenal Evil Power safely. You must use Nevermove to disrupt his rhythm, but missing it leaves you open to an immediate Event Horizon counter-attack. The lane remains neutral until one of you overextends; a trapped Swain is easily burst down, whereas a Veigar without his cage cannot stop your raw health drain.

Cómo jugar

To win this, never activate Demonic Ascension proactively unless Veigar has already wasted Event Horizon. Position yourself diagonally from him to make landing Nevermove easier while baiting out his cage. If you do get trapped inside the perimeter, do not panic-walk into the stun boundary; instead, use the internal space to dodge Dark Matter and cast Vision of Empire to slow his follow-up, waiting out the cage before re-engaging.

Ficha completa →
Corki

Corki±0

sustainteamfights This matchup is a battle of attrition centered on Corki's mobility versus your ultimate's zone. While Swain relies on pulling Corki with Nevermove to trigger Ravenous Flock and sustain, Corki easily negates your ultimate pressure. The moment you activate Demonic Ascension, Corki can react with Valkyrie to dash out of your drain range, completely cutting off your health regeneration and leaving you vulnerable. Ver detalles
Corki

Por qué

This matchup is a battle of attrition centered on Corki's mobility versus your ultimate's zone. While Swain relies on pulling Corki with Nevermove to trigger Ravenous Flock and sustain, Corki easily negates your ultimate pressure. The moment you activate Demonic Ascension, Corki can react with Valkyrie to dash out of your drain range, completely cutting off your health regeneration and leaving you vulnerable.

Impacto en la línea

Laning revolves around managing the distance between Corki's long-range Phosphorus Bomb or Missile Barrage poke and your short-range Death's Hand. Because Corki matches your wave clear using Gatling Gun, you cannot easily force him under tower. The lane remains even until someone missteps; if you fail to pin him down before he acquires his Special Delivery package, he will easily out-roam you and pressure other lanes.

Cómo jugar

To win this duel, never initiate with Demonic Ascension while Corki has Valkyrie available. Instead, fish for trades using Nevermove to pull him in with Ravenous Flock, forcing him to panic-dash. Once his mobility is down, you can safely unleash your ultimate. When he retrieves his package, use Vision of Empire to scout his pathing and slow his Special Delivery approach, keeping yourself safe from the high-damage burning trail.

Ficha completa →

Otros emparejamientos

Favorables

26

Estos campeones suelen tener problemas para responder a tus principales fortalezas, lo que te permite afrontar el enfrentamiento con más libertad. Normalmente tienes varias formas de presionarlos y forzar intercambios a tu favor. Aprovecha esta ventaja para imponer tu ritmo en lugar de darles tiempo para volver a una posición cómoda.

Ahri

Ahri−1

sustainteamfight This matchup is a battle of attrition where Swain holds the upper hand. While Ahri relies on Orb of Deception and Essence Theft to poke and sustain, she lacks the raw burst to pierce through Demonic Ascension. When you activate your ultimate, her entire offensive pressure evaporates; she cannot outdamage your constant draining and is forced to burn Spirit Rush charges defensively just to escape your zone of influence. Ver detalles
Ahri

Por qué

This matchup is a battle of attrition where Swain holds the upper hand. While Ahri relies on Orb of Deception and Essence Theft to poke and sustain, she lacks the raw burst to pierce through Demonic Ascension. When you activate your ultimate, her entire offensive pressure evaporates; she cannot outdamage your constant draining and is forced to burn Spirit Rush charges defensively just to escape your zone of influence.

Impacto en la línea

Because Ahri cannot easily kill you, the lane revolves around minion management. You can constantly shove her under turret with Death's Hand, neutralizing her roaming potential. Her Orb of Deception forces her to choose between matching your push or trading. If she tries to trade, your Ravenous Flock passive keeps your health pool too high for her to setup a dive, locking her in mid lane and protecting your side lanes.

Cómo jugar

Keep your distance to make dodging Charm easier, and always hold Nevermove until she commits to a forward movement or dashes. If she attempts to trade with Fox-Fire, pull her with Ravenous Flock to trigger your healing. Should she bait out your Demonic Ascension and escape with Spirit Rush, immediately back off to your turret and use Vision of Empire from safety to scout her potential roams until your ultimate is back online.

Ficha completa →
Diana

Diana−2

sustainteamfight Diana relies on marking you with Crescent Strike to dive in with Lunar Rush and unleash Moonfall. However, her burst is entirely countered by Demonic Ascension, which instantly grants you bonus health to absorb her combo. Once her cooldowns are spent, Diana has no escape and cannot match your continuous healing from Ravenous Flock and close-range spam of Death's Hand during an extended duel. Ver detalles
Diana

Por qué

Diana relies on marking you with Crescent Strike to dive in with Lunar Rush and unleash Moonfall. However, her burst is entirely countered by Demonic Ascension, which instantly grants you bonus health to absorb her combo. Once her cooldowns are spent, Diana has no escape and cannot match your continuous healing from Ravenous Flock and close-range spam of Death's Hand during an extended duel.

Impacto en la línea

This matchup shifts the lane pressure entirely in your favor once you reach level five. Since Diana cannot burst you down, her aggressive trades backfire, forcing her to play defensively or risk dying. This gives you total control over the wave state. You can shove her under turret repeatedly, forcing her to waste mana on Pale Cascade to farm, while you look to impact the side lanes.

Cómo jugar

Position yourself slightly behind your minions to make her Crescent Strike predictable. Hold Nevermove until she commits with Lunar Rush; since she dashes directly to you, landing your root is guaranteed, letting you pull her with Ravenous Flock. If she roams to avoid your pressure, don't blindly follow her into unwarded areas. Instead, use Vision of Empire to scout her path or delay her, then hard-shove the wave to punish her tower.

Ficha completa →
Zed

Zed−1

armor rushultimate timing Zed relies entirely on executing you with his Death Mark combo, but your ultimate completely shuts down his assassination window. Activating Demonic Ascension instantly inflates your health pool, and pulling him or his clones with Ravenous Flock provides continuous healing. Because Death Mark's pop damage scales off how much damage Zed inflicts during the mark, your massive health spike and constant healing easily nullify his burst. Ver detalles
Zed

Por qué

Zed relies entirely on executing you with his Death Mark combo, but your ultimate completely shuts down his assassination window. Activating Demonic Ascension instantly inflates your health pool, and pulling him or his clones with Ravenous Flock provides continuous healing. Because Death Mark's pop damage scales off how much damage Zed inflicts during the mark, your massive health spike and constant healing easily nullify his burst.

Impacto en la línea

Zed is forced into a defensive posture, unable to threaten you under your tower. Whenever he approaches the wave to trigger Contempt for the Weak on minions, you can punish him with a point-blank Death's Hand. This pressure forces him to burn Living Shadow just to escape or clear from range with Razor Shuriken, preventing him from roaming to side lanes and locking him in mid.

Cómo jugar

Never throw Nevermove blindly while Zed has Living Shadow available, as he will easily dodge it. Instead, hold your crowd control for his ultimate. When Zed casts Death Mark, he always reappears directly behind you. Cast Nevermove behind your own back the split second he lands to guarantee an instant root, then pull him with Ravenous Flock, activate Demonic Ascension, and blast him with Death's Hand to turn his dive into a self-trap.

Ficha completa →
Pyke

Pyke−2

sustainexecution denial Pyke relies entirely on bringing your health low enough to execute you with Death from Below. However, the moment he leaps to cast his ultimate, your activation of Demonic Ascension grants you an instantaneous health surge. This sudden burst of maximum and current health instantly pulls you out of his execution threshold, completely wasting his ultimate reset and leaving him vulnerable at close range. Ver detalles
Pyke

Por qué

Pyke relies entirely on bringing your health low enough to execute you with Death from Below. However, the moment he leaps to cast his ultimate, your activation of Demonic Ascension grants you an instantaneous health surge. This sudden burst of maximum and current health instantly pulls you out of his execution threshold, completely wasting his ultimate reset and leaving him vulnerable at close range.

Impacto en la línea

Before level five, Pyke attempts to fish for hooks with Bone Skewer or stun you with Phantom Undertow to set up trades. Because he lacks wave clear, you can easily shove him under turret. Once you both unlock your ultimates, Pyke loses all kill pressure in lane. He is forced to abandon the mid lane to roam with Ghostwater Dive, leaving you free to secure plates.

Cómo jugar

Always hold onto Nevermove when Pyke approaches. If he charges Bone Skewer, cast it directly in his path to interrupt him, then trigger Ravenous Flock to pull him. During all-ins, bait his Death from Below by letting your health drop slightly, then reactively activate Demonic Ascension to deny his reset. If he disappears with Ghostwater Dive, immediately alert your side lanes and use Vision of Empire to scout the river.

Ficha completa →
Mel

Mel−2

outscalinghealth advantage Mel's kit relies on zoning but lacks the explosive burst to delete you or the mobility to disengage once you close the gap. When you activate Demonic Ascension, she is trapped in your drain radius. This helplessness turns Mel into an easy target for Nevermove, letting you pull her with Ravenous Flock repeatedly to stack permanent health while healing back any poke she managed to land. Ver detalles
Mel

Por qué

Mel's kit relies on zoning but lacks the explosive burst to delete you or the mobility to disengage once you close the gap. When you activate Demonic Ascension, she is trapped in your drain radius. This helplessness turns Mel into an easy target for Nevermove, letting you pull her with Ravenous Flock repeatedly to stack permanent health while healing back any poke she managed to land.

Impacto en la línea

Because Mel cannot threaten your life bar quickly, you dictate the minion waves. By maintaining a slow push, you force her to use her spells on minions rather than poking you. When she steps up to clear, you can easily fish for Nevermove or scout her rotations with Vision of Empire. You will constantly hold mid priority, allowing you to sustain through her minor trades.

Cómo jugar

Slow-push the first three waves to build a minion cushion, then freeze near your turret to force Mel to overextend. Once she steps past the midway line, fish for Nevermove. If it lands, immediately deploy Vision of Empire behind her, activate Demonic Ascension, and run her down with Death's Hand. If she flashes away, do not chase blindly; simply reset the wave and repeat the freeze, knowing she has no tools to break it safely.

Ficha completa →
Malphite

Malphite−2

sustain heavyanti engage Malphite relies on poking you down with Seismic Shard before executing a lethal burst with Unstoppable Force. However, Swain completely neutralizes this game plan. Whenever Malphite commits his full combo, activating Demonic Ascension instantly negates his burst by draining his health. Furthermore, you easily bypass his Granite Shield during trades, constantly generating soul fragments with Ravenous Flock and Nevermove to out-sustain him over any long engagement. Ver detalles
Malphite

Por qué

Malphite relies on poking you down with Seismic Shard before executing a lethal burst with Unstoppable Force. However, Swain completely neutralizes this game plan. Whenever Malphite commits his full combo, activating Demonic Ascension instantly negates his burst by draining his health. Furthermore, you easily bypass his Granite Shield during trades, constantly generating soul fragments with Ravenous Flock and Nevermove to out-sustain him over any long engagement.

Impacto en la línea

This matchup turns the mid lane into a slow squeeze. Malphite cannot match your wave clear once you use Death's Hand to shove, forcing him under turret where his Granite Shield is constantly broken by Vision of Empire. Since his mana pool drains quickly trying to poke you, his recall timings are terrible. You will secure early priority, letting you move first to skirmishes while he remains stuck clearing.

Cómo jugar

To secure this advantage, shift your early purchases toward heavy magic penetration and raw health rather than rushing traditional flat AP. In lane, always hold Nevermove until Malphite uses Seismic Shard; the movement speed steal makes him move in a predictable straight line to close the gap, making your root easy to land. If he plays passively, cast Vision of Empire deep in his jungle to steal camps or track his jungler while keeping him pinned.

Ficha completa →
Teemo

Teemo−2

easy ccburst down Teemo's short auto-attack range is his downfall here. To apply his Toxic Shot poison, he is forced to step directly into the optimal range of your Nevermove. Since Swain relies entirely on spellcasting, Teemo's Blinding Dart is completely useless, failing to mitigate any damage from Death's Hand or your ultimate, Demonic Ascension. You hold all the cards in trades because his main defensive tool cannot stop your magic output. Ver detalles
Teemo

Por qué

Teemo's short auto-attack range is his downfall here. To apply his Toxic Shot poison, he is forced to step directly into the optimal range of your Nevermove. Since Swain relies entirely on spellcasting, Teemo's Blinding Dart is completely useless, failing to mitigate any damage from Death's Hand or your ultimate, Demonic Ascension. You hold all the cards in trades because his main defensive tool cannot stop your magic output.

Impacto en la línea

Because Teemo cannot safely blind your primary damage, you can easily zone him off the minion wave. Every time he steps up to farm, he risks getting pulled by Ravenous Flock. This constant threat restricts his Move Quick rotations, keeping him pinned under his turret. Consequently, Teemo loses the ability to safely place Noxious Trap around the river, securing your mid-lane priority and freeing you to assist your jungler.

Cómo jugar

Position yourself slightly behind your own melee minions to bait Teemo into stepping forward to poke you. Keep a constant eye out for his shimmer if he uses Guerrilla Warfare, and immediately throw Vision of Empire to reveal and slow him. Hold onto Nevermove until he commits to an auto-attack animation; his locked stance makes him an incredibly easy target to root, pull, and burst down with Demonic Ascension.

Ficha completa →

Otros emparejamientos

Items to Counter Swain

Buy these items to reduce this champion's effectiveness in your games.

Morellonomicon
Morellonomicon
Bâton du vide
Bâton du vide
Coiffe de Rabadon
Coiffe de Rabadon
Étreinte démoniaque
Étreinte démoniaque

Cómo contrarrestar a este campeón

Ángulo de contra

Hacer counter a Swain no consiste solo en elegir un champion que lo mate rápido. La verdadera lógica es romper la duración de su pelea: evitar que mantenga objetivos dentro de su R, obligarlo a usar Stasis a la defensiva y luego salir de su zona antes de que recicle Q y E. En la midlane, los asesinos móviles ya presentes en los datos pueden castigarlo antes de sus objetos, mientras que algunos champions de control pueden evitar que convierta una oleada neutral en una rotación al río. Swain sufre principalmente cuando el enemigo decide el timing exacto del trade y rechaza las peleas largas donde su sustain se vuelve valioso.

Contexto del parche

Los mejores counters de Swain atacan una de sus tres dependencias: el acceso a los objetivos, la duración de la ultimate o la estabilidad antes de su primer objeto. Si falla la E de vuelta, a menudo carece del control necesario para dar un paso adelante. Si activa la R demasiado pronto y el enemigo se va, pierde su mayor ventana de oportunidad. Y si los asesinos o champions capaces de perturbar su waveclear lo presionan, llega tarde a los objectives donde normalmente debería brillar.

Lectura rápida

  • Fuerza su R, retrocede y luego vuelve a entrar cuando Stasis o la ultimate ya no puedan proteger su entrada.
  • No os agrupéis en los pasillos de la Jungle: Swain gana cuando varios objetivos son ralentizados o drenados al mismo tiempo.
  • Castigar su early game es más fiable que intentar matarlo durante su timing más fuerte en el mid game.

Arquetipos de contra

Asesinos móviles que rompen su timing

Estos matchups funcionan contra Swain porque pueden elegir ventanas cortas, entrar a por él antes de que su R sea valiosa y luego evitar quedarse dentro de la zona de drenaje. Swain quiere que la pelea continúe; estos champions quieren crear una rotación rápida, forzar Stasis o Flash, y luego irse o reiniciar. Su movilidad también hace que la E de vuelta sea más difícil de acertar: si Swain falla ese control, a menudo pierde el permiso para dar un paso adelante y termina sufriendo la oleada o el roam enemigo.

Cómo se adapta el campeón. Swain debe aceptar una lane menos ambiciosa, guardar la E para la entrada real en lugar de hacer poke y comprar Stasis temprano. Su objetivo no es ganar cada trade, sino llegar al primer objective sin ceder demasiado tempo.

Duelistas y mids que le niegan el control de zona

Estos champions no hacen counter a Swain de la misma manera que los asesinos puros. Le complican la vida porque pueden disputar el espacio en lugar de simplemente sufrir su R. Yasuo puede reducir el valor de ciertos ángulos de habilidad y amenazar a Swain dentro de la oleada, Diana puede hacer engage de forma brutal si Swain usó la E demasiado pronto, y Lissandra puede romper el ritmo de la pelea con su control. En estos matchups, Swain pierde cuando cede la iniciativa antes de establecer su zona.

Cómo se adapta el campeón. Swain debe jugar alrededor de las oleadas, evitar desperdiciar la E en el espacio vacío y esperar a que el oponente se comprometa demasiado. Cuanto más guarde las habilidades para responder al contacto, más difícil será ignorar su R.

Magos favorables que Swain todavía necesita convertir limpiamente

Estos champions parecen favorables para Swain porque a menudo le dan una lane más predecible y menos amenaza de ejecución inmediata. Pero el error sería pensar que el matchup se gana solo. Si mantienen la distancia, controlan la oleada o castigan su falta de movilidad con su propio setup, Swain puede terminar farmeando sin sacar ventaja. Su verdadera condición de victoria es convertir la estabilidad o prioridad de la lane en escaramuzas en el río, no simplemente sobrevivir en mid.

Cómo se adapta el campeón. Swain debe buscar ángulos para la E después de que el enemigo use una habilidad, y luego moverse hacia los objectives con su jungler. El matchup favorable solo importa si crea una ventaja de zona o de tempo.

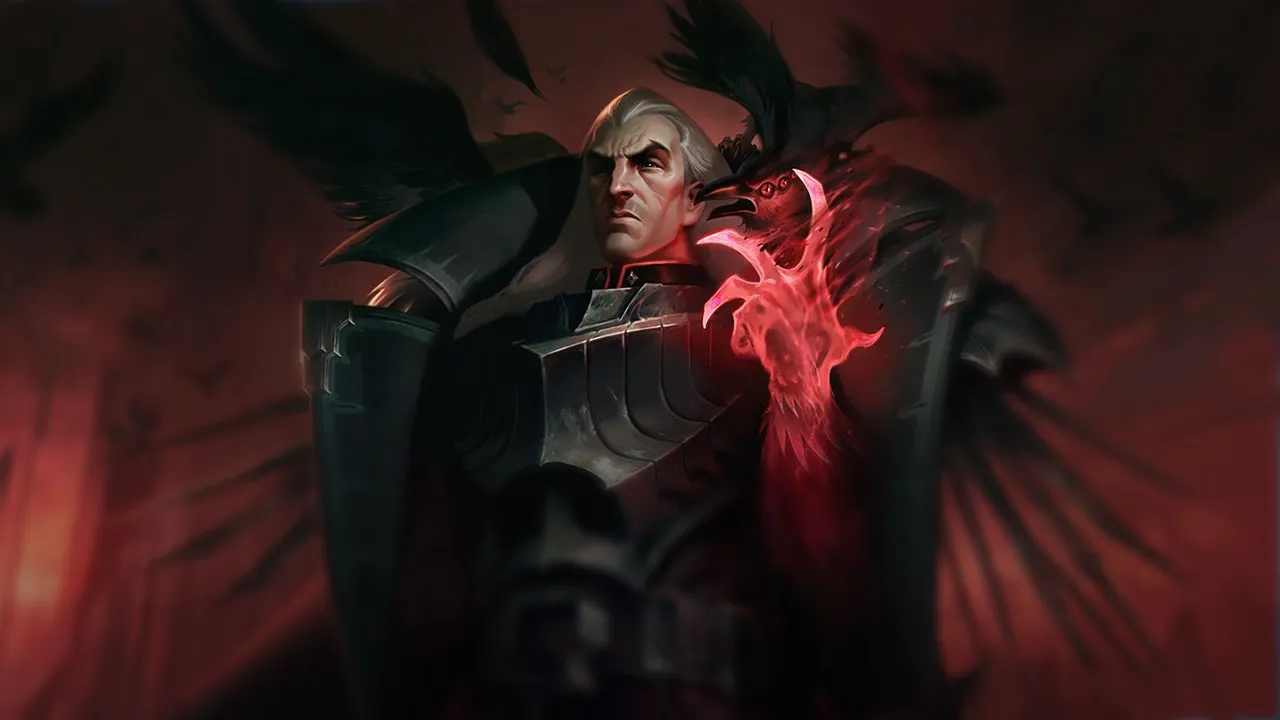
Emparejamientos prioritarios

Fizz

Fizz es un matchup prioritario que explicar porque ataca exactamente el punto débil de Swain MID: el timing antes de que la R, el Stasis y los objetos estabilicen al champion. Si Swain usa la E para hacer poke o pushea sin visión lateral, Fizz puede forzar un trade corto, salir de la zona de drenaje y amenazar con matarlo antes de que la pelea se alargue. Para Swain, la decisión clave es rechazar trades innecesarios, guardar recursos para la entrada real de Fizz y jugar los objectives solo con Stasis o Flash disponibles.

Katarina

Katarina merece un análisis específico porque el matchup no se limita a la lane. Swain puede aguantar ciertas oleadas, pero si Katarina encuentra un reset en el río o en la botlane, su tempo supera rápidamente la capacidad de Swain para controlar el centro. Swain debe usar la W para leer las rotaciones, avisar con pings temprano y guardar la E para interrumpir o castigar una mala entrada. El objetivo no es solo sobrevivir en mid: es evitar que Katarina transforme el mapa antes de que Swain alcance su mid game.


Errores comunes en su contra

Errores comunes en su contra

  • Quedarse dentro de su R después de forzar la activación, en lugar de retroceder unos segundos y romper toda su ventana de oportunidad.
  • Agruparse en un pasillo de objective sin visión, dándole a Swain una E fácil y múltiples objetivos para drenar.
  • Hacer engage a Swain sin un plan para su Stasis: si se usa todo el burst antes de este, a menudo regresa con tiempo suficiente para dar la vuelta a la pelea.
  • Permitir que Swain consiga Rylai gratis y luego tener dificultades para salir de su zona después.
  • Confundir un matchup favorable contra Swain con una partida ganada: incluso un champion que le gana en lane puede perder si le da peleas largas por los objectives.

Notas del coach

  • La mejor respuesta contra Swain a menudo se basa en el timing: fuerza su ultimate, vete y luego regresa. Muchos jugadores pierden porque tratan su R como un desafío que deben ganar de inmediato.
  • Contra Swain, vigila el espacio por encima de todo. Si te pelea en un área estrecha con Stasis listo, estás jugando a su juego. Si tiene que caminar hacia ti en terreno abierto, pierde mucha amenaza.

FAQ

¿Cómo se vence a Swain en la midlane?

Para vencer a Swain mid, debes evitar darle la pelea larga que él quiere. Castiga los lanzamientos fallidos de su E, fuerza su R sin quedarte dentro de ella y juega alrededor de los timings de su Stasis. Los asesinos móviles pueden atacarlo antes de sus objetos, pero incluso con un buen matchup, debes evitar que Swain saque ventaja en el río. Si llega gratis al Dragon con la R y el Stasis disponibles, una lane ganada puede perder valor rápidamente.

¿Por qué los asesinos son peligrosos para Swain?

Los asesinos son peligrosos porque reducen la pelea a una ventana de tiempo muy corta. Swain quiere activar su R, ralentizar con Rylai, reciclar su Q y obligar a los enemigos a quedarse. Un asesino con movilidad puede, en cambio, entrar, forzar el Flash o la Stasis, y luego salir antes de que el drenaje sea decisivo. El matchup se vuelve aún más difícil si Swain gasta su E para hacer poke, porque pierde su principal herramienta para responder a la entrada.

¿Deberías ignorar a Swain durante su ultimate?

No siempre debes ignorarlo, pero debes evitar darle exactamente lo que quiere. Si Swain ya ha activado su R y tu equipo puede retroceder, salir de la ralentización de Rylai o esperar a que termine su Stasis, a menudo es mejor que invertir todo dentro de su zona. Sin embargo, si está aislado, no tiene Stasis o está demasiado adelantado, un burst coordinado puede castigarlo antes de que obtenga valor de la duración de su ultimate.

¿Son suficientes los matchups favorables para neutralizar a Swain?

No. Un matchup favorable ayuda a frenarlo, pero Swain puede seguir siendo útil si la partida se decide en objectives agrupados. El verdadero objetivo es denegar su tempo: obligarlo a usar la R lejos de los objectives, ganar la visión antes que él y evitar pasillos donde pueda golpear a varios campeones. Si ganas la lane pero le das una pelea cerrada en el Dragon, pones a Swain de nuevo en su mejor escenario.