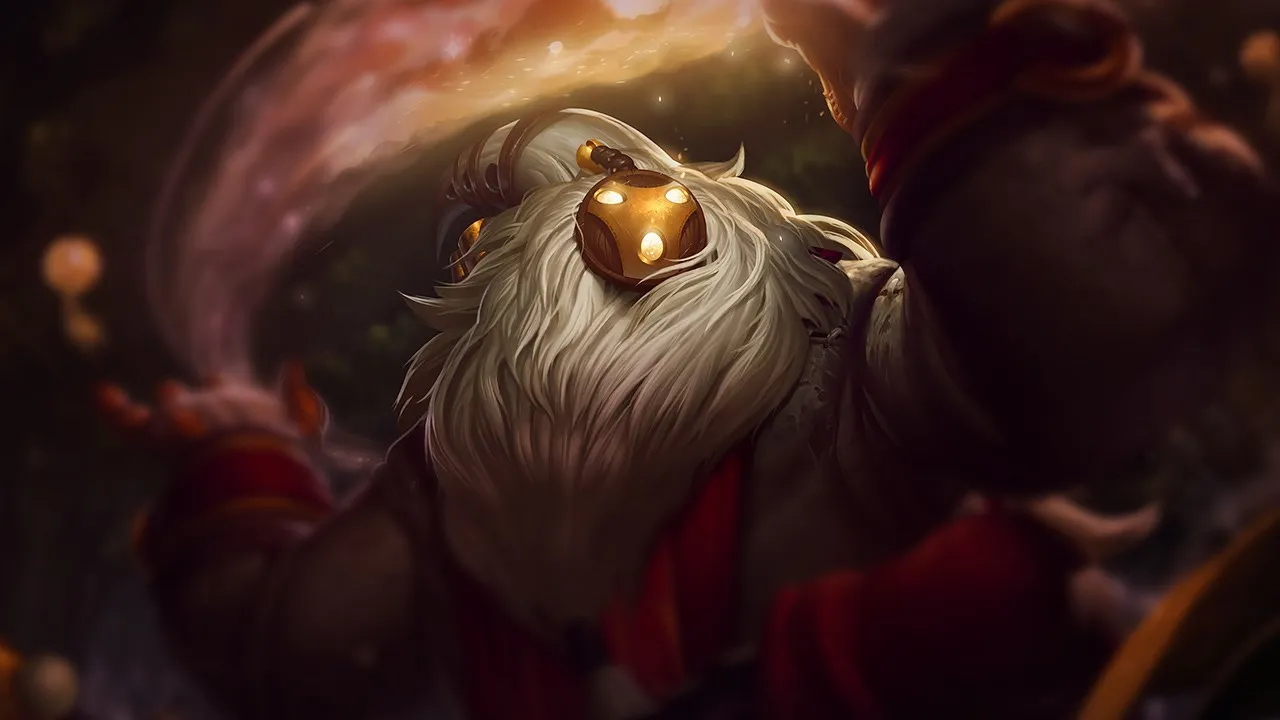
Bard queda expuesto contra composiciones de engage agresivo que no le dan tiempo para hacer roam. Su bajo peel inmediato lo vuelve vulnerable cuando está lejos de su ADC. Los campeones de pick o de all-in constante castigan sus ausencias en la lane.
★ SUPPORTTier S+
DAÑO
UTIL
TANK
DIFF
Guía de counters de Bard Wild Rift
Contras Difíciles
2
Estos campeones tienen una build y un estilo de juego que superan directamente al tuyo, lo que puede hacer que controlar la línea y farmear sea extremadamente difícil. Sus habilidades pueden neutralizar tus principales fortalezas o castigarte en cuanto intentas jugar tu plan habitual. En estos matchups, el objetivo suele ser minimizar errores y buscar soluciones fuera del enfrentamiento directo.
EscaladoPokeEl enorme alcance de ataque básico de Senna le permite recolectar almas de ti con facilidad cada vez que te acercas. Si intentas devolver el trade con Cosmic Binding, ella simplemente anula tu poke lanzando Piercing Darkness a través de la wave de minions para curarse a sí misma y a su aliado. Este sustain y esta ventaja de alcance constantes hacen que escale rápidamente mientras castiga tu presencia de menor alcance.Build de Senna →Ver detalles
Senna
Por qué
El enorme alcance de ataque básico de Senna le permite recolectar almas de ti con facilidad cada vez que te acercas. Si intentas devolver el trade con Cosmic Binding, ella simplemente anula tu poke lanzando Piercing Darkness a través de la wave de minions para curarse a sí misma y a su aliado. Este sustain y esta ventaja de alcance constantes hacen que escale rápidamente mientras castiga tu presencia de menor alcance.
Impacto en la línea
Este matchup arruina por completo tu control de la lane. Como Senna te va quitando vida constantemente, te ves obligado a gastar maná en Caretaker's Shrine en lugar de jugar de forma agresiva. Esta presión interminable empuja tu wave bajo la torreta, haciendo muy peligroso que hagas roam y recojas chimes para Traveler's Call, lo que a su vez frena tu propio scaling y tu presencia en el mapa.
Cómo jugar
No te acerques a hacer trade a menos que Senna falle Last Embrace. Coloca tu Caretaker's Shrine muy por detrás de tu torreta para que tu carry pueda curarse con seguridad sin recibir poke. Usa Cosmic Binding solo de forma reactiva cuando ella intente avanzar para recolectar un alma. Si intenta escapar de un gank usando Curse of the Black Mist, apunta Tempered Fate para fijarla antes de que gane camuflaje, permitiendo a tu equipo cerrar la distancia.
Control de masasPresión en el mapaEl bucle central de Bard, hacer roam para recoger chimes de Traveler's Call, habilita directamente la amenaza letal de kill lane de Blitzcrank. En cuanto Bard se aleja, Blitzcrank usa Overdrive para cerrar la distancia y fijar al tirador aislado con Rocket Grab y Power Fist. Esto crea un conflicto estructural: Bard debe abandonar su mecánica de scaling o dejar a su compañero expuesto a un gancho repentino y fatal bajo o cerca de la torreta.Build de Blitzcrank →Ver detalles
Blitzcrank
Por qué
El bucle central de Bard, hacer roam para recoger chimes de Traveler's Call, habilita directamente la amenaza letal de kill lane de Blitzcrank. En cuanto Bard se aleja, Blitzcrank usa Overdrive para cerrar la distancia y fijar al tirador aislado con Rocket Grab y Power Fist. Esto crea un conflicto estructural: Bard debe abandonar su mecánica de scaling o dejar a su compañero expuesto a un gancho repentino y fatal bajo o cerca de la torreta.
Impacto en la línea
Esta dinámica paraliza tu presión de lane. No puedes desplegar Caretaker's Shrine con seguridad para mantener tu sustain si estás obligado constantemente a pegarte a tu ADC para bloquear los ángulos de Rocket Grab. Si Blitzcrank gana el control de la wave, puede hacer freeze cerca de su torre y forzar a tu ADC a una zona peligrosa donde cualquier paso adelante acaba en un letal knock-up de Power Fist, mientras que tus escapes con Magical Journey son inútiles si te enganchan primero.
Cómo jugar
Para sobrevivir, debes limitar tu roam con Traveler's Call exclusivamente a cuando la wave esté completamente crasheada bajo la torre enemiga o cuando Blitzcrank falle Rocket Grab. Colócate siempre ligeramente por delante de tu ADC, manteniendo activo el bloqueo con minions, y reserva Cosmic Binding para aturdir a Blitzcrank contra una pared si carga hacia delante con Overdrive. Si enganchan a tu ADC, usa Tempered Fate sobre el ADC enemigo para impedir que siga con el CC, en lugar de usarla sobre el propio Blitzcrank.
Estos campeones tienen herramientas que generalmente les dan ventaja en el enfrentamiento, sin llegar a hacer el matchup injugable. Pueden tener más alcance, mejor capacidad para aguantar tu ofensiva o más formas de responder a tus engagements. Tendrás que adaptar tu enfoque y elegir con cuidado los momentos en los que aceptas el combate.
Control de masasDesengancheThresh tiene la amenaza de la lane porque un solo impacto de Death Sentence te obliga a ti o a tu carry a entrar en The Box. Sin embargo, que Thresh dependa de Dark Passage para transportar a su jungler o salvar a su ADC es su mayor vulnerabilidad. Cuando un aliado hace clic en la linterna, se desplaza directamente hacia Thresh. Alinear Cosmic Binding justo cuando chocan crea un doble stun instantáneo e ineludible, convirtiendo su principal escape en una trampa mortal.Build de Thresh →Ver detalles
Thresh
Por qué
Thresh tiene la amenaza de la lane porque un solo impacto de Death Sentence te obliga a ti o a tu carry a entrar en The Box. Sin embargo, que Thresh dependa de Dark Passage para transportar a su jungler o salvar a su ADC es su mayor vulnerabilidad. Cuando un aliado hace clic en la linterna, se desplaza directamente hacia Thresh. Alinear Cosmic Binding justo cuando chocan crea un doble stun instantáneo e ineludible, convirtiendo su principal escape en una trampa mortal.
Impacto en la línea
Como Thresh puede ir a pescar ganchos, no puedes vagar a ciegas para recoger chimes de Traveler's Call sin sacrificar presión de lane. Si te atrae, Flay interrumpirá tu escape y te dejará vulnerable bajo tu propia torreta. Esta amenaza te obliga a jugar a la defensiva cerca de tu Caretaker's Shrine, lo que significa que perderás prioridad a menudo y tendrás que ceder el control temprano de los arbustos para evitar ganchos ciegos mortales.
Cómo jugar
Colócate constantemente detrás de los minions para bloquear Death Sentence, y mantén siempre un Caretaker's Shrine completamente cargado detrás de tu ADC. Nunca malgastes Cosmic Binding de forma proactiva; resérvalo específicamente para el momento en que Thresh lance Dark Passage o intente hacer engage. Si logra atraparte con The Box, lanza Tempered Fate directamente sobre su ADC para frenar su daño y luego usa Magical Journey a través de la pared más cercana para escapar con seguridad.
All-inDesengancheNautilus domina el espacio de la lane porque Dredge Line y Staggering Blow castigan fácilmente tu frágil reserva de vida. Sin embargo, el matchup gira por completo en torno a Depth Charge. Cuando Nautilus apunta a tu aliado con esta ultimate, puedes lanzar Tempered Fate sobre su backline. Al congelar en estasis a sus dañadores de seguimiento, neutralizas su dive y dejas inútil su engage basado en la ultimate.Build de Nautilus →Ver detalles
Nautilus
Por qué
Nautilus domina el espacio de la lane porque Dredge Line y Staggering Blow castigan fácilmente tu frágil reserva de vida. Sin embargo, el matchup gira por completo en torno a Depth Charge. Cuando Nautilus apunta a tu aliado con esta ultimate, puedes lanzar Tempered Fate sobre su backline. Al congelar en estasis a sus dañadores de seguimiento, neutralizas su dive y dejas inútil su engage basado en la ultimate.
Impacto en la línea
Te empujarán constantemente bajo la torre porque hacer trade contra el escudo de Titan's Wrath es muy poco eficiente. Acercarte a recoger chimes de Traveler's Call te expone a un Dredge Line que te obligará a gastar un hechizo de invocador o a hacer un mal recall. Esta presión restringe tus rotaciones por el mapa, lo que significa que no puedes hacer roam con libertad sin arriesgar que tu ADC muera por un dive iniciado con la ralentización de Riptide y CC.
Cómo jugar
Colócate de forma constante detrás de tu wave de minions para bloquear Dredge Line, y coloca Caretaker's Shrine muy por detrás de tu torre para darle a tu ADC una ruta de retirada segura. Nunca uses Tempered Fate de forma agresiva. En su lugar, resérvala específicamente para el momento en que Nautilus lance Depth Charge. En cuanto veas que Depth Charge avanza, apunta tu ultimate al seguimiento enemigo. Si Nautilus elude tu wave, usa Cosmic Binding sobre él y la pared más cercana para aturdirlo.
Inmunidad a CCPokeMorgana anula tu juego agresivo porque su Black Shield absorbe por completo el daño mágico y niega el stun de tu Cosmic Binding. Cada vez que intentas alinear un stun contra la pared, ella puede proteger de forma reactiva a su aliado, dejándote totalmente vulnerable. Esta amenaza constante de negación te obliga a jugar a la defensiva, ya que no puedes forzar trades favorables mientras su cooldown defensivo esté disponible.Build de Morgana →Ver detalles
Morgana
Por qué
Morgana anula tu juego agresivo porque su Black Shield absorbe por completo el daño mágico y niega el stun de tu Cosmic Binding. Cada vez que intentas alinear un stun contra la pared, ella puede proteger de forma reactiva a su aliado, dejándote totalmente vulnerable. Esta amenaza constante de negación te obliga a jugar a la defensiva, ya que no puedes forzar trades favorables mientras su cooldown defensivo esté disponible.
Impacto en la línea
No puedes avanzar para hostigar con Traveler's Call sin arriesgarte a un letal combo de Dark Binding seguido de Tormented Shadow. Usar Magical Journey para hacer engage es suicida, ya que Morgana puede enraizarte fácilmente a ti o a tu carry en cuanto salgan del portal. En consecuencia, te empujan bajo la torreta y te ves obligado a depender de Caretaker's Shrine para mantener sustain frente a su poke mientras su escudo impide cualquier represalia.
Cómo jugar
Para ganar este juego mental, acércate de forma amenazante para hacer bait de su Black Shield sin lanzar realmente Cosmic Binding. Una vez que su escudo esté en su largo cooldown, tienes una breve ventana para atacar. Al usar Tempered Fate, apunta al aliado al que no protegió, o congela a los dos para reiniciar la pelea. Nunca viajes a través de un Magical Journey si su Dark Binding está listo, y mantén tu Caretaker's Shrine completamente cargado detrás de tu línea de minions.
EscaladoPicksSona te supera mucho en scaling porque Aria of Perseverance y Hymn of Valor ofrecen sustain continuo y stats de combate para todo el equipo que tu Caretaker's Shrine no puede igualar en peleas largas. Sin embargo, que dependa de canalizar Crescendo para ganar las teamfights la hace vulnerable. Tu ultimate, Tempered Fate, es el gran igualador, capaz de congelarla en plena animación o de pillarla antes de que su scaling haga a su equipo imposible de matar.Build de Sona →Ver detalles
Sona
Por qué
Sona te supera mucho en scaling porque Aria of Perseverance y Hymn of Valor ofrecen sustain continuo y stats de combate para todo el equipo que tu Caretaker's Shrine no puede igualar en peleas largas. Sin embargo, que dependa de canalizar Crescendo para ganar las teamfights la hace vulnerable. Tu ultimate, Tempered Fate, es el gran igualador, capaz de congelarla en plena animación o de pillarla antes de que su scaling haga a su equipo imposible de matar.
Impacto en la línea
Al principio, Sona usará Power Chord y Hymn of Valor para hacerte poke y neutralizar tus trades cortos. Si la dejas escalar libremente, su sustain en lane hace que su presión sobre la torre sea inmensa. El matchup se decide por lo bien que aproveches su poca durabilidad antes de que desbloquee Crescendo. Fallar tu stun con Cosmic Binding o no hacer roam durante sus débiles primeros niveles le da vía libre para superarte en scaling.
Cómo jugar
Para sobrevivir y ganar, debes jugar alrededor de los cooldowns de Sona. Mantén Cosmic Binding listo para castigarla cada vez que avance para activar su Power Chord. Cuando empiecen las teamfights, no lances Tempered Fate al azar; sigue su posicionamiento y reserva la ultimate específicamente para congelarla en el momento en que se coloque para lanzar Crescendo. Si juega de forma extremadamente segura, usa Magical Journey para hacer roam con tu jungler e influir en otras lanes antes de que la brecha de scaling se vuelva insalvable.
PokeEscudosTu herramienta principal para hacer jugadas, Cosmic Binding, queda completamente neutralizada por Garden of Thorns de Zyra. Cuando reacciona a tu agresividad usando Rampant Growth combinado con Deadly Spines o Grasping Roots, las plantas resultantes actúan como escudos físicos. Como estas unidades invocadas bloquean la trayectoria del proyectil, no puedes asegurar stuns sobre Zyra ni sobre su tirador, y tus intentos ofensivos se convierten en maná malgastado.Build de Zyra →Ver detalles
Zyra
Por qué
Tu herramienta principal para hacer jugadas, Cosmic Binding, queda completamente neutralizada por Garden of Thorns de Zyra. Cuando reacciona a tu agresividad usando Rampant Growth combinado con Deadly Spines o Grasping Roots, las plantas resultantes actúan como escudos físicos. Como estas unidades invocadas bloquean la trayectoria del proyectil, no puedes asegurar stuns sobre Zyra ni sobre su tirador, y tus intentos ofensivos se convierten en maná malgastado.
Impacto en la línea
Como no puedes depender de Cosmic Binding para hacer peel o engage, Zyra establece un control de zona dominante. Si avanzas para recoger chimes de Traveler's Call, sus plantas te hacen poke sin descanso. Este daño constante te obliga a generar Caretaker's Shrine continuamente, drenando tu maná. En consecuencia, te empujan bajo la torre, retrasando tus ventanas de roam y obligando a tu ADC a ceder las primeras waves de minions.
Cómo jugar
Para sobrevivir en esta lane, debes guardar Cosmic Binding hasta que Zyra haya generado ya sus plantas en otro sitio. Colócate en paralelo a tus minions, usándolos como amortiguadores contra sus Grasping Roots. Si malgasta cargas de Rampant Growth, esa es tu señal para buscar un ángulo. Cuando te empujen, usa Magical Journey desde detrás de tu torre para recoger con seguridad los chimes cercanos, en lugar de caminar por su jardín mortal.
PokeDaño explosivoEl poke de zoning de largo alcance de Lux con Lucent Singularity amenaza constantemente tu reserva de vida y te fuerza a posiciones defensivas. Si intentas avanzar para recoger chimes o hacer poke con los autos potenciados de Traveler's Call, te expones a su Light Binding. Como Cosmic Binding requiere ángulos precisos cerca de paredes o minions, Lux puede quedarse fácilmente detrás de su wave, protegiendo cualquier daño de respuesta con Prismatic Barrier mientras te va desgastando.Build de Lux →Ver detalles
Lux
Por qué
El poke de zoning de largo alcance de Lux con Lucent Singularity amenaza constantemente tu reserva de vida y te fuerza a posiciones defensivas. Si intentas avanzar para recoger chimes o hacer poke con los autos potenciados de Traveler's Call, te expones a su Light Binding. Como Cosmic Binding requiere ángulos precisos cerca de paredes o minions, Lux puede quedarse fácilmente detrás de su wave, protegiendo cualquier daño de respuesta con Prismatic Barrier mientras te va desgastando.
Impacto en la línea
Te empujan constantemente bajo la torre porque el explosivo Lucent Singularity de Lux limpia waves y te quita vida a la vez. Esto limita tus ventanas de roam, ya que dejar sola a tu ADC bajo esta presión es suicida. Tu vida se irá agotando sin parar, forzando bases tempranas a menos que mitigues activamente el poke. Si te atrapa Light Binding, su combo con Final Spark te hará burst desde vida completa antes de que puedas reaccionar con Tempered Fate.
Cómo jugar
Para sobrevivir, prioriza colocar Caretaker's Shrine detrás de tus minions caster para que se carguen por completo; usa su aumento de velocidad y su curación para recuperarte del daño de Lucent Singularity. Nunca te quedes justo detrás de minions con poca vida, donde un Light Binding sorpresa puede atravesarlos. Si Lux falla su binding, busca un stun rápido con Cosmic Binding, pero no la persigas muy lejos. Si te hacen dive, usa Tempered Fate sobre Lux para frenar su Final Spark mientras usas Magical Journey para escapar por las paredes laterales.
PokeEscudosKarma domina la fase inicial de lane porque su Inner Flame inflige un daño de área fuerte e inevitable cada vez que intentas recoger chimes de Traveler's Call cerca de la wave. Esta presión implacable a distancia, amplificada por su Mantra, te va quitando vida constantemente. Para sobrevivir, te ves obligado a gastar tu maná en colocar Caretaker's Shrine detrás de tu torre en lugar de buscar ángulos ofensivos para Cosmic Binding.Build de Karma →Ver detalles
Karma
Por qué
Karma domina la fase inicial de lane porque su Inner Flame inflige un daño de área fuerte e inevitable cada vez que intentas recoger chimes de Traveler's Call cerca de la wave. Esta presión implacable a distancia, amplificada por su Mantra, te va quitando vida constantemente. Para sobrevivir, te ves obligado a gastar tu maná en colocar Caretaker's Shrine detrás de tu torre en lugar de buscar ángulos ofensivos para Cosmic Binding.
Impacto en la línea
Este hostigamiento constante te obliga a adoptar una postura defensiva extremadamente pasiva. Como Karma asegura fácilmente la prioridad de wave con su daño en área, verás tu wave de minions empujada bajo la torreta. Esto restringe tu capacidad de usar Magical Journey para hacer roam en busca de chimes, ya que dejar sola a tu tirador bajo este tipo de asedio es fatal. Cada trade está muy inclinado en tu contra, y dependes por completo de la curación gradual de los paquetes de Caretaker's Shrine completamente cargados.
Cómo jugar
Para mantenerte a flote, deja de forma preventiva tres paquetes de vida de Caretaker's Shrine detrás de tu torreta antes de que empiece el trading intenso, dejando que se carguen por completo. Colócate muy por detrás de tus propios minions para evitar que Karma te salpique con su Inner Flame cuando apunte a la wave. Si se sobreextiende para activar Focused Resolve, aprovecha esa trayectoria predecible en línea recta para fijarla contra una pared o sus propios minions con Cosmic Binding, convirtiendo su agresividad en un contra-engage.
IniciaciónDesengancheMaokai neutraliza por completo tus herramientas defensivas porque Twisted Advance le otorga el estado de no seleccionable. Cuando intentas quitártelo de encima con Cosmic Binding, un Maokai hábil activará su root para eludir tu proyectil por completo y cerrar la distancia. Una vez que aterriza, Bramble Smash te empuja de vuelta hacia su equipo, dejándote sin forma de escapar de su seguimiento con CC.Build de Maokai →Ver detalles
Maokai
Por qué
Maokai neutraliza por completo tus herramientas defensivas porque Twisted Advance le otorga el estado de no seleccionable. Cuando intentas quitártelo de encima con Cosmic Binding, un Maokai hábil activará su root para eludir tu proyectil por completo y cerrar la distancia. Una vez que aterriza, Bramble Smash te empuja de vuelta hacia su equipo, dejándote sin forma de escapar de su seguimiento con CC.
Impacto en la línea
Esta interacción te obliga a jugar con extrema seguridad, cediendo el control de los arbustos por culpa de su Sapling Toss. No puedes avanzar para hostigar con Traveler's Call sin arriesgarte a quedar bloqueado de repente. Si Maokai hace freeze de la wave cerca de su torre, cualquier intento de recoger chimes o colocar un Caretaker's Shrine te deja vulnerable a un Twisted Advance de largo alcance o a un amplio Nature's Grasp que asegura una kill fácil.
Cómo jugar
Para sobrevivir, nunca lances Cosmic Binding de forma reactiva cuando Maokai camine hacia ti; en su lugar, guárdalo hasta que complete Twisted Advance, apuntando a la pared que tienes detrás para aturdirlo después del dash. Coloca tu Caretaker's Shrine muy al fondo, detrás de tu torreta, para asegurar una ruta de retirada segura. Si te atrapa con Nature's Grasp, usa Tempered Fate sobre su tirador entrante en lugar de sobre el propio Maokai, ganando tiempo para tu escape con Magical Journey.
Estos enfrentamientos son sobre todo duelos de ejecución: ambos campeones tienen formas reales de tomar la ventaja. Esquivar una habilidad clave, anticipar bien un engagement o un simple error de posicionamiento puede inclinar el duelo hacia un lado. Conocer el matchup y reconocer las ventanas de acción correctas es especialmente importante aquí.
Presión en el mapaEste matchup es una carrera pura de influencia global. Aunque tu Magical Journey te permite atravesar el terreno para sorprender a otras lanes, Galio puede responder al instante a cualquier movimiento agresivo con Hero's Entrance. Esta interacción anula tu ventaja numérica de inmediato, convirtiendo tu gank proactivo en un mortal contra-engage en el que su Shield of Durand puede provocar a todo tu grupo de dive.Build de Galio →Ver detalles
Galio
Por qué
Este matchup es una carrera pura de influencia global. Aunque tu Magical Journey te permite atravesar el terreno para sorprender a otras lanes, Galio puede responder al instante a cualquier movimiento agresivo con Hero's Entrance. Esta interacción anula tu ventaja numérica de inmediato, convirtiendo tu gank proactivo en un mortal contra-engage en el que su Shield of Durand puede provocar a todo tu grupo de dive.
Impacto en la línea
En la duo lane tienes una ventaja de alcance para hacer poke a Galio con los ataques potenciados de Traveler's Call. Sin embargo, no puedes hacer roam sin pensar. Si abandonas la lane, Galio limpia las waves al instante usando Winds of War y Colossal Smash, estableciendo prioridad. Esto le permite posicionarse con seguridad en la niebla de guerra, listo para caer sobre la lane que decidas gankear.
Cómo jugar
Para ganar esta carrera de tempo, debes hacer bait de Hero's Entrance antes de comprometer del todo a tus aliados. Si lo ves canalizando su ultimate para salvar a un objetivo, prepara Tempered Fate para congelar la zona de aterrizaje y neutralizar su impacto. En lane, reserva Cosmic Binding exclusivamente para interrumpir su dash de Justice Punch o para aturdirlo contra una pared cuando cargue Shield of Durand, impidiéndole fijar a tu tirador.
Presión en el mapaProtecciónEste matchup se define por la naturaleza defensiva de Lulu. Aunque ofrece un excelente peel con Help, Pix! y Wild Growth, carece del engage fuerte y proactivo necesario para hacer dive rápido a un carry aislado bajo la torre. Este estilo pasivo te da la ventana perfecta para activar Traveler’s Call y recoger chimes por todo el mapa, sabiendo que tu tirador está relativamente a salvo de dives repentinos y agresivos durante tus breves ausencias.Build de Lulu →Ver detalles
Lulu
Por qué
Este matchup se define por la naturaleza defensiva de Lulu. Aunque ofrece un excelente peel con Help, Pix! y Wild Growth, carece del engage fuerte y proactivo necesario para hacer dive rápido a un carry aislado bajo la torre. Este estilo pasivo te da la ventana perfecta para activar Traveler’s Call y recoger chimes por todo el mapa, sabiendo que tu tirador está relativamente a salvo de dives repentinos y agresivos durante tus breves ausencias.
Impacto en la línea
La lane gira en torno a mitigar los trades. Lulu intentará hacerte poke con Glitterlance y Pix, Faerie Companion cada vez que te adelantes. Sin embargo, colocar Caretaker’s Shrine detrás de tu torre asegura que tu ADC se mantenga con sustain frente a su presión moderada mientras estás fuera. Tus roams obligarán a la lane de Lulu a hacer push, pero su falta de daño a estructuras mantiene a salvo la vida de tu torre mientras impactas otras lanes.
Cómo jugar
Carga siempre tres packs de Caretaker’s Shrine bajo tu torre antes de hacer roam. Si ves que Lulu usa Whimsy a la defensiva para acelerar a su compañero, busca de inmediato un Cosmic Binding agresivo para aturdirla, ya que pierde su principal herramienta para neutralizar tu engage. Al volver a la lane, usa Magical Journey a través de las paredes de la jungla para pillarla desprevenida, y guarda Tempered Fate para aislar a su carry justo después de que ella gaste Wild Growth.
All-inDesengancheLa lane gira por completo en torno al engage de Leona contra el counter-disengage de Bard. Cuando Leona se lanza hacia delante con Zenith Blade, su trayectoria lineal la hace increíblemente vulnerable a un Cosmic Binding bien cronometrado. Como aterriza justo encima de su objetivo, puedes aturdirla fácilmente contra el terreno cercano o contra su tirador que se acerca, neutralizando la amenaza de su Shield of Daybreak antes de que pueda inmovilizar a nadie.Build de Leona →Ver detalles
Leona
Por qué
La lane gira por completo en torno al engage de Leona contra el counter-disengage de Bard. Cuando Leona se lanza hacia delante con Zenith Blade, su trayectoria lineal la hace increíblemente vulnerable a un Cosmic Binding bien cronometrado. Como aterriza justo encima de su objetivo, puedes aturdirla fácilmente contra el terreno cercano o contra su tirador que se acerca, neutralizando la amenaza de su Shield of Daybreak antes de que pueda inmovilizar a nadie.
Impacto en la línea
El support que use mal su herramienta principal pierde por completo el control de la línea de arbustos. Si Leona falla Zenith Blade, se convierte en un blanco andante, lo que te permite hacerle poke con los ataques potenciados de Traveler’s Call. Sin embargo, si desperdicias Cosmic Binding, tu ADC tiene que retirarse de inmediato, cediendo la prioridad de wave y permitiendo que Leona te aleje de tus packs de Caretaker’s Shrine bajo la torre.
Cómo jugar
Nunca lances Cosmic Binding de forma proactiva a menos que Zenith Blade de Leona esté en cooldown. Colócate cerca de las paredes para atraer su engage, pero deja siempre un ángulo despejado para acertar tu aturdimiento de inmediato cuando ella se lance hacia ti. Si en cambio inmoviliza a tu tirador, apunta a su ADC con Tempered Fate para detener su daño de seguimiento, y luego coloca un Caretaker’s Shrine detrás de tu compañero para ayudarle a retirarse con seguridad.
SustentoContraengancheEste matchup es una guerra constante de trades donde el posicionamiento decide la supervivencia. Nami se apoya en las curas con rebote de Ebb and Flow para dominar los trades cortos, mientras que Bard iguala esa presión con los aturdimientos de Cosmic Binding. La lane se mantiene perfectamente igualada porque Bard puede neutralizar por completo los engages masivos de Tidal Wave de Nami, ya sea escapando con Magical Journey o usando Tempered Fate para congelar a los aliados de Nami en plena iniciación.Build de Nami →Ver detalles
Nami
Por qué
Este matchup es una guerra constante de trades donde el posicionamiento decide la supervivencia. Nami se apoya en las curas con rebote de Ebb and Flow para dominar los trades cortos, mientras que Bard iguala esa presión con los aturdimientos de Cosmic Binding. La lane se mantiene perfectamente igualada porque Bard puede neutralizar por completo los engages masivos de Tidal Wave de Nami, ya sea escapando con Magical Journey o usando Tempered Fate para congelar a los aliados de Nami en plena iniciación.
Impacto en la línea
Los dos luchan constantemente por el control de los arbustos para acertar sus respectivos skillshots. Mientras Nami usa Tidecaller's Blessing para ayudar a su ADC a hacer push de las waves y poke, tú debes contrarrestar ese daño sostenido preparando reliquias de Caretaker’s Shrine detrás de tu torre. Fallar un Cosmic Binding o pisar un Aqua Prison inclina al instante la presión de la lane, forzando recalls tempranos y dejando que el compañero de lane de Nami haga crash de las waves para asegurar el oro de las placas.
Cómo jugar
Para ganar esta batalla de posicionamiento, colócate en paralelo a tu ADC para dividir los objetivos de Ebb and Flow de Nami, impidiendo que consiga rebotes dobles. Nunca uses Magical Journey de forma agresiva si Nami tiene Tidal Wave disponible; en su lugar, pégate a las paredes para poder abrir de inmediato un portal y escapar de su ola. Si inicia desde lejos, guarda Tempered Fate para congelar a los atacantes que la siguen en lugar de intentar golpear a la propia Nami, desperdiciando así su ventana de engage.
MovilidadDesengancheEste matchup es un duelo de reflejos a alta velocidad centrado en el dash de Rakan y tu control de masas. Toda la lane depende de Grand Entrance. Como Rakan debe comprometerse con su punto de aterrizaje, su trayectoria predecible te permite lanzar Cosmic Binding de forma preventiva. Apuntando a su lugar de aterrizaje, puedes aturdirlo fácilmente contra el mismo aliado al que intenta derribar o contra una pared cercana, convirtiendo su salto agresivo en una trampa que él mismo se pone.Build de Rakan →Ver detalles
Rakan
Por qué
Este matchup es un duelo de reflejos a alta velocidad centrado en el dash de Rakan y tu control de masas. Toda la lane depende de Grand Entrance. Como Rakan debe comprometerse con su punto de aterrizaje, su trayectoria predecible te permite lanzar Cosmic Binding de forma preventiva. Apuntando a su lugar de aterrizaje, puedes aturdirlo fácilmente contra el mismo aliado al que intenta derribar o contra una pared cercana, convirtiendo su salto agresivo en una trampa que él mismo se pone.
Impacto en la línea
Los hechizos fallados dictan la presión de la lane. Si Rakan desperdicia Grand Entrance, su amenaza desaparece, lo que te permite presionarlo con ataques infundidos de Meep de Traveler's Call. En cambio, si tu Cosmic Binding falla, Rakan forzará trades de inmediato, protegiendo a su compañero con Battle Dance para anular tu poke. Las barras de vida oscilan enormemente según estas escaramuzas rápidas, lo que hace imposible farmear de forma pasiva mientras ambos supports buscan constantemente oportunidades para hacer bait.
Cómo jugar
Nunca lances Cosmic Binding a ciegas; guárdalo específicamente para reaccionar al dash hacia delante de Rakan. Colócate cerca del terreno para tentar su salto, y apunta tu proyectil directamente a los pies de tu aliado en el momento en que Rakan empiece la animación de Grand Entrance. Si coordina The Quickness para hechizarte antes de que puedas reaccionar, lanza de inmediato Tempered Fate sobre su backline para aislarlo, o escapa atravesando una pared con Magical Journey para reiniciar el enfrentamiento.
SustentoDesengancheEste matchup de habilidades gira en torno a la capacidad de Milio para anular tu control de masas. Aunque un Cosmic Binding bien colocado puede aturdir a Milio o a su carry, Milio puede eliminar al instante ese aturdimiento con Breath of Life. Sin embargo, su ultimate no sirve de nada contra la estasis dorada de Tempered Fate. Como Tempered Fate elude por completo su limpieza, tienes la herramienta definitiva para congelarlo a él o a sus aliados, dejándolos vulnerables justo cuando termina la estasis.Build de Milio →Ver detalles
Milio
Por qué
Este matchup de habilidades gira en torno a la capacidad de Milio para anular tu control de masas. Aunque un Cosmic Binding bien colocado puede aturdir a Milio o a su carry, Milio puede eliminar al instante ese aturdimiento con Breath of Life. Sin embargo, su ultimate no sirve de nada contra la estasis dorada de Tempered Fate. Como Tempered Fate elude por completo su limpieza, tienes la herramienta definitiva para congelarlo a él o a sus aliados, dejándolos vulnerables justo cuando termina la estasis.
Impacto en la línea
La fase de lane se disuelve en una batalla de desgaste donde tu Caretaker’s Shrine compite con Cozy Campfire y Warm Hugs de Milio para mantener sanos a los tiradores. Si lanzas Cosmic Binding a ciegas, Milio protegerá el daño y te ganará en sustain. No puedes forzar kills rápidas bajo la torre; en su lugar, debes ir desgastando sus recursos, obligando a Milio a agotar su maná en curas antes de buscar una jugada de portal profunda.
Cómo jugar
Para ganar, haz que Milio gaste Warm Hugs con ataques básicos potenciados por Traveler’s Call antes de gastar tu maná. Nunca inicies un engage fuerte con Cosmic Binding cuando Breath of Life de Milio esté disponible. En su lugar, lanza Tempered Fate directamente sobre Milio para dejarlo fuera de la pelea primero. Una vez que esté congelado en estasis, alinea tu Cosmic Binding sobre su punto de aterrizaje, asegurando un aturdimiento ineludible en el momento en que salga.
Estos campeones suelen tener problemas para responder a tus principales fortalezas, lo que te permite afrontar el enfrentamiento con más libertad. Normalmente tienes varias formas de presionarlos y forzar intercambios a tu favor. Aprovecha esta ventaja para imponer tu ritmo en lugar de darles tiempo para volver a una posición cómoda.
SustentoPicksBard elude la legendaria curación de Soraka eliminándola temporalmente de la pelea. Como todo su poder defensivo depende de spamear Astral Infusion o soltar un Wish global clave para salvar a objetivos con poca vida, acertar Tempered Fate directamente sobre Soraka anula su utilidad básica. Mientras está atrapada en estasis, sus aliados se quedan sin su red de seguridad, vulnerables a que los foquen.Build de Soraka →Ver detalles
Soraka
Por qué
Bard elude la legendaria curación de Soraka eliminándola temporalmente de la pelea. Como todo su poder defensivo depende de spamear Astral Infusion o soltar un Wish global clave para salvar a objetivos con poca vida, acertar Tempered Fate directamente sobre Soraka anula su utilidad básica. Mientras está atrapada en estasis, sus aliados se quedan sin su red de seguridad, vulnerables a que los foquen.
Impacto en la línea
Soraka quiere desgastarte poco a poco con Starcall mientras mantiene a su carry siempre sano. Sin embargo, como puedes aguantar con sustain los trades cortos gracias a Caretaker’s Shrine, ella no puede sacarte de la lane. Esto te permite recoger chimes de Traveler’s Call sin perder presión en la torre, y una vez que ambos llegan al nivel cinco, la amenaza de tu ultimate la obliga a jugar muy atrás, cediéndote el control de la maleza.
Cómo jugar
Durante las escaramuzas, nunca desperdicies Cosmic Binding en Soraka si está cerca de su zona de Equinox, ya que te silenciará. En su lugar, haz que gaste su silencio y lanza de inmediato Tempered Fate directamente sobre ella. Mientras está congelada, reposiciónate rápido para alinear un aturdimiento de Cosmic Binding contra una pared sobre su carry. Si fallas tu ultimate, retírate de inmediato con Magical Journey para reiniciar en lugar de pelear contra su curación sostenida.
PokePicksSeraphine depende de largas animaciones de lanzamiento y de preparación para impactar en las teamfights, sobre todo con su ultimate. Tempered Fate de Bard lo neutraliza por completo al ponerla en estasis a mitad del lanzamiento, cancelando la extensión de Encore o congelándola antes de que pueda encadenar su Beat Drop potenciado por Stage Presence. Como su utilidad defensiva de Surround Sound tiene un cooldown enorme, interrumpir su ritmo la deja increíblemente vulnerable al seguimiento de tu equipo.Build de Seraphine →Ver detalles
Seraphine
Por qué
Seraphine depende de largas animaciones de lanzamiento y de preparación para impactar en las teamfights, sobre todo con su ultimate. Tempered Fate de Bard lo neutraliza por completo al ponerla en estasis a mitad del lanzamiento, cancelando la extensión de Encore o congelándola antes de que pueda encadenar su Beat Drop potenciado por Stage Presence. Como su utilidad defensiva de Surround Sound tiene un cooldown enorme, interrumpir su ritmo la deja increíblemente vulnerable al seguimiento de tu equipo.
Impacto en la línea
Durante la fase de lane, Seraphine intentará empujar la wave con High Note y hacerte poke. Sin embargo, su push agresivo la hace muy susceptible a los ganks. Si se posiciona mal para acertar un ataque pasivo de Stage Presence, puedes castigarla fácilmente con Cosmic Binding contra la oleada de minions o las paredes. Una vez que gasta Surround Sound para absorber trades, obtienes una enorme ventana de vulnerabilidad en la que puedes aprovechar su falta de movilidad.
Cómo jugar
Para ganar este matchup, guarda Tempered Fate específicamente para cuando Seraphine empiece su animación de Encore o cuando se agrupe con sus aliados para lanzar Surround Sound. Colócate cerca de las paredes laterales para amenazar con un aturdimiento de Cosmic Binding cada vez que se adelante a hacer poke. Si juega demasiado seguro, usa Magical Journey para flanquearla desde la jungla y pillarla por detrás antes de que pueda reaccionar con Beat Drop.
EscudosPicksEste matchup favorece a Bard porque la herramienta defensiva distintiva de Braum, Unbreakable, queda totalmente eludida por la ultimate de Bard. Aunque Braum puede bloquear fácilmente el proyectil de Cosmic Binding para proteger a su carry, no tiene respuesta a Tempered Fate. Como Tempered Fate es una estasis de área lanzada en arco, ignora por completo el escudo direccional, inutilizando tanto a Braum como a su compañero y dejándolos vulnerables a un aturdimiento de seguimiento garantizado.Build de Braum →Ver detalles
Braum
Por qué
Este matchup favorece a Bard porque la herramienta defensiva distintiva de Braum, Unbreakable, queda totalmente eludida por la ultimate de Bard. Aunque Braum puede bloquear fácilmente el proyectil de Cosmic Binding para proteger a su carry, no tiene respuesta a Tempered Fate. Como Tempered Fate es una estasis de área lanzada en arco, ignora por completo el escudo direccional, inutilizando tanto a Braum como a su compañero y dejándolos vulnerables a un aturdimiento de seguimiento garantizado.
Impacto en la línea
En la lane, esta dinámica anula la capacidad de Braum de hacer peel con seguridad o de ejecutar saltos agresivos con Stand Behind Me. Tu presión continua con los ataques potenciados por Meep de Traveler’s Call obliga a Braum a jugar a la defensiva, gastando su maná en Unbreakable. Una vez que desbloqueas Tempered Fate, la amenaza de un tower dive o de un engage repentino detrás de su escudo impide que el dúo enemigo mantenga con seguridad la wave de minions cerca de su torre, dándote prioridad total.
Cómo jugar
Para ejecutarlo a la perfección, colócate en diagonal a la wave de minions para hacer que Braum levante Unbreakable. En el momento en que despliegue su escudo para bloquear tu poke, lanza de inmediato Tempered Fate directamente sobre el carry que está detrás de él. Cuando la estasis esté a punto de terminar, alinea tu Cosmic Binding para que atraviese al carry congelado y golpee a Braum o una pared cercana, asegurando un aturdimiento devastador. Usa Magical Journey para escapar si su pasiva Concussive Blows se acumula sobre ti.
IniciaciónInalcanzableEste matchup se inclina por completo a tu favor cuando ambos supports llegan al nivel 5. Toda la amenaza de Malphite gira en torno a su engage explosivo con Unstoppable Force. Sin embargo, como Tempered Fate tiene un alcance de lanzamiento que te permite quedarte a salvo por detrás, puedes lanzar reactivamente tu estasis dorada directamente sobre los aliados a los que apunta. Esto absorbe por completo el derribo y el daño de su ultimate, dejando a Malphite en lo profundo de tu territorio sin escapatoria.Build de Malphite →Ver detalles
Malphite
Por qué
Este matchup se inclina por completo a tu favor cuando ambos supports llegan al nivel 5. Toda la amenaza de Malphite gira en torno a su engage explosivo con Unstoppable Force. Sin embargo, como Tempered Fate tiene un alcance de lanzamiento que te permite quedarte a salvo por detrás, puedes lanzar reactivamente tu estasis dorada directamente sobre los aliados a los que apunta. Esto absorbe por completo el derribo y el daño de su ultimate, dejando a Malphite en lo profundo de tu territorio sin escapatoria.
Impacto en la línea
Antes del hito de la ultimate, dominas fácilmente el estado de la wave. La naturaleza melee de Malphite lo hace muy vulnerable a tus ataques a distancia de Traveler's Call y a los aturdimientos de Cosmic Binding cuando se adelanta a compartir minions. Una vez desbloqueadas las ultimates, su presencia bajo tu torre queda totalmente neutralizada. No puede amenazar con un dive porque cualquier intento de usar su engage distintivo termina en una estasis inmediata que lo atrapa bajo el fuego de la torre.
Cómo jugar
Colócate bien por detrás de tu tirador, obligando a Malphite a elegir entre objetivos de ultimate en lugar de golpear a los dos. Mantén Tempered Fate estrictamente fuera de cooldown para reaccionar a su Unstoppable Force; nunca la uses para iniciar a menos que sepas que su ultimate no está disponible. Si intenta hacer poke con Seismic Shard, coloca un Caretaker's Shrine detrás de tu carry para neutralizar el trade de vida. Antes de comprometerte con un aturdimiento de Cosmic Binding, rompe siempre primero su Granite Shield con un simple ataque básico potenciado por Meep.
Presión en el mapaPresión tempranaYuumi depende por completo de You and Me! para engancharse a su tirador, lo que significa que su presencia en la lane es extremadamente pasiva. Como no puede amenazar con un engage fuerte, puedes dejar la lane con comodidad para recoger chimes con Traveler's Call. Mientras los recoges, tu carry está totalmente a salvo porque la única herramienta de poke de Yuumi es Prowling Projectile, que carece del burst o del control de masas para castigar a un objetivo solitario.Build de Yuumi →Ver detalles
Yuumi
Por qué
Yuumi depende por completo de You and Me! para engancharse a su tirador, lo que significa que su presencia en la lane es extremadamente pasiva. Como no puede amenazar con un engage fuerte, puedes dejar la lane con comodidad para recoger chimes con Traveler's Call. Mientras los recoges, tu carry está totalmente a salvo porque la única herramienta de poke de Yuumi es Prowling Projectile, que carece del burst o del control de masas para castigar a un objetivo solitario.
Impacto en la línea
Esta dinámica elimina por completo el riesgo habitual de dejar solo a tu compañero. Puedes soltar un par de packs de Caretaker's Shrine bajo tu torre y luego desaparecer en la jungla. Tu aliado no sufrirá un dive porque la lane enemiga no puede aguantar los disparos de la torre ni inmovilizarlo sin Final Chapter. Esto te permite asegurar visión profunda mientras Yuumi sigue pegada a su compañero, desperdiciando su potencial de scaling.
Cómo jugar
Observa el estado de la wave y espera a que rebote hacia tu lado antes de usar Magical Journey para rotar. Antes de irte, carga tres nodos de Caretaker's Shrine detrás de tu tirador. Si Yuumi se despega para activar Bop 'n' Block, busca de inmediato interrumpirla con Cosmic Binding para dejarla sin su host. Si estalla una pelea mientras vuelves, usa Tempered Fate para congelar al carry enemigo, separándolo de la curación de Yuumi.
Presión en el mapaBard tiene una enorme ventaja porque Tempered Fate anula directamente Death from Below. Al poner en estasis a aliados con poca vida justo cuando Pyke salta para ejecutarlos, desperdicias por completo su ultimate y le niegas el reinicio con reparto de oro. Además, el posicionamiento predecible de Pyke al cargar Bone Skewer o al hacer dash con Phantom Undertow lo convierte en un blanco fácil para los aturdimientos de Cosmic Binding contra el terreno cercano.Build de Pyke →Ver detalles
Pyke
Por qué
Bard tiene una enorme ventaja porque Tempered Fate anula directamente Death from Below. Al poner en estasis a aliados con poca vida justo cuando Pyke salta para ejecutarlos, desperdicias por completo su ultimate y le niegas el reinicio con reparto de oro. Además, el posicionamiento predecible de Pyke al cargar Bone Skewer o al hacer dash con Phantom Undertow lo convierte en un blanco fácil para los aturdimientos de Cosmic Binding contra el terreno cercano.
Impacto en la línea
La incapacidad de Pyke para asegurar ejecuciones frena su potencial de snowball y lo deja sin oro en la bot lane. Como Pyke debe respetar la amenaza de Tempered Fate, no puede jugar de forma agresiva bajo tu torre. Mientras tanto, puedes hacerle poke libremente con los ataques básicos potenciados por Traveler's Call, obligándolo a gastar Ghostwater Dive a la defensiva para activar Gift of the Drowned Ones en lugar de hacer roam por el mapa.
Cómo jugar
Nunca lances Tempered Fate de forma proactiva en las escaramuzas; guárdala exclusivamente para el indicador en forma de X de Death from Below, para salvar a tu carry y arruinar el reinicio de Pyke en la teamfight. Cuando Pyke intente canalizar Bone Skewer, colócate cerca de una pared y prepara Cosmic Binding para aturdirlo en el momento en que lo suelte. Si se escabulle con Ghostwater Dive, usa de inmediato Magical Journey para seguir su roam o volver a tu lane con seguridad.
Ventaja: veredicto canónico de Wild Rift Core (−3 a +3), desde el punto de vista del campeón nombrado en la fila. Tasa de victorias y de selección: las del propio rival en este rol — Wild Rift CN · Challenger, Patch 7.3b. No es la tasa de victorias del enfrentamiento directo.
Cómo contrarrestar a este campeón
Ángulo de contra
Los counters de Bard no se limitan a los matchups de línea, sino a limitar su impacto global. Bard se vuelve problemático cuando puede hacer roam libremente y crear picks con su ultimate. Los campeones que restringen su roaming, niegan su control o castigan su ausencia en línea son los más efectivos. Vencer a Bard no consiste solo en ganar la línea, sino en reducir su influencia en el mapa.
Contexto del parche
En este meta, los supports que controlan el tempo de la línea o niegan los engages tienen ventaja sobre Bard. Su kit depende de las oportunidades: sin acceso a muros, vision o contra herramientas de disengage, pierde gran parte de su valor. Los campeones que mantienen la presión de la línea mientras protegen a su ADC reducen significativamente su impacto.
Lectura rápida
Castigar sus roams es clave.
Las herramientas de disengage reducen su impacto.
El control de la vision limita sus jugadas.
Arquetipos de contra
Supports de disengage
Estos supports evitan que Bard concrete sus engages. Su Q y su ultimate requieren un seguimiento rápido, pero las herramientas de disengage rompen esa dinámica. Obligan a Bard a adoptar un estilo de juego más pasivo y reducen su impacto en las peleas. En línea, también protegen eficazmente a su ADC de sus trades cortos.
Cómo se adapta el campeón. Espera a que cometa errores de posicionamiento y juega alrededor del fog en lugar de forzar engages frontales.
Supports de control anti-engage
Estos campeones castigan directamente los intentos de engage de Bard. Pueden bloquear o dar la vuelta a sus jugadas, haciendo que su iniciación sea arriesgada. En línea, suelen ganar los trades largos, forzando a Bard a jugar a la defensiva y limitando sus oportunidades de roaming.
Cómo se adapta el campeón. Concéntrate más en la vision y el timing en lugar de buscar engages directos.
Supports de poke con presión de línea
Estos campeones obligan a Bard a quedarse en línea castigándolo cada vez que da un paso adelante. Su poke constante hace que los trades sean arriesgados y limita su capacidad para dejar la línea sin consecuencias. También se aprovechan de su falta de sustain inmediato.
Morgana neutraliza gran parte del kit de Bard. Sus herramientas de control evitan engages limpios y obligan a Bard a depender del timing más que de la iniciativa. Esto convierte el matchup en un juego de paciencia más que en una oportunidad para hacer jugadas.
Errores comunes en su contra
Errores comunes en su contra
Ignorar sus roams.
Pelear cerca de los muros.
No anticipar su ultimate.
Falta de vision.
Subestimar su potencial de pick.
Notas del coach
Bard pierde valor si controlas el tempo.
Castigar su ausencia es clave.
FAQ
¿Cómo castigar a Bard de forma efectiva?
La mejor manera de castigar a Bard es aprovechar sus roams. Cada vez que deje la línea, debes presionar al ADC enemigo o asegurar recursos. Cuanto más fuerces respuestas rápidas, menos podrá Bard desplegar su estilo de macro.
¿Por qué es difícil hacer counter a Bard?
Porque no solo juega la lane. Incluso perdiendo la lane, puede crear ventajas en otros lugares. Hacerle counter requiere coordinación y map awareness, no solo un buen matchup.
¿Deberías seguir sus roams?
No siempre. A veces es mejor castigar su ausencia en lugar de seguirlo. La decisión depende del timing y de la posición de la wave. Seguirlo a ciegas puede empeorar las cosas.
¿Cómo jugar contra su ultimate?
Anticipa los ángulos y evita agruparos innecesariamente. Después del stasis, separaos para limitar el follow-up. Entender su timing es clave para evitar trampas.