agosto de 2026 · Patch 7.2d
Support · SUPPORT

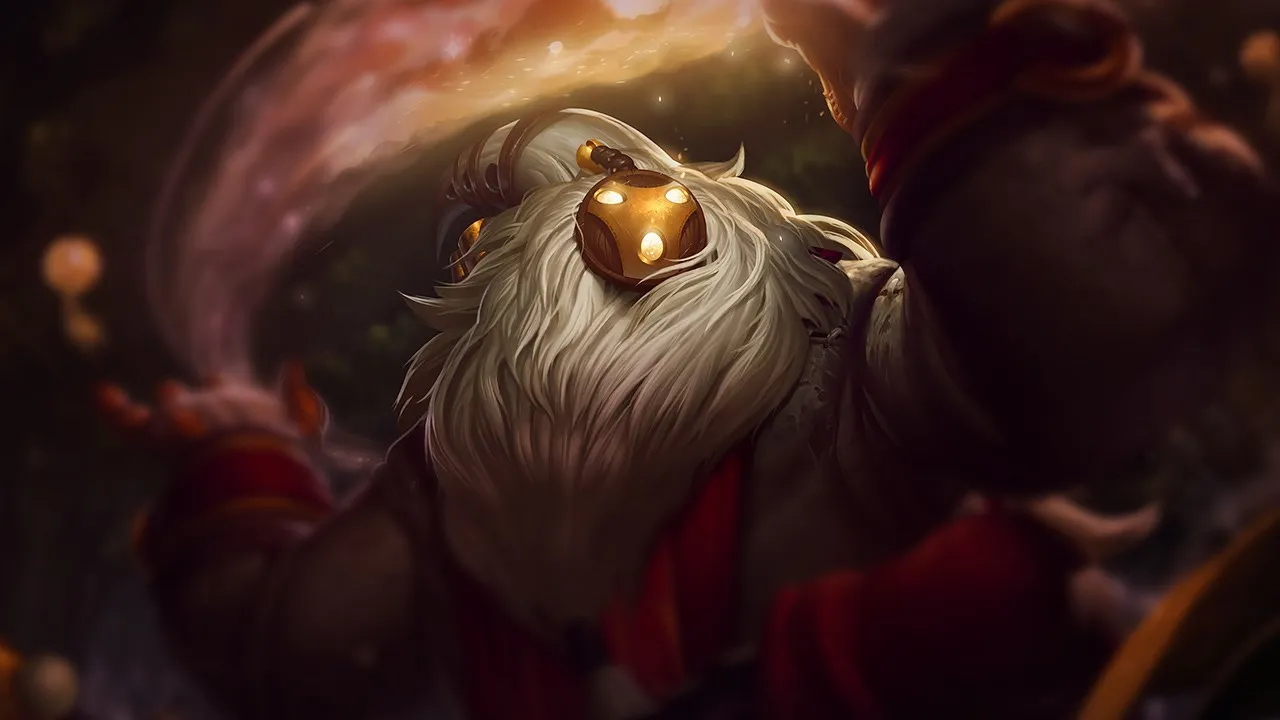
Guia de counters de Bard Wild Rift

Bard fica exposto contra composições agressivas de engage que não lhe dão tempo para dar roam. Seu baixo peel imediato o deixa vulnerável quando está longe de seu ADC. Campeões de pick ou de all-in constante punem suas ausências da lane.

★ SUPPORT Tier S+
DANO
UTIL
TANK
DIFF
Win 50.6% #43 · ↑3pt
Pick 1.2% #33
Ban 0.4% #119

Guia de counters de Bard Wild Rift ★ Counter Sheet

Hard Counters

2

Esses campeões têm uma build e um estilo de jogo que superam diretamente o seu, o que pode tornar o controle da lane e o farm extremamente difíceis. As habilidades deles podem neutralizar seus principais pontos fortes ou te punir assim que você tenta jogar do seu jeito de sempre. Nesses matchups, o objetivo costuma ser reduzir os erros e buscar soluções fora do confronto direto.

Senna

Senna

scalingpoke Senna's massive Basic Attack range allows her to easily harvest souls from you whenever you step up. If you try to trade back using Cosmic Binding, she simply negates your poke by casting Piercing Darkness through the minion wave to heal herself and her ally. This constant sustain and range advantage means she scales rapidly while punishing your shorter-range presence. Ver detalhes
Senna

Por quê

Senna's massive Basic Attack range allows her to easily harvest souls from you whenever you step up. If you try to trade back using Cosmic Binding, she simply negates your poke by casting Piercing Darkness through the minion wave to heal herself and her ally. This constant sustain and range advantage means she scales rapidly while punishing your shorter-range presence.

Impacto na lane

This matchup completely ruins your lane control. Because Senna constantly chips away at your health, you are forced to spend mana on Caretaker’s Shrine rather than playing aggressively. This endless pressure pushes your wave under turret, making it extremely dangerous for you to roam and collect chimes for Traveler’s Call, which in turn stalls your own scaling and map presence.

Como jogar

Do not walk up to trade unless Senna misses Last Embrace. Place your Caretaker’s Shrine far behind your turret so your carry can safely heal without being poked. Only use Cosmic Binding reactively when she tries to step forward to harvest a soul. If she attempts to escape a gank using Curse of the Black Mist, aim Tempered Fate to lock her down before she gains camouflage, allowing your team to close the gap.

Ficha completa →
Blitzcrank

Blitzcrank

hook_threatroaming_risk Bard's core loop of roaming for Traveler's Call chimes directly enables Blitzcrank's lethal kill-lane threat. The moment Bard steps away, Blitzcrank uses Overdrive to close the gap and lock down the isolated marksman with Rocket Grab and Power Fist. This creates a structural conflict: Bard must either abandon his scaling mechanic or leave his partner exposed to a sudden, fatal hook under or near the turret. Ver detalhes
Blitzcrank

Por quê

Bard's core loop of roaming for Traveler's Call chimes directly enables Blitzcrank's lethal kill-lane threat. The moment Bard steps away, Blitzcrank uses Overdrive to close the gap and lock down the isolated marksman with Rocket Grab and Power Fist. This creates a structural conflict: Bard must either abandon his scaling mechanic or leave his partner exposed to a sudden, fatal hook under or near the turret.

Impacto na lane

This dynamic paralyzes your lane pressure. You cannot safely deploy Caretaker's Shrine to sustain if you are constantly forced to hug your ADC to block Rocket Grab angles. If Blitzcrank gains wave control, he can freeze near his tower, forcing your ADC into a dangerous zone where any step forward results in a deadly Power Fist knock-up, while your Magical Journey escapes are useless if you get hooked first.

Como jogar

To survive, you must limit your Traveler's Call roaming exclusively to when the wave is fully crashed under the enemy tower or when Blitzcrank misses Rocket Grab. Always position yourself slightly ahead of your ADC, keeping minion block active, holding Cosmic Binding to stun Blitzcrank against a wall if he charges forward with Overdrive. If your ADC is hooked, use Tempered Fate on the enemy ADC to prevent them from following up on the crowd control, rather than using it on Blitzcrank himself.

Ficha completa →

Desfavoráveis

9

Esses campeões têm ferramentas que geralmente dão a eles vantagem no confronto, sem tornar o matchup impossível de jogar. Eles podem ter mais alcance, mais capacidade de aguentar sua ofensiva ou mais formas de responder aos seus engajamentos. Você vai precisar adaptar sua abordagem e escolher com cuidado os momentos em que aceita a luta.

Thresh

Thresh

hook_threatdisengage Thresh holds the lane's threat because one hit from Death Sentence forces you or your carry into The Box. However, Thresh's reliance on Dark Passage to taxi his jungler or save his ADC is his biggest vulnerability. When an ally clicks the lantern, they path directly to Thresh. Lining up Cosmic Binding right as they collide creates an instant, inescapable double stun, turning his primary escape into a death trap. Ver detalhes
Thresh

Por quê

Thresh holds the lane's threat because one hit from Death Sentence forces you or your carry into The Box. However, Thresh's reliance on Dark Passage to taxi his jungler or save his ADC is his biggest vulnerability. When an ally clicks the lantern, they path directly to Thresh. Lining up Cosmic Binding right as they collide creates an instant, inescapable double stun, turning his primary escape into a death trap.

Impacto na lane

Because Thresh can fish for hooks, you cannot blindly wander to collect chimes from Traveler’s Call without sacrificing lane pressure. If you are pulled, Flay will disrupt your escape, leaving you vulnerable under your own turret. This threat forces you to play defensively near your Caretaker’s Shrine, meaning you will often lose priority and have to concede early brush control to avoid deadly blind hooks.

Como jogar

Position yourself constantly behind minions to block Death Sentence, and always keep one Caretaker’s Shrine fully charged behind your ADC. Never waste Cosmic Binding proactively; hold it specifically for the moment Thresh throws Dark Passage or tries to engage. If he manages to trap you with The Box, cast Tempered Fate directly on his ADC to stall their damage, then use Magical Journey through the nearest wall to slip away safely.

Ficha completa →
Nautilus

Nautilus

all_indisengage Nautilus dominates the lane space because Dredge Line and Staggering Blow easily punish your fragile health pool. However, the matchup pivots entirely around Depth Charge. When Nautilus targets your ally with this ultimate, you can cast Tempered Fate on his backline. By freezing his follow-up damage dealers in stasis, you neutralize his dive and render his ultimate-led engage useless. Ver detalhes
Nautilus

Por quê

Nautilus dominates the lane space because Dredge Line and Staggering Blow easily punish your fragile health pool. However, the matchup pivots entirely around Depth Charge. When Nautilus targets your ally with this ultimate, you can cast Tempered Fate on his backline. By freezing his follow-up damage dealers in stasis, you neutralize his dive and render his ultimate-led engage useless.

Impacto na lane

You will constantly be pushed under tower because trading into Titan's Wrath shield is highly inefficient. Stepping up to collect Traveler’s Call chimes exposes you to a Dredge Line that will force a summoner spell or a bad recall. This pressure restricts your map rotations, meaning you cannot roam freely without risking your ADC dying to a dive initiated by Riptide slow and crowd control.

Como jogar

Stand consistently behind your minion wave to block Dredge Line, and place Caretaker’s Shrine far behind your tower to give your ADC a safe retreat path. Never use Tempered Fate aggressively. Instead, hold it specifically for the moment Nautilus casts Depth Charge. The second you see the depth charge tracking, aim your ultimate at the enemy follow-up. If Nautilus bypasses your wave, use Cosmic Binding on him and the nearest wall to stun him.

Ficha completa →
Morgana

Morgana

cc_negationpoke Morgana shuts down your aggressive playmaking because her Black Shield completely absorbs the magic damage and negates the stun from your Cosmic Binding. Whenever you attempt to line up a stun against the wall, she can reactively shield her ally, leaving you completely vulnerable. This constant threat of negation forces you to play defensively, as you cannot force favorable trades while her defensive cooldown is available. Ver detalhes
Morgana

Por quê

Morgana shuts down your aggressive playmaking because her Black Shield completely absorbs the magic damage and negates the stun from your Cosmic Binding. Whenever you attempt to line up a stun against the wall, she can reactively shield her ally, leaving you completely vulnerable. This constant threat of negation forces you to play defensively, as you cannot force favorable trades while her defensive cooldown is available.

Impacto na lane

You cannot step forward to harass with Traveler’s Call without risking a lethal Dark Binding into Tormented Shadow combo. Using Magical Journey to engage is suicidal, as Morgana can easily root you or your carry the moment you exit the portal. Consequently, you are pushed under turret, forced to rely on Caretaker’s Shrine to sustain through her poke while her shield prevents any retaliation.

Como jogar

To win this mental game, walk up threateningly to bait her Black Shield without actually casting Cosmic Binding. Once her shield is on its long cooldown, you have a brief window to strike. When utilizing Tempered Fate, target the ally she did not shield, or freeze them both to reset the fight. Never travel through a Magical Journey if her Dark Binding is ready, and keep your Caretaker’s Shrine fully charged behind your minion line.

Ficha completa →
Sona

Sona

scalingcatch_potential Sona outscales you heavily because Aria of Perseverance and Hymn of Valor provide continuous teamwide sustain and combat stats that your Caretaker's Shrine cannot match in extended fights. However, her reliance on channeling Crescendo to win teamfights makes her vulnerable. Your ultimate, Tempered Fate, is the ultimate equalizer, capable of freezing her mid-animation or catching her out before her scaling makes her team unkillable. Ver detalhes
Sona

Por quê

Sona outscales you heavily because Aria of Perseverance and Hymn of Valor provide continuous teamwide sustain and combat stats that your Caretaker's Shrine cannot match in extended fights. However, her reliance on channeling Crescendo to win teamfights makes her vulnerable. Your ultimate, Tempered Fate, is the ultimate equalizer, capable of freezing her mid-animation or catching her out before her scaling makes her team unkillable.

Impacto na lane

Early on, Sona will use Power Chord and Hymn of Valor to poke you down, neutralizing your short trades. If you let her freely scale, her lane sustain makes her tower pressure immense. The match is decided by how well you abuse her weak durability before she unlocks Crescendo. Missing your stun with Cosmic Binding or failing to roam during her weak early levels gives her a free path to outscaling.

Como jogar

To survive and win, you must play around Sona's cooldowns. Keep Cosmic Binding ready to punish her whenever she steps forward to trigger her Power Chord. When teamfights begin, do not throw Tempered Fate randomly; track her positioning and hold it specifically to freeze her the moment she positions to cast Crescendo. If she plays extremely safe, use Magical Journey to roam with your jungler and impact other lanes before her scaling gap becomes insurmountable.

Ficha completa →
Zyra

Zyra

pokeblock_mechanic Your primary tool to make plays, Cosmic Binding, is completely neutralized by Zyra's Garden of Thorns. When she reacts to your aggression by using Rampant Growth combined with Deadly Spines or Grasping Roots, the resulting plants act as physical shields. Because these summoned units block the missile path, you cannot secure stuns on Zyra or her marksman, turning your offensive attempts into wasted mana. Ver detalhes
Zyra

Por quê

Your primary tool to make plays, Cosmic Binding, is completely neutralized by Zyra's Garden of Thorns. When she reacts to your aggression by using Rampant Growth combined with Deadly Spines or Grasping Roots, the resulting plants act as physical shields. Because these summoned units block the missile path, you cannot secure stuns on Zyra or her marksman, turning your offensive attempts into wasted mana.

Impacto na lane

Because you cannot rely on Cosmic Binding to peel or engage, Zyra establishes dominant zone control. If you step forward to collect chimes for Traveler’s Call, her plants poke you down relentlessly. This constant chip damage forces you to spawn Caretaker’s Shrine constantly, draining your mana. Consequently, your lane is pushed under tower, delaying your roam windows and forcing your ADC to concede early minion waves.

Como jogar

To survive this lane, you must hold Cosmic Binding until Zyra has already spawned her plants elsewhere. Position yourself parallel to your minions, using them as buffers against her Grasping Roots. If she wastes Rampant Growth charges, that is your cue to look for an angle. When you are pushed out, use Magical Journey from behind your tower to safely collect nearby chimes, rather than walking through her deadly garden.

Ficha completa →
Lux

Lux

pokeburst Lux's high-range zoning through Lucent Singularity constantly threatens your health pool, forcing you into defensive positions. If you attempt to step up to collect chimes or poke with Traveler's Call enhanced autos, you expose yourself to her Light Binding. Because Cosmic Binding requires precise angles near walls or minions, Lux can easily stay behind her wave, shielding any return damage with Prismatic Barrier while whittling you down. Ver detalhes
Lux

Por quê

Lux's high-range zoning through Lucent Singularity constantly threatens your health pool, forcing you into defensive positions. If you attempt to step up to collect chimes or poke with Traveler's Call enhanced autos, you expose yourself to her Light Binding. Because Cosmic Binding requires precise angles near walls or minions, Lux can easily stay behind her wave, shielding any return damage with Prismatic Barrier while whittling you down.

Impacto na lane

You are constantly pushed under tower because Lux's explosive Lucent Singularity clears waves and chips your health simultaneously. This limits your roam windows, as leaving your ADC alone under this pressure is suicidal. Your health pool will constantly deplete, forcing early bases unless you actively mitigate the poke. If you get caught by Light Binding, her Final Spark combo will easily burst you from full health before you can react with Tempered Fate.

Como jogar

To survive, prioritize placing Caretaker's Shrine behind your caster minions to let them fully charge; use their speed boost and healing to recover from Lucent Singularity damage. Never stand directly behind low-health minions where a sneaky Light Binding can pass through. If Lux misses her binding, look for a quick Cosmic Binding stun, but do not chase deeply. If dived, use Tempered Fate on Lux to stall her Final Spark while using Magical Journey to escape through the side walls.

Ficha completa →
Karma

Karma

pokeshielding Karma dominates the early laning phase because her Inner Flame inflicts heavy, unavoidable area-of-effect damage whenever you try to collect Traveler's Call chimes near the wave. This relentless ranged pressure, amplified by her Mantra, constantly chips away at your health bar. To survive, you are forced to spend your mana on placing Caretaker's Shrine behind your tower rather than looking for offensive Cosmic Binding angles. Ver detalhes
Karma

Por quê

Karma dominates the early laning phase because her Inner Flame inflicts heavy, unavoidable area-of-effect damage whenever you try to collect Traveler's Call chimes near the wave. This relentless ranged pressure, amplified by her Mantra, constantly chips away at your health bar. To survive, you are forced to spend your mana on placing Caretaker's Shrine behind your tower rather than looking for offensive Cosmic Binding angles.

Impacto na lane

This constant harassment forces you into an extremely passive defensive posture. Because Karma easily secures wave priority with her splash damage, you will find your minion wave shoved under turret. This restricts your ability to use Magical Journey to roam for chimes, as leaving your marksman alone under this sort of siege is fatal. Every trade is heavily skewed, making you rely entirely on the gradual healing of fully charged Caretaker's Shrine packs.

Como jogar

To stay afloat, pre-emptively drop three Caretaker's Shrine health packs behind your turret before the heavy trading begins, letting them charge fully. Stand far behind your own minions to prevent Karma from splashing her Inner Flame onto you when she targets the wave. If she overextends to trigger Focused Resolve, use that predictable straight-line pathing to lock her against a wall or her own minions with Cosmic Binding, turning her aggression into a counter-engage.

Ficha completa →
Maokai

Maokai

engagedisengage Maokai completely neutralizes your defensive tools because Twisted Advance grants him untargetability. When you try to peel him off with Cosmic Binding, a skilled Maokai will activate his root to bypass your projectile entirely and close the gap. Once he lands, Bramble Smash knocks you back into his team, leaving you unable to escape his follow-up crowd control. Ver detalhes
Maokai

Por quê

Maokai completely neutralizes your defensive tools because Twisted Advance grants him untargetability. When you try to peel him off with Cosmic Binding, a skilled Maokai will activate his root to bypass your projectile entirely and close the gap. Once he lands, Bramble Smash knocks you back into his team, leaving you unable to escape his follow-up crowd control.

Impacto na lane

This interaction forces you to play extremely safe, giving up brush control because of his Sapling Toss. You cannot step up to harass with Traveler’s Call without risking a sudden lockup. If Maokai freezes the wave near his tower, any attempt to collect chimes or place a Caretaker’s Shrine leaves you vulnerable to a long-range Twisted Advance or a wide Nature's Grasp that secures an easy kill.

Como jogar

To survive, never cast Cosmic Binding reactively when Maokai walks at you; instead, hold it until after he completes Twisted Advance, aiming it at the wall behind you to stun him post-dash. Place your Caretaker’s Shrine deep behind your turret to secure a safe retreat path. If he traps you with Nature's Grasp, use Tempered Fate on his incoming marksman rather than Maokai himself, buying time for your Magical Journey escape.

Ficha completa →

Outros matchups

Skill Matchups

8

Esses confrontos são, acima de tudo, duelos de execução: os dois campeões têm formas reais de levar vantagem. Uma habilidade importante esquivada, um engajamento bem antecipado ou um erro de posicionamento podem ser suficientes para decidir o duelo. Conhecer o matchup e reconhecer as janelas de ação certas faz toda a diferença.

Galio

Galio

roamingutility This matchup is a pure race of global influence. While your Magical Journey allows you to bypass terrain to surprise other lanes, Galio can immediately answer any aggressive move with Hero's Entrance. This interaction nullifies your numerical advantage instantly, turning your proactive gank into a deadly counter-engage where his Shield of Durand can taunt your entire diving party. Ver detalhes
Galio

Por quê

This matchup is a pure race of global influence. While your Magical Journey allows you to bypass terrain to surprise other lanes, Galio can immediately answer any aggressive move with Hero's Entrance. This interaction nullifies your numerical advantage instantly, turning your proactive gank into a deadly counter-engage where his Shield of Durand can taunt your entire diving party.

Impacto na lane

In the duo lane, you hold a ranged advantage to poke Galio with Traveler's Call enhanced attacks. However, you cannot roam mindlessly. If you leave the lane, Galio clears waves instantly using Winds of War and Colossal Smash, establishing priority. This allows him to position himself safely in the fog of war, ready to drop on whichever lane you decide to gank.

Como jogar

To win this tempo race, you must bait Hero's Entrance before fully committing your allies. If you see him channeling his ultimate to save a target, prepare Tempered Fate to freeze the landing zone, neutralizing his impact. In lane, hold Cosmic Binding exclusively to interrupt his Justice Punch dash or to stun him against a wall when he charges Shield of Durand, preventing him from locking down your marksman.

Ficha completa →
Lulu

Lulu

roamingutility_peel This matchup is defined by Lulu's defensive nature. While she provides excellent peel with Help, Pix! and Wild Growth, she lacks the hard, proactive engage required to quickly dive an isolated carry under turret. This passive playstyle gives you the perfect window to trigger Traveler’s Call and collect chimes across the map, knowing your marksman is relatively safe from sudden, aggressive dives during your brief absences. Ver detalhes
Lulu

Por quê

This matchup is defined by Lulu's defensive nature. While she provides excellent peel with Help, Pix! and Wild Growth, she lacks the hard, proactive engage required to quickly dive an isolated carry under turret. This passive playstyle gives you the perfect window to trigger Traveler’s Call and collect chimes across the map, knowing your marksman is relatively safe from sudden, aggressive dives during your brief absences.

Impacto na lane

Laning revolves around trade mitigation. Lulu will try to poke you down using Glitterlance and Pix, Faerie Companion whenever you step up. However, placing Caretaker’s Shrine behind your turret ensures your ADC sustains through her moderate pressure while you are away. Your roamings will force Lulu's lane to push, but their lack of structural damage means your turret health remains safe while you impact other lanes.

Como jogar

Always charge three Caretaker’s Shrine packs under your tower before roaming. If you catch Lulu using Whimsy defensively to speed up her partner, immediately look for an aggressive Cosmic Binding stun, as she loses her primary tool to neutralize your engage. When returning to lane, use Magical Journey through the jungle walls to catch her off-guard, and hold Tempered Fate to isolate her carry right after she commits Wild Growth.

Ficha completa →
Leona

Leona

all_indisengage The lane revolves entirely around Leona's engage versus Bard's counter-disengage. When Leona launches forward with Zenith Blade, her linear path makes her incredibly vulnerable to a well-timed Cosmic Binding. Because she lands directly on top of her target, you can easily stun her against nearby terrain or her approaching marksman, neutralizing her Shield of Daybreak threat before she can lock anyone down. Ver detalhes
Leona

Por quê

The lane revolves entirely around Leona's engage versus Bard's counter-disengage. When Leona launches forward with Zenith Blade, her linear path makes her incredibly vulnerable to a well-timed Cosmic Binding. Because she lands directly on top of her target, you can easily stun her against nearby terrain or her approaching marksman, neutralizing her Shield of Daybreak threat before she can lock anyone down.

Impacto na lane

Whichever support misuses their primary tool loses complete control of the bush line. If Leona misses Zenith Blade, she becomes a walking target, allowing you to poke her down with Traveler’s Call empowered attacks. However, if you waste Cosmic Binding, your ADC has to retreat immediately, conceding wave priority and allowing Leona to zone you away from your Caretaker’s Shrine packs under the turret.

Como jogar

Never throw Cosmic Binding proactively unless Leona's Zenith Blade is on cooldown. Stand near walls to bait her engage, but always keep an angle clear to land your stun immediately when she pulls herself to you. If she locks down your marksman instead, target her ADC with Tempered Fate to stop their follow-up damage, then drop a Caretaker’s Shrine behind your partner to help them safely retreat.

Ficha completa →
Nami

Nami

sustaincounter_engage This matchup is a constant trade war where positioning dictates survival. Nami relies on the bouncing heals of Ebb and Flow to dominate short trades, while Bard matches this pressure with Cosmic Binding stuns. The lane remains perfectly even because Bard can completely neutralize Nami’s massive Tidal Wave engages, either by escaping through Magical Journey or using Tempered Fate to freeze Nami's allies mid-initiation. Ver detalhes
Nami

Por quê

This matchup is a constant trade war where positioning dictates survival. Nami relies on the bouncing heals of Ebb and Flow to dominate short trades, while Bard matches this pressure with Cosmic Binding stuns. The lane remains perfectly even because Bard can completely neutralize Nami’s massive Tidal Wave engages, either by escaping through Magical Journey or using Tempered Fate to freeze Nami's allies mid-initiation.

Impacto na lane

Both of you constantly fight for bush control to land your respective skillshots. While Nami uses Tidecaller's Blessing to help her ADC push waves and poke, you must counteract this sustained damage by preparing Caretaker’s Shrine relics behind your tower. Missing a Cosmic Binding or stepping into an Aqua Prison instantly swings the lane pressure, forcing early recalls and letting Nami's lane partner crash waves to secure plate gold.

Como jogar

To win this positioning battle, stand parallel to your ADC to split Nami's Ebb and Flow targets, preventing her from getting double bounces. Never use Magical Journey aggressively if Nami has Tidal Wave available; instead, hug walls so you can immediately open a portal to escape her wave. If she initiates from afar, hold Tempered Fate to freeze her incoming follow-up attackers rather than trying to hit Nami herself, effectively wasting her engage window.

Ficha completa →
Rakan

Rakan

mobilitydisengage This matchup is a high-speed duel of reflexes centered on Rakan's dash and your crowd control. The entire lane hinges on Grand Entrance. Because Rakan must commit to his landing spot, his predictable trajectory allows you to cast Cosmic Binding preemptively. By targeting his landing location, you can easily stun him against the very ally he tries to knock up or a nearby wall, turning his aggressive jump into a self-inflicted trap. Ver detalhes
Rakan

Por quê

This matchup is a high-speed duel of reflexes centered on Rakan's dash and your crowd control. The entire lane hinges on Grand Entrance. Because Rakan must commit to his landing spot, his predictable trajectory allows you to cast Cosmic Binding preemptively. By targeting his landing location, you can easily stun him against the very ally he tries to knock up or a nearby wall, turning his aggressive jump into a self-inflicted trap.

Impacto na lane

Missed spells dictate the lane's pressure. If Rakan wastes Grand Entrance, his threat vanishes, allowing you to pressure him with Meep-infused attacks from Traveler's Call. Conversely, if your Cosmic Binding misses, Rakan will instantly force trades, shielding his partner with Battle Dance to negate your poke. Health pools swing wildly based on these quick skirmishes, making passive farming impossible as both supports constantly fish for baiting opportunities.

Como jogar

Never throw Cosmic Binding blindly; hold it specifically to react to Rakan's forward dash. Stand near terrain to tempt his jump, then aim your projectile directly at your ally's feet the moment Rakan begins his Grand Entrance animation. If he coordinates The Quickness to charm you before you can react, immediately cast Tempered Fate on his backline to isolate him, or escape through a wall using Magical Journey to reset the engagement.

Ficha completa →
Milio

Milio

sustaindisengage This skill matchup revolves around Milio's ability to negate your crowd control. While a well-placed Cosmic Binding can stun Milio or his carry, Milio can instantly wipe this stun away using Breath of Life. However, his ultimate is completely useless against the golden stasis of Tempered Fate. Because Tempered Fate bypasses his cleanse entirely, you possess the ultimate tool to freeze him or his allies, leaving them vulnerable right as the stasis ends. Ver detalhes
Milio

Por quê

This skill matchup revolves around Milio's ability to negate your crowd control. While a well-placed Cosmic Binding can stun Milio or his carry, Milio can instantly wipe this stun away using Breath of Life. However, his ultimate is completely useless against the golden stasis of Tempered Fate. Because Tempered Fate bypasses his cleanse entirely, you possess the ultimate tool to freeze him or his allies, leaving them vulnerable right as the stasis ends.

Impacto na lane

Laning dissolves into a battle of attrition where your Caretaker’s Shrine competes with Milio's Cozy Campfire and Warm Hugs to keep marksmen healthy. If you blindly throw Cosmic Binding, Milio will shield the damage and out-sustain you. You cannot force quick kills under tower; instead, you must chip away at their resources, forcing Milio to exhaust his mana on heals before you look for a deep portal play.

Como jogar

To win this, bait out Warm Hugs with basic attacks empowered by Traveler’s Call before committing your mana. Never initiate a hard engage with Cosmic Binding when Milio's Breath of Life is available. Instead, launch Tempered Fate directly onto Milio to lock him out of the fight first. Once he is frozen in stasis, line up your Cosmic Binding on his landing spot, ensuring an inescapable stun the moment he emerges.

Ficha completa →

Outros matchups

Favoráveis

8

Esses campeões geralmente têm dificuldade para responder às suas principais forças, o que te dá mais liberdade para abordar o confronto. Você costuma ter várias formas de pressioná-los e forçar trocas a seu favor. Aproveite essa vantagem para impor seu ritmo, em vez de dar tempo para eles se estabilizarem.

Soraka

Soraka

sustaincatch_potential Bard bypasses Soraka's legendary healing by temporarily deleting her from the fight. Because her entire defensive power relies on spamming Astral Infusion or dropping a clutch global Wish to save low-health targets, landing Tempered Fate directly on Soraka shuts down her baseline utility. While she is trapped in stasis, her allies are completely stripped of their safety net, leaving them vulnerable to being focused down. Ver detalhes
Soraka

Por quê

Bard bypasses Soraka's legendary healing by temporarily deleting her from the fight. Because her entire defensive power relies on spamming Astral Infusion or dropping a clutch global Wish to save low-health targets, landing Tempered Fate directly on Soraka shuts down her baseline utility. While she is trapped in stasis, her allies are completely stripped of their safety net, leaving them vulnerable to being focused down.

Impacto na lane

Soraka wants to slowly wear you down with Starcall while keeping her carry perpetually healthy. However, because you can easily sustain through short trades with Caretaker’s Shrine, she cannot force you out of lane. This allows you to collect chimes from Traveler’s Call without losing tower pressure, and once you both reach level five, the threat of your ultimate forces her to play incredibly far back, conceding control of the brush.

Como jogar

During skirmishes, never waste Cosmic Binding on Soraka if she is standing near her Equinox zone, as she will silence you. Instead, bait out her silence, then immediately launch Tempered Fate directly onto her. While she is frozen, quickly reposition to line up a Cosmic Binding stun against a wall on her carry. If you miss your ultimate, retreat through a Magical Journey immediately to reset rather than fighting her sustained healing.

Ficha completa →
Seraphine

Seraphine

pokecatch_potential Seraphine relies on long casting animations and setup to impact teamfights, particularly with her ultimate. Bard's Tempered Fate completely neutralizes this by putting her in stasis mid-cast, canceling the extension of Encore or freezing her before she can chain her Stage Presence-empowered Beat Drop. Since her defensive utility from Surround Sound has a massive cooldown, interrupting her rhythm leaves her incredibly vulnerable to your team's follow-up. Ver detalhes
Seraphine

Por quê

Seraphine relies on long casting animations and setup to impact teamfights, particularly with her ultimate. Bard's Tempered Fate completely neutralizes this by putting her in stasis mid-cast, canceling the extension of Encore or freezing her before she can chain her Stage Presence-empowered Beat Drop. Since her defensive utility from Surround Sound has a massive cooldown, interrupting her rhythm leaves her incredibly vulnerable to your team's follow-up.

Impacto na lane

During the laning phase, Seraphine will try to shove the wave using High Note and poke you down. However, her aggressive pushing makes her incredibly susceptible to ganks. If she mispositions to land a Stage Presence passive attack, you can easily punish her with Cosmic Binding against the minion wave or walls. Once she wastes Surround Sound to absorb trades, you gain a massive window of vulnerability where her lack of mobility can be exploited.

Como jogar

To win this matchup, hold Tempered Fate specifically for when Seraphine begins her Encore animation or when she groups with her allies to cast Surround Sound. Position yourself near the side walls to threaten a Cosmic Binding stun whenever she steps up to poke. If she plays too safely, use Magical Journey to flank her from the jungle, catching her from behind before she can react with Beat Drop.

Ficha completa →
Braum

Braum

shield_negationcatch_potential This matchup favors Bard because Braum's signature defensive tool, Unbreakable, is completely bypassed by Bard's ultimate. While Braum can easily block the projectile of Cosmic Binding to protect his carry, he has no answer for Tempered Fate. Because Tempered Fate is a lobbed area-of-effect stasis, it ignores the directional shield entirely, disabling both Braum and his partner and leaving them vulnerable to a guaranteed follow-up stun. Ver detalhes
Braum

Por quê

This matchup favors Bard because Braum's signature defensive tool, Unbreakable, is completely bypassed by Bard's ultimate. While Braum can easily block the projectile of Cosmic Binding to protect his carry, he has no answer for Tempered Fate. Because Tempered Fate is a lobbed area-of-effect stasis, it ignores the directional shield entirely, disabling both Braum and his partner and leaving them vulnerable to a guaranteed follow-up stun.

Impacto na lane

In lane, this dynamic neuters Braum’s ability to safely peel or execute aggressive leaps with Stand Behind Me. Your continuous pressure with Meep-empowered attacks from Traveler’s Call forces Braum to play defensively, burning his mana on Unbreakable. Once you unlock Tempered Fate, the threat of a tower dive or a sudden engage behind his shield prevents the enemy duo from safely holding the minion wave near their turret, giving you total priority.

Como jogar

To execute this perfectly, position yourself diagonally to the minion wave to bait Braum into raising Unbreakable. The moment he deploys his shield to block your poke, immediately cast Tempered Fate directly on the carry standing behind him. As the stasis is about to end, line up your Cosmic Binding so it passes through the frozen carry and hits Braum or a nearby wall, ensuring a devastating stun. Use Magical Journey to escape if his passive Concussive Blows gets stacked on you.

Ficha completa →
Malphite

Malphite

engage_denialstasis This matchup swings entirely in your favor once both supports reach level 5. Malphite's entire threat revolves around his explosive engage with Unstoppable Force. However, because Tempered Fate has a cast range that allows you to stand safely behind, you can reactively throw your golden stasis directly onto your targeted allies. This completely absorbs his ultimate's knockup and damage, leaving Malphite deep in your territory with no escape. Ver detalhes
Malphite

Por quê

This matchup swings entirely in your favor once both supports reach level 5. Malphite's entire threat revolves around his explosive engage with Unstoppable Force. However, because Tempered Fate has a cast range that allows you to stand safely behind, you can reactively throw your golden stasis directly onto your targeted allies. This completely absorbs his ultimate's knockup and damage, leaving Malphite deep in your territory with no escape.

Impacto na lane

Before the ultimate milestone, you easily dominate the wave state. Malphite's melee nature makes him highly vulnerable to your ranged Traveler's Call attacks and Cosmic Binding stuns when he steps up to share minions. Once ultimates are unlocked, his presence under your tower is completely neutralized. He cannot threaten a dive because any attempt to use his signature engage results in an immediate stasis that traps him under tower fire.

Como jogar

Position yourself well behind your marksman, forcing Malphite to choose between ultimate targets rather than hitting both of you. Keep Tempered Fate strictly off cooldown to react to his Unstoppable Force; never use it to initiate unless you know his ultimate is down. If he tries to poke with Seismic Shard, place a Caretaker's Shrine behind your carry to neutralize the health trade. Before committing to a Cosmic Binding stun, always pop his Granite Shield with a simple Meep-empowered basic attack first.

Ficha completa →
Yuumi

Yuumi

roaminglane_pressure Yuumi relies entirely on You and Me! to attach to her marksman, meaning her lane presence is extremely passive. Since she cannot threaten a hard engage, you can comfortably leave the lane to gather chimes with Traveler's Call. While you collect these, your carry is perfectly safe because Yuumi's only poking tool is Prowling Projectile, which lacks the burst or crowd control to punish a solo target. Ver detalhes
Yuumi

Por quê

Yuumi relies entirely on You and Me! to attach to her marksman, meaning her lane presence is extremely passive. Since she cannot threaten a hard engage, you can comfortably leave the lane to gather chimes with Traveler's Call. While you collect these, your carry is perfectly safe because Yuumi's only poking tool is Prowling Projectile, which lacks the burst or crowd control to punish a solo target.

Impacto na lane

This dynamic completely removes the typical risk of leaving your partner alone. You can drop a couple of Caretaker's Shrine packs under your tower, then disappear into the jungle. Your ally won't get dived because the enemy lane cannot tank tower shots or lock them down without Final Chapter. This allows you to secure deep vision while Yuumi remains glued to her partner, wasting her scaling potential.

Como jogar

Watch the wave state and wait until it bounces back toward your side before you utilize Magical Journey to rotate. Before you leave, charge three Caretaker's Shrine nodes behind your shooter. If Yuumi detaches to trigger Bop 'n' Block, immediately look to interrupt her with Cosmic Binding to lock her out of her host. If a fight breaks out while you are returning, use Tempered Fate to freeze the enemy carry, separating them from Yuumi's healing.

Ficha completa →
Pyke

Pyke

execution_denialroaming Bard holds a massive advantage because Tempered Fate directly shuts down Death from Below. By placing low-health allies in stasis as Pyke leaps to execute them, you completely waste his ultimate and deny his gold-sharing reset. Furthermore, Pyke's predictable positioning when charging Bone Skewer or dashing with Phantom Undertow makes him an easy target for Cosmic Binding stuns against nearby terrain. Ver detalhes
Pyke

Por quê

Bard holds a massive advantage because Tempered Fate directly shuts down Death from Below. By placing low-health allies in stasis as Pyke leaps to execute them, you completely waste his ultimate and deny his gold-sharing reset. Furthermore, Pyke's predictable positioning when charging Bone Skewer or dashing with Phantom Undertow makes him an easy target for Cosmic Binding stuns against nearby terrain.

Impacto na lane

Pyke's inability to secure executions halts his snowball potential, leaving him gold-starved in the bot lane. Because Pyke must respect the threat of Tempered Fate, he cannot play aggressively under your turret. Meanwhile, you can freely poke him down with Traveler's Call enhanced basic attacks, forcing him to waste Ghostwater Dive defensively to trigger Gift of the Drowned Ones instead of roaming the map.

Como jogar

Never cast Tempered Fate proactively in skirmishes; hold it exclusively for the distinct X-shaped indicator of Death from Below to save your carry and ruin Pyke's teamfight reset. When Pyke attempts to channel Bone Skewer, stand near a wall and prepare Cosmic Binding to stun him the moment he releases it. If he slips away using Ghostwater Dive, immediately use Magical Journey to follow his roam or return safely to your lane.

Ficha completa →

Outros matchups

Items to Counter Bard

Buy these items to reduce this champion's effectiveness in your games.

Mercury's Treads
Mercury's Treads
Quicksilver Enchant
Quicksilver Enchant
Stasis Enchant
Stasis Enchant
Morellonomicon
Morellonomicon
Force of Nature
Force of Nature

Como counterar este campeão

Ângulo de counter

Os contra-ataques do Bard não se resumem apenas aos confrontos nas linhas, mas visam limitar seu impacto global. O Bard se torna problemático quando consegue se deslocar livremente e criar oportunidades de abate com sua habilidade definitiva. Os campeões que restringem sua mobilidade, neutralizam seu controle ou punem sua ausência na linha são os mais eficazes. Vencer o Bard não se resume apenas a vencer na rota — trata-se de reduzir sua influência no mapa.

Contexto do patch

Nesta meta, os campeões que controlam o ritmo da rota ou neutralizam as tentativas de engajamento levam vantagem sobre o Bard. Seu kit depende de oportunidades: sem acesso a paredes, visão ou diante de ferramentas de desengajamento, ele perde grande parte de seu valor. Campeões que mantêm a pressão na rota enquanto protegem seu ADC reduzem significativamente o impacto dele.

Leitura rápida

  • É fundamental punir suas incursões.
  • As ferramentas de desengate reduzem o impacto.
  • A visão limitada restringe suas jogadas.

Arquétipos de counter

Desengatar os apoios

Esses suportes impedem que Bard consiga converter seus engajamentos. Seu Q e sua ultimate exigem uma resposta rápida, mas as ferramentas de desengajamento quebram essa dinâmica. Elas forçam Bard a adotar um estilo de jogo mais passivo e reduzem seu impacto nas lutas. Na rota, elas também protegem efetivamente o ADC contra suas trocas rápidas.

Como o campeão deve se adaptar. Aguarde pelos erros de posicionamento e aproveite a névoa, em vez de forçar confrontos frontais.

Suportes de controle anti-engate

Esses campeões punem diretamente as tentativas de engajamento do Bard. Eles conseguem bloquear ou reverter suas jogadas, tornando sua iniciação arriscada. Na rota, costumam sair vitoriosos em trocas prolongadas, forçando o Bard a adotar um estilo defensivo e limitando suas oportunidades de roaming.

Como o campeão deve se adaptar. Concentre-se mais na visão e no momento certo, em vez de ataques diretos.

Suportes de pressão para a pista

Esses campeões forçam o Bard a permanecer na rota, punindo-o sempre que ele avança. Seus ataques constantes tornam as trocas de dano arriscadas e limitam sua capacidade de sair da rota sem sofrer consequências. Eles também se aproveitam de sua falta de sustain imediato.

Como o campeão deve se adaptar. Procure ângulos inesperados em vez de jogar de frente na linha.

Matchups prioritários

Morgana

Morgana neutraliza grande parte do repertório de Bard. Suas ferramentas de controle impedem ataques precisos e forçam Bard a confiar no timing, em vez de na iniciativa. Isso transforma o confronto em um jogo de paciência, em vez de uma oportunidade para criar jogadas.

Erros comuns contra ele

Erros comuns contra ele

  • Ignorando suas andanças.
  • Luta perto de paredes.
  • Não prevendo seu golpe final.
  • Falta de visão.
  • Subestimar o potencial dele como escolha.

Notas do coach

  • O parâmetro Bard perde valor se você controlar o tempo.
  • É fundamental penalizar a ausência dele.

FAQ

Como resolver o erro Bard de forma eficaz?

A melhor maneira de punir o Bard é tirar proveito de suas incursões. Sempre que ele sair da rota, você deve pressionar o ADC inimigo ou garantir recursos. Quanto mais você forçar respostas rápidas, menos o Bard conseguirá jogar com seu estilo macro.

Por que é difícil se defender contra o Bard?

Porque ele não se limita apenas à rota. Mesmo quando está perdendo na rota, ele consegue criar vantagens em outras áreas. Para enfrentá-lo, é preciso coordenação e percepção do mapa, não apenas um bom confronto direto.

Você deveria acompanhar suas andanças?

Nem sempre. Às vezes, é melhor aproveitar a ausência dele do que segui-lo. A decisão depende do momento certo e da posição na onda. Seguir cegamente pode piorar a situação.

Como se defender contra a habilidade definitiva dele?

Antecipe os ângulos e evite agrupamentos desnecessários. Após a estagnação, espalhe-se para limitar o acompanhamento. Compreender o ritmo dele é fundamental para evitar armadilhas.