agosto de 2026 · Patch 7.2d
Mage · MID · SUPPORT

Guia de counters de Veigar Wild Rift

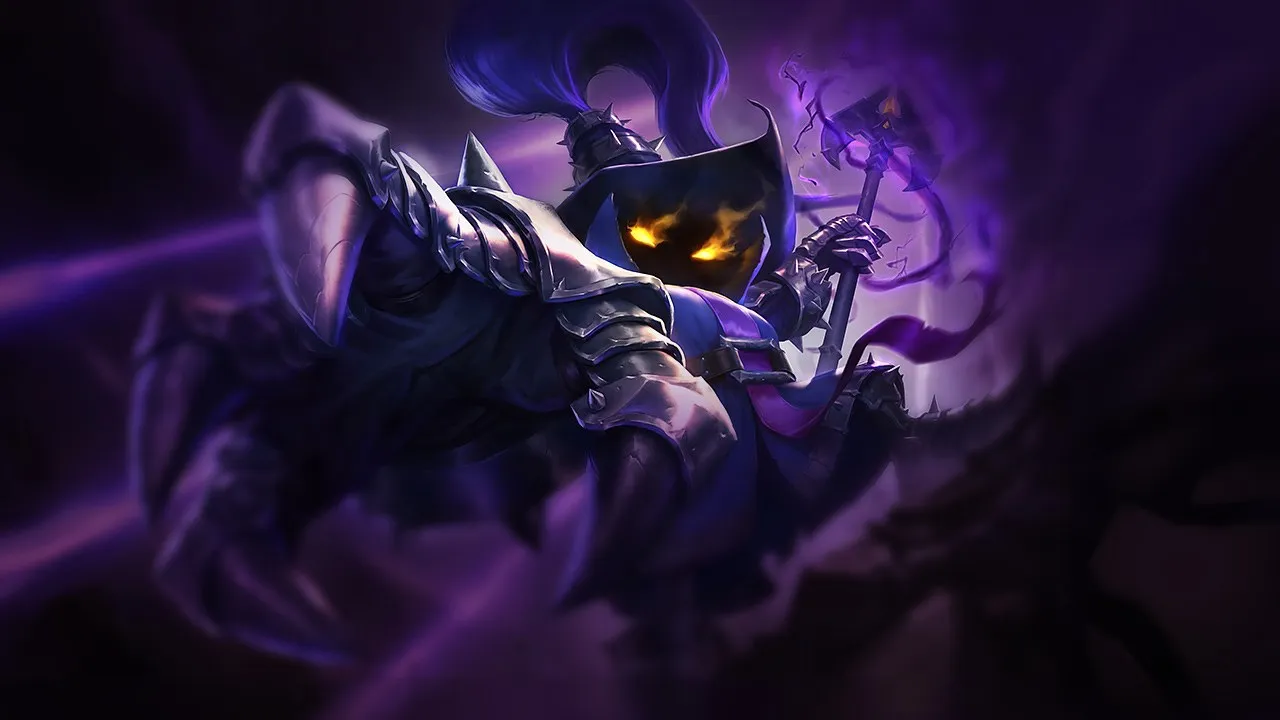
Veigar é vulnerável contra assassinos e composições de dive que se aproximam antes que ele posicione sua gaiola. Campeões de alta mobilidade passam por sua gaiola ou se esquivam dela. Seu early game extremamente fraco é sua janela de vulnerabilidade crítica.

★ MID · SUPPORT Tier S
DANO
UTIL
TANK
DIFF
Win 47.9% #87 · ↓0pt
Pick 10.4% #3
Ban 8.0% #32

Guia de counters de Veigar Wild Rift ★ Counter Sheet

Hard Counters

6

Esses campeões têm uma build e um estilo de jogo que superam diretamente o seu, o que pode tornar o controle da lane e o farm extremamente difíceis. As habilidades deles podem neutralizar seus principais pontos fortes ou te punir assim que você tenta jogar do seu jeito de sempre. Nesses matchups, o objetivo costuma ser reduzir os erros e buscar soluções fora do confronto direto.

Yone

Yone

spacingdefense Yone completely neutralizes your primary defensive tool, *Event Horizon*, by exploiting the snap-back mechanic of *Soul Unbound*. When Yone initiates a trade with his spirit form, he can bypass your cage's stun entirely by cleansing the crowd control upon returning to his physical body. This leaves you completely exposed to his high-velocity physical burst from *Mortal Steel* and *Fate Sealed* without any reliable way to lock him down. Ver detalhes
Yone

Por quê

Yone completely neutralizes your primary defensive tool, *Event Horizon*, by exploiting the snap-back mechanic of *Soul Unbound*. When Yone initiates a trade with his spirit form, he can bypass your cage's stun entirely by cleansing the crowd control upon returning to his physical body. This leaves you completely exposed to his high-velocity physical burst from *Mortal Steel* and *Fate Sealed* without any reliable way to lock him down.

Impacto na lane

This interaction forces you into a passive posture under your own turret. Because Yone can safely poke with *Spirit Cleave* and dive you from long range using *Mortal Steel* stacks, you cannot contest the minion waves. Attempting to push makes you an easy target, bleeding your health pool and forcing early recalls that cost you massive stacks of *Phenomenal Evil Power* and tower plating.

Como jogar

To survive, you must master strict wave management near your tower. Never cast *Event Horizon* aggressively; hold it exclusively to zone Yone's physical body when he activates *Soul Unbound*. Predict his return point and drop *Dark Matter* on his original physical husk rather than his active spirit form. If his *Mortal Steel* Q3 tornado is primed, step back immediately and use *Baleful Strike* only to secure safe, long-range last hits.

Ficha completa →
Zed

Zed

defensetiming Zed completely neutralizes Veigar's primary defensive tool, Event Horizon. When Veigar drops his cage to self-peel, Zed can immediately cast Death Mark, turning untargetable and blinking directly behind Veigar. This bypasses the stun entirely, letting Zed unleash a lethal combination of Razor Shuriken and Shadow Slash up close, while Contempt for the Weak secures the kill on the low-health yordle. Ver detalhes
Zed

Por quê

Zed completely neutralizes Veigar's primary defensive tool, Event Horizon. When Veigar drops his cage to self-peel, Zed can immediately cast Death Mark, turning untargetable and blinking directly behind Veigar. This bypasses the stun entirely, letting Zed unleash a lethal combination of Razor Shuriken and Shadow Slash up close, while Contempt for the Weak secures the kill on the low-health yordle.

Impacto na lane

Once Zed reaches level five, the threat of Death Mark forces Veigar to play incredibly far back, sacrificing lane priority and farm. If Veigar attempts to stack Phenomenal Evil Power with Baleful Strike on the wave, he risks getting poked down by Living Shadow combined with Razor Shuriken. This constant health pressure forces early recalls, allowing Zed to shove, roam freely, and dive Veigar under tower.

Como jogar

You must hold Event Horizon defensively and never cast it proactively. When Zed initiates with Living Shadow, immediately walk laterally to dodge the incoming Razor Shuriken. If he commits with Death Mark, wait for his reappearance animation behind you before placing Event Horizon directly on top of yourself. This guarantees the stun as he lands, allowing you to quickly retaliate with Baleful Strike and Primordial Burst before retreating to the safety of your turret.

Ficha completa →
Katarina

Katarina

blink_advantageburst_trade Your entire defensive gameplan relies on Event Horizon to zone threats, but Katarina completely nullifies this. Because Shunpo is an instantaneous blink rather than a dash, she can teleport directly over your cage's stun boundary to land right on top of you. This allows her to safely ignore your crowd control and immediately execute her full Preparation and Death Lotus burst sequence. Ver detalhes
Katarina

Por quê

Your entire defensive gameplan relies on Event Horizon to zone threats, but Katarina completely nullifies this. Because Shunpo is an instantaneous blink rather than a dash, she can teleport directly over your cage's stun boundary to land right on top of you. This allows her to safely ignore your crowd control and immediately execute her full Preparation and Death Lotus burst sequence.

Impacto na lane

You are forced into a permanent defensive posture, unable to step up to stack Phenomenal Evil Power with Baleful Strike. Every time you walk past your caster minions, Katarina can throw Bouncing Blade and blink behind you. This constant threat forces you to concede wave priority, letting her easily crash waves and roam to side lanes to farm kills with Voracity while you are stuck farming under tower.

Como jogar

Never drop Event Horizon to catch her proactively; instead, hold it and place its perimeter directly on yourself only after she commits with Shunpo. Stand far away from her Bouncing Blade daggers on the ground so she cannot reset her cooldowns. If she leaves the lane to roam, do not follow her blindly into the fog; instead, quickly clear the wave using Dark Matter to stack your passive and ping your teammates back.

Ficha completa →
Kassadin

Kassadin

mobilityburst_mitigation Your entire defensive identity revolves around Event Horizon, but Kassadin completely bypasses this obstacle once he reaches level 5. Because Riftwalk is an instantaneous blink rather than a dash, he can teleport directly over your stun boundary without triggering it, landing on top of you. This interaction completely negates your zone control, allowing him to easily follow up with Null Sphere and Nether Blade. Ver detalhes
Kassadin

Por quê

Your entire defensive identity revolves around Event Horizon, but Kassadin completely bypasses this obstacle once he reaches level 5. Because Riftwalk is an instantaneous blink rather than a dash, he can teleport directly over your stun boundary without triggering it, landing on top of you. This interaction completely negates your zone control, allowing him to easily follow up with Null Sphere and Nether Blade.

Impacto na lane

Once Kassadin unlocks his ultimate, you can no longer safely step past your tower range. Trading with Baleful Strike or attempting to stack Phenomenal Evil Power with Dark Matter becomes incredibly risky, as any forward step baiting out Riftwalk results in a chunked health bar. You will constantly be pushed under tower, sacrificing mid lane priority and leaving your jungler without backup during early skirmishes.

Como jogar

To survive this lane, you must alter your positioning to stay strictly within tower range once Kassadin has his ultimate. Never cast Event Horizon proactively; instead, hold it and place the boundary directly on yourself only after he uses Riftwalk to engage. If he blinks onto you, instantly drop Event Horizon around your own feet to prevent him from walking away after his combo, forcing him to take tower shots or tank your Primordial Burst.

Ficha completa →
Morgana

Morgana

hard_counterscaling_gap Morgana completely neutralizes your defensive and offensive setups because her Black Shield grants crowd control immunity. Whenever you drop Event Horizon to lock her down or escape her advance, she can simply activate Black Shield and walk straight through the boundary without being stunned. This interaction invalidates your main zoning tool, leaving you highly vulnerable to her Dark Binding and Tormented Shadow follow-up. Ver detalhes
Morgana

Por quê

Morgana completely neutralizes your defensive and offensive setups because her Black Shield grants crowd control immunity. Whenever you drop Event Horizon to lock her down or escape her advance, she can simply activate Black Shield and walk straight through the boundary without being stunned. This interaction invalidates your main zoning tool, leaving you highly vulnerable to her Dark Binding and Tormented Shadow follow-up.

Impacto na lane

Laning becomes a passive, defensive struggle. Because you cannot threaten her with Event Horizon, Morgana easily pushes waves with Tormented Shadow, forcing you under turret. You are forced to use Baleful Strike and Dark Matter solely to secure farm rather than trading. Attempting to contest her lane priority risks getting hit by Dark Binding, which sets up her Soul Shackles and guarantees you lose massive health or your life.

Como jogar

Stand deep behind your minion wave to block Dark Binding, using them as a physical shield. Never drop Event Horizon unless Morgana has already wasted Black Shield on herself or an ally. If she approaches with Soul Shackles, do not panic-cast your cage on her; instead, retreat towards your turret and focus on stacking Phenomenal Evil Power safely from a distance with Baleful Strike. If she freezes, concede priority and wait for the wave to bounce.

Ficha completa →
Yasuo

Yasuo

spacingdefense Yasuo's kit directly neutralizes Veigar's threat. His Wind Wall completely nullifies both Baleful Strike and the critical execute damage of Primordial Burst. Furthermore, Yasuo's high mobility from Sweeping Blade allows him to dash through minions and slide clean around Event Horizon before the cage edges can stun him, making your main defensive tool highly unreliable. Ver detalhes
Yasuo

Por quê

Yasuo's kit directly neutralizes Veigar's threat. His Wind Wall completely nullifies both Baleful Strike and the critical execute damage of Primordial Burst. Furthermore, Yasuo's high mobility from Sweeping Blade allows him to dash through minions and slide clean around Event Horizon before the cage edges can stun him, making your main defensive tool highly unreliable.

Impacto na lane

You cannot contest waves safely. Yasuo will constantly use Sweeping Blade to close the distance, popping his Way of the Wanderer shield to absorb your retaliatory damage. Because you must hold Event Horizon for defense, you lose the ability to control the wave with Dark Matter. This forces you under tower, bleeding gold while Yasuo roams freely to pressure your map.

Como jogar

Play defensively and prioritize stacking. Never throw Baleful Strike or Primordial Burst while Yasuo has Wind Wall available. Instead, bait this defensive barrier by stepping forward, then immediately step back. If he dashes in with Sweeping Blade, drop Event Horizon centered on yourself rather than him, forcing him to collide with the edge. Always keep moving to dodge his third Steel Tempest cast, denying him the knock-up needed for Last Breath.

Ficha completa →

Desfavoráveis

30

Esses campeões têm ferramentas que geralmente dão a eles vantagem no confronto, sem tornar o matchup impossível de jogar. Eles podem ter mais alcance, mais capacidade de aguentar sua ofensiva ou mais formas de responder aos seus engajamentos. Você vai precisar adaptar sua abordagem e escolher com cuidado os momentos em que aceita a luta.

Ahri

Ahri

scaling_gaproaming This lane is dictated by how Ahri's mobility nullifies your primary self-peel. While Event Horizon is your ultimate defensive tool, Ahri can easily position herself outside its perimeter before activating Spirit Rush. This allows her to dash around the cage entirely rather than through it, closing the gap to land a fatal Charm and Orb of Deception combo without ever touching your stun. Ver detalhes
Ahri

Por quê

This lane is dictated by how Ahri's mobility nullifies your primary self-peel. While Event Horizon is your ultimate defensive tool, Ahri can easily position herself outside its perimeter before activating Spirit Rush. This allows her to dash around the cage entirely rather than through it, closing the gap to land a fatal Charm and Orb of Deception combo without ever touching your stun.

Impacto na lane

Ahri uses Orb of Deception to rapidly clear waves and trigger Essence Theft sustain, forcing you to use Baleful Strike defensively under turret. Because you cannot safely step up to trade without risking her Spirit Rush engage, she secures early priority. This allows her to roam to side lanes while you are stuck stacking Phenomenal Evil Power on incoming minions, punishing your map.

Como jogar

To survive, never cast Event Horizon proactively unless her ultimate is down. Keep the wave frozen near your turret, utilizing Baleful Strike and Dark Matter solely for safe farming. If Ahri activates Spirit Rush and dashes past your cage, retreat directly to your tower and prepare to flash her Charm. When she roams, do not blindly follow her into the river; instead, ping missing instantly and punish her absence by stacking Phenomenal Evil Power as fast as possible.

Ficha completa →
Galio

Galio

burst_mitigationcc_bypass Galio acts as a natural wall against Veigar's burst potential. His Shield of Durand provides massive magic damage reduction, directly neutralizing the execution power of Primordial Burst. Furthermore, Veigar's defensive tool, Event Horizon, is not foolproof here; if Galio winds up Justice Punch during the cage's brief arming delay, his dash can cross the boundary before the stun wall fully materializes, leaving Veigar vulnerable to Colossal Smash. Ver detalhes
Galio

Por quê

Galio acts as a natural wall against Veigar's burst potential. His Shield of Durand provides massive magic damage reduction, directly neutralizing the execution power of Primordial Burst. Furthermore, Veigar's defensive tool, Event Horizon, is not foolproof here; if Galio winds up Justice Punch during the cage's brief arming delay, his dash can cross the boundary before the stun wall fully materializes, leaving Veigar vulnerable to Colossal Smash.

Impacto na lane

Trading with Baleful Strike and Dark Matter feels unrewarding against Galio's innate tankiness. He will constantly shove waves using Winds of War, forcing you to use your mana on waveclear rather than stacking Phenomenal Evil Power on him. If you overextend, his Justice Punch engage forces you back to base, while his Hero's Entrance allows him to map-play while you are trapped under your tower clearing the wave.

Como jogar

To survive this lane, your primary goal is to safely stack Phenomenal Evil Power from a distance using Baleful Strike. Never throw Event Horizon aggressively unless Galio has already wasted Justice Punch. If he initiates with Justice Punch, drop Event Horizon directly on yourself, but step backward immediately to account for the arming delay. Finally, never cast Primordial Burst while his Shield of Durand is active; wait out his defensive channel or bait it with Dark Matter before committing your ultimate.

Ficha completa →
Irelia

Irelia

dodge_ccall_in This matchup is dictated by the delay on your cage. If you deploy Event Horizon to stop an engage, Irelia can reactively use Bladesurge on a low-health minion or directly onto you before the stun walls fully materialize. Once she bypasses this perimeter, her Ionian Fervor stacks allow her to shred your health bar, while Defiant Dance easily mitigates your reactive Baleful Strike and Dark Matter burst. Ver detalhes
Irelia

Por quê

This matchup is dictated by the delay on your cage. If you deploy Event Horizon to stop an engage, Irelia can reactively use Bladesurge on a low-health minion or directly onto you before the stun walls fully materialize. Once she bypasses this perimeter, her Ionian Fervor stacks allow her to shred your health bar, while Defiant Dance easily mitigates your reactive Baleful Strike and Dark Matter burst.

Impacto na lane

You cannot safely contest the wave when Irelia has low-health minions nearby to chain Bladesurge. She will constantly bait out your Event Horizon to create a massive zone of control. If she successfully dodges or bypasses the stun, you are forced to retreat under tower, bleeding gold and losing priority. Missing your stun window means giving her a free dive opportunity with Vanguard's Edge.

Como jogar

Never cast Event Horizon preemptively just to poke. Instead, hold it until Irelia commits her Flawless Duet. If she misses her stun, that is your cue to safely farm with Baleful Strike from a distance. If she dashes in, drop the cage directly on yourself, forcing her to either step into the stun or use Defiant Dance passively. If you get marked by Vanguard's Edge, disengage immediately and farm under tower using Dark Matter.

Ficha completa →
Annie

Annie

burst_racecage_dodge This matchup hinges on the deployment delay of your Event Horizon. When Annie activates Molten Shield, the sudden burst of movement speed allows her to sprint straight through your cage's perimeter before the boundary fully materializes and stuns. Once inside your zone, she can easily discharge a Pyromania-empowered Disintegrate or Summon: Tibbers to lock you down, bypassing your primary self-peel and setting up her lethal burst combo. Ver detalhes
Annie

Por quê

This matchup hinges on the deployment delay of your Event Horizon. When Annie activates Molten Shield, the sudden burst of movement speed allows her to sprint straight through your cage's perimeter before the boundary fully materializes and stuns. Once inside your zone, she can easily discharge a Pyromania-empowered Disintegrate or Summon: Tibbers to lock you down, bypassing your primary self-peel and setting up her lethal burst combo.

Impacto na lane

Because Annie can bypass your cage, you are forced to play incredibly far back, sacrificing wave priority. You cannot safely step forward to secure stacks for Phenomenal Evil Power using Baleful Strike. If you attempt to match her wave clear with Dark Matter, she can easily initiate a trade. Consequently, you will find yourself pushed under turret, constantly bleeding mana on defensive cages while trying to survive her flash-stuns.

Como jogar

To survive, never cast Event Horizon proactively when Annie has her Pyromania stun ready or her Molten Shield off cooldown. Instead, position yourself deep behind your caster minions, forcing her to burn her movement speed just to reach you. If she overextends and wastes her shield, immediately drop Dark Matter on her path while retreating. Only use Primordial Burst to execute her when she commits Summon: Tibbers, turning her aggressive dive into a double-kill opportunity.

Ficha completa →
Fizz

Fizz

dodge_ccall_in This matchup is dictated by how easily Fizz can bypass your primary defensive tool. Normally, Event Horizon keeps aggressive melee champions at bay, but Fizz can use Playful to hop cleanly over the stun boundary without taking any crowd control. This leaves you completely exposed to his heavy burst from Urchin Strike and Rending Wave, turning your main safety net into an empty threat. Ver detalhes
Fizz

Por quê

This matchup is dictated by how easily Fizz can bypass your primary defensive tool. Normally, Event Horizon keeps aggressive melee champions at bay, but Fizz can use Playful to hop cleanly over the stun boundary without taking any crowd control. This leaves you completely exposed to his heavy burst from Urchin Strike and Rending Wave, turning your main safety net into an empty threat.

Impacto na lane

Because you cannot reliably self-peel, you lose all lane priority. If you step up past the river to stack Phenomenal Evil Power, Fizz will fish for Chum the Waters to initiate. This forces you to constantly retreat, farming passively with Baleful Strike under your turret. You will bleed gold, lose early plates, and struggle to assist your jungler because Fizz can roam freely while you clear slowly.

Como jogar

To survive, you must never cast Event Horizon proactively. Hold this ability as a deterrent; if Fizz initiates with Urchin Strike instead of jumping, drop the cage directly on yourself to force out his Playful. Once he lands, you have a brief sixteen-second window where his mobility is gone. Only then can you safely drop Dark Matter and look to execute him with Primordial Burst if he is already low. Otherwise, stay back and stack.

Ficha completa →
Talon

Talon

cage_baitingburst_race While a well-timed Event Horizon can interrupt Talon's Noxian Diplomacy mid-dash, his mobility advantage dictates the lane. By using Assassin's Path over the mid-lane walls, he can completely bypass your defensive cage to flank you from unexpected angles. This ability to ignore your primary self-peel tool makes lane safety deceptive, forcing you to respect angles where your stun cannot protect you. Ver detalhes
Talon

Por quê

While a well-timed Event Horizon can interrupt Talon's Noxian Diplomacy mid-dash, his mobility advantage dictates the lane. By using Assassin's Path over the mid-lane walls, he can completely bypass your defensive cage to flank you from unexpected angles. This ability to ignore your primary self-peel tool makes lane safety deceptive, forcing you to respect angles where your stun cannot protect you.

Impacto na lane

Whenever Talon uses Rake to clear waves, you must exploit this brief recovery period to safely stack Phenomenal Evil Power with Baleful Strike. However, the moment he vanishes over a wall using Assassin's Path, your map pressure vanishes. Following him through the river is suicidal, as he can wait in unwarded bushes to ambush you with Shadow Assault before your cage can land.

Como jogar

Position yourself strictly in the dead center of the lane, far from the side walls, to maximize your reaction time against an Assassin's Path flank. Never cast Event Horizon preemptively; hold it specifically to threaten his Noxian Diplomacy dash. If he unleashes Shadow Assault, immediately retreat toward your turret and drop Dark Matter directly on your own character model to deter his melee burst.

Ficha completa →
Jayce

Jayce

pokecc_avoidance Jayce dominates this matchup because his accelerated To the Skies! projectile, fired through his Thundering Blow acceleration gate, vastly outranges your Event Horizon. He can repeatedly chip away at your health from complete safety, and because he remains outside the stun radius of your cage, you have no way to lock him down or retaliate. This neutralizes your ability to stack Phenomenal Evil Power safely. Ver detalhes
Jayce

Por quê

Jayce dominates this matchup because his accelerated To the Skies! projectile, fired through his Thundering Blow acceleration gate, vastly outranges your Event Horizon. He can repeatedly chip away at your health from complete safety, and because he remains outside the stun radius of your cage, you have no way to lock him down or retaliate. This neutralizes your ability to stack Phenomenal Evil Power safely.

Impacto na lane

Under constant threat of long-range poke, you are forced to retreat behind your minions, sacrificing crucial farm. Jayce will easily secure wave control, pushing you under turret with his Lightning Field. If your health drops too low from his cannon shots, he can easily swap with Transform Mercury Cannon and leap in with his melee To the Skies! to execute you under your own tower, starving you of gold.

Como jogar

Focus entirely on survival and safe stacking. Keep your distance and use Baleful Strike from maximum range to secure minions rather than trying to poke him. Never deploy Event Horizon aggressively; instead, hold this cage as a self-peel tool. If Jayce decides to engage with his hammer form's To the Skies!, immediately place the stun boundary directly on yourself to stop his burst, then retreat and clear what you can with Dark Matter.

Ficha completa →
Kayle

Kayle

scalingburst_denial The primary issue in this matchup is how Divine Judgment completely invalidates your main execute, Primordial Burst. While you can stack Phenomenal Evil Power early against her weak melee phase, she will outscale you once Divine Ascent kicks in. Any attempt to burst her down inside your Event Horizon is easily countered if she reacts with her ultimate, leaving you completely vulnerable with no remaining burst. Ver detalhes
Kayle

Por quê

The primary issue in this matchup is how Divine Judgment completely invalidates your main execute, Primordial Burst. While you can stack Phenomenal Evil Power early against her weak melee phase, she will outscale you once Divine Ascent kicks in. Any attempt to burst her down inside your Event Horizon is easily countered if she reacts with her ultimate, leaving you completely vulnerable with no remaining burst.

Impacto na lane

Before level five, you can freely farm stacks with Baleful Strike as Kayle plays passively. However, once she unlocks her ultimate, your kill pressure vanishes. If you try to trade, she uses Celestial Blessing to dodge Dark Matter or escape Event Horizon. This forces a passive farming lane where her Divine Ascent gradually gives her the upper hand, slowly pushing you under your own turret.

Como jogar

Never cast Primordial Burst as an opener; you must bait out Divine Judgment first. Trap her inside Event Horizon and drop Dark Matter to force her to panic-cast her ultimate defensively. If she uses it, immediately back off and wait for this massive cooldown window to reset. If she holds her ultimate, focus solely on stacking Phenomenal Evil Power with Baleful Strike and matching her wave clear rather than seeking solo kills.

Ficha completa →
Orianna

Orianna

spacingscaling Orianna completely neutralizes your defensive zone control because her sphere operates independently of her own body. When you cast Event Horizon to protect yourself or lock her down, she can effortlessly position her ball inside your cage using Command: Attack. This allows her to safely trigger Command: Dissonance to chunk your health, turning your main defensive tool into an arena where she can poke you without any risk of retaliation. Ver detalhes
Orianna

Por quê

Orianna completely neutralizes your defensive zone control because her sphere operates independently of her own body. When you cast Event Horizon to protect yourself or lock her down, she can effortlessly position her ball inside your cage using Command: Attack. This allows her to safely trigger Command: Dissonance to chunk your health, turning your main defensive tool into an arena where she can poke you without any risk of retaliation.

Impacto na lane

This constant threat severely limits where you can stand to stack Phenomenal Evil Power. You are forced to use Baleful Strike from maximum range to secure minions, yielding wave priority. As Orianna pushes you under turret, she will continuously place her ball to block your pathing. If you get chipped down too low, her Command: Shockwave becomes a lethal dive threat, forcing suboptimal recall timings and preventing you from assisting your jungler.

Como jogar

To survive, never stand in a direct line between Orianna and her ball. Keep your distance and use Baleful Strike exclusively to farm from safety, accepting that you cannot contest early lane priority. Hold Event Horizon to deter her from walking forward to auto-attack you with Clockwork Windup. If she mispositions her ball far to one side, immediately step to the opposite side to create space and drop Dark Matter on the wave to prevent complete crashes.

Ficha completa →

Outros matchups

Skill Matchups

6

Esses confrontos são, acima de tudo, duelos de execução: os dois campeões têm formas reais de levar vantagem. Uma habilidade importante esquivada, um engajamento bem antecipado ou um erro de posicionamento podem ser suficientes para decidir o duelo. Conhecer o matchup e reconhecer as janelas de ação certas faz toda a diferença.

Kai'Sa

Kai'Sa

dodge_ccassassination This matchup is a volatile race of burst damage dictated entirely by the uptime of your cage. While you want to stack *Phenomenal Evil Power* from afar, Kai'Sa thrives on finding isolated targets. The entire lane pivots on *Event Horizon*. If you fail to trap her or force her away with it, she will instantly cross the distance using *Killer Instinct* to blow you up with *Icathian Rain* while you are defenseless. Ver detalhes
Kai'Sa

Por quê

This matchup is a volatile race of burst damage dictated entirely by the uptime of your cage. While you want to stack *Phenomenal Evil Power* from afar, Kai'Sa thrives on finding isolated targets. The entire lane pivots on *Event Horizon*. If you fail to trap her or force her away with it, she will instantly cross the distance using *Killer Instinct* to blow you up with *Icathian Rain* while you are defenseless.

Impacto na lane

You cannot afford to use *Event Horizon* aggressively to secure minions or force random trades. Missing it leaves you completely vulnerable, allowing Kai'Sa to activate *Supercharge* and run you down. To survive, you must position yourself directly inside your own minion wave so that if she does engage, her *Icathian Rain* damage is split among your minions rather than isolating and killing you instantly.

Como jogar

Never initiate trades; instead, focus on stacking *Phenomenal Evil Power* using *Baleful Strike* from maximum range. Hold *Event Horizon* strictly as a disengage tool. If Kai'Sa hits you with *Void Seeker*, immediately retreat to prevent her from using *Killer Instinct*. Should she manage to dash onto you, drop your cage directly centered on your own character model to stun her mid-flight and retaliate with *Primordial Burst* to turn the fight.

Ficha completa →
Varus

Varus

burst_threatcc_avoidancescaling_clash This matchup is a pure contest of distance. Varus relies on the extreme range of Piercing Arrow, empowered by Blighted Quiver, to poke you down from absolute safety. However, to land these arrows, he must momentarily channel, making his movement predictable. If he steps even slightly too close to charge his arrow, he enters the threat zone of your Event Horizon, which completely shuts down his mobility and sets up your Dark Matter. Ver detalhes
Varus

Por quê

This matchup is a pure contest of distance. Varus relies on the extreme range of Piercing Arrow, empowered by Blighted Quiver, to poke you down from absolute safety. However, to land these arrows, he must momentarily channel, making his movement predictable. If he steps even slightly too close to charge his arrow, he enters the threat zone of your Event Horizon, which completely shuts down his mobility and sets up your Dark Matter.

Impacto na lane

Because Varus can clear waves quickly with Hail of Arrows and Piercing Arrow, you will often find yourself pushed under turret early. He will attempt to trap you there, using the threat of Chain of Corruption to lock you down for a lethal combo. This constant pressure limits your ability to safely stack Phenomenal Evil Power with Baleful Strike, forcing you to choose between secure last-hits and keeping your health bar high enough to prevent an all-in.

Como jogar

To survive and scale, never step forward when Varus is actively charging Piercing Arrow unless your Event Horizon is ready to catch him mid-channel. Stand behind your minions to reduce the arrow's damage, and use Hail of Arrows' slow as your cue to back off immediately. If he misses his ultimate, Chain of Corruption, aggressively search for a counter-attack using Baleful Strike and Primordial Burst to execute him before his attack speed from Living Vengeance can overwhelm you.

Ficha completa →
Swain

Swain

spacingcooldown_windows This matchup revolves around controlling space during Swain's ultimate. While Swain relies on Demonic Ascension to drain health and sustain through fights, Veigar has the perfect counter-tool. Placing Event Horizon directly around Swain halts his advance, preventing him from getting into range for Death's Hand or maintaining his drain. This interaction turns a potentially devastating teamfight ultimate into a self-contained cage, neutralizing Swain's main threat. Ver detalhes
Swain

Por quê

This matchup revolves around controlling space during Swain's ultimate. While Swain relies on Demonic Ascension to drain health and sustain through fights, Veigar has the perfect counter-tool. Placing Event Horizon directly around Swain halts his advance, preventing him from getting into range for Death's Hand or maintaining his drain. This interaction turns a potentially devastating teamfight ultimate into a self-contained cage, neutralizing Swain's main threat.

Impacto na lane

During the laning phase, Swain will constantly try to fish with Nevermove to trigger Ravenous Flock and pull you into his high-damage Death's Hand. Missing your positioning means giving Swain free health stacks. Because Veigar wants to farm safely with Baleful Strike, Swain often secures early wave priority using Vision of Empire to disrupt your recalls, forcing you to play defensively under tower while hoarding your mana.

Como jogar

To succeed, never use Event Horizon offensively unless Swain has already wasted Nevermove. Keep this cage ready as a disengage tool. When Swain activates Demonic Ascension, drop the cage so the boundary sits right between you, forcing him to either stun himself or waste his ultimate's duration. If he manages to root you, immediately buffer Dark Matter on your own position to punish his forward walk.

Ficha completa →

Outros matchups

Favoráveis

6

Esses campeões geralmente têm dificuldade para responder às suas principais forças, o que te dá mais liberdade para abordar o confronto. Você costuma ter várias formas de pressioná-los e forçar trocas a seu favor. Aproveite essa vantagem para impor seu ritmo, em vez de dar tempo para eles se estabilizarem.

Outros matchups

Items to Counter Veigar

Buy these items to reduce this champion's effectiveness in your games.

Stase (Enchant)
Stase (Enchant)
Bâton du vide
Bâton du vide
Morellonomicon
Morellonomicon
Coiffe de Rabadon
Coiffe de Rabadon

Como counterar este campeão

Ângulo de counter

Enfrentar o Veigar não se resume apenas a sobreviver ao seu ataque repentino. O verdadeiro objetivo é quebrar a estrutura que permite que ele jogue: agrupamentos seguros, posicionamento estável e uma “cage” proativa antes dos objetivos. Os melhores confrontos contra ele são aqueles que o forçam a usar o Event Horizon para sobreviver, em vez de para controlar o espaço. Se o Veigar colocar a jaula primeiro, saindo da névoa ou em torno de um ponto de estrangulamento, a luta geralmente se torna muito difícil. Mas se o inimigo o forçar a recuar, negar a prioridade ao mid ou fazê-lo desperdiçar a jaula antes da entrada real, seu impacto cai drasticamente. Os campeões já identificados como difíceis para ele nos dados do site geralmente têm um ponto em comum: eles ameaçam sua imobilidade, seu timing de “cage” ou sua capacidade de alcançar objetivos com o espaço já preparado.

Contexto do patch

O Veigar sofre mais quando o confronto reduz o tempo entre “eu vejo a ameaça” e “eu preciso reagir”. Ele quer se antecipar: colocar a jaula no caminho, preparar uma zona, punir uma entrada. Assassinos e divers rápidos o forçam a reagir mais rápido do que seu kit permite. Magos de longo alcance ou que exercem pressão constante também podem impedi-lo de jogar no seu ritmo, especialmente se o forçarem a farmar sob pressão em vez de acumular recursos sem interferências. A chave, portanto, não é apenas desviar do W dele ou escapar da jaula: é fazê-lo usar a jaula em uma situação em que ela não garanta posição, objetivo nem abate.

Leitura rápida

  • A melhor estratégia de contra-ataque é ativar o Event Horizon antes do confronto propriamente dito e, em seguida, voltar à batalha durante o período de inatividade dele.
  • Veigar se torna muito menos perigoso quando chega atrasado aos objetivos e precisa posicionar a gaiola defensivamente.
  • Confrontos em movimento ou com pressão prolongada o prejudicam, pois quebram sua posição estável antes que seu ataque repentino tenha efeito.

Arquétipos de counter

Assassinos de entrada rápida

Esses campeões representam um verdadeiro problema para o Veigar, pois reduzem seu tempo de decisão. O Fizz, o Zed ou o Akali podem ameaçar o all-in antes que o Veigar tenha construído uma configuração de jaula confortável ao seu redor. Embora o Event Horizon possa puni-los, ele deve ser guardado para o momento certo: se for usado muito cedo, eles esperam ou se esquivam; se for muito tarde, o Veigar já terá perdido a posição. O ponto forte deles é transformar a jaula em um feitiço defensivo obrigatório, em vez de uma ferramenta de controle de zona.

Como o campeão deve se adaptar. Veigar deve jogar com visão, adotar uma estratégia mais segura e reservar a jaula para a verdadeira investida do inimigo. Ele não deve tentar atacar com o E se o inimigo ainda tiver o dash ou a ultimate disponíveis.

Duelistas móveis que atravessam a zona

Esses confrontos são perigosos porque não respeitam a área de proteção da mesma forma que um mago imóvel. Yone, Yasuo ou Diana podem ameaçar vários momentos de entrada, forçar o Veigar a escolher entre autoproteção e controle de ondas e, em seguida, usar a mobilidade para punir um posicionamento excessivamente central. Mesmo quando não o matam diretamente, eles podem impedir que o Veigar jogue na rota em seu próprio ritmo, limitar o empilhamento limpo e fazer com que ele chegue aos objetivos com menor prioridade.

Como o campeão deve se adaptar. O Veigar deve evitar fazer “panic cages” no meio da pista. A melhor estratégia é controlar a onda a partir de uma distância segura, enviar sinais para os jogadores que estão se deslocando e usar o “cage” para bloquear o caminho de entrada deles, em vez de perseguir um confronto isolado.

Magos de longo alcance que exercem pressão constante

Esses campeões não derrotam necessariamente o Veigar atacando-o diretamente, mas impedindo-o de se preparar. O Orianna, o Ahri ou o Syndra podem disputar a onda, ameaçar trocas à distância e tornar cada tentativa de acumulação mais onerosa. A vantagem deles é forçar o Veigar a escolher entre preservar o HP, acumular, ou manter mana e posição suficientes para o próximo objetivo. Se o Veigar perder esse ritmo, sua jaula muitas vezes se torna uma resposta tardia, em vez da ferramenta que dita o espaço.

Como o campeão deve se adaptar. O Veigar deve optar por uma rota mais cautelosa, evitar perder muitos pontos de vida em uma única rodada e procurar alvos escondidos na névoa após a onda, em vez de se envolver em trocas frontais repetidas.

Matchups prioritários

Fizz

Fizz é um confronto prioritário a ser explicado, pois ele ataca exatamente o ponto fraco de Veigar: o atraso entre a gaiola e a segurança real. Se Veigar usar o Event Horizon para controlar a onda ou causar dano à distância, Fizz pode esperar o feitiço passar e, em seguida, ameaçar um all-in com uma janela de oportunidade muito mais simples. O confronto não se resume apenas a “não morrer”: o Veigar deve construir sua estratégia na rota levando em conta o nível 5, a visão lateral e a preservação da jaula. Uma jaula defensiva bem mantida pode virar a troca, mas uma jaula usada sem um motivo claro dá ao Fizz o sinal para entrar.


Zed

Zed obriga Veigar a jogar com disciplina, pois pode ameaçar a rota, a névoa e as rotações em direção aos objetivos. O Cage não deve ser usado apenas como uma ferramenta de ataque à distância: ele deve responder a um compromisso real ou impedir que Zed acesse uma saída após seu burst. O ponto-chave é não ficar parado no centro da rota sem visão, pois o Zed pode transformar essa posição em pressão constante. O Veigar vence mais esse confronto negando o ângulo de entrada do que buscando um combo agressivo logo no início.

Erros comuns contra ele

Erros comuns contra ele

  • Envolver o Veigar em um ponto de estrangulamento já controlado, em vez de forçá-lo a lançar o “cage” antes de chegar ao objetivo.
  • Usar todos os traços para entrar e, em seguida, ficar preso dentro do Event Horizon sem nenhuma saída segura.
  • Deixar o Veigar acumular pontos de forma livre no mid, sem pressioná-lo com a pressão das ondas ou com jogadas de roaming.
  • Disputa pelo dragon em linha reta quando o Veigar está especificamente aguardando esse caminho para posicionar a gaiola.
  • Pensar que basta se esquivar do W: se a jaula bloquear o acesso, o Veigar já ganhou parte da luta.

Notas do coach

  • Para derrotar o Veigar, não basta levar em conta apenas o dano que ele causa: preste atenção ao momento em que a jaula fica disponível. Esse é o seu verdadeiro botão de controle.
  • O melhor momento para atacá-lo geralmente surge depois que ele erra ou é forçado a usar a jaula. Aproveite esse tempo de recarga, pois é nesse momento que a defesa dele entra em colapso.

FAQ

Que tipo de campeão é o melhor para neutralizar o Veigar?

As melhores estratégias contra o Veigar são aquelas que o impedem de usar o Event Horizon de forma proativa. Assassinos rápidos, duelistas ágeis e magos que exercem pressão constante podem todos dificultar a vida dele, mas por motivos diferentes. Os assassinos reduzem seu tempo de reação, os duelistas ágeis cruzam ou provocam sua zona, e os magos de longo alcance impedem que ele acumule efeitos com facilidade. A ideia comum é sempre a mesma: forçá-lo a usar a jaula defensivamente e, em seguida, retomar o jogo enquanto ela não estiver mais disponível.

Como se joga contra a “jaula” do Veigar?

Você não deve tratar o “cage” apenas como um atordoamento a ser desviado. Trata-se, principalmente, de uma ferramenta para cortar o espaço. Se você entrar em um objetivo por um corredor óbvio, o Veigar nem precisa acertar o atordoamento para fazer você perder a posição. Uma boa contra-ofensiva significa atrair a “cage” antes do confronto real, variar os ângulos de entrada e não gastar todas as ferramentas de mobilidade antes que ela seja lançada. Quando o “Event Horizon” estiver em recarga, o Veigar perde grande parte de sua segurança e ameaça.

Você deveria atacar o Veigar só porque ele está imóvel?

Não automaticamente. O Veigar é imóvel, mas sua jaula castiga muito bem os mergulhos mal preparados. Se você atacar em linha reta sem ter visão dos aliados dele, pode ficar preso, perder o timing e dar à habilidade definitiva dele uma oportunidade fácil de executar. A investida se torna eficaz quando a jaula dele já foi forçada, quando você tem vários ângulos de entrada ou quando sua equipe consegue absorver o primeiro efeito de controle dele. O objetivo não é simplesmente correr na direção dele, mas sim neutralizar a jaula antes de se comprometer com a investida.

Como impedir que o Veigar seja dimensionado?

Nem sempre é possível impedi-lo de acumular stacks completamente, mas você pode tornar essa acumulação mais cara para ele. Pressione a onda, force-o a escolher entre farmar e se proteger, ameace com roams se o mid lane ficar muito passivo e alcance os objetivos antes dele. O Veigar escala muito bem quando o jogo lhe dá tempo ocioso. Se você transformar cada onda em uma decisão sob pressão, ele ainda pode ganhar AP, mas perde a posição e o ritmo que lhe permitem converter essa escalabilidade em controle real.