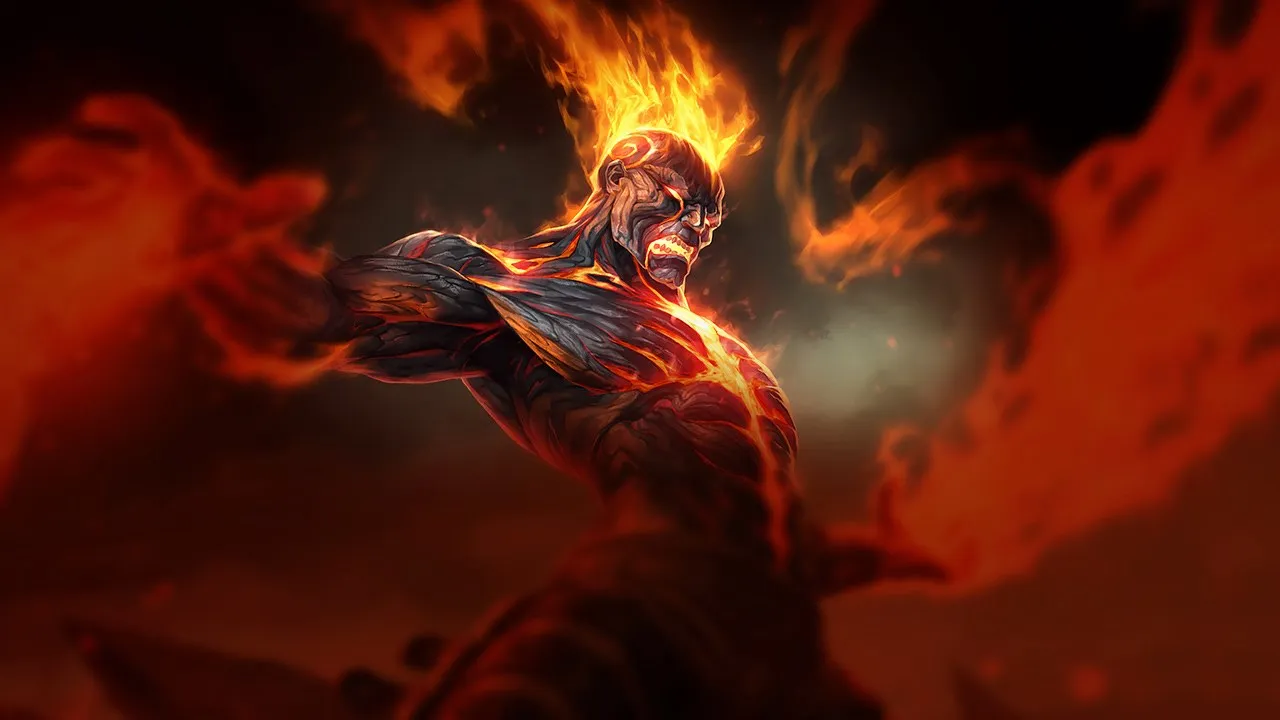
Brand sofre contra composições capazes de aplicar burst rapidamente ou fechar a distância antes que ele complete seu combo de habilidades completo. Poke de longo alcance, alta mobilidade e fortes ferramentas de disengage reduzem bastante o impacto do seu kit de dano contínuo. Sua dependência de acertar habilidades em cadeia e de posicionamento define suas fraquezas estruturais.
★ MID · SUPPORTTier B
DANO
UTIL
TANK
DIFF
Win52.6%#18 · ↑1pt
Pick10.4%#2
Ban8.5%#23
Guia de counters de Brand Wild Rift
Hard Counters
2
Esses campeões têm uma build e um estilo de jogo que superam diretamente o seu, o que pode tornar o controle da lane e o farm extremamente difíceis. As habilidades deles podem neutralizar seus principais pontos fortes ou te punir assim que você tenta jogar do seu jeito de sempre. Nesses matchups, o objetivo costuma ser reduzir os erros e buscar soluções fora do confronto direto.
IniciaçãoTanquesControle de grupoDredge Line aproxima Nautilus e Brand, e então Staggering Blow e Depth Charge estendem o travamento. Brand precisa incendiar um alvo antes que Sear consiga atordoá-lo; quando o controle de grupo inicia a troca, falta a ele o tempo necessário para encadear Blaze, Sear e Pillar of Flame.Build de Nautilus →Ver detalhes
Nautilus
Por quê
Dredge Line aproxima Nautilus e Brand, e então Staggering Blow e Depth Charge estendem o travamento. Brand precisa incendiar um alvo antes que Sear consiga atordoá-lo; quando o controle de grupo inicia a troca, falta a ele o tempo necessário para encadear Blaze, Sear e Pillar of Flame.
Impacto na lane
A ameaça da âncora reduz seus ângulos de poke e te força a manter minions entre Nautilus e você mesmo. Uma única pegada pode custar vida suficiente para perder a wave e, em seguida, o controle do arbusto. Titan's Wrath também permite que ele absorva parte da sua primeira sequência de dano.
Como jogar
Jogue atrás da wave sem ficar alinhado ao lado do seu carry, para que Dredge Line não consiga criar dois alvos fáceis. Guarde Sear até que Blaze esteja aplicado e Nautilus avance; o atordoamento deve interromper a perseguição dele, não servir como poke casual. Depois de uma âncora perdida, use Pillar of Flame e saia antes que Depth Charge possa iniciar outra sequência.
Controle de grupoPicksMobilidadeRocket Grab puxa Brand para o alcance corpo a corpo, onde Power Fist pode lançá-lo para o alto e Static Field pode silenciá-lo. Como Brand não tem nenhuma habilidade de movimento, uma pegada costuma impedir a sequência que permite o atordoamento de Sear. Blitzcrank transforma um único ângulo de tiro ruim em uma troca decisiva.Build de Blitzcrank →Ver detalhes
Blitzcrank
Por quê
Rocket Grab puxa Brand para o alcance corpo a corpo, onde Power Fist pode lançá-lo para o alto e Static Field pode silenciá-lo. Como Brand não tem nenhuma habilidade de movimento, uma pegada costuma impedir a sequência que permite o atordoamento de Sear. Blitzcrank transforma um único ângulo de tiro ruim em uma troca decisiva.
Impacto na lane
Enquanto Rocket Grab estiver disponível, as laterais da wave e os arbustos próximos se tornam difíceis de ocupar. Recuar demais abre mão do poke de Pillar of Flame e da pressão sobre os minions; se expor sem um bloqueio oferece a pegada de graça. Essa tensão decide o controle da wave e o acesso ao rio.
Como jogar
Mantenha um minion vivo no caminho de Rocket Grab e troque de lado conforme a wave diminui. Não gaste Sear de forma casual: Blaze seguido de Sear pode parar Blitzcrank depois que ele se aproximar. Quando Rocket Grab errar, avance para aplicar Pillar of Flame e Conflagration, depois reposicione-se antes da próxima tentativa dele.
Esses campeões têm ferramentas que geralmente dão a eles vantagem no confronto, sem tornar o matchup impossível de jogar. Eles podem ter mais alcance, mais capacidade de aguentar sua ofensiva ou mais formas de responder aos seus engajamentos. Você vai precisar adaptar sua abordagem e escolher com cuidado os momentos em que aceita a luta.
EscudosImunidade a CCMecânicaBlack Shield absorve dano mágico e bloqueia controle de grupo enquanto durar, o que pode cancelar o atordoamento de Sear. Dark Binding enraíza Brand por tempo suficiente para que Tormented Shadow cause dano persistente. Assim, Morgana consegue proteger um alvo da sua abertura enquanto pune o seu próprio posicionamento.Build de Morgana →Ver detalhes
Morgana
Por quê
Black Shield absorve dano mágico e bloqueia controle de grupo enquanto durar, o que pode cancelar o atordoamento de Sear. Dark Binding enraíza Brand por tempo suficiente para que Tormented Shadow cause dano persistente. Assim, Morgana consegue proteger um alvo da sua abertura enquanto pune o seu próprio posicionamento.
Impacto na lane
Se você engajar diretamente em cima de Black Shield, você gasta Blaze e Sear sem obter a parada esperada, e então Morgana toma a iniciativa. Ficar na linha de Dark Binding também reduz suas janelas para Pillar of Flame. A lane se torna uma sequência de recursos: forçar o escudo, evitar a raiz e só então comprometer a trade completa.
Como jogar
Use Pillar of Flame ou Conflagration para desgastar Black Shield antes de comprometer Sear, e mantenha um minion entre Dark Binding e você. Se o escudo permanecer intacto, não force o controle; mude de alvo ou espere. Quando ele desaparecer, aplique Blaze e direcione Sear antes que Morgana reconstrua a proteção dela.
AlcanceEscalamentoPokeSenna ganha alcance e dano ao coletar Mist, enquanto Piercing Darkness pode causar dano em inimigos e curar aliados na mesma linha. Brand precisa se aproximar mais para aplicar Blaze. Uma lane passiva, portanto, permite que Senna melhore exatamente a vantagem de alcance que torna suas aberturas cada vez mais difíceis.Build de Senna →Ver detalhes
Senna
Por quê
Senna ganha alcance e dano ao coletar Mist, enquanto Piercing Darkness pode causar dano em inimigos e curar aliados na mesma linha. Brand precisa se aproximar mais para aplicar Blaze. Uma lane passiva, portanto, permite que Senna melhore exatamente a vantagem de alcance que torna suas aberturas cada vez mais difíceis.
Impacto na lane
Cada alma não contestada aumenta a pressão futura de Senna, mas avançar em linha reta oferece Piercing Darkness ou Last Embrace de graça. Depois de várias trades perdidas, a cura dela apaga gradualmente seu poke e te força para fora da wave. Seu momento mais limpo é quando ela para para pegar uma alma ou gasta o projétil que enraíza.
Como jogar
Posicione Pillar of Flame no ponto onde Senna precisa parar para coletar uma alma, sem perseguir além da sua wave. Mantenha um minion entre Last Embrace e você. Depois que esse projétil for gasto, aplique Blaze e Sear para uma troca curta; se Piercing Darkness curar o dano imediatamente, saia em vez de alimentar o ritmo preferido dela.
EscudosBloqueio de projéteisProteçãoUnbreakable bloqueia o primeiro projétil e reduz o dano seguinte vindo da mesma direção. Ele pode anular Sear ou o primeiro salto de Pyroclasm, protegendo em seguida o carry de Braum. Winter's Bite também aplica o primeiro stack de Concussive Blows, tornando uma troca prolongada perigosa para um Brand imóvel.Build de Braum →Ver detalhes
Braum
Por quê
Unbreakable bloqueia o primeiro projétil e reduz o dano seguinte vindo da mesma direção. Ele pode anular Sear ou o primeiro salto de Pyroclasm, protegendo em seguida o carry de Braum. Winter's Bite também aplica o primeiro stack de Concussive Blows, tornando uma troca prolongada perigosa para um Brand imóvel.
Impacto na lane
Usar toda a sequência em cima do escudo causa pouco dano e permite que Braum avance enquanto suas habilidades recarregam. Se Winter's Bite acertar, os ataques da dupla dele passam a ameaçar o atordoamento e te empurram para longe da wave. Ângulos laterais importam mais aqui do que o número de habilidades que você usa.
Como jogar
Primeiro force a direção de Unbreakable com Pillar of Flame ou Conflagration, depois mude de ângulo antes de enviar Sear. Não lance Pyroclasm direto na frente do escudo. Se Winter's Bite acertar, saia antes que Concussive Blows acumule; quando errar, retome um ângulo e aplique Blaze no carry em vez de em Braum.
Light Binding e Lucent Singularity alcançam Brand antes que ele consiga aplicar Blaze com facilidade, enquanto Prismatic Barrier protege Lux nas duas passagens. Ela consegue testar sua vida a partir de um espaço onde Sear exige mais risco. Uma raiz bem-sucedida também prepara Final Spark antes que você consiga se reposicionar.Build de Lux →Ver detalhes
Lux
Por quê
Light Binding e Lucent Singularity alcançam Brand antes que ele consiga aplicar Blaze com facilidade, enquanto Prismatic Barrier protege Lux nas duas passagens. Ela consegue testar sua vida a partir de um espaço onde Sear exige mais risco. Uma raiz bem-sucedida também prepara Final Spark antes que você consiga se reposicionar.
Impacto na lane
Ficar alinhado com poucos minions permite que Light Binding controle a lane, enquanto Lucent Singularity fecha caminhos estreitos. Se você avançar para responder a todo poke, o escudo de Lux torna a troca de vida ineficiente. A pressão muda de lado quando as duas habilidades de zoneamento estão indisponíveis e a wave ainda te dá um bloqueio.
Como jogar
Mova-se lateralmente em torno da wave e não permaneça dentro de Lucent Singularity enquanto prepara Sear. Depois que Light Binding for gasto, avance o suficiente para acertar Pillar of Flame e aplicar Blaze, e então ameace o atordoamento sem perseguir através de Prismatic Barrier. Enquanto a raiz ainda estiver disponível, mantenha distância e priorize preservar sua vida.
Esses confrontos são, acima de tudo, duelos de execução: os dois campeões têm formas reais de levar vantagem. Uma habilidade importante esquivada, um engajamento bem antecipado ou um erro de posicionamento podem ser suficientes para decidir o duelo. Conhecer o matchup e reconhecer as janelas de ação certas faz toda a diferença.
PosicionamentoVisãoEsse matchup exige execução precisa das habilidades de Brand para punir os cooldowns de Pyke. Pyke, por outro lado, explora qualquer deslize de Brand ou habilidade desperdiçada para uma trade decisiva a favor dele.Build de Pyke →Ver detalhes
Pyke
Por quê
Esse matchup exige execução precisa das habilidades de Brand para punir os cooldowns de Pyke. Pyke, por outro lado, explora qualquer deslize de Brand ou habilidade desperdiçada para uma trade decisiva a favor dele.
Impacto na lane
A ameaça do gancho de Pyke e os dives furtivos forçam Brand a manter um espaçamento impecável e visão vigilante. Negligenciar isso cede rapidamente a prioridade da wave e expõe Brand a tentativas de all-in letais.
Como jogar
Brand deve priorizar poke consistente e bem executado, além de um espaçamento vigilante. Visão proativa nega os flancos de Pyke, permitindo que Brand capitalize pacientemente sobre os cooldowns de Pyke ou qualquer deslize dele.
PokeControle de áreaVisãoAs sementes de Zyra se transformam em plantas quando atingidas por Deadly Spines ou Grasping Roots. Essas unidades somam poke e podem ocupar o caminho de Sear. Brand tem dano de área mais imediato através de Pillar of Flame e Conflagration, mas perde a troca quando seu projétil é gasto em uma planta.Build de Zyra →Ver detalhes
Zyra
Por quê
As sementes de Zyra se transformam em plantas quando atingidas por Deadly Spines ou Grasping Roots. Essas unidades somam poke e podem ocupar o caminho de Sear. Brand tem dano de área mais imediato através de Pillar of Flame e Conflagration, mas perde a troca quando seu projétil é gasto em uma planta.
Impacto na lane
Cada semente perto da wave muda seu ângulo de atordoamento e permite que Zyra empurre sem se expor diretamente. Se Grasping Roots acertar, as plantas estendem a pressão enquanto você está enraizado. Depois que as sementes forem consumidas e a raiz gasta, você pode retomar o controle do arbusto e forçar Zyra a recuar.
Como jogar
Só envie Sear por um caminho limpo e use Pillar of Flame para alcançar Zyra sem depender de um projétil bloqueável. Evite a linha de Grasping Roots, depois avance quando ela passar para aplicar Blaze e ameaçar o atordoamento. Contra Stranglethorns, saia da zona antes do knock-up em vez de terminar sua sequência no lugar.
PosicionamentoVisãoThresh explora consistentemente as habilidades de Brand em cooldown, transformando pequenos deslizes em vantagens significativas na lane. Para Brand, dominar a dança delicada dos padrões de engajamento é a chave para a vitória.Build de Thresh →Ver detalhes
Thresh
Por quê
Thresh explora consistentemente as habilidades de Brand em cooldown, transformando pequenos deslizes em vantagens significativas na lane. Para Brand, dominar a dança delicada dos padrões de engajamento é a chave para a vitória.
Impacto na lane
Não respeitar a ameaça de Thresh e sua capacidade de iniciar pode mudar rapidamente o controle da lane, forçando Brand a uma postura defensiva. Isso afeta diretamente a capacidade de Brand de estabelecer visão e influenciar efetivamente as lutas por objetivos.
Como jogar
Esse matchup exige que os jogadores de Brand demonstrem execução precisa, usando espaçamento meticuloso para evitar os ganchos de Thresh e comprometendo habilidades somente em janelas claras. Garanta o dano e desengaje rapidamente, esperando pacientemente pela próxima oportunidade favorável em vez de forçar engajamentos arriscados.
Grand Entrance exige que Rakan aterrisse dentro da sua dupla para lançar os alvos para o alto, e então Battle Dance o devolve para um aliado. Essa entrada dá a Brand um alvo próximo para Blaze e Pillar of Flame, mas o controle inicial pode interromper sua preparação. O matchup, portanto, depende de guardar Sear para o momento do pouso.Build de Rakan →Ver detalhes
Rakan
Por quê
Grand Entrance exige que Rakan aterrisse dentro da sua dupla para lançar os alvos para o alto, e então Battle Dance o devolve para um aliado. Essa entrada dá a Brand um alvo próximo para Blaze e Pillar of Flame, mas o controle inicial pode interromper sua preparação. O matchup, portanto, depende de guardar Sear para o momento do pouso.
Impacto na lane
Se você gastar Sear em poke, Rakan pode usar Grand Entrance durante o cooldown dela e sair com Battle Dance. Se você guardá-la, ele precisa respeitar a área em torno do seu carry e a lane fica mais estável. Um knock-up bem-sucedido restaura o controle de arbusto dele; uma entrada interrompida te dá prioridade de wave.
Como jogar
Guarde Sear até Rakan iniciar Grand Entrance e aplique Blaze com Conflagration ou Pillar of Flame na área de pouso dele. Direcione o atordoamento depois que ele chegar, e então fique entre ele e seu carry sem perseguir Battle Dance. Enquanto The Quickness estiver ativa, separe sua dupla para que apenas um jogador possa ser enfeitiçado.
Esses campeões geralmente têm dificuldade para responder às suas principais forças, o que te dá mais liberdade para abordar o confronto. Você costuma ter várias formas de pressioná-los e forçar trocas a seu favor. Aproveite essa vantagem para impor seu ritmo, em vez de dar tempo para eles se estabilizarem.
PicksDano explosivoBola de neveSona precisa permanecer perto do aliado dela para compartilhar as auras de Hymn of Valor e Aria of Perseverance. Esse agrupamento dá a Conflagration alvos próximos e a Pyroclasm caminhos de salto curtos. A cura dela consegue apagar poke isolado, mas sofre mais quando Blaze e seu dano de área alcançam os dois jogadores.Build de Sona →Ver detalhes
Sona
Por quê
Sona precisa permanecer perto do aliado dela para compartilhar as auras de Hymn of Valor e Aria of Perseverance. Esse agrupamento dá a Conflagration alvos próximos e a Pyroclasm caminhos de salto curtos. A cura dela consegue apagar poke isolado, mas sofre mais quando Blaze e seu dano de área alcançam os dois jogadores.
Impacto na lane
Sona quer trades pequenas e repetidas seguidas de cura, enquanto Brand quer uma única sequência que alcance a dupla toda. Se você mantiver a wave neutra o suficiente para ameaçar as duas posições, ela não consegue avançar livremente para usar Hymn of Valor. Um bom acerto de área custa vida, mana de cura e, frequentemente, o controle do arbusto.
Como jogar
Espere Sona se aproximar do carry dela antes de usar Pillar of Flame ou espalhar Blaze com Conflagration. Não gaste a sequência completa em poke que Aria of Perseverance consiga curar sozinha. Depois que os dois alvos estiverem queimando, Sear ameaça o atordoamento e Pyroclasm ganha os saltos que realmente convertem sua vantagem.
PicksLutas em equipePressão no inícioYou and Me! torna Yuumi intangível, mas a fixa na posição do aliado dela. Brand, portanto, consegue prever onde Pillar of Flame e Conflagration precisam acertar, e então usar Pyroclasm contra uma dupla agrupada. Zoomies cura e acelera sem separar os dois corpos que alimentam seu dano de área.Build de Yuumi →Ver detalhes
Yuumi
Por quê
You and Me! torna Yuumi intangível, mas a fixa na posição do aliado dela. Brand, portanto, consegue prever onde Pillar of Flame e Conflagration precisam acertar, e então usar Pyroclasm contra uma dupla agrupada. Zoomies cura e acelera sem separar os dois corpos que alimentam seu dano de área.
Impacto na lane
O carry de Yuumi precisa se expor sozinho para cada last hit, o que simplifica seu zoneamento. Quando o poke acerta uma vez, Zoomies conserta o dano; quando Blaze se espalha e os dois alvos recebem dano de área, o sustain deles é muito mais sobrecarregado. A pressão depende da qualidade, não do volume das suas habilidades.
Como jogar
Direcione Pillar of Flame para o caminho de last hit do aliado que está com Yuumi anexada, em vez de usar a habilidade sem calcular. Quando Yuumi se desanexar para usar Bop 'n' Block, Sear pode puni-la depois que Blaze for aplicado. Guarde Pyroclasm para um momento em que os dois campeões permaneçam próximos, e recue se Final Chapter começar a acumular suas ondas que enraízam.
Nami precisa avançar para fazer Ebb and Flow saltar entre aliados e inimigos. Esse caminho a coloca dentro do alcance de Pillar of Flame, depois do qual Blaze habilita o atordoamento de Sear. Aqua Prison continua sendo a resposta dela: se Brand ficar parado durante a sequência, a bolha pode interromper sua vantagem antes de Pyroclasm.Build de Nami →Ver detalhes
Nami
Por quê
Nami precisa avançar para fazer Ebb and Flow saltar entre aliados e inimigos. Esse caminho a coloca dentro do alcance de Pillar of Flame, depois do qual Blaze habilita o atordoamento de Sear. Aqua Prison continua sendo a resposta dela: se Brand ficar parado durante a sequência, a bolha pode interromper sua vantagem antes de Pyroclasm.
Impacto na lane
Cada cura ofensiva expõe Nami brevemente, mas Ebb and Flow também pode reparar um poke mal convertido. Punir esse avanço reduz a vida dela e o acesso ao arbusto; errar isso gasta duas habilidades em um único salto de cura. A lane recompensa janelas claras em vez de uso constante de habilidades.
Como jogar
Mova-se lateralmente durante Aqua Prison e não fique alinhado ao lado do seu carry contra Tidal Wave. Quando Nami avançar para usar Ebb and Flow, posicione Pillar of Flame, aplique Blaze e direcione Sear para a saída dela. Se a bolha ainda estiver disponível, saia depois da primeira habilidade; se ela errar, complete com Conflagration ou Pyroclasm.
Esses campeões têm uma build e um estilo de jogo que superam diretamente o seu, o que pode tornar o controle da lane e o farm extremamente difíceis. As habilidades deles podem neutralizar seus principais pontos fortes ou te punir assim que você tenta jogar do seu jeito de sempre. Nesses matchups, o objetivo costuma ser reduzir os erros e buscar soluções fora do confronto direto.
SobrevivênciaPosicionamentoYasuo representa um counter direto para toda a sua sequência de burst por causa da Wind Wall. Essa única habilidade pode apagar sua Pyroclasm no meio do ar e bloquear completamente o stun da Sear, paralisando instantaneamente sua capacidade de se defender ou de acionar explosões de Blaze. Como ele pode atravessar os minions usando a Sweeping Blade para fechar a distância, perder seu principal projétil de self-peel para a barreira dele te deixa totalmente vulnerável ao dano físico implacável dele.Build de Yasuo →Ver detalhes
Yasuo
Por quê
Yasuo representa um counter direto para toda a sua sequência de burst por causa da Wind Wall. Essa única habilidade pode apagar sua Pyroclasm no meio do ar e bloquear completamente o stun da Sear, paralisando instantaneamente sua capacidade de se defender ou de acionar explosões de Blaze. Como ele pode atravessar os minions usando a Sweeping Blade para fechar a distância, perder seu principal projétil de self-peel para a barreira dele te deixa totalmente vulnerável ao dano físico implacável dele.
Impacto na lane
Você não consegue manter o meio da lane com segurança, já que Yasuo vai ameaçá-lo constantemente com os tornados da Steel Tempest. Toda vez que você avança para usar a Pillar of Flame e garantir o farm, você corre o risco de levar um dash seguido de um knock-up para dentro da Last Breath. Isso te força a ficar embaixo da sua própria torre, sacrificando o controle de wave e deixando-o roamar livremente para ajudar o jungler dele, enquanto você luta para farmar com segurança.
Como jogar
Para sobreviver, você precisa provocar o uso da Wind Wall antes de comprometer qualquer recurso importante. Estoure o escudo da Way of the Wanderer dele com um ataque básico, depois use a Pillar of Flame para fazer poke sem lançar projéteis em linha reta. Mantenha sua Sear guardada como dissuasão; enquanto você não a lançar, ele precisa respeitar o stun em potencial. Se ele desperdiçar a parede dele, você tem uma breve janela de vinte segundos para buscar agressivamente uma sequência de Conflagration e Pyroclasm.
Pressão no mapaKassadin é seu pior pesadelo porque ele é construído para absorver dano mágico e esquivar de skillshots. Toda vez que você tenta fazer poke nele, a Null Sphere dele gera um escudo mágico que anula o dano da sua Pillar of Flame, enquanto a Void Stone dele dá a ele um escudo adicional só pelo fato de você lançar habilidades. Depois que ele desbloqueia a Riftwalk, ele consegue dar blink por cima da sua Sear e da Pillar of Flame sem esforço, tornando todo o seu combo de burst inútil.Build de Kassadin →Ver detalhes
Kassadin
Por quê
Kassadin é seu pior pesadelo porque ele é construído para absorver dano mágico e esquivar de skillshots. Toda vez que você tenta fazer poke nele, a Null Sphere dele gera um escudo mágico que anula o dano da sua Pillar of Flame, enquanto a Void Stone dele dá a ele um escudo adicional só pelo fato de você lançar habilidades. Depois que ele desbloqueia a Riftwalk, ele consegue dar blink por cima da sua Sear e da Pillar of Flame sem esforço, tornando todo o seu combo de burst inútil.
Impacto na lane
Esse matchup limita seriamente sua pressão no início de jogo. Você não consegue trocar vida com segurança porque Kassadin sustenta através do seu poke, o que significa que você não consegue facilmente forçá-lo a sair da lane. A partir do nível cinco, a ameaça de Riftwalk seguida de Force Pulse significa que você não pode se estender demais além do rio. Você é forçado a jogar recuado, o que concede a prioridade do mid e deixa ele escalar livremente até se tornar um monstro imparável no late game.
Como jogar
Para sobreviver, você precisa focar totalmente em controlar a wave de minions perto da sua torre. Nunca empurre a wave às cegas com a Pillar of Flame. Em vez disso, use a Conflagration para reduzir a wave com segurança enquanto mantém os minions do seu lado da lane. Mantenha sua Sear pronta para dissuadir os avanços agressivos dele; nunca a lance proativamente enquanto a Riftwalk dele estiver disponível. Se ele avançar com a Riftwalk, solte imediatamente a Pyroclasm e a Conflagration nele para punir o avanço.
PosicionamentoSobrevivênciaYone tem uma vantagem enorme porque sua Soul Unbound permite que ele esquive sem esforço dos skillshots da sua Pillar of Flame e da Sear enquanto avança para a frente. Ao contornar suas ferramentas de zoneamento, ele anula completamente seu setup defensivo de stun. Depois que ele fecha a distância com essa forma espiritual, ele consegue facilmente encadear os knockups da Mortal Steel direto na Fate Sealed, te explodindo antes mesmo que sua passiva Blaze consiga ramp up.Build de Yone →Ver detalhes
Yone
Por quê
Yone tem uma vantagem enorme porque sua Soul Unbound permite que ele esquive sem esforço dos skillshots da sua Pillar of Flame e da Sear enquanto avança para a frente. Ao contornar suas ferramentas de zoneamento, ele anula completamente seu setup defensivo de stun. Depois que ele fecha a distância com essa forma espiritual, ele consegue facilmente encadear os knockups da Mortal Steel direto na Fate Sealed, te explodindo antes mesmo que sua passiva Blaze consiga ramp up.
Impacto na lane
Essa ameaça te força a uma postura altamente defensiva, cedendo o controle da wave no início de jogo. Você não consegue avançar com segurança para usar a Conflagration nos minions sem arriscar um engajamento repentino. Toda vez que Yone tem o tornado da Mortal Steel pronto, você precisa recuar para sua torre. Essa pressão constante limita suas janelas de recall, desgasta sua vida e te impede de ajudar seu jungler a garantir objetivos próximos.
Como jogar
Nunca lance sua Sear de forma reativa quando Yone avançar na forma espiritual dele. Em vez disso, fique perto da sua torre e aponte sua Pillar of Flame para o ponto de retorno do corpo físico dele. Observe de perto a projeção dele; no momento em que a Soul Unbound acabar e ele voltar de estalo, lance a Conflagration e a Pyroclasm para punir a retirada dele. Se ele conseguir acertar a Fate Sealed em você debaixo da sua torre, dê flash para fugir imediatamente em vez de tentar trocar de volta.
SobrevivênciaMecânicaEsse matchup é incrivelmente opressivo porque Fizz tem a ferramenta perfeita para anular toda a sua ameaça. Sempre que você tenta travá-lo com o stun da Sear ou ricochetear sua Pyroclasm, ele simplesmente pode ativar a Playful para esquivar completamente da habilidade. Sem essas ferramentas defensivas, você fica completamente sem defesa contra o follow-up dele, permitindo que ele avance com a Urchin Strike e te explode.Build de Fizz →Ver detalhes
Fizz
Por quê
Esse matchup é incrivelmente opressivo porque Fizz tem a ferramenta perfeita para anular toda a sua ameaça. Sempre que você tenta travá-lo com o stun da Sear ou ricochetear sua Pyroclasm, ele simplesmente pode ativar a Playful para esquivar completamente da habilidade. Sem essas ferramentas defensivas, você fica completamente sem defesa contra o follow-up dele, permitindo que ele avance com a Urchin Strike e te explode.
Impacto na lane
Você é forçado a uma postura defensiva desde as primeiras waves. Fazer poke com a Pillar of Flame ou espalhar a Blaze com a Conflagration se torna extremamente arriscado, já que avançar além dos seus minions caster convida um Chum the Waters mortal como iniciação. Se você empurrar a wave demais, Fizz vai fazer freeze, te forçando a avançar e enfrentar um all-in inevitável onde sua torre não consegue te salvar.
Como jogar
Sua sobrevivência depende inteiramente de guardar a Sear. Nunca a lance proativamente; você precisa mantê-la carregada como ameaça para dissuadir Fizz de usar a Urchin Strike. Foque apenas em usar a Pillar of Flame no alcance máximo para reduzir a wave. Se ele desperdiçar a Playful para limpar minions, você tem uma breve janela de doze segundos para jogar agressivamente. Se a Chum the Waters se fixar em você, prepare-se para dar flash imediatamente no knock-up que vem a seguir.
SobrevivênciaPosicionamentoIrelia dita completamente o ritmo dessa lane por causa de como a Bladesurge interage com seus skillshots. Sempre que você tenta arremessar a Pillar of Flame ou montar um stun com a Sear, ela pode instantaneamente dar um dash através de um minion com pouca vida para se esquivar deles. Usando sua própria wave como pista de pouso, ela fecha a distância sem esforço, tornando sua vantagem de alcance inútil e forçando uma luta corpo a corpo letal onde a Ionian Fervor dela te destrói.Build de Irelia →Ver detalhes
Irelia
Por quê
Irelia dita completamente o ritmo dessa lane por causa de como a Bladesurge interage com seus skillshots. Sempre que você tenta arremessar a Pillar of Flame ou montar um stun com a Sear, ela pode instantaneamente dar um dash através de um minion com pouca vida para se esquivar deles. Usando sua própria wave como pista de pouso, ela fecha a distância sem esforço, tornando sua vantagem de alcance inútil e forçando uma luta corpo a corpo letal onde a Ionian Fervor dela te destrói.
Impacto na lane
Você não consegue contestar a wave nem empurrar para ganhar prioridade sem correr o risco de uma morte súbita. No momento em que a vida de um minion cai, você precisa recuar, sacrificando gold inicial e pressão sobre a torre. Se ela congelar a lane perto da torre dela, você fica completamente zoneado, já que avançar para quebrar o freeze te torna um alvo fácil para a Flawless Duet. Essa perda de prioridade no mid deixa seu jungler sem apoio durante os combates iniciais no rio.
Como jogar
Para sobreviver, nunca lance a Pillar of Flame na wave quando Irelia tiver minions com pouca vida por perto para usar como alvo da Bladesurge. Em vez disso, guarde a Sear e a Conflagration estritamente para autodefesa; só dispare seu stun quando ela comprometer a Bladesurge diretamente em você, tornando a trajetória dela previsível. Se ela acertar a Flawless Duet ou iniciar com a Vanguard's Edge, solte a Pyroclasm imediatamente e recue em direção à sua torre. Aceite perder um pouco de gold para manter sua vida alta o suficiente para evitar dives.
SobrevivênciaZed neutraliza completamente suas ferramentas defensivas porque a Death Mark o torna não-alvejável, permitindo que ele contorne facilmente o stun da sua Sear. Se você tentar acionar a Blaze e lançar a Sear para fazer peel em si mesmo, ele simplesmente usa a ultimate para esquivar dela. Sem nenhuma mobilidade, Brand não consegue escapar do burst subsequente da Razor Shuriken e da Shadow Slash, te deixando completamente sem defesa depois que seu crowd control for desperdiçado.Build de Zed →Ver detalhes
Zed
Por quê
Zed neutraliza completamente suas ferramentas defensivas porque a Death Mark o torna não-alvejável, permitindo que ele contorne facilmente o stun da sua Sear. Se você tentar acionar a Blaze e lançar a Sear para fazer peel em si mesmo, ele simplesmente usa a ultimate para esquivar dela. Sem nenhuma mobilidade, Brand não consegue escapar do burst subsequente da Razor Shuriken e da Shadow Slash, te deixando completamente sem defesa depois que seu crowd control for desperdiçado.
Impacto na lane
Depois que Zed desbloqueia a Death Mark, você perde toda a agência ofensiva na mid lane. Você é forçado a farmar a uma distância extrema com a Pillar of Flame, já que avançar convida uma lentidão de Living Shadow e Shadow Slash, montando um dive fácil. Se ele te deixar abaixo de metade da vida com poke, a Contempt for the Weak dele garante uma execução rápida debaixo da sua própria torre, forçando recalls ruins e deixando ele roamar livremente.
Como jogar
Você precisa guardar a Sear como dissuasão absoluta. Nunca a lance proativamente para trocar. Quando Zed iniciar com a Death Mark, espere o momento exato em que ele reaparecer atrás de você. Marque-o instantaneamente com a Conflagration e aponte a Sear diretamente atrás do seu próprio modelo para garantir o stun. Essa é sua única janela para sobreviver; se você acertar, siga com a Pillar of Flame e a Pyroclasm para forçar uma troca com kill antes que a marca dele detone.
Esses campeões têm ferramentas que geralmente dão a eles vantagem no confronto, sem tornar o matchup impossível de jogar. Eles podem ter mais alcance, mais capacidade de aguentar sua ofensiva ou mais formas de responder aos seus engajamentos. Você vai precisar adaptar sua abordagem e escolher com cuidado os momentos em que aceita a luta.
Dano explosivoIniciaçãoA ameaça de Galio está em usar a Justice Punch para escapar exatamente do círculo da sua Pillar of Flame. Como o tempo de preparação da sua principal habilidade de área é previsível, um Galio atento vai contornar a explosão, colidir diretamente com você e encadear com a Shield of Durand. Esse fechamento rápido de distância te nega o espaçamento crucial necessário para acertar a Sear e acionar a Blaze, transformando seu poke em um lockdown mortal.Build de Galio →Ver detalhes
Galio
Por quê
A ameaça de Galio está em usar a Justice Punch para escapar exatamente do círculo da sua Pillar of Flame. Como o tempo de preparação da sua principal habilidade de área é previsível, um Galio atento vai contornar a explosão, colidir diretamente com você e encadear com a Shield of Durand. Esse fechamento rápido de distância te nega o espaçamento crucial necessário para acertar a Sear e acionar a Blaze, transformando seu poke em um lockdown mortal.
Impacto na lane
Você não pode empurrar a wave sem pensar, porque se estender demais te torna um alvo primário para a Justice Punch. Se Galio congelar a lane perto da torre dele, a Winds of War vai desgastar sua vida enquanto você tenta estourar os minions. Essa ameaça constante de um avanço repentino te força a jogar na defensiva debaixo da sua própria torre, sacrificando a prioridade inicial e deixando ele roamar livremente com a Hero's Entrance.
Como jogar
Para sobreviver, nunca lance a Pillar of Flame de forma agressiva, a menos que Galio já tenha desperdiçado a Justice Punch para limpar minions. Mantenha distância e foque em espalhar a Blaze usando a Conflagration nos minions próximos. Se ele avançar mesmo assim, lance rapidamente a Sear diretamente no caminho dele para stuná-lo no meio do dash, antes que o taunt da Shield of Durand consiga canalizar. Se você for pego, guarde a Pyroclasm para o momento em que ele se agrupar com os aliados dele.
EsquivaTempo de recargaA alta mobilidade de Akali neutraliza completamente seus skillshots. Como seu burst principal depende de acertar a Pillar of Flame e garantir o stun com a Sear, a capacidade dela de esquivar das duas sem esforço usando a Shuriken Flip ou o dash da Perfect Execution torna as trocas extremamente perigosas. Depois que ela contorna sua ferramenta inicial de zoneamento e aciona a Assassin's Mark, sua falta de mobilidade te deixa completamente exposto ao combo de execução completo dela.Build de Akali →Ver detalhes
Akali
Por quê
A alta mobilidade de Akali neutraliza completamente seus skillshots. Como seu burst principal depende de acertar a Pillar of Flame e garantir o stun com a Sear, a capacidade dela de esquivar das duas sem esforço usando a Shuriken Flip ou o dash da Perfect Execution torna as trocas extremamente perigosas. Depois que ela contorna sua ferramenta inicial de zoneamento e aciona a Assassin's Mark, sua falta de mobilidade te deixa completamente exposto ao combo de execução completo dela.
Impacto na lane
Você não pode atravessar seu lado do rio com segurança para empurrar, já que qualquer posição estendida demais permite que Akali acerte a Shuriken Flip para forçar um all-in letal. Essa restrição te força a jogar na defensiva debaixo da torre, cedendo prioridade e permitindo que ela roame livremente. Sua vida ficará constantemente ameaçada se você avançar para aplicar a Blaze, o que significa que você frequentemente será forçado a recalls em momentos ruins.
Como jogar
Para sobreviver, você precisa guardar a Sear como dissuasão defensiva em vez de usá-la para poke. Nunca lance a Pillar of Flame a menos que Akali já tenha desperdiçado a Shuriken Flip ou esteja travada na animação dela. Fique colado na segurança da sua torre, usando a Conflagration nos minions para espalhar a Blaze passivamente e limpar a wave. Se ela usar a Twilight Shroud, recue imediatamente e prepare-se para lançar a Pyroclasm caso ela comprometa a ultimate dela.
EscaramuçasTrocasEsse matchup é altamente desfavorável para Brand por causa de como a mobilidade de Akshan counteriza sua autodefesa. Quando você tenta se defender, Akshan usa a Heroic Swing para orbitar em torno de você. Esse movimento circular rápido torna incrivelmente fácil para ele esquivar do skillshot linear da sua Sear, te impedindo de acionar seu stun, enquanto o dano físico dele destroça rapidamente sua vida frágil.Build de Akshan →Ver detalhes
Akshan
Por quê
Esse matchup é altamente desfavorável para Brand por causa de como a mobilidade de Akshan counteriza sua autodefesa. Quando você tenta se defender, Akshan usa a Heroic Swing para orbitar em torno de você. Esse movimento circular rápido torna incrivelmente fácil para ele esquivar do skillshot linear da sua Sear, te impedindo de acionar seu stun, enquanto o dano físico dele destroça rapidamente sua vida frágil.
Impacto na lane
A ameaça constante de uma troca de burst físico de Akshan te força a jogar na defensiva embaixo ou perto da sua torre. Você não consegue contestar o push dele facilmente, já que usar a Pillar of Flame na wave de minions te deixa completamente vulnerável. Ele vai limpar waves facilmente com a Avengerang, ganhar prioridade na lane e usar a Going Rogue para roamar em direção às lanes laterais sem ser detectado, colocando uma pressão imensa no mapa inteiro enquanto você fica preso limpando a wave.
Como jogar
Para sobreviver, nunca lance a Sear preemptivamente. Você precisa guardar essa habilidade até Akshan realmente se comprometer com a Heroic Swing dele. Aponte seu stun diretamente para o ponto de ancoragem dele ou espere até ele colidir com você ou com um minion para garantir o acerto. Posicione-se estritamente atrás da sua wave de minions ou perto de cantos do terreno para bloquear o caminho do swing dele. Se ele te pegar no aberto, solte imediatamente a Conflagration e a Pillar of Flame aos seus próprios pés para forçar uma troca via Blaze enquanto ele fecha a distância.
Dano explosivoEsquivaAnnie counteriza seu padrão de poke porque a velocidade de movimento instantânea da Molten Shield dela permite que ela se esquive facilmente da sua Pillar of Flame. No momento em que você erra essa habilidade crucial, ela pode fechar a distância agressivamente. Com a passiva Pyromania totalmente carregada, ela vai te travar imediatamente com a Disintegrate ou a Incinerate, te deixando completamente vulnerável ao combo de burst completo dela, sem nenhuma forma de reagir.Build de Annie →Ver detalhes
Annie
Por quê
Annie counteriza seu padrão de poke porque a velocidade de movimento instantânea da Molten Shield dela permite que ela se esquive facilmente da sua Pillar of Flame. No momento em que você erra essa habilidade crucial, ela pode fechar a distância agressivamente. Com a passiva Pyromania totalmente carregada, ela vai te travar imediatamente com a Disintegrate ou a Incinerate, te deixando completamente vulnerável ao combo de burst completo dela, sem nenhuma forma de reagir.
Impacto na lane
Essa diferença de velocidade de reação te força a uma postura defensiva, cedendo a prioridade da mid lane. Annie pode farmar e gerenciar a wave com segurança usando a Disintegrate enquanto mantém a ameaça do stun dela. Se você avançar demais para limpar minions com a Conflagration, ela pode soltar instantaneamente a Summon: Tibbers para apagar sua barra de vida, te forçando a um recall prematuro ou a perder pedaços enormes de plating da torre.
Como jogar
Para sobreviver, você precisa jogar com extrema paciência. Nunca inicie uma troca com a Pillar of Flame; em vez disso, espere Annie desperdiçar a Molten Shield antes de lançá-la, ou lance-a exatamente quando ela estiver travada na animação da Disintegrate. Mantenha um olho constante no medidor da Pyromania dela. Se ela ativar o stun dela e avançar sobre você, prepare uma combinação defensiva de Conflagration seguida de Sear para stuná-la no meio do avanço e se desengajar imediatamente.
PosicionamentoPokeOrianna dita completamente essa lane ao manter a Ball dela posicionada além do seu alcance. Ela te assedia repetidamente com a Command: Attack a partir de uma distância onde sua Pillar of Flame não consegue alcançá-la. Mesmo se você avançar para trocar, ela anula imediatamente sua retaliação com a Command: Protect, usando o escudo para absorver a queimadura passiva da sua Blaze enquanto você leva dano de graça da zona dela.Build de Orianna →Ver detalhes
Orianna
Por quê
Orianna dita completamente essa lane ao manter a Ball dela posicionada além do seu alcance. Ela te assedia repetidamente com a Command: Attack a partir de uma distância onde sua Pillar of Flame não consegue alcançá-la. Mesmo se você avançar para trocar, ela anula imediatamente sua retaliação com a Command: Protect, usando o escudo para absorver a queimadura passiva da sua Blaze enquanto você leva dano de graça da zona dela.
Impacto na lane
Esse alcance superior constante te força a ceder a prioridade da wave. Você vai se ver constantemente farmando debaixo da torre, lutando para acertar a Conflagration e espalhar sua passiva pela wave sem ser pego pela Command: Dissonance. Sua barra de vida vai diminuir lentamente, forçando recalls antecipados e te deixando incapaz de ajudar seu jungler, enquanto Orianna permanece segura e saudável atrás da bola protetora dela.
Como jogar
Para sobreviver, nunca fique dentro da sua própria wave de minions; faça-a escolher entre te dar poke com a Command: Attack ou empurrar a wave. Se ela avançar demais para posicionar a bola dela, espere ela desperdiçar a Command: Protect antes de tentar acertar seu combo de Pillar of Flame e Sear. Se ela errar os skillshots dela, procure espalhar a Blaze pelos minions para forçá-la a recuar, guardando sua Pyroclasm para quando ela comprometer a Command: Shockwave.
EsquivaDano explosivoA mobilidade de Aurora interrompe completamente seu padrão normal de troca. No momento em que você lança a Pillar of Flame, ela pode reagir instantaneamente com a Across the Veil para saltar para longe, ficar invisível e tornar sua principal fonte de dano completamente inútil. Depois que sua habilidade-chave é desperdiçada, ela pode fechar a distância com segurança para acertar a Twofold Hex e acionar a Spirit Abjuration, te deixando sem nenhuma forma confiável de trocar de volta.Build de Aurora →Ver detalhes
Aurora
Por quê
A mobilidade de Aurora interrompe completamente seu padrão normal de troca. No momento em que você lança a Pillar of Flame, ela pode reagir instantaneamente com a Across the Veil para saltar para longe, ficar invisível e tornar sua principal fonte de dano completamente inútil. Depois que sua habilidade-chave é desperdiçada, ela pode fechar a distância com segurança para acertar a Twofold Hex e acionar a Spirit Abjuration, te deixando sem nenhuma forma confiável de trocar de volta.
Impacto na lane
Como você não pode lançar a Pillar of Flame às cegas, você perde o controle das waves de minions. Se você a usar para limpar, Aurora vai te punir imediatamente com a Twofold Hex. Essa ameaça constante da Across the Veil dela te força a jogar na defensiva perto da sua torre. Você vai ter dificuldade para garantir a prioridade do mid, o que significa que não pode ajudar seu jungler, enquanto Aurora consegue roamar confortavelmente usando a alta mobilidade dela.
Como jogar
Para sobreviver, você precisa guardar a Pillar of Flame como dissuasão, e não como ferramenta de iniciação. Comece suas trocas espalhando a Blaze com a Conflagration para ameaçar um stun. Se Aurora saltar agressivamente para a frente com a Across the Veil, espere a breve invisibilidade dela passar antes de lançar a Sear para stuná-la. Depois que ela estiver travada, você pode soltar com segurança a Pillar of Flame e a Pyroclasm para virar a troca a seu favor.
MecânicaPosicionamentoEsse matchup é fortemente dominado pela forma como Morgana usa a Black Shield para neutralizar sua pressão ofensiva. Para executar seu burst, você precisa acertar a Sear em um alvo já afetado pela Blaze. Porém, a Black Shield absorve o dano mágico e anula totalmente o componente de stun da Sear. Sem esse crowd control, você não consegue garantir seu combo completo, ficando altamente vulnerável à retaliação da Dark Binding e da Tormented Shadow dela.Build de Morgana →Ver detalhes
Morgana
Por quê
Esse matchup é fortemente dominado pela forma como Morgana usa a Black Shield para neutralizar sua pressão ofensiva. Para executar seu burst, você precisa acertar a Sear em um alvo já afetado pela Blaze. Porém, a Black Shield absorve o dano mágico e anula totalmente o componente de stun da Sear. Sem esse crowd control, você não consegue garantir seu combo completo, ficando altamente vulnerável à retaliação da Dark Binding e da Tormented Shadow dela.
Impacto na lane
Morgana neutraliza facilmente sua pressão de wave ao soltar a Tormented Shadow nos minions, te forçando a usar a Pillar of Flame e a Conflagration defensivamente só para se manter no jogo. Como ela pode ignorar a ameaça do seu stun, ela vai avançar com confiança para pescar a Dark Binding. Ser pego pela root dela enquanto a Tormented Shadow desgasta sua barra de vida significa perder a prioridade do mid, o que acaba forçando recalls antecipados e deixando seu jungler sem apoio.
Como jogar
Seu sucesso depende inteiramente de provocar o uso do cooldown defensivo dela. Lance a Pillar of Flame para ameaçar uma troca, mas guarde a Sear até ver ela desperdiçar a Black Shield. Como o cooldown do escudo dela é excepcionalmente longo, você tem uma boa janela de quinze segundos para atacar. Se ela guardar o escudo, foque em farmar com a Conflagration. Quando ela avançar para lançar a Soul Shackles, não lance a Sear em pânico contra o escudo dela; em vez disso, ande para trás para quebrar o tether e espere o escudo expirar antes de contra-atacar.
EsquivaPosicionamentoLux comanda esse matchup porque a Light Binding dela permite que ela pesque roots a partir de uma distância segura, bem fora do alcance das suas habilidades. Mesmo que você consiga trocar de volta com a Pillar of Flame, a Prismatic Barrier dela é excelente em absorver o dano contínuo da sua passiva Blaze. Isso neutraliza sua principal pressão de dano ao longo do tempo, enquanto a mantém totalmente fora do alcance do stun da sua Sear.Build de Lux →Ver detalhes
Lux
Por quê
Lux comanda esse matchup porque a Light Binding dela permite que ela pesque roots a partir de uma distância segura, bem fora do alcance das suas habilidades. Mesmo que você consiga trocar de volta com a Pillar of Flame, a Prismatic Barrier dela é excelente em absorver o dano contínuo da sua passiva Blaze. Isso neutraliza sua principal pressão de dano ao longo do tempo, enquanto a mantém totalmente fora do alcance do stun da sua Sear.
Impacto na lane
Você vai se ver constantemente empurrado debaixo da torre enquanto Lux limpa as waves com segurança usando a Lucent Singularity. Avançar para contestar a wave arrisca te acertar com a Light Binding, que prepara imediatamente o combo de alto dano da Final Spark dela. Essa ameaça constante te força a uma postura defensiva, sangrando prioridade e limitando sua capacidade de espalhar a Conflagration pela wave de minions para pressioná-la.
Como jogar
Para sobreviver, fique atrás da sua wave de minions para bloquear a Light Binding, mas lembre-se de que ela pode atravessar um alvo. Provoque a snare dela se movendo lateralmente, depois capitalize imediatamente sobre o longo cooldown dela para avançar e limpar a wave com a Pillar of Flame. Se ela proteger os minions dela com a Prismatic Barrier, não force trocas; em vez disso, use a Conflagration em minions com pouca vida para ricochetear a Blaze nela com segurança, sem entrar na zona de ameaça do laser dela.
Limpeza de rotaPressão no mapaTalon dita o ritmo do mapa porque a Rake dele limpa suas waves instantaneamente a partir de uma posição segura, permitindo que ele salte imediatamente sobre as paredes do rio usando a Assassin's Path. Como um mago lento, Brand não consegue acompanhar essa hiper-mobilidade pela jungle. Se você tentar segui-lo às cegas, corre o risco de entrar em uma bush onde a Noxian Diplomacy e a Blade's End podem te explodir antes mesmo que você consiga acertar a Sear.Build de Talon →Ver detalhes
Talon
Por quê
Talon dita o ritmo do mapa porque a Rake dele limpa suas waves instantaneamente a partir de uma posição segura, permitindo que ele salte imediatamente sobre as paredes do rio usando a Assassin's Path. Como um mago lento, Brand não consegue acompanhar essa hiper-mobilidade pela jungle. Se você tentar segui-lo às cegas, corre o risco de entrar em uma bush onde a Noxian Diplomacy e a Blade's End podem te explodir antes mesmo que você consiga acertar a Sear.
Impacto na lane
Você vai se ver constantemente debaixo da sua própria torre, usando a Pillar of Flame e a Conflagration só para acompanhar o push dele. Essa pressão constante limita suas janelas de recall e te impede de ajudar seu jungler. Toda vez que Talon desaparece por cima de uma parede, suas lanes laterais precisam recuar, sangrando gold e experiência, enquanto você é forçado a escolher entre pegar plating de torre ou arriscar uma rotação perigosa.
Como jogar
Nunca persiga Talon pela jungle quando ele roamar; em vez disso, marque imediatamente o status de missing dele e use a Conflagration seguida da Pillar of Flame para empurrar com força sua wave até a torre dele. Sempre guarde sua Sear quando ele se aproximar, já que ameaçar com o stun é sua única dissuasão contra o engajamento da Noxian Diplomacy dele. Se ele saltar sobre você com a Shadow Assault, solte a Pyroclasm imediatamente para ricochetear entre vocês dois, forçando-o a recuar ou a trocar a vida dele.
EsquivaPosicionamentoZiggs tem uma vantagem de alcance enorme que dita essa lane. A Bouncing Bomb dele consegue te assediar com segurança, bem antes de você conseguir avançar para lançar a Pillar of Flame ou a Conflagration. Para aplicar a Blaze ou montar um stun de Sear, você é forçado a andar diretamente na trajetória dele, levando poke inevitável só para fechar a distância.Build de Ziggs →Ver detalhes
Ziggs
Por quê
Ziggs tem uma vantagem de alcance enorme que dita essa lane. A Bouncing Bomb dele consegue te assediar com segurança, bem antes de você conseguir avançar para lançar a Pillar of Flame ou a Conflagration. Para aplicar a Blaze ou montar um stun de Sear, você é forçado a andar diretamente na trajetória dele, levando poke inevitável só para fechar a distância.
Impacto na lane
Você vai se ver constantemente preso debaixo da torre, lutando para acompanhar a limpeza de wave dele. Como a Bouncing Bomb mantém sua vida baixa, você não consegue contestar o push dele sem arriscar a morte. Isso permite que Ziggs desgaste livremente seu plating usando a Short Fuse e execute rapidamente sua torre com a Satchel Charge, enquanto a Hexplosive Minefield dele nega suas tentativas de roam.
Como jogar
Para sobreviver, nunca fique diretamente dentro da sua wave de minions. Isso força Ziggs a escolher entre usar a Bouncing Bomb para limpar minions ou te dar poke. Se ele avançar de forma errada para acertar a Short Fuse, puna-o imediatamente com a Pillar of Flame seguida da Sear. Se você ficar com pouca vida, não defenda o plating com avareza; abra mão da prioridade da torre em vez de morrer para a Mega Inferno Bomb enquanto tenta limpar a wave.
PosicionamentoEsquivaEsse matchup é dominado por alcance bruto e velocidade de burst. Syndra tem mais alcance que você, porque a Scatter the Weak dela pode lançar uma Dark Sphere bem de fora do seu perímetro de lançamento de habilidades. Como sua Conflagration e sua Pillar of Flame exigem que você avance, ela pode facilmente interceptar sua aproximação, te stunar instantaneamente e seguir com a Force of Will e a Unleashed Power antes mesmo que você consiga aplicar sua passiva Blaze.Build de Syndra →Ver detalhes
Syndra
Por quê
Esse matchup é dominado por alcance bruto e velocidade de burst. Syndra tem mais alcance que você, porque a Scatter the Weak dela pode lançar uma Dark Sphere bem de fora do seu perímetro de lançamento de habilidades. Como sua Conflagration e sua Pillar of Flame exigem que você avance, ela pode facilmente interceptar sua aproximação, te stunar instantaneamente e seguir com a Force of Will e a Unleashed Power antes mesmo que você consiga aplicar sua passiva Blaze.
Impacto na lane
Você não consegue avançar para contestar a wave com segurança. Toda vez que você tenta limpar minions com a Pillar of Flame, corre o risco de entrar na linha de posicionamento da sphere dela. Isso te força a conceder a prioridade inicial, deixando ela acumular a passiva Transcendent dela passivamente. Se você for desgastado por uma sphere projetada, você é forçado a um recall prematuro, dando a ela oportunidades de roam de graça enquanto você luta para se manter.
Como jogar
Para sobreviver, você precisa se ancorar atrás dos seus próprios minions caster e focar em farmar com a borda externa da Pillar of Flame. Nunca ande em linha reta quando a Dark Sphere dela já estiver no chão. Se ela desperdiçar a Scatter the Weak e errar, você tem uma breve janela para avançar, usar a Conflagration para espalhar a Blaze e ameaçar um stun de Sear. Se ela guardar o stun dela, iguale a paciência dela e farme com segurança.
PosicionamentoSobrevivênciaEsse matchup é dominado pela vantagem de mobilidade de Ekko sobre seus tempos de lançamento lentos. Sempre que você tenta assediá-lo ou limpar waves com a Pillar of Flame, ele pode reagir facilmente com a Phase Dive, dando blink para fora da zona de explosão. Esse dash fecha a distância imediatamente, permitindo que ele acione rapidamente a Z-Drive Resonance com um auto-attack e a Timewinder, desgastando sua barra de vida enquanto te deixa incapaz de retaliar.Build de Ekko →Ver detalhes
Ekko
Por quê
Esse matchup é dominado pela vantagem de mobilidade de Ekko sobre seus tempos de lançamento lentos. Sempre que você tenta assediá-lo ou limpar waves com a Pillar of Flame, ele pode reagir facilmente com a Phase Dive, dando blink para fora da zona de explosão. Esse dash fecha a distância imediatamente, permitindo que ele acione rapidamente a Z-Drive Resonance com um auto-attack e a Timewinder, desgastando sua barra de vida enquanto te deixa incapaz de retaliar.
Impacto na lane
Por causa dessa ameaça constante, você não consegue passar com segurança do ponto médio da lane. Se você usar a Pillar of Flame agressivamente e errar, Ekko dita imediatamente o estado da wave, congelando-a ou te forçando a recuar com uma troca pesada. Você é forçado a jogar na defensiva, sacrificando a prioridade inicial e deixando ele roamar, já que empurrar demais te expõe a um dive letal debaixo da torre usando a Parallel Convergence.
Como jogar
Para sobreviver, você precisa jogar um jogo de espera paciente. Nunca abra uma troca com a Pillar of Flame; em vez disso, guarde-a e use a Conflagration para espalhar a Blaze e farmar com mais segurança a distância. Se Ekko usar a Phase Dive agressivamente para avançar, essa é sua deixa. Lance sua Sear para interceptar a trajetória de aterrissagem dele, stune-o e só então solte seu combo completo, incluindo a Pyroclasm, se ele não tiver a Chronobreak para desfazer o burst.
SobrevivênciaPosicionamentoA ameaça de Diana está inteiramente em acertar a Crescent Strike para aplicar a marca da passiva dela. Depois que você é marcado, ela pode executar um duplo Lunar Rush para fechar a distância instantaneamente, te arrastando para o burst pesado da Moonfall. Como um mago imóvel, Brand não consegue escapar desse engajamento sem ajuda. Sua sobrevivência depende de reagir instantaneamente com a Sear para stunar ela no meio do avanço, o que exige que ela já esteja em chamas por causa de outra habilidade.Build de Diana →Ver detalhes
Diana
Por quê
A ameaça de Diana está inteiramente em acertar a Crescent Strike para aplicar a marca da passiva dela. Depois que você é marcado, ela pode executar um duplo Lunar Rush para fechar a distância instantaneamente, te arrastando para o burst pesado da Moonfall. Como um mago imóvel, Brand não consegue escapar desse engajamento sem ajuda. Sua sobrevivência depende de reagir instantaneamente com a Sear para stunar ela no meio do avanço, o que exige que ela já esteja em chamas por causa de outra habilidade.
Impacto na lane
Esse matchup te força a uma postura altamente defensiva, onde empurrar waves é perigoso. Tentar dar poke nela com a Pillar of Flame frequentemente te coloca dentro do alcance do dash dela, tornando cada troca um risco enorme. Se ela conseguir desgastar sua vida, ela vai congelar a wave ou avançar sobre você, te tirando do farm e te impedindo de ajudar em combates no rio enquanto ela roama livremente.
Como jogar
Posicione-se do lado oposto da trajetória curva da Crescent Strike para facilitar a esquiva. Você precisa guardar a Sear religiosamente; nunca a lance só para dar poke. Quando ela se comprometer com a Lunar Rush, use imediatamente a Conflagration seguida da Sear para um stun instantâneo à queima-roupa. Se ela ativar a Pale Cascade para absorver seu dano de retaliação, guarde a Pyroclasm por um breve segundo até o escudo dela se dissipar antes de soltar sua sequência explosiva completa.
Esses confrontos são, acima de tudo, duelos de execução: os dois campeões têm formas reais de levar vantagem. Uma habilidade importante esquivada, um engajamento bem antecipado ou um erro de posicionamento podem ser suficientes para decidir o duelo. Conhecer o matchup e reconhecer as janelas de ação certas faz toda a diferença.
EsquivaPosicionamentoEsse matchup é definido por como você explora o auto-bloqueio de Aurelion Sol. Para canalizar a Breath of Light, ele precisa ficar completamente parado, o que neutraliza totalmente a capacidade dele de se esquivar. Essa janela estacionária o torna um alvo incrivelmente fácil para o projétil da sua Sear. Ao prepará-lo primeiro com a Conflagration ou uma Pillar of Flame rápida, você pode acionar instantaneamente o stun da sua Blaze, interrompendo a principal fonte de dano dele e ganhando a troca de burst.Build de Aurelion Sol →Ver detalhes
Aurelion Sol
Por quê
Esse matchup é definido por como você explora o auto-bloqueio de Aurelion Sol. Para canalizar a Breath of Light, ele precisa ficar completamente parado, o que neutraliza totalmente a capacidade dele de se esquivar. Essa janela estacionária o torna um alvo incrivelmente fácil para o projétil da sua Sear. Ao prepará-lo primeiro com a Conflagration ou uma Pillar of Flame rápida, você pode acionar instantaneamente o stun da sua Blaze, interrompendo a principal fonte de dano dele e ganhando a troca de burst.
Impacto na lane
Durante a fase de lane, Aurelion Sol vai tentar constantemente soltar a Singularity para coletar cargas de Cosmic Creator dos minions. Se ele avançar para executá-los com a Breath of Light, a ameaça de um stun repentino da sua Sear o força a cancelar a canalização ou a levar dano massivo. Isso o impede de te empurrar para debaixo da torre facilmente, mantendo a lane neutra e forçando os dois a trocarem vida pesadamente sempre que os cooldowns estiverem disponíveis.
Como jogar
Nunca lance sua Sear às cegas enquanto ele estiver se movendo ativamente. Em vez disso, espere pacientemente o momento exato em que ele ativar a Breath of Light e se travar no lugar, ou quando ele voar em uma linha reta previsível com a Astral Flight. Marque-o instantaneamente com a Conflagration para aplicar a Blaze, depois lance seu stun. Se você errar esse combo, recue imediatamente atrás dos seus minions para evitar o pull da Singularity dele, esperando seus cooldowns acabarem antes de avançar novamente.
PosicionamentoSustentaçãoEsse matchup é um confronto direto entre a cura constante de Vladimir com a Transfusion e o dano persistente da sua Blaze. Embora a Crimson Pact de Vladimir aumente naturalmente a vida dele enquanto ele acumula poder, essa vida extra na verdade joga contra ele, amplificando a queimadura passiva da sua Blaze. Porém, a capacidade dele de escapar usando a Sanguine Pool pode anular completamente os ricochetes da sua Pyroclasm ou desfazer o stun crucial da sua Sear, resetando o momentum da luta.Build de Vladimir →Ver detalhes
Vladimir
Por quê
Esse matchup é um confronto direto entre a cura constante de Vladimir com a Transfusion e o dano persistente da sua Blaze. Embora a Crimson Pact de Vladimir aumente naturalmente a vida dele enquanto ele acumula poder, essa vida extra na verdade joga contra ele, amplificando a queimadura passiva da sua Blaze. Porém, a capacidade dele de escapar usando a Sanguine Pool pode anular completamente os ricochetes da sua Pyroclasm ou desfazer o stun crucial da sua Sear, resetando o momentum da luta.
Impacto na lane
A fase de lane é dominada pela barra de recurso carmesim de Vladimir; quando ela se enche para uma Transfusion potencializada, você precisa recuar para evitar que ele apague o dano da sua troca. Como ele usa a Tides of Blood ao custo da própria vida para limpar waves, você pode facilmente prendê-lo debaixo da torre. Porém, forçar um all-in antes que ele desperdice a Sanguine Pool é uma armadilha, já que ele vai absorver seu burst com segurança enquanto a Hemoplague dele conta o tempo para curá-lo.
Como jogar
Para vencer essa batalha de execução, nunca lance a Pyroclasm ou comprometa a Sear enquanto Vladimir tiver a Sanguine Pool disponível. Em vez disso, dê poke nele a distância usando a Conflagration espalhada nos minions, forçando-o a usar a pool dele defensivamente antes da hora. Depois que ele se liquefizer, conte os segundos do cooldown dele, depois vá imediatamente para a agressão com a Pillar of Flame e seu combo completo. Se ele te travar com a Hemoplague, ande para trás para evitar que ele acerte uma Tides of Blood totalmente carregada enquanto você espera sua queimadura surtir efeito.
PosicionamentoControle de grupoEsse matchup é um duelo de alto risco de tempos de reação. Katarina depende da Voracity e da Shunpo para dançar em volta dos seus skillshots, mas ela precisa ficar parada para canalizar a Death Lotus. Essa canalização é sua oportunidade de ouro. Toda a dinâmica gira em torno de você ter a Sear pronta para stunar ela no momento em que ela girar, ou de ela provocar o uso da sua Sear para te assassinar com segurança.Build de Katarina →Ver detalhes
Katarina
Por quê
Esse matchup é um duelo de alto risco de tempos de reação. Katarina depende da Voracity e da Shunpo para dançar em volta dos seus skillshots, mas ela precisa ficar parada para canalizar a Death Lotus. Essa canalização é sua oportunidade de ouro. Toda a dinâmica gira em torno de você ter a Sear pronta para stunar ela no momento em que ela girar, ou de ela provocar o uso da sua Sear para te assassinar com segurança.
Impacto na lane
Por causa dessa ameaça, a pressão da lane oscila bastante. Se você desperdiçar a Sear tentando dar poke, Katarina vai engajar imediatamente com a Bouncing Blade e a Shunpo para desgastar sua barra de vida. Porém, se você mantiver a wave dela empurrada usando a Pillar of Flame e a Conflagration, ela é forçada a usar as adagas dela para farmar debaixo da torre. Isso a impede de roamar para garantir kills e fazer snowball no mapa.
Como jogar
Nunca lance a Sear proativamente, a menos que Katarina já tenha saltado e você tenha uma carga garantida de Blaze aplicada via Conflagration. Durante os confrontos, posicione-se perto dos seus próprios minions para rastrear onde a Bouncing Blade dela cai. Se ela engajar com a Preparation, recue e espere as adagas dela desaparecerem. No momento em que ela canalizar a Death Lotus, acerte imediatamente seu combo de Conflagration e Sear para neutralizar a ultimate dela instantaneamente. Se você errar, recue para sua torre imediatamente.
Esses campeões geralmente têm dificuldade para responder às suas principais forças, o que te dá mais liberdade para abordar o confronto. Você costuma ter várias formas de pressioná-los e forçar trocas a seu favor. Aproveite essa vantagem para impor seu ritmo, em vez de dar tempo para eles se estabilizarem.
PokePosicionamentoRyze precisa se aproximar relativamente da wave de minions para marcá-la com a Spell Flux antes de espalhar o dano dele. Como o alcance dele é limitado, esse movimento previsível te dá uma janela enorme para soltar a Pillar of Flame diretamente nele. Como Ryze não tem habilidades de mobilidade para esquivar, ele precisa escolher entre levar dano pesado ou abrir mão da limpeza da wave, permitindo que sua passiva Blaze desgaste facilmente a vida dele.Build de Ryze →Ver detalhes
Ryze
Por quê
Ryze precisa se aproximar relativamente da wave de minions para marcá-la com a Spell Flux antes de espalhar o dano dele. Como o alcance dele é limitado, esse movimento previsível te dá uma janela enorme para soltar a Pillar of Flame diretamente nele. Como Ryze não tem habilidades de mobilidade para esquivar, ele precisa escolher entre levar dano pesado ou abrir mão da limpeza da wave, permitindo que sua passiva Blaze desgaste facilmente a vida dele.
Impacto na lane
Essa dinâmica te dá controle total sobre o estado da wave. Ryze não consegue acompanhar sua limpeza de wave com segurança sem levar poke constante, o que o força a farmar debaixo da torre, onde os resets da Overload dele são mais difíceis de usar em trocas. Ao mantê-lo pressionado e com pouca vida, você atrasa o scaling dele vindo da Arcane Mastery e o impede de usar a Realm Warp para impactar outras lanes, mantendo-o preso no mid.
Como jogar
Fique só fora do alcance da Rune Prison dele e observe seus próprios minions com pouca vida. No momento em que Ryze avançar para lançar a Spell Flux, coloque imediatamente a Pillar of Flame onde ele está. Se ele ficar agressivo e tentar fechar a distância, acerte-o com a Sear para acionar o stun nas cargas de Blaze já existentes, depois siga com a Conflagration e a Pyroclasm se ele tentar reagir dentro da própria wave de minions dele.
PokeDano explosivoEsse matchup é fortemente a seu favor porque Veigar precisa pausar constantemente o movimento dele para lançar a Baleful Strike e ganhar cargas de Phenomenal Evil Power. Esse breve auto-root é a janela perfeita para colocar a Pillar of Flame bem debaixo dos pés dele. Como a limpeza de wave inicial dele é lenta e previsível, você pode facilmente forçá-lo a escolher entre perder gold ou levar dano mágico massivo da sua passiva, a Blaze.Build de Veigar →Ver detalhes
Veigar
Por quê
Esse matchup é fortemente a seu favor porque Veigar precisa pausar constantemente o movimento dele para lançar a Baleful Strike e ganhar cargas de Phenomenal Evil Power. Esse breve auto-root é a janela perfeita para colocar a Pillar of Flame bem debaixo dos pés dele. Como a limpeza de wave inicial dele é lenta e previsível, você pode facilmente forçá-lo a escolher entre perder gold ou levar dano mágico massivo da sua passiva, a Blaze.
Impacto na lane
Sua capacidade de punir o last-hit dele te dá controle absoluto sobre as waves de minions. Ao empurrá-lo constantemente debaixo da torre com a Conflagration e a Pillar of Flame, você o força a gastar mana farmando em vez de acumular cargas. Ele vai ficar com vida baixa demais para avançar e te prender com a Event Horizon, tornando-o inútil para o jungler dele e te dando prioridade de roam de graça.
Como jogar
Observe de perto seus próprios minions com pouca vida. No milissegundo exato em que Veigar avançar e encarar um minion para lançar a Baleful Strike, solte imediatamente a Pillar of Flame nele. Se ele tentar retaliar te prendendo dentro da Event Horizon, não entre em pânico e corra para dentro da parede de stun. Mantenha-se firme dentro da jaula, esquive da Dark Matter com atraso dele, e prepare-se para disparar a Sear para stuná-lo no momento em que ele tentar fechar a distância para um Primordial Burst.
SustentaçãoKiteSwain depende da Demonic Ascension dele para ganhar vida massiva e drenar seu time, mas essa transformação o torna o alvo perfeito para seu kit. O tamanho aumentado e a necessidade de ficar próximo garantem que ele não consiga esquivar das suas habilidades, permitindo que sua passiva Blaze destroce a vida inflada dele. Além disso, quando ele se aproxima, sua Pyroclasm vai ricochetear implacavelmente entre ele e os minions dele, transformando a ultimate dele na própria armadilha dele.Build de Swain →Ver detalhes
Swain
Por quê
Swain depende da Demonic Ascension dele para ganhar vida massiva e drenar seu time, mas essa transformação o torna o alvo perfeito para seu kit. O tamanho aumentado e a necessidade de ficar próximo garantem que ele não consiga esquivar das suas habilidades, permitindo que sua passiva Blaze destroce a vida inflada dele. Além disso, quando ele se aproxima, sua Pyroclasm vai ricochetear implacavelmente entre ele e os minions dele, transformando a ultimate dele na própria armadilha dele.
Impacto na lane
Durante a fase de lane, você mantém controle completo sobre o estado da wave. Usando a Pillar of Flame e a Conflagration, você pode empurrar Swain constantemente debaixo da torre dele, forçando-o a desperdiçar a Death's Hand farmando em vez de trocar. Como Swain precisa avançar para acertar a Nevermove para a passiva Ravenous Flock dele, você pode prever facilmente o movimento dele para puni-lo, criando diferenças enormes de vida que atrasam o primeiro recall dele.
Como jogar
Sempre mantenha o alcance máximo de lançamento para neutralizar a Nevermove dele. Nunca entre no caminho da garra retornando. Quando Swain inevitavelmente ativar a Demonic Ascension e tentar te alcançar, não entre em pânico; guarde a Sear até ter aplicado a Blaze com a Conflagration ou a Pillar of Flame para garantir um stun instantâneo. Se você errar seu stun, use imediatamente a Pyroclasm para forçá-lo a recuar ou morrer pelo dano de ricochete enquanto você kita para trás.
PosicionamentoImunidade a CCA ameaça de Lissandra depende inteiramente de fechar a distância para ativar a Ring of Frost. Porém, sua abordagem previsível, seja andando até você ou usando Glacial Path, joga direto a seu favor. Como ela precisa entrar no seu alcance efetivo para causar dano relevante, ela se expõe a um setup fácil de Blaze. Você pode facilmente marcá-la com Conflagration e interromper seu avanço com um stun garantido de Sear, neutralizando completamente sua agressão.Build de Lissandra →Ver detalhes
Lissandra
Por quê
A ameaça de Lissandra depende inteiramente de fechar a distância para ativar a Ring of Frost. Porém, sua abordagem previsível, seja andando até você ou usando Glacial Path, joga direto a seu favor. Como ela precisa entrar no seu alcance efetivo para causar dano relevante, ela se expõe a um setup fácil de Blaze. Você pode facilmente marcá-la com Conflagration e interromper seu avanço com um stun garantido de Sear, neutralizando completamente sua agressão.
Impacto na lane
Essa dinâmica força Lissandra a jogar na defensiva, usando Ice Shard para garantir minions a distância, o que naturalmente empurra a wave para o seu lado. Você dita o ritmo da lane. Sempre que Glacial Path está em cooldown, ela perde toda a segurança, permitindo que você a zone agressivamente ou a prenda sob a torre com Pillar of Flame, criando uma vantagem enorme de CS sem arriscar sua vida.
Como jogar
Sempre guarde seu Sear até que Lissandra se comprometa. Quando ela projetar Glacial Path, posicione-se um pouco atrás do ponto final do trajeto. No momento em que ela teleportar, use imediatamente Conflagration seguido de Sear para atordoá-la antes que ela possa reagir com Ring of Frost. Se ela se salvar usando Frozen Tomb, não entre em pânico; apenas pré-conjure Pillar of Flame e solte Pyroclasm exatamente quando a stasis terminar para explodi-la instantaneamente.
PokeDano explosivoAs animações de conjuração estática de Mel a tornam extremamente vulnerável à sua sequência principal de burst. Sempre que ela para para canalizar suas habilidades, sua falta de mobilidade a transforma em um alvo fácil. Isso permite que você posicione facilmente um Pillar of Flame de dano máximo, iniciando rapidamente uma cadeia de ativação de blaze. Como vocês dois dependem de rotações de alto dano, essa janela de imobilidade te dá uma vantagem decisiva no potencial de troca.Build de Mel →Ver detalhes
Mel
Por quê
As animações de conjuração estática de Mel a tornam extremamente vulnerável à sua sequência principal de burst. Sempre que ela para para canalizar suas habilidades, sua falta de mobilidade a transforma em um alvo fácil. Isso permite que você posicione facilmente um Pillar of Flame de dano máximo, iniciando rapidamente uma cadeia de ativação de blaze. Como vocês dois dependem de rotações de alto dano, essa janela de imobilidade te dá uma vantagem decisiva no potencial de troca.
Impacto na lane
Essa vulnerabilidade força Mel a jogar na defensiva, dando a você controle total sobre as waves de minions. Você pode facilmente estourar waves com Conflagration e Pillar of Flame para garantir visão profunda ou fazer um roam. Como Mel não consegue desviar facilmente dos seus skillshots durante suas conjurações, ela vai perder vida constantemente, forçando recalls prematuros ou deixando-a exposta a um dive letal com Pyroclasm sob a própria torre.
Como jogar
Mantenha uma posição diagonal logo fora do alcance de ameaça de Mel, acompanhando os indicadores de conjuração dela. No momento em que ela começar a animação de canalização, solte imediatamente Pillar of Flame direto nos pés dela, depois siga com Sear para atordoá-la enquanto ela está presa no lugar. Se você errar esse skillshot inicial, recue imediatamente para trás dos seus minions para evitar o counter-burst dela, guardando Conflagration como dissuasão para impedi-la de te perseguir.
Limpeza de rotaPokeToda a presença de lane de Heimerdinger depende de se aninhar dentro do seu setup de H-28G Evolution Turret. Porém, isso joga direto a seu favor. Ao aplicar Blaze nas torretas estáticas dele, você pode conjurar Conflagration para espalhar o fogo sem esforço direto para Heimerdinger quando ele fica perto delas. As próprias construções dele se tornam faróis estáticos que estendem seu alcance, permitindo que você ative explosões de Blaze e acerte facilmente golpes de Pillar of Flame.Build de Heimerdinger →Ver detalhes
Heimerdinger
Por quê
Toda a presença de lane de Heimerdinger depende de se aninhar dentro do seu setup de H-28G Evolution Turret. Porém, isso joga direto a seu favor. Ao aplicar Blaze nas torretas estáticas dele, você pode conjurar Conflagration para espalhar o fogo sem esforço direto para Heimerdinger quando ele fica perto delas. As próprias construções dele se tornam faróis estáticos que estendem seu alcance, permitindo que você ative explosões de Blaze e acerte facilmente golpes de Pillar of Flame.
Impacto na lane
Essa interação retira completamente de Heimerdinger sua vantagem usual de push. Em vez de te prender sob a torre, os posicionamentos de H-28G Evolution Turret dele permitem que você dizime waves inteiras de minions instantaneamente enquanto reduz a vida dele ao mesmo tempo. Você vai ditar constantemente o ritmo da wave, forçando-o a escolher entre deixar suas torretas morrerem ou sofrer dano pesado de queimadura, neutralizando efetivamente sua pressão.
Como jogar
Posicione-se com segurança atrás dos seus próprios minions para evitar o CH-2 Electron Storm Grenade dele. Quando ele colocar uma H-28G Evolution Turret perto da wave, prepare-a com um ataque básico ou uma habilidade, depois use Conflagration para saltar Blaze até ele. Se ele avançar para defender seu ninho, siga imediatamente com Sear para atordoá-lo, depois solte Pillar of Flame. Se ele tentar soltar uma torreta gigante com UPGRADE!!!, simplesmente recue e derreta-a a distância.
PokeA lane de Twisted Fate depende de travar suas cartas coloridas com Pick a Card. Porém, isso denuncia seu movimento e o trava brevemente em um trajeto previsível. Como ele não tem mobilidade, Brand pode facilmente aproveitar essa janela. No momento em que ele avança para escolher sua carta, você pode soltar Pillar of Flame diretamente debaixo dele, preparando Conflagration e um stun fácil de Sear para soltar toda a queimadura de Blaze.Build de Twisted Fate →Ver detalhes
Twisted Fate
Por quê
A lane de Twisted Fate depende de travar suas cartas coloridas com Pick a Card. Porém, isso denuncia seu movimento e o trava brevemente em um trajeto previsível. Como ele não tem mobilidade, Brand pode facilmente aproveitar essa janela. No momento em que ele avança para escolher sua carta, você pode soltar Pillar of Flame diretamente debaixo dele, preparando Conflagration e um stun fácil de Sear para soltar toda a queimadura de Blaze.
Impacto na lane
Ao manter pressão constante na wave, você impede que Twisted Fate use Wild Cards para dar clear com segurança. Forçá-lo a escolher entre igualar seu push ou usar Pick a Card para farmar sob a torre o mantém preso. Se ele tentar passar pelos seus minions casters para trocar dano, sua ameaça de burst o força a recuar. Isso neutraliza completamente a pressão de mapa dele, mantendo sua vida baixa demais para canalizar Destiny com segurança.
Como jogar
Não jogue suas habilidades aleatoriamente. Espere o ciclo de cartas acima da cabeça de Pick a Card começar. Se ele travar uma carta dourada, ele precisa andar direto até você para jogá-la; use esse trajeto linear para acertar Conflagration seguido imediatamente de Sear para atordoá-lo antes que a carta dourada o acerte. Se você vê-lo canalizar Destiny nas proximidades, solte imediatamente Pyroclasm e Pillar of Flame para punir sua canalização estática, convertendo a tentativa de roam dele em tela cinza.
Vantagem: veredito canônico do Wild Rift Core (−3 a +3), do ponto de vista do campeão citado na linha. Taxa de vitória e taxa de escolha: as do próprio adversário nessa função — Wild Rift CN · Challenger, Patch 7.3b. Não é uma taxa de vitória do confronto direto.
Vantagem: veredito canônico do Wild Rift Core (−3 a +3), do ponto de vista do campeão citado na linha. Taxa de vitória e taxa de escolha: as do próprio adversário nessa função — Wild Rift CN · Challenger, Patch 7.3b. Não é uma taxa de vitória do confronto direto.
Como counterar este campeão
Ângulo de counter
O Brand depende muito do posicionamento e do ritmo da luta. Contra-ataques eficazes não se resumem apenas ao dano, mas também a atrapalhar sua preparação antes que ele consiga agir. Isso inclui campeões capazes de diminuir rapidamente a distância, evitar suas zonas ou forçar confrontos curtos. Compreender esses perfis é fundamental para antecipar seus limites.
Contexto do patch
Os campeões que neutralizam o Brand aproveitam sua falta de mobilidade e o fato de ele precisar de tempo para causar dano. Assassinos e campeões ágeis reduzem sua janela de impacto ao iniciar o combate rapidamente. Além disso, formações espalhadas impedem que seus efeitos se espalhem, reduzindo drasticamente sua eficácia.
Leitura rápida
Fraco contra assassinos rápidos.
Baseia-se em lutas em grupo.
Passível de punição antes da instalação.
Arquétipos de counter
Assassinos móveis
Esses campeões conseguem diminuir rapidamente a distância e atacar Brand antes que ele lance seus feitiços. Sua mobilidade também lhes permite desviar de habilidades-chave, impedindo a aplicação do Blaze e reduzindo significativamente o DPS dele. Brand fica incapaz de cumprir seu papel nas lutas.
Como o campeão deve se adaptar. Jogue bem atrás, antecipe os ataques e guarde o atordoamento para a defesa, em vez de usá-lo para iniciar o combate.
Composições de pastas
Quando os inimigos ficam espalhados, o Brand perde grande parte de seu valor. Sua habilidade definitiva ricocheteia menos e sua área de efeito atinge menos alvos. Isso reduz drasticamente seu impacto geral e transforma seu conjunto de habilidades em simples ataques à distância, sem representar uma ameaça real.
Como o campeão deve se adaptar. Procure ângulos isolados de poke e espere pelos erros de posicionamento em grupo.
Engate rápido
Campeões com engajamento instantâneo forçam o Brand a reagir sob pressão. Ele não tem tempo para aplicar acumulações ou se posicionar adequadamente. Isso reduz sua contribuição a quase zero se o engajamento for bem executado.
Zed é um dos piores adversários para Brand, pois combina dano explosivo e mobilidade. Ele pode esperar que Brand use seus feitiços antes de partir para o tudo ou nada com segurança. O confronto gira em torno do gerenciamento de recargas e da capacidade de Brand de permanecer fora de alcance, mantendo o atordoamento pronto para uso.
Fizz neutraliza grande parte do kit de Brand graças à sua invulnerabilidade. Ele consegue se esquivar de feitiços importantes e entrar em combate livremente. Brand precisa jogar com extrema cautela e evitar trocas prolongadas.
Erros comuns contra ele
Erros comuns contra ele
Subestimar a velocidade de ataque do inimigo.
Usar feitiços sem visão.
Posicionamento muito próximo da frente.
Fazer posições compradas contra assassinos.
Ignorar os tempos de recarga dos inimigos.
Notas do coach
Contra o Brand, o segredo é reduzir o tempo de impacto dele.
Nunca deixe que ele se posicione completamente.
FAQ
Por que o Brand tem dificuldade contra o Zed?
O Zed pode aguardar o término dos feitiços do Brand antes de iniciar o combate, anulando completamente sua preparação. Uma vez no combate, o Brand não possui mobilidade nem defesa para sobreviver. O confronto gira em torno da disciplina e do gerenciamento dos tempos de recarga.
Como jogar contra o Fizz?
O Fizz consegue se esquivar dos feitiços principais do Brand, o que torna os confrontos arriscados. Jogue com cautela, mantenha distância e nunca entre em combate sem visão ou sem que os tempos de recarga estejam prontos.
Será que o Brand conseguirá vencer seus adversários?
Sim, mas isso depende do posicionamento e dos erros do inimigo. Se o Brand ficar fora do alcance e forçar combates em grupo, ele consegue compensar suas fraquezas.
Qual é a maior ameaça do Brand?
A maior ameaça é não conseguir usar seu conjunto de habilidades. Qualquer coisa que reduza seu tempo de atividade ou sua capacidade de atingir vários alvos limita drasticamente seu impacto.