agosto de 2026 · Patch 7.2d
Assassin · MID

Guia de counters de Ahri Wild Rift

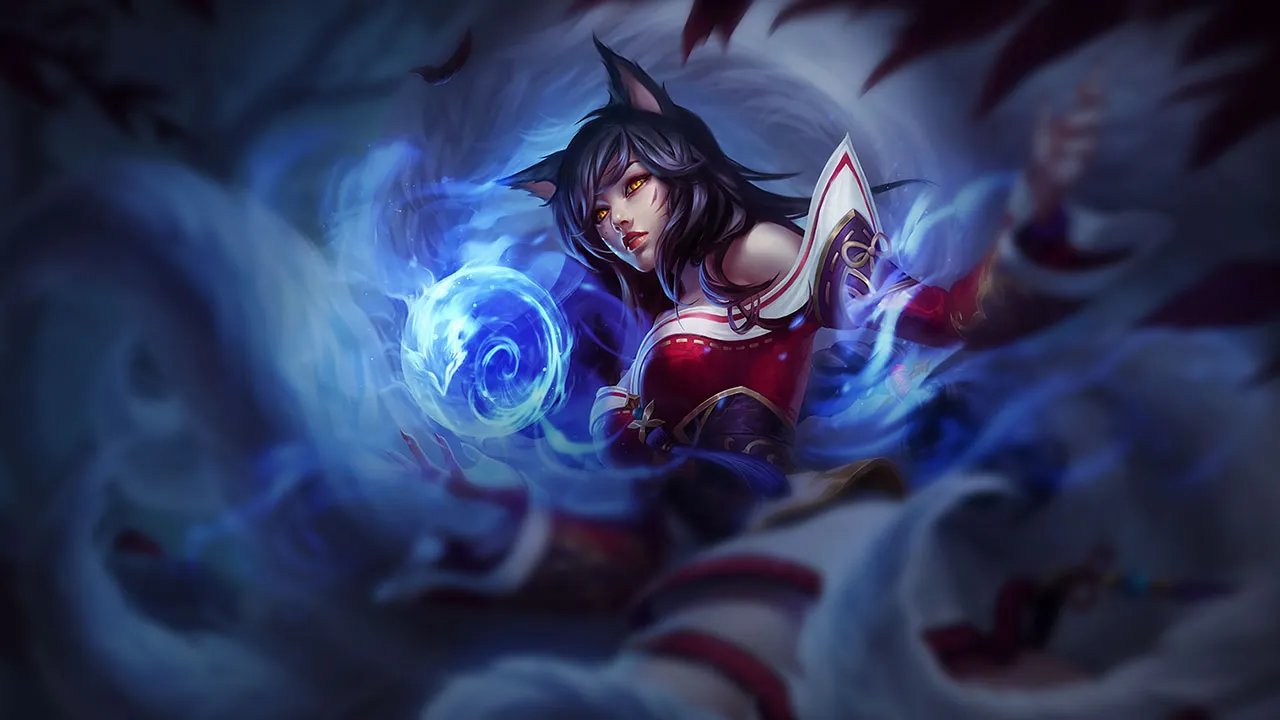
Ahri, uma mid lane mage de alta mobilidade, depende de sua mobility e de um Charm preciso para controlar as lutas. Composições com engage rápido, burst instantâneo ou pressão implacável limitam suas opções de reposicionamento. Se for forçada a lutar sem espaço, seu impacto cai significativamente.

★ MID Tier S+
DANO
UTIL
TANK
DIFF
Win 51.8% #27 · ↓0pt
Pick 5.3% #13
Ban 0.2% #127

Guia de counters de Ahri Wild Rift ★ Counter Sheet

Hard Counters

3

Esses campeões têm uma build e um estilo de jogo que superam diretamente o seu, o que pode tornar o controle da lane e o farm extremamente difíceis. As habilidades deles podem neutralizar seus principais pontos fortes ou te punir assim que você tenta jogar do seu jeito de sempre. Nesses matchups, o objetivo costuma ser reduzir os erros e buscar soluções fora do confronto direto.

Irelia

Irelia

skirmishdive_threat Irelia's unmatched mobility within the minion wave completely neutralizes your skillshot-reliant kit. By constantly resetting Bladesurge on dying minions, she can easily bait out or dodge your Charm. Once your crowd control is wasted, she can immediately follow up with Flawless Duet to stun you, building max stacks of Ionian Fervor to shred your health pool before you can disengage. Ver detalhes
Irelia

Por quê

Irelia's unmatched mobility within the minion wave completely neutralizes your skillshot-reliant kit. By constantly resetting Bladesurge on dying minions, she can easily bait out or dodge your Charm. Once your crowd control is wasted, she can immediately follow up with Flawless Duet to stun you, building max stacks of Ionian Fervor to shred your health pool before you can disengage.

Impacto na lane

This matchup forces you into defensive farming under your own turret. Because you cannot reliably land Orb of Deception or Fox-Fire without risking a sudden counter-engage, you cannot contest the lane. Any attempt to push the wave gives Irelia a longer lane to chase you down. If she freezes, you are entirely locked out of gold, leaving your jungler completely isolated.

Como jogar

You must absolutely hold onto Charm as a deterrent, never casting it aggressively while Irelia has low-health minions to dash to. Keep the wave frozen just outside your turret range using Orb of Deception solely to thin the incoming wave. If she lands Flawless Duet or initiates with Vanguard's Edge, immediately use Spirit Rush to dash diagonally away from her blade wall, prioritizing survival over trying to trade back.

Ficha completa →
Lissandra

Lissandra

hard_ccgank_setup Your usual safety net is entirely compromised here. While Spirit Rush normally allows you to reposition or escape, Lissandra's point-and-click Frozen Tomb instantly locks you down mid-dash. This makes every aggressive forward jump an invitation for her to lock you in place, while her Ring of Frost prevents you from retaliating or landing a clean Charm during her lockdown. Ver detalhes
Lissandra

Por quê

Your usual safety net is entirely compromised here. While Spirit Rush normally allows you to reposition or escape, Lissandra's point-and-click Frozen Tomb instantly locks you down mid-dash. This makes every aggressive forward jump an invitation for her to lock you in place, while her Ring of Frost prevents you from retaliating or landing a clean Charm during her lockdown.

Impacto na lane

You cannot contest the wave safely once she reaches level five. Lissandra can shove effortlessly using Ice Shard, forcing you under turret. If you try to step up to thin the wave with Orb of Deception, her Glacial Path allows her to close the gap instantly, setting up an inescapable gank with her ultimate. This constant pressure neutralizes your priority, forcing you to lose gold.

Como jogar

Shift your focus entirely away from solo kills. Keep Orb of Deception for farming from maximum range under your tower. The moment Lissandra uses Glacial Path aggressively or roams, do not follow her directly through the river; instead, look for opposite-side map plays. Save your Charm strictly to deter her dives, and only activate Spirit Rush to escape after she has wasted Frozen Tomb.

Ficha completa →
Vex

Vex

anti_dashfear Vex’s kit directly counters your high mobility. Every single dash of Spirit Rush triggers her Doom 'n Gloom passive, marking you and charging her fear. If you attempt to dive or reposition with your ultimate, Vex can instantly interrupt your dash mid-flight using Personal Space to apply that fear, leaving you completely vulnerable to a point-blank Mistral Bolt and Looming Darkness combination. Ver detalhes
Vex

Por quê

Vex’s kit directly counters your high mobility. Every single dash of Spirit Rush triggers her Doom 'n Gloom passive, marking you and charging her fear. If you attempt to dive or reposition with your ultimate, Vex can instantly interrupt your dash mid-flight using Personal Space to apply that fear, leaving you completely vulnerable to a point-blank Mistral Bolt and Looming Darkness combination.

Impacto na lane

This matchup severely limits your offensive agency. You cannot use Spirit Rush to initiate trades, as doing so invites an immediate, unavoidable interrupt. Consequently, Vex gains free control over the wave, shoving you under turret with Looming Darkness and Mistral Bolt. If you step up to contest, you risk losing half your health bar, forcing you to rely solely on Essence Theft to survive the lane.

Como jogar

Your primary goal is to monitor Vex’s passive bar constantly. Never use Spirit Rush while Doom 'n Gloom is active. Instead, bait her into wasting the fear on waveclear with Mistral Bolt. The moment her passive indicator disappears, you have a brief window to trade with Orb of Deception and Fox-Fire. If she initiates with Shadow Surge, hold Charm to interrupt her dash mid-flight, then immediately disengage to neutral ground.

Ficha completa →

Desfavoráveis

15

Esses campeões têm ferramentas que geralmente dão a eles vantagem no confronto, sem tornar o matchup impossível de jogar. Eles podem ter mais alcance, mais capacidade de aguentar sua ofensiva ou mais formas de responder aos seus engajamentos. Você vai precisar adaptar sua abordagem e escolher com cuidado os momentos em que aceita a luta.

Orianna

Orianna

spacingtethering Orianna dominates the early game by constantly repositioning her ball with Command: Attack, forcing you to step back to avoid Command: Dissonance. Because her ranged auto-attacks from Clockwork Windup hurt, you cannot easily trade back. However, the tide turns when she moves her ball too far forward. Without Command: Protect immediately available to shield her, Orianna becomes completely defenseless against a sudden Spirit Rush dash. Ver detalhes
Orianna

Por quê

Orianna dominates the early game by constantly repositioning her ball with Command: Attack, forcing you to step back to avoid Command: Dissonance. Because her ranged auto-attacks from Clockwork Windup hurt, you cannot easily trade back. However, the tide turns when she moves her ball too far forward. Without Command: Protect immediately available to shield her, Orianna becomes completely defenseless against a sudden Spirit Rush dash.

Impacto na lane

You will find yourself constantly pushed toward your tower, forced to use Orb of Deception just to secure minions from a safe distance. Every mistake in your positioning leads to heavy health loss, forcing you to rely on Essence Theft to sustain through her poke. This constant pressure limits your ability to roam, locking you in lane until you can find an opening to punish her ball placement.

Como jogar

Never stand in a direct line between Orianna and her ball. Position yourself laterally to force her to choose between hitting you or clearing the wave. The moment she throws Command: Attack too far behind your caster minions, immediately trigger Spirit Rush forward to bypass her zone. With her ball out of position, she cannot quickly use Command: Shockwave on herself, leaving her wide open to a clean Charm and Fox-Fire burst.

Ficha completa →
Swain

Swain

sustainteamfight Your burst from Charm followed by Orb of Deception and Fox-Fire is completely neutralized by Swain's massive healing during Demonic Ascension. Because you lack the raw damage to pierce his ultimate's health gain, any attempt to all-in him directly backfires. You are forced to burn charges of Spirit Rush defensively just to escape his drain radius, wasting your ultimate's offensive pressure to survive his transformation. Ver detalhes
Swain

Por quê

Your burst from Charm followed by Orb of Deception and Fox-Fire is completely neutralized by Swain's massive healing during Demonic Ascension. Because you lack the raw damage to pierce his ultimate's health gain, any attempt to all-in him directly backfires. You are forced to burn charges of Spirit Rush defensively just to escape his drain radius, wasting your ultimate's offensive pressure to survive his transformation.

Impacto na lane

Swain constantly pressures the lane with Death's Hand and searches for pulls with Nevermove. If you get caught, his Ravenous Flock sustain wins him the trade automatically. This means you must focus heavily on keeping the wave balanced or pushing using Orb of Deception. If you lose control of the wave, Swain will crash it, poke you under turret with Vision of Empire, and easily secure roam priority.

Como jogar

To survive this matchup, prioritize clearing minions from a distance. Use Orb of Deception to match his push, keeping yourself safely behind your wave to block Nevermove. If Swain activates Demonic Ascension, immediately cast Spirit Rush backwards to break his drain tether, holding your remaining charges until his demon form ends. Never commit Charm aggressively unless his ultimate is on cooldown; instead, save it to interrupt his forward advance while you retreat.

Ficha completa →
Yasuo

Yasuo

lane_pressureskirmish Yasuo controls the pace of this lane because his Wind Wall completely negates your primary setup tool, Charm, alongside your Orb of Deception. Since your entire burst relies on hitting that single projectile to amplify subsequent damage, his wall leaves you highly vulnerable. Furthermore, his Way of the Wanderer passive constantly absorbs your basic attack poke, making it incredibly difficult to chunk him down before he finds an engage angle. Ver detalhes
Yasuo

Por quê

Yasuo controls the pace of this lane because his Wind Wall completely negates your primary setup tool, Charm, alongside your Orb of Deception. Since your entire burst relies on hitting that single projectile to amplify subsequent damage, his wall leaves you highly vulnerable. Furthermore, his Way of the Wanderer passive constantly absorbs your basic attack poke, making it incredibly difficult to chunk him down before he finds an engage angle.

Impacto na lane

You are forced into a defensive posture, as Yasuo easily clears waves using Steel Tempest and Sweeping Blade. If you throw Charm blindly, he will block it, dash through your minions, and force a lethal trade with Last Breath once he knocks you up. This constant threat forces you to save your mana and restrict your Orb of Deception solely to farming under or near your tower.

Como jogar

To survive, break his Way of the Wanderer shield with a simple basic attack before attempting any trade. Never cast Charm unless you have baited out his Wind Wall, which has a massive cooldown; instead, use Fox-Fire to gain movement speed and dodge his Steel Tempest tornadoes. If he dashes forward with Sweeping Blade, use Spirit Rush to reposition laterally, escaping his linear threat zone while keeping your distance until his wall expires.

Ficha completa →
Galio

Galio

cc_lockdownburst_mitigation Galio naturally blunts your assassination potential because Shield of Durand grants him massive magic damage reduction, allowing him to easily absorb your entire Charm and Orb of Deception burst. Furthermore, his Justice Punch acts as an excellent zoning tool that can knock you out of the air right as you attempt to reposition or chase with Spirit Rush. This makes direct, aggressive skirmishing highly unfavorable for you. Ver detalhes
Galio

Por quê

Galio naturally blunts your assassination potential because Shield of Durand grants him massive magic damage reduction, allowing him to easily absorb your entire Charm and Orb of Deception burst. Furthermore, his Justice Punch acts as an excellent zoning tool that can knock you out of the air right as you attempt to reposition or chase with Spirit Rush. This makes direct, aggressive skirmishing highly unfavorable for you.

Impacto na lane

Because you cannot easily threaten him with solo kills, Galio can freely clear waves using Winds of War and Colossal Smash to shove you under turret. This constant pressure limits your roam timers, while his Hero's Entrance allows him to impact side lanes much faster than you can follow. Any trade you force usually ends with you losing more health to his passive-infused melee swings.

Como jogar

To survive this lane, you must play a war of attrition. Use your Orb of Deception at maximum range to thin the wave and poke him simultaneously, utilizing Essence Theft to sustain through his retaliatory Winds of War. Never initiate with Charm; instead, hold it defensively to interrupt his Justice Punch if he charges at you. Only commit your Spirit Rush to chase once he has completely wasted his Shield of Durand, leaving him vulnerable to magic damage.

Ficha completa →
Taliyah

Taliyah

zone_controlmobility_counter This matchup is dictated by how Taliyah's Unraveled Earth directly neutralizes your ultimate mobility. When you activate Spirit Rush, crossing her field of scattered rocks triggers immediate explosions that stun and heavily damage you. This interaction completely strips away your safety net, turning your primary tool for aggressive outplays into a self-inflicted trap while she safely pokes you down from distance with Threaded Volley. Ver detalhes
Taliyah

Por quê

This matchup is dictated by how Taliyah's Unraveled Earth directly neutralizes your ultimate mobility. When you activate Spirit Rush, crossing her field of scattered rocks triggers immediate explosions that stun and heavily damage you. This interaction completely strips away your safety net, turning your primary tool for aggressive outplays into a self-inflicted trap while she safely pokes you down from distance with Threaded Volley.

Impacto na lane

Laning becomes a battle of attrition where you cannot easily contest the wave. Taliyah will constantly shove with Threaded Volley, forcing you to use Orb of Deception defensively for waveclear rather than poke. If you get caught by Seismic Shove near her mines, you lose half your health bar. This pressure keeps you pinned, allowing her to easily roam to side lanes using Weaver's Wall.

Como jogar

To survive, you must discipline your dashes. Never cast Spirit Rush while Unraveled Earth is active on the ground; instead, walk parallel to her zone and wait out its four-second duration. Use Orb of Deception purely to match her push from a safe angle, away from walls where her Rock Surfing gives her an edge. If she misses Seismic Shove, you have a brief window to step up and fish for a Charm.

Ficha completa →
Morgana

Morgana

spell_shieldwave_clear This matchup is dictated by how Black Shield completely negates your pick potential. Whenever you attempt to set up a burst combo with Charm, Morgana can reactively absorb the crowd control and the initial magic damage. Without the damage amplification from Charm, your Orb of Deception and Fox-Fire fail to threaten her health bar, while her passive Soul Siphon allows her to easily sustain through any minor poke you land. Ver detalhes
Morgana

Por quê

This matchup is dictated by how Black Shield completely negates your pick potential. Whenever you attempt to set up a burst combo with Charm, Morgana can reactively absorb the crowd control and the initial magic damage. Without the damage amplification from Charm, your Orb of Deception and Fox-Fire fail to threaten her health bar, while her passive Soul Siphon allows her to easily sustain through any minor poke you land.

Impacto na lane

Laning becomes a tedious war of attrition. Morgana will constantly shove the wave using Tormented Shadow, forcing you to use Orb of Deception defensively for waveclear rather than poke. If you get caught by Dark Binding while trying to match her push, she will drop Tormented Shadow underneath you for massive damage. This limits your roam timers, keeping you locked in mid-lane and unable to utilize Spirit Rush to map-play.

Como jogar

To survive, you must bait out Black Shield before committing. Use Fox-Fire to gain movement speed and position aggressively, threatening a fake engage. If she holds her shield, do not throw Charm; instead, focus on farming with Orb of Deception. When she misses Dark Binding, you have a short window to pressure her. If she catches you with Soul Shackles, immediately use Spirit Rush to dash out of its tether range before the stun triggers.

Ficha completa →
Syndra

Syndra

spacingburst Syndra dictates the pace of this matchup because her defensive tools completely shut down your aggressive options. Whenever you attempt to close the gap with Spirit Rush, she can reactively use Scatter the Weak to knock you out of your dash. This interruption completely ruins your momentum, preventing you from getting into the optimal angle to land Charm, leaving you vulnerable to a massive burst of Dark Sphere and Unleashed Power. Ver detalhes
Syndra

Por quê

Syndra dictates the pace of this matchup because her defensive tools completely shut down your aggressive options. Whenever you attempt to close the gap with Spirit Rush, she can reactively use Scatter the Weak to knock you out of your dash. This interruption completely ruins your momentum, preventing you from getting into the optimal angle to land Charm, leaving you vulnerable to a massive burst of Dark Sphere and Unleashed Power.

Impacto na lane

This interaction forces you onto the defensive, limiting your ability to contest waves. Since you cannot reliably threaten an all-in, Syndra can freely poke you with Dark Sphere while shoving the lane with Force of Will. If you get chipped down, you will be forced into awkward recall timings under your own tower, giving her free reign to stack Transcendent shards and secure early mid priority.

Como jogar

To survive, never dash directly at Syndra. Position diagonally relative to her Dark Sphere placements to avoid quick stuns. Always hold your Spirit Rush until she wastes Scatter the Weak to push a wave or harass. If she discipline-holds her knockback, do not force the fight; instead, use Orb of Deception to clear waves from maximum range, then use your mobility to assist your jungler rather than trying to force a solo kill in mid.

Ficha completa →
Kassadin

Kassadin

anti_magescaling Your magic poke with Orb of Deception and Fox-Fire is constantly absorbed by the magic shield Kassadin gains from casting Null Sphere. While Essence Theft offers you some lane sustain, it cannot match his passive scaling. Once he unlocks Riftwalk, his zero-cooldown blinks completely outclass the mobility of your Spirit Rush, turning what was once a safe distance into a lethal zone where he easily dodges Charm. Ver detalhes
Kassadin

Por quê

Your magic poke with Orb of Deception and Fox-Fire is constantly absorbed by the magic shield Kassadin gains from casting Null Sphere. While Essence Theft offers you some lane sustain, it cannot match his passive scaling. Once he unlocks Riftwalk, his zero-cooldown blinks completely outclass the mobility of your Spirit Rush, turning what was once a safe distance into a lethal zone where he easily dodges Charm.

Impacto na lane

Because Null Sphere shrugs off your trades, you cannot easily force Kassadin out of lane. You must focus on shoving him under tower with Orb of Deception to exploit his weak early waveclear before he gets Force Pulse charges. If you fail to lock the wave, he scales for free. Eventually, his Riftwalk roam pressure forces you to stay glued to your mid turret, losing all priority for river skirmishes.

Como jogar

Never throw Charm when Kassadin has Riftwalk ready, as he will easily blink over it to burst you. Instead, slow-push the early waves and hold Orb of Deception to punish him only when his Null Sphere is on cooldown. If he freezes the wave near his tower, stop trying to trade; use Fox-Fire to quickly crash the minions and look to roam with your jungler before he reaches his scaling spikes.

Ficha completa →
Fizz

Fizz

assassindodge Fizz holds a massive advantage because his Playful completely negates your primary defensive tool, Charm. If you attempt to initiate or peel yourself, a skilled Fizz will reactively jump onto his trident, dodging the projectile entirely. Once Charm is on cooldown, you are left defenseless, allowing him to land directly on you and initiate a lethal trade with Urchin Strike and Rending Wave. Ver detalhes
Fizz

Por quê

Fizz holds a massive advantage because his Playful completely negates your primary defensive tool, Charm. If you attempt to initiate or peel yourself, a skilled Fizz will reactively jump onto his trident, dodging the projectile entirely. Once Charm is on cooldown, you are left defenseless, allowing him to land directly on you and initiate a lethal trade with Urchin Strike and Rending Wave.

Impacto na lane

This interaction forces you into a highly passive laning phase where you cannot safely step up to poke. Throwing Orb of Deception carelessly leaves you vulnerable to a sudden engage. Because you must respect his burst, you will often find yourself pushed under turret, sacrificing priority and allowing Fizz to freely look for roams once he unlocks Chum the Waters to threaten the side lanes.

Como jogar

Your survival depends entirely on holding Charm as a deterrent; never throw it first. Use Orb of Deception strictly for safe, maximum-range waveclear. If Fizz targets you with Urchin Strike, do not panic-cast your crowd control; wait until he commits his Playful and lands before retaliating. If he initiates with Chum the Waters, immediately use Spirit Rush to dash diagonally, breaking his line of sight and avoiding the explosive knock-up.

Ficha completa →
Vladimir

Vladimir

sustainscaling Vladimir completely nullifies your kill pressure because any attempt to lock him down with Charm is met with Sanguine Pool, making him untargetable and wasting your crowd control. Even if you land Orb of Deception or Fox-Fire for trade damage, his Transfusion allows him to constantly drain your health and replenish his own, winning the battle of attrition. Ver detalhes
Vladimir

Por quê

Vladimir completely nullifies your kill pressure because any attempt to lock him down with Charm is met with Sanguine Pool, making him untargetable and wasting your crowd control. Even if you land Orb of Deception or Fox-Fire for trade damage, his Transfusion allows him to constantly drain your health and replenish his own, winning the battle of attrition.

Impacto na lane

Since you cannot easily burst him, the lane devolves into a grueling test of wave management. If you blindly push with Orb of Deception, you feed his safe farming under tower. Meanwhile, taking short trades against his empowered Transfusion slowly chips away at your health, forcing bad recall timings and leaving your tower vulnerable while he scales into a massive threat.

Como jogar

To survive this matchup, you must hold Charm as a defensive deterrent rather than using it to initiate. Force him to use Sanguine Pool by threatening him with Orb of Deception and Fox-Fire first. Keep the minion wave close to your side of the lane to deny him easy Transfusion targets. If he overextends without his pool, use Spirit Rush to quickly reposition and burst him down.

Ficha completa →
Annie

Annie

burstcc_tracking Annie completely neutralizes your offensive pressure by holding her Pyromania passive. The moment you attempt to dash forward with Spirit Rush, she can instantly lock you down with a point-and-click Disintegrate or a wide Incinerate stun. This immediate crowd control leaves you entirely vulnerable to her devastating Summon: Tibbers burst, turning any proactive engage attempt into a lethal trap where your mobility is rendered useless. Ver detalhes
Annie

Por quê

Annie completely neutralizes your offensive pressure by holding her Pyromania passive. The moment you attempt to dash forward with Spirit Rush, she can instantly lock you down with a point-and-click Disintegrate or a wide Incinerate stun. This immediate crowd control leaves you entirely vulnerable to her devastating Summon: Tibbers burst, turning any proactive engage attempt into a lethal trap where your mobility is rendered useless.

Impacto na lane

This threat forces you into a defensive posture where aggressive Charm plays are too risky. You cannot safely contest the wave up close, meaning Annie can control the tempo with Incinerate while using Molten Shield to absorb your Orb of Deception poke. If you get chunked by a stunned trade, you will be forced into a bad recall, losing plates and letting her roam first with her bear.

Como jogar

Keep your eyes glued to her status bar to track Pyromania stacks. Only initiate with Spirit Rush when she has zero or one stack, or immediately after she wastes her stun to last-hit a minion with Disintegrate. When she sits on a fully charged stun, farm safely from maximum range using Orb of Deception. If she aggressively moves forward with Molten Shield active, immediately retreat using the burst of speed from Fox-Fire to stay outside her flash-stun radius.

Ficha completa →

Outros matchups

Skill Matchups

11

Esses confrontos são, acima de tudo, duelos de execução: os dois campeões têm formas reais de levar vantagem. Uma habilidade importante esquivada, um engajamento bem antecipado ou um erro de posicionamento podem ser suficientes para decidir o duelo. Conhecer o matchup e reconhecer as janelas de ação certas faz toda a diferença.

Aurora

Aurora

skirmishoutplay This matchup is a high-speed duel where Ahri's Spirit Rush directly matches Aurora's slippery evasiveness. Neither can easily pin the other down because both rely on quick repositioning to land skillshots. While Aurora tries to trigger Spirit Abjuration using Twofold Hex and her stealth from Across the Veil, Ahri relies on Orb of Deception to trade back. The lane remains perfectly even, decided entirely by who misuses their movement tools first. Ver detalhes
Aurora

Por quê

This matchup is a high-speed duel where Ahri's Spirit Rush directly matches Aurora's slippery evasiveness. Neither can easily pin the other down because both rely on quick repositioning to land skillshots. While Aurora tries to trigger Spirit Abjuration using Twofold Hex and her stealth from Across the Veil, Ahri relies on Orb of Deception to trade back. The lane remains perfectly even, decided entirely by who misuses their movement tools first.

Impacto na lane

Trades are short and incredibly fast-paced, meaning both midlaners constantly struggle to secure clean wave priority. Aurora uses The Weirding to shove and back away, while Ahri uses Orb of Deception to match the clear. If Aurora triggers her passive healing, Ahri must rely on Essence Theft to sustain. Health pools fluctuate rapidly, meaning a single mistimed trade forces an early recall, leaving the remaining midlaner free to pressure the tower.

Como jogar

Never throw Charm proactively when Aurora has Across the Veil available. Instead, clear waves with Orb of Deception and Fox-Fire, keeping your distance to avoid Twofold Hex. When Aurora jumps forward using her stealth, track her trajectory and launch Charm exactly where she exits Across the Veil. If she traps you with Between Worlds, use Spirit Rush to dash safely within the zone's boundaries, dodging her return damage until the arena fades.

Ficha completa →
Yone

Yone

skirmishcc_timing This matchup is a high-stakes spacing duel governed entirely by the timer on Yone's Soul Unbound. While Yone uses Mortal Steel and his spirit form to close the gap and bypass your ranged advantage, his return point remains fixed. The entire lane revolves around this tether: the moment he snaps back to his original body, he is completely predictable, allowing you to buffer a guaranteed Charm onto his physical anchor. Ver detalhes
Yone

Por quê

This matchup is a high-stakes spacing duel governed entirely by the timer on Yone's Soul Unbound. While Yone uses Mortal Steel and his spirit form to close the gap and bypass your ranged advantage, his return point remains fixed. The entire lane revolves around this tether: the moment he snaps back to his original body, he is completely predictable, allowing you to buffer a guaranteed Charm onto his physical anchor.

Impacto na lane

Every trade is dictated by the status of Yone's Mortal Steel. When he accumulates two stacks, you must yield wave priority and space backward to avoid the knock-up. If he wastes this tornado or misses his Soul Unbound engage, you immediately seize control, using Orb of Deception and Fox-Fire to shove him under tower or chunk his health bar before his defensive Spirit Cleave shield can absorb the damage.

Como jogar

Never throw Charm mindlessly during neutral play; hold it specifically for his Soul Unbound activation. When Yone initiates with his spirit form, track the physical clone left behind. Position yourself to have a clear line of sight to that clone. As the indicator circle on his tether shrinks, fire Charm directly at his original body. If he attempts to dive you with Fate Sealed, use Spirit Rush to dodge laterally, then retaliate instantly.

Ficha completa →
Zed

Zed

assassinreaction_time This lane behaves as a pure skill duel centered on the timing of Zed's ultimate and Ahri's main crowd control. When Zed casts Death Mark, he always appears directly behind Ahri. This predictable spawn allows Ahri to buffer Charm behind her back, immediately interrupting Zed's burst setup and turning his aggressive dive into a lethal mistake, while Zed must bait this key cooldown first. Ver detalhes
Zed

Por quê

This lane behaves as a pure skill duel centered on the timing of Zed's ultimate and Ahri's main crowd control. When Zed casts Death Mark, he always appears directly behind Ahri. This predictable spawn allows Ahri to buffer Charm behind her back, immediately interrupting Zed's burst setup and turning his aggressive dive into a lethal mistake, while Zed must bait this key cooldown first.

Impacto na lane

Before level five, you must abuse your ranged advantage with Orb of Deception to punish Zed whenever he uses Living Shadow to farm. If Zed wastes his shadow clone, he loses his escape tool, allowing you to play aggressively. However, if he manages to chunk your health, his Contempt for the Weak makes you an easy target under tower, forcing bad recalls that cost you mid lane priority.

Como jogar

Never throw Charm recklessly while Zed has Living Shadow available, as he can easily teleport to dodge it. Instead, poke with Orb of Deception and Fox-Fire. When he commits with Death Mark, wait for the exact moment he reappears behind you to cast Charm backward. If you miss, immediately use Spirit Rush to dash away, dodging his Razor Shuriken and Shadow Slash to survive his mark's explosion.

Ficha completa →
Akali

Akali

skirmishshroud_play This even matchup revolves entirely around how you handle Akali's stealth. While Twilight Shroud usually keeps her safe from direct targeting, her brief windows of visibility when striking with Five Point Strike allow your Fox-Fire to instantly lock onto her. This automatic targeting bypasses her shroud defenses, converting what should be her safe zone into a trade opportunity, provided you don't waste Charm while she is completely obscured. Ver detalhes
Akali

Por quê

This even matchup revolves entirely around how you handle Akali's stealth. While Twilight Shroud usually keeps her safe from direct targeting, her brief windows of visibility when striking with Five Point Strike allow your Fox-Fire to instantly lock onto her. This automatic targeting bypasses her shroud defenses, converting what should be her safe zone into a trade opportunity, provided you don't waste Charm while she is completely obscured.

Impacto na lane

Laning is a tense stalemate where wave control determines safety. Shoving with Orb of Deception keeps Akali under tower, limiting her Shuriken Flip angles. However, stepping up to harass invites a sudden Perfect Execution engagement. A single misstep during trades drastically shifts health bars, meaning recall timings are forced by who survives the burst rather than natural wave states, severely limiting early roaming potential for both.

Como jogar

Never throw Charm randomly into Twilight Shroud; instead, activate Fox-Fire and walk near the edge to let the flames auto-acquire her whenever she strikes. If she marks you with Shuriken Flip, do not panic. Hold your Charm and cast it directly along her incoming dash trajectory when she reactivates the flip. Should you miss this crucial crowd control, immediately use Spirit Rush defensively to disengage and survive her execution window.

Ficha completa →

Outros matchups

Favoráveis

13

Esses campeões geralmente têm dificuldade para responder às suas principais forças, o que te dá mais liberdade para abordar o confronto. Você costuma ter várias formas de pressioná-los e forçar trocas a seu favor. Aproveite essa vantagem para impor seu ritmo, em vez de dar tempo para eles se estabilizarem.

Katarina

Katarina

skirmishcc_timing Ahri completely dictates this lane because her Charm hard-counters Katarina's entire win condition. Katarina relies on jumping in with Shunpo and channeling Death Lotus to wipe out teams, but a single well-aimed heart instantly stops her ultimate mid-cast. Without the massive damage from her channel, Katarina is left highly vulnerable, unable to trigger Voracity resets while your Orb of Deception and Fox-Fire clean up her remaining health. Ver detalhes
Katarina

Por quê

Ahri completely dictates this lane because her Charm hard-counters Katarina's entire win condition. Katarina relies on jumping in with Shunpo and channeling Death Lotus to wipe out teams, but a single well-aimed heart instantly stops her ultimate mid-cast. Without the massive damage from her channel, Katarina is left highly vulnerable, unable to trigger Voracity resets while your Orb of Deception and Fox-Fire clean up her remaining health.

Impacto na lane

This matchup dynamic forces Katarina to play incredibly passively, fearing your crowd control. You can safely shove waves using Orb of Deception to poke her down under tower while she struggles to farm with Bouncing Blade. Her roam potential is severely crippled because she cannot risk leaving her turret while you have the mobility of Spirit Rush to match her map rotations or dive her directly.

Como jogar

Your golden rule is to never throw Charm proactively unless Katarina has already used Shunpo to jump onto a dagger. Always hold onto this ability during skirmishes specifically to interrupt Death Lotus. If you miss your projectile, immediately activate Spirit Rush to dash out of her ultimate's radius, healing back up with Essence Theft stacks before re-engaging once her daggers disappear.

Ficha completa →
Lux

Lux

mobilitypunish This lane revolves entirely around Lux's ability to lock you down. While Lucent Singularity provides annoying poke, Lux lacks the mobility to escape your burst once her defensive tools are gone. The matchup swings heavily in your favor because Spirit Rush completely invalidates her skillshots. If she throws out Light Binding and misses, her entire safety net crumbles, leaving her defenseless against your full trade. Ver detalhes
Lux

Por quê

This lane revolves entirely around Lux's ability to lock you down. While Lucent Singularity provides annoying poke, Lux lacks the mobility to escape your burst once her defensive tools are gone. The matchup swings heavily in your favor because Spirit Rush completely invalidates her skillshots. If she throws out Light Binding and misses, her entire safety net crumbles, leaving her defenseless against your full trade.

Impacto na lane

Before level five, Lux will try to shove the wave with Lucent Singularity to force you under turret. However, Essence Theft keeps your health pool healthy enough to withstand this early pressure. Once you unlock Spirit Rush, the lane dynamic flips. Lux is forced to play incredibly passively, holding her Light Binding in fear, which grants you free reign over wave priority and allows easy rotations.

Como jogar

Bait out Lux's Light Binding by constantly moving diagonally just outside her range. The moment her snare goes on cooldown, immediately cast Spirit Rush forward to close the gap. Follow up with a guaranteed Charm and Orb of Deception, then ignite Fox-Fire to finish her off before she can recycle her Prismatic Barrier. If she plays too far back, use your mobility to clear and roam.

Ficha completa →
Mel

Mel

all_inroam_timing Mel's heavy reliance on highly telegraphed area-of-effect spells makes her incredibly vulnerable to Ahri's agility. Before level five, Mel can attempt to zone you, but the moment you unlock Spirit Rush, the dynamic completely flips. You can effortlessly dash out of her circular ground targets, bridging the gap instantly to land a clean, unblocked Charm, amplified by Fox-Fire and Orb of Deception for a lethal burst. Ver detalhes
Mel

Por quê

Mel's heavy reliance on highly telegraphed area-of-effect spells makes her incredibly vulnerable to Ahri's agility. Before level five, Mel can attempt to zone you, but the moment you unlock Spirit Rush, the dynamic completely flips. You can effortlessly dash out of her circular ground targets, bridging the gap instantly to land a clean, unblocked Charm, amplified by Fox-Fire and Orb of Deception for a lethal burst.

Impacto na lane

This matchup pressure forces Mel to play extremely defensively once your ultimate is up. While she wants to push with her area-of-effect spells, doing so locks her in place, allowing your Orb of Deception to clear waves while you fish for an engage. Mel cannot contest the mid-lane priority without risking a sudden Spirit Rush forward, giving you free reign to roam or secure deep vision.

Como jogar

During the early levels, use Orb of Deception to match her push and rely on Essence Theft to heal back any chip damage from her long-range poke. Once you reach level five, never initiate with Charm from distance. Instead, wait for Mel to start her telegraphed casting animation, immediately use Spirit Rush diagonally to bypass her minions, and release Charm point-blank. Keep your remaining dashes to chase her down or disengage if her jungler counter-ganks.

Ficha completa →
Veigar

Veigar

scaling_gaproaming Ahri dominates Veigar because his primary defensive tool, Event Horizon, is easily bypassed. While Veigar relies on landing this stun to setup Dark Matter or escape, Ahri's high mobility completely neutralizes it. By staying mobile and positioning correctly, she can wait out the cage or use Spirit Rush to dash around the perimeter, closing the gap instantly to burst him down before he can scale his Phenomenal Evil Power. Ver detalhes
Veigar

Por quê

Ahri dominates Veigar because his primary defensive tool, Event Horizon, is easily bypassed. While Veigar relies on landing this stun to setup Dark Matter or escape, Ahri's high mobility completely neutralizes it. By staying mobile and positioning correctly, she can wait out the cage or use Spirit Rush to dash around the perimeter, closing the gap instantly to burst him down before he can scale his Phenomenal Evil Power.

Impacto na lane

In lane, this dynamic forces Veigar to play incredibly defensively, conceding wave control. You can safely clear minions with Orb of Deception and harass him under tower. Since Veigar cannot safely step up without risking a Charm, you secure early priority. This allows you to secure quick recall timings and roam to side lanes, snowballing the map while Veigar is stuck farming Baleful Strike under his turret.

Como jogar

When trading, never dash directly into Event Horizon. Instead, bait Veigar into casting his cage by walking forward, then walk backward to stay outside its boundary. Once the walls appear, use Spirit Rush laterally to flank the cage and instantly follow up with Charm and Fox-Fire. If he plays too safely, use Orb of Deception to shove the wave hard and immediately roam to assist your jungler, leaving Veigar to choose between following you or stacking his passive.

Ficha completa →
Talon

Talon

roamingharass Ahri dominates this matchup because her Charm completely shuts down Talon's primary engagement tool. Whenever Talon attempts to close the gap using Noxian Diplomacy, a well-timed heart stops his leap mid-air, leaving him vulnerable and unable to apply his Blade's End stacks. By neutralizing his main gap-closer, you prevent him from executing his burst combo and safely disengage or turn the trade in your favor. Ver detalhes
Talon

Por quê

Ahri dominates this matchup because her Charm completely shuts down Talon's primary engagement tool. Whenever Talon attempts to close the gap using Noxian Diplomacy, a well-timed heart stops his leap mid-air, leaving him vulnerable and unable to apply his Blade's End stacks. By neutralizing his main gap-closer, you prevent him from executing his burst combo and safely disengage or turn the trade in your favor.

Impacto na lane

This interaction forces Talon to play defensively, allowing you to use Orb of Deception to constantly push the waves under his tower. Because he cannot safely dash onto you, he loses the priority needed to utilize Assassin's Path for early map rotations. You dictate the pace of the lane, forcing him to choose between losing gold to his turret or taking heavy damage from your Fox-Fire while attempting to clear.

Como jogar

Always hold onto Charm when Talon steps forward; never cast it aggressively unless his Noxian Diplomacy is on cooldown. Stand near the center of the lane to easily clear with Orb of Deception, then immediately look at the side lanes. If Talon manages to slip away using Assassin's Path over a wall, do not blindly follow his path. Instead, use Spirit Rush to quickly cross the river safely and counter-gank him before his Shadow Assault can surprise your allies.

Ficha completa →
Twisted Fate

Twisted Fate

roamingall_in Twisted Fate relies entirely on Pick a Card to keep you at bay. The moment he locks in a blue or red card to restore mana or clear minions, he is defenseless. Using Spirit Rush, you can instantly close the distance, bypass his Wild Cards, and land an easy Charm. Without his gold card active, his lack of mobility makes him a perfect target for your burst. Ver detalhes
Twisted Fate

Por quê

Twisted Fate relies entirely on Pick a Card to keep you at bay. The moment he locks in a blue or red card to restore mana or clear minions, he is defenseless. Using Spirit Rush, you can instantly close the distance, bypass his Wild Cards, and land an easy Charm. Without his gold card active, his lack of mobility makes him a perfect target for your burst.

Impacto na lane

This dynamic forces Twisted Fate to play extremely defensively, conceding wave control to avoid your lethal range. You can easily out-shove him using Orb of Deception, forcing him under his turret. This pressure prevents him from freely utilizing Destiny to impact side lanes, as leaving his turret means losing plates or dying. You dictate the recall timings and can safely rotate first to secure map priority.

Como jogar

To execute this, watch Twisted Fate's overhead cards constantly. The second he locks a non-yellow card, trigger Spirit Rush forward. Do not throw Charm immediately; use Fox-Fire and your movement speed to bait his flash before securing the crowd control. If he plays excessively safe under turret, use Orb of Deception to crash the wave, then fake a roam toward the side lanes to force him into a panic Destiny, capitalizing on his mistakes.

Ficha completa →

Outros matchups

Items to Counter Ahri

Buy these items to reduce this champion's effectiveness in your games.

Mercury's Treads
Mercury's Treads
Maw of Malmortius
Maw of Malmortius
Stasis Enchant
Stasis Enchant
Null-Magic Mantle (into MR items)

Como counterar este campeão

Ângulo de counter

A Ahri não é neutralizada por meio de estatísticas puras, mas sim por meio de perfis que quebram sua lógica de escolha. Todo o seu kit gira em torno de uma sequência clara: acertar o E, causar dano explosivo e sair com o R. Campeões que atrapalham isso — seja se esquivando, iniciando o combate mais rápido ou sobrevivendo ao dano explosivo dela — tornam-se problemas estruturais. Entender quem a neutraliza significa entender quem a impede de atuar nas lutas.

Contexto do patch

Nesta atualização, os adversários da Ahri ganham força com o aumento da mobilidade e das ferramentas defensivas. Assassinos que a atacam antes do nível 5 ou que conseguem se esquivar do Charm reduzem significativamente o impacto dela. Campeões que absorvem seu dano explosivo ou a forçam a usar a R defensivamente também a limitam. O problema não é apenas morrer — é não conseguir executar seu plano de jogo.

Leitura rápida

  • Os assassinos ágeis a atacam logo no início e se esquivam do E.
  • Os tanques e o empilhamento de MR reduzem o dano explosivo dela.
  • Campeões com engate rápido quebram o ritmo dela.

Arquétipos de counter

Assassinos móveis

Esses campeões exploram diretamente a dependência da Ahri em relação ao Charm. Sua mobilidade permite que eles desviem do E ou a punam imediatamente caso ela erre o golpe. No início da partida, eles podem forçar confrontos decisivos antes que ela tenha o R, tirando-lhe a segurança. Mesmo no jogo do mid, eles criam trocas rápidas nas quais o Ahri não consegue executar seu combo completo. Como resultado, ela perde seu papel de criadora de jogadas.

Como o campeão deve se adaptar. Jogue na defensiva no início, mantenha a tecla E pressionada para se preparar para o ataque deles e priorize a visão para evitar ângulos de ataque total.

Ameaças de rajadas instantâneas

Esses campeões apostam em rajadas de dano instantâneas, em vez de combates prolongados. Eles iniciam o combate mais rápido do que Ahri consegue reagir ou punir o posicionamento dela antes que ela use R. Isso limita a capacidade dela de participar de combates prolongados e se reposicionar. Se ela usar R defensivamente, perde toda a pressão ofensiva.

Como o campeão deve se adaptar. Respeite os tempos máximos deles e nunca se exponha sem ter visão ou R disponível.

Escaladores anti-explosão

Com o passar do tempo, esses campeões ficam difíceis de matar. O Kassadin consegue se esquivar facilmente das tentativas de pick, enquanto o Orianna controla o espaço e castiga a agressividade excessiva. Nesses confrontos, o Ahri perde gradualmente a pressão de matar e precisa se concentrar na utilidade. Sem uma vantagem inicial, ele passa a depender da equipe.

Como o campeão deve se adaptar. Impulsione o ritmo do jogo logo no início, com movimentos de exploração e emboscadas, antes que os inimigos ganhem poder.

Matchups prioritários

Fizz

Fizz é um dos confrontos mais difíceis, pois ele ignora completamente o padrão de jogo de Ahri. Seu E desvia do Charm, e seu all-in pode acontecer antes que ela reaja. O segredo nesse confronto é a paciência: forçar jogadas leva à derrota, mas punir os erros mantém a jogadora na disputa.

Erros comuns contra ele

Erros comuns contra ele

  • É possível negociar sem o E.
  • Subestimar os all-ins nas primeiras mãos.
  • Usando o R de forma ofensiva, sem possibilidade de fuga.
  • Ignorar as janelas de tempo do inimigo.
  • Jogar de forma muito frontal contra campeões que usam muito o dash.

Notas do coach

  • Seu objetivo não é dominar a rota, mas sim sobreviver e criar oportunidades de abate em outras áreas.
  • Nunca jogue uma rota difícil como se fosse uma neutra.

FAQ

Será que a Ahri consegue vencer seus adversários?

Sim, mas raramente na rota direta. Ela vence ao sair do confronto por meio de roams e picks. Contra adversários que a neutralizam, seu objetivo é minimizar as perdas e aguardar oportunidades, em vez de forçar duelos.

Qual é o pior campeão contra o Ahri?

Os campeões que combinam mobilidade e rajadas rápidas são os mais problemáticos. Eles se esquivam do “Charm” e contra-atacam instantaneamente, atrapalhando a jogabilidade dela, que depende do timing.

Devo jogar de forma agressiva contra os adversários que me neutralizam?

Não, a menos que você tenha informações claras. Forçar jogadas para criar contra-ataques costuma ser um erro. É melhor seguir o ritmo geral da partida e causar impacto em outros aspectos.

Como sobreviver contra assassinos?

Mantenha a tecla E pressionada para o ataque deles, jogue com mais cautela na rota e use a visão para bloquear os ângulos. Seu objetivo é atrasar o efeito bola de neve deles, não matá-los.
















































