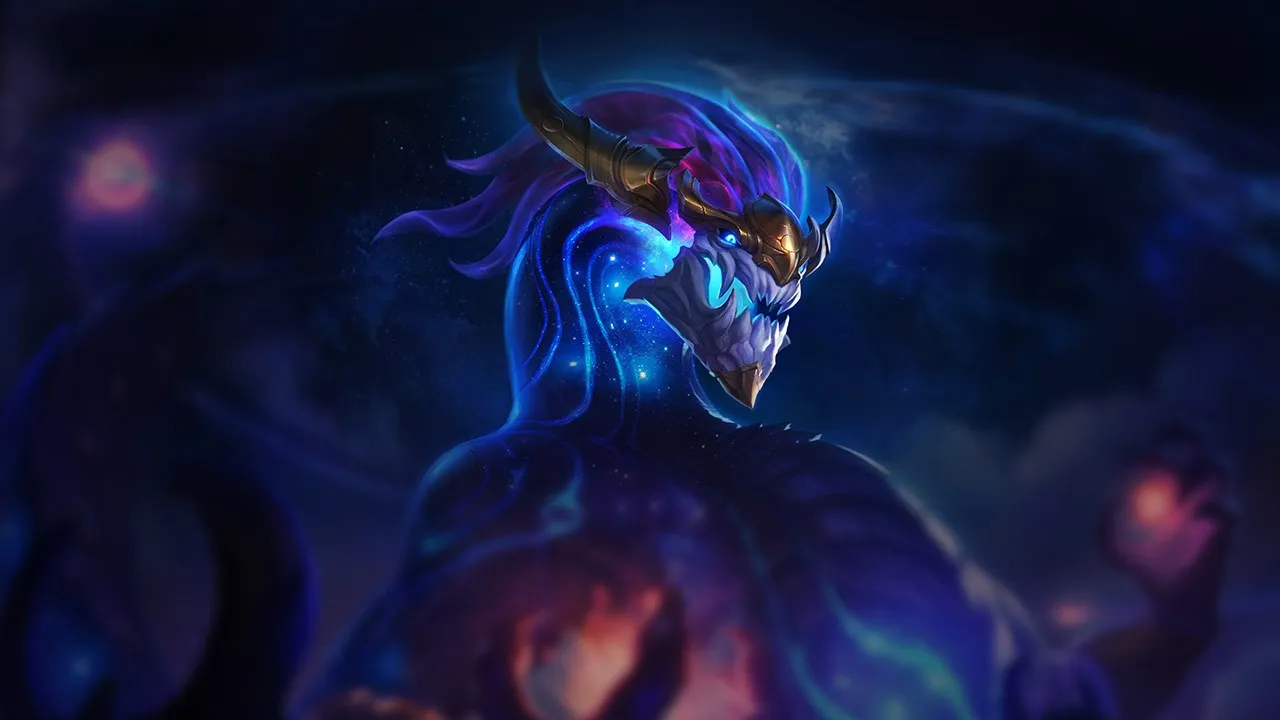
Aurelion Sol sofre contra campeões que conseguem interromper seu roaming e impedir seu acúmulo de stack. Assassins móveis e composições de dive o ameaçam antes que ele atinja seu pico de poder. Seu early game frágil é sua principal janela de vulnerabilidade.
★ MIDTier S
DANO
UTIL
TANK
DIFF
Win51.6%#29 · ↓4pt
Pick6.4%#9
Ban2.3%#49
Guia de counters de Aurelion Sol Wild Rift
Hard Counters
12
Esses campeões têm uma build e um estilo de jogo que superam diretamente o seu, o que pode tornar o controle da lane e o farm extremamente difíceis. As habilidades deles podem neutralizar seus principais pontos fortes ou te punir assim que você tenta jogar do seu jeito de sempre. Nesses matchups, o objetivo costuma ser reduzir os erros e buscar soluções fora do confronto direto.
InterrupçãoMobilidadeKassadin neutraliza completamente sua principal fonte de dano. Sempre que você tenta canalizar Breath of Light, ele pode lançar imediatamente Null Sphere. O silence interrompe instantaneamente sua respiração, deixando você completamente vulnerável sem dano de backup. Além disso, o escudo mágico de Void Stone dele absorve seu poke, e quando ele consegue Riftwalk, ele pode facilmente encurtar a distância para te estourar enquanto você está em silence.Build de Kassadin →Ver detalhes
Kassadin
Por quê
Kassadin neutraliza completamente sua principal fonte de dano. Sempre que você tenta canalizar Breath of Light, ele pode lançar imediatamente Null Sphere. O silence interrompe instantaneamente sua respiração, deixando você completamente vulnerável sem dano de backup. Além disso, o escudo mágico de Void Stone dele absorve seu poke, e quando ele consegue Riftwalk, ele pode facilmente encurtar a distância para te estourar enquanto você está em silence.
Impacto na lane
Você não consegue dar trade de volta de forma eficaz, o que te força a jogar uma fase de lane puramente defensiva. Tentar congelar a wave ou contestá-la com Breath of Light resulta em ficar em silence e ser bastante desgastado pelo combo de Nether Blade e Force Pulse dele. Essa perda de prioridade significa que você vai ficar preso sob a torre, perdendo gold, enquanto Kassadin ganha janelas livres de roam para impactar o mapa com sua alta mobilidade.
Como jogar
Seu objetivo é sobreviver e farmar Stardust com segurança. Solte Singularity de uma distância segura para limpar os minions sem entrar no alcance de Null Sphere. Nunca use Astral Flight de forma agressiva; guarde-a apenas como ferramenta de fuga para quando ele iniciar com Riftwalk. Se ele congelar a wave perto da torre dele, não avance para quebrá-la; em vez disso, espere a wave estourar ou combine com seu jungler para resetá-la.
MobilidadeControle de grupoIrelia representa um pesadelo absoluto para Aurelion Sol por causa de como sua principal ferramenta de dano funciona. Quando você fica parado para canalizar Breath of Light, você se torna um alvo estático. Isso torna trivial para Irelia acertar Flawless Duet e te stunar. Uma vez stunado, sua canalização é interrompida, e ela pode fechar a distância instantaneamente e te executar com resets implacáveis de Bladesurge.Build de Irelia →Ver detalhes
Irelia
Por quê
Irelia representa um pesadelo absoluto para Aurelion Sol por causa de como sua principal ferramenta de dano funciona. Quando você fica parado para canalizar Breath of Light, você se torna um alvo estático. Isso torna trivial para Irelia acertar Flawless Duet e te stunar. Uma vez stunado, sua canalização é interrompida, e ela pode fechar a distância instantaneamente e te executar com resets implacáveis de Bladesurge.
Impacto na lane
Essa ameaça te força a jogar de forma completamente passiva, cedendo a prioridade de lane desde a primeira wave. Você não consegue coletar stacks de Cosmic Creator com segurança usando Breath of Light nos minions, porque Irelia vai saltar em alvos marcados com Bladesurge. Toda tentativa de limpar a wave com Singularity vai empurrá-la, te expondo ao engajamento de Vanguard's Edge dela longe da sua torre.
Como jogar
Para sobreviver, você precisa estabelecer uma regra estrita de posicionamento: nunca use Breath of Light a menos que Irelia já tenha gastado Flawless Duet. Mantenha a wave de minions permanentemente congelada bem na borda do alcance da sua torre para evitar as correntes de dash de Bladesurge dela. Se ela te divar com Vanguard's Edge, use imediatamente Astral Flight para voar para trás, em direção à sua segunda torre, em vez de tentar reagir com Falling Star, que ela pode reduzir facilmente com Defiant Dance.
Pressão no inícioPressão no mapaA lane está fortemente inclinada a favor de Akshan por causa de como Breath of Light te mantém imóvel. Enquanto você fica parado para canalizar seu fogo estelar, Akshan pode facilmente ancorar Heroic Swing em uma parede próxima para circular em volta de você, soltando um burst devastador de dano físico enquanto ignora seus minions. Sua falta de mobilidade no início significa que você não consegue escapar dos trades de shield de Dirty Fighting dele, transformando sua principal ferramenta de trade em uma armadilha autoinfligida.Build de Akshan →Ver detalhes
Akshan
Por quê
A lane está fortemente inclinada a favor de Akshan por causa de como Breath of Light te mantém imóvel. Enquanto você fica parado para canalizar seu fogo estelar, Akshan pode facilmente ancorar Heroic Swing em uma parede próxima para circular em volta de você, soltando um burst devastador de dano físico enquanto ignora seus minions. Sua falta de mobilidade no início significa que você não consegue escapar dos trades de shield de Dirty Fighting dele, transformando sua principal ferramenta de trade em uma armadilha autoinfligida.
Impacto na lane
Akshan vai empurrar agressivamente as primeiras waves com Avengerang para garantir uma vantagem de nível no início. Se você tentar reduzir a wave com Singularity, ele vai capitalizar imediatamente sobre seu posicionamento, usando Heroic Swing para divar além do alcance da sua torre ou forçar um Astral Flight prematuro. Essa pressão constante te nega stacks de Cosmic Creator, te força a recuos mal cronometrados e permite que Akshan faça roam livremente com Going Rogue enquanto você fica preso sob a torre.
Como jogar
Para sobreviver a essa pressão, você precisa jogar na defensiva perto da sua torre e abandonar completamente a ideia de usar Breath of Light em Akshan a menos que o Heroic Swing dele esteja em cooldown. Posicione Singularity diretamente nos seus minions caster para garantir farm a uma distância segura. Se ele tentar te divar sob a torre, prepare Falling Star para interromper o swing dele no meio do ar. Priorize segurança em vez de gold no início; seu scaling com Cosmic Creator eventualmente vai superar o potencial de assassinato single-target dele quando chegarem as teamfights.
AssassinoEsquivaEssa lane é dominada pela facilidade com que Zed consegue neutralizar seu self-peel. Quando você tenta soltar Falling Star para deter o avanço dele, ele pode usar imediatamente Death Mark para esquivar completamente do impacto. Ao reaparecer diretamente atrás de você, ele torna seu Breath of Light canalizado e direcional completamente inútil, deixando você exposto a uma combinação devastadora à queima-roupa de Shadow Slash e Razor Shuriken potencializada por Contempt for the Weak.Build de Zed →Ver detalhes
Zed
Por quê
Essa lane é dominada pela facilidade com que Zed consegue neutralizar seu self-peel. Quando você tenta soltar Falling Star para deter o avanço dele, ele pode usar imediatamente Death Mark para esquivar completamente do impacto. Ao reaparecer diretamente atrás de você, ele torna seu Breath of Light canalizado e direcional completamente inútil, deixando você exposto a uma combinação devastadora à queima-roupa de Shadow Slash e Razor Shuriken potencializada por Contempt for the Weak.
Impacto na lane
Antes do nível cinco, você pode reunir stacks de Cosmic Creator com segurança a distância usando Singularity. Porém, quando Zed destrava Death Mark, a dinâmica de poder muda violentamente. Você é forçado a abandonar a prioridade de lane e limpar as waves de uma distância extrema. Avançar além do meio da lane convida um all-in que você não consegue sobreviver, e usar Astral Flight de forma agressiva se torna um convite para Zed te interceptar e executar facilmente.
Como jogar
Para sobreviver a esse matchup, nunca inicie trades com Falling Star. Você precisa guardar essa ferramenta defensiva até Zed usar a ultimate dele. Quando ele te marcar com Death Mark, prepare-se para apontar Falling Star diretamente atrás do seu próprio modelo no exato instante em que ele reaparecer. Se ele errar os shurikens, solte Singularity nos seus pés para dificultar o movimento dele e use imediatamente Astral Flight para recuar com segurança sob a proteção da sua torre.
InterrupçãoDano explosivoEsse matchup é inteiramente dominado pela facilidade com que Syndra consegue perturbar seus padrões de trade. Sua principal ferramenta de dano, Breath of Light, exige que você fique parado ou voe em uma linha previsível durante Astral Flight. Syndra consegue interromper facilmente essa canalização a uma distância segura lançando uma Dark Sphere com Scatter the Weak. Esse knockback e stun imediatos cancelam completamente seu DPS, deixando você imobilizado e exposto ao burst de follow-up dela.Build de Syndra →Ver detalhes
Syndra
Por quê
Esse matchup é inteiramente dominado pela facilidade com que Syndra consegue perturbar seus padrões de trade. Sua principal ferramenta de dano, Breath of Light, exige que você fique parado ou voe em uma linha previsível durante Astral Flight. Syndra consegue interromper facilmente essa canalização a uma distância segura lançando uma Dark Sphere com Scatter the Weak. Esse knockback e stun imediatos cancelam completamente seu DPS, deixando você imobilizado e exposto ao burst de follow-up dela.
Impacto na lane
Você não consegue contestar o estado da wave ou garantir prioridade com segurança. Toda vez que você tenta limpar os minions usando Singularity e Breath of Light, Syndra vai punir sua postura estática com Force of Will e Dark Sphere. Essa passividade forçada te empurra para sob a sua torre, perdendo placas de torre e te impedindo de ajudar seu jungler, enquanto permite que Syndra escale livremente e melhore suas habilidades através de Transcendent.
Como jogar
Para sobreviver, priorize farmar da distância máxima usando apenas Singularity para reunir stacks de Cosmic Creator. Nunca canalize Breath of Light a menos que Syndra tenha gastado recentemente Scatter the Weak; esse cooldown é sua única janela segura para limpar ativamente. Se ela guardar o stun, tenha paciência sob a torre e aceite perder um pouco de farm. Se ela te pegar com Unleashed Power, use imediatamente Astral Flight de forma defensiva em direção à sua torre, em vez de tentar reagir.
MobilidadeControle de grupoFicar parado enquanto canaliza Breath of Light te torna um alvo incrivelmente fácil para Yone. Ele consegue fechar a distância sem esforço, de uma posição segura, usando Soul Unbound. Uma vez em cima de você, ele vai interromper imediatamente sua respiração canalizada com o knock-up do terceiro golpe de Mortal Steel, neutralizando completamente sua principal fonte de dano enquanto mantém a própria ameaça alta.Build de Yone →Ver detalhes
Yone
Por quê
Ficar parado enquanto canaliza Breath of Light te torna um alvo incrivelmente fácil para Yone. Ele consegue fechar a distância sem esforço, de uma posição segura, usando Soul Unbound. Uma vez em cima de você, ele vai interromper imediatamente sua respiração canalizada com o knock-up do terceiro golpe de Mortal Steel, neutralizando completamente sua principal fonte de dano enquanto mantém a própria ameaça alta.
Impacto na lane
Essa dinâmica te força a uma postura altamente defensiva, em que você não consegue contestar a wave de minions com segurança. Toda vez que você tenta soltar Singularity para limpar, você corre o risco de entrar no alcance do dash dele. Ele vai te forçar facilmente para sob a sua torre, desgastando sua barra de vida ou fazendo você gastar o flash, o que acaba dando a ele liberdade total para fazer roam ou garantir prioridade no rio.
Como jogar
Para sobreviver, você precisa acompanhar as stacks de vento dele com atenção; nunca canalize seu dano quando a espada dele brilhar com a terceira carga de Mortal Steel. Guarde Astral Flight estritamente como ferramenta de fuga para voar embora no momento em que ele acionar Soul Unbound. Se ele te divar sob a torre, solte Singularity diretamente sobre o marcador do corpo original dele, para que ele leve dano pesado e fique lento quando o espírito for forçado a retornar.
Controle de áreaInterrupçãoO núcleo desse matchup está em como Taliyah neutraliza completamente sua mobilidade. No momento em que você ativa Astral Flight para se reposicionar ou escapar, qualquer sobreposição com o campo minado de Unraveled Earth dela ativa um stun instantâneo. Essa interação retira sua principal ferramenta defensiva e sua rede de segurança, deixando seu Breath of Light canalizado extremamente vulnerável a ser interrompido pelo combo de Seismic Shove dela.Build de Taliyah →Ver detalhes
Taliyah
Por quê
O núcleo desse matchup está em como Taliyah neutraliza completamente sua mobilidade. No momento em que você ativa Astral Flight para se reposicionar ou escapar, qualquer sobreposição com o campo minado de Unraveled Earth dela ativa um stun instantâneo. Essa interação retira sua principal ferramenta defensiva e sua rede de segurança, deixando seu Breath of Light canalizado extremamente vulnerável a ser interrompido pelo combo de Seismic Shove dela.
Impacto na lane
Como você não consegue voar com segurança, é forçado a limpar as waves de forma defensiva, a distância. Se você avançar para soltar Singularity na wave, Taliyah pode te zonear com Threaded Volley ou preparar um Seismic Shove mortal em direção às minas dela. Isso te nega stacks de Cosmic Creator no início, dando a ela liberdade total para usar Rock Surfing e Weaver's Wall e fazer roam enquanto você fica preso sob a sua torre.
Como jogar
Para sobreviver, trate Astral Flight puramente como uma ferramenta de recuo de reação tardia, e nunca a use de forma ofensiva ou paralela à posição dela. Mantenha-se sempre posicionado longe de terrenos para limitar os ângulos de aproximação de Rock Surfing dela. Posicione sua Singularity de forma defensiva para desacelerar o push dela à distância máxima. Se ela errar Seismic Shove, você tem uma breve janela para canalizar Breath of Light, mas precisa cancelar imediatamente se ela colocar Unraveled Earth.
InalvejávelMergulhoPlayful de Fizz anula completamente sua principal ferramenta defensiva e sua ultimate, Falling Star. Se você tentar stunar ou zonear ele quando ele te divar, ele simplesmente salta para o estado intangível, tornando seu impacto inútil. Depois que ele contorna sua ultimate e cai bem em cima de você, Urchin Strike e Rending Wave dele vão destruir rapidamente sua barra de vida antes mesmo que você consiga canalizar Breath of Light.Build de Fizz →Ver detalhes
Fizz
Por quê
Playful de Fizz anula completamente sua principal ferramenta defensiva e sua ultimate, Falling Star. Se você tentar stunar ou zonear ele quando ele te divar, ele simplesmente salta para o estado intangível, tornando seu impacto inútil. Depois que ele contorna sua ultimate e cai bem em cima de você, Urchin Strike e Rending Wave dele vão destruir rapidamente sua barra de vida antes mesmo que você consiga canalizar Breath of Light.
Impacto na lane
Essa interação transforma a fase de lane em um desafio passivo de sobrevivência. Você não consegue avançar para coletar stacks de Cosmic Creator na wave, porque Fizz vai te punir com Chum the Waters. Ele vai freezar os minions ou te divar sob a sua própria torre, forçando você a abrir mão de prioridade e gold no início. Essa pressão te impede de ajudar seu jungler, dando a Fizz liberdade total para fazer roam.
Como jogar
Para sobreviver, você nunca deve usar Falling Star ou Singularity de forma ofensiva; guarde-os até Fizz se comprometer com o Playful dele. Se ele iniciar com Urchin Strike, solte Singularity diretamente em cima de você mesmo e prepare Astral Flight para voar para trás imediatamente em direção à sua torre. Nunca tente dar trade de volta com Breath of Light enquanto o salto intangível dele estiver disponível. Se ele acertar Chum the Waters, voe para longe imediatamente antes que o tubarão apareça.
Esses campeões têm ferramentas que geralmente dão a eles vantagem no confronto, sem tornar o matchup impossível de jogar. Eles podem ter mais alcance, mais capacidade de aguentar sua ofensiva ou mais formas de responder aos seus engajamentos. Você vai precisar adaptar sua abordagem e escolher com cuidado os momentos em que aceita a luta.
Controle de grupoLimpeza de rotaGalio representa um obstáculo difícil porque o crowd control dele neutraliza diretamente sua principal ferramenta de trade e farm. Sempre que você tenta canalizar Breath of Light para garantir Stardust ou limpar os minions, Galio pode te interromper facilmente. Um Justice Punch rápido para frente ou um Shield of Durand carregado cancela instantaneamente sua canalização, deixando você vulnerável enquanto sua principal fonte de dano fica em cooldown.Build de Galio →Ver detalhes
Galio
Por quê
Galio representa um obstáculo difícil porque o crowd control dele neutraliza diretamente sua principal ferramenta de trade e farm. Sempre que você tenta canalizar Breath of Light para garantir Stardust ou limpar os minions, Galio pode te interromper facilmente. Um Justice Punch rápido para frente ou um Shield of Durand carregado cancela instantaneamente sua canalização, deixando você vulnerável enquanto sua principal fonte de dano fica em cooldown.
Impacto na lane
Como seu waveclear está constantemente ameaçado, Galio ganha prioridade com facilidade para empurrar com Winds of War. Se você for pego pelo crowd control dele enquanto tenta acompanhar o push, você vai perder vida e perder a corrida pelo roam. Isso permite que ele procure livremente jogadas de Hero's Entrance pelo mapa, forçando você a escolher constantemente entre garantir seus próprios stacks sob a torre ou tentar acompanhar as rotações dele.
Como jogar
Para sobreviver e escalar, você precisa jogar fora do alcance do Justice Punch dele. Use Singularity de uma distância segura para desacelerar a wave e juntar os minions, forçando-o a usar o dash só para te alcançar. Nunca comprometa seu Astral Flight de forma agressiva; em vez disso, reserve-o para escapar com segurança ou para se realocar rapidamente e acompanhar o roam dele quando ele se comprometer com Hero's Entrance em uma lane lateral.
PokePosicionamentoOrianna domina esse matchup porque a esfera dela permite que ela te zoneie a uma distância em que você não consegue canalizar com segurança. Quando você tenta acumular Stardust usando Breath of Light, precisa ficar parado, o que te torna um alvo fácil. Ela pode reposicionar a bola dela facilmente com Command: Attack e interromper imediatamente sua canalização a distância usando Command: Shockwave, neutralizando completamente sua principal fonte de dano enquanto se mantém totalmente fora do seu alcance.Build de Orianna →Ver detalhes
Orianna
Por quê
Orianna domina esse matchup porque a esfera dela permite que ela te zoneie a uma distância em que você não consegue canalizar com segurança. Quando você tenta acumular Stardust usando Breath of Light, precisa ficar parado, o que te torna um alvo fácil. Ela pode reposicionar a bola dela facilmente com Command: Attack e interromper imediatamente sua canalização a distância usando Command: Shockwave, neutralizando completamente sua principal fonte de dano enquanto se mantém totalmente fora do seu alcance.
Impacto na lane
Durante os primeiros níveis, Orianna dita o estado da wave posicionando a bola dela de forma agressiva. Se você tentar garantir os minions usando Singularity, ela vai te punir com Command: Attack e Command: Dissonance. Você é forçado a farmar sob a torre, perdendo vida sempre que tenta acompanhar o push dela. Esse harass constante atrasa seu scaling de Stardust e força recuos antecipados, dando a ela oportunidades livres para pressionar sua torre do meio.
Como jogar
Para sobreviver, você precisa ancorar seu posicionamento atrás dos seus minions caster, usando Singularity apenas para congelar ou desacelerar as waves que chegam, em vez de lutar. Nunca ative Breath of Light enquanto o Command: Shockwave dela estiver disponível, a menos que ela já tenha posicionado mal a bola. Se ela avançar para te zonear, use Astral Flight para trás imediatamente para escapar do raio do Command: Dissonance dela, aceitando que você precisa abrir mão de um pouco de farm para garantir seu scaling.
Controle de grupoO Rune Prison de alvo automático de Ryze é o counter definitivo para o seu Astral Flight. Enquanto você tenta se reposicionar ou escapar, o root instantâneo dele interrompe imediatamente seu voo no meio do ar, deixando você parado e vulnerável ao burst de Spell Flux e Overload dele. Como Ryze escala excepcionalmente bem com Arcane Mastery, deixá-lo perturbar sua principal ferramenta defensiva e de mobilidade torna difícil reunir Stardust com segurança usando Singularity.Build de Ryze →Ver detalhes
Ryze
Por quê
O Rune Prison de alvo automático de Ryze é o counter definitivo para o seu Astral Flight. Enquanto você tenta se reposicionar ou escapar, o root instantâneo dele interrompe imediatamente seu voo no meio do ar, deixando você parado e vulnerável ao burst de Spell Flux e Overload dele. Como Ryze escala excepcionalmente bem com Arcane Mastery, deixá-lo perturbar sua principal ferramenta defensiva e de mobilidade torna difícil reunir Stardust com segurança usando Singularity.
Impacto na lane
Essa interação limita severamente sua capacidade de dar trade ou limpar waves de forma agressiva. Você não consegue usar Astral Flight para voar sobre os minions e dar uma rajada rápida de Breath of Light sem correr o risco de ser derrubado imediatamente. Se Ryze congelar a wave ou usar Realm Warp para se reposicionar, você é forçado a jogar na defensiva perto da sua torre, atrasando o scaling da sua passiva e reduzindo sua pressão no mapa.
Como jogar
Nunca inicie trades com Astral Flight enquanto Rune Prison estiver disponível. Em vez disso, provoque-o a usar o root ficando bem na borda do alcance curto dele enquanto usa Singularity para farmar. Quando Rune Prison estiver em cooldown, você tem uma breve janela para canalizar Breath of Light com segurança. Se Ryze tentar rotacionar com Realm Warp, prepare-se para soltar Falling Star no destino do portal dele para stunar instantaneamente na chegada.
InterrupçãoA lane é dominada pela passiva de Annie, Pyromania. Como sua principal fonte de dano depende de canalizar Breath of Light, Annie pode neutralizar seu DPS instantaneamente. Qualquer uma das habilidades ofensivas dela, especialmente um Disintegrate direcionado ou um Incinerate instantâneo, vai consumir o stun dela para cancelar sua canalização imediatamente. Isso te deixa completamente vulnerável e incapaz de devolver dano no trade durante suas janelas mais vulneráveis, parado ou voando.Build de Annie →Ver detalhes
Annie
Por quê
A lane é dominada pela passiva de Annie, Pyromania. Como sua principal fonte de dano depende de canalizar Breath of Light, Annie pode neutralizar seu DPS instantaneamente. Qualquer uma das habilidades ofensivas dela, especialmente um Disintegrate direcionado ou um Incinerate instantâneo, vai consumir o stun dela para cancelar sua canalização imediatamente. Isso te deixa completamente vulnerável e incapaz de devolver dano no trade durante suas janelas mais vulneráveis, parado ou voando.
Impacto na lane
Você não consegue contestar a wave ou dar trade de vida diretamente com segurança. Tentar limpar os minions com Breath of Light permite que Annie avance e acione Pyromania, te forçando a recuar ou preparando um burst fácil de Summon: Tibbers. Essa ameaça constante te força a ficar sob a torre, atrasando seu acúmulo de Cosmic Creator. Consequentemente, você perde prioridade no início, dando a Annie janelas livres para se mover para o rio ou garantir bons timings de recall enquanto você luta para limpar a wave.
Como jogar
Para sobreviver, monitore constantemente o indicador da passiva de Annie. Nunca se engaje com Astral Flight enquanto Pyromania estiver totalmente carregada. Em vez disso, solte Singularity à distância máxima para farmar com segurança e acumular Cosmic Creator. No momento em que Annie gastar o stun dela — muitas vezes usando Disintegrate para garantir um last-hit — use imediatamente seu Breath of Light para empurrar forte os minions restantes. Quando a wave estourar, use Astral Flight para fazer roam e ajudar outras lanes antes que ela consiga recarregar o stun e te seguir.
Controle de grupoPressão no mapaLissandra domina essa lane porque neutraliza completamente sua principal ferramenta de fuga. Sempre que você tenta voar para longe ou se reposicionar usando Astral Flight, ela pode interromper seu momentum instantaneamente com o stun de alvo automático de Frozen Tomb ou te pegar no meio do voo com Ring of Frost. Como o crowd control dela é instantâneo, você nunca consegue canalizar Breath of Light com segurança ou voar de forma agressiva enquanto a ultimate dela estiver disponível.Build de Lissandra →Ver detalhes
Lissandra
Por quê
Lissandra domina essa lane porque neutraliza completamente sua principal ferramenta de fuga. Sempre que você tenta voar para longe ou se reposicionar usando Astral Flight, ela pode interromper seu momentum instantaneamente com o stun de alvo automático de Frozen Tomb ou te pegar no meio do voo com Ring of Frost. Como o crowd control dela é instantâneo, você nunca consegue canalizar Breath of Light com segurança ou voar de forma agressiva enquanto a ultimate dela estiver disponível.
Impacto na lane
Essa ameaça de lockdown te força a jogar na defensiva sob a sua torre, sacrificando o controle da wave no início. Lissandra destrói os minions facilmente com Ice Shard e pode te empurrar para dentro, usando Glacial Path para fazer roam enquanto você limpa lentamente. Se você tentar acompanhar o push dela, ela pode preparar facilmente um gank; ser pego fora de posição significa morte garantida se ela conectar Frozen Tomb com Ring of Frost antes que você consiga reagir.
Como jogar
Para sobreviver, você precisa jogar estritamente em torno das janelas de cooldown dela. Nunca use Astral Flight de forma proativa, a menos que tenha visto Lissandra gastar Glacial Path ou a ultimate dela, Frozen Tomb. Mantenha distância e foque em coletar Stardust de uma distância segura usando Singularity e rajadas rápidas de Breath of Light. Se ela se aproximar de forma agressiva com a garra, recue imediatamente em direção à sua torre em vez de tentar dar trade de volta, já que a sequência de crowd control dela sempre vai vencer os confrontos de curta distância.
Controle de áreaDano explosivoEsse matchup é dominado pela forma como o Event Horizon de Veigar anula completamente sua principal mobilidade. Se você tentar escapar ou se reposicionar usando Astral Flight, bater na borda da jaula dele te derruba imediatamente do ar e te stuna. Isso te deixa completamente vulnerável a um combo garantido de Dark Matter e Primordial Burst, transformando sua principal ferramenta defensiva em uma armadilha mortal.Build de Veigar →Ver detalhes
Veigar
Por quê
Esse matchup é dominado pela forma como o Event Horizon de Veigar anula completamente sua principal mobilidade. Se você tentar escapar ou se reposicionar usando Astral Flight, bater na borda da jaula dele te derruba imediatamente do ar e te stuna. Isso te deixa completamente vulnerável a um combo garantido de Dark Matter e Primordial Burst, transformando sua principal ferramenta defensiva em uma armadilha mortal.
Impacto na lane
Como Event Horizon ameaça interromper seu voo, você não consegue usar Astral Flight livremente para escapar de ganks ou dar trade de forma agressiva com Breath of Light. Veigar pode te zonear facilmente, impedindo seu farm com Singularity, posicionando a jaula dele em volta do seu poço de gravidade. Isso limita sua capacidade de acumular Cosmic Creator com segurança, forçando você a jogar sob a sua torre e cedendo a prioridade do meio durante os confrontos iniciais no rio.
Como jogar
Para sobreviver a essa lane, você precisa adotar uma regra estrita de posicionamento: nunca use Astral Flight enquanto Event Horizon estiver fora de cooldown. Em vez disso, foque em farmar à distância máxima usando Breath of Light e Singularity. Se Veigar se posicionar mal e errar a jaula, você tem uma breve janela para voar na diagonal e evitar o Baleful Strike linear dele enquanto reúne stacks de Cosmic Creator. Se ficar preso dentro da jaula, fique parado, evite as paredes e prepare-se para desviar manualmente de Dark Matter.
MobilidadeEsquivaAurora tem uma vantagem enorme nos confrontos porque seu principal controle de zona, Singularity, é neutralizado com facilidade. No momento em que você solta o buraco negro para zoneá-la ou coletar Stardust, ela pode ativar Across the Veil para ficar invisível, ganhar velocidade e se reposicionar completamente fora do puxão. Isso te deixa canalizando Breath of Light no vazio enquanto ela se reposiciona para retaliar.Build de Aurora →Ver detalhes
Aurora
Por quê
Aurora tem uma vantagem enorme nos confrontos porque seu principal controle de zona, Singularity, é neutralizado com facilidade. No momento em que você solta o buraco negro para zoneá-la ou coletar Stardust, ela pode ativar Across the Veil para ficar invisível, ganhar velocidade e se reposicionar completamente fora do puxão. Isso te deixa canalizando Breath of Light no vazio enquanto ela se reposiciona para retaliar.
Impacto na lane
Como sua configuração de waveclear fica comprometida, ela pode te ameaçar constantemente com Twofold Hex e The Weirding para te forçar a sair da wave. Você não consegue imobilizá-la facilmente para dar trade de volta, o que significa que precisa abrir mão da prioridade do meio no início. Se você se sobre-extender tentando acumular Stardust, o Between Worlds dela pode te prender nos termos dela, impedindo qualquer fuga rápida via Astral Flight.
Como jogar
Para sobreviver, você precisa jogar na defensiva perto da sua torre, focando apenas em farmar com segurança. Nunca inicie com Singularity; em vez disso, guarde-a como ferramenta defensiva para quando ela se comprometer. Se ela usar Across the Veil de forma agressiva, deslize para trás usando Astral Flight imediatamente para quebrar a linha de visão dela. Guarde Falling Star estritamente para interrompê-la quando ela se teleportar ao longo das bordas do campo de Between Worlds dela.
Controle de grupoPokeSua principal fonte de dano e Stardust, Breath of Light, te força a ficar completamente parado para canalizar. Esse self-root é uma desvantagem enorme contra Viktor, que consegue soltar Gravity Field sem esforço bem em cima da sua hitbox estática. Se você tentar dar trade de volta ou limpar waves durante sua canalização, aciona instantaneamente o stun dele, deixando você vulnerável a um follow-up de Hextech Ray e Arcane Storm.Build de Viktor →Ver detalhes
Viktor
Por quê
Sua principal fonte de dano e Stardust, Breath of Light, te força a ficar completamente parado para canalizar. Esse self-root é uma desvantagem enorme contra Viktor, que consegue soltar Gravity Field sem esforço bem em cima da sua hitbox estática. Se você tentar dar trade de volta ou limpar waves durante sua canalização, aciona instantaneamente o stun dele, deixando você vulnerável a um follow-up de Hextech Ray e Arcane Storm.
Impacto na lane
Essa interação restringe severamente seu gerenciamento de wave. Você não consegue usar Singularity e Breath of Light livremente para limpar as waves, porque Viktor vai punir sua imobilidade com Gravity Field e te desgastar com Hextech Ray. Consequentemente, você é forçado a farmar na defensiva perto da sua torre, cedendo a prioridade de lane no início e desacelerando o scaling da sua passiva, enquanto Viktor acumula Glorious Evolution com segurança e controla a lane do meio.
Como jogar
Nunca inicie uma canalização de Breath of Light a menos que veja Viktor gastar Gravity Field para zonear ou dar peel. Quando precisar reunir Stardust, provoque o Hextech Ray dele primeiro se movendo lateralmente, e então use um Singularity rápido para coletar os minions. Se Viktor soltar a zona dele agressivamente em você, cancele sua canalização imediatamente e use Astral Flight para recuar com segurança antes que o stun seja acionado. Paciência durante as longas janelas de cooldown dele é seu único caminho para o scaling.
EscudosInterrupçãoO kit agressivo de Diana prospera fechando a distância com Crescent Strike e Lunar Rush, o que representa uma ameaça constante às suas canalizações estáticas. O perigo definitivo é o Moonfall dela, que funciona como uma parada forçada para suas principais ferramentas. Ele cancela instantaneamente sua canalização de Breath of Light e te arrasta diretamente do ar durante Astral Flight, transformando sua principal ferramenta de fuga em uma armadilha mortal.Build de Diana →Ver detalhes
Diana
Por quê
O kit agressivo de Diana prospera fechando a distância com Crescent Strike e Lunar Rush, o que representa uma ameaça constante às suas canalizações estáticas. O perigo definitivo é o Moonfall dela, que funciona como uma parada forçada para suas principais ferramentas. Ele cancela instantaneamente sua canalização de Breath of Light e te arrasta diretamente do ar durante Astral Flight, transformando sua principal ferramenta de fuga em uma armadilha mortal.
Impacto na lane
Por causa dessa ameaça constante de interrupção, você não consegue canalizar Breath of Light livremente para reduzir as waves de minions sem colocar sua barra de vida em risco. Diana pode te zonear facilmente, afastando-o da wave, forçando você a depender apenas de posicionamentos defensivos de Singularity para colher stacks de Cosmic Creator. Um deslize permite que ela force um trade mortal bem sob a sua própria torre, destruindo sua prioridade de lane e seu ritmo de farm.
Como jogar
Para sobreviver a esse matchup, adote uma postura estritamente defensiva e nunca use Astral Flight de forma ofensiva enquanto Diana tiver Moonfall disponível. Use Singularity à distância máxima para garantir stacks e farmar com segurança. Se ela conseguir saltar em você com Lunar Rush, solte imediatamente Falling Star nos seus próprios pés para stunar ela, e então use seu voo para escapar somente depois que o puxão da ultimate dela tiver sido gasto.
Dano explosivoImunidade a CCEsse matchup é fortemente dominado pela forma como Ekko contorna seu principal controle de zona. Quando você implanta Singularity para limpar waves ou desencorajar agressão, Ekko pode ignorar instantaneamente o puxão e o slow usando Phase Dive. Esse blink permite que ele cruze a fronteira sem esforço, fechando a distância para te atacar. Uma vez em cima de você, ele aciona facilmente Z-Drive Resonance com Timewinder, dando trade pesado antes que você consiga aumentar o Breath of Light.Build de Ekko →Ver detalhes
Ekko
Por quê
Esse matchup é fortemente dominado pela forma como Ekko contorna seu principal controle de zona. Quando você implanta Singularity para limpar waves ou desencorajar agressão, Ekko pode ignorar instantaneamente o puxão e o slow usando Phase Dive. Esse blink permite que ele cruze a fronteira sem esforço, fechando a distância para te atacar. Uma vez em cima de você, ele aciona facilmente Z-Drive Resonance com Timewinder, dando trade pesado antes que você consiga aumentar o Breath of Light.
Impacto na lane
Você não consegue avançar com segurança para canalizar Breath of Light, já que ficar parado te torna um alvo fácil para Parallel Convergence. Como Singularity não consegue garantir sua segurança, você precisa ceder a prioridade de wave no início para evitar ser desgastado. Se você usar Astral Flight de forma agressiva, Ekko pode prever sua rota de voo, implantar o escudo dele e te interceptar com Chronobreak ou Phase Dive, cortando completamente suas rotas de fuga.
Como jogar
Para sobreviver, adote uma postura estritamente defensiva e mantenha a wave de minions perto da sua torre. Nunca solte Singularity de forma proativa para waveclear; em vez disso, guarde-a até Ekko se comprometer avançando com Phase Dive, usando-a nos seus próprios pés para forçá-lo a recuar ou tomar tiros de torre. Se ele te divar sob a torre, solte imediatamente Falling Star para stunar ele no lugar. Guarde Astral Flight exclusivamente como um desengajamento reativo para voar para trás.
Controle de grupoInterrupçãoA lane é definida pela forma como a passiva de Vex, Doom 'n Gloom, neutraliza completamente sua principal mobilidade. Sempre que a barra vermelha dela estiver cheia, qualquer uma das habilidades básicas dela — Mistral Bolt, Personal Space ou Looming Darkness — vai interromper seu Astral Flight no meio do ar com um fear. Esse cancelamento imediato de deslocamento interrompe sua fuga ou reposicionamento instantaneamente, deixando você incrivelmente vulnerável ao burst de follow-up dela.Build de Vex →Ver detalhes
Vex
Por quê
A lane é definida pela forma como a passiva de Vex, Doom 'n Gloom, neutraliza completamente sua principal mobilidade. Sempre que a barra vermelha dela estiver cheia, qualquer uma das habilidades básicas dela — Mistral Bolt, Personal Space ou Looming Darkness — vai interromper seu Astral Flight no meio do ar com um fear. Esse cancelamento imediato de deslocamento interrompe sua fuga ou reposicionamento instantaneamente, deixando você incrivelmente vulnerável ao burst de follow-up dela.
Impacto na lane
Por causa dessa ameaça constante, você não consegue usar Astral Flight livremente para limpar waves ou escapar de ganks. Se você tentar forçar um trade usando Breath of Light enquanto voa, Vex pode te interromper facilmente e contra-engajar com Shadow Surge. Isso te força a jogar na defensiva perto da sua torre, desacelerando o acúmulo de stacks de Cosmic Creator e dando a Vex liberdade total para empurrar e fazer roam.
Como jogar
Sua regra principal é acompanhar constantemente a barra de Doom 'n Gloom de Vex. Só ative Astral Flight depois que ela gastar o estado potencializado em Mistral Bolt ou Looming Darkness para limpar os minions. Mantenha Singularity centrada nos seus próprios minions caster para puxar a wave de volta com segurança sem avançar. Se ela te marcar com Shadow Surge, não voe em pânico; espere ela chegar antes de usar o stun de Falling Star para dar peel nela.
EsquivaPressão no mapaEsse matchup é dominado pela facilidade com que Katarina contorna seu controle de zona. Como Breath of Light te força a encarar uma única direção enquanto canaliza, Katarina pode reagir instantaneamente com Shunpo para dar um blink atrás de você. Essa manobra não só evita seu fluxo principal de dano, como também permite que ela saia completamente do raio da sua Singularity, transformando sua canalização estática em um convite aberto para as adagas dela.Build de Katarina →Ver detalhes
Katarina
Por quê
Esse matchup é dominado pela facilidade com que Katarina contorna seu controle de zona. Como Breath of Light te força a encarar uma única direção enquanto canaliza, Katarina pode reagir instantaneamente com Shunpo para dar um blink atrás de você. Essa manobra não só evita seu fluxo principal de dano, como também permite que ela saia completamente do raio da sua Singularity, transformando sua canalização estática em um convite aberto para as adagas dela.
Impacto na lane
Você não consegue contestar a wave perto da torre dela com segurança, já que empurrar demais te expõe a um engajamento súbito de Shunpo. Essa pressão te força a jogar na defensiva sob a torre, dando a ela liberdade para limpar com Bouncing Blade e fazer roam. Se você tentar seguir as rotações dela pelo rio sem visão, o burst dela pode te pegar no caminho antes que você consiga escapar com Astral Flight.
Como jogar
Para sobreviver, nunca inicie trades com Singularity. Guarde essa zona e Breath of Light até ela já ter se comprometido com o Shunpo em uma adaga. Se ela soltar Death Lotus, use imediatamente Astral Flight para voar para trás em segurança. Quando ela desaparecer da lane para fazer roam, não a persiga às cegas por caminhos sem visão; em vez disso, marque seus aliados, reúna Stardust com segurança e empurre a wave com força para punir a ausência dela.
AssassinoDano explosivoSua influência no mapa depende inteiramente de usar Astral Flight para contornar o terreno, mas o Assassin's Path de Talon faz dele o counter-roamer definitivo. Ele consegue acompanhar facilmente a sua trajetória de voo saltando sobre as paredes da jungle. Isso transforma sua rotação em uma armadilha mortal, já que ele pode te interceptar no meio do caminho ou te emboscar no seu destino com Shadow Assault antes mesmo que você consiga aterrissar.Build de Talon →Ver detalhes
Talon
Por quê
Sua influência no mapa depende inteiramente de usar Astral Flight para contornar o terreno, mas o Assassin's Path de Talon faz dele o counter-roamer definitivo. Ele consegue acompanhar facilmente a sua trajetória de voo saltando sobre as paredes da jungle. Isso transforma sua rotação em uma armadilha mortal, já que ele pode te interceptar no meio do caminho ou te emboscar no seu destino com Shadow Assault antes mesmo que você consiga aterrissar.
Impacto na lane
Como Talon limpa rapidamente com Rake, ele vai desaparecer constantemente no rio. Você não consegue contestar os movimentos dele com segurança usando Astral Flight sem arriscar um face-check mortal. Isso te força a jogar na defensiva sob a sua torre, usando Singularity para segurar a wave, enquanto suas lanes laterais sofrem com a pressão constante e irreagível dele, já que você não consegue acompanhar as rotações dele com segurança.
Como jogar
Nunca inicie uma rotação de Astral Flight a menos que Talon esteja visível em outro lugar. Em vez disso, solte Singularity na wave a uma distância segura e colha stacks de Cosmic Creator sob a torre. Se Talon saltar em você com Noxian Diplomacy, solte Falling Star diretamente em você mesmo para interromper o proc de Blade's End dele, e então use seu voo em direção à segurança da sua torre de nível dois, em vez de sobre paredes laterais, onde Assassin's Path permite que ele te cace.
Esses confrontos são, acima de tudo, duelos de execução: os dois campeões têm formas reais de levar vantagem. Uma habilidade importante esquivada, um engajamento bem antecipado ou um erro de posicionamento podem ser suficientes para decidir o duelo. Conhecer o matchup e reconhecer as janelas de ação certas faz toda a diferença.
EsquivaPosicionamentoEsse matchup gira inteiramente em torno da sua imobilidade durante Breath of Light. Como você precisa ficar parado para canalizar sua principal fonte de dano, Brand tem uma facilidade incrível para acertar Sear e te stunar, desde que já tenha aplicado Blaze via Pillar of Flame ou Conflagration. Isso interrompe instantaneamente sua canalização, deixando você completamente vulnerável ao trade de burst completo dele.Build de Brand →Ver detalhes
Brand
Por quê
Esse matchup gira inteiramente em torno da sua imobilidade durante Breath of Light. Como você precisa ficar parado para canalizar sua principal fonte de dano, Brand tem uma facilidade incrível para acertar Sear e te stunar, desde que já tenha aplicado Blaze via Pillar of Flame ou Conflagration. Isso interrompe instantaneamente sua canalização, deixando você completamente vulnerável ao trade de burst completo dele.
Impacto na lane
A lane oscila entre limpezas rápidas de wave e trades punitivos. Se você usar Singularity e Breath of Light sem pensar para acumular Cosmic Creator, Brand vai avançar para te desgastar. Toda vez que você for stunado, você perde uma quantidade significativa de vida, forçando recuos antecipados que custam placas de torre e atrasam seu scaling. Quando ele erra os skillshots, porém, isso te dá liberdade total para empurrá-lo sob a torre.
Como jogar
Nunca ative Breath of Light enquanto Brand tiver Sear disponível, a menos que você esteja voando com segurança para os lados com Astral Flight. Primeiro, provoque o Pillar of Flame dele avançando e recuando imediatamente. Quando ele errar ou gastar Sear em um minion, solte imediatamente Singularity para prendê-lo e canalize seu fogo. Se ele iniciar com Pyroclasm, voe para longe imediatamente com Astral Flight para evitar que as bolas de fogo voltem para você.
EscudosEsquivaEsse matchup é uma batalha pura de anulação de utilidade. Morgana depende de Black Shield para absorver completamente seu dano mágico e, mais importante, anular o puxão de deslocamento da sua Singularity e o stun de Falling Star. Sem essas ferramentas de crowd control para imobilizá-la, seu Breath of Light se torna incrivelmente difícil de canalizar com segurança, já que ela pode retaliar facilmente com Dark Binding ou Soul Shackles.Build de Morgana →Ver detalhes
Morgana
Por quê
Esse matchup é uma batalha pura de anulação de utilidade. Morgana depende de Black Shield para absorver completamente seu dano mágico e, mais importante, anular o puxão de deslocamento da sua Singularity e o stun de Falling Star. Sem essas ferramentas de crowd control para imobilizá-la, seu Breath of Light se torna incrivelmente difícil de canalizar com segurança, já que ela pode retaliar facilmente com Dark Binding ou Soul Shackles.
Impacto na lane
O controle de wave dita todo o ritmo dessa lane. Morgana usa Tormented Shadow para dissolver rapidamente as waves de minions, forçando você a acompanhar o push dela com Singularity. Se você gastar sua zona na wave, ela pode arriscar Dark Binding com segurança. Como Black Shield te impede de garantir abates rápidos, essa lane muitas vezes se transforma em um simulador de farm, em que os dois lutam para pressionar a torre do adversário.
Como jogar
Para vencer isso, nunca inicie com Falling Star. Em vez disso, use Breath of Light para desgastar o Black Shield dela antes de comprometer seu crowd control. Provoque o shield dela se posicionando de forma agressiva, e então desengaje imediatamente usando Astral Flight. Se ela guardar o shield, foque inteiramente em reunir stacks de Cosmic Creator soltando Singularity diretamente nos minions caster. Quando ela avançar para usar Soul Shackles, voe para longe imediatamente.
Limpeza de rotaAlcanceEsse matchup é um duelo de artilharia constante, em que o posicionamento da wave dita quem leva o poke. Enquanto Aurelion Sol quer canalizar *Breath of Light* para coletar stacks de *Cosmic Creator* nas waves de minions, Ziggs se destaca em punir alvos parados. O *Bouncing Bomb* dele desgasta facilmente sua vida a distância, mas a verdadeira ameaça é o *Satchel Charge*, que pode interromper instantaneamente seu voo canalizado ou seu dano, deixando você vulnerável e malposicionado na lane.Build de Ziggs →Ver detalhes
Ziggs
Por quê
Esse matchup é um duelo de artilharia constante, em que o posicionamento da wave dita quem leva o poke. Enquanto Aurelion Sol quer canalizar *Breath of Light* para coletar stacks de *Cosmic Creator* nas waves de minions, Ziggs se destaca em punir alvos parados. O *Bouncing Bomb* dele desgasta facilmente sua vida a distância, mas a verdadeira ameaça é o *Satchel Charge*, que pode interromper instantaneamente seu voo canalizado ou seu dano, deixando você vulnerável e malposicionado na lane.
Impacto na lane
A fase de lane se torna uma corrida de alto risco pela prioridade. Se você deixar Ziggs te empurrar para sob a torre, o *Short Fuse* e o *Satchel Charge* dele vão destruir rapidamente suas placas. Porém, avançar para contestar a wave com *Singularity* te expõe ao *Hexplosive Minefield* dele. Todo trade gira em torno da eficiência de vida contra mana; se você for forçado a recuar antecipadamente, perde o momentum crítico de stacking enquanto sua torre do meio desmorona.
Como jogar
Para sobreviver e escalar, nunca use *Astral Flight* de forma agressiva, a menos que Ziggs já tenha gastado o *Satchel Charge* dele. Mantenha distância limpando as waves por trás dos seus minions caster usando *Singularity*, forçando-o a escolher entre te atingir ou atingir a wave com *Bouncing Bomb*. Se ele tentar te zonear com *Hexplosive Minefield*, solte imediatamente *Singularity* na wave adversária para acompanhar a velocidade de limpeza dele, impedindo-o de usar a passiva dele na sua torre.
Imunidade a CCLimpeza de rotaEsse matchup gira em torno de uma vulnerabilidade perigosa durante o uso da sua principal ferramenta de dano. Sempre que você canaliza Breath of Light, você se torna um alvo completamente estático, tornando-se uma presa incrivelmente fácil para o Light Binding de Lux. Se ela te pegar com esse root, pode seguir imediatamente com Lucent Singularity e Final Spark para destruir sua barra de vida. Seu estado imóvel transforma os skillshots dela de pokes especulativos em acertos garantidos.Build de Lux →Ver detalhes
Lux
Por quê
Esse matchup gira em torno de uma vulnerabilidade perigosa durante o uso da sua principal ferramenta de dano. Sempre que você canaliza Breath of Light, você se torna um alvo completamente estático, tornando-se uma presa incrivelmente fácil para o Light Binding de Lux. Se ela te pegar com esse root, pode seguir imediatamente com Lucent Singularity e Final Spark para destruir sua barra de vida. Seu estado imóvel transforma os skillshots dela de pokes especulativos em acertos garantidos.
Impacto na lane
Por causa dessa ameaça, você não consegue limpar as waves livremente com Breath of Light sem arriscar um trade letal. Se você for rootado sob a torre dela ou no meio da lane, ela vai destruir sua vida, forçando recuos antecipados que atrasam seu acúmulo de Cosmic Creator. Consequentemente, você muitas vezes precisa ceder a prioridade do meio, permitindo que Lux empurre as waves com Lucent Singularity e ameace suas lanes laterais enquanto você luta para coletar Stardust com segurança.
Como jogar
Para sobreviver, nunca use Breath of Light a menos que Lux tenha acabado de gastar Light Binding, ou que você esteja posicionado com segurança atrás de pelo menos dois minions para bloquear a trajetória. Se ela guardar o root, foque em soltar Singularity para farmar a distância e conservar seu Astral Flight. Se ela jogar a jaula e errar, ative imediatamente Astral Flight na diagonal para se reposicionar enquanto a ataca, forçando-a a depender de Prismatic Barrier para absorver sua retaliação.
Controle de grupoPressão no mapaEsse matchup é uma corrida pura de influência global, em que suas rotas de voo colidem com os teleportes dele. A tensão definidora está na sua mobilidade; se você tentar escapar ou se reposicionar com Astral Flight, Twisted Fate pode te derrubar do céu instantaneamente, imobilizando você com uma carta dourada de Pick a Card. Isso torna qualquer voo agressivo altamente punível se as cartas dele estiverem prontas.Build de Twisted Fate →Ver detalhes
Twisted Fate
Por quê
Esse matchup é uma corrida pura de influência global, em que suas rotas de voo colidem com os teleportes dele. A tensão definidora está na sua mobilidade; se você tentar escapar ou se reposicionar com Astral Flight, Twisted Fate pode te derrubar do céu instantaneamente, imobilizando você com uma carta dourada de Pick a Card. Isso torna qualquer voo agressivo altamente punível se as cartas dele estiverem prontas.
Impacto na lane
Na lane, você precisa respeitar o waveclear dele com Wild Cards e o gold bônus de Dice carregado. Como ele consegue acompanhar seu push, a lane se transforma em uma batalha constante de pressão. Se ele tirar a carta dourada, você é forçado a recuar, perdendo a prioridade para soltar Singularity. Isso permite que ele use Destiny primeiro, forçando você a perseguir os roams dele ou punir a torre dele.
Como jogar
Nunca inicie Astral Flight enquanto o Pick a Card dele estiver ativo ou fora de cooldown. Em vez disso, provoque a seleção de carta dele usando Breath of Light a partir de uma posição segura. Se ele fixar uma carta azul ou vermelha para limpar os minions, essa é sua deixa para soltar Singularity na wave e procurar um roam. Se ele usar Destiny para ajudar as lanes laterais dele, canalize imediatamente Breath of Light para empurrar a wave e garantir placas de torre.
MergulhoControle de áreaYasuo é um matchup de skill, não um counter forte. O Wind Wall dele não consegue bloquear Breath of Light nem Singularity, já que nenhum dos dois é um projétil, então todo o seu combo continua disponível. O perigo é a mobilidade dele. Sweeping Blade através dos seus minions fecha a distância rapidamente, e um knock-up de Steel Tempest seguido de Last Breath pode te matar antes que seu Stardust tenha escalado.Build de Yasuo →Ver detalhes
Yasuo
Por quê
Yasuo é um matchup de skill, não um counter forte. O Wind Wall dele não consegue bloquear Breath of Light nem Singularity, já que nenhum dos dois é um projétil, então todo o seu combo continua disponível. O perigo é a mobilidade dele. Sweeping Blade através dos seus minions fecha a distância rapidamente, e um knock-up de Steel Tempest seguido de Last Breath pode te matar antes que seu Stardust tenha escalado.
Impacto na lane
Os primeiros níveis são desconfortáveis quando ele tem minions para atravessar com o dash, porque você fica parado enquanto canaliza Breath of Light. Se você guardar Singularity para o engajamento dele, o slow e o puxão o mantêm dentro do seu feixe e você ganha o trade. Depois que você acumular Stardust, seu alcance e dano superam o all-in dele, e Astral Flight permite que você saia da lane para jogar o mapa.
Como jogar
Não guarde suas habilidades por medo do Wind Wall: ele só bloqueia seus ataques básicos. Guarde Singularity para o momento em que ele avançar com o dash, e então canalize Breath of Light enquanto ele estiver lento. Reduza a wave que ele usa como trampolim e fique fora do alcance do tornado dele. Se ele se comprometer com um knock-up carregado, voe em direção à sua torre com Astral Flight e volte quando suas habilidades estiverem disponíveis.
Esses campeões geralmente têm dificuldade para responder às suas principais forças, o que te dá mais liberdade para abordar o confronto. Você costuma ter várias formas de pressioná-los e forçar trocas a seu favor. Aproveite essa vantagem para impor seu ritmo, em vez de dar tempo para eles se estabilizarem.
FarmEscalamentoSwain depende de avançar durante Demonic Ascension para drenar sua vida, mas sua completa falta de ferramentas de mobilidade o torna o alvo perfeito para o seu zoneamento. No momento em que ele ativa a ultimate dele, soltar Singularity diretamente no caminho dele o prende. Ele não consegue escapar facilmente do puxão, permitindo que você canalize Breath of Light com segurança e colha grandes quantidades de stacks de Stardust enquanto ele se move lentamente.Build de Swain →Ver detalhes
Swain
Por quê
Swain depende de avançar durante Demonic Ascension para drenar sua vida, mas sua completa falta de ferramentas de mobilidade o torna o alvo perfeito para o seu zoneamento. No momento em que ele ativa a ultimate dele, soltar Singularity diretamente no caminho dele o prende. Ele não consegue escapar facilmente do puxão, permitindo que você canalize Breath of Light com segurança e colha grandes quantidades de stacks de Stardust enquanto ele se move lentamente.
Impacto na lane
Essa interação muda a dinâmica dos minions totalmente a seu favor. Como Swain não pode avançar agressivamente sem arriscar uma perda enorme de vida dentro da sua zona, você dita o fluxo da wave. Você pode facilmente congelar a linha de minions perto da sua torre ou empurrá-lo para debaixo da turret dele usando Singularity. Isso neutraliza as roams dele com Vision of Empire e o priva completamente dos stacks da passiva Ravenous Flock.
Como jogar
Durante os níveis iniciais, foque em farmar com segurança enquanto observa com atenção a trajetória do Nevermove dele. Sempre guarde o Astral Flight para se desengajar instantaneamente caso ele consiga acertar um root. Quando ele destravar Demonic Ascension e tentar forçar uma luta, coloque Singularity atrás dele para cortar o avanço, depois canalize Breath of Light. Se ele usar flash para forçar um engage, voe para trás imediatamente para resetar seu espaçamento.
SustentaçãoEscalamentoEsse matchup é altamente vantajoso porque Vladimir não tem nenhuma forma de crowd control forte para interromper seu Breath of Light. Enquanto ele depende de Transfusion para sustain e farm, ele não consegue impedir que você canalize sua principal fonte de dano diretamente nele. Essa vulnerabilidade estrutural neutraliza completamente a pressão inicial dele, permitindo que você colha stacks de Cosmic Creator rapidamente enquanto acompanha a ameaça de scaling dele sem nenhum risco de ser cancelado.Build de Vladimir →Ver detalhes
Vladimir
Por quê
Esse matchup é altamente vantajoso porque Vladimir não tem nenhuma forma de crowd control forte para interromper seu Breath of Light. Enquanto ele depende de Transfusion para sustain e farm, ele não consegue impedir que você canalize sua principal fonte de dano diretamente nele. Essa vulnerabilidade estrutural neutraliza completamente a pressão inicial dele, permitindo que você colha stacks de Cosmic Creator rapidamente enquanto acompanha a ameaça de scaling dele sem nenhum risco de ser cancelado.
Impacto na lane
Você dita o ritmo da wave desde o primeiro minuto. Ao colocar Singularity diretamente na wave de minions, você força Vladimir a escolher entre levar dano pesado de Breath of Light ou gastar Sanguine Pool, o que custa a ele uma parte enorme da vida atual. Essa pressão garante prioridade de push permanente, deixando você estourar waves à vontade, garantir recalls fáceis e stackar sua passiva com segurança.
Como jogar
Observe de perto a barra de recurso do Vladimir; quando o Transfusion dele estiver totalmente carregado e vermelho, recue um pouco para negar o heal potencializado. Depois que essa janela passar, solte Singularity na wave imediatamente para prendê-lo, então voe para frente com Astral Flight enquanto canaliza Breath of Light para punir a retirada dele. Se ele entrar em pânico e usar Sanguine Pool, não persiga; espere ele emergir e então finalize a trade com seu alcance superior.
FarmEscalamentoA completa falta de crowd control ou ameaça de burst da Kayle no início remove qualquer perigo quando você canaliza Breath of Light. Como o Divine Ascent dela a mantém fraca e de alcance melee inicialmente, ela não consegue contestar seu posicionamento na wave. Você pode soltar Singularity diretamente nos minions sem medo de que o slow de Radiant Blast se transforme em uma perseguição letal, permitindo que você acumule stacks de Cosmic Creator rapidamente.Build de Kayle →Ver detalhes
Kayle
Por quê
A completa falta de crowd control ou ameaça de burst da Kayle no início remove qualquer perigo quando você canaliza Breath of Light. Como o Divine Ascent dela a mantém fraca e de alcance melee inicialmente, ela não consegue contestar seu posicionamento na wave. Você pode soltar Singularity diretamente nos minions sem medo de que o slow de Radiant Blast se transforme em uma perseguição letal, permitindo que você acumule stacks de Cosmic Creator rapidamente.
Impacto na lane
Esse matchup transforma a mid lane em uma zona de farm livre, onde você dita o ritmo. Kayle é forçada a depender de Starfire Spellblade para garantir last hits individuais debaixo da própria turret. Ao manter a wave empurrada com Singularity, você nega qualquer potencial de roam dela e a força a gastar mana em Celestial Blessing para se sustentar, garantindo sua prioridade sem sacrificar vida.
Como jogar
Foque totalmente em agrupar as waves de minions. Coloque Singularity nos minions caster quando chegarem, depois derreta-os imediatamente com Breath of Light para farmar Stardust com segurança. Se ela avançar para dar poke com Radiant Blast, não entre em pânico; apenas ative Astral Flight para trás para resetar seu espaçamento. Nunca troque enquanto o Divine Judgment dela estiver ativo; espere a invulnerabilidade passar antes de usar Falling Star.
Vantagem: veredito canônico do Wild Rift Core (−3 a +3), do ponto de vista do campeão citado na linha. Taxa de vitória e taxa de escolha: as do próprio adversário nessa função — Wild Rift CN · Challenger, Patch 7.3b. Não é uma taxa de vitória do confronto direto.
Como counterar este campeão
Ângulo de counter
Entender os contra-ataques do Aurelion Sol não se resume apenas a identificar assassinos. Trata-se de reconhecer os campeões que atrapalham seu ritmo e impedem que suas zonas se formem. Seu kit depende de canalizações, posicionamento e controle de espaço. Os contra-ataques são aqueles que interrompem, contornam ou ignoram essas zonas. Por outro lado, os campeões forçados a entrar em suas zonas ficam vulneráveis. A compreensão do confronto deve se concentrar no ritmo e na pressão no mapa, em vez de se limitar a duelos puros.
Contexto do patch
Os adversários do Aurelion Sol exploram duas fraquezas principais: sua dependência da canalização do Q e a falta de mobilidade instantânea. Assassinos móveis como o Zed ou o Yone conseguem contornar suas zonas e atacá-lo diretamente. Outros, como o Galio ou o Diana, conseguem iniciar o combate através do controle que ele exerce. Em um meta que privilegia a mobilidade e os engajamentos rápidos, esses perfis reduzem significativamente a eficácia dele.
Leitura rápida
Fraco contra assassinos móveis.
Sujeito a interrupções no canal.
Eficaz contra campeões imóveis.
Arquétipos de counter
Assassinos de rajada
Esses campeões contornam completamente a estratégia de jogo do Aurelion Sol. Eles conseguem iniciar o combate rapidamente, interromper o Q dele e matá-lo antes que ele consiga estabelecer o controle de zona. Sua mobilidade também lhes permite evitar o E dele e se reposicionar constantemente, reduzindo a eficácia dele.
Como o campeão deve se adaptar. Jogue na defensiva, priorize a visão e ajude a proteger os companheiros. Nunca use o Q sem ter informações.
Envolver os profissionais da linha de frente
Esses campeões podem iniciar combates em suas zonas. Sua resistência permite que absorvam danos e forcem o confronto direto, quebrando o ritmo controlado do qual o Aurelion Sol depende.
Como o campeão deve se adaptar. Utilize o R para a remoção da pele e o reposicionamento; evite o posicionamento na linha de frente.
Magos móveis
Esses campeões conseguem se esquivar das zonas dele e manter a pressão. Sua mobilidade dificulta a manutenção da canalização do Q e lhes permite punir erros de posicionamento.
Zed é um adversário extremamente perigoso, pois ele pode iniciar o combate de fora do alcance e eliminar Aurelion Sol instantaneamente. O segredo é evitar trocas de dano e jogar levando em conta o tempo de recarga da habilidade definitiva dele.
Erros comuns contra ele
Erros comuns contra ele
Subestimar a mobilidade do inimigo.
Canalizar o Q muito cedo.
Ignorando a visão.
Perda de E.
Forçar lutas isoladas.
Notas do coach
Você vence as estratégias de contra-ataque por meio de jogadas macro, não em duelos.
Cada segundo de canalização do Q é uma vitória.
FAQ
Qual é o pior adversário do Aurelion Sol?
Assassinos como o Zed são especialmente difíceis, pois conseguem ignorar suas zonas e derrotá-lo instantaneamente. Esse confronto exige uma adaptação completa do estilo de jogo, com foco na defesa e maior dependência dos companheiros de equipe.
Será que ele consegue vencer seus adversários?
Sim, mas não por meio de duelos. Ele precisa se movimentar pelo mapa, evitar confrontos diretos e usar o controle para influenciar os objetivos. A vitória depende de evitar situações desfavoráveis.
Como sobreviver a rotas difíceis?
Jogando com cautela, mantendo distância e priorizando a visão. O objetivo é evitar ser eliminado e manter a prioridade de explorar o mapa sempre que possível.
Por que alguns confrontos se tornam fáceis?
Porque alguns campeões não conseguem evitar suas zonas nem interromper suas canalizações. Nesses casos, ele consegue ditar o ritmo e controlar as lutas.