S
2026年9月 · Patch 7.2d
Mage · MID

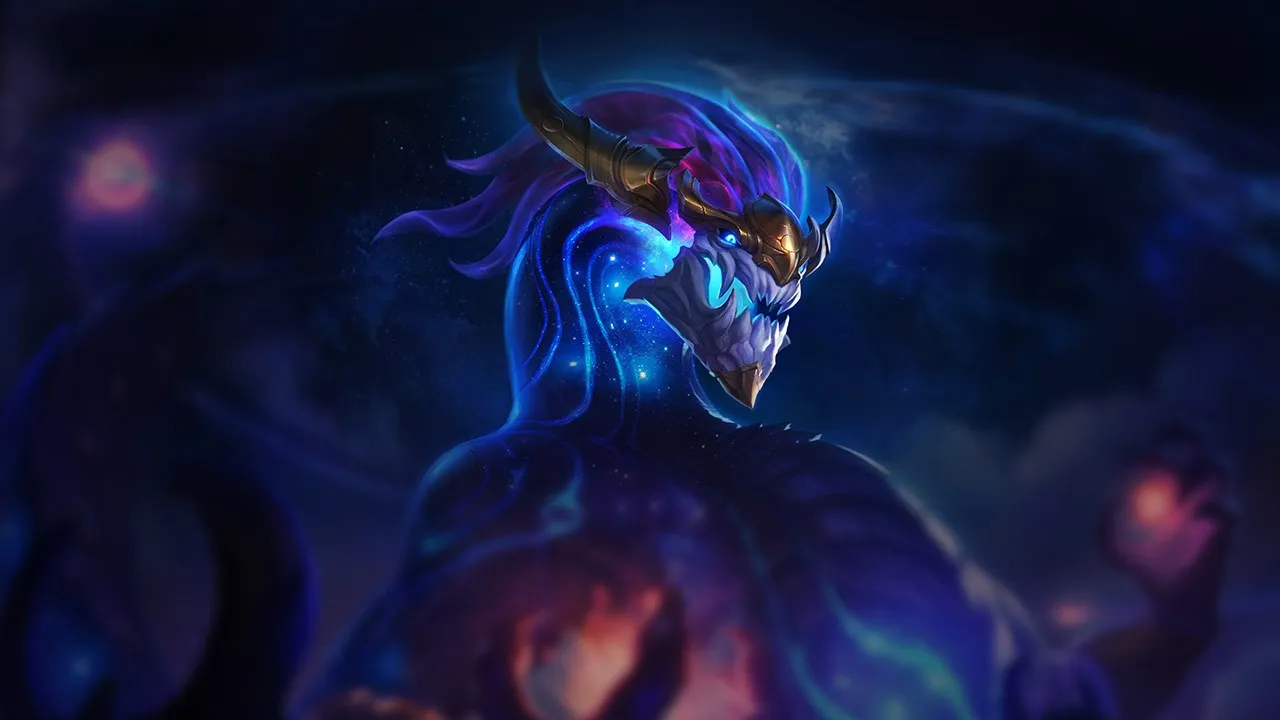
Aurelion Sol Wild Rift カウンターガイド

Aurelion Solは、自身のロームを妨害し、stackの蓄積を拒否してくるチャンピオンを苦手とします。機動力の高いassassinsdive構成は、彼がピークパワーに達する前に脅威となります。脆弱なearly gameが、彼の最大の弱点となる時間帯です。

★ MID Tier S
ダメージ
UTIL
TANK
DIFF
Win 50.2% #52 · ↓6pt
Pick 6.8% #8
Ban 5.1% #43

Aurelion Sol Wild Rift カウンターガイド ★ Counter Sheet

マッチアップ一覧
マッチアップ 判定 有利度 勝率 ピック率
Kassadin ハードカウンター +3 50.1% 1.5%
Irelia ハードカウンター +3
Syndra ハードカウンター +2 53.3% 13.3%
Taliyah ハードカウンター +2 51.9% 2.8%
Yone ハードカウンター +2 51.8% 5.3%
Akshan ハードカウンター +2 51.5% 1.1%
Vel'Koz ハードカウンター +2 50.6% 3.5%
Zed ハードカウンター +2 48.9% 3.8%
Yasuo ハードカウンター +2 48.9% 10.8%
Fizz ハードカウンター +2 48.6% 2.0%
Zoe ハードカウンター +2 48.6% 1.0%
Jayce ハードカウンター +2 47.7% 1.3%
Akali ハードカウンター +2 45.0% 2.5%
Zyra 不利なマッチアップ +1 51.6% 2.9%
Ahri 不利なマッチアップ +1 51.5% 5.1%
Galio 不利なマッチアップ +1 51.1% 11.3%
Orianna 不利なマッチアップ +1 50.8% 4.9%
Norra 不利なマッチアップ +1 50.5% 1.5%
Viktor 不利なマッチアップ +1 50.5% 3.5%
Ekko 不利なマッチアップ +1 50.5% 2.9%
Aurora 不利なマッチアップ +1 49.8% 3.8%
Annie 不利なマッチアップ +1 49.3% 2.2%
Ryze 不利なマッチアップ +1 48.8% 2.9%
Lissandra 不利なマッチアップ +1 48.8% 4.1%
Diana 不利なマッチアップ +1 48.7% 1.4%
Vex 不利なマッチアップ +1 48.6% 2.2%
Katarina 不利なマッチアップ +1 48.6% 1.7%
Veigar 不利なマッチアップ +1 47.4% 9.4%
Cho'Gath 不利なマッチアップ +1
Malphite 不利なマッチアップ +1
Pantheon 不利なマッチアップ +1
Pyke 不利なマッチアップ +1
Talon 不利なマッチアップ +1
Varus 不利なマッチアップ +1
Twisted Fate スキル次第のマッチアップ ±0 52.5% 6.8%
Brand スキル次第のマッチアップ ±0 52.0% 9.4%
Morgana スキル次第のマッチアップ ±0 51.2% 6.1%
Lux スキル次第のマッチアップ ±0 48.7% 5.6%
Ziggs スキル次第のマッチアップ ±0 48.2% 5.9%
Corki スキル次第のマッチアップ ±0
Karma スキル次第のマッチアップ ±0
Rumble スキル次第のマッチアップ ±0
Swain 有利なマッチアップ −1 52.8% 4.6%
Kennen 有利なマッチアップ −1 49.6% 1.5%
Vladimir 有利なマッチアップ −1 49.4% 4.9%
Mel 有利なマッチアップ −1 46.3% 7.9%
Kai'Sa 有利なマッチアップ −1
Seraphine 有利なマッチアップ −1
Zilean 有利なマッチアップ −1
Teemo 有利なマッチアップ −2 50.8% 1.6%
Heimerdinger 有利なマッチアップ −2 50.6% 1.3%
Kayle 有利なマッチアップ −2

Edge: Wild Rift Core canonical verdict (−3 to +3), shown from the point of view of the champion named in the row. Win rate and pick rate: the opponent's own rate in this role — Wild Rift CN · Challenger, Patch 7.2d. Not a head-to-head win rate.

ハードカウンター

13

これらのチャンピオンは、こちらのビルドやプレイスタイルを真正面から上回る構成を持ち、レーン戦のコントロールとファームを極めて難しくする。彼らのスキルはこちらの主要な強みを無効化し、いつも通りのプランを実行しようとした瞬間に手痛い反撃を受けさせてくる。こうしたマッチアップでは、ミスを最小限に抑え、正面からの対決以外で解決策を探すことが重要になる。

Kassadin

Kassadin+3

silence interruptmobility gap Kassadin completely shuts down your main damage source. Whenever you try to channel Breath of Light, he can immediately throw Null Sphere. The silence instantly interrupts your breath, leaving you completely vulnerable with no back-up damage. Furthermore, his Void Stone magic shield absorbs your poke, and once he gets Riftwalk, he can easily close the distance to burst you down while you are silenced. Kassadinのビルド → 詳細を見る
Kassadin

理由

Kassadin completely shuts down your main damage source. Whenever you try to channel Breath of Light, he can immediately throw Null Sphere. The silence instantly interrupts your breath, leaving you completely vulnerable with no back-up damage. Furthermore, his Void Stone magic shield absorbs your poke, and once he gets Riftwalk, he can easily close the distance to burst you down while you are silenced.

レーン戦への影響

You cannot trade back effectively, forcing you to play a purely defensive laning phase. Attempting to freeze or contest the wave with Breath of Light results in getting silenced and heavily chunked by his Nether Blade and Force Pulse combo. This loss of priority means you will be stuck under tower, bleeding gold, while Kassadin gains free roam timers to impact the map with his high mobility.

立ち回り方

Your goal is to survive and farm Stardust safely. Drop Singularity from a safe distance to clear minions without stepping into Null Sphere range. Never use Astral Flight aggressively; save it solely as an escape tool when he initiates with Riftwalk. If he freezes the wave near his tower, do not walk up to break it; instead, wait for the wave to crash or coordinate with your jungler to reset it.

チャンピオン詳細 → Kassadinのビルド →
Irelia

Irelia+3

dash engagecc lock Irelia represents an absolute nightmare for Aurelion Sol due to how your primary damage tool works. When you stand still to channel Breath of Light, you become a stationary target. This makes it trivial for Irelia to land Flawless Duet to stun you. Once stunned, your channel is broken, and she can instantly close the gap and execute you with relentless Bladesurge resets. Ireliaのビルド → 詳細を見る
Irelia

理由

Irelia represents an absolute nightmare for Aurelion Sol due to how your primary damage tool works. When you stand still to channel Breath of Light, you become a stationary target. This makes it trivial for Irelia to land Flawless Duet to stun you. Once stunned, your channel is broken, and she can instantly close the gap and execute you with relentless Bladesurge resets.

レーン戦への影響

This threat forces you to play completely passive, conceding lane priority from the first wave. You cannot safely collect Cosmic Creator stacks using Breath of Light on minions because Irelia will jump on marked targets with Bladesurge. Every attempt to clear with Singularity will push the wave, exposing you to her Vanguard's Edge engage far from your turret.

立ち回り方

To survive, you must establish a strict positioning rule: never use Breath of Light unless Irelia has already wasted Flawless Duet. Keep the minion wave permanently frozen just outside your turret range to prevent her Bladesurge dash chains. If she dives you with Vanguard's Edge, immediately use Astral Flight to fly backward toward your second turret, rather than trying to fight back with Falling Star, which she can easily reduce with Defiant Dance.

チャンピオン詳細 → Ireliaのビルド →
Akshan

Akshan+2

early bullyroam denial The lane is heavily tilted in Akshan's favor due to how Breath of Light locks you in place. While you stand still to channel your starfire, Akshan can easily anchor Heroic Swing on a nearby wall to circle around you, unleashing a devastating burst of physical damage while bypassing your minions. Your lack of early mobility means you cannot escape his Dirty Fighting shield trades, making your primary trading tool a self-inflicted trap. Akshanのビルド → 詳細を見る
Akshan

理由

The lane is heavily tilted in Akshan's favor due to how Breath of Light locks you in place. While you stand still to channel your starfire, Akshan can easily anchor Heroic Swing on a nearby wall to circle around you, unleashing a devastating burst of physical damage while bypassing your minions. Your lack of early mobility means you cannot escape his Dirty Fighting shield trades, making your primary trading tool a self-inflicted trap.

レーン戦への影響

Akshan will aggressively push the first waves with Avengerang to secure an early level advantage. If you attempt to thin the wave with Singularity, he will immediately capitalise on your positioning, using Heroic Swing to dive past your tower range or force a premature Astral Flight. This constant pressure denies you Cosmic Creator stacks, forces you into bad recall timings, and allows Akshan to roam freely with Going Rogue while you are trapped under turret.

立ち回り方

To survive this onslaught, you must play defensively near your turret and completely abandon the idea of using Breath of Light on Akshan unless his Heroic Swing is on cooldown. Place Singularity directly on your caster minions to secure farm from a safe distance. If he attempts to dive you under turret, prepare Falling Star to interrupt his swing mid-air. Prioritise safety over gold early; your scaling with Cosmic Creator will eventually outvalue his single-target assassination potential once you reach teamfights.

チャンピオン詳細 → Akshanのビルド →
Zed

Zed+2

assassin divedodge ult This lane is dictated by how easily Zed can neutralize your self-peel. When you attempt to drop Falling Star to stop his advance, he can immediately cast Death Mark to dodge the impact entirely. By reappearing directly behind you, he renders your channeled, directional Breath of Light completely useless, leaving you exposed to a devastating point-blank combination of Shadow Slash and Razor Shuriken enhanced by Contempt for the Weak. Zedのビルド → 詳細を見る
Zed

理由

This lane is dictated by how easily Zed can neutralize your self-peel. When you attempt to drop Falling Star to stop his advance, he can immediately cast Death Mark to dodge the impact entirely. By reappearing directly behind you, he renders your channeled, directional Breath of Light completely useless, leaving you exposed to a devastating point-blank combination of Shadow Slash and Razor Shuriken enhanced by Contempt for the Weak.

レーン戦への影響

Before level five, you can safely gather Cosmic Creator stacks from a distance using Singularity. However, once Zed unlocks Death Mark, the power dynamic shifts violently. You are forced to surrender lane priority and clear waves from extreme range. Stepping past the midway point of the lane invites an all-in that you cannot survive, and using Astral Flight aggressively becomes an invitation for Zed to easily intercept and execute you.

立ち回り方

To survive this matchup, never initiate trades with Falling Star. You must hold this defensive tool until Zed commits his ultimate. When he targets you with Death Mark, prepare to aim Falling Star directly behind your own model the split-second he reappears. If he misses his shurikens, drop Singularity at your feet to hinder his movement and immediately use Astral Flight to retreat safely under your turret's protection.

チャンピオン詳細 → Zedのビルド →
Syndra

Syndra+2

cc interruptburst threat This matchup is entirely dictated by how easily Syndra can disrupt your trading patterns. Your primary damage tool, Breath of Light, requires you to remain stationary or fly in a predictable line during Astral Flight. Syndra can effortlessly interrupt this channel from a safe distance by launching a Dark Sphere with Scatter the Weak. This immediate knockback and stun completely cancels your DPS while leaving you immobilized and exposed to her follow-up burst. Syndraのビルド → 詳細を見る
Syndra

理由

This matchup is entirely dictated by how easily Syndra can disrupt your trading patterns. Your primary damage tool, Breath of Light, requires you to remain stationary or fly in a predictable line during Astral Flight. Syndra can effortlessly interrupt this channel from a safe distance by launching a Dark Sphere with Scatter the Weak. This immediate knockback and stun completely cancels your DPS while leaving you immobilized and exposed to her follow-up burst.

レーン戦への影響

You cannot safely contest the wave state or secure priority. Every time you attempt to clear minions using Singularity and Breath of Light, Syndra will punish your stationary posture with Force of Will and Dark Sphere. This forced passivity pushes you under your turret, bleeding tower plates and preventing you from assisting your jungler, while allowing Syndra to freely scale and upgrade her abilities through Transcendent.

立ち回り方

To survive, prioritize farming from maximum distance solely using Singularity to gather Cosmic Creator stacks. Never channel Breath of Light unless Syndra has recently wasted Scatter the Weak; this cooldown is your only safe window to actively clear. If she holds her stun, remain patient under turret and accept losing some farm. Should she catch you with Unleashed Power, immediately use Astral Flight defensively toward your tower rather than trying to fight back.

チャンピオン詳細 → Syndraのビルド →
Yasuo

Yasuo+2

wind wallmelee dive Yasuo holds a massive advantage because his Wind Wall completely deletes both the projectile of your Singularity and the channeled beam of your Breath of Light. Because you rely on these two abilities to gather Stardust and clear waves, a well-placed wall leaves you completely defenceless. Furthermore, his Sweeping Blade allows him to easily dash out of your stationary zoning tools, rendering your area-of-effect threat useless. Yasuoのビルド → 詳細を見る
Yasuo

理由

Yasuo holds a massive advantage because his Wind Wall completely deletes both the projectile of your Singularity and the channeled beam of your Breath of Light. Because you rely on these two abilities to gather Stardust and clear waves, a well-placed wall leaves you completely defenceless. Furthermore, his Sweeping Blade allows him to easily dash out of your stationary zoning tools, rendering your area-of-effect threat useless.

レーン戦への影響

You cannot safely contest wave state because Yasuo can use Sweeping Blade to aggressively close the gap and trade while blocking your retaliation with Wind Wall. This forces you to drop back, conceding early priority and tower pressure. If he lands a Steel Tempest tornado, he can immediately trigger Last Breath to dive you, turning the lane into a constant survival struggle where you lose gold and map presence.

立ち回り方

To survive, you must drop your Singularity directly under your own feet or turret, rather than aiming it at the wave, preventing Wind Wall from intercepting it. Never channel Breath of Light while his wall is available; wait for him to waste it defensively before committing your mana. If he dashes forward, use Astral Flight backward immediately toward your turret to break his chase before he can stack Steel Tempest for a knock-up.

チャンピオン詳細 → Yasuoのビルド →
Yone

Yone+2

gap closecc chain Staying stationary while channeling Breath of Light makes you an incredibly easy target for Yone. He can effortlessly close the gap from safe distance using Soul Unbound. Once he is on top of you, he will immediately interrupt your channeled breath with the knock-up from his third Mortal Steel strike, completely neutralizing your primary damage source while keeping his own threat high. Yoneのビルド → 詳細を見る
Yone

理由

Staying stationary while channeling Breath of Light makes you an incredibly easy target for Yone. He can effortlessly close the gap from safe distance using Soul Unbound. Once he is on top of you, he will immediately interrupt your channeled breath with the knock-up from his third Mortal Steel strike, completely neutralizing your primary damage source while keeping his own threat high.

レーン戦への影響

This dynamic forces you into a highly defensive posture where you cannot safely contest the minion wave. Every time you attempt to drop Singularity to clear, you risk stepping into his dash range. He will easily force you under your turret, chunking your health bar or burning your flash, which ultimately gives him free reign to roam or secure river priority.

立ち回り方

To survive, you must track his wind stacks diligently; never channel your damage when his sword glows with his third Mortal Steel charge. Keep Astral Flight strictly as an escape tool to fly away the moment he triggers Soul Unbound. If he dives you under turret, drop Singularity directly on his original body's marker so he takes heavy damage and gets slowed when his spirit is forced to return there.

チャンピオン詳細 → Yoneのビルド →
Taliyah

Taliyah+2

dash trapcc interrupt The core of this matchup lies in how Taliyah completely shuts down your mobility. The moment you activate Astral Flight to reposition or escape, any overlap with her Unraveled Earth minefield triggers an instant stun. This interaction strips away your main defensive tool and safety net, leaving your channeled Breath of Light extremely vulnerable to being interrupted by her Seismic Shove combo. Taliyahのビルド → 詳細を見る
Taliyah

理由

The core of this matchup lies in how Taliyah completely shuts down your mobility. The moment you activate Astral Flight to reposition or escape, any overlap with her Unraveled Earth minefield triggers an instant stun. This interaction strips away your main defensive tool and safety net, leaving your channeled Breath of Light extremely vulnerable to being interrupted by her Seismic Shove combo.

レーン戦への影響

Because you cannot fly safely, you are forced to clear waves defensively from a distance. If you step up to drop Singularity on the wave, Taliyah can zone you with Threaded Volley or setup a deadly Seismic Shove into her mines. This denies you early Cosmic Creator stacks, giving her free rein to use Rock Surfing and Weaver's Wall to roam while you remain pinned under your tower.

立ち回り方

To survive, treat Astral Flight purely as a late-reaction retreat tool, and never use it offensively or parallel to her position. Always keep yourself positioned away from terrain to limit her Rock Surfing approach angles. Place your Singularity defensively to slow her push from maximum range. If she misses Seismic Shove, you have a brief window to channel Breath of Light, but you must cancel it immediately if she lays down Unraveled Earth.

チャンピオン詳細 → Taliyahのビルド →
Fizz

Fizz+2

untargetable dodgemelee dive Fizz's Playful completely negates your primary defensive tool and ultimate, Falling Star. If you attempt to stun him or zone him out when he dives you, he simply hops into his untargetable state, rendering your impact useless. Once he bypasses your ultimate and lands directly on top of you, his Urchin Strike and Rending Wave will quickly shred your health bar before you can even channel Breath of Light. Fizzのビルド → 詳細を見る
Fizz

理由

Fizz's Playful completely negates your primary defensive tool and ultimate, Falling Star. If you attempt to stun him or zone him out when he dives you, he simply hops into his untargetable state, rendering your impact useless. Once he bypasses your ultimate and lands directly on top of you, his Urchin Strike and Rending Wave will quickly shred your health bar before you can even channel Breath of Light.

レーン戦への影響

This interaction turns the laning phase into a passive survival challenge. You cannot walk up to collect Cosmic Creator stacks on the wave because Fizz will punish you with Chum the Waters. He will freeze the minions or dive you under your own turret, forcing you to forfeit early priority and gold. This pressure prevents you from helping your jungler, giving Fizz free reign to roam.

立ち回り方

To survive, you must never cast Falling Star or Singularity offensively; keep them locked until Fizz commits his Playful. If he initiates with Urchin Strike, drop Singularity directly on yourself and prepare Astral Flight to fly backward immediately towards your turret. Never try to trade back with Breath of Light while his untargetable jump is available. If he lands Chum the Waters, immediately fly away to safety before the shark erupts.

チャンピオン詳細 → Fizzのビルド →

その他のマッチアップ

不利なマッチアップ

21

これらのチャンピオンは、マッチアップ自体を絶望的にするわけではないが、対面で優位に立ちやすいツールを持っている。射程が長かったり、攻撃を受け止める力が高かったり、エンゲージへの対応手段が豊富だったりする。アプローチを調整し、戦闘を受け入れるタイミングを慎重に選ぶ必要がある。

Galio

Galio+1

cc lockdownwave clear Galio represents a tough obstacle because his crowd control directly shuts down your primary trading and farming tool. Whenever you attempt to channel Breath of Light to secure Stardust or clear minions, Galio can easily interrupt you. A quick Justice Punch forward or a charged Shield of Durand instantly cancels your channel, leaving you vulnerable while your main source of damage is placed on cooldown. Galioのビルド → 詳細を見る
Galio

理由

Galio represents a tough obstacle because his crowd control directly shuts down your primary trading and farming tool. Whenever you attempt to channel Breath of Light to secure Stardust or clear minions, Galio can easily interrupt you. A quick Justice Punch forward or a charged Shield of Durand instantly cancels your channel, leaving you vulnerable while your main source of damage is placed on cooldown.

レーン戦への影響

Because your waveclear is constantly threatened, Galio easily gains priority to push with Winds of War. If you get caught by his crowd control while trying to match his push, you will bleed health and lose the race to roam. This allows him to freely look for Hero's Entrance plays on the map, forcing you to constantly choose between securing your own stacks under turret or trying to follow his rotations.

立ち回り方

To survive and scale, you must play outside the range of his Justice Punch. Use Singularity from a safe distance to slow the wave and pull minions together, forcing him to use his dash just to reach you. Never commit your Astral Flight aggressively; instead, reserve it to safely escape or to quickly relocate and match his roam once he commits his Hero's Entrance to a side lane.

チャンピオン詳細 → Galioのビルド →
Orianna

Orianna+1

poke pressurespacing Orianna dominates this matchup because her sphere allows her to zone you from a distance where you cannot safely channel. When you try to stack Stardust using Breath of Light, you must stand still, making you an easy target. She can easily reposition her ball with Command: Attack and immediately interrupt your channel from afar using Command: Shockwave, completely neutralizing your primary damage source while keeping herself entirely out of your reach. Oriannaのビルド → 詳細を見る
Orianna

理由

Orianna dominates this matchup because her sphere allows her to zone you from a distance where you cannot safely channel. When you try to stack Stardust using Breath of Light, you must stand still, making you an easy target. She can easily reposition her ball with Command: Attack and immediately interrupt your channel from afar using Command: Shockwave, completely neutralizing your primary damage source while keeping herself entirely out of your reach.

レーン戦への影響

During the early levels, Orianna dictates the wave state by placing her ball aggressively. If you attempt to secure minions using Singularity, she will punish you with Command: Attack and Command: Dissonance. You are forced to farm under tower, bleeding health whenever you try to match her push. This constant harass delays your Stardust scaling and forces early recalls, giving her free opportunities to pressure your mid turret.

立ち回り方

To survive, you must anchor your positioning behind your caster minions, using Singularity solely to freeze or slow down incoming waves rather than to fight. Never activate Breath of Light while her Command: Shockwave is available unless she has already misplaced her ball. If she moves forward to zone you, use Astral Flight backward immediately to escape the radius of her Command: Dissonance, accepting that you must give up some farm to secure your scaling.

チャンピオン詳細 → Oriannaのビルド →
Ryze

Ryze+1

scale fightcc lock Ryze's point-and-click Rune Prison is the ultimate counter to your Astral Flight. While you attempt to reposition or escape, his instant root immediately stops your flight mid-air, leaving you stationary and vulnerable to his Spell Flux and Overload burst. Because Ryze scales exceptionally well with Arcane Mastery, letting him disrupt your main defensive and mobility tool makes it hard to safely gather Stardust from Singularity. Ryzeのビルド → 詳細を見る
Ryze

理由

Ryze's point-and-click Rune Prison is the ultimate counter to your Astral Flight. While you attempt to reposition or escape, his instant root immediately stops your flight mid-air, leaving you stationary and vulnerable to his Spell Flux and Overload burst. Because Ryze scales exceptionally well with Arcane Mastery, letting him disrupt your main defensive and mobility tool makes it hard to safely gather Stardust from Singularity.

レーン戦への影響

This interaction severely limits your ability to trade or clear waves aggressively. You cannot use Astral Flight to fly over minions for a quick Breath of Light spray without risking an immediate grounding. If Ryze freezes the wave or uses Realm Warp to reposition, you are forced to play defensively near your tower, delaying your passive scaling and reducing your map pressure.

立ち回り方

Never initiate trades with Astral Flight while Rune Prison is available. Instead, bait him into using his root by standing just outside its short range while using Singularity to farm. Once Rune Prison is on cooldown, you have a brief window to channel Breath of Light safely. If Ryze attempts to rotate with Realm Warp, prepare to drop Falling Star on his portal destination to instantly stun him upon arrival.

チャンピオン詳細 → Ryzeのビルド →
Annie

Annie+1

punish channelscale check The lane is dictated by Annie's passive, Pyromania. Because your primary source of damage relies on channeling Breath of Light, Annie can instantly shut down your DPS. Any of her offensive spells, especially a targeted Disintegrate or instant Incinerate, will consume her stun to cancel your channel immediately. This leaves you completely vulnerable and unable to return trade damage during your most vulnerable standing or flying windows. Annieのビルド → 詳細を見る
Annie

理由

The lane is dictated by Annie's passive, Pyromania. Because your primary source of damage relies on channeling Breath of Light, Annie can instantly shut down your DPS. Any of her offensive spells, especially a targeted Disintegrate or instant Incinerate, will consume her stun to cancel your channel immediately. This leaves you completely vulnerable and unable to return trade damage during your most vulnerable standing or flying windows.

レーン戦への影響

You cannot safely contest the wave or trade health directly. Attempting to clear minions with Breath of Light allows Annie to walk up and trigger Pyromania, forcing you back or setting up an easy Summon: Tibbers burst. This constant threat forces you under tower, delaying your Cosmic Creator stacking. Consequently, you lose early priority, giving Annie free windows to move into the river or secure recall timings while you struggle to clear.

立ち回り方

To survive, monitor Annie’s passive indicator constantly. Never engage with Astral Flight while Pyromania is fully charged. Instead, drop Singularity from maximum range to safely farm and stack Cosmic Creator. The moment Annie wastes her stun—often using Disintegrate to secure a last-hit—immediately use your Breath of Light to hard-shove the remaining minions. Once the wave crashes, use Astral Flight to roam and assist other lanes before she can recharge her stun and follow you.

チャンピオン詳細 → Annieのビルド →
Lissandra

Lissandra+1

cc chaingank setup Lissandra dominates this lane because she completely neutralizes your main escape tool. Whenever you attempt to fly away or reposition using Astral Flight, she can instantly interrupt your momentum with the point-and-click stun of Frozen Tomb or catch you mid-flight with Ring of Frost. Because her crowd control is instantaneous, you can never safely channel Breath of Light or fly aggressively while her ultimate is available. Lissandraのビルド → 詳細を見る
Lissandra

理由

Lissandra dominates this lane because she completely neutralizes your main escape tool. Whenever you attempt to fly away or reposition using Astral Flight, she can instantly interrupt your momentum with the point-and-click stun of Frozen Tomb or catch you mid-flight with Ring of Frost. Because her crowd control is instantaneous, you can never safely channel Breath of Light or fly aggressively while her ultimate is available.

レーン戦への影響

This lockdown threat forces you to play defensively under your turret, sacrificing early wave control. Lissandra easily shatters minions with Ice Shard and can shove you in, using Glacial Path to roam while you slowly clear. If you try to match her push, she can easily setup a gank; being caught out of position means a guaranteed death if she links Frozen Tomb into Ring of Frost before you can react.

立ち回り方

To survive, you must play strictly around her cooldown windows. Never cast Astral Flight proactively unless you have seen Lissandra waste Glacial Path or her ultimate, Frozen Tomb. Keep your distance and focus on collecting Stardust from a safe range using Singularity and quick bursts of Breath of Light. If she approaches aggressively with her claw, immediately retreat toward your tower rather than trying to trade back, as her crowd control sequence will always win short-range skirmishes.

チャンピオン詳細 → Lissandraのビルド →
Veigar

Veigar+1

cage trapburst threat This matchup is dictated by how Veigar's Event Horizon completely nullifies your primary mobility. If you attempt to escape or reposition using Astral Flight, hitting the boundary of his cage immediately knocks you out of the air and stuns you. This leaves you completely vulnerable to a guaranteed Dark Matter and Primordial Burst combo, turning your main defensive tool into a deadly trap. Veigarのビルド → 詳細を見る
Veigar

理由

This matchup is dictated by how Veigar's Event Horizon completely nullifies your primary mobility. If you attempt to escape or reposition using Astral Flight, hitting the boundary of his cage immediately knocks you out of the air and stuns you. This leaves you completely vulnerable to a guaranteed Dark Matter and Primordial Burst combo, turning your main defensive tool into a deadly trap.

レーン戦への影響

Because Event Horizon threatens to interrupt your flight, you cannot freely use Astral Flight to escape ganks or aggressively trade with Breath of Light. Veigar can easily zone you away from farming with Singularity by placing his cage around your gravity well. This limits your ability to safely stack Cosmic Creator, forcing you to play under your tower and concede mid priority during early river skirmishes.

立ち回り方

To survive this lane, you must adopt a strict positioning rule: never use Astral Flight while Event Horizon is off cooldown. Instead, focus on farming from maximum range using Breath of Light and Singularity. If Veigar mispositions and misses his cage, you have a brief window to fly diagonally to avoid his linear Baleful Strike while gathering Cosmic Creator stacks. If trapped inside the cage, stand still, avoid the walls, and prepare to dodge Dark Matter manually.

チャンピオン詳細 → Veigarのビルド →
Aurora

Aurora+1

mobility gapdodge ult Aurora holds a massive advantage in skirmishes because your primary zone control, Singularity, is easily neutralized. The moment you drop the black hole to zone her or collect Stardust, she can activate Across the Veil to turn invisible, gain speed, and reposition completely out of the pull. This leaves you canalizing Breath of Light into empty space while she repositions to retaliate. Auroraのビルド → 詳細を見る
Aurora

理由

Aurora holds a massive advantage in skirmishes because your primary zone control, Singularity, is easily neutralized. The moment you drop the black hole to zone her or collect Stardust, she can activate Across the Veil to turn invisible, gain speed, and reposition completely out of the pull. This leaves you canalizing Breath of Light into empty space while she repositions to retaliate.

レーン戦への影響

Because your wave-clear setup is compromised, she can constantly threaten you with Twofold Hex and The Weirding to force you off the wave. You cannot easily lock her down to trade back, meaning you must surrender early mid priority. If you overextend trying to stack Stardust, her Between Worlds can trap you under her terms, preventing any quick escape via Astral Flight.

立ち回り方

To survive, you must play defensively near your turret, focusing solely on safe farming. Never initiate with Singularity; instead, hold it as a defensive tool for when she commits. If she uses Across the Veil aggressively, glide backward using Astral Flight immediately to break her line of sight. Save Falling Star strictly to interrupt her when she teleports along the borders of her Between Worlds field.

チャンピオン詳細 → Auroraのビルド →
Viktor

Viktor+1

cc trappoke trade Your main source of damage and Stardust, Breath of Light, forces you to stand completely still to channel. This self-root is a massive liability against Viktor, who can effortlessly drop Gravity Field directly on top of your static hitbox. If you try to trade back or clear waves with your channel, you instantly trigger his stun, leaving you vulnerable to a follow-up Hextech Ray and Arcane Storm. Viktorのビルド → 詳細を見る
Viktor

理由

Your main source of damage and Stardust, Breath of Light, forces you to stand completely still to channel. This self-root is a massive liability against Viktor, who can effortlessly drop Gravity Field directly on top of your static hitbox. If you try to trade back or clear waves with your channel, you instantly trigger his stun, leaving you vulnerable to a follow-up Hextech Ray and Arcane Storm.

レーン戦への影響

This interaction severely restricts your wave management. You cannot freely use Singularity and Breath of Light to clear waves because Viktor will punish your immobility with Gravity Field and chunk you with Hextech Ray. Consequently, you are forced to farm defensively near your tower, conceding early lane priority and slowing down your passive scaling while Viktor safely stacks his Glorious Evolution and controls the mid lane.

立ち回り方

Never initiate a channel of Breath of Light unless you see Viktor waste Gravity Field to zone or peel. When you need to gather Stardust, bait his Hextech Ray first by moving laterally, then use a quick Singularity to collect minions. If Viktor aggressively drops his zone on you, immediately cancel your channel and use Astral Flight to retreat safely before the stun triggers. Patience during his long cooldown windows is your only path to scaling.

チャンピオン詳細 → Viktorのビルド →
Diana

Diana+1

shield divecc interrupt Diana's aggressive kit thrives on closing the gap with Crescent Strike and Lunar Rush, which presents a constant threat to your stationary channels. The defining danger is her Moonfall, which acts as a hard stop to your primary tools. It instantly cancels your Breath of Light channeling and drags you directly out of the sky during Astral Flight, turning your main escape tool into a deadly trap. Dianaのビルド → 詳細を見る
Diana

理由

Diana's aggressive kit thrives on closing the gap with Crescent Strike and Lunar Rush, which presents a constant threat to your stationary channels. The defining danger is her Moonfall, which acts as a hard stop to your primary tools. It instantly cancels your Breath of Light channeling and drags you directly out of the sky during Astral Flight, turning your main escape tool into a deadly trap.

レーン戦への影響

Because of this constant interruption threat, you cannot freely channel Breath of Light to thin out minion waves without putting your life bar at risk. Diana can easily zone you away from the wave, forcing you to rely solely on defensive Singularity placements to harvest Cosmic Creator stacks. One misstep allows her to force a deadly trade under your own turret, destroying your lane priority and farming rhythm.

立ち回り方

To survive this matchup, adopt a strictly defensive stance and never cast Astral Flight offensively while Diana has Moonfall available. Use Singularity from maximum range to secure stacks and farm safely. If she manages to jump on you with Lunar Rush, immediately drop Falling Star on your own feet to stun her, then use your flight to escape only after her ultimate pull has been wasted.

チャンピオン詳細 → Dianaのビルド →
Ekko

Ekko+1

mobility burstdodge cc This matchup is heavily dictated by how Ekko bypasses your primary zone control. When you deploy Singularity to clear waves or deter aggression, Ekko can instantly ignore the pull and slow using Phase Dive. This blink allows him to cross the boundary effortlessly, closing the gap to strike you. Once on top of you, he easily triggers Z-Drive Resonance with Timewinder, trading heavily before you can ramp up Breath of Light. Ekkoのビルド → 詳細を見る
Ekko

理由

This matchup is heavily dictated by how Ekko bypasses your primary zone control. When you deploy Singularity to clear waves or deter aggression, Ekko can instantly ignore the pull and slow using Phase Dive. This blink allows him to cross the boundary effortlessly, closing the gap to strike you. Once on top of you, he easily triggers Z-Drive Resonance with Timewinder, trading heavily before you can ramp up Breath of Light.

レーン戦への影響

You cannot safely step up to channel Breath of Light, as standing still makes you an easy target for Parallel Convergence. Because Singularity cannot guarantee your safety, you must concede early wave priority to avoid getting chunked. If you use Astral Flight aggressively, Ekko can predict your flight path, deploy his shield, and intercept you with Chronobreak or Phase Dive, completely cutting off your escape routes.

立ち回り方

To survive, adopt a strict defensive posture and keep the minion wave close to your turret. Never drop Singularity proactively to waveclear; instead, hold it until Ekko commits his Phase Dive forward, using it on your own feet to force him to retreat or take turret shots. If he dives you under tower, immediately drop Falling Star to stun him in place. Save Astral Flight exclusively as a reactive disengage to fly backward.

チャンピオン詳細 → Ekkoのビルド →
Vex

Vex+1

gloom fearcc interrupt The lane is defined by how Vex's passive, Doom 'n Gloom, completely shuts down your primary mobility. Whenever her red bar is full, any of her basic spells—Mistral Bolt, Personal Space, or Looming Darkness—will interrupt your Astral Flight mid-air with a fear. This immediate displacement cancel stops your escape or repositioning instantly, leaving you incredibly vulnerable to her follow-up burst. Vexのビルド → 詳細を見る
Vex

理由

The lane is defined by how Vex's passive, Doom 'n Gloom, completely shuts down your primary mobility. Whenever her red bar is full, any of her basic spells—Mistral Bolt, Personal Space, or Looming Darkness—will interrupt your Astral Flight mid-air with a fear. This immediate displacement cancel stops your escape or repositioning instantly, leaving you incredibly vulnerable to her follow-up burst.

レーン戦への影響

Because of this constant threat, you cannot freely use Astral Flight to clear waves or escape ganks. If you try to force a trade using Breath of Light while flying, Vex can easily interrupt you and counter-engage with Shadow Surge. This forces you to play defensively near your tower, slowing down your Cosmic Creator stack accumulation and giving Vex free reign to push and roam.

立ち回り方

Your primary rule is to track Vex's Doom 'n Gloom bar constantly. Only activate Astral Flight after she wastes her empowered state on Mistral Bolt or Looming Darkness to clear minions. Keep Singularity centered on your own caster minions to pull the wave back safely without stepping forward. If she marks you with Shadow Surge, do not panic-fly; wait for her to arrive before using the stun from Falling Star to peel her off.

チャンピオン詳細 → Vexのビルド →
Katarina

Katarina+1

blink dodgeroam race This matchup is dictated by how easily Katarina bypasses your zone control. Because Breath of Light forces you to face a single direction while channeling, Katarina can instantly react with Shunpo to blink behind you. This maneuver not only evades your primary damage stream but also allows her to step completely out of your Singularity radius, turning your static channel into an open invitation for her daggers. Katarinaのビルド → 詳細を見る
Katarina

理由

This matchup is dictated by how easily Katarina bypasses your zone control. Because Breath of Light forces you to face a single direction while channeling, Katarina can instantly react with Shunpo to blink behind you. This maneuver not only evades your primary damage stream but also allows her to step completely out of your Singularity radius, turning your static channel into an open invitation for her daggers.

レーン戦への影響

You cannot safely contest the wave near her tower, as pushing too far exposes you to a sudden Shunpo engage. This pressure forces you to play defensively under tower, granting her the freedom to clear with Bouncing Blade and roam. If you try to follow her rotations through the river without vision, her burst can catch you in transit before you can escape with Astral Flight.

立ち回り方

To survive, never initiate trades with Singularity. Hold this zone and Breath of Light until she has already committed her Shunpo onto a dagger. If she unleashes Death Lotus, immediately use Astral Flight to fly backward to safety. When she disappears from the lane to roam, do not chase her blindly through unwarded paths; instead, ping your allies, gather Stardust safely, and push the wave hard to punish her absence.

チャンピオン詳細 → Katarinaのビルド →
Talon

Talon+1

assassin roamburst threat Your map influence relies entirely on using Astral Flight to bypass terrain, but Talon's Assassin's Path makes him the ultimate counter-roamer. He can easily match your flight trajectory by vaulting over the jungle walls. This turns your rotation into a death trap, as he can intercept you mid-way or ambush you at your destination with Shadow Assault before you can even land. Talonのビルド → 詳細を見る
Talon

理由

Your map influence relies entirely on using Astral Flight to bypass terrain, but Talon's Assassin's Path makes him the ultimate counter-roamer. He can easily match your flight trajectory by vaulting over the jungle walls. This turns your rotation into a death trap, as he can intercept you mid-way or ambush you at your destination with Shadow Assault before you can even land.

レーン戦への影響

Because Talon clears quickly with Rake, he will constantly disappear into the river. You cannot safely contest his movements with Astral Flight without risking a deadly face-check. This forces you to play defensively under your turret, using Singularity to hold the wave, while your side lanes suffer from his constant, unreactable pressure since you cannot safely match his rotations.

立ち回り方

Never initiate an Astral Flight rotation unless Talon is visible elsewhere. Instead, drop Singularity on the wave from a safe distance and harvest Cosmic Creator stacks under tower. If Talon jumps you with Noxian Diplomacy, drop Falling Star directly on yourself to disrupt his Blade's End proc, then use your flight toward the safety of your tier-two turret rather than over side-walls where Assassin's Path allows him to hunt you down.

チャンピオン詳細 → Talonのビルド →

その他のマッチアップ

スキル次第のマッチアップ

8

このマッチアップは何よりもまず実行力の勝負であり、両者ともに優位を取れる現実的な手段を持っている。重要なスキルを一つ避けられるか、エンゲージを正しく読めるか、あるいはたった一つの位置取りのミスが、勝敗を分けることもある。マッチアップを理解し、行動すべき瞬間を見極める力がとりわけ重要になる。

Brand

Brand±0

dodge skillshotspacing This matchup revolves entirely around your immobility during Breath of Light. Because you must stand still to channel your main source of damage, Brand has an incredibly easy time landing Sear to stun you, provided he has already applied Blaze via Pillar of Flame or Conflagration. This instantly interrupts your channel, leaving you completely vulnerable to his full burst trade. Brandのビルド → 詳細を見る
Brand

理由

This matchup revolves entirely around your immobility during Breath of Light. Because you must stand still to channel your main source of damage, Brand has an incredibly easy time landing Sear to stun you, provided he has already applied Blaze via Pillar of Flame or Conflagration. This instantly interrupts your channel, leaving you completely vulnerable to his full burst trade.

レーン戦への影響

The lane oscillates between rapid wave clearing and punishing trades. If you mindlessly use Singularity and Breath of Light to stack Cosmic Creator, Brand will walk up to chunk you. Every time you get stunned, you lose significant health, forcing early recalls that cost you tower plating and delay your scaling. Missing his skillshots, however, gives you free reign to push him under tower.

立ち回り方

Never activate Breath of Light while Brand has his Sear available unless you are safely flying sideways with Astral Flight. Bait out his Pillar of Flame first by stepping forward and immediately back. Once he misses or wastes Sear on a minion, immediately drop Singularity to trap him and channel your fire. If he initiates with Pyroclasm, immediately fly away with Astral Flight to prevent the fireballs from bouncing back to you.

チャンピオン詳細 → Brandのビルド →
Morgana

Morgana±0

spell shieldcc dodge This matchup is a pure battle of utility negation. Morgana relies on Black Shield to completely absorb your magic damage and, more importantly, negate the displacement pull of your Singularity and the stun from Falling Star. Without these crowd control tools to lock her down, your Breath of Light becomes incredibly difficult to channel safely, as she can easily retaliate with Dark Binding or Soul Shackles. Morganaのビルド → 詳細を見る
Morgana

理由

This matchup is a pure battle of utility negation. Morgana relies on Black Shield to completely absorb your magic damage and, more importantly, negate the displacement pull of your Singularity and the stun from Falling Star. Without these crowd control tools to lock her down, your Breath of Light becomes incredibly difficult to channel safely, as she can easily retaliate with Dark Binding or Soul Shackles.

レーン戦への影響

Wave control dictates the entire pace of this lane. Morgana uses Tormented Shadow to quickly dissolve minion waves, forcing you to match her push with Singularity. If you waste your zone on the wave, she can safely fish for Dark Binding. Because Black Shield prevents you from securing quick kills, this lane often devolves into a farming simulator where both of you struggle to pressure the opponent's tower.

立ち回り方

To win this, never initiate with Falling Star. Instead, use Breath of Light to chip away at her Black Shield before committing your crowd control. Bait out her shield by positioning aggressively, then immediately disengage using Astral Flight. If she holds her shield, focus entirely on gathering Cosmic Creator stacks by dropping Singularity directly on the caster minions. When she steps up to cast Soul Shackles, fly away immediately.

チャンピオン詳細 → Morganaのビルド →
Ziggs

Ziggs±0

wave clearrange battle This matchup is a constant artillery duel where wave positioning dictates who gets poked down. While Aurelion Sol wants to channel *Breath of Light* to collect *Cosmic Creator* stacks on minion waves, Ziggs excels at punishing stationary targets. His *Bouncing Bomb* easily chips away at your health from afar, but the true threat is *Satchel Charge*, which can instantly interrupt your channeled flight or damage, leaving you vulnerable and misplaced in the lane. Ziggsのビルド → 詳細を見る
Ziggs

理由

This matchup is a constant artillery duel where wave positioning dictates who gets poked down. While Aurelion Sol wants to channel *Breath of Light* to collect *Cosmic Creator* stacks on minion waves, Ziggs excels at punishing stationary targets. His *Bouncing Bomb* easily chips away at your health from afar, but the true threat is *Satchel Charge*, which can instantly interrupt your channeled flight or damage, leaving you vulnerable and misplaced in the lane.

レーン戦への影響

The laning phase becomes a high-stakes race for priority. If you let Ziggs shove you under turret, his *Short Fuse* and *Satchel Charge* will rapidly demolish your plating. However, stepping forward to contest the wave with *Singularity* exposes you to his *Hexplosive Minefield*. Every trade revolves around health versus mana efficiency; if you get forced to recall early, you lose critical stacking momentum while your mid turret crumbles.

立ち回り方

To survive and scale, never use *Astral Flight* aggressively unless Ziggs has already wasted his *Satchel Charge*. Keep your distance by clearing waves from behind your caster minions using *Singularity*, forcing him to choose between targeting you or the wave with *Bouncing Bomb*. If he attempts to zone you with *Hexplosive Minefield*, immediately drop *Singularity* on the opposing wave to match his clear speed, preventing him from utilizing his passive on your turret.

チャンピオン詳細 → Ziggsのビルド →
Lux

Lux±0

dodge ccwave clear This matchup revolves around a dangerous vulnerability during your main damage tool. Whenever you channel Breath of Light, you become a completely static target, making you incredibly easy prey for Lux's Light Binding. If she catches you with this root, she can immediately follow up with Lucent Singularity and Final Spark to delete your health bar. Your immobile state turns her skillshots from speculative pokes into guaranteed hits. Luxのビルド → 詳細を見る
Lux

理由

This matchup revolves around a dangerous vulnerability during your main damage tool. Whenever you channel Breath of Light, you become a completely static target, making you incredibly easy prey for Lux's Light Binding. If she catches you with this root, she can immediately follow up with Lucent Singularity and Final Spark to delete your health bar. Your immobile state turns her skillshots from speculative pokes into guaranteed hits.

レーン戦への影響

Because of this threat, you cannot freely clear waves with Breath of Light without risking a lethal trade. If you get rooted under her turret or in the middle of the lane, she will strip your health, forcing early recalls that delay your Cosmic Creator stacking. Consequently, you must often concede mid priority, allowing Lux to shove waves with Lucent Singularity and threaten your side lanes while you struggle to collect Stardust safely.

立ち回り方

To survive, never tap Breath of Light unless Lux has just wasted Light Binding, or you are safely positioned behind at least two minions to block its trajectory. If she holds her root, focus on dropping Singularity to farm from afar and conserve your Astral Flight. Should she throw her cage and miss, immediately activate Astral Flight diagonally to reposition while blasting her, forcing her to rely on Prismatic Barrier to absorb your retaliation.

チャンピオン詳細 → Luxのビルド →
Twisted Fate

Twisted Fate±0

point click ccglobal presence This matchup is a pure race of global influence where your flight paths collide with his teleports. The defining tension lies in your mobility; if you attempt to escape or reposition with Astral Flight, Twisted Fate can instantly knock you out of the sky by locking you down with a gold card from Pick a Card. This makes any aggressive flight highly punishable if his cards are ready. Twisted Fateのビルド → 詳細を見る
Twisted Fate

理由

This matchup is a pure race of global influence where your flight paths collide with his teleports. The defining tension lies in your mobility; if you attempt to escape or reposition with Astral Flight, Twisted Fate can instantly knock you out of the sky by locking you down with a gold card from Pick a Card. This makes any aggressive flight highly punishable if his cards are ready.

レーン戦への影響

In lane, you must respect his wave clear from Wild Cards and bonus gold from Loaded Dice. Since he can match your push, the lane turns into a constant pressure battle. If he pulls a gold card, you are forced to retreat, losing priority to drop Singularity. This allows him to cast Destiny first, forcing you to chase his roams or punish his tower.

立ち回り方

Never initiate Astral Flight while his Pick a Card is active or off cooldown. Instead, bait his card selection by tapping Breath of Light from safety. If he locks in a blue or red card to clear minions, that is your cue to drop Singularity on the wave and look for a roam. If he casts Destiny to help his side lanes, immediately channel Breath of Light to shove the wave and secure tower plates.

チャンピオン詳細 → Twisted Fateのビルド →

その他のマッチアップ

有利なマッチアップ

10

これらのチャンピオンは、こちらの主要な強みに効果的に対応するのが難しく、より自由に対面を組み立てることができる。プレッシャーをかけて有利な交換を引き出す手段は複数あることが多い。相手が態勢を立て直す時間を与えるのではなく、この優位を活かして主導権を握ろう。

Swain

Swain−1

safe farmoutscale Swain relies on marching forward during Demonic Ascension to drain your health, but his complete lack of mobility tools makes him the ultimate target for your zoning. The moment he activates his ultimate, dropping Singularity directly on his path traps him. He cannot escape the pull easily, allowing you to safely channel Breath of Light and harvest massive Stardust stacks off his slow-moving frame. Swainのビルド → 詳細を見る
Swain

理由

Swain relies on marching forward during Demonic Ascension to drain your health, but his complete lack of mobility tools makes him the ultimate target for your zoning. The moment he activates his ultimate, dropping Singularity directly on his path traps him. He cannot escape the pull easily, allowing you to safely channel Breath of Light and harvest massive Stardust stacks off his slow-moving frame.

レーン戦への影響

This interaction shifts the minion dynamic entirely in your favor. Because Swain cannot aggressively step up without risking a massive health loss inside your zone, you dictate the wave flow. You can easily freeze the minion line near your tower or shove him under his turret using Singularity. This neutralizes his Vision of Empire roams and completely starves him of his Ravenous Flock passive stacks.

立ち回り方

During the early levels, focus on safe farming while keeping a watchful eye on his Nevermove trajectory. Always hold Astral Flight to instantly disengage if he manages to land a root. Once he unlocks Demonic Ascension and tries to force a fight, place Singularity behind him to cut off his advance, then channel Breath of Light. If he ever flashes forward to force an engage, immediately fly backward to reset your spacing.

チャンピオン詳細 → Swainのビルド →
Vladimir

Vladimir−1

sustain battlelate game This matchup is highly advantageous because Vladimir lacks any form of hard crowd control to interrupt your Breath of Light. While he relies on Transfusion to sustain and farm, he cannot stop you from channeling your main damage source directly onto him. This structural vulnerability completely neutralizes his early pressure, allowing you to harvest Cosmic Creator stacks rapidly while matching his scaling threat without any threat of being cancelled. Vladimirのビルド → 詳細を見る
Vladimir

理由

This matchup is highly advantageous because Vladimir lacks any form of hard crowd control to interrupt your Breath of Light. While he relies on Transfusion to sustain and farm, he cannot stop you from channeling your main damage source directly onto him. This structural vulnerability completely neutralizes his early pressure, allowing you to harvest Cosmic Creator stacks rapidly while matching his scaling threat without any threat of being cancelled.

レーン戦への影響

You dictate the wave's tempo from the first minute. By placing Singularity directly on the minion wave, you force Vladimir to choose between taking heavy damage from Breath of Light or burning Sanguine Pool, which costs him a massive portion of his current health. This pressure secures you permanent push priority, letting you crash waves at will, secure easy recall timings, and safely stack your passive.

立ち回り方

Watch Vladimir's resource bar closely; when his Transfusion is fully charged and red, step back slightly to deny his empowered heal. Once that window passes, immediately drop Singularity on the wave to trap him, then fly forward with Astral Flight while channeling Breath of Light to punish his retreat. If he panics and uses Sanguine Pool, do not chase; wait for him to emerge, then finish the trade with your superior range.

チャンピオン詳細 → Vladimirのビルド →
Kayle

Kayle−2

free farmlate game Kayle's complete lack of early crowd control or burst threat removes any danger when you channel Breath of Light. Because her Divine Ascent keeps her weak and melee-range initially, she cannot contest your wave positioning. You can drop Singularity directly on the minions without fear of a Radiant Blast slow turning into a lethal chase, allowing you to accumulate Cosmic Creator stacks rapidly. Kayleのビルド → 詳細を見る
Kayle

理由

Kayle's complete lack of early crowd control or burst threat removes any danger when you channel Breath of Light. Because her Divine Ascent keeps her weak and melee-range initially, she cannot contest your wave positioning. You can drop Singularity directly on the minions without fear of a Radiant Blast slow turning into a lethal chase, allowing you to accumulate Cosmic Creator stacks rapidly.

レーン戦への影響

This matchup turns the mid lane into a free-farming zone where you dictate the tempo. Kayle is forced to rely on Starfire Spellblade to secure individual last hits under her turret. By keeping the wave pushed with Singularity, you deny her any roaming potential and force her to burn mana on Celestial Blessing to sustain, securing your priority without sacrificing health.

立ち回り方

Focus entirely on grouping the minion waves. Place Singularity on the caster minions as they arrive, then immediately melt them with Breath of Light to farm Stardust safely. If she steps forward to poke with Radiant Blast, do not panic; simply activate Astral Flight backward to reset your spacing. Never trade when her Divine Judgment is active; wait out its invulnerability before committing Falling Star.

チャンピオン詳細 → Kayleのビルド →

その他のマッチアップ

Aurelion Sol対策アイテム

これらのアイテムを購入すると、このチャンピオンの影響力を抑えられます。

Quicksilver Enchant
Quicksilver Enchant
Mercury's Treads
Mercury's Treads
Maw of Malmortius
Maw of Malmortius
Wit's End
Wit's End

このチャンピオンへの対策

カウンターアングル

Aurelion Solのカウンターを理解することは、アサシンを見つけるだけではありません。彼のテンポを乱し、ゾーン形成を阻止できるチャンピオンを認識することです。彼のキットは、チャネリング、ポジショニング、スペースコントロールに依存しています。カウンターとは、これらのゾーンを妨害、回避、または無視するチャンピオンのことです。逆に、彼のゾーンに押し込まれたチャンピオンは脆弱になります。マッチアップの理解は、純粋なデュエルではなく、テンポとマッププレッシャーに焦点を当てるべきです。

パッチの文脈

Aurelion Solのカウンターは、Qのチャネリングへの依存とインスタントな移動能力の欠如という2つの主な弱点を突きます。ZedやYoneのような機動力のあるアサシンは、彼のゾーンを回避して直接罰することができます。GalioやDianaのような他のチャンピオンは、彼のコントロールをすり抜けてエンゲージできます。機動力と速いエンゲージが有利なメタでは、これらのプロファイルは彼の有効性を大幅に低下させます。

クイックリード

  • 機動力のあるアサシンに弱い。
  • チャネリング中断に脆弱。
  • 機動力のないチャンピオンに強い。

カウンターの原型

バーストアサシン

これらのチャンピオンはAurelion Solのゲームプランを完全に回避します。素早くエンゲージし、彼のQを中断させ、ゾーンコントロールを確立する前に彼を倒すことができます。彼らの機動力は、彼のEを回避し、常に再配置することを可能にし、彼の有効性を低下させます。

チャンピオンの適応方法. 防御的にプレイし、視界とピールを優先してください。情報なしにQをチャネリングしないでください。

エンゲージフロントライナー

これらのチャンピオンは、彼のゾーンをすり抜けて戦闘を開始できます。彼らの耐久力により、ダメージを吸収し、直接的なエンゲージを強制して、Aurelion Solが依存するコントロールされたペースを破ることができます。

チャンピオンの適応方法. Rをピールと再配置に使用し、フロントラインでのポジショニングを避けてください。

機動力のあるメイジ

これらのチャンピオンは、彼のゾーンを回避し、プレッシャーを維持できます。彼らの機動力により、Qのチャネリングを維持することが困難になり、ポジショニングのミスを罰することができます。

チャンピオンの適応方法. デュエルではなく、集団戦を強制してください。

優先度の高いマッチアップ

Zed

Zedは、レンジ外からエンゲージしてAurelion Solを即座にバーストできるため、非常に危険なマッチアップです。鍵はトレードを避け、彼のアルティメットのクールダウンを考慮してプレイすることです。

対面時のよくある間違い

対面時のよくある間違い

  • 敵の機動力を見くびる。
  • Qを早すぎるタイミングでチャネリングする。
  • 視界を無視する。
  • Eの配置を間違える。
  • 孤立した戦闘を強制する。

コーチングノート

  • カウンターには、デュエルではなくマクロで勝とう。
  • Qのチャネリングは1秒たりとも無駄にするな。

FAQ

Aurelion Solの最悪のカウンターは?

Zedのようなアサシンは、彼のゾーンを無視して即座にバーストできるため、特に厄介です。このマッチアップでは、防御に重点を置き、味方に頼るなど、プレイスタイルを完全に調整する必要があります。

カウンターに勝てる?

ああ、でもデュエルでは無理だ。マップを広く使い、直接的な戦闘を避け、コントロールでオブジェクトに影響を与える必要がある。不利な状況を避けることが勝利の鍵だ。

厳しいレーンを生き抜くには?

安全にプレイし、距離を保ち、視界を最優先することだ。目標は、死なずに優先度を維持し、可能な限りローミングすることだ。

相性が有利になるのはなぜ?

彼のゾーンを避けられない、またはチャネリングを中断できないチャンピオンがいるからだ。これらの場合、彼は自分のテンポを押し付け、戦闘をコントロールできる。