
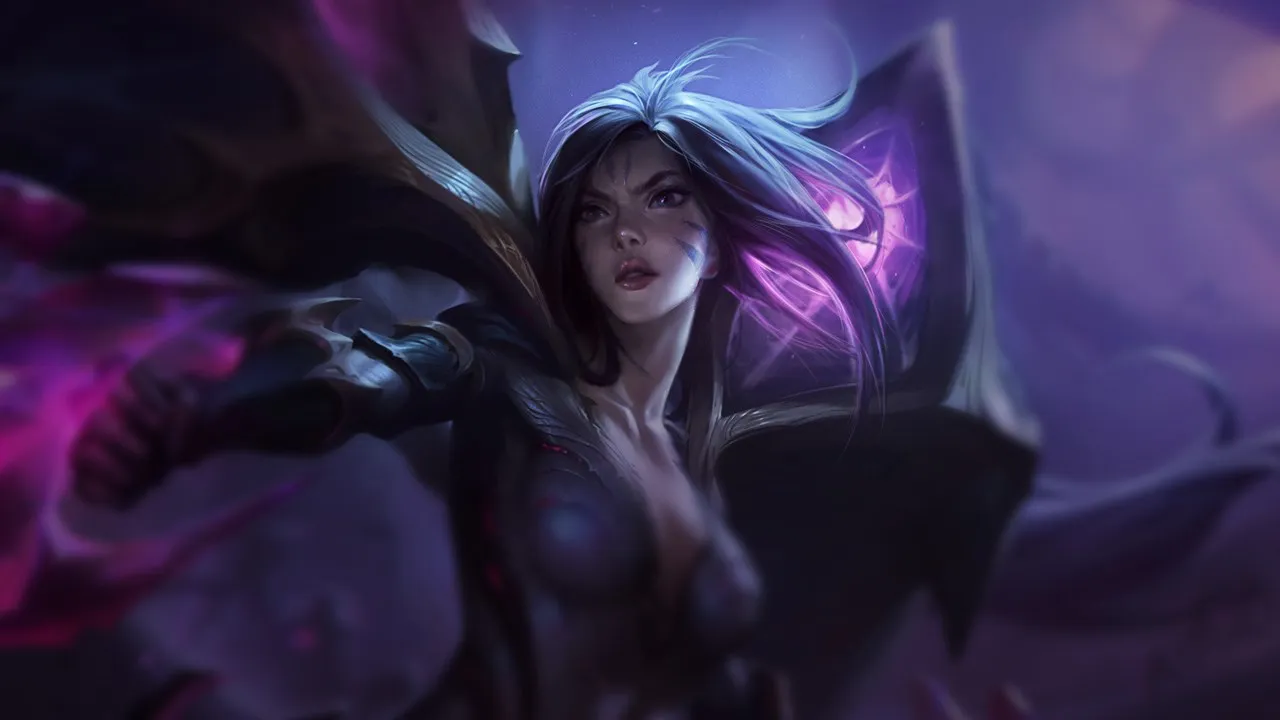
Kai'Sa Wild Rift カウンターガイド
不利なマッチアップ
8これらのチャンピオンは、マッチアップ自体を絶望的にするわけではないが、対面で優位に立ちやすいツールを持っている。射程が長かったり、攻撃を受け止める力が高かったり、エンゲージへの対応手段が豊富だったりする。アプローチを調整し、戦闘を受け入れるタイミングを慎重に選ぶ必要がある。

Caitlyn+1
Caitlyn は、長い通常攻撃の射程とパッシブの Headshot を悪用して、minionを取りに前に出るたびにあなたをharassします。ただし、Icathian Rain によるあなたの反撃burstを抑えるため、自分のminion waveのすぐ後ろに位置せざるを得ません。このように、ミサイルを吸収させるためにwaveに頼るので動きが制限され、孤立した状態で Icathian Rain のダメージを受ける危険なしに、自由にあなたを追い詰めることはできません。
Caitlynのビルド →
詳細を見る
理由
Caitlyn は、長い通常攻撃の射程とパッシブの Headshot を悪用して、minionを取りに前に出るたびにあなたをharassします。ただし、Icathian Rain によるあなたの反撃burstを抑えるため、自分のminion waveのすぐ後ろに位置せざるを得ません。このように、ミサイルを吸収させるためにwaveに頼るので動きが制限され、孤立した状態で Icathian Rain のダメージを受ける危険なしに、自由にあなたを追い詰めることはできません。
レーン戦への影響
Caitlyn が Piltover Peacemaker でpushし、Yordle Snap Trap であなたをzoneするので、絶えずタワー下に押し込まれることになります。Caitlyn の射程のせいでHPバーが低いままなので、序盤の優先権の確保はほぼ不可能です。このプレッシャーでrecallが遅れ、タワーのplateの体力も脅かされるため、長射程の Ace in the Hole で処刑されないよう、序盤のゴールドを手放す必要があります。
立ち回り方
waveをcrashさせ、薄いwaveを優先して、タワー下で Icathian Rain で安全にfarmしてください。Supercharge を攻撃的に使わず、移動速度を Piltover Peacemaker の回避と Yordle Snap Trap のラインを避けるために温存します。Caitlyn が minion のシールドから出てあなたをpokeしてきたら、すぐに Void Seeker を撃って Second Skin をスタックし、サポートがエンゲージしたら Killer Instinct でdiveして、Caitlyn をminionから孤立させます。

Kalista+1
Kalista の Martial Poise による絶え間ない跳躍が、あなたの標準的なtradeのパターンを完全に崩します。Kalista は通常攻撃のたびに跳ぶので、直接の決闘では、Void Seeker を当てて即座にプラズマのスタックを付与し、Killer Instinct のエンゲージを準備するのはほぼ不可能です。Kalista は Pierce で minion の後ろに位置を取り直しつつ Rend のスタックであなたを削ってくるので、Icathian Rain のために孤立させるのも簡単ではありません。
Kalistaのビルド →
詳細を見る
理由
Kalista の Martial Poise による絶え間ない跳躍が、あなたの標準的なtradeのパターンを完全に崩します。Kalista は通常攻撃のたびに跳ぶので、直接の決闘では、Void Seeker を当てて即座にプラズマのスタックを付与し、Killer Instinct のエンゲージを準備するのはほぼ不可能です。Kalista は Pierce で minion の後ろに位置を取り直しつつ Rend のスタックであなたを削ってくるので、Icathian Rain のために孤立させるのも簡単ではありません。
レーン戦への影響
この機動力の差で、序盤にタワー下に押し込まれます。Kalista が簡単にwaveの優先権を取るのは、槍の弾幕を受けずにKalistaを争えないからです。前に出てwaveを減らそうとすると、Kalista はあなたのスキルショットを避けながら Rend をスタックしてきます。このプレッシャーでスキルの進化が遅れ、序盤のdragonの優先権を手放し、タワーのplatingを守るために守りに回ることになります。
立ち回り方
caster minionの真後ろに位置して Pierce をブロックし、Void Seeker は Kalista が Fate's Call のモーションで固まっているとき、またはサポートにスローされているときだけに使ってください。Supercharge を攻撃的に使わず、Kalista が Rend をスタックしようとしたときに離脱のために発動してください。Kalista が強気に前に跳んできたら、タワーの方へ退き、waveをcrashさせて、小競り合いを試みる前に farm に集中して Icathian Rain の進化を解放しましょう。

Lucian+1
Lucian は序盤のレベルを支配します。Piercing Light を撃ったあとに、パッシブの Lightslinger で即座にあなたへ連続2発を撃てるからです。Icathian Rain で反撃しようとしても、Lucian は Relentless Pursuit で孤立したミサイルの射程から簡単にダッシュで抜け出し、パッシブをリセットして再び素早いburstを狙えます。Second Skin のプラズマのスタックは、Lucian の即座で高テンポのスペルの織り交ぜに比べて爆発するまでに時間がかかりすぎるため、進化を得る前の直接tradeはあなたにとって非常に厳しいものになります。
Lucianのビルド →
詳細を見る
理由
Lucian は序盤のレベルを支配します。Piercing Light を撃ったあとに、パッシブの Lightslinger で即座にあなたへ連続2発を撃てるからです。Icathian Rain で反撃しようとしても、Lucian は Relentless Pursuit で孤立したミサイルの射程から簡単にダッシュで抜け出し、パッシブをリセットして再び素早いburstを狙えます。Second Skin のプラズマのスタックは、Lucian の即座で高テンポのスペルの織り交ぜに比べて爆発するまでに時間がかかりすぎるため、進化を得る前の直接tradeはあなたにとって非常に厳しいものになります。
レーン戦への影響
この攻撃的なプレッシャーで、序盤はタワー下に押し込まれます。Lucian は minion wave越しに Piercing Light の角度をつけてpokeしつつ、同時にpushできるからです。waveの主導権を失うと、Lucian は Relentless Pursuit の脅しで farm からあなたをzoneします。序盤の優先権を手放すことになるので、pushを争うのではなくタワー下での last hit の確保に集中する必要があり、重要な最初のアイテムのスパイクが遅れます。
立ち回り方
生き残るために、minionの直線上の外に立って、Lucian にただで Piercing Light を当てられないようにしてください。Icathian Rain は、Lucian が Relentless Pursuit で前にダッシュしたときのために常に温存してください。そうすれば、Lucian がwaveから孤立しているときにミサイルが命中します。Lucian がdiveしようとしたり The Culling をチャネリングしたりしたら、すぐに Supercharge を使って射線を外せるだけの移動速度を得るか、Killer Instinct を発動してburstに対するシールドを得てください。

Draven+1
Draven は、自分のminion waveの真ん中に位置することで、あなたの主力burstを自然に無効化します。あなたがtradeしようとすると、Draven の minion が Icathian Rain のミサイルを吸収してしまい、Draven を孤立させられません。一方、Draven の Spinning Axe は、通常攻撃のたびに軽減されない大きな物理ダメージを与えます。距離を詰めたり反撃したりしようとしても、Draven は Stand Aside で簡単にあなたを妨害し、Blood Rush で追い詰めてきます。
Dravenのビルド →
詳細を見る
理由
Draven は、自分のminion waveの真ん中に位置することで、あなたの主力burstを自然に無効化します。あなたがtradeしようとすると、Draven の minion が Icathian Rain のミサイルを吸収してしまい、Draven を孤立させられません。一方、Draven の Spinning Axe は、通常攻撃のたびに軽減されない大きな物理ダメージを与えます。距離を詰めたり反撃したりしようとしても、Draven は Stand Aside で簡単にあなたを妨害し、Blood Rush で追い詰めてきます。
レーン戦への影響
このやり取りにより、序盤は守りの姿勢を強いられます。last hitを取りに前に出るたびに、Draven の絶え間ない Spinning Axe の圧力があなたのHPバーを脅かすので、pushを争えません。ダメージを受けたら、Draven はdiveしてくるかfreezeして、League of Draven の歓声をスタックします。あなたはタワー下に押し込まれ、plateのゴールドを失い続け、あなたのjunglerはマップの下側での優先権をすべて失います。
立ち回り方
Draven が斧を落とすか、waveから離されるまでは、tradeを始めないでください。遠く後ろに立って、Void Seeker で farm するか、安全な場所から Draven のHPを削ってください。Supercharge は、Stand Aside を避けるため、または Draven が Blood Rush を発動したときにすばやく退くための移動速度として、厳密に温存します。Draven が自分のタワー近くでwaveをfreezeしたら、歩いて近づかず、代わりにwaveが跳ね返るのを待ち、HPを保ちながら経験値を吸収してください。

Xayah+1
このmatchupは、あなたが戦いを強いようとしたときの Xayah の守りの強さが中心です。Killer Instinct でエンゲージしてburstで倒そうとするのは、Xayah の強みにそのまま付き合うことです。Xayah は Featherstorm で ターゲット不可になってあなたのdiveを簡単に無効化でき、同時にばらまいた羽根を Bladecaller ですぐに引き戻します。この一連の動きで Kai'Sa がその場でルートされ、攻撃的なダッシュが自分でかかった罠になります。
Xayahのビルド →
詳細を見る
理由
このmatchupは、あなたが戦いを強いようとしたときの Xayah の守りの強さが中心です。Killer Instinct でエンゲージしてburstで倒そうとするのは、Xayah の強みにそのまま付き合うことです。Xayah は Featherstorm で ターゲット不可になってあなたのdiveを簡単に無効化でき、同時にばらまいた羽根を Bladecaller ですぐに引き戻します。この一連の動きで Kai'Sa がその場でルートされ、攻撃的なダッシュが自分でかかった罠になります。
レーン戦への影響
Xayah は Clean Cuts と Double Daggers でlaneのペースを握り、羽根のセットアップの周りを常に踊らされます。長い小競り合いになると Deadly Plumage をスタックされるので、Xayah のpushを簡単には争えず、積極的にtradeすることもできません。劣勢になると、Xayah のwaveクリアでタワー下に押さえ込まれ、Icathian Rain が最大ダメージを出すために必要な孤立も得られなくなります。
立ち回り方
Xayah が ult を使える間は、Killer Instinct をエンゲージの手段として使わないでください。代わりに、Void Seeker で離れた場所からpokeして、Xayah に守りに回らせます。仕掛ける前に、サポートに Featherstorm を誘わせるのを待ちます。Xayah が Bladecaller をwaveに無駄に使ったら、それが Supercharge を発動して短く攻撃的にtradeする合図で、追加の移動速度を使って背後に残る羽根を避けます。

Varus+1
Varus は射程の優位を悪用して、あなたがtradeする前にHPを削り取り、このlaneを支配します。Piercing Arrow と Hail of Arrows で安全な場所から絶えず脅かし、Blighted Quiver のスタックを付与してHPバーを溶かします。飛びかかろうとしても、Chain of Corruption があなたの勢いを完全に止め、Varus の高ダメージの追撃に無防備にさらされます。
Varusのビルド →
詳細を見る
理由
Varus は射程の優位を悪用して、あなたがtradeする前にHPを削り取り、このlaneを支配します。Piercing Arrow と Hail of Arrows で安全な場所から絶えず脅かし、Blighted Quiver のスタックを付与してHPバーを溶かします。飛びかかろうとしても、Chain of Corruption があなたの勢いを完全に止め、Varus の高ダメージの追撃に無防備にさらされます。
レーン戦への影響
Varus がwaveを楽々と処理するので、絶えずタワー下に押し込まれることになります。この容赦ないプレッシャーで、Icathian Rain でminionを確保するか、Varus の直線のスナイプを避けるかの二択を迫られます。HPが減れば購入が遅れ、タワーのplateを譲れば、Varus はあなたと直接やり合わなくてもゴールドのリードをsnowballさせられます。
立ち回り方
生き残れるかは反応速度にかかっています。Varus の ult が発動している間は、Killer Instinct でエンゲージしようとしないでください。代わりに動き続け、Supercharge の移動速度のburstを、Piercing Arrow を横に避けるため、または Chain of Corruption を誘うために使ってください。この2つの脅威がcooldownのときだけ、安全に Void Seeker で印をつけ、ダッシュで入って孤立した Icathian Rain のburstを狙えます。

Yunara+1
このmatchupは、Yunara の優れた脅威射程で決まります。Arc of Judgment は圧迫的な間合い取りのツールで、あなたが前に歩こうとするたびにスローをかけてHPを削ります。この絶え間ないzoneのせいで、Icathian Rain のミサイルを孤立させられるほど近くに位置を取れません。このダメージを孤立させられなければ、短射程のtradeの可能性は完全に無効化され、一方で Yunara の Vow of the First Lands により、ハイブリッドのスケーリングであなたのダメージを上回ります。
Yunaraのビルド →
詳細を見る
理由
このmatchupは、Yunara の優れた脅威射程で決まります。Arc of Judgment は圧迫的な間合い取りのツールで、あなたが前に歩こうとするたびにスローをかけてHPを削ります。この絶え間ないzoneのせいで、Icathian Rain のミサイルを孤立させられるほど近くに位置を取れません。このダメージを孤立させられなければ、短射程のtradeの可能性は完全に無効化され、一方で Yunara の Vow of the First Lands により、ハイブリッドのスケーリングであなたのダメージを上回ります。
レーン戦への影響
序盤のlaning phaseは、タワー下に閉じ込められて過ごすことになります。Yunara は Cultivation of Spirit で攻撃を跳ね返しながらwaveを楽にpushしつつ、スローであなたを人質に取ります。前に出てwaveを争おうとすると Arc of Judgment でHPを削られ、早めのrecallでゴールドと経験値を失います。Yunara が Transcend One's Self を解放すると、pokeは致死的になり、タワーのplateを削り、サポートを釘付けにします。
立ち回り方
生き残るために、受け身の姿勢を取り、waveをcrashさせてください。安全な場所から Void Seeker でcannon minionを確保し、Supercharge は飛んでくる Arc of Judgment の軌道を避けるためだけに温存します。サポートが強いCCを当てない限り、まともなtradeを試みてはいけません。Yunara が Transcend One's Self を発動したら、捕まっていれば Killer Instinct ですぐに退くか、タワー下でトランス時間が切れるのを待ってから、孤立した Icathian Rain の機会を探してください。
その他のマッチアップ

スキル次第のマッチアップ
9このマッチアップは何よりもまず実行力の勝負であり、両者ともに優位を取れる現実的な手段を持っている。重要なスキルを一つ避けられるか、エンゲージを正しく読めるか、あるいはたった一つの位置取りのミスが、勝敗を分けることもある。マッチアップを理解し、行動すべき瞬間を見極める力がとりわけ重要になる。

Akshan±0
このmatchupは、burstとtradeのタイミングが激しく揺れる決闘です。Akshan は Dirty Fighting を使い、守りのシールドと素早い2連続攻撃でtradeして、Kai'Sa の短いtradeを無効化します。ただし、Akshan が攻撃的なall-inを仕掛けた場合、安全はminionの援護にかかっています。Kai'Sa が Akshan を孤立した状態で捕まえれば、集中した Icathian Rain がHPバーを完全に削り取り、Akshan の攻撃的な機動力が逆に Akshan に不利に働きます。
Akshanのビルド →
詳細を見る
理由
このmatchupは、burstとtradeのタイミングが激しく揺れる決闘です。Akshan は Dirty Fighting を使い、守りのシールドと素早い2連続攻撃でtradeして、Kai'Sa の短いtradeを無効化します。ただし、Akshan が攻撃的なall-inを仕掛けた場合、安全はminionの援護にかかっています。Kai'Sa が Akshan を孤立した状態で捕まえれば、集中した Icathian Rain がHPバーを完全に削り取り、Akshan の攻撃的な機動力が逆に Akshan に不利に働きます。
レーン戦への影響
ここではwave管理が絶対的な戦場です。Akshan は Avengerang で絶えずpushして、Kai'Sa をタワー下で farm させるか、マナを使ってwaveを処理させたいと考えています。Akshan がその優先権を確立すれば、Heroic Swing を使ってdiveやroamができます。Kai'Sa はwaveの位置を争わなければなりません。minionを中央に保てば、Akshan が楽にシールドを得るのを防げ、同時に Akshan のwaveから離れた場所で孤立させる余地を確保できます。
立ち回り方
勝つために、minionの数に完全に集中してください。Dirty Fighting のシールドが使える間は、通常攻撃のtradeをしないでください。代わりに、waveを薄くしてタワー下の圧力を防ぎます。Akshan が Heroic Swing でエンゲージしてきたら、Akshan の移動軌道が固定されるのを待ち、すぐに Supercharge で位置を取り直して孤立した Icathian Rain を放ちます。Void Seeker のpokeを外したら、グラップルが活きる壁の近くで追いかけようとしないでください。

Ashe±0
このspacingの決闘は、あなたのdive脅威に対する Ashe の圧倒的な射程の優位が中心です。Volley とパッシブの Frost Shot で離れた場所からHPを削られますが、Ashe は直接のburstには非常に弱いままです。隙を見つければ、Killer Instinct で Ashe の前衛を完全にすり抜けられ、孤立した Ashe は、強烈な Icathian Rain と Second Skin による処刑の絶好の標的になります。
Asheのビルド →
詳細を見る
理由
このspacingの決闘は、あなたのdive脅威に対する Ashe の圧倒的な射程の優位が中心です。Volley とパッシブの Frost Shot で離れた場所からHPを削られますが、Ashe は直接のburstには非常に弱いままです。隙を見つければ、Killer Instinct で Ashe の前衛を完全にすり抜けられ、孤立した Ashe は、強烈な Icathian Rain と Second Skin による処刑の絶好の標的になります。
レーン戦への影響
このlaneを誰が握るかは、wave管理で決まります。Ashe にタワー下に押し込まれると、Ashe は Volley のpokeをただで当てながら安全にスケールします。minionのバランスを保つために、wave管理を争わなければなりません。waveを中立に保てば、Ashe が巨大なwaveの陰に隠れるのを防げ、サポートがCCを当てるための開けたスペースが生まれます。そのCCでプラズマが発動し、致命的なdiveの準備が整います。
立ち回り方
minionの後ろに立って Volley の弾を防ぎ、Supercharge の移動速度で Enchanted Crystal Arrow を避けてください。Ashe が自分のminion waveから孤立するのを見張ります。孤立した瞬間に Void Seeker を当ててプラズマを付与し、すぐに Killer Instinct を発動して距離を詰めてください。これで Ashe を孤立させ、Icathian Rain のミサイルを最大限に当てて、Ashe が Ranger's Focus をスタックする前にburstで倒せます。

Samira±0
この互角のmatchupは、すべて Samira の守りの反応とあなたの主力burstとのやり取りにかかっています。Blade Whirl が使える間にtradeすると、Samira は Icathian Rain のミサイルと Void Seeker の弾の両方を即座に飲み込めます。これにより、Second Skin のプラズマを素早くスタックできなくなり、tradeの力が完全にしぼみ、Samira の攻撃的な追撃に無防備になります。
Samiraのビルド →
詳細を見る
理由
この互角のmatchupは、すべて Samira の守りの反応とあなたの主力burstとのやり取りにかかっています。Blade Whirl が使える間にtradeすると、Samira は Icathian Rain のミサイルと Void Seeker の弾の両方を即座に飲み込めます。これにより、Second Skin のプラズマを素早くスタックできなくなり、tradeの力が完全にしぼみ、Samira の攻撃的な追撃に無防備になります。
レーン戦への影響
この飛び道具ブロックの脅しが、laneのtradeで張り詰めた膠着を生みます。急なエンゲージの危険なしには、安全にwaveをpushしたり Void Seeker でpokeしたりできません。Samira があなたのburstをブロックすると、すぐに Wild Rush で距離を詰め、Daredevil Impulse のスタイルのスタックを積みますが、あなたは反撃する手段がなく、互角だったwaveの状態が強制的なrecallに変わります。
立ち回り方
この小競り合いに勝つには、主力のダメージを出す前に Blade Whirl を誘い出さなければなりません。通常攻撃でtradeを始めて Second Skin を付与し、スペルは撃たずに Supercharge を発動して位置を取り直し、Samira の射程の周りで踊ってください。Icathian Rain と Void Seeker を撃つのは、Samira の防御の円が消えるのを見てからだけです。ブロックが使える状態で Wild Rush で飛びかかってきたら、Killer Instinct を防御的に使ってシールドを得て、minionの後ろに位置を取り直してください。

Ezreal±0
この lane は、ポジショニングを軸にした純粋な実力勝負です。Ezreal は minion wave に張り付いてあなたの Icathian Rain のミサイルを分散させつつ、Arcane Shift を温存してあなたの Void Seeker を簡単に回避しようとします。Ezreal があなたの burst をうまく避けた場合、Ezreal の Rising Spell Force と Mystic Shot によって、長引く小競り合いではあなたはすぐに DPS で負けてしまいます。あらゆる trade は、仕掛ける前に Ezreal を孤立させられるか、Ezreal の blink を誘えるかにかかっています。
Ezrealのビルド →
詳細を見る
理由
この lane は、ポジショニングを軸にした純粋な実力勝負です。Ezreal は minion wave に張り付いてあなたの Icathian Rain のミサイルを分散させつつ、Arcane Shift を温存してあなたの Void Seeker を簡単に回避しようとします。Ezreal があなたの burst をうまく避けた場合、Ezreal の Rising Spell Force と Mystic Shot によって、長引く小競り合いではあなたはすぐに DPS で負けてしまいます。あらゆる trade は、仕掛ける前に Ezreal を孤立させられるか、Ezreal の blink を誘えるかにかかっています。
レーン戦への影響
Wave の状態が lane の主導権を決めます。Ezreal が Icathian Rain を無力化するために wave の中で安全に立ち回ると、あなたの push 力は制限され、lane は消極的な farm 勝負になります。ただし、Ezreal が立ち位置を誤ったり Arcane Shift を無駄に使ったりした場合は、あなたは積極的に wave を crash させて、Ezreal をタワー下に追い込めます。体力は Mystic Shot の poke で急速に増減するため、回避を一度ミスしただけで priority と dragon の主導権を失う可能性があります。
立ち回り方
勝つためには、Void Seeker を無防備に撃ってはいけません。Ezreal が Arcane Shift を使うか CC を受けるまで温存してください。Minion wave に対して斜めに位置取り、Ezreal に「孤立した状態で Icathian Rain を受ける」か「あなたのサポートの危険範囲に踏み込む」かを選ばせましょう。Mystic Shot で体力を削られた場合は、Killer Instinct で不利な all-in を強行しようとせず、Supercharge を防御的に使って近接 minion の後ろに位置を取り直してください。

Tristana±0
この不安定な matchup は、burst を決め切る速さの純粋な競争です。Tristana は Rapid Fire の攻撃速度を使って Explosive Charge を重ね、あなたを爆破することに完全に依存しています。しかし、lane 全体はあなたが Tristana の爆弾にどう反応できるかにかかっています。Explosive Charge の 4 スタック目が爆発する直前に Killer Instinct を合わせて dash しシールドを得れば、Tristana の主なダメージ源を吸収して、デュエルを有利に進められます。
Tristanaのビルド →
詳細を見る
理由
この不安定な matchup は、burst を決め切る速さの純粋な競争です。Tristana は Rapid Fire の攻撃速度を使って Explosive Charge を重ね、あなたを爆破することに完全に依存しています。しかし、lane 全体はあなたが Tristana の爆弾にどう反応できるかにかかっています。Explosive Charge の 4 スタック目が爆発する直前に Killer Instinct を合わせて dash しシールドを得れば、Tristana の主なダメージ源を吸収して、デュエルを有利に進められます。
レーン戦への影響
Tristana のパッシブ Draw a Bead は常に wave を push するため、あなたは Icathian Rain で Tristana の clear 速度に合わせないと、タワー下に押さえ込まれてしまいます。Tristana が Rocket Jump で all-in を仕掛けてきた場合、lane は一瞬で決まります。Tristana があなたに Explosive Charge を爆発させられなかった場合は、ジャンプのリセットを失い、孤立した Icathian Rain とあなたのパッシブに対して完全に無防備になります。
立ち回り方
Tristana が Rocket Jump で仕掛けてきても、慌てて下がってはいけません。代わりにすぐ Supercharge を発動して移動速度を得て、Tristana の最初の攻撃を外させるか、minion の周りで位置を取り直してください。頭上で時を刻む爆弾に注意し、Tristana が 3 発目の通常攻撃を当てた瞬間に Killer Instinct を使って Tristana へ dash しましょう。シールドが最後の Explosive Charge の爆発を吸収するので、孤立した Icathian Rain で簡単に仕留められます。

Corki±0
この matchup は spacing の純粋な試験で、Corki の圧倒的な poke とあなたの爆発的な burst がぶつかります。Corki は Missile Barrage で遠距離から体力を削り、短い trade では Gatling Gun であなたのアーマーを削ってきます。しかし、Corki の安全は距離に完全に左右されます。Void Seeker で Corki にマークを付ければ、Killer Instinct で Corki のロケットを完全にすり抜けられ、あなたの Icathian Rain が圧倒する、突然の孤立したデュエルに持ち込めます。
Corkiのビルド →
詳細を見る
理由
この matchup は spacing の純粋な試験で、Corki の圧倒的な poke とあなたの爆発的な burst がぶつかります。Corki は Missile Barrage で遠距離から体力を削り、短い trade では Gatling Gun であなたのアーマーを削ってきます。しかし、Corki の安全は距離に完全に左右されます。Void Seeker で Corki にマークを付ければ、Killer Instinct で Corki のロケットを完全にすり抜けられ、あなたの Icathian Rain が圧倒する、突然の孤立したデュエルに持ち込めます。
レーン戦への影響
Lane のテンポは、Corki の弾数と Package の出現タイミングを中心に大きく変動します。Corki にタワー下まで押し込まれてはいけません。last hit をしている間に Phosphorus Bomb で簡単に harass されてしまいます。Wave を中立に保てば、Corki は minion に Missile Barrage を使うか、ロケットをあなたのために温存するかの選択を迫られます。位置取りを一度誤ると、致命的なダメージを受けて早期 recall を強いられる可能性があります。
立ち回り方
勝つには、Corki が wave を push しながら同時に Phosphorus Bomb で poke できないよう、minion wave の外側に立ってください。Corki のロケット数を見て、Missile Barrage から「Big One」を撃った瞬間に Supercharge を発動して移動速度を得て、横に避けながら Void Seeker を当てにいきましょう。当たったら、すぐに Killer Instinct を使って Corki の燃える Valkyrie の軌道を飛び越え、Corki の真上に着地して完全に孤立した Icathian Rain を放ってください。
その他のマッチアップ



有利なマッチアップ
7これらのチャンピオンは、こちらの主要な強みに効果的に対応するのが難しく、より自由に対面を組み立てることができる。プレッシャーをかけて有利な交換を引き出す手段は複数あることが多い。相手が態勢を立て直す時間を与えるのではなく、この優位を活かして主導権を握ろう。

Jinx−1
この matchup は、Jinx があなたの孤立時のダメージに対抗できないため、あなたの burst の可能性が大きく有利です。主な勝ち筋は Icathian Rain で、Jinx が minion から離れれば、1 回のキャストで Jinx の体力を大きく削れます。Jinx はあなたのミサイルを分散させるため wave の中で守りに回るしかなく、Switcheroo! の射程であなたを harass する能力は制限され、そうしようとすれば突然の all-in にさらされます。
Jinxのビルド →
詳細を見る
理由
この matchup は、Jinx があなたの孤立時のダメージに対抗できないため、あなたの burst の可能性が大きく有利です。主な勝ち筋は Icathian Rain で、Jinx が minion から離れれば、1 回のキャストで Jinx の体力を大きく削れます。Jinx はあなたのミサイルを分散させるため wave の中で守りに回るしかなく、Switcheroo! の射程であなたを harass する能力は制限され、そうしようとすれば突然の all-in にさらされます。
レーン戦への影響
Jinx はあなたの burst を生き延びるために minion にしがみつく必要があるので、Switcheroo! のロケットで反撃しようとして自然と wave を push します。この絶え間ない圧力のおかげで、あなたはタワー付近で freeze でき、Jinx のゴールドを枯渇させられます。Jinx が freeze を崩そうと前に出れば、wave の外で捕まるリスクがあり、Void Seeker のマークを素早く付けて Killer Instinct で Jinx に dive できます。
立ち回り方
Jinx の wave と平行に位置取り、Jinx が minion から孤立する角度を常に狙ってください。Jinx が Zap! の狙いを定めようと横に出たら、Supercharge を使ってビームを横に避けつつ距離を詰め、Icathian Rain が Jinx だけに当たるようにしましょう。Jinx が Flame Chompers! であなたの進路を塞ごうとしたら、root の起動時間が過ぎるのを待ち、それから Killer Instinct を発動して Jinx の罠をすり抜け、Jinx が逃げる前に仕留めてください。

Twitch−1
Kai'Sa は、即座の burst の可能性が Twitch の溜め込み型ダメージを完全に上回るため、この matchup を支配します。Twitch が意味のある Contaminate のために Deadly Venom を重ねるには時間が必要ですが、Kai'Sa はすぐに反撃できます。Twitch が Ambush から姿を現した瞬間、Kai'Sa は Supercharge を発動して Twitch の Venom Cask から離れる位置に動き、孤立した Icathian Rain を放って、毒が回る前に Twitch のもろい体力を溶かせます。
Twitchのビルド →
詳細を見る
理由
Kai'Sa は、即座の burst の可能性が Twitch の溜め込み型ダメージを完全に上回るため、この matchup を支配します。Twitch が意味のある Contaminate のために Deadly Venom を重ねるには時間が必要ですが、Kai'Sa はすぐに反撃できます。Twitch が Ambush から姿を現した瞬間、Kai'Sa は Supercharge を発動して Twitch の Venom Cask から離れる位置に動き、孤立した Icathian Rain を放って、毒が回る前に Twitch のもろい体力を溶かせます。
レーン戦への影響
この流れにより Twitch は自分のタワー下で守りに回るしかなく、あなたは minion wave を完全に支配できます。Twitch は正面の trade に勝てないため、苦し紛れの Ambush に頼るしかなくなります。Wave を中央付近かやや push した状態に保てば、Twitch が Spray and Pray であなたを追い詰めるための空間を与えずに済み、lane はゴールドを稼げるゾーンになって、アイテムの進化も簡単に確保できます。
立ち回り方
この有利を活かすために、wave の clear に Supercharge を決して無駄使いしないでください。常に Twitch の Ambush 突入に対する直接の対抗手段として温存しましょう。Twitch が姿を現したら、すぐに Supercharge の移動速度を使って Twitch の minion wave から離れ、Icathian Rain のミサイルが Twitch だけに当たるようにしてください。Twitch が逃げようとしたら、Void Seeker を当てて居場所を明らかにし、Killer Instinct を発動して Twitch の最後の Contaminate のダメージをシールドで防ぎ、仕留めを確実にしましょう。

Sivir−1
Kai'Sa は直接のデュエルで大きな有利を持ちます。Sivir の防御的な能力は、あなたの主なダメージ源に対してほとんど効果がないからです。Sivir は Spell Shield を発動してあなたの Void Seeker を吸収し、Second Skin のプラズマの爆発を防げますが、Icathian Rain に対しては完全に無力です。散らばったミサイルは Sivir のシールドの「1 つのスキルのみ無効化」を簡単にすり抜けるので、小競り合いではあなたの主力ダメージが常に完全に命中します。
Sivirのビルド →
詳細を見る
理由
Kai'Sa は直接のデュエルで大きな有利を持ちます。Sivir の防御的な能力は、あなたの主なダメージ源に対してほとんど効果がないからです。Sivir は Spell Shield を発動してあなたの Void Seeker を吸収し、Second Skin のプラズマの爆発を防げますが、Icathian Rain に対しては完全に無力です。散らばったミサイルは Sivir のシールドの「1 つのスキルのみ無効化」を簡単にすり抜けるので、小競り合いではあなたの主力ダメージが常に完全に命中します。
レーン戦への影響
この相互作用が、あらゆる短い trade を左右します。Sivir は、孤立した Icathian Rain の攻撃を受けるリスクを負わずに、Ricochet で wave の priority を争いに前へ出ることができません。Sivir はあなたの主な burst を防げないので、守りに回って lane の主導権を譲るしかありません。あなたは安全に Sivir をタワー下へ押し込み、深い vision を取ったり、快適な recall のタイミングを確保したりできます。その間、Sivir の Boomerang Blade はあなたとの trade ではなく minion wave に使わされます。
立ち回り方
リードを確実にするには、Void Seeker で trade を始めてはいけません。代わりに Supercharge で Sivir に走り寄り、Sivir が minion から孤立したときに Icathian Rain を放ってください。Sivir に慌てて Spell Shield を使わせてあなたの通常攻撃を防がせ、バリアが消えた後にだけ Void Seeker を撃って Second Skin を発動させましょう。Sivir が On the Hunt で仕掛けてきたら、Killer Instinct を使って Sivir の背後に位置を取り直し、Boomerang Blade を避けながら攻撃の圧力を保ってください。

Miss Fortune−1
Miss Fortune は、Make It Rain であなたを縛り付けてから、強力な Bullet Time をチャネリングしてあなたの体力を溶かすことに大きく依存しています。しかし、お互いの ult が使える状態になると、Kai'Sa はこの zoning の脅威を完全に無力化します。Killer Instinct を使えば、Miss Fortune の広い扇状の射撃を一瞬ですり抜け、自分をシールドで守りながら、動けないチャネリング中の Miss Fortune の真後ろにワープして Icathian Rain で burst させられます。
Miss Fortuneのビルド →
詳細を見る
理由
Miss Fortune は、Make It Rain であなたを縛り付けてから、強力な Bullet Time をチャネリングしてあなたの体力を溶かすことに大きく依存しています。しかし、お互いの ult が使える状態になると、Kai'Sa はこの zoning の脅威を完全に無力化します。Killer Instinct を使えば、Miss Fortune の広い扇状の射撃を一瞬ですり抜け、自分をシールドで守りながら、動けないチャネリング中の Miss Fortune の真後ろにワープして Icathian Rain で burst させられます。
レーン戦への影響
レベル 5 より前は、Miss Fortune は Double Up の跳弾と Love Tap のダメージであなたを bully して farm を妨害できます。ult が解放されると、力関係は完全に逆転します。Miss Fortune はもう wave を freeze したり、Make It Rain の脅威であなたをタワー下に押し込んだりできません。ult をチャネリングするために前に出ると、致命的な counter-engage の格好の的になるからです。
立ち回り方
Killer Instinct を防御的に無駄使いしないでください。Miss Fortune が Bullet Time のチャネリングを始めたら、Void Seeker でマークを付け、すぐに ult を発動して Miss Fortune の背後にテレポートしてください。これでチャネリングのあなたへの効果は無くなります。直後に Supercharge を発動して位置を取り直し、Miss Fortune のスローを避けながら、完全に孤立した Icathian Rain を放ちましょう。弾を外した場合は、Supercharge の移動速度ブーストを使って下がってください。

Vayne−1
Kai'Sa は序盤のテンポを支配します。Vayne には範囲の wave clear がないからです。Icathian Rain を使えば、Kai'Sa は minion wave を一瞬で削れますが、Vayne は last hit のために単体対象の通常攻撃と Tumble に頼るしかありません。この差のせいで Vayne はあなたの push に追いつけず、自分のタワー下に閉じ込められたまま、あなたは完全に主導権を握り続けられます。
Vayneのビルド →
詳細を見る
理由
Kai'Sa は序盤のテンポを支配します。Vayne には範囲の wave clear がないからです。Icathian Rain を使えば、Kai'Sa は minion wave を一瞬で削れますが、Vayne は last hit のために単体対象の通常攻撃と Tumble に頼るしかありません。この差のせいで Vayne はあなたの push に追いつけず、自分のタワー下に閉じ込められたまま、あなたは完全に主導権を握り続けられます。
レーン戦への影響
Vayne を常にタワー下に押し込み続けると、Vayne の序盤の farm のリズムが崩れ、last hit に苦労するうちに体力も削られていきます。Vayne は大量の wave を失わずには、roam したり jungler を助けたりできません。この絶え間ない圧力のおかげで、あなたは簡単な recall のタイミングを確保し、ゴールドのリードを築き、Void Seeker で安全に Vayne を poke できます。
立ち回り方
最初の wave から push を始めてください。Minion がぶつかったらすぐに Icathian Rain を使って Vayne を後退させましょう。壁から距離を保てば、Vayne の Condemn のスタンを完全に防げます。Vayne が Final Hour と Tumble で trade しようとしても慌てないでください。Supercharge を発動して安全に位置を取り直し、Vayne が逃げようとしたら Killer Instinct でシールドを得つつ Vayne の機動力に合わせましょう。
その他のマッチアップ


ハードカウンター
5これらのチャンピオンは、こちらのビルドやプレイスタイルを真正面から上回る構成を持ち、レーン戦のコントロールとファームを極めて難しくする。彼らのスキルはこちらの主要な強みを無効化し、いつも通りのプランを実行しようとした瞬間に手痛い反撃を受けさせてくる。こうしたマッチアップでは、ミスを最小限に抑え、正面からの対決以外で解決策を探すことが重要になる。

Syndra+2
Syndra は Scatter the Weak を温存することで、あなたのキット全体を完全に無力化します。Supercharge で射程内に滑り込もうとしたり、Killer Instinct で近づく dive に頼ったりするたびに、Syndra は sphere で即座にあなたを knock back できます。この防御的な knockback により、あなたは孤立して Second Skin を stack できなくなり、Syndra の Unleashed Power による強烈な単体 burst に完全にさらされます。
Syndraのビルド →
詳細を見る
理由
Syndra は Scatter the Weak を温存することで、あなたのキット全体を完全に無力化します。Supercharge で射程内に滑り込もうとしたり、Killer Instinct で近づく dive に頼ったりするたびに、Syndra は sphere で即座にあなたを knock back できます。この防御的な knockback により、あなたは孤立して Second Skin を stack できなくなり、Syndra の Unleashed Power による強烈な単体 burst に完全にさらされます。
レーン戦への影響
最初の wave から、あなたは守りの姿勢を強いられます。Syndra は Dark Sphere と Force of Will で遠くから wave を処理しつつ、あなたの体力を削れます。push を争うために前に出たり、minion に Icathian Rain を使ったりすると、画面の端から端まで届く距離から stun されるリスクがあります。この絶え間ないプレッシャーにより早い recall を強いられ、gold を失い、Syndra は自由に roam してあなたの jungler にプレッシャーをかけられます。
立ち回り方
この matchup を生き残るには、Syndra の出ている sphere の軌道の外で厳密に spacing を取る必要があります。Syndra が Scatter the Weak を無駄に使ったのを見ない限り、Supercharge を攻撃的に使ってはいけません。代わりに Void Seeker で遠くの last-hit を確保し、安全な位置から poke してください。stun を受けたら、Unleashed Power が当たる直前に shield を得られるよう、すぐに Killer Instinct を守りで使う準備をして、Syndra の ult の大部分を吸収しながら turret の下に下がってください。

Vex+2
mid lane の Kai'Sa は厳しい戦いになります。Vex は mobile な marksman を封じるために作られているからです。主な脅威は Vex のパッシブ Doom 'n Gloom です。Killer Instinct で距離を詰めたり位置を変えたりしようとするたびに、Vex の charge された Doom bar が空中であなたの dash を即座に中断し、fear を与え、Vex のフル burst combo にあなたを完全にさらします。
Vexのビルド →
詳細を見る
理由
mid lane の Kai'Sa は厳しい戦いになります。Vex は mobile な marksman を封じるために作られているからです。主な脅威は Vex のパッシブ Doom 'n Gloom です。Killer Instinct で距離を詰めたり位置を変えたりしようとするたびに、Vex の charge された Doom bar が空中であなたの dash を即座に中断し、fear を与え、Vex のフル burst combo にあなたを完全にさらします。
レーン戦への影響
このパッシブの脅威があるため、自分を標的にされることなく Supercharge を自由に使って trade したり回避したりすることはできません。Vex は Mistral Bolt で簡単に wave を制御しつつ、あなたを zone し続けます。Vex が Looming Darkness を当てれば、あなたは下がるしかなく、mid lane の priority を譲ることになります。Killer Instinct で戦況をひっくり返そうとすると、Vex の tower 下で自分から CC chain を招く結果になります。
立ち回り方
この matchup を生き残るには、Killer Instinct を initiation の手段ではなく defensive な shield として扱う必要があります。Vex の体力の下にある赤い bar が空になっている、つまり Doom 'n Gloom が cooldown 中だと確認できない限り、前に dash してはいけません。Void Seeker を使って last hit を確保しながら、遠くから安全に farm することに集中してください。Vex が Shadow Surge を外したら、その短い隙を使って Icathian Rain で wave を処理し、すぐに下がってください。

Yasuo+2
Yasuo は Kai'Sa の burst の可能性を完全に無力化します。Yasuo の Wind Wall は Icathian Rain と Void Seeker の両方を空中で消し去り、あなたの主なダメージ源と、遠くから Second Skin を stack する手段を奪います。あなたのミサイルは projectile なので、Yasuo は反応してあなたの trade 全体を無効化でき、あなたには通常攻撃しか残らず、その間に Yasuo は Sweeping Blade で距離を詰めてきます。
Yasuoのビルド →
詳細を見る
理由
Yasuo は Kai'Sa の burst の可能性を完全に無力化します。Yasuo の Wind Wall は Icathian Rain と Void Seeker の両方を空中で消し去り、あなたの主なダメージ源と、遠くから Second Skin を stack する手段を奪います。あなたのミサイルは projectile なので、Yasuo は反応してあなたの trade 全体を無効化でき、あなたには通常攻撃しか残らず、その間に Yasuo は Sweeping Blade で距離を詰めてきます。
レーン戦への影響
mid lane の wave を安全に争うことはできません。Yasuo は minion を通して Sweeping Blade を使い、Way of the Wanderer の shield を発動させて trade を強いてきます。Icathian Rain で反撃しようとしても Yasuo の Wind Wall に吸収され、Yasuo は Steel Tempest を自由に charge できます。あなたは tower の下に追い込まれて priority を失い、jungler は mid lane のサポートを受けられず、さらに Yasuo の 3発目の Steel Tempest の tornado に当たれば dive されるリスクもあります。
立ち回り方
何かを仕掛ける前に、通常攻撃 1回で Yasuo の Way of the Wanderer の shield を割ってください。Yasuo の Wind Wall が使える間は Void Seeker や Icathian Rain を撃ってはいけません。代わりに、trade するかのように前に歩いて Wind Wall を誘い、その直後に Supercharge の移動速度で下がってください。Yasuo の Wind Wall が cooldown 中は積極的に trade してください。Yasuo に knockup されたら、Last Breath が終わった直後に Killer Instinct を使って shield を得ながら安全な場所へ dash してください。
その他のマッチアップ


不利なマッチアップ
25これらのチャンピオンは、マッチアップ自体を絶望的にするわけではないが、対面で優位に立ちやすいツールを持っている。射程が長かったり、攻撃を受け止める力が高かったり、エンゲージへの対応手段が豊富だったりする。アプローチを調整し、戦闘を受け入れるタイミングを慎重に選ぶ必要がある。

Orianna+1
Orianna は大きな射程の優位を悪用して、この mid lane の matchup を支配します。Command: Attack で ball を絶えず動かし直せるため、あなたは距離を取らされ、Orianna の waveclear に張り合うことが事実上できません。近づいて通常攻撃すると Command: Dissonance の slow が発動するため、あなたは安全を保ちながら個々の minion を確保するだけのために、極端な遠距離から Void Seeker を使い続けるしかありません。
Oriannaのビルド →
詳細を見る
理由
Orianna は大きな射程の優位を悪用して、この mid lane の matchup を支配します。Command: Attack で ball を絶えず動かし直せるため、あなたは距離を取らされ、Orianna の waveclear に張り合うことが事実上できません。近づいて通常攻撃すると Command: Dissonance の slow が発動するため、あなたは安全を保ちながら個々の minion を確保するだけのために、極端な遠距離から Void Seeker を使い続けるしかありません。
レーン戦への影響
farm のために Void Seeker に頼らざるを得ないので、Orianna が安全に wave を shove する間に mana pool が急速に減っていきます。wave に Icathian Rain を使うために前に出ると、Orianna は簡単にあなたの体力を削ってきます。自分の tower の下でのこの受け身の状態が Orianna に lane priority を完全に与え、あなたがプレッシャーを受けながら wave を処理している間に、Orianna は自由に rotate して skirmish に参加できます。
立ち回り方
生き残るには、Orianna の ball に対して斜めの spacing を保ち、Command: Attack の軌道上に直接歩いて入らないでください。Supercharge は、距離を詰めるのに使うのではなく、Command: Shockwave を避けるための防御手段としてのみ温存してください。Orianna が ball の配置をミスしたら、孤立した minion に素早く Icathian Rain を使って wave を薄くし、cooldown が戻る前に下がってください。

Lissandra+1
Lissandra の防御的な crowd control があなたの ult に直接 counter になるため、Lissandra はあなたの攻撃性を完全に封じます。Killer Instinct で仕留めようとしたり位置を変えようとしたりした瞬間、Lissandra は Frozen Tomb を自分にかけてあなたの shield と burst を即座に無効化したり、Ring of Frost でその場に root したりできます。この即座の lock-down により、Icathian Rain を当てるために Lissandra を孤立させることができなくなり、Lissandra の領域の奥深くで極めて危険な状態になります。
Lissandraのビルド →
詳細を見る
理由
Lissandra の防御的な crowd control があなたの ult に直接 counter になるため、Lissandra はあなたの攻撃性を完全に封じます。Killer Instinct で仕留めようとしたり位置を変えようとしたりした瞬間、Lissandra は Frozen Tomb を自分にかけてあなたの shield と burst を即座に無効化したり、Ring of Frost でその場に root したりできます。この即座の lock-down により、Icathian Rain を当てるために Lissandra を孤立させることができなくなり、Lissandra の領域の奥深くで極めて危険な状態になります。
レーン戦への影響
laning phase 中、Lissandra の Ice Shard は絶えず wave を push しつつ minion 越しにあなたを poke してくるので、あなたは trade ではなく守りの farm のために Icathian Rain を使わされます。Supercharge で trade しに歩いて近づくことはできません。Lissandra は Glacial Path で距離を詰めてあなたを lock down し、簡単に反撃できるからです。この絶え間ない wave pressure のせいで roam の可能性が限られ、自分の turret の下で守りに回ることになります。
立ち回り方
この lane を生き残るには、long-range の scale champion として立ち回る必要があります。距離を保ち、Void Seeker で安全なダメージを狙ってください。Lissandra が Frozen Tomb と Ring of Frost の両方を使い切ったのを見ない限り、Killer Instinct で engage してはいけません。Lissandra が Glacial Path で仕掛けてきたら、これから来る stun や root をすぐ cleanse できるよう、即座に準備してください。Supercharge は Lissandra の脅威範囲から逃れるためだけに発動し、Lissandra に dive されて倒されない程度の体力を保ってください。

Yone+1
*Soul Unbound* によって Yone はあなたの ranged の優位を完全にすり抜けられるため、Yone が mid lane のリズムを支配します。Yone がこの spirit form を始動するたびに、gap-close によってあなたは攻撃範囲から逃れるため即座に *Supercharge* を発動する必要があります。この移動速度 buff をすぐに使わなければ、Yone は *Mortal Steel* の攻撃を簡単に当て、帰りに *Spirit Cleave* で自分に shield を張りながら、楽に trade に勝ちます。
Yoneのビルド →
詳細を見る
理由
*Soul Unbound* によって Yone はあなたの ranged の優位を完全にすり抜けられるため、Yone が mid lane のリズムを支配します。Yone がこの spirit form を始動するたびに、gap-close によってあなたは攻撃範囲から逃れるため即座に *Supercharge* を発動する必要があります。この移動速度 buff をすぐに使わなければ、Yone は *Mortal Steel* の攻撃を簡単に当て、帰りに *Spirit Cleave* で自分に shield を張りながら、楽に trade に勝ちます。
レーン戦への影響
*Supercharge* を受け身で使わされると、wave control が台無しになります。minion を処理する attack speed boost がないため、turret の下に押し込まれ、Yone は自由に roam できます。防御手段が cooldown 中になるたびにあなたは space を譲らなければならず、*Icathian Rain* のために minion を孤立させに歩いて近づくこともできません。この絶え間ないプレッシャーにより早い recall を強いられ、序盤の skirmish であなたの jungler は mid-lane の priority を失います。
立ち回り方
生き残るには、Yone の *Mortal Steel* の stack を追ってください。Yone の wind dash が使える状態のときは、*Soul Unbound* と組み合わせてあなたに届かせないよう、caster minion のはるか後ろに立ってください。*Void Seeker* を先制して撃ってはいけません。Yone の spirit が元の肉体に戻る瞬間に狙撃して mark を付けるため、温存してください。mobility がない状態で Yone に捕まったら、すぐに *Killer Instinct* を使って Yone の背後に dash し、*Fate Sealed* を避けながら、burst を耐えるための重要な shield を得てください。

Ryze+1
Ryze は、Spell Flux と Overload による wave clear であなたを絶えず tower の下に追い込むため、この mid matchup を支配します。反撃したり、Ryze の執拗な trade から逃れようとしたりするたびに、Ryze の point-and-click の Rune Prison が即座にあなたを root します。これはあなたの Supercharge を直接封じ、飛んでくる skillshot を避けたり安全に位置を変えたりするのに必要な移動速度を得られなくします。
Ryzeのビルド →
詳細を見る
理由
Ryze は、Spell Flux と Overload による wave clear であなたを絶えず tower の下に追い込むため、この mid matchup を支配します。反撃したり、Ryze の執拗な trade から逃れようとしたりするたびに、Ryze の point-and-click の Rune Prison が即座にあなたを root します。これはあなたの Supercharge を直接封じ、飛んでくる skillshot を避けたり安全に位置を変えたりするのに必要な移動速度を得られなくします。
レーン戦への影響
あなたは turret の下に閉じ込められ、Spell Flux の跳ね返りによる間接ダメージを受けながら、Ryze の push に張り合うのに苦労するでしょう。Ryze が前に出てきた時点で Supercharge で離脱することに頼れないため、早い段階で mid priority を譲るしかありません。つまり Ryze は Realm Warp を使って自由に roam し、あなたの jungler にプレッシャーをかけられる一方、あなたはプレッシャーの中で minion をかき集めるため、自分の gold 獲得が遅れます。
立ち回り方
生き残るには、Spell Flux の伝播を避けるために wave のはるか後ろに立ち、Ryze の Rune Prison を使わせた直後でない限り、Supercharge を攻撃的に発動してはいけません。Icathian Rain は、押し寄せる wave がぶつかる前に薄くするためだけに使ってください。Ryze が判断を誤って前に出すぎたら、遠距離の Void Seeker の mark を狙ってください。Ryze の主力の crowd control が使えない今なら、Killer Instinct で Ryze の横をすり抜けて dive し、root を完全にすり抜けられます。

Ziggs+1
Ziggs は Bouncing Bomb を連発して、あなたが触れるより前に minion wave を壊滅させ、安全な位置から絶え間ない lane pressure をかけます。序盤は Icathian Rain の進化後のミサイル数がないため、あなたの waveclear は Ziggs の素早い AoE の速さに追いつけません。この機構上の不足により、あなたは自分の turret の下に閉じ込められ、Ziggs のテンポに張り合うのに苦労し、一方 Ziggs は最大射程から安全に farm します。
Ziggsのビルド →
詳細を見る
理由
Ziggs は Bouncing Bomb を連発して、あなたが触れるより前に minion wave を壊滅させ、安全な位置から絶え間ない lane pressure をかけます。序盤は Icathian Rain の進化後のミサイル数がないため、あなたの waveclear は Ziggs の素早い AoE の速さに追いつけません。この機構上の不足により、あなたは自分の turret の下に閉じ込められ、Ziggs のテンポに張り合うのに苦労し、一方 Ziggs は最大射程から安全に farm します。
レーン戦への影響
あなたは絶えず tower の下に釘付けにされ、turret のランダムなターゲット選択で CS を取りこぼし続けるでしょう。Ziggs はこの priority を利用して Short Fuse であなたの plate を削ったり、Satchel Charge で素早い execution を狙ったりします。Ziggs の river への rotate を争うこともできず、wave を薄くしようと前に出れば、Hexplosive Minefield に当たって slow され、Mega Inferno Bomb の簡単な追撃を受けるリスクがあります。
立ち回り方
trade するよりも、Ziggs の push に合わせることを優先してください。自分の minion wave の外側に立ち、Ziggs に Bouncing Bomb であなたと wave のどちらを狙うか選ばせてください。tower の砲撃で失うことになる遠くの cannon を確保するために、Void Seeker を温存してください。Icathian Rain を evolve させれば、ようやく Ziggs の push 速度に追いつけます。Ziggs が前に出すぎて別の場所に Mega Inferno Bomb を投げたら、すぐに Supercharge で gap-close し、Second Skin の stack を発動させ、Ziggs の機動力のなさを咎めてください。

Lux+1
Lux は射程の優位を悪用して、mid lane の spacing を支配します。Kai'Sa は Icathian Rain で効果的に waveclear するために近づく必要がありますが、そのたびに Lucent Singularity や Light Binding に踏み込むリスクを常に抱えます。決定的な危険は Lux の crowd control にあります。Light Binding に root されると、Lux は Illumination を proc させて強力な Final Spark へ簡単につなげられ、あなたは反撃の余地を一切失います。
Luxのビルド →
詳細を見る
理由
Lux は射程の優位を悪用して、mid lane の spacing を支配します。Kai'Sa は Icathian Rain で効果的に waveclear するために近づく必要がありますが、そのたびに Lucent Singularity や Light Binding に踏み込むリスクを常に抱えます。決定的な危険は Lux の crowd control にあります。Light Binding に root されると、Lux は Illumination を proc させて強力な Final Spark へ簡単につなげられ、あなたは反撃の余地を一切失います。
レーン戦への影響
常に Lux の射程を警戒しなければならないため、Lux は簡単に lane priority を握れます。Lux は Lucent Singularity で wave を shove し、あなたの体力を削って、あなたを turret の下に押し込みます。poke を受けすぎると不利な recall を強いられ、plating を失います。さらに、priority がないせいで map の skirmish を手伝えず、生き残るだけで精一杯の状態で mid lane に縛り付けられます。
立ち回り方
minion の後ろで守りの立ち回りをしつつ、即座に反応できる準備をしておく必要があります。Supercharge を攻撃的に使ってはいけません。Light Binding を避けるためだけにこのスキルを温存してください。追加の移動速度は、Lux の root を横にかわす唯一確実な手段です。当たってしまったら、すぐに Killer Instinct を使って shield を得て、飛んでくる Final Spark の burst を吸収するようにし、その後すぐに安全な場所へ下がってください。

Teemo+1
Teemo の Blinding Dart があなたの主なダメージ源を直接無力化するため、Teemo は mid lane でのあなたの攻撃の脅威を完全に封じます。trade を決めようとするたびに、blind 効果であなたの通常攻撃は完全に外れます。これにより Second Skin の plasma stack を爆発させることが直接妨げられ、パッシブの burst の可能性を引き出せなくなる一方、Teemo の Toxic Shot はパッシブ効果であなたの体力を削り続けます。
Teemoのビルド →
詳細を見る
理由
Teemo の Blinding Dart があなたの主なダメージ源を直接無力化するため、Teemo は mid lane でのあなたの攻撃の脅威を完全に封じます。trade を決めようとするたびに、blind 効果であなたの通常攻撃は完全に外れます。これにより Second Skin の plasma stack を爆発させることが直接妨げられ、パッシブの burst の可能性を引き出せなくなる一方、Teemo の Toxic Shot はパッシブ効果であなたの体力を削り続けます。
レーン戦への影響
確実に trade し返せないため、Teemo は序盤の wave priority を簡単に握れます。Teemo は Move Quick を使ってあなたの turret の下まで harass し、あなたは wave を薄くするのではなく、minion の last-hit を確保するためだけに守りで Icathian Rain を使わされます。この絶え間ない poke により早い recall を強いられ、gold と経験値を失う一方、Teemo は lane に Noxious Trap をばらまいてあなたの動きを制限できます。
立ち回り方
生き残るための最優先目標は、仕掛けずに Blinding Dart を誘い出すことです。後ろに下がって、Void Seeker で遠くから安全に farm してください。Teemo が minion に blind を無駄遣いしたり外したりした瞬間が、攻める短い隙です。すぐに Supercharge で距離を詰めて Icathian Rain を放ち、Teemo の主な防御手段が使えない間に plasma を stack してください。Noxious Trap を踏んだら、すぐに turret の下へ下がり、反撃しようとしてはいけません。

Zoe+1
Zoe はあなたの短い射程を突いて、この matchup を支配します。*Paddle Star!* と *More Sparkles!* を組み合わせて、安全な位置から強力な poke を与えてきます。決定的な危険は、あなたが *Supercharge* を発動したときに生じます。一瞬の加速であなたは予測しやすい移動経路に固定されてしまい、Zoe が *Sleepy Trouble Bubble* を当てて致命的な burst を狙うのが非常に簡単になります。
Zoeのビルド →
詳細を見る
理由
Zoe はあなたの短い射程を突いて、この matchup を支配します。*Paddle Star!* と *More Sparkles!* を組み合わせて、安全な位置から強力な poke を与えてきます。決定的な危険は、あなたが *Supercharge* を発動したときに生じます。一瞬の加速であなたは予測しやすい移動経路に固定されてしまい、Zoe が *Sleepy Trouble Bubble* を当てて致命的な burst を狙うのが非常に簡単になります。
レーン戦への影響
あなたは絶えず tower の下に押し込まれ、Zoe の脅威範囲に踏み込まずに *Icathian Rain* で安全に wave を処理するのに苦労するでしょう。*Paddle Star!* の poke を受けて早い recall を強いられ、mid priority を失うことになります。これにより Zoe は *Spell Thief* で summoner spell を盗んだり、壁越しに river へ *Sleepy Trouble Bubble* を投げたりして、あなたが farm に縛られている間にあなたの jungler を脅かせます。
立ち回り方
Zoe が *Sleepy Trouble Bubble* を使える間は、直線的に *Supercharge* を発動してはいけません。minion wave の後ろに立って Zoe の bubble を遮り、*Void Seeker* で遠くから安全に farm するか、ward のない raptor の壁を確認してください。Zoe が bubble を外したり *Portal Jump* を攻撃的に使ったりしたら、*Killer Instinct* で距離を詰めて咎め、Zoe が下がる前に *Icathian Rain* ですぐに burst で倒してください。

Zed+1
Zed は近接 assassin のキットで、Living Shadow と Razor Shuriken により安全な位置から Kai'Sa を poke しつつ致命的な burst を準備できるため、この mid lane の matchup を支配します。Kai'Sa には hard crowd control がないので、Zed は安全に combo を決められます。ただし、ult の決闘は正確な interaction にかかっています。Kai'Sa は Death Mark が爆発する直前に Killer Instinct を発動することで、大きな shield を得て、遅延された爆発を吸収できます。
Zedのビルド →
詳細を見る
理由
Zed は近接 assassin のキットで、Living Shadow と Razor Shuriken により安全な位置から Kai'Sa を poke しつつ致命的な burst を準備できるため、この mid lane の matchup を支配します。Kai'Sa には hard crowd control がないので、Zed は安全に combo を決められます。ただし、ult の決闘は正確な interaction にかかっています。Kai'Sa は Death Mark が爆発する直前に Killer Instinct を発動することで、大きな shield を得て、遅延された爆発を吸収できます。
レーン戦への影響
レベル5前は、Zed の Living Shadow と Shadow Slash の組み合わせにより wave の push が危険になり、あなたは Icathian Rain を使って turret の下で farm することになります。Second Skin を発動させるために前に出すぎれば、Zed は高ダメージの trade で罰してきます。Death Mark が解放されると、体力の不足はそのまま脅威となるので、Zed に Contempt for the Weak を発動させないよう、頻繁に recall するか mid priority を手放す必要があります。
立ち回り方
この lane を生き残るには、守りの立ち回りをして、遠くから Void Seeker を当てて farm を確保するか Zed に mark を付けることに集中する必要があります。Zed の clone が出ているときは、飛んでくる Razor Shuriken を避けるために Supercharge を準備しておいてください。最も重要なのは、Zed が Death Mark をあなたに使ったとき、慌ててすぐに dash しないことです。Zed の mark の 3秒の遅延を追い、爆発が起きる直前に Killer Instinct を使って shield を得ることで、execution を完全に無効化してください。
Varus+1
Varus は大きな射程の優位を突いてこの mid matchup を支配し、あなたが trade の射程に入る前から Piercing Arrow と Hail of Arrows で harass してきます。あなたの主な engage 手段の Killer Instinct は完全に無力化されます。腕のいい Varus はあなたの ult の視覚的な合図に反応して、飛行中に Chain of Corruption を放ち、あなたをその場に即座に root して、Blighted Quiver の burst にさらすからです。
Varusのビルド →
詳細を見る
理由
Varus は大きな射程の優位を突いてこの mid matchup を支配し、あなたが trade の射程に入る前から Piercing Arrow と Hail of Arrows で harass してきます。あなたの主な engage 手段の Killer Instinct は完全に無力化されます。腕のいい Varus はあなたの ult の視覚的な合図に反応して、飛行中に Chain of Corruption を放ち、あなたをその場に即座に root して、Blighted Quiver の burst にさらすからです。
レーン戦への影響
この射程差のせいで、序盤の wave control を譲ることになります。minion を処理しに前に出ると Piercing Arrow による強い poke を招くからです。自分の turret の下で体力を削られ続け、積極的な map rotation は不可能になります。このプレッシャーを破ろうとして all-in を強行しても、Varus の Chain of Corruption に対して接近のタイミングを誤れば、致命的な counter-burst を受け、Varus に mid priority と turret plate の優位を完全に握られます。
立ち回り方
生き残るには、turret の下で Icathian Rain を使って minion を確保しつつ、横移動で Piercing Arrow を積極的に誘い出してください。Varus に Chain of Corruption を使い切らせたか、うまく横にかわした場合を除いて、Killer Instinct を発動してはいけません。Varus が ult を温存しているなら、Void Seeker で遠くから安全に farm することに集中し、前方への dash を試みる前に、jungler が Varus を lock down してくれるのを待ってください。

Viktor+1
Viktor は mid lane の位置関係を支配し、Kai'Sa がきれいな角度を見つけるのを難しくします。Hextech Ray が遠くからあなたの体力を削り、Siphon Power が反撃の Icathian Rain のミサイルを無効化します。最大の抑止力は Gravity Field です。Killer Instinct で Viktor に dive しようとすると、Viktor は自分の足元に直接この trap を落とし、避けられない stun であなたの burst を無力化できます。
Viktorのビルド →
詳細を見る
理由
Viktor は mid lane の位置関係を支配し、Kai'Sa がきれいな角度を見つけるのを難しくします。Hextech Ray が遠くからあなたの体力を削り、Siphon Power が反撃の Icathian Rain のミサイルを無効化します。最大の抑止力は Gravity Field です。Killer Instinct で Viktor に dive しようとすると、Viktor は自分の足元に直接この trap を落とし、避けられない stun であなたの burst を無力化できます。
レーン戦への影響
Viktor は Hextech Ray で容赦なく push してくるため、あなたは turret が落ちるのを防ぐだけのために Icathian Rain で mana を消費し続けるしかありません。体力の trade は非常に非効率です。Siphon Power の shield が短い skirmish に勝ち、あなたは安全に roam するには体力が低すぎる状態になります。この絶え間ないプレッシャーにより Supercharge の evolve が遅れ、不自然な守りの recall タイミングを強いられる一方、Viktor は自由に Glorious Evolution を scale させます。
立ち回り方
この lane を生き残るには、厳密に斜めの spacing を保ち、Viktor に Hextech Ray であなたと wave のどちらを狙うか選ばせてください。Supercharge の追加移動速度は、仕掛けるためではなく、Viktor の直線的な laser を避けるために受け身で使ってください。Gravity Field が使われたことを目視で確認しない限り、Killer Instinct を攻撃的に発動してはいけません。turret の下に閉じ込められたら、Void Seeker に頼って遠くの minion を安全に確保してください。

Talon+1
Talon は、Rake のおかげで安全な位置から楽に minion wave を処理しつつ Blade's End のパッシブを準備できるため、この matchup を支配します。lane が push されると、Assassin's Path で mid lane の壁を瞬時に飛び越えて、あなたのサイドレーンを gank できます。Kai'Sa であるあなたの Icathian Rain は序盤、この速い push に張り合えず、致命的な facecheck を避けながら Talon の経路を追う mobility 手段もありません。
Talonのビルド →
詳細を見る
理由
Talon は、Rake のおかげで安全な位置から楽に minion wave を処理しつつ Blade's End のパッシブを準備できるため、この matchup を支配します。lane が push されると、Assassin's Path で mid lane の壁を瞬時に飛び越えて、あなたのサイドレーンを gank できます。Kai'Sa であるあなたの Icathian Rain は序盤、この速い push に張り合えず、致命的な facecheck を避けながら Talon の経路を追う mobility 手段もありません。
レーン戦への影響
あなたは自分の turret の下に釘付けにされ続け、tower が落ちるのを防ぐために mana を消費することになるでしょう。trade しに前に出ると、Talon は Noxian Diplomacy で距離を詰め、Shadow Assault で致命的な burst を放てます。この圧力で守りの recall タイミングを強いられ、自分のスキルを evolve させるために必死に farm している間に、サイドレーンは大きな被害を受けます。
立ち回り方
Talon の Rake の射程の外に立ちつつ、Void Seeker で遠くの last-hit を確保して、生存を最優先してください。Talon を闇雲に river まで追ってはいけません。代わりに danger ping をすぐに連打し、Talon がいない間を使って Icathian Rain で wave を shove してください。Supercharge は、Talon の戻ってくる blade を避けるための移動速度 boost 専用に温存し、Killer Instinct は、Talon の ult が完全に使い切られてから、自分を shield するか re-engage するためだけに使ってください。
その他のマッチアップ












スキル次第のマッチアップ
7このマッチアップは何よりもまず実行力の勝負であり、両者ともに優位を取れる現実的な手段を持っている。重要なスキルを一つ避けられるか、エンゲージを正しく読めるか、あるいはたった一つの位置取りのミスが、勝敗を分けることもある。マッチアップを理解し、行動すべき瞬間を見極める力がとりわけ重要になる。

Veigar±0
この midlane の matchup は、高ダメージの burst の可能性を競う純粋なレースで、Veigar の cage の脅威に大きく左右されます。Veigar は Phenomenal Evil Power で AP を scale させますが、機動力のなさのため非常に脆いです。lane 全体が Event Horizon を中心に回ります。Veigar がこの crowd control を外せば守りは崩れ、Kai'Sa は Dark Matter をすり抜けて、Veigar のスキルが戻る前に消し去れます。
Veigarのビルド →
詳細を見る
理由
この midlane の matchup は、高ダメージの burst の可能性を競う純粋なレースで、Veigar の cage の脅威に大きく左右されます。Veigar は Phenomenal Evil Power で AP を scale させますが、機動力のなさのため非常に脆いです。lane 全体が Event Horizon を中心に回ります。Veigar がこの crowd control を外せば守りは崩れ、Kai'Sa は Dark Matter をすり抜けて、Veigar のスキルが戻る前に消し去れます。
レーン戦への影響
序盤のレベルは、wave の位置取りをめぐる繊細な駆け引きです。Veigar は poke しながら minion に Baleful Strike を stack したがり、あなたは Veigar に turret の下へ shove されないよう Icathian Rain を使う必要があります。両者ともレベル5以降は相手を100から0にできるため、lane は極度の緊張を保ちます。Veigar の cage の壁の近くで一度でも判断を誤れば、致命的な Primordial Burst の combo を受けます。
立ち回り方
積極的に動いて Veigar の cage を誘い出し、すぐに Supercharge で位置を変えてください。Veigar の Event Horizon が cooldown 中で Veigar が孤立しているなら、Void Seeker を撃って mark を付け、すぐに Killer Instinct を発動して Dark Matter の領域をすり抜けて dive してください。Veigar のスキルが戻る前に、孤立した Icathian Rain と Second Skin の proc で burst して倒してください。cage の外周の内側で捕まったら、壁に触れないようにしながら Baleful Strike を避けることに集中してください。

Twisted Fate±0
この mid lane の matchup は、反射神経とタイミングの純粋な試験です。主な攻撃手段の Supercharge で距離を詰めて Twisted Fate を削れますが、Twisted Fate の Pick a Card が交戦を完全に支配します。Gold Card を確定させれば、あなたの前進を即座に止め、DPS を出せる時間を無力化します。stun がなければ、Twisted Fate の Wild Cards と Stacked Deck は、単独の Icathian Rain のダメージに太刀打ちできません。
Twisted Fateのビルド →
詳細を見る
理由
この mid lane の matchup は、反射神経とタイミングの純粋な試験です。主な攻撃手段の Supercharge で距離を詰めて Twisted Fate を削れますが、Twisted Fate の Pick a Card が交戦を完全に支配します。Gold Card を確定させれば、あなたの前進を即座に止め、DPS を出せる時間を無力化します。stun がなければ、Twisted Fate の Wild Cards と Stacked Deck は、単独の Icathian Rain のダメージに太刀打ちできません。
レーン戦への影響
Twisted Fate は Wild Cards と赤の Pick a Card の発動で、絶えず wave に圧力をかけてきます。Twisted Fate が mana 回復や範囲ダメージのために card を選んだ瞬間は、Twisted Fate を押し返す短い隙になります。しかし Gold Card の脅威を温存している場合、あなたは守りに回るしかありません。stun を 1回受けるだけで full rotation を受け、Twisted Fate が Destiny で roam する前に体力を大きく削られます。
立ち回り方
Pick a Card が回っている間は、Twisted Fate の頭上をよく見てください。cleanse 効果を使える状態なら、Gold Card が当たったまさにその瞬間に発動し、すぐに Supercharge を発動して追撃を再開し、Icathian Rain で burst して倒してください。それ以外では、card が回っている間に Killer Instinct で dive してはいけません。Twisted Fate に守りの farm で stun を無駄遣いさせ、6秒の cooldown の間に攻めてください。

Swain±0
この midlane は互角の消耗戦で、あなたの単体 DPS と Swain の回復がぶつかります。Swain は Nevermove を当てて Ravenous Flock を発動させ、Death's Hand の射程にあなたを引き込むことに大きく依存しています。しかし Kai'Sa には完璧な counter 手段があります。Supercharge の突然の移動速度の爆発により、戻ってくる root に反応して避けることができ、Swain の準備を無効化し、あなたの継続ダメージに耐えるために Swain が必要とする体力の stack を与えません。
Swainのビルド →
詳細を見る
理由
この midlane は互角の消耗戦で、あなたの単体 DPS と Swain の回復がぶつかります。Swain は Nevermove を当てて Ravenous Flock を発動させ、Death's Hand の射程にあなたを引き込むことに大きく依存しています。しかし Kai'Sa には完璧な counter 手段があります。Supercharge の突然の移動速度の爆発により、戻ってくる root に反応して避けることができ、Swain の準備を無効化し、あなたの継続ダメージに耐えるために Swain が必要とする体力の stack を与えません。
レーン戦への影響
Swain は Death's Hand で絶えず wave を shove しつつ、minion 越しに Nevermove を狙ってきます。root をうまく避ければ Swain は非常に脆くなり、Icathian Rain で短い trade を強いることができます。しかし捕まると、Demonic Ascension の中に直接引き込まれ、互角だった lane が危険な領域に変わります。Swain は簡単にあなたの burst を sustain で上回り、あなたは早すぎる recall を強いられます。
立ち回り方
farm や wave clear のためだけに Supercharge を発動してはいけません。このスキルは主な防御手段として温存してください。Swain に対して斜めに立ち、Nevermove を予測しやすい角度で投げさせてください。claw が発射されるのを見たら、Supercharge を発動して戻ってくる経路を素早く横にかわしてください。root されて Swain が Demonic Ascension を発動した場合は、すぐに Killer Instinct を使って安全な場所へ滑り出し、shield を使って Swain の Nova の最初の burst を吸収してください。
その他のマッチアップ




有利なマッチアップ
8これらのチャンピオンは、こちらの主要な強みに効果的に対応するのが難しく、より自由に対面を組み立てることができる。プレッシャーをかけて有利な交換を引き出す手段は複数あることが多い。相手が態勢を立て直す時間を与えるのではなく、この優位を活かして主導権を握ろう。

Vladimir−1
Vladimir は poke を耐えるために Transfusion に頼り、Sanguine Pool に溶け込んで、あなたの Icathian Rain の単独ミサイル burst を簡単に避けられます。しかし Sanguine Pool は現在体力のかなりの部分を消費します。Vladimir が出てきた後は、高い cooldown のせいで、あなたの継続的な通常攻撃と Second Skin の plasma 破裂に無防備になり、これらは Vladimir の遅いスキルベースの回復よりずっと強く scale します。
Vladimirのビルド →
詳細を見る
理由
Vladimir は poke を耐えるために Transfusion に頼り、Sanguine Pool に溶け込んで、あなたの Icathian Rain の単独ミサイル burst を簡単に避けられます。しかし Sanguine Pool は現在体力のかなりの部分を消費します。Vladimir が出てきた後は、高い cooldown のせいで、あなたの継続的な通常攻撃と Second Skin の plasma 破裂に無防備になり、これらは Vladimir の遅いスキルベースの回復よりずっと強く scale します。
レーン戦への影響
Vladimir の序盤の Tides of Blood による waveclear は遅く体力を消費するため、Vladimir の tower の下でも絶えず圧力をかけられます。Vladimir は execution の射程に入らずにあなたの push に張り合えないため、楽に priority を握れます。Vladimir は minion の last-hit のために Transfusion を minion に使うか、sustain のためにあなたに使うかを選ばされ、あなたは mid lane の rotate を完全に支配できます。
立ち回り方
Vladimir の resource bar が赤くなったら一歩下がって強化された Transfusion を誘い出し、すぐに前に出て trade してください。Icathian Rain から始めるのではなく、通常攻撃から始めて Second Skin を発動させ、Vladimir に守りで Sanguine Pool を無駄遣いさせてください。Vladimir が早めに pool に入ったら、再び現れた瞬間に狙撃できるよう Void Seeker を温存してください。Hemoplague に捕まったら、Supercharge で位置を変え、Vladimir の ult のダメージ増幅が切れるまで Vladimir を kite してください。

Galio−1
Galio は物理ダメージでの harass に弱い、大きな近接ターゲットです。Void Seeker を遠距離から撃って mark を付け、Galio が前に出てきたら Icathian Rain の物理ミサイルを使うことで、魔法 shield のパッシブを簡単にすり抜けられます。minion に Colossal Smash を使うには近接射程まで歩かなければならないため、Galio は CS を取ろうとするたびに、反撃できないまま大きなダメージを受けることになります。
Galioのビルド →
詳細を見る
理由
Galio は物理ダメージでの harass に弱い、大きな近接ターゲットです。Void Seeker を遠距離から撃って mark を付け、Galio が前に出てきたら Icathian Rain の物理ミサイルを使うことで、魔法 shield のパッシブを簡単にすり抜けられます。minion に Colossal Smash を使うには近接射程まで歩かなければならないため、Galio は CS を取ろうとするたびに、反撃できないまま大きなダメージを受けることになります。
レーン戦への影響
この絶え間ない物理の脅威により、あなたは turret の近くで wave を freeze したり、好きなときにゆっくり push したりできます。Galio は、あなたの burst にさらされずに Winds of War で waveclear することはできません。体力を削られた Galio は自分の turret の下に釘付けにされ、recall のタイミングを見つけられず、Hero's Entrance で他の lane に影響を与えることもできません。あなたが lane のペースを支配し、Galio に gold を失わせ続けられます。
立ち回り方
Galio の Justice Punch を遮るため、常に自分の minion の後ろに位置取りしてください。Galio が Shield of Durand を charge してあなたを taunt してきたら、すぐに Supercharge を発動して移動速度を得て、後ろ向きに kite して Galio の射程から出てください。Galio の crowd control が外れたら、振り返って Icathian Rain で罰してください。万が一 Galio に捕まった場合の burst を shield で受けるため、あるいは Galio が tower の下へ逃げようとしたときに execute するために、Killer Instinct を温存してください。

Kassadin−1
Kassadin は魔法ダメージに対して lane で生き残るために Null Sphere に頼っていますが、魔法 shield はあなたの物理ダメージにはまったく役に立ちません。Kassadin を孤立させれば、Icathian Rain が大きな物理 burst を与え、防御手段を完全に無視します。これに、Second Skin を付与する遠距離の通常攻撃を組み合わせれば、Kassadin が安全に farm することさえできないうちに、体力を簡単に削り取れます。
Kassadinのビルド →
詳細を見る
理由
Kassadin は魔法ダメージに対して lane で生き残るために Null Sphere に頼っていますが、魔法 shield はあなたの物理ダメージにはまったく役に立ちません。Kassadin を孤立させれば、Icathian Rain が大きな物理 burst を与え、防御手段を完全に無視します。これに、Second Skin を付与する遠距離の通常攻撃を組み合わせれば、Kassadin が安全に farm することさえできないうちに、体力を簡単に削り取れます。
レーン戦への影響
この interaction により、あなたは序盤の wave を支配できます。Kassadin は近接で、あなたの物理的な trade を防げないため、あなたは wave をゆっくり push し、Kassadin を minion から遠ざけ、last-hit を取るためだけに Nether Blade を Kassadin の tower の下で使わせられます。Kassadin は常に体力が低すぎて jungler を助けられず、あなたは lane priority を握って自由に rotate できます。
立ち回り方
Kassadin の minion wave の内側に積極的に位置取りしつつ、Kassadin を孤立させるために自分の minion からは離れてください。Kassadin が last-hit のために近づいてきたら、Icathian Rain で素早く trade してください。slow されないよう Force Pulse の charge を追ってください。Kassadin が Riftwalk で逃げたり engage したりしようとしたら、Supercharge で素早く位置を変えるか、mana の計算を誤った場合は Killer Instinct で Kassadin に dive してください。Void Seeker はとどめ用に温存してください。

Katarina−1
Katarina は Voracity を発動させるため、Bouncing Blade と Preparation の予測しやすい着地地点に頼っています。Kai'Sa であるあなたは、Killer Instinct で危険度の高い dagger の範囲から即座に dash して離れられるため、この skirmish の力関係を支配します。即座に位置を変えることで、Katarina の Shunpo の reset を防ぐだけでなく、Death Lotus の channel された dagger を吸収する大きな shield も得られます。
Katarinaのビルド →
詳細を見る
理由
Katarina は Voracity を発動させるため、Bouncing Blade と Preparation の予測しやすい着地地点に頼っています。Kai'Sa であるあなたは、Killer Instinct で危険度の高い dagger の範囲から即座に dash して離れられるため、この skirmish の力関係を支配します。即座に位置を変えることで、Katarina の Shunpo の reset を防ぐだけでなく、Death Lotus の channel された dagger を吸収する大きな shield も得られます。
レーン戦への影響
Katarina は近接射程なので、wave clear のために前に出る必要があり、単独の Icathian Rain のミサイルに非常に弱くなります。あなたは Katarina の all-in の可能性に反応して無力化できるため、Katarina は守りに回るか、lane で死ぬリスクを負うしかありません。これにより Katarina は楽な roam ができず、turret の下に縛り付けられ、あなたは安全に scale しながら mid lane に絶えず圧力をかけられます。
立ち回り方
trade 中は、Killer Instinct を攻撃的に使ってはいけません。Katarina が Shunpo で仕掛けて Death Lotus を channel するまで、必ず温存してください。Katarina が回り始めた瞬間にあなたの ult を発動し、床に残る dagger から離れた安全な角度へ dash して、shield で Katarina のダメージを即座に吸収してください。trade の序盤に Supercharge を使って Bouncing Blade の着地地点を横にかわし、Icathian Rain で Katarina の cooldown を咎めてください。

Kayle−1
Kayle の序盤の防御はひどく弱く、mid lane ではあなたの生の物理 burst に非常に脆くなります。この matchup は Kayle を孤立させられるかにかかっています。Kayle は Celestial Blessing の短い速度上昇以外に、信頼できる防御的な機動力がないため、簡単に距離を詰められます。孤立した Icathian Rain は Kayle を非常に速く溶かすため、Kayle が Divine Judgment に反応して使う前に、常に倒しきれます。
Kayleのビルド →
詳細を見る
理由
Kayle の序盤の防御はひどく弱く、mid lane ではあなたの生の物理 burst に非常に脆くなります。この matchup は Kayle を孤立させられるかにかかっています。Kayle は Celestial Blessing の短い速度上昇以外に、信頼できる防御的な機動力がないため、簡単に距離を詰められます。孤立した Icathian Rain は Kayle を非常に速く溶かすため、Kayle が Divine Judgment に反応して使う前に、常に倒しきれます。
レーン戦への影響
Kayle は近接のうちはあなたと争えないため、最初の wave からあなたがテンポを支配できます。この priority を使って wave を crash させ、Void Seeker で Kayle を tower の下で poke してください。Kayle の唯一の対応は、Starfire Spellblade で距離を取って CS を確保することです。あなたの絶え間ない trade を生き残るために Celestial Blessing に mana を消費させれば、早い recall を強いられ、無料で plate を得て、mid lane の rotate を完全に支配できます。
立ち回り方
Icathian Rain を発動する前に Kayle を完全に孤立させるため、常に minion wave の横に位置取りしてください。Kayle が Starfire Spellblade で farm しようとしたら、すぐに Supercharge で突っ込み、Second Skin を発動させるのに必要な attack speed を得てください。Kayle が生き残って Divine Judgment を発動したら、Killer Instinct で Kayle の背後に dash するか安全に位置を変え、Kayle の無敵 shield が切れるのを待ってから、最後の plasma stack を与えてください。
その他のマッチアップ



Kai'Sa対策アイテム
これらのアイテムを購入すると、このチャンピオンの影響力を抑えられます。


| マッチアップ | 判定 | 有利度 | 勝率 | ピック率 |
|---|---|---|---|---|
| Varus | 不利なマッチアップ | +1 | 51.1% | 6.2% |
| Xayah | 不利なマッチアップ | +1 | 50.9% | 5.2% |
| Kalista | 不利なマッチアップ | +1 | 50.4% | 7.3% |
| Caitlyn | 不利なマッチアップ | +1 | 49.7% | 15.7% |
| Yunara | 不利なマッチアップ | +1 | 49.5% | 6.5% |
| Lucian | 不利なマッチアップ | +1 | 47.3% | 3.1% |
| Draven | 不利なマッチアップ | +1 | 47.2% | 5.4% |
| Nilah | 不利なマッチアップ | +1 | — | — |
| Ashe | スキル次第のマッチアップ | ±0 | 52.9% | 9.7% |
| Smolder | スキル次第のマッチアップ | ±0 | 52.6% | 9.1% |
| Samira | スキル次第のマッチアップ | ±0 | 51.0% | 11.8% |
| Ezreal | スキル次第のマッチアップ | ±0 | 50.4% | 7.8% |
| Jhin | スキル次第のマッチアップ | ±0 | 49.5% | 15.9% |
| Zeri | スキル次第のマッチアップ | ±0 | 49.0% | 1.2% |
| Tristana | スキル次第のマッチアップ | ±0 | 48.6% | 11.4% |
| Akshan | スキル次第のマッチアップ | ±0 | — | — |
| Corki | スキル次第のマッチアップ | ±0 | — | — |
| Kog'Maw | 有利なマッチアップ | −1 | 52.9% | 2.7% |
| Jinx | 有利なマッチアップ | −1 | 50.4% | 13.3% |
| Twitch | 有利なマッチアップ | −1 | 49.9% | 9.9% |
| Sivir | 有利なマッチアップ | −1 | 49.4% | 3.9% |
| Miss Fortune | 有利なマッチアップ | −1 | 48.8% | 12.8% |
| Vayne | 有利なマッチアップ | −1 | 48.7% | 6.5% |
| Senna | 有利なマッチアップ | −1 | — | — |
有利度:Wild Rift Coreの公式判定(−3〜+3)で、各行に記載されたチャンピオンの視点から見た値です。勝率とピック率:このロールにおける相手チャンピオン自身の数値 — Wild Rift CN · Challenger、Patch 7.3c。直接対決の勝率ではありません。
| マッチアップ | 判定 | 有利度 | 勝率 | ピック率 |
|---|---|---|---|---|
| Zyra | ハードカウンター | +2 | 52.4% | 3.3% |
| Syndra | ハードカウンター | +2 | 51.8% | 6.4% |
| Vex | ハードカウンター | +2 | 49.0% | 2.1% |
| Yasuo | ハードカウンター | +2 | 47.6% | 8.3% |
| Irelia | ハードカウンター | +2 | — | — |
| Teemo | 不利なマッチアップ | +1 | 52.8% | 2.3% |
| Hwei | 不利なマッチアップ | +1 | 52.4% | 6.5% |
| Morgana | 不利なマッチアップ | +1 | 52.2% | 6.5% |
| Lissandra | 不利なマッチアップ | +1 | 52.1% | 4.6% |
| Aurelion Sol | 不利なマッチアップ | +1 | 51.5% | 6.4% |
| Taliyah | 不利なマッチアップ | +1 | 51.5% | 1.9% |
| Zed | 不利なマッチアップ | +1 | 51.3% | 4.5% |
| Orianna | 不利なマッチアップ | +1 | 50.8% | 4.6% |
| Aurora | 不利なマッチアップ | +1 | 50.4% | 4.0% |
| Viktor | 不利なマッチアップ | +1 | 50.1% | 3.1% |
| Jayce | 不利なマッチアップ | +1 | 49.8% | 2.3% |
| Yone | 不利なマッチアップ | +1 | 49.0% | 5.2% |
| Lux | 不利なマッチアップ | +1 | 48.8% | 5.6% |
| Ziggs | 不利なマッチアップ | +1 | 48.4% | 5.4% |
| Fizz | 不利なマッチアップ | +1 | 48.1% | 2.2% |
| Ryze | 不利なマッチアップ | +1 | 47.3% | 2.9% |
| Diana | 不利なマッチアップ | +1 | 47.2% | 1.0% |
| Corki | 不利なマッチアップ | +1 | — | — |
| Karma | 不利なマッチアップ | +1 | — | — |
| Malphite | 不利なマッチアップ | +1 | — | — |
| Pantheon | 不利なマッチアップ | +1 | — | — |
| Rumble | 不利なマッチアップ | +1 | — | — |
| Talon | 不利なマッチアップ | +1 | — | — |
| Varus | 不利なマッチアップ | +1 | — | — |
| Zoe | 不利なマッチアップ | +1 | — | — |
| Kennen | スキル次第のマッチアップ | ±0 | 51.9% | 1.6% |
| Norra | スキル次第のマッチアップ | ±0 | 50.4% | 1.3% |
| Twisted Fate | スキル次第のマッチアップ | ±0 | 50.4% | 5.7% |
| Veigar | スキル次第のマッチアップ | ±0 | 49.4% | 7.7% |
| Swain | スキル次第のマッチアップ | ±0 | 48.9% | 2.6% |
| Cho'Gath | スキル次第のマッチアップ | ±0 | — | — |
| Pyke | スキル次第のマッチアップ | ±0 | — | — |
| Vladimir | 有利なマッチアップ | −1 | 51.5% | 4.3% |
| Galio | 有利なマッチアップ | −1 | 51.3% | 11.4% |
| Kassadin | 有利なマッチアップ | −1 | 50.5% | 1.8% |
| Vel'Koz | 有利なマッチアップ | −1 | 50.2% | 3.4% |
| Nasus | 有利なマッチアップ | −1 | 48.3% | 1.1% |
| Katarina | 有利なマッチアップ | −1 | 48.2% | 1.5% |
| Mel | 有利なマッチアップ | −1 | 46.0% | 8.5% |
| Kayle | 有利なマッチアップ | −1 | — | — |
有利度:Wild Rift Coreの公式判定(−3〜+3)で、各行に記載されたチャンピオンの視点から見た値です。勝率とピック率:このロールにおける相手チャンピオン自身の数値 — Wild Rift CN · Challenger、Patch 7.3c。直接対決の勝率ではありません。