
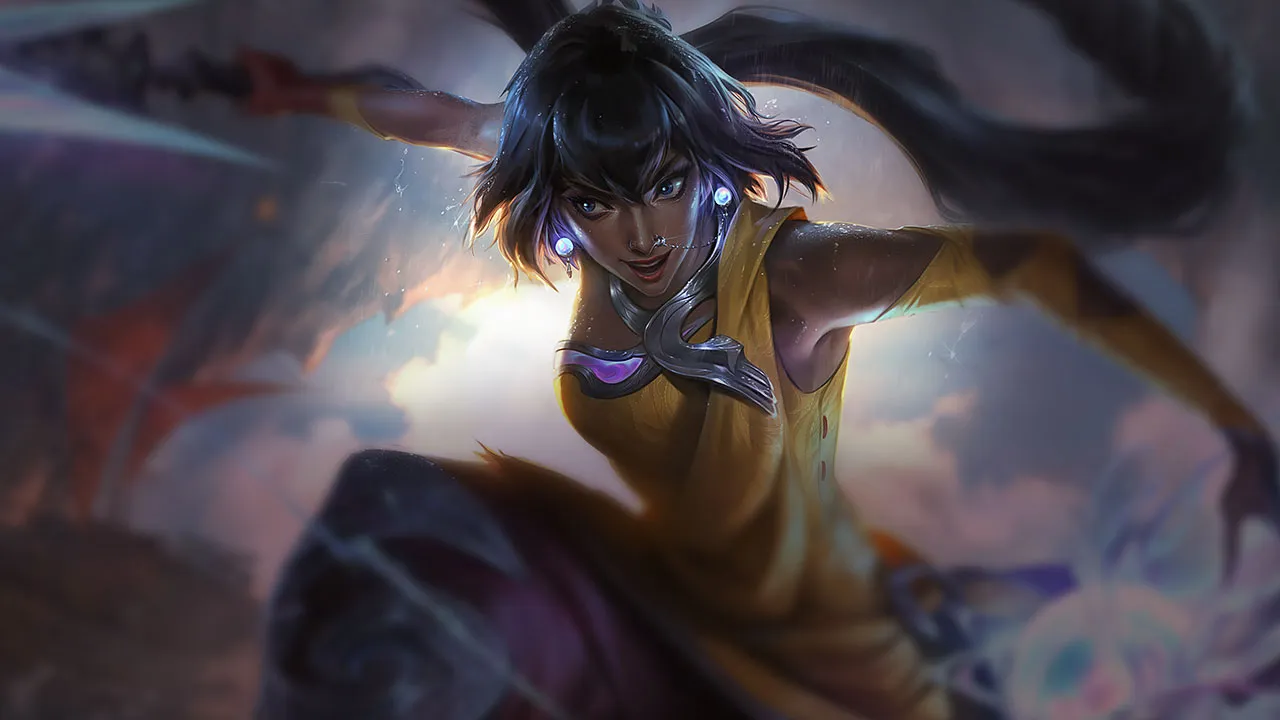
Nilah Wild Rift カウンターガイド
ハードカウンター
3これらのチャンピオンは、こちらのビルドやプレイスタイルを真正面から上回る構成を持ち、レーン戦のコントロールとファームを極めて難しくする。彼らのスキルはこちらの主要な強みを無効化し、いつも通りのプランを実行しようとした瞬間に手痛い反撃を受けさせてくる。こうしたマッチアップでは、ミスを最小限に抑え、正面からの対決以外で解決策を探すことが重要になる。

Caitlyn+1
Caitlyn は Nilah にとって最悪の matchup の 1 つです。あなたの根本的な弱点を突いてくるからです。あなたは、接近できる時間が必要な近接 ADC です。Caitlyn は射程で接近を拒否し、ラストヒットのたびに罰し、完璧な準備がなければ本当にはプレイできないレーンにあなたを押し込みます。
Caitlynのビルド →
詳細を見る
理由
Caitlyn は Nilah にとって最悪の matchup の 1 つです。あなたの根本的な弱点を突いてくるからです。あなたは、接近できる時間が必要な近接 ADC です。Caitlyn は射程で接近を拒否し、ラストヒットのたびに罰し、完璧な準備がなければ本当にはプレイできないレーンにあなたを押し込みます。
レーン戦への影響
レーンでは、Caitlyn がプライオリティをただで手に入れます。つまり、あなたの視界は減り、Caitlyn のジャングラーとサポートはより自由に動けます。トラップもあなたの突入を難しくします。ダッシュで飛び込んでも、本当のダメージを与える前に足止めされたり、押し出されたりすることがあります。
立ち回り方
デュエルのつもりで戦わないでください。あなたの目標は、アイテムが揃うまで綺麗に生き残ることです。wave を使って、無防備になるラストヒットを避けてください。体力を高く保つために、数個の CS を落とすのは受け入れてください。all-in を狙うのは、Caitlyn が強いトラップの援護なしに前に出すぎていて、かつあなたのサポートに本当の engage があるときだけにしてください。

Alistar
Alistar は Nilah にとって難しい相手です。あなたを倒す必要はなく、悪いタイミングであなたを動かせばいいからです。Nilah は DPS を出すためにターゲットに張り付く必要があります。Alistar の W か Q が 1 回入るだけで、突入は崩され、あなたは孤立し、ダメージを出す代わりに防御系のクールダウンを使わされます。
Alistarのビルド →
詳細を見る
理由
Alistar は Nilah にとって難しい相手です。あなたを倒す必要はなく、悪いタイミングであなたを動かせばいいからです。Nilah は DPS を出すためにターゲットに張り付く必要があります。Alistar の W か Q が 1 回入るだけで、突入は崩され、あなたは孤立し、ダメージを出す代わりに防御系のクールダウンを使わされます。
レーン戦への影響
レーンでは、フラッシュコンボの脅威によって後ろに押し戻され、poke のレーンに対してファームが難しくなります。集団戦では、Alistar はあなたが到着した瞬間にノックバックして自分の carry を守れるので、あなたの攻撃のチャンスは消えます。
立ち回り方
フラッシュの射程を警戒し、Alistar のコンボを見るまでは仕掛けないでください。Alistar が他の誰かに engage した場合が、即座に妨害されずに突入できる最大のチャンスです。どうしても engage する必要があるなら、Alistar が W であなたを味方やタワーの方へ飛ばせない角度から行ってください。

Janna
Janna は Nilah を最も機能不全に追い込むサポートの 1 人です。あなたは飛び込みたいのに、Janna はあなたを押し出したいからです。tornado と ult のリセットのせいで all-in は決めきるのが難しく、Nilah は、peel を受けている遠距離 ADC のように、遠くから DPS を出すことができません。
Jannaのビルド →
詳細を見る
理由
Janna は Nilah を最も機能不全に追い込むサポートの 1 人です。あなたは飛び込みたいのに、Janna はあなたを押し出したいからです。tornado と ult のリセットのせいで all-in は決めきるのが難しく、Nilah は、peel を受けている遠距離 ADC のように、遠くから DPS を出すことができません。
レーン戦への影響
レーンでは、Janna は軽く poke してきますが、それ以上に重要なのは、engage のチャンスを潰してくることです。あなたは相手のミスを待つしかなくなります。集団戦では、Janna はあなたをノックバックしたり、狙っているターゲットを孤立させたりして、あなたの ult のタイミングを打ち消すことができます。
立ち回り方
Janna がすべてのスペルを持っている間は、無理に突入しないでください。tornado や ult が、別の脅威への対応で使われるのを待ってください。あなたの計画は、多くの場合、最初の engage ボタンになることではなく、味方の最初の仕掛けの後に回り込むか突入することです。
不利なマッチアップ
6これらのチャンピオンは、マッチアップ自体を絶望的にするわけではないが、対面で優位に立ちやすいツールを持っている。射程が長かったり、攻撃を受け止める力が高かったり、エンゲージへの対応手段が豊富だったりする。アプローチを調整し、戦闘を受け入れるタイミングを慎重に選ぶ必要がある。

Lux
Lux は不利な相手です。射程の外から戦い、あなたの接近をリスクに変えるからです。bind 1 回であなたは接近の機会を失います。Nilah は sustain できますが、all-in したいときに体力が低すぎると、決めきるための余裕がありません。
Luxのビルド →
詳細を見る
理由
Lux は不利な相手です。射程の外から戦い、あなたの接近をリスクに変えるからです。bind 1 回であなたは接近の機会を失います。Nilah は sustain できますが、all-in したいときに体力が低すぎると、決めきるための余裕がありません。
レーン戦への影響
レーンでは、ラストヒットで削られ、プライオリティを失い、しばしばジャングラーのプレッシャーも受けます。ミッドゲームでは、Lux はローテーションを罰してきます。Nilah は、戦いの前に捕まるのを嫌います。実際には、wave のプライオリティ、リセットのタイミング、リバーやオブジェクトへのアクセスに影響します。タイミングのミスが 1 回あるだけで、次の一連の流れの主導権を失いかねません。
立ち回り方
無駄にダメージを受けてはいけません。bind を食らうことになるなら、CS を 1 つ落としてください。突入は、Lux が Q を外したばかりのときや、ワードを置いたりクリアしたりするために前に出てこなければならないときのために取っておいてください。engage するなら、運任せではなく、はっきりしたチャンスに行ってください。

Morgana
Morgana は不利な相手です。Q が近接 ADC を完璧に罰するからです。拘束されたら、Nilah としてプレイできません。W も、ダメージを受けるか CS を失うかの選択をあなたに強い、アイテムのタイミングを遅らせます。
Morganaのビルド →
詳細を見る
理由
Morgana は不利な相手です。Q が近接 ADC を完璧に罰するからです。拘束されたら、Nilah としてプレイできません。W も、ダメージを受けるか CS を失うかの選択をあなたに強い、アイテムのタイミングを遅らせます。
レーン戦への影響
レーンは軌道を意識できているかのテストになります。まっすぐ歩けば bind をプレゼントすることになります。集団戦でも、Morgana は Black Shield でバックラインを守れるため、ターゲットに ult を当てても決めきるのが難しくなります。
立ち回り方
斜めに動いてください。横の角度から近づき、wave を目隠しとして使って、Morgana に反応ではなく予想で動かせてください。all-in は、Q がクールダウン中のとき、または Morgana が他のターゲットにシールドを張るのに忙しいときに始めてください。そうしないと、拘束を受けてあなたのテンポが潰れるリスクがあります。

Ezreal±0
Ezreal は不利な相手です。Nilah の好む戦いを拒否するからです。遠くから poke して、近づくと blink で離れます。接近の計画は高くつき、早すぎるタイミングで仕掛けると、Ezreal に kite されて poke される間、あなたは使える手段を失ってしまいます。
Ezrealのビルド →
詳細を見る
理由
Ezreal は不利な相手です。Nilah の好む戦いを拒否するからです。遠くから poke して、近づくと blink で離れます。接近の計画は高くつき、早すぎるタイミングで仕掛けると、Ezreal に kite されて poke される間、あなたは使える手段を失ってしまいます。
レーン戦への影響
レーンでは、Ezreal は安全にプレイし、プライオリティを保ち、あなたを削ることができます。Ezreal を倒せるのは、E の本当のミスがあったときか、タイミングのいいサポートの engage があったときだけです。ミッドゲームでは、オブジェクト周辺でのヒットアンドランが得意です。
立ち回り方
ずっと追いかけ続けてはいけません。あなたの all-in は「モード」ではなく「瞬間」であるべきです。Ezreal に、(脅威を与えることで) E を守りのために使わせてから、位置を取り直せないチャンスに engage してください。Ezreal に届かないなら、ターゲットを切り替えてください。Nilah は、前に出すぎた前衛を罰することでも勝てます。

Xayah+1
Nilah は Slipstream と Formless Blade で短い射程まで入らなければなりませんが、そこはまさに Xayah が羽根を準備している場所です。Bladecaller は羽根を Xayah の方へ呼び戻し、3 本の軌道がつながると拘束します。さらに Featherstorm で Xayah は一瞬ターゲット不可になります。そのため Xayah は Apotheosis を避け、その後で Nilah の着地位置を罰することができます。
Xayahのビルド →
詳細を見る
理由
Nilah は Slipstream と Formless Blade で短い射程まで入らなければなりませんが、そこはまさに Xayah が羽根を準備している場所です。Bladecaller は羽根を Xayah の方へ呼び戻し、3 本の軌道がつながると拘束します。さらに Featherstorm で Xayah は一瞬ターゲット不可になります。そのため Xayah は Apotheosis を避け、その後で Nilah の着地位置を罰することができます。
レーン戦への影響
Xayah に向かうダッシュは、どれも複数の羽根のラインを横切る可能性があり、短い trade が拘束に変わります。Deadly Plumage は長引く攻防も強化するため、Jubilant Veil の後も近接射程に留まり続けるのは、持続的な答えにはなりません。Xayah が自分とミニオンの間に十分な羽根を設置すると、Nilah は wave に近づけなくなります。
立ち回り方
Slipstream を使う前に、地面にある羽根の数を数え、横から入ってください。決して羽根が戻ってくる軸に沿って入ってはいけません。Apotheosis を見せるのは Featherstorm の後だけにするか、Xayah が対抗手段を持っている間は別のターゲットに使ってください。Jubilant Veil は攻撃に対しては役立ちますが、Bladecaller は防げないので、veil を使って突入を続ける前に、軌道から離れてください。
その他のマッチアップ


スキル次第のマッチアップ
9このマッチアップは何よりもまず実行力の勝負であり、両者ともに優位を取れる現実的な手段を持っている。重要なスキルを一つ避けられるか、エンゲージを正しく読めるか、あるいはたった一つの位置取りのミスが、勝敗を分けることもある。マッチアップを理解し、行動すべき瞬間を見極める力がとりわけ重要になる。

Kai'Sa−1
Jubilant Veil によって Nilah は一時的に飛び道具を回避でき、Kai'Sa が攻撃で Plasma を溜めようとするのを中断できます。しかし、Icathian Rain は孤立したターゲットにミサイルを集中させ、Killer Instinct はマークされたターゲットに一気に距離を詰めます。そのため、両者とも位置取りによって決まる all-in のチャンスがあります。
Kai'Saのビルド →
詳細を見る
理由
Jubilant Veil によって Nilah は一時的に飛び道具を回避でき、Kai'Sa が攻撃で Plasma を溜めようとするのを中断できます。しかし、Icathian Rain は孤立したターゲットにミサイルを集中させ、Killer Instinct はマークされたターゲットに一気に距離を詰めます。そのため、両者とも位置取りによって決まる all-in のチャンスがあります。
レーン戦への影響
wave と味方の近くにいれば、Icathian Rain の一斉射撃の多くは分散し、Joy Unending は受けた回復やシールドの価値を高めます。孤立すると、Nilah ははるかに綺麗な burst を受け、Kai'Sa に追いかける対象を与えてしまいます。レーンは、最初に無駄になった veil か、最初に遮られなかった Void Seeker で傾きます。
立ち回り方
Void Seeker を防ぎ、Icathian Rain の一斉射撃が全部集中するのを防ぐために、ミニオンの近くにいてください。Jubilant Veil は、Kai'Sa が攻撃を連続させたいタイミングのために温存し、その後 Slipstream で離れるか、攻防を終わらせてください。veil が使えない間は、すでに Killer Instinct のためにマークされているターゲットを追いかけてはいけません。

Samira−1
Samira は、ある点で Nilah と似ています。近距離の戦いが大好きなのです。そのため、単に「どちらが強いか」ではなく、「どちらが戦いをうまく組み立てるか」が問題になります。Samira に突入と味方の CC があれば、あなたに burst を出せます。あなたに前衛と綺麗な準備があれば、あなたの sustain が Samira を上回れます。
Samiraのビルド →
詳細を見る
理由
Samira は、ある点で Nilah と似ています。近距離の戦いが大好きなのです。そのため、単に「どちらが強いか」ではなく、「どちらが戦いをうまく組み立てるか」が問題になります。Samira に突入と味方の CC があれば、あなたに burst を出せます。あなたに前衛と綺麗な準備があれば、あなたの sustain が Samira を上回れます。
レーン戦への影響
レーンは 1 回の all-in で決まることもあります。集団戦では、主要な CC が使われた後に 2 番目に突入した側が有利になることが多いです。即座に止められることなく DPS を出せるからです。
立ち回り方
CC を把握せずに最初に仕掛けてはいけません。主要なスペルが使われるのを待ってください。Samira が突入してきたら、ダッシュの後に張り付いて罰してください。あなたが突入するなら、Samira に burst されないよう、サポートかジャングラーが拘束できる状態にしておいてください。

Ashe−1
Ashe は距離の matchup です。必ずしもあなたに burst を出すわけではありませんが、スロウで接触を拒否し、R で pick を作ります。Nilah は kite されるのを嫌うので、突入の準備がなければ、Ashe はあなたを役立たずにできます。
Asheのビルド →
詳細を見る
理由
Ashe は距離の matchup です。必ずしもあなたに burst を出すわけではありませんが、スロウで接触を拒否し、R で pick を作ります。Nilah は kite されるのを嫌うので、突入の準備がなければ、Ashe はあなたを役立たずにできます。
レーン戦への影響
レーンでは、Ashe は poke して、あなたを wave から遠ざけます。ミッドゲームでは、Ashe の ult のせいでローテーションが危険になります。戦いの前に捕まると、突入のタイミングを失います。実際には、wave のプライオリティ、リセットのタイミング、リバーやオブジェクトへのアクセスに影響します。タイミングのミスが 1 回あるだけで、次の一連の流れの主導権を失いかねません。
立ち回り方
あなたの仕事は 10 回ではなく 1 回だけ接触することです。視界と味方の engage で突入の準備をしてください。Ashe が ult を持っているなら、霧を警戒し、近くのターゲットにダッシュで飛びつける角度を保って、スロウの影響を減らしてください。
その他のマッチアップ






有利なマッチアップ
10これらのチャンピオンは、こちらの主要な強みに効果的に対応するのが難しく、より自由に対面を組み立てることができる。プレッシャーをかけて有利な交換を引き出す手段は複数あることが多い。相手が態勢を立て直す時間を与えるのではなく、この優位を活かして主導権を握ろう。

Jhin−1
Jhin は Nilah にとって有利になり得ます。本当の機動力がなく、一度捕まると戦場から逃げるのに苦労するからです。Nilah は、ダッシュで逃げられない相手に強いです。一度張り付けば、Nilah の sustain と DPS は手に負えません。
Jhinのビルド →
詳細を見る
理由
Jhin は Nilah にとって有利になり得ます。本当の機動力がなく、一度捕まると戦場から逃げるのに苦労するからです。Nilah は、ダッシュで逃げられない相手に強いです。一度張り付けば、Nilah の sustain と DPS は手に負えません。
レーン戦への影響
レーンでは、Jhin は poke できますが、リロードの時間帯に頼っています。正しい突入のタイミングなら、弾がないときに罰せられます。集団戦では、Jhin は距離を取りたがります。あなたは一度その距離を詰めたいのです。
立ち回り方
読みやすい突入のタイミングを探してください。4 発目の後か、リロード中です。Jhin が ult をチャネリングしているなら、それは別の場所で戦いを強要するチャンスであることが多いです。Jhin は動けないので、あなたの ult ですばやく決めきれます。
その他のマッチアップ








ハードカウンター
2これらのチャンピオンは、こちらのビルドやプレイスタイルを真正面から上回る構成を持ち、レーン戦のコントロールとファームを極めて難しくする。彼らのスキルはこちらの主要な強みを無効化し、いつも通りのプランを実行しようとした瞬間に手痛い反撃を受けさせてくる。こうしたマッチアップでは、ミスを最小限に抑え、正面からの対決以外で解決策を探すことが重要になる。

Rammus+2
Rammus は Nilah の近接 DPS を、そのまま Nilah に向けて武器にします。Rammus が Defensive Ball Curl を発動して Frenzying Taunt であなたを狙うと、あなたは一切のコントロールを失います。タウントによって、Formless Blade で強化されたあなたの攻撃は、高速で Rammus のトゲの殻を殴ることになります。Rolling Armordillo のアーマーに応じた反射ダメージのせいで、タウントが切れる前に、あなた自身の高速の攻撃があなたの体力を削り取ります。
Rammusのビルド →
詳細を見る
理由
Rammus は Nilah の近接 DPS を、そのまま Nilah に向けて武器にします。Rammus が Defensive Ball Curl を発動して Frenzying Taunt であなたを狙うと、あなたは一切のコントロールを失います。タウントによって、Formless Blade で強化されたあなたの攻撃は、高速で Rammus のトゲの殻を殴ることになります。Rolling Armordillo のアーマーに応じた反射ダメージのせいで、タウントが切れる前に、あなた自身の高速の攻撃があなたの体力を削り取ります。
レーン戦への影響
ジャングルでは、この状況があなたのルーティングを完全に決めてしまいます。Rammus の体力が満タンなら、Scuttle Crab で争うことも、オブジェクトの小競り合いを確保することもできません。Rammus が Powerball で転がり込み、Soaring Slam で仕掛けてきたら、あなたは反撃の engage ではなく逃げるしかありません。この譲歩ばかりのプレイスタイルは、Rammus が自由にあなたのレーナーへダイブすることを招き、あなたのマップ全体を遅れさせます。
立ち回り方
Slipstream で仕掛けてはいけません。代わりに、Rammus が Powerball で近づいてきたときにキャンプの壁を越えて逃げられるよう、2 回分のチャージを温存してください。捕まってしまったら、Rammus の Defensive Ball Curl が終わるのを待ってから Formless Blade を発動しなければなりません。最良の手段は Apotheosis です。引き寄せを使って、空中の Soaring Slam を妨害するか、体力の低い味方から Rammus を引き離し、その間に Jubilant Veil の速度を使って逃げてください。

Poppy+2
Poppy はジャングルでのあなたの機動力を完全に封じます。Slipstream で逃げたり engage したりしようとした瞬間に、Poppy は Steadfast Presence を発動できます。これはあなたのダッシュを空中で即座に中断して地面に落とし、壁へのスタンに対してあなたを完全に無力にします。あなたのキット全体が、距離を詰めて Formless Blade と Apotheosis を当てることに頼っているため、この防御手段 1 つであなたの攻めのプレッシャーは完全に無効化されます。
Poppyのビルド →
詳細を見る
理由
Poppy はジャングルでのあなたの機動力を完全に封じます。Slipstream で逃げたり engage したりしようとした瞬間に、Poppy は Steadfast Presence を発動できます。これはあなたのダッシュを空中で即座に中断して地面に落とし、壁へのスタンに対してあなたを完全に無力にします。あなたのキット全体が、距離を詰めて Formless Blade と Apotheosis を当てることに頼っているため、この防御手段 1 つであなたの攻めのプレッシャーは完全に無効化されます。
レーン戦への影響
ジャングルでは、この matchup がマップのコントロールを決めます。壁の近くでの小競り合いは命取りになるため、Scuttle Crab を争ったり、安全に侵略したりすることはできません。リバーで捕まると、Steadfast Presence があなたの唯一の逃げ道を封じ、Poppy は簡単にダブルバフを確保したり、あなたを基地に戻したりできます。ゴールドの獲得は台無しになります。守りのルーティングを強いられるため、あなたの gank の可能性は大きく遅れ、序盤のオブジェクトのプライオリティを譲ることになります。
立ち回り方
生き残るには、完全に受け身のプレイをしなければなりません。キャンプのクリアやリバーへの移動を Slipstream で始めてはいけません。このダッシュは、Poppy の防御バリアが切れた後の、遅めの離脱用に取っておいてください。小競り合いでは、先に歩いて前に出て Formless Blade で攻撃し、Steadfast Presence を誘い出してください。Apotheosis を使うのは、ジャングルの地形から遠く離れた広い場所に位置取りしているときだけにしてください。ダッシュがキャンセルされても、壁に叩きつけられにくくなります。
不利なマッチアップ
20これらのチャンピオンは、マッチアップ自体を絶望的にするわけではないが、対面で優位に立ちやすいツールを持っている。射程が長かったり、攻撃を受け止める力が高かったり、エンゲージへの対応手段が豊富だったりする。アプローチを調整し、戦闘を受け入れるタイミングを慎重に選ぶ必要がある。

Vi+1
Vi は、Jubilant Veil では Vi のポイント&クリック型の Cease and Desist をまったく回避も軽減もできないため、あなたの守りの循環を完全にカウンターします。Vi が ult であなたを拘束すると、続く Vault Breaker を確実に当て、Denting Blows も簡単に発動させます。Slipstream の機動力では止められない ult から逃げ切ることはできず、サプレッション中は Vi の物理burstをすべて受けることになります。
Viのビルド →
詳細を見る
理由
Vi は、Jubilant Veil では Vi のポイント&クリック型の Cease and Desist をまったく回避も軽減もできないため、あなたの守りの循環を完全にカウンターします。Vi が ult であなたを拘束すると、続く Vault Breaker を確実に当て、Denting Blows も簡単に発動させます。Slipstream の機動力では止められない ult から逃げ切ることはできず、サプレッション中は Vi の物理burstをすべて受けることになります。
レーン戦への影響
ジャングルでは、この力関係のせいで Scuttle Crab を争ったり、安全にinvadeしたりできません。リバーで Vi に捕まると、Vi は cooldown が戻るのを待つ間、Blast Shield であなたの序盤の Formless Blade による反撃を吸収します。skirmishを強制することはできません。Apotheosis で仕掛けても、Vi はあなたの channel を中断するか、Vault Breaker でポジションを変えるだけでよく、マッププレッシャーは大きく Vi のチーム側に傾きます。
立ち回り方
生き残るには、Vi の Cease and Desist が使える間は絶対に戦闘を仕掛けないでください。Vi の動きを追い、Vi が Vault Breaker をキャンプや味方に使って無駄にしてから初めて、Slipstream のダッシュで踏み込みましょう。Vi が拳をチャージしてあなたに向かってきたら、すぐに Jubilant Veil を発動して続く Relentless Force の攻撃をブロックし、Formless Blade で反撃してください。先に Vi の ult を受けた場合は、着地した瞬間に Apotheosis を先行入力して、最初のburstで減った分を回復してください。

Lee Sin+1
Lee Sin はこのジャングルのmatchupを支配します。あなたの主な防御手段である Jubilant Veil は、Lee Sin のスペルによるburstには効果がないからです。Flurry で強化された通常攻撃はブロックできても、Sonic Wave の大きな物理ダメージや Tempest の魔法ダメージはまったく軽減できません。そのため Lee Sin の序盤のデュエル性能をまともに受けることになります。
Lee Sinのビルド →
詳細を見る
理由
Lee Sin はこのジャングルのmatchupを支配します。あなたの主な防御手段である Jubilant Veil は、Lee Sin のスペルによるburstには効果がないからです。Flurry で強化された通常攻撃はブロックできても、Sonic Wave の大きな物理ダメージや Tempest の魔法ダメージはまったく軽減できません。そのため Lee Sin の序盤のデュエル性能をまともに受けることになります。
レーン戦への影響
キャンプへの積極的な序盤のinvadeが予想されます。Lee Sin は Safeguard であなたの視界を越えて、クリアの最中に捕まえにきて、あなたはモンスターを諦めることになります。HPが低いときに Sonic Wave を当てられると、キャンプを争うことも反撃することもできません。このプレッシャーで Apotheosis の入手が遅れ、序盤のリバーのコントロールを譲ることになります。
立ち回り方
生き残るには、安全にクリアするため、Lee Sin の開始サイドから離れたルートを取ってください。Lee Sin が近くにいそうなときは、クリア中に Formless Blade を不用意に使わないでください。Lee Sin がinvadeしてきて Sonic Wave を当ててきても、すぐには Jubilant Veil を発動せず、代わりに Slipstream でジャングルモンスターを通り抜け、ダッシュを発動される前に Lee Sin のengageの角度を崩してください。Jubilant Veil は、Lee Sin のスペルが cooldown に入ってから Flurry をブロックするために温存します。

Talon+1
Jubilant Veil は通常攻撃に対しては身を守れますが、Talon の主力burstにはほとんど役に立ちません。Talon は Rake の素の物理スペルダメージと、Shadow Assault の最初の刃のリングに大きく頼って、あなたのHPバーを削ります。このアビリティによる攻撃で、すぐに Blade's End が3スタック溜まり、あなたの防御のベールを完全にすり抜ける致命的な出血が発生します。
Talonのビルド →
詳細を見る
理由
Jubilant Veil は通常攻撃に対しては身を守れますが、Talon の主力burstにはほとんど役に立ちません。Talon は Rake の素の物理スペルダメージと、Shadow Assault の最初の刃のリングに大きく頼って、あなたのHPバーを削ります。このアビリティによる攻撃で、すぐに Blade's End が3スタック溜まり、あなたの防御のベールを完全にすり抜ける致命的な出血が発生します。
レーン戦への影響
ジャングルでは、Talon は Assassin's Path による機動力で、いつどこで戦うかを決められます。リバーや自分のジャングルで Talon に出会ったら、安全にtradeすることはできません。Talon に早期のrecallを強いられ、キャンプを奪われ、縦方向のコントロールを握られかねません。このプレッシャーで、あなたはキャンプ周りで守りのプレイを強いられ、スケールが遅れます。
立ち回り方
生き残るには、Talon の動きを追い、待ち伏せされていそうなブッシュを不用意に確認しに入らないでください。Talon が Rake で仕掛けてきたらすぐ、Slipstream を守りに使ってモンスターや壁を抜けてダッシュで離れ、Talon に戻りのヒットを当てさせないようにします。Talon の Shadow Assault が発動している間は Apotheosis を使わないでください。短い透明状態が終わるまで待ってから引き寄せ、ult の回復が見えているターゲットにかかるようにします。

Nidalee+1
Nilah の序盤のジャングルクリアは遅く無防備になりがちで、Nidalee はその弱点を突くのが得意です。Nidalee は視界の外から Javelin Toss を撃ち、あなたがモンスターと近接距離で拘束されている間にHPバーを削れます。あなたの序盤のダメージは Formless Blade に大きく依存するため、素早いskirmishでは Nidalee に太刀打ちできません。特に Aspect of the Cougar が、機動力の高いexecuteダメージを Nidalee に与えるので尚更です。
Nidaleeのビルド →
詳細を見る
理由
Nilah の序盤のジャングルクリアは遅く無防備になりがちで、Nidalee はその弱点を突くのが得意です。Nidalee は視界の外から Javelin Toss を撃ち、あなたがモンスターと近接距離で拘束されている間にHPバーを削れます。あなたの序盤のダメージは Formless Blade に大きく依存するため、素早いskirmishでは Nidalee に太刀打ちできません。特に Aspect of the Cougar が、機動力の高いexecuteダメージを Nidalee に与えるので尚更です。
レーン戦への影響
この絶え間ないinvadeの脅威のせいで、守りに偏った最適でないルートを強いられます。Nidalee に自分のジャングルで Javelin Toss を1発でも当てられたら、Jubilant Veil を守りに使い切るか、kill を渡さないようキャンプを完全に諦めるしかありません。その結果レベル5が遅れ、Joy Unending によるパッシブのXPボーナスも無効になり、Scuttle Crab の争いや、レーナーへの序盤のgankも難しくなります。
立ち回り方
生き残るには、序盤にリバーの入口へディープwardを置いて、Nidalee の開始サイドを把握してください。クリア中は Slipstream を攻撃的に使わず、Nidalee に飛びかかられたときに壁やモンスターを抜けてダッシュできるよう、チャージを常に温存してください。Nidalee がinvadeしてきたらそのキャンプは譲り、すぐにマップを横断して Nidalee の反対側のキャンプを取りましょう。Apotheosis を習得したら、Nidalee が Aspect of the Cougar でdiveしてくるのを待ってから ult を撃ち、引き寄せてskirmishの流れを変えてください。

Pantheon+1
このジャングルのmatchupは非常に厳しいです。Pantheon があなたの主な防御手段を完全に無効化するからです。Jubilant Veil を発動すれば物理攻撃の猛攻を回避できると期待しますが、Pantheon の Shield Vault は回避不能のポイント&クリック型スタンで、その回避を貫通します。この拘束で Pantheon は、Mortal Will で強化された Comet Spear を自由に撃ち込み、あなたが反撃したり Formless Blade をスタックしたりする前にburstで倒してしまいます。
Pantheonのビルド →
詳細を見る
理由
このジャングルのmatchupは非常に厳しいです。Pantheon があなたの主な防御手段を完全に無効化するからです。Jubilant Veil を発動すれば物理攻撃の猛攻を回避できると期待しますが、Pantheon の Shield Vault は回避不能のポイント&クリック型スタンで、その回避を貫通します。この拘束で Pantheon は、Mortal Will で強化された Comet Spear を自由に撃ち込み、あなたが反撃したり Formless Blade をスタックしたりする前にburstで倒してしまいます。
レーン戦への影響
ジャングルでは、Pantheon の序盤のプレッシャーのせいで、活発なskirmishやカニのスポーンを争えません。リバーで Pantheon と正面から出会うと、Shield Vault の仕込みによって Pantheon のレーナーたちの格好の的になります。Pantheon は Grand Starfall でdiveして序盤のkillを取れるため、あなたのレーンは強いプレッシャーを受け、あなたは安全にfarmするしかなくなり、Joy Unending でのスケールが遅れ、序盤の Apotheosis の影響力も限られます。
立ち回り方
生き残るには、リバーでの正面のデュエルを探さないでください。Pantheon のジャングルルートを追い、カウンターgankに専念しましょう。Pantheon が Shield Vault で味方に飛びかかったら、最初のburstと Aegis Assault をやり過ごしてください。Pantheon のシールドが消えたら Slipstream で距離を詰め、Formless Blade で攻撃し、Apotheosis を発動して Pantheon を引き戻し、味方を回復します。Pantheon が先にあなたを狙ってきたら、味方に頼って Pantheon を妨害してもらいましょう。
その他のマッチアップ















スキル次第のマッチアップ
10このマッチアップは何よりもまず実行力の勝負であり、両者ともに優位を取れる現実的な手段を持っている。重要なスキルを一つ避けられるか、エンゲージを正しく読めるか、あるいはたった一つの位置取りのミスが、勝敗を分けることもある。マッチアップを理解し、行動すべき瞬間を見極める力がとりわけ重要になる。

Warwick±0
このmatchupは、お互いに戦闘中の大量の回復に頼る、リバーとジャングルキャンプでの激しい消耗戦です。Warwick は Eternal Hunger と Jaws of the Beast の強力なライフスティールで回復します。しかし Nilah はその回復を完全に封じられます。Jubilant Veil を発動すれば Warwick の通常攻撃を回避でき、Warwick のパッシブによる回復は無効になり、噛みつきから主なHP吸収効果が奪われます。
Warwickのビルド →
詳細を見る
理由
このmatchupは、お互いに戦闘中の大量の回復に頼る、リバーとジャングルキャンプでの激しい消耗戦です。Warwick は Eternal Hunger と Jaws of the Beast の強力なライフスティールで回復します。しかし Nilah はその回復を完全に封じられます。Jubilant Veil を発動すれば Warwick の通常攻撃を回避でき、Warwick のパッシブによる回復は無効になり、噛みつきから主なHP吸収効果が奪われます。
レーン戦への影響
どちらのジャングラーもキャンプからすばやく回復できるため、ジャングルのskirmishはクリア速度ではなく正確なタイミングで決まります。HPが低いあなたを Warwick が Blood Hunt で捉えれば、デュエルを強制してきます。しかし中立objectiveの付近では形勢を逆転できます。Scuttle Crab を巡る戦いで Warwick の回復の対象を奪えば、Warwick は退くか、Primal Howl のダメージ軽減が間に合う前に倒されるリスクを負うことになります。
立ち回り方
Warwick がすでに ult を使い切っている場合を除き、Slipstream で仕掛けないでください。Warwick が Infinite Duress で飛びかかってきたら、サプレッションを耐え切り、解放された瞬間にすぐ Jubilant Veil を発動してください。このブロック時間で、Warwick の追撃の通常攻撃と Jaws of the Beast の追撃を止められます。タイミングを誤って先に Primal Howl でフィアーにされたら、Slipstream でジャングルモンスターを抜けて滑るように離れ、ポジションを仕切り直し、ダメージ軽減が切れるのを待ってください。

Wukong±0
このジャングルのmatchupは、どちらにも自然な有利がない、タイミングの緊張した戦いです。Wukong の Cyclone のノックアップがあなたの Apotheosis の channel を直接キャンセルするため、あなたのチームファイトでの存在感は完全に封じられかねません。しかしあなたには大きな防御面の強みがあります。Jubilant Veil を発動すれば、Wukong の主なダメージ源である Golden Staff の強化攻撃を回避できます。勝敗は、どちらが相手の cooldown を上回るプレイをできるかに完全にかかっています。
Wukongのビルド →
詳細を見る
理由
このジャングルのmatchupは、どちらにも自然な有利がない、タイミングの緊張した戦いです。Wukong の Cyclone のノックアップがあなたの Apotheosis の channel を直接キャンセルするため、あなたのチームファイトでの存在感は完全に封じられかねません。しかしあなたには大きな防御面の強みがあります。Jubilant Veil を発動すれば、Wukong の主なダメージ源である Golden Staff の強化攻撃を回避できます。勝敗は、どちらが相手の cooldown を上回るプレイをできるかに完全にかかっています。
レーン戦への影響
リバーのobjective周辺のskirmishは非常に不安定になります。Wukong は Nimbus Strike で仕掛け、序盤からあなたに防御手段を切らせようとします。epic monster付近の狭い通路で捕まると、Wukong の範囲CCで、あなたが勢いに乗る前にHPバーを大きく削られかねません。ジャングルでの一度のタイミングミスの交戦で、リバーの優先権が丸ごと相手に渡り、クリア速度も活かせなくなります。
立ち回り方
Wukong が Cyclone を使うまで Apotheosis を温存してください。ult を早く使いすぎると、Wukong にノックアップされて回復が無駄になります。Wukong がダッシュで飛び込んできたら、すぐに Jubilant Veil を発動して Golden Staff のburstを吸収してください。Warrior Trickster でフェイントを掛けられたら、Slipstream で近くのキャンプや味方のほうへダッシュで離れ、分身が消えるまでスペーシングを仕切り直してください。

Olaf±0
このジャングルのデュエルは、Olaf の ult に対して防御のベールをいつ使うかのタイミングで決まります。Olaf は Ragnarok を発動して Apotheosis の引き寄せとダメージを完全に無視できますが、Vicious Strikes と Berserker Rage を発動させるには通常攻撃に完全に頼っています。Olaf が激昂したときに Jubilant Veil を発動すれば、ライフスティールの通常攻撃を封じて回復を無効化でき、その間に Olaf のCC無効は切れていきます。
Olafのビルド →
詳細を見る
理由
このジャングルのデュエルは、Olaf の ult に対して防御のベールをいつ使うかのタイミングで決まります。Olaf は Ragnarok を発動して Apotheosis の引き寄せとダメージを完全に無視できますが、Vicious Strikes と Berserker Rage を発動させるには通常攻撃に完全に頼っています。Olaf が激昂したときに Jubilant Veil を発動すれば、ライフスティールの通常攻撃を封じて回復を無効化でき、その間に Olaf のCC無効は切れていきます。
レーン戦への影響
ジャングルでは、この相互作用がobjectiveの争いとリバーのskirmishを左右します。Olaf はinvadeしたり、Undertow で減速させて序盤のデュエルを強制しようとしたりします。Olaf が戦いを強制してきた場合、あなたの ult のCCを無視できる Olaf を、味方から引きはがすことはできません。しかし ult 中にライフスティールを得られなければ Olaf の攻勢は完全に止まり、Olaf が一気に成長するのを防げます。
立ち回り方
Olaf の ult が使える状態なら、Apotheosis で絶対に仕掛けないでください。CCを簡単に振り払われます。代わりに、Slipstream でジャングルモンスターや壁を抜けながら後ろにkiteして、Ragnarok を誘ってください。Olaf が突っ込んで向かってきたら、すぐに Jubilant Veil を発動して Vicious Strikes と Reckless Swing をブロックします。Olaf の ult が切れて斧が空振りしたら、Formless Blade で再度仕掛け、残りのHPを削り切りましょう。

Volibear±0
このジャングルのデュエルは、Volibear の通常攻撃強化を封じることに完全にかかっています。Volibear は Thundering Smash であなたを拘束し、Frenzied Maul でskirmish中に回復します。Volibear が突進してきた瞬間に Jubilant Veil を発動すれば、飛んでくるスタンを完全に回避し、噛みつきもブロックできます。この2つの主力が通らなければ Volibear は戦闘力を失い、本来は危険なデュエルが互角の戦いになります。
Volibearのビルド →
詳細を見る
理由
このジャングルのデュエルは、Volibear の通常攻撃強化を封じることに完全にかかっています。Volibear は Thundering Smash であなたを拘束し、Frenzied Maul でskirmish中に回復します。Volibear が突進してきた瞬間に Jubilant Veil を発動すれば、飛んでくるスタンを完全に回避し、噛みつきもブロックできます。この2つの主力が通らなければ Volibear は戦闘力を失い、本来は危険なデュエルが互角の戦いになります。
レーン戦への影響
ジャングルでは、この相互作用がリバーのカニと序盤のskirmishの主導権を左右します。Volibear に誘われて Jubilant Veil を早く使わされると、Volibear は離脱し、あなたの防御が切れるのを待って、Stormbringer で再度engageし、あなたのクリアを潰せます。逆に Volibear の最初の攻撃をブロックできれば、objectiveの戦いに勝ち、Scuttle Crab を確保し、Volibear を守りがちな遅いfarmルートに追い込めます。
立ち回り方
Volibear の動きをよく追い、Volibear が Thundering Smash で前足を地面につけて走ってくるのが見えるまで Jubilant Veil を温存してください。Volibear が減速させるために Sky Splitter を撃っただけで、慌てて使わないでください。タイミングを誤ってスタンされたら、すぐに Slipstream で Volibear やジャングルモンスターを抜けて、追撃の Frenzied Maul の噛みつきから逃れてください。防御の cooldown が戻るまで、Formless Blade を維持して Volibear の通常攻撃より長いレンジを保ちましょう。

Nunu & Willump±0
このジャングルのmatchupは、Nunu & Willump の比類ないepic monster確保能力で決まります。Consume の大きな確定ダメージと Smite の組み合わせにより、Nilah は序盤のドラゴンや Rift Herald を争うことが完全にできなくなります。Nilah は Formless Blade による通常攻撃のスケールに頼っているため、Nunu & Willump の確実な手段を相手にobjectiveをburstで倒そうとするのは数字上も負けで、辛抱強いfarmのプレイを強いられます。
Nunu & Willumpのビルド →
詳細を見る
理由
このジャングルのmatchupは、Nunu & Willump の比類ないepic monster確保能力で決まります。Consume の大きな確定ダメージと Smite の組み合わせにより、Nilah は序盤のドラゴンや Rift Herald を争うことが完全にできなくなります。Nilah は Formless Blade による通常攻撃のスケールに頼っているため、Nunu & Willump の確実な手段を相手にobjectiveをburstで倒そうとするのは数字上も負けで、辛抱強いfarmのプレイを強いられます。
レーン戦への影響
Nunu & Willump は序盤のobjectiveの時間を支配し、縦方向のマッププレッシャーとのtradeを強います。Biggest Snowball Ever! でレーンに転がってくる Nunu & Willump のgank速度には太刀打ちできません。最初のドラゴンは諦めると割り切り、その間にキャンプをクリアするかカウンタージャングルしてください。勝ち筋はスケールです。序盤の中立の戦いを強行しようとすると、Smite で先を越されて取り返しがつかないほど遅れます。
立ち回り方
ジャングルを完全にクリアして、終盤の力を解放することを優先してください。Nunu & Willump がドラゴンを開始したら、すぐに Slipstream で壁を越えて Nunu & Willump のトップ側のキャンプを奪うか、Rift Herald にプレッシャーを掛けてください。skirmish中は、Call of the Freljord で強化された通常攻撃をブロックするため、または味方がノックアップを回避する手助けのため、Jubilant Veil を温存しましょう。最後に Apotheosis で Nunu & Willump を Absolute Zero の channel から引き離し、ult の大ダメージを無効化してください。
その他のマッチアップ





有利なマッチアップ
18これらのチャンピオンは、こちらの主要な強みに効果的に対応するのが難しく、より自由に対面を組み立てることができる。プレッシャーをかけて有利な交換を引き出す手段は複数あることが多い。相手が態勢を立て直す時間を与えるのではなく、この優位を活かして主導権を握ろう。

Viego−1
Jubilant Veil が Viego の主なダメージ源を直接無効化するため、Nilah は正面のskirmishで Viego を圧倒します。Viego が Blade of the Ruined King を当てると、マークを消費して2連撃と回復を得るために、続く通常攻撃に頼ります。まさにこのタイミングで Jubilant Veil を発動すればそれらの通常攻撃を完全にブロックでき、Viego のパッシブによる回復を奪い、Viego がkillを取れないため Sovereign's Domination も役に立たなくなります。
Viegoのビルド →
詳細を見る
理由
Jubilant Veil が Viego の主なダメージ源を直接無効化するため、Nilah は正面のskirmishで Viego を圧倒します。Viego が Blade of the Ruined King を当てると、マークを消費して2連撃と回復を得るために、続く通常攻撃に頼ります。まさにこのタイミングで Jubilant Veil を発動すればそれらの通常攻撃を完全にブロックでき、Viego のパッシブによる回復を奪い、Viego がkillを取れないため Sovereign's Domination も役に立たなくなります。
レーン戦への影響
この決闘での優位は、積極的なジャングルへのinvadeと、Scuttle Crab の支配に繋がります。Slipstream で距離を詰めれば Viego の迷彩は意味を失うので、Harrowed Path の中にいる Viego でも安全に争えます。Viego はあなたとの孤立したデュエルに勝てないため、Viego のgankの圧力は大きく削がれ、Viego は守りのクリアに追い込まれ、あなたはマップのテンポを握って序盤の中立objectiveを確保できます。
立ち回り方
これを完璧にこなすには、Jubilant Veil から戦闘を始めないでください。代わりに Formless Blade で Viego のレンジに合わせてデュエルを開始し、Viego が逃げようとしたら、そのダッシュに付いていくために Slipstream を温存してください。Jubilant Veil を発動するのは、Viego が Spectral Maw をチャージするのが見えた瞬間か、Blade of the Ruined King を当てた直後だけです。Viego が逃げようとしたり Heartbreaker で流れを変えようとしたりしたら、Apotheosis でダメージゾーンに引き戻してください。

Shyvana−1
Nilah は終盤に向けて Shyvana よりはるかに強くスケールし、通常は farm 競争になる状況を、スケール差で有利な状況に変えます。ジャングルでの正面のskirmishでは、Jubilant Veil が Shyvana の Twin Bite の2連撃の物理ダメージを完全にブロックするため、Nilah が機械的に大きく有利です。Shyvana のburstの可能性は消え、Shyvana にデュエルで残るのは Burnout の継続ダメージだけです。
Shyvanaのビルド →
詳細を見る
理由
Nilah は終盤に向けて Shyvana よりはるかに強くスケールし、通常は farm 競争になる状況を、スケール差で有利な状況に変えます。ジャングルでの正面のskirmishでは、Jubilant Veil が Shyvana の Twin Bite の2連撃の物理ダメージを完全にブロックするため、Nilah が機械的に大きく有利です。Shyvana のburstの可能性は消え、Shyvana にデュエルで残るのは Burnout の継続ダメージだけです。
レーン戦への影響
このmatchupは、ジャングルのプレッシャーを中立objectiveのコントロールへと完全に移します。Nilah はピット付近の孤立したデュエルに簡単に勝てるため、Shyvana は受け身にならざるをえず、小さなキャンプで Fury of the Dragonborn をスタックします。あなたは自信を持って序盤のドラゴンと Rift Herald を確保できます。あなたの優れたDPSと正面から当たる致命的なリスクなしには、Shyvana はepic monsterを争えないからです。
立ち回り方
キャンプを争うときは、Jubilant Veil から仕掛けないでください。代わりに Formless Blade でクリアし、Shyvana が Dragon's Descent でengageするか距離を詰めてくるのを待ってください。Twin Bite で爪が光ったまさにその瞬間に Jubilant Veil を発動して、Shyvana の主力burstを吸収します。Shyvana が Burnout の移動速度で逃げようとしたら、Slipstream で通り抜けるようにダッシュして、Apotheosis で引き戻し、killを確実に取ってください。

Nocturne−1
Nocturne は Paranoia でdiveし、Duskbringer でくっついて、物理の通常攻撃であなたのHPバーを削ることに完全に頼っています。しかし Jubilant Veil はこの戦い方のハードカウンターになります。diveの最中に通常攻撃を完全にブロックすれば、Nocturne の主なダメージ源と Umbra Blades による回復を無効化でき、攻撃的な突入は孤立した脆い状態に変わり、Apotheosis で簡単に叩き潰せます。
Nocturneのビルド →
詳細を見る
理由
Nocturne は Paranoia でdiveし、Duskbringer でくっついて、物理の通常攻撃であなたのHPバーを削ることに完全に頼っています。しかし Jubilant Veil はこの戦い方のハードカウンターになります。diveの最中に通常攻撃を完全にブロックすれば、Nocturne の主なダメージ源と Umbra Blades による回復を無効化でき、攻撃的な突入は孤立した脆い状態に変わり、Apotheosis で簡単に叩き潰せます。
レーン戦への影響
ジャングルでは、この相互作用がマッププレッシャーを左右します。Nocturne は、通常攻撃がブロックされればどんなデュエルも失敗するとわかっているため、あなたのキャンプに安全にinvadeしたり Scuttle Crab を争ったりできません。この安心感のおかげで、Formless Blade で効率よくクリアでき、余裕を持ってスケールし、objective付近のskirmishを支配できます。Nocturne の ult のプレッシャーは、あなたを狙った瞬間に無効化されるからです。
立ち回り方
クリアを速めるために Jubilant Veil を無駄にしないでください。Nocturne のマップ全体への脅威に備えて温存しておきます。Paranoia が聞こえたら、Nocturne が実際に接触してくるまで防御のベールを温存し、Nocturne の最大burstの時間を空振りさせてください。Nocturne の Shroud of Darkness に注意しましょう。そのスペルシールドに、すぐ Apotheosis や Slipstream を投げ込んではいけません。代わりに、まず素早い Formless Blade でシールドを剥がしてから、持てるCCを一気に叩き込んでください。

Rengar−1
Jubilant Veil が Rengar の主なダメージ源を完全に無効化するため、Nilah はジャングルで決定的に有利です。Rengar が Unseen Predator でブッシュから飛びかかったり、Thrill of the Hunt を使ったりするとき、Rengar は強化された Savagery で標的を一瞬で倒すことに頼っています。Rengar の跳躍に合わせて Jubilant Veil のタイミングを取れば、Nilah はこの大burstを丸ごと回避でき、捕食者から脅威を奪って無防備にします。
Rengarのビルド →
詳細を見る
理由
Jubilant Veil が Rengar の主なダメージ源を完全に無効化するため、Nilah はジャングルで決定的に有利です。Rengar が Unseen Predator でブッシュから飛びかかったり、Thrill of the Hunt を使ったりするとき、Rengar は強化された Savagery で標的を一瞬で倒すことに頼っています。Rengar の跳躍に合わせて Jubilant Veil のタイミングを取れば、Nilah はこの大burstを丸ごと回避でき、捕食者から脅威を奪って無防備にします。
レーン戦への影響
この相互作用は、リバーのskirmishとジャングルのinvadeの流れを左右します。待ち伏せに失敗すれば無防備になると知っているため、Rengar は Scuttle Crab を気楽に争ったり、あなたのキャンプにinvadeしたりできません。Rengar が跳躍で奪おうとしても Savagery が空振りするだけだとわかっているので、自信を持って中立objectiveを確保できます。この安全さのおかげで、キャンプを積極的にfarmし、Rengar のジャングル領域にも恐れずプレッシャーを掛けられます。
立ち回り方
Jubilant Veil から戦闘を仕掛けないでください。視界のないエリアに入るときや Thrill of the Hunt の効果音が聞こえるときは、常にこのアビリティを使える状態にしておきます。Rengar が飛びかかってきた瞬間に Jubilant Veil を押して Savagery を吸収し、すぐ Formless Blade で反撃してください。Rengar が Battle Roar で逃げようとしたら、Slipstream で通り抜けるようにダッシュして、Apotheosis で引き戻し、killを確実に取ってください。

Xin Zhao−1
Jubilant Veil が Xin Zhao の主なデュエル手段を完全に無効化するため、Nilah はこのジャングルのデュエルを支配します。Xin Zhao が仕掛けてくると、Xin Zhao のダメージの循環とCCは、Three Talon Strike の3連続の通常攻撃を当ててノックアップさせることにすべてかかっています。Xin Zhao が距離を詰めてきたときに Jubilant Veil を発動すれば、3発すべてを回避してノックアップを完全に防ぎ、その間に Formless Blade で Xin Zhao を削り倒せます。
Xin Zhaoのビルド →
詳細を見る
理由
Jubilant Veil が Xin Zhao の主なデュエル手段を完全に無効化するため、Nilah はこのジャングルのデュエルを支配します。Xin Zhao が仕掛けてくると、Xin Zhao のダメージの循環とCCは、Three Talon Strike の3連続の通常攻撃を当ててノックアップさせることにすべてかかっています。Xin Zhao が距離を詰めてきたときに Jubilant Veil を発動すれば、3発すべてを回避してノックアップを完全に防ぎ、その間に Formless Blade で Xin Zhao を削り倒せます。
レーン戦への影響
この相互作用のおかげで、序盤のリバーのskirmishと Scuttle Crab の争いを完全に支配できます。Xin Zhao はあなたに対してパッシブの Determination による回復もCCも確実には発動できないため、あなたのジャングルのキャンプを争うことも、序盤のプレッシャーに対抗することもできません。Xin Zhao のキャンプにも積極的にinvadeでき、中立objectiveでも戦いを強制できます。Xin Zhao の序盤のデュエル性能は、あなたの防御のベールで完全に無効化されているからです。
立ち回り方
Jubilant Veil を序盤に無駄にしないでください。Xin Zhao が Audacious Charge で距離を詰めて Three Talon Strike を発動するまで待ちましょう。槍が光った瞬間に Jubilant Veil を押して主力burstを吸収します。Xin Zhao が Crescent Guard で離脱しようとしたら、Slipstream でそのまま Crescent Guard の範囲内へダッシュで戻り、Formless Blade が発動している間に Apotheosis で引き戻して仕留めてください。

Graves−2
Jubilant Veil が Graves の主なダメージ源を完全に無効化するため、Nilah はこのジャングルのmatchupを支配します。Graves のパッシブ New Destiny は通常攻撃のペレットに完全に頼っているため、防御のベールを発動すればあなたはそのburstを受け付けなくなります。これで Graves は Quickdraw からの True Grit をスタックできず、意味のあるダメージも与えられなくなり、積極的なカウンタージャングルは、必死の撤退を強いられるだけのものになります。
Gravesのビルド →
詳細を見る
理由
Jubilant Veil が Graves の主なダメージ源を完全に無効化するため、Nilah はこのジャングルのmatchupを支配します。Graves のパッシブ New Destiny は通常攻撃のペレットに完全に頼っているため、防御のベールを発動すればあなたはそのburstを受け付けなくなります。これで Graves は Quickdraw からの True Grit をスタックできず、意味のあるダメージも与えられなくなり、積極的なカウンタージャングルは、必死の撤退を強いられるだけのものになります。
レーン戦への影響
この相互作用は、序盤のリバーのskirmishと Scuttle Crab を巡る争いのテンポを左右します。Graves が正面のデュエルに勝てないとわかっているので、Graves のキャンプにinvadeしたり、自信を持ってobjectiveを争ったりできます。Graves がキャンプを確保しようとしたとき、Slipstream で追い出せます。Graves の反撃のburstは簡単に無効化されるからです。このプレッシャーで Graves のゴールド獲得が制限され、序盤のマップコントロールを握らせずに済みます。
立ち回り方
Jubilant Veil をいきなり使って戦闘を始めないでください。代わりに Slipstream で距離を詰め、まず Formless Blade で攻撃してください。Graves に Quickdraw を慌てて撃たせるか、Smoke Screen を投げて逃げさせましょう。Graves がショットガンで撃ち返そうと振り向いた瞬間に Jubilant Veil を発動して、チャージされた散弾を吸収します。Graves が離脱しようとしたら、2回目の Slipstream のチャージを使うか、Apotheosis で引き戻して kill を確実に取ってください。

Tryndamere−2
Jubilant Veil が Tryndamere のダメージ源をすべて無効化するため、Nilah はこのジャングルのmatchupを支配します。Tryndamere は、低HPで生き延びるために Undying Rage を発動すれば、Bloodlust で回復したり、高fury のクリティカル攻撃であなたを削ったりできると期待します。Tryndamere の ult 中に Jubilant Veil を発動すれば、通常攻撃は役に立たなくなり、5秒間の不死を、傷ひとつ負わずに安全にやり過ごせます。
Tryndamereのビルド →
詳細を見る
理由
Jubilant Veil が Tryndamere のダメージ源をすべて無効化するため、Nilah はこのジャングルのmatchupを支配します。Tryndamere は、低HPで生き延びるために Undying Rage を発動すれば、Bloodlust で回復したり、高fury のクリティカル攻撃であなたを削ったりできると期待します。Tryndamere の ult 中に Jubilant Veil を発動すれば、通常攻撃は役に立たなくなり、5秒間の不死を、傷ひとつ負わずに安全にやり過ごせます。
レーン戦への影響
この相互作用は、ジャングルのプレッシャーを完全にあなたの側へ傾けます。skirmishになれば、タダで Tryndamere の Undying Rage を吐き出させられるため、Tryndamere は Rift Scuttler やepic monsterを安全には争えません。Jubilant Veil があればデュエルで勝てないとわかっているので Tryndamere は受け身のfarmに追い込まれ、あなたは Tryndamere のキャンプに自由にinvadeしたりobjectiveを確保したりでき、Tryndamere は効果的なgankを見つけるのに苦労します。
立ち回り方
skirmishの序盤に Jubilant Veil を無駄にしないでください。Formless Blade と Apotheosis で戦闘を始め、Tryndamere に Undying Rage を発動させます。ult が発動した瞬間に Jubilant Veil を発動して、ライフスティールの攻撃を封じてください。Tryndamere が Spinning Slash で壁を抜けて逃げようとしたら、すぐに Slipstream で追いかけ、不死が切れたところで kill を確実に取ってください。

Master Yi−2
Master Yi の火力の仕組みは Double Strike と Wuju Style で強化された通常攻撃にすべて依存しているため、Nilah は Master Yi を完全に封じます。Jubilant Veil を発動すれば、あなたは Master Yi のオートアタックを完全に無効化できます。Highlander と Alpha Strike は距離を詰めて素早く攻撃するためのものにすぎず、その物理攻撃を封じれば Master Yi は完全に無防備になり、skirmish中にライフスティールも cooldown のリセットもできなくなります。
Master Yiのビルド →
詳細を見る
理由
Master Yi の火力の仕組みは Double Strike と Wuju Style で強化された通常攻撃にすべて依存しているため、Nilah は Master Yi を完全に封じます。Jubilant Veil を発動すれば、あなたは Master Yi のオートアタックを完全に無効化できます。Highlander と Alpha Strike は距離を詰めて素早く攻撃するためのものにすぎず、その物理攻撃を封じれば Master Yi は完全に無防備になり、skirmish中にライフスティールも cooldown のリセットもできなくなります。
レーン戦への影響
ジャングルでは、このmatchupのせいで Master Yi は序盤に Scuttle Crab を争うことも、あなたのキャンプにinvadeすることもできません。リバーで出会っても、あなたの防御アクティブがburstを完全に止めてしまうため、Master Yi はデュエルを強制できません。この安心感のおかげで、積極的にキャンプをクリアでき、Master Yi のハイテンポなデュエル性能を恐れずに、安全にカウンタージャングルしたり中立objectiveを確保したりできます。
立ち回り方
慌てて Jubilant Veil を使って戦闘を始めないでください。代わりに Master Yi が Alpha Strike で仕掛けてあなたの近くに着地するのを待ちましょう。Master Yi が再び姿を現して Wuju Style を発動した瞬間にベールを発動して、burstの時間全体を吸収してください。Master Yi がダメージを与えられないまま慌てて攻撃を空振りしている間に、Formless Blade で反撃して延びた近接レンジを活かし、Master Yi が退こうとしたり Meditate を channel したりしたら Slipstream で追い詰めましょう。

Kindred−2
Jubilant Veil が Kindred の主なダメージ源を完全に無効化するため、ジャングルのデュエルはあなたに大きく有利です。Kindred が Mounting Dread をスタックしようとしたり Wolf's Frenzy の中で戦おうとしたりしても、防御のベールを発動すれば、Kindred は通常攻撃を無駄にするしかありません。Kindred は Dance of Arrows で飛び退いて時間を稼ぐしかなく、戦闘のリズムはあなたが完全に握れます。
Kindredのビルド →
詳細を見る
理由
Jubilant Veil が Kindred の主なダメージ源を完全に無効化するため、ジャングルのデュエルはあなたに大きく有利です。Kindred が Mounting Dread をスタックしようとしたり Wolf's Frenzy の中で戦おうとしたりしても、防御のベールを発動すれば、Kindred は通常攻撃を無駄にするしかありません。Kindred は Dance of Arrows で飛び退いて時間を稼ぐしかなく、戦闘のリズムはあなたが完全に握れます。
レーン戦への影響
この物理攻撃への免疫のおかげで、すべてのリバーのskirmishと Mark of the Kindred のマークを巡る争いが、あなたにとって大きな有利に変わります。Formless Blade に対してHPを効率よくtradeできないため、Kindred は Scuttle Crab を簡単には争えず、あなたのキャンプにもinvadeできません。Kindred があなたのburstを耐えようと Lamb's Respite を置いても、引き寄せるか、やり過ごすだけで済み、Kindred は守りの撤退に追い込まれます。
立ち回り方
Jubilant Veil から仕掛けず、Slipstream で滑り込んで、まず Formless Blade で攻撃してください。ベールを発動する前に、Kindred に Wolf's Frenzy を置かせ、攻撃のシーケンスを開始させましょう。Kindred が慌てて Dance of Arrows で退こうとしたら、2回目の Slipstream のチャージで追いかけてください。Apotheosis は、Kindred をあなたの近接レンジに引き戻すか、Lamb's Respite の回復円が切れる瞬間に Kindred を一か所に固めるために温存しましょう。

Twitch−2
Jubilant Veil が Twitch の ult を完全に無効化するため、このmatchupは Nilah に大きく有利です。Twitch が Ambush から姿を現して Spray and Pray を発動しても、長射程の貫通ボルトはあなたの防御のベールに完全にブロックされます。この防御面の相互作用で Twitch の主なダメージ出力は無効化され、Nilah は簡単に距離を詰めて Twitch を圧倒できます。
Twitchのビルド →
詳細を見る
理由
Jubilant Veil が Twitch の ult を完全に無効化するため、このmatchupは Nilah に大きく有利です。Twitch が Ambush から姿を現して Spray and Pray を発動しても、長射程の貫通ボルトはあなたの防御のベールに完全にブロックされます。この防御面の相互作用で Twitch の主なダメージ出力は無効化され、Nilah は簡単に距離を詰めて Twitch を圧倒できます。
レーン戦への影響
あなたは Twitch のチームファイトでの脅威に対する最大のカウンターを握っているため、あなたが近くにいるとき Twitch は Scuttle Crab や中立objectiveを安全には争えません。Twitch が Ambush からのステルスgankを仕掛けても、自信を持ってカウンターgankできます。ジャングルでのあなたの安全さが Twitch を受け身のプレイに追い込み、ステルスのinvadeでレーンをsnowballさせる力を大きく制限します。
立ち回り方
Twitch の最初の Venom Cask によるスロウに Jubilant Veil を無駄にしないでください。代わりに Twitch の位置取りを追い、Spray and Pray を発動する正確な瞬間を待ちましょう。ult が発動したらすぐにベールを発動し、Slipstream で Twitch のところへダッシュして、Apotheosis で拘束してください。Twitch が逃げようとしたら、Formless Blade による Slipstream のリセットを使って kill を確実に取ってください。
その他のマッチアップ








Nilah対策アイテム
これらのアイテムを購入すると、このチャンピオンの影響力を抑えられます。





| マッチアップ | 判定 | 有利度 | 勝率 | ピック率 |
|---|---|---|---|---|
| Varus | 不利なマッチアップ | +1 | 51.1% | 6.2% |
| Xayah | 不利なマッチアップ | +1 | 50.9% | 5.2% |
| Caitlyn | ハードカウンター | +1 | 49.7% | 15.7% |
| Yunara | 不利なマッチアップ | +1 | 49.5% | 6.5% |
| Ezreal | 不利なマッチアップ | ±0 | 50.4% | 7.8% |
| Sivir | スキル次第のマッチアップ | ±0 | 49.4% | 3.9% |
| Miss Fortune | スキル次第のマッチアップ | ±0 | 48.8% | 12.8% |
| Lucian | スキル次第のマッチアップ | ±0 | 47.3% | 3.1% |
| Akshan | スキル次第のマッチアップ | ±0 | — | — |
| Corki | スキル次第のマッチアップ | ±0 | — | — |
| Senna | スキル次第のマッチアップ | ±0 | — | — |
| Ashe | スキル次第のマッチアップ | −1 | 52.9% | 9.7% |
| Kog'Maw | 有利なマッチアップ | −1 | 52.9% | 2.7% |
| Smolder | 有利なマッチアップ | −1 | 52.6% | 9.1% |
| Samira | スキル次第のマッチアップ | −1 | 51.0% | 11.8% |
| Jinx | 有利なマッチアップ | −1 | 50.4% | 13.3% |
| Kai'Sa | スキル次第のマッチアップ | −1 | 50.1% | 16.3% |
| Jhin | 有利なマッチアップ | −1 | 49.5% | 15.9% |
| Zeri | 有利なマッチアップ | −1 | 49.0% | 1.2% |
| Vayne | 有利なマッチアップ | −1 | 48.7% | 6.5% |
| Kalista | 有利なマッチアップ | −2 | 50.4% | 7.3% |
| Twitch | 有利なマッチアップ | −2 | 49.9% | 9.9% |
| Tristana | 有利なマッチアップ | −2 | 48.6% | 11.4% |
| Draven | 有利なマッチアップ | −2 | 47.2% | 5.4% |
| Alistar | ハードカウンター | — | — | — |
| Janna | ハードカウンター | — | — | — |
| Lux | 不利なマッチアップ | — | — | — |
| Morgana | 不利なマッチアップ | — | — | — |
有利度:Wild Rift Coreの公式判定(−3〜+3)で、各行に記載されたチャンピオンの視点から見た値です。勝率とピック率:このロールにおける相手チャンピオン自身の数値 — Wild Rift CN · Challenger、Patch 7.3c。直接対決の勝率ではありません。
| マッチアップ | 判定 | 有利度 | 勝率 | ピック率 |
|---|---|---|---|---|
| Rammus | ハードカウンター | +2 | 55.3% | 4.6% |
| Poppy | ハードカウンター | +2 | — | — |
| Amumu | 不利なマッチアップ | +1 | 56.5% | 2.7% |
| Shen | 不利なマッチアップ | +1 | 54.9% | 1.4% |
| Skarner | 不利なマッチアップ | +1 | 53.9% | 1.6% |
| Fiddlesticks | 不利なマッチアップ | +1 | 51.6% | 1.8% |
| Zed | 不利なマッチアップ | +1 | 51.4% | 2.6% |
| Pantheon | 不利なマッチアップ | +1 | 51.0% | 6.1% |
| Cho'Gath | 不利なマッチアップ | +1 | 50.7% | 8.3% |
| Darius | 不利なマッチアップ | +1 | 50.4% | 6.5% |
| Diana | 不利なマッチアップ | +1 | 50.3% | 1.4% |
| Nidalee | 不利なマッチアップ | +1 | 50.1% | 2.3% |
| Talon | 不利なマッチアップ | +1 | 50.0% | 3.0% |
| Jax | 不利なマッチアップ | +1 | 49.8% | 1.9% |
| Vi | 不利なマッチアップ | +1 | 49.0% | 4.8% |
| Yone | 不利なマッチアップ | +1 | 48.7% | 2.7% |
| Evelynn | 不利なマッチアップ | +1 | 48.7% | 2.0% |
| Riven | 不利なマッチアップ | +1 | 48.6% | 1.3% |
| Fizz | 不利なマッチアップ | +1 | 48.5% | 1.8% |
| Lee Sin | 不利なマッチアップ | +1 | 46.9% | 12.4% |
| Gragas | 不利なマッチアップ | +1 | — | — |
| Mordekaiser | 不利なマッチアップ | +1 | — | — |
| Lillia | スキル次第のマッチアップ | ±0 | 53.3% | 3.0% |
| Nunu & Willump | スキル次第のマッチアップ | ±0 | 53.1% | 1.9% |
| Gwen | スキル次第のマッチアップ | ±0 | 52.8% | 2.6% |
| Jarvan IV | スキル次第のマッチアップ | ±0 | 52.4% | 7.3% |
| Olaf | スキル次第のマッチアップ | ±0 | 51.8% | 1.8% |
| Warwick | スキル次第のマッチアップ | ±0 | 51.0% | 2.0% |
| Wukong | スキル次第のマッチアップ | ±0 | 49.6% | 3.4% |
| Volibear | スキル次第のマッチアップ | ±0 | 48.4% | 4.5% |
| Camille | スキル次第のマッチアップ | ±0 | — | — |
| Maokai | スキル次第のマッチアップ | ±0 | — | — |
| Ambessa | 有利なマッチアップ | −1 | 54.1% | 1.2% |
| Ekko | 有利なマッチアップ | −1 | 54.0% | 7.3% |
| Dr. Mundo | 有利なマッチアップ | −1 | 52.9% | 1.7% |
| Nocturne | 有利なマッチアップ | −1 | 52.5% | 6.6% |
| Kayn | 有利なマッチアップ | −1 | 51.6% | 6.9% |
| Xin Zhao | 有利なマッチアップ | −1 | 50.6% | 9.0% |
| Kha'Zix | 有利なマッチアップ | −1 | 50.1% | 5.3% |
| Hecarim | 有利なマッチアップ | −1 | 49.6% | 1.8% |
| Rengar | 有利なマッチアップ | −1 | 48.8% | 2.2% |
| Viego | 有利なマッチアップ | −1 | 46.3% | 4.2% |
| Shyvana | 有利なマッチアップ | −1 | 45.2% | 2.8% |
| Aatrox | 有利なマッチアップ | −1 | 44.9% | 1.1% |
| Nautilus | 有利なマッチアップ | −1 | — | — |
| Kindred | 有利なマッチアップ | −2 | 50.7% | 2.4% |
| Tryndamere | 有利なマッチアップ | −2 | 48.8% | 8.6% |
| Master Yi | 有利なマッチアップ | −2 | 48.0% | 9.8% |
| Graves | 有利なマッチアップ | −2 | 47.9% | 7.3% |
| Twitch | 有利なマッチアップ | −2 | 46.8% | 2.1% |
有利度:Wild Rift Coreの公式判定(−3〜+3)で、各行に記載されたチャンピオンの視点から見た値です。勝率とピック率:このロールにおける相手チャンピオン自身の数値 — Wild Rift CN · Challenger、Patch 7.3c。直接対決の勝率ではありません。