
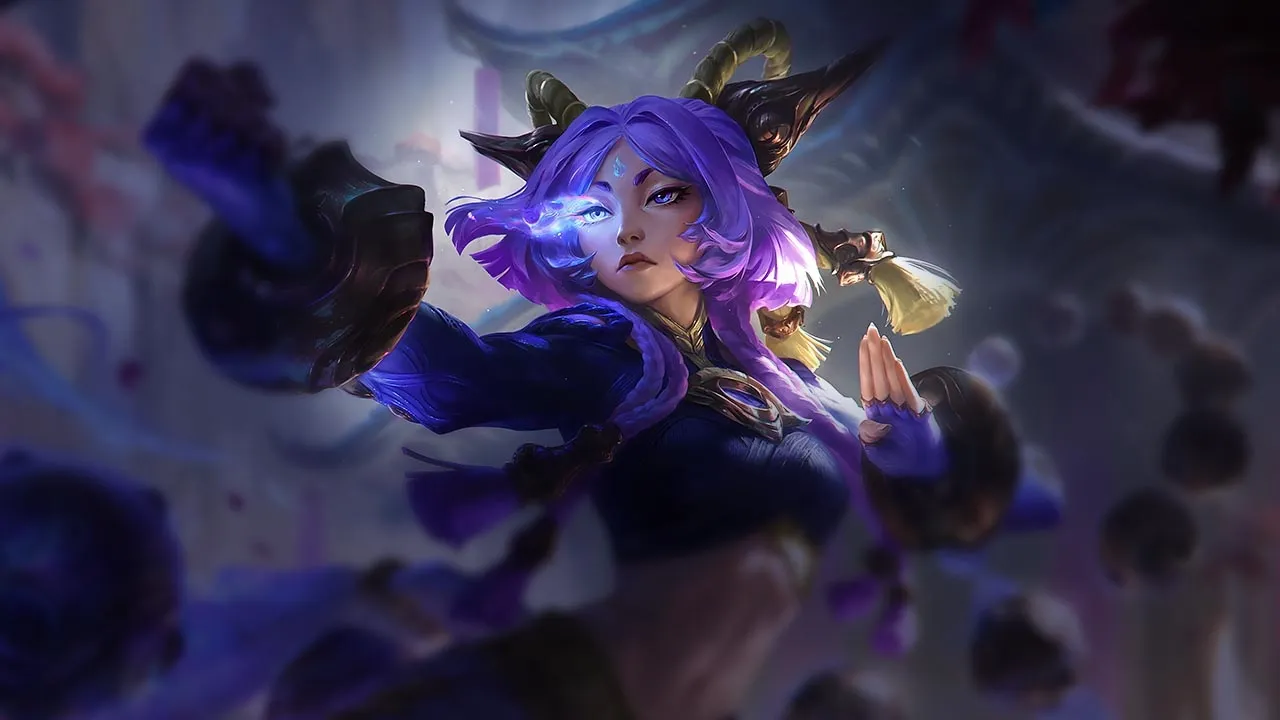

Yunara Wild Rift カウンターガイド
ハードカウンター
1これらのチャンピオンは、こちらのビルドやプレイスタイルを真正面から上回る構成を持ち、レーン戦のコントロールとファームを極めて難しくする。彼らのスキルはこちらの主要な強みを無効化し、いつも通りのプランを実行しようとした瞬間に手痛い反撃を受けさせてくる。こうしたマッチアップでは、ミスを最小限に抑え、正面からの対決以外で解決策を探すことが重要になる。

Lucian±0
Lucian の Lightslinger はスキルのたびに Lucian に 2 回の高速攻撃を与え、Relentless Pursuit で Lucian は突入と角度の変更ができます。Yunara は持続的なダメージを積み上げるために Cultivation of Spirit を使いたいのですが、Lucian はそのリズムが実を結ぶ前に出力を圧縮します。つまり、Lucian の短い burst が、あなたの Trance が使える前の局面を支配します。
Lucianのビルド →
詳細を見る
理由
Lucian の Lightslinger はスキルのたびに Lucian に 2 回の高速攻撃を与え、Relentless Pursuit で Lucian は突入と角度の変更ができます。Yunara は持続的なダメージを積み上げるために Cultivation of Spirit を使いたいのですが、Lucian はそのリズムが実を結ぶ前に出力を圧縮します。つまり、Lucian の短い burst が、あなたの Trance が使える前の局面を支配します。
レーン戦への影響
Lucian の Piercing Light は最初の対象を貫通するので、minion の後ろに並ぶと、farm がそのまま Lucian の無料の poke になります。数回のシークエンスで wave に近づけなくなり、recall を強いられることがあります。その後 Lucian が押し、Yunara は Transcend One's Self に間に合うのに必要なリソースを失います。
立ち回り方
champion と minion を結ぶ線上から外れて動き、Relentless Pursuit のあとに距離を取り直すために Kanmei's Steps を温存してください。Lucian がその前方ダッシュを使い切ったら、Arc of Judgment でスローし、Cultivation of Spirit の攻撃を数発だけ返してください。Lucian がモビリティを持っている間は、安全な minion だけを取り、フルの撃ち合いは避けてください。
不利なマッチアップ
1これらのチャンピオンは、マッチアップ自体を絶望的にするわけではないが、対面で優位に立ちやすいツールを持っている。射程が長かったり、攻撃を受け止める力が高かったり、エンゲージへの対応手段が豊富だったりする。アプローチを調整し、戦闘を受け入れるタイミングを慎重に選ぶ必要がある。

Nilah−1
Nilah の Jubilant Veil により Nilah は飛び道具を短時間回避でき、Yunara の攻撃の核を断ち切ります。その後 Nilah は Slipstream で Formless Blade と Apotheosis のレンジに入ってきます。攻撃が追いかける局面では Cultivation of Spirit が圧倒しますが、Jubilant Veil はまさにその局面を逆転し、Nilah に距離を詰める時間を与えます。
Nilahのビルド →
詳細を見る
理由
Nilah の Jubilant Veil により Nilah は飛び道具を短時間回避でき、Yunara の攻撃の核を断ち切ります。その後 Nilah は Slipstream で Formless Blade と Apotheosis のレンジに入ってきます。攻撃が追いかける局面では Cultivation of Spirit が圧倒しますが、Jubilant Veil はまさにその局面を逆転し、Nilah に距離を詰める時間を与えます。
レーン戦への影響
Nilah のレンジは短いので、Yunara は序盤の minion を支配できますが、wave を押すと Slipstream の対象を Nilah に与えてしまい、退路も減ります。Jubilant Veil に向けて Cultivation of Spirit を発動すると、ダメージなしであなたのピークを使い切ってしまいます。代わりに Jubilant Veil が切れるのを待てば、Arc of Judgment の poke とその後の攻撃がはるかに効果的になります。
立ち回り方
Slipstream があなたに直接つながらない距離に wave を保ってください。攻撃を数発見せて Nilah の Jubilant Veil を誘い、Cultivation of Spirit は使わずに Kanmei's Steps で後退します。Jubilant Veil が切れたら、Arc of Judgment で Nilah をスローして短い撃ち合いをしてください。Apotheosis の間は、追いかけずに中央から離れてください。
スキル次第のマッチアップ
4このマッチアップは何よりもまず実行力の勝負であり、両者ともに優位を取れる現実的な手段を持っている。重要なスキルを一つ避けられるか、エンゲージを正しく読めるか、あるいはたった一つの位置取りのミスが、勝敗を分けることもある。マッチアップを理解し、行動すべき瞬間を見極める力がとりわけ重要になる。

Ezreal±0
Ezreal の Mystic Shot は最初の対象で止まり、命中すると Ezreal の cooldown を短縮し、Arcane Shift は即座の位置変更を可能にします。Yunara は minion を遮蔽にして Cultivation of Spirit の跳ね返りで応じられますが、Ezreal がブリンクを持っている間は簡単に前へ出られません。
Ezrealのビルド →
詳細を見る
理由
Ezreal の Mystic Shot は最初の対象で止まり、命中すると Ezreal の cooldown を短縮し、Arcane Shift は即座の位置変更を可能にします。Yunara は minion を遮蔽にして Cultivation of Spirit の跳ね返りで応じられますが、Ezreal がブリンクを持っている間は簡単に前へ出られません。
レーン戦への影響
受けた Mystic Shot 1 発ごとに Ezreal の次のサイクルが加速し、あなたの体力が削られます。minion に防がれた弾ごとに、あなたは farm を追えます。したがって両チャンピオンとも、自らをさらさずに自分の計画を進められます。プライオリティが変わるのは主に、Ezreal が Arcane Shift を前方に使ったとき、または Yunara が Kanmei's Steps を無駄にしたときです。
立ち回り方
Mystic Shot を止めるために minion の後ろにいて、Arcane Shift を追わないでください。Ezreal が攻撃的にブリンクを使ったら、Arc of Judgment でスローし、Cultivation of Spirit を発動して短い撃ち合いを 1 回してください。Essence Flux に対して角度を変えるために Kanmei's Steps を温存し、起爆の前に wave の後ろへ戻ってください。

Kalista±0
この matchup は、あなたのゾーン制圧と Kalista の絶え間ない動きがどう噛み合うかで決まります。Arc of Judgment を撃つと、Kalista は Martial Poise で簡単にジャンプし、飛び道具の軌道から抜け出せます。この減速を避けられると、Kalista はすぐに Pierce で反撃して複数の槍をスタックさせ、強力な Rend の引き寄せを狙ってきます。外したスキルが、大きく一方的な trade に変わります。
Kalistaのビルド →
詳細を見る
理由
この matchup は、あなたのゾーン制圧と Kalista の絶え間ない動きがどう噛み合うかで決まります。Arc of Judgment を撃つと、Kalista は Martial Poise で簡単にジャンプし、飛び道具の軌道から抜け出せます。この減速を避けられると、Kalista はすぐに Pierce で反撃して複数の槍をスタックさせ、強力な Rend の引き寄せを狙ってきます。外したスキルが、大きく一方的な trade に変わります。
レーン戦への影響
スキルショットを外すと、すぐに wave の主導権が移ります。Kalista が Arc of Judgment を避けると、Rend の脅威を使って、あなたを minion の wave から積極的に押し出してきます。ただし、Kalista が判断を誤ったり、minion を取るために Rend を早く使いすぎたりすると、trade の力は大きく落ちます。そのため、主要なユーティリティを使うタイミングを誤った側に優先権が急速に移る、不安定な lane になります。
立ち回り方
Kalista が自由にジャンプできるスペースがあるときに、Arc of Judgment を闇雲に撃たないでください。代わりに、Kalista がオートアタックのモーションに縛られるのを待つか、地形の近くで動きを読みやすい状況に追い込んでください。Kalista が Fate's Call を発動したら、ノックアップが当たる前に Kanmei's Steps で距離を取ってください。Kalista が Rend を無駄にしたら、すぐに Transcend One's Self と Cultivation of Spirit を発動して、最も弱い時間帯を突いてください。

Jhin±0
この matchup は、Jhin の長射程の Deadly Flourish とあなたの Kanmei's Steps の間の、リスクの高い駆け引きで決まります。Jhin のルートは非常に読みやすいため、Jhin はまずあなたに機動力を使わせない限り、確実には拘束できません。移動速度バフや、Transcend One's Self 中の Untouchable Shadow のダッシュを早すぎるタイミングで使うと、Jhin の追撃の格好の的になります。
Jhinのビルド →
詳細を見る
理由
この matchup は、Jhin の長射程の Deadly Flourish とあなたの Kanmei's Steps の間の、リスクの高い駆け引きで決まります。Jhin のルートは非常に読みやすいため、Jhin はまずあなたに機動力を使わせない限り、確実には拘束できません。移動速度バフや、Transcend One's Self 中の Untouchable Shadow のダッシュを早すぎるタイミングで使うと、Jhin の追撃の格好の的になります。
レーン戦への影響
lane フェーズでは、これらの cooldown によって wave のプレッシャーが急速に移り変わります。Jhin が Deadly Flourish を外すと、Jhin の脅威は大きく下がり、Cultivation of Spirit を発動して minion の wave を押し込んだり、反撃を恐れずに短い trade をしたりできます。ただし、Jhin があなたの逃げを誘うことに成功すると、Captive Audience の trap を簡単に仕掛けたり、Curtain Call の脅威であなたを wave から遠ざけたりできます。
立ち回り方
鉄則は、Jhin の Deadly Flourish が cooldown 中のとき以外は、Kanmei's Steps を攻撃的に使わないことです。Jhin が Whisper の4発目を準備したら、すぐにルートで追撃してくると予想してください。移動速度は横に避けるために温存するか、Transcend One's Self に入ってから Untouchable Shadow のダッシュを使って、Jhin の視線を完全に切ってください。被弾したら、すぐに Arc of Judgment を使って後退し、Jhin の前進を減速させてください。
その他のマッチアップ

有利なマッチアップ
18これらのチャンピオンは、こちらの主要な強みに効果的に対応するのが難しく、より自由に対面を組み立てることができる。プレッシャーをかけて有利な交換を引き出す手段は複数あることが多い。相手が態勢を立て直す時間を与えるのではなく、この優位を活かして主導権を握ろう。

Ashe−1
Ashe の Frost Shot と Volley は Yunara をスローしますが、Ashe はそのコントロールを活かすには攻撃を続けなければなりません。Kanmei's Steps は移動速度を回復し、Cultivation of Spirit はより長い攻撃シークエンスを強化します。Enchanted Crystal Arrow の初撃を避け、すでにスローされた状態で始めなければ、Yunara は長い撃ち合いに勝てます。
Asheのビルド →
詳細を見る
理由
Ashe の Frost Shot と Volley は Yunara をスローしますが、Ashe はそのコントロールを活かすには攻撃を続けなければなりません。Kanmei's Steps は移動速度を回復し、Cultivation of Spirit はより長い攻撃シークエンスを強化します。Enchanted Crystal Arrow の初撃を避け、すでにスローされた状態で始めなければ、Yunara は長い撃ち合いに勝てます。
レーン戦への影響
Ashe の Volley は、距離を取り戻せばあなたのダメージを失わずに、一時的に wave への接近を閉ざせます。スローが last hit を追走に変えるとき Ashe が優位に立ち、Volley を外して Cultivation of Spirit の跳ね返りが Volley のスキルが戻る前に複数の対象を押すとき Yunara が優位に立ちます。
立ち回り方
角度を変えて Ashe の Volley を避け、Frost Shot の追跡から離れるために Kanmei's Steps を温存してください。Volley の後に Cultivation of Spirit を発動し、退路を保ったまま数発攻撃してください。Enchanted Crystal Arrow に対しては、まずポジショニングと minion に頼ってください。Untouchable Shadow が dash になるのは Trance の間だけです。

Varus±0
Varus は遠距離から Piercing Arrow を準備し、Blighted Quiver でスタックを加え、それが Varus のスキルに消費されます。Varus の poke は強力ですが予兆があり、Kanmei's Steps で Yunara は角度を変えられ、Cultivation of Spirit は持続的なダメージを積み上げます。矢を外した場合、Varus にはその反撃を拒むモビリティがありません。
Varusのビルド →
詳細を見る
理由
Varus は遠距離から Piercing Arrow を準備し、Blighted Quiver でスタックを加え、それが Varus のスキルに消費されます。Varus の poke は強力ですが予兆があり、Kanmei's Steps で Yunara は角度を変えられ、Cultivation of Spirit は持続的なダメージを積み上げます。矢を外した場合、Varus にはその反撃を拒むモビリティがありません。
レーン戦への影響
minion のライン上に立つと Varus のチャージした矢の的になり、持続ダメージが意味を持つ前に体力を削られることがあります。こまめに立つ側を変えれば farm を維持でき、Varus に Hail of Arrows を wave へ使わせられます。それらのスキルのあとは Varus のローテーションが遅くなり、Yunara は跳ね返りで押し込めます。
立ち回り方
Piercing Arrow がチャージされている間は動き続け、Hail of Arrows の中ではトレードを終わらせずに離れてください。矢が放たれたら、Arc of Judgment で Varus をスローし、Cultivation of Spirit を発動して数発攻撃してください。Chain of Corruption が未使用の間は Kanmei's Steps を使える状態にしておいてください。root があなたの追撃を止められるからです。

Sivir−1
Sivir は Ricochet と Boomerang Blade を押しに投資し、Yunara は Cultivation of Spirit の跳ね返りで応じます。Sivir の Spell Shield はスキルを 1 つ防ぎますが、あなたの攻撃は止めません。したがって Yunara は、Arc of Judgment をシールドに差し出さない限り、持続ダメージの計画を保てます。
Sivirのビルド →
詳細を見る
理由
Sivir は Ricochet と Boomerang Blade を押しに投資し、Yunara は Cultivation of Spirit の跳ね返りで応じます。Sivir の Spell Shield はスキルを 1 つ防ぎますが、あなたの攻撃は止めません。したがって Yunara は、Arc of Judgment をシールドに差し出さない限り、持続ダメージの計画を保てます。
レーン戦への影響
どちらのチャンピオンも素早く clear しますが、Sivir の脅威は即座の all-in よりも、たまった wave を通して生じます。吸収された Arc of Judgment は Sivir を回復し Fleet of Foot を発動させ、プライオリティを取り戻させます。そのスキルを温存すれば、Sivir に sustain を与えずに wave に対応できます。
立ち回り方
wave には Cultivation of Spirit を使い、Arc of Judgment は Spell Shield が切れるのを待ってから使ってください。Sivir が Boomerang Blade を投げたら、その戻り道から離れて攻撃を再開します。On the Hunt を追いかけず、Kanmei's Steps を発動して距離を保ち、次の wave を clear して、Sivir に押しをやり直させてください。

Senna−2
Senna の攻撃は遅いですが、Mist によってレンジとダメージが伸びます。Yunara は Cultivation of Spirit を発動して、Senna の次の攻撃までに数発当てることで、そのリズムを突けます。Piercing Darkness はその線上で回復するため、ばらけた poke は修復されますが、一度に集中した短いトレードなら Senna の回復する時間を抑えられます。
Sennaのビルド →
詳細を見る
理由
Senna の攻撃は遅いですが、Mist によってレンジとダメージが伸びます。Yunara は Cultivation of Spirit を発動して、Senna の次の攻撃までに数発当てることで、そのリズムを突けます。Piercing Darkness はその線上で回復するため、ばらけた poke は修復されますが、一度に集中した短いトレードなら Senna の回復する時間を抑えられます。
レーン戦への影響
取られなかった魂は Senna の将来のレンジを伸ばしますが、魂を集めるには見える経路が必要です。Yunara はその一歩に Arc of Judgment を置き、跳ね返りで wave のプレッシャーを維持できます。Senna の Last Embrace が当たると、遅れて発動する root は周囲の対象にも当たり、主導権を一瞬で逆転させます。
立ち回り方
Senna の魂を集める動きには Arc of Judgment と Cultivation of Spirit の攻撃を数発で罰し、Curse of the Black Mist へは追いかけて入らないでください。Last Embrace とあなたの間に minion を置き、Piercing Darkness のために味方と一直線に並ばないようにします。root が外れたら、Senna がレンジをさらに伸ばす前に wave を取り戻してください。

Kog'Maw−1
Kog'Maw にはモビリティがありませんが、Yunara は Kanmei's Steps で速度を得て、Trance の間は Untouchable Shadow が dash になります。Kog'Maw の Bio-Arcane Barrage はレンジとダメージを一時的に上げますが、Yunara はその時間帯から離れ、Cultivation of Spirit で戻ることができます。ダメージの打ち合いがいつ実際に始まるかを決めるのは、Yunara のモビリティです。
Kog'Mawのビルド →
詳細を見る
理由
Kog'Maw にはモビリティがありませんが、Yunara は Kanmei's Steps で速度を得て、Trance の間は Untouchable Shadow が dash になります。Kog'Maw の Bio-Arcane Barrage はレンジとダメージを一時的に上げますが、Yunara はその時間帯から離れ、Cultivation of Spirit で戻ることができます。ダメージの打ち合いがいつ実際に始まるかを決めるのは、Yunara のモビリティです。
レーン戦への影響
Bio-Arcane Barrage の間、Kog'Maw は伸びたレンジから wave を争えますが、終わった後は Arc of Judgment からすばやく離れることも角度を変えることもできません。そこで Yunara は押し込み、Kog'Maw にプレッシャーの下で last hit させ、自分のリソースを犠牲にせずローテーションへ先に動けます。
立ち回り方
Kog'Maw の Bio-Arcane Barrage が発動したら退き、ボーナスレンジが切れてから戻ってください。Arc of Judgment で Kog'Maw をスローし、Void Ooze から離れるために Kanmei's Steps を温存しつつ Cultivation of Spirit を発動してください。Trance の間は、Untouchable Shadow で位置を変え、Living Artillery のゾーンを不必要に横切らないようにしてください。

Akshan−1
Akshan は Heroic Swing で攻撃的な角度を探すことに頼っていますが、あなたはこうした小競り合いを完全に封じられます。Cultivation of Spirit を発動すると、Akshan の Dirty Fighting のシールドを貫通する圧倒的な混合ダメージを与えられ、Akshan がスイングで飛び込もうとしても、Kanmei's Steps の機動力ですぐに離脱したり位置を変えたりできます。この相互作用によって、Akshan の序盤のキルプレッシャーが無力化され、Akshan は自力では有利な trade を強いられなくなります。
Akshanのビルド →
詳細を見る
理由
Akshan は Heroic Swing で攻撃的な角度を探すことに頼っていますが、あなたはこうした小競り合いを完全に封じられます。Cultivation of Spirit を発動すると、Akshan の Dirty Fighting のシールドを貫通する圧倒的な混合ダメージを与えられ、Akshan がスイングで飛び込もうとしても、Kanmei's Steps の機動力ですぐに離脱したり位置を変えたりできます。この相互作用によって、Akshan の序盤のキルプレッシャーが無力化され、Akshan は自力では有利な trade を強いられなくなります。
レーン戦への影響
Akshan は安全に engage できないため、あなたは優れた wave 管理で lane のペースを握れます。slow-push で簡単に wave を押し込み、Akshan を自分のタワーの下に追いやれます。そこでは Avengerang の trade 性能は低くなります。押し込むことで Akshan は Going Rogue で roam できなくなり、lane に閉じ込められます。その間にあなたは余裕を持った recall のタイミングを確保し、突然の反撃の engage を恐れずに Akshan のタワーのプレートを削れます。
立ち回り方
序盤は minion の wave を自分の側に保ち、Akshan が Heroic Swing を外すか使うまでは、Kanmei's Steps を無駄にしないでください。Akshan が trade を仕掛けてきたら、Cultivation of Spirit を発動して、後ろに下がりながらバウンスする攻撃で反撃してください。位置取りを誤って Akshan の Comeuppance に捕まったら、すぐに Transcend One's Self を発動し、Untouchable Shadow の強化ダッシュで、最も近い壁の後ろに入って Akshan の視線を切ってください。

Draven−1
この matchup は、Transcend One's Self の圧倒的な力で Yunara が主導権を握ります。Yunara がトランスを発動すると、強化された機動力とダメージが、Spinning Axe による Draven の序盤の強さを上回ります。あなたの攻撃的な前進を止めるための Draven 唯一の防御手段は Stand Aside です。あなたの ult が cooldown 中だと、Draven は Blood Rush で簡単にあなたを追い詰められます。
Dravenのビルド →
詳細を見る
理由
この matchup は、Transcend One's Self の圧倒的な力で Yunara が主導権を握ります。Yunara がトランスを発動すると、強化された機動力とダメージが、Spinning Axe による Draven の序盤の強さを上回ります。あなたの攻撃的な前進を止めるための Draven 唯一の防御手段は Stand Aside です。あなたの ult が cooldown 中だと、Draven は Blood Rush で簡単にあなたを追い詰められます。
レーン戦への影響
この lane は、Draven のプレッシャーとあなたの ult のタイミングを中心に回ります。Draven は予想通り Spinning Axe を取りに動くので、Cultivation of Spirit を使って Draven にダメージをバウンスさせ、wave を簡単に操作できます。Stand Aside が使えない Draven は守りに回らざるを得ず、パッシブの League of Draven も無力化されます。
立ち回り方
Draven の斧が落ちる位置を常に把握してください。Arc of Judgment を Draven の着地の目印に直接撃ち込んで、動きを罰してください。Transcend One's Self を闇雲に発動せず、前に歩いて Draven の Stand Aside を誘い、その後 Untouchable Shadow のダッシュで横に避けてノックバックをかわしてください。前進を Draven に妨げられたら、Kanmei's Steps の移動速度で離脱してください。

Corki−1
Yunara はゲームが進むにつれて自然に Corki よりスケーリングし、Vow of the First Lands によってクリティカルを大きなハイブリッドダメージに変えます。Corki は Special Delivery を定期的に脅威として使って戦いを強いますが、Yunara にはこの攻勢を無力化する最適な手段があります。Kanmei's Steps を発動するか、Transcend One's Self の状態に入ることで、Corki の強力な炎のゾーンから即座に逃れるための急な機動力を得られます。
Corkiのビルド →
詳細を見る
理由
Yunara はゲームが進むにつれて自然に Corki よりスケーリングし、Vow of the First Lands によってクリティカルを大きなハイブリッドダメージに変えます。Corki は Special Delivery を定期的に脅威として使って戦いを強いますが、Yunara にはこの攻勢を無力化する最適な手段があります。Kanmei's Steps を発動するか、Transcend One's Self の状態に入ることで、Corki の強力な炎のゾーンから即座に逃れるための急な機動力を得られます。
レーン戦への影響
序盤の lane では、Corki は荷物を届ける準備として、Phosphorus Bomb と Missile Barrage であなたを poke しようとします。ただし、Special Delivery からは安全に離脱できるため、Corki は簡単にあなたを lane から追い出したり、タワーにダイブしたりできません。この安全性のおかげで、落ち着いて farm でき、Cultivation of Spirit が Corki の持続ダメージを完全に圧倒するまで、Corki の中盤のスパイクを安全に乗り越えてスケーリングできます。
立ち回り方
Corki が Hextech Munitions を手に入れたタイミングを、常にマップで確認してください。Corki が Special Delivery で飛んできても慌てず、すぐに Kanmei's Steps を発動して炎から走って抜け出してください。ノックバックから逃れるために即座のダッシュが必要なら、Transcend One's Self を使ってください。荷物が無駄になったら、すぐに Cultivation of Spirit で戦況をひっくり返してください。機動力がない状態で捕まったら、Arc of Judgment で Corki の接近を減速させてください。

Jinx−1
この matchup では Yunara が圧倒します。Jinx は、あなたの通常攻撃の射程と Cultivation of Spirit のプレッシャーに対抗するため、Switcheroo! でマナを消費する Fishbones の形態を強いられるからです。Jinx が farm したり trade を返そうとしたりするとき、あなたを寄せ付けないために Flame Chompers に大きく頼ります。Kanmei's Steps を止めるためにその trap を無駄にしてしまえば、Jinx にはあなたに追い詰められるのを防ぐ確実な手段がありません。
Jinxのビルド →
詳細を見る
理由
この matchup では Yunara が圧倒します。Jinx は、あなたの通常攻撃の射程と Cultivation of Spirit のプレッシャーに対抗するため、Switcheroo! でマナを消費する Fishbones の形態を強いられるからです。Jinx が farm したり trade を返そうとしたりするとき、あなたを寄せ付けないために Flame Chompers に大きく頼ります。Kanmei's Steps を止めるためにその trap を無駄にしてしまえば、Jinx にはあなたに追い詰められるのを防ぐ確実な手段がありません。
レーン戦への影響
Jinx は絶えずロケットを使うため、マナがすぐに枯渇し、Cultivation of Spirit が発動した後は、あなたの wave clear に対抗できなくなります。Jinx が Flame Chompers を外すと、安全網が消え、あなたは大きな wave を crash させ、Jinx 自身のタワーの下でも自由に poke できます。この絶え間ないプレッシャーによって、Jinx は安全に farm しにくくなり、スケーリングが遅れて、あなたのチームが優先権を得られます。
立ち回り方
Kanmei's Steps の追加の移動速度を使って斜めに前進し、Jinx の trap を積極的に誘ってから、素早く横に避けてください。Jinx の Flame Chompers が地面に落ちて外れた瞬間に、すぐ Transcend One's Self を発動して、機動力を Untouchable Shadow に変えてください。Jinx の minion の wave をすり抜け、Cultivation of Spirit を発動して Vow of the First Lands の追加魔法ダメージを活かし、長い trade に持ち込んでください。

Kai'Sa−1
この matchup では Yunara が距離を支配します。Arc of Judgment を使えば、遠くから Kai'Sa を継続的に減速させてダメージを与えられます。この長射程による牽制によって、Kai'Sa は前に歩いてあなたを孤立させ、Icathian Rain の burst をフルで当てることができません。Kai'Sa は Second Skin をスタックさせるために近づく必要があるので、あなたの優れたリーチと減速が、Kai'Sa が Supercharge で距離を詰める前に、Kai'Sa の trade パターンを完全に無効化します。
Kai'Saのビルド →
詳細を見る
理由
この matchup では Yunara が距離を支配します。Arc of Judgment を使えば、遠くから Kai'Sa を継続的に減速させてダメージを与えられます。この長射程による牽制によって、Kai'Sa は前に歩いてあなたを孤立させ、Icathian Rain の burst をフルで当てることができません。Kai'Sa は Second Skin をスタックさせるために近づく必要があるので、あなたの優れたリーチと減速が、Kai'Sa が Supercharge で距離を詰める前に、Kai'Sa の trade パターンを完全に無効化します。
レーン戦への影響
この射程の優位によって、Cultivation of Spirit を使って常に wave を push できます。Kai'Sa は、あなたと trade する代わりに、タワーの下で minion を処理するために Icathian Rain を無駄にせざるを得ません。序盤の体力の優位を簡単に確保でき、Kai'Sa は早すぎる recall かゴールドの損失を強いられます。この絶え間ないプレッシャーによって、Kai'Sa は Killer Instinct で追撃しにくくなり、自分の lane で守りに閉じ込められます。
立ち回り方
常に自分の minion の wave の後ろに位置取りしてください。そうすれば、Kai'Sa があなたの Arc of Judgment を避けようとしても、はずれた Icathian Rain のミサイルは minion に分散され、Kai'Sa の burst は無力化されます。Kai'Sa が Supercharge で近づこうとしたときのために、Arc of Judgment を用意しておいてください。Kai'Sa が Killer Instinct でダイブしてきたら、すぐに Transcend One's Self と Kanmei's Steps を組み合わせて位置を変え、強化された攻撃で戦況をひっくり返してください。

Samira−1
この matchup は、Arc of Judgment の脅威だけで Yunara が完全に支配します。Samira は、この飛び道具を迎撃するために Blade Whirl を温存せざるを得ません。Samira がブロックに失敗すると、減速のおかげで、あなたは最大射程から Cultivation of Spirit を安全に放てます。防御の円がなければ、Samira は距離を詰めることも、Daredevil Impulse をスタックさせることもできず、強烈な混合ダメージを受けることになります。
Samiraのビルド →
詳細を見る
理由
この matchup は、Arc of Judgment の脅威だけで Yunara が完全に支配します。Samira は、この飛び道具を迎撃するために Blade Whirl を温存せざるを得ません。Samira がブロックに失敗すると、減速のおかげで、あなたは最大射程から Cultivation of Spirit を安全に放てます。防御の円がなければ、Samira は距離を詰めることも、Daredevil Impulse をスタックさせることもできず、強烈な混合ダメージを受けることになります。
レーン戦への影響
この流れによって、Samira は序盤に wave を争う力を大きく失います。Samira はあなたの射程を警戒しなければならないので、風の壁が使えない状態では、Wild Rush で安全に engage できません。Samira を常にタワーの下に押し込み、Samira が farm に苦しむ間に体力を削れます。この圧力により、Samira は Inferno Trigger をスノーボールさせるのに切実に必要な序盤のキルを取れなくなります。
立ち回り方
これを活かすために、安全な距離から Arc of Judgment を投げて、Blade Whirl を誘ってください。Samira の回転が消えるのが見えた瞬間に、すぐ Cultivation of Spirit を発動し、Samira の長い防御の隙を罰してください。Samira が Wild Rush でカウンターの engage をしようとしたら、Kanmei's Steps の移動速度で離脱し、間合いを保ってください。Samira の短射程の刃が届かない、あなたの最大攻撃射程で Samira を捉え続けてください。

Miss Fortune−1
この lane は、Yunara の機動力が Miss Fortune のセットアップを直接無効化するので、Yunara が有利です。Miss Fortune は poke を確実にするために Make It Rain であなたを減速させることに頼っていますが、Yunara は Kanmei's Steps、または Transcend One's Self 中の Untouchable Shadow のダッシュで、すぐにそのゾーンから逃れられます。この最初の減速を避けることで、Miss Fortune は致命的な Double Up のバウンスを当てたり、Bullet Time のためにあなたを拘束したりするためのセットアップを作れなくなります。
Miss Fortuneのビルド →
詳細を見る
理由
この lane は、Yunara の機動力が Miss Fortune のセットアップを直接無効化するので、Yunara が有利です。Miss Fortune は poke を確実にするために Make It Rain であなたを減速させることに頼っていますが、Yunara は Kanmei's Steps、または Transcend One's Self 中の Untouchable Shadow のダッシュで、すぐにそのゾーンから逃れられます。この最初の減速を避けることで、Miss Fortune は致命的な Double Up のバウンスを当てたり、Bullet Time のためにあなたを拘束したりするためのセットアップを作れなくなります。
レーン戦への影響
Miss Fortune は簡単にあなたをゾーンできないので、minion の wave のテンポの主導権をすぐに失います。Cultivation of Spirit を発動して、Miss Fortune の minion を通して攻撃をバウンスさせれば、wave clear で楽に張り合えます。Miss Fortune が Make It Rain を無駄にすると trade 力が無力化されるため、あなたが lane の完全な優先権を得て、Miss Fortune を自分のタワーの下で farm させ、その間にあなたはタワーのプレートを削れます。
立ち回り方
Kanmei's Steps を単純な移動のために先に使わず、Miss Fortune が Make It Rain を使ったときに反応するためだけに、この速度ブーストを温存してください。減速ゾーンから安全に抜け出したら、すぐに Cultivation of Spirit を発動して、Miss Fortune のスキルが cooldown 中に反撃してください。Miss Fortune が Bullet Time をチャネリングしようとしたら、Untouchable Shadow のダッシュで射撃の扇形から斜めに逃れ、Arc of Judgment で振り向いてキルを取ってください。

Tristana−1
Tristana は Rocket Jump で飛び込み、Rapid Fire ですばやく Explosive Charge をスタックさせることに頼っています。Kanmei's Steps によってオートアタックの射程から走って逃れる速度が得られ、強化された Untouchable Shadow で即座にダッシュして離れられるので、Yunara はこの burst パターンを完全に counter します。スタックが最大の爆弾がなければ、Tristana はリセットと序盤の主な burst の源を失い、Yunara のハイブリッド DPS に対して脆弱になります。
Tristanaのビルド →
詳細を見る
理由
Tristana は Rocket Jump で飛び込み、Rapid Fire ですばやく Explosive Charge をスタックさせることに頼っています。Kanmei's Steps によってオートアタックの射程から走って逃れる速度が得られ、強化された Untouchable Shadow で即座にダッシュして離れられるので、Yunara はこの burst パターンを完全に counter します。スタックが最大の爆弾がなければ、Tristana はリセットと序盤の主な burst の源を失い、Yunara のハイブリッド DPS に対して脆弱になります。
レーン戦への影響
この流れによって、Tristana は攻撃的にプレイしたり、あなたを wave から追い出したりできなくなります。Tristana はあなたに対して Explosive Charge を簡単に起爆できないので、all-in のダイブの脅威はなくなります。Cultivation of Spirit を使って Tristana の minion を通して攻撃をバウンスさせれば、安全に Tristana の push に張り合えます。体力を少しずつ削り、Tristana に、displacement の手段としてではなく、Buster Shot を守りのために使わせられます。
立ち回り方
機動力のスキルで trade を仕掛けないでください。Tristana がジャンプするときのためだけに、Kanmei's Steps を用意しておいてください。Tristana が Rocket Jump で空中にいるのが見えた瞬間に、それを発動して、オートアタックの拘束を断ち切ってください。Transcend One's Self を発動しているなら、Untouchable Shadow の直接ダッシュで、4スタック目の Explosive Charge を即座に避けてください。爆弾が不発になったら、Cultivation of Spirit を発動して、Tristana のジャンプが cooldown 中に容赦なく追い詰めてください。

Caitlyn−1
Yunara は、Caitlyn の優れた射程を無力化することで、この matchup を自然に支配します。Caitlyn が Piltover Peacemaker とパッシブの Headshot でじわじわとあなたの体力を削ろうとする一方、あなたの ult の能力が状況を完全に変えます。Transcend One's Self を発動すると、Untouchable Shadow による機動力の脅威のせいで、Caitlyn は 90 Caliber Net を防御のために温存せざるを得なくなり、攻撃的なプレッシャーが無力化され、あなたは Cultivation of Spirit で Caitlyn を圧倒できます。
Caitlynのビルド →
詳細を見る
理由
Yunara は、Caitlyn の優れた射程を無力化することで、この matchup を自然に支配します。Caitlyn が Piltover Peacemaker とパッシブの Headshot でじわじわとあなたの体力を削ろうとする一方、あなたの ult の能力が状況を完全に変えます。Transcend One's Self を発動すると、Untouchable Shadow による機動力の脅威のせいで、Caitlyn は 90 Caliber Net を防御のために温存せざるを得なくなり、攻撃的なプレッシャーが無力化され、あなたは Cultivation of Spirit で Caitlyn を圧倒できます。
レーン戦への影響
ult が解放される前は、Caitlyn の息苦しいほどの lane の押し込みに耐えなければなりません。Caitlyn は Piltover Peacemaker で wave を push し、あなたの動きを制限するために、あなたのタワーの下に Yordle Snap Trap を仕掛けます。しかし、Transcend One's Self が解放された瞬間に、この息苦しいセットアップは完全に消え去ります。力が発動すれば、Cultivation of Spirit で Caitlyn の push に楽に張り合え、lane を活発な脅威ゾーンに変えて、Caitlyn にあなたの all-in の可能性を常に警戒させられます。
立ち回り方
優位を確実にするために、minion で Piltover Peacemaker を防ぎ、Caitlyn の Headshot の射程から離れることで、序盤の不必要なダメージを最小限に抑えてください。Caitlyn の 90 Caliber Net が使える間は、Kanmei's Steps で仕掛けないでください。代わりに、Arc of Judgment で安全に poke し、Caitlyn の逃げのスキルを誘ってください。Caitlyn がネットを無駄にした瞬間に、すぐに Transcend One's Self を発動し、Untouchable Shadow で距離を詰めて、Caitlyn が安全な場所に退く前にキルを狙ってください。

Zeri−1
Vow of the First Lands によるハイブリッドダメージが Zeri の基本アーマーを貫通し、Cultivation of Spirit が Burst Fire より優れた素の DPS を提供するので、この matchup では Yunara が圧倒します。Zeri は直線のスキルショットを当てて距離を保つことに頼っています。ただし、Yunara が Transcend One's Self を解放すると、Untouchable Shadow が使えるようになり、Zeri の kite のリズムが完全に崩れ、Yunara はすべての決闘のペースを握れます。
Zeriのビルド →
詳細を見る
理由
Vow of the First Lands によるハイブリッドダメージが Zeri の基本アーマーを貫通し、Cultivation of Spirit が Burst Fire より優れた素の DPS を提供するので、この matchup では Yunara が圧倒します。Zeri は直線のスキルショットを当てて距離を保つことに頼っています。ただし、Yunara が Transcend One's Self を解放すると、Untouchable Shadow が使えるようになり、Zeri の kite のリズムが完全に崩れ、Yunara はすべての決闘のペースを握れます。
レーン戦への影響
lane では、minion の後ろに簡単に隠れて Burst Fire を防げるため、Zeri は安全な角度を見つけるのに苦労します。Cultivation of Spirit によってより速く wave を push でき、Zeri はタワーの下で farm を集めるために Spark Surge を守りで使わざるを得なくなります。Zeri が壁の後ろから Ultrashock Laser で減速を狙っても、あなたのプレッシャーは変わらず、Lightning Crash をスタックさせるためのスペースを与えません。
立ち回り方
キルを取るために、Zeri が trade に踏み込むまで Transcend One's Self を温存してください。Zeri が Ultrashock Laser を撃った瞬間に、強化された E の Untouchable Shadow ですぐに反応し、斜めにダッシュして減速を完全に無効化してください。Zeri が Spark Surge で壁を越えて逃げようとしたら、同じ Untouchable Shadow のダッシュで先回りして、Cultivation of Spirit の攻撃の射程内に捉え続け、逃げ道を塞いでください。

Twitch−2
Twitch は、チームを溶かすために Spray and Pray の直線的で読みやすい弾に頼っています。しかし、Yunara はこの脅威を完全に無効化します。Kanmei's Steps によって、Twitch の ult の貫通ラインを楽に横に避けるための移動速度の急上昇を得られます。Twitch がまっすぐ撃つしかない間、Yunara は Vow of the First Lands によって、アーマーを貫通するハイブリッドのクリティカルダメージで反撃でき、DPS 勝負に勝ちます。
Twitchのビルド →
詳細を見る
理由
Twitch は、チームを溶かすために Spray and Pray の直線的で読みやすい弾に頼っています。しかし、Yunara はこの脅威を完全に無効化します。Kanmei's Steps によって、Twitch の ult の貫通ラインを楽に横に避けるための移動速度の急上昇を得られます。Twitch がまっすぐ撃つしかない間、Yunara は Vow of the First Lands によって、アーマーを貫通するハイブリッドのクリティカルダメージで反撃でき、DPS 勝負に勝ちます。
レーン戦への影響
Twitch の ult を避けられるので、お互いにレベル5になった後は、Twitch は安全に wave を争いに前に出られません。Cultivation of Spirit で Twitch の wave を通して攻撃をバウンスさせ、Twitch を積極的にタワーの下に押し込めます。この守りの強制によって、Twitch は Ambush でステルスに入って roam することができず、lane に閉じ込められます。その間にあなたは序盤のタワーのプレートを確保し、Twitch に不自然な recall のタイミングを強いられます。
立ち回り方
Twitch が Ambush から出た後に Spray and Pray を発動する瞬間のためだけに、常に Kanmei's Steps を温存してください。Twitch が撃ち始めたら、すぐに速度ブーストを発動して横に走り、直線の軌道から外れてください。先に Twitch の Venom Cask の減速に捕まったら、すぐに Transcend One's Self を発動して機動力を素早いダッシュに変え、即座に位置を変えて、Contaminate が最大スタックに達する前に burst で倒してください。

Vayne−1
Yunara は、優れた射程を活かして Vayne に防御的な対応を強いることで、この matchup を支配します。主な武器は Arc of Judgment で、Vayne は絶えずこれを Tumble で避けるよう迫られます。poke で削られるのを避けるためだけに主要な機動力のスキルを使わなければならないので、Vayne は安全に trade を返せません。Transcend One's Self で戦いをエスカレートさせると、Vayne は、あなたを押しのけて逃げるためだけに Condemn を無駄にせざるを得なくなります。
Vayneのビルド →
詳細を見る
理由
Yunara は、優れた射程を活かして Vayne に防御的な対応を強いることで、この matchup を支配します。主な武器は Arc of Judgment で、Vayne は絶えずこれを Tumble で避けるよう迫られます。poke で削られるのを避けるためだけに主要な機動力のスキルを使わなければならないので、Vayne は安全に trade を返せません。Transcend One's Self で戦いをエスカレートさせると、Vayne は、あなたを押しのけて逃げるためだけに Condemn を無駄にせざるを得なくなります。
レーン戦への影響
この流れによって、Vayne は非常に受け身の lane に追い込まれます。Arc of Judgment の脅威を警戒しなければならないので、Vayne は安全に minion の wave を争えず、あなたは優先権を確立して体力を削れます。Vayne が Tumble を攻撃的に誤用したら、すぐに Vayne 自身のタワーの下でプレッシャーをかけられます。Vayne の体力は常に低いままで、効果的な gank を仕込んだり、序盤の中立オブジェクトを争ったりできません。
立ち回り方
Vayne がラストヒットに前に出てきたら、Arc of Judgment を当てるよう狙ってください。Vayne が横や前に Tumble を使うのが見えた瞬間に、すぐ Cultivation of Spirit を発動して、素早くバウンスする攻撃で罰してください。Vayne が反撃しようとしたら、Transcend One's Self を発動して Vayne の Condemn を誘ってください。ノックバックがなくなったら、Untouchable Shadow で距離を詰め、Vayne の cooldown が戻る前にキルを取ってください。

Xayah−1
Kanmei's Steps / Untouchable Shadow が Xayah の主な脅威である Bladecaller を完全に無効化するため、Yunara がこの matchup のペースを握ります。Xayah が Clean Cuts や Double Daggers で羽根を置くたびに、Xayah はルートを当てるための読みやすい戻りの角度に頼っています。機動力のスキルを温存することで、Xayah に羽根の呼び戻しを我慢させ、burst の可能性を無力化し、その間にあなたは Cultivation of Spirit で DPS で上回れます。
Xayahのビルド →
詳細を見る
理由
Kanmei's Steps / Untouchable Shadow が Xayah の主な脅威である Bladecaller を完全に無効化するため、Yunara がこの matchup のペースを握ります。Xayah が Clean Cuts や Double Daggers で羽根を置くたびに、Xayah はルートを当てるための読みやすい戻りの角度に頼っています。機動力のスキルを温存することで、Xayah に羽根の呼び戻しを我慢させ、burst の可能性を無力化し、その間にあなたは Cultivation of Spirit で DPS で上回れます。
レーン戦への影響
Xayah はルートを確実に当てられないので、Deadly Plumage で wave を争う自信を失います。そのおかげで、常に Xayah をタワーの下に押し込めます。Xayah がプレッシャーの下で farm に苦しむ間、Arc of Judgment / Arc of Ruin で安全に poke できます。Xayah が Featherstorm で反撃しようとしても、敗北を遅らせるだけです。着地した後は簡単に追い詰められるからです。
立ち回り方
minion の wave に対して斜めに位置取りして、Xayah に minion の処理か、あなたに向けた Clean Cuts かを選ばせてください。Kanmei's Steps / Untouchable Shadow で trade を仕掛けず、代わりに Cultivation of Spirit を発動した状態で歩いて近づいてください。Xayah が Double Daggers を使って羽根を呼び戻そうとした瞬間に、ダッシュを横に発動して引き寄せの軌道から逃れ、その後 Transcend One's Self を発動して、Xayah の長い cooldown の間に完全に圧倒してください。
Yunara対策アイテム
これらのアイテムを購入すると、このチャンピオンの影響力を抑えられます。



| マッチアップ | 判定 | 有利度 | 勝率 | ピック率 |
|---|---|---|---|---|
| Smolder | スキル次第のマッチアップ | ±0 | 52.6% | 8.0% |
| Varus | 有利なマッチアップ | ±0 | 51.3% | 5.8% |
| Kalista | スキル次第のマッチアップ | ±0 | 50.9% | 5.8% |
| Ezreal | スキル次第のマッチアップ | ±0 | 49.7% | 7.4% |
| Jhin | スキル次第のマッチアップ | ±0 | 49.5% | 18.8% |
| Lucian | ハードカウンター | ±0 | 47.4% | 3.2% |
| Ashe | 有利なマッチアップ | −1 | 53.2% | 8.6% |
| Kog'Maw | 有利なマッチアップ | −1 | 52.3% | 2.5% |
| Samira | 有利なマッチアップ | −1 | 51.1% | 10.9% |
| Jinx | 有利なマッチアップ | −1 | 50.8% | 13.2% |
| Xayah | 有利なマッチアップ | −1 | 50.4% | 5.0% |
| Kai'Sa | 有利なマッチアップ | −1 | 50.1% | 16.4% |
| Zeri | 有利なマッチアップ | −1 | 49.9% | 1.3% |
| Caitlyn | 有利なマッチアップ | −1 | 49.7% | 16.4% |
| Tristana | 有利なマッチアップ | −1 | 49.0% | 11.2% |
| Sivir | 有利なマッチアップ | −1 | 48.9% | 3.3% |
| Vayne | 有利なマッチアップ | −1 | 48.9% | 6.3% |
| Miss Fortune | 有利なマッチアップ | −1 | 48.7% | 12.3% |
| Draven | 有利なマッチアップ | −1 | 46.8% | 5.2% |
| Akshan | 有利なマッチアップ | −1 | — | — |
| Corki | 有利なマッチアップ | −1 | — | — |
| Nilah | 不利なマッチアップ | −1 | — | — |
| Senna | 有利なマッチアップ | −2 | 51.0% | 1.5% |
| Twitch | 有利なマッチアップ | −2 | 49.9% | 10.5% |
有利度:Wild Rift Coreの公式判定(−3〜+3)で、各行に記載されたチャンピオンの視点から見た値です。勝率とピック率:このロールにおける相手チャンピオン自身の数値 — Wild Rift CN · Challenger、Patch 7.3b。直接対決の勝率ではありません。