
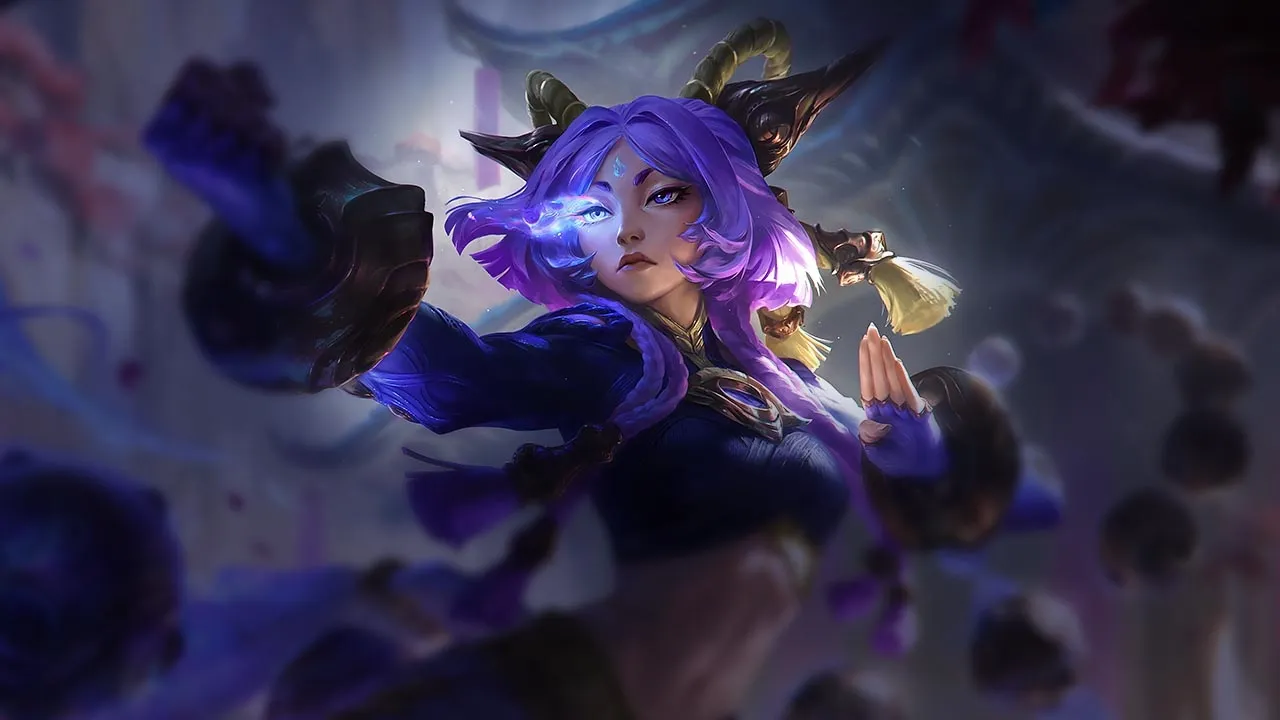

Yunara Wild Rift Counters Guide
Hard Counters
1These champions have a build and playstyle that directly overpower yours, which can make controlling the lane and farming extremely difficult. Their kit can neutralize your core strengths or punish you the moment you try to play your usual game plan. In these matchups, the goal is often to minimize mistakes and look for ways to win outside of direct confrontation.

Lucian±0
Lightslinger gives Lucian two rapid attacks after each ability, while Relentless Pursuit lets him enter and change angle. Yunara wants Cultivation of Spirit to build sustained damage; Lucian compresses his output before that cadence pays off. His short burst therefore controls the phase before your Trance is available.
Lucian build →
See details
The interaction that decides it
Lucian must use Relentless Pursuit to dodge her Arc of Judgment while capitalizing on her long cooldowns early.
Why
Lightslinger gives Lucian two rapid attacks after each ability, while Relentless Pursuit lets him enter and change angle. Yunara wants Cultivation of Spirit to build sustained damage; Lucian compresses his output before that cadence pays off. His short burst therefore controls the phase before your Trance is available.
Lane impact
Piercing Light passes through its first target, so lining up behind a minion turns farming into free poke. A few sequences can remove your wave access and force a recall. Lucian then pushes while Yunara loses the resources needed to reach Transcend One's Self on time.
How to play
Move off the champion-minion line and keep Kanmei's Steps to rebuild distance after Relentless Pursuit. When Lucian spends that dash forward, slow him with Arc of Judgment and return only a few Cultivation of Spirit attacks. While he holds mobility, take safe minions and refuse the full exchange.
Unfavorable
1These champions have tools that generally give them the edge in a fight, without making the matchup unwinnable. They might have more range, a better ability to soak up your offense, or more ways to answer your engages. You'll need to adapt your approach and carefully pick your moments to accept a fight.

Nilah−1
Jubilant Veil lets Nilah evade projectiles briefly, cutting off the core of Yunara's attacks. Slipstream then brings her into Formless Blade and Apotheosis range. Cultivation of Spirit dominates when attacks chase; the veil reverses that exact window and gives Nilah time to close distance.
Nilah build →
See details
The interaction that decides it
Yunara's Kanmei's Steps allows her to kite Nilah's short-range Formless Blade attacks effectively in early skirmishes.
Why
Jubilant Veil lets Nilah evade projectiles briefly, cutting off the core of Yunara's attacks. Slipstream then brings her into Formless Blade and Apotheosis range. Cultivation of Spirit dominates when attacks chase; the veil reverses that exact window and gives Nilah time to close distance.
Lane impact
Nilah's short range lets Yunara control early minions, but a pushed wave supplies Slipstream targets and reduces your retreat. Activating Cultivation of Spirit into Jubilant Veil spends your peak without damage. Waiting out the veil instead makes Arc of Judgment poke and following attacks much more effective.
How to play
Hold the wave at a distance where Slipstream does not lead directly onto you. Show a few attacks to draw Jubilant Veil, then retreat with Kanmei's Steps without committing Cultivation of Spirit. Once the veil ends, slow Nilah with Arc of Judgment and take a short exchange. During Apotheosis, leave the center instead of chasing.
Skill Matchups
4These matchups are above all duels of execution: both champions have credible ways to gain the upper hand. Dodging one key ability, anticipating an engage correctly, or a single positioning mistake can be enough to tip the duel one way or the other. Knowing the matchup and recognizing the right windows to act are especially important here.

Ezreal±0
Mystic Shot stops on the first target and reduces Ezreal's cooldowns when it lands, while Arcane Shift gives an instant reposition. Yunara can use minions as a screen and answer through Cultivation of Spirit bounces, but cannot easily extend while Ezreal holds his blink.
Ezreal build →
See details
The interaction that decides it
Ezreal can use Arcane Shift to dodge Yunara's Arc of Ruin, but must be careful of her high DPS once she activates Transcend One's Self.
Why
Mystic Shot stops on the first target and reduces Ezreal's cooldowns when it lands, while Arcane Shift gives an instant reposition. Yunara can use minions as a screen and answer through Cultivation of Spirit bounces, but cannot easily extend while Ezreal holds his blink.
Lane impact
Each Mystic Shot received accelerates Ezreal's next cycle and wears down your health; each projectile blocked by a minion lets you chase farming. Both champions can therefore follow their plan without exposing themselves. Priority mainly changes when Arcane Shift goes forward or Yunara wastes Kanmei's Steps.
How to play
Stay behind a minion to stop Mystic Shot and do not chase Arcane Shift. When Ezreal uses the blink offensively, slow him with Arc of Judgment and activate Cultivation of Spirit for one short exchange. Keep Kanmei's Steps to change angle against Essence Flux and return behind the wave before its detonation.

Kalista±0
This matchup is defined by how your zone control interacts with her constant movement. When you cast Arc of Judgment, Kalista can easily trigger Martial Poise to leap out of the projectile's trajectory. If she successfully dodges this slow, she will immediately retaliate with Pierce and stack multiple spears for a devastating Rend pull, turning your missed ability into a heavily one-sided trade.
Kalista build →
See details
The interaction that decides it
Kalista can use Martial Poise to hop out of Yunara's Arc of Judgment while stacking Rend spears for a quick trade.
Why
This matchup is defined by how your zone control interacts with her constant movement. When you cast Arc of Judgment, Kalista can easily trigger Martial Poise to leap out of the projectile's trajectory. If she successfully dodges this slow, she will immediately retaliate with Pierce and stack multiple spears for a devastating Rend pull, turning your missed ability into a heavily one-sided trade.
Lane impact
Missed skillshots immediately shift wave control. If Kalista evades Arc of Judgment, she will aggressively push you off the minion wave using the threat of Rend. However, if she missteps or uses Rend prematurely to secure a minion, her trading power drops drastically. This creates a volatile lane where priority swings rapidly based on who mistimes their primary utility window.
How to play
Do not throw Arc of Judgment blindly when Kalista has free space to leap. Instead, wait for her to lock herself into an auto-attack animation, or force her to move predictably near terrain. If she activates Fate's Call, use Kanmei's Steps to gain distance before the knock-up lands. Once she wastes Rend, immediately activate Transcend One's Self and Cultivation of Spirit to punish her during her weakest window.

Jhin±0
This matchup is defined by the high-stakes dance between Jhin's long-range Deadly Flourish and your Kanmei's Steps. Because Jhin's root is highly predictable, he cannot reliably lock you down unless he first forces you to expend your mobility. If you prematurely use your movement speed buff or the dash from Untouchable Shadow during Transcend One's Self, you become an easy target for his follow-up.
Jhin build →
See details
The interaction that decides it
Jhin must bait out Kanmei's Steps before attempting to root her with Deadly Flourish.
Why
This matchup is defined by the high-stakes dance between Jhin's long-range Deadly Flourish and your Kanmei's Steps. Because Jhin's root is highly predictable, he cannot reliably lock you down unless he first forces you to expend your mobility. If you prematurely use your movement speed buff or the dash from Untouchable Shadow during Transcend One's Self, you become an easy target for his follow-up.
Lane impact
During the laning phase, wave pressure shifts rapidly based on these cooldowns. When Jhin misses Deadly Flourish, his threat drops dramatically, allowing you to activate Cultivation of Spirit to shove the minion wave or force short trades without fear of retaliation. However, if he successfully baits your escape, he can easily setup Captive Audience traps or zone you away from the wave with the threat of Curtain Call.
How to play
Your golden rule is to never use Kanmei's Steps aggressively unless Jhin's Deadly Flourish is on cooldown. When Jhin prepares his fourth shot of Whisper, expect him to follow up immediately with his root. Save your movement speed to dodge laterally, or use the dash of Untouchable Shadow once you enter Transcend One's Self to completely break his line of sight. If you are hit, immediately retreat using Arc of Judgment to slow his advance.
Other matchups

Favorable
18These champions generally struggle to answer your main strengths, which lets you approach the matchup with more freedom. You often have several ways to pressure them and force trades that go in your favor. Use this advantage to dictate the pace rather than giving them time to get back into a comfortable position.

Ashe−1
Frost Shot and Volley slow Yunara, but Ashe must maintain attacks to convert that control. Kanmei's Steps restores movement speed, while Cultivation of Spirit strengthens a longer attack sequence. Yunara can win the extended exchange when she avoids Enchanted Crystal Arrow's opening and does not begin already slowed.
Ashe build →
See details
The interaction that decides it
Yunara's Kanmei's Steps allows her to dodge Volley and close the distance to unleash her high-damage Cultivation of Spirit.
Why
Frost Shot and Volley slow Yunara, but Ashe must maintain attacks to convert that control. Kanmei's Steps restores movement speed, while Cultivation of Spirit strengthens a longer attack sequence. Yunara can win the extended exchange when she avoids Enchanted Crystal Arrow's opening and does not begin already slowed.
Lane impact
Volley can briefly close wave access without removing your damage once distance is restored. Ashe gains the edge when slows turn a last hit into a chase; Yunara gains it when Volley misses and Cultivation of Spirit bounces push several targets before the ability returns.
How to play
Change angle to avoid Volley and keep Kanmei's Steps to leave a Frost Shot chase. After the volley, activate Cultivation of Spirit and take a few attacks while preserving a retreat path. Against Enchanted Crystal Arrow, rely first on positioning and minions; Untouchable Shadow only becomes a dash during Trance.

Varus±0
Varus prepares Piercing Arrow from range and uses Blighted Quiver to add stacks consumed by his abilities. His poke is strong but telegraphed, while Kanmei's Steps lets Yunara change angle and Cultivation of Spirit builds sustained damage. If the arrow misses, Varus has no movement ability to refuse the answer.
Varus build →
See details
The interaction that decides it
Varus must bait out Yunara's Kanmei's Steps before committing his Chain of Corruption, as her mobility can easily dodge his ultimate.
Why
Varus prepares Piercing Arrow from range and uses Blighted Quiver to add stacks consumed by his abilities. His poke is strong but telegraphed, while Kanmei's Steps lets Yunara change angle and Cultivation of Spirit builds sustained damage. If the arrow misses, Varus has no movement ability to refuse the answer.
Lane impact
Standing on the minion line offers charged arrows and can lower your health before sustained damage matters. By changing side regularly, you preserve farm and force Varus to spend Hail of Arrows on the wave. After those spells, his rotations slow down and Yunara can push through her bounces.
How to play
Move while Piercing Arrow charges and leave Hail of Arrows without finishing a trade inside it. Once the arrow is released, slow Varus with Arc of Judgment and activate Cultivation of Spirit for a few attacks. Keep Kanmei's Steps available while Chain of Corruption remains unused, because the root can still break your pursuit.

Sivir−1
Sivir invests Ricochet and Boomerang Blade into pushing, while Yunara answers with Cultivation of Spirit bounces. Spell Shield blocks one ability but does not stop your attacks. Yunara therefore keeps her sustained-damage plan when she does not donate Arc of Judgment into the shield.
Sivir build →
See details
The interaction that decides it
Sivir must save Spell Shield to block Yunara's Arc of Judgment poke or her ultimate Transcend One's Self during all-ins.
Why
Sivir invests Ricochet and Boomerang Blade into pushing, while Yunara answers with Cultivation of Spirit bounces. Spell Shield blocks one ability but does not stop your attacks. Yunara therefore keeps her sustained-damage plan when she does not donate Arc of Judgment into the shield.
Lane impact
Both champions clear quickly, but Sivir threatens through stacked waves more than an immediate all-in. An absorbed Arc of Judgment heals her and triggers Fleet of Foot, restoring priority. By holding that spell, you can match the wave without feeding her sustain.
How to play
Use Cultivation of Spirit on the wave and wait for Spell Shield to end before Arc of Judgment. When Sivir throws Boomerang Blade, move off its return path and resume attacks. Do not chase On the Hunt; activate Kanmei's Steps to maintain distance, clear the next wave, and make her restart the push.

Senna−2
Senna's attacks are slow but gain range and damage through Mist. Yunara can exploit that cadence by activating Cultivation of Spirit and landing several attacks before the next one. Piercing Darkness heals along its line, so scattered poke is repaired while one concentrated short trade limits Senna's recovery time.
Senna build →
See details
The interaction that decides it
Yunara's high mobility from Kanmei's Steps allows her to dodge Last Embrace and close the gap to burst Senna down.
Why
Senna's attacks are slow but gain range and damage through Mist. Yunara can exploit that cadence by activating Cultivation of Spirit and landing several attacks before the next one. Piercing Darkness heals along its line, so scattered poke is repaired while one concentrated short trade limits Senna's recovery time.
Lane impact
Each uncontested soul improves Senna's future range, but collecting it requires a visible path. Yunara can place Arc of Judgment on that step and keep wave pressure through bounces. If Last Embrace lands, its delayed root also catches nearby targets and immediately reverses that initiative.
How to play
Punish a soul collection with Arc of Judgment and a few Cultivation of Spirit attacks without chasing into Curse of the Black Mist. Keep a minion between Last Embrace and you, and avoid lining up with your ally for Piercing Darkness. If the root misses, reclaim the wave before Senna extends her range further.

Kog'Maw−1
Kog'Maw has no movement ability, while Kanmei's Steps gives speed and Untouchable Shadow becomes a dash during Trance. Bio-Arcane Barrage temporarily increases his range and damage, but Yunara can leave that window and return with Cultivation of Spirit. Her mobility decides when the damage race actually happens.
Kog'Maw build →
See details
The interaction that decides it
Yunara's Kanmei's Steps / Untouchable Shadow allows her to reposition and dodge Kog'Maw's Void Ooze or Living Artillery while trading.
Why
Kog'Maw has no movement ability, while Kanmei's Steps gives speed and Untouchable Shadow becomes a dash during Trance. Bio-Arcane Barrage temporarily increases his range and damage, but Yunara can leave that window and return with Cultivation of Spirit. Her mobility decides when the damage race actually happens.
Lane impact
During Bio-Arcane Barrage, Kog'Maw can contest the wave from increased range; after it ends, he cannot quickly leave Arc of Judgment or change angle. Yunara can then push, force him to last-hit under pressure, and move first toward a rotation without sacrificing her own resources.
How to play
Retreat when Bio-Arcane Barrage activates, then return after the bonus range ends. Slow Kog'Maw with Arc of Judgment and activate Cultivation of Spirit while keeping Kanmei's Steps to leave Void Ooze. During Trance, use Untouchable Shadow to reposition without crossing Living Artillery zones unnecessarily.

Akshan−1
Akshan relies on finding aggressive angles with Heroic Swing, but you completely deny these skirmishes. Activating Cultivation of Spirit inflicts overwhelming mixed damage that bypasses his Dirty Fighting shield, while the mobility from Kanmei's Steps allows you to disengage or reposition instantly if he attempts to swing in. This interaction neutralizes his early kill pressure, leaving him unable to force favorable trades on his own.
Akshan build →
See details
The interaction that decides it
Yunara's high mixed damage from Cultivation of Spirit and safety from Kanmei's Steps makes it difficult for Akshan to find clean all-in angles without support setup.
Why
Akshan relies on finding aggressive angles with Heroic Swing, but you completely deny these skirmishes. Activating Cultivation of Spirit inflicts overwhelming mixed damage that bypasses his Dirty Fighting shield, while the mobility from Kanmei's Steps allows you to disengage or reposition instantly if he attempts to swing in. This interaction neutralizes his early kill pressure, leaving him unable to force favorable trades on his own.
Lane impact
Because Akshan cannot safely engage, you dictate the lane's pace through superior wave management. You can easily slow-push waves to force him under his turret, where Avengerang is less effective at trading. Shoving him in prevents him from roaming with Going Rogue, locking him in lane while you secure comfortable recall timings and chip away at his tower plates without fearing a sudden retaliatory engage.
How to play
Keep the minion wave on your side of the lane early on, and never waste Kanmei's Steps unless Akshan has already missed or used Heroic Swing. If he tries to trade, activate Cultivation of Spirit to retaliate with bouncing attacks while backing away. Should you misposition and get caught by his Comeuppance, quickly trigger Transcend One's Self to gain the enhanced dash from Untouchable Shadow to break his line of sight behind the nearest wall.

Draven−1
Yunara dictates this matchup through the sheer power of Transcend One's Self. When she activates her trance, her enhanced mobility and damage override Draven's early strength from Spinning Axe. Draven's sole defensive tool to halt your aggressive forward momentum is Stand Aside. If your ultimate is on cooldown, his Blood Rush allows him to run you down easily.
Draven build →
See details
The interaction that decides it
Draven must trade when Yunara's Transcend One's Self is down, using Stand Aside to interrupt her aggressive advances.
Why
Yunara dictates this matchup through the sheer power of Transcend One's Self. When she activates her trance, her enhanced mobility and damage override Draven's early strength from Spinning Axe. Draven's sole defensive tool to halt your aggressive forward momentum is Stand Aside. If your ultimate is on cooldown, his Blood Rush allows him to run you down easily.
Lane impact
The lane revolves entirely around Draven's pressure versus your ultimate window. You can easily manipulate the wave by using Cultivation of Spirit to bounce damage onto him while he predictably moves to catch his Spinning Axe. Without Stand Aside available, Draven is forced to play defensively, neutralizing his passive, League of Draven.
How to play
Constantly track his axe dropping zones. Cast Arc of Judgment directly on his landing indicators to punish his movement. Never activate Transcend One's Self blindly; instead, bait his Stand Aside by walking forward, then use the dash from Untouchable Shadow to dodge his displacement sideways. If he interrupts your advance, disengage using the movement speed from Kanmei's Steps.

Corki−1
Yunara naturally out-scales Corki as the game goes on, turning her critical strikes into massive hybrid damage through Vow of the First Lands. While Corki relies on the periodic threat of Special Delivery to force fights, Yunara possesses the perfect tools to neutralize this power play. By activating Kanmei's Steps or entering her Transcend One's Self state, she gains the sudden mobility needed to instantly escape his devastating burn zone.
Corki build →
See details
The interaction that decides it
Yunara's Kanmei's Steps and Transcend One's Self allow her to easily reposition out of Corki's Special Delivery burn zone while out-scaling him.
Why
Yunara naturally out-scales Corki as the game goes on, turning her critical strikes into massive hybrid damage through Vow of the First Lands. While Corki relies on the periodic threat of Special Delivery to force fights, Yunara possesses the perfect tools to neutralize this power play. By activating Kanmei's Steps or entering her Transcend One's Self state, she gains the sudden mobility needed to instantly escape his devastating burn zone.
Lane impact
In the early lane, Corki will try to poke you down with Phosphorus Bomb and Missile Barrage to prepare for his package delivery. However, because you can safely disengage from his Special Delivery, he cannot easily force you out of lane or dive your turret. This safety allows you to farm peacefully, safely scaling past his mid-game spike until your Cultivation of Spirit completely overwhelms his sustained damage output.
How to play
Keep a constant eye on the map for when Corki acquires Hextech Munitions. When he flies in with Special Delivery, do not panic; immediately activate Kanmei's Steps to run out of the fire, or use Transcend One's Self if you need the instant dash to escape the knockback. Once his package is wasted, immediately turn the fight with Cultivation of Spirit. If you get caught without your mobility, use Arc of Judgment to slow his approach.

Jinx−1
Yunara dominates this matchup because Jinx is forced into her mana-draining Fishbones form via Switcheroo! to match your basic attack range and Cultivation of Spirit pressure. When Jinx tries to farm or trade back, she relies heavily on Flame Chompers to keep you at bay. Once she wastes those traps to stop your Kanmei's Steps, she has no reliable tools to prevent you from running her down.
Jinx build →
See details
The interaction that decides it
Jinx must use Fishbones rockets to match Yunara's poke while saving Flame Chompers to zone her when she advances with Kanmei's Steps.
Why
Yunara dominates this matchup because Jinx is forced into her mana-draining Fishbones form via Switcheroo! to match your basic attack range and Cultivation of Spirit pressure. When Jinx tries to farm or trade back, she relies heavily on Flame Chompers to keep you at bay. Once she wastes those traps to stop your Kanmei's Steps, she has no reliable tools to prevent you from running her down.
Lane impact
Jinx's constant rocket usage quickly depletes her mana pool, rendering her unable to contest your wave clear once Cultivation of Spirit is active. When she misses Flame Chompers, her safety net vanishes, allowing you to crash massive waves and poke her freely under her own turret. This constant pressure limits her ability to safely farm and delays her scaling, giving your team priority.
How to play
Actively bait her traps by walking forward diagonally using the extra movement speed from Kanmei's Steps, then quickly step aside. The moment her Flame Chompers hit the floor and miss, immediately activate Transcend One's Self to transform your mobility into Untouchable Shadow. Slide past her minion wave, activate Cultivation of Spirit to benefit from Vow of the First Lands bonus magic damage, and force an extended trade.

Kai'Sa−1
Yunara dictates the distance in this matchup. By using Arc of Judgment, you can consistently slow and damage Kai'Sa from afar. This long-range deterrence prevents her from walking forward to isolate you for a full Icathian Rain burst. Since Kai'Sa relies on getting close to stack Second Skin, your superior reach and slow negate her trading pattern entirely before she can even activate Supercharge to close the gap.
Kai'Sa build →
See details
The interaction that decides it
Yunara's Arc of Judgment keeps Kai'Sa at bay, preventing her from stepping up to land isolated Icathian Rain missiles.
Why
Yunara dictates the distance in this matchup. By using Arc of Judgment, you can consistently slow and damage Kai'Sa from afar. This long-range deterrence prevents her from walking forward to isolate you for a full Icathian Rain burst. Since Kai'Sa relies on getting close to stack Second Skin, your superior reach and slow negate her trading pattern entirely before she can even activate Supercharge to close the gap.
Lane impact
This range advantage allows you to constantly push the wave using Cultivation of Spirit. Kai'Sa is forced to waste Icathian Rain on clearing minions under her turret rather than trading with you. You will easily secure early health advantages, forcing her to recall prematurely or lose gold. This constant pressure limits her ability to follow up with Killer Instinct, keeping her trapped defensively in her own lane.
How to play
Position yourself constantly behind your own minion wave. This ensures that even if Kai'Sa tries to bypass your Arc of Judgment, any stray Icathian Rain missiles are split among your minions, neutralizing her burst. Keep Arc of Judgment ready for when she attempts to approach with Supercharge. If she uses Killer Instinct to dive you, immediately cast Transcend One's Self combined with Kanmei's Steps to reposition and turn the fight with your empowered attacks.

Samira−1
Yunara dictates this matchup entirely through the threat of Arc of Judgment. Samira is forced to hold her Blade Whirl specifically to intercept this projectile; if she fails to block it, the slow enables you to safely unleash Cultivation of Spirit from maximum range. Without her defensive circle, Samira cannot close the gap or stack Daredevil Impulse without absorbing devastating mixed damage.
Samira build →
See details
The interaction that decides it
Samira must save Blade Whirl to block Yunara's Arc of Judgment projectile, preventing her from establishing her enhanced auto-attack state.
Why
Yunara dictates this matchup entirely through the threat of Arc of Judgment. Samira is forced to hold her Blade Whirl specifically to intercept this projectile; if she fails to block it, the slow enables you to safely unleash Cultivation of Spirit from maximum range. Without her defensive circle, Samira cannot close the gap or stack Daredevil Impulse without absorbing devastating mixed damage.
Lane impact
This dynamic cripples Samira's ability to contest the wave early. Because she must respect your range, she cannot safely use Wild Rush to engage without her defensive windwall ready. You can constantly shove her under turret, chipping away at her health bar while she struggles to farm. This pressure denies her the early kills she desperately needs to snowball her Inferno Trigger.
How to play
To exploit this, throw Arc of Judgment from a safe distance to bait out Blade Whirl. The moment you see her spin disappear, immediately activate Cultivation of Spirit and punish her during her long defensive window. If she attempts to counter-engage with Wild Rush, use the movement speed from Kanmei's Steps to disengage and maintain your spacing. Keep her at your maximum attack range where her short-range blades cannot touch you.

Miss Fortune−1
This lane favors Yunara because her mobility directly nullifies Miss Fortune's setup. Miss Fortune relies on slowing you with Make It Rain to secure her poke, but Yunara can immediately escape the zone using Kanmei's Steps or the dash of Untouchable Shadow under Transcend One's Self. By dodging this initial slow, you deny her the setup needed to land a fatal Double Up bounce or lock you down for Bullet Time.
Miss Fortune build →
See details
The interaction that decides it
Yunara can use Kanmei's Steps / Untouchable Shadow to quickly reposition out of Make It Rain and avoid Miss Fortune's follow-up poke.
Why
This lane favors Yunara because her mobility directly nullifies Miss Fortune's setup. Miss Fortune relies on slowing you with Make It Rain to secure her poke, but Yunara can immediately escape the zone using Kanmei's Steps or the dash of Untouchable Shadow under Transcend One's Self. By dodging this initial slow, you deny her the setup needed to land a fatal Double Up bounce or lock you down for Bullet Time.
Lane impact
Since Miss Fortune cannot easily zone you, she quickly loses control over the minion wave's tempo. You can easily match her wave clear by activating Cultivation of Spirit to bounce attacks through her minions. Because her trade potential is neutralized once she wastes Make It Rain, you gain complete priority in the lane, forcing her to farm under her turret while you chip away at its plates.
How to play
Never use Kanmei's Steps proactively for simple movement; save this speed boost exclusively to react when Miss Fortune casts Make It Rain. Once you safely exit her slow zone, immediately activate Cultivation of Spirit and retaliate while her skills are on cooldown. If she attempts to channel Bullet Time, use the dash of Untouchable Shadow to escape the firing cone diagonally, then turn back with Arc of Judgment to secure the kill.

Tristana−1
Tristana relies on jumping in with Rocket Jump and quickly stacking Explosive Charge with Rapid Fire. Yunara completely counters this burst pattern because Kanmei's Steps gives her the speed to run out of auto-attack range, while her empowered Untouchable Shadow allows her to dash away instantly. Without her max-stacked bomb, Tristana loses her reset and her main source of early burst, leaving her vulnerable to Yunara's hybrid DPS.
Tristana build →
See details
The interaction that decides it
Tristana's Rocket Jump all-in can be neutralized if Yunara uses Kanmei's Steps to reposition or Untouchable Shadow to dodge the Explosive Charge stack accumulation.
Why
Tristana relies on jumping in with Rocket Jump and quickly stacking Explosive Charge with Rapid Fire. Yunara completely counters this burst pattern because Kanmei's Steps gives her the speed to run out of auto-attack range, while her empowered Untouchable Shadow allows her to dash away instantly. Without her max-stacked bomb, Tristana loses her reset and her main source of early burst, leaving her vulnerable to Yunara's hybrid DPS.
Lane impact
This dynamic prevents Tristana from playing aggressively or forcing you off waves. Because she cannot easily detonate Explosive Charge on you, her threat of an all-in dive is non-existent. You can safely match her push using Cultivation of Spirit to bounce attacks through her minions, slowly chipping at her health and forcing her to use Buster Shot defensively rather than as a displacement tool.
How to play
Never initiate trades with your mobility tools. Keep Kanmei's Steps ready specifically for when Tristana leaps. The moment you see her mid-air in Rocket Jump, activate it to break her auto-attack leash. If you have activated Transcend One's Self, use the direct dash of Untouchable Shadow to instantly dodge the fourth stack of Explosive Charge. Once her bomb fizzles, activate Cultivation of Spirit to relentlessly run her down while her jump is on cooldown.

Caitlyn−1
Yunara naturally commands this matchup by neutralizing Caitlyn's superior range. While Caitlyn attempts to chip away at your health bar using Piltover Peacemaker and passive Headshot procs, your ultimate capacity completely alters the dynamic. Once you trigger Transcend One's Self, the threat of your mobility under Untouchable Shadow forces Caitlyn to hold her 90 Caliber Net defensively, neutralizing her offensive pressure and allowing you to overwhelm her with Cultivation of Spirit.
Caitlyn build →
See details
The interaction that decides it
Caitlyn must use her range to poke Yunara before she can activate Transcend One's Self, using 90 Caliber Net to disengage if Yunara dashes forward with Kanmei's Steps.
Why
Yunara naturally commands this matchup by neutralizing Caitlyn's superior range. While Caitlyn attempts to chip away at your health bar using Piltover Peacemaker and passive Headshot procs, your ultimate capacity completely alters the dynamic. Once you trigger Transcend One's Self, the threat of your mobility under Untouchable Shadow forces Caitlyn to hold her 90 Caliber Net defensively, neutralizing her offensive pressure and allowing you to overwhelm her with Cultivation of Spirit.
Lane impact
Before unlocking your ultimate, you must endure Caitlyn's oppressive lane-shoving power. Caitlyn will use Piltover Peacemaker to push waves and set Yordle Snap Trap under your tower to restrict your movement. However, this oppressive setup completely evaporates the moment you unlock Transcend One's Self. With your power active, you can easily match her push with Cultivation of Spirit, turning the lane into an active threat zone where Caitlyn must constantly respect your all-in potential.
How to play
To secure your advantage, minimize unnecessary damage early by using minions to block Piltover Peacemaker and staying clear of her Headshot range. Do not initiate with Kanmei's Steps while her 90 Caliber Net is available. Instead, poke safely with Arc of Judgment and bait her escape tool. The second she wastes her net, immediately activate Transcend One's Self, gap-close using Untouchable Shadow, and commit to the kill before she can retreat to safety.

Zeri−1
Yunara dominates this matchup because her hybrid damage from Vow of the First Lands bypasses Zeri's basic armor, while Cultivation of Spirit provides superior raw DPS compared to Burst Fire. Zeri relies on landing linear skillshots and maintaining distance. However, once Yunara unleashes Transcend One's Self, her access to Untouchable Shadow completely breaks Zeri's kiting rhythm, allowing Yunara to dictate the pace of every duel.
Zeri build →
See details
The interaction that decides it
Yunara can use her enhanced E (Untouchable Shadow) dash during her R (Transcend One's Self) to dodge Zeri's W (Ultrashock Laser) or close the gap when Zeri attempts to escape with E (Spark Surge).
Why
Yunara dominates this matchup because her hybrid damage from Vow of the First Lands bypasses Zeri's basic armor, while Cultivation of Spirit provides superior raw DPS compared to Burst Fire. Zeri relies on landing linear skillshots and maintaining distance. However, once Yunara unleashes Transcend One's Self, her access to Untouchable Shadow completely breaks Zeri's kiting rhythm, allowing Yunara to dictate the pace of every duel.
Lane impact
In lane, Zeri struggles to find safe angles because you can easily hide behind minions to block Burst Fire. Your Cultivation of Spirit allows you to push waves faster, forcing Zeri to use Spark Surge defensively to collect farm under turret. When she tries to fish for slows with Ultrashock Laser from behind walls, your pressure remains constant, denying her the space needed to stack Lightning Crash.
How to play
To secure kills, save Transcend One's Self until Zeri commits to a trade. The moment she fires Ultrashock Laser, react instantly with your enhanced E, Untouchable Shadow, to dash diagonally, completely negating the slow. If she tries to slide over a wall with Spark Surge to escape, use that same Untouchable Shadow dash to cut her off, keeping her within range of your Cultivation of Spirit attacks and shutting down her escape.

Twitch−2
Twitch relies on the linear, predictable bolts of Spray and Pray to shred teams. However, Yunara completely nullifies this threat. With Kanmei's Steps, she gains the burst of movement speed needed to effortlessly sidestep his ultimate's piercing line. While Twitch is locked into firing straight, Yunara's Vow of the First Lands allows her to retaliate with hybrid critical damage that bypasses his armor, winning the DPS race.
Twitch build →
See details
The interaction that decides it
Yunara can use Kanmei's Steps to dodge the piercing line of Twitch's Spray and Pray while returning high mixed damage.
Why
Twitch relies on the linear, predictable bolts of Spray and Pray to shred teams. However, Yunara completely nullifies this threat. With Kanmei's Steps, she gains the burst of movement speed needed to effortlessly sidestep his ultimate's piercing line. While Twitch is locked into firing straight, Yunara's Vow of the First Lands allows her to retaliate with hybrid critical damage that bypasses his armor, winning the DPS race.
Lane impact
Because you can outmaneuver his ultimate, Twitch cannot safely walk up to contest waves once both of you reach level five. You can aggressively push him under tower using Cultivation of Spirit to bounce attacks through his wave. This forced defense prevents him from entering stealth with Ambush to roam, locking him in lane while you secure early turret plates and force him into awkward recall timings.
How to play
Always hold Kanmei's Steps specifically for the moment Twitch activates Spray and Pray after exiting Ambush. When he opens fire, immediately activate the speed boost to run laterally, breaking his straight-line trajectory. If you get caught in his Venom Cask slow first, immediately activate Transcend One's Self to transform your mobility into a fast dash, allowing you to reposition instantly and burst him down before Contaminate can reach max stacks.

Vayne−1
Yunara dominates this matchup by leveraging her superior range to force Vayne into defensive reactions. Your primary tool is Arc of Judgment, which Vayne is constantly pressured to dodge using Tumble. Because she must burn her main mobility tool just to avoid being poked down, she cannot safely trade back. If you escalate the fight with Transcend One's Self, Vayne is forced to waste Condemn simply to push you away and escape.
Vayne build →
See details
The interaction that decides it
Vayne must use Tumble to dodge Yunara's Arc of Judgment poke while using Condemn to disengage if Yunara activates Transcend One's Self.
Why
Yunara dominates this matchup by leveraging her superior range to force Vayne into defensive reactions. Your primary tool is Arc of Judgment, which Vayne is constantly pressured to dodge using Tumble. Because she must burn her main mobility tool just to avoid being poked down, she cannot safely trade back. If you escalate the fight with Transcend One's Self, Vayne is forced to waste Condemn simply to push you away and escape.
Lane impact
This dynamic restricts Vayne to a highly passive lane. Because she must respect the threat of Arc of Judgment, she cannot safely contest the minion waves, allowing you to establish priority and chip away at her health. If she misuses Tumble offensively, you can immediately pressure her under her own turret. Her health pool will consistently remain too low to set up effective ganks or contest early neutral objectives.
How to play
Fish for Arc of Judgment hits when Vayne steps up to last-hit. The moment you see her burn Tumble sideways or forward, immediately activate Cultivation of Spirit to punish her with rapid, bouncing attacks. If she tries to fight back, trigger Transcend One's Self to bait out her Condemn. Once her knockback is gone, use Untouchable Shadow to close the gap and secure the kill before her cooldowns return.

Xayah−1
Yunara dictates the pace of this matchup because her Kanmei's Steps / Untouchable Shadow completely invalidates Xayah's primary threat, Bladecaller. Whenever Xayah lays down feathers with Clean Cuts or Double Daggers, she relies on a predictable return angle to root you. By holding your mobility tool, you force her to hold her recall, rendering her burst potential inert while you out-DPS her with Cultivation of Spirit.
Xayah build →
See details
The interaction that decides it
Yunara can easily reposition away from Xayah's E (Bladecaller) recall using E (Kanmei's Steps / Untouchable Shadow), forcing Xayah to hold her feathers until Yunara commits her dash.
Why
Yunara dictates the pace of this matchup because her Kanmei's Steps / Untouchable Shadow completely invalidates Xayah's primary threat, Bladecaller. Whenever Xayah lays down feathers with Clean Cuts or Double Daggers, she relies on a predictable return angle to root you. By holding your mobility tool, you force her to hold her recall, rendering her burst potential inert while you out-DPS her with Cultivation of Spirit.
Lane impact
Because Xayah cannot reliably hit her root, she loses the confidence to contest waves with Deadly Plumage. This allows you to constantly shove her under turret. You can safely poke her with Arc of Judgment / Arc of Ruin while she struggles to farm under pressure. If she attempts to retaliate with Featherstorm, she merely delays her defeat, as you can easily chase her down once she lands.
How to play
Position diagonally from the minion wave to force Xayah to choose between clearing minions or aiming Clean Cuts at you. Never initiate trades with Kanmei's Steps / Untouchable Shadow; instead, walk up with Cultivation of Spirit active. The moment she casts Double Daggers and attempts to recall the feathers, activate your dash laterally to escape the pull trajectory, then activate Transcend One's Self to completely overwhelm her during her long cooldown window.
Items to Counter Yunara
Buy these items to reduce this champion's effectiveness in your games.




| Matchup | Verdict | Edge | Win rate | Pick rate |
|---|---|---|---|---|
| Smolder | Skill Matchups | ±0 | 52.6% | 8.0% |
| Varus | Favorable | ±0 | 51.3% | 5.8% |
| Kalista | Skill Matchups | ±0 | 50.9% | 5.8% |
| Ezreal | Skill Matchups | ±0 | 49.7% | 7.4% |
| Jhin | Skill Matchups | ±0 | 49.5% | 18.8% |
| Lucian | Hard Counters | ±0 | 47.4% | 3.2% |
| Ashe | Favorable | −1 | 53.2% | 8.6% |
| Kog'Maw | Favorable | −1 | 52.3% | 2.5% |
| Samira | Favorable | −1 | 51.1% | 10.9% |
| Jinx | Favorable | −1 | 50.8% | 13.2% |
| Xayah | Favorable | −1 | 50.4% | 5.0% |
| Kai'Sa | Favorable | −1 | 50.1% | 16.4% |
| Zeri | Favorable | −1 | 49.9% | 1.3% |
| Caitlyn | Favorable | −1 | 49.7% | 16.4% |
| Tristana | Favorable | −1 | 49.0% | 11.2% |
| Sivir | Favorable | −1 | 48.9% | 3.3% |
| Vayne | Favorable | −1 | 48.9% | 6.3% |
| Miss Fortune | Favorable | −1 | 48.7% | 12.3% |
| Draven | Favorable | −1 | 46.8% | 5.2% |
| Akshan | Favorable | −1 | — | — |
| Corki | Favorable | −1 | — | — |
| Nilah | Unfavorable | −1 | — | — |
| Senna | Favorable | −2 | 51.0% | 1.5% |
| Twitch | Favorable | −2 | 49.9% | 10.5% |
Edge: Wild Rift Core canonical verdict (−3 to +3), shown from the point of view of the champion named in the row. Win rate and pick rate: the opponent's own rate in this role — Wild Rift CN · Challenger, Patch 7.3b. Not a head-to-head win rate.