












A
2026年9月 · Patch 7.2d
Assassin · JUNGLE

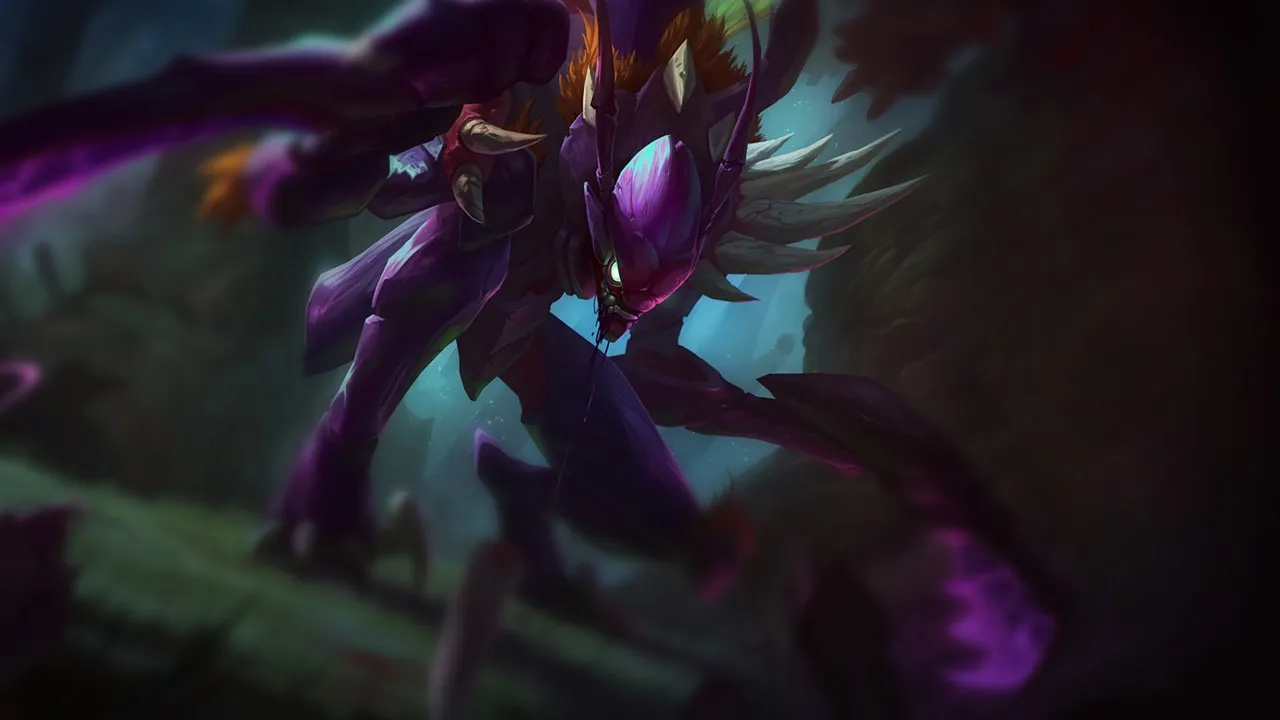
Kha'Zix Wild Rift カウンターガイド

Kha'Zixは、決して孤立しないターゲットや、高密度のpeel構成に対して有効性を失います。CCステルス検知を持つチャンピオンは、彼が攻撃する前に無力化します。visionコントロールと集団でのプレイは彼の最大の天敵です。

★ JUNGLE Tier A
ダメージ
UTIL
TANK
DIFF
Win 50.0% #34 · ↑4pt
Pick 4.9% #14
Ban 0.2% #123

Kha'Zix Wild Rift カウンターガイド ★ カウンターシート

マッチアップ一覧
マッチアップ 判定 有利度 勝率 ピック率
Rammus ハードカウンター +2 54.7% 4.3%
Warwick ハードカウンター +2 52.6% 2.7%
Poppy ハードカウンター +2
Olaf 不利なマッチアップ +1 52.5% 2.4%
Vi 不利なマッチアップ +1 51.9% 9.3%
Pantheon 不利なマッチアップ +1 51.7% 5.5%
Xin Zhao 不利なマッチアップ +1 50.7% 9.5%
Skarner 不利なマッチアップ +1 50.6% 1.1%
Wukong 不利なマッチアップ +1 50.3% 3.7%
Ambessa 不利なマッチアップ +1 50.3% 1.2%
Nocturne 不利なマッチアップ +1 50.3% 5.5%
Volibear 不利なマッチアップ +1 49.9% 3.3%
Riven 不利なマッチアップ +1 48.8% 1.2%
Dr. Mundo 不利なマッチアップ +1 48.6% 1.1%
Jax 不利なマッチアップ +1 48.4% 2.1%
Cho'Gath 不利なマッチアップ +1 47.6% 5.4%
Maokai 不利なマッチアップ +1
Mordekaiser 不利なマッチアップ +1
Nautilus 不利なマッチアップ +1
Nilah 不利なマッチアップ +1
Nunu & Willump スキル次第のマッチアップ ±0 54.8% 1.9%
Jarvan IV スキル次第のマッチアップ ±0 52.4% 8.5%
Diana スキル次第のマッチアップ ±0 52.1% 2.9%
Ekko スキル次第のマッチアップ ±0 51.6% 4.3%
Tryndamere スキル次第のマッチアップ ±0 50.6% 6.8%
Nidalee スキル次第のマッチアップ ±0 50.2% 2.4%
Hecarim スキル次第のマッチアップ ±0 49.2% 2.6%
Graves スキル次第のマッチアップ ±0 48.3% 7.6%
Rengar スキル次第のマッチアップ ±0 47.8% 1.6%
Fizz スキル次第のマッチアップ ±0 47.4% 2.1%
Lee Sin スキル次第のマッチアップ ±0 47.3% 12.0%
Camille スキル次第のマッチアップ ±0
Gragas スキル次第のマッチアップ ±0
Amumu 有利なマッチアップ −1 55.1% 3.3%
Lillia 有利なマッチアップ −1 51.9% 3.3%
Gwen 有利なマッチアップ −1 51.8% 1.9%
Darius 有利なマッチアップ −1 51.5% 8.1%
Shyvana 有利なマッチアップ −1 51.1% 7.0%
Fiddlesticks 有利なマッチアップ −1 50.8% 2.7%
Kayn 有利なマッチアップ −1 50.6% 9.2%
Kindred 有利なマッチアップ −1 49.8% 2.6%
Yone 有利なマッチアップ −1 49.1% 2.0%
Talon 有利なマッチアップ −1 49.1% 2.8%
Evelynn 有利なマッチアップ −1 48.6% 2.4%
Master Yi 有利なマッチアップ −1 48.0% 9.3%
Zed 有利なマッチアップ −1 47.6% 1.8%
Viego 有利なマッチアップ −1 46.0% 3.4%
Aatrox 有利なマッチアップ −1
Morgana 有利なマッチアップ −2
Twitch 有利なマッチアップ −2

Edge: Wild Rift Core canonical verdict (−3 to +3), shown from the point of view of the champion named in the row. Win rate and pick rate: the opponent's own rate in this role — Wild Rift CN · Challenger, Patch 7.2d. Not a head-to-head win rate.

ハードカウンター

3

これらのチャンピオンは、こちらのビルドやプレイスタイルを真正面から上回る構成を持ち、レーン戦のコントロールとファームを極めて難しくする。彼らのスキルはこちらの主要な強みを無効化し、いつも通りのプランを実行しようとした瞬間に手痛い反撃を受けさせてくる。こうしたマッチアップでは、ミスを最小限に抑え、正面からの対決以外で解決策を探すことが重要になる。

Rammus

Rammus+2

teamfightcounter pick Dueling Rammus is a death sentence because of how his kit counters your physical burst. The moment you initiate with Taste Their Fear, he activates Defensive Ball Curl, skyrocketing his armor and reflecting your damage back at you. If you try to flee, his Frenzying Taunt forces you to continuously strike his spiked shell, turning your own attack speed against you while you are completely locked down. Rammusのビルド → 詳細を見る
Rammus

理由

Dueling Rammus is a death sentence because of how his kit counters your physical burst. The moment you initiate with Taste Their Fear, he activates Defensive Ball Curl, skyrocketing his armor and reflecting your damage back at you. If you try to flee, his Frenzying Taunt forces you to continuously strike his spiked shell, turning your own attack speed against you while you are completely locked down.

レーン戦への影響

This matchup strips away your early invade threat and jungle dominance. You cannot safely contest objectives or scuttle crabs if Rammus rolls in with Powerball. Because you cannot duel him, your jungle clear becomes a game of avoidance. If he counter-ganks you, his Soaring Slam and crowd control will shut down your assassination attempts, leaving your laners vulnerable to his high-tempo ganks.

立ち回り方

Never engage Rammus directly. Instead, use Void Spike from a distance to scout bushes and slow his Powerball charge before he reaches your allies. Always save Leap to escape over walls when he commits his crowd control. In skirmishes, ignore him entirely and use Void Assault to slip into the backline, targeting isolated squishies who cannot withstand Taste Their Fear, rather than wasting your cooldowns on his armored shell.

チャンピオン詳細 → Rammusのビルド →
Poppy

Poppy+2

skirmishanti dash Your entire assassination and escape potential hinges on Leap, but Poppy's defensive barrier counters this movement directly. Attempting to jump near her triggers an instant knock-up and grounds you, preventing any quick disengagement. This mechanical lock leaves you highly vulnerable to her close-quarters damage, neutralizing the mobility advantage of Void Assault and making isolated targets near her impossible to execute safely. Poppyのビルド → 詳細を見る
Poppy

理由

Your entire assassination and escape potential hinges on Leap, but Poppy's defensive barrier counters this movement directly. Attempting to jump near her triggers an instant knock-up and grounds you, preventing any quick disengagement. This mechanical lock leaves you highly vulnerable to her close-quarters damage, neutralizing the mobility advantage of Void Assault and making isolated targets near her impossible to execute safely.

レーン戦への影響

In the jungle, this interaction completely strips away your early invades and skirmishing confidence. You cannot safely contest Scuttle Crabs or secure objectives because Poppy can zone you out simply by holding her barrier. If you get caught in the river, you cannot jump away over walls, forcing you to take unfavorable duels where Taste Their Fear is minimized by her high innate tankiness.

立ち回り方

Never initiate a fight with Leap. Instead, approach on foot using the stealth of Void Assault to apply Unseen Threat and bait out her defensive barrier first. Poke from a distance with Void Spike to slow her down. If she activates her barrier, walk away and wait for it to expire before committing your damage. Only use your jump to clean up fights once her blocking tool is definitely on cooldown.

チャンピオン詳細 → Poppyのビルド →
Warwick

Warwick+2

duelingsustain Attempting to burst Warwick is highly ineffective because Primal Howl grants him massive damage reduction that completely blunts your Taste Their Fear. Even if you catch him isolated, his low-health healing from Eternal Hunger combined with the immediate life steal of Jaws of the Beast outpaces your execute threshold, turning what looked like a clean assassination into a losing battle of attrition. Warwickのビルド → 詳細を見る
Warwick

理由

Attempting to burst Warwick is highly ineffective because Primal Howl grants him massive damage reduction that completely blunts your Taste Their Fear. Even if you catch him isolated, his low-health healing from Eternal Hunger combined with the immediate life steal of Jaws of the Beast outpaces your execute threshold, turning what looked like a clean assassination into a losing battle of attrition.

レーン戦への影響

This dynamic locks you out of invading his jungle, as Blood Hunt alerts him to your low health, enabling him to hunt you down with superior movement speed. You cannot contest early neutral camps directly. Meeting him in the river usually forces you into a panic Leap, draining your mana and giving him free rein to pressure your lanes while you recover.

立ち回り方

Prioritize evolving Void Spike to safely poke him and slow his advances from a distance. If he catches you with Infinite Duress, do not panic; wait out the suppression and immediately chain Void Assault to enter stealth, dropping his target lock and preventing him from biting you with Jaws of the Beast. Always conserve Leap to escape over thick jungle walls the moment he triggers Primal Howl's damage reduction.

チャンピオン詳細 → Warwickのビルド →

不利なマッチアップ

17

これらのチャンピオンは、マッチアップ自体を絶望的にするわけではないが、対面で優位に立ちやすいツールを持っている。射程が長かったり、攻撃を受け止める力が高かったり、エンゲージへの対応手段が豊富だったりする。アプローチを調整し、戦闘を受け入れるタイミングを慎重に選ぶ必要がある。

Pantheon

Pantheon+1

skirmishtiming Pantheon shuts down your assassination attempts because his Aegis Assault completely absorbs the burst of an isolated Taste Their Fear. When you leap in, he can react instantly with Shield Vault to lock you down, then raise his shield to block your high-damage claws. Because your entire kit relies on chunking isolated targets quickly, his front-facing invulnerability leaves you vulnerable and out of options once your initial jump is spent. Pantheonのビルド → 詳細を見る
Pantheon

理由

Pantheon shuts down your assassination attempts because his Aegis Assault completely absorbs the burst of an isolated Taste Their Fear. When you leap in, he can react instantly with Shield Vault to lock you down, then raise his shield to block your high-damage claws. Because your entire kit relies on chunking isolated targets quickly, his front-facing invulnerability leaves you vulnerable and out of options once your initial jump is spent.

レーン戦への影響

In the river and jungle corridors, you cannot safely contest Scuttle Crabs or initiate duels. If you facecheck him, a Mortal Will empowered Shield Vault combined with Comet Spear will chunk your health before you can even react. This forces you to concede early skirmishes, delaying your evolutions and allowing Pantheon to use Grand Starfall to impact lanes while you are stuck catching up on camps.

立ち回り方

To survive and win, you must play as a patient clean-up artist. Never initiate with Leap; instead, walk up and use Void Spike to slow him, baiting out Aegis Assault first. Once he deploys his shield, immediately use Void Assault to slip behind him or wait out the duration in stealth. Only commit your evolved Taste Their Fear when his defensive barrier expires and he is isolated from his teammates.

チャンピオン詳細 → Pantheonのビルド →
Vi

Vi+1

skirmishcounter engage This matchup is dictated by Vi's ability to completely shut down your mobility. If you use Leap aggressively, she can immediately lock you down with Cease and Desist, preventing any escape. Furthermore, her Vault Breaker acts as a massive disruption tool that stops your burst setup. Because you cannot easily isolate her when she triggers Blast Shield for extra durability, direct duels are heavily tilted in her favor. Viのビルド → 詳細を見る
Vi

理由

This matchup is dictated by Vi's ability to completely shut down your mobility. If you use Leap aggressively, she can immediately lock you down with Cease and Desist, preventing any escape. Furthermore, her Vault Breaker acts as a massive disruption tool that stops your burst setup. Because you cannot easily isolate her when she triggers Blast Shield for extra durability, direct duels are heavily tilted in her favor.

レーン戦への影響

In the jungle, this forces you into a reactive posture during early skirmishes and neutral objective contests. You cannot safely contest her in the river if her abilities are up, as her Denting Blows will shred you in prolonged fights. If she catches you with Vault Breaker, she easily forces your flash or secures a kill, meaning you constantly lose crab priority and must concede early vision control.

立ち回り方

To survive and win skirmishes, you must absolutely hold your Leap as a defensive tool rather than an initiator. Wait in the shadows using Unseen Threat and poke her from afar with Void Spike. Only commit to Taste Their Fear once she has wasted Vault Breaker on your teammates. If she targets you with Cease and Desist, immediately use Void Assault right after the impact to drop her focus and stall her Blast Shield duration.

チャンピオン詳細 → Viのビルド →
Wukong

Wukong+1

skirmishclone bait Wukong counters your primary burst mechanic by manipulating isolation on demand. The moment you strike, he deploys Warrior Trickster to summon a clone. This decoy immediately strips away the isolation bonus needed to empower Taste Their Fear, while soaking up your high-damage strike. Additionally, his Stone Skin passive builds up armor during trades, severely reducing your physical damage output if you cannot secure an instantaneous, isolated assassination. Wukongのビルド → 詳細を見る
Wukong

理由

Wukong counters your primary burst mechanic by manipulating isolation on demand. The moment you strike, he deploys Warrior Trickster to summon a clone. This decoy immediately strips away the isolation bonus needed to empower Taste Their Fear, while soaking up your high-damage strike. Additionally, his Stone Skin passive builds up armor during trades, severely reducing your physical damage output if you cannot secure an instantaneous, isolated assassination.

レーン戦への影響

This dynamic prevents you from invading Wukong's jungle or contesting objectives with confidence. Attempting a duel usually results in him absorbing your opener with his decoy, then counter-attacking with Nimbus Strike and Golden Staff to shred your armor. In skirmishes, Wukong's Cyclone can knock you out of your Leap mid-air and disrupt your target access, making straight fights highly unfavorable unless his defensive tools are completely down.

立ち回り方

To survive this matchup, patience is your absolute priority. Never commit your Taste Their Fear until you have forced out his Warrior Trickster. Use the evolved version of Void Spike from a distance to poke him down and reveal his movements. If he triggers his clone, immediately activate Void Assault to drop aggro, reposition, and let the decoy expire. Only use Leap to chase once his clone and Cyclone have both been exhausted.

チャンピオン詳細 → Wukongのビルド →
Nocturne

Nocturne+1

skirmishspell shield Nocturne dominates the direct duel because Shroud of Darkness perfectly counters your main burst tool, Taste Their Fear. If he successfully absorbs your isolated damage, he gains a massive attack speed boost to shred you while you are feared by his Unspeakable Horror. Since your entire gameplay revolves around quick isolation execution, his spell shield completely neutralizes your threat window, turning a potential ambush into a deadly trap. Nocturneのビルド → 詳細を見る
Nocturne

理由

Nocturne dominates the direct duel because Shroud of Darkness perfectly counters your main burst tool, Taste Their Fear. If he successfully absorbs your isolated damage, he gains a massive attack speed boost to shred you while you are feared by his Unspeakable Horror. Since your entire gameplay revolves around quick isolation execution, his spell shield completely neutralizes your threat window, turning a potential ambush into a deadly trap.

レーン戦への影響

This interaction limits your jungle freedom, forcing you to concede early Scuttle Crabs or direct river duels. If Nocturne finds you isolated in your jungle, you cannot contest him safely, meaning your lanes must play defensively without expecting your priority. His Paranoia pressure combined with this dueling advantage prevents you from executing standard counter-ganks, forcing you to track his movements constantly to avoid fatal encounters.

立ち回り方

To survive, you must bait out Shroud of Darkness before committing your main damage. Start skirmishes with Unseen Threat or Void Spike to force his shield, holding Taste Their Fear until the barrier expires. If he initiates with Unspeakable Horror, use Leap defensively to break the tether distance immediately. Never jump in aggressively unless you have tracked his cooldowns or have backup, as a mistimed engage guarantees a grey screen.

チャンピオン詳細 → Nocturneのビルド →
Jax

Jax+1

skirmishdueling Jax directly neutralizes your primary assassination tools. When you jump in, his Counter Strike completely negates your Unseen Threat passive auto-attack, denying your initial burst. Additionally, if you try to burst him down when he is isolated, the massive armor boost from his Grandmaster-at-Arms active makes him too tanky to quickly execute with Taste Their Fear, turning any duel into a prolonged, losing brawl. Jaxのビルド → 詳細を見る
Jax

理由

Jax directly neutralizes your primary assassination tools. When you jump in, his Counter Strike completely negates your Unseen Threat passive auto-attack, denying your initial burst. Additionally, if you try to burst him down when he is isolated, the massive armor boost from his Grandmaster-at-Arms active makes him too tanky to quickly execute with Taste Their Fear, turning any duel into a prolonged, losing brawl.

レーン戦への影響

This defensive kit strips away your early jungle pressure and dueling confidence. You cannot contest crab or invade him safely, as he can initiate with Leap Strike and force you out. If you get caught in your own jungle, you are forced to burn Leap defensively rather than using it to secure kills. This delays your evolutions and limits your ability to secure isolated picks around objectives.

立ち回り方

To survive this matchup, you must master the art of disengagement. Never lead with Leap; keep it to escape his Counter Strike stun. Use Void Spike from a distance to poke and slow him, then activate Void Assault to slip into stealth when he turns on his Grandmaster-at-Arms. Wait out his defensive durations in the shadows, and only strike with Taste Their Fear once his helicopter counter-stance is completely on cooldown.

チャンピオン詳細 → Jaxのビルド →
Volibear

Volibear+1

skirmishsustain Volibear presents a massive hurdle because your burst relies on isolating him with Taste Their Fear. However, his Sky Splitter provides a massive shield that absorbs your initial damage, while Frenzied Maul allows him to heal back any health you manage to chip away. This combination of shielding and healing makes him impossible to burst down in early skirmishes, rendering your passive Unseen Threat insufficient to secure quick kills. Volibearのビルド → 詳細を見る
Volibear

理由

Volibear presents a massive hurdle because your burst relies on isolating him with Taste Their Fear. However, his Sky Splitter provides a massive shield that absorbs your initial damage, while Frenzied Maul allows him to heal back any health you manage to chip away. This combination of shielding and healing makes him impossible to burst down in early skirmishes, rendering your passive Unseen Threat insufficient to secure quick kills.

レーン戦への影響

This durability gap prevents you from contesting early Scuttle Crabs or invading his jungle safely. If you try to force a duel in the river, Volibear's Thundering Smash will lock you down under his Sky Splitter, leaving you vulnerable to a counter-jungling deficit. You are forced to cede river priority, which pressure-tests your laners as Volibear threatens dives with Stormbringer.

立ち回り方

To survive, you must play a game of evasion. Use Void Spike to safely check bushes and slow Volibear if he charges at you with Thundering Smash. Never use Leap aggressively unless his Sky Splitter is on cooldown and he is low. If he initiates on you, immediately use Void Assault to break his targeting, preventing him from landing a second Frenzied Maul to trigger his healing.

チャンピオン詳細 → Volibearのビルド →
Maokai

Maokai+1

skirmishvision Maokai completely neutralizes your early jungle pressure through his Sapling Toss. By tossing these explosive saplings into critical brushes, he constantly reveals your position and denies you the ability to slip into the fog of war. Without brush control, you cannot reset your Unseen Threat passive, which severely cuts your burst potential. This makes invading him or contesting camps extremely risky, as you lose your primary source of bonus damage. Maokaiのビルド → 詳細を見る
Maokai

理由

Maokai completely neutralizes your early jungle pressure through his Sapling Toss. By tossing these explosive saplings into critical brushes, he constantly reveals your position and denies you the ability to slip into the fog of war. Without brush control, you cannot reset your Unseen Threat passive, which severely cuts your burst potential. This makes invading him or contesting camps extremely risky, as you lose your primary source of bonus damage.

レーン戦への影響

Because Maokai secures brush priority around objectives, you cannot safely contest Scuttle Crabs or secure early drakes in direct skirmishes. His Sapling Toss zones you out of crucial choke points, while Twisted Advance allows his team to lock you down instantly if you step too close. This constant vision disadvantage forces your laners to play defensively, as you cannot offer reliable counter-ganks without risking a disastrous head-on fight.

立ち回り方

To survive this jungle matchup, prioritize farming your own camps and tracking Maokai's pathing to gank the opposite side of the map. During teamfights, never face-check brushes; wait for Maokai to expend Twisted Advance on your frontline before using Leap to access the backline. Hold Void Assault to drop aggro and force him to lose target lock. If he controls the objective pit with Sapling Toss, concede the area and seek isolated targets elsewhere with Taste Their Fear.

チャンピオン詳細 → Maokaiのビルド →
Mordekaiser

Mordekaiser+1

skirmishultimate interaction Although Mordekaiser's Realm of Death seems like a gift by isolating him for your evolved Taste Their Fear, it is actually a trap. The confined space makes it impossible to escape his passive Darkness Rise aura. Once he triggers this vortex, his sustained magic damage easily outvalues your burst, turning your isolation-dependent kit against you in an inescapable, brutal battle of raw statistics. Mordekaiserのビルド → 詳細を見る
Mordekaiser

理由

Although Mordekaiser's Realm of Death seems like a gift by isolating him for your evolved Taste Their Fear, it is actually a trap. The confined space makes it impossible to escape his passive Darkness Rise aura. Once he triggers this vortex, his sustained magic damage easily outvalues your burst, turning your isolation-dependent kit against you in an inescapable, brutal battle of raw statistics.

レーン戦への影響

This matchup severely limits your freedom in the river and neutral objective zones. You cannot safely contest isolated skirmishes once Mordekaiser reaches level five, as a single Death's Grasp can pull you into a lethal confrontation. If he invades your camps, you must concede territory rather than fighting, which slows your gold generation and forces you to hunt for squishier targets elsewhere on the map.

立ち回り方

Never use Leap to initiate a fight against him; always keep it to jump over walls when he approaches. If he catches you with Realm of Death, do not panic and try to burst him down. Instead, immediately activate Void Assault to go invisible, stalling out the timer of his ultimate. Wait for him to waste Obliterate in the dark, then use Void Spike to heal and run until the barrier fades.

チャンピオン詳細 → Mordekaiserのビルド →
Xin Zhao

Xin Zhao+1

skirmishearly game Xin Zhao dominates early jungle encounters because his combination of Audacious Charge and Three Talon Strike provides immediate gap-close, high base damage, and a knock-up. Kha'Zix relies heavily on isolating targets with Taste Their Fear, but before acquiring core items, your burst cannot match his sustained DPS and passive healing from Determination. If he marks you with Wind Becomes Lightning, his engage is practically guaranteed, leaving you outmatched in raw power. Xin Zhaoのビルド → 詳細を見る
Xin Zhao

理由

Xin Zhao dominates early jungle encounters because his combination of Audacious Charge and Three Talon Strike provides immediate gap-close, high base damage, and a knock-up. Kha'Zix relies heavily on isolating targets with Taste Their Fear, but before acquiring core items, your burst cannot match his sustained DPS and passive healing from Determination. If he marks you with Wind Becomes Lightning, his engage is practically guaranteed, leaving you outmatched in raw power.

レーン戦への影響

This power gap prevents you from contesting the early Scuttle Crabs directly, forcing you to concede river priority. If Xin Zhao invades your camps, you must forfeit the zone immediately, as a prolonged duel will result in your death. This loss of early presence allows him to pressure your lanes freely or force objectives, while you are forced to clear defensively and delay your power spikes.

立ち回り方

To survive, path away from him during your initial clear to guarantee a safe level five. If he jumps on you with Audacious Charge, immediately use Leap to disengage over a wall rather than trying to trade back. Keep river bushes warded and use Void Spike to scout or slow him from a safe distance. Only look for fights when you have evolved Taste Their Fear and can ambush him while he has his cooldowns spent on camps.

チャンピオン詳細 → Xin Zhaoのビルド →
Olaf

Olaf+1

duelingcc immunity Fighting Olaf in the jungle is highly unfavorable because Ragnarok completely nullifies the slowing effect of Void Spike, which is your primary tool for disengagement. Without this slow, Olaf can easily run you down by chain-slowing you with Undertow. Even if you isolate him for Taste Their Fear, his Berserker Rage and Vicious Strikes grant him massive attack speed and healing that out-sustains your burst. Olafのビルド → 詳細を見る
Olaf

理由

Fighting Olaf in the jungle is highly unfavorable because Ragnarok completely nullifies the slowing effect of Void Spike, which is your primary tool for disengagement. Without this slow, Olaf can easily run you down by chain-slowing you with Undertow. Even if you isolate him for Taste Their Fear, his Berserker Rage and Vicious Strikes grant him massive attack speed and healing that out-sustains your burst.

レーン戦への影響

This matchup completely dictates your pathing, forcing you to concede early Rift Scuttlers to avoid direct duels. Olaf will aggressively invade your camps, knowing that his Reckless Swing true damage and Berserker Rage make him unbeatable in early skirmishes. Getting caught forces you to use Leap defensively to escape, sacrificing your jungle pressure and leaving your laners exposed to Olaf's unchecked ganks.

立ち回り方

To survive, never use Leap offensively unless Olaf has already wasted Ragnarok. Keep Leap ready to hop over terrain when he charges with Undertow. Use Void Assault to drop his aggro and stall his ultimate's duration. If he invades your jungle, immediately yield the camp and steal his opposite side camps or look to ambush isolated laners.

チャンピオン詳細 → Olafのビルド →

その他のマッチアップ

スキル次第のマッチアップ

13

このマッチアップは何よりもまず実行力の勝負であり、両者ともに優位を取れる現実的な手段を持っている。重要なスキルを一つ避けられるか、エンゲージを正しく読めるか、あるいはたった一つの位置取りのミスが、勝敗を分けることもある。マッチアップを理解し、行動すべき瞬間を見極める力がとりわけ重要になる。

Diana

Diana±0

skirmishisolation This duel is a pure test of burst execution. While your single-target execution relies heavily on isolating Diana to maximize Taste Their Fear, she possesses direct tools to deny this. By positioning near active jungle monsters, she strips away your isolation bonus. Furthermore, her Pale Cascade provides a timely shield that can absorb the brunt of your initial Unseen Threat and burst combo. Dianaのビルド → 詳細を見る
Diana

理由

This duel is a pure test of burst execution. While your single-target execution relies heavily on isolating Diana to maximize Taste Their Fear, she possesses direct tools to deny this. By positioning near active jungle monsters, she strips away your isolation bonus. Furthermore, her Pale Cascade provides a timely shield that can absorb the brunt of your initial Unseen Threat and burst combo.

レーン戦への影響

Jungle skirmishes become highly calculated standoffs around camps. If Diana secures a lead, her Crescent Strike allows her to chase you down with Lunar Rush, making escaping with Leap dangerous. Conversely, if you catch her without her shield, your burst can delete her instantly. This tension slows down early ganks as both junglers must constantly track each other to avoid a fatal counter-gank.

立ち回り方

To win the duel, you must control the engagement rules. Never jump in with Leap; save it to disengage if she pulls you with Moonfall. Instead, initiate from brush using Void Assault to trigger Unseen Threat. Wait out her Pale Cascade shield before committing your evolved Taste Their Fear. If she drags a camp to block isolation, poke with Void Spike and back off until the monsters reset.

チャンピオン詳細 → Dianaのビルド →
Ekko

Ekko±0

duelingburst damage This duel hinges on how effectively you can isolate Ekko to maximize Taste Their Fear. While your natural burst is devastating, Ekko possesses unique tools to deny your Unseen Threat advantage. By utilizing Parallel Convergence, he can summon a clone that acts as a nearby ally to break his isolation status, while Chronobreak allows him to instantly reposition, heal, and completely reset a fight you thought you were winning. Ekkoのビルド → 詳細を見る
Ekko

理由

This duel hinges on how effectively you can isolate Ekko to maximize Taste Their Fear. While your natural burst is devastating, Ekko possesses unique tools to deny your Unseen Threat advantage. By utilizing Parallel Convergence, he can summon a clone that acts as a nearby ally to break his isolation status, while Chronobreak allows him to instantly reposition, heal, and completely reset a fight you thought you were winning.

レーン戦への影響

Neither jungler can easily invade the other without risking a lethal counter-burst. Skirmishes in the river are highly volatile; if you cannot burst him before he triggers Z-Drive Resonance, his movement speed will allow him to kite your Leap. The jungle matchup becomes a game of chicken where whoever commits their mobility tool first—your Leap versus his Phase Dive—usually loses the ensuing objective skirmish.

立ち回り方

To win, never initiate with Leap unless his Chronobreak is on cooldown. Instead, walk up using Void Assault to strike with Unseen Threat, forcing him to react. If he casts Parallel Convergence, immediately step out of the zone to avoid the stun and deny him the shield, waiting for the clone to vanish before using Taste Their Fear. If you fail to burst him and he escapes with Chronobreak, disengage instantly using Void Spike to slow him down.

チャンピオン詳細 → Ekkoのビルド →
Gragas

Gragas±0

isolation avoidancepeel This jungle duel revolves around Gragas denying your isolation burst. While you try to catch him isolated to maximize Taste Their Fear damage, his Drunken Rage grants him massive damage reduction that can completely absorb your initial strike. Additionally, his passive Happy Hour provides him with sustained healing during these skirmishes, meaning you cannot easily burst him down if he drinks before you strike. Gragasのビルド → 詳細を見る
Gragas

理由

This jungle duel revolves around Gragas denying your isolation burst. While you try to catch him isolated to maximize Taste Their Fear damage, his Drunken Rage grants him massive damage reduction that can completely absorb your initial strike. Additionally, his passive Happy Hour provides him with sustained healing during these skirmishes, meaning you cannot easily burst him down if he drinks before you strike.

レーン戦への影響

In the jungle corridors, this dynamic prevents you from securing quick, clean assassinations. If Gragas lands Body Slam followed by Barrel Roll, he chunks your health before you can retaliate. This standoff slows down your objective takes; you cannot blindly commit to a fight because a poorly timed Leap into his path invites an Explosive Cask that separates you from safety.

立ち回り方

To outplay this, never open with your burst. Engage with Void Spike from a distance to force him to react. When Gragas drinks his Drunken Rage, use your Void Assault invisibility to wait out the damage reduction duration. Once his defensive buff fades, strike with your isolated Taste Their Fear, holding your Leap to dodge his Body Slam while re-triggering Unseen Threat.

チャンピオン詳細 → Gragasのビルド →
Graves

Graves±0

skirmishdueling This duel is dictated entirely by your isolation mechanic. Graves can mitigate your burst by using Quickdraw to dash directly into his jungle camps, using the monsters to block the isolation bonus of Taste Their Fear. Furthermore, his New Destiny pellets and the True Grit armor stacks he gains from dashing make him deceptively tanky in prolonged skirmishes if you cannot burst him instantly. Gravesのビルド → 詳細を見る
Graves

理由

This duel is dictated entirely by your isolation mechanic. Graves can mitigate your burst by using Quickdraw to dash directly into his jungle camps, using the monsters to block the isolation bonus of Taste Their Fear. Furthermore, his New Destiny pellets and the True Grit armor stacks he gains from dashing make him deceptively tanky in prolonged skirmishes if you cannot burst him instantly.

レーン戦への影響

Jungle skirmishes are decided by where the fight breaks out. If you catch Graves in the open river, his lack of nearby targets guarantees isolated Taste Their Fear strikes, forcing him to use Smoke Screen to disengage. However, if he invades your camps, he can easily fight near your monsters, using End of the Line off the camp walls to quickly chunk your health while staying safe from your burst.

立ち回り方

Track Graves' ammunition from New Destiny and wait for him to reload before leaping. If you must engage near a camp, use Void Spike to slow him and walk around the monsters to force an isolated angle rather than immediately committing your Leap. Should he drop Smoke Screen, immediately activate Void Assault to reposition, drop his armor stacks, and re-engage once his defenses decay and he is separated from the camp.

チャンピオン詳細 → Gravesのビルド →
Rengar

Rengar±0

skirmishstealth This duel is a pure hunt of shadows determined by who strikes first from the unseen. Rengar relies on the bushes to trigger Unseen Predator and leap onto you, while your power lies in resetting Unseen Threat via fog of war or Void Assault. If he leaps from a bush, his immediate burst with Savagery will overwhelm you before you can isolate him with Taste Their Fear. Rengarのビルド → 詳細を見る
Rengar

理由

This duel is a pure hunt of shadows determined by who strikes first from the unseen. Rengar relies on the bushes to trigger Unseen Predator and leap onto you, while your power lies in resetting Unseen Threat via fog of war or Void Assault. If he leaps from a bush, his immediate burst with Savagery will overwhelm you before you can isolate him with Taste Their Fear.

レーン戦への影響

Jungle navigation becomes extremely tense, turning every bush check into a high-stakes gamble. You cannot blindly contest camps near the river without knowing his position, as a sudden Thrill of the Hunt or brush leap will instantly force your Leap defensively. This constant threat slows down your clear and restricts your ability to safely secure neutral objectives or find isolated targets.

立ち回り方

To win this deadly game of hide-and-seek, never path near face-check bushes unless you have active vision or can scout them with Void Spike. If Rengar initiates with his leap, do not panic; immediately cast Void Assault to break his auto-attack chain and deny his Savagery burst. Wait out his empowered state in stealth, then retaliate with your evolved Taste Their Fear once he has wasted his Battle Roar heal.

チャンピオン詳細 → Rengarのビルド →
Hecarim

Hecarim±0

isolationassassin This jungle duel hinges entirely on the isolation mechanic. Your Taste Their Fear deals devastating burst to Hecarim when he is isolated in the river or deep jungle. However, Hecarim thrives in prolonged skirmishes using Rampage and Spirit of Dread to out-sustain you. If he drags the duel into an active monster camp, the camp negates your isolation bonus, shifting the duel heavily in his favor. Hecarimのビルド → 詳細を見る
Hecarim

理由

This jungle duel hinges entirely on the isolation mechanic. Your Taste Their Fear deals devastating burst to Hecarim when he is isolated in the river or deep jungle. However, Hecarim thrives in prolonged skirmishes using Rampage and Spirit of Dread to out-sustain you. If he drags the duel into an active monster camp, the camp negates your isolation bonus, shifting the duel heavily in his favor.

レーン戦への影響

The outcome of early skirmishes dictates who controls the river and neutral objectives. Contesting the Scuttle Crab is highly volatile; if you catch Hecarim before he stacks Rampage, you can force him out. However, invading his camps is extremely risky. If he initiates with Devastating Charge while standing next to his Krugs or Raptors, you lose the ability to burst him, forcing a defensive Leap and giving up map pressure.

立ち回り方

To win this, never fight Hecarim inside active camp spawns. Force skirmishes in the open river where Taste Their Fear is guaranteed to trigger its isolated bonus. Hold your Void Assault to break his momentum when he charges with Devastating Charge or launches Onslaught of Shadows, using the brief invisibility to reposition away from his AoE. If he successfully drags you into a camp, immediately disengage using Leap rather than taking an unfavorable sustained trade.

チャンピオン詳細 → Hecarimのビルド →
Tryndamere

Tryndamere±0

kitingultimate management This duel is dictated by how you manage the five seconds of Undying Rage. While your isolated Taste Their Fear can quickly force Tryndamere to critical health, a direct melee brawl during his ultimate is fatal due to his high Battle Fury critical strikes. To survive, you must exploit your mobility and stealth, turning his offensive window into a useless chase where he cannot land his basic attacks. Tryndamereのビルド → 詳細を見る
Tryndamere

理由

This duel is dictated by how you manage the five seconds of Undying Rage. While your isolated Taste Their Fear can quickly force Tryndamere to critical health, a direct melee brawl during his ultimate is fatal due to his high Battle Fury critical strikes. To survive, you must exploit your mobility and stealth, turning his offensive window into a useless chase where he cannot land his basic attacks.

レーン戦への影響

In the jungle, this dynamic creates high-stakes skirmishes around neutral camps. When Undying Rage is on cooldown, Tryndamere must play defensively, allowing you to invade and secure isolated Taste Their Fear pickoffs. However, if his ultimate is available, he can aggressively counter-jungle and force deep duels. You cannot contest objectives head-on if you cannot safely bait and survive his temporary invincibility, shifting map pressure heavily based on ultimate timers.

立ち回り方

Never initiate with Leap unless Tryndamere has already wasted his Spinning Slash to escape. When he triggers Undying Rage, immediately fire Void Spike to apply a heavy slow, then activate Void Assault to slip into stealth. Walk away to waste his ultimate's duration, re-entering stealth with your second charge if he attempts to close the gap or uses Mocking Shout to slow you. Only re-engage with Taste Their Fear once his invincibility completely expires.

チャンピオン詳細 → Tryndamereのビルド →
Nidalee

Nidalee±0

skirmishinvade This jungle duel is a deadly game of hide-and-seek centered entirely on Nidalee's Javelin Toss. Since both of you are fragile assassins, whoever gets the jump wins. If Nidalee misses her spear, she cannot trigger her hunted bonus, stripping away her mobility and cougar burst. This leaves her highly vulnerable to your high isolated damage from Taste Their Fear if you jump her immediately. Nidaleeのビルド → 詳細を見る
Nidalee

理由

This jungle duel is a deadly game of hide-and-seek centered entirely on Nidalee's Javelin Toss. Since both of you are fragile assassins, whoever gets the jump wins. If Nidalee misses her spear, she cannot trigger her hunted bonus, stripping away her mobility and cougar burst. This leaves her highly vulnerable to your high isolated damage from Taste Their Fear if you jump her immediately.

レーン戦への影響

Jungle pathing becomes highly tense, with both champions trying to secure deep vision to set up lethal ambushes. A single missed Javelin Toss during a skirmish over the Scuttle Crab completely flips the pressure, forcing Nidalee to retreat and forfeit her camps. Conversely, getting sniped from the fog of war means you cannot contest your own buffs, leading to heavy counter-jungling.

立ち回り方

Constantly clear her traps and wards with your sweeping lens to keep your Unseen Threat active. When contesting camps, stand behind monsters to block her Javelin Toss. The moment her spear flies wide, immediately use Leap to close the gap and execute her with Taste Their Fear and Void Spike. If she manages to land a spear from distance, use Void Assault to break her line of sight and disengage before she can pounce.

チャンピオン詳細 → Nidaleeのビルド →
Jarvan IV

Jarvan IV±0

assassingrouping This matchup hinges entirely on how tightly the Demacian prince can pack his squad. When Jarvan IV drops his Demacian Standard, the attack speed aura acts as a rallying beacon for his teammates. This natural grouping completely neutralizes your passive bonus from Unseen Threat and prevents you from triggering the amplified damage of Taste Their Fear, turning your deadly ambush potential into a minor annoyance during team fights. Jarvan IVのビルド → 詳細を見る
Jarvan IV

理由

This matchup hinges entirely on how tightly the Demacian prince can pack his squad. When Jarvan IV drops his Demacian Standard, the attack speed aura acts as a rallying beacon for his teammates. This natural grouping completely neutralizes your passive bonus from Unseen Threat and prevents you from triggering the amplified damage of Taste Their Fear, turning your deadly ambush potential into a minor annoyance during team fights.

レーン戦への影響

In the river and around objectives, you cannot force straightforward skirmishes. If Jarvan IV coordinates with his laners near his Demacian Standard, your jungle clearing speed won't save you from a coordinated counter-gank. Furthermore, if he locks you down inside Cataclysm while his allies are clustered nearby, you will struggle to find any isolated targets, severely limiting your snowball potential and leaving you vulnerable to his armor-shredding Dragon Strike.

立ち回り方

To succeed, patience is your primary tool. Never initiate with Leap; instead, utilize Void Assault to weave through the shadows and scout their positions. Use Void Spike to poke and slow opponents, waiting for them to step away from the Demacian Standard's protective zone. Once an enemy panics and detaches from the group, immediately strike with Taste Their Fear. If Jarvan IV traps you with Cataclysm, use your Leap defensively to bypass the arena walls and reset the fight.

チャンピオン詳細 → Jarvan IVのビルド →
Lee Sin

Lee Sin±0

skirmishoutplay This jungle duel is a pure test of reflexes centered on a single projectile. Lee Sin relies heavily on landing Sonic Wave to initiate his burst and close the distance. If it connects, his follow-up is devastating and his Tempest can reveal you. However, you have the perfect counter-tool: activating Void Assault to break his line of sight and dodge the incoming wave, turning this into an even battle of anticipation. Lee Sinのビルド → 詳細を見る
Lee Sin

理由

This jungle duel is a pure test of reflexes centered on a single projectile. Lee Sin relies heavily on landing Sonic Wave to initiate his burst and close the distance. If it connects, his follow-up is devastating and his Tempest can reveal you. However, you have the perfect counter-tool: activating Void Assault to break his line of sight and dodge the incoming wave, turning this into an even battle of anticipation.

レーン戦への影響

Every skirmish around the Scuttle Crab or in the river becomes a high-stakes standoff. You cannot afford to engage blindly with Leap because Lee Sin will punish your lack of escape with Dragon's Rage. Instead, the jungle pressure remains completely neutral, forcing both of you to hover near lanes, waiting for the other to show first. One missed skillshot or mistimed ultimate instantly hands over objective control to the survivor.

立ち回り方

To win this duel, never open the fight with Leap; keep it as your emergency disengage or to chase him down after he uses Safeguard. When Lee Sin approaches, wait for the distinct animation of Sonic Wave before immediately pressing Void Assault to slip away or reposition. Once his main gap-closer is wasted, strike back hard with Taste Their Fear, making sure to fight him away from his camps to trigger your isolation damage.

チャンピオン詳細 → Lee Sinのビルド →
Nunu & Willump

Nunu & Willump±0

invadeobjectives This matchup is a pure race for neutral monsters defined by contrasting tools. Nunu & Willump dominates epic monster execution using the massive true damage of Consume. However, if you catch the boy and his yeti alone in the river or his own jungle, Taste Their Fear deals devastating isolation damage, allowing you to easily shred his health bar before he can react. Nunu & Willumpのビルド → 詳細を見る
Nunu & Willump

理由

This matchup is a pure race for neutral monsters defined by contrasting tools. Nunu & Willump dominates epic monster execution using the massive true damage of Consume. However, if you catch the boy and his yeti alone in the river or his own jungle, Taste Their Fear deals devastating isolation damage, allowing you to easily shred his health bar before he can react.

レーン戦への影響

The map pressure swings wildly based on positioning. Nunu & Willump wants to use Biggest Snowball Ever! to gank lanes rapidly and then rush dragons. You cannot contest a straight epic monster smite fight against his Consume. Instead, you must force him to play scared by constantly threatening his life in his own camps, delaying his map rotations and punishing his attempts to solo objectives.

立ち回り方

Track his jungle pathing and invade when he is clearing camps like Gromp or Krugs. Wait for him to waste Consume on a monster before jumping in with Leap. Once engaged, use Void Assault to dodge his Snowball Barrage and prevent him from triggering the root. If he channels Absolute Zero, do not panic; use your high single-target damage to burst him down or save Leap to escape the blast radius.

チャンピオン詳細 → Nunu & Willumpのビルド →

その他のマッチアップ

有利なマッチアップ

17

これらのチャンピオンは、こちらの主要な強みに効果的に対応するのが難しく、より自由に対面を組み立てることができる。プレッシャーをかけて有利な交換を引き出す手段は複数あることが多い。相手が態勢を立て直す時間を与えるのではなく、この優位を活かして主導権を握ろう。

Aatrox

Aatrox−1

isolationstealth Kha'Zix dominates this jungle matchup by entirely neutralizing Aatrox's primary damage source. When Aatrox swings The Darkin Blade, its critical sweetspots require precise targeting. By activating Void Assault, you instantly vanish into stealth, breaking his target lock and forcing him to waste his strikes in the wrong direction. Without those knockups, Aatrox cannot sustain the fight. Aatroxのビルド → 詳細を見る
Aatrox

理由

Kha'Zix dominates this jungle matchup by entirely neutralizing Aatrox's primary damage source. When Aatrox swings The Darkin Blade, its critical sweetspots require precise targeting. By activating Void Assault, you instantly vanish into stealth, breaking his target lock and forcing him to waste his strikes in the wrong direction. Without those knockups, Aatrox cannot sustain the fight.

レーン戦への影響

This interaction turns river skirmishes and jungle duels heavily in your favor. Aatrox relies on landing his attacks to cycle Deathbringer Stance and stay healthy. Because you can easily dodge his sweetspots, his clear slows down and his health pool remains dangerously low. You can aggressively invade his camps, stripping away his jungle pressure and forcing him into defensive routing.

立ち回り方

Do not initiate with Leap. Instead, walk up to Aatrox and start the duel with Taste Their Fear. Save Void Assault specifically for his second and third casts of The Darkin Blade. When he begins those animations, activate your stealth to reposition behind him, completely dodging the sweetspots. If he manages to hit you with Infernal Chains, use Leap to instantly break the tether before you are pulled back.

チャンピオン詳細 → Aatroxのビルド →
Darius

Darius−1

isolation threatjungle dueling Darius's strength lies in prolonged skirmishes where he can stack Hemorrhage, but your isolation mechanic completely dismantles this slow burn. In the open river or transit corridors, Taste Their Fear inflicts devastating isolated damage that chunks him before he can charge Noxian Might. Because he lacks immediate burst protection, your Unseen Threat slow combined with raw physical burst leaves him with no time to execute his healing loop. Dariusのビルド → 詳細を見る
Darius

理由

Darius's strength lies in prolonged skirmishes where he can stack Hemorrhage, but your isolation mechanic completely dismantles this slow burn. In the open river or transit corridors, Taste Their Fear inflicts devastating isolated damage that chunks him before he can charge Noxian Might. Because he lacks immediate burst protection, your Unseen Threat slow combined with raw physical burst leaves him with no time to execute his healing loop.

レーン戦への影響

This dynamic forces Darius to play defensively, anchoring himself to active monster camps to artificially break his isolation state. If you catch him invading or securing Scuttle Crabs, he cannot safely retaliate, meaning you dictate the tempo of objective setups. However, if he manages to drag you into a camp where monsters absorb your Taste Their Fear isolation bonus, the duel swings back to his favor as he stacks his passive.

立ち回り方

To secure your advantage, track his pathing and jump him using Leap only after he wastes Apprehend, or use Void Assault to dodge the outer edge of his Decimate. Never fight him directly inside an active raptor or krug camp where his isolation is blocked. If he attempts to pull you in with Apprehend, immediately reposition with Void Assault to reset Unseen Threat and strike him from a fresh angle where his hache blade cannot heal him.

チャンピオン詳細 → Dariusのビルド →
Gwen

Gwen−1

isolation avoidanceburst mitigation Kha'Zix holds a clear advantage because Void Assault completely neutralizes Gwen's combat tools. When Gwen deploys Hallowed Mist to gain resistances, she expects a direct brawl. By entering stealth with Void Assault, you can easily stall out her mist's duration while remaining untouchable. Furthermore, this brief invisibility allows you to reposition and slip sideways, completely dodging the consecutive needle trajectories of her Needlework, stripping away her healing and burst. Gwenのビルド → 詳細を見る
Gwen

理由

Kha'Zix holds a clear advantage because Void Assault completely neutralizes Gwen's combat tools. When Gwen deploys Hallowed Mist to gain resistances, she expects a direct brawl. By entering stealth with Void Assault, you can easily stall out her mist's duration while remaining untouchable. Furthermore, this brief invisibility allows you to reposition and slip sideways, completely dodging the consecutive needle trajectories of her Needlework, stripping away her healing and burst.

レーン戦への影響

This dynamic shifts the power during skirmishes around river objectives. Gwen cannot safely contest you because her Hallowed Mist fails to protect her from your close-range isolation damage. If she attempts to initiate with Skip 'n Slash, she is forced to commit without her defensive zone, leaving her highly vulnerable to your burst. This pressure forces her to farm defensively, giving you priority to invade and steal her camps.

立ち回り方

When hunting Gwen, never open the fight with Leap. Instead, walk up or use a brush to strike with Taste Their Fear first. The moment she panics and activates Hallowed Mist, immediately press Void Assault to vanish. Use this stealth window to step behind or to the side of her, anticipating her Needlework direction. Once her mist fades and her needles miss, re-engage with Taste Their Fear, holding Leap to catch her after her Skip 'n Slash.

チャンピオン詳細 → Gwenのビルド →
Fiddlesticks

Fiddlesticks−1

assassinearly game Your jungle duels are highly favorable because Fiddlesticks clearing camps is a prime target for Taste Their Fear due to isolation. However, his Terrify is his ultimate disengage tool. If you jump in recklessly, he can interrupt your assault instantly, allowing him to channel Bountiful Harvest to heal back up while you are feared. Fiddlesticksのビルド → 詳細を見る
Fiddlesticks

理由

Your jungle duels are highly favorable because Fiddlesticks clearing camps is a prime target for Taste Their Fear due to isolation. However, his Terrify is his ultimate disengage tool. If you jump in recklessly, he can interrupt your assault instantly, allowing him to channel Bountiful Harvest to heal back up while you are feared.

レーン戦への影響

This matchup dictates a predatory playstyle where you dominate the neutral spaces. Since Fiddlesticks relies on sneaking into brushes to launch Crowstorm, your map presence forces him to play defensively. You can aggressively invade his camps, stripping him of resources, provided you don't let him turn the fight near his A Harmless Scarecrow traps.

立ち回り方

To secure the kill, never initiate the duel by jumping. Instead, track him in his jungle and flank him on foot, utilizing Unseen Threat and Taste Their Fear first. Hold Leap exclusively to close the gap after he panics and casts Terrify. If he starts channeling Bountiful Harvest, use Void Spike to poke from safety or leap away if his teammates collapse.

チャンピオン詳細 → Fiddlesticksのビルド →
Kayn

Kayn−1

assassindueling Before Kayn gathers enough essence for The Darkin Scythe, his base stats and raw dueling are incredibly weak. If you catch him alone in his camps, his lack of early burst means your isolated Taste Their Fear deals devastating damage. He cannot match your damage output in a direct 1v1, as his Reaping Slash and Blade's Reach have longer cooldowns and lower scaling than your isolated claws. Kaynのビルド → 詳細を見る
Kayn

理由

Before Kayn gathers enough essence for The Darkin Scythe, his base stats and raw dueling are incredibly weak. If you catch him alone in his camps, his lack of early burst means your isolated Taste Their Fear deals devastating damage. He cannot match your damage output in a direct 1v1, as his Reaping Slash and Blade's Reach have longer cooldowns and lower scaling than your isolated claws.

レーン戦への影響

This power differential completely dictates the early pathing. Kayn is forced to path defensively, often conceding scuttle crabs and avoiding direct skirmishes. You can aggressively invade his camps, knowing that if he tries to contest, you can force his Shadow Step defensively. By denying him early combat, you delay his transformation, keeping him in his weaker base state while you secure objective priority.

立ち回り方

To exploit this, actively track Kayn’s starting camp by watching lane arrivals. Plan your route to meet him at his second buff where he is most vulnerable. Do not initiate with Leap; instead, walk up to him, slow him with Unseen Threat or Void Spike, and save your jump to follow him when he tries to escape through a wall using Shadow Step. If he turns with Umbral Trespass, wait out the duration to strike again.

チャンピオン詳細 → Kaynのビルド →
Evelynn

Evelynn−1

duelingassassin This matchup heavily favors you because Evelynn is incredibly fragile when isolated during her early jungle clears. Her primary defensive tool, Demon Shade, only provides safety once she reaches level five and stays out of combat. By seeking her out in her own territory, your Taste Their Fear deals devastating isolation damage, completely overwhelming her low base health before she can even charge Allure to fight back. Evelynnのビルド → 詳細を見る
Evelynn

理由

This matchup heavily favors you because Evelynn is incredibly fragile when isolated during her early jungle clears. Her primary defensive tool, Demon Shade, only provides safety once she reaches level five and stays out of combat. By seeking her out in her own territory, your Taste Their Fear deals devastating isolation damage, completely overwhelming her low base health before she can even charge Allure to fight back.

レーン戦への影響

Your threat of invasion forces Evelynn to surrender early Scuttle Crabs and play defensively. She cannot safely clear her camps without risking a sudden death, which delays her level five spike. This pressure relieves your laners, as she cannot easily set up ganks with Allure when she is constantly running from her own camps, allowing you to secure early neutral objectives with ease.

立ち回り方

Invade her red or blue buff early to disrupt her initial clear. When fighting her, never initiate with Leap; instead, walk up to her and use Taste Their Fear. Hold Leap to chase her down if she tries to escape using the displacement from Last Caress. If she manages to mark you with Allure, immediately activate Void Assault to go invisible, stalling out the charm's duration and resetting Unseen Threat for a lethal burst.

チャンピオン詳細 → Evelynnのビルド →
Shyvana

Shyvana−1

invadescaling gap This matchup is heavily weighted in your favor during the early stages of the game. Before unlocking Dragon's Descent, Shyvana is highly vulnerable and lacks the tools to fight back. She simply cannot match the raw single-target damage of Taste Their Fear when isolated in her jungle. Since she lacks early mobility, you can easily abuse Unseen Threat to slow her down and secure early kills. Shyvanaのビルド → 詳細を見る
Shyvana

理由

This matchup is heavily weighted in your favor during the early stages of the game. Before unlocking Dragon's Descent, Shyvana is highly vulnerable and lacks the tools to fight back. She simply cannot match the raw single-target damage of Taste Their Fear when isolated in her jungle. Since she lacks early mobility, you can easily abuse Unseen Threat to slow her down and secure early kills.

レーン戦への影響

Your early dominance completely halts Shyvana's momentum, severely delaying her Fury of the Dragonborn stacks. By stealing her camps, you force her to concede Rift Scuttlers and delay her crucial ultimate milestone. This pressure forces her laners to play defensively, as you command total control over the river and can safely use Leap to counter-gank or punish any overextensions.

立ち回り方

Track her starting camp with early wards and invade her second buff immediately. Keep your Leap in reserve during the initial engage; only use this jump to close the gap if she attempts to flee using the movement speed from Burnout. If she manages to survive until her dragon form and activates Flame Breath, disengage temporarily using the heal and slow of Void Spike before turning back to finish her.

チャンピオン詳細 → Shyvanaのビルド →
Lillia

Lillia−1

skirmishburst This matchup favors you heavily due to your sheer explosive power against a fragile skirmisher. Lillia relies on hit-and-run tactics, but she needs time to stack the bonus movement speed from Blooming Blows. By striking from isolation, your Taste Their Fear combined with Unseen Threat inflicts massive damage instantly. She will die before she can build up her momentum or safely channel Lilting Lullaby to sleep you. Lilliaのビルド → 詳細を見る
Lillia

理由

This matchup favors you heavily due to your sheer explosive power against a fragile skirmisher. Lillia relies on hit-and-run tactics, but she needs time to stack the bonus movement speed from Blooming Blows. By striking from isolation, your Taste Their Fear combined with Unseen Threat inflicts massive damage instantly. She will die before she can build up her momentum or safely channel Lilting Lullaby to sleep you.

レーン戦への影響

You dictate the pace of the jungle from the very first clear. Because Lillia cannot contest you in a direct duel, you can aggressively invade her camps and steal her resources. Her fear of a sudden Leap from a brush forces her to take wider, less efficient routing, delaying her level spikes. This pressure keeps her from safely contesting early Scuttle Crabs, giving your lanes permanent security from her ganks.

立ち回り方

Never initiate with Leap if you can avoid it; instead, walk up to her from a brush using Void Assault to proc Unseen Threat and land an isolated Taste Their Fear. Save your Leap to follow her if she attempts to escape with Watch Out! Eep! or to dodge her slow from Swirlseed. If she manages to tag you with Dream-Laden Bough, immediately burst her down before the drowsy effect of Lilting Lullaby takes hold.

チャンピオン詳細 → Lilliaのビルド →
Talon

Talon−1

skirmishburst You hold a massive advantage in this hunter-versus-hunter matchup. Because Talon spends his time traversing jungle corridors using Assassin's Path, he is constantly isolated. When you catch him alone, your Taste Their Fear deals devastating isolation damage. By combining this with the slow and bonus damage of Unseen Threat, you can easily burst him down before he can land his Rake and stack Blade's End for a lethal bleed. Talonのビルド → 詳細を見る
Talon

理由

You hold a massive advantage in this hunter-versus-hunter matchup. Because Talon spends his time traversing jungle corridors using Assassin's Path, he is constantly isolated. When you catch him alone, your Taste Their Fear deals devastating isolation damage. By combining this with the slow and bonus damage of Unseen Threat, you can easily burst him down before he can land his Rake and stack Blade's End for a lethal bleed.

レーン戦への影響

Your dueling dominance completely alters the early jungle tempo. Talon cannot safely use Assassin's Path to invade or escape, because your Leap can easily match his wall-hops if he is already low. This threat forces him to concede Scuttle Crabs and play fearfully around his own camps. His signature map-wide roaming pressure is neutered, giving your laners a much safer early game while you freely secure neutral objectives.

立ち回り方

Focus your efforts on tracking him inside his own territory. Keep your yellow wards near his raptor and gromp camps to catch him isolated. Do not initiate fights with Leap; instead, walk up to him to proc Unseen Threat and hit Taste Their Fear. Save your jump specifically to follow him over a wall when he attempts to flee with Assassin's Path. If he retaliates with Shadow Assault, activate Void Assault immediately to drop his target lock and negate his burst.

チャンピオン詳細 → Talonのビルド →
Amumu

Amumu−1

early skirmishisolation Amumu excels at clearing camps with Despair and Tantrum, but he lacks the raw single-target damage to duel you early. The moment he steps away from his camps or lanes, he triggers your isolation passive. An isolated Taste Their Fear shreds through his health pool rapidly, turning his own jungle into a massive hazard where his defensive stats cannot ramp up fast enough to survive your burst. Amumuのビルド → 詳細を見る
Amumu

理由

Amumu excels at clearing camps with Despair and Tantrum, but he lacks the raw single-target damage to duel you early. The moment he steps away from his camps or lanes, he triggers your isolation passive. An isolated Taste Their Fear shreds through his health pool rapidly, turning his own jungle into a massive hazard where his defensive stats cannot ramp up fast enough to survive your burst.

レーン戦への影響

Because Amumu fears your solo damage, he is forced to clear defensively or beg his laners for protection. This allows you to easily secure both Rift Scuttlers and steal his buffs. By constantly threatening him in his camps, you delay his level five spike and neutralize the massive teamfight threat of Curse of the Sad Mummy before it can impact your lanes.

立ち回り方

Track Amumu's starting buff and invade his second buff directly. When you engage, walk up to him to save Leap as a tool to pursue or escape. If he attempts to lock you down with Bandage Toss, use Void Assault to break line of sight in the brush or dodge the skillshot, resetting Unseen Threat for another burst. If he manages to trigger Curse of the Sad Mummy, disengage immediately and wait out the duration before re-engaging with Taste Their Fear.

チャンピオン詳細 → Amumuのビルド →
Viego

Viego−1

skirmishoutplay Kha'Zix dominates this jungle duel because Viego relies entirely on landing Spectral Maw to initiate his burst. By utilizing either Leap or the instant invisibility of Void Assault, you can easily react to and dodge this linear stun. Once Viego misses his crowd control, he cannot escape your burst, leaving him isolated in his own jungle for a lethal Taste Their Fear. Viegoのビルド → 詳細を見る
Viego

理由

Kha'Zix dominates this jungle duel because Viego relies entirely on landing Spectral Maw to initiate his burst. By utilizing either Leap or the instant invisibility of Void Assault, you can easily react to and dodge this linear stun. Once Viego misses his crowd control, he cannot escape your burst, leaving him isolated in his own jungle for a lethal Taste Their Fear.

レーン戦への影響

This matchup dynamic forces Viego to play passively around his camps. Knowing you can dodge his stun, you can aggressively invade his Harrowed Path zones. He cannot safely contest Scuttle Crabs or his own buffs, meaning you dictate the jungle's pace. If he attempts to secure objectives, you can easily force a duel, knowing you win any direct confrontation.

立ち回り方

When invading, never open the fight with Leap. Instead, walk up to Viego or use Void Spike to slow him, forcing him to charge Spectral Maw. The moment you see him release the stun, use Leap to jump over the projectile or activate Void Assault to break his targeting. Once the stun is wasted, immediately follow up with Taste Their Fear to shred his health while he is isolated.

チャンピオン詳細 → Viegoのビルド →
Kindred

Kindred−1

skirmishultimate management Your raw isolation damage from Taste Their Fear completely overwhelms Kindred's fragile defense before their Dance of Arrows or Wolf's Frenzy can wear you down. This massive burst pressure forces an emergency Lamb's Respite. Because you possess the tools to stall this temporary safe zone, you dictate the entire flow of the confrontation, turning their ultimate survival tool into a predictable delay of their inevitable death. Kindredのビルド → 詳細を見る
Kindred

理由

Your raw isolation damage from Taste Their Fear completely overwhelms Kindred's fragile defense before their Dance of Arrows or Wolf's Frenzy can wear you down. This massive burst pressure forces an emergency Lamb's Respite. Because you possess the tools to stall this temporary safe zone, you dictate the entire flow of the confrontation, turning their ultimate survival tool into a predictable delay of their inevitable death.

レーン戦への影響

Kindred is constantly terrified of your jungle invasions, making them hesitant to collect their Mark of the Kindred stacks in your territory. You can aggressively contest neutral camps and objectives, knowing that if they try to deploy Wolf's Frenzy to fight back, you can instantly turn on them. This pressure severely stunts their scaling, forcing them to concede early map control.

立ち回り方

When ambushing, open with Taste Their Fear and Void Spike to quickly chunk their health and force an early Lamb's Respite. The moment they activate their sanctuary, do not keep attacking blindly. Instead, use Void Assault to slip into stealth or Leap to disengage just outside the golden circle. Wait out the timer, and as the healing burst triggers, immediately jump back in to execute them with a final, isolated Taste Their Fear.

チャンピオン詳細 → Kindredのビルド →
Twitch

Twitch−2

invadeburst Twitch is exceptionally vulnerable to early-game aggression in his own jungle. Because he relies on stacking Deadly Venom and triggering Contaminate to win extended duels, he cannot cope with immediate burst. Kha'Zix excels at catching him isolated in his camps, where Taste Their Fear deals massive, instant damage. This completely nullifies Twitch's ultimate, Spray and Pray, before he can even position to fire. Twitchのビルド → 詳細を見る
Twitch

理由

Twitch is exceptionally vulnerable to early-game aggression in his own jungle. Because he relies on stacking Deadly Venom and triggering Contaminate to win extended duels, he cannot cope with immediate burst. Kha'Zix excels at catching him isolated in his camps, where Taste Their Fear deals massive, instant damage. This completely nullifies Twitch's ultimate, Spray and Pray, before he can even position to fire.

レーン戦への影響

This matchup completely shifts the jungle pressure in your favor, forcing Twitch into a defensive state. He is forced to use Ambush as an escape tool rather than an offensive ganking weapon. By tracking his camp rotations, you deny him the gold needed to scale, securing early neutral control and keeping your laners safe from his signature invisible flanking maneuvers.

立ち回り方

Priorize early counter-jungling by invading Twitch at his camps where you can catch him off-guard. Do not initiate with Leap; instead, walk up from brush using Unseen Threat to slow him. Save your leap to chase him down when he attempts to flee with Ambush. If he retaliates with Venom Cask, immediately use Void Assault to break line of sight, reposition, and execute him with an evolved Taste Their Fear.

チャンピオン詳細 → Twitchのビルド →
Master Yi

Master Yi−1

skirmishstealth stall This matchup favors you because your burst toolkit directly counters Master Yi's sustained damage. When he activates Highlander and Wuju Style to shred you with auto-attacks, you can immediately cast Void Assault. Going invisible denies him targets for his basic attacks, wasting his ultimate's precious seconds. Once his buff expires, you can easily execute him using isolated Taste Their Fear strikes. Master Yiのビルド → 詳細を見る
Master Yi

理由

This matchup favors you because your burst toolkit directly counters Master Yi's sustained damage. When he activates Highlander and Wuju Style to shred you with auto-attacks, you can immediately cast Void Assault. Going invisible denies him targets for his basic attacks, wasting his ultimate's precious seconds. Once his buff expires, you can easily execute him using isolated Taste Their Fear strikes.

レーン戦への影響

In the jungle, this dynamic gives you absolute invasion priority. Master Yi cannot safely contest his own camps or secure objectives early if you find him isolated. If he attempts to engage you with Alpha Strike, he commits his only gap-closer and evasion tool, leaving him completely vulnerable to your counter-burst. This pressure forces him to farm defensively, conceding early river control.

立ち回り方

Never initiate a duel by jumping in with Leap. Instead, walk up or slow him with Void Spike, forcing him to use Alpha Strike first. The moment he activates Highlander, cycle your Void Assault charges to remain invisible during his peak DPS window. Wait out his Meditate damage reduction before unleashing your evolved Taste Their Fear. If he gets a reset, disengage immediately.

チャンピオン詳細 → Master Yiのビルド →

その他のマッチアップ

Kha'Zix対策アイテム

これらのアイテムを購入すると、このチャンピオンの影響力を抑えられます。

Stasis Enchant
Stasis Enchant
Plated Steelcaps
Plated Steelcaps
Randuin's Omen
Randuin's Omen
Thornmail
Thornmail
Guardian Angel
Guardian Angel

このチャンピオンへの対策

カウンターアングル

カ=ジックスのカウンターは、特定のチャンピオンだけでなく、孤立とリセットパターンを妨害することにあります。タンク系のジャングラーや直接的なエンゲージ能力を持つ脅威は、彼を不利な戦闘に追い込むことができ、連携の取れた構成は彼の機会を制限します。カウンターを理解することは、彼からテンポを奪うものを理解することです:視界、集団行動、そして絶え間ないプレッシャーです。

パッチの文脈

現在のメタでは、カ=ジックスは序盤のテンポをコントロールできるジャングラーや、直接的な戦闘を強要できるジャングラーに対して最も苦戦します。サステイン、クラウドコントロール、または強力なリバー2v2能力を持つチャンピオンは、彼のスノーボール能力を低下させます。さらに、視界を維持し、孤立したローテーションを避けるチームは、彼のインパクトを劇的に低下させます。問題はデュエルだけでなく、彼が活動する環境全体にあります。

クイックリード

  • タンク系のチャンピオンは彼のバーストを妨害します。
  • 集団化されたチームは彼の孤立を奪います。
  • 視界コントロールは彼の角度を制限します。

カウンターの原型

タンクエンゲージジャングラー

これらのチャンピオンは、カ=ジックスが孤立に頼れない直接的な戦闘を強要します。彼らの耐久力は彼のバーストを低下させ、彼らのエンゲージツールはRによる再配置能力を制限します。彼らは、彼がゲームをコントロールするのではなく反応するテンポを課し、彼のピックオフプレイを完全に妨害します。

チャンピオンの適応方法. 正面からの戦闘を避け、より遅くプレイし、セカンダリターゲットを探してください。

序盤プレッシャー系ジャングラー

これらのジャングラーは、彼の序盤のキャンプを妨害し、リバーのコントロールを防ぎます。序盤のゲームを防御的に強いることで、彼らは彼のスパイクを遅らせ、スノーボールの可能性を制限します。序盤のリードなしでは、カ=ジックスははるかに予測可能になり、敵のミスに依存するようになります。

チャンピオンの適応方法. 序盤は安全にプレイし、侵入よりも追跡を優先してください。

集団化され規律のある構成

チームが集団化され、キャリーを守るとき、カ=ジックスは彼の主なツールである孤立を失います。孤立したターゲットなしでは、彼のQの効果が低下し、インパクトを与えるために彼はより大きなリスクを冒すことを余儀なくされます。これにより、彼は真の処刑者ではなく、脅威へと変わります。

チャンピオンの適応方法. 側面を狙い、戦闘を強要するのではなくミスを罰してください。

優先度の高いマッチアップ

Lee Sin

Lee Sinは序盤からテンポを設定するため問題となります。彼は侵入し、デュエルを強要し、カ=ジックスがスパイクに到達する前に罰することができます。彼の機動力とコントロールは、クリーンなキルを確保するのをより困難にします。彼に対して、カ=ジックスは直接的な戦闘を避け、マクロプレイに集中する必要があります。

対面時のよくある間違い

対面時のよくある間違い

  • タンクとのデュエルを強要すること。
  • 敵の視界を無視すること。
  • 孤立なしでエンゲージすること。
  • 早すぎること。
  • リバー2v2ファイトを過小評価すること。

コーチングノート

  • 孤立させられないなら、エンゲージすべきじゃない。
  • 一番の敵は、個別のチャンピオンではなく、規律のあるチームだ。

FAQ

タンクはなぜカ=ジックスに有利なの?

タンクはカ=ジックスのバーストダメージを減らし、長期戦を強いることができる。これはカ=ジックスにとって危険だ。また、タンクは直接エンゲージできるため、カ=ジックスが視界や孤立を活かすプレイを妨害できる。これにより、カ=ジックスの素早いキルとリセットのパターンが完全に崩れる。

Lee Sin はなぜ難しいの?

Lee Sin は速いペースで序盤からカ=ジックスを罰することができる。彼は序盤に有利を持ち、川をコントロールして孤立の機会を制限できる。これにより、カ=ジックスは守備的なプレイスタイルを強いられ、スノーボールが遅れる。

カウンターを避けるにはどうすればいい?

プレイスタイルを適応させる必要がある:直接的な戦闘を避け、視界を活かし、ミスを待つ。カウンターに対しては、デュエルに勝つのではなく、マップの他の場所で機会を見つけることが目標だ。

集団構成はハードカウンター?

はい、孤立の機会を大幅に減らすためだ。しかし、そのような構成に対しても、ポジショニングのミスを罰することは可能だ。重要なのは忍耐強く、無理なエンゲージを避けることだ。









































