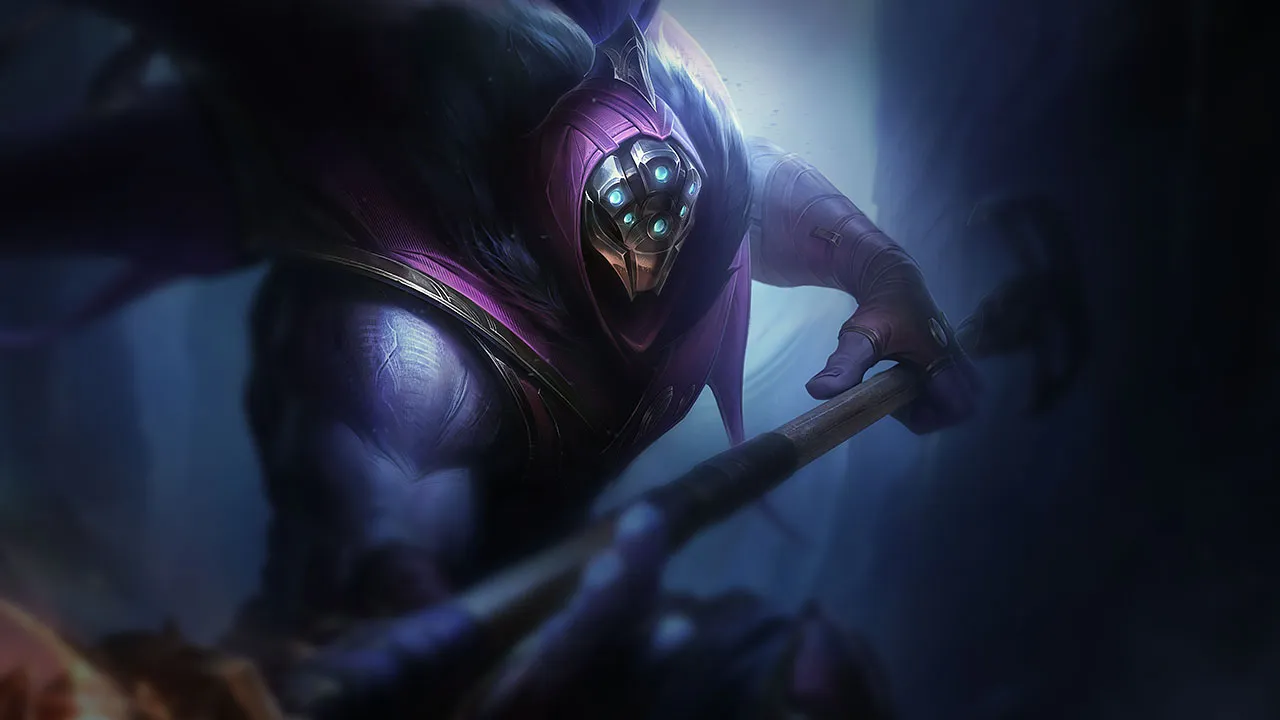




















カウンターアングル
Jaxは直接的なマッチアップで負けるのではなく、ペースを握られることで負ける。効果的なカウンターすべてに共通するのは、Jaxが長期的なトレードをできないようにすることだ。ポーク、バースト、コントロールのいずれであっても、彼が時間とともに価値を蓄積する能力を妨害する。Jaxのカウンターを理解することは、名前ではなく、彼の戦闘パターンを崩すものを理解することだ。

Jaxは、射程外からpokeを仕掛け、彼のduelのタイミングを回避してくる構成に対して脆弱です。AP burstチャンピオンや、持続的なkiteを得意とするプロファイルは、彼がpassiveを効果的にスタックするのを妨げます。アイテムが揃う前の脆弱なearly gameが、彼の最大の弱点となります。
これらのチャンピオンは、こちらのビルドやプレイスタイルを真正面から上回る構成を持ち、レーン戦のコントロールとファームを極めて難しくする。彼らのスキルはこちらの主要な強みを無効化し、いつも通りのプランを実行しようとした瞬間に手痛い反撃を受けさせてくる。こうしたマッチアップでは、ミスを最小限に抑え、正面からの対決以外で解決策を探すことが重要になる。

Malphite は、Jax の攻撃の軸を完全に封じます。Jax が engage すると、Malphite の Ground Slam が攻撃速度を大きく下げ、Relentless Assault による攻撃速度の上昇と、Grandmaster-at-Arms の追加の発動を無力化します。Leap Strike で Malphite に張り付こうとしても、Malphite は Seismic Shard であなたの移動速度を奪って無傷で歩き去り、あなたは機動力を失って無防備になります。
この状況は、Jax の trade 能力を破壊します。Malphite は Granite Shield に安全に守られながら常に poke で削ってくるため、あなたは安全に wave を争えません。長い trade を強行しようとしても、Malphite の debuff で通常攻撃が極端に遅くなり、必ず失敗します。結果として自分の tower の下に押し込まれて farm を落とし、あなたが wave の処理に苦しむ間に、Malphite は Unstoppable Force で自由に roam してマップに干渉します。
生き残りと scaling に完全に集中してください。ビルドは、純粋な攻撃力ではなく魔法防御と tenacity の方向へ切り替えましょう。Leap Strike で trade を仕掛けてはいけません。代わりに、逃げるときや、Malphite の Seismic Shard で slow を受けた後に安全圏へ跳ぶときのためだけに取っておいてください。Counter Strike は、Malphite の Thunderclap が有効なときに強化された通常攻撃を防ぐためだけに使い、Ground Slam の debuff を受けたらすぐに下がってください。

Kennen は、Jax の主力の攻撃手段をいとも簡単に無力化します。Leap Strike で距離を詰めようとするたびに、Kennen は Lightning Rush ですぐに高速で離れることができ、あなたの Counter Strike は意味をなさなくなります。あなたが cooldown を使い切って下がる間、Kennen は Thundering Shuriken と Electrical Surge で安全な距離から容赦なく punish し、Mark of the Storm をスタックさせて、あなたが触れる前に stun を決めます。
あなたは永続的に tower の下へ押し込まれ、絶え間ない遠距離の魔法ダメージを受けながら gold を失い続けます。Kennen はあらゆる trade を許さないため、強く poke されることなしに wave に対して Relentless Assault をスタックすることはできません。この絶え間ない消耗によって、序盤の不利な recall を強いられ、Kennen は tower の plate を自由に削ったり、チームを助けに rotate したりできます。その間、あなたは必死に farm で追いつこうとするしかありません。
生き残るには、純粋なダメージを急いで積むのではなく、序盤から魔法防御を重視した守備的なビルドへ完全に切り替える必要があります。Leap Strike で engage を仕掛けてはいけません。代わりに、歩いて近づいて farm し、Leap Strike は逃げるとき、または Kennen が Lightning Rush を無駄にしたときにだけ Kennen へ跳ぶために取っておいてください。Kennen が Slicing Maelstrom で tower の下にあなたを閉じ込めたら、Counter Strike で通常攻撃を軽減し、stun を吸収して、すぐに下がって次の機会に備えましょう。

この matchup の核心は、Poppy があなたの機動力を完全に封じることです。Leap Strike で trade を仕掛けたり逃げたりしようとするたびに、Poppy は Steadfast Presence で反応して発動できます。これであなたの dash はすぐに中断され、あなたは倒されて地面に固定されます。主力の gap-closer を失って立ち往生すると、Poppy の Hammer Shock の叩きつけに無防備になります。これは大きなダメージを与えて slow を付与し、有効な反撃を妨げます。
この封じ込めによってあなたの攻撃的な pressure は完全に無力化され、受け身の姿勢を強いられます。Relentless Assault をスタックするために前に出ると、壁に押しつけられたり大きく削られたりするため、wave の priority を争えません。trade は非常に不利になり、Poppy は自由に wave をゆっくり push したり、あなたの tower に crash させて楽に recall したり、あなたが wave の処理に追われている間に roam してチームを助けたりできます。
生き残るには、ポジショニングが最重要です。常に lane の中央に立って壁から離れ、Poppy に有利な角度を与えないでください。Leap Strike で engage を仕掛けてはいけません。代わりに歩いて近づいて farm し、Poppy が Steadfast Presence をすでに無駄にした後に逃げるためだけに跳躍を取っておいてください。Poppy が trade を強要してきたら、Counter Strike を防御的に使って通常攻撃を防ぎ、すぐに disengage してダメージを抑えてください。
これらのチャンピオンは、マッチアップ自体を絶望的にするわけではないが、対面で優位に立ちやすいツールを持っている。射程が長かったり、攻撃を受け止める力が高かったり、エンゲージへの対応手段が豊富だったりする。アプローチを調整し、戦闘を受け入れるタイミングを慎重に選ぶ必要がある。

Akali の防御的な機動力が、Jax の主力の脅威に完璧に対抗するため、Akali がこの lane を支配します。Counter Strike を発動して trade を仕掛けるたびに、Akali は Twilight Shroud に入るか Shuriken Flip で飛び退くことで、すぐにあなたの stun とダメージを無効化できます。あなたの回避と stun が決まる脅威がなければ、Leap Strike と Empower の combo はすべての pressure を失い、Akali の素早い魔法ダメージでの反撃にさらされます。
この状況では、守備的な姿勢を強いられ、安全に wave を争えません。Akali の Twilight Shroud が有効なときに trade を強行すると、致命的な体力損失につながり、recall のタイミングが狂って、Akali に wave control を完全に握られます。序盤の priority は譲り、体力を温存しながら tower の下で farm しなければならず、jungler を助けることも、scaling の前に Akali の tower に pressure をかけることもできません。
生き残るには、Akali の防御手段が使える間は Leap Strike で engage を仕掛けないでください。代わりに歩いて近づいて farm し、Counter Strike を防御的に使って、Assassin's Mark で強化された攻撃を防ぎましょう。Akali が Twilight Shroud を無駄にしたら、20 秒間のチャンスが生まれ、Leap Strike と Empower で積極的に trade できます。Akali の Shuriken Flip を受けた場合は、すぐに Counter Strike を発動して追撃の dash のダメージを防ぎ、Akali を下がらせてください。

この matchup が厳しいのは、Jax の主力の防御手段である Counter Strike が、Mordekaiser の主なダメージ源に対してまったく効果がないからです。Obliterate を避けることも、Darkness Rise の継続的な範囲ダメージを防ぐこともできません。このため、持続的な近接 trade で非常に無防備になり、Mordekaiser の重い skillshot を避けて自分で位置を変えるために、ほぼ完全に Leap Strike に頼ることになります。
このメカニズム上の不利のせいで、序盤の wave を直接争うことはできません。last hit を取ろうとするたびに、Mordekaiser は孤立したあなたを Obliterate で脅かし続けます。Death's Grasp で引き寄せられたら、Counter Strike を押すだけで安全に disengage することはできません。このため tower の下で守備的に立ち回ることになり、序盤の priority を犠牲にし、Realm of Death を耐えられるよう体力ゲージを高く保つために gold を少し失います。
生き残るには、Obliterate の単体ダメージを薄めるために、常に自分の minion の wave の中に立ってください。Leap Strike で trade を仕掛けてはいけません。代わりに歩いて近づいて Empower で攻撃し、Mordekaiser が Death's Grasp を詠唱したり Darkness Rise を発動したりしたときに、味方の minion へ跳んで戻るために Leap Strike を取っておいてください。Realm of Death に引き込まれた場合は、パッシブとのダメージ勝負をしようとせず、円を描くように走って叩きつけを誘って避けることだけに集中してください。

Volibear が短い trade に勝てるのは、Thundering Smash であなたを lock down して Sky Splitter と 2 回の Frenzied Maul の噛みつきにつなげることに大きく依存しています。Counter Strike で Volibear の stun と通常攻撃を完全に無効化できますが、Volibear の 2 回目の Frenzied Maul は大きく回復するため、Jax は長引く戦いで苦戦します。そのため lane が難しくなり、Volibear に 2 回噛みつかれると sustain で上回れません。
あなたは tower の下で常に pressure を感じることになります。Volibear は The Relentless Storm で wave を push しつつ、シールドを得るために Sky Splitter をあなたに当てようと狙います。Thundering Smash で stun されると、体力ゲージの半分と priority を取るチャンスをすべて失います。このため守備的に立ち回り、序盤の wave control を犠牲にして、Volibear と争わずに wave が戻ってくるのを待つことになります。
Volibear が Thundering Smash を有効にしてあなたに走ってくる瞬間に Counter Strike を発動して、stun を防いでください。すぐに素早い Empower の攻撃で追撃し、Volibear が 2 回目の Frenzied Maul で自分を回復する前に、Leap Strike で味方の minion へ跳んで戻ってください。Volibear が Sky Splitter を外したら、積極的に動く合図です。stun を防げなかった場合は、すぐに disengage して、反撃しようとしないでください。

Gragas の Body Slam が完璧な disengage 手段として働くため、Gragas は Jax の攻撃的な pressure を完全に無力化します。Counter Strike を回しながら Leap Strike で trade を仕掛けようとするたびに、Gragas はあなたの跳躍に合わせて dash を先行入力できます。これであなたの飛行は中断されて stun を受け、あなたが自分の stun を当てる前に Gragas はよたよたと去っていきます。
短い trade を確実に強要できないため、wave の位置取りは Gragas が決めます。Gragas は Barrel Roll であなたを poke で削り、受けたわずかなダメージは Happy Hour で回復します。無謀に跳び込むと、Gragas の counter-engage で大きく削られて無防備になり、lane の priority を明け渡すか、tower の下で gold を失うか、Explosive Cask で相手の tower の方へ飛ばされるリスクを負うことになります。
生き残るには、辛抱強く待つ展開で立ち回る必要があります。Leap Strike から trade を始めてはいけません。代わりに歩いて近づいて farm し、Empower で minion を確保しましょう。Gragas が Body Slam を攻撃的に、または waveclear に無駄にした場合にのみ、Counter Strike を発動して跳ぶ合図になります。それ以外は、minion に Relentless Assault をスタックして Gragas を脅かすことに集中し、Explosive Cask から逃げるために跳躍を温存してください。

この matchup は重要なやり取りにかかっています。Jax の Counter Strike は通常攻撃を避けますが、Heimerdinger の H-28G Evolution Turret のチャージされたレーザーは防げません。Leap Strike で闇雲に engage すると、Heimerdinger は Hextech Micro-Rockets や CH-2 Electron Storm Grenade を当てることで簡単にこれらのレーザーを発動でき、あなたが engage のモーションに縛られている間に体力ゲージが一瞬で溶けます。
Heimerdinger は 3 基の H-28G Evolution Turret を悠々と lane に置いて、あなたを tower の下に追い込みます。Leap Strike で確実に trade できないため、序盤の priority を譲るしかありません。Heimerdinger の設置物を壊そうとするたびに CH-2 Electron Storm Grenade にさらされ、Hextech Micro-Rockets からの強い poke につながります。あなたが Relentless Assault をスタックするのに苦労する間、tower は絶えずダメージを受け続けます。
生き残るには、規律ある忍耐が必要です。Heimerdinger がすでに CH-2 Electron Storm Grenade を無駄にした後でない限り、前方に Leap Strike を使ってはいけません。代わりに歩いて近づき、孤立した H-28G Evolution Turret を Empower で素早く reset しながら安全に壊し、Counter Strike は minion のダメージを軽減するか下がるためだけに温存してください。Heimerdinger が UPGRADE!!! を発動したら、すぐに味方の minion か ward に Leap Strike を使って下がり、強大なダメージ範囲から逃れてください。

Jayce は、遠距離フォームを悪用して Jax の体力を削ることで、この lane を支配します。Leap Strike で距離を詰めようとした瞬間、Jayce はすぐにフォームを切り替えて Thundering Blow を使い、空中、または着地した直後にあなたを吹き飛ばせます。これにより Counter Strike の stun の脅威は完全に無効化され、あなたは Jayce の遠距離の minion wave に取り残されたまま、強い反撃を受けます。
あなたは常に tower の下へ押し込まれ、体力ゲージの半分を失わずに minion の last hit を確保するためだけに、Counter Strike を防御的に使わされます。Leap Strike を早まって無駄にすると、Jayce は To the Skies! と Lightning Field で punish してあなたを大きく削り、序盤の recall を強います。これで gold を奪われ、Jayce は楽に plate の gold を手にし、jungler を助ける priority も得ます。
生き残るには、Leap Strike で engage を仕掛けるのではなく、歩いて近づいて trade する必要があります。Leap Strike は、Jayce が Thundering Blow を使った後に再び engage するときや、ハンマーフォームに切り替えて burst で倒しにきたときに味方の minion へ逃げ戻るためだけに温存してください。Counter Strike は、Jayce が近接の To the Skies! を使うまで温存し、素早い物理 burst を防ぎます。all-in を狙う前に、遠距離フォームの Jayce にマナを無駄にさせてください。

Teemo は、射程の優位と、ある特定の防御手段を組み合わせて、Jax の攻撃の脅威を完全に無力化します。距離を詰めようとすると、Teemo の Blinding Dart が通常攻撃を無効化し、Empower の追加魔法ダメージもキャンセルします。このため trade 中に Relentless Assault をスタックできず、Teemo の主力の防御手段が完全に尽きない限り、Teemo の毒のパッシブにダメージで勝つことはできません。
この状況では、minion を確保しようとするたびに Teemo の容赦ない Toxic Shot の poke にさらされるため、序盤の wave control を譲ることになります。無謀に trade を仕掛けると、タイミングのよい Blinding Dart で無防備になり、致命的な体力の trade になって早すぎる recall を強いられます。その結果、序盤は tower を守って過ごすことになり、安全に farm できるチャンスを待ちながら、gold を互角に保つのに苦労します。
生き残るには、Teemo の blind が使える間は Leap Strike で engage を仕掛けないでください。代わりに歩いて近づいて farm を脅かし、Blinding Dart を誘って使わせましょう。Teemo が使い切ったら、Leap Strike と Empower で engage できる短いチャンスが生まれます。Teemo が blind を温存している場合は、Counter Strike を発動して通常攻撃を防ぎながら、brush の安全圏へ下がってください。体力が減りすぎたら、CS を完全に諦めて、経験値を得るだけにしてください。

Jax の Counter Strike は Rumble の Flamespitter の範囲ダメージを 25% 軽減しますが、通常攻撃のように完全には防げません。Rumble は対象指定ではない持続的な魔法ダメージを与えるため、Jax は単に回避するだけではトレードから抜け出せません。Rumble の魔法 poke は Jax の体力を絶えず削り続けるので、Jax が Rumble の heat 管理の隙を突けない限り、正面からの戦いは危険です。
Rumble は序盤の wave のペースを簡単に支配し、Jax は minion 1体ごとに体力を失うことになります。タワー下に押し込まれると、Flamespitter の脅威が常にあるため farm は悪夢になります。このプレッシャーでマップのローテーションが制限され、あなたの jungler はトップの優先権を得られません。lane の勝敗は、反撃の最初の本当のチャンスとなる Grandmaster-at-Arms を解放するまでに、どれだけ体力を温存できるかで決まります。
序盤のレベルでは守備的にプレイし、wave をクラッシュさせてください。Leap Strike の後に Empower で仕掛けるのは、Rumble が heat を使い切った直後か、前に出すぎたときだけにしてください。Rumble が Flamespitter を発動したら、すぐに Counter Strike を発動して 25% の範囲ダメージを軽減し、その後は長引くデュエルに踏み込まず、stun を使って安全に離脱してください。体力が大きく減ってしまった場合は minion を譲り、Grandmaster-at-Arms を待って、短いトレードで Rumble を burst で倒してください。

この matchup は、Vayne があなたの主要なギャップクローザーに対抗できるかどうかで決まります。あなたが Leap Strike で仕掛けるたびに、Vayne は即座に Condemn で反応して、空中のあなたをノックバックさせられます。これであなたの Counter Strike の stun を仕込む流れは完全に潰されます。stun を当てられないと、あなたは孤立し、Vayne の絶え間ない Silver Bolts の発動と Tumble による間合い調整にさらされます。
序盤のほとんどを自分のタワーの下に閉じ込められて過ごし、体力を守るために minion を諦めることになります。トレードを試みるのは非常に危険です。Vayne がノックバックを温存している場合、退く前に大ダメージを受けます。このプレッシャーでマップでの存在感が制限され、あなたはトップ lane に縛られます。
lane で生き残れるかどうかは、Condemn の長い cooldown を突けるかにかかっています。Vayne のノックバックが使える間は、絶対に Leap Strike で仕掛けないでください。代わりに、ブッシュを使って minion のヘイトを外し、Vayne が位置取りを誤るよう誘ってください。Vayne が防御手段を無駄にしたら、Empower と Counter Strike を組み合わせて積極的に飛び込み、トレードを強いる絶好のチャンスです。

Vladimir の Sanguine Pool があなたの Counter Strike の stun とダメージを完全に無効化するため、短いトレードでは Vladimir がすべての主導権を握ります。Vladimir があなたの主要な防御手段を避けるためにプールに溶けると、あなたは完全に無防備になります。Vladimir はあなたが退いている間にすぐ Transfusion で追撃して体力を吸い戻すので、攻撃的なジャンプはすべてあなたの純損失になります。
この力関係により、あなたは消耗戦に追い込まれ、wave を簡単にクラッシュさせることも Vladimir を lane から追い出すこともできません。Vladimir は Transfusion で絶えず回復するため、あなたが与えたチップダメージは帳消しになり、あなた自身の体力は少しずつ減っていきます。タワーの下に釘付けにされてゴールドの確保に苦労し、Vladimir の体力に脅威を与えられるようになる Grandmaster-at-Arms の入手タイミングをひたすら待つことになります。
生き残って隙を見つけるために、Vladimir のプールが使える間は絶対に Leap Strike で仕掛けないでください。代わりに、minion に Relentless Assault を積み、Vladimir に向かってまっすぐ歩いてください。通常攻撃と Empower だけで、Vladimir に焦って Sanguine Pool を使わせてください。Vladimir が再び姿を現し、プールが非常に長い cooldown に入ったら、それこそがあなたのスパイクのタイミングです。Counter Strike を発動して飛び込み、Transfusion で体力を回復される前に all-in でトレードしてください。
その他のマッチアップ
このマッチアップは何よりもまず実行力の勝負であり、両者ともに優位を取れる現実的な手段を持っている。重要なスキルを一つ避けられるか、エンゲージを正しく読めるか、あるいはたった一つの位置取りのミスが、勝敗を分けることもある。マッチアップを理解し、行動すべき瞬間を見極める力がとりわけ重要になる。

この matchup は、あなたの Counter Strike と Dr. Mundo のパッシブ Goes Where He Pleases の直接的なぶつかり合いが軸です。Counter Strike の stun を発動すると、Dr. Mundo のパッシブがその CC を完全に無効化し、キャニスターを落とします。これで主要な防御手段が cooldown 中のあなたは完全に無防備になり、Dr. Mundo は Blunt Force Trauma の重い物理ダメージですぐに反撃できます。
これらの cooldown が噛み合わないため、トレードの局面は非常に不安定になります。あなたが何も考えずに Leap Strike で仕掛けて Counter Strike を発動すると、Mundo はその stun を吸収し、歩いて離れながら Blunt Force Trauma であなたの体力を大きく削ります。これは wave の管理にも影響します。防御用の stun が無駄になるたびに Mundo が破壊的なカウンタートレードを仕掛けてくる可能性があるため、自由に freeze したり slow push したりできません。
このテンポ争いに勝つには、全面戦闘に入る前に Dr. Mundo のスペルシールドを割る必要があります。Leap Strike で距離を詰め、Empower と通常攻撃での短いトレードでキャニスターを誘ってください。Dr. Mundo の Goes Where He Pleases が cooldown 中になるか、落ちたキャニスターを踏んで Dr. Mundo にタイマーを短縮させないようにできれば、安全に Counter Strike を使って Blunt Force Trauma を防ぎ、有利なトレードを取れます。

この lane は、Jax の Counter Strike と Fiora の Riposte の駆け引きだけに集中した、純粋な心理戦です。あなたが Counter Strike を発動すると、Fiora は Riposte のタイミングを合わせてあなたの stun を弾き返し、あなたに跳ね返そうとします。Fiora のパリィを誘い出すか、再発動を温存できれば、Relentless Assault による高い攻撃速度で反撃を受けずに Fiora を削れる大きなチャンスが生まれます。
Counter Strike のタイミングを1回でも誤れば、Fiora が Lunge で Vital を決めてトレードに勝つため、すべてのトレードが非常に緊張します。Riposte が cooldown 中なら、あなたは wave を完全にコントロールでき、slow push して大きな wave をクラッシュさせられます。逆に、Fiora に stun されると、Fiora は簡単に Grand Challenge を発動でき、あなたはタワーまで退くか、solo kill を献上するリスクを負うことになります。
この心理戦に勝つには、Counter Strike をすぐに再発動しないでください。stun のタイミングを変え、すぐに再発動することもあれば、2秒間フルで持続させることもあります。Fiora が Riposte を温存している場合は、Leap Strike で味方の minion の元へ飛び戻って離脱してください。Fiora が Grand Challenge を発動したら、地形かあなた自身のタワーに張り付いて、Fiora に最後の Vital を当てさせないようにし、回復ゾーンを無効化してください。

このデュエルは、Garen のスピンに対して Counter Strike をどう使うかで決まります。Counter Strike は Garen の Decisive Strike のサイレンスを完全に防ぎますが、Judgment には効果がありません。Garen のスピンは、あなたが回避している間もあなたのアーマーを削りダメージを与え続けるため、Garen が主力のダメージスキルを使える状態では、防御の構えで闇雲にトレードに勝とうとすることはできません。
この相性により、非常に不安定なトレードの展開になります。序盤に Counter Strike を無駄にすると、Garen はすぐに Decisive Strike であなたをサイレンスし、Judgment でスピンして倒し、lane から追い出すか Demacian Justice で処刑できます。逆に、先に Garen のスピンを誘い出せれば、Garen を拘束し、Relentless Assault を積んで、何の心配もなく wave のプッシュを支配できます。
Garen の Judgment が cooldown 中のとき以外は、Leap Strike でトレードを仕掛けないでください。代わりに歩いて近づいて farm し、Garen が Decisive Strike をチャージしてきたら、攻撃が当たる直前に Counter Strike を発動してサイレンスを防いでください。Garen がスピンを始めたら、すぐに Leap Strike で味方の minion かワードへ飛んで範囲から逃れてください。Garen の剣のスピンが止まってから、Empower と Grandmaster-at-Arms で再び仕掛け、長い cooldown の隙を突いて重いトレードを強いてください。

この lane は、Renekton の Ruthless Predator とあなたの Counter Strike をめぐる純粋な心理戦です。Ruthless Predator は強化された通常攻撃なので、Counter Strike はその stun とダメージを完全に無効化します。しかし、賢い Renekton は Slice and Dice で飛び込み、あなたの防御スピンを誘い、また離脱してきます。あなたが回避を無駄にすると、Renekton の fury が高い状態のコンボがあなたの体力を一瞬で削ります。
誰が先に動揺するかで体力が激しく入れ替わります。Renekton の fury が高いときは、Cull the Meek が wave を押しながら Renekton を回復させるため、wave のコントロールを譲らなければなりません。Renekton の stun を防げたなら、Leap Strike と Empower で長い lane を追いかけ、Dominus を使わせるか kill を取れます。そうでなければ、あなたは拘束され、体力を削られ、最悪の recall を強いられます。
Renekton が Slice and Dice で飛び込んできても、先走って Counter Strike を発動しないでください。代わりに、Renekton が通常攻撃のモーションに入るのを待ってください。Renekton が Ruthless Predator を使わずに離脱した場合は、すぐに追って飛びかからず、Leap Strike は離脱用か、Renekton の cooldown が尽きてから追うために温存してください。戦うときは、通常攻撃の後に Empower を挟んで素早く Relentless Assault を積み、Renekton の burst がなくなった長いトレードで圧倒してください。

この skill matchup は成長差が軸で、Ornn は Living Forge でアイテムを鍛えるために生き残ろうとし、あなたはサイドレーンで Ornn に scaling で勝つことを狙います。重要な転換点は Bellows Breath です。Ornn の炎が当たった場合、Ornn は通常攻撃を当てて Brittle マークを消費し、大ダメージを与える必要があります。Counter Strike を発動すればその通常攻撃を完全に防げて、Ornn の主要なトレード手段を無効化できます。
wave のコントロールが lane のペースを決めます。Ornn は Leap Strike にさらされることなくあなたの freeze を崩すのが難しいため、minion を自分のタワー付近に保つことで Ornn を危険な位置に追い込めます。wave の管理に失敗すると、Ornn は Volcanic Rupture で簡単に wave を押し込み、無料の recall でアイテムを購入します。lane の状態をコントロールすれば、Ornn が安全に scaling するのを防げ、Ornn の受け身の farm を常に危険なものにできます。
Ornn の Searing Charge が cooldown 中のとき以外は、Leap Strike でトレードを仕掛けないでください。代わりに歩いて近づいて farm し、wave に Relentless Assault を積んで、Ornn の Bellows Breath を誘ってください。Ornn が炎を吐くのを見たら、すぐに Counter Strike を発動してマークを消費する攻撃を吸収し、その後 Empower で通常攻撃をリセットしてください。Ornn が Volcanic Rupture の柱に Searing Charge をぶつけて退くなら、wave を freeze して Ornn のゴールドを奪ってください。

この matchup は、防御用 cooldown のトレードの仕方で決まります。あなたは Nasus の主要なダメージ源を防ぐ最適な手段を持っており、Counter Strike で Siphoning Strike を完全に無効化できます。しかし、Nasus は Wither であなたの Relentless Assault による攻撃速度の伸びを打ち消し、攻撃の勢いを削いできます。防御の構えを早く使いすぎると、Nasus はあなたをほぼ動けないほど減速させ、ダメージのスタックを自由に積みます。
lane の結果は、あなたの wave 管理に完全にかかっています。闇雲に押すと、Nasus は自分のタワー付近で freeze し、安全に Siphoning Strike で farm し、Soul Eater で sustain します。あなたは自分側で minion を freeze して、Nasus にスタックを求めて前に出すぎさせなければなりません。Nasus に邪魔されずに farm させると、最終的には Fury of the Sands を使った Nasus に追い詰められます。
トレードするときは、絶対に Leap Strike で仕掛けないでください。代わりに歩いて近づき、Empower で Nasus を poke してください。Counter Strike は、Nasus が Siphoning Strike で反撃しようとしたときのために温存してください。Nasus が Wither をあなたに使ってきたら、すぐに Leap Strike で味方の minion に飛び戻り、行動不能に近い減速が切れるまで離脱してください。Nasus の攻撃速度低下を押し切って戦おうとせず、効果が切れるのを待ってから攻勢を再開してください。

このデュエルは、Warwick の Eternal Hunger と Jaws of the Beast による回復と、Jax の防御の隙との絶え間ない消耗戦です。決定的な転換点は Counter Strike です。Warwick が Infinite Duress を発動した瞬間にぴったり Counter Strike を発動すれば、Jax はサプレッションの物理ダメージと大きなライフスティールの両方を完全に無効化し、本来なら致命的な ult を無駄な cooldown に変えられます。
Warwick は通常攻撃で sustain するため、短いトレードは無意味です。lane から poke で追い出すことはできません。そのため、自分のタワー付近で freeze しなければならない、ゆっくりした lane になります。単純なトレードで Counter Strike を防御的に無駄にすると、Warwick はすぐに Blood Hunt と Infinite Duress で all-in を強い、あなたに dive するか、minion の wave からあなたを遠ざけ続けます。
Warwick の Primal Howl がすでに cooldown 中のとき以外は、Leap Strike でトレードを仕掛けないでください。距離を保ち、minion に Relentless Assault を積んでください。Warwick が Infinite Duress で飛びかかってきたら、すぐに Counter Strike で反応して、Warwick の ult のヒット時効果を防いでください。先に Primal Howl でフィアーを受けた場合は、すぐに Leap Strike で味方の minion へ飛んで離脱し、仕切り直してください。

この matchup は、Jax の Counter Strike と Riven の Broken Wings がどう噛み合うかに集中した、純粋なメカニクスのデュエルです。Riven はあなたの周りを動き回り、高い機動力であなたに防御の構えを無駄にさせようとします。誘いに乗ってしまうと、Riven の Runic Blade と Ki Burst による高い burst に圧倒されます。逆に、Riven がダッシュ中にあなたの stun を当てれば、Empower で反撃し、Relentless Assault を積めます。
wave の状態は、どちらが主要な手段を使える脅威を保っているかで完全に決まります。Counter Strike を無駄にすると、Riven はすぐに wave のコントロールを得て、あなたを minion から追い払い、Blade of the Exile で dive の脅威をかけてきます。Counter Strike を温存していれば、Riven は壊滅的なカウンターエンゲージを受けるリスクなしには Valor を使って簡単にトレードできません。すべてのトレードが爆発的なので、タイミングを1回誤っただけで序盤の recall を強いられることもよくあります。
Riven が Broken Wings のコンボを始めた瞬間に焦って Counter Strike を発動しないでください。代わりに Riven に並んで歩き、通常攻撃で Relentless Assault のスタックを積んでください。stun を使うのは、Riven が3段目のノックアップに踏み込んだときか、Valor で逃げようとしたときだけにしてください。ダメージを受けずに防御を誘われてしまった場合は、Riven の cooldown が戻る前にすぐ Leap Strike で味方の minion へ飛んで退き、Empower を構えたまま、Riven を迎え撃ってください。

この matchup は、攻撃を防ぐゾーン同士の純粋な戦いです。Shen は主なダメージを Twilight Assault に頼っていますが、それはあなたの Counter Strike で完全に無効化されます。逆に、あなたが Empower と Relentless Assault のスタックで反撃しようとすると、Shen は Spirit's Refuge を展開してあなたの通常攻撃を無効化します。互いに対になる防御手段を先に誘い出さない限り、どちらのチャンピオンも力ずくで相手を押し切れません。
短く爆発的なトレードが lane を支配し、どちらもコミットをためらうため wave の状態は中立のままです。Counter Strike を無駄にすると、Shen はすぐに Shadow Dash でトレードを強いてきます。しかし、Shen の Stand United によるグローバルな脅威は、あなたの存在によって大きく牽制されます。Counter Strike の stun で Shen のチャネリングをキャンセルするか、Shen が離れた隙にすぐにタワーのプレートを取って罰することができます。
Leap Strike で仕掛けるのではなく、wave に歩いて近づいて Relentless Assault を積んでください。Shen が Shadow Dash であなたをタウントしたら、すぐに Counter Strike を発動して Twilight Assault のダメージを無効化してください。Shen の Spirit's Refuge のゾーンが消えるまで Empower を温存し、ダメージを無駄にしないようにしてください。最後に、Shen が ult を持っているときは Leap Strike を温存し、素早く距離を詰めて Stand United から stun で引きずり出してください。

この matchup は、Pantheon の強化された Shield Vault とあなたの Counter Strike の直接のぶつかり合いで決まります。Pantheon が Mortal Will を最大までスタックさせると、Pantheon の次のジャンプは3連続の攻撃を一瞬で繰り出します。Counter Strike を発動してこの3連撃を吸収すれば、Pantheon の主要な burst ダメージ源を完全に無効化でき、不安定だった lane は互いのスキルの cooldown で決まる互角の勝負になります。
その結果、wave のコントロールは、互いに相手の主要な防御手段を誘い合う緊張した待ちのゲームになります。Pantheon は stun を温存したまま、短射程の Comet Spear の突きであなたの体力を削ろうとします。あなたが Counter Strike を無駄にすると、lane の優先権をすべて失い、退かなければなりません。Pantheon が仕掛けのタイミングを外せば、あなたが wave を完全にコントロールできます。
Pantheon のパッシブバーから目を離さないでください。Mortal Will が最大までチャージされたら、Counter Strike を温存し、Leap Strike でトレードを仕掛けないでください。Pantheon が前方にジャンプしてきたら、すぐに Counter Strike を発動して3連撃をパリィしてください。Pantheon が Aegis Assault であなたの stun の再発動を防いできた場合は、Pantheon の体をすり抜けて無防備な背中を攻撃し、シールドが切れたらすぐに Empower を続けてください。
その他のマッチアップ
これらのチャンピオンは、こちらの主要な強みに効果的に対応するのが難しく、より自由に対面を組み立てることができる。プレッシャーをかけて有利な交換を引き出す手段は複数あることが多い。相手が態勢を立て直す時間を与えるのではなく、この優位を活かして主導権を握ろう。

Jax は自然に Aatrox に scaling で勝ちますが、lane で即座に優位に立てるのは、Aatrox の間合い取りを簡単に封じられるからです。Aatrox が The Darkin Blade を撃つとき、Leap Strike で Aatrox の真上に飛び込めば、最初の2回の攻撃の外側のスイートスポットを完全にすり抜けられます。近接距離に入ったら Counter Strike を発動することで、Aatrox の重要な Deathbringer Stance の通常攻撃を無効化し、Aatrox は回復もトレードのやり返しも効果的にできなくなります。
この力関係により、Aatrox は守備的な姿勢を強いられ、minion wave を安全に争えなくなります。あなたは近距離の長いトレードにすべて勝てるので、自分のタワー付近で簡単に wave を freeze したり、slow push して dive の脅威を作ったりできます。Aatrox は中立的な recall のタイミングを見つけるのに苦労し、The Darkin Blade であなたを poke しようとするたびに、体力を大きく削られる壊滅的なカウンターエンゲージを受けるリスクがあります。
Aatrox の射程の近くを歩いて、最初の The Darkin Blade を絶えず誘い出してください。Aatrox が撃った瞬間に Leap Strike で最小射程の内側へ飛び込み、致命的なダメージゾーンをすり抜けてください。Counter Strike はすぐには発動せず、Aatrox がパッシブの Deathbringer Stance で反撃しようとするまで温存してください。Aatrox が非常に安全にプレイして Infernal Chains で離脱するなら、単に minion のところへ歩いて戻り、パッシブの Relentless Assault のスタックをリセットして、Aatrox の長い cooldown を待ってください。

Jax が大きく有利なのは、攻撃的なトレードの流れが Gnar の防御的な対応を完全に強いるからです。Counter Strike を発動中に Leap Strike で仕掛けると、Mini Gnar は stun されて Relentless Assault に削られるのを避けるため、即座に Hop を使うしかありません。Leap Strike の cooldown は Hop よりかなり短いため、Jax には Gnar が完全に無防備になる大きな攻撃の窓が生まれます。
この cooldown の差が wave の力関係を決めます。Hop が cooldown 中の Gnar は非常に後ろに下がってプレイせざるを得ず、あなたは lane を freeze したり slow push したりする完全な自由を得ます。Gnar が Boomerang Throw で farm しようと前に出てきたら、すぐに罰することができます。Gnar はあなたの wave のコントロールに対抗できず、あなたは簡単にタワープレートを取れ、Gnar が自分のタワーの下で farm に苦しむ間に深いビジョンコントロールも取れます。
このリードを確実にするため、最初の Leap Strike で仕掛けるときは Counter Strike を早く再発動しないでください。ヘリコプターを最後まで持続させて、Gnar に Hop を使わせてください。Gnar が Hop を無駄にしたら、自分の wave まで退いて Relentless Assault を積み、Hop が戻る前に次の Leap Strike でもう一度 Gnar に飛びかかってください。Gnar の rage バーに注意してください。変身しそうなときは、Boulder Toss の stun を避けるためにジャンプを温存してください。

Counter Strike が、通常攻撃と Crippling Strike による Darius の Hemorrhage スタックの付与を完全に無効化するため、Jax はこの matchup を支配します。Darius は通常攻撃できないので、あなたの回避の間のトレードと回復を Decimate に頼らざるを得ません。Leap Strike を温存して Decimate の内側のハンドル部分に飛び込めば、Darius の回復を完全に阻止しつつ、攻撃のプレッシャーを維持できます。
この相性により、lane の力関係は完全にあなた優位に傾きます。Darius は Apprehend であなたを zone することが安全にできません。フックを試みるたびに、あなたが壊滅的なトレードで反撃できるからです。あなたは大きな wave を簡単に作ってクラッシュさせ、Darius にタワー下でゴールドを失わせられます。Darius は Decimate で回復できないため、体力はすぐに減り、受け身の lane の状態に追い込まれます。
歩いて近づき Counter Strike を始めて、Darius の通常攻撃を防ぐ形でトレードを仕掛けてください。Darius のアニメーションをよく見て、Decimate を振りかぶった瞬間にすぐ Leap Strike で Darius に飛びつき、体にぴったり張り付いて、ハンドルのダメージを受けつつ回復を阻止してください。着地したらすぐに Empower で攻撃をリセットし、素早く Relentless Assault を積んで Grandmaster-at-Arms のパッシブ攻撃を発動させてください。先に Darius の Apprehend で引き寄せられた場合は、すぐに回避を発動してください。

Counter Strike が Pit Grit のパンチと Knuckle Down の強化攻撃を完全に無効化するため、Jax は大きく有利です。Sett は Grit を溜めるためにこれらの通常攻撃に大きく依存しています。Sett が Haymaker でトレードを挽回しようとしても、Jax は単に Leap Strike で minion の上や中央の true damage ゾーンの外に飛ぶだけで、Sett のシールドとパンチを無意味にし、自分の体力を保てます。
短いトレードは楽に勝てるので、wave を slow push して、Sett に選択を迫れます。Sett は Facebreaker で仕掛けるために気軽に歩いて近づくことができません。そうすると、あなたが Counter Strike を発動するのにちょうどいい距離に入ってしまうからです。これで Sett は自分のタワーの下に釘付けになり、minion のゴールドを失い続け、あなたは自由に Relentless Assault を積んで dive の脅威を作ったり、楽な recall のタイミングを確保したりできます。
Leap Strike でトレードを仕掛けず、代わりに歩いて近づき、Empower で強化した通常攻撃を使ってください。Counter Strike は、Sett が Knuckle Down を発動したときのためにしっかり温存してください。Sett が Facebreaker であなたを掴んだら、すぐに Counter Strike を発動して追撃を防いでください。Sett が Haymaker をチャネリングしたら、すぐに Leap Strike で中央のラインから脱出してください。早く飛びすぎると、Sett は攻撃の向きを変えるだけか、The Show Stopper であなたを捕まえます。

Kayle は farm も poke も Starfire Spellblade の通常攻撃に完全に頼っているため、Jax がこの matchup を完全に支配します。Kayle が高レベルのパッシブの進化に到達する前なら、Jax は Kayle の kite を簡単にすり抜けられます。Leap Strike で一瞬で距離を詰めつつ Counter Strike で Kayle の物理 DPS をすべて無効化すれば、Jax は Kayle の序盤のトレード力を無力化し、タワー下へ追い込めます。
この matchup は序盤に大きなプレッシャーを生みます。Kayle の Radiant Blast では攻撃的なジャンプを止められないため、最初の数 wave から Kayle を zone できます。Kayle はあなたの wave のコントロールに対抗できないので、slow push を積み重ね、クラッシュさせ、range を得る前に dive できます。Kayle は Celestial Blessing を防御的に使わざるを得ず、mana を消耗して、資源の乏しい惨めな lane に閉じ込められます。
レベル1か2から積極的にトレードを始めてください。wave に歩いて近づいて Kayle を下がらせ、Kayle が Celestial Blessing で離脱しようとしたときのために Leap Strike を温存してください。Counter Strike は空中か着地直後に発動して、Kayle の Starfire Spellblade による反撃を吸収してください。Kayle がタワー下で非常に安全にプレイしている場合、Divine Judgment が使える状態では dive を強行せず、代わりに自分のタワー付近で wave を freeze し、XP 範囲から Kayle を完全に zone してください。

この matchup では Jax が大きな scaling 面の優位を持ち、Jarvan IV の ult は 1v1 ではまったく役に立ちません。Jarvan IV が Cataclysm であなたを閉じ込めても、minion、味方のワード、あるいは Jarvan IV 自身を Leap Strike の対象にすれば、アリーナから簡単に脱出できます。さらに、Jax の Counter Strike は Jarvan IV の高ダメージなパッシブ Martial Cadence を完全に防ぎ、Relentless Assault による攻撃速度が上がるにつれて、長いデュエルはすべて Jax に大きく傾きます。
Jarvan IV は距離を取って Dragon Strike と Demacian Standard であなたを poke するしかなく、すぐに mana プールを消耗します。適切な間合いを保てば、この直線的な脅威を回避でき、wave の優先権を確保し、大きな wave をクラッシュさせてタワーにプレッシャーをかけられます。Jarvan IV はあなたを拘束することも、デュエル力で対抗することもできないため、優先権を譲らざるを得ず、味方を助けるための roam ができなくなります。
Jarvan IV が Cataclysm で仕掛けてきた場合に Leap Strike での脱出ルートを確実にするため、必ずインベントリにワードを持っておいてください。短いトレードでは Jarvan IV のアニメーションをよく見て、Jarvan IV が Martial Cadence をあなたに発動させようとした瞬間にすぐ Counter Strike を使ってください。Jarvan IV の旗とドラッグの射程のすぐ外に立ち、Jarvan IV の機動手段が cooldown 中になったら Leap Strike で飛び込み、Empower で攻撃をリセットして、Jarvan IV を lane から追い出してください。

Jax の Counter Strike が Yone の主要なダメージ源を完全に封じるため、Jax はこの matchup を支配します。Mortal Steel は最初の対象に対して通常攻撃として扱われるため、Counter Strike を発動すると、Yone の通常攻撃と物理の突きの両方をパリィできます。これにより Yone は素早いスタック生成を阻まれ、攻撃的なトレードの試みは自分自身への stun の隙になり、Jax が簡単に反撃できます。
Yone は、あなたの防御の構えが使える状態では、二重ダメージの通常攻撃で安全に歩いて近づき wave を取ることができません。wave の位置取りはあなたが決め、Yone は Mortal Steel の先端で距離を取って farm するしかありません。この絶え間ないプレッシャーによって、あなたは wave を Yone のタワーに向けて slow push でき、Spirit Cleave のシールドなしでは反撃に苦労する Yone の体力を、タワー下で Empower を込めた攻撃で削れます。
Counter Strike を早く無駄にしないでください。Yone が Soul Unbound で仕掛けてくるか、3回目の Mortal Steel をチャージするまで待ってください。Yone が前にダッシュしてきたら Counter Strike を発動して burst を吸収し、すぐに Leap Strike と Empower で追撃して体力を大きく削ってください。Yone にあなたの Evasion を誘われ、霊体で離脱された場合は、主要な防御の cooldown が戻るまで、すぐに minion の wave まで退いてください。

lane での優位は、Counter Strike が Drakehound's Step とどう噛み合うかにかかっています。Ambessa が Cunning Sweep か Lacerate を発動するたびに、攻撃速度とダメージが強化されたダッシュ攻撃のためにパッシブを準備状態にします。Counter Strike を発動すれば、これら高ダメージの強化された通常攻撃を完全に無効化でき、Ambessa は反撃のトレードをするどころか、あなたの stun 範囲から逃れるためだけに方向フェイントを防御的に使い切らざるを得なくなります。
この相性は Ambessa の序盤の lane bully としての立場を奪い、あなたは好きなように wave を slow push できます。Ambessa はあなたの近接射程に入ると致命的なトレードになるリスクがあるため、wave 上のあなたの Relentless Assault のスタックに対抗できません。Ambessa は距離を取って farm するか退くためにスキルを使わざるを得ないので、Repudiation のシールドはしばしば無駄になり、レベル6に到達したあなたの強力なタワー dive にさらされます。
すぐに Counter Strike でトレードを仕掛けないでください。代わりに歩いて近づくか、Leap Strike と Empower で Ambessa の Cunning Sweep を誘ってください。Ambessa が反撃のために Drakehound's Step を発動したら、すぐにスピンを発動してください。Ambessa が Repudiation であなたの stun を防ごうとする場合は、再発動を最大持続まで遅らせて、stun が当たる前にシールドが切れるようにしてください。Ambessa が Public Execution で逃げた場合は、ult のアニメーションが終わった後に距離を詰めるため Leap Strike を温存してください。

Jax の Counter Strike が Camille の主要なダメージ源 Precision Protocol を完全に無効化するため、Jax は Camille を支配します。Camille は強化された通常攻撃の true damage 部分に頼っているので、Camille がレッグブレードを発動したときに Jax が Counter Strike を押すだけで、Camille のトレードパターンはすべて無効になります。これで Camille は守勢に回り、致命的な stun で固められる反撃を受けるリスクなしには Hookshot を積極的に使えなくなります。
この相性により、Camille はトレードも wave の争奪も完全に麻痺します。Camille を minion の wave から簡単に zone でき、Camille は距離を取って Tactical Sweep で farm するしかなく、それは自然に wave をあなたのタワーの方へ押し込みます。Camille がスプリットプッシュしようとしたり last hit のために歩いて近づいたりしたら、あなたが仕掛けるタイミングを決められます。ゴールドと経験値の大きなリードをじわじわ築き、それがサイドレーンでの圧倒的な支配につながります。
Counter Strike でトレードを仕掛けないでください。代わりに Camille に歩いて近づき、Leap Strike と Empower で Camille に防御用の Adaptive Defenses シールドを使わせてください。シールドが切れるのを待ち、Camille が Precision Protocol を発動するのが聞こえたり見えたりしたときだけ Counter Strike を発動してください。Camille に stun を誘われて Hookshot で逃げようとした場合は、すぐに Leap Strike で Camille の逃走経路を追い、stun を当てて安全地帯に着く前に仕留めてください。

Counter Strike が New Destiny による Graves の通常攻撃をすべて完全に無効化するため、この matchup は Jax に大きく有利です。Graves はダメージを与え Quickdraw の cooldown を縮めるために、この近距離の散弾を当てることに頼っています。あなたの回避があれば Graves は完全に無防備になります。ランタンを回しながら Leap Strike で飛び込めば、Graves は慌てて退くしかなく、有意なダメージを返せません。
Graves は非常に守備的にプレイせざるを得ず、安全な距離から minion を確保するためだけに End of the Line を無駄にすることもよくあります。これは自然に wave をあなたのタワーの方へ押し込み、freeze を作らせてくれます。Graves がショットガンを撃つために前に出てきたら、all-in の脅威をかけられ、ゴールドを飢えさせ、Graves が基地に戻らざるを得なくなる間に楽にプレートを取れます。
闇雲に飛び込まず、歩いて近づいて Graves の Quickdraw のダッシュを誘ってください。Graves が機動手段を使ったら、すぐに Leap Strike で仕掛けて Counter Strike を発動し、飛んでくる散弾を防いでください。stun 中に Empower でリセットして追撃してください。Graves が Smoke Screen を使ってあなたを盲目にしてきたら、視界を失ってあなたの強化攻撃が当てられなくなる前に、すぐ Counter Strike を再発動して stun を確実に当ててください。

Jax の Counter Strike が Urgot の主要なダメージ源を完全に止めるため、この matchup はあなたに大きく有利です。Urgot が Purge を発動して連射の弾幕を放っても、Counter Strike を発動すればすべての弾を完全に無効化します。Urgot のダメージをすべて回避できるだけでなく、Urgot の Purge の攻撃があなたの Counter Strike の再発動のダメージを急速にチャージしてくれるため、Urgot は完全に無防備になります。
Urgot はあなたの存在を警戒せざるを得ず、Purge で簡単に wave をクリアしたり minion の優先権を争ったりできません。すべてのトレードが Urgot の cooldown を中心に回ります。Urgot が Corrosive Charge を外したり Purge を早く使いすぎたりしたら、wave から Urgot を完全に zone できます。これにより、好きなように wave を slow push でき、無料の recall のためにクラッシュさせられ、本格的なタワープレッシャーに直面することなく大きなゴールドのリードを築けます。
Counter Strike でトレードを仕掛けないでください。代わりに歩いて近づくか Leap Strike で仕掛け、Empower を当ててください。Urgot が焦って Purge を発動するのを待ってから Counter Strike を押してください。Urgot が時間稼ぎのために Disdain であなたを投げ飛ばそうとしたら、Leap Strike ですぐに再び距離を詰めてください。Urgot の防御シールドが切れたときに通常攻撃で圧倒できるよう、wave で Relentless Assault を満タンに積んでおいてください。

Counter Strike が Irelia の主要な勝ち筋を完全に無力化するため、Jax はこの matchup を支配します。Irelia は Bladesurge のリセットで Ionian Fervor をスタックさせ、高速の通常攻撃で相手を削ることに大きく頼っています。Counter Strike を発動すれば、パッシブが満タンの間の Irelia の攻撃の出力をすべて防げ、最も強い skirmish の窓が無駄な空振りになり、その間にあなたは Relentless Assault を高めていけます。
この相性により、wave のコントロールは完全にあなたの手に移ります。Irelia は、壊滅的なトレードを受けるリスクなしには、Bladesurge で体力の低い minion を安全に処理できません。Irelia が wave でパッシブを積もうとするたびに、あなたが仕掛ける脅威をかけられます。これにより Irelia は優先権を譲らざるを得なくなり、あなたは wave を slow push したり、Grandmaster-at-Arms でタワー下の Irelia に dive したり、ゴールドを完全に締め出したりできます。
先走って Counter Strike を無駄にしてトレードを仕掛けないでください。代わりに歩いて近づき、Leap Strike と Empower で反応を引き出してください。Counter Strike は、Irelia が Bladesurge で戦いに踏み込むか最大スタックに達するまで温存してください。Irelia が Defiant Dance であなたの stun を防ごうとする場合は、Irelia の後ろに回り込むか、再発動を遅らせて通常攻撃を最大化してください。Irelia が Flawless Duet を外したら、すぐに飛びかかって Flash か kill を強要してください。

Yasuo はダメージを与えることと tornado を溜めることを、通常攻撃と Steel Tempest に完全に頼っています。Steel Tempest は攻撃として扱われるため、Jax の Counter Strike はこの両方を同時に完全に無効化します。回避の間、Yasuo はあなたにダメージを与えられないので、長引くトレードのデュエルには勝てません。この機構的なブロックによって、Yasuo の lane bully としての可能性は奪われ、守備的にプレイせざるを得なくなります。
レベル1から wave を完全に支配できます。Yasuo は Counter Strike に対してトレードを返せないため、wave を積極的に進めるのではなく、Sweeping Blade で退くしかありません。簡単に freeze を作れ、minion のゴールドから Yasuo を完全に zone できます。Yasuo が Steel Tempest で poke しようと前に出すぎたら、体力を簡単に大きく削って、悪いタイミングでの recall に追い込めます。
全面攻撃を始める前に、シンプルな通常攻撃か素早い Leap Strike で Yasuo の Way of the Wanderer のシールドを割ってください。シールドが消えたら、トレードを仕掛けてください。Counter Strike はすぐには発動せず、Yasuo が Steel Tempest か通常攻撃に踏み込むのを待ってください。Yasuo が minion を使った Sweeping Blade で逃げようとしたら、Leap Strike で追いかけ、次の攻撃を Empower で強化して楽に kill を取ってください。

Sion の主要な手段 Decimating Smash に対して、あなたは2つの直接的な対抗策を持っているため、この matchup は Jax に大きく有利です。Sion が斧のチャージを始めたら、Leap Strike で背後に飛ぶか、Counter Strike を発動してチャネリングから stun で引き離すことで、脅威を即座に無効化できます。あなたのパッシブ Relentless Assault と Grandmaster-at-Arms は Sion の硬さを上回って scaling するため、Sion はあなたの素の DPS に太刀打ちできません。
Sion は wave をクリアするために Decimating Smash と Soul Furnace を使わなければならず、それが自然に minion をあなたの方へ押し込みます。これにより自分のタワー付近で wave を freeze でき、Sion は歩いてあなたの脅威範囲に入らざるを得ません。freeze が決まれば、Sion を完全に zone したり dive の脅威をかけたりでき、Sion の高い体力プールは役に立たなくなり、あなたは自由に minion に Relentless Assault を積めます。
自分の minion の wave の中に立って Sion の Decimating Smash を誘ってください。Leap Strike で仕掛けず、歩いて近づいて Empower と通常攻撃で Sion を攻撃してください。Sion が斧のチャネリングを始めた瞬間に、すぐ Leap Strike で Sion の後ろの minion へ飛ぶか、Counter Strike を発動してチャージをキャンセルしてください。Sion が Soul Furnace を発動したら、burst ダメージを発動される前に Empower で素早くシールドを割ることに集中してください。

この matchup は、Counter Strike が Tryndamere の攻撃にどう作用するかで大きく決まります。Tryndamere はダメージを与えるのに Battle Fury のクリティカルに完全に頼っているため、あなたの Evasion の窓は Tryndamere の脅威を完全に無効化します。最も重要なのは、Tryndamere が Undying Rage を発動したとき、Counter Strike を発動すれば Tryndamere の通常攻撃を安全に防げ、あなたが ult の持続が終わるのを待つ間、Tryndamere の5秒間の不死は無意味になることです。
Tryndamere は守勢に回らされ、wave 上で自由に Battle Fury のスタックを積めません。Tryndamere が歩いて近づこうとしたら、素早い Leap Strike と Empower で体力を大きく削れます。この絶え間ない脅威により、Tryndamere は退くために Spinning Slash を無駄にし、minion wave を完全にあなたに支配させることになります。簡単に slow push でき、タワー下の Tryndamere に dive でき、あるいはトレードの代わりに Bloodlust の回復で fury を消費させられます。
短く無料の stun が確実に取れるとき以外は、Counter Strike でトレードを仕掛けないでください。代わりに、Empower でリセットする通常攻撃で Tryndamere を harass し、Spinning Slash を追えるよう Leap Strike を構えておいてください。死ぬまで戦う局面になり Tryndamere が Undying Rage を発動したら、すぐに Counter Strike を発動してください。回避中は Tryndamere と並んで走り、ぎりぎりで再発動して stun を当て、不死が切れた瞬間に仕留めてください。

Counter Strike が Gwen の戦闘ループを直接止めるため、Jax は大きく有利です。Gwen が Skip 'n Slash で飛び込むとき、cooldown を戻すために通常攻撃を当てなければなりません。Counter Strike を発動すればその通常攻撃を完全に防げます。これにより Gwen はダッシュの cooldown を縮められず、機動手段のない状態で取り残され、あなたは Relentless Assault を積んで Gwen を叩きのめせます。
この機構的な相性により、あなたは lane の wave を完全にコントロールできます。Gwen はあなたに飛びかかられるリスクを負えないため、安全に歩いて近づいてスタックを積み Snip Snip! を使うことができません。Skip 'n Slash のリセットなしには効果的にトレードを返せないので、自分のタワー付近で wave を freeze したり、好きなように slow push したりできます。Gwen は自分のタワーの下でゴールドを失い続け、lane の優先権をすべて失います。
これを完璧に実行するには、Counter Strike でトレードを仕掛けないでください。代わりに、Gwen が Skip 'n Slash で前に踏み込むのを待ってください。Gwen が攻撃のためにダッシュした瞬間に Counter Strike を発動して最初の攻撃を防ぎ、cooldown の返還を阻止してください。Gwen が退こうとしたら Leap Strike で追いかけ、Empower で攻撃タイマーをリセットしてください。Gwen が Hallowed Mist を展開したら、攻撃が当たり続けるようゾーンの中にそのまま歩いて入ってください。
その他のマッチアップ
これらのチャンピオンは、こちらのビルドやプレイスタイルを真正面から上回る構成を持ち、レーン戦のコントロールとファームを極めて難しくする。彼らのスキルはこちらの主要な強みを無効化し、いつも通りのプランを実行しようとした瞬間に手痛い反撃を受けさせてくる。こうしたマッチアップでは、ミスを最小限に抑え、正面からの対決以外で解決策を探すことが重要になる。

Rammus は最大の counter です。Rammus のキットが、Relentless Assault によるあなた本来の通常攻撃の速さを罰するからです。Rammus が Defensive Ball Curl を発動し、Frenzying Taunt であなたに Rammus を攻撃させると、あなた自身の高速な攻撃が自分に返ってきます。ヒットするたびに Rammus の防御的なダメージ反射が発動し、しかも Rammus の armor で増幅されるため、Counter Strike が守ってくれる前に、文字通り自分の体力を削り取ることになります。
Jungle では、この matchup によってあなたの skirmish の可能性が完全に変わります。river でも counter-gank でも、Rammus と正面から争うことはできません。Rammus が Powerball で転がり込んできてあなたを捕まえると、Frenzying Taunt によって、あなたは Rammus のトゲの甲羅に自ら突っ込むことになります。そのため序盤の scuttle crab や neutral objective を譲らざるを得ません。Rammus に拘束される 2v2 では、あなたはすぐに倒されます。
生き残るには、build の道筋全体を変える必要があります。itemization を純粋な attack speed と物理ダメージから離し、魔法防御と armor penetration を選んで Defensive Ball Curl を軽減してください。戦闘では、Leap Strike で Rammus に仕掛けないでください。代わりに、Leap Strike は、Rammus が Powerball で近づいてきたときに壁を越えて逃げるために温存してください。捕まった場合は、Frenzying Taunt が入る前にすぐ Counter Strike を発動し、Rammus の味方の追撃ダメージを遅らせてください。
その他のマッチアップ
これらのチャンピオンは、マッチアップ自体を絶望的にするわけではないが、対面で優位に立ちやすいツールを持っている。射程が長かったり、攻撃を受け止める力が高かったり、エンゲージへの対応手段が豊富だったりする。アプローチを調整し、戦闘を受け入れるタイミングを慎重に選ぶ必要がある。
Gragas は、Body Slam があなたの主要な engage に対する完璧な counter になるため、あなたの攻撃的な圧力を完全に無力化します。Counter Strike を発動しながら Leap Strike で飛び込むたびに、Gragas は前方に突進するだけで、空中のあなたの dash を中断したり、あなたをノックバックさせたりできます。これにより Counter Strike の stun が入らず、主要な防御手段を失ったあなたは無防備になり、さらに Gragas の Drunken Rage があなたの追撃ダメージを軽減します。
Skirmish や river の争いでは、この相互作用により、序盤の scuttle crab の確保や counter-gank の成功が非常に難しくなります。Gragas は Barrel Roll で簡単にあなたを zone でき、Relentless Assault のスタック蓄積を妨げられます。闇雲に仕掛けると、やり返せないまま体力を大きく失い、早期 recall を強いられて jungle の pathing が台無しになり、objective の主導権を Gragas に渡すことになります。
辛抱強く待つゲームをしなければなりません。Gragas の Body Slam が使える間は、Leap Strike で仕掛けないでください。代わりに、camp や skirmish には歩いて近づき、dash を温存してください。Gragas に Body Slam を守りで無駄打ちさせるか、Gragas が味方への engage に使うのを待ってください。主要な displacement がなくなったら、Counter Strike を発動して Leap Strike で飛び込み Gragas を拘束し、Empower と Grandmaster-at-Arms を頼りに長引く決闘に勝ってください。

この matchup は非常に不利です。Jax が素早い通常攻撃のために Relentless Assault のスタックに頼っており、それが Amumu の強みにまともに噛み合ってしまうからです。Tantrum のパッシブ部分は Amumu に固定の物理ダメージ軽減を与え、あなたの attack speed 依存の DPS を深刻に損ないます。さらに、あなたが当てるたびに Tantrum の cooldown が短縮されるため、Amumu はあなたの物理的な圧力を受け流しながら範囲ダメージを連発できます。
Jungle では、この相互作用により、決闘や序盤の skirmish で Amumu と争えません。camp の近くで Amumu と戦うと、Despair と絶え間ない Tantrum のリセットであなたの体力は溶け、あなたの攻撃は Amumu の armor をほとんど削れません。序盤の Scuttle Crabs の priority を失い、objective を譲るか、Bandage Toss で拘束されて敵の簡単な collapse を招くかの二択になります。
この matchup を生き残るには、Amumu の cooldown を追い、Leap Strike で仕掛けるのを避けなければなりません。Amumu が Bandage Toss で踏み込んできたときに壁を越えて逃げるために、ジャンプを温存してください。Amumu が Tantrum を jungle monster に無駄打ちしたばかりで、Amumu のチームが追撃できない場合にだけ engage してください。Amumu が Curse of the Sad Mummy を発動したら、すぐに Counter Strike を使って Amumu の味方の通常攻撃を回避し、その間に Amumu の CC が切れるのを待ってから、Empower で反撃を試みてください。

Lillia は悪夢のような相手です。あなたの防御の看板である Counter Strike は通常攻撃しか回避できないからです。Lillia のダメージは Blooming Blows や Watch Out! Eep! といったスペルから完全に来るため、あなたの回避は役に立ちません。さらに悪いことに、Lillia があなたに当てるたびに Blooming Blows から大きな movement speed を得て、あなたの棍棒の届かないところを踊るように動けます。
序盤は scuttle crab も直接の skirmish も争えません。飛び込むと、Lillia は Swirlseed を当て、あなたを slow し、周りをぐるぐる回ります。これにより、序盤の river priority を譲り、受け身のゲームを強いられます。river で Lillia に捕まると、簡単に poke で削られ、Lilting Lullaby を仕込まれて kill を取られるか、あなたの脱出手段を使わされます。
Leap Strike で戦いを始めないでください。代わりに、camp や objective には歩いて近づき、Leap Strike は、壁を越えて逃げる手段として、または Lillia が Swirlseed を外すか Watch Out! Eep! を使い切った後に距離を詰める場合にだけ、温存してください。Lillia が Lilting Lullaby を発動したら、眠りが効く前にすぐ Leap Strike で blast cone、ward、monster に飛び、距離を取ってください。
Pantheon は序盤の skirmish を支配します。Mortal Will によって発動する強化版の Shield Vault が、あなたを一瞬で大きく削れるからです。Counter Strike はこの 3 連撃の猛攻を回避する完璧な手段ですが、Pantheon はあなたに向けてすぐ Aegis Assault を構えることでこれに対抗します。これにより、あなたの stun のダメージとその後の Empower による反撃が無効化され、主要な防御手段が cooldown に入ると無防備になります。
このダイナミクスにより、jungle の pathing は守り中心になり、序盤の Scuttle Crabs を直接争うのは非常に危険です。river で Pantheon に見つかると、Pantheon の burst で jungle から追い出されるか、簡単に kill を取られます。Grand Starfall により Pantheon は標準的な rotation であなたの Leap Strike が距離を詰めるより速くサイドレーンに影響を与えられるため、gank の圧力で常に遅れを取ります。
Pantheon のパッシブが満タンにスタックしているときは、Leap Strike で仕掛けないでください。代わりに、farm や bait のために歩いて近づき、Shield Vault のアニメーションが始まるのを見てから Counter Strike を発動してください。Aegis Assault で stun を防がれたら、Leap Strike で Pantheon の背後か近くの monster に飛び、正面のシールドをすり抜けてください。そして Relentless Assault をスタックさせて Grandmaster-at-Arms のパッシブダメージを安全に発動できるようになったら、戦いをやり直してください。
その他のマッチアップ
このマッチアップは何よりもまず実行力の勝負であり、両者ともに優位を取れる現実的な手段を持っている。重要なスキルを一つ避けられるか、エンゲージを正しく読めるか、あるいはたった一つの位置取りのミスが、勝敗を分けることもある。マッチアップを理解し、行動すべき瞬間を見極める力がとりわけ重要になる。

この決闘は、Vi の攻撃修飾に対して防御の構えのタイミングを合わせることが軸です。Jax は Counter Strike を発動して Relentless Force を回避し、Denting Blows のスタックが付与されるのを防ぐことで、Vi の主要なダメージ源を完全に無効化できます。しかし、Vi は charge した Vault Breaker のノックバックで Jax のジャンプを妨害したり、Counter Strike が Vi を stun させる直前に Jax を押しのけたりできるため、この matchup は依然として非常に不安定です。
river や jungle の通路では、防御手段を準備しないまま先に仕掛けた方が skirmish に負けます。Vi が Vault Breaker を外せば、Vi は mobility と displacement を失い、Leap Strike での counter-engage に無防備になります。逆に、scuttle crab の戦いで Counter Strike を早く使いすぎると、Vi は Cease and Desist で簡単に決闘をひっくり返し、あなたは低い体力で退き、neutral の主導権を手放すことになります。
Leap Strike で飛び込むときに、Counter Strike を先走って発動しないでください。代わりに、Relentless Assault のスタックと Empower のリセットで戦いを始め、Vi に Vault Breaker を charge させてください。Vi が charge したら、dash が完了する前に Counter Strike を早めに再発動して stun させる準備をするか、Grandmaster-at-Arms の active で攻撃を受け止めてください。Vi が先に Cease and Desist であなたを拘束した場合は、Vi が通常攻撃で追撃しようとするまで回避を温存してください。

この matchup はスケーリングとタイミングの緊迫した戦いです。skirmish を支配する Jax の力は、Counter Strike の stun を当てることに大きく依存します。しかし Kayn は、回避の持続時間が終わる直前に Umbral Trespass で Jax に取り憑くことで、この重要な CC を完全に無効化できます。この相互作用により、すべての決闘は、重要なスキルのタイミングを誤った方が負ける、高リスクの心理戦になります。
Kayn が The Darkin Scythe で form を解放する前は、Jax は river で明確な決闘の優位を持ちます。しかし Kayn が早く変身を完了すると、スケーリングの力関係は劇的に変わります。gank や counter-gank の最中にタイミングの悪い Counter Strike を使うと、Kayn は Reaping Slash と Blade's Reach で簡単に戦いをひっくり返し、マップ全体の流れを完全に変え、序盤の neutral objective を確保します。
この心理戦に勝つには、Kayn がすでに Shadow Step で逃げた場合を除いて、Counter Strike を早く再発動しないでください。代わりに、防御の構えを全持続時間保持し、Kayn に Umbral Trespass のタイミングを推測させてください。Kayn が焦って ult を早く使ったら、Kayn が出てきた瞬間に Empower と Leap Strike を発動して burst で倒す準備をし、Reaping Slash で回復される前に仕留めてください。

この jungle の決闘は、Counter Strike と Shroud of Darkness の間の、高リスクの心理戦で決まります。Jax は Nocturne のダメージの流れを中断するために stun が必要ですが、Nocturne が spell shield で再発動を防ぐと、大きな bonus attack speed を得ます。防御スキルを一瞬でも間違ったタイミングで発動した jungler が skirmish に負けるため、この matchup は反応速度と bait の純粋な勝負になります。
どちらの jungler も、致命的な 1v1 の危険を冒さずに相手の jungle に簡単には invade できません。Scuttle Crab 周辺の river skirmish や序盤の neutral objective は非常に緊迫し、stun を誤って防がれると、river の priority がすぐに相手に渡ります。この緊張が gank を遅らせます。お互いに、ボタンを 1 回間違えれば誰が死ぬかが決まる river で出会うリスクを天秤にかけなければならないからです。
Nocturne と戦うときは、Leap Strike を使った直後に Counter Strike を再発動しないでください。代わりに、回避の全持続時間を回し切り、その間 Empower で Nocturne の体力を削ってください。これにより Nocturne は、いつ pop が来るかを推測させられるか、Shroud of Darkness を早く無駄打ちさせられます。Nocturne が Unspeakable Horror を連続で当ててきたら、fear 中は Counter Strike のタイミングを合わせて通常攻撃を吸収し、fear 後の burst を無効化してください。

この jungle の決闘は、Wukong の Warrior Trickster に対する Counter Strike のタイミングの合わせ方にすべてかかっています。Counter Strike は Golden Staff と Nimbus Strike の攻撃を防ぎますが、Wukong は分身であなたの stun を誘おうとします。再発動が早すぎると、主要な防御を Wukong の囮に無駄打ちしてしまい、Cyclone の knock-up に無防備になり、さらに Wukong の Stone Skin があなたの反撃を軽減します。
この相互作用が、序盤の Scuttle Crabs や skirmish をどう争うかを決めます。防御のスピンのタイミングを誤ると river priority を譲ることになり、Wukong が序盤の neutral objective を確保できます。しかし Wukong の囮を見抜ければ、Wukong は唯一の脱出手段を失い、Leap Strike で追い詰めて、Wukong 自身の jungle camp から追い出せます。
river で Wukong と戦うときは、Counter Strike を発動しても、すぐには再発動しないでください。Wukong の動きのパターンを注意深く見て、急に止まったら Warrior Trickster の合図です。冷静に、囮が出ている短い時間が過ぎるのを待ってください。本物の Wukong が現れたら stun を放ち、Empower で通常攻撃をリセットして、Wukong の Cyclone で skirmish をひっくり返される前に Wukong を削り切ってください。

この matchup は、あなたの Counter Strike が Olaf の Ragnarok とどう相互作用するかにすべてかかっています。Ragnarok は Olaf にあなたの stun への完全な耐性を与えますが、Olaf のダメージと回復の主な源は依然として通常攻撃を当てて Berserker Rage と Vicious Strikes を活用することにあります。Counter Strike は依然として非常に有効です。通常攻撃を完全に回避すれば Olaf の lifesteal を奪い、Reckless Swing の cooldown を短縮させないからです。
Jungle では、序盤の skirmish は非常に不安定です。Olaf が Undertow を当てれば Olaf に追い詰められますが、Leap Strike で壁を越えて逃げられます。お互いに ult を解放した後は、Grandmaster-at-Arms が Olaf の初動の burst を耐える防御ステータスをくれますが、Olaf の ult の持続時間を kite しきれない限り、Olaf が Ragnarok を発動している間は長引く決闘に持ち込めません。
これらの決闘に勝つには、Olaf が Ragnarok を発動しても Counter Strike を早く再発動しないでください。代わりに、回避を 2 秒の全持続時間まで走らせ、Olaf の体力が低く Berserker Rage が最大のときに Vicious Strikes による lifesteal を奪ってください。Olaf が Ragnarok で戦いを始めたら、すぐに Leap Strike で monster や ward に飛んで Olaf の ult の持続時間を無駄にさせ、それから Grandmaster-at-Arms で戦いに戻ってください。

この決闘は、Lee Sin の displacement に対して防御手段のタイミングをどう合わせるかにすべてかかっています。Counter Strike により Lee Sin の Flurry で強化された通常攻撃を受けなくなりますが、腕の立つ相手は、回避の時間が切れる前に Dragon's Rage でキックして飛ばすことで、すぐにあなたの stun を防ぎます。この相互作用が主要な engage を無効化し、本来は簡単なはずの決闘を、反射神経とスキル追跡の精密な勝負に変えます。
この相互作用により、序盤の jungle skirmish は非常に不安定になります。Lee Sin にキックで飛ばされると、Lee Sin は簡単に scuttle crab を確保したり、Safeguard で壁を越えて逃げたりできます。これにより、あなたは、Lee Sin のマップでの存在感に対抗するために camp 上の Relentless Assault のスタックを最適化しなければならない、テンポの速い farm 競争を強いられます。river の決闘で stun を 1 回外せば、圧力を失い、epic monster を譲ることになります。
これらの skirmish に勝つには、Leap Strike で trade を始めないでください。代わりに、Lee Sin に歩いて近づいて Sonic Wave を使わせてください。Lee Sin が dash を使い切ってから Counter Strike を発動してください。Lee Sin があなたを押し返す Dragon's Rage を準備したら、cast のアニメーションが終わる前に stun させるため、Counter Strike をすぐに早めに再発動する準備をするか、キックで飛ばされた後に Leap Strike で即座に距離を詰めて Empower の圧力を維持するために、Leap Strike を温存してください。
その他のマッチアップ
これらのチャンピオンは、こちらの主要な強みに効果的に対応するのが難しく、より自由に対面を組み立てることができる。プレッシャーをかけて有利な交換を引き出す手段は複数あることが多い。相手が態勢を立て直す時間を与えるのではなく、この優位を活かして主導権を握ろう。
Counter Strike が Ambessa の Drakehound's Step を完全に封じるため、Jax がこの matchup を支配します。Ambessa の流れるような戦闘ループは、dash を強化された通常攻撃につなげて energy を回復し主要なダメージを出すことに依存しているため、あなたの回避の時間は Ambessa から資源を完全に奪います。それらの攻撃からの energy 還元がなければ、Ambessa は Cunning Sweep や Lacerate に戻れず、無防備になります。
Jungle の skirmish や river の争いでは、この相互作用により Ambessa は序盤の決闘の優位を失います。長引く決闘では passive ダメージが使えなくなるため、Ambessa は Rift Scuttlers を安全に争うことも、あなたの camp に invade することもできません。Counter Strike が有効な間は Ambessa が energy を溜められないため、Public Execution の処刑のような決め手の脅威が無力化され、序盤の neutral な skirmish の priority を妨害なしに握れます。
Counter Strike で決闘を始めないでください。代わりに、Leap Strike で距離を詰め、Empower で通常攻撃をリセットして、Ambessa に防御の Repudiation を使わせてください。Ambessa が Drakehound's Step の dash で counter-engage しようとしたら、Counter Strike を発動して強化された攻撃を吸収してください。Ambessa が mobility で逃げようとしたら、再発動の stun で拘束し、Ambessa が energy を再充填して戦いをひっくり返せないようにしてください。
Counter Strike が Aatrox のパッシブである Deathbringer Stance を完全に無効化するため、Jax は jungle の直接の決闘で大きな優位を持ちます。この強化された通常攻撃を回避することで、Aatrox が burst ダメージと重要な回復の両方を得るのを防げます。命綱となる sustain がなければ、Aatrox は、長引く skirmish で Relentless Assault による Jax の上昇する attack speed と Empower の魔法ダメージに太刀打ちできません。
この相互作用が、jungle の skirmish と river の争いのリズムを決めます。Aatrox は正面衝突を恐れるため、Scuttle Crabs を安全に争うことも、あなたの領域に invade することもできません。river で会うたびに、Aatrox を objective から遠ざけられます。Aatrox は守りに回らざるを得なくなり、あなたは neutral monster を自由に確保したり counter-gank の準備をしたりできます。正面からの 2v2 は必ず勝てると分かっているからです。
Aatrox と戦うときは、すぐに Counter Strike を発動しないでください。代わりに、Leap Strike で始めて The Darkin Blade の sweet spot の内側に入ってください。Aatrox に慌てて振らせ、パッシブの光で Deathbringer Stance の準備ができたと分かったときにだけ回避を発動してください。Aatrox が Umbral Dash で逃げようとしたり Infernal Chains であなたを引き寄せたりしたら、Empower で攻撃をリセットし、Aatrox の cooldown が戻る前に素早く仕留めてください。
Counter Strike が Darius の主な勝ち筋を直接無効化するため、Jax は Darius との skirmish を完全に支配します。この防御の構えを発動すると、Darius の通常攻撃を回避し、Crippling Strike を完全に防ぎます。これにより Darius が素早く Hemorrhage をスタックさせることを防ぎ、Noxian Might による大きな attack damage 上昇を奪い、Noxian Guillotine であなたを処刑する能力を封じます。
Jungle では、この相互作用により、Darius に invade したり両方の Scuttle Crabs を争ったりする完全な自由が得られます。Darius は skirmish に勝つために素早いスタックに頼っているため、river であなたと快適に決闘できません。Darius が Apprehend であなたを引き寄せて無駄打ちすると、あなたが Counter Strike を発動した後、Darius には離脱する手段がありません。この圧力により、Darius は自分の camp で守りに回らされ、あなたが priority を握れます。
Darius と戦うときは、Counter Strike で始めないでください。代わりに、Empower で強化した通常攻撃で決闘を始めてください。ランタンを回す前に、Darius が Crippling Strike を準備するか Hemorrhage を付与しようとするのを待ってください。Darius が Decimate を振りかぶったら、すぐに Leap Strike で Darius に直接飛びついてください。これにより、Decimate の内側の柄の部分に入ることになり、Darius の回復と追加ダメージを完全に防ぎ、無防備にできます。
この jungle matchup は、Counter Strike が Gwen の攻撃ループを完全に無効化するため、Jax に大きく有利です。回避を発動している間、Gwen は A Thousand Cuts を発動させたり Skip 'n Slash の残り cooldown を短縮させたりするのに必要な通常攻撃を当てられません。この通常攻撃を封じることで、Gwen は無防備になり、skirmish 中に位置を変えることも回復することもできず、主要な mobility と回復手段が役に立たなくなります。
決闘での圧倒的な優位が river のリズムを決めます。あなたが invade を選べば、Gwen は Scuttle Crabs を安全に争うことも、自分の camp を守ることもできません。Gwen は消極的に立ち回らざるを得ず、時間稼ぎのためだけに Hallowed Mist に頼ります。この圧力で、Gwen は序盤の neutral objective を譲らざるを得ません。Gwen には、主なダメージ源が完全に無効化される正面衝突を受ける余裕がないからです。
決闘の序盤で Counter Strike を無駄打ちしないでください。Leap Strike と Empower で始めて、Gwen に Skip 'n Slash を使わせて逃げさせるか位置を変えさせてください。Gwen が dash を使ったら、Counter Strike を発動して反撃の攻撃を防ぎ、Gwen の mobility のリセットを防いでください。Gwen が Needlework であなたを slow させようとしたら、防御の構えの movement speed を使って距離を詰め、stun を当ててください。
Dr. Mundo はスケーリングする hybrid ダメージに耐えられないため、Jax は時間とともにこの matchup を支配します。Dr. Mundo の Goes Where He Pleases は Counter Strike の stun を完全に防ぎますが、Relentless Assault による Jax の上昇する attack speed と絶え間ない Empower のリセットが Dr. Mundo の体力を溶かします。Grandmaster-at-Arms が発動すれば、Jax は十分な防御ステータスと on-hit の魔法ダメージを得て、どんな決闘でもこの tank を楽に削り取れます。
Jungle では、Goes Where He Pleases の保護と、接近を鈍らせる Infected Bonesaw のせいで、序盤に Dr. Mundo を簡単に burst で倒すことはできません。つまり、序盤の objective の争いには忍耐が必要です。しかし、ゲームが進むにつれて、あなたの clear 速度と決闘力が Dr. Mundo を上回ります。序盤の skirmish を避ける立場から、Dr. Mundo の camp に invade し続ける立場へと移り、Dr. Mundo にエリア全体を譲らせます。Dr. Mundo はもうあなたの純粋なダメージに対抗できないからです。
Dr. Mundo のパッシブのシールドがあるときは、Leap Strike を仕掛けに使わないでください。代わりに、歩いて近づき、Counter Strike の再発動で Goes Where He Pleases を発動させて canister を破裂させ、回避で Blunt Force Trauma の通常攻撃を防いでください。Leap Strike は、Dr. Mundo が Maximum Dosage を使った後や、movement speed で逃げようとした後に張り付くために温存してください。パッシブが消えれば、持続する Relentless Assault と Empower の攻撃で簡単に仕留められます。

Jax は Talon の主要な engage 手段を自然に counter します。Counter Strike を発動すると、Noxian Diplomacy のダメージと出血のスタックを完全に無効化し、Talon の burst を封じます。Talon は Assassin's Path で地形を越えて逃げますが、Jax は Talon のパルクールのような rotation についていくことも、Leap Strike ですぐに距離を詰めることもでき、すばしこい assassin を殴れる範囲にとどめられます。
この matchup は jungle の圧力をあなたに大きく有利に傾けます。burst を防がれると直接の決闘に負けるため、Talon は objective の skirmish を快適に争えません。Talon はあなたを完全に避け、高い mobility で素早い gank を狙ってきます。主な課題は Talon の jungle の pathing を追うことで、そうすれば counter-gank でき、Talon の burst を封じられる戦いに持ち込めます。
壁の近くで Leap Strike を使って追跡を始めないでください。代わりに、歩いて近づいて Talon に先に Assassin's Path を使わせ、障害物を越えて追うためにジャンプを温存してください。Talon が Noxian Diplomacy で飛びかかるか Shadow Assault を発動するのを見るまで、Counter Strike を温存してください。Talon が invisible になったら、すぐにランタンを回して戻ってくる刃を吸収し、Blade's End の発動を防いでください。

Jax は Hecarim を大きく上回ってスケーリングしますが、この決闘は 1 つの相互作用で直接決まります。Hecarim が高速の Devastating Charge で engage しようとしたとき、Jax は Counter Strike を発動できます。これにより、突進の burst ダメージとノックバックの両方が完全に無効化されます。この最初の衝撃がなければ、Hecarim は Rampage のスタックを効果的に築けず、Jax の優れた持続 DPS に無防備になります。
Jungle では、この相互作用により、skirmish や crab の争いで力関係が大きく傾きます。Hecarim は速い clear と gank 速度に頼っていますが、river で正面からあなたと争えません。Hecarim が invade したり objective を争ったりしようとしても、主要な engage 手段を封じるあなたの能力のせいで、Hecarim は消極的に立ち回らざるを得ません。主要な cooldown が無駄になれば、Hecarim の決闘力は完全に損なわれると分かっているので、Hecarim の camp に楽に invade できます。
clear 中や skirmish の開始時に、Counter Strike を早く無駄打ちしないでください。Hecarim の Devastating Charge があなたに向かって走ってくる音または視覚的な合図を待ってください。衝突の直前に発動して stun させ、すぐに Leap Strike と Empower で追撃して体力を大きく削ってください。Hecarim が Onslaught of Shadows で逃げたり向きを変えたりしたら、Grandmaster-at-Arms を発動して fear の持続を耐え、フルスタックの Relentless Assault で叩きのめしてください。
Jax の Counter Strike は、Warwick の主な回復とダメージ源を完全に無効化します。Warwick は on-hit 効果を付与してパッシブの Eternal Hunger を発動させるために、通常攻撃と Jaws of the Beast に大きく頼っています。Counter Strike がこれらを完全に回避するため、あなたの防御の時間中、Warwick は体力を維持することも意味のあるダメージを与えることもできません。これにより、長引く jungle の決闘は Jax に大きく有利になります。
このメカニクス上の優位が jungle のペースを決めます。あなたは Warwick が直接の決闘で sustain 負けすると分かっているので、自信を持って Rift Scuttlers を争い、Warwick の camp に invade できます。あなたの体力が低いときに Warwick の Blood Hunt で位置が明らかになっても、高ダメージの Leap Strike と Empower の組み合わせで、Warwick が低体力時の回復ボーナスを使う前に burst で倒せ、序盤のマップ支配を確保できます。
これを完璧にこなすには、Counter Strike で skirmish を始めないでください。歩いて近づくか Leap Strike を使って攻撃を始めてください。Counter Strike は、Warwick が Jaws of the Beast で噛みつこうとしたとき、または Infinite Duress を放ったときにだけ発動してください。Warwick が Primal Howl を charge していても、慌てないでください。ダメージ軽減の段階が終わるのを待ち、fear が終わる瞬間に Counter Strike を再発動して stun させ、Empower で仕留めてください。
基本スキルが Jarvan IV の脅威を直接無効化するため、Jax はこの jungle matchup で大きな優位を持ちます。Counter Strike は skirmish 中の Martial Cadence による最初の burst を完全に回避します。さらに重要なことに、Jarvan IV の看板の拘束スキルである Cataclysm は、Jax が Leap Strike で設置した ward や近くの味方に飛び乗ることで通行不能の地形を楽にすり抜けられるため、危険性を完全に失います。
この相互作用により、序盤の jungle の圧力がすべてあなたの手に移り、Jarvan IV に積極的に invade して neutral objective を争えます。あなたを閉じ込められないことを自覚して、Demacia の王子は gank への自信を失います。あなたの counter-gank は壊滅的になります。Jarvan IV が Demacian Standard と Dragon Strike で踏み込んでいる間に、あなたは混戦に直接飛び込めます。あなたは遥かに優れた duelist にスケーリングすると分かっているからです。
Jarvan IV に Cataclysm の中に閉じ込められた瞬間に Leap Strike で素早く脱出できるよう、常に ward を inventory に用意しておいてください。skirmish では、Jarvan IV が Demacian Standard と Dragon Strike の combo で追撃しようとするまで Counter Strike を遅らせ、Martial Cadence の発動を防いでください。ward がなく不意を突かれた場合は、味方の援護を待つ間、すぐに Grandmaster-at-Arms を発動して Jarvan IV の物理 burst に耐えてください。

Counter Strike が Shyvana の Twin Bite を完全に無効化するため、Jax は jungle の 1v1 の決闘を完全に支配します。Twin Bite は Shyvana の主な burst ダメージ源であり、通常攻撃のタイマーもリセットするため、両方の攻撃を回避すれば致命的な脅威がなくなります。二連撃が入らなければ、Shyvana は Relentless Assault による Jax の上昇する attack speed に太刀打ちできず、反撃の手段は Burnout の継続ダメージだけになります。
この matchup は jungle の圧力を完全にあなたに有利に傾け、Shyvana のスケーリングを遅らせられます。Shyvana は Fury of the Dragonborn をスタックさせるために camp を処理する必要があるため、Shyvana を自分の camp から追い出すあなたの力は、Dragon's Descent と全体的な強さを大きく遅らせます。Shyvana の camp を積極的に争い、monster を諦めさせるか自分の jungle で死ぬ危険を冒させることができ、その間 Flame Breath の mark は無駄になります。
Shyvana の camp の rotation を追い、clear で Burnout が cooldown 中のときに invade してください。Shyvana が monster に Flame Breath を使った直後に、Leap Strike で即座に距離を詰めてください。melee 射程に入っても、すぐには Counter Strike を発動しないでください。Twin Bite の特徴的なアニメーションを待って回避を発動し、burst を無効化してください。Shyvana が Dragon's Descent で逃げようとしたら、強化された Leap Strike と Empower の組み合わせですぐに追いかけて仕留めてください。
Jax は Counter Strike のおかげで、Volibear の攻撃的なプレッシャーを完全に封じます。このスキル 1 つで Volibear の主力のダメージ手段とユーティリティ手段をすべて防ぎ、Thundering Smash のスタンも、Frenzied Maul の重要な回復付きの噛みつきも回避します。Jax が Volibear のマークと CC を封じることで、本来は恐ろしいはずの熊の突進が、完全に一方的なデュエルになります。
この相互作用がジャングルでのスキルミッシュやリバーの争いをすべて左右します。Volibear は Scuttle Crabs を安全に争うことも、あなたのキャンプに侵入することもできません。正面から衝突すれば、相手は退くか死ぬかを迫られるからです。Volibear は戦闘中に Frenzied Maul を 2 回当てることで持ちこたえるので、最初の一撃を完全に防げば、ジャングルでのデュエル性能が完全に崩れ、あなたは Volibear の領域へ自由に侵入できます。
Volibear が近くにいると思われるときは、ジャングルのキャンプで Counter Strike を無駄にしないでください。Volibear が Thundering Smash で突進してきたら、近接距離に入る直前に防御を発動してスタンを空振りさせましょう。すぐに Empower と通常攻撃で続けて、Volibear の体力を削ります。タイミングを誤って先にスタンを受けた場合は、Leap Strike でモンスターか ward に飛んで離脱してください。

Counter Strike が Viego の主力の戦闘エンジンを完全に無力化するので、ジャングルのマッチアップでは Jax が決定的に有利です。Viego が Blade of the Ruined King であなたにマークを付けても、その後のパッシブによる 2 連続の通常攻撃は Counter Strike で完全に防がれます。この相互作用により、Viego は主要な回復手段を得られず、近接のスキルミッシュで戦闘スタックを素早く溜めることもできません。
この相互作用により、リバーと中立キャンプは Viego にとって危険地帯になります。あなたは正面のデュエルに勝てるので、scuttle crabs を積極的に争い、Viego のキャンプにも侵入できます。Viego は Harrowed Path にいるところを捕まえられたら DPS が完全に封じられると分かっているため、慎重にクリアせざるを得ません。直接のスキルミッシュで優位に立つことで、Viego が序盤のマッププレッシャーや中立オブジェクトを確保する力も制限されます。
キャンプを争うときは、Viego が Spectral Maw で突進するか、Blade of the Ruined King のパッシブを使って戦闘に踏み込むまで Counter Strike を温存してください。防御のスタンスを早く使い切ってはいけません。Viego が仕掛けてきたら Counter Strike を発動して 2 連続の攻撃を吸収し、Empower で攻撃タイマーをリセットして burst で倒しましょう。Viego が Harrowed Path や Heartbreaker で退こうとしたら、Leap Strike を温存しておいて距離を詰め、相手の領域内でとどめを刺してください。

Counter Strike が、Void Reaver の Unseen Threat パッシブによる通常攻撃のダメージとスローを完全に無効化するので、Jax は Kha'Zix の暗殺の試みに対して自然にカウンターになります。さらに、Kha'Zix が孤立した状態に対する Taste Their Fear の攻撃であなたを burst で倒そうとしても、Grandmaster-at-Arms を発動すれば物理 burst を完全に吸収できるだけのボーナスアーマーを得られ、致命的になるはずだった奇襲が失敗に終わります。
この相互作用がジャングルのスキルミッシュの主導権を決めます。Kha'Zix は burst を無効化される危険があるため、あなたと正面からデュエルできず、リバーでの直接の争いや序盤の侵入を避けざるを得ません。あなたは scuttle crabs を積極的に確保し、中立オブジェクトのペースを握れます。Kha'Zix が争おうとしても、あなたのデュエル性能の高さで序盤に撤退させられ、相手のジャングルキャンプはあなたのカウンタージャングルに無防備になります。
ジャングルを移動するときは、Taste Their Fear による孤立ダメージを与えさせないよう、常に自分のキャンプや minion wave の近くに位置取りしてください。Kha'Zix が Leap で仕掛けてきても、慌てて防御を使わないでください。Counter Strike は、着地時の通常攻撃で Unseen Threat を防ぐために温存します。Kha'Zix が機動力を使い切ったら Grandmaster-at-Arms を発動して最初の burst を耐え、逃げようとする相手を Leap Strike と Empower で追い詰めましょう。
Counter Strike が New Destiny のショットガンの弾を完全に無効化するので、Jax は Graves を完全に圧倒します。Graves はダメージを与え、Quickdraw のクールダウンを短縮するために、これらの通常攻撃を当てる必要があるため、主導権はすべて Jax にあります。Leap Strike で距離を詰めれば、Graves の射程の優位を無視でき、その回避の間は Graves のダメージをすべて避けられるので、Graves は完全に無防備になります。
この相互作用がジャングルの力関係を決め、Graves のキャンプへ積極的に侵入し、両方の Scuttle Crabs を絶対の自信を持って争えます。Graves は trade で打ち返せないため、死のリスクを負わずに中立オブジェクトを争うことも、red buff を守ることもできません。Graves は防御的に Smoke Screen を無駄にするか、壁越しに Quickdraw を使って逃げるしかなく、あなたの laner は Graves の gank のプレッシャーから完全に解放されます。
Graves を狩るときは、Graves が Quickdraw で kite して離れようとするまで Leap Strike を温存してください。または、Counter Strike を発動して最初の New Destiny の burst を吸収する場合は、すぐに使ってもかまいません。Graves が視界を妨害しようと Smoke Screen を置いても、退かないでください。前進し続けて Counter Strike のスタンを発動させ、すぐに Empower で攻撃タイマーをリセットして、Grandmaster-at-Arms の 3 回目の攻撃による魔法ダメージをすばやく発動させましょう。
Counter Strike がすべての通常攻撃を無効化し、Tryndamere が Battle Fury を溜めることもクリティカルを当てることもできなくなるので、Jax は Tryndamere の攻撃的な脅威を完全に封じます。Tryndamere が生き延びようと Undying Rage を発動したら、Jax はすぐに Leap Strike でジャングルの壁や camp の上に飛び、5 秒間の無敵時間を余裕を持って kite しながらやり過ごしてから、戻ってとどめを刺せます。
このマッチアップでは、リバーとジャングルキャンプが Tryndamere にとって危険地帯になります。防御手段を温存していれば Tryndamere はデュエルに勝てないと分かっているので、あなたはすべての Scuttle Crab を争い、序盤から Tryndamere のキャンプに侵入できます。Tryndamere は消極的にファームするか、防御的に Spinning Slash を使うしかなく、それによって pathing が完全に崩れ、序盤のゴールドと中立オブジェクトが得られなくなります。
Leap Strike でデュエルを始めてはいけません。代わりに、Tryndamere に歩いて近づき、殴って Relentless Assault をスタックさせ、Tryndamere が反撃しようとしたときにだけ Counter Strike を発動してください。Tryndamere が焦って Undying Rage を発動したら、すぐ近くのジャングルモンスターか ward に Leap Strike で飛んで、間に壁を作ります。離れた安全な場所から ult の持続時間が切れるのを待ち、歩いて戻ってキルを回収しましょう。

Jax は、Kindred の主要な自己 peel と burst の手段を無効化することで、Kindred の kite の可能性を完全に封じます。Kindred が距離を取ろうとしても、Leap Strike が一瞬で距離を詰めます。さらに重要なのは、Kindred が Mounting Dread であなたを処刑しようとしたとき、Counter Strike を発動すると、その決定的な 3 回目の攻撃ダメージを発動させるのに必要な通常攻撃を防げるため、Kindred は無防備になり、主要な防御面の脅威を失うことです。
このマッチアップの優位により、ジャングルのプレッシャーは大きくあなたに傾き、Mark of the Kindred の出現を積極的に争えます。Kindred は 1v1 であなたと安全に trade できないため、あなたは Kindred のキャンプに侵入し、リバーから追い出せます。Kindred は守りに回らざるを得ず、マークの獲得が遅れ、スケーリングが大きく制限される一方で、あなたは序盤のマップコントロールを確保します。
何も考えずに飛び込んで戦闘を始めてはいけません。歩いて近づくか、bush から flank し、Kindred が Dance of Arrows を使った後に追えるよう Leap Strike を温存してください。Counter Strike は、Kindred が Mounting Dread を付与するときのために温存し、3 回目の攻撃の直前に発動して処刑を防ぎます。Kindred が Lamb's Respite を展開したら、Kindred と一緒に円の内側に立ち、攻撃をチャージして、ult が切れたまさにその瞬間に Empower を当てるタイミングを計ってください。

Jax の防御キットが Xin Zhao の主力の攻撃手段を直接無効化するため、Jax はジャングルでの 1v1 のスキルミッシュを完全に圧倒します。Xin Zhao が Audacious Charge で仕掛けて Three Talon Strike を発動したら、Jax はすぐに Counter Strike を発動できます。これで強化された 3 回の通常攻撃をすべて完全に防ぎ、Determination による回復を無効化し、決定的な 3 回目のノックアップも阻止するので、Xin Zhao は完全に無防備になり、デュエルに勝てません。
この相互作用が序盤のテンポを左右し、あなたは絶対の自信を持って Xin Zhao のキャンプに侵入し、Scuttle Crabs を争えます。Xin Zhao は snowball のために序盤のスキルミッシュに頼っているので、主力の CC とダメージを封じることで勢いが完全に止まります。あなたが近くにいる限り、Rift Herald や Dragons のようなオブジェクトを安全に争えず、消極的にプレイするか、自分のジャングルで死ぬリスクを負うしかありません。
これを完璧に実行するには、Counter Strike から始めてはいけません。代わりに、歩いて近づくか Leap Strike で距離を詰め、Empower を当ててください。ランタンを回すのは、Xin Zhao が Three Talon Strike を使い切るまで待ちます。Xin Zhao が Crescent Guard で離脱しようとしたら、Leap Strike ですぐに飛び戻りましょう。戦闘を始める前に、ジャングルモンスターで Relentless Assault のスタックを高く保ち、ダメージを最大化してください。

Counter Strike が Master Yi のキット全体に対する完璧なシールドとして働くため、Jax は Master Yi の攻撃的な脅威を完全に封じます。Master Yi が Wuju Style を発動して Double Strike の burst に頼っても、あなたの防御のスタンスはその物理ダメージと確定ダメージをすべて完全に無効化します。この相互作用により、Master Yi は完全に無防備になり、完璧な Alpha Strike であなたの最後のスタンを回避できない限り反撃できません。
ジャングルでは、この力関係によって、あなたは序盤のスキルミッシュとリバーの争いの絶対的な支配者になります。あなたが近くにいる限り、Master Yi は Scuttle Crabs を安全に争うことも、オブジェクトを確保することもできず、あなたは積極的に Master Yi のキャンプに侵入できます。リバーでの直接のデュエルでは、Master Yi は領域を譲るか、防御的に Meditate を使うしかなく、ファームが止まる一方で、あなたは Relentless Assault のスタックを加速させてマップにプレッシャーをかけます。
すべてのデュエルで勝利を確実にするため、Counter Strike を早まって発動してはいけません。Empower で強化した通常攻撃で Master Yi に仕掛け、逃げる相手を追えるよう Leap Strike を準備しておいてください。Master Yi が Alpha Strike を始めたら、再出現した直後に Counter Strike を発動して Wuju Style の burst を吸収します。Master Yi があなたのスタンを耐えようと Meditate をチャネリングしたら、すぐに Empower で通常攻撃のタイマーをリセットしてダメージ軽減を突破し、とどめを刺してください。

Counter Strike で Rengar の最初の burst を完全に無効化できるので、Jax は Rengar の奇襲の可能性を完全に封じます。Rengar の脅威はすべて、Unseen Predator で bush から飛び出すか、Thrill of the Hunt を使って強烈な Savagery を放つことにかかっています。Rengar の跳躍も Savagery も通常攻撃として扱われるため、Counter Strike を発動すれば最初の burst をすべて完璧に無効化でき、ハンターは完全に無防備になって反撃できません。
この相互作用はジャングル全体の力関係を決め、Rengar お気に入りの bush を死の罠に変えます。恐れずに Rengar のキャンプに積極的に侵入し、scuttle crabs を争えます。Rengar は burst で倒せないと分かっているため序盤のスキルミッシュを諦めるしかなく、snowball の勢いを失います。あなたが counter-gank で簡単に対応でき、暗殺の試みを封じられるので、マップ上の Rengar のプレッシャーは大きく削がれます。
やみくもに Counter Strike を出して戦闘を始めてはいけません。代わりに、堂々と bush に歩いて入り、Rengar が跳ぶのを待ってください。跳躍のアニメーションが見えるか、Thrill of the Hunt の音が聞こえたら、すぐに Counter Strike を発動して Savagery を吸収します。Rengar の burst が無駄になったら、通常攻撃し、Empower でタイマーをリセットし、壁越しに逃げようとした場合にだけ Leap Strike を使ってください。

Jax は、集団戦における Twitch の攻撃的な特徴をすべて完全に無効化します。Twitch が Spray and Pray を発動してあなたのチームを貫通しようとしたとき、Counter Strike を発動すれば、その長射程のボルトを 1 本残らず回避できます。Twitch は Deadly Venom をスタックさせて Contaminate を起爆するために、これらの通常攻撃を当てることに完全に頼っているので、あなたの防御のスタンスが Twitch のダメージ出力を完全に封じ、Twitch の ult はクールダウンの無駄になります。
この相互作用は、スキルミッシュやリバーの戦闘におけるジャングルの力関係を完全にあなたに有利に変えます。あなたが近くにいる限り、Twitch はオブジェクトを争うことも crabs を確保することもできず、あなたのしつこい追撃から逃れるために Ambush を安全にチャネリングすることもできません。Twitch が gank や デュエルを無理に仕掛けようとしても、あなたの純粋なブロック性能のせいで、あなたを倒すのに必要な burst が出せず、逆効果になります。
最大の目標は、Twitch の位置に張り付き、Counter Strike を Twitch の ult のためだけに温存することです。戦闘が始まっても、E を早く無駄にしないでください。Twitch が Ambush から姿を現したら、Leap Strike で距離を詰めます。Spray and Pray の独特な音を待ち、すぐに回避を発動してください。Twitch とあなたのバックラインの間に正確に立つことで、スタンをチャージしながら Twitch の ult をすべて吸収して無効化できます。
その他のマッチアップ
これらのアイテムを購入すると、このチャンピオンの影響力を抑えられます。




| マッチアップ | 判定 | 有利度 | 勝率 | ピック率 |
|---|---|---|---|---|
| Malphite | ハードカウンター | +2 | 54.2% | 8.2% |
| Kennen | ハードカウンター | +2 | 50.5% | 2.5% |
| Poppy | ハードカウンター | +2 | 49.4% | 1.8% |
| Teemo | 不利なマッチアップ | +1 | 53.4% | 4.9% |
| Vayne | 不利なマッチアップ | +1 | 52.1% | 1.7% |
| Singed | 不利なマッチアップ | +1 | 51.5% | 1.3% |
| Mordekaiser | 不利なマッチアップ | +1 | 51.3% | 11.5% |
| Jayce | 不利なマッチアップ | +1 | 50.2% | 4.8% |
| Vladimir | 不利なマッチアップ | +1 | 48.7% | 1.0% |
| Volibear | 不利なマッチアップ | +1 | 48.2% | 8.7% |
| Rumble | 不利なマッチアップ | +1 | 48.1% | 1.9% |
| Akali | 不利なマッチアップ | +1 | — | — |
| Aurora | 不利なマッチアップ | +1 | — | — |
| Gragas | 不利なマッチアップ | +1 | — | — |
| Heimerdinger | 不利なマッチアップ | +1 | — | — |
| Ryze | 不利なマッチアップ | +1 | — | — |
| Shen | スキル次第のマッチアップ | ±0 | 54.9% | 2.9% |
| K'Santé | スキル次第のマッチアップ | ±0 | 51.4% | 7.4% |
| Ornn | スキル次第のマッチアップ | ±0 | 51.1% | 1.9% |
| Dr. Mundo | スキル次第のマッチアップ | ±0 | 50.5% | 6.5% |
| Fiora | スキル次第のマッチアップ | ±0 | 50.4% | 3.7% |
| Riven | スキル次第のマッチアップ | ±0 | 50.3% | 1.7% |
| Renekton | スキル次第のマッチアップ | ±0 | 48.7% | 3.1% |
| Garen | スキル次第のマッチアップ | ±0 | 48.7% | 12.1% |
| Nasus | スキル次第のマッチアップ | ±0 | 46.4% | 5.6% |
| Pantheon | スキル次第のマッチアップ | ±0 | — | — |
| Warwick | スキル次第のマッチアップ | ±0 | — | — |
| Olaf | 有利なマッチアップ | −1 | 52.0% | 1.0% |
| Nautilus | 有利なマッチアップ | −1 | 50.9% | 1.3% |
| Sett | 有利なマッチアップ | −1 | 50.4% | 8.3% |
| Yone | 有利なマッチアップ | −1 | 50.4% | 5.9% |
| Kayle | 有利なマッチアップ | −1 | 50.2% | 2.1% |
| Wukong | 有利なマッチアップ | −1 | 50.1% | 1.6% |
| Cho'Gath | 有利なマッチアップ | −1 | 50.1% | 9.0% |
| Gnar | 有利なマッチアップ | −1 | 50.0% | 3.3% |
| Sion | 有利なマッチアップ | −1 | 49.9% | 2.5% |
| Aatrox | 有利なマッチアップ | −1 | 49.6% | 7.0% |
| Darius | 有利なマッチアップ | −1 | 49.5% | 14.8% |
| Jarvan IV | 有利なマッチアップ | −1 | — | — |
| Maokai | 有利なマッチアップ | −1 | — | — |
| Skarner | 有利なマッチアップ | −1 | — | — |
| Swain | 有利なマッチアップ | −1 | — | — |
| Ambessa | 有利なマッチアップ | −2 | 52.7% | 1.7% |
| Kalista | 有利なマッチアップ | −2 | 52.6% | 2.5% |
| Gwen | 有利なマッチアップ | −2 | 50.5% | 3.4% |
| Smolder | 有利なマッチアップ | −2 | 50.4% | 1.4% |
| Camille | 有利なマッチアップ | −2 | 48.9% | 2.1% |
| Urgot | 有利なマッチアップ | −2 | 48.9% | 3.8% |
| Irelia | 有利なマッチアップ | −2 | 48.5% | 1.4% |
| Tryndamere | 有利なマッチアップ | −2 | 45.9% | 2.5% |
| Yasuo | 有利なマッチアップ | −2 | 45.5% | 1.8% |
| Graves | 有利なマッチアップ | −2 | — | — |
| Rengar | 有利なマッチアップ | −2 | — | — |
有利度:Wild Rift Coreの公式判定(−3〜+3)で、各行に記載されたチャンピオンの視点から見た値です。勝率とピック率:このロールにおける相手チャンピオン自身の数値 — Wild Rift CN · Challenger、Patch 7.3c。直接対決の勝率ではありません。
| マッチアップ | 判定 | 有利度 | 勝率 | ピック率 |
|---|---|---|---|---|
| Rammus | ハードカウンター | +2 | 55.3% | 4.6% |
| Poppy | ハードカウンター | +2 | — | — |
| Amumu | 不利なマッチアップ | +1 | 56.5% | 2.7% |
| Skarner | 不利なマッチアップ | +1 | 53.9% | 1.6% |
| Lillia | 不利なマッチアップ | +1 | 53.3% | 3.0% |
| Pantheon | 不利なマッチアップ | +1 | 51.0% | 6.1% |
| Nidalee | 不利なマッチアップ | +1 | 50.1% | 2.3% |
| Evelynn | 不利なマッチアップ | +1 | 48.7% | 2.0% |
| Gragas | 不利なマッチアップ | +1 | — | — |
| Mordekaiser | 不利なマッチアップ | +1 | — | — |
| Shen | スキル次第のマッチアップ | ±0 | 54.9% | 1.4% |
| Nunu & Willump | スキル次第のマッチアップ | ±0 | 53.1% | 1.9% |
| Nocturne | スキル次第のマッチアップ | ±0 | 52.5% | 6.6% |
| Olaf | スキル次第のマッチアップ | ±0 | 51.8% | 1.8% |
| Kayn | スキル次第のマッチアップ | ±0 | 51.6% | 6.9% |
| Fiddlesticks | スキル次第のマッチアップ | ±0 | 51.6% | 1.8% |
| Zed | スキル次第のマッチアップ | ±0 | 51.4% | 2.6% |
| Wukong | スキル次第のマッチアップ | ±0 | 49.6% | 3.4% |
| Vi | スキル次第のマッチアップ | ±0 | 49.0% | 4.8% |
| Lee Sin | スキル次第のマッチアップ | ±0 | 46.9% | 12.4% |
| Maokai | スキル次第のマッチアップ | ±0 | — | — |
| Ambessa | 有利なマッチアップ | −1 | 54.1% | 1.2% |
| Ekko | 有利なマッチアップ | −1 | 54.0% | 7.3% |
| Dr. Mundo | 有利なマッチアップ | −1 | 52.9% | 1.7% |
| Gwen | 有利なマッチアップ | −1 | 52.8% | 2.6% |
| Jarvan IV | 有利なマッチアップ | −1 | 52.4% | 7.3% |
| Warwick | 有利なマッチアップ | −1 | 51.0% | 2.0% |
| Kindred | 有利なマッチアップ | −1 | 50.7% | 2.4% |
| Cho'Gath | 有利なマッチアップ | −1 | 50.7% | 8.3% |
| Xin Zhao | 有利なマッチアップ | −1 | 50.6% | 9.0% |
| Darius | 有利なマッチアップ | −1 | 50.4% | 6.5% |
| Diana | 有利なマッチアップ | −1 | 50.3% | 1.4% |
| Kha'Zix | 有利なマッチアップ | −1 | 50.1% | 5.3% |
| Talon | 有利なマッチアップ | −1 | 50.0% | 3.0% |
| Hecarim | 有利なマッチアップ | −1 | 49.6% | 1.8% |
| Riven | 有利なマッチアップ | −1 | 48.6% | 1.3% |
| Fizz | 有利なマッチアップ | −1 | 48.5% | 1.8% |
| Volibear | 有利なマッチアップ | −1 | 48.4% | 4.5% |
| Viego | 有利なマッチアップ | −1 | 46.3% | 4.2% |
| Shyvana | 有利なマッチアップ | −1 | 45.2% | 2.8% |
| Aatrox | 有利なマッチアップ | −1 | 44.9% | 1.1% |
| Nautilus | 有利なマッチアップ | −1 | — | — |
| Nilah | 有利なマッチアップ | −1 | — | — |
| Tryndamere | 有利なマッチアップ | −2 | 48.8% | 8.6% |
| Rengar | 有利なマッチアップ | −2 | 48.8% | 2.2% |
| Yone | 有利なマッチアップ | −2 | 48.7% | 2.7% |
| Master Yi | 有利なマッチアップ | −2 | 48.0% | 9.8% |
| Graves | 有利なマッチアップ | −2 | 47.9% | 7.3% |
| Twitch | 有利なマッチアップ | −2 | 46.8% | 2.1% |
| Camille | 有利なマッチアップ | −2 | — | — |
有利度:Wild Rift Coreの公式判定(−3〜+3)で、各行に記載されたチャンピオンの視点から見た値です。勝率とピック率:このロールにおける相手チャンピオン自身の数値 — Wild Rift CN · Challenger、Patch 7.3c。直接対決の勝率ではありません。
Jaxは直接的なマッチアップで負けるのではなく、ペースを握られることで負ける。効果的なカウンターすべてに共通するのは、Jaxが長期的なトレードをできないようにすることだ。ポーク、バースト、コントロールのいずれであっても、彼が時間とともに価値を蓄積する能力を妨害する。Jaxのカウンターを理解することは、名前ではなく、彼の戦闘パターンを崩すものを理解することだ。
Jaxのキットは、カウンター・ストライクのタイミングとレンジ内に留まる能力に大きく依存している。彼のカウンターは、弱い序盤か、クールダウンへの依存を突く。安全にポークできるチャンピオンや、戦闘サイクルに入る前にバーストできるチャンピオンは、彼のインパクトを劇的に低下させる。逆に、メレーレンジに押し込まれるチャンピオンは、彼に自然なアドバンテージを与える。
これらのチャンピオンは、JaxがHPを失わずに近づくのを防ぐ。彼らは彼の弱い序盤とリープ・エンゲージへの依存を突く。彼のリープが使われると、Jaxは予測可能で脆弱になる。絶え間ないポークは彼のスパイクを遅らせ、防御的なプレイを強要し、彼のスケーリング計画を完全に破壊する。
チャンピオンの適応方法. パッシブにプレイし、ファームを最大化し、不必要なトレードを避ける。ミスかjungleのセットアップを待つ。
これらのチャンピオンはJaxのダメージを大幅に軽減し、必要に応じてエンゲージまたはディスエンゲージできる。例えばMalphiteは、レーンとチームファイトの両方で彼のインパクトを制限する。Jaxは彼を素早くキルできず、彼のスノーボールをブロックし、不利な戦闘を強いる。
チャンピオンの適応方法. 不必要なトレードを避け、スケーリングとスプリットプッシュのためにプレイする。
これらのチャンピオンは、Jaxが長期的なトレードに落ち着く前に罰を与える。彼らのバーストは、彼がキットを時間とともに使うのを防ぐ。彼らは絶え間ないレーンプレッシャーを作り、彼をタレット下に追いやり、彼のスケーリングを大幅に遅らせる。
チャンピオンの適応方法. 敵のタイミングを尊重し、ビジョンやクールダウンなしでのエンゲージを避ける。
MalphiteはJaxの最悪のマッチアップの1つである。なぜなら、彼はゲームプランを完全に無力化するからだ。レーンでは、Jaxのダメージを軽減し、レンジからポークする。チームファイトでは、彼のクラウドコントロールでJaxがバックラインに到達するのを防ぐ。問題は死ぬことではなく、ゲームに全く影響を与えられないことだ。Jaxはレーンで勝てないことを受け入れ、スケーリングとスプリットプッシュに完全に集中する必要がある。
Jaxはキットを最大限に活かすために、長期的なトレードに大きく依存している。遠距離からのポークは、エンゲージできる前に体力を少しずつ削ることで、これらのトレードを防ぐ。彼のジャンプはしばしば唯一のギャップクローザーであり、予測可能で罰せられやすい。これにより、彼は防御的なプレイを強いられ、スパイクが大幅に遅れる。
直接的なカウンターに対しては、目標が完全に変わる。レーンで勝とうとするのではなく、損失を最小限に抑えることになる。これには、クリーンなウェーブ管理、リスクの高いトレードの回避、jungleの機会を待つことが含まれる。Jaxは後で役立つので、生き残ることがすでに勝利だ。
はい、しかし純粋な1v1ではめったにありません。敵のミス、jungleのアドバンテージ、またはより良いスケーリングを通じて彼らに勝つことができます。重要なのは、マッチアップを直接的な決闘としてではなく、タイミングレースとして扱うことだ。アイテムが揃えば、一部のカウンターは問題にならなくなる。
最悪のカウンターは、ポークとコントロールを組み合わせたものだ。これらはJaxが戦闘に参加するのを防ぎ、エンゲージの試みを罰する。このタイプのマッチアップは彼のプレイパターンを完全にシャットダウンし、レーンを積極的にプレイするのではなく、耐えることを余儀なくさせる。