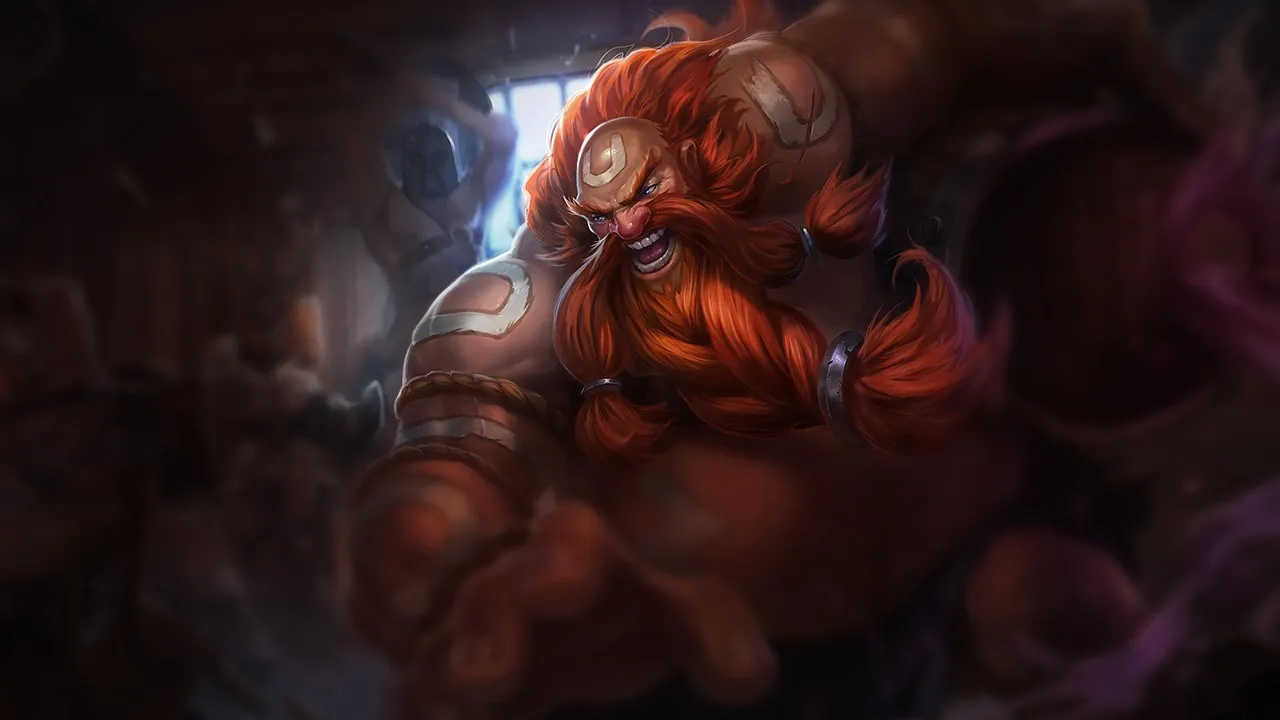




























カウンターアングル
Gragasは、単純なステータスやバーストダメージだけでは対策できず、エンゲージのタイミングを妨害できるチャンピオンによってカウンターされます。彼のキットは精密なウィンドウに依存しており、Eでエンゲージし、Rで再配置します。これらのウィンドウを無視したり、罰したりできるチャンピオンは、彼のインパクトを劇的に低下させます。カウンターを理解することは、彼の角度がどのように無効化されるかを理解することです。

Gragasは、敵が彼のCC zoneを回避したり、engageを咎めてきたりすると苦戦します。kiting、持続的なpoke、または高いmobilityを中心に構築された構成は、彼のcomboの有効性を減少させます。直接的な接触や集団戦がない場合、彼のengageと分断のポテンシャルは低下します。
これらのチャンピオンは、こちらのビルドやプレイスタイルを真正面から上回る構成を持ち、レーン戦のコントロールとファームを極めて難しくする。彼らのスキルはこちらの主要な強みを無効化し、いつも通りのプランを実行しようとした瞬間に手痛い反撃を受けさせてくる。こうしたマッチアップでは、ミスを最小限に抑え、正面からの対決以外で解決策を探すことが重要になる。

Olaf は Gragas の防御用のキット全体を完全に無効化します。Gragas は敵を吹き飛ばしたりスタンさせたりして、不利な trade から逃れます。しかし、Olaf が Ragnarok を発動すると、Olaf は Explosive Cask の吹き飛ばしと Body Slam のスタンを完全に受け付けなくなります。これらの CC 手段がなければ、Olaf は Undertow で Gragas を追い詰め、Reckless Swing と Berserker Rage で Gragas を切り刻めます。
この構造的な不利により、あなたは非常に守備的な姿勢を強いられます。タワーの保護範囲を越えて前に出ると致命的な追撃を受けるため、wave の優先権は争えません。体力を削り合う trade は危険です。Barrel Roll で poke しようとしても、Olaf は Ragnarok 中ならスローを簡単に無視して all-in を強いてきます。この常時の脅威によって、あなたはタワーの下に閉じ込められ、序盤のプレートを譲ることになります。
この猛攻を生き延びるには、位置取りが命綱です。タワーに張り付き、Olaf の ult がクールダウン中の場合を除き、Body Slam を攻撃的に使ってはいけません。Barrel Roll は、安全な距離から押し寄せる minion wave を削るためだけに使い、Happy Hour を発動して体力を維持してください。Olaf が自分のタワー付近で wave を freeze してきても、近づいてはいけません。代わりに Olaf が push してくるのを待ち、Drunken Rage でダメージを吸収しましょう。
これらのチャンピオンは、マッチアップ自体を絶望的にするわけではないが、対面で優位に立ちやすいツールを持っている。射程が長かったり、攻撃を受け止める力が高かったり、エンゲージへの対応手段が豊富だったりする。アプローチを調整し、戦闘を受け入れるタイミングを慎重に選ぶ必要がある。

Mordekaiser は Darkness Rise が発動すると、特に Death's Grasp で Gragas を引き寄せた場合、純粋なステータス勝負に勝ちます。しかし、Explosive Cask が Mordekaiser を吹き飛ばして ult の持続時間を無駄にさせる完璧な手段になるため、Gragas は Realm of Death の隔離を生き延びられます。この disengage を使わずに正面から戦うと、Mordekaiser の継続的な魔法ダメージと Indestructible のシールドが、あなたのタフさを押し潰します。
この力関係により、lane は wave の封じ込めの戦いになります。Mordekaiser は Obliterate で常に push し、trade を強いてこようとします。長い skirmish では Mordekaiser と争えないため、序盤の優先権は諦めてタワー下でファームしなければなりません。Mordekaiser があなたを Realm of Death に引きずり込む前に Body Slam を誘い出してしまうと、唯一の確実な脱出手段を失い、簡単なダイブか強制 recall につながります。
距離を保ち、Barrel Roll で poke して Happy Hour の回復を発動させてください。Mordekaiser が Death's Grasp を外した直後でない限り、Body Slam を攻撃的に使ってはいけません。Mordekaiser はいずれ必ず Realm of Death を発動してきますが、慌てないでください。すぐに Explosive Cask で Mordekaiser をアリーナの反対側へ吹き飛ばし、残りのダメージは Drunken Rage で軽減しながら時間切れを待ちましょう。ノックバックの方向を間違えた場合は、Body Slam で Mordekaiser をすり抜けるようにダッシュして距離を作ってください。

Gwen のスケーリングと true damage の脅威により、ゲームが進むほどこの matchup は厳しくなります。Body Slam で安全にダッシュして逃げれば、Gwen の Snip Snip! のカットや Needlework のスローからは簡単に逃れられますが、DPS では太刀打ちできません。長引く skirmish では、Gwen のパッシブ A Thousand Cuts と切り刻むようなダメージが、あなたの Drunken Rage のダメージ軽減を簡単に貫通します。
この力関係により、あなたは守勢に立たされ、Gwen が wave のテンポを握ります。Gwen は minion に対して Snip Snip! を重ね、Skip 'n Slash で前にダッシュしようと常に狙ってきます。前に出すぎて捕まると、Needlework で追い詰められるリスクがあります。序盤の lane の主導権を譲り、Barrel Roll で距離を取って安全にファームすることが多くなるでしょう。
生き延びるには、位置取りを徹底し、Gwen が Skip 'n Slash で距離を詰めてきたときの disengage のためだけに Body Slam を温存してください。ダッシュを攻撃的に使ってはいけません。Gwen が Hallowed Mist を発動したら、すぐに下がって Gwen の防御バフを無効にしましょう。Drunken Rage で Gwen の最初のバーストを吸収し、Gwen が Needlework であなたを追い詰めようとしてきたら Explosive Cask で吹き飛ばしてください。

Sett の Pit Grit と Knuckle Down による容赦ない物理プレッシャーは、長い trade を Gragas にとって致命的にします。この matchup は完全に Sett のエンゲージを封じることにかかっています。Sett が Facebreaker であなたを引き寄せたがる一方で、あなたの Body Slam は完璧な counter-engage になります。そのダッシュで Sett の引き寄せ範囲から逃れたり、Sett を後ろに吹き飛ばして巨大な Haymaker のシールドスラムの溜め動作を妨害し、true damage の中心部分があなたに当たるのを防いだりできます。
Sett は The Show Stopper の脅威であなたを zone するのが得意なため、あなたは常にタワー下に押し込まれることになります。Body Slam を攻撃的に無駄使いすると、Sett はすぐに Facebreaker で罰して体力をごっそり削り、貴重なゴールドを失う早い recall を強いてきます。wave 管理は純粋に守備的なままで、Barrel Roll で距離を取って安全にファームし、Sett の避けられない poke は Happy Hour で耐えます。
ダッシュで trade を始めてはいけません。Body Slam は待機させておきましょう。Sett が Knuckle Down を発動して突っ込んできたら、下がって Barrel Roll を投げ、Sett の前進をスローにしてください。Sett が Facebreaker であなたを引き寄せてきた場合は、すぐに Body Slam を先行入力して disengage するか、Haymaker の最中に Sett の Grit ゲージが最大になっているのが見えたときに、Sett を妨害するために使ってください。Sett が The Show Stopper であなたを掴んできたら、事前に Drunken Rage を使って、大きな着地ダメージを軽減しましょう。

Jayce の遠距離プレッシャーによりこの matchup は厳しいですが、生き延びる手段はあります。Jayce の距離からの絶え間ない poke は、体力を健全に保つ Happy Hour のパッシブで無効化できます。この lane の決定的な場面は、Jayce が To the Skies! で飛びかかってきたときです。Jayce が跳躍する瞬間に Body Slam のタイミングを合わせれば、すぐにダイブを妨害して大きく trade し返せます。
序盤のレベルは、Jayce が wave を握って優先権を持つ間、タワー下に押し込まれて過ごすことになるでしょう。Jayce はタワープレートを削り、早い recall を強いてくるはずです。しかし、そのダメージは軽減できるため、Jayce がスノーボールするのを防げます。この lane は忍耐の試練となり、序盤のマップ上での存在感と引き換えに、完璧に守り切ったタワーを手に入れ、Jayce を top lane に閉じ込めておけます。
minion の後ろに立って Jayce の shockblast を当てにくくし、Barrel Roll は安全な距離から瀕死の minion を確保するためだけに使ってください。Body Slam を攻撃的に使ってはいけません。Jayce の To the Skies! を妨害するためだけに温存してください。体力を大きく削られたら、Drunken Rage を発動して Jayce の burst を吸収し、タワー下で安全にファームして、Jayce の変身の cooldown を待ってから反撃を考えましょう。

Vayne は射程の優先権と *Tumble* を活かして、*Silver Bolts* の true damage を何度もあなたに発動させます。Vayne の *Condemn* が飛行中の *Body Slam* を簡単に中断できるため、直接の trade は非常に危険です。この lane に残るための主力は *Happy Hour* で、*Barrel Roll* をファームに使った後に体力を回復し、Vayne の絶え間ない物理ダメージと true damage の poke を相殺してくれます。
序盤のほとんどをタワー下に閉じ込められて minion を取り逃がし、その間 Vayne はタワーのプレートを自由に削っていきます。Vayne の執拗な harass により体力は常に半分前後になり、*Tumble* で強化された攻撃を避けられないと、早すぎる recall が起こりやすくなります。ただし、*Silver Bolts* を発動させるための Vayne の攻撃的な位置取りは自然と wave を押し込むため、Vayne は序盤の gank に非常に弱くなります。
タワーの安全圏に張り付き、*Barrel Roll* を最大射程から使って瀕死の minion を確保してください。*Drunken Rage* は、*Silver Bolts* の 3 発目を避けられない場合にだけ発動しましょう。Vayne がすでに *Condemn* を無駄にしている場合を除き、*Body Slam* で仕掛けてはいけません。代わりに位置を保ち、Vayne が前に出すぎるのを待ってから、Vayne の背後に *Explosive Cask* を放って、Vayne をタワーの射程内に直接吹き飛ばすか、近づいてくる jungler の簡単なキルを確保しましょう。

Way of the Hunter と Mortal Steel は終盤に向けて非常にスケールするため、Yone は試合が進むにつれて自然とあなたを上回ります。しかし、Yone の攻めに対して、あなたには強力な操作面の答えがあります。完璧なタイミングの Body Slam なら、Soul Unbound の戻りのフェーズか、Yone の ult である Fate Sealed の溜めモーションのどちらかを中断して Yone の攻撃のプレッシャーを止められ、Yone 自身の前進する勢いを Yone に返せます。
Yone は Mortal Steel と Spirit Cleave で wave を押し込み、あなたをタワー下に追いやりながら、Soul Unbound で安全に trade しようと常に狙ってきます。Yone のダッシュに反応できないと、体力を削られ、大きなゴールドリードを取られ、簡単にダイブされます。このプレッシャーのせいで Happy Hour に頼って生き延びるしかなくなり、優先権を犠牲にして Yone に自由に roam させることになります。
caster minion の近くに立って、Yone を予測しやすい Soul Unbound の軌道に誘い込んでください。wave を片付けるために Body Slam を無駄にしてはいけません。Yone が Fate Sealed を使ったとき、あるいはスピリットの分身へ戻ろうとしたときに衝突させるために、特にこのアビリティを温存してください。Yone が Mortal Steel の 3 回目を外したら、すぐに Barrel Roll を転がして Yone をスローにし、Drunken Rage で Yone の反撃を軽減してから disengage しましょう。

Volibear は長引くデュエルに強く、*Frenzied Maul* がマークした標的に対して Volibear を繰り返し回復させ、*Sky Splitter* でシールドを与えます。*Happy Hour* が体力を満タンに保ってくれても、Volibear に距離を詰められると、Volibear の素の回復量には太刀打ちできません。この matchup は Volibear に 2 回噛まれるのを防げるかにかかっており、つまり、Volibear に拘束される前に *Thundering Smash* のスプリントを無効化しなければなりません。
Volibear のパッシブ *The Relentless Storm* が常に連鎖する雷を発動するため、Volibear は自然と minion をあなたの方へ押し込みます。これにより wave 管理で大きな優位を得られ、タワー付近で wave を freeze できます。lane の中央付近で体力を削り合う trade は避けてください。Volibear のスタンで捕まると、*Stormbringer* でのタワーダイブに無防備になり、あなたの防御面の優位が完全に無効化されます。
*Body Slam* は必ず防御用の手段として温存しなければなりません。Volibear が *Thundering Smash* を発動して突っ込んできたら、Volibear の突進に *Body Slam* を直接合わせて勢いを止め、Volibear が *Frenzied Maul* を使う前に安全に disengage してください。Volibear に *Sky Splitter* を落とされたら、すぐに *Drunken Rage* を発動して burst を吸収しましょう。*Barrel Roll* は Volibear の前進をスローにするためだけに使い、Volibear が *Stormbringer* でダイブしようとしたら *Explosive Cask* を投げて吹き飛ばしてください。
その他のマッチアップ
このマッチアップは何よりもまず実行力の勝負であり、両者ともに優位を取れる現実的な手段を持っている。重要なスキルを一つ避けられるか、エンゲージを正しく読めるか、あるいはたった一つの位置取りのミスが、勝敗を分けることもある。マッチアップを理解し、行動すべき瞬間を見極める力がとりわけ重要になる。

この lane は純粋なテンポの試練です。Nasus は Wither で追撃の下準備をしてあなたを追い詰めようとしますが、あなたの Body Slam はこのスローを完全に無効化し、すぐに安全圏へ滑り戻れます。ただし、あなたの cooldown は長いため、Nasus を常に harass することはできません。Nasus は Siphoning Strike を自由にスタックさせ、Soul Eater であなたの poke に耐えるので、時計が進み続ける状況になり、Nasus のスケーリングを簡単には阻止できません。
Nasus はマジックレジストを少し得るとソロで倒せなくなるため、wave の状態がすべてです。wave を Nasus 側に跳ね返らせると、Nasus は Siphoning Strike を安全にいつまでもスタックできます。Barrel Roll で Nasus の push を遅らせたり、freeze を維持したりしなければなりません。wave を管理できないと、Nasus はやがて Fury of the Sands を押し、あなたのダメージを無視して、あなたをダイブするかタワーを取ってしまいます。
Body Slam は disengage 手段としてのみ温存し、Nasus がすでに Wither を無駄にしている場合を除き、trade を始めるために使ってはいけません。Nasus が Fury of the Sands を発動したら、すぐに Explosive Cask で吹き飛ばして戦いをリセットしてください。Nasus が自分のタワー付近で freeze しようとしたら、Happy Hour の回復と Drunken Rage を組み合わせて Spirit Fire のダメージを吸収しつつ、Barrel Roll で wave を crash させて、Nasus が楽にスタックできないようにしましょう。

この lane は、Urgot の Disdain を中心とした純粋な反射神経の試練です。Urgot はこの flip を決めて Purge を発動させ、Echoing Flames であなたの周りを回ることに頼っていますが、Gragas には Urgot を止める完璧な手段があります。タイミングを合わせた Body Slam は、Disdain の前進する勢いを完全にキャンセルし、Urgot の移動とシールドの両方を無効化します。このタイミングを外すと、Urgot に体力を Fear Beyond Death の射程まで削られます。
両方のチャンピオンが優れた wave clear を持つため、誰かがミスをするまで lane は比較的動きません。Urgot は Corrosive Charge であなたを poke してエンゲージの下準備をしようとします。Disdain の妨害に成功すれば、Urgot はシールドを失って無防備になり、あなたは立ち去ることも Drunken Rage で trade し返すこともできます。ただし、発動のタイミングを逃すと、処刑されないために Explosive Cask を防御用に切らされることになります。
Urgot が Disdain を使える間は、Body Slam で trade を始めてはいけません。代わりに Barrel Roll でファームして Urgot の移動を遅らせ、Urgot にダッシュを使わせるよう誘ってください。minion の少し後ろに立つと、Urgot の Corrosive Charge が当てにくくなります。Urgot が前に突進してきたら、こちらのスラムですぐに反応して衝突で押さえ込んでください。この妨害を外したら、タワーの方へ退きながら、すぐに Drunken Rage をチャネリングして、飛んでくる Purge のダメージを軽減しましょう。

この lane は純粋な消耗戦になります。Malphite のパッシブ Granite Shield は、あなた自身の Happy Hour によって直接無効化されるからです。Malphite が Seismic Shard であなたの体力を削ろうとするたびに、パッシブの回復で失った体力が戻ります。お互いに相手の防御手段を簡単には突破できないため、この matchup はすぐに安定した、穏やかなファーム lane になり、solo kill はまれです。
積極的な trade ではキルプレッシャーが生まれないため、minion wave の管理があなたの最優先事項になります。Malphite は Ground Slam と Thunderclap で wave を押し込むので、あなたは Barrel Roll で Malphite のクリア速度に合わせる必要があります。Malphite に wave を自由に crash させると、Malphite は簡単な recall のタイミングを得ます。minion を lane の中央付近に保てば、Malphite が Unstoppable Force で roam するのを防げます。
この lane をうまく運ぶには、Malphite が Seismic Shard を詠唱するのが見えたら必ず Drunken Rage を発動して、最初の魔法ダメージを軽減してください。Malphite の Granite Shield が有効な間は、Malphite に Barrel Roll を投げてはいけません。代わりに、遠くの minion を確保したり、シールドの再生タイマーを遅らせたりするために使いましょう。最後に、Malphite が Thunderclap を有効にして距離を詰めようとしたら、即座に disengage できるよう Body Slam を防御用に温存し、安全なファーム距離を保ってください。

この lane は純粋な消耗戦で、Gragas は Ornn の生まれつきのタフさに対抗するために Happy Hour に頼ります。全体の流れは、Body Slam をどう使うかにかかっています。Ornn が Brittle を付与するには Bellows Breath を完了させる必要があり、ノックアップのためには Searing Charge を柱に当てる必要があるため、タイミングを合わせた Body Slam は両方のモーションを詠唱の途中で中断でき、Ornn の trade 力を完全に無効化します。
その結果、lane 戦は持久戦になります。どちらも簡単にはダイブを強いられないため、wave の状態は比較的安定します。ただし Body Slam を無駄にすると、Ornn はすぐに Volcanic Rupture と Searing Charge であなたを zone しようとします。trade に勝てば、Happy Hour があなたの体力を健全に保つ間に Ornn の体力を少しずつ削れ、Ornn は守りに回って鍛造を進めるしかなくなります。
Body Slam で trade を始めてはいけません。反応用の手段として待機させておいてください。Ornn が Bellows Breath で炎を吐き始めたら、Ornn に叩き潰される前に、すぐに Body Slam で突進して最後の tick を妨害しましょう。Ornn が Volcanic Rupture を外したら、短い隙ができるので、Barrel Roll で poke してラストヒットを確保できます。Call of the Forge God を避けられない場合は、Drunken Rage で衝撃を吸収してください。

このスキル面の matchup は、あなたの Body Slam と Irelia の Bladesurge の相互作用に完全にかかっています。Irelia は minion を通ってダッシュして Ionian Fervor をスタックさせ、距離を詰めたがります。しかし Body Slam が優先されます。Irelia の Bladesurge の途中に衝突するようにタイミングを合わせれば、Irelia のダッシュをキャンセルしてリセットを防ぎ、Irelia の主要な移動手段を長い cooldown に追い込んで、あなたの反撃に完全に無防備にできます。
Irelia は Bladesurge のリセットのために体力の少ない minion を常に準備しようとするため、wave の状態が lane の緊張を左右します。大きい wave は、あなたの Body Slam を誘うためのダッシュ対象を Irelia に増やすので、押し込むために Barrel Roll を無闇に投げてはいけません。妨害を外すと Irelia は Ionian Fervor をスタックしてあなたを追い詰めますが、妨害を決めれば Irelia は守りに回るか、生き延びるために Defiant Dance を無駄にするしかありません。
Irelia がラストヒットを狙うなら、あなたの hitbox に直接ダッシュさせることになるよう、自分の体力の少ない minion のすぐ隣に位置取りしてください。Body Slam で trade を始めてはいけません。Irelia の Bladesurge に反応するためだけに温存してください。Irelia に Flawless Duet や Vanguard's Edge でマークされたら、Irelia が必ず出してくる追撃のダッシュを妨害する準備をしつつ、すぐに Drunken Rage をチャネリングして、飛んでくる burst を軽減しましょう。

このスキル面の matchup は、Riven の攻撃的な移動を封じる力で決まります。lane 全体が、1 つのマイクロな駆け引きにかかっています。Riven の 3 段目の Broken Wings の最中に Body Slam で衝突することです。この空中攻撃を妨害すれば、Riven の主要なノックアップを完全に無効にし、即座の Runic Blade 強化攻撃も阻止できるので、Riven は無防備になり、あなたの反撃 burst から逃げられません。
その結果、trade の局面は緊張感のある待ちの勝負になります。Riven は無闇にあなたのタワー下へ wave を押し込めません。そうすると致命的な拘束にさらされるからです。Riven は Valor であなたの脱出手段を誘うか、先に Ki Burst でスタンさせようとします。防御用の手段を温存していれば wave の状態は中立のままですが、妨害のタイミングを誤ると、Riven は Blade of the Exile を発動してあなたを追い詰めます。
これに勝つには、徹底して反応型のプレイスタイルを取ってください。安全な位置から Barrel Roll でファームし、Body Slam で trade を始めてはいけません。このチャージは Riven の 3 段目の Broken Wings のジャンプのためだけに温存してください。Riven が前にダッシュしてきたら、すぐに Drunken Rage をチャネリングして最初の物理 burst を軽減し、Riven が空中にいるまさにその瞬間にタックルを放ちましょう。タイミングを誤ってスタンされた場合は、すぐに Explosive Cask を投げて Riven を押しのけ、disengage してください。

この lane は反応速度の絶え間ない試練で、Renekton のエンゲージにどう対応するかが完全に中心です。Renekton は Slice and Dice で距離を詰め、フューリーが高い状態の Ruthless Predator で即座にあなたを拘束します。しかし、あなたの Body Slam には Renekton のダッシュを空中で妨害するという独自の特性があります。この衝突のタイミングを正しく合わせれば、Renekton はスタンを使えないまま取り残され、burst を出せません。
Renekton のダッシュを阻止できれば、wave のプレッシャーと trade の結果が完全に決まります。Slice and Dice を妨害すると、Renekton は後退を強いられ、あなたは Barrel Roll で体力を削って wave の優先権を確保できます。タイミングをミスすると、Renekton はあなたの体力を削り取り、タワー下へ追いやり、Dominus を発動して大量のフューリーを溜めた時点で簡単にダイブしてきます。
Renekton の Slice and Dice がクールダウン中の場合を除き、Body Slam を攻撃的に使ってはいけません。caster minion の近くに立ち、Renekton が前に出てくるのを待ってください。Renekton がダッシュしたら、こちらのチャージですぐに反応しましょう。外した場合は、すぐに Drunken Rage を飲んで飛んでくる burst を軽減し、Happy Hour を発動して体力を少し回復し、Explosive Cask で disengage して Renekton を押しのけ、フルコンボが入る前に離れてください。

このスキル面の matchup は、K'Sante の攻撃的な位置移動にどう対処するかにかかっています。K'Sante は Ntofo Strikes であなたを消耗させ、All Out で壁越しに引きずろうとしますが、あなたのキットには完璧な答えがあります。決め手は Explosive Cask です。K'Sante が All Out であなたを孤立させた瞬間に、ult を炸裂させて K'Sante を吹き飛ばし、K'Sante の高ダメージの時間帯を無効化できます。
序盤の lane では、trade は短く爆発的です。Happy Hour で Ntofo Strikes の poke を耐えつつ、Drunken Rage で K'Sante のパッシブ Dauntless Instinct の burst を軽減できます。ただし、壁に近づきすぎると All Out の格好の的になります。地形の近くで位置取りを 1 回ミスするだけで、致命的なダイブにつながり、本来は安定していた wave の状態が、K'Sante にとっての突然のキルに変わります。
成功するには、K'Sante が ult の角度を取りやすくならないよう、alcove と川の壁から常に安全な距離を保ってください。K'Sante の Ntofo Strikes のスタックをよく見て、3 発目が準備できたら、横に避けるか、タイミングを合わせた Body Slam でダッシュを妨害する準備をしましょう。何より重要なのは、Explosive Cask を先走って使ってはいけないことです。この重要なスペルは、K'Sante が All Out を使った直後に即座に disengage するためだけに温存し、自分の条件で戦いをリセットしてください。

Teemo は、*Toxic Shot* による絶え間ないharassと *Blinding Dart* に頼って、あなたのfarmを妨害します。幸い、あなたの *Happy Hour* パッシブは、毒のティックの間もあなたを回復することで、この継続ダメージに直接対抗できます。この転換点は *Explosive Cask* を習得したときに訪れます。Teemo にはhardな脱出手段がないため、安全地帯からあなたのburstの射程内へ直接吹き飛ばされると非常に脆くなります。
序盤のレベルでは、Teemo はwaveを簡単にpushして、*Noxious Trap* でlane中にキノコをばらまこうとします。あなたは序盤のpriorityを譲る必要があり、*Barrel Roll* を使って安全な距離からminionを確保します。ultを習得すれば、all-inの脅威によって相手の積極的なポジショニングが完全に止まり、あなたのタワーの近くに安全にキノコを置くことも、*Guerrilla Warfare* のカモフラージュを悪用することもできなくなります。
スペルを連打せず間隔をあけて使うことで、*Happy Hour* の回復を最大限に活かします。tradeするときは、*Blinding Dart* の持続時間が終わるのを待ってから、強化された *Drunken Rage* の攻撃を行います。killを確実に取るには、Teemo の後ろに *Explosive Cask* を投げて相手のポジショニングを崩しつつ、あなたの方へ弾き飛ばし、*Move Quick* を発動される前にすぐ *Body Slam* で追撃して拘束します。

このlaneは消耗戦になり、どちらも簡単には相手をrecallに追い込めません。あなたの Happy Hour パッシブで、Vladimir が Transfusion から得る回復に並ぶことができ、相手のpokeを無効化できます。ただし、決定的なkillを取るのは非常に難しく、あなたが Body Slam で仕掛けたり Explosive Cask で相手を動かそうとしたりするたびに、相手は Sanguine Pool に潜ってあなたのburstを無効化し、安全に逃げることができます。
直接のkillが少ないため、laneは完全にminionのポジショニングの勝負になります。Vladimir に自分のタワー付近でwaveを自由にfreezeさせてはいけません。相手は安全にスケールしつつ、Tides of Blood であなたをzoningしてきます。Barrel Roll で相手のwave clearに対抗し、minionを中央に保つ必要があります。waveの管理が悪いと前に出過ぎることになり、パッシブがcooldownのときに相手の Hemoplague のall-inを受けることになります。
成功するには、Vladimir のリソースを意識して立ち回ります。相手が強化された Transfusion をminionに無駄打ちした直後にだけ、Body Slam と Drunken Rage で短いtradeを仕掛けます。相手が赤いゲージを溜めたままなら、引きます。Sanguine Pool を誘うには、ultをcommitするのではなく、脅威になる Barrel Roll を投げます。相手が逃げてHPで優位に立った場合は、Happy Hour でセーフティネットが戻るまで、距離を取ってスキルでのfarmに専念します。

このmatchupは、Pantheon のinitiationを中心とした純粋な反射神経勝負です。lane全体が、相手の Shield Vault に反応できるかどうかにかかっています。相手のジャンプに合わせて Body Slam を先行入力すれば、相手を空中で叩き落とし、スタンを完全に無効化できるうえ、スタックが溜まった Mortal Will のcomboをあなたに叩き込まれるのも防げます。このタイミングを外すと、相手は Aegis Assault を盾にして一方的にtradeできてしまいます。
相手のダッシュを一貫して中断できれば、Pantheon はあなたのHPを大きく削る主力のツールを失い、あなたは Happy Hour でどんなpokeにもsustainできます。しかし、相手のスタンが当たると、相手は Aegis Assault であなたの反撃を簡単に防ぎつつ、waveをpushします。この流れが、minion waveを握るのがどちらか、そして強いプレッシャーの下で早くrecallを強いられるのがどちらかを決めます。
Pantheon の Shield Vault がcooldownのとき以外は、Body Slam を攻撃的に使わないでください。距離を保ち、自分のダッシュが使える状態で前に出て相手のジャンプを誘います。相手が仕掛けてきたら、E を相手に向けて直接撃ち、衝突で相手のジャンプを中断させ、すぐに相手の後ろへ Barrel Roll で転がり、相手の方向性シールドをすり抜けます。ダッシュのタイミングを誤ってスタンされたら、すぐに Drunken Rage を発動して、飛んでくる相手のburstを軽減します。
その他のマッチアップ
これらのチャンピオンは、こちらの主要な強みに効果的に対応するのが難しく、より自由に対面を組み立てることができる。プレッシャーをかけて有利な交換を引き出す手段は複数あることが多い。相手が態勢を立て直す時間を与えるのではなく、この優位を活かして主導権を握ろう。

Gragas がこのmatchupを支配します。Sion の主力のダメージ兼CCツールである Decimating Smash を完全に無効化できるからです。Sion が巨大な斧を振りかぶるたびに、Gragas は Body Slam ですぐに止められます。このチャネルを即座に中断することで、Sion の主力のwave clear兼tradeツールを封じ、主力スペルがフルcooldownに入った相手を無防備にします。
Sion は中断されずに Decimating Smash をチャージできないため、waveを争う力を失います。Barrel Roll と、強化された Drunken Rage の攻撃で Soul Furnace のシールドを割りながら、簡単にfreezeできます。主力のwaveclearがなければ、Sion はタワー下でfarmするしかなく、ゴールドを失い、priorityをすべて失います。これにより序盤のスケーリングは完全に抑えられ、proxyされる脅威もなくなります。
鉄則は、Sion がすでに Decimating Smash のチャージを始めている場合を除き、Body Slam を攻撃的に使わないことです。minionの近くに立って相手の Q を誘い、すぐにダッシュで飛び込んでキャンセルします。続けて Drunken Rage と Barrel Roll のスローでtradeをきれいに制します。Sion が Unstoppable Onslaught で逃げたり仕掛けたりしてきたら、相手の後ろに Explosive Cask を投げて進路を乱し、孤立させます。

Gragas がこのlaneで大きく有利です。Shen の代名詞であるグローバルなプレッシャーが、あなたが簡単に妨害できるチャネルに完全に頼っているからです。Shen が Stand United で味方にシールドをかけてテレポートしようとするたびに、Body Slam か Explosive Cask でそのキャストを即座にキャンセルできます。これで相手のult能力が完全に無効になり、チームはシールドなしで取り残され、相手自身もあなたのlaneプレッシャーに縛り付けられます。
このやり取りは、Shen の主なマップへの影響力をあなたに有利な形で無効化します。Shen は自由にテレポートで離れられないので、waveのテンポを握れます。Barrel Roll で常にshoveしてpokeを入れ、相手に二択を迫れます。あなたのしつこいpushでタワーを失うか、Stand United があなたのCCに常に脅かされて味方が死ぬのを見るかです。
これを完璧にこなすには、Shen がレベル5になったら、常に Body Slam か Explosive Cask のどちらかを温存してください。tradeの間に両方のスキルを同時に使わないようにし、相手のultを止められるツールを常に1つ用意しておきます。Shen がmeleeの射程外から Stand United をキャストしようとタワーの方へ下がったら、すぐに Explosive Cask を投げて遠くから妨害します。相手が Spirit's Refuge を展開してあなたの通常攻撃を防いだら、Drunken Rage で相手の反撃を軽減するだけで十分です。

Gragas は当然このmatchupを支配します。キット全体が Tryndamere の攻撃の機会を封じるように作られているからです。Tryndamere が致命的なtradeを生き延びるために Undying Rage を発動しても、相手の5秒間の不死身を即座に無効化できます。うまく置いた Explosive Cask で相手を吹き飛ばし、残る Barrel Roll で相手をスローにして距離を詰められなくし、相手のultを完全に無意味にします。
この防御的なユーティリティにより、Tryndamere のいつものsplit-pushのプレッシャーとdiveの可能性が奪われます。Body Slam と Explosive Cask が使える Gragas にdiveするのは自殺行為なので、相手は安全にwaveをcrashさせることも、あなたのタワーを脅かすこともできません。HPのtradeのペースはあなたが握り、失ったHPも Happy Hour で簡単に回復でき、minion waveをタワーの近くで安全にfreezeしたままにできます。
これを完璧にこなすには、相手の Spinning Slash によるinitiateに対抗するため、常に Body Slam を温存してください。相手のダッシュがcooldownのとき以外は、攻撃的に使わないでください。相手が Undying Rage を発動したら、すぐに Explosive Cask を投げて後ろへ吹き飛ばし、続けて Barrel Roll で安全な距離から相手の残りのバフ持続時間を減らします。うっかり早い段階でultを無駄にしてしまったら、すぐに Drunken Rage を発動して自分のタワーまで下がり、相手の一時的な無敵を生き延びます。

Gragas が大きく有利です。Jax の主な攻撃の脅威を完全に無力化するからです。Jax が Counter Strike を回しながら Leap Strike でtradeを仕掛けようとするたびに、Body Slam を直接先行入力することで、相手のジャンプを空中で中断できます。これで相手の勢いがすぐに止まり、スタンも当たらず、主力の防御ツールも失敗したengageに無駄打ちさせられます。
このやり取りでlaningの流れは完全にあなたの有利に傾きます。Jax は安全に短いtradeを仕掛けることも、あなたに対して Relentless Assault をスタックさせることもできません。waveを簡単に操作でき、Jax はタワー下でCSを失うか、Barrel Roll で大ダメージを受けるかの二択を迫られます。Jax は Leap Strike であなたにプレッシャーをかけられないため、あなたがlaneのペースを握り、相手に早いrecallを強いて、スケーリングのスパイクを遅らせることができます。
鉄則は、minion waveに Body Slam を無駄打ちしないことです。このスキルは、Jax が Counter Strike を発動したとき、または Leap Strike のモーションに入ったときのために温存してください。相手がジャンプした瞬間に Body Slam を相手に直接撃って弾き飛ばし、すぐに Drunken Rage と Barrel Roll で追撃してとても有利なtradeを行ってから、下がります。タイミングを誤った場合は、Explosive Cask で相手を弾き飛ばしてdisengageします。

Kayle は、Divine Ascent で遠距離攻撃を得る前の序盤のレベルでは、非常に脆いです。Gragas はこの弱点を突き、Body Slam でギャップクローズして拘束し、続けて強力な Drunken Rage の一撃を叩き込めます。Gragas のburstパターンは非常に速いため、相手が Divine Judgment を自分にキャストする反応時間を得る前に、HPを大きく削る、あるいは一気に倒し切ることさえできます。
最初の1分からwaveのポジショニングを握れます。Kayle が Starfire Spellblade でminionを確保しに近づくたびに、farmを失うか Barrel Roll で大ダメージを受けるかを選ばなければなりません。この絶え間ない脅威のせいで相手は大きく下がってプレイすることになり、あなたは相手のタワー下で大きなwaveをslow-pushし、安全にrecallし、相手がタワー下でのクリアに苦労している間に jungler を助けにroamできます。
序盤に Barrel Roll で Kayle にharassして、Celestial Blessing で回復させ、manaを消耗させます。相手のHPが半分を切ったら、相手がラストヒットのために前に出てくるのを待ち、素早く Body Slam から Drunken Rage のcomboにつなげます。相手がレベル5に達したら、遅いtradeで自分を餌にしないでください。代わりに Explosive Cask で相手を相手のタワーから弾き飛ばすか、Divine Judgment を発動される前に妨害して、確実にkillを取ります。
その他のマッチアップ
これらのチャンピオンは、こちらのビルドやプレイスタイルを真正面から上回る構成を持ち、レーン戦のコントロールとファームを極めて難しくする。彼らのスキルはこちらの主要な強みを無効化し、いつも通りのプランを実行しようとした瞬間に手痛い反撃を受けさせてくる。こうしたマッチアップでは、ミスを最小限に抑え、正面からの対決以外で解決策を探すことが重要になる。
Olaf は、Ragnarok があなたの kit を完全に無効化するため、jungle での Gragas にとって悪夢の matchup です。通常、あなたは peel や engage に Body Slam を、teamfight の撹乱に Explosive Cask を頼りにしています。Olaf が ult を発動すると、Olaf はあらゆる displacement と stun を無視し、Undertow の斧であなたを追い詰め、Reckless Swing と Vicious Strikes のライフスティールであなたの体力を削ります。
jungle では、この関係があなたの duel の力とプレッシャーを奪います。Olaf が近くにいると、scuttle crab や neutral objective を直接争えません。Olaf は Barrel Roll の slow をそのまま歩いて抜けられるからです。Olaf が invade してきたら、Olaf が怒り状態になると防御用の Body Slam では突進を止められないので、すぐに退くしかありません。これにより序盤のマップの優先権を譲ることになり、あなたの laner は Olaf の素早く止められない gank に対して無防備になります。
生き延びるには、Olaf の位置を把握し、マップの反対側へ動く必要があります。小競り合いでは、Olaf の ult が使えるときは Explosive Cask で initiate しないでください。代わりに安全な距離から Barrel Roll で poke して Ragnarok を誘い、Drunken Rage で Reckless Swing の true damage を吸収しましょう。Olaf の斧が飛んでこなくなったら、CC 無効の時間が完全に終わるのを待ってから、carry を peel するために Body Slam を使ってください。
その他のマッチアップ
これらのチャンピオンは、マッチアップ自体を絶望的にするわけではないが、対面で優位に立ちやすいツールを持っている。射程が長かったり、攻撃を受け止める力が高かったり、エンゲージへの対応手段が豊富だったりする。アプローチを調整し、戦闘を受け入れるタイミングを慎重に選ぶ必要がある。

Dr. Mundo のパッシブ Goes Where He Pleases は、あなたの主力の防御・攻撃手段を根本から counter します。peel や initiate に Explosive Cask を使っても、Dr. Mundo は displacement を吸収して少しのダメージを受けるだけで、ノックバックを完全に無視します。これにより Dr. Mundo はあなたの妨害をそのまま歩いて抜けられ、主力の CC が役に立たなくなり、小競り合いで carry を守ることも Dr. Mundo を孤立させることもできなくなります。
jungle の小競り合いや river の争いでは、この関係があなたの脅威を奪います。Dr. Mundo は Body Slam を無視して Infected Bonesaw の slow であなたを追い詰められるため、objective を確実に確保することも lane を守ることもできません。Dr. Mundo の clear に張り合おうとしても、Dr. Mundo の Blunt Force Trauma があなたの Happy Hour の sustain を上回り、序盤の crab の優先権を譲り、Maximum Dosage の dive の脅威にさらされて受け身に回らざるを得ません。
生き延びるには、前衛の後ろにとどまるように位置取りを調整し、離れた位置から Barrel Roll を使って先に Dr. Mundo の canister を割ってください。Goes Where He Pleases が有効な間は、Explosive Cask を撃ったり Body Slam で突っ込んだりしてはいけません。displacement を試みる前に、味方が Dr. Mundo のパッシブを発動させるのを待つか、最大射程の barrel で自分で誘ってください。Dr. Mundo が Maximum Dosage を発動したら、Drunken Rage で物理ダメージを軽減し、すぐに離脱してください。

Lillia のパッシブ、Blooming Blows の stack は大きな移動速度を与え、Lillia があなたの Barrel Roll を軽やかに回避できます。zone と slow の主力手段が Lillia の絶え間ない動きで無効になるため、Lillia を拘束するのに苦労します。Lillia の Dream-Laden Bough の burn はあなたの Happy Hour の sustain も削り、簡単には勝てない、非常に mobile でストレスのたまる追いかけっこになります。
jungle では、この mobility の差により、Lillia はあなたの clear を簡単に上回り、あなたを kite して scuttle crab を確保できます。river で Lillia と直接争うと、Lillia は Swirlseed で離れた位置から Dream-Laden Bough を付与でき、あなたが Body Slam の射程に入る前に Lilting Lullaby で眠らせてきます。これにより守りの farm パターンを強いられ、序盤の neutral control を犠牲にします。
この matchup を生き延びるには、Lillia が最大 stack の間は Barrel Roll を闇雲に投げないでください。代わりに cooldown を温存し、Lillia が Watch Out! Eep! で突っ込んでくるのを待ちましょう。Lillia が一瞬その場に固定されるので、Body Slam の絶好の標的になります。objective を争うときは、戦いを始めようとせず、Explosive Cask を離脱用の防御として使って Lillia を弾き飛ばしてください。Lillia を追い詰めようとするのは確実な死の罠です。

Graves は、New Destiny による遠距離の通常攻撃で常に安全な位置からあなたを削るため、jungle の小競り合いのペースを握ります。主な問題はあなたの initiate 手段にあります。Graves は Quickdraw で反応的にダッシュして、Barrel Roll の範囲から簡単に滑り出せます。最初の slow を当てられなければ、Body Slam を当てるために確実に距離を詰められず、Graves に kite されてしまい、Flash を使わない限り拘束を確保できません。
この mobility の不一致のせいで、river で camp を争うのは非常に危険です。Graves があなたの jungle に invade してきたら、Graves の Smoke Screen と、壁越しの End of the Line を組み合わせて camp から追い出されかねません。kite されずに trade し返すことが確実にはできないので、Scuttle Crab を譲らざるを得ないことが多く、序盤の gold とテンポで遅れ、サイド lane へのプレッシャーが下がります。
生き延びてこれに対抗するには、Barrel Roll で先手を取らないでください。代わりに、Graves が End of the Line を跳ね返らせそうな頑丈な壁の近くに位置取りしつつ、Graves の burst を吸収するため早めに Drunken Rage を使ってください。Graves が攻撃的にでも防御的にでも Quickdraw を使い切るまで Body Slam を温存しましょう。engage せざるを得ない場合は、Explosive Cask で Graves を味方チームの方か、あなたの近接範囲の中へ後方にノックバックさせ、メインの CC を使う前にダッシュを吐かせてください。

Nocturne は、Shroud of Darkness があなたの影響力の大きい CC への決定的な counter になるため、jungle の小競り合いを支配します。Body Slam や Explosive Cask で peel や engage をしようとすると、反応型の spell shield が displacement を完全に無効化します。これであなたの主力の防御・攻撃手段が無駄になるだけでなく、Nocturne の攻撃速度 buff が発動し、Nocturne は Duskbringer と Unspeakable Horror であなたを簡単に追い詰められます。
river と jungle の通路では、Nocturne の spell shield が使える間は、Scuttle Crab を安全に争うことも invade することもできません。1v1 の状況で衝突すると、極めて消極的なプレイを強いられ、優先権を譲ることになります。Nocturne が Paranoia を得たら、効果的に counter-gank できないため、あなたの lane は常に危険にさらされます。遅れて到着しても、Nocturne の Shroud of Darkness があなたの peel を防ぐため、味方を救えません。
この matchup を生き延びるには、Body Slam や Explosive Cask で先手を取らないでください。代わりに、最大射程の Barrel Roll を投げて離れた位置から Shroud of Darkness を誘うか、Drunken Rage を発動して、Nocturne のシールドが減衰する間に最初の burst を吸収しましょう。Nocturne が Paranoia で initiate して Unspeakable Horror であなたを結びつけたら、Happy Hour のパッシブ回復を使って歩いて離れ、恐怖の持続時間を耐えてから、シールドが切れた後にだけ振り向いて displacement のスキルを撃ってください。
その他のマッチアップ
このマッチアップは何よりもまず実行力の勝負であり、両者ともに優位を取れる現実的な手段を持っている。重要なスキルを一つ避けられるか、エンゲージを正しく読めるか、あるいはたった一つの位置取りのミスが、勝敗を分けることもある。マッチアップを理解し、行動すべき瞬間を見極める力がとりわけ重要になる。

この jungle の matchup は、あなたの Body Slam と Diana の Lunar Rush の決定的な相互作用に完全に集約されます。Diana が味方やあなたにダッシュを仕掛けてきたとき、突進のタイミングを合わせて空中で Diana を撃ち落とせば、Diana の engage を完全に無効化できます。Diana の mobility は Crescent Strike の印による Lunar Rush のリセットに大きく依存しているため、最初のダッシュを中断すれば進入を阻止でき、主力の gap-closer を完全な cooldown に追い込めます。
jungle では、この機械的なチェックが、小競り合いや neutral objective の争いの展開を決めます。Diana のダッシュを止めることに成功すれば、Diana が Moonfall であなたのチームを引き寄せるのを防げ、teamfight での影響力を無効化できます。しかし、Body Slam を防御的に無駄にしたり外したりすると、Diana はすぐにあなたの後衛を削ります。このため river での遭遇はすべて高リスクな膠着になり、先に主力スキルを使ってしまったほうがマップのプレッシャーを失います。
Gragas としては、小競り合いで極度の忍耐が必要です。Diana が近くにいるときは Body Slam で initiate せず、Diana の Lunar Rush のアニメーションに反応するためにスキルを温存してください。Diana が Crescent Strike を外したら、短い時間だけ Barrel Roll と Drunken Rage で積極的にプレイできます。中断をしくじって Diana に Moonfall を当てられたら、Diana の burst が入る前に、すぐ Explosive Cask で離脱し、無防備な味方から Diana を吹き飛ばしてください。

この jungle の matchup は、teamfight の妨害を軸にした、純粋な反応速度の勝負です。Amumu は Bandage Toss を当ててあなたのチームに dive し、壊滅的な Curse of the Sad Mummy を放つことに頼っています。しかし Gragas には究極の counter 手段があります。あなたの Explosive Cask なら、ダッシュの途中や着地の瞬間に Amumu を味方から遠くへ吹き飛ばせ、Amumu の巨大な CC のセットアップを完全に台無しにして、Amumu を孤立させられます。
jungle では、この関係により Amumu は自由に小競り合いを強いることができなくなります。序盤の objective の争いで、あなたは Body Slam で簡単に Amumu を引き剥がせるため、Amumu は無鉄砲に engage できません。Amumu があなたの carry を拘束しようとしても、あなたの displacement の脅威のせいで、Amumu は engage を遅らせざるを得ません。これにより、どちらの jungler も簡単には踏み込めない緊迫した膠着が生まれ、neutral の戦いは忍耐強い位置取りの勝負になります。
これに勝つには、Explosive Cask を防御的な離脱のためだけに厳密に温存する必要があります。戦闘の開始に無駄にしてはいけません。主力の carry のやや後ろに立って Amumu を迎え撃ちましょう。Amumu が Bandage Toss を放った瞬間に、エイムの準備をしてください。当たったら、Amumu が Curse of the Sad Mummy を発動する前に、ult を Amumu の真上かやや前に即座に投げて、Amumu をターゲットから吹き飛ばしてください。失敗したら、Body Slam で Amumu の進路を塞ぎましょう。

この matchup は、river と camp でのミクロな相互作用で決まる、純粋な burst のぶつかり合いです。Kha'Zix は Gragas を孤立させ、Unseen Threat で強化された壊滅的な Taste Their Fear を放つことで力を発揮します。しかし、Gragas は Drunken Rage のタイミングを合わせることで、この致命的な初撃を完全に無効化できます。Kha'Zix の主力 burst のタイミングをうまく吸収できれば、プレッシャーが移り、ヴォイドの捕食者である Kha'Zix は主力のダメージ源なしで戦うことになります。
Scuttle Crab を巡る jungle の小競り合いと序盤の小競り合いが、マップの流れを決めます。Kha'Zix の burst を軽減できなければ、camp から追い出されて優先権を譲り、Kha'Zix にあなたの laner へプレッシャーをかけられてしまいます。逆に、踏みとどまって孤立させられたダメージを吸収すれば、体力を高く保てるため、neutral camp を守り、Kha'Zix の序盤の snowball の可能性を無効化できます。
Kha'Zix の視界がない状態で camp clear に Drunken Rage を無駄にしないでください。Kha'Zix が Leap で initiate した瞬間に、すぐ Drunken Rage をチャネリングして、孤立状態での Taste Their Fear を吸収してください。Kha'Zix が踏み込んできたら、Body Slam でリズムを崩し、Barrel Roll で続けて trade を確保しましょう。Kha'Zix が Void Assault を発動してパッシブをリセットしたら、孤立を断つために味方側の monster か minion の方へ下がってください。

この jungle の matchup は、Lee Sin の mobility に対して Body Slam のタイミングをどう合わせるかで完全に決まります。Lee Sin の主力 burst は Sonic Wave の 2 回目の発動で標的を仕留めることに頼っているため、あなたの Body Slam は完璧な counter になります。ダッシュの途中で Lee Sin に衝突すれば、ダッシュのダメージを完全にキャンセルでき、簡単に kill を取られるのを防げて、Lee Sin の序盤の暗殺の可能性を即座に無効化します。
活発な小競り合いと objective の争いでは、この関係が river を支配するのが誰かを決めます。CC を温存していれば、Lee Sin は味方に楽に dive することも、Dragon's Rage を使った攻めに踏み切ることもできません。しかし、Body Slam を早まって無駄にすると、Lee Sin はその隙を突いてすぐ Sonic Wave であなたを burst で倒し、あなたを自分の jungle から追い出し、scuttle の優先権を犠牲にさせます。
Lee Sin の Sonic Wave が使える状態では、Body Slam で小競り合いを始めないでください。代わりに Barrel Roll で Lee Sin の接近を遅くし、Drunken Rage をチャージして最初の burst を吸収しましょう。最初の印が当たるときは、体力の低い味方、またはあなた自身の真上に立ってください。Lee Sin が 2 回目の飛行を発動した瞬間、進路上に Body Slam を放って Lee Sin を空中から叩き落としてください。タイミングを誤ったら、すぐに Explosive Cask で離脱し、Lee Sin を弾き飛ばして仕切り直しましょう。

この jungle の matchup は、爆発的な実行速度が鍵となります。Viego は skirmish 中に Sovereign's Domination を発動して回復し、流れを覆そうとしますが、本来は脆い相手です。Gragas はこの sustain のループを完全に回避できます。Drunken Rage と Body Slam、Explosive Cask を組み合わせれば、あなたは Viego の体力を満タンから 0 まで burst でき、相手のパッシブが発動する前に、味方の体を乗っ取る力を奪えます。
Jungle の skirmish は一瞬の差で決まります。Viego が Harrowed Path で jungle の壁を抜けてくる場合、あなたは相手の camouflage を追わなければなりません。Viego が Spectral Maw で仕掛けてきて、その stun が外れると、相手は非常に無防備になります。Heartbreaker を使える低体力の標的を相手が見つける前に burst で倒しきれないと、相手は skirmish を snowball させ、味方の lane は重要な priority とマップコントロールを失います。
Viego の cooldown が上がっている間は、決して無警戒に仕掛けないでください。Body Slam を温存し、相手の Spectral Maw の dash を空中で止めて、主力の CC を無力化しましょう。Viego が Heartbreaker で逃げようとしたり味方を execute しようとしたりしたら、Explosive Cask を撃ち込んで標的から引き離します。Barrel Roll を外して最初の burst に失敗した場合は、すぐに Happy Hour の回復を使って離脱し、cooldown が戻るまで生き延びてください。

この jungle の matchup は、Eternal Hunger と Jaws of the Beast による Warwick のしつこい life steal を無力化できるかどうかにかかっています。Warwick は低体力時の回復によって長引く skirmish を支配しますが、Gragas には相手の ult を止める最適な手段があります。タイミングのよい Body Slam なら、Warwick の Infinite Duress の跳躍を空中で中断でき、suppression を完全に無効化して、相手があなたの体力を食い尽くす前に大幅な自己回復を止められます。
あなたは相手の主力の engage 手段をキャンセルできるため、Warwick は Scuttle Crabs や序盤の neutral objective であなたに skirmish を簡単には強要できません。ただし、あなたが CC を無駄にすると、相手は Blood Hunt で追いつき、優れた sustain を生かしてきます。この緊張関係により、river での duel はどれも、先に主力の移動手段を使った側がすべての pressure を失う、高リスクの我慢比べになります。
Warwick に対して、Body Slam で fight を始めてはいけません。代わりに Barrel Roll で相手の接近を slow し、Drunken Rage で強化した auto-attack で間合いを取ります。Body Slam は、Warwick の Infinite Duress の跳躍に反応するときや、味方から相手を peel するときのためだけに温存してください。相手が ult を channel しようとしたら、真正面から Body Slam をぶつけて suppression を打ち破ります。この重要な中断に失敗したら、すぐに Explosive Cask で相手を吹き飛ばして離脱してください。

この jungle の matchup は、Ekko の Parallel Convergence を中心とした位置取りの繊細な駆け引きです。Ekko は時間のゾーンを使ってあなたを拘束したり shield を得たりしようとしますが、あなたの切り札は ult の Explosive Cask です。この樽を正しく起爆すれば、stun が発動する前に Ekko を自身の Parallel Convergence の円の外へ物理的に吹き飛ばせます。Ekko の主力の engage 手段は、無駄になった cooldown と化します。
Jungle では、この相互作用が objective をめぐる skirmish と river の fight を完全に左右します。Ekko が Parallel Convergence を当て、Z-Drive Resonance を発動させれば、相手の burst はあなたの体力を溶かし、早すぎる撤退を強いるでしょう。しかし、タイミングのよい Body Slam や displacement で相手の突入を妨げれば、Ekko は守りで Chronobreak に頼らざるを得なくなり、相手のマップ上の pressure は無力化され、scuttle の主導権はあなたのものになります。
この execution 勝負に勝つには、fight を始めるために Explosive Cask を無駄遣いしないでください。Ekko の clone が Parallel Convergence を唱えたと聞こえたら距離を保ち、Ekko が Phase Dive で中に飛び込んだ瞬間に、ゾーンの中心へ ult を狙い撃ちします。ult が cooldown 中なら、Body Slam で相手の dash に対抗し、すぐに Barrel Roll の slow を使って離脱し、相手の temporal shield が切れるのを待ちましょう。
序盤の jungle での衝突では、この matchup は Pantheon の突発的な burst をどう処理するかで決まります。Pantheon は Mortal Will を発動して Comet Spear を強化し、あなたを一瞬で削れると考えています。しかし、相手が跳び込んでくるまさにその瞬間に Drunken Rage を発動すれば、相手の物理ダメージの大半を受け止められ、致命的な trade を互角で耐えられる交換に変えたうえで、離脱できます。
この力関係により、序盤の Scuttle Crabs や neutral camp の周りで、緊張感のあるゆっくりとした駆け引きが続きます。ダメージ軽減のタイミングを外すと、Pantheon は楽に kill を取り、Grand Starfall で相手側の lane を snowball させます。相手の最初の突きを parry できれば、相手の clear 速度は落ち、あなたの jungle への invade を防げるうえ、cooldown が戻るのを待つ時間を相手に無駄に使わせられます。
Pantheon のパッシブゲージから目を離さないでください。Mortal Will が満タンの状態で相手が Shield Vault で仕掛けてきたら、すぐに Drunken Rage を channel する準備をします。相手の Aegis Assault が使える間は、Body Slam で先に仕掛けてはいけません。相手があなたの反撃ダメージを block してしまうからです。代わりに Barrel Roll で相手の退却を slow し、防御用の shield が切れるのを待ってから、CC のフルローテーションを叩き込みます。
その他のマッチアップ
これらのチャンピオンは、こちらの主要な強みに効果的に対応するのが難しく、より自由に対面を組み立てることができる。プレッシャーをかけて有利な交換を引き出す手段は複数あることが多い。相手が態勢を立て直す時間を与えるのではなく、この優位を活かして主導権を握ろう。

Body Slam が Vi の主力の engage 手段である Vault Breaker を完全に封じるため、この jungle duel は Gragas が支配します。Vi が突進して前方へ dash し、仕掛けたり逃げたりしようとするたびに、タイミングのよい Body Slam が空中で相手と衝突し、ノックバックをキャンセルして立ち往生させます。Vault Breaker の gap-closer と最初の CC を失うと、Denting Blows を重ねたり Blast Shield を展開したりする Vi の動きは大きく遅れます。
この相互作用により、Vi の gank 力と objective への pressure は完全に失われます。Scuttle Crabs を争うときや序盤の skirmish で、相手は安全に fight を強要できません。Vi が味方の laner に仕掛けようとしても、あなたは楽に相手を peel できるので、インパクトの大きい gank が counter-gank の大失敗に変わります。この無力化により、相手は受け身の farm を強いられ、序盤のマップの動きをあなたが自由に握れます。
これを完璧にこなすには、Vi の近くで camp を処理するとき、Body Slam を先に使ってはいけません。代わりに味方の laner の近くで待機し、Body Slam を Vi の Vault Breaker のチャージへの反応専用に温存します。Vi が Cease and Desist であなたを拘束してきたら、unstoppable のアニメーションが終わるのを待ってから、すぐに Explosive Cask を落として相手を標的から引き離し、Drunken Rage でその後の Relentless Force の burst を吸収します。

Gragas の ult が Shyvana の最大の脅威を完全に無力化するため、Gragas はこの jungle の matchup を本質的に支配します。Shyvana が Dragon's Descent で teamfight や objective の争いを仕掛けようとしたら、すぐに Explosive Cask で反応できます。これは空中で相手を捉え、味方から遠くへ散らします。ドラゴン形態での engage を失えば、相手は簡単に kite でき、Burnout と Twin Bite も役に立たなくなります。
この matchup は、neutral objective の争い方を変えます。Shyvana は Fury of the Dragonborn のスタックを溜めることと、強力な engage を強要することに頼っています。あなたが相手の dive を止められるため、Shyvana のチームは相手の initiation にうまく追従できません。その結果、相手は受け身のプレイを強いられ、あなたは Scuttle Crabs を確保し、Barrel Roll で相手を slow し、Drunken Rage で Flame Breath の poke を吸収しながら、相手の camp を安全に争えます。
最優先事項は、teamfight 中に Explosive Cask を温存することです。Shyvana の ult が使える状態なら、適当な poke に使って無駄にしないでください。frontline のやや後ろに位置取りし、相手が Dragon's Descent を放つのを待ちます。相手が飛んだ瞬間、着地経路めがけて樽を投げ、進路をそらします。river で Burnout によって不意を突かれたら、Body Slam を守りに使って距離を作りつつ、Happy Hour を発動して体力を保ってください。

この matchup は、短い skirmish の中で Talon の burst を封じられるかどうかで決まります。Talon があなたや味方を Noxian Diplomacy で狙ったとき、Body Slam で相手の dash を空中で阻止できます。この物理的な block により、相手の勢いは完全に止まり、Blade's End の致命的な出血ダメージを発動させるのに必要な auto-attack を当てられなくなり、相手は逃げ場のないまま無防備になります。
あなたがこの mechanical な counter を握っているため、Talon は river を自由に争ったり、あなたの camp を invade したりできません。あなたの存在により、Assassin's Path での Talon の flank は自殺行為になります。序盤の gank の脅威を無力化することで、相手は受け身の farm を強いられ、snowball の可能性が大幅に減り、味方の laner への大きな pressure が解消されて、序盤の重要なマップ priority を確保できます。
Body Slam で skirmish を始めてはいけません。代わりに Barrel Roll で相手を slow し、相手に commit させます。dash は、Talon の Noxian Diplomacy を妨害するためだけに温存してください。Rake が飛んでくるのが見えたらすぐに Drunken Rage を発動し、最初の burst を軽減します。Talon が Assassin's Path で壁を越えて逃げようとしたら、地形を抜けられる前に Explosive Cask を撃ち込んで、あなたのチームの中へ吹き飛ばし返します。

Hecarim は Devastating Charge で速度を溜めて fight を仕掛け、Warpath の AD を伸ばすことに大きく依存しています。しかし、あなたの Body Slam は相手の勢いを止める hard stop になります。突進してくる相手に真正面から衝突することで、相手のノックバックを完全に無効化し、無防備な場所に立ち往生させます。Rampage のスタックを溜めたり Spirit of Dread で回復したりする前に、主力の engage 手段を無力化できます。
この相互作用は、序盤の skirmish や river の争いで、jungle の matchup を大きくあなたに有利に傾けます。あなたが counter-gank しているときは、Hecarim は安全に gank できません。いつでも味方の laner から相手を peel できるからです。Devastating Charge が無力化されるため、相手は scuttle crab を確保したり、あなたの invade から逃れたりする主力の手段を失い、受け身の farm を強いられ、マップのペースはあなたが握ります。
Skirmish では、Hecarim に対して Body Slam を先に使って engage してはいけません。代わりにこのスキルを温存し、無防備な味方の近くで待機します。Hecarim が Devastating Charge を発動して前方へ疾走するのを待ち、相手の進路上に位置取って Body Slam を叩き込みます。相手が Onslaught of Shadows であなたを bypass しようとしたら、すぐに Explosive Cask を投げて味方から遠くへ吹き飛ばし、そのあと Barrel Roll で slow してください。

Gragas は、Kayn の ult の効果を完全に無力化することで、相手の攻撃的な dive パターンを本質的に counter します。Kayn が Umbral Trespass で味方の 1 人に取り憑くとき、相手の脱出地点とタイミングは完全に予測できます。Kayn が出てくるまさにその瞬間に Explosive Cask を先行入力しておけば、無防備な味方から即座に相手を吹き飛ばせ、Rhaast による回復や Shadow Assassin 形態による暗殺 burst を防げます。
この相互作用は、mid-game の objective fight で skirmish の流れを大きくあなたに傾けます。あなたの存在によって Kayn は守りのプレイを強いられるため、Shadow Step を使ってあなたの backline を安全に flank できません。相手が engage を強行しようとしても、Umbral Trespass を阻止できるあなたの力により、Kayn のチームは主力の initiator か executioner を失い、あなたのチームは自由な pressure を得て、neutral objective をより楽に確保できます。
これを完璧にこなすには、teamfight の序盤で Explosive Cask を無駄にしてはいけません。Umbral Trespass の標的にされた味方から目を離さないでください。host の表示が切れそうになったら、味方のやや後ろに ult を狙い、Kayn を自チームの奥深くか壁の向こうへ打ち上げます。さらに、Body Slam を温存して Reaping Slash の dash を中断し、相手があなたの camp を stack ごと処理したり、壁を越えて逃げたりするのを防ぎます。

この matchup は、ult 同士の直接的な相互作用のおかげで、あなたに大きく有利です。Kindred は Lamb's Respite に頼って致命的な burst を耐え、fight をひっくり返します。しかし、あなたの Explosive Cask は究極の counter ツールとなり、Kindred や Kindred の味方を安全地帯から即座に弾き出せます。これで無敵が完全に無効化され、相手の守りの聖域は、あなたの味方が楽に掃除できる死の罠に変わります。
Jungle では、この相互作用が objective の争いや skirmish における力関係を変えます。Kindred は ult で窮地を脱することができないため、neutral monster を安全に奪ったり、あなたの camp に invade したりできません。Mark of the Kindred をめぐって fight が起きるたびに、あなたの存在が Kindred を極めて受け身のプレイに追い込みます。Wolf's Frenzy を置いたり Dance of Arrows で dive したりすれば、displace されて burst で倒される大きなリスクがあるからです。
この有利を確保するには、teamfight の序盤に Explosive Cask を投げてはいけません。Drunken Rage を先に用意して Kindred の最初の Mounting Dread のダメージを吸収し、Body Slam で Dance of Arrows の dash を止めます。Kindred が焦って Lamb's Respite を発動したら、円の中心に正確に樽を狙って外側へ吹き飛ばします。ult を置き間違えてしまったら、相手の回復ゾーンの中で戦わず、すぐに下がって cooldown が戻るのを待ってください。
Gragas は Jax の主力の engage 手段を着実に封じられるため、jungle で優位に立ちます。Jax は Leap Strike で飛び込みながら Counter Strike を channel して stun を確実に入れ、Relentless Assault を発動させることに大きく依存しています。しかし、タイミングのよい Body Slam は空中の Jax を完全に中断してノックバックさせ、相手の防御が切れていく間、Gragas を stun の範囲外の安全な位置に保ちます。
River や jungle の通路では、この相互作用が skirmish のペースを左右します。Jax は有利な trade を強要できないため、Scuttle Crabs を安全に争ったり、あなたの camp に invade したりできません。Jax が飛びかかってくるたびに、あなたはきれいに離脱し、相手は長い防御の cooldown を使い切って無防備になります。これにより、Jax が退却を強いられる間に、あなたは序盤の neutral objective を確保できます。
Jax のスキルが使える状態では、Body Slam で skirmish を始めてはいけません。代わりに Barrel Roll で poke するか Drunken Rage をチャージして、相手の engage を誘います。Jax が Leap Strike で commit した瞬間、すぐに Body Slam で反応して相手の跳躍を中断します。Counter Strike が終わって cooldown に入ったら、すぐに Explosive Cask で反撃し、さらに押しのけるか、相手の防御の機会が完全になくなっている間に burst で倒しきります。

この jungle の matchup は、Rammus の主力の gank 手段をどう封じるかで大きく決まります。Powerball は標的に当たるまで遮られない進路を必要とするため、あなたの Body Slam は完璧な counter-disengage になります。相手の転がりに体ごとぶつかれば、相手の勢いを完全に止められ、あなたの carry に Frenzying Taunt を使えるほど近づかれることもありません。
River 周辺での skirmish や counter-gank の間、Rammus は主導権をすべて失います。あなたの存在が相手の転がりを即座にキャンセルする脅威となるため、相手は fight をうまく仕掛けられません。これにより相手の jungle での pressure が無力化され、相手は Defensive Ball Curl を悪い位置で無駄に使わされます。相手は trade を強要できないため、高い物理防御も役に立たず、neutral な fight のペースをあなたが握れます。
Rammus が近くをうろついているときは、fight を始めるために Body Slam を先に使ってはいけません。代わりに、相手と無防備な味方の間に人間の盾として立ち位置を取ります。このスキルは、Powerball を block するためだけに温存してください。Rammus が Soaring Slam で飛び越えてあなたを bypass しようとしたら、すぐに Explosive Cask を撃ち込んで味方から遠くへ吹き飛ばし、相手を孤立させ、その間に Happy Hour で sustain して立て直します。

Gragas が Nidalee の機動力を止められるため、この jungle の matchup は大きくあなたに有利に傾きます。Nidalee が Pounce で飛び込んで Takedown でとどめを刺そうとするたびに、タイミングのよい Body Slam が相手の前進の勢いを完全にキャンセルします。相手の burst はクーガー形態の跳躍を当てることに頼っているため、この dash を中断されると、Nidalee はあなたの jungle の真ん中で非常に脆く無防備になります。
River や jungle の通路では、この相互作用が Nidalee の攻撃的な invade スタイルを封じます。あなたに飛びかかるのは死を意味するため、相手は Scuttle Crabs を安全に争ったり、あなたの camp を奪ったりできません。序盤の skirmish 力は完全に無力化されます。Javelin Toss / Takedown を外せば、相手はあなたを camp から追い出せず、相手の得意な高テンポの counter-jungling を恐れることなく、jungle の priority と neutral objective を確保できます。
何も考えずに Body Slam を撃って skirmish を始めてはいけません。代わりに、camp を処理しながら Drunken Rage で Javelin Toss / Takedown の槍の poke を軽減します。Nidalee があなたをマークして Pounce で飛び込んできたら、すぐに相手の進路に向けて Body Slam を発動し、跳躍中に stun させます。そのあと Explosive Cask で脱出経路から相手を弾き飛ばし、楽に kill を取ります。

Wukong の主力の teamfight での脅威に対する究極の答えをあなたが持っているため、この matchup は非常に有利です。Wukong が Nimbus Strike で仕掛けて Cyclone を発動し、あなたのチームを打ち上げようとしたとき、的確に置いた Explosive Cask が相手を味方から遠くへ吹き飛ばし、相手の ult を完全に無力化します。二重の打ち上げによる妨害がなければ、Wukong のダメージと Stone Skin による armor は、あなたの backline にとって簡単に無視できます。
序盤の skirmish や neutral objective の争いで、Wukong は engage を簡単には強要できません。Wukong が Warrior Trickster で分身を作り、flank のために位置を変えようとするたびに、Barrel Roll によるあなたのゾーンコントロールが相手の接近を slow します。相手の主力の engage を無力化することで、Rift Herald と Dragons の priority を確保でき、Wukong は受け身の farm を強いられます。相手の低めの勝率と乏しい scaling が、レイトゲームでの影響力を制限します。
fight を始めるために Explosive Cask を無駄にしてはいけません。必ず、Wukong が Cyclone を唱える瞬間のために温存してください。Wukong が Warrior Trickster であなたのスキルを誘おうとしてきたら、Drunken Rage を先行入力して Golden Staff の burst を吸収し、Body Slam で反撃します。ult のタイミングを誤って Wukong に squishy な味方を打ち上げられたら、すぐに相手の追撃の進路を body-block して、carry が位置を取り直す時間を稼ぎます。

Master Yi は、Highlander の純粋な攻撃速度と slow 無効に完全に頼って、skirmish でターゲットを切り刻みます。しかし、Gragas はこの攻撃の機会を完全に無力化します。Master Yi が ult を発動した瞬間に、Master Yi めがけて Explosive Cask を撃ち込めば、相手を味方から遠くへ吹き飛ばせます。この強制的な displacement が Highlander の貴重な数秒を無駄にし、相手が一撃も入れる前に主力の戦闘能力を奪います。
Jungle では、この相互作用が neutral objective の pressure をすべてあなたの側に傾けます。あなたの disengage の脅威が Highlander を役立たずにするため、Master Yi は epic monster を安全に争えません。Master Yi が突入を強行しようとしても、タイミングのよい displacement が相手の engage を台無しにし、相手は反撃を受けやすくなります。その結果、相手は受け身の farm を強いられ、味方の lane に余裕が生まれ、序盤のマップコントロールを確保できます。
Master Yi が近くにいるとき、Explosive Cask で fight を始めてはいけません。代わりに Barrel Roll と Drunken Rage で camp を処理し、Body Slam は位置取りのために残しておきます。ult は Master Yi の Highlander のためだけに温存してください。まず相手が Alpha Strike で commit するのを待ちます。相手は標的の近くに再出現するので、すぐに着地点へ Explosive Cask を投げて吹き飛ばせます。外した場合は、すぐに Drunken Rage で Wuju Style の true damage を軽減しながら退却してください。

Body Slam が Xin Zhao の主力の gap-closer である Audacious Charge を完全に無効化するため、Gragas は skirmish で明確な優位に立ちます。あなたの dash を相手の dash に衝突させるタイミングで使えば、相手を空中で止められます。これにより、相手は味方に張り付けなくなり、Three Talon Strike の打ち上げを発動させるのに必要な 3 回の auto-attack を入れることが不可能になります。
River の skirmish や neutral objective 周辺の fight では、この相互作用が Xin Zhao の序盤の pressure を無力化します。あなたが相手に張り付いて動けば、相手の engage は完全に予測可能なため、相手は gank や invade を成功させられません。Xin Zhao が味方の laner に dive してきても、あなたの即時の peel で相手は立ち往生し、相手の攻めのプレイがあなたのチームへの無料の kill に変わります。
Fight 中は、Xin Zhao の Audacious Charge が使える状態なら、Body Slam で仕掛けてはいけません。無防備な carry の近くで待機し、相手が commit するのを待ちます。相手が dash のアニメーションを始めた瞬間に、すぐに割り込んでください。タイミングを外して Three Talon Strike で打ち上げられてしまったら、Explosive Cask で相手を吹き飛ばして fight をリセットし、その間に Happy Hour で回復します。
Gragas は、jungle での Tryndamere の攻撃的な skirmish を本質的に counter します。Tryndamere は Battle Fury でクリティカルを溜め、Spinning Slash で標的に張り付くことに頼りますが、Gragas には相手を止める手段が複数あります。究極の counter は Explosive Cask で、Undying Rage を完全に無力化します。Tryndamere が ult を発動した瞬間に相手を投げ飛ばすことで、Gragas は相手に無敵時間をダメージを与えるためではなく、走って戻るために使わせます。
この相互作用は、jungle の skirmish と objective fight のペースを左右します。Undying Rage を無意味にされうると分かっているため、Tryndamere は深い invade や無理な duel を安全に仕掛けられません。あなたの存在により、相手は tower 下で味方の laner に自由に dive できません。neutral camp をめぐって fight が起きるたびに、相手の ult を離脱させるあなたの力が力関係を変え、相手の貴重な無敵時間を cooldown の大きな無駄に変えます。
Skirmish 中は、Explosive Cask で仕掛けてはいけません。代わりに Barrel Roll で相手の接近を slow し、Drunken Rage で最初の Battle Fury のクリティカルを吸収します。相手が距離を詰めようとしたら、Body Slam を温存して Spinning Slash に対抗します。Tryndamere の体力が減って Undying Rage を発動した瞬間に、相手の真下へ Explosive Cask を撃って吹き飛ばします。これで無敵時間のすべてが無駄になり、相手は無防備で仕留めやすくなります。

Gragas の displacement 手段は案山子(Fiddlesticks)の channel を完全に封じるため、Gragas は Fiddlesticks のキット全体を本質的に無力化します。Fiddlesticks が Bountiful Harvest で回復しながらダメージを与えようとしても、素早い Body Slam で即座に channel をキャンセルできます。さらに、Fiddlesticks が破壊的な Crowstorm で飛び込んできても、Gragas は Explosive Cask で相手をチームから吹き飛ばし、相手の ult の広範囲の大ダメージを無駄にできます。
この相互作用は、Fiddlesticks に守りの jungle ルートを強います。Bountiful Harvest を中断されると相手は非常に squishy になり duel に勝てないため、scuttle crab を争ったり序盤に skirmish したりできません。mid-game の teamfight では、Explosive Cask の絶え間ない脅威により、Fiddlesticks はきれいな flank を実行できず、ult を遅らせるか、主力の engage 手段が完全に無力化されるのを見ているしかなくなります。
この matchup を支配するには、Fiddlesticks の体力吸収が使える状態では、Body Slam で仕掛けてはいけません。代わりに Drunken Rage でダメージを軽減しながら歩いて近づき、dash は Bountiful Harvest が始まった瞬間に中断するために温存します。大きな teamfight では、kill を追いかけず carry の近くに位置取りし、Fiddlesticks が Crowstorm でテレポートしてきた瞬間に相手を peel して引き離すために、Explosive Cask を温存してください。
その他のマッチアップ
これらのアイテムを購入すると、このチャンピオンの影響力を抑えられます。



| マッチアップ | 判定 | 有利度 | 勝率 | ピック率 |
|---|---|---|---|---|
| Olaf | ハードカウンター | +2 | 52.0% | 1.0% |
| Vayne | 不利なマッチアップ | +1 | 52.1% | 1.7% |
| Mordekaiser | 不利なマッチアップ | +1 | 51.3% | 11.5% |
| Gwen | 不利なマッチアップ | +1 | 50.5% | 3.4% |
| Fiora | 不利なマッチアップ | +1 | 50.4% | 3.7% |
| Sett | 不利なマッチアップ | +1 | 50.4% | 8.3% |
| Yone | 不利なマッチアップ | +1 | 50.4% | 5.9% |
| Jayce | 不利なマッチアップ | +1 | 50.2% | 4.8% |
| Volibear | 不利なマッチアップ | +1 | 48.2% | 8.7% |
| Rumble | 不利なマッチアップ | +1 | 48.1% | 1.9% |
| Heimerdinger | 不利なマッチアップ | +1 | — | — |
| Ryze | 不利なマッチアップ | +1 | — | — |
| Warwick | 不利なマッチアップ | +1 | — | — |
| Malphite | スキル次第のマッチアップ | ±0 | 54.2% | 8.2% |
| Teemo | スキル次第のマッチアップ | ±0 | 53.4% | 4.9% |
| Ambessa | スキル次第のマッチアップ | ±0 | 52.7% | 1.7% |
| K'Santé | スキル次第のマッチアップ | ±0 | 51.4% | 7.4% |
| Ornn | スキル次第のマッチアップ | ±0 | 51.1% | 1.9% |
| Dr. Mundo | スキル次第のマッチアップ | ±0 | 50.5% | 6.5% |
| Kennen | スキル次第のマッチアップ | ±0 | 50.5% | 2.5% |
| Riven | スキル次第のマッチアップ | ±0 | 50.3% | 1.7% |
| Wukong | スキル次第のマッチアップ | ±0 | 50.1% | 1.6% |
| Cho'Gath | スキル次第のマッチアップ | ±0 | 50.1% | 9.0% |
| Aatrox | スキル次第のマッチアップ | ±0 | 49.6% | 7.0% |
| Poppy | スキル次第のマッチアップ | ±0 | 49.4% | 1.8% |
| Urgot | スキル次第のマッチアップ | ±0 | 48.9% | 3.8% |
| Renekton | スキル次第のマッチアップ | ±0 | 48.7% | 3.1% |
| Vladimir | スキル次第のマッチアップ | ±0 | 48.7% | 1.0% |
| Garen | スキル次第のマッチアップ | ±0 | 48.7% | 12.1% |
| Irelia | スキル次第のマッチアップ | ±0 | 48.5% | 1.4% |
| Nasus | スキル次第のマッチアップ | ±0 | 46.4% | 5.6% |
| Yasuo | スキル次第のマッチアップ | ±0 | 45.5% | 1.8% |
| Graves | スキル次第のマッチアップ | ±0 | — | — |
| Maokai | スキル次第のマッチアップ | ±0 | — | — |
| Pantheon | スキル次第のマッチアップ | ±0 | — | — |
| Skarner | スキル次第のマッチアップ | ±0 | — | — |
| Swain | スキル次第のマッチアップ | ±0 | — | — |
| Shen | 有利なマッチアップ | −1 | 54.9% | 2.9% |
| Singed | 有利なマッチアップ | −1 | 51.5% | 1.3% |
| Jax | 有利なマッチアップ | −1 | 50.6% | 3.6% |
| Kayle | 有利なマッチアップ | −1 | 50.2% | 2.1% |
| Gnar | 有利なマッチアップ | −1 | 50.0% | 3.3% |
| Sion | 有利なマッチアップ | −1 | 49.9% | 2.5% |
| Darius | 有利なマッチアップ | −1 | 49.5% | 14.8% |
| Camille | 有利なマッチアップ | −1 | 48.9% | 2.1% |
| Tryndamere | 有利なマッチアップ | −1 | 45.9% | 2.5% |
| Akali | 有利なマッチアップ | −1 | — | — |
| Jarvan IV | 有利なマッチアップ | −1 | — | — |
有利度:Wild Rift Coreの公式判定(−3〜+3)で、各行に記載されたチャンピオンの視点から見た値です。勝率とピック率:このロールにおける相手チャンピオン自身の数値 — Wild Rift CN · Challenger、Patch 7.3c。直接対決の勝率ではありません。
| マッチアップ | 判定 | 有利度 | 勝率 | ピック率 |
|---|---|---|---|---|
| Olaf | ハードカウンター | +3 | 51.8% | 1.8% |
| Poppy | ハードカウンター | +2 | — | — |
| Ambessa | 不利なマッチアップ | +1 | 54.1% | 1.2% |
| Skarner | 不利なマッチアップ | +1 | 53.9% | 1.6% |
| Lillia | 不利なマッチアップ | +1 | 53.3% | 3.0% |
| Dr. Mundo | 不利なマッチアップ | +1 | 52.9% | 1.7% |
| Gwen | 不利なマッチアップ | +1 | 52.8% | 2.6% |
| Nocturne | 不利なマッチアップ | +1 | 52.5% | 6.6% |
| Graves | 不利なマッチアップ | +1 | 47.9% | 7.3% |
| Mordekaiser | 不利なマッチアップ | +1 | — | — |
| Amumu | スキル次第のマッチアップ | ±0 | 56.5% | 2.7% |
| Ekko | スキル次第のマッチアップ | ±0 | 54.0% | 7.3% |
| Pantheon | スキル次第のマッチアップ | ±0 | 51.0% | 6.1% |
| Warwick | スキル次第のマッチアップ | ±0 | 51.0% | 2.0% |
| Cho'Gath | スキル次第のマッチアップ | ±0 | 50.7% | 8.3% |
| Diana | スキル次第のマッチアップ | ±0 | 50.3% | 1.4% |
| Kha'Zix | スキル次第のマッチアップ | ±0 | 50.1% | 5.3% |
| Yone | スキル次第のマッチアップ | ±0 | 48.7% | 2.7% |
| Lee Sin | スキル次第のマッチアップ | ±0 | 46.9% | 12.4% |
| Viego | スキル次第のマッチアップ | ±0 | 46.3% | 4.2% |
| Maokai | スキル次第のマッチアップ | ±0 | — | — |
| Rammus | 有利なマッチアップ | −1 | 55.3% | 4.6% |
| Shen | 有利なマッチアップ | −1 | 54.9% | 1.4% |
| Jarvan IV | 有利なマッチアップ | −1 | 52.4% | 7.3% |
| Kayn | 有利なマッチアップ | −1 | 51.6% | 6.9% |
| Zed | 有利なマッチアップ | −1 | 51.4% | 2.6% |
| Kindred | 有利なマッチアップ | −1 | 50.7% | 2.4% |
| Xin Zhao | 有利なマッチアップ | −1 | 50.6% | 9.0% |
| Darius | 有利なマッチアップ | −1 | 50.4% | 6.5% |
| Nidalee | 有利なマッチアップ | −1 | 50.1% | 2.3% |
| Talon | 有利なマッチアップ | −1 | 50.0% | 3.0% |
| Jax | 有利なマッチアップ | −1 | 49.8% | 1.9% |
| Hecarim | 有利なマッチアップ | −1 | 49.6% | 1.8% |
| Wukong | 有利なマッチアップ | −1 | 49.6% | 3.4% |
| Vi | 有利なマッチアップ | −1 | 49.0% | 4.8% |
| Rengar | 有利なマッチアップ | −1 | 48.8% | 2.2% |
| Evelynn | 有利なマッチアップ | −1 | 48.7% | 2.0% |
| Riven | 有利なマッチアップ | −1 | 48.6% | 1.3% |
| Fizz | 有利なマッチアップ | −1 | 48.5% | 1.8% |
| Volibear | 有利なマッチアップ | −1 | 48.4% | 4.5% |
| Master Yi | 有利なマッチアップ | −1 | 48.0% | 9.8% |
| Twitch | 有利なマッチアップ | −1 | 46.8% | 2.1% |
| Shyvana | 有利なマッチアップ | −1 | 45.2% | 2.8% |
| Aatrox | 有利なマッチアップ | −1 | 44.9% | 1.1% |
| Camille | 有利なマッチアップ | −1 | — | — |
| Nautilus | 有利なマッチアップ | −1 | — | — |
| Nilah | 有利なマッチアップ | −1 | — | — |
| Nunu & Willump | 有利なマッチアップ | −2 | 53.1% | 1.9% |
| Fiddlesticks | 有利なマッチアップ | −2 | 51.6% | 1.8% |
| Tryndamere | 有利なマッチアップ | −2 | 48.8% | 8.6% |
有利度:Wild Rift Coreの公式判定(−3〜+3)で、各行に記載されたチャンピオンの視点から見た値です。勝率とピック率:このロールにおける相手チャンピオン自身の数値 — Wild Rift CN · Challenger、Patch 7.3c。直接対決の勝率ではありません。
Gragasは、単純なステータスやバーストダメージだけでは対策できず、エンゲージのタイミングを妨害できるチャンピオンによってカウンターされます。彼のキットは精密なウィンドウに依存しており、Eでエンゲージし、Rで再配置します。これらのウィンドウを無視したり、罰したりできるチャンピオンは、彼のインパクトを劇的に低下させます。カウンターを理解することは、彼の角度がどのように無効化されるかを理解することです。
Gragasのカウンターは、主に2つの弱点を突きます。それは、クールダウンへの依存と、角度(エンゲージチャンス)を必要とすることです。序盤から積極的に攻めるチャンピオンや、彼のバーストに耐性のあるチャンピオンは、彼を防御的なプレイに追い込みます。さらに、彼のエンゲージ後に追撃したり罰したりできるピックは、あらゆるミスを非常に高くつきます。
これらのチャンピオンはGragasのバーストを部分的に無視でき、エンゲージ後も前進し続けることができます。彼らのサステインやタンク性能は、彼のコンボの影響を軽減し、Gragasにエンゲージ後の後退を強います。また、Eを外したり、アルティメットを不適切に使用したりした場合に、すぐに罰を与えることもできます。
チャンピオンの適応方法. 長期戦よりもピック(少数戦)を狙い、長時間のエンゲージは避けよう。
これらのチャンピオンは、序盤のGragasが対応できないテンポを強います。彼らはインベードし、彼のパワースパイク前に戦闘を強要し、リソースを奪うことができます。彼らのモビリティは、彼のエンゲージを回避したり、罰したりすることも可能にします。
チャンピオンの適応方法. 序盤を確保し、直接的な戦闘は避けよう。
これらのチャンピオンは、彼のバーストを回避または耐え、クールダウン中に彼を罰することができます。彼らのモビリティやレンジは、捕まえにくくし、彼のピック(エンゲージ)の価値を低下させます。
チャンピオンの適応方法. エンゲージを強いるのではなく、ミスを待とう。
Lee Sinはダイナミックなマッチアップであり、Gragasは序盤のテンポを失うことを受け入れる必要があります。Lee Sinはインベードし、デュエルを強要し、モビリティでコンボを回避できます。鍵は、midまで生き残ることです。その頃には、Gragasはピック(少数戦)を通じてコントロールを取り戻すことができます。
おそらく孤立しているか、ポジショニングが悪いからです。Gragasは個人のミスを罰するのが得意です。前に出すぎたり、離れすぎたりすると、すぐにコンボを決められてしまいます。集団で行動し、エンゲージを回避するための移動スキルを準備しておくことが重要です。
反応するのではなく、予測する必要があります。ダッシュやフラッシュを温存しておくことが鍵です。孤立しやすい位置取りを避けましょう。戦闘中は、アルティメットが最も効果を発揮する狭い場所を避けましょう。
特に強くはありません。Gragasはレベル5とアイテムのスパイクに依存します。それまでは、インベードやアグレッシブなジャングラーに対して脆弱です。この弱点を突くことが非常に重要です。
Eやアルティメットをミスした後です。これらのスキルはクールダウンが長いため、これらなしではGragasは多くのプレッシャーを失います。その時がエンゲージしたり、オブジェクトを取ったりするのに最適なタイミングです。