
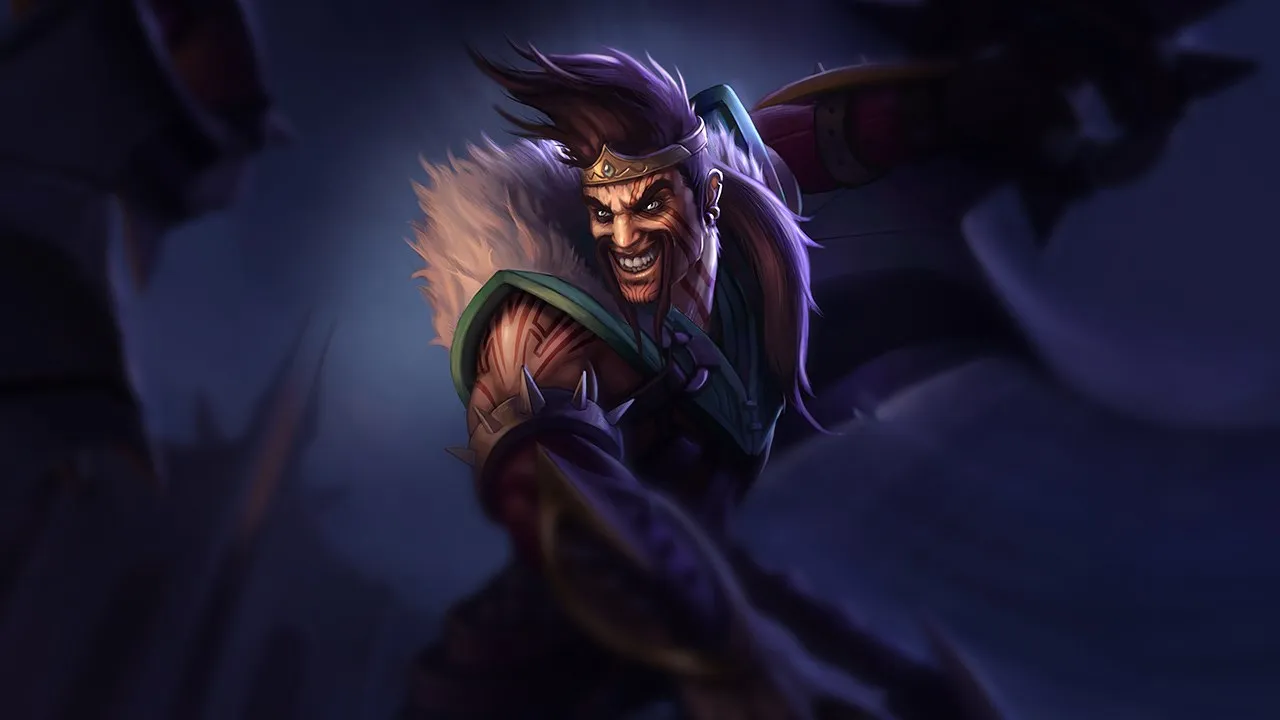
Draven Wild Rift カウンターガイド
ハードカウンター
1これらのチャンピオンは、こちらのビルドやプレイスタイルを真正面から上回る構成を持ち、レーン戦のコントロールとファームを極めて難しくする。彼らのスキルはこちらの主要な強みを無効化し、いつも通りのプランを実行しようとした瞬間に手痛い反撃を受けさせてくる。こうしたマッチアップでは、ミスを最小限に抑え、正面からの対決以外で解決策を探すことが重要になる。
その他のマッチアップ

不利なマッチアップ
4これらのチャンピオンは、マッチアップ自体を絶望的にするわけではないが、対面で優位に立ちやすいツールを持っている。射程が長かったり、攻撃を受け止める力が高かったり、エンゲージへの対応手段が豊富だったりする。アプローチを調整し、戦闘を受け入れるタイミングを慎重に選ぶ必要がある。

Xayah+1
このマッチアップは、あなたの斧の見えやすさで決まります。Xayah は Spinning Axe の着地インジケーターをはっきり見られるため、そこに Double Daggers を楽に狙い、Clean Cuts の羽根を直接スタックできます。あなたが斧をキャッチしようと前に出た瞬間、Xayah は Bladecaller で羽根を引き戻し、あなたの機動力を止める確実な root を取り、あなたは Xayah の高い burst に完全に無防備になります。
Xayahのビルド →
詳細を見る
理由
このマッチアップは、あなたの斧の見えやすさで決まります。Xayah は Spinning Axe の着地インジケーターをはっきり見られるため、そこに Double Daggers を楽に狙い、Clean Cuts の羽根を直接スタックできます。あなたが斧をキャッチしようと前に出た瞬間、Xayah は Bladecaller で羽根を引き戻し、あなたの機動力を止める確実な root を取り、あなたは Xayah の高い burst に完全に無防備になります。
レーン戦への影響
Blood Rush を使って考えなしにプッシュしたり trade したりはできません。斧をキャッチするたびに致死のカウンターエンゲージを受けるリスクがあるからです。この強いられたためらいが wave 処理を遅くし、trade を非常に危険にします。Bladecaller を避けるために斧を落とさざるを得ないと、DPS が大きく落ち、League of Draven パッシブが停滞し、Xayah に wave の状態と優先権を握られます。
立ち回り方
生き残るには、予測しやすい動きを餌に変える必要があります。Spinning Axe のインジケーターの方へ歩いて Xayah に早めに Bladecaller を使わせ、その直後に Blood Rush の移動速度で進路から外れて斧を捨ててください。積極的な trade に踏み込むのは、Xayah の羽根が消えているか、羽根を呼び戻すスキルが cooldown 中のときだけにして、Stand Aside を使ってください。Xayah が Deadly Plumage を発動したら、DPS で上回ろうとせず、すぐに後退してください。

Yunara+1
Yunara は Transcend One's Self を発動すると、射程でも機動力でもあなたを上回り、Vow of the First Lands でクリティカル攻撃を魔法ダメージに変換します。Spinning Axe の着地点が予測しやすいため、あなたは Yunara の Arc of Judgment の poke に非常に脆くなります。Yunara の基本のスキルセットには、ultimate のトランス状態がなければ決闘での素の火力がないため、このマッチアップは、Yunara の自己バフが使えない瞬間を突けるかどうかに完全にかかっています。
Yunaraのビルド →
詳細を見る
理由
Yunara は Transcend One's Self を発動すると、射程でも機動力でもあなたを上回り、Vow of the First Lands でクリティカル攻撃を魔法ダメージに変換します。Spinning Axe の着地点が予測しやすいため、あなたは Yunara の Arc of Judgment の poke に非常に脆くなります。Yunara の基本のスキルセットには、ultimate のトランス状態がなければ決闘での素の火力がないため、このマッチアップは、Yunara の自己バフが使えない瞬間を突けるかどうかに完全にかかっています。
レーン戦への影響
Yunara がトランスを発動したときに、序盤の優先権をやみくもに争うことはできません。Cultivation of Spirit によるバウンスする攻撃が素早く wave を押し、あなたは Arc of Ruin を避けながらタワーの下に押し込まれます。Transcend One's Self 中に Spinning Axe のキャッチを欲張ると、Yunara の突然の burst に仕留められ、League of Draven の adoration スタックがリセットされて、Yunara にボトム lane を完全に支配されます。
立ち回り方
Yunara の ultimate を尊重してください。Yunara が Transcend One's Self を発動した瞬間に、後退して Blood Rush を防御的に使い、Yunara の skillshot を回避してください。Stand Aside を準備しておき、Yunara が Untouchable Shadow で積極的に滑り込んできたら、斧を放ってダッシュ中の Yunara を interrupt し、勢いを止めてください。トランスが切れたら、Yunara の強力な cooldown が戻って lane を支配する前に、すぐに Spinning Axe で積極的な trade を強いてください。

Caitlyn+1
Caitlyn は斧の落下地点を武器にして、あなたのリズムを完全に崩します。Spinning Axe を投げるたびに、Caitlyn は着地インジケーターの真上にすぐ Yordle Snap Trap を置けます。これにより、斧をキャッチすれば root されて確定の Headshot を受け、トラップを避ければ斧を落として主なダメージ源を失うという、息苦しいゾーンが生まれます。
Caitlynのビルド →
詳細を見る
理由
Caitlyn は斧の落下地点を武器にして、あなたのリズムを完全に崩します。Spinning Axe を投げるたびに、Caitlyn は着地インジケーターの真上にすぐ Yordle Snap Trap を置けます。これにより、斧をキャッチすれば root されて確定の Headshot を受け、トラップを避ければ斧を落として主なダメージ源を失うという、息苦しいゾーンが生まれます。
レーン戦への影響
この絶え間ないトラップの脅威により、Caitlyn の優れた通常攻撃レンジと Piltover Peacemaker に体力を削られ続けるため、あなたは自分のタワーの下で防御的にプレイせざるを得ません。Spinning Axe をリセットするのが非常に危険になるため、League of Draven のスタックを維持するのに苦労するでしょう。プッシュしようとすると、Caitlyn に簡単に咎められ、ゆっくり lane から押し出され、序盤のタワープレートを取られます。
立ち回り方
生き残るには、Caitlyn のターゲティングを欺く必要があります。Spinning Axe のインジケーターを意図的に後方や横の安全な場所へ向け、Caitlyn に Yordle Snap Trap を無駄打ちさせてください。エンゲージするのは、Caitlyn がポジションを誤ったか、90 Caliber Net を外したときだけです。マーカーにトラップを置かれたら、斧を落とし、すぐに Blood Rush を発動して距離を詰め、Stand Aside で Caitlyn の後退を妨害して、射程の優位を悪用される前に対処してください。
その他のマッチアップ

スキル次第のマッチアップ
3このマッチアップは何よりもまず実行力の勝負であり、両者ともに優位を取れる現実的な手段を持っている。重要なスキルを一つ避けられるか、エンゲージを正しく読めるか、あるいはたった一つの位置取りのミスが、勝敗を分けることもある。マッチアップを理解し、行動すべき瞬間を見極める力がとりわけ重要になる。

Lucian±0
このマッチアップは、Lucian の素早いスペル織り交ぜによる burst と、あなたの優れた持続ダメージがぶつかる不安定なデュエルです。Lucian は Piercing Light を合わせて Lightslinger を発動させ、あなたの体力を即座に削って逃げることに頼っています。しかし、この最初の burst を生き延びれば、長引く撃ち合いでは Spinning Axe の素のダメージがはるかに大きく、Lucian の cooldown が尽きたら楽に DPS で上回れます。
Lucianのビルド →
詳細を見る
理由
このマッチアップは、Lucian の素早いスペル織り交ぜによる burst と、あなたの優れた持続ダメージがぶつかる不安定なデュエルです。Lucian は Piercing Light を合わせて Lightslinger を発動させ、あなたの体力を即座に削って逃げることに頼っています。しかし、この最初の burst を生き延びれば、長引く撃ち合いでは Spinning Axe の素のダメージがはるかに大きく、Lucian の cooldown が尽きたら楽に DPS で上回れます。
レーン戦への影響
minion wave は、Lucian が Piercing Light の角度を絶えず狙う危険な罠のゾーンになります。当てられたら、Lucian はすぐに Relentless Pursuit でタワーの下のあなたにプレッシャーをかけたり、早期リコールを強いたりします。逆に、Lucian がダッシュを無駄にして仕留め損ねたら、wave を freeze し、Spinning Axe のスタックを維持して、Lucian をゴールドを得られる範囲から完全にゾーニングし、all-in を脅かせます。
立ち回り方
勝つには、Lucian に Piercing Light の簡単な的を与えないよう、体力の少ない minion のすぐ後ろには決して立たないでください。Lucian が poke しに前に出てきたら、レーザーを誘ってから、Lucian のスキルが cooldown に入った隙にすぐ Blood Rush で距離を詰めてください。Stand Aside は、Lucian の Relentless Pursuit による脱出を妨害するか、The Culling の詠唱中に Lucian の向きをそらすために温存してください。Lucian の burst 中に Spinning Axe を落としてしまったら、すぐにタワーの方へ disengage してください。

Varus±0
このマッチアップは反射神経の純粋な勝負で、Draven の積極的な all-in が Varus の長射程 poke と正面からぶつかります。Varus は安全な位置から Piercing Arrow であなたの体力を削り、Blighted Quiver のスタックで楽な仕留めを狙います。Spinning Axe の着地インジケーターが Hail of Arrows をどこに撃てばよいかを Varus に正確に教えてしまうため、あなたは斧をキャッチするか大きな poke を受けるかの選択を常に強いられます。
Varusのビルド →
詳細を見る
理由
このマッチアップは反射神経の純粋な勝負で、Draven の積極的な all-in が Varus の長射程 poke と正面からぶつかります。Varus は安全な位置から Piercing Arrow であなたの体力を削り、Blighted Quiver のスタックで楽な仕留めを狙います。Spinning Axe の着地インジケーターが Hail of Arrows をどこに撃てばよいかを Varus に正確に教えてしまうため、あなたは斧をキャッチするか大きな poke を受けるかの選択を常に強いられます。
レーン戦への影響
lane の状況は体力バーによって大きく変動します。Varus が Piercing Arrow を連続で当てたら、優先権を楽に握り、あなたをタワーの下に押し込み、League of Draven の cash-out の可能性を無力化します。逆に Varus の skillshot をうまく回避できれば、機動力のない Varus はあなたの高い DPS に完全に無防備になり、wave を自分のタワー付近で freeze して、Varus を危険な前に出すぎた位置へ追い込めます。
立ち回り方
勝つには、farm 中に通常攻撃を速くするためだけに Blood Rush を発動しないでください。代わりに、その瞬間的な移動速度を、Varus の Piercing Arrow のチャージや ultimate の Chain of Corruption を反応的にかわすために温存してください。これらの重要なスペルが無駄になったら、すぐに Stand Aside を使って Varus の後退を妨害し、Spinning Axe で完全な all-in に踏み込んでください。Hail of Arrows に捕まったら、不利な trade を受けるのではなく、下がって斧をリセットしてください。

Miss Fortune±0
このマッチアップは、Miss Fortune の長射程 poke と、あなたの強烈な all-in 能力との絶え間ない綱引きです。直接の決闘では Spinning Axe と Blood Rush で Miss Fortune を楽に切り刻めますが、Miss Fortune は wave の後ろからあなたの体力を削るのが得意です。lane の行方は Miss Fortune の Double Up にかかっています。死にかけの minion を経由してバウンスさせると、クリティカルダメージで斧のキャッチを即座にゾーニングされかねません。
Miss Fortuneのビルド →
詳細を見る
理由
このマッチアップは、Miss Fortune の長射程 poke と、あなたの強烈な all-in 能力との絶え間ない綱引きです。直接の決闘では Spinning Axe と Blood Rush で Miss Fortune を楽に切り刻めますが、Miss Fortune は wave の後ろからあなたの体力を削るのが得意です。lane の行方は Miss Fortune の Double Up にかかっています。死にかけの minion を経由してバウンスさせると、クリティカルダメージで斧のキャッチを即座にゾーニングされかねません。
レーン戦への影響
誰がテンポを握るかは、wave のポジショニングで決まります。Miss Fortune は Double Up のバウンスの角度を合わせるため、minion の体力を調整し続けます。その結果、あなたは Spinning Axe を落とすか大ダメージを受けるかの選択を迫られます。序盤に大ダメージを受けると、Miss Fortune の Make It Rain の仕込みにより、あなたは Bullet Time の格好の標的になります。逆に体力を高く保てば、wave を freeze し、lane を駆け下りる致死の追撃を脅かせます。
立ち回り方
体力の少ない minion の後ろに一直線に立たないでください。Miss Fortune に Double Up をあなたへ直接使わせるか、完全に外させてください。Miss Fortune が poke しに前に出てきたら、Blood Rush で wave から積極的に角度をずらし、Stand Aside で Miss Fortune の Strut の移動速度を interrupt してください。Miss Fortune が Bullet Time をチャネリングしたら、すぐに Whirling Death を投げ、移動速度で円錐の外に出てから仕留めてください。
有利なマッチアップ
17これらのチャンピオンは、こちらの主要な強みに効果的に対応するのが難しく、より自由に対面を組み立てることができる。プレッシャーをかけて有利な交換を引き出す手段は複数あることが多い。相手が態勢を立て直す時間を与えるのではなく、この優位を活かして主導権を握ろう。

Jhin−1
Jhin は Whisper の固定された遅いリズムと Deadly Flourish を当てることで距離をコントロールしているため、Draven がこのマッチアップを支配します。Blood Rush の瞬間的な移動速度を活用すれば、Jhin の直線の snare を楽にかわせます。Jhin がその一発を外すと、リロードの間の持続 DPS の欠如により、Jhin は、あなたの絶え間ない高ダメージの Spinning Axe 攻撃に完全に無防備になります。
Jhinのビルド →
詳細を見る
理由
Jhin は Whisper の固定された遅いリズムと Deadly Flourish を当てることで距離をコントロールしているため、Draven がこのマッチアップを支配します。Blood Rush の瞬間的な移動速度を活用すれば、Jhin の直線の snare を楽にかわせます。Jhin がその一発を外すと、リロードの間の持続 DPS の欠如により、Jhin は、あなたの絶え間ない高ダメージの Spinning Axe 攻撃に完全に無防備になります。
レーン戦への影響
この相互作用で、あなたは大きな lane の優先権を得ます。Jhin は4発目の Whisper を、あなたのプッシュに対抗するために使うか、あなたを脅かすために温存するかを絶えず選ばなければなりません。Jhin がその最後の弾を無駄にしたり、wave に Dancing Grenade を使ったりするたびに、積極的に Jhin をゾーニングして追い払えます。この容赦ないプレッシャーが Jhin を Jhin 自身のタワーの下に追い込み、そこでは Jhin は Stand Aside による妨害や Whirling Death でのダイブの仕込みに非常に脆くなります。
立ち回り方
Jhin の弾数バーに注意してください。Jhin が4発目を撃って Whisper のリロードを始めた瞬間に、Blood Rush を発動して Jhin に向かって一直線に走ってください。一瞬だけ横に動いて Deadly Flourish を誘って回避し、その後追撃を再開します。Jhin が爆発する Captive Audience のトラップの後ろへ退こうとしたら、Stand Aside で安全な場所から引き離し、Jhin が倒れるまで連続して Spinning Axe の攻撃を当てられるようにしてください。

Ezreal−1
Ezreal が踏みとどまって戦おうとするなら、あなたの Spinning Axe の通常攻撃は Ezreal の trade の可能性を完全に上回ります。しかし、Ezreal は Arcane Shift で後ろに跳んで安全圏へ絶えず disengage するため、きれいに kill を取るのは非常に困難です。その結果 Ezreal は安全な距離から Mystic Shot で minion を拾うことだけに頼り、あなたが序盤の kill で League of Draven パッシブを楽に cash out することもできなくなります。
Ezrealのビルド →
詳細を見る
理由
Ezreal が踏みとどまって戦おうとするなら、あなたの Spinning Axe の通常攻撃は Ezreal の trade の可能性を完全に上回ります。しかし、Ezreal は Arcane Shift で後ろに跳んで安全圏へ絶えず disengage するため、きれいに kill を取るのは非常に困難です。その結果 Ezreal は安全な距離から Mystic Shot で minion を拾うことだけに頼り、あなたが序盤の kill で League of Draven パッシブを楽に cash out することもできなくなります。
レーン戦への影響
Ezreal はあなたの素の DPS に対抗できないため、wave のポジションを楽に支配できます。minion を押し続けることで、Ezreal はあなたを poke する代わりに、自分のタワーの下で farm するために Mystic Shot を使わざるを得ません。この絶え間ないプレッシャーが Rising Spell Force のスタックを許さず、マナを消耗させ、Ezreal が wave 処理に縛られている間、リコールのタイミングとドラゴンの優先権の完全な主導権をあなたに与えます。
立ち回り方
撃ち合いの序盤に Stand Aside を無駄にしないでください。Ezreal が Arcane Shift を使った直後に interrupt するか追撃するために温存してください。Ezreal に簡単にはダイブできないので、大きな wave をゆっくり Ezreal のタワーまで押すことに集中してください。Ezreal がタワーの下でラストヒットを取るのに忙しいときは、Blood Rush で前に出て、大ダメージの Spinning Axe を1発入れ、すぐに下がってください。この削る方法で Ezreal はリコールを強いられ、危険なダイブなしでプレートを得られます。

Kalista−1
Kalista の本質は、Martial Poise を使って跳び回り skillshot を回避することにあります。しかし、あなたの Stand Aside はこの仕組みに直接対抗し、Kalista をダッシュのアニメーションから叩き出します。ジャンプを interrupt されると Kalista は一時的にその場に止まって完全に逃げられなくなり、体勢を立て直す前に、Spinning Axe で中断なしの大ダメージを楽に与えられます。
Kalistaのビルド →
詳細を見る
理由
Kalista の本質は、Martial Poise を使って跳び回り skillshot を回避することにあります。しかし、あなたの Stand Aside はこの仕組みに直接対抗し、Kalista をダッシュのアニメーションから叩き出します。ジャンプを interrupt されると Kalista は一時的にその場に止まって完全に逃げられなくなり、体勢を立て直す前に、Spinning Axe で中断なしの大ダメージを楽に与えられます。
レーン戦への影響
この相互作用は、Kalista の序盤の lane での攻撃性を完全に麻痺させます。前に出て trade をするとあなたの displacement の射程に入ってしまうため、Kalista は安全に Pierce を使ったり、あなたに Rend の槍をスタックしたりできません。あなたは常に wave のポジションを支配し、序盤のゴールドプレートを確保できます。一方 Kalista は、Martial Poise から叩き出されることを恐れて lane の優先権を譲り、自分のタワーの下で farm することになります。
立ち回り方
鉄則は、Kalista が攻撃的な跳躍に踏み切るか、Rend で minion を仕留めようとするまで Stand Aside を温存することです。やみくもに投げないでください。Kalista が前へダッシュするのを待ってから、displacement を放って空中で捕まえてください。Kalista が弾き飛ばされた瞬間に、すぐに Blood Rush を発動して、跳んで逃げられない Kalista を連続する Spinning Axe の攻撃で切り刻むのに必要な攻撃速度を得てください。

Tristana−1
Draven は Tristana の唯一の脱出手段を完全に封じられるため、このmatchupを支配します。Tristana が Rocket Jump で位置を変えたり逃げたりしようとしても、タイミングよく Stand Aside を当てれば空中で妨害できます。これにより Tristana は主要な機動力を失って立ち往生し、距離で身を守ることもできないまま、あなたの Spinning Axe と Blood Rush による素の物理ダメージに立ち向かうことになります。
Tristanaのビルド →
詳細を見る
理由
Draven は Tristana の唯一の脱出手段を完全に封じられるため、このmatchupを支配します。Tristana が Rocket Jump で位置を変えたり逃げたりしようとしても、タイミングよく Stand Aside を当てれば空中で妨害できます。これにより Tristana は主要な機動力を失って立ち往生し、距離で身を守ることもできないまま、あなたの Spinning Axe と Blood Rush による素の物理ダメージに立ち向かうことになります。
レーン戦への影響
このやり取りは Tristana の攻撃的な選択肢を完全に麻痺させます。致命的なcounter-engageを受ける危険を冒さずに、前へジャンプしてあなたに Explosive Charge を重ねることはできません。そのため、wave を freeze したり、Tristana のタワー下まで積極的に push したりでき、Tristana が last hit を取ろうとするたびに Blood Rush で圧力をかけられます。Tristana の trade のタイミングは、あなたが displacement を使える状態かどうかに完全に左右されます。
立ち回り方
poke や wave clear のために Stand Aside を使ってはいけません。Tristana のジャンプ専用に温存してください。少し前に出て Tristana に Rocket Jump を使わせるよう誘い、その直後に斧を投げて跳び出しを妨害します。Tristana が Rapid Fire を使ったら、Blood Rush で少し後ろへ kite し、攻撃速度の強化が無駄に切れるのを待ってから、向き直って Whirling Death で追い詰めます。このとき Tristana の脱出手段は cooldown 中です。

Sivir−1
Sivir の防御の強みは Spell Shield で重要なスキルを防ぐことですが、この手段はあなたの主なダメージ源に対してはまったく役に立ちません。Spinning Axe は通常攻撃を強化するだけなので、Sivir はあなたの強力な斧を防げません。そのためすべての trade が素のダメージの撃ち合いになり、あなたの DPS が Sivir の Boomerang Blade と Ricochet を大きく上回るので、容赦なく押し込めます。
Sivirのビルド →
詳細を見る
理由
Sivir の防御の強みは Spell Shield で重要なスキルを防ぐことですが、この手段はあなたの主なダメージ源に対してはまったく役に立ちません。Spinning Axe は通常攻撃を強化するだけなので、Sivir はあなたの強力な斧を防げません。そのためすべての trade が素のダメージの撃ち合いになり、あなたの DPS が Sivir の Boomerang Blade と Ricochet を大きく上回るので、容赦なく押し込めます。
レーン戦への影響
Sivir はあなたと直接 trade できないため、Boomerang Blade と Ricochet を使い、安全な距離から必死に wave を push しようとします。タワー下まで押し込まれると、Sivir の wave clear があなたの kill pressure を無力化します。wave の状態を管理して minion を中央か自分側に寄せておき、Sivir に farm のため前に出させて、そこを罰する必要があります。
立ち回り方
Sivir が Ricochet で wave を処理しに前へ出てきたら、Blood Rush を使って積極的に距離を詰めます。仕掛けの先頭に Stand Aside や Whirling Death を使ってはいけません。Sivir は Spell Shield で簡単に防いで、体力を回復し移動速度を得てしまいます。まずは Spinning Axe の通常攻撃で削ってください。Stand Aside を投げるのは、Sivir が慌てて shield を無駄にした後に、退路を妨害するときか、Boomerang Blade のモーションをキャンセルするときだけです。

Akshan−2
このmatchupはあなたに大きく有利です。Akshan は trade にも脱出にも Heroic Swing に完全に頼っているからです。Akshan が壁にグラップルを付けた瞬間、Stand Aside で空中から完全に叩き落とせます。これで主なダメージ源が潰れ、Akshan は立ち往生します。Heroic Swing がなければ、Akshan の Dirty Fighting の shield ではあなたの Spinning Axe の素の物理ダメージを吸収できず、攻撃的なジャンプはそのまま確定の死につながります。
Akshanのビルド →
詳細を見る
理由
このmatchupはあなたに大きく有利です。Akshan は trade にも脱出にも Heroic Swing に完全に頼っているからです。Akshan が壁にグラップルを付けた瞬間、Stand Aside で空中から完全に叩き落とせます。これで主なダメージ源が潰れ、Akshan は立ち往生します。Heroic Swing がなければ、Akshan の Dirty Fighting の shield ではあなたの Spinning Axe の素の物理ダメージを吸収できず、攻撃的なジャンプはそのまま確定の死につながります。
レーン戦への影響
Akshan は Heroic Swing を妨害されることを恐れているため、消極的にプレイせざるを得ません。あなたは Spinning Axe で Akshan の Avengerang を簡単に押し負かせるので、lane priority を完全に握れます。この絶え間ない圧力で Akshan は自分のタワー下に閉じ込められ、Going Rogue による roam の可能性も封じられます。一方であなたは League of Draven の adoration stack を現金化する機会を楽に得られます。
立ち回り方
poke や wave clear のために Stand Aside を投げてはいけません。counter-engage 専用に温存してください。Akshan が Heroic Swing のために壁を狙ったら、すぐに反応して叩き落とし、その直後に Blood Rush を使って Spinning Axe の攻撃を浴びせながら追いかけます。Akshan が自分のタワーの裏で Comeuppance を channel しようとしたら、Blood Rush の移動速度で距離を詰め、もう一度うまく当てた Stand Aside で ult をキャンセルします。

Twitch−2
Twitch は Deadly Venom をゆっくり重ねることに頼っていますが、あなたの Spinning Axe による即座の burst は、短い trade での Twitch のダメージを完全に上回ります。Twitch の序盤は非常に弱いので、前に出てきた瞬間に Blood Rush を使って積極的に追い詰められます。Twitch はアイテムを揃える前にあなたの素の物理的な力に対抗できず、Contaminate もあなたを脅かせるほどのダメージにはなりません。
Twitchのビルド →
詳細を見る
理由
Twitch は Deadly Venom をゆっくり重ねることに頼っていますが、あなたの Spinning Axe による即座の burst は、短い trade での Twitch のダメージを完全に上回ります。Twitch の序盤は非常に弱いので、前に出てきた瞬間に Blood Rush を使って積極的に追い詰められます。Twitch はアイテムを揃える前にあなたの素の物理的な力に対抗できず、Contaminate もあなたを脅かせるほどのダメージにはなりません。
レーン戦への影響
このmatchupは、minion の wave をどれだけ厳密にコントロールできるかで決まります。wave を自分のタワーの近くで freeze すれば、Twitch は安全な farm の場所を離れざるを得ません。Twitch が Venom Cask で freeze を崩そうとしたら、その立ち位置をすぐに罰せます。この絶え間ない圧力でゴールドを奪い、早めの recall に追い込み、League of Draven の stack を現金化して lane を snowball させられます。
立ち回り方
Spinning Axe を常に維持し、minion の wave を lane の自分側に留めてください。Twitch が last hit のために前に出てきたら、Blood Rush を発動して体力を大きく削ります。Stand Aside は、Twitch が Ambush で逃げようとしたときの妨害や、Spray and Pray を発動したときの妨害のために温存してください。Twitch が非常に消極的にプレイするなら、考えなしに shove せず、freeze を維持してゴールドを枯渇させます。

Samira−2
Draven は Samira の戦略全体を封じる究極の手段を持っているため、このmatchupを支配します。Samira は Daredevil Impulse の stack を溜めて Inferno Trigger を放ちたいのですが、あなたの Stand Aside は Samira の ult を即座に、かつ容赦なくキャンセルします。channel 中の大きなライフスティールと DPS がなければ、Samira は正面の戦いであなたの Spinning Axe の素の持続的な物理ダメージに太刀打ちできません。
Samiraのビルド →
詳細を見る
理由
Draven は Samira の戦略全体を封じる究極の手段を持っているため、このmatchupを支配します。Samira は Daredevil Impulse の stack を溜めて Inferno Trigger を放ちたいのですが、あなたの Stand Aside は Samira の ult を即座に、かつ容赦なくキャンセルします。channel 中の大きなライフスティールと DPS がなければ、Samira は正面の戦いであなたの Spinning Axe の素の持続的な物理ダメージに太刀打ちできません。
レーン戦への影響
このやり取りで Samira は消極的な laning を強いられ、Wild Rush で安全に engage できなくなります。Samira があなたの Spinning Axe の跳ね返りを Blade Whirl で防ごうとすれば、最も長い防御用の cooldown を無駄にし、強力な poke にさらされます。wave を簡単に freeze したり crash させて dive したりでき、序盤の plate を確保して、League of Draven の adoration stack を安全に現金化できます。
立ち回り方
鉄則は、poke や trade を始めるために Stand Aside を投げないことです。Samira が Inferno Trigger を発動するまさにその瞬間のために、このスキルを温存してください。Samira の Daredevil Impulse のランクを確認し、S ランクに近づいて Wild Rush で飛び込んでくるときは、近接の斬撃範囲の少し外に位置取り、displacement を投げて ult をキャンセルします。Samira が Blade Whirl で斧を誘ってきたら、Blood Rush を発動し直して位置を調整し、通常攻撃を再開するだけで構いません。

Jinx−2
Jinx は序盤のデュエル力に欠け、あなたの射程に対抗するため Switcheroo! のロケットに大きく頼っています。しかし、あなたの素のダメージには対処できません。Blood Rush を発動すれば、Jinx の射程の優位を突破するための移動速度と攻撃速度が得られ、Spinning Axe で繰り返し体力を大きく削れます。Jinx はキルなしでは Get Excited! を発動できないため、序盤の小競り合いであなたに積極的に前進されるとまったく無防備です。
Jinxのビルド →
詳細を見る
理由
Jinx は序盤のデュエル力に欠け、あなたの射程に対抗するため Switcheroo! のロケットに大きく頼っています。しかし、あなたの素のダメージには対処できません。Blood Rush を発動すれば、Jinx の射程の優位を突破するための移動速度と攻撃速度が得られ、Spinning Axe で繰り返し体力を大きく削れます。Jinx はキルなしでは Get Excited! を発動できないため、序盤の小競り合いであなたに積極的に前進されるとまったく無防備です。
レーン戦への影響
あなたのダメージ面の優位により、minion の wave を自分のタワーの近くで freeze でき、Jinx は farm のために前に出すぎざるを得ません。Jinx が Switcheroo! のロケットの爆発で wave を減らしたり、Zap! で poke したりすれば、貴重な mana を消費し、無防備になります。ゴールドを完全に奪って大きな圧力の空白を作り、Jinx が脅威に scale するのを阻止できます。さらに、League of Draven の stack を序盤から確実に現金化できます。
立ち回り方
Jinx の Flame Chompers! から常に目を離さないでください。Flame Chompers! が使える状態なら、何も考えずにまっすぐ突っ込んではいけません。代わりに斜めに走って罠を誘い、Stand Aside で Jinx の動きを妨害したり退路を断ったりしてから、Blood Rush で再度 engage します。Jinx が自分のタワー下で安全に farm しているなら、危険な dive は無理にせず、大きな wave をゆっくり push してタワーを削るか、Jinx が recall しようとしたときに Whirling Death で遠くからとどめを刺してください。

Kai'Sa−1
序盤の小競り合いでのあなたの素のダメージは、Kai'Sa のダメージを自然と上回ります。ただし、Kai'Sa の主な burst 源を無効化できればの話です。自分の minion の wave のちょうど中に立てば、Kai'Sa の Icathian Rain のミサイルが標的の間で分散し、ダメージは無視できる程度になります。この位置取りなら、強化された Spinning Axe の攻撃で自由に体力を削れ、Kai'Sa の Second Skin は発動に時間がかかりすぎるため、正面の trade にすべて勝てます。
Kai'Saのビルド →
詳細を見る
理由
序盤の小競り合いでのあなたの素のダメージは、Kai'Sa のダメージを自然と上回ります。ただし、Kai'Sa の主な burst 源を無効化できればの話です。自分の minion の wave のちょうど中に立てば、Kai'Sa の Icathian Rain のミサイルが標的の間で分散し、ダメージは無視できる程度になります。この位置取りなら、強化された Spinning Axe の攻撃で自由に体力を削れ、Kai'Sa の Second Skin は発動に時間がかかりすぎるため、正面の trade にすべて勝てます。
レーン戦への影響
wave の中なら恐れずに trade できるので、Kai'Sa は priority を譲らざるを得ません。Kai'Sa は Supercharge を使って積極的に近づくと、大きなダメージを受けてしまいます。体力の優位を楽に確保でき、wave を Kai'Sa のタワーへ slow push して farm を妨害し、League of Draven の cash-out stack を安全に大きく溜められます。
立ち回り方
trade するときは、必ず自分の minion の wave の真ん中に立ってください。Kai'Sa が Void Seeker で狙ってきたら、minion の後ろに下がって防ぎます。Kai'Sa が wave にミサイルを無駄打ちしたら、すぐに Blood Rush を発動して優位を押し切ります。Kai'Sa が Supercharge で逃げようとしたり、Killer Instinct で位置を変えようとしたりしたら、うまく当てた Stand Aside で勢いを止め、キルを確実にします。

Ashe−2
Ashe は短い小競り合いであなたの素のダメージに太刀打ちできません。特に Ranger's Focus を溜める前は、Spinning Axe によってあなたの通常攻撃のほうが Frost Shot よりはるかに致命的になります。この大きなステータスの優位により、正面のデュエルはすべて勝てます。さらに、Ashe が距離を取ろうとしたり Enchanted Crystal Arrow を channel しようとしたりしても、正確に狙った Stand Aside で勢いをすぐ止めたり、詠唱モーションを妨害したりできます。
Asheのビルド →
詳細を見る
理由
Ashe は短い小競り合いであなたの素のダメージに太刀打ちできません。特に Ranger's Focus を溜める前は、Spinning Axe によってあなたの通常攻撃のほうが Frost Shot よりはるかに致命的になります。この大きなステータスの優位により、正面のデュエルはすべて勝てます。さらに、Ashe が距離を取ろうとしたり Enchanted Crystal Arrow を channel しようとしたりしても、正確に狙った Stand Aside で勢いをすぐ止めたり、詠唱モーションを妨害したりできます。
レーン戦への影響
この力の差により、Ashe は守りに回り、Volley で遠くから farm するしかなくなります。minion の wave を楽にコントロールして、Ashe を自分のタワー下に釘付けにしながら、League of Draven の stack を大きく溜められます。Ashe は致命的な engage を受ける危険を冒さずにあなたの push に対抗できないので、lane のペースはあなたが握ります。Ashe は守りのために mana を消費させられ、序盤のゴールドも奪われるため、クリティカルの scaling が遅れます。
立ち回り方
このmatchupを活かすには、Volley の射程のすぐ外に厳密な距離の境界を保ちます。Ashe が minion を取りに前に出てきたら、Blood Rush を発動して距離を詰め、Spinning Axe で攻撃します。むやみに Stand Aside を投げてはいけません。Ashe が kite して下がろうとするときの位置取りを妨害するため、あるいは Enchanted Crystal Arrow のモーションをキャンセルするために温存してください。Ashe が下がりすぎたら、wave を freeze して経験値を奪います。

Corki−2
Corki はあなたの積極的な trade から逃げられないので、あなたが大きく有利です。Corki の唯一の防御手段である Valkyrie は、空中であなたの Stand Aside にキャンセルされやすい弱点があります。ダッシュ中に叩き落とせば、Corki はまったく無力になり、逃げられないまま、Spinning Axe の攻撃で体力が急速に溶けていきます。Corki には、こうした途切れない素の撃ち合いを生き延びるだけの序盤の物理的な耐久力がありません。
Corkiのビルド →
詳細を見る
理由
Corki はあなたの積極的な trade から逃げられないので、あなたが大きく有利です。Corki の唯一の防御手段である Valkyrie は、空中であなたの Stand Aside にキャンセルされやすい弱点があります。ダッシュ中に叩き落とせば、Corki はまったく無力になり、逃げられないまま、Spinning Axe の攻撃で体力が急速に溶けていきます。Corki には、こうした途切れない素の撃ち合いを生き延びるだけの序盤の物理的な耐久力がありません。
レーン戦への影響
この脅威により、Corki は minion の wave を取り合う力を完全に封じられます。自分のタワーの近くで lane を楽に freeze でき、Corki は farm のために前に出すぎざるを得ません。Corki が Phosphorus Bomb で wave を crash させようとしたら、Blood Rush で追い詰められます。この絶え間ない圧力で Corki は最悪のタイミングで recall させられ、あなたは序盤のタワーの plate を確保して Adoration の stack を現金化できます。
立ち回り方
Corki の近接 minion より前に積極的に位置取りして、Corki を経験値の範囲外に追い出してください。むやみに poke するために Stand Aside を投げてはいけません。Valkyrie のモーションに反応するためだけに温存してください。Corki が Hextech Munitions のパッケージを得たら、強化されたダッシュの燃える軌跡を避けるため、一時的に下がります。displacement を外したら、すぐに Blood Rush で後退して位置を立て直し、cooldown が戻るのを待ってから再び trade してください。

Vayne−2
Vayne の序盤は有名なほど弱く、あなたの攻撃的な kit にとって格好の標的です。Vayne が farm のために前に出てくるたびに、Spinning Axe が避けようのない大きな物理ダメージを与え、Vayne はそれに太刀打ちできません。Vayne が Silver Bolts を有効にするには連続 3 回の攻撃を当てる必要がありますが、あなたは強化攻撃を 1 回か 2 回当てるだけで体力を大きく削れ、アイテムを買う前に Vayne の scaling の脅威を完全に無効化できます。
Vayneのビルド →
詳細を見る
理由
Vayne の序盤は有名なほど弱く、あなたの攻撃的な kit にとって格好の標的です。Vayne が farm のために前に出てくるたびに、Spinning Axe が避けようのない大きな物理ダメージを与え、Vayne はそれに太刀打ちできません。Vayne が Silver Bolts を有効にするには連続 3 回の攻撃を当てる必要がありますが、あなたは強化攻撃を 1 回か 2 回当てるだけで体力を大きく削れ、アイテムを買う前に Vayne の scaling の脅威を完全に無効化できます。
レーン戦への影響
最初の minion からあなたが wave を支配します。wave を中央付近に置くか slow push することで、Vayne は last hit を取るためだけに Spinning Axe の射程内に踏み込まざるを得ません。Vayne は自分のタワー下でゴールドを失い続けるか、壊滅的な trade を受けるかのどちらかです。この絶え間ない圧力により、League of Draven の stack を楽に現金化でき、Vayne の Final Hour の power spike はいつまでも遅れます。
立ち回り方
これを完璧にこなすには、Vayne が Condemn であなたを stun できる壁と平行になる位置には決して立たないでください。Blood Rush を積極的に発動して高い移動速度を保てば、斧をキャッチしながら Vayne の短射程の poke を簡単に避けられます。Vayne が Final Hour 中に Tumble で逃げたり engage したりしようとしたら、すぐに Stand Aside を投げてダッシュを妨害し、減速させます。これでダブルアックスのキルが確実になり、passive を現金化できます。
その他のマッチアップ




Draven対策アイテム
これらのアイテムを購入すると、このチャンピオンの影響力を抑えられます。




| マッチアップ | 判定 | 有利度 | 勝率 | ピック率 |
|---|---|---|---|---|
| Nilah | ハードカウンター | +2 | — | — |
| Xayah | 不利なマッチアップ | +1 | 50.9% | 5.2% |
| Caitlyn | 不利なマッチアップ | +1 | 49.7% | 15.7% |
| Yunara | 不利なマッチアップ | +1 | 49.5% | 6.5% |
| Ziggs | 不利なマッチアップ | +1 | — | — |
| Varus | スキル次第のマッチアップ | ±0 | 51.1% | 6.2% |
| Miss Fortune | スキル次第のマッチアップ | ±0 | 48.8% | 12.8% |
| Lucian | スキル次第のマッチアップ | ±0 | 47.3% | 3.1% |
| Ezreal | 有利なマッチアップ | −1 | 50.4% | 7.8% |
| Kalista | 有利なマッチアップ | −1 | 50.4% | 7.3% |
| Kai'Sa | 有利なマッチアップ | −1 | 50.1% | 16.3% |
| Jhin | 有利なマッチアップ | −1 | 49.5% | 15.9% |
| Sivir | 有利なマッチアップ | −1 | 49.4% | 3.9% |
| Zeri | 有利なマッチアップ | −1 | 49.0% | 1.2% |
| Tristana | 有利なマッチアップ | −1 | 48.6% | 11.4% |
| Ashe | 有利なマッチアップ | −2 | 52.9% | 9.7% |
| Kog'Maw | 有利なマッチアップ | −2 | 52.9% | 2.7% |
| Samira | 有利なマッチアップ | −2 | 51.0% | 11.8% |
| Jinx | 有利なマッチアップ | −2 | 50.4% | 13.3% |
| Twitch | 有利なマッチアップ | −2 | 49.9% | 9.9% |
| Vayne | 有利なマッチアップ | −2 | 48.7% | 6.5% |
| Akshan | 有利なマッチアップ | −2 | — | — |
| Corki | 有利なマッチアップ | −2 | — | — |
| Senna | 有利なマッチアップ | −2 | — | — |
| Smolder | 有利なマッチアップ | −3 | 52.6% | 9.1% |
有利度:Wild Rift Coreの公式判定(−3〜+3)で、各行に記載されたチャンピオンの視点から見た値です。勝率とピック率:このロールにおける相手チャンピオン自身の数値 — Wild Rift CN · Challenger、Patch 7.3c。直接対決の勝率ではありません。