
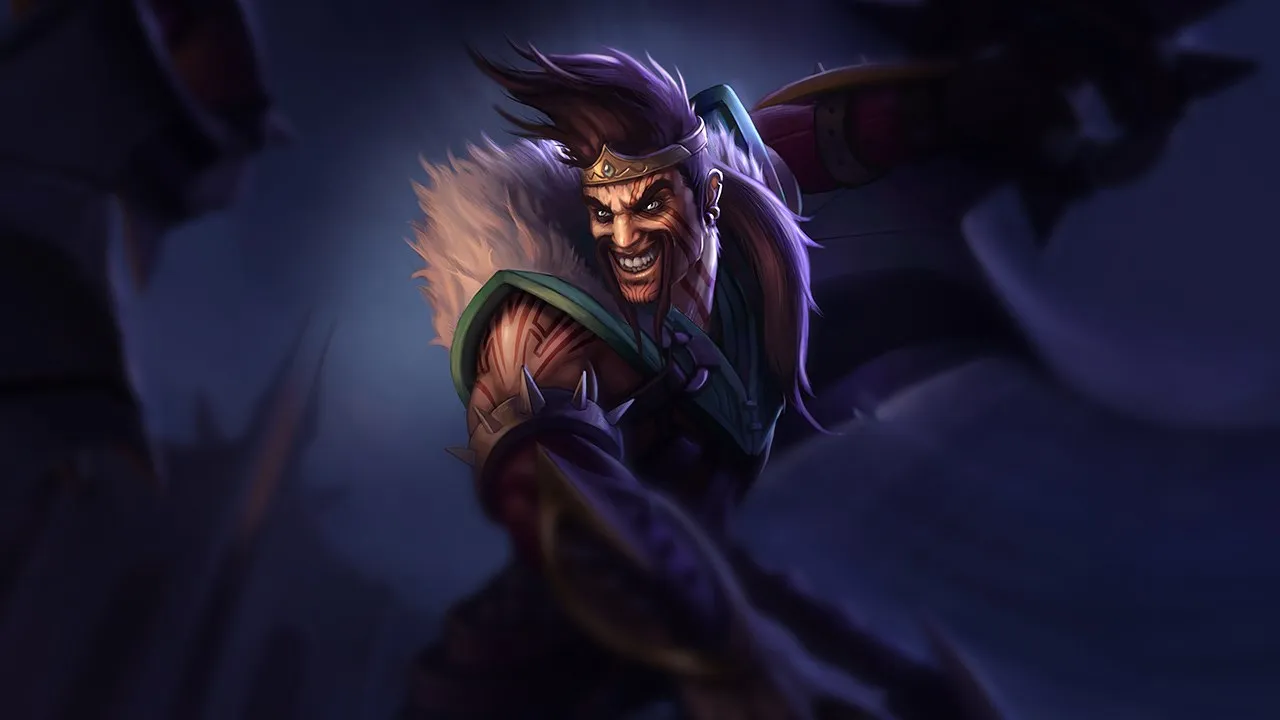
Guía de counters de Draven Wild Rift
Contras Difíciles
1Estos campeones tienen una build y un estilo de juego que superan directamente al tuyo, lo que puede hacer que controlar la línea y farmear sea extremadamente difícil. Sus habilidades pueden neutralizar tus principales fortalezas o castigarte en cuanto intentas jugar tu plan habitual. En estos matchups, el objetivo suele ser minimizar errores y buscar soluciones fuera del enfrentamiento directo.
Otros emparejamientos

Desfavorables
4Estos campeones tienen herramientas que generalmente les dan ventaja en el enfrentamiento, sin llegar a hacer el matchup injugable. Pueden tener más alcance, mejor capacidad para aguantar tu ofensiva o más formas de responder a tus engagements. Tendrás que adaptar tu enfoque y elegir con cuidado los momentos en los que aceptas el combate.

Xayah+1
Este matchup se define por la visibilidad de tus hachas. Como Xayah puede ver con claridad los indicadores de aterrizaje de tu Spinning Axe, puede apuntar sin esfuerzo Double Daggers y acumular plumas de Clean Cuts justo en esos puntos. En el momento en que avanzas para atrapar un hacha, ella las recoge con Bladecaller, asegurando un root fácil que anula tu movilidad y te deja completamente vulnerable a su gran burst.
Build de Xayah →
Ver detalles
Por qué
Este matchup se define por la visibilidad de tus hachas. Como Xayah puede ver con claridad los indicadores de aterrizaje de tu Spinning Axe, puede apuntar sin esfuerzo Double Daggers y acumular plumas de Clean Cuts justo en esos puntos. En el momento en que avanzas para atrapar un hacha, ella las recoge con Bladecaller, asegurando un root fácil que anula tu movilidad y te deja completamente vulnerable a su gran burst.
Impacto en la línea
No puedes empujar ni hacer trade sin pensar usando Blood Rush, ya que cada hacha atrapada conlleva el riesgo de un counter-engage mortal. Esta vacilación forzada ralentiza tu waveclear y vuelve los trades muy arriesgados. Si te ves obligado a soltar hachas para evitar Bladecaller, tu DPS cae de forma significativa, estancando tu pasiva League of Draven y dándole a Xayah el control del estado de la wave y de la prioridad.
Cómo jugar
Para sobrevivir, debes convertir tu movimiento predecible en un cebo. Camina hacia el indicador de tu Spinning Axe para forzar que lance Bladecaller pronto, y usa enseguida la velocidad de movimiento de Blood Rush para desviarte del camino y descartar el hacha. Comprométete a un trade agresivo con Stand Aside solo cuando sus plumas estén despejadas o su habilidad de recall esté en cooldown. Si activa Deadly Plumage, retírate de inmediato en lugar de intentar superarla en DPS.

Yunara+1
Yunara te supera en alcance y en maniobra una vez que activa Transcend One's Self, que convierte los golpes críticos en daño mágico con Vow of the First Lands. Tus puntos de aterrizaje predecibles de Spinning Axe te hacen muy vulnerable a su poke de Arc of Judgment. Como su kit básico carece de poder de duelo bruto sin el estado de trance de su definitiva, el matchup depende por completo de aprovechar los momentos en que su automejora no está disponible.
Build de Yunara →
Ver detalles
Por qué
Yunara te supera en alcance y en maniobra una vez que activa Transcend One's Self, que convierte los golpes críticos en daño mágico con Vow of the First Lands. Tus puntos de aterrizaje predecibles de Spinning Axe te hacen muy vulnerable a su poke de Arc of Judgment. Como su kit básico carece de poder de duelo bruto sin el estado de trance de su definitiva, el matchup depende por completo de aprovechar los momentos en que su automejora no está disponible.
Impacto en la línea
No puedes disputar a ciegas la prioridad temprana cuando Yunara activa su trance. Sus ataques con rebote de Cultivation of Spirit empujan las waves rápidamente, obligándote a retirarte bajo la torre mientras esquivas Arc of Ruin. Si te arriesgas por atrapar un Spinning Axe durante su Transcend One's Self, su burst repentino te ejecutará, reiniciando tus acumulaciones de adoración de League of Draven y dándole el control total de la bottom lane.
Cómo jugar
Respeta su definitiva. En el momento en que Yunara active Transcend One's Self, retrocede y usa Blood Rush a la defensiva para esquivar sus skillshots. Mantén Stand Aside listo; si intenta acercarse con agresividad usando Untouchable Shadow, lanza tus hachas para interrumpirla a mitad del dash y cancelar su impulso. En cuanto expire su trance, fuerza de inmediato un trade agresivo con Spinning Axe antes de que sus potentes cooldowns vuelvan a dominar la lane.

Caitlyn+1
Caitlyn desbarata por completo tu ritmo usando como arma tus zonas de caída de hachas. Siempre que lanzas un Spinning Axe, ella puede colocar al instante un Yordle Snap Trap justo sobre el indicador de aterrizaje. Esto crea una zona opresiva en la que atrapar tu hacha significa quedar inmovilizado y recibir un Headshot garantizado, mientras que esquivar la trampa te obliga a soltar tus hachas y perder tu principal fuente de daño.
Build de Caitlyn →
Ver detalles
Por qué
Caitlyn desbarata por completo tu ritmo usando como arma tus zonas de caída de hachas. Siempre que lanzas un Spinning Axe, ella puede colocar al instante un Yordle Snap Trap justo sobre el indicador de aterrizaje. Esto crea una zona opresiva en la que atrapar tu hacha significa quedar inmovilizado y recibir un Headshot garantizado, mientras que esquivar la trampa te obliga a soltar tus hachas y perder tu principal fuente de daño.
Impacto en la línea
Esta amenaza constante de trampas te obliga a jugar a la defensiva bajo tu propia torre, ya que su superior alcance de ataque básico y su Piltover Peacemaker te van desgastando la barra de vida. Te costará mantener tus acumulaciones de League of Draven porque reiniciar Spinning Axe se vuelve muy arriesgado. Si intentas empujar, ella te castiga con facilidad, expulsándote poco a poco de la lane y llevándose las placas de torre tempranas.
Cómo jugar
Para sobrevivir, debes engañar su puntería. Dirige intencionadamente los indicadores de tu Spinning Axe hacia atrás o hacia los lados, a zonas seguras, para provocar que malgaste su Yordle Snap Trap. Haz engage solo cuando ella se posicione mal o falle su 90 Caliber Net. Si coloca una trampa en tu marcador, deja caer el hacha, activa de inmediato Blood Rush para cerrar la distancia y usa Stand Aside para interrumpir su retirada antes de que pueda abusar de su ventaja de alcance.
Otros emparejamientos

Matchups de Habilidad
3Estos enfrentamientos son sobre todo duelos de ejecución: ambos campeones tienen formas reales de tomar la ventaja. Esquivar una habilidad clave, anticipar bien un engagement o un simple error de posicionamiento puede inclinar el duelo hacia un lado. Conocer el matchup y reconocer las ventanas de acción correctas es especialmente importante aquí.

Lucian±0
Este matchup es un duelo volátil entre el burst de Lucian, que combina hechizos y ataques con rapidez, y tu daño sostenido superior. Lucian depende de alinear Piercing Light para activar Lightslinger, quitándote de golpe buena parte de la vida antes de escapar. Sin embargo, si sobrevives a ese burst inicial, tu Spinning Axe inflige muchísimo más daño bruto en cualquier intercambio prolongado, lo que te permite superarlo con facilidad en DPS una vez que gaste sus cooldowns.
Build de Lucian →
Ver detalles
Por qué
Este matchup es un duelo volátil entre el burst de Lucian, que combina hechizos y ataques con rapidez, y tu daño sostenido superior. Lucian depende de alinear Piercing Light para activar Lightslinger, quitándote de golpe buena parte de la vida antes de escapar. Sin embargo, si sobrevives a ese burst inicial, tu Spinning Axe inflige muchísimo más daño bruto en cualquier intercambio prolongado, lo que te permite superarlo con facilidad en DPS una vez que gaste sus cooldowns.
Impacto en la línea
Las waves de minions se convierten en peligrosas zonas de cebo donde Lucian busca constantemente ángulos de Piercing Light. Si conecta, usará de inmediato Relentless Pursuit para presionarte bajo la torre o forzarte a un recall temprano. En cambio, si malgasta su dash con agresividad y no logra ejecutarte, puedes hacer freeze de la wave, mantener tus acumulaciones de Spinning Axe y hacerle zoning fuera de rango de oro por completo, amenazando con un all-in.
Cómo jugar
Para ganar, nunca te pongas justo detrás de tus minions con poca vida, para negarle a Lucian objetivos fáciles de Piercing Light. Cuando se adelante para hacerte poke, provoca el láser y activa enseguida Blood Rush para cerrar la distancia mientras sus habilidades entran en cooldown. Guarda Stand Aside específicamente para interrumpir su escape con Relentless Pursuit o para redirigirlo a mitad de lanzamiento durante The Culling. Si sueltas tu Spinning Axe durante su burst, retírate de inmediato hacia tu torre.

Varus±0
Este matchup es una pura prueba de reflejos: el all-in agresivo de Draven choca de frente con el poke de largo alcance de Varus. Varus intenta desgastar tu vida con Piercing Arrow desde un lugar seguro, preparando una ejecución fácil con los acumulados de Blighted Quiver. Como los indicadores de aterrizaje de tu Spinning Axe le muestran a Varus exactamente dónde apuntar su Hail of Arrows, estás obligado constantemente a elegir entre atrapar las hachas o recibir mucho poke.
Build de Varus →
Ver detalles
Por qué
Este matchup es una pura prueba de reflejos: el all-in agresivo de Draven choca de frente con el poke de largo alcance de Varus. Varus intenta desgastar tu vida con Piercing Arrow desde un lugar seguro, preparando una ejecución fácil con los acumulados de Blighted Quiver. Como los indicadores de aterrizaje de tu Spinning Axe le muestran a Varus exactamente dónde apuntar su Hail of Arrows, estás obligado constantemente a elegir entre atrapar las hachas o recibir mucho poke.
Impacto en la línea
El estado de la lane fluctúa mucho según las barras de vida. Si Varus acierta varios Piercing Arrow seguidos, consigue prioridad con facilidad, te empuja bajo la torre y neutraliza tu potencial de cobrar League of Draven. En cambio, si esquivas con éxito sus skillshots, su falta de movilidad lo deja completamente indefenso ante tu alto DPS, lo que te permite hacer freeze de la wave cerca de tu torre y obligarlo a una posición peligrosa y sobreextendida.
Cómo jugar
Para ganar, nunca actives Blood Rush solo para acelerar tus ataques básicos mientras haces farmeo. En su lugar, guarda su ráfaga de velocidad de movimiento para esquivar de forma reactiva la carga de Piercing Arrow de Varus o su definitiva, Chain of Corruption. Una vez gastados esos hechizos clave, suelta de inmediato Stand Aside para interrumpir su retirada y comprométete a un all-in completo con Spinning Axe. Si te atrapa con Hail of Arrows, retrocede y reinicia tus hachas en lugar de aceptar un trade desventajoso.

Miss Fortune±0
Este matchup es un constante tira y afloja entre el poke de largo alcance de Miss Fortune y tu brutal potencial de all-in. Aunque puedes destrozarla con facilidad en un duelo directo usando Spinning Axe y Blood Rush, ella destaca desgastando tu vida desde detrás de su wave. Toda la lane depende de su Double Up: si lo rebota en un minion a punto de morir, el daño crítico puede sacarte de la zona al instante e impedirte atrapar tus hachas.
Build de Miss Fortune →
Ver detalles
Por qué
Este matchup es un constante tira y afloja entre el poke de largo alcance de Miss Fortune y tu brutal potencial de all-in. Aunque puedes destrozarla con facilidad en un duelo directo usando Spinning Axe y Blood Rush, ella destaca desgastando tu vida desde detrás de su wave. Toda la lane depende de su Double Up: si lo rebota en un minion a punto de morir, el daño crítico puede sacarte de la zona al instante e impedirte atrapar tus hachas.
Impacto en la línea
La posición de la wave determina quién marca el ritmo. Miss Fortune intentará constantemente preparar la vida de los minion para alinear los rebotes de Double Up, obligándote a elegir entre soltar una Spinning Axe o recibir muchísimo daño. Si te quitan mucha vida al principio, su preparación con Make It Rain te convierte en un objetivo ideal para Bullet Time. En cambio, mantener tu vida alta te permite hacer freeze y amenazar con una persecución letal por la lane.
Cómo jugar
Nunca te quedes en línea recta detrás de tus minion con poca vida. Obliga a Miss Fortune a usar Double Up directamente sobre ti o a fallarlo por completo. Cuando se acerque para hacer poke, usa Blood Rush para salir en ángulo y alejarte de la wave, y luego usa Stand Aside para interrumpir la velocidad de movimiento de su Strut. Si canaliza Bullet Time, lanza de inmediato Whirling Death y usa tu velocidad de movimiento para salir del cono antes de ejecutarla.
Favorables
17Estos campeones suelen tener problemas para responder a tus principales fortalezas, lo que te permite afrontar el enfrentamiento con más libertad. Normalmente tienes varias formas de presionarlos y forzar intercambios a tu favor. Aprovecha esta ventaja para imponer tu ritmo en lugar de darles tiempo para volver a una posición cómoda.

Jhin−1
Draven domina este matchup porque Jhin depende de la cadencia fija y lenta de Whisper y de acertar Deadly Flourish para controlar la distancia. Aprovechando la ráfaga de velocidad de movimiento de Blood Rush, puedes esquivar sin esfuerzo su inmovilización lineal. Una vez que Jhin falla ese disparo, su falta de DPS sostenido durante el ciclo de recarga lo deja completamente indefenso ante tus ataques continuos y de alto daño con Spinning Axe.
Build de Jhin →
Ver detalles
Por qué
Draven domina este matchup porque Jhin depende de la cadencia fija y lenta de Whisper y de acertar Deadly Flourish para controlar la distancia. Aprovechando la ráfaga de velocidad de movimiento de Blood Rush, puedes esquivar sin esfuerzo su inmovilización lineal. Una vez que Jhin falla ese disparo, su falta de DPS sostenido durante el ciclo de recarga lo deja completamente indefenso ante tus ataques continuos y de alto daño con Spinning Axe.
Impacto en la línea
Esta interacción te da una enorme prioridad de lane. Jhin debe elegir constantemente entre usar su cuarto disparo de Whisper para disputar tu push o amenazarte con él. Cada vez que desperdicia esa última bala o usa Dancing Grenade sobre la wave, puedes sacarlo de la zona de forma agresiva. Esta presión implacable empuja a Jhin bajo su torre, donde queda muy vulnerable a las interrupciones de Stand Aside y a los dives preparados con Whirling Death.
Cómo jugar
Vigila de cerca la barra de munición de Jhin. En cuanto dispare su cuarto tiro y empiece a recargar Whisper, activa Blood Rush y corre directamente hacia él. Muévete lateralmente por una fracción de segundo para provocar y esquivar Deadly Flourish, y luego retoma la persecución. Si intenta retirarse tras sus trampas explosivas de Captive Audience, usa Stand Aside para desplazarlo lejos de la seguridad, asegurándote de acertar golpes consecutivos de Spinning Axe hasta que caiga.

Ezreal−1
Tus ataques básicos con Spinning Axe eclipsan por completo el potencial de trade de Ezreal si decide quedarse a pelear. Sin embargo, conseguir un kill limpio es muy difícil porque él se retirará constantemente con Arcane Shift para volver a un lugar seguro. Esto lo deja dependiendo solo de Mystic Shot para quedarse con los minion desde una distancia segura, lo que te impide cobrar con facilidad tu pasiva League of Draven mediante kills tempranos.
Build de Ezreal →
Ver detalles
Por qué
Tus ataques básicos con Spinning Axe eclipsan por completo el potencial de trade de Ezreal si decide quedarse a pelear. Sin embargo, conseguir un kill limpio es muy difícil porque él se retirará constantemente con Arcane Shift para volver a un lugar seguro. Esto lo deja dependiendo solo de Mystic Shot para quedarse con los minion desde una distancia segura, lo que te impide cobrar con facilidad tu pasiva League of Draven mediante kills tempranos.
Impacto en la línea
Como Ezreal no puede disputar tu DPS bruto, dictas con facilidad la posición de la wave. Al mantener los minion empujados, lo obligas a usar Mystic Shot para farmear bajo su torre en lugar de hacerte poke. Esta presión constante le niega cualquier oportunidad de acumular Rising Spell Force, drena su maná y te da control total sobre los tiempos de recall y la prioridad del dragón mientras él está atascado limpiando.
Cómo jugar
Nunca desperdicies Stand Aside al inicio de un intercambio; guárdalo específicamente para interrumpirlo o rematarlo justo después de que use Arcane Shift. Como no puedes hacerle dive con facilidad, concéntrate en empujar lentamente waves grandes hacia su torre. Cuando esté ocupado asegurando last-hits bajo la torre, usa Blood Rush para acercarte, conecta una sola Spinning Axe que le quite una buena parte de vida y retrocede de inmediato. Este desgaste lo obliga a hacer recall y te da las placas sin necesidad de un dive arriesgado.

Kalista−1
Toda la identidad de Kalista gira en torno a usar Martial Poise para saltar de un lado a otro y esquivar skillshots. Sin embargo, tu Stand Aside contrarresta directamente esa mecánica al sacarla de la animación de su dash. Interrumpir su salto la deja inmóvil por un momento y completamente incapaz de escapar, lo que te permite acertar enormes ráfagas de daño ininterrumpido con tu Spinning Axe antes de que se recupere.
Build de Kalista →
Ver detalles
Por qué
Toda la identidad de Kalista gira en torno a usar Martial Poise para saltar de un lado a otro y esquivar skillshots. Sin embargo, tu Stand Aside contrarresta directamente esa mecánica al sacarla de la animación de su dash. Interrumpir su salto la deja inmóvil por un momento y completamente incapaz de escapar, lo que te permite acertar enormes ráfagas de daño ininterrumpido con tu Spinning Axe antes de que se recupere.
Impacto en la línea
Esta interacción paraliza por completo la agresividad de Kalista en la lane temprana. No puede usar Pierce con seguridad ni acumular lanzas de Rend en ti, porque avanzar para hacer trade la deja al alcance de tu desplazamiento. Dictarás constantemente la posición de la wave y conseguirás las primeras placas de oro, mientras su miedo a que la saquen de Martial Poise la obliga a ceder la prioridad de lane y a farmear bajo su propia torre.
Cómo jugar
La regla de oro es guardar Stand Aside hasta que Kalista se comprometa con un salto ofensivo o intente ejecutar un minion con Rend. Nunca lo lances a ciegas. Espera a que avance con su dash y lanza tu desplazamiento para atraparla en el aire. En cuanto la hayas apartado, activa de inmediato Blood Rush para ganar la velocidad de ataque necesaria para destrozarla con golpes consecutivos de Spinning Axe mientras no puede saltar para alejarse.

Tristana−1
Draven domina este matchup porque puede anular por completo la única herramienta de escape de Tristana. Cuando Tristana intenta reposicionarse o huir con Rocket Jump, un Stand Aside bien cronometrado la interrumpe en pleno aire. Esto la deja varada sin su principal herramienta de movilidad, obligada a enfrentarse al daño físico bruto de tu Spinning Axe y Blood Rush sin ninguna distancia que la proteja.
Build de Tristana →
Ver detalles
Por qué
Draven domina este matchup porque puede anular por completo la única herramienta de escape de Tristana. Cuando Tristana intenta reposicionarse o huir con Rocket Jump, un Stand Aside bien cronometrado la interrumpe en pleno aire. Esto la deja varada sin su principal herramienta de movilidad, obligada a enfrentarse al daño físico bruto de tu Spinning Axe y Blood Rush sin ninguna distancia que la proteja.
Impacto en la línea
Esta interacción paraliza por completo las opciones agresivas de Tristana. No puede saltar hacia delante para acumular Explosive Charge en ti sin arriesgarse a un contraengage letal. Esto te permite hacer freeze de la wave o hacer push agresivo bajo su torre, usando Blood Rush para presionarla cada vez que intente asegurar last-hits. Sus ventanas de trade dependen por completo de si tienes tu desplazamiento disponible.
Cómo jugar
Nunca uses Stand Aside para hacer poke ni para limpiar waves; debes guardarlo específicamente para su salto. Colócate un poco más adelante para provocar que use Rocket Jump y lanza de inmediato tus hachas para interrumpir su lanzamiento. Si activa Rapid Fire, usa Blood Rush para hacer kite hacia atrás un poco, dejando que su aumento de velocidad de ataque se desperdicie antes de darte la vuelta y acorralarla con Whirling Death cuando su escape esté en cooldown.

Sivir−1
La fortaleza defensiva de Sivir está en bloquear habilidades clave con Spell Shield, pero esa herramienta es completamente inútil contra tu principal fuente de daño. Como Spinning Axe simplemente potencia tus ataques básicos, ella no puede bloquear tus hachas pesadas. Esto convierte cada trade en un duelo de daño bruto en el que tu DPS empequeñece a su Boomerang Blade y Ricochet, lo que te permite presionarla sin descanso.
Build de Sivir →
Ver detalles
Por qué
La fortaleza defensiva de Sivir está en bloquear habilidades clave con Spell Shield, pero esa herramienta es completamente inútil contra tu principal fuente de daño. Como Spinning Axe simplemente potencia tus ataques básicos, ella no puede bloquear tus hachas pesadas. Esto convierte cada trade en un duelo de daño bruto en el que tu DPS empequeñece a su Boomerang Blade y Ricochet, lo que te permite presionarla sin descanso.
Impacto en la línea
Como Sivir no puede hacer trade contigo directamente, intentará desesperadamente empujar la wave desde una distancia segura con Boomerang Blade y Ricochet. Si dejas que te empuje bajo tu torre, su waveclear neutraliza tu presión de kill. Debes controlar el estado de la wave para mantener los minion cerca del centro o más cerca de tu lado, obligándola a acercarse a farmear donde puedes castigarla.
Cómo jugar
Activa Blood Rush para cerrar la distancia de forma agresiva cada vez que Sivir se acerque a usar Ricochet sobre la wave. No inicies con Stand Aside ni con Whirling Death, porque ella puede bloquearlos fácilmente con Spell Shield para curarse y ganar velocidad de movimiento. En su lugar, castígala primero con auto-ataques de Spinning Axe. Lanza Stand Aside solo para interrumpir su retirada o cancelar la animación de su Boomerang Blade cuando entre en pánico y gaste su escudo.

Akshan−2
Este matchup te favorece mucho porque Akshan depende por completo de Heroic Swing para hacer trade y escapar. En el momento en que engancha su gancho a una pared, tu Stand Aside lo tumba del aire por completo, cancelando su principal fuente de daño y dejándolo varado. Sin su swing, el escudo de Dirty Fighting no puede absorber el daño físico bruto de tu Spinning Axe, y sus saltos agresivos se convierten en muertes aseguradas.
Build de Akshan →
Ver detalles
Por qué
Este matchup te favorece mucho porque Akshan depende por completo de Heroic Swing para hacer trade y escapar. En el momento en que engancha su gancho a una pared, tu Stand Aside lo tumba del aire por completo, cancelando su principal fuente de daño y dejándolo varado. Sin su swing, el escudo de Dirty Fighting no puede absorber el daño físico bruto de tu Spinning Axe, y sus saltos agresivos se convierten en muertes aseguradas.
Impacto en la línea
Como Akshan teme que le interrumpan Heroic Swing, se ve obligado a jugar de forma pasiva. Puedes superar con facilidad su Avengerang en el push con tu Spinning Axe, consiguiendo prioridad de lane absoluta. Esta presión constante lo encierra bajo su torre, negándole su potencial de roaming con Going Rogue, y te da oportunidades fáciles de cobrar tus acumulados de adoración de League of Draven.
Cómo jugar
Nunca lances Stand Aside para hacer poke ni para limpiar waves; guárdalo estrictamente como herramienta de contraengage. Cuando Akshan apunte a una pared con Heroic Swing, reacciona al instante para derribarlo y activa de inmediato Blood Rush para perseguirlo con golpes implacables de Spinning Axe. Si intenta canalizar Comeuppance detrás de su torre, usa la velocidad de movimiento de Blood Rush para cerrar la distancia y cancelar su definitiva con otro Stand Aside bien colocado.

Twitch−2
Twitch depende de acumular Deadly Venom lentamente, pero tu burst inmediato de Spinning Axe supera por completo su daño en trades cortos. Como su early game es extremadamente débil, puedes activar Blood Rush para perseguirlo de forma agresiva en cuanto se acerque. No puede igualar tu poder físico bruto antes de tener objetos, y su Contaminate no hará suficiente daño para amenazarte.
Build de Twitch →
Ver detalles
Por qué
Twitch depende de acumular Deadly Venom lentamente, pero tu burst inmediato de Spinning Axe supera por completo su daño en trades cortos. Como su early game es extremadamente débil, puedes activar Blood Rush para perseguirlo de forma agresiva en cuanto se acerque. No puede igualar tu poder físico bruto antes de tener objetos, y su Contaminate no hará suficiente daño para amenazarte.
Impacto en la línea
Este matchup se decide por lo bien que controles las waves de minion. Al hacer freeze de la wave cerca de tu torre, obligas a Twitch a dejar la seguridad de su farmeo. Si intenta romper el freeze con Venom Cask, puedes castigar su posición de inmediato. Esta presión constante le niega oro, lo obliga a hacer recall pronto y te permite cobrar tus acumulados de League of Draven para hacer snowball de la lane.
Cómo jugar
Mantén tu Spinning Axe activa en todo momento y conserva la wave de minion de tu lado de la lane. Cuando Twitch se acerque a hacer last-hit, activa Blood Rush para quitarle una buena parte de vida. Guarda tu Stand Aside para interrumpirlo si intenta escapar con Ambush o para desbaratarlo cuando active Spray and Pray. Si juega de forma extremadamente pasiva, mantén el freeze para dejarlo sin oro en lugar de hacer push sin sentido.

Samira−2
Draven domina este matchup porque posee la herramienta definitiva para frenar todo el plan de juego de Samira. Mientras Samira quiere acumular Daredevil Impulse para desatar Inferno Trigger, tu Stand Aside actúa como una cancelación instantánea e ineludible de su definitiva. Sin el enorme lifesteal y DPS de su canalización, Samira no puede igualar el daño físico bruto y sostenido de tu Spinning Axe en un duelo directo.
Build de Samira →
Ver detalles
Por qué
Draven domina este matchup porque posee la herramienta definitiva para frenar todo el plan de juego de Samira. Mientras Samira quiere acumular Daredevil Impulse para desatar Inferno Trigger, tu Stand Aside actúa como una cancelación instantánea e ineludible de su definitiva. Sin el enorme lifesteal y DPS de su canalización, Samira no puede igualar el daño físico bruto y sostenido de tu Spinning Axe en un duelo directo.
Impacto en la línea
Esta interacción obliga a Samira a una fase de lane pasiva en la que no puede usar Wild Rush para engage con seguridad. Si intenta bloquear el rebote de tu Spinning Axe con Blade Whirl, desperdicia su cooldown defensivo más largo y queda expuesta a mucho poke. Puedes hacer freeze de la wave o hacerla crashear para hacerle dive, asegurar las primeras placas y cobrar con seguridad tus acumulados de adoración de League of Draven.
Cómo jugar
Tu regla de oro es nunca lanzar Stand Aside para hacer poke ni para iniciar trades. Guarda esta habilidad estrictamente para el instante exacto en que Samira active Inferno Trigger. Sigue el rango de su Daredevil Impulse; cuando se acerque al rango S y entre con Wild Rush, colócate un poco fuera del alcance de sus tajos cuerpo a cuerpo y lanza tu desplazamiento para cancelar su definitiva. Si te provoca para que gastes tus hachas con Blade Whirl, simplemente refresca Blood Rush para reposicionarte y retomar los auto-ataques.

Jinx−2
Jinx carece de poder en duelos al inicio de la partida y depende mucho de los cohetes de Switcheroo! para igualar tu alcance. Sin embargo, no puede con tu daño bruto. Al activar Blood Rush, ganas la velocidad de movimiento y de ataque necesarias para superar su ventaja de alcance, lo que te permite quitarle vida repetidamente con Spinning Axe. Como no puede activar Get Excited! sin un kill, queda completamente indefensa ante tu avance agresivo en las escaramuzas tempranas.
Build de Jinx →
Ver detalles
Por qué
Jinx carece de poder en duelos al inicio de la partida y depende mucho de los cohetes de Switcheroo! para igualar tu alcance. Sin embargo, no puede con tu daño bruto. Al activar Blood Rush, ganas la velocidad de movimiento y de ataque necesarias para superar su ventaja de alcance, lo que te permite quitarle vida repetidamente con Spinning Axe. Como no puede activar Get Excited! sin un kill, queda completamente indefensa ante tu avance agresivo en las escaramuzas tempranas.
Impacto en la línea
Tu ventaja de daño te permite hacer freeze de la wave de minion cerca de tu torre, obligando a Jinx a sobreextenderse para farmear. Si intenta reducir la wave con el daño en área de los cohetes de Switcheroo! o hacer poke con Zap!, consume maná valioso y se expone. Puedes negarle el oro por completo, creando un enorme vacío de presión que le impide escalar hasta ser una amenaza, y te aseguras de cobrar tus acumulados de League of Draven pronto.
Cómo jugar
Vigila constantemente sus Flame Chompers!. Nunca avances a ciegas en línea recta si los tiene disponibles. En su lugar, corre en ángulo para provocar las trampas, usa Stand Aside para interrumpir su movimiento o cancelar su retirada, y vuelve a entrar con Blood Rush. Si consigue farmear con seguridad bajo su torre, no fuerces dives arriesgados; en cambio, haz push lento de una wave enorme para desgastar su torre o usa Whirling Death para ejecutarla desde lejos cuando intente hacer recall.

Kai'Sa−1
Tu daño bruto en las escaramuzas tempranas supera de forma natural al suyo, siempre que anules su principal fuente de burst. Al colocarte justo dentro de tu propia wave de minion, los misiles de Icathian Rain de Kai'Sa se reparten entre los objetivos y su daño se vuelve insignificante. Esta posición te permite quitarle vida libremente con ataques potenciados de Spinning Axe, ganando todos los trades directos porque su Second Skin tarda demasiado en activarse.
Build de Kai'Sa →
Ver detalles
Por qué
Tu daño bruto en las escaramuzas tempranas supera de forma natural al suyo, siempre que anules su principal fuente de burst. Al colocarte justo dentro de tu propia wave de minion, los misiles de Icathian Rain de Kai'Sa se reparten entre los objetivos y su daño se vuelve insignificante. Esta posición te permite quitarle vida libremente con ataques potenciados de Spinning Axe, ganando todos los trades directos porque su Second Skin tarda demasiado en activarse.
Impacto en la línea
Como puedes hacer trade sin miedo dentro de tu wave, Kai'Sa se ve obligada a ceder la prioridad. No puede acercarse a usar Supercharge de forma agresiva sin recibir grandes cantidades de daño. Conseguirás con facilidad una ventaja de vida, lo que te permite hacer push lento de las waves hacia su torre, negarle el farmeo y acumular con seguridad grandes cantidades de League of Draven para cobrar.
Cómo jugar
Al hacer trade, colócate siempre en medio de tu wave de minion activa. Si intenta hacer poke con Void Seeker, ponte detrás de un minion para bloquearlo. Cuando desperdicie sus misiles en la wave, activa de inmediato Blood Rush para aprovechar tu ventaja. Si intenta huir con Supercharge o reposicionarse con Killer Instinct, interrumpe su impulso con un Stand Aside bien cronometrado para asegurar el kill.

Ashe−2
Ashe no puede igualar tu daño bruto en escaramuzas breves. Tu Spinning Axe hace que tus ataques básicos sean mucho más letales que su Frost Shot, sobre todo antes de que cargue Ranger's Focus. Esta enorme ventaja de estadísticas significa que ganas cualquier duelo directo. Además, si intenta ganar distancia o canalizar Enchanted Crystal Arrow, puedes cancelar su impulso o interrumpir su animación de lanzamiento de inmediato con un Stand Aside bien apuntado.
Build de Ashe →
Ver detalles
Por qué
Ashe no puede igualar tu daño bruto en escaramuzas breves. Tu Spinning Axe hace que tus ataques básicos sean mucho más letales que su Frost Shot, sobre todo antes de que cargue Ranger's Focus. Esta enorme ventaja de estadísticas significa que ganas cualquier duelo directo. Además, si intenta ganar distancia o canalizar Enchanted Crystal Arrow, puedes cancelar su impulso o interrumpir su animación de lanzamiento de inmediato con un Stand Aside bien apuntado.
Impacto en la línea
Esta diferencia de poder obliga a Ashe a jugar a la defensiva, dependiendo de Volley para farmear desde lejos. Puedes controlar con facilidad las waves de minion, manteniéndola acorralada bajo su torre mientras acumulas grandes cantidades de League of Draven. Como no puede disputar tu push sin arriesgarse a un engage letal, dictas el ritmo de la lane, obligándola a gastar maná a la defensiva y privándola de oro temprano, lo que retrasa su escalado de golpe crítico.
Cómo jugar
Para aprovechar este matchup, mantén un límite estricto de espaciado justo fuera del alcance de su Volley. Cuando se acerque a asegurar un minion, activa Blood Rush para cerrar la distancia y golpea con Spinning Axe. No lances Stand Aside a ciegas; guárdalo específicamente para desbaratar su posición cuando intente hacer kite hacia atrás, o para cancelar la animación de su Enchanted Crystal Arrow. Si se retira demasiado, haz freeze de la wave para negarle experiencia.

Corki−2
Tienes una enorme ventaja porque Corki no puede escapar de tus trades agresivos. Su única herramienta defensiva, Valkyrie, es muy vulnerable a que tu Stand Aside la cancele en pleno aire. Sacarlo de su dash lo deja completamente indefenso, incapaz de huir mientras tus ataques de Spinning Axe derriten rápidamente su barra de vida. Simplemente carece de la durabilidad física temprana para sobrevivir a estos intercambios brutos e ininterrumpidos.
Build de Corki →
Ver detalles
Por qué
Tienes una enorme ventaja porque Corki no puede escapar de tus trades agresivos. Su única herramienta defensiva, Valkyrie, es muy vulnerable a que tu Stand Aside la cancele en pleno aire. Sacarlo de su dash lo deja completamente indefenso, incapaz de huir mientras tus ataques de Spinning Axe derriten rápidamente su barra de vida. Simplemente carece de la durabilidad física temprana para sobrevivir a estos intercambios brutos e ininterrumpidos.
Impacto en la línea
Esta amenaza ahoga por completo la capacidad de Corki de disputar las waves de minion. Puedes hacer freeze de la lane cerca de tu torre con facilidad, obligándolo a sobreextenderse para farmear. Si intenta hacer crashear la wave con Phosphorus Bomb, puedes perseguirlo con Blood Rush. Esta presión constante lo lleva a tiempos de recall pésimos, lo que te permite asegurar placas de torre tempranas y cobrar tus acumulados de Adoration.
Cómo jugar
Colócate de forma agresiva más allá de sus minion cuerpo a cuerpo, manteniéndolo fuera del rango de experiencia. Nunca lances Stand Aside al azar para hacer poke; guárdalo exclusivamente para reaccionar a la animación de su Valkyrie. Si consigue su paquete de Hextech Munitions, retrocede temporalmente para evitar el rastro ardiente de su dash potenciado. Si fallas tu desplazamiento, retírate de inmediato usando Blood Rush para reiniciar tu posición y espera a tus cooldowns antes de volver a hacer trade.

Vayne−2
El early game de Vayne es notoriamente débil, lo que la convierte en el objetivo perfecto para tu kit agresivo. Cada vez que se acerca a farmear, tu Spinning Axe le inflige un daño físico enorme e inevitable que ella no puede igualar. Mientras que ella depende de acertar tres ataques consecutivos para que Silver Bolts sea efectivo, tú solo necesitas uno o dos ataques potenciados para quitarle una buena parte de vida, neutralizando por completo su amenaza de escalado antes de que pueda comprar objetos.
Build de Vayne →
Ver detalles
Por qué
El early game de Vayne es notoriamente débil, lo que la convierte en el objetivo perfecto para tu kit agresivo. Cada vez que se acerca a farmear, tu Spinning Axe le inflige un daño físico enorme e inevitable que ella no puede igualar. Mientras que ella depende de acertar tres ataques consecutivos para que Silver Bolts sea efectivo, tú solo necesitas uno o dos ataques potenciados para quitarle una buena parte de vida, neutralizando por completo su amenaza de escalado antes de que pueda comprar objetos.
Impacto en la línea
Dictas la wave desde el primer minion. Al mantener la wave cerca del centro o hacer push lento, obligas a Vayne a entrar en el rango de tu Spinning Axe solo para asegurar last-hits. Se ve obligada a perder oro bajo su torre o a aceptar trades devastadores. Esta presión constante te permite cobrar con facilidad los acumulados de League of Draven, mientras retrasas indefinidamente el pico de poder de su Final Hour.
Cómo jugar
Para ejecutar esto a la perfección, nunca te coloques en paralelo a las paredes, donde Vayne puede aturdirte con Condemn. Activa Blood Rush con frecuencia para mantener una velocidad de movimiento alta, lo que te permite atrapar tus hachas mientras esquivas con facilidad sus pokes de corto alcance. Si intenta escapar o hacer engage con Tumble durante su Final Hour, lanza de inmediato Stand Aside para interrumpir su dash y ralentizarla, asegurando un kill limpio con doble hacha para cobrar tu pasiva.
Otros emparejamientos




Objetos contra Draven
Compra estos objetos para reducir la eficacia de este campeón en tus partidas.




| Emparejamiento | Veredicto | Ventaja | Tasa de victorias | Tasa de selección |
|---|---|---|---|---|
| Nilah | Contras Difíciles | +2 | — | — |
| Xayah | Desfavorables | +1 | 50.4% | 5.2% |
| Caitlyn | Desfavorables | +1 | 49.9% | 15.4% |
| Yunara | Desfavorables | +1 | 49.3% | 7.2% |
| Ziggs | Desfavorables | +1 | — | — |
| Varus | Matchups de Habilidad | ±0 | 50.9% | 6.2% |
| Miss Fortune | Matchups de Habilidad | ±0 | 48.9% | 12.4% |
| Lucian | Matchups de Habilidad | ±0 | 46.8% | 3.2% |
| Kai'Sa | Favorables | −1 | 50.5% | 16.1% |
| Zeri | Favorables | −1 | 50.4% | 1.3% |
| Kalista | Favorables | −1 | 50.1% | 7.2% |
| Ezreal | Favorables | −1 | 49.7% | 7.8% |
| Jhin | Favorables | −1 | 49.5% | 17.2% |
| Sivir | Favorables | −1 | 49.5% | 3.9% |
| Tristana | Favorables | −1 | 48.5% | 11.3% |
| Ashe | Favorables | −2 | 53.5% | 9.0% |
| Kog'Maw | Favorables | −2 | 53.4% | 2.6% |
| Samira | Favorables | −2 | 51.1% | 11.7% |
| Jinx | Favorables | −2 | 50.8% | 13.3% |
| Twitch | Favorables | −2 | 50.1% | 9.9% |
| Vayne | Favorables | −2 | 48.8% | 6.6% |
| Akshan | Favorables | −2 | — | — |
| Corki | Favorables | −2 | — | — |
| Senna | Favorables | −2 | — | — |
| Smolder | Favorables | −3 | 52.4% | 9.0% |
Ventaja: veredicto canónico de Wild Rift Core (−3 a +3), desde el punto de vista del campeón nombrado en la fila. Tasa de victorias y de selección: las del propio rival en este rol — Wild Rift CN · Challenger, Patch 7.3b. No es la tasa de victorias del enfrentamiento directo.