
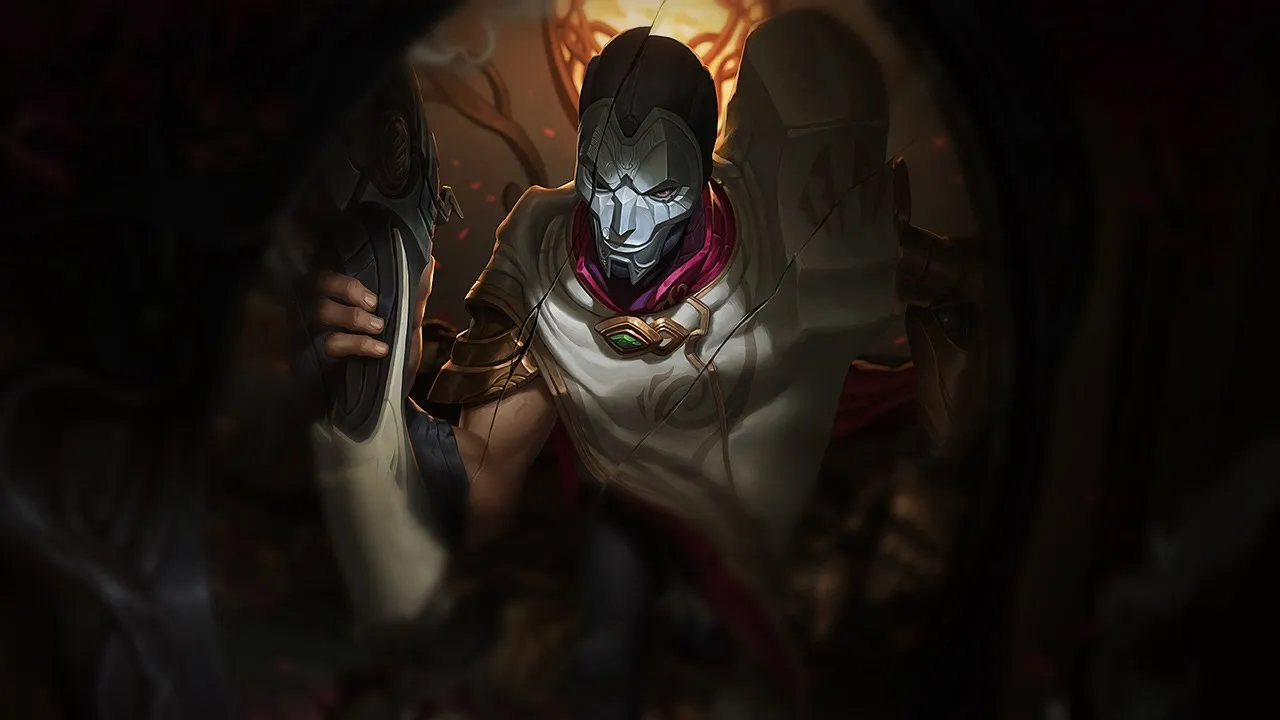
Jhin Wild Rift カウンターガイド
不利なマッチアップ
13これらのチャンピオンは、マッチアップ自体を絶望的にするわけではないが、対面で優位に立ちやすいツールを持っている。射程が長かったり、攻撃を受け止める力が高かったり、エンゲージへの対応手段が豊富だったりする。アプローチを調整し、戦闘を受け入れるタイミングを慎重に選ぶ必要がある。

Draven+1
Draven は Blood Rush で急激な機動力を得て、あなたの Deadly Flourish を簡単に回避できるため、この matchup を支配します。root がなければ、あなたは安全に離脱できません。Whisper のリロードモーションに入ると、Draven は Spinning Axe の優れた素の DPS でたやすくあなたを追い詰められ、長引く trade は致命的な追跡に変わります。
Dravenのビルド →
詳細を見る
理由
Draven は Blood Rush で急激な機動力を得て、あなたの Deadly Flourish を簡単に回避できるため、この matchup を支配します。root がなければ、あなたは安全に離脱できません。Whisper のリロードモーションに入ると、Draven は Spinning Axe の優れた素の DPS でたやすくあなたを追い詰められ、長引く trade は致命的な追跡に変わります。
レーン戦への影響
この状況では、あなたはタワー下で守備的にプレイして序盤の wave の主導権を譲らざるを得ません。last hit のために前に出るたびに、Draven は Spinning Axe をキャッチして Blood Rush を維持したまま all-in を狙ってきます。たった1度のミスで体力の半分を失うと、悪いタイミングでの recall を強いられ、Draven は League of Draven でゴールドを積み上げます。
立ち回り方
Draven が Blood Rush を使える間は、Deadly Flourish を反応で撃たないでください。代わりに、Draven が Spinning Axe をキャッチしに行くのを確認するまで温存します。落下位置のインジケーターが、Draven が歩かなければならない場所を正確に教えてくれるからです。caster minion の後ろに厳密に立ち、Dancing Grenade で安全な位置から farm します。Draven が速度の burst を発動したら、あらかじめ置いておいた Captive Audience のトラップの方へすぐに下がります。

Corki+1
Corki は Jhin の長距離でのキャッチ力を簡単に無効化するため、この matchup は非常に不利です。Deadly Flourish で拘束しようとしたり、Curtain Call で撃ち始めたりするたびに、Corki は Valkyrie ですぐに直線のスキルショットをダッシュで避けたり、ult の発射範囲から逃げたりできます。さらに、Hextech Munitions による混合ダメージは、あなたの短い trade のパターンよりも価値があります。
Corkiのビルド →
詳細を見る
理由
Corki は Jhin の長距離でのキャッチ力を簡単に無効化するため、この matchup は非常に不利です。Deadly Flourish で拘束しようとしたり、Curtain Call で撃ち始めたりするたびに、Corki は Valkyrie ですぐに直線のスキルショットをダッシュで避けたり、ult の発射範囲から逃げたりできます。さらに、Hextech Munitions による混合ダメージは、あなたの短い trade のパターンよりも価値があります。
レーン戦への影響
Corki は Phosphorus Bomb で遠くから安全に wave を処理できるため、あなたは守備的な姿勢を強いられます。Corki はあなたの Dancing Grenade の push に簡単に対抗し、Missile Barrage を習得すると、高い安全性のもとで絶えずあなたの体力を削ってきます。このレンジの優位のせいで、Whisper の4発目を当てるために前に出られず、序盤の priority を相手チームに譲ることになります。
立ち回り方
このレーンを生き延びるには、Corki の機動手段が使える間は Deadly Flourish で trade を始めないでください。代わりに、Dancing Grenade で minion を処理し、レーンのブッシュに Captive Audience のトラップを置いてサイドを固めます。Curtain Call のチャネリングに踏み切る前に、Corki に Valkyrie を守備的に使わせましょう。Corki が荷物を拾って Special Delivery を発射しようとしたら、危険が消えるまでタワー下で安全にプレイします。

Lucian+1
Lucian は Jhin の固定された攻撃リズムを突くことで、この matchup を支配します。Deadly Flourish で拘束しようとするたびに、Lucian は即座に反応して Relentless Pursuit で滑るように離れます。この防御用のダッシュですぐに反撃の位置を取り、Lightslinger の2連射であなたを撃ちます。その間、Whisper は4秒の遅いリロードモーションに入るため、あなたは完全に無防備になります。
Lucianのビルド →
詳細を見る
理由
Lucian は Jhin の固定された攻撃リズムを突くことで、この matchup を支配します。Deadly Flourish で拘束しようとするたびに、Lucian は即座に反応して Relentless Pursuit で滑るように離れます。この防御用のダッシュですぐに反撃の位置を取り、Lightslinger の2連射であなたを撃ちます。その間、Whisper は4秒の遅いリロードモーションに入るため、あなたは完全に無防備になります。
レーン戦への影響
この matchup では絶え間ないプレッシャーが生まれ、Lucian は minion を越えて前に出て、短くて爆発的な trade を強いてきます。ポジションを誤ると、Lucian の Piercing Light が wave 越しにあなたを poke し、あなたはタワー下で受け身に farm することになります。minion wave の状態をコントロールできなくなり、Captive Audience のトラップを安全に設置することもできません。priority を失うことで、あなたのジャングラーはマップの反対側を中心に動かざるを得なくなります。
立ち回り方
Lucian が minion を処理したり trade したりするために Relentless Pursuit をすでに使ってしまった場合を除いて、Deadly Flourish は撃たないでください。距離を保ち、体力の低い minion を使って Dancing Grenade をバウンスさせ、安全な位置から Lucian を poke することに集中します。Lucian が戦闘を始めようと積極的に前へダッシュしてきたら、すぐに後ろへ Captive Audience を落として、タワーの方へ下がります。Curtain Call は、サポートが先に強力な CC を当てたあとの、長距離での kill 確保のためだけに温存してください。

Akshan+1
Akshan の高い機動力は、Jhin の長距離のセットアップを完全に無効化します。Deadly Flourish で拘束しようとしたり、Curtain Call で撃ち始めたりするたびに、Akshan はすぐに Heroic Swing を発動して壁からスイングし、弾を完全に回避できます。あなたの CC を回避すると、Akshan はその勢いで距離を詰め、高い burst ダメージを叩き込みます。Jhin には逃げる手段がありません。
Akshanのビルド →
詳細を見る
理由
Akshan の高い機動力は、Jhin の長距離のセットアップを完全に無効化します。Deadly Flourish で拘束しようとしたり、Curtain Call で撃ち始めたりするたびに、Akshan はすぐに Heroic Swing を発動して壁からスイングし、弾を完全に回避できます。あなたの CC を回避すると、Akshan はその勢いで距離を詰め、高い burst ダメージを叩き込みます。Jhin には逃げる手段がありません。
レーン戦への影響
この状況では、あなたは自分のタワー下で非常に守備的な姿勢を取らざるを得ません。Akshan は Going Rogue で気づかれずに近づき、Heroic Swing で予測しにくい角度からエンゲージできるため、Dancing Grenade で wave を安全に push できません。river を越えて前に出ると、1回の悪い trade でダイブされたり、体力が少ない状態で下がろうとして Comeuppance で処刑されたりします。
立ち回り方
生き延びるには、Deadly Flourish を攻めの開始技ではなく、純粋な自衛の手段として温存する必要があります。Akshan がすでに Heroic Swing を使い、その軌道が確定している場合にだけ撃ってください。レーンの中央に厳密に立ち、壁から離れることで、Akshan のグラップルの角度を制限します。Akshan がダイブしてきたら、あらかじめ置いておいた Captive Audience のトラップに向かってスイングさせ、勢いを遅くして burst を妨害します。

Samira+1
この matchup は、Samira の Blade Whirl があなたの予測しやすい burst のタイミングにどう対抗するかで決まります。あなたの攻撃的なプレッシャーのすべては、Whisper の4発目のクリティカルショットか、Curtain Call の大きなダメージにかかっています。Blade Whirl はこれらの重要な弾を完全に消し去るため、Samira はあなたの trade を終わらせる手段を楽に無効化できます。あなたはリロードで動けなくなり、Samira の素早い Daredevil Impulse のスタックと、積極的な Wild Rush の追撃に対して脆くなります。
Samiraのビルド →
詳細を見る
理由
この matchup は、Samira の Blade Whirl があなたの予測しやすい burst のタイミングにどう対抗するかで決まります。あなたの攻撃的なプレッシャーのすべては、Whisper の4発目のクリティカルショットか、Curtain Call の大きなダメージにかかっています。Blade Whirl はこれらの重要な弾を完全に消し去るため、Samira はあなたの trade を終わらせる手段を楽に無効化できます。あなたはリロードで動けなくなり、Samira の素早い Daredevil Impulse のスタックと、積極的な Wild Rush の追撃に対して脆くなります。
レーン戦への影響
laning phase では、Whisper の4発目で嫌がらせをするために安全に前へ出ることはできません。Samira が Blade Whirl を温存している場合、あなたは守備的にプレイして、wave の主導権と priority を譲ることになります。Deadly Flourish の root を外すと、Samira は Wild Rush ですぐに距離を詰めて Inferno Trigger を発動できます。あなたはタワー下で farm するしかなくなり、ジャングラーの手助けもできなくなります。
立ち回り方
生き延びるには、Samira の cooldown を中心に辛抱強くプレイする必要があります。Blade Whirl が使える間は、Whisper の4発目を撃ったり Curtain Call を発動したりしないでください。代わりに、Dancing Grenade を使って Samira の防御のスピンを誘うか、wave を減らします。足元の近くに Captive Audience のトラップを置いて、Samira が Wild Rush でエンゲージしてきたときに減速させます。Deadly Flourish は、Daredevil Impulse のスタックを溜めさせないための守備にだけ使ってください。

Sivir+1
Sivir は Spell Shield で Jhin の主要な pick 手段である Deadly Flourish を完全に無効化できるため、この matchup で大きな優位に立ちます。Deadly Flourish ははっきり見える直線のインジケーターがあるため、Sivir は反応する時間が十分にあります。root を吸収して体力を回復し、Fleet of Foot で移動速度の burst も得ます。この相互作用によって、あなたの長距離のセットアップは役に立たなくなり、主要な playmaking 手段が Sivir にとっての無料のリソース生成源に変わってしまいます。
Sivirのビルド →
詳細を見る
理由
Sivir は Spell Shield で Jhin の主要な pick 手段である Deadly Flourish を完全に無効化できるため、この matchup で大きな優位に立ちます。Deadly Flourish ははっきり見える直線のインジケーターがあるため、Sivir は反応する時間が十分にあります。root を吸収して体力を回復し、Fleet of Foot で移動速度の burst も得ます。この相互作用によって、あなたの長距離のセットアップは役に立たなくなり、主要な playmaking 手段が Sivir にとっての無料のリソース生成源に変わってしまいます。
レーン戦への影響
レーンでは、Sivir は Ricochet と Boomerang Blade を使って絶えずあなたをタワー下へ押し込み、体力を削ってきます。普通なら、この積極的な push を素早い Deadly Flourish で罰して拘束するところですが、Sivir の防御シールドがそれを不可能にします。Dancing Grenade で Sivir の waveclear に対抗しようとすると息切れしてしまい、Sivir は On the Hunt の保護のもとで安全にスケーリングします。
立ち回り方
生き延びるには、価値の高いスキルを使う前に Spell Shield を誘って消費させる必要があります。Deadly Flourish で trade を始めないでください。代わりに、Sivir の進路に Captive Audience のトラップを置くか、Whisper の4発目を当てて、焦ってシールドを発動させます。Sivir の防御バリアが cooldown に入ったら、短い16秒の猶予ができ、そのあいだに Curtain Call を撃つか、サポートと連携して root を確保できます。Sivir がシールドを温存しているなら、Dancing Grenade で farm の確保に厳密に集中します。

Ezreal+1
Ezreal は Arcane Shift が信頼できる緊急用のボタンとなり、あなたの pick の可能性のすべてを回避できるため、明確な優位に立っています。Deadly Flourish で拘束しようとするたびに、Ezreal はすぐにブリンクして弾の軌道から外れます。この機動力のせいで、Curtain Call をチャネリングしているときも、Ezreal は非常に捕まえにくく、Whisper の4発目が命中する前にあなたの発射範囲から簡単に逃げられます。
Ezrealのビルド →
詳細を見る
理由
Ezreal は Arcane Shift が信頼できる緊急用のボタンとなり、あなたの pick の可能性のすべてを回避できるため、明確な優位に立っています。Deadly Flourish で拘束しようとするたびに、Ezreal はすぐにブリンクして弾の軌道から外れます。この機動力のせいで、Curtain Call をチャネリングしているときも、Ezreal は非常に捕まえにくく、Whisper の4発目が命中する前にあなたの発射範囲から簡単に逃げられます。
レーン戦への影響
この状況では、あなたの積極的な trade の可能性が封じられ、より遅くて守備的な laning phase を強いられます。Deadly Flourish を確実に当てられないため、突然の all-in の脅威を失います。Ezreal は距離を保ったまま Mystic Shot で自由に poke し、ゆっくりとあなたの体力を削ります。これにより priority が制限され、タワー下での farm に押し込まれ、river での小競り合いを助ける力も下がります。
立ち回り方
生き延びるには、Ezreal の cooldown を意識してプレイする必要があります。Deadly Flourish でエンゲージを始めず、Ezreal が Arcane Shift を攻撃的または防御的に使ったあとまで温存しましょう。死にかけの minion に Dancing Grenade をバウンスさせて、wave の後ろから安全に Ezreal を poke します。Curtain Call を始めるなら、サポートが Ezreal のブリンクを強制するまで待つか、Ezreal の機動手段が使えない間に、代わりにサポートを狙って有利な人数差を作ります。

Ashe+1
Ashe はあなたの機動力を活かしたプレイスタイルを完全に封じます。Whisper で得られる移動速度の burst は、Ashe の Frost Shot による絶え間ない減速で即座に打ち消され、あなたは非常に簡単に追い詰められます。さらに、Curtain Call を発動するとあなたは動けない的になり、Ashe の Enchanted Crystal Arrow の最高の標的になります。この矢は遠くからあなたをスタンさせ、ult を即座にキャンセルします。
Asheのビルド →
詳細を見る
理由
Ashe はあなたの機動力を活かしたプレイスタイルを完全に封じます。Whisper で得られる移動速度の burst は、Ashe の Frost Shot による絶え間ない減速で即座に打ち消され、あなたは非常に簡単に追い詰められます。さらに、Curtain Call を発動するとあなたは動けない的になり、Ashe の Enchanted Crystal Arrow の最高の標的になります。この矢は遠くからあなたをスタンさせ、ult を即座にキャンセルします。
レーン戦への影響
Ashe の Volley は基本攻撃のレンジを簡単に上回るため、priority を維持するのに常に苦労します。タワー下に押し込まれると、Ashe の優れたリーチにより、last hit を狙うあなたを容赦なく poke して削ってきます。その結果、Dancing Grenade を攻撃的なバウンスのためではなく、minion wave への守備的な処理に無駄使いすることになり、マップの bot 側のプレッシャーをすべて手放すことになります。
立ち回り方
レーンのブッシュで Captive Audience を使って Ashe の素早い push を減速させ、minion wave を自分のタワーの近くで freeze し続けます。Ashe の Enchanted Crystal Arrow が cooldown に入っていることを確認できるまで、Ashe の視界内で Curtain Call を発動しないでください。Ashe が Ranger's Focus を発動したら、すぐに下がって trade を断ち、攻撃速度のステロイドが切れてから初めて、Deadly Flourish で反撃を狙います。

Kalista+1
Kalista は Martial Poise による絶え間ないホップで、あなたの予告されたスキルショットを完全に無効化します。オートアタックのたびに、Kalista は楽にポジションを変えられるため、Captive Audience を発動させたとしても、Deadly Flourish で拘束するのはほぼ不可能です。Curtain Call を始めても、Kalista の高頻度のジャンプで最後の重要な弾を簡単に避けられ、ult は動けない罠のようになり、その間に Kalista は距離を詰めてきます。
Kalistaのビルド →
詳細を見る
理由
Kalista は Martial Poise による絶え間ないホップで、あなたの予告されたスキルショットを完全に無効化します。オートアタックのたびに、Kalista は楽にポジションを変えられるため、Captive Audience を発動させたとしても、Deadly Flourish で拘束するのはほぼ不可能です。Curtain Call を始めても、Kalista の高頻度のジャンプで最後の重要な弾を簡単に避けられ、ult は動けない罠のようになり、その間に Kalista は距離を詰めてきます。
レーン戦への影響
root を確実に当てられないため、Kalista は短い trade を支配します。Kalista は Pierce でスピアを積極的にスタックさせ、Whisper の4発目で反撃する前に Rend で引き抜けます。この機動力の差のせいで、あなたはタワー下で守備的にプレイし、minion wave の主導権を譲ることになります。Kalista のサポートが Fate's Call であなたを打ち上げたら、あなたには生き延びるための直接の脱出手段がなく、素早く処刑されます。
立ち回り方
生き延びるには、Deadly Flourish を、Kalista が Pierce のモーションに固定されているときか、Rend を使った直後にだけ使うよう厳密に温存し、Kalista の回避の可能性を抑えます。caster minion の奥深くに立ち、Dancing Grenade のバウンスを使って遠くから安全に farm します。Curtain Call を使わざるを得ない場合は、Kalista が発射前に弾の軌道を視覚的に予測できない、fog of war の奥深くからだけ撃ってください。

Tristana+1
Tristana は高速なエンゲージを強いることで、Jhin の慎重なリズムを完全に崩します。Jhin は Whisper の固定された攻撃速度に縛られているため、Tristana の Explosive Charge と Rapid Fire を組み合わせた素の burst に、正面からの決闘では太刀打ちできません。Tristana が Rocket Jump で距離を詰めると、Jhin が4発目のクリティカルショットを装填する前に、爆弾を完全にスタックさせて起爆できます。
Tristanaのビルド →
詳細を見る
理由
Tristana は高速なエンゲージを強いることで、Jhin の慎重なリズムを完全に崩します。Jhin は Whisper の固定された攻撃速度に縛られているため、Tristana の Explosive Charge と Rapid Fire を組み合わせた素の burst に、正面からの決闘では太刀打ちできません。Tristana が Rocket Jump で距離を詰めると、Jhin が4発目のクリティカルショットを装填する前に、爆弾を完全にスタックさせて起爆できます。
レーン戦への影響
この matchup では Jhin は守備に回ります。死にかけの minion に近づきすぎると、Draw a Bead のパッシブによるスプラッシュダメージを受けるからです。Tristana はタワーや前列の minion に Explosive Charge を使って、簡単に wave を push でき、Jhin が削られたらダイブも狙ってきます。あなたは常にタワー下に釘付けにされ、序盤の priority を失い、序盤の小競り合いでジャングラーに bot 側のサポートを提供できなくなります。
立ち回り方
生き延びるには、Rocket Jump のレンジのすぐ外側に立つという、厳格な安全距離を保つ必要があります。距離を保って Dancing Grenade での farm に集中してください。Deadly Flourish は無闇に使わず、Tristana が前へ跳んできたときに空中で root するため、または Tristana がエンゲージした後に peel するために、このスキルを温存します。それでも Tristana に跳び込まれたら、足元に Captive Audience のトラップを置いて減速させ、タワーの方へ下がります。
その他のマッチアップ



スキル次第のマッチアップ
6このマッチアップは何よりもまず実行力の勝負であり、両者ともに優位を取れる現実的な手段を持っている。重要なスキルを一つ避けられるか、エンゲージを正しく読めるか、あるいはたった一つの位置取りのミスが、勝敗を分けることもある。マッチアップを理解し、行動すべき瞬間を見極める力がとりわけ重要になる。

Yunara±0
このレーンは純粋な spacing の勝負で、Jhin の遅くて重い Whisper と、Yunara の Vow of the First Lands による継続的なハイブリッド DPS がぶつかります。Jhin は Dancing Grenade を使った短い trade を狙いますが、Yunara は移動速度が発動すると Cultivation of Spirit で簡単に Jhin を追い詰められます。全体の流れは Deadly Flourish にかかっています。Yunara が Kanmei's Steps を使える状態なら、root を簡単にすり抜けて trade をひっくり返します。
Yunaraのビルド →
詳細を見る
理由
このレーンは純粋な spacing の勝負で、Jhin の遅くて重い Whisper と、Yunara の Vow of the First Lands による継続的なハイブリッド DPS がぶつかります。Jhin は Dancing Grenade を使った短い trade を狙いますが、Yunara は移動速度が発動すると Cultivation of Spirit で簡単に Jhin を追い詰められます。全体の流れは Deadly Flourish にかかっています。Yunara が Kanmei's Steps を使える状態なら、root を簡単にすり抜けて trade をひっくり返します。
レーン戦への影響
snare を外すと、Yunara はバウンスする Cultivation of Spirit の攻撃ですぐに wave を押し込み、あなたは強いプレッシャーのもとでタワー下に閉じ込められます。序盤の体力 trade は非常に不安定です。root が成功すれば Whisper の4発目を安全に確保できますが、外すと Yunara は Arc of Judgment を発動して減速させ、体力を大きく削ってきます。早い recall を強いられ、dragon の priority を相手に渡すことになります。
立ち回り方
Deadly Flourish を先撃ちしないでください。代わりに、4発目を装填した状態で威圧するように前進し、Yunara に Kanmei's Steps を守備的に発動させて誘います。Yunara がこの移動速度ブーストを使って、それが切れたら、確実に攻められるチャンスです。Yunara が Transcend One's Self でエンゲージしてきたら、足元に直接 Captive Audience を置いて前進を減速させます。そして、Yunara のダッシュの cooldown を完全に使い切らせたあとで初めて、Curtain Call の爆発的なフィナーレを使います。

Caitlyn±0
この流れは、Jhin の Whisper のリロードタイマーと Caitlyn のレンジを中心に動きます。Caitlyn は、あなたがリロードモーションに固定されているときに、基本攻撃や Headshot で積極的に poke しようとします。しかし、その基本攻撃を当てるために前に出すぎると、特に Dancing Grenade や味方の攻撃で削られた直後なら、あなたの Deadly Flourish の格好の的になります。
Caitlynのビルド →
詳細を見る
理由
この流れは、Jhin の Whisper のリロードタイマーと Caitlyn のレンジを中心に動きます。Caitlyn は、あなたがリロードモーションに固定されているときに、基本攻撃や Headshot で積極的に poke しようとします。しかし、その基本攻撃を当てるために前に出すぎると、特に Dancing Grenade や味方の攻撃で削られた直後なら、あなたの Deadly Flourish の格好の的になります。
レーン戦への影響
Caitlyn は Piltover Peacemaker であなたをタワー下へ押し込み、Yordle Snap Trap を設置して動きを制限しようとします。この圧迫的な攻城を防ぐには、Caitlyn の push に合わせて対抗する必要があります。Dancing Grenade を minion の間でバウンスさせて wave を減らすことで、戦線をレーンの中央に保ち、自分のタワー下で farm しているときに Caitlyn が自由に poke するスペースを与えずに済みます。
立ち回り方
Whisper が最後の1発のときは、trade を確実に取れる場合を除いて、無闇に前へ出ないでください。Caitlyn がゾーンしようとしてきたら、Dancing Grenade のバウンスを使って安全な距離から farm します。Deadly Flourish は、Caitlyn が poke のために基本攻撃のモーションに自分を固定するまで、必ず温存してください。これが root して counter-burst を始める最高のタイミングです。

Varus±0
このレーンは純粋な長距離の撃ち合いで、あなたの機動力が Varus の最大の burst に直接対抗します。Varus は Piercing Arrow をチャージして、Blighted Quiver のスタックを起爆させようとします。しかし、Whisper のクリティカルで得られる移動速度は、この脅威を横に避けるための完璧な手段です。矢を避ければすぐに優位に立てますが、狙撃されれば体力 trade に完全に負けます。
Varusのビルド →
詳細を見る
理由
このレーンは純粋な長距離の撃ち合いで、あなたの機動力が Varus の最大の burst に直接対抗します。Varus は Piercing Arrow をチャージして、Blighted Quiver のスタックを起爆させようとします。しかし、Whisper のクリティカルで得られる移動速度は、この脅威を横に避けるための完璧な手段です。矢を避ければすぐに優位に立てますが、狙撃されれば体力 trade に完全に負けます。
レーン戦への影響
minion wave ごとに、ポジショニングの緊張した駆け引きになります。Varus が Hail of Arrows を当ててあなたを減速させると、Piercing Arrow が簡単に決まり、あなたは早めの recall を強いられます。逆に、Varus の狙撃を誘ってうまく避けられれば、すぐに Deadly Flourish で拘束し、Varus を相手のタワー下に押し込むチャンスが生まれ、Varus の waveclear を無効化できます。
立ち回り方
この決闘に勝つには、まず minion に Whisper の4発目を準備しておき、積極的に前へ出て Varus に Piercing Arrow をチャージさせて誘います。撃って速度ブーストを得た瞬間に、横にステップして射線を避け、チャネリング中で動けない Varus にすぐ Deadly Flourish を続けます。Varus に Chain of Corruption で拘束されたら、広がりを避けるためにすぐに下がってください。
その他のマッチアップ



有利なマッチアップ
6これらのチャンピオンは、こちらの主要な強みに効果的に対応するのが難しく、より自由に対面を組み立てることができる。プレッシャーをかけて有利な交換を引き出す手段は複数あることが多い。相手が態勢を立て直す時間を与えるのではなく、この優位を活かして主導権を握ろう。

Jinx−1
Jinx は自然なダッシュを持たないため、安全に farm するには Switcheroo! のロケットのレンジにすべてを頼っています。Jhin はこの機動力のなさを簡単に突けます。Jinx の狭い進路に Captive Audience を置けば、Jinx は減速ゾーンに踏み込まざるを得ません。これで Deadly Flourish が楽に決まり、Jinx をその場に root できます。続けて Whisper の重い4発目を撃ち込めば、Jinx が Get Excited! を発動して逃げる前に仕留められます。
Jinxのビルド →
詳細を見る
理由
Jinx は自然なダッシュを持たないため、安全に farm するには Switcheroo! のロケットのレンジにすべてを頼っています。Jhin はこの機動力のなさを簡単に突けます。Jinx の狭い進路に Captive Audience を置けば、Jinx は減速ゾーンに踏み込まざるを得ません。これで Deadly Flourish が楽に決まり、Jinx をその場に root できます。続けて Whisper の重い4発目を撃ち込めば、Jinx が Get Excited! を発動して逃げる前に仕留められます。
レーン戦への影響
最初の wave から、あなたは wave のテンポを握れます。死にかけの minion に Dancing Grenade をバウンスさせることで、Jinx の体力を削りながら、絶えず Jinx を相手のタワー下へ押し込めます。この継続的なプレッシャーで、Jinx はミニガンの攻撃速度をスタックさせる自由を奪われます。Jinx は処理のために Switcheroo! のロケットで mana を消耗せざるを得ず、早い recall につながり、あなたには大きな局所的なタワープレートのリードがもたらされます。
立ち回り方
レーンのブッシュに Captive Audience のトラップを維持して、Jinx をゾーンして追い出します。Jinx が Zap! を撃ったり Flame Chompers! を投げたりしてその場に固定されるまで、Deadly Flourish を温存してください。そうすれば Jinx は動けない的になります。root を外して Jinx が Super Mega Death Rocket! で反撃してきたら、すぐに射線を切って下がり、安全な距離から Curtain Call を準備して仕留めます。

Zeri−1
Zeri はあなたの burst に太刀打ちできないため、Jhin は序盤のレベルを完全に支配します。Zeri は Burst Fire のスキルショットを何発も当てて farm や poke をする必要がありますが、Jhin は体力の低い minion に Dancing Grenade を準備して、Zeri に大きなダメージをバウンスさせられます。このバウンスと Whisper の4発目を組み合わせることで、Zeri が持続ダメージを立ち上げる前に、trade の射程から追い出せます。
Zeriのビルド →
詳細を見る
理由
Zeri はあなたの burst に太刀打ちできないため、Jhin は序盤のレベルを完全に支配します。Zeri は Burst Fire のスキルショットを何発も当てて farm や poke をする必要がありますが、Jhin は体力の低い minion に Dancing Grenade を準備して、Zeri に大きなダメージをバウンスさせられます。このバウンスと Whisper の4発目を組み合わせることで、Zeri が持続ダメージを立ち上げる前に、trade の射程から追い出せます。
レーン戦への影響
この burst を常に脅威として見せ続けることで、最初の1分から wave のテンポを握れます。wave をゆっくり push でき、Zeri に自分のタワー下で Burst Fire を使わせることになり、Zeri は序盤の last hit に苦労します。このプレッシャーが、序盤のプレートのゴールド、river の深い視界の支配、余裕のある recall のタイミングにつながり、Zeri が中盤のパワースパイクで安全にスケーリングする機会を一切与えません。
立ち回り方
自分の minion wave の後ろに立って、Zeri の直線の Burst Fire を遮りつつ、バウンスを狙います。Whisper の4発目は装填したままにして、死にかけの minion から Zeri をゾーンして遠ざけます。Zeri が逃げようとしたり Spark Surge でエンゲージしようとしたりしたときに snare するために、Deadly Flourish を温存します。trade がうまくいかず、Zeri がパッシブのシールドをスタックさせてしまったら、すぐに下がって wave を reset し、次の4発目を待って優位を取り戻します。

Twitch−1
Twitch は序盤に意味のある waveclear を持たず、基本攻撃と Deadly Venom のゆっくりした準備だけに頼っています。体力の低い minion に Dancing Grenade をバウンスさせて Twitch を削りつつ、wave を相手のタワー下へ押し込むことで、この弱点を簡単に突けます。Twitch がタワー下で farm するしかなくなったら、caster minion の後ろに Captive Audience の地雷を置けば、動きを完全に封じて悪いポジションに追い込めます。
Twitchのビルド →
詳細を見る
理由
Twitch は序盤に意味のある waveclear を持たず、基本攻撃と Deadly Venom のゆっくりした準備だけに頼っています。体力の低い minion に Dancing Grenade をバウンスさせて Twitch を削りつつ、wave を相手のタワー下へ押し込むことで、この弱点を簡単に突けます。Twitch がタワー下で farm するしかなくなったら、caster minion の後ろに Captive Audience の地雷を置けば、動きを完全に封じて悪いポジションに追い込めます。
レーン戦への影響
wave を絶えず押し込むことで、Twitch が fog of war から安全に Ambush を使うことを防げます。Twitch は釘付けにされ、last hit を取るために体力を犠牲にします。その間、あなたの Dancing Grenade のバウンスが Twitch の体力を低く保ち、争うことすらできません。この大きなレーン priority が序盤の局所的なゴールドリードにつながり、ステルスからの反撃を恐れずに、プレートを確保して bot 側の river をコントロールできます。
立ち回り方
まず Dancing Grenade を積極的にバウンスさせて、レベル2の priority を確保します。Twitch が Ambush で側面から回り込んだり、aggro を外したりするのを防ぐため、レーンのブッシュの近くに少なくとも1チャージの Captive Audience を維持してください。Twitch が前に出て Contaminate のスタックを発動しようとしたときのために、Deadly Flourish を温存し、あなたの minion の中で拘束します。主導権を失って Twitch がステルスに入ったら、すぐにタワーの方へ下がり、姿を現すのを待ちます。

Xayah−1
Jhin は基本レンジが優れているため、Xayah の危険な範囲に入らずに Whisper で Xayah を削れるので、このレーンを支配します。Xayah は Featherstorm の untargetable を発動して Curtain Call を確実に無効化できますが、通常の状況では距離を詰めるのに苦労します。羽根を準備するために Clean Cuts と Double Daggers に頼っているため、あなたは簡単に spacing で上回り、Xayah の短いレンジを罰せます。
Xayahのビルド →
詳細を見る
理由
Jhin は基本レンジが優れているため、Xayah の危険な範囲に入らずに Whisper で Xayah を削れるので、このレーンを支配します。Xayah は Featherstorm の untargetable を発動して Curtain Call を確実に無効化できますが、通常の状況では距離を詰めるのに苦労します。羽根を準備するために Clean Cuts と Double Daggers に頼っているため、あなたは簡単に spacing で上回り、Xayah の短いレンジを罰せます。
レーン戦への影響
このレンジ差が wave の流れを決め、Dancing Grenade で押しながら Xayah を相手のタワー下に釘付けにできます。Xayah は minion を回収するために前に出なければならないので、Whisper の4発目を受けたり、Deadly Flourish で拘束されたりするリスクが常にあります。このプレッシャーで Xayah は Bladecaller を守備的に温存せざるを得ず、本格的なレーン priority を築けなくなります。
立ち回り方
この優位を活かすには、Clean Cuts と Double Daggers の直線の貫通を避けるために、自分の minion の真後ろには決して立たないでください。エンゲージするときは、混戦の中で Xayah が Featherstorm を守備的に使わざるを得なくなるまで Curtain Call を温存するか、ult の脅威を使って Xayah の untargetable を誘います。Xayah が Deadly Plumage で trade しようとしたら、すぐに下がり、そのバフが切れたら Deadly Flourish で振り返って反撃します。

Vayne−1
あなたの大きなレンジの優位がこの matchup を決めます。Vayne はレンジの短いハンターで、last hit のために前に出なければならず、Dancing Grenade のバウンスに対して非常に脆くなります。Vayne がプレッシャーの下で farm しようとすると、Whisper の4発目が Vayne には打ち返せない大きなダメージを与えます。Vayne の Tumble は短すぎて、大きなダメージを受けずに距離を詰めることはできません。
Vayneのビルド →
詳細を見る
理由
あなたの大きなレンジの優位がこの matchup を決めます。Vayne はレンジの短いハンターで、last hit のために前に出なければならず、Dancing Grenade のバウンスに対して非常に脆くなります。Vayne がプレッシャーの下で farm しようとすると、Whisper の4発目が Vayne には打ち返せない大きなダメージを与えます。Vayne の Tumble は短すぎて、大きなダメージを受けずに距離を詰めることはできません。
レーン戦への影響
この matchup は、あなたに wave の完全な支配をもたらします。Dancing Grenade で wave を絶えず Vayne のタワーへ押し込むことで、Vayne はタワー下での難しい last hit に集中せざるを得ません。このプレッシャーで、Vayne はあなたに Silver Bolts を発動させる自由を奪われます。あなたは序盤のタワープレートを簡単に確保でき、Vayne を閉じ込めたままにできるため、Night Hunter で追いかけられることもありません。
立ち回り方
死にかけの minion に Dancing Grenade を使って wave を積極的に push し、Vayne へのバウンスダメージを最大化します。Condemn で壁にぶつけられてスタンさせられる簡単な角度を与えないよう、レーンの中央付近に立ちます。Vayne が自分のタワー下で farm しようとしたら、Vayne が攻撃のために止まった瞬間に root するため、Deadly Flourish を準備しておきます。Vayne の体力が減って閉じ込められたら、少し下がって、安全に Curtain Call を撃ち込みます。
その他のマッチアップ

Jhin対策アイテム
これらのアイテムを購入すると、このチャンピオンの影響力を抑えられます。


| マッチアップ | 判定 | 有利度 | 勝率 | ピック率 |
|---|---|---|---|---|
| Ashe | 不利なマッチアップ | +1 | 52.9% | 9.7% |
| Kog'Maw | 不利なマッチアップ | +1 | 52.9% | 2.7% |
| Samira | 不利なマッチアップ | +1 | 51.0% | 11.8% |
| Ezreal | 不利なマッチアップ | +1 | 50.4% | 7.8% |
| Kalista | 不利なマッチアップ | +1 | 50.4% | 7.3% |
| Sivir | 不利なマッチアップ | +1 | 49.4% | 3.9% |
| Tristana | 不利なマッチアップ | +1 | 48.6% | 11.4% |
| Lucian | 不利なマッチアップ | +1 | 47.3% | 3.1% |
| Draven | 不利なマッチアップ | +1 | 47.2% | 5.4% |
| Akshan | 不利なマッチアップ | +1 | — | — |
| Corki | 不利なマッチアップ | +1 | — | — |
| Nilah | 不利なマッチアップ | +1 | — | — |
| Ziggs | 不利なマッチアップ | +1 | — | — |
| Varus | スキル次第のマッチアップ | ±0 | 51.1% | 6.2% |
| Kai'Sa | スキル次第のマッチアップ | ±0 | 50.1% | 16.3% |
| Caitlyn | スキル次第のマッチアップ | ±0 | 49.7% | 15.7% |
| Yunara | スキル次第のマッチアップ | ±0 | 49.5% | 6.5% |
| Miss Fortune | スキル次第のマッチアップ | ±0 | 48.8% | 12.8% |
| Senna | スキル次第のマッチアップ | ±0 | — | — |
| Smolder | 有利なマッチアップ | −1 | 52.6% | 9.1% |
| Xayah | 有利なマッチアップ | −1 | 50.9% | 5.2% |
| Jinx | 有利なマッチアップ | −1 | 50.4% | 13.3% |
| Twitch | 有利なマッチアップ | −1 | 49.9% | 9.9% |
| Zeri | 有利なマッチアップ | −1 | 49.0% | 1.2% |
| Vayne | 有利なマッチアップ | −1 | 48.7% | 6.5% |
有利度:Wild Rift Coreの公式判定(−3〜+3)で、各行に記載されたチャンピオンの視点から見た値です。勝率とピック率:このロールにおける相手チャンピオン自身の数値 — Wild Rift CN · Challenger、Patch 7.3c。直接対決の勝率ではありません。