S
2026年9月 · Patch 7.2d
Mage · SUPPORT · MID

Zyra Wild Rift カウンターガイド

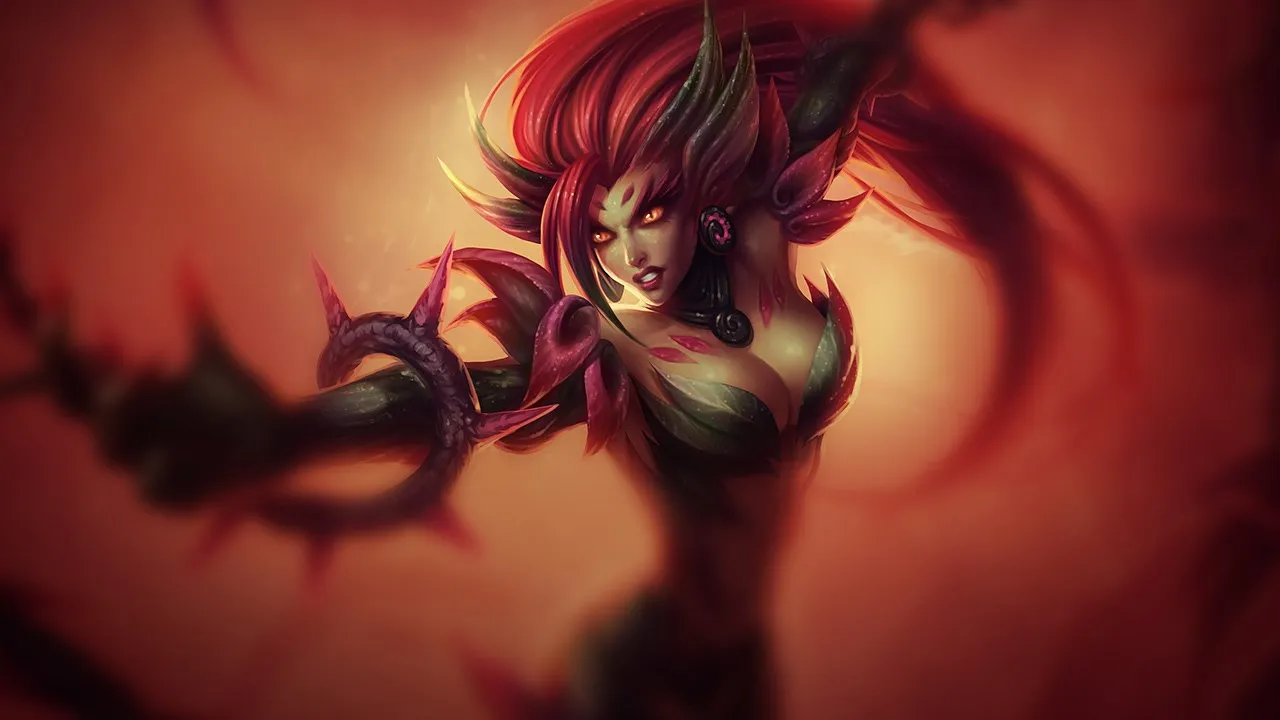
Zyraは、植物を配置する前に接近してくるアサシンダイブ構成に対して無防備です。モビリティがほぼ完全に欠如しているため、突然のエンゲージに対して非常に脆弱です。ゾーン範囲攻撃(AoE)効果は植物を素早く破壊し、影響力を制限します。

★ SUPPORT · MID Tier S
ダメージ
UTIL
TANK
DIFF
Win 51.4% #29 · ↓2pt
Pick 4.8% #19
Ban 38.6% #6

Zyra Wild Rift カウンターガイド ★ Counter Sheet

マッチアップ一覧
マッチアップ 判定 有利度 勝率 ピック率
Galio スキル次第のマッチアップ ±0 52.0% 2.8%
Zilean スキル次第のマッチアップ ±0 52.0% 1.3%
Soraka スキル次第のマッチアップ ±0 51.3% 5.8%
Norra スキル次第のマッチアップ ±0
Sona 有利なマッチアップ −1 52.8% 6.6%
Vel'Koz 有利なマッチアップ −1 51.8% 1.7%
Senna 有利なマッチアップ −1 51.5% 5.0%
Morgana 有利なマッチアップ −1 51.5% 6.3%
Karma 有利なマッチアップ −1 51.4% 6.8%
Brand 有利なマッチアップ −1 51.3% 2.5%
Rell 有利なマッチアップ −1 51.2% 3.3%
Maokai 有利なマッチアップ −1 51.1% 5.0%
Leona 有利なマッチアップ −1 51.0% 8.9%
Rakan 有利なマッチアップ −1 50.5% 3.1%
Pyke 有利なマッチアップ −1 50.4% 5.7%
Janna 有利なマッチアップ −1 50.4% 1.5%
Malphite 有利なマッチアップ −1 50.3% 7.6%
Seraphine 有利なマッチアップ −1 50.3% 6.5%
Bard 有利なマッチアップ −1 50.1% 1.2%
Thresh 有利なマッチアップ −1 50.1% 13.6%
Nami 有利なマッチアップ −1 49.7% 6.5%
Lux 有利なマッチアップ −1 49.7% 8.0%
Blitzcrank 有利なマッチアップ −1 49.4% 7.2%
Milio 有利なマッチアップ −1 49.3% 5.5%
Nautilus 有利なマッチアップ −1 48.9% 10.7%
Swain 有利なマッチアップ −1 48.2% 3.1%
Veigar 有利なマッチアップ −1 47.7% 2.9%
Braum 有利なマッチアップ −2 52.1% 4.1%
Ornn 有利なマッチアップ −2 50.7% 1.4%
Sett 有利なマッチアップ −2 50.3% 2.1%
Alistar 有利なマッチアップ −2 49.7% 4.4%
Lulu 有利なマッチアップ −2 48.5% 11.2%
Yuumi 有利なマッチアップ −2 46.9% 10.7%

Edge: Wild Rift Core canonical verdict (−3 to +3), shown from the point of view of the champion named in the row. Win rate and pick rate: the opponent's own rate in this role — Wild Rift CN · Challenger, Patch 7.2d. Not a head-to-head win rate.

スキル次第のマッチアップ

4

このマッチアップは何よりもまず実行力の勝負であり、両者ともに優位を取れる現実的な手段を持っている。重要なスキルを一つ避けられるか、エンゲージを正しく読めるか、あるいはたった一つの位置取りのミスが、勝敗を分けることもある。マッチアップを理解し、行動すべき瞬間を見極める力がとりわけ重要になる。

Zilean

Zilean±0

poke wardisengage This matchup is a delicate battle of area denial. Your burst potential with Stranglethorns is heavily countered by Zilean's Chronoshift, which can resurrect whoever you target. However, during the laning phase, Zilean is forced to burn Temporal Mirage to outrun your Grasping Roots. If he lacks that speed boost, he cannot escape your root or the subsequent plant damage, making his mobility his only defense before level five. Zileanのビルド → 詳細を見る
Zilean

理由

This matchup is a delicate battle of area denial. Your burst potential with Stranglethorns is heavily countered by Zilean's Chronoshift, which can resurrect whoever you target. However, during the laning phase, Zilean is forced to burn Temporal Mirage to outrun your Grasping Roots. If he lacks that speed boost, he cannot escape your root or the subsequent plant damage, making his mobility his only defense before level five.

レーン戦への影響

The lane shifts dramatically based on spell usage. When Zilean misses a double Time Bomb, you gain complete freedom to zone him with Garden of Thorns and Deadly Spines. However, if he successfully baits your Grasping Roots using his Temporal Mirage, his ADC can safely walk past your seeds. This constant tug-of-war over ground control dictates who gets to push the wave and chip down the enemy tower.

立ち回り方

Never commit your full Stranglethorns combo while Chronoshift is available. Instead, walk up to threaten Grasping Roots to force Zilean to use Temporal Mirage defensively. Once his speed boost is on cooldown, spawn plants with Rampant Growth and Q to poke him down. If he saves his ultimate for himself, quickly redirect your focus to his marksman with a sudden burst, or force him to cast his resurrection early on a low-health target.

チャンピオン詳細 → Zileanのビルド →
Galio

Galio±0

summon blockpoke This matchup is a pure test of reflexes and spacing between Zyra's ranged zoning and Galio's engage tools. The entire lane hinges on how you use Rampant Growth. Because Galio's Justice Punch stops immediately upon colliding with any enemy unit, a well-timed plant spawned directly in his path halts his dash mid-air. This completely neutralizes his attempt to close the gap and set up Shield of Durand. Galioのビルド → 詳細を見る
Galio

理由

This matchup is a pure test of reflexes and spacing between Zyra's ranged zoning and Galio's engage tools. The entire lane hinges on how you use Rampant Growth. Because Galio's Justice Punch stops immediately upon colliding with any enemy unit, a well-timed plant spawned directly in his path halts his dash mid-air. This completely neutralizes his attempt to close the gap and set up Shield of Durand.

レーン戦への影響

When you successfully block his dash, Galio is left stranded in the minion wave, taking heavy return damage from Deadly Spines and Grasping Roots. This allows you to safely thin or push the wave, forcing him to absorb poke while trying to farm. However, if you waste your seeds, he will immediately zone you off the wave with Winds of War and threaten a lethal flash-engage with Shield of Durand.

立ち回り方

To win this execution battle, never throw out Rampant Growth blindly for simple poke. Always keep at least one seed charge ready. Stand slightly behind your caster minions, forcing Galio to telegraph his Justice Punch path. The moment he winds up his dash, drop a seed and trigger it with Grasping Roots to slow him with a lasher, or Deadly Spines to shred his health. If he bypasses your plants with Flash, immediately counter-engage with Stranglethorns to peel.

チャンピオン詳細 → Galioのビルド →
Soraka

Soraka±0

sustain tempodisengage This lane is a constant battle between your plant-based poke and her healing. While your Garden of Thorns spawns can chip away at the enemy ADC, Soraka easily negates this damage using Astral Infusion. However, her sustain relies on her staying safe. If she steps too close to trade with Starcall and gets caught by your Grasping Roots, she lacks the defensive tools to survive your burst. Sorakaのビルド → 詳細を見る
Soraka

理由

This lane is a constant battle between your plant-based poke and her healing. While your Garden of Thorns spawns can chip away at the enemy ADC, Soraka easily negates this damage using Astral Infusion. However, her sustain relies on her staying safe. If she steps too close to trade with Starcall and gets caught by your Grasping Roots, she lacks the defensive tools to survive your burst.

レーン戦への影響

Because Astral Infusion neutralizes your passive plant damage, you cannot simply rely on passive attrition to force recalls. Instead, the lane becomes a high-stakes zone control game. If you fail to lock Soraka down, her ADC will comfortably maintain high health, giving them lane priority and better recall timings. However, forcing her to play defensively limits her ability to safely deploy Equinox to disrupt your ADC's farming.

立ち回り方

To win this, bypass the enemy marksman and focus your aggression on Soraka herself. Bait out her Starcall to prevent her from gaining passive healing stacks, then immediately look for a Grasping Roots capture when she moves forward. Never waste Stranglethorns on the enemy ADC while Soraka is healthy, as Wish will easily counter it. Hold your ultimate until you can lock Soraka down directly, forcing her to use her healing resources on herself.

チャンピオン詳細 → Sorakaのビルド →

その他のマッチアップ

有利なマッチアップ

29

これらのチャンピオンは、こちらの主要な強みに効果的に対応するのが難しく、より自由に対面を組み立てることができる。プレッシャーをかけて有利な交換を引き出す手段は複数あることが多い。相手が態勢を立て直す時間を与えるのではなく、この優位を活かして主導権を握ろう。

Janna

Janna−1

poke warzone controldodge focus Zyra naturally smothers Janna’s poking tools because Rampant Growth seeds, when bloomed by Deadly Spines or Grasping Roots, create physical blockers. These plants absorb Janna's single-target Zephyr and clutter her movement. Furthermore, whenever Janna attempts to step forward to apply Zephyr or shield her ADC with Eye of the Storm, her predictable pathing makes her highly vulnerable to being caught and locked down by Grasping Roots. Jannaのビルド → 詳細を見る
Janna

理由

Zyra naturally smothers Janna’s poking tools because Rampant Growth seeds, when bloomed by Deadly Spines or Grasping Roots, create physical blockers. These plants absorb Janna's single-target Zephyr and clutter her movement. Furthermore, whenever Janna attempts to step forward to apply Zephyr or shield her ADC with Eye of the Storm, her predictable pathing makes her highly vulnerable to being caught and locked down by Grasping Roots.

レーン戦への影響

This interaction shifts the lane pressure entirely to Zyra's side. Janna cannot easily trade back, forcing her to play defensively behind her minion wave. Your plants constantly chip away at Eye of the Storm shields, rendering her AD buffs useless. By rendering Janna's Zephyr ineffective against your plant barrier, you secure complete bush control and push her under tower, bleeding her mana as she tries to disengage with Howling Gale.

立ち回り方

To execute this, always position yourself just behind your Garden of Thorns spawns. Hold Grasping Roots specifically for the moment Janna steps past her caster minions to cast Zephyr. When she does, immediately spawn a plant with Rampant Growth in her direct path to absorb the slow, then fire your root to lock her down. If she counters with Howling Gale to interrupt you, back off, wait for your seeds to recharge, and restart the cycle.

チャンピオン詳細 → Jannaのビルド →
Karma

Karma−1

pokedisengage This matchup swings heavily in Zyra's favor because your plants sprouted via Rampant Growth act as active physical shields against Karma's primary poke. Whenever she charges forward to release Inner Flame, a well-timed plant block absorbs the projectile entirely. This single interaction neutralizes her main source of lane pressure and prevents her from easily reducing her Transcendent Embrace cooldown through passive hits. Karmaのビルド → 詳細を見る
Karma

理由

This matchup swings heavily in Zyra's favor because your plants sprouted via Rampant Growth act as active physical shields against Karma's primary poke. Whenever she charges forward to release Inner Flame, a well-timed plant block absorbs the projectile entirely. This single interaction neutralizes her main source of lane pressure and prevents her from easily reducing her Transcendent Embrace cooldown through passive hits.

レーン戦への影響

By rendering Karma's Inner Flame useless, you dictate the lane's physical space. She cannot contest your bush control, meaning she must waste Inspire to shield herself from your retaliatory damage. This allows your ADC to safely push waves, securing early tower plate pressure while Karma is forced to play far back, unable to secure the health advantage she needs to set up ganks with Focused Resolve.

立ち回り方

Always keep at least one charge of Rampant Growth ready to deploy reactively rather than blindly spamming seeds. Position yourself slightly forward to bait her Inner Flame, then instantly block it with a plant. If Karma attempts to close the distance to tether you with Focused Resolve, punish her straightforward pathing by landing Grasping Roots, spawning a slowing plant, and unleashing Deadly Spines to force a heavily favorable trade.

チャンピオン詳細 → Karmaのビルド →
Blitzcrank

Blitzcrank−1

block mechanicpoke avoidance This matchup is highly favorable for Zyra because Rocket Grab can be completely neutralized on reaction. By quickly placing a seed with Rampant Growth and immediately triggering it with Deadly Spines or Grasping Roots directly in the trajectory of the hook, you block the grab with a plant. This turns Blitzcrank's sole threat into a wasted cooldown, leaving him vulnerable to your ranged harass. Blitzcrankのビルド → 詳細を見る
Blitzcrank

理由

This matchup is highly favorable for Zyra because Rocket Grab can be completely neutralized on reaction. By quickly placing a seed with Rampant Growth and immediately triggering it with Deadly Spines or Grasping Roots directly in the trajectory of the hook, you block the grab with a plant. This turns Blitzcrank's sole threat into a wasted cooldown, leaving him vulnerable to your ranged harass.

レーン戦への影響

Because Blitzcrank cannot reliably land Rocket Grab through your plant wall, he loses all lane pressure. You can freely control the wave, keeping him shoved under his tower. This constant push allows you to poke him down with Deadly Spines while his Overdrive is wasted trying to find angles. He cannot easily trigger Mana Barrier without being safely behind his turret, bleeding health.

立ち回り方

Always keep at least one charge of Rampant Growth ready; never use both for random poke. Stand slightly behind your minion wave, but when you step into the open, keep your cursor ready to drop a seed directly in front of you the moment you see the Rocket Grab animation start. If he runs at you with Overdrive, use Grasping Roots to root him and spawn a slowing plant to completely shut down his engage.

チャンピオン詳細 → Blitzcrankのビルド →
Bard

Bard−1

pokeblock mechanic Zyra dictates this lane because her plants from Rampant Growth act as active shields against Bard's primary threat, Cosmic Binding. Since Bard relies on hitting an initial target to setup his stun, spawning a plant directly in his projectile's path completely neutralizes his crowd control. This reaction nullifies his engage potential, turning his signature tool into a wasted cooldown while your plants continue to spit at him. Bardのビルド → 詳細を見る
Bard

理由

Zyra dictates this lane because her plants from Rampant Growth act as active shields against Bard's primary threat, Cosmic Binding. Since Bard relies on hitting an initial target to setup his stun, spawning a plant directly in his projectile's path completely neutralizes his crowd control. This reaction nullifies his engage potential, turning his signature tool into a wasted cooldown while your plants continue to spit at him.

レーン戦への影響

With his stun neutralized, Bard cannot walk forward to trade with his Traveler's Call passive without taking massive damage from Deadly Spines. This denies him the lane presence needed to safely drop Caretaker's Shrine for his ADC. You easily establish constant lane priority, forcing Bard to abandon his partner to seek chimes elsewhere, leaving his ADC vulnerable to heavy dive pressure under tower.

立ち回り方

Always hold at least one charge of Rampant Growth specifically to react to Cosmic Binding. Position yourself near walls to bait his shot, then spawn a plant to intercept it. If Bard tries to escape or engage through a Magical Journey, immediately place Grasping Roots at the exit. Follow up with Stranglethorns to knock him up instantly as he emerges, ensuring a clean kill before he can use Tempered Fate.

チャンピオン詳細 → Bardのビルド →
Leona

Leona−1

zone controlplant block This matchup is highly favorable for Zyra because you possess the perfect tools to shut down Leona's aggressive forward movement. Whenever Leona attempts to close the distance using Zenith Blade, your Grasping Roots can root her mid-flight or immediately upon landing, preventing her from following up with Shield of Daybreak. Additionally, placing seeds via Rampant Growth to block her straight-line pathing utterly ruins her engage angles. Leonaのビルド → 詳細を見る
Leona

理由

This matchup is highly favorable for Zyra because you possess the perfect tools to shut down Leona's aggressive forward movement. Whenever Leona attempts to close the distance using Zenith Blade, your Grasping Roots can root her mid-flight or immediately upon landing, preventing her from following up with Shield of Daybreak. Additionally, placing seeds via Rampant Growth to block her straight-line pathing utterly ruins her engage angles.

レーン戦への影響

Because Leona cannot easily engage without taking massive damage, she is forced to play passively behind her minion wave. This allows you to constantly harass her and her carry with Deadly Spines, securing total bush dominance. You will easily dictate the minion wave's state, driving her under turret, chipping away at her health, and forcing early recalls that deny her team any priority for regional skirmishes.

立ち回り方

Never cast Grasping Roots aggressively unless Leona's Zenith Blade is on cooldown; holding this root is your absolute safety guarantee. Always position yourself slightly behind your spawned plants from Garden of Thorns to create a physical barrier. If she attempts to force a fight using Solar Flare, immediately counter-engage by dropping Stranglethorns right beneath her feet. This neutralizes her follow-up and turns her own engage attempt into a lethal trap for her team.

チャンピオン詳細 → Leonaのビルド →
Lux

Lux−1

minion blockspacing Zyra dominates this matchup because her Rampant Growth seeds can be grown instantly to intercept Lux's Light Binding. Because Light Binding only affects the first two targets it touches, spawning a plant directly in its path completely blocks the projectile. This simple reaction nullifies Lux's main crowd control, preventing her from setting up her high-damage Final Spark and leaving her vulnerable. Luxのビルド → 詳細を見る
Lux

理由

Zyra dominates this matchup because her Rampant Growth seeds can be grown instantly to intercept Lux's Light Binding. Because Light Binding only affects the first two targets it touches, spawning a plant directly in its path completely blocks the projectile. This simple reaction nullifies Lux's main crowd control, preventing her from setting up her high-damage Final Spark and leaving her vulnerable.

レーン戦への影響

This defensive interaction shifts the lane pressure entirely in your favor. Lux is forced to play extremely passively, unable to fish for aggressive bindings through the minion wave. You can freely push and poke with Deadly Spines and Grasping Roots. Consequently, Lux must repeatedly burn mana on Prismatic Barrier to survive the constant plant harass, losing priority and getting shoved under her own turret.

立ち回り方

Always hold at least one charge of Rampant Growth specifically to react to Lux's animations. Position yourself slightly outside your minion wave to tempt her into casting Light Binding directly at you. The moment she throws it, spawn a plant using Deadly Spines to block the bind, then immediately counter-attack with Grasping Roots. If she misses her root, she has no self-peel, making her an easy target for a full Stranglethorns engage.

チャンピオン詳細 → Luxのビルド →
Pyke

Pyke−1

hook blockingzone control This matchup leans heavily in Zyra's favor because she completely shuts down Pyke's primary hook threat. When Pyke charges Bone Skewer, Zyra can immediately react by placing a seed with Rampant Growth and blooming it with Deadly Spines or Grasping Roots directly in its path. The newly spawned plant absorbs the hook entirely, leaving Pyke vulnerable and stripped of his main engage tool. Pykeのビルド → 詳細を見る
Pyke

理由

This matchup leans heavily in Zyra's favor because she completely shuts down Pyke's primary hook threat. When Pyke charges Bone Skewer, Zyra can immediately react by placing a seed with Rampant Growth and blooming it with Deadly Spines or Grasping Roots directly in its path. The newly spawned plant absorbs the hook entirely, leaving Pyke vulnerable and stripped of his main engage tool.

レーン戦への影響

This interaction completely paralyzes Pyke's laning phase. Because his Bone Skewer is constantly blocked, he cannot secure early kills to trigger Death from Below. Zyra can safely establish dominant wave control, pushing the enemy duo under their turret. Pyke is forced to use Ghostwater Dive defensively or roam early, leaving his ADC exposed to relentless poke from your plants and Deadly Spines.

立ち回り方

To execute this flawlessly, never waste both charges of Rampant Growth while poking. Always keep at least one seed ready to block a potential hook. Stand slightly behind your caster minions, and when Pyke channels Bone Skewer, cast Rampant Growth directly between him and yourself, triggering it with Grasping Roots to root him in place while the plant blocks the projectile. If he tries to close the gap with Phantom Undertow, use Stranglethorns defensively to disengage and turn the fight.

チャンピオン詳細 → Pykeのビルド →
Swain

Swain−1

poke wardisengage Zyra dictates this matchup by completely neutralizing Swain's crowd control and zone threat. When Swain casts Nevermove, you can reactively block the returning claw by spawning a plant with Rampant Growth, preventing him from triggering Ravenous Flock. Furthermore, if he attempts to close the distance with Demonic Ascension, your Grasping Roots keeps him rooted far outside his draining radius, turning his ultimate into a wasted cooldown. Swainのビルド → 詳細を見る
Swain

理由

Zyra dictates this matchup by completely neutralizing Swain's crowd control and zone threat. When Swain casts Nevermove, you can reactively block the returning claw by spawning a plant with Rampant Growth, preventing him from triggering Ravenous Flock. Furthermore, if he attempts to close the distance with Demonic Ascension, your Grasping Roots keeps him rooted far outside his draining radius, turning his ultimate into a wasted cooldown.

レーン戦への影響

This interaction strips Swain of all lane pressure, as he cannot safely fish for roots to stack Ravenous Flock. Because his primary engage is constantly blocked, you can easily control the lane bushes and maintain high health. This allows you to constantly chip away at his health with Deadly Spines and push him under tower, forcing his AD carry to farm under constant harassment while denying Swain any roaming windows.

立ち回り方

To execute this plan, never waste all charges of Rampant Growth on simple poke. Keep one seed ready to drop behind you or in the trajectory of Nevermove as it starts to fly back toward Swain. If he activates Demonic Ascension, resist the urge to panic; instead, aim Grasping Roots directly at his path to freeze him in place, then follow up with Stranglethorns to burst him down before he can heal.

チャンピオン詳細 → Swainのビルド →
Nautilus

Nautilus−1

disengagezone control Zyra dominates this lane because she completely neutralizes Nautilus's primary engage tool. Whenever Nautilus attempts to fish for a catch with Dredge Line, Zyra can reactively drop a seed using Rampant Growth and trigger it with Deadly Spines or Grasping Roots. This spawns a plant directly in the path of the anchor, blocking the hook entirely and leaving Nautilus vulnerable, unable to reach you or your carry. Nautilusのビルド → 詳細を見る
Nautilus

理由

Zyra dominates this lane because she completely neutralizes Nautilus's primary engage tool. Whenever Nautilus attempts to fish for a catch with Dredge Line, Zyra can reactively drop a seed using Rampant Growth and trigger it with Deadly Spines or Grasping Roots. This spawns a plant directly in the path of the anchor, blocking the hook entirely and leaving Nautilus vulnerable, unable to reach you or your carry.

レーン戦への影響

This block mechanic completely shifts the lane pressure. Because Nautilus cannot safely throw Dredge Line through your plants, he is forced to play defensively behind his minions. You can constantly poke him down with Deadly Spines plants while keeping him low. This denies him the health pool needed to activate Titan's Wrath effectively, securing your duo free wave priority, early tower plating, and easy bush control.

立ち回り方

Position yourself slightly ahead of your AD carry to bait Nautilus into throwing his hook. Always hold at least one charge of Rampant Growth specifically to intercept Dredge Line. If he misses or his hook gets blocked, immediately punish his retreat with Grasping Roots to root him, then unleash Stranglethorns if he is low. Should you misstep and get hit, quickly drop Stranglethorns on yourself to knock him up during his Staggering Blow follow-up, disrupting his lockup chain.

チャンピオン詳細 → Nautilusのビルド →
Rell

Rell−1

disengagepoke harass Rell relies on her jump engage to start fights, but Zyra completely neutralizes this projection. By casting Grasping Roots directly into Rell's crash-down trajectory, you stop her momentum or root her immediately. Once Rell is dismounted, her self-inflicted movement speed penalty makes her a sitting duck. Spawning plants with Rampant Growth and Deadly Spines allows Zyra to relentlessly pelt the slowed tank without any risk of retaliation. Rellのビルド → 詳細を見る
Rell

理由

Rell relies on her jump engage to start fights, but Zyra completely neutralizes this projection. By casting Grasping Roots directly into Rell's crash-down trajectory, you stop her momentum or root her immediately. Once Rell is dismounted, her self-inflicted movement speed penalty makes her a sitting duck. Spawning plants with Rampant Growth and Deadly Spines allows Zyra to relentlessly pelt the slowed tank without any risk of retaliation.

レーン戦への影響

This interaction completely paralyzes Rell's lane presence, stripping away her ability to threaten engage. Because she cannot safely jump in without taking massive counter-poke, you can establish permanent bush control using Garden of Thorns. This secures dominant wave control, letting you constantly chip away at the enemy under tower. Rell's health bar will constantly dwindle from plant attacks, forcing early recalls and neutralizing her roaming potential.

立ち回り方

Never throw Grasping Roots proactively just to poke. Hold this ability specifically as a disengage tool for when Rell steps forward to jump. Stand slightly behind your minion wave, forcing her to telegraph her jump. The moment she commits, cast Grasping Roots on her landing spot, immediately dropping Rampant Growth seeds to block her retreat. If she manages to flash-engage, immediately drop Stranglethorns on top of yourself to knock her up and reset the spacing.

チャンピオン詳細 → Rellのビルド →
Malphite

Malphite−1

zone controlsquishy target Malphite relies entirely on his passive Granite Shield to absorb early harass and close the distance. However, Zyra completely neutralizes this defense. By spawning plants via Rampant Growth combined with Deadly Spines or Grasping Roots, you can constantly chip away at his shield from maximum range. These physical plant units also physically clutter his pathing, making it incredibly difficult for him to walk up and land Seismic Shard. Malphiteのビルド → 詳細を見る
Malphite

理由

Malphite relies entirely on his passive Granite Shield to absorb early harass and close the distance. However, Zyra completely neutralizes this defense. By spawning plants via Rampant Growth combined with Deadly Spines or Grasping Roots, you can constantly chip away at his shield from maximum range. These physical plant units also physically clutter his pathing, making it incredibly difficult for him to walk up and land Seismic Shard.

レーン戦への影響

This interaction completely strips Malphite of his lane presence before he can access Unstoppable Force. Because your plants keep him perpetually low on health and without his passive shield, he cannot contest the minion waves. You will secure permanent lane priority, pushing him under his turret. This constant pressure denies him any opportunity to roam or assist his jungler, forcing him to lose gold while bleeding HP under pressure.

立ち回り方

To maximize this advantage, place your Rampant Growth seeds defensively between you and Malphite, triggering them with Deadly Spines to create ranged spitters that chip him down. Always hold Grasping Roots as a disengage tool. If he attempts to run at you with Seismic Shard's speed boost, use the root to stop him in his tracks. Once he reaches level five, maintain a split positioning from your ADC to ensure he cannot hit both of you with Unstoppable Force.

チャンピオン詳細 → Malphiteのビルド →
Alistar

Alistar−2

poke lanedisengage Alistar's reliance on walking forward or telegraphing his Headbutt makes him incredibly vulnerable to Zyra's zone control. By casting Grasping Roots the moment he steps up, you halt his forward momentum before he can reach Pulverize range. When teamfights erupt, your Stranglethorns acts as the ultimate counter-engage, knocking his follow-up allies skyward and isolating Alistar even if he activates Unbreakable Will. Alistarのビルド → 詳細を見る
Alistar

理由

Alistar's reliance on walking forward or telegraphing his Headbutt makes him incredibly vulnerable to Zyra's zone control. By casting Grasping Roots the moment he steps up, you halt his forward momentum before he can reach Pulverize range. When teamfights erupt, your Stranglethorns acts as the ultimate counter-engage, knocking his follow-up allies skyward and isolating Alistar even if he activates Unbreakable Will.

レーン戦への影響

During the laning phase, Alistar's lack of ranged threat allows you to freely sprout spitfires using Deadly Spines and Rampant Growth. His passive Triumphant Roar cannot keep pace with this continuous magic damage. Consequently, the enemy duo is constantly pinned under their turret, bleeding health, which completely neutralizes Alistar's ability to flash-engage or roam to secure river objectives.

立ち回り方

Maintain a safe distance just outside Alistar's Headbutt range, using your spawned plants from Garden of Thorns as a physical buffer. Never throw Grasping Roots randomly; hold this spell specifically to react to his forward movement. If he manages to bypass your snare and activates Unbreakable Will, immediately redirect your Stranglethorns and plants toward his incoming follow-up damage dealers rather than wasting your high-damage cooldowns on his temporarily indestructible frame.

チャンピオン詳細 → Alistarのビルド →
Lulu

Lulu−2

zone controlpoke damage Zyra dominates this matchup because her Rampant Growth seeds can be blossomed into ranged attackers that completely outrange Lulu's Help, Pix! and Whimsy. More importantly, these spawned plants act as physical interceptors, absorbing the linear projectile of Glitterlance before it can reach you or your ADC. This neutralizes Lulu's primary poke tool while forcing her to take passive, non-reciprocated damage. Luluのビルド → 詳細を見る
Lulu

理由

Zyra dominates this matchup because her Rampant Growth seeds can be blossomed into ranged attackers that completely outrange Lulu's Help, Pix! and Whimsy. More importantly, these spawned plants act as physical interceptors, absorbing the linear projectile of Glitterlance before it can reach you or your ADC. This neutralizes Lulu's primary poke tool while forcing her to take passive, non-reciprocated damage.

レーン戦への影響

This interaction completely paralyzes Lulu’s laning phase, preventing her from stepping up to shield or buff her marksman. As your plants constantly whittle down her health, she is forced to deplete her mana pool on self-casting Help, Pix! rather than playing aggressively. You easily secure permanent bush control and constant tower pressure, forcing Lulu and her carry into awkward, delayed recall timings under their own turret.

立ち回り方

To execute this, always position yourself just behind your Rampant Growth plants to guarantee they intercept Glitterlance. Save Grasping Roots for the exact moment Lulu steps forward to attempt a Whimsy or Help, Pix! on you. If she uses Wild Growth to survive an engagement, immediately drop Stranglethorns to counter-engage and knock up her enlarged target, ensuring she cannot salvage the trade.

チャンピオン詳細 → Luluのビルド →
Yuumi

Yuumi−2

poke pressurezone control Yuumi relies heavily on detaching to trigger Bop 'n' Block for mana and shields, but doing so against you is suicidal. As long as you hold Grasping Roots, she is forced to remain attached via You and Me!. This permanent attachment means her host must bear the full brunt of your Deadly Spines and Rampant Growth seed spawns without any passive shielding, slowly draining her high-cost Zoomies pool. Yuumiのビルド → 詳細を見る
Yuumi

理由

Yuumi relies heavily on detaching to trigger Bop 'n' Block for mana and shields, but doing so against you is suicidal. As long as you hold Grasping Roots, she is forced to remain attached via You and Me!. This permanent attachment means her host must bear the full brunt of your Deadly Spines and Rampant Growth seed spawns without any passive shielding, slowly draining her high-cost Zoomies pool.

レーン戦への影響

Because Yuumi is locked inside her partner, your plants from Garden of Thorns can relentlessly spit at a single, slow target. This constant pressure pushes the wave naturally under their turret. The enemy duo is forced into terrible recall timings and constant health deficits, preventing Yuumi's host from safely farming. You easily secure early tower plates while denying them any roam opportunities.

立ち回り方

Never waste Grasping Roots blindly. Keep it active to threaten Yuumi the second she attempts to detach. Instead, zone her host using only Deadly Spines and Rampant Growth to sprout plants. If Yuumi gets greedy and detaches to auto-attack, immediately throw your Grasping Roots to catch her mid-animation, preventing her from re-attaching with You and Me! and securing an easy kill with Stranglethorns.

チャンピオン詳細 → Yuumiのビルド →
Braum

Braum−2

shield bypasspoke mitigation Zyra dominates this matchup because Braum's signature defensive tool, Unbreakable, is completely useless against her primary crowd control. Both Grasping Roots and Stranglethorns emerge directly from the ground as subterranean plants. Because they are not traditional flying projectiles, they bypass his protective wall entirely, allowing Zyra to root and knock up Braum or his carry even when he attempts to intercept her spells. Braumのビルド → 詳細を見る
Braum

理由

Zyra dominates this matchup because Braum's signature defensive tool, Unbreakable, is completely useless against her primary crowd control. Both Grasping Roots and Stranglethorns emerge directly from the ground as subterranean plants. Because they are not traditional flying projectiles, they bypass his protective wall entirely, allowing Zyra to root and knock up Braum or his carry even when he attempts to intercept her spells.

レーン戦への影響

Because Braum cannot block Zyra's crowd control, his lane partner remains constantly exposed to poke. Zyra can freely use Garden of Thorns and Rampant Growth to spawn plants that chip away at their health. Braum cannot safely use Stand Behind Me to protect his ally, as jumping to them only groups them together, making them perfect targets for a double Grasping Roots and massive health losses.

立ち回り方

Position yourself parallel to the minion wave to maintain a clear path for your roots. When Braum steps up to aim Winter's Bite, do not retreat; instead, cast Grasping Roots directly through his Unbreakable shield to lock him down, following up with Deadly Spines and Rampant Growth to sprout ranged plants. Save Stranglethorns for the exact moment he uses Stand Behind Me, ensuring you knock up both enemies simultaneously when they group.

チャンピオン詳細 → Braumのビルド →

その他のマッチアップ

Zyra対策アイテム

これらのアイテムを購入すると、このチャンピオンの影響力を抑えられます。

Stasis Enchant
Stasis Enchant
Rylai's Crystal Scepter
Liandry's Torment
Liandry's Torment
Morellonomicon
Morellonomicon
 / Crown
/ Crown

このチャンピオンへの対策

カウンターアングル

Zyraへのカウンターは、ダメージを避けるだけじゃない。本当の目的は、彼女が地形有利を取るのを阻止することだ。Zyraがゾーンに先に到着すると、種を設置して、ルートで脅し、チームをスロウや体力削り plantes を踏ませるように仕向けることができる。だから最も効果的なカウンターは、彼女のセットアップを崩すものだ:ロックダウンエンゲージ、ポジショニングを罰するフック、ルートを早めに使わせるプレッシャー、またはポークの価値を下げるサステイン。既存のデータはこのロジックを明確に示している:LeonaとBlitzcrankは、1回のポジショニングミスを即死に変えることができるため危険だ。一方、Nautilus、Pyke、Namiはそれぞれ異なる方法で彼女のテンポを崩していく。

パッチの文脈

Zyraは、相手がファイトの最初の本当のイベントを作り出した時に苦戦する。彼女がスペースをコントロールすれば、敵チームはゆっくり入り、プランツをクリアし、彼女のルートを警戒せざるを得なくなる。しかし、エンゲージのsupportが直接彼女に到達したり、フックでフラッシュを強制されたりすると、彼女のプランツは二の次になる。したがって、難しいマッチアップは、Zyraが見えてから接触が起こるまでの時間を短縮できるものだ。逆に、有利なマッチアップは、彼女のポークを即座に罰することなく歩いて通過しなければならないものが多い。

クイックリード

  • Zyraを倒す最善の方法は、準備なしでプレイさせることだ:速いエンゲージ、正確なフック、または視界プレッシャー。
  • プランツの中をゆっくり歩いてオブジェクトを争うのではなく、視界をクリアするか、ゾーンが確立される前に彼女を強制しろ。
  • 彼女のミスしたルートを罰することは極めて重要だ:それが利用できなくなると、Zyraはスペースを守る能力を大きく失う。

カウンターの原型

直接的なロックダウンエンゲージ

このプロファイルは、Zyraのポジショニングミスと罰の間隔を縮めるため機能する。Zyraはプランツ、ルート、アルティメットで敵の侵入を遅らせたいが、ロックダウンエンゲージは彼女に即座に対応を強制し、多くの場合、彼女の種が有効になる前にそうさせる。もし彼女がルートを早めに使うか、ポークのために前に出れば、機動力のない脆いターゲットになる。LeonaとNautilusは、彼女のクラウドコントロールはZyraが長時間晒される必要がないため、特にこれらのウィンドウを罰する:1回のクリーンなエンゲージで十分な場合がある。

チャンピオンの適応方法. Zyraは、防御的な種を維持し、ウェーブの後ろに位置し、彼女のプランツを横切らずにエンゲージを開始できるまっすぐな角度を避ける必要がある。彼女のアルティメットは、野心的なオープナーを探すのではなく、敵の侵入に対応するために使われるべきだ。

フックとインスタントピック

フックは異なる問題を生む:それらはしばしばZyraの遅いゾーン構築パターンをバイパスする。彼女がブラシや入り口をコントロールしていても、1回のミスステップでフラッシュを強制されたり、プランツがファイトを有利にする前にキルされたりする可能性がある。BlitzcrankとPykeは、Zyraに常に脅威ラインを意識させ、自由にポークする能力を制限する。また、ルートのために前に出る傾向も罰する。なぜなら、その瞬間が彼女を予測可能で一時的に動けなくさせるからだ。

チャンピオンの適応方法. Zyraはウェーブと共にプレイし、サイドブラシに種をまき、読みやすい位置からルートをキャストするのを避ける必要がある。フックに対しては、忍耐は追加のポーク1回よりも価値がある:生き残ることがゾーンをアクティブに保つ。

サステインとポーク拒否

このプロファイルは、必ずしもZyraを倒すことで彼女を倒すわけではないが、彼女のメインプランの価値を下げることで勝つ。もしZyraのポークが回復されたり吸収されたりすれば、彼女は単純なレーンプレッシャー以上のものを見つける必要がある:ルートを決め、オブジェクトを準備し、ポジショニングミスを強制しなければならない。Nami、Sona、またはYuumiは、短いトレードをそれほど決定的にしないようにできる。特にZyraが永続的なコントロールを得ずに種を消費した場合だ。これはマッチアップを精度へとシフトさせる:Zyraは、サステインと機動力がもはや十分でない瞬間を狙う必要がある。

チャンピオンの適応方法. Zyraは、小さなダメージだけを狙うのをやめるべきだ。ポークを使ってスペースを稼ぎ、そのスペースを視界、ルート、またはサステインがすべてを消せないオブジェクトコントロールに変換すべきだ。

優先度の高いマッチアップ

Leona

Leonaは、Zyraの限界を理解する上で最も重要なマッチアップの1つだ。もしZyraが防御的な種やウェーブなしでポークのために前に出れば、Leonaはレーンを即座のオールインに変えることができる。鍵は、ゲーム全体で受動的にプレイすることではなく、Leonaがターゲットに到達する前に準備されたゾーンを横切るように強制することだ。Zyraはブラシをコントロールし、ルートを回答として保持し、彼女のアルティメットがオープナーではなくアンチエンゲージツールであることが多いことを受け入れるべきだ。

Blitzcrank

Blitzcrankは、ゾーンコントロールとポジショニングの自由を混同するZyraプレイヤーを罰する。良いプランツがあっても、1回のフック成功ですべての準備を消し去ることができる。したがって、このマッチアップはラインを通してプレイされる:ウェーブの後ろに留まり、サイドブラシに種をまき、Blitzcrankがより速く対応できる角度からルートをキャストするのを避ける。Zyraはポーク戦争に勝つことができるが、すべての利用可能なフックを、回避するスペルとしてではなく、潜在的なデスコンディションとして扱う必要がある。

対面時のよくある間違い

対面時のよくある間違い

  • 視界をクリアしたり角度を変えたりするのではなく、Zyraが準備したゾーンにゆっくり入ること。
  • 理論上は良いタイミングだったはずのファイトを、すでに多くのプランツダメージを受けた後にエンゲージすること。
  • dragonまたはHeraldよりも先にZyraに無料で種を設置させることを許し、その後、ゾーンが中立であるかのように争うこと。
  • 彼女のミスしたルートを罰することに失敗すること:これはしばしば前に出るか、彼女のフラッシュを強制する最良のウィンドウだ。

  • Zyraの位置を見ずに植物に集中すると、彼女のルートやアルティメットが本当の罰を用意することがよくあります。

コーチングノート

  • Zyraに対しては、忍耐力よりもタイミングが重要です。待機しすぎると彼女はゾーンを準備し、角度なしで早すぎるフォースは彼女の罠に歩くことになります。
  • 前進する最良の合図は、彼女のルートが外れたか、種が使われた時であることが多いです。彼女が両方とも持っている限り、ゾーンを尊重することは必須です。

FAQ

レーンでZyraに勝つにはどうすればいいですか?

彼女のリズムでレーンをプレイすることを避けなければなりません。実質的な脅威なしにポーク範囲にとどまると、Zyraは自然に優先権を獲得します。正しい計画は、彼女のルートを追跡し、消費された種を罰し、彼女が自分のスペースを守るための十分なツールを持たなくなった時にフォースすることです。エンゲージやフックサポートは、特に彼女の植物の中をゆっくり歩くことを避けるべきです。彼らは、視界から、またはスペルミス後に、クリーンな角度を必要とします。

なぜLeonaとBlitzcrankはZyraに対して危険なのですか?

それらはZyraの反応時間を短縮するため危険です。Zyraは種を配置し、スペースをコントロールし、敵が入るタイミングを決定したいのです。LeonaとBlitzcrankは、即座の対応を強制するエンゲージやフックのプレッシャーでその計画を破ることができます。もしZyraがすでにルートを使用したか、ポークのために前に出た場合、彼女はしばしば間違いを修正する機動性を欠いています。

Zyraの植物に集中すべきですか?

はい、しかし戦闘の残りを見ないほど自動的にならないように。植物を倒すことは彼女のコントロールを減らし、特に目標の前でライライやリアンドリーの価値を制限します。しかし、Zyraがまだルートを持っているかアルティメットを使用している場合、彼女はあなたの植物への動きを利用してあなたをルートしたり、間違ったゾーンにあなたを強制したりすることができます。安全な時にそれらをクリアすべきであり、まっすぐ歩いてそれを実行すべきではありません。

Zyraに対して目標を争うにはどうすればいいですか?

最悪の方法は、遅れて到着し、メインのチョークを歩くことです。Zyraはまさにそのシナリオを望んでいます。集団化され、植物を横断させられる敵。争うためには、より早く視界をクリアし、サイドの角度を探すか、Zyraがセットアップを終える前にフォースする必要があります。彼女のゾーンに入る必要がある場合は、少なくともルートミスや早すぎるアルティメットの使用のようなミスを待ってください。