S
2026年9月 · Patch 7.2d
Support · SUPPORT · MID

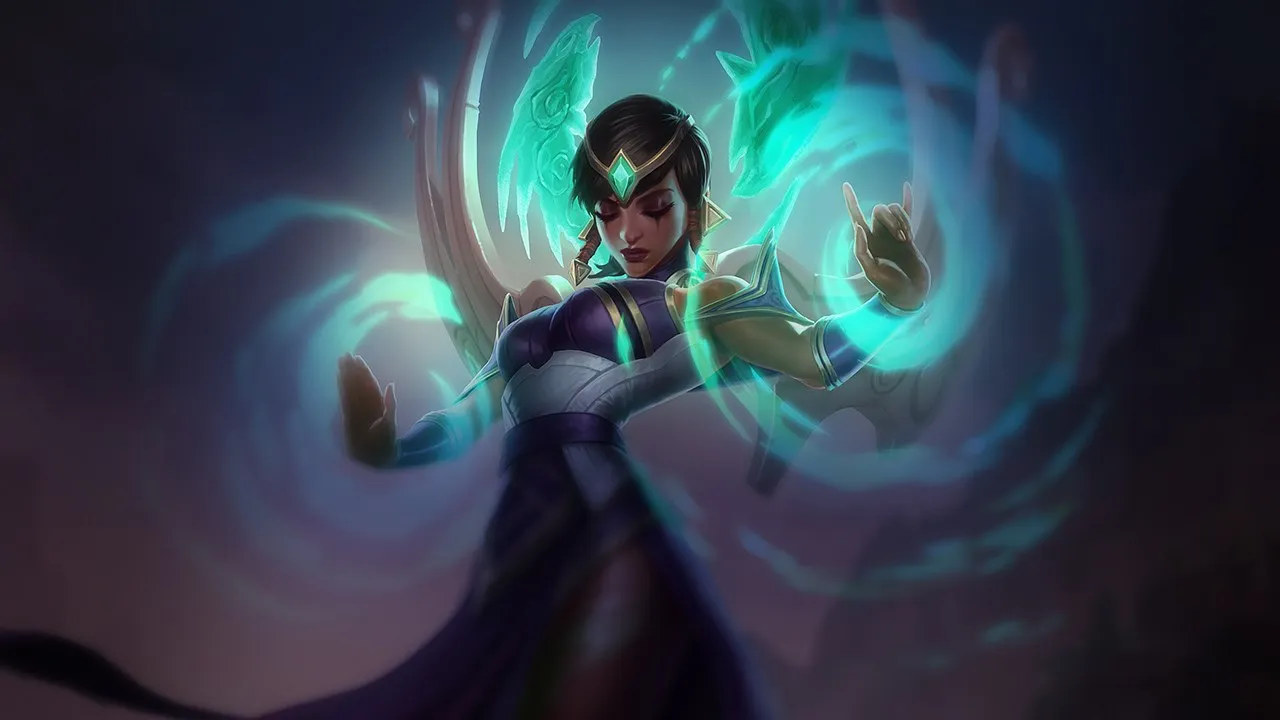
Karma Wild Rift カウンターガイド

Karmaは、pokeとシールドを通じてトレードのペースをコントロールすることに依存しています。素早く戦闘を開始できる構成や、突然のburstダメージを与える構成は、彼女の影響力を大幅に低下させます。距離を維持し、スキルサイクルを繰り返すスペースがなければ、彼女の影響力はすぐに衰退します。

★ SUPPORT · MID Tier S
ダメージ
UTIL
TANK
DIFF
Win 51.4% #28 · ↓5pt
Pick 6.8% #9
Ban 0.7% #93

Karma Wild Rift カウンターガイド ★ Counter Sheet

マッチアップ一覧
マッチアップ 判定 有利度 勝率 ピック率
Senna ハードカウンター +2 51.5% 5.0%
Pyke ハードカウンター +2 50.4% 5.7%
Sona 不利なマッチアップ +1 52.8% 6.6%
Zilean 不利なマッチアップ +1 52.0% 1.3%
Morgana 不利なマッチアップ +1 51.5% 6.3%
Zyra 不利なマッチアップ +1 51.4% 4.8%
Maokai 不利なマッチアップ +1 51.1% 5.0%
Leona 不利なマッチアップ +1 51.0% 8.9%
Nami 不利なマッチアップ +1 49.7% 6.5%
Braum スキル次第のマッチアップ ±0 52.1% 4.1%
Galio スキル次第のマッチアップ ±0 52.0% 2.8%
Vel'Koz スキル次第のマッチアップ ±0 51.8% 1.7%
Soraka スキル次第のマッチアップ ±0 51.3% 5.8%
Seraphine スキル次第のマッチアップ ±0 50.3% 6.5%
Thresh スキル次第のマッチアップ ±0 50.1% 13.6%
Lux スキル次第のマッチアップ ±0 49.7% 8.0%
Blitzcrank スキル次第のマッチアップ ±0 49.4% 7.2%
Milio スキル次第のマッチアップ ±0 49.3% 5.5%
Nautilus スキル次第のマッチアップ ±0 48.9% 10.7%
Norra スキル次第のマッチアップ ±0
Brand 有利なマッチアップ −1 51.3% 2.5%
Rell 有利なマッチアップ −1 51.2% 3.3%
Rakan 有利なマッチアップ −1 50.5% 3.1%
Janna 有利なマッチアップ −1 50.4% 1.5%
Malphite 有利なマッチアップ −1 50.3% 7.6%
Bard 有利なマッチアップ −1 50.1% 1.2%
Alistar 有利なマッチアップ −1 49.7% 4.4%
Lulu 有利なマッチアップ −1 48.5% 11.2%
Swain 有利なマッチアップ −1 48.2% 3.1%
Veigar 有利なマッチアップ −1 47.7% 2.9%
Ashe 有利なマッチアップ −1
Sett 有利なマッチアップ −2 50.3% 2.1%
Yuumi 有利なマッチアップ −2 46.9% 10.7%

Edge: Wild Rift Core canonical verdict (−3 to +3), shown from the point of view of the champion named in the row. Win rate and pick rate: the opponent's own rate in this role — Wild Rift CN · Challenger, Patch 7.2d. Not a head-to-head win rate.

ハードカウンター

2

これらのチャンピオンは、こちらのビルドやプレイスタイルを真正面から上回る構成を持ち、レーン戦のコントロールとファームを極めて難しくする。彼らのスキルはこちらの主要な強みを無効化し、いつも通りのプランを実行しようとした瞬間に手痛い反撃を受けさせてくる。こうしたマッチアップでは、ミスを最小限に抑え、正面からの対決以外で解決策を探すことが重要になる。

Pyke

Pyke+2

engageall in Pyke presents a lethal threat because his Bone Skewer can drag you out of safe range, immediately followed by Phantom Undertow to guarantee a prolonged stun. While Inspire offers temporary damage mitigation, it is entirely bypassed once your health drops into the execution threshold of Death from Below. Your natural squishiness makes you a prime target for his high-damage burst. Pykeのビルド → 詳細を見る
Pyke

理由

Pyke presents a lethal threat because his Bone Skewer can drag you out of safe range, immediately followed by Phantom Undertow to guarantee a prolonged stun. While Inspire offers temporary damage mitigation, it is entirely bypassed once your health drops into the execution threshold of Death from Below. Your natural squishiness makes you a prime target for his high-damage burst.

レーン戦への影響

This constant threat of execution forces you to play extremely defensively, surrendering lane priority from the first waves. You cannot safely step forward to poke with Inner Flame without risking a hook from the bushes. Consequently, your AD carry is pressured under tower, and Pyke can freely roam using Ghostwater Dive to terrorize your mid laner while you are stuck safely clearing.

立ち回り方

To survive, always position yourself behind your minion wave to block Bone Skewer, and never walk near unwarded bushes. You must hold Focused Resolve exclusively as a disengage tool; if Pyke dashes forward with Phantom Undertow, tether him immediately to root him before he can escape or execute. If he slips out of vision using Ghostwater Dive, ping your allies instantly and focus on pushing the wave rather than chasing him.

チャンピオン詳細 → Pykeのビルド →
Senna

Senna+2

scalingpoke Karma's traditional early pressure is neutralized because Senna's Piercing Darkness directly counters your Inner Flame poke by healing her ADC while simultaneously damaging you. As the lane progresses, Senna's Basic Attack passive allows her to collect souls, granting her permanent range and attack damage. This scaling gap means her poke quickly out-ranges your Focused Resolve tether range, leaving you unable to safely lock her down. Sennaのビルド → 詳細を見る
Senna

理由

Karma's traditional early pressure is neutralized because Senna's Piercing Darkness directly counters your Inner Flame poke by healing her ADC while simultaneously damaging you. As the lane progresses, Senna's Basic Attack passive allows her to collect souls, granting her permanent range and attack damage. This scaling gap means her poke quickly out-ranges your Focused Resolve tether range, leaving you unable to safely lock her down.

レーン戦への影響

You will constantly lose the war of attrition. Every trade you attempt with Inner Flame is erased by her sustain, while her superior range gradually pushes you under tower. This forces you into a defensive wave control style where you must use Inspire to protect your carry from her long-range harass under turret, sacrificing lane priority and preventing you from roaming to secure vision or assist your jungler.

立ち回り方

To survive, focus entirely on freezing the wave near your turret. Save your Mantra exclusively to empower Inspire for the area-of-effect shield, neutralizing her Dawning Shadow bursts and poke. Never fish for aggressive roots with Focused Resolve unless Senna misses her Last Embrace. If she freezes the lane or out-scales you too quickly, abandon attempts to poke and play purely as a defensive shield bot to keep your carry farming safely.

チャンピオン詳細 → Sennaのビルド →

不利なマッチアップ

7

これらのチャンピオンは、マッチアップ自体を絶望的にするわけではないが、対面で優位に立ちやすいツールを持っている。射程が長かったり、攻撃を受け止める力が高かったり、エンゲージへの対応手段が豊富だったりする。アプローチを調整し、戦闘を受け入れるタイミングを慎重に選ぶ必要がある。

Morgana

Morgana+1

disengagepeel Your offensive pressure relies on setting up kills with the root from Focused Resolve, but Morgana completely neutralizes this tool. The moment you link yourself to her or her carry, she can reactively cast Black Shield to absorb your magic damage and negate the crowd control entirely. This leaves you vulnerable to a counter-engage with Dark Binding while your primary crowd control is down. Morganaのビルド → 詳細を見る
Morgana

理由

Your offensive pressure relies on setting up kills with the root from Focused Resolve, but Morgana completely neutralizes this tool. The moment you link yourself to her or her carry, she can reactively cast Black Shield to absorb your magic damage and negate the crowd control entirely. This leaves you vulnerable to a counter-engage with Dark Binding while your primary crowd control is down.

レーン戦への影響

Because Focused Resolve is so easily countered, you cannot reliably initiate trades. If you step up to poke with Inner Flame, you risk getting caught by Dark Binding over the minion wave. This forces you into a defensive posture where you must rely on Inspire to absorb Tormented Shadow damage, gradually giving up wave control and lane priority to Morgana's superior zone denial.

立ち回り方

To survive, you must play around Black Shield's massive cooldown. Bait it out by throwing a Mantra-infused Inner Flame to threaten high damage, then hold your Focused Resolve until her shield is gone. Always stay behind your minions to block Dark Binding, and use the movement speed from Inspire to dodge her Soul Shackles when she tries to force an ultimate fight.

チャンピオン詳細 → Morganaのビルド →
Zyra

Zyra+1

pokedisengage This matchup hinges on how Zyra's foliage disrupts your poke. When you try to harass with Inner Flame, Zyra can reactively spawn plants using Rampant Growth combined with Deadly Spines or Grasping Roots. Because these plants have physical hitboxes, they intercept and absorb your projectile before it can reach Zyra or her marksman, completely neutralizing your primary tool for lane pressure and Mantra cooldown reduction. Zyraのビルド → 詳細を見る
Zyra

理由

This matchup hinges on how Zyra's foliage disrupts your poke. When you try to harass with Inner Flame, Zyra can reactively spawn plants using Rampant Growth combined with Deadly Spines or Grasping Roots. Because these plants have physical hitboxes, they intercept and absorb your projectile before it can reach Zyra or her marksman, completely neutralizing your primary tool for lane pressure and Mantra cooldown reduction.

レーン戦への影響

Without reliable poke from Inner Flame, you lose the ability to easily contest the minion wave or force Zyra backward. She will comfortably zone you and your carry under turret using Garden of Thorns. If you try to walk up to land Focused Resolve, you expose yourself to her Grasping Roots counter-engage, leaving you vulnerable to a full burst from Stranglethorns while her spitters chip away at your health bar.

立ち回り方

To survive, alter your angling. Instead of shooting Inner Flame directly through the minion wave where her plants sprout, angle your skillshot to clip the outer edges of the wave, or wait until her Rampant Growth seeds are on cooldown. Save Inspire specifically to shield your carry from the plants' auto-attacks rather than using it for trade speed. If caught by Grasping Roots, immediately activate Transcendent Embrace combined with Focused Resolve to self-heal and survive her ultimate burst.

チャンピオン詳細 → Zyraのビルド →
Nami

Nami+1

tradesustain Nami's trade efficiency makes her a tough opponent because Ebb and Flow acts as a double-edged sword, healing her ADC while damaging you. If you attempt to mitigate this with Inspire, you only block a portion of her bounce's value. Unless you consistently land Inner Flame to punish her approach, her raw sustain naturally outclasses your shielding, leaving you and your marksman slowly chipped down in short, repetitive skirmishes. Namiのビルド → 詳細を見る
Nami

理由

Nami's trade efficiency makes her a tough opponent because Ebb and Flow acts as a double-edged sword, healing her ADC while damaging you. If you attempt to mitigate this with Inspire, you only block a portion of her bounce's value. Unless you consistently land Inner Flame to punish her approach, her raw sustain naturally outclasses your shielding, leaving you and your marksman slowly chipped down in short, repetitive skirmishes.

レーン戦への影響

Because Nami can easily neutralise your poke with Ebb and Flow, you cannot mindlessly shove waves. Missing an Inner Flame gives Nami's carry the green light to play aggressively, empowered by Tidecaller's Blessing. This constant health disparity forces earlier recalls, stripping away your early-game tower pressure. If you get caught by Aqua Prison while trying to poke, a simple trade turns into a lethal engage, forcing a defensive Mantra usage.

立ち回り方

To survive, stand parallel to your carry but far enough apart that Ebb and Flow cannot bounce between you. Only cast Inner Flame when Nami steps forward to trade, ensuring she pays a heavy mana price for her healing. If she misses Aqua Prison, immediately lock her down with Focused Resolve to force her defensive Tidal Wave. Should you fall behind in health, save your Mantra strictly for Inspire to shield your entire duo from her incoming wave.

チャンピオン詳細 → Namiのビルド →
Sona

Sona+1

scalingpoke Your early-game pressure relies on landing Inner Flame powered by Mantra to chunk Sona down. However, as Sona ranks up Aria of Perseverance, her constant healing and shielding neutralize your poke damage. Once she unlocks Crescendo, her teamfight-deciding crowd control vastly outclasses the utility of your Inspire shields, shifting the game's momentum entirely in her favor as the match progresses. Sonaのビルド → 詳細を見る
Sona

理由

Your early-game pressure relies on landing Inner Flame powered by Mantra to chunk Sona down. However, as Sona ranks up Aria of Perseverance, her constant healing and shielding neutralize your poke damage. Once she unlocks Crescendo, her teamfight-deciding crowd control vastly outclasses the utility of your Inspire shields, shifting the game's momentum entirely in her favor as the match progresses.

レーン戦への影響

During the first few levels, you can easily dictate the wave's position and force Sona under tower with aggressive Inner Flame splash damage. But if you fail to secure a significant health lead before she gains access to Crescendo, the lane stagnates. Her endless recovery from Aria of Perseverance makes trades unprofitable, neutralizing your push and allowing her to scale safely without risking deadly recalls.

立ち回り方

Capitalize entirely on your early level advantages by weaving Mantra with Inner Flame whenever she steps up to trigger Power Chord. If she mispositions, lock her down with Focused Resolve. Once she unlocks Crescendo, you must alter your playstyle: stop chasing aggressive trades and instead hold Inspire to shield her Hymn of Valor poke. Avoid grouping tightly with your carry to prevent a double stun from her ultimate.

チャンピオン詳細 → Sonaのビルド →
Maokai

Maokai+1

engagepeel Maokai's point-and-click Twisted Advance completely bypasses Karma's poke advantage. While Inspire provides a shield and a movement speed boost, this extra speed is useless against an untargetable, targeted dash that guarantees a root. Once Maokai successfully closes the distance, he can easily disrupt Focused Resolve with Bramble Smash, ensuring you cannot turn the trade around or easily escape his lock-down. Maokaiのビルド → 詳細を見る
Maokai

理由

Maokai's point-and-click Twisted Advance completely bypasses Karma's poke advantage. While Inspire provides a shield and a movement speed boost, this extra speed is useless against an untargetable, targeted dash that guarantees a root. Once Maokai successfully closes the distance, he can easily disrupt Focused Resolve with Bramble Smash, ensuring you cannot turn the trade around or easily escape his lock-down.

レーン戦への影響

This interaction forces a highly defensive laning phase where you cannot aggressively fish for Inner Flame poke. Maokai uses Sapling Toss to secure brush control, preventing you from safely zoning him. If you step too far forward, a quick Twisted Advance leads to devastating trades that chunk your health bar, forcing early recalls and stripping away your ability to safely farm Mantra cooldown reductions.

立ち回り方

To survive, maintain a strict distance equal to the maximum range of Inner Flame. Never walk within range of Twisted Advance unless Maokai has already wasted it. If he does manage to jump on your carry, do not try to tether him with Focused Resolve immediately, as his Bramble Smash will interrupt you; instead, immediately cast a Mantra empowered Inspire to shield your ally from the incoming burst, then disengage.

チャンピオン詳細 → Maokaiのビルド →
Leona

Leona+1

engageall in Leona directly threatens your lane pressure because her Zenith Blade bypasses the spacing created by your Inner Flame. Once she connects with this gap-closer, she can immediately lock down your ally with Shield of Daybreak and trigger Sunlight. This sudden engage forces you to waste your Mantra on a defensive Inspire to save your carry, stripping away your ability to use Transcendent Embrace for poke. Leonaのビルド → 詳細を見る
Leona

理由

Leona directly threatens your lane pressure because her Zenith Blade bypasses the spacing created by your Inner Flame. Once she connects with this gap-closer, she can immediately lock down your ally with Shield of Daybreak and trigger Sunlight. This sudden engage forces you to waste your Mantra on a defensive Inspire to save your carry, stripping away your ability to use Transcendent Embrace for poke.

レーン戦への影響

Fearing Zenith Blade forces you to play parallel or behind your ADC, surrender wave control, and stop poking with Inner Flame. Leona easily secures bush dominance, using Eclipse to shrug off minor damage. You will find yourselves trapped under tower, struggling for cs while bleeding lane priority, which leaves you vulnerable to a coordinated dive once Leona unlocks Solar Flare.

立ち回り方

Position diagonally behind your minion wave to distort the angle of Zenith Blade. Never waste Focused Resolve to poke; hold it to root Leona if she attempts to walk up with Shield of Daybreak active. If she does land her sword on your ADC, immediately self-correct: abandon any offensive plans, instantly cast a Mantra-infused Inspire on your ally to absorb Sunlight damage, and use the haste to disengage safely.

チャンピオン詳細 → Leonaのビルド →

その他のマッチアップ

スキル次第のマッチアップ

11

このマッチアップは何よりもまず実行力の勝負であり、両者ともに優位を取れる現実的な手段を持っている。重要なスキルを一つ避けられるか、エンゲージを正しく読めるか、あるいはたった一つの位置取りのミスが、勝敗を分けることもある。マッチアップを理解し、行動すべき瞬間を見極める力がとりわけ重要になる。

Blitzcrank

Blitzcrank±0

poke avoidancemobility clash This matchup is a high-stakes reaction game. Blitzcrank relies entirely on landing Rocket Grab to pull you into a devastating Power Fist and Static Field burst. Your primary defense is the immediate movement speed from Inspire. If you react quickly, you can bait and side-step his hook easily. However, if you mismanage your shield's cooldown or get caught without its speed, you will be instantly deleted. Blitzcrankのビルド → 詳細を見る
Blitzcrank

理由

This matchup is a high-stakes reaction game. Blitzcrank relies entirely on landing Rocket Grab to pull you into a devastating Power Fist and Static Field burst. Your primary defense is the immediate movement speed from Inspire. If you react quickly, you can bait and side-step his hook easily. However, if you mismanage your shield's cooldown or get caught without its speed, you will be instantly deleted.

レーン戦への影響

The wave becomes your physical shield. You must constantly position behind minions to block Rocket Grab, while trying to poke Blitzcrank down with Inner Flame to disable his Mana Barrier before any fight. If Blitzcrank activates Overdrive to charge forward and bypass the wave, you are forced to retreat immediately, temporarily conceding lane pressure to avoid the knock-up from his Power Fist.

立ち回り方

Never cast Inspire defensively for minor poke; save its movement speed exclusively to dodge Rocket Grab or to outrun Blitzcrank when he activates Overdrive. When his hook is on its long cooldown, aggressively walk forward to tether him with Focused Resolve and spam Inner Flame. If you do get hooked, immediately self-cast Mantra empowered Focused Resolve for the burst heal to survive his Static Field burst.

チャンピオン詳細 → Blitzcrankのビルド →
Braum

Braum±0

poke mitigationshield war The balance of this lane hinges on how Braum deploys Unbreakable against your Transcendent Embrace. When you empower Inner Flame to poke his marksman, a quick reaction with his shield completely nullifies the projectile and prevents the explosive zone from detonating on his team. This interaction shifts the matchup from a free lane-bully scenario into a tactical battle of baiting his defensive wall. Braumのビルド → 詳細を見る
Braum

理由

The balance of this lane hinges on how Braum deploys Unbreakable against your Transcendent Embrace. When you empower Inner Flame to poke his marksman, a quick reaction with his shield completely nullifies the projectile and prevents the explosive zone from detonating on his team. This interaction shifts the matchup from a free lane-bully scenario into a tactical battle of baiting his defensive wall.

レーン戦への影響

If you waste your empowered Inner Flame into Unbreakable, you lose all lane pressure. Without your primary threat, Braum's ADC is safe to farm, while Braum can aggressively leap forward with Stand Behind Me to fish for a Winter's Bite. Missing your poke window enables them to stack Concussive Blows on you, turning your range advantage into a deadly, slow-induced engage.

立ち回り方

Stand off-center from the minion wave to create diagonal shooting lanes, forcing Braum to choose between blocking your Inner Flame or protecting his ADC from a different angle. Never cast your Transcendent Embrace combo while he has Unbreakable ready; instead, walk up to bait his shield using basic attacks. If he overcommits, use Inspire to absorb Winter's Bite and tether him with Focused Resolve to force his retreat without wasting your burst.

チャンピオン詳細 → Braumのビルド →
Galio

Galio±0

pokemobility This matchup revolves around Karma's ability to neutralize Galio's engage windows. While Galio seeks to lock down your carry with Justice Punch and Shield of Durand, the shield and burst of movement speed from your Inspire allow your ally to easily react. By boosting their speed, they can outrun the expanding taunt radius of Shield of Durand and effortlessly sidestep the slow-moving damage of Winds of War. Galioのビルド → 詳細を見る
Galio

理由

This matchup revolves around Karma's ability to neutralize Galio's engage windows. While Galio seeks to lock down your carry with Justice Punch and Shield of Durand, the shield and burst of movement speed from your Inspire allow your ally to easily react. By boosting their speed, they can outrun the expanding taunt radius of Shield of Durand and effortlessly sidestep the slow-moving damage of Winds of War.

レーン戦への影響

When you cycle Inspire correctly, Galio is forced to absorb heavy poke from Inner Flame whenever he tries to use Colossal Smash on the minion wave. However, if you misstime your shield, Galio can freely channel Shield of Durand to lock you down. This creates a high-stakes lane where a single missed engage or wasted defensive cooldown completely shifts the push and tower pressure.

立ち回り方

Never throw out Inspire blindly for simple trade shielding; always save it to react to the animation of Galio's Justice Punch. Stand diagonally to the minion wave to force him to choose between pushing with Winds of War or poking you. If he manages to flash-taunt with Shield of Durand, immediately activate Mantra paired with Focused Resolve to root him in place and heal back his initial burst damage.

チャンピオン詳細 → Galioのビルド →
Milio

Milio±0

enchanterpoke This matchup quickly stagnates into a war of attrition because Milio possesses the perfect tool to nullify your primary poke. Every time you launch an empowered Inner Flame via Mantra, Milio can instantly deploy Warm Hugs to shield his carry and absorb the burst. Because his defensive tools directly match your offensive rhythm, raw aggression often results in wasted mana, turning the lane into an even farming lane. Milioのビルド → 詳細を見る
Milio

理由

This matchup quickly stagnates into a war of attrition because Milio possesses the perfect tool to nullify your primary poke. Every time you launch an empowered Inner Flame via Mantra, Milio can instantly deploy Warm Hugs to shield his carry and absorb the burst. Because his defensive tools directly match your offensive rhythm, raw aggression often results in wasted mana, turning the lane into an even farming lane.

レーン戦への影響

This shield-versus-poke dynamic prevents you from securing early health advantages, forcing a neutral wave state. Since Cozy Campfire provides sustained healing and range, your trade attempts rarely stick. Neither duo can easily force a recall or dive, meaning the lane is decided by who manages their mana pool better and who capitalizes on the rare moments when defensive tools are down.

立ち回り方

To break this stalemate, you must bait out Warm Hugs before committing your Mantra. Walk up aggressively to threaten with basic attacks, forcing Milio to shield prematurely. Once his shields are on cooldown, immediately fire your Inner Flame. If he mispositions, lock him down with Focused Resolve, but be ready to disengage if he uses Ultra Mega Fire Kick to disrupt your tether. Save Inspire to protect your carry when Milio's allies trade back with his Fired Up! passive.

チャンピオン詳細 → Milioのビルド →
Thresh

Thresh±0

engagepeel This matchup is a pure test of reflexes and positioning around the hook range. Karma relies on the sudden burst of movement speed from Inspire to bait and sidestep Thresh's Death Sentence. However, if she miscalculates her movement or attempts to lock him down with Focused Resolve, Thresh can easily interrupt her tether link by using Flay to push her back and break the distance threshold. Threshのビルド → 詳細を見る
Thresh

理由

This matchup is a pure test of reflexes and positioning around the hook range. Karma relies on the sudden burst of movement speed from Inspire to bait and sidestep Thresh's Death Sentence. However, if she miscalculates her movement or attempts to lock him down with Focused Resolve, Thresh can easily interrupt her tether link by using Flay to push her back and break the distance threshold.

レーン戦への影響

Minion wave positioning dictates the pressure in this lane. Karma wants to constantly push and harass with Inner Flame, forcing Thresh under tower where his hook angles are limited. However, overextending makes her vulnerable to a quick Dark Passage lantern gank. A single successful Death Sentence completely shifts the health bar balance, forcing Karma to play defensively and concede lane priority.

立ち回り方

To win this lane, never cast Focused Resolve unless Thresh has already wasted Flay, or you have safely activated Mantra with Transcendent Embrace to secure the heal. Always hold Inspire to react to the wind-up animation of Death Sentence rather than using it randomly for poke shielding. If he misses his hook, immediately step past the minion wave to punish him with Inner Flame during his long cooldown window.

チャンピオン詳細 → Threshのビルド →
Nautilus

Nautilus±0

engagepeel This lane is a pure test of reflexes and spacing. Nautilus wants to lock you down, but your mobility is his worst enemy. The matchup revolves around whether you can reactively cast Inspire to sidestep his Dredge Line. If his anchor misses, Nautilus is highly vulnerable to your Inner Flame poke, but if he hooks you, his Staggering Blow and Titan's Wrath will completely overwhelm your fragile defense. Nautilusのビルド → 詳細を見る
Nautilus

理由

This lane is a pure test of reflexes and spacing. Nautilus wants to lock you down, but your mobility is his worst enemy. The matchup revolves around whether you can reactively cast Inspire to sidestep his Dredge Line. If his anchor misses, Nautilus is highly vulnerable to your Inner Flame poke, but if he hooks you, his Staggering Blow and Titan's Wrath will completely overwhelm your fragile defense.

レーン戦への影響

Nautilus will try to command the lane bush to threaten hooks, forcing your AD carry to play defensively. Missing a Dredge Line completely flips the lane pressure, allowing you to walk up and abuse your ranged advantage. If you get caught, however, the massive crowd control chain from his Riptide and Depth Charge will force early summoner spells, ruin your recall timings, and leave your tower exposed.

立ち回り方

Keep a minion wave between you and Nautilus to block his Dredge Line. Never use Inspire offensively unless his anchor is on cooldown; you need that movement speed burst ready to dodge his skillshots instantly. If he walks past the wave to threaten you, immediately fire Inner Flame to slow his advance, and if he manages to land Depth Charge on you, prepare Mantra combined with Focused Resolve to root him and heal yourself through his follow-up engage.

チャンピオン詳細 → Nautilusのビルド →
Soraka

Soraka±0

pokesustain This lane is a pure war of attrition where Soraka's Astral Infusion can nullify any poke you land on her ADC. However, her healing costs her own health. If you direct your Inner Flame directly at Soraka instead of her partner, you force her into a defensive loop. She cannot easily regenerate her health without landing Starcall, turning this matchup into a precise battle of spacing and skillshot accuracy. Sorakaのビルド → 詳細を見る
Soraka

理由

This lane is a pure war of attrition where Soraka's Astral Infusion can nullify any poke you land on her ADC. However, her healing costs her own health. If you direct your Inner Flame directly at Soraka instead of her partner, you force her into a defensive loop. She cannot easily regenerate her health without landing Starcall, turning this matchup into a precise battle of spacing and skillshot accuracy.

レーン戦への影響

Target selection dictates the entire wave state. If you waste Inner Flame on the enemy marksman, Soraka simply tops them up, gaining lane priority and pushing you under turret. Conversely, keeping Soraka low prevents her from trading health for her ally's safety. This limits her ability to walk up and drop Equinox to zone you, keeping the wave neutral and allowing you to contest early vision around the river.

立ち回り方

Position aggressively parallel to the minion wave to establish a clear angle for Inner Flame directly onto Soraka, ignoring her carry. Whenever she steps forward to attempt a Starcall heal, immediately activate Inspire to shield her counter-poke and mitigate her health regeneration. If you get caught by Equinox, do not panic-cast; wait out the silence, then tether her with Focused Resolve empowered by Mantra to root her and force her to blow Wish defensively.

チャンピオン詳細 → Sorakaのビルド →
Seraphine

Seraphine±0

poketeamfight This matchup is a direct contest between your early pressure and her defensive scaling. Karma relies on landing Inner Flame empowered by Mantra to chip down Seraphine's health before she can scale. However, Seraphine counters this poke with the shield and eventual healing of Surround Sound. If you get slowed by her abilities or minions, her Beat Drop will instantly root you, turning an aggressive trade into a disaster. Seraphineのビルド → 詳細を見る
Seraphine

理由

This matchup is a direct contest between your early pressure and her defensive scaling. Karma relies on landing Inner Flame empowered by Mantra to chip down Seraphine's health before she can scale. However, Seraphine counters this poke with the shield and eventual healing of Surround Sound. If you get slowed by her abilities or minions, her Beat Drop will instantly root you, turning an aggressive trade into a disaster.

レーン戦への影響

Wave control dictates who controls the lane's tempo. Using Inner Flame to secure the push prevents Seraphine from easily lining up High Note on both you and the wave. If you fail to maintain wave priority, she will shove you under turret, using Stage Presence notes to chip your tower. Conversely, overextending without a minion shield leaves you highly vulnerable to a long-range Encore engage.

立ち回り方

To win trades, save Inspire specifically to dodge her Beat Drop or to run out of the path of High Note. Never commit to an aggressive Focused Resolve tether unless you have verified that Seraphine's Beat Drop is on cooldown, otherwise she will easily root you in place and walk away. If she initiates with Encore, immediately activate Mantra combined with Inspire to shield your entire team and provide the crucial movement speed needed to escape her follow-up.

チャンピオン詳細 → Seraphineのビルド →
Lux

Lux±0

pokeburst This lane is a pure test of reflexes and positioning, defined by how you trade shields for damage. Lux attempts to wear you and your ADC down using Lucent Singularity. You can nullify this pressure instantly by shielding the target with Inspire. However, the balance instantly shatters if you step into the path of Light Binding; getting rooted guarantees Lux lands her full burst, turning an even poke battle into a lethal disaster. Luxのビルド → 詳細を見る
Lux

理由

This lane is a pure test of reflexes and positioning, defined by how you trade shields for damage. Lux attempts to wear you and your ADC down using Lucent Singularity. You can nullify this pressure instantly by shielding the target with Inspire. However, the balance instantly shatters if you step into the path of Light Binding; getting rooted guarantees Lux lands her full burst, turning an even poke battle into a lethal disaster.

レーン戦への影響

Because both of you possess high-range area-of-effect spells, the minion wave is constantly in flux. When you successfully block Lucent Singularity with Inspire, you maintain the health advantage needed to step up and pressure with Inner Flame. Conversely, if either you or your marksman gets caught by Light Binding, you lose all lane priority, forcing an early recall or giving up control of the bush.

立ち回り方

To survive this lane, never stand directly behind a single low-health minion, as Light Binding can pass through it to root you. Always position diagonally to Lux, forcing her to choose between aiming at you or the wave. Save Inspire specifically for when you see Lucent Singularity flying through the air. If you do get caught, immediately self-cast Mantra-empowered Focused Resolve to tether Lux, healing yourself to survive the incoming Final Spark burst.

チャンピオン詳細 → Luxのビルド →

その他のマッチアップ

有利なマッチアップ

13

これらのチャンピオンは、こちらの主要な強みに効果的に対応するのが難しく、より自由に対面を組み立てることができる。プレッシャーをかけて有利な交換を引き出す手段は複数あることが多い。相手が態勢を立て直す時間を与えるのではなく、この優位を活かして主導権を握ろう。

Bard

Bard−1

pokeshielding Karma dominates this matchup from level one because her Inner Flame outranges and outdamages Bard's basic poke. Bard is forced to expend his limited mana pool placing Caretaker's Shrine to keep himself and his ADC healthy, rather than using his mana to look for aggressive plays. Empowering your poke with Mantra early on completely neutralizes his lane presence before he can even collect enough chimes. Bardのビルド → 詳細を見る
Bard

理由

Karma dominates this matchup from level one because her Inner Flame outranges and outdamages Bard's basic poke. Bard is forced to expend his limited mana pool placing Caretaker's Shrine to keep himself and his ADC healthy, rather than using his mana to look for aggressive plays. Empowering your poke with Mantra early on completely neutralizes his lane presence before he can even collect enough chimes.

レーン戦への影響

By constantly landing Inner Flame on both the minion wave and Bard, you secure absolute wave control. This relentless push forces Bard to stay under his turret to help his carry farm, effectively trapping him. He cannot roam to collect chimes via Traveler's Call without sacrificing his turret's plating, which starves him of experience and denies him the opportunity to create plays with Magical Journey.

立ち回り方

Position yourself outside your own minion wave to deny Bard an easy angle for his Cosmic Binding stun. Keep the wave shoved, but save Focused Resolve for the exact moment Bard attempts to portal behind you using Magical Journey; rooting him immediately prevents any follow-up. If he tries to turn a fight with Tempered Fate, prepare your Mantra combined with Inspire to shield your entire team the millisecond the stasis ends, mitigating his primary engagement tool.

チャンピオン詳細 → Bardのビルド →
Alistar

Alistar−1

poke lanespacing Karma completely dictates the pace because Alistar has no ranged tools to answer her early pressure. By constantly landing Inner Flame when he tries to step up, you chunk his health before he can even find an angle. If he attempts to close the gap with Headbutt, a timely Inspire grants your marksman the burst of movement speed needed to effortlessly drift out of his initiation range, neutralizing his primary engage tool. Alistarのビルド → 詳細を見る
Alistar

理由

Karma completely dictates the pace because Alistar has no ranged tools to answer her early pressure. By constantly landing Inner Flame when he tries to step up, you chunk his health before he can even find an angle. If he attempts to close the gap with Headbutt, a timely Inspire grants your marksman the burst of movement speed needed to effortlessly drift out of his initiation range, neutralizing his primary engage tool.

レーン戦への影響

This interaction forces Alistar to play defensively from under his turret, rendering his passive Triumphant Roar insufficient against your persistent poke. You easily secure wave priority, allowing your duo to crash waves and chip away at tower plates. Since Alistar is kept too low to safely execute a Headbutt into Pulverize combo, your marksman can farm aggressively without fearing sudden flashes, forcing Alistar into disadvantageous recalls.

立ち回り方

Position yourself parallel to your marksman, just outside the range of Alistar's Headbutt. Never waste your Mantra on Focused Resolve unless he manages to dive in; instead, use it to empower Inner Flame for heavy splash damage when he hides behind minions. If he triggers Unbreakable Will to shrug off your slow, immediately cast Inspire on your ally and back off, waiting out his ultimate's duration before resuming your oppressive poke.

チャンピオン詳細 → Alistarのビルド →
Janna

Janna−1

poke warshield timinglane pressure Your laning dominance stems from a simple mathematical advantage in trading tools. Every time you cast Transcendent Embrace to empower Inner Flame, you unleash devastating area-of-effect damage. While Janna attempts to absorb this poke using Eye of the Storm, her shield's long cooldown cannot keep pace with your quick cooldown cycles. She is forced to bleed health or surrender ground once her defensive barrier is depleted. Jannaのビルド → 詳細を見る
Janna

理由

Your laning dominance stems from a simple mathematical advantage in trading tools. Every time you cast Transcendent Embrace to empower Inner Flame, you unleash devastating area-of-effect damage. While Janna attempts to absorb this poke using Eye of the Storm, her shield's long cooldown cannot keep pace with your quick cooldown cycles. She is forced to bleed health or surrender ground once her defensive barrier is depleted.

レーン戦への影響

This cooldown mismatch creates relentless pressure, pushing Janna and her partner deep under their turret. Because her Eye of the Storm cannot protect against every poke sequence, the opposing duo constantly sits at low health, neutralizing any offensive utility from Howling Gale. This constant threat secures you total control over the minion wave, allowing your ADC to farm freely while denying Janna the room to execute aggressive rotations.

立ち回り方

Force the issue by baiting out Eye of the Storm with a basic Inner Flame. The moment Janna burns her shield to protect herself or her ally, immediately activate Transcendent Embrace for an empowered Inner Flame blast on the unprotected target. If she attempts to disengage or interrupt you with Howling Gale, use Inspire to dodge the projectile's path, then immediately lock her down with Focused Resolve to secure a decisive, clean trade.

チャンピオン詳細 → Jannaのビルド →
Malphite

Malphite−1

pokeengage check Karma heavily punishes Malphite's melee nature during the first five levels. By constantly landing Inner Flame, you easily strip away his Granite Shield, preventing him from utilizing his passive tankiness. Because he has no gap closer early on, your range advantage is absolute. However, this dynamic shifts dramatically at level six, when his Unstoppable Force becomes a threat that you must mitigate with a perfectly timed Inspire. Malphiteのビルド → 詳細を見る
Malphite

理由

Karma heavily punishes Malphite's melee nature during the first five levels. By constantly landing Inner Flame, you easily strip away his Granite Shield, preventing him from utilizing his passive tankiness. Because he has no gap closer early on, your range advantage is absolute. However, this dynamic shifts dramatically at level six, when his Unstoppable Force becomes a threat that you must mitigate with a perfectly timed Inspire.

レーン戦への影響

This matchup grants you complete control over wave states and trade tempos early on. You can aggressively push Malphite under his turret, forcing him to absorb Inner Flame while trying to last-hit. This constant harassment denies him gold and keeps his health too low to coordinate ganks. Yet, the moment he reaches level six, the lane's pressure freezes; you can no longer step up blindly without risking a sudden, fatal engagement.

立ち回り方

Maximize your early advantage by throwing Inner Flame whenever Malphite approaches the wave, ensuring his Granite Shield never stays active. Use Mantra to empower your poke for maximum damage. Once he unlocks Unstoppable Force, alter your playstyle entirely. Keep your distance, never stand clumped with your carry, and hold Inspire. The instant you see him launch his ultimate, cast Inspire on his target to absorb the burst and enable a fast escape.

チャンピオン詳細 → Malphiteのビルド →
Rakan

Rakan−1

engage checkpeel Karma naturally dominates this matchup because her defensive toolkit completely neutralizes Rakan’s primary initiation tool. Whenever Rakan attempts to jump forward with Grand Entrance, Karma can instantly cast Inspire to grant her ally the necessary movement speed to sidestep the knock-up. This failed dive leaves Rakan highly vulnerable, allowing Karma to immediately tether him with Focused Resolve, locking him down before he can retreat with Battle Dance. Rakanのビルド → 詳細を見る
Rakan

理由

Karma naturally dominates this matchup because her defensive toolkit completely neutralizes Rakan’s primary initiation tool. Whenever Rakan attempts to jump forward with Grand Entrance, Karma can instantly cast Inspire to grant her ally the necessary movement speed to sidestep the knock-up. This failed dive leaves Rakan highly vulnerable, allowing Karma to immediately tether him with Focused Resolve, locking him down before he can retreat with Battle Dance.

レーン戦への影響

This dynamic forces Rakan to play passively, granting Karma absolute control over wave positioning. Because Rakan cannot safely engage, you can constantly harass him with Inner Flame to deplete his Fey Feathers shield and chip away at his health. Every time Rakan wastes his jump, you gain a massive fifteen-second window of total lane dominance to crash waves, secure deep vision, or deny gold under the enemy tower.

立ち回り方

Position yourself parallel to your marksman so you can shield them instantly when needed. Always hold Inspire specifically for Rakan's Grand Entrance; using it too early leaves your carry defenseless. If Rakan activates The Quickness to force an engage, immediately use a Mantra-empowered Inspire to shield and speed up your entire team, neutralizing his ultimate charm. If you get caught yourself, self-cast Focused Resolve to heal through Mantra and survive his burst.

チャンピオン詳細 → Rakanのビルド →
Lulu

Lulu−1

pokeenchanter This matchup hinges on your ability to dictate trades from afar. By combining Transcendent Embrace with Inner Flame, you create an explosive zone of damage that Lulu cannot easily match. This massive burst of poke forces her to use Help, Pix! exclusively as a shield to mitigate your damage, neutralizing her ability to use it offensively for poke or to empower her ADC's basic attacks. Luluのビルド → 詳細を見る
Lulu

理由

This matchup hinges on your ability to dictate trades from afar. By combining Transcendent Embrace with Inner Flame, you create an explosive zone of damage that Lulu cannot easily match. This massive burst of poke forces her to use Help, Pix! exclusively as a shield to mitigate your damage, neutralizing her ability to use it offensively for poke or to empower her ADC's basic attacks.

レーン戦への影響

Because Lulu is constantly forced onto the back foot, she loses the freedom to use Whimsy for aggressive chase downs. This pressure keeps her and her partner pinned under their turret, giving your duo total control over the lane's push. The constant health deficit you inflict with your splash damage prevents them from contesting bushes, leaving Lulu unable to safely land Glitterlance to slow you down.

立ち回り方

To execute this, always wait for Lulu to step forward to cast Glitterlance before launching your empowered Inner Flame. Once she wastes Help, Pix! to block your blast, you have a clear ten-second window where her defensive capabilities are down. If she attempts to close the gap with Whimsy, immediately use Inspire on yourself to kite backwards, maintaining your ranged advantage while preparing your Focused Resolve to root any overextended target.

チャンピオン詳細 → Luluのビルド →
Yuumi

Yuumi−2

pokelane bully Yuumi relies entirely on attaching to her partner with You and Me!, leaving them as a single, massive target. Because Yuumi cannot bodyblock incoming skillshots, your Inner Flame becomes unavoidable splash damage. By empowering this projectile with Mantra, you can consistently blast the host marksman behind their minion wave, easily out-damaging Yuumi's high-mana Zoomies healing over time. Yuumiのビルド → 詳細を見る
Yuumi

理由

Yuumi relies entirely on attaching to her partner with You and Me!, leaving them as a single, massive target. Because Yuumi cannot bodyblock incoming skillshots, your Inner Flame becomes unavoidable splash damage. By empowering this projectile with Mantra, you can consistently blast the host marksman behind their minion wave, easily out-damaging Yuumi's high-mana Zoomies healing over time.

レーン戦への影響

This constant blast radius denies the enemy any chance of freezing the lane. You will easily secure complete control over the minion waves, pushing them directly under the enemy turret. The hostile marksman is forced to choose between losing gold under tower or tanking heavy poke. This continuous pressure ruins their recall timings, drains their mana pool, and secures early turret plate gold.

立ち回り方

Stand near your caster minions to easily aim Inner Flame at the enemy ADC whenever they step up to last hit. Always hold Focused Resolve to lock down the host if Yuumi attempts to detach for her Bop 'n' Block shield, or to counter her Final Chapter engage. If you get caught by their slow, cast Inspire immediately on your carry to outrun the rooting waves and disengage safely.

チャンピオン詳細 → Yuumiのビルド →

その他のマッチアップ

Karma対策アイテム

これらのアイテムを購入すると、このチャンピオンの影響力を抑えられます。

Stasis Enchant
Stasis Enchant
Quicksilver Enchant
Quicksilver Enchant
Morellonomicon
Morellonomicon
Mikael's Blessing
Mikael's Blessing
Ardent Censer
Ardent Censer

このチャンピオンへの対策

カウンターアングル

Karmaは数字ではなく、立ち回りによって対策されます。テンポを崩してくるチャンピオン、つまり、素早いエンゲージ、瞬時のバーストダメージ、またはそれ以上の長距離ポークを持つチャンピオンに対して苦戦します。彼女は戦闘を長引かせ、トレードをコントロールしたいと考えていますが、カウンターチャンピオンは即時の判断を強います。これにより根本的な不均衡が生じます。Karmaが予測するのではなく、反応しなければならない場合、彼女は自身のインパクトの多くを失います。彼女のカウンターを理解することは、彼女がもはやペースをコントロールできなくなるタイミングを理解することです。

パッチの文脈

Karmaがカウンターチャンピオンに対して抱える主な問題は、ハードCC(行動妨害)が不足していることです。彼女は生存のためにポジショニングとシールドに依存していますが、ターゲットを即座に捕らえることができるチャンピオンに対しては、それが不十分になります。さらに、彼女のポークは、サステイン(継続回復)で彼女を上回るか、プレッシャーを無視して直接エンゲージしてくるサポートに対しては効果がなくなります。最後に、彼女のマントラは予測可能になります。一度使用されると、明確な脆弱性のウィンドウが生まれます。

クイックリード

  • 素早く直接的なエンゲージに苦戦します。

  • 長距離ポークサポートは彼女の影響力を無力化できます。
  • マントラがない時間帯は利用されやすいです。

カウンターの原型

爆発的なエンゲージ

これらのチャンピオンは、Karmaの最大の弱点である即時対応の欠如を直接的に罰します。捕まってしまうと、効果的に離脱したり、シールドで補ったりすることができません。彼女の予測ベースのゲームプレイは、素早く予測不可能なエンゲージに対しては無意味になります。さらに、彼女のマントラEは、影響を受ける前に完全に適用される時間がしばしばありません。

チャンピオンの適応方法. より後方に位置取りし、マントラは離脱のために温存し、レーンでの不必要なリスクを避けてください。

それ以上のポーク

これらのチャンピオンは、Karma自身の領域で彼女に匹敵するか、それを上回ることができます。彼らのレンジ(射程)やサステインにより、彼女のポークを無力化し、時間をかけてトレードで勝利することができます。Karmaは彼女の主な利点であるレーンテンポのコントロールを失います。彼女は指示するのではなく、反応することになります。

チャンピオンの適応方法. 個々のポークよりも、シールドとチームテンポを優先してください。

優先度の高いマッチアップ

Leona

Leonaとの対戦は、Karmaの限界を完璧に示しています。一度エンゲージされると、効果的に対応できません。LeonaはKarmaに絶え間ない反応を強います。鍵は、レーンを支配しようとするのではなく、すべての動きを予測することです。

対面時のよくある間違い

対面時のよくある間違い

  • マントラ切れの時間帯を過小評価すること。
  • エンゲージに対して攻撃的にプレイしすぎること。
  • 生き残る代わりにポークしようとすること。
  • 視界コントロールの悪さ。
  • 敵のクールダウンを無視すること。

コーチングノート

  • カウンターチャンピオンに対して、Karmaは防御的にプレイし、ミスを待つ必要があります。
  • あなたの目標はレーンに勝つことではなく、失わないことです。

FAQ

なぜKarmaはLeonaに苦戦するのですか?

Leonaは直接的かつ即座のエンゲージを強制し、Karmaのプレイスタイルを完全に無力化します。Karmaは予測とテンポコントロールに依存しますが、Leonaは即時の判断を強います。捕まった場合、Karmaは効果的に再配置したりシールドを張ったりできないため、すべてのミスが非常に致命的になります。 Karma Karma Karma Leona Leona