A
2026年9月 · Patch 7.2d
Tank · TOP · JUNGLE

Sett Wild Rift カウンターガイド

Settは、ターゲットに到達するのを阻む、絶え間ないkiteを持つ構成に対して脆弱です。射程の長いpokeチャンピオンは、戦闘前に彼のパッシブによる自動回復を削り取ります。高magic damage構成は、彼の物理防御スタックをバイパスします。

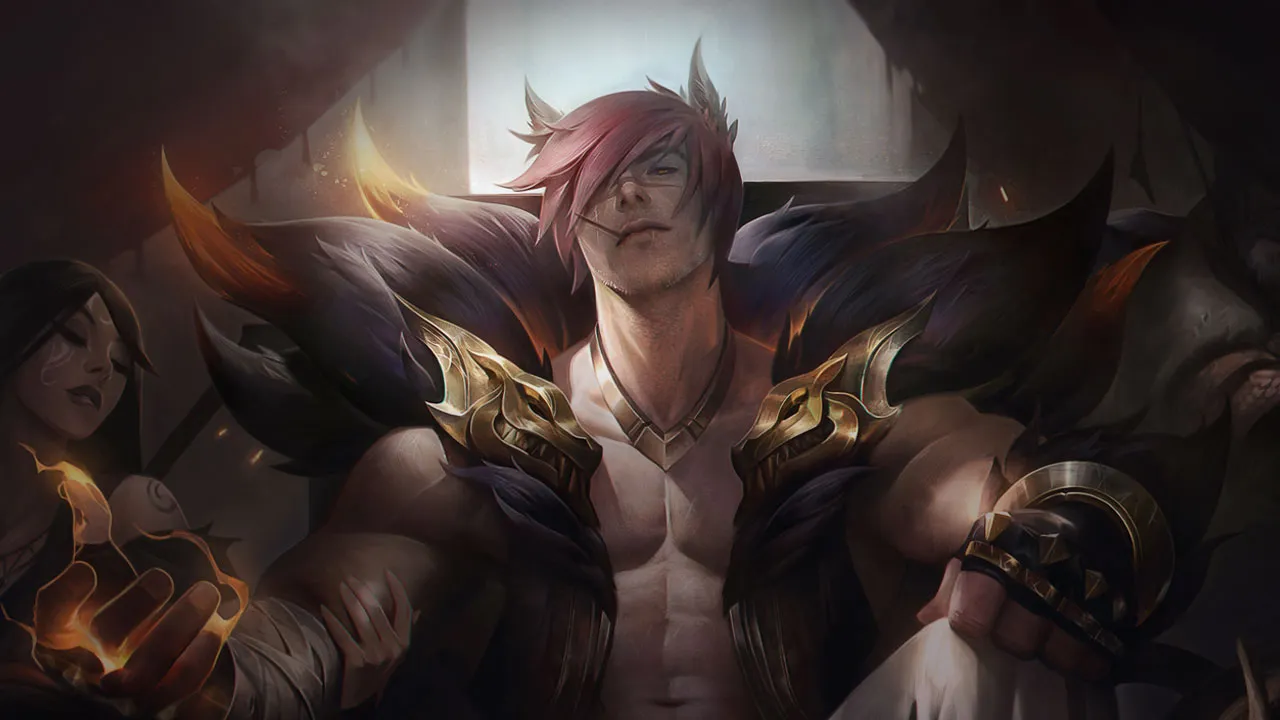
Sett
★ TOP · JUNGLE Tier A
ダメージ
UTIL
TANK
DIFF
Win 49.1% #73 · ↓8pt
Pick 11.4% #5
Ban 2.7% #56

Sett Wild Rift カウンターガイド ★ Counter Sheet

マッチアップ一覧
マッチアップ 判定 有利度 勝率 ピック率
Vayne ハードカウンター +3 52.2% 2.0%
Teemo ハードカウンター +2 51.8% 3.2%
Vladimir ハードカウンター +2 47.0% 1.1%
Heimerdinger ハードカウンター +2
Kalista ハードカウンター +2
Smolder 不利なマッチアップ +1 52.5% 1.6%
Gnar 不利なマッチアップ +1 51.5% 3.5%
Volibear 不利なマッチアップ +1 51.4% 7.1%
Gwen 不利なマッチアップ +1 51.4% 3.1%
Olaf 不利なマッチアップ +1 51.0% 1.1%
Jax 不利なマッチアップ +1 50.9% 3.9%
Kennen 不利なマッチアップ +1 49.1% 1.3%
Aatrox 不利なマッチアップ +1 48.9% 6.1%
Jayce 不利なマッチアップ +1 48.1% 2.7%
Akali 不利なマッチアップ +1
Aurora 不利なマッチアップ +1
Graves 不利なマッチアップ +1
Ryze 不利なマッチアップ +1
Swain 不利なマッチアップ +1
Warwick 不利なマッチアップ +1
Shen スキル次第のマッチアップ ±0 51.9% 1.6%
Darius スキル次第のマッチアップ ±0 50.2% 16.0%
Fiora スキル次第のマッチアップ ±0 48.1% 4.6%
Malphite 有利なマッチアップ −1 52.5% 5.7%
Wukong 有利なマッチアップ −1 51.5% 2.2%
Ornn 有利なマッチアップ −1 50.5% 2.0%
Irelia 有利なマッチアップ −1 50.4% 2.0%
Camille 有利なマッチアップ −1 50.4% 3.7%
Poppy 有利なマッチアップ −1 50.4% 2.3%
Dr. Mundo 有利なマッチアップ −1 50.2% 5.9%
Kayle 有利なマッチアップ −1 50.0% 1.8%
Garen 有利なマッチアップ −1 50.0% 14.7%
Ambessa 有利なマッチアップ −1 49.7% 2.0%
Nasus 有利なマッチアップ −1 49.1% 5.9%
K'Santé 有利なマッチアップ −1 49.0% 5.9%
Riven 有利なマッチアップ −1 48.9% 1.2%
Tryndamere 有利なマッチアップ −1 48.5% 2.1%
Renekton 有利なマッチアップ −1 48.4% 3.9%
Skarner 有利なマッチアップ −1 48.1% 1.3%
Gragas 有利なマッチアップ −1
Jarvan IV 有利なマッチアップ −1
Maokai 有利なマッチアップ −1
Pantheon 有利なマッチアップ −1
Cho'Gath 有利なマッチアップ −2 50.8% 12.1%
Sion 有利なマッチアップ −2 49.6% 3.8%
Yasuo 有利なマッチアップ −2 47.0% 3.0%
Nautilus 有利なマッチアップ −2
Rengar 有利なマッチアップ −2

Edge: Wild Rift Core canonical verdict (−3 to +3), shown from the point of view of the champion named in the row. Win rate and pick rate: the opponent's own rate in this role — Wild Rift CN · Challenger, Patch 7.2d. Not a head-to-head win rate.

ハードカウンター

5

これらのチャンピオンは、こちらのビルドやプレイスタイルを真正面から上回る構成を持ち、レーン戦のコントロールとファームを極めて難しくする。彼らのスキルはこちらの主要な強みを無効化し、いつも通りのプランを実行しようとした瞬間に手痛い反撃を受けさせてくる。こうしたマッチアップでは、ミスを最小限に抑え、正面からの対決以外で解決策を探すことが重要になる。

Vladimir

Vladimir+2

ap sustainelusive target Vladimir scaling gap makes this a ticking clock for Sett. Whenever you attempt to turn a trade with your max-Grit Haymaker, Vladimir can simply sink into Sanguine Pool, completely dodging the true damage center of your shield punch. This interaction nullifies your main burst-trading tool while his Crimson Pact and Transfusion slowly out-sustain your Pit Grit health regeneration. Vladimirのビルド → 詳細を見る
Vladimir

理由

Vladimir scaling gap makes this a ticking clock for Sett. Whenever you attempt to turn a trade with your max-Grit Haymaker, Vladimir can simply sink into Sanguine Pool, completely dodging the true damage center of your shield punch. This interaction nullifies your main burst-trading tool while his Crimson Pact and Transfusion slowly out-sustain your Pit Grit health regeneration.

レーン戦への影響

Because you cannot threaten Vladimir with Haymaker, you lose the ability to contest the wave directly. He will use Transfusion and Tides of Blood to safely thin the wave or slow-push it into your tower. If you try to force a freeze, he can poke you down from range. Your inability to gain priority means you cannot help your jungler, while Vladimir scales freely into a late-game monster.

立ち回り方

To survive, you must use Facebreaker and Knuckle Down to pull Vladimir in only after he wastes Sanguine Pool, or use them to force it out. Never release Haymaker early in a fight unless you have successfully baited his pool. Focus entirely on pulling the minion wave close to your tower using smart wave-trimming. If he freezes near his tower, do not walk up; instead, look to crash the wave with your jungler's help or roam with The Show Stopper.

チャンピオン詳細 → Vladimirのビルド →
Vayne

Vayne+3

hard counterranged abuse Sett struggles immensely here because Vayne possesses the perfect tools to deny his engage. Every time you activate Knuckle Down to close the distance, Vayne can instantly cancel your momentum by firing Condemn, pushing you back into her optimal firing range. Furthermore, her Tumble allows her to easily slide out of the central true damage zone of Haymaker, while Silver Bolts melts your tanky health bar during extended chases. Vayneのビルド → 詳細を見る
Vayne

理由

Sett struggles immensely here because Vayne possesses the perfect tools to deny his engage. Every time you activate Knuckle Down to close the distance, Vayne can instantly cancel your momentum by firing Condemn, pushing you back into her optimal firing range. Furthermore, her Tumble allows her to easily slide out of the central true damage zone of Haymaker, while Silver Bolts melts your tanky health bar during extended chases.

レーン戦への影響

This constant threat of displacement completely neutralizes your early laning. You will find yourself locked out of the minion wave, forced to concede priority and watch Vayne slow-push waves into your turret. Trying to contest farm results in taking heavy, unretaliated trade sequences where Silver Bolts proc repeatedly. This pressure drains your health pool, forcing premature recalls and leaving your top turret vulnerable to heavy early plating damage.

立ち回り方

To survive, you must abandon any dreams of solo kills and let the wave crash. Never run directly at Vayne with Knuckle Down unless her Condemn is on cooldown. Position yourself away from walls to prevent her stun. If she overextends, wait for her to waste Tumble before attempting a surprise flash engage with Facebreaker. If she dives you, use The Show Stopper to drag her deep under your turret.

チャンピオン詳細 → Vayneのビルド →
Teemo

Teemo+2

ranged bullysustain survival Teemo completely dictates the pace of this lane through relentless range harassment. Whenever you attempt to close the distance using the movement speed from Knuckle Down, Teemo will shut down your trade immediately with Blinding Dart. This blind makes your empowered punches completely useless, nullifying your primary burst. Consequently, you are forced to absorb Toxic Shot poison while retreating, relying solely on your Pit Grit passive regeneration to survive. Teemoのビルド → 詳細を見る
Teemo

理由

Teemo completely dictates the pace of this lane through relentless range harassment. Whenever you attempt to close the distance using the movement speed from Knuckle Down, Teemo will shut down your trade immediately with Blinding Dart. This blind makes your empowered punches completely useless, nullifying your primary burst. Consequently, you are forced to absorb Toxic Shot poison while retreating, relying solely on your Pit Grit passive regeneration to survive.

レーン戦への影響

Because you cannot trade back effectively, you will constantly lose control of the minion waves. Teemo will easily freeze the wave near his tower or slow-push massive waves into yours, forcing you to farm under pressure. Every minion you contest costs you a chunk of health from his ranged attacks. This constant pressure ruins your recall timings and prevents you from helping your team with early map rotations.

立ち回り方

Accept giving up early farm and let the wave crash into your tower. Never initiate with Knuckle Down while his Blinding Dart is available; instead, walk up to farm and use Facebreaker defensively to stun him if he overextends. When Teemo tries to poke you under your turret, activate Haymaker to absorb the poison from Toxic Shot with the shield while securing distant minions. Your goal is survival; wait for a gank before attempting any all-in with The Show Stopper.

チャンピオン詳細 → Teemoのビルド →
Heimerdinger

Heimerdinger+2

zone controlpoke Sett relies on closing the gap, but Heimerdinger's setup completely shuts this down. When you activate Knuckle Down to rush him, your linear movement path becomes entirely predictable. This makes you a trivial target for his CH-2 Electron Storm Grenade, which stuns you mid-charge. Combined with his H-28G Evolution Turret nest, any attempt to engage results in taking massive automated damage while you are immobilized. Heimerdingerのビルド → 詳細を見る
Heimerdinger

理由

Sett relies on closing the gap, but Heimerdinger's setup completely shuts this down. When you activate Knuckle Down to rush him, your linear movement path becomes entirely predictable. This makes you a trivial target for his CH-2 Electron Storm Grenade, which stuns you mid-charge. Combined with his H-28G Evolution Turret nest, any attempt to engage results in taking massive automated damage while you are immobilized.

レーン戦への影響

You will find yourself permanently shoved under your turret as H-28G Evolution Turret continuously pushes the minion wave. Attempting to clear them exposes you to heavy poke from Hextech Micro-Rockets. Because you cannot trade back without being stunned, your health pool will constantly dwindle, forcing early recalls that cost crucial gold and experience while granting Heimerdinger complete lane control.

立ち回り方

To survive, you must abandon standard aggressive trades and focus on defense. Never use Knuckle Down directly towards Heimerdinger unless his CH-2 Electron Storm Grenade has already been wasted. Instead, use the movement speed to dodge laterally. Let the wave crash, and use Haymaker solely to absorb the burst from UPGRADE!!! empowered rockets. Keep your health high enough to set up a gank with The Show Stopper.

チャンピオン詳細 → Heimerdingerのビルド →

その他のマッチアップ

不利なマッチアップ

15

これらのチャンピオンは、マッチアップ自体を絶望的にするわけではないが、対面で優位に立ちやすいツールを持っている。射程が長かったり、攻撃を受け止める力が高かったり、エンゲージへの対応手段が豊富だったりする。アプローチを調整し、戦闘を受け入れるタイミングを慎重に選ぶ必要がある。

Jayce

Jayce+1

disengagepoke down Jayce dictates the distance in this lane by neutralizing your primary gap-closer. Whenever you activate Knuckle Down to sprint forward for a trade, Jayce can immediately deny your approach by using Thundering Blow in his melee form to knock you away. Because this disengage prevents you from landing Facebreaker or your basic attacks, you are left running backwards while taking heavy ranged poke without any way to retaliate. Jayceのビルド → 詳細を見る
Jayce

理由

Jayce dictates the distance in this lane by neutralizing your primary gap-closer. Whenever you activate Knuckle Down to sprint forward for a trade, Jayce can immediately deny your approach by using Thundering Blow in his melee form to knock you away. Because this disengage prevents you from landing Facebreaker or your basic attacks, you are left running backwards while taking heavy ranged poke without any way to retaliate.

レーン戦への影響

This interaction forces you to play on the defensive, conceding early wave control. Jayce will constantly poke you from range, making it risky to walk up for minions. If you waste your health trying to force trades, you will be forced into a bad recall or dove under tower. The lane is decided by how much health you can preserve before reaching the safety of your turret, limiting your map pressure.

立ち回り方

To survive, you must bait out Thundering Blow before committing. Walk forward threateningly without using Knuckle Down, forcing him to waste his knockback early. Once his defensive tool is on cooldown, you have a brief window to activate Knuckle Down and pull him in with Facebreaker. If he holds his displacement, focus on farming under turret, using Haymaker to absorb his poke, and wait for your jungler to lock him down.

チャンピオン詳細 → Jayceのビルド →
Jax

Jax+1

skirmish timingdodge mechanic Jax controls this matchup because Counter Strike completely nullifies your primary trade tool, Knuckle Down, denying your Pit Grit progression. If you try to retaliate with Haymaker once the stun wears off, he can easily use Leap Strike to jump onto a minion or behind you, completely avoiding the true damage center. This leaves you with wasted cooldowns and zero trade power. Jaxのビルド → 詳細を見る
Jax

理由

Jax controls this matchup because Counter Strike completely nullifies your primary trade tool, Knuckle Down, denying your Pit Grit progression. If you try to retaliate with Haymaker once the stun wears off, he can easily use Leap Strike to jump onto a minion or behind you, completely avoiding the true damage center. This leaves you with wasted cooldowns and zero trade power.

レーン戦への影響

Because of this defensive advantage, Jax can walk up to slow-push waves or freeze them near his tower. You cannot contest short trades safely; every time you walk up to secure a minion, he threatens to initiate with Counter Strike. This forces you to drop CS or take heavy damage, leading to an early HP deficit that ruins your first recall timing and forces you under turret.

立ち回り方

To survive, you must bait out Counter Strike without committing your own spells. Walk up to simulate an engage, then immediately walk away. Only activate Knuckle Down after his spin ends. If he jumps on you with Leap Strike, use Facebreaker immediately to pull him in and interrupt his flow, forcing a raw trade where your basic attacks can actually connect. Never throw Haymaker until he has spent his leap.

チャンピオン詳細 → Jaxのビルド →
Akali

Akali+1

shroud playburst trading Akali holds the upper hand because her high mobility completely neutralizes your main retaliatory tool. The moment you channel Haymaker to turn her burst into a shield and true damage, she can instantly react with Shuriken Flip or Perfect Execution. By dashing directly behind you, she effortlessly escapes the central blast zone, leaving you completely vulnerable with an empty Grit bar and no defensive shield. Akaliのビルド → 詳細を見る
Akali

理由

Akali holds the upper hand because her high mobility completely neutralizes your main retaliatory tool. The moment you channel Haymaker to turn her burst into a shield and true damage, she can instantly react with Shuriken Flip or Perfect Execution. By dashing directly behind you, she effortlessly escapes the central blast zone, leaving you completely vulnerable with an empty Grit bar and no defensive shield.

レーン戦への影響

This interaction forces you into a defensive posture where securing wave control is extremely difficult. Standard trades become highly risky; if she bait-forces your Haymaker and dashes behind you, you lose the trade catastrophically and are forced to retreat under tower. You cannot easily pressure her with Facebreaker because Twilight Shroud lets her safely stall out your defensive windows.

立ち回り方

To survive, never cast Haymaker reactively while she has her dashes available. Instead, prioritize landing a stunned Facebreaker by pulling her alongside a minion before releasing your true damage blast; this brief stun window prevents her from using Shuriken Flip or Perfect Execution to escape behind you. If she shrouds, walk away immediately toward your tower to force her to chase you outside her safety zone, keeping Knuckle Down ready to punish her.

チャンピオン詳細 → Akaliのビルド →
Gnar

Gnar+1

kitingspacing Mini Gnar maintains a constant spacing advantage using Boomerang Throw to slow you, while Hyper provides him bursts of speed. Whenever you attempt to close the distance with Knuckle Down, Gnar can reactively use Hop to bounce away. This single mobility tool allows him to effortlessly dodge your Facebreaker pull or escape the high-damage center of your Haymaker, leaving you exposed without any retaliation. Gnarのビルド → 詳細を見る
Gnar

理由

Mini Gnar maintains a constant spacing advantage using Boomerang Throw to slow you, while Hyper provides him bursts of speed. Whenever you attempt to close the distance with Knuckle Down, Gnar can reactively use Hop to bounce away. This single mobility tool allows him to effortlessly dodge your Facebreaker pull or escape the high-damage center of your Haymaker, leaving you exposed without any retaliation.

レーン戦への影響

This dynamic forces you into a defensive stance where Gnar commands wave priority. You will constantly absorb poke while trying to last-hit under your turret, slowly building up your Pit Grit passive but unable to convert it into aggressive trades. If Gnar mismanages his Rage Gene and transforms into Mega Gnar, the lane shifts to melee, but your window to punish him is strictly limited to when his Hop is on cooldown.

立ち回り方

Never initiate with Facebreaker while Gnar has his jump available. Instead, bait out Boomerang Throw, walk forward to threaten him, and wait for him to panic-cast Hop. Once his jump is on its long cooldown, you have a brief window to force a trade using Knuckle Down to catch him, followed by Facebreaker. If he transforms, use The Show Stopper to redirect his Boulder Toss engage away from your tower.

チャンピオン詳細 → Gnarのビルド →
Olaf

Olaf+1

anti ccall in Olaf holds a massive advantage because Ragnarok completely nullifies both your Facebreaker stun and your ultimate, The Show Stopper, stripping away your ability to peel or lock him down. Since his ultimate makes him immune to your crowd control, his only real threat is the true damage sweet spot of Haymaker. However, if he manages to flash or sidestep that central blast, your entire kit's high-impact threat is neutralized. Olafのビルド → 詳細を見る
Olaf

理由

Olaf holds a massive advantage because Ragnarok completely nullifies both your Facebreaker stun and your ultimate, The Show Stopper, stripping away your ability to peel or lock him down. Since his ultimate makes him immune to your crowd control, his only real threat is the true damage sweet spot of Haymaker. However, if he manages to flash or sidestep that central blast, your entire kit's high-impact threat is neutralized.

レーン戦への影響

Once Olaf reaches level five, the lane dynamic shifts heavily in his favor, preventing you from ever freezing safely. If you attempt extended trades, Undertow slows you down, allowing him to run you down with Berserker Rage and Vicious Strikes. This constant threat forces you to concede wave priority, meaning you will often find yourself shoved under tower, slowly bleeding health while trying to farm under immense pressure.

立ち回り方

To survive, you must play around the duration of Ragnarok. Never initiate with The Show Stopper; instead, bait his ultimate by walking up with Knuckle Down, then immediately retreat. Hold Facebreaker specifically to disrupt his Undertow axes when his crowd control immunity is offline. If he triggers his ultimate, immediately charge your Haymaker grit, aiming the central line carefully to force his flash or punish his straightforward chase when he tries to finish you off.

チャンピオン詳細 → Olafのビルド →
Kennen

Kennen+1

ranged pokedisengage Kennen's ranged advantage makes this matchup highly oppressive for Sett. He will constantly harass you with basic attacks and Thundering Shuriken to stack Mark of the Storm. Whenever you try to close the gap and pull him in with Facebreaker, Kennen can instantly activate Lightning Rush to zoom away safely. This interaction denies you any proactive trade, leaving you taking free damage while your primary engage tool is wasted. Kennenのビルド → 詳細を見る
Kennen

理由

Kennen's ranged advantage makes this matchup highly oppressive for Sett. He will constantly harass you with basic attacks and Thundering Shuriken to stack Mark of the Storm. Whenever you try to close the gap and pull him in with Facebreaker, Kennen can instantly activate Lightning Rush to zoom away safely. This interaction denies you any proactive trade, leaving you taking free damage while your primary engage tool is wasted.

レーン戦への影響

You will spend the early levels pushed under your turret, struggling to secure minions. Every time you step up to trigger Pit Grit on a minion, you risk eating an Electrical Surge active. If your health drops too low from constant poke, Kennen will freeze the wave or dive you with Slicing Maelstrom. This pressure forces premature recalls, setting you behind in gold and keeping you stuck in lane while Kennen roams.

立ち回り方

Give up early minion gold to protect your health bar. Let him push, and use the shield from Haymaker to absorb Thundering Shuriken poke. Never initiate with Facebreaker; instead, walk up threateningly with Knuckle Down to bait out his Lightning Rush. Once his escape tool is on cooldown, you have a brief window to grab him with Facebreaker. If he overcommits with Slicing Maelstrom, use The Show Stopper to carry him away from your wave and disengage.

チャンピオン詳細 → Kennenのビルド →
Volibear

Volibear+1

juggernaut duelsustain battle Volibear dominates extended trades because Frenzied Maul heals him significantly on the second cast against marked targets, while The Relentless Storm ramps up his DPS. To survive this lane, you must play around his cooldown windows. If you let him freely bite you twice, his sustain outlasts your natural Pit Grit regeneration. Your entire survivability rests on neutralizing that critical second bite. Volibearのビルド → 詳細を見る
Volibear

理由

Volibear dominates extended trades because Frenzied Maul heals him significantly on the second cast against marked targets, while The Relentless Storm ramps up his DPS. To survive this lane, you must play around his cooldown windows. If you let him freely bite you twice, his sustain outlasts your natural Pit Grit regeneration. Your entire survivability rests on neutralizing that critical second bite.

レーン戦への影響

Volibear's passive lightning from The Relentless Storm constantly shoves the wave, forcing you under turret. If you fail to block his bite, you will be too low to contest waves, allowing him to easily dive you with Stormbringer. This constant pressure prevents you from assisting your team, locking you into a defensive lane where every wave requires perfect execution to prevent him from taking plating.

立ち回り方

Never initiate trades blindly. Let Volibear engage with Thundering Smash, and watch for the mark he applies. When you see him wind up for the second Frenzied Maul, immediately cast Haymaker to absorb the massive damage and healing trigger with your grit shield. If he misses his Sky Splitter, use that brief window to strike back with Knuckle Down and pull him with Facebreaker. If you misstep, use The Show Stopper defensively to peel him off you.

チャンピオン詳細 → Volibearのビルド →
Ryze

Ryze+1

kitingdisengage Sett struggles because Ryze commands the distance with ranged attacks. Whenever you attempt to close the gap by activating Knuckle Down for the movement speed boost, Ryze instantly shuts down your advance with Rune Prison. This targeted root freezes you in place, making it impossible to get close enough to pull him in with Facebreaker. You are left stranded while he unloads Spell Flux and Overload from safety. Ryzeのビルド → 詳細を見る
Ryze

理由

Sett struggles because Ryze commands the distance with ranged attacks. Whenever you attempt to close the gap by activating Knuckle Down for the movement speed boost, Ryze instantly shuts down your advance with Rune Prison. This targeted root freezes you in place, making it impossible to get close enough to pull him in with Facebreaker. You are left stranded while he unloads Spell Flux and Overload from safety.

レーン戦への影響

Because you cannot easily retaliate, you will spend most of the early game pushed under your turret. Ryze will constantly bounce Spell Flux through your minions to chip away at your health. This constant pressure limits your ability to secure last hits without taking heavy damage, slowing down your gold acquisition. However, Ryze's reliance on mana means he cannot harass indefinitely before needing to use Realm Warp or a manual recall to replenish.

立ち回り方

To survive this matchup, you must master bush control. Hide in the lane brushes to force Ryze to facecheck or waste his wards, preventing him from freely landing his basic attacks. Never initiate a trade with Knuckle Down if he has his root ready; instead, walk up naturally and save the speed boost to catch him after he wastes Rune Prison on a minion. If you get caught out of position, shield his burst with a well-timed Haymaker to absorb the damage.

チャンピオン詳細 → Ryzeのビルド →

その他のマッチアップ

スキル次第のマッチアップ

3

このマッチアップは何よりもまず実行力の勝負であり、両者ともに優位を取れる現実的な手段を持っている。重要なスキルを一つ避けられるか、エンゲージを正しく読めるか、あるいはたった一つの位置取りのミスが、勝敗を分けることもある。マッチアップを理解し、行動すべき瞬間を見極める力がとりわけ重要になる。

Shen

Shen±0

aa blockglobal pressure This matchup is an even battle of cooldown management and utility denial. Sett wants to execute his basic attack loops with Pit Grit and Knuckle Down, but Shen's Spirit's Refuge completely blocks these auto-attacks. The lane pivots entirely around how Sett responds to Shen's ultimate, Stand United. Sett has the perfect tools to cancel this global map pressure instantly using Facebreaker or The Show Stopper. Shenのビルド → 詳細を見る
Shen

理由

This matchup is an even battle of cooldown management and utility denial. Sett wants to execute his basic attack loops with Pit Grit and Knuckle Down, but Shen's Spirit's Refuge completely blocks these auto-attacks. The lane pivots entirely around how Sett responds to Shen's ultimate, Stand United. Sett has the perfect tools to cancel this global map pressure instantly using Facebreaker or The Show Stopper.

レーン戦への影響

During short trades, Shen uses Shadow Dash to engage and Spirit's Refuge to deny Sett's damage. If Sett wastes Knuckle Down into Shen's defensive zone, he loses the trade. However, if Shen tries to save an ally across the map with Stand United, Sett can punish him. Successfully interrupting the channel keeps Shen stuck in lane, allowing Sett to dominate the wave and secure heavy turret damage.

立ち回り方

Always hold either Facebreaker or The Show Stopper when Shen reaches level five and looks to teleport. When he casts Stand United, immediately use one of these crowd control abilities to cancel his channel. During standard laning, wait out the duration of Spirit's Refuge before activating Knuckle Down, and counter his Shadow Dash taunt by absorbing the incoming damage with Haymaker to retaliate with true damage once his shield expires.

チャンピオン詳細 → Shenのビルド →
Fiora

Fiora±0

parry timingdodge skillshot The matchup centers entirely on a high-stakes psychological game between Sett's crowd control and Fiora's defensive reaction. Since Fiora relies on Riposte to parry either the stun from Facebreaker or the true damage center of Haymaker, the duel is an active mind game. If she blocks Facebreaker, she stuns Sett and wins easily; if she parries Haymaker, she mitigates Sett's biggest burst potential, turning the fight in her favor. Fioraのビルド → 詳細を見る
Fiora

理由

The matchup centers entirely on a high-stakes psychological game between Sett's crowd control and Fiora's defensive reaction. Since Fiora relies on Riposte to parry either the stun from Facebreaker or the true damage center of Haymaker, the duel is an active mind game. If she blocks Facebreaker, she stuns Sett and wins easily; if she parries Haymaker, she mitigates Sett's biggest burst potential, turning the fight in her favor.

レーン戦への影響

Because of this delicate balance, trades are explosive and leave little room for error. A successful parry allows Fiora to trigger Grand Challenge and dive you, while a baited Riposte lets Sett zone her away from the wave with Knuckle Down. Minion waves often freeze near the middle as both players fear committing without a clear advantage, making health bars fluctuate wildly based on who lands their key ability first.

立ち回り方

To outplay her, you must delay your crowd control. Never start a trade by pulling her with Facebreaker immediately; instead, run at her with Knuckle Down to force an early Riposte. If she holds her parry, angle your Haymaker slightly to the side to avoid her shield while still gaining your grit barrier, or use The Show Stopper to reposition behind her, disrupting her Duelist's Dance vital alignments.

チャンピオン詳細 → Fioraのビルド →
Darius

Darius±0

shield baittrue damage This matchup is a pure battle of micro-positioning during all-ins. Darius aims to stack Hemorrhage to prime Noxian Guillotine, while you rely on Grit to absorb that damage. The critical swing point is Haymaker: Darius will attempt to sidestep the central true damage line or use Apprehend to displace you during its cast, rendering your shield useless and leaving you vulnerable to his ultimate execution. Dariusのビルド → 詳細を見る
Darius

理由

This matchup is a pure battle of micro-positioning during all-ins. Darius aims to stack Hemorrhage to prime Noxian Guillotine, while you rely on Grit to absorb that damage. The critical swing point is Haymaker: Darius will attempt to sidestep the central true damage line or use Apprehend to displace you during its cast, rendering your shield useless and leaving you vulnerable to his ultimate execution.

レーン戦への影響

Every trade is highly volatile, preventing passive farming. If you miss your true damage, Darius easily secures wave control and freezes near his tower, forcing you into overextended positions. A single botched duel leads to an immediate snowball, giving Darius the lane pressure to dive you or threaten your jungler during river skirmishes.

立ち回り方

To secure your Haymaker true damage, never cast it raw. Use Facebreaker to stun Darius first, locking him in place so he cannot sidestep or disrupt you with Apprehend. If he pulls you early with Apprehend, immediately activate Knuckle Down to reset your Pit Grit punches, build your shield quickly, and aim the center of Haymaker directly where he stands. If his Noxian Guillotine is ready, use The Show Stopper to buy time or reposition him away from your wave.

チャンピオン詳細 → Dariusのビルド →

有利なマッチアップ

25

これらのチャンピオンは、こちらの主要な強みに効果的に対応するのが難しく、より自由に対面を組み立てることができる。プレッシャーをかけて有利な交換を引き出す手段は複数あることが多い。相手が態勢を立て直す時間を与えるのではなく、この優位を活かして主導権を握ろう。

Riven

Riven−1

shield timingdodge skillshot Sett dominates this duel because his Haymaker completely eclipses Riven's burst pattern. While Riven relies on cycling Broken Wings and Ki Burst to chip your health, she cannot match your raw grit generation. The matchup hinges on her Valor or final Broken Wings dash; if she burns them offensively, she has no escape from the true damage centerline of your shield blast. Rivenのビルド → 詳細を見る
Riven

理由

Sett dominates this duel because his Haymaker completely eclipses Riven's burst pattern. While Riven relies on cycling Broken Wings and Ki Burst to chip your health, she cannot match your raw grit generation. The matchup hinges on her Valor or final Broken Wings dash; if she burns them offensively, she has no escape from the true damage centerline of your shield blast.

レーン戦への影響

Because Riven must constantly respect your Haymaker, she is forced to play defensively, giving you complete control over the wave. You can slow push to crash massive waves, forcing her under tower where Facebreaker threats prevent her from safely farming. Every trade she attempts drains her resources faster than yours, allowing you to establish a massive health lead and dive her with The Show Stopper.

立ち回り方

Initiate trades with Knuckle Down and basic attacks to force Riven into using Ki Burst and Valor. Never rush your Haymaker; hold it until your grit bar is completely full. To guarantee the true damage hit, pull her back with Facebreaker right as she tries to execute her third Broken Wings strike, or use The Show Stopper to lock her in place before unleashing your shield blast so she cannot dash away.

チャンピオン詳細 → Rivenのビルド →
Yasuo

Yasuo−2

melee squishypunish mobility Yasuo is completely defenseless against your kit because Wind Wall cannot block any of Sett's attacks or abilities. Whenever he attempts to dance through your minions with Sweeping Blade, his movement path is highly predictable. This allows you to easily disrupt his mobility with Facebreaker, pulling him out of his dash before unleashing a heavy Knuckle Down sequence to shred his Way of the Wanderer shield. Yasuoのビルド → 詳細を見る
Yasuo

理由

Yasuo is completely defenseless against your kit because Wind Wall cannot block any of Sett's attacks or abilities. Whenever he attempts to dance through your minions with Sweeping Blade, his movement path is highly predictable. This allows you to easily disrupt his mobility with Facebreaker, pulling him out of his dash before unleashing a heavy Knuckle Down sequence to shred his Way of the Wanderer shield.

レーン戦への影響

You dictate the pace of every trade near the minion wave. Yasuo cannot safely farm with Steel Tempest without exposing himself to your pull. When he tries to stack his tornado, you can stand directly inside your wave, forcing him to take bad trades where your Pit Grit out-sustains his poke. This constant threat of being grabbed under your tower or slammed by The Show Stopper forces him into defensive, low-income lane play.

立ち回り方

Position yourself constantly in the middle of your own minion wave. This ensures you always have targets on both sides to trigger the stun on Facebreaker when Yasuo dashes in. Hold your Haymaker specifically for when he attempts to cast Last Breath or after he commits his Steel Tempest tornado, ensuring the true damage center-line hits him while he is locked in animation. If he plays extremely safe, use Knuckle Down to zone him completely off the gold.

チャンピオン詳細 → Yasuoのビルド →
Sion

Sion−2

tank shredinterrupt heavy Sett completely shuts down Sion's primary threat because Facebreaker instantly cancels the charge of Decimating Smash, stripping Sion of his main damage and knock-up. Since Sion naturally accumulates massive permanent health through Glory in Death and Soul Furnace, he unwittingly scales Sett's ultimate. The Show Stopper transforms Sion's massive HP pool into a devastating weapon, allowing Sett to slam him directly into the enemy team for colossal area-of-effect damage. Sionのビルド → 詳細を見る
Sion

理由

Sett completely shuts down Sion's primary threat because Facebreaker instantly cancels the charge of Decimating Smash, stripping Sion of his main damage and knock-up. Since Sion naturally accumulates massive permanent health through Glory in Death and Soul Furnace, he unwittingly scales Sett's ultimate. The Show Stopper transforms Sion's massive HP pool into a devastating weapon, allowing Sett to slam him directly into the enemy team for colossal area-of-effect damage.

レーン戦への影響

Sion is forced into a defensive posture, unable to use Decimating Smash to secure wave control or poke without getting punished. Whenever he attempts to clear minions, you can walk up with Knuckle Down to threaten a pull. His attempts to absorb trades using the Soul Furnace shield are easily bypassed by the true damage of Haymaker, allowing you to freeze the wave at will or dive him under tower with absolute impunity.

立ち回り方

Position yourself constantly inside or just behind Sion's minion wave to stay within striking distance. Never use Facebreaker proactively to initiate; hold it strictly to react when Sion begins the red indicator of Decimating Smash. If he plays extremely safe, use Knuckle Down to close the gap and force him to react. Finally, when you deplete his health bar, immediately back off or save Haymaker to block the rapid basic attacks of his Glory in Death zombie form.

チャンピオン詳細 → Sionのビルド →

その他のマッチアップ

Sett対策アイテム

これらのアイテムを購入すると、このチャンピオンの影響力を抑えられます。

Cotte épineuse
Cotte épineuse
Force de la nature
Force de la nature
Gage de Sterak
Gage de Sterak
Couperet noir
Couperet noir
Plaque du mort
Plaque du mort

このチャンピオンへの対策

カウンターアングル

Settへのカウンターは、彼のWを避けることだけではありません。それは主に、彼が作り出したい戦い――つまり、ダメージを吸収して有利交換を狙える、複数のターゲットが密集した長期的な近接戦闘――を拒否することです。彼を最も苦しめるのは、アクセスを断ち、無駄なスキルを使わせたり、ウェーブ維持か体力維持かの選択を迫ったりするチャンピオンです。レーンでは、Settは相手がEで脅せる距離にいて、かつ彼のタフネスに攻撃を叩き込める自信がある状態を望みます。集団戦では、バックラインにアルティメットを叩き込むための確実なターゲットを欲します。したがって、彼に対する最善の策は、接触前に消耗させる、Wの中心を避ける、または彼のエンゲージを無駄な動きに変えることです。

パッチの文脈

Settは、彼のキットが非常に特定のカウンターウィンドウに依存していることを理解すれば、より簡単にカウンターできます。彼はかなりのダメージを吸収できますが、それは相手が彼の反撃をチャージするのに十分な長さの交換を許した場合に限られます。難しいマッチアップは、必ずしも純粋なダメージで彼を打ち負かすわけではありません。距離をコントロールし、トレードのリズムを変え、Wが変換を必要とする時に彼の軸をずらすことで打ち負かします。ランク戦では、多くのプレイヤーがこのウィンドウを無償で与えてしまっています。強力なカウンターは、Settに不確実なまま前進を強要し、EまたはWがクールダウン中に彼を罰します。

クイックリード

  • Wが使用可能な間、Settに長時間の近接トレードを挑まないでください。短くトレードして離れ、クールダウン中に罰してください。
  • Wの中心を避けるために、ダッシュ、スロー、または安全な距離を維持してください。すべてを最初に使用するのではなく。
  • オブジェクト周辺では、タンクの後ろに並ばないでください。Settは、その位置を集団戦のエンゲージに変えることができます。

カウンターの原型

タイミングを崩すデュエリスト

これらのチャンピオンは、必ずしも完璧なトレードを許すことなくSettと競り合うことができます。彼らはWの中心を回避し、交換を自身のタイミングで延長または短縮し、Eを使い果たしたSettを罰する手段を持っています。Settにとっての危険は、近接接触が自動的に有利だと信じることです。このタイプの相手には、スキルのミス一つ一つが実際の敵のウィンドウを開きます。もし彼が生存のためにWを使用し、ターゲットを狙うために使用しない場合、彼は多くのプレッシャーを失います。

チャンピオンの適応方法. Settはより忍耐強くプレイする必要があります。確実な接続を確保するためにEを保持し、パニック反応としてWを使用することを避け、相手にファーミングかゾーンの尊重かの選択を強いるためにウェーブを利用してください。

接触を拒否するレンジハラス

このタイプの相手は、Settにとって最も重要なリソース――レンジでの実際の長期的な交換――を奪うため、彼を悩ませます。KennenとVayneは、彼がウェーブに到達する前に消耗させ、Qで加速したときに離れ、体力低下かプレッシャー放棄かの選択を強いることができます。Settはフラッシュ、側面攻撃、またはポジショニングミスで危険な存在であり続けますが、レンジチャンピオンが距離を保ち、チャージされたWに不必要に攻撃しない限り、レーンはフラストレーションが溜まるものになります。

チャンピオンの適応方法. Settは、体力を温存するために、いくつかの小さなトレードを失うことを受け入れる必要があります。彼はタワー近くでウェーブを管理し、ゴーストやフラッシュのタイミングを探し、ターゲットがまだディスエンゲージツールを持っている間にEを無駄にすることを避けるべきです。

軸をずらすAPまたはモバイルブルーザー

これらのマッチアップは、単にスタッツでSettを打ち負かすわけではありません。彼らは彼のカウンター軸を不安定にするため、彼を打ち負かします。Akaliはターゲットの視認性を破壊でき、Gwenはダメージの一部を回避または遅延でき、Singedはレーンを無駄な追跡に変えることができます。Settは、彼が前に留まる相手を望みます。これらのチャンピオンは戦闘を移動させ、距離を変え、しばしば彼に重要なターゲットがもはや中心にいなくなったエリアにWをキャストさせます。

チャンピオンの適応方法. Settは、ウェーブコントロールや視界なしで彼らを追いかけることを避ける必要があります。彼は固定されたポイント(ウェーブクラッシュ、オブジェクト、壁、またはjungleの入り口)を中心にプレイすべきです。地形が移動経路を制限するほど、彼のEとWの価値は再び高まります。

優先度の高いマッチアップ

Vayne

Vayneは、彼女がSettのコアロジックを直接攻撃するため、説明すべき優先度の高いマッチアップです。彼女は近接接触を受け入れたくなく、一歩踏み出すたびに罰することができ、レーンを忍耐のテストに変えます。Settプレイヤーは、各ウェーブで完璧なトレードを探すことをやめなければなりません。彼は体力を温存し、ウェーブを引き込み、ジャングラーと連携し、Vayneが十分なスペースを持たなくなった瞬間のためにツールを保持する必要があります。もしSettが早すぎるプッシュを仕掛けると、彼はVayneに彼女が利用したいまさにそのリズムを与えてしまいます。

Fiora

Fioraは、多くのプレイヤーが彼が自動的に優位だと考えているエリア――長期的なデュエル――でSettを打ち負かすことができるため、ターゲットを絞った分析に値します。彼女はバイタルを脅かし、自身の防御的なタイミングでプレイし、SettのEまたはWが予測可能になった場合に罰することができます。Settにとって、このマッチアップはより少ないエゴとより多くの規律を必要とします。ウェーブをコントロールし、フリーな角度を与えることを避け、すべての小さなプレッシャーに応答するのではなく、実際のコミットを罰するためにWを使用してください。

対面時のよくある間違い

対面時のよくある間違い

  • Wが使用可能な間、明確な目的なくSettを攻撃し、その後、彼が対応したときに中央線にとどまること。
  • dragonの周りでタンクの前衛に集まり、Settに完璧なアルティメットの軌道を与えること。
  • SettがEまたはWを見せる前に、すべてのダッシュを攻撃的に使用すること。
  • オブジェクト前のポークが少なすぎ、その後、Settが強くなるタイトな戦いを受け入れること。
  • HPが減ったSettは、タフネスとステラックの秘宝で逆転できるのに、弱いはずがない。

コーチングノート

  • Settに対しては、ただ下がるだけではダメ。適切なタイミング、つまり彼が君たちからのダメージをWで帳消しにする直前に下がるのが正解だ。
  • Settと対面するときは、常にタンクとキャリーの位置関係を考えよう。たとえ味方のタンクが上手くポジショニングできていても、Settにアルティメットで飛び道具にされてしまう可能性がある。

FAQ

レーンでSettに勝つには?

レーンでSettに勝つには、Wが使える状態での長期トレードを避け、スキルのクールダウンを突こう。一番良いのは、短い交換を仕掛けて、Wの中央部分に巻き込まれる前に下がり、彼が主要な脅威を失った後に再びプレッシャーを取り戻すことだ。ウェーブ管理も重要だ。Eで確実にタワーに帰れない状況で彼をタワーから遠くへ追いやれば、ポークやガンク、繰り返しの短期トレードに対してより脆弱になる。

なぜレンジチャンピオンはSettに強いのか?

レンジチャンピオンがSettに強いのは、実際に接触する前に彼を罰することができるからだ。SettはQ、E、Wが脅威となる範囲に入りたがる。上手く立ち回るレンジチャンピオンは、彼が前に進んでくる間に体力を削り、彼が加速したら下がり、Wの中央を避けるための十分な距離を保つ。Settはミスやgankで勝つこともできるが、チャンスを作るためにはずっと苦労する必要がある。

集団戦でSettをフォーカスすべきか?

計画なしにSettをフォーカスするのは、彼のタフネスゲージを溜めてしまい、より強力なWの反撃を許すことになるため、しばしば間違いだ。彼をコントロールし、理想的でないターゲットにスキルを使わせ、WかEが使えなくなった後に罰するのがより良い。もし君のチームが彼の攻撃軸から後退しながら彼を無視できるなら、それは彼に逆転のチャンスを与える大量のバーストを与えるよりも良いことが多い。

オブジェクト周りでSettに対して最もよくある間違いは?

最もよくある間違いは、特に川やjungleの入り口で、前衛の後ろに一列に並んでしまうことだ。Settはタンク役のターゲットをアルティメットの起点として利用し、キャリーに直接的な影響を与えることができる。これを制限するには、より広く展開し、彼の側面への視界を保ち、複数のチャンピオンが並んだ単純な軌道を与えないようにしよう。




















































