August 2026 · Patch 7.2d
Tank · TOP · JUNGLE

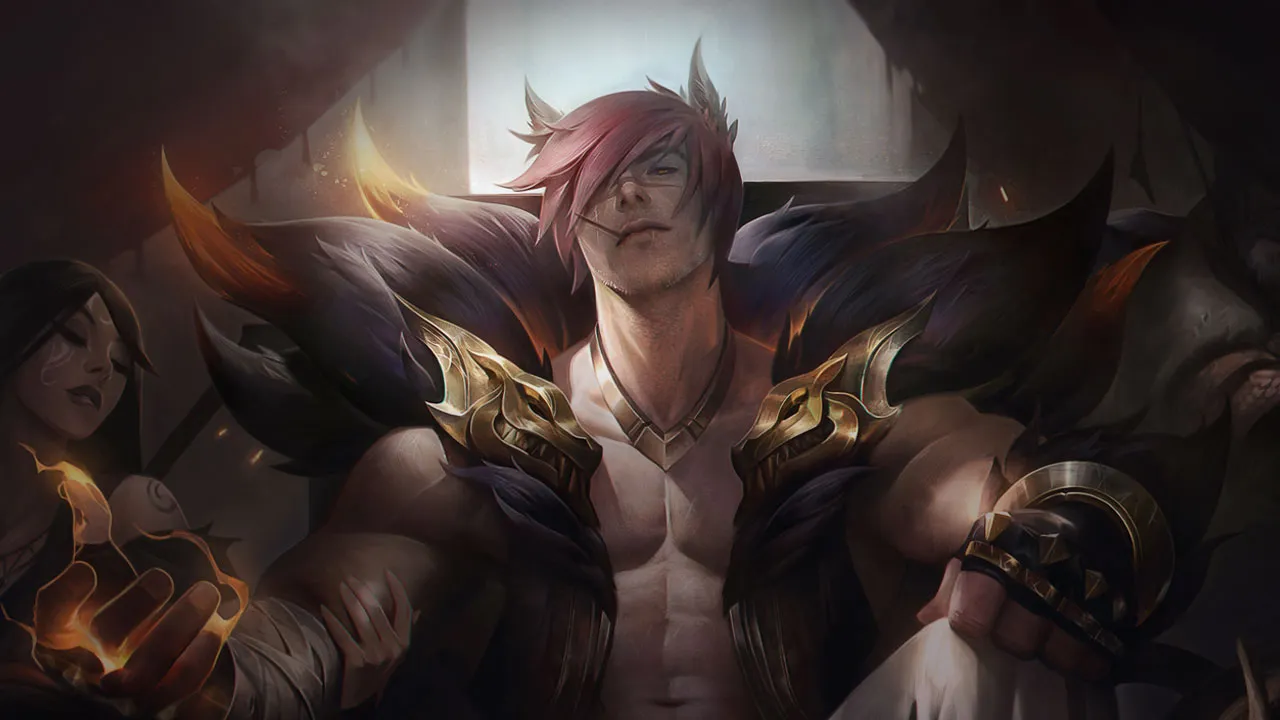
Sett Wild Rift Counter-Guide

Sett ist anfällig gegen Kompositionen mit konstantem kite, die ihn daran hindern, Ziele zu erreichen. poke-Champions mit hoher Reichweite zehren seine passive Regeneration vor Kämpfen auf. Kompositionen mit hohem magic damage umgehen seine physische Resistenz-Skalierung.

Sett
★ TOP · JUNGLE Tier A
SCHADEN
UTIL
TANK
DIFF
Win 49.8% #62 · ↓0pt
Pick 11.2% #5
Ban 2.7% #58

Sett Wild Rift Counter-Guide ★ Counter Sheet

Hard Counters

4

Diese Champions haben ein Build und einen Spielstil, der deinen direkt überlegen ist, was die Kontrolle der Lane und das Farmen extrem schwierig machen kann. Ihr Kit kann deine Kernstärken neutralisieren oder dich bestrafen, sobald du versuchst, deinen gewohnten Spielplan umzusetzen. In diesen Matchups geht es oft darum, Fehler zu minimieren und nach Wegen zu suchen, außerhalb der direkten Konfrontation zu gewinnen.

Vladimir

Vladimir

ap_sustainelusive_target Vladimir scaling gap makes this a ticking clock for Sett. Whenever you attempt to turn a trade with your max-Grit Haymaker, Vladimir can simply sink into Sanguine Pool, completely dodging the true damage center of your shield punch. This interaction nullifies your main burst-trading tool while his Crimson Pact and Transfusion slowly out-sustain your Pit Grit health regeneration. Details ansehen
Vladimir

Warum

Vladimir scaling gap makes this a ticking clock for Sett. Whenever you attempt to turn a trade with your max-Grit Haymaker, Vladimir can simply sink into Sanguine Pool, completely dodging the true damage center of your shield punch. This interaction nullifies your main burst-trading tool while his Crimson Pact and Transfusion slowly out-sustain your Pit Grit health regeneration.

Lane-Einfluss

Because you cannot threaten Vladimir with Haymaker, you lose the ability to contest the wave directly. He will use Transfusion and Tides of Blood to safely thin the wave or slow-push it into your tower. If you try to force a freeze, he can poke you down from range. Your inability to gain priority means you cannot help your jungler, while Vladimir scales freely into a late-game monster.

Wie man spielt

To survive, you must use Facebreaker and Knuckle Down to pull Vladimir in only after he wastes Sanguine Pool, or use them to force it out. Never release Haymaker early in a fight unless you have successfully baited his pool. Focus entirely on pulling the minion wave close to your tower using smart wave-trimming. If he freezes near his tower, do not walk up; instead, look to crash the wave with your jungler's help or roam with The Show Stopper.

Vollständiges Profil →
Vayne

Vayne

hard_counterranged_abuse Sett struggles immensely here because Vayne possesses the perfect tools to deny his engage. Every time you activate Knuckle Down to close the distance, Vayne can instantly cancel your momentum by firing Condemn, pushing you back into her optimal firing range. Furthermore, her Tumble allows her to easily slide out of the central true damage zone of Haymaker, while Silver Bolts melts your tanky health bar during extended chases. Details ansehen
Vayne

Warum

Sett struggles immensely here because Vayne possesses the perfect tools to deny his engage. Every time you activate Knuckle Down to close the distance, Vayne can instantly cancel your momentum by firing Condemn, pushing you back into her optimal firing range. Furthermore, her Tumble allows her to easily slide out of the central true damage zone of Haymaker, while Silver Bolts melts your tanky health bar during extended chases.

Lane-Einfluss

This constant threat of displacement completely neutralizes your early laning. You will find yourself locked out of the minion wave, forced to concede priority and watch Vayne slow-push waves into your turret. Trying to contest farm results in taking heavy, unretaliated trade sequences where Silver Bolts proc repeatedly. This pressure drains your health pool, forcing premature recalls and leaving your top turret vulnerable to heavy early plating damage.

Wie man spielt

To survive, you must abandon any dreams of solo kills and let the wave crash. Never run directly at Vayne with Knuckle Down unless her Condemn is on cooldown. Position yourself away from walls to prevent her stun. If she overextends, wait for her to waste Tumble before attempting a surprise flash engage with Facebreaker. If she dives you, use The Show Stopper to drag her deep under your turret.

Vollständiges Profil →
Teemo

Teemo

ranged_bullysustain_survival Teemo completely dictates the pace of this lane through relentless range harassment. Whenever you attempt to close the distance using the movement speed from Knuckle Down, Teemo will shut down your trade immediately with Blinding Dart. This blind makes your empowered punches completely useless, nullifying your primary burst. Consequently, you are forced to absorb Toxic Shot poison while retreating, relying solely on your Pit Grit passive regeneration to survive. Details ansehen
Teemo

Warum

Teemo completely dictates the pace of this lane through relentless range harassment. Whenever you attempt to close the distance using the movement speed from Knuckle Down, Teemo will shut down your trade immediately with Blinding Dart. This blind makes your empowered punches completely useless, nullifying your primary burst. Consequently, you are forced to absorb Toxic Shot poison while retreating, relying solely on your Pit Grit passive regeneration to survive.

Lane-Einfluss

Because you cannot trade back effectively, you will constantly lose control of the minion waves. Teemo will easily freeze the wave near his tower or slow-push massive waves into yours, forcing you to farm under pressure. Every minion you contest costs you a chunk of health from his ranged attacks. This constant pressure ruins your recall timings and prevents you from helping your team with early map rotations.

Wie man spielt

Accept giving up early farm and let the wave crash into your tower. Never initiate with Knuckle Down while his Blinding Dart is available; instead, walk up to farm and use Facebreaker defensively to stun him if he overextends. When Teemo tries to poke you under your turret, activate Haymaker to absorb the poison from Toxic Shot with the shield while securing distant minions. Your goal is survival; wait for a gank before attempting any all-in with The Show Stopper.

Vollständiges Profil →
Heimerdinger

Heimerdinger

zone_controlpoke Sett relies on closing the gap, but Heimerdinger's setup completely shuts this down. When you activate Knuckle Down to rush him, your linear movement path becomes entirely predictable. This makes you a trivial target for his CH-2 Electron Storm Grenade, which stuns you mid-charge. Combined with his H-28G Evolution Turret nest, any attempt to engage results in taking massive automated damage while you are immobilized. Details ansehen
Heimerdinger

Warum

Sett relies on closing the gap, but Heimerdinger's setup completely shuts this down. When you activate Knuckle Down to rush him, your linear movement path becomes entirely predictable. This makes you a trivial target for his CH-2 Electron Storm Grenade, which stuns you mid-charge. Combined with his H-28G Evolution Turret nest, any attempt to engage results in taking massive automated damage while you are immobilized.

Lane-Einfluss

You will find yourself permanently shoved under your turret as H-28G Evolution Turret continuously pushes the minion wave. Attempting to clear them exposes you to heavy poke from Hextech Micro-Rockets. Because you cannot trade back without being stunned, your health pool will constantly dwindle, forcing early recalls that cost crucial gold and experience while granting Heimerdinger complete lane control.

Wie man spielt

To survive, you must abandon standard aggressive trades and focus on defense. Never use Knuckle Down directly towards Heimerdinger unless his CH-2 Electron Storm Grenade has already been wasted. Instead, use the movement speed to dodge laterally. Let the wave crash, and use Haymaker solely to absorb the burst from UPGRADE!!! empowered rockets. Keep your health high enough to set up a gank with The Show Stopper.

Vollständiges Profil →

Ungünstig

15

Diese Champions haben Werkzeuge, die ihnen im Kampf meist einen Vorteil verschaffen, ohne das Matchup unspielbar zu machen. Sie haben vielleicht mehr Reichweite, können deine Offensive besser abfangen oder haben mehr Möglichkeiten, auf deine Engages zu reagieren. Du musst deine Herangehensweise anpassen und sorgfältig die Momente wählen, in denen du den Kampf annimmst.

Jayce

Jayce

disengagepoke_down Jayce dictates the distance in this lane by neutralizing your primary gap-closer. Whenever you activate Knuckle Down to sprint forward for a trade, Jayce can immediately deny your approach by using Thundering Blow in his melee form to knock you away. Because this disengage prevents you from landing Facebreaker or your basic attacks, you are left running backwards while taking heavy ranged poke without any way to retaliate. Details ansehen
Jayce

Warum

Jayce dictates the distance in this lane by neutralizing your primary gap-closer. Whenever you activate Knuckle Down to sprint forward for a trade, Jayce can immediately deny your approach by using Thundering Blow in his melee form to knock you away. Because this disengage prevents you from landing Facebreaker or your basic attacks, you are left running backwards while taking heavy ranged poke without any way to retaliate.

Lane-Einfluss

This interaction forces you to play on the defensive, conceding early wave control. Jayce will constantly poke you from range, making it risky to walk up for minions. If you waste your health trying to force trades, you will be forced into a bad recall or dove under tower. The lane is decided by how much health you can preserve before reaching the safety of your turret, limiting your map pressure.

Wie man spielt

To survive, you must bait out Thundering Blow before committing. Walk forward threateningly without using Knuckle Down, forcing him to waste his knockback early. Once his defensive tool is on cooldown, you have a brief window to activate Knuckle Down and pull him in with Facebreaker. If he holds his displacement, focus on farming under turret, using Haymaker to absorb his poke, and wait for your jungler to lock him down.

Vollständiges Profil →
Jax

Jax

skirmish_timingdodge_mechanic Jax controls this matchup because Counter Strike completely nullifies your primary trade tool, Knuckle Down, denying your Pit Grit progression. If you try to retaliate with Haymaker once the stun wears off, he can easily use Leap Strike to jump onto a minion or behind you, completely avoiding the true damage center. This leaves you with wasted cooldowns and zero trade power. Details ansehen
Jax

Warum

Jax controls this matchup because Counter Strike completely nullifies your primary trade tool, Knuckle Down, denying your Pit Grit progression. If you try to retaliate with Haymaker once the stun wears off, he can easily use Leap Strike to jump onto a minion or behind you, completely avoiding the true damage center. This leaves you with wasted cooldowns and zero trade power.

Lane-Einfluss

Because of this defensive advantage, Jax can walk up to slow-push waves or freeze them near his tower. You cannot contest short trades safely; every time you walk up to secure a minion, he threatens to initiate with Counter Strike. This forces you to drop CS or take heavy damage, leading to an early HP deficit that ruins your first recall timing and forces you under turret.

Wie man spielt

To survive, you must bait out Counter Strike without committing your own spells. Walk up to simulate an engage, then immediately walk away. Only activate Knuckle Down after his spin ends. If he jumps on you with Leap Strike, use Facebreaker immediately to pull him in and interrupt his flow, forcing a raw trade where your basic attacks can actually connect. Never throw Haymaker until he has spent his leap.

Vollständiges Profil →
Akali

Akali

shroud_playburst_trading Akali holds the upper hand because her high mobility completely neutralizes your main retaliatory tool. The moment you channel Haymaker to turn her burst into a shield and true damage, she can instantly react with Shuriken Flip or Perfect Execution. By dashing directly behind you, she effortlessly escapes the central blast zone, leaving you completely vulnerable with an empty Grit bar and no defensive shield. Details ansehen
Akali

Warum

Akali holds the upper hand because her high mobility completely neutralizes your main retaliatory tool. The moment you channel Haymaker to turn her burst into a shield and true damage, she can instantly react with Shuriken Flip or Perfect Execution. By dashing directly behind you, she effortlessly escapes the central blast zone, leaving you completely vulnerable with an empty Grit bar and no defensive shield.

Lane-Einfluss

This interaction forces you into a defensive posture where securing wave control is extremely difficult. Standard trades become highly risky; if she bait-forces your Haymaker and dashes behind you, you lose the trade catastrophically and are forced to retreat under tower. You cannot easily pressure her with Facebreaker because Twilight Shroud lets her safely stall out your defensive windows.

Wie man spielt

To survive, never cast Haymaker reactively while she has her dashes available. Instead, prioritize landing a stunned Facebreaker by pulling her alongside a minion before releasing your true damage blast; this brief stun window prevents her from using Shuriken Flip or Perfect Execution to escape behind you. If she shrouds, walk away immediately toward your tower to force her to chase you outside her safety zone, keeping Knuckle Down ready to punish her.

Vollständiges Profil →
Gnar

Gnar

kitingspacing Mini Gnar maintains a constant spacing advantage using Boomerang Throw to slow you, while Hyper provides him bursts of speed. Whenever you attempt to close the distance with Knuckle Down, Gnar can reactively use Hop to bounce away. This single mobility tool allows him to effortlessly dodge your Facebreaker pull or escape the high-damage center of your Haymaker, leaving you exposed without any retaliation. Details ansehen
Gnar

Warum

Mini Gnar maintains a constant spacing advantage using Boomerang Throw to slow you, while Hyper provides him bursts of speed. Whenever you attempt to close the distance with Knuckle Down, Gnar can reactively use Hop to bounce away. This single mobility tool allows him to effortlessly dodge your Facebreaker pull or escape the high-damage center of your Haymaker, leaving you exposed without any retaliation.

Lane-Einfluss

This dynamic forces you into a defensive stance where Gnar commands wave priority. You will constantly absorb poke while trying to last-hit under your turret, slowly building up your Pit Grit passive but unable to convert it into aggressive trades. If Gnar mismanages his Rage Gene and transforms into Mega Gnar, the lane shifts to melee, but your window to punish him is strictly limited to when his Hop is on cooldown.

Wie man spielt

Never initiate with Facebreaker while Gnar has his jump available. Instead, bait out Boomerang Throw, walk forward to threaten him, and wait for him to panic-cast Hop. Once his jump is on its long cooldown, you have a brief window to force a trade using Knuckle Down to catch him, followed by Facebreaker. If he transforms, use The Show Stopper to redirect his Boulder Toss engage away from your tower.

Vollständiges Profil →
Olaf

Olaf

anti_ccall_in Olaf holds a massive advantage because Ragnarok completely nullifies both your Facebreaker stun and your ultimate, The Show Stopper, stripping away your ability to peel or lock him down. Since his ultimate makes him immune to your crowd control, his only real threat is the true damage sweet spot of Haymaker. However, if he manages to flash or sidestep that central blast, your entire kit's high-impact threat is neutralized. Details ansehen
Olaf

Warum

Olaf holds a massive advantage because Ragnarok completely nullifies both your Facebreaker stun and your ultimate, The Show Stopper, stripping away your ability to peel or lock him down. Since his ultimate makes him immune to your crowd control, his only real threat is the true damage sweet spot of Haymaker. However, if he manages to flash or sidestep that central blast, your entire kit's high-impact threat is neutralized.

Lane-Einfluss

Once Olaf reaches level five, the lane dynamic shifts heavily in his favor, preventing you from ever freezing safely. If you attempt extended trades, Undertow slows you down, allowing him to run you down with Berserker Rage and Vicious Strikes. This constant threat forces you to concede wave priority, meaning you will often find yourself shoved under tower, slowly bleeding health while trying to farm under immense pressure.

Wie man spielt

To survive, you must play around the duration of Ragnarok. Never initiate with The Show Stopper; instead, bait his ultimate by walking up with Knuckle Down, then immediately retreat. Hold Facebreaker specifically to disrupt his Undertow axes when his crowd control immunity is offline. If he triggers his ultimate, immediately charge your Haymaker grit, aiming the central line carefully to force his flash or punish his straightforward chase when he tries to finish you off.

Vollständiges Profil →
Kennen

Kennen

ranged_pokedisengage Kennen's ranged advantage makes this matchup highly oppressive for Sett. He will constantly harass you with basic attacks and Thundering Shuriken to stack Mark of the Storm. Whenever you try to close the gap and pull him in with Facebreaker, Kennen can instantly activate Lightning Rush to zoom away safely. This interaction denies you any proactive trade, leaving you taking free damage while your primary engage tool is wasted. Details ansehen
Kennen

Warum

Kennen's ranged advantage makes this matchup highly oppressive for Sett. He will constantly harass you with basic attacks and Thundering Shuriken to stack Mark of the Storm. Whenever you try to close the gap and pull him in with Facebreaker, Kennen can instantly activate Lightning Rush to zoom away safely. This interaction denies you any proactive trade, leaving you taking free damage while your primary engage tool is wasted.

Lane-Einfluss

You will spend the early levels pushed under your turret, struggling to secure minions. Every time you step up to trigger Pit Grit on a minion, you risk eating an Electrical Surge active. If your health drops too low from constant poke, Kennen will freeze the wave or dive you with Slicing Maelstrom. This pressure forces premature recalls, setting you behind in gold and keeping you stuck in lane while Kennen roams.

Wie man spielt

Give up early minion gold to protect your health bar. Let him push, and use the shield from Haymaker to absorb Thundering Shuriken poke. Never initiate with Facebreaker; instead, walk up threateningly with Knuckle Down to bait out his Lightning Rush. Once his escape tool is on cooldown, you have a brief window to grab him with Facebreaker. If he overcommits with Slicing Maelstrom, use The Show Stopper to carry him away from your wave and disengage.

Vollständiges Profil →
Volibear

Volibear

juggernaut_duelsustain_battle Volibear dominates extended trades because Frenzied Maul heals him significantly on the second cast against marked targets, while The Relentless Storm ramps up his DPS. To survive this lane, you must play around his cooldown windows. If you let him freely bite you twice, his sustain outlasts your natural Pit Grit regeneration. Your entire survivability rests on neutralizing that critical second bite. Details ansehen
Volibear

Warum

Volibear dominates extended trades because Frenzied Maul heals him significantly on the second cast against marked targets, while The Relentless Storm ramps up his DPS. To survive this lane, you must play around his cooldown windows. If you let him freely bite you twice, his sustain outlasts your natural Pit Grit regeneration. Your entire survivability rests on neutralizing that critical second bite.

Lane-Einfluss

Volibear's passive lightning from The Relentless Storm constantly shoves the wave, forcing you under turret. If you fail to block his bite, you will be too low to contest waves, allowing him to easily dive you with Stormbringer. This constant pressure prevents you from assisting your team, locking you into a defensive lane where every wave requires perfect execution to prevent him from taking plating.

Wie man spielt

Never initiate trades blindly. Let Volibear engage with Thundering Smash, and watch for the mark he applies. When you see him wind up for the second Frenzied Maul, immediately cast Haymaker to absorb the massive damage and healing trigger with your grit shield. If he misses his Sky Splitter, use that brief window to strike back with Knuckle Down and pull him with Facebreaker. If you misstep, use The Show Stopper defensively to peel him off you.

Vollständiges Profil →
Ryze

Ryze

kitingdisengage Sett struggles because Ryze commands the distance with ranged attacks. Whenever you attempt to close the gap by activating Knuckle Down for the movement speed boost, Ryze instantly shuts down your advance with Rune Prison. This targeted root freezes you in place, making it impossible to get close enough to pull him in with Facebreaker. You are left stranded while he unloads Spell Flux and Overload from safety. Details ansehen
Ryze

Warum

Sett struggles because Ryze commands the distance with ranged attacks. Whenever you attempt to close the gap by activating Knuckle Down for the movement speed boost, Ryze instantly shuts down your advance with Rune Prison. This targeted root freezes you in place, making it impossible to get close enough to pull him in with Facebreaker. You are left stranded while he unloads Spell Flux and Overload from safety.

Lane-Einfluss

Because you cannot easily retaliate, you will spend most of the early game pushed under your turret. Ryze will constantly bounce Spell Flux through your minions to chip away at your health. This constant pressure limits your ability to secure last hits without taking heavy damage, slowing down your gold acquisition. However, Ryze's reliance on mana means he cannot harass indefinitely before needing to use Realm Warp or a manual recall to replenish.

Wie man spielt

To survive this matchup, you must master bush control. Hide in the lane brushes to force Ryze to facecheck or waste his wards, preventing him from freely landing his basic attacks. Never initiate a trade with Knuckle Down if he has his root ready; instead, walk up naturally and save the speed boost to catch him after he wastes Rune Prison on a minion. If you get caught out of position, shield his burst with a well-timed Haymaker to absorb the damage.

Vollständiges Profil →

Andere Matchups

Skill Matchups

5

Diese Matchups sind vor allem Duelle der Ausführung: Beide Champions haben glaubwürdige Wege, die Oberhand zu gewinnen. Eine wichtige ausgewichene Fähigkeit, ein richtig antizipierter Engage oder ein einziger Positionierungsfehler können reichen, um das Duell zu entscheiden. Das Matchup zu kennen und die richtigen Fenster zum Handeln zu erkennen, ist hier besonders wichtig.

Shen

Shen

aa_blockglobal_pressure This matchup is an even battle of cooldown management and utility denial. Sett wants to execute his basic attack loops with Pit Grit and Knuckle Down, but Shen's Spirit's Refuge completely blocks these auto-attacks. The lane pivots entirely around how Sett responds to Shen's ultimate, Stand United. Sett has the perfect tools to cancel this global map pressure instantly using Facebreaker or The Show Stopper. Details ansehen
Shen

Warum

This matchup is an even battle of cooldown management and utility denial. Sett wants to execute his basic attack loops with Pit Grit and Knuckle Down, but Shen's Spirit's Refuge completely blocks these auto-attacks. The lane pivots entirely around how Sett responds to Shen's ultimate, Stand United. Sett has the perfect tools to cancel this global map pressure instantly using Facebreaker or The Show Stopper.

Lane-Einfluss

During short trades, Shen uses Shadow Dash to engage and Spirit's Refuge to deny Sett's damage. If Sett wastes Knuckle Down into Shen's defensive zone, he loses the trade. However, if Shen tries to save an ally across the map with Stand United, Sett can punish him. Successfully interrupting the channel keeps Shen stuck in lane, allowing Sett to dominate the wave and secure heavy turret damage.

Wie man spielt

Always hold either Facebreaker or The Show Stopper when Shen reaches level five and looks to teleport. When he casts Stand United, immediately use one of these crowd control abilities to cancel his channel. During standard laning, wait out the duration of Spirit's Refuge before activating Knuckle Down, and counter his Shadow Dash taunt by absorbing the incoming damage with Haymaker to retaliate with true damage once his shield expires.

Vollständiges Profil →
Fiora

Fiora

parry_timingdodge_skillshot The matchup centers entirely on a high-stakes psychological game between Sett's crowd control and Fiora's defensive reaction. Since Fiora relies on Riposte to parry either the stun from Facebreaker or the true damage center of Haymaker, the duel is an active mind game. If she blocks Facebreaker, she stuns Sett and wins easily; if she parries Haymaker, she mitigates Sett's biggest burst potential, turning the fight in her favor. Details ansehen
Fiora

Warum

The matchup centers entirely on a high-stakes psychological game between Sett's crowd control and Fiora's defensive reaction. Since Fiora relies on Riposte to parry either the stun from Facebreaker or the true damage center of Haymaker, the duel is an active mind game. If she blocks Facebreaker, she stuns Sett and wins easily; if she parries Haymaker, she mitigates Sett's biggest burst potential, turning the fight in her favor.

Lane-Einfluss

Because of this delicate balance, trades are explosive and leave little room for error. A successful parry allows Fiora to trigger Grand Challenge and dive you, while a baited Riposte lets Sett zone her away from the wave with Knuckle Down. Minion waves often freeze near the middle as both players fear committing without a clear advantage, making health bars fluctuate wildly based on who lands their key ability first.

Wie man spielt

To outplay her, you must delay your crowd control. Never start a trade by pulling her with Facebreaker immediately; instead, run at her with Knuckle Down to force an early Riposte. If she holds her parry, angle your Haymaker slightly to the side to avoid her shield while still gaining your grit barrier, or use The Show Stopper to reposition behind her, disrupting her Duelist's Dance vital alignments.

Vollständiges Profil →
Darius

Darius

shield_baittrue_damage This matchup is a pure battle of micro-positioning during all-ins. Darius aims to stack Hemorrhage to prime Noxian Guillotine, while you rely on Grit to absorb that damage. The critical swing point is Haymaker: Darius will attempt to sidestep the central true damage line or use Apprehend to displace you during its cast, rendering your shield useless and leaving you vulnerable to his ultimate execution. Details ansehen
Darius

Warum

This matchup is a pure battle of micro-positioning during all-ins. Darius aims to stack Hemorrhage to prime Noxian Guillotine, while you rely on Grit to absorb that damage. The critical swing point is Haymaker: Darius will attempt to sidestep the central true damage line or use Apprehend to displace you during its cast, rendering your shield useless and leaving you vulnerable to his ultimate execution.

Lane-Einfluss

Every trade is highly volatile, preventing passive farming. If you miss your true damage, Darius easily secures wave control and freezes near his tower, forcing you into overextended positions. A single botched duel leads to an immediate snowball, giving Darius the lane pressure to dive you or threaten your jungler during river skirmishes.

Wie man spielt

To secure your Haymaker true damage, never cast it raw. Use Facebreaker to stun Darius first, locking him in place so he cannot sidestep or disrupt you with Apprehend. If he pulls you early with Apprehend, immediately activate Knuckle Down to reset your Pit Grit punches, build your shield quickly, and aim the center of Haymaker directly where he stands. If his Noxian Guillotine is ready, use The Show Stopper to buy time or reposition him away from your wave.

Vollständiges Profil →

Andere Matchups

Günstig

22

Diese Champions tun sich meist schwer, auf deine Hauptstärken zu reagieren, was dir mehr Freiheit im Matchup gibt. Du hast oft mehrere Möglichkeiten, sie unter Druck zu setzen und Trades zu deinen Gunsten zu erzwingen. Nutze diesen Vorteil, um das Tempo zu bestimmen, statt ihnen Zeit zu geben, wieder in eine komfortable Position zu kommen.

Riven

Riven

shield_timingdodge_skillshot Sett dominates this duel because his Haymaker completely eclipses Riven's burst pattern. While Riven relies on cycling Broken Wings and Ki Burst to chip your health, she cannot match your raw grit generation. The matchup hinges on her Valor or final Broken Wings dash; if she burns them offensively, she has no escape from the true damage centerline of your shield blast. Details ansehen
Riven

Warum

Sett dominates this duel because his Haymaker completely eclipses Riven's burst pattern. While Riven relies on cycling Broken Wings and Ki Burst to chip your health, she cannot match your raw grit generation. The matchup hinges on her Valor or final Broken Wings dash; if she burns them offensively, she has no escape from the true damage centerline of your shield blast.

Lane-Einfluss

Because Riven must constantly respect your Haymaker, she is forced to play defensively, giving you complete control over the wave. You can slow push to crash massive waves, forcing her under tower where Facebreaker threats prevent her from safely farming. Every trade she attempts drains her resources faster than yours, allowing you to establish a massive health lead and dive her with The Show Stopper.

Wie man spielt

Initiate trades with Knuckle Down and basic attacks to force Riven into using Ki Burst and Valor. Never rush your Haymaker; hold it until your grit bar is completely full. To guarantee the true damage hit, pull her back with Facebreaker right as she tries to execute her third Broken Wings strike, or use The Show Stopper to lock her in place before unleashing your shield blast so she cannot dash away.

Vollständiges Profil →
Yasuo

Yasuo

melee_squishypunish_mobility Yasuo is completely defenseless against your kit because Wind Wall cannot block any of Sett's attacks or abilities. Whenever he attempts to dance through your minions with Sweeping Blade, his movement path is highly predictable. This allows you to easily disrupt his mobility with Facebreaker, pulling him out of his dash before unleashing a heavy Knuckle Down sequence to shred his Way of the Wanderer shield. Details ansehen
Yasuo

Warum

Yasuo is completely defenseless against your kit because Wind Wall cannot block any of Sett's attacks or abilities. Whenever he attempts to dance through your minions with Sweeping Blade, his movement path is highly predictable. This allows you to easily disrupt his mobility with Facebreaker, pulling him out of his dash before unleashing a heavy Knuckle Down sequence to shred his Way of the Wanderer shield.

Lane-Einfluss

You dictate the pace of every trade near the minion wave. Yasuo cannot safely farm with Steel Tempest without exposing himself to your pull. When he tries to stack his tornado, you can stand directly inside your wave, forcing him to take bad trades where your Pit Grit out-sustains his poke. This constant threat of being grabbed under your tower or slammed by The Show Stopper forces him into defensive, low-income lane play.

Wie man spielt

Position yourself constantly in the middle of your own minion wave. This ensures you always have targets on both sides to trigger the stun on Facebreaker when Yasuo dashes in. Hold your Haymaker specifically for when he attempts to cast Last Breath or after he commits his Steel Tempest tornado, ensuring the true damage center-line hits him while he is locked in animation. If he plays extremely safe, use Knuckle Down to zone him completely off the gold.

Vollständiges Profil →
Sion

Sion

tank_shredinterrupt_heavy Sett completely shuts down Sion's primary threat because Facebreaker instantly cancels the charge of Decimating Smash, stripping Sion of his main damage and knock-up. Since Sion naturally accumulates massive permanent health through Glory in Death and Soul Furnace, he unwittingly scales Sett's ultimate. The Show Stopper transforms Sion's massive HP pool into a devastating weapon, allowing Sett to slam him directly into the enemy team for colossal area-of-effect damage. Details ansehen
Sion

Warum

Sett completely shuts down Sion's primary threat because Facebreaker instantly cancels the charge of Decimating Smash, stripping Sion of his main damage and knock-up. Since Sion naturally accumulates massive permanent health through Glory in Death and Soul Furnace, he unwittingly scales Sett's ultimate. The Show Stopper transforms Sion's massive HP pool into a devastating weapon, allowing Sett to slam him directly into the enemy team for colossal area-of-effect damage.

Lane-Einfluss

Sion is forced into a defensive posture, unable to use Decimating Smash to secure wave control or poke without getting punished. Whenever he attempts to clear minions, you can walk up with Knuckle Down to threaten a pull. His attempts to absorb trades using the Soul Furnace shield are easily bypassed by the true damage of Haymaker, allowing you to freeze the wave at will or dive him under tower with absolute impunity.

Wie man spielt

Position yourself constantly inside or just behind Sion's minion wave to stay within striking distance. Never use Facebreaker proactively to initiate; hold it strictly to react when Sion begins the red indicator of Decimating Smash. If he plays extremely safe, use Knuckle Down to close the gap and force him to react. Finally, when you deplete his health bar, immediately back off or save Haymaker to block the rapid basic attacks of his Glory in Death zombie form.

Vollständiges Profil →

Andere Matchups

Items to Counter Sett

Buy these items to reduce this champion's effectiveness in your games.

Cotte épineuse
Cotte épineuse
Force de la nature
Force de la nature
Gage de Sterak
Gage de Sterak
Couperet noir
Couperet noir
Plaque du mort
Plaque du mort

Wie man diesen Champion kontert

Konter-Winkel

Sett zu kontern, geht es nicht nur darum, seinen W auszuweichen. Es geht hauptsächlich darum, die Art von Kampf zu verweigern, die er erzeugen will: einen verlängerten Nahkampf mit mehreren Zielen, die eng beieinander stehen, wo er Schaden absorbieren und den Trade umkehren kann. Die Champions, die ihn am meisten stören, sind diejenigen, die seinen Zugang unterbrechen, ihn zwingen, Zauber ins Leere zu wirken, oder ihn zwingen, zwischen dem Halten der Welle und dem Erhalten von Gesundheit zu wählen. In der Lane will Sett den Gegner nah genug haben, um E zu bedrohen, und selbstbewusst genug, um in seine Zähigkeit hineinzuschlagen. In Teamfights will er ein solides Ziel für seinen Ult in die Backline. Die besten Pläne gegen ihn sind daher diejenigen, die ihn vor dem Kontakt zermürben, das Zentrum von W ausweichen oder seinen Engage in verschwendete Bewegung verwandeln.

Patch-Kontext

Sett ist leichter zu kontern, sobald du verstehst, dass sein Kit von einem sehr spezifischen Bestrafungsfenster abhängt. Er kann viel absorbieren, aber nur, wenn der Gegner ihm einen ausreichend langen Austausch ermöglicht, um seine Reaktion aufzuladen. Schwierige Matchups schlagen ihn nicht immer durch rohen Schaden; sie schlagen ihn, indem sie die Distanz kontrollieren, den Rhythmus des Trades ändern oder seine Achse verlassen, wenn W konvertieren muss. In Ranked geben viele Spieler dieses Fenster umsonst. Starke Konter zwingen Sett, unsicher nach vorne zu gehen und bestrafen ihn, wenn E oder W auf Cooldown sind.

Schnell gelesen

  • Gib Sett keinen langen Nahkampf-Trade, während W verfügbar ist: kurz handeln, zurückziehen und dann während des Cooldowns bestrafen.
  • Behalte einen Dash, Slow oder sicheren Abstand, um das Zentrum von W zu verlassen, anstatt alles am Anfang zu benutzen.
  • Vermeide es um Objectives herum, dich hinter deinem Tank aufzustellen: Sett kann diese Position in einen Engage für sein Team verwandeln.

Konter-Archetypen

Duellanten, die sein Timing brechen

Diese Champions können Sett contesten, ohne ihm unbedingt den perfekten Trade zu geben. Sie haben Werkzeuge, um das Zentrum von W zu vermeiden, den Austausch nach eigenem Timing zu verlängern oder zu kürzen und Sett zu bestrafen, sobald er E verbraucht hat. Die Gefahr für Sett besteht darin zu glauben, dass Nahkontakt automatisch vorteilhaft ist: gegen dieses Profil öffnet jeder verfehlte Zauber ein echtes gegnerisches Fenster. Wenn er W benutzt, um zu überleben, anstatt ein zentriertes Ziel zu bedrohen, verliert er viel Druck.

Wie sich der Champion anpasst. Sett muss geduldiger spielen: Halte E, um eine echte Verbindung zu sichern, vermeide es, W als Panikreaktion zu benutzen, und benutze die Welle, um den Gegner zu zwingen, zwischen Farmen und seiner Zone zu wählen.

Ranged Harass, der Kontakt verweigert

Dieses Profil stört Sett, weil es ihm seine wichtigste Ressource verweigert: einen echten verlängerten Austausch in Reichweite. Kennen und Vayne können ihn zermürben, bevor er die Welle erreicht, zurückziehen, wenn er sich mit Q beschleunigt, und ihn zwingen, zwischen dem Verlust von Gesundheit oder dem Aufgeben von Druck zu wählen. Auch wenn Sett mit Flash, einem Flank oder einem Positionsfehler gefährlich bleibt, wird die Lane frustrierend, wenn der Ranged-Champion Abstand hält und nicht unnötigerweise in seine aufgeladene W schlägt.

Wie sich der Champion anpasst. Sett muss akzeptieren, einige kleine Trades zu verlieren, um Gesundheit zu erhalten. Er sollte die Welle näher an seinen Turm managen, nach Timings mit Ghost oder Flash suchen und vermeiden, E zu verschwenden, solange das Ziel noch sein Disengage-Tool hat.

AP oder mobile Bruiser, die seine Achse verlassen

Diese Matchups schlagen Sett nicht nur durch Stats. Sie schlagen ihn, weil sie seine Bestrafungsachse instabil machen. Akali kann die Ziel-Sichtbarkeit brechen, Gwen kann Teile des Schadens ausweichen oder verzögern, und Singed kann die Lane in eine nutzlose Verfolgungsjagd verwandeln. Sett will einen Gegner, der vor ihm bleibt; diese Champions bewegen den Kampf, ändern die Distanz und zwingen ihn oft, W in einen Bereich zu wirken, wo das wichtige Ziel nicht mehr zentriert ist.

Wie sich der Champion anpasst. Sett muss vermeiden, sie ohne Wellenkontrolle oder Vision zu jagen. Er sollte um feste Punkte herum spielen: Wellencrash, Objective, Wand oder jungle-Eingang. Je mehr das Gelände die Bewegungspfade einschränkt, desto mehr Wert gewinnen seine E und W.

Prioritäts-Matchups

Vayne

Vayne ist ein prioritäres Matchup zu erklären, weil sie Setts Kernlogik direkt angreift. Sie will keinen Nahkampf akzeptieren, sie kann jeden Schritt nach vorne bestrafen und sie verwandelt die Lane in einen Geduldstest. Der Sett-Spieler muss aufhören, bei jeder Welle nach dem perfekten Trade zu suchen: er muss Gesundheit erhalten, die Welle kommen lassen, mit dem Jungler koordinieren und Werkzeuge für den Moment aufbewahren, in dem Vayne nicht mehr genug Platz hat. Wenn Sett zu früh erzwingt, gibt er Vayne genau den Rhythmus, den sie ausnutzen will.

Fiora

Fiora verdient eine gezielte Lektüre, weil sie Sett in dem Bereich schlagen kann, in dem viele Spieler denken, dass er automatisch dominant ist: das verlängerte Duell. Sie kann Vitals bedrohen, um ihre eigenen defensiven Timings spielen und Sett bestrafen, wenn seine E oder W vorhersehbar werden. Für Sett erfordert das Matchup weniger Ego und mehr Disziplin: kontrolliere die Welle, vermeide es, freie Winkel zu geben, und benutze W, um einen echten Commit zu bestrafen, anstatt auf jeden kleinen Druck zu reagieren.

Häufige Fehler gegen ihn

Häufige Fehler gegen ihn

  • Sett ohne klaren Zweck treffen, während sein W verfügbar ist, und dann in der Mittellinie bleiben, wenn er antwortet.
  • Hinter einer tankigen Frontlinie um dragon gruppieren und Sett eine perfekte Ultimate-Flugbahn geben.
  • Jeden Dash offensiv einsetzen, bevor Sett sein E oder W gezeigt hat.
  • Ihn vor einem Objective zu wenig anpoken und dann trotzdem den engen Kampf akzeptieren, wo Sett stark wird.
  • Auch ein angeschlagener Sett ist nicht automatisch schwach, wenn er den Kampf mit seiner Zähigkeit und Steraks noch drehen kann.

Coach-Notizen

  • Gegen Sett ist die richtige Reaktion nicht nur, sich zurückzuziehen. Es ist, sich im richtigen Moment zurückzuziehen: kurz bevor seine W den Schaden, den du ihm gerade zugefügt hast, umwandelt.
  • Wenn du gegen Sett kämpfst, denke immer an die Positionierung von Tank und Carry. Selbst ein gut positionierter verbündeter Tank kann gefährlich werden, wenn Sett ihn mit seinem Ultimate als Projektil benutzt.

FAQ

Wie besiegt man Sett auf der Lane?

Um Sett auf der Lane zu besiegen, vermeide lange Trades, wenn seine W verfügbar ist, und bestrafe seine Cooldowns. Der beste Plan ist oft, einen kurzen Austausch zu initiieren, dich zurückzuziehen, bevor du in die Mitte seiner W gerätst, und dann wieder Druck aufzubauen, sobald er seine Hauptbedrohung nicht mehr hat. Der Wellenzustand ist ebenfalls wichtig: Wenn du ihn zwingst, weit von seinem Turm wegzulaufen, ohne eine garantierte E, wird er anfälliger für Poke, Ganks und wiederholte kurze Trades.

Warum sind Fernkämpfer stark gegen Sett?

Fernkämpfer sind stark gegen Sett, weil sie ihn bestrafen können, bevor es zum echten Kontakt kommt. Sett möchte in eine Reichweite gelangen, in der Q, E und W bedrohlich werden. Ein gut gespielter Fernkämpfer zermürbt ihn, während er vorwärts geht, zieht sich zurück, wenn er schneller wird, und hält genug Abstand, um der Mitte seiner W auszuweichen. Sett kann immer noch durch einen Fehler oder einen gank gewinnen, aber er muss viel härter arbeiten, um sein Fenster zu schaffen.

Sollte man Sett in Teamfights fokussieren?

Sett ohne Plan zu fokussieren ist oft ein Fehler, weil du seine Zähigkeitsleiste füllst und ihm eine stärkere W-Reaktion gibst. Es ist besser, ihn zu kontrollieren, ihn zu zwingen, Zauber ohne ideales Ziel zu wirken, und ihn dann zu bestrafen, sobald W oder E nicht mehr verfügbar sind. Wenn dein Team ihn ignorieren kann, während es sich von seiner Achse zurückzieht, ist das oft besser, als ihm einen massiven Burst zu geben, den er umkehren kann.

Was ist der häufigste Fehler gegen Sett bei Zielen (Objectives)?

Der häufigste Fehler ist, sich in einer Linie hinter einer Frontlinie aufzustellen, besonders im Fluss oder bei jungle-Eingängen. Sett kann ein tankiges Ziel als Ausgangspunkt für sein Ultimate nutzen und direkten Einfluss auf die Carries nehmen. Um dies zu begrenzen, spiele breiter, halte Sicht auf seine Flanken und vermeide es, ihm eine einfache Flugbahn zu mehreren aufgereihten Champions zu geben.





















































