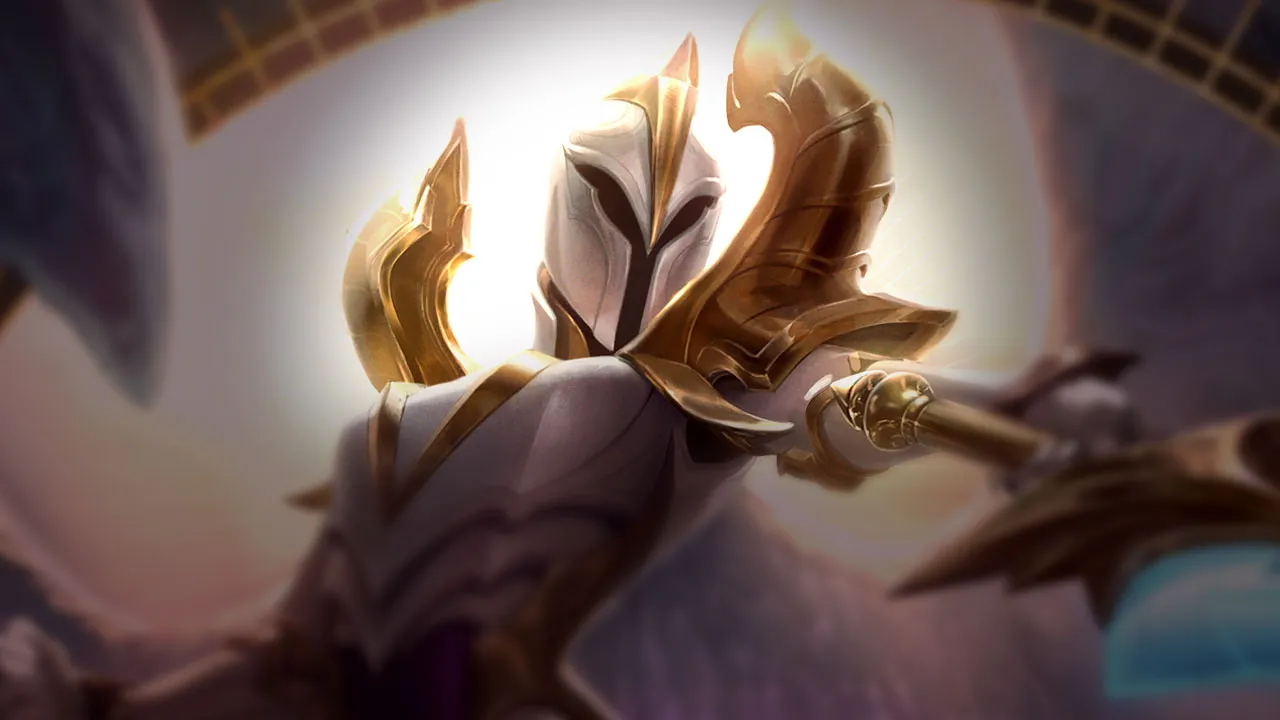

























カウンターアングル
Kayleのカウンターを理解することは、レーンで誰が彼女に勝てるかを知るだけではありません。彼女のキットがなぜ脆弱なのかを理解することです。彼女は時間、距離、そして構造化された戦いに依存しています。これらを妨げるもの――序盤のプレッシャー、速いエンゲージ、即時のバースト――はすべて彼女を直接脅かします。カウンターとは、彼女に対して強いピックであるだけでなく、彼女がスパイクに到達したり、戦闘でDPSを発揮したりするのを妨げるチャンピオンのことです。

Kayleは優れたscalingを持ちますが、序盤は非常に脆弱です。強力なearly gameプレッシャーをかけるアグレッシブな構成は、彼女が重要なアップグレードに達する前に咎めることができます。これらのpower spikeに到達できなければ、彼女の影響力は限定的なままです。
これらのチャンピオンは、こちらのビルドやプレイスタイルを真正面から上回る構成を持ち、レーン戦のコントロールとファームを極めて難しくする。彼らのスキルはこちらの主要な強みを無効化し、いつも通りのプランを実行しようとした瞬間に手痛い反撃を受けさせてくる。こうしたマッチアップでは、ミスを最小限に抑え、正面からの対決以外で解決策を探すことが重要になる。

Darius の passive の Hemorrhage は、あなたの passive の Divine Ascent が攻撃速度を上げるよりも速く溜まるため、Darius はあなたの scaling を完全に封じます。farm のために前に出ると、Apprehend で引き寄せられ、出血の stack を一気に溜められます。この圧力により、相手の素のダメージを防ぐために早すぎる Divine Judgment を使わざるを得なくなり、無敵が切れたまさにその瞬間、致命的な Noxian Guillotine に対して完全に無防備になります。
どの minion を争っても致命的な Decimate の範囲に入ってしまうため、最初の wave から lane の優先権を譲らざるを得ません。Darius は wave をゆっくり push してあなたに dive するか、自分の tower の近くで freeze してあなたの経験値を奪います。この wave 管理の劣勢により、Starfire Spellblade は tower の下でたまに last hit を取るための苦肉の手段に落ち、チームは top lane の圧力なしで戦わなければなりません。
生き残るには、Apprehend で引き寄せられた場合に Crippling Strike の slow から逃れるため、Celestial Blessing を絶対に温存しなければなりません。Radiant Blast は、相手が前に歩いてきたときに slow をかけて離脱するためだけに使ってください。Darius が自分の tower の近くで wave を freeze することに成功したら、壊しに前に出てはいけません。gold を失うことを受け入れ、経験値の範囲内にとどまり、wave が自然に戻ってくるのを待ちます。

Kayle は Irelia の Bladesurge のダッシュを中断できないため、この matchup は悪夢です。Divine Ascent の射程を解放する前は、gold を集めるために前に出なければならず、Irelia に Ionian Fervor の stack を溜める格好の的を与えてしまいます。相手が Flawless Duet を当てると、あなたには連鎖を断ち切る displacement もダッシュもなく、相手の絶え間ない on-hit の物理ダメージに完全にさらされます。
Irelia は 2 レベルから、minion wave を自分の turret の近くで freeze してあなたを完全に zone できます。Starfire Spellblade を使おうと前に出れば、相手は Bladesurge で即座に距離を詰めるため、Celestial Blessing を防御的に使わざるを得なくなります。この絶え間ない体力の消耗により、自分の turret の下ですら安全に farm できず、相手が Vanguard's Edge を解放すると、繰り返される dive の非常に簡単な的になります。
生き残るには、徹底した忍耐が必要です。序盤の minion は捨て、安全な場所から最大射程の Radiant Blast と Starfire Spellblade で取れる分だけ確保してください。Irelia が Vanguard's Edge で仕掛けてきても、すぐに慌てて Celestial Blessing を使わないでください。代わりに Divine Judgment を温存し、turret の下で stack が溜まった Bladesurge の burst ダメージを吸収します。唯一の目標は、Divine Ascent で反撃に必要な射程と攻撃速度を得るまで、失う gold を最小限に抑えることです。

Camille の Adaptive Defenses の shield が、Starfire Spellblade での序盤の poke をすべて完全に無効化するため、この matchup は Camille が支配します。5 レベルで Divine Ascent の射程を得る前は、Camille は Tactical Sweep で簡単にあなたの体力を削り、拘束できます。Hookshot が使えるようになると、あなたが逃げられない trade を強制できる機動力を持ち、5 レベル前の laning 段階は悪夢になります。
この matchup は、Camille が minion wave を自分の turret の近くで freeze できるかどうかにかかっています。あなたには序盤の waveclear がないため、相手は gold からあなたを zone で遠ざけます。freeze を取ると、Hookshot で距離を詰め、Hextech Ultimatum であなたをあなたの turret の下に閉じ込める致命的な dive を仕掛け、jungler に面倒を見させるか、経験値が完全に足りない状態に追い込みます。
5 レベル前は極めて厳しい規律でプレイしなければなりません。wave を push してはいけません。代わりに Radiant Blast は、来る minion を最大距離から減らして last hit を取るためだけに使います。Tactical Sweep の外縁を避けるために、Celestial Blessing を使える状態に保ってください。Camille が壁の近くで Hookshot を準備していたら、すぐに下がります。Hextech Ultimatum で閉じ込められたら、Divine Judgment を早まって慌てて使わず、Precision Protocol の true damage を防ぐために遅らせてください。

Jayce は Transform Mercury Cannon の 2 つのフォームを悪用して、あなたの序盤を封じます。cannon フォームの To the Skies! で簡単にあなたの体力を削ってから、hammer フォームに切り替えて直接跳びかかります。最初の Divine Ascent の段階を解放するまでは、trade をやり返すだけの射程も素のステータスもなく、相手の攻撃的な構えは非常に圧迫的です。
burst で倒されないよう後ろに下がり、最初の wave を譲らざるを得ません。Jayce は lane を freeze するか、大きな wave をゆっくり push して turret の下であなたに dive します。Starfire Spellblade でたまに minion を確保するのが唯一の命綱ですが、それは優先権と turret plate を犠牲にすることを意味します。この序盤の劣勢が scaling を遅らせ、チームはマップの objective を大きな不利で戦うことになります。
gold より生存を優先してください。wave は自分の turret の下で crash させ、Jayce が dive してきたら Radiant Blast で slow をかけます。飛んでくる projectile を避けるため、あるいは hammer フォームの engage から逃げるのに必要な移動速度を得るために、Celestial Blessing を使える状態に保ってください。相手が To the Skies! で仕掛けてきたら、Divine Judgment で burst ダメージを吸収し、そのあと戦闘をひっくり返そうとせず、すぐに下がります。

Kayle の序盤の脆さは、素早い機動力がないことに由来し、*Shuriken Flip* を当てられる非常に簡単な的になります。マークされると、Akali の続くダッシュから簡単には逃げられません。*Divine Judgment* を解放する 5 レベルに達する前は、Akali の *Five Point Strike* と *Assassin's Mark* で簡単に体力を削られ、基本のスキルセットでは振り切れない致命的な *Perfect Execution* の dive につながります。
序盤の wave の主導権は完全に譲ることになり、追い詰められないよう turret の近くで freeze します。trade は負け戦です。*Starfire Spellblade* で minion を確保しようとすると、Akali の *Five Point Strike* の poke にさらされます。相手が *Shuriken Flip* を当てたら、すぐに下がらなければ強制的に recall することになり、tower が無防備になって、相手は自由に roam してチームに圧力をかけられます。
*Shuriken Flip* を避けるため、あるいは shroud の stealth で近づく Akali から逃げるためだけに、*Celestial Blessing* を温存して生存を優先してください。相手がダッシュで前に出てきたら、*Radiant Blast* を最大射程から使って slow をかけます。相手が *Perfect Execution* で仕掛けてきても、すぐに慌てて *Divine Judgment* を使わないでください。最大のダメージを防ぐため、相手の 2 回目のダッシュによる execute の段階まで待ちます。遅れを取ったら、gold を犠牲にして、安全な距離から経験値を吸収してください。

Kayle は 5 レベルで Divine Ascent による遠距離攻撃を解放する前は、機動力がないため簡単な的になります。Ambessa はこれを利用し、Cunning Sweep と Lacerate を繋いで Drakehound's Step のダッシュを何度も発動させます。この絶え間ない機動力は Kayle の弱い self-peel を完全にすり抜け、Ambessa は常に距離を詰めて重い trade を強制でき、Kayle は逃げることも Starfire Spellblade で対抗することもできません。
Ambessa は繰り返しダッシュできるため、Kayle は序盤の wave の主導権を完全に譲らざるを得ません。Cunning Sweep で体力を削られたり Lacerate で slow をかけられたりせずに、last hit のために前に出ることはできません。これにより Kayle は自分の turret の下で gold を失い、必死に Radiant Blast で取れる分を確保することになります。Ambessa は大きな wave を crash させ、Public Execution での dive を狙うか、5 レベル前に大きな gold 差を生み出します。
この猛攻を生き延びるには、最初の wave から turret の射程のすぐ外で wave を freeze しなければなりません。Celestial Blessing は、Cunning Sweep の外縁を避けて下がるための移動速度上昇のためだけに温存してください。Ambessa が Public Execution で仕掛けてきたら、すぐに Divine Judgment で反応して execute ダメージを防ぎ、そのあと Radiant Blast で slow をかけて逃げます。Starfire Spellblade で poke してはいけません。last hit のためだけに使ってください。

Jarvan IV は先に 5 レベルに到達して、序盤のテンポ争いを支配します。Demacian Standard と Dragon Strike の標準的なコンボで簡単に打ち上げられますが、本当の脅威は Cataclysm です。あなたがまだ 4 レベルのうちに解放されると、すぐに arena に閉じ込められます。身を守る Divine Judgment がないため、Flash を使うか、すぐに倒されるかのどちらかを強いられます。
この序盤のレベル差により、wave の管理が完全に麻痺します。Starfire Spellblade で farm を争うことはできません。歩み寄れば、Golden Aegis の slow で強化された Martial Cadence の poke を受けるからです。tower の下まで押し込まれると、Jarvan IV は 5 レベルになった瞬間に簡単にあなたに dive します。早い段階で Flash を失うと、相手の jungler があなたの lane を繰り返し camp でき、tower の破壊が snowball します。
この matchup を生き延びるには、gold より防御的な安全を優先してください。river のラインを越えて前に出ず、最大射程から Radiant Blast を使って安全に minion を確保します。打ち上げを避けるために Celestial Blessing を使える状態に保ち、攻撃的には絶対に使わないでください。Jarvan IV が先に 5 レベルに達したら、turret の後ろに完全に下がり、必要なら経験値は諦めてください。Flash を温存するほうが、melee minion 2 体より価値があります。

Yone は Soul Unbound の圧倒的な距離を詰める力のおかげで、Divine Ascent による 5 レベル以降のあなたの射程を完全に無効化します。3 回目の攻撃の竜巻のために Mortal Steel をチャージすると、相手の脅威範囲は非常に広くなります。このダッシュから簡単に Fate Sealed に繋げられ、あなたの Radiant Blast の slow をすり抜ける致命的な crowd-control の連鎖に閉じ込められ、Starfire Spellblade の poke は意味をなさなくなります。
常に防御的な姿勢を強いられ、最大距離から Radiant Blast と Starfire Spellblade だけで farm することになります。Yone は trade の際に Spirit Cleave で自分を shield で守るため、あなたの反撃ダメージを防がれ、wave を効果的に減らせません。Soul Unbound での dive の脅威が常にあるため、gold を落とし、lane の優先権を完全に譲ることになり、top 側の jungle も無防備になります。
相手の Mortal Steel の stack を常に確認し、風のオーラが発動中ならすぐに下がってください。向かってくる竜巻を避ける移動速度上昇のために、Celestial Blessing を cooldown が戻った状態に保ってください。Fate Sealed に捕まってしまっても、すぐに慌てて Divine Judgment を使わないでください。Soul Unbound で戻ってくる直前に burst ダメージを防げるよう ult のタイミングを合わせ、防げるダメージを最大化します。

Rumble の flame spitter による継続的な魔法ダメージが Kayle の弱い序盤の防御を簡単にすり抜けるため、Rumble がこの lane を支配します。Divine Ascent で射程を得る前は、last hit のために前に出なければならず、相手の炎の射程に直接入ってしまいます。Rumble が harpoon を当てれば、slow でダメージ範囲に閉じ込められます。Starfire Spellblade での trade は相手の shield を貫けず、序盤のやり取りは完全に一方的になります。
常に自分の turret の下まで押し込まれ、相手の持続的な範囲ダメージを避けながら minion を確保するのに苦労します。Rumble の絶対的な wave 管理により序盤の優先権が奪われ、river で jungler を助けることができません。体力の trade を試みるたびに体力を削られ、早い recall を強いられてレベルの scaling が遅れ、Rumble は自由に tower plate を削れます。
生き残るには、規律ある wave 管理と正確なスキルの使用が必要です。Celestial Blessing を攻撃的に使ってはいけません。この heal と速度上昇は、Rumble の harpoon の slow を解除し、flame spitter の射程からすばやく抜け出すためだけに温存してください。遠くの minion は、安全な場所から Radiant Blast と Starfire Spellblade で確保します。Rumble が wave を自分の tower の近くで freeze したら、前に出てはいけません。相手が範囲の炎で必ず wave を押し戻すのを待ってください。

Riven はあなたの spacing 手段を完全に無効化します。Broken Wings の前進と Valor の急なダッシュを繋げることで、反応する前に即座に距離を詰めます。近づかれると、Ki Burst の stun により Celestial Blessing で kite できなくなり、Divine Ascent の wave を発動する前に、Runic Blade で増幅された壊滅的な burst を叩き込まれます。
この距離を詰める脅威のため、wave を争うことはできません。Riven は minion を自分の turret の近くに留めてあなたの farm を阻止し、一歩前に出ただけで倒される危険な領域にあなたを追い込みます。優先権を譲らざるを得ないため、マップの圧力に参加できず、強い turret の圧力の下で Starfire Spellblade で minion を確保するためだけに、体力を犠牲にすることも多くなります。
Riven に push させ、minion wave を turret の射程のすぐ外に留めておきます。Radiant Blast は、遠くから倒れかけの minion を確保するためだけに使い、poke には絶対に使わないでください。相手が Valor で仕掛けてきたら、すぐに Celestial Blessing を使って下がり、Radiant Blast は Broken Wings の 3 回目の発動を slow させるために温存します。相手が Blade of the Exile を発動して dive してきたら、高ダメージの execute の斬撃を吸収するため、Divine Judgment をぎりぎりまで遅らせてください。

Malphite の Seismic Shard は、Kayle の序盤の spacing に対する究極の counter です。発動されると、あなたの移動速度が奪われ、Celestial Blessing の速度上昇が効果を失います。この速度の劣勢により、Thunderclap と Ground Slam の trade を kite する能力が奪われ、相手が Unstoppable Force を解放して tower の下で致命的な dive を仕掛けてくると、完全に無防備になります。
純粋に防御的な姿勢を強いられ、wave を確実に crash させることも、Granite Shield のリセットを争うこともできません。Malphite が Seismic Shard を投げるたびにあなたの体力が減り、あなたの wave は相手に向かってゆっくり push されます。体力が半分まで削られると、Unstoppable Force の脅威のせいで turret の近くに安全に立てず、不利な早い recall を強いられて gold とマップの圧力を失います。
poke を生き延びるため、序盤は素のダメージより魔法防御を優先してください。Celestial Blessing は先出しで使ってはいけません。Seismic Shard が当たったあとの slow を打ち消すために温存します。Starfire Spellblade と Radiant Blast で遠くから farm するときは、最大射程を保ってください。Malphite が 5 レベルに達したら、Unstoppable Force の衝撃を和らげるためだけに Divine Judgment を温存し、相手があなたに向かって止められないダッシュを放つまさにその瞬間に ult を使います。

どちらも scaling を目指しますが、Nasus はあなたの scaling の優位を完全に無効化します。最大の障害は Wither です。Nasus がこの攻撃速度と移動速度の低下であなたを狙うと、攻撃も kite もできなくなるため、passive の Divine Ascent は役に立たなくなります。Starfire Spellblade で poke しても、相手の passive の Soul Eater でそのダメージを簡単に回復され、Siphoning Strike を安全に溜められてしまいます。
この力関係により、push する余裕がない非常に厳しい lane の状態になります。誤ってゆっくり push してしまうと、Nasus は wave を自分の tower の近くで freeze し、Siphoning Strike を安全に溜めます。freeze を壊そうと前に出ると、Wither と、耐性を削る Spirit Fire の単純な組み合わせで、確実に倒されるか、自分の turret に逃げ帰るためだけに Divine Judgment を使わされます。
生き残るには、防御的にプレイして wave を自分の turret にぶつけさせなければなりません。Radiant Blast を wave に使ってはいけません。Nasus が近づいてきたときに slow をかけるためだけに温存してください。相手が Fury of the Sands を発動してあなたに走ってきたら、すぐに Celestial Blessing を使って移動速度を上げて下がります。Wither を当てられてしまったら、trade をやり返そうとせず、ただ tower に向かって走り、Divine Judgment は最後の手段としてのみ使ってください。

Pantheon の序盤は絶対的な悪夢です。ポイント&クリック式の Shield Vault が、安全に spacing を取るあなたの能力を完全にすり抜けるからです。相手が Mortal Will を溜めているとき、last hit のために前に出ようとすると即座に stun を受け、続けて壊滅的な Comet Spear を受けたうえ、Aegis Assault で安全に離脱されます。5 レベル前のあなたは melee 状態のため、やり返すことはできず、完全に相手の言いなりです。
この脅威により、最初の 3 つの wave は完全に譲らざるを得ません。序盤に体力を削られると、wave が crash したときに dive されるのが確実だからです。Pantheon はゆっくり push し、wave を溜めて、あなたを tower の下に閉じ込めます。体力は溜め込むべき資源になります。半分を下回ると、Comet Spear の execute ダメージと連携した dive で、Divine Judgment を解放する前にゲームを壊されます。
生き残るには、wave を跳ね返らせ、Radiant Blast か Starfire Spellblade は、倒れかけの minion を最大射程から確保するためだけに使ってください。Pantheon が Shield Vault で仕掛けようと前に出た瞬間にすぐ下がれるよう、Celestial Blessing を使える状態に保ってください。相手が自分の tower の近くで freeze したら、前に出てはいけません。経験値の範囲内にとどまり、wave が跳ね返るのを待ちます。Divine Judgment は、勝ち目のない trade をひっくり返そうとするのではなく、dive の際の高ダメージの burst を吸収するためだけに温存してください。

この lane は、Renekton が一瞬で距離を詰められるかどうかで決まります。minion を通り抜けて Slice and Dice を使うことで 2 回目のダッシュを得て距離を詰め、強化された Ruthless Predator の stun ですぐにあなたを拘束します。この素早い burst により、Celestial Blessing で反応することも、Divine Judgment を間に合うように備えることもできず、少しでも前に出すぎると、体力を致命的に削られます。
この脅威のため、序盤は wave を争えません。Renekton は dive するためにゆっくり push するか、あなたの farm を奪うために freeze します。Starfire Spellblade で last hit を取ろうと前に出ると、体力を危険なレベルまで削られ、早まった recall を強いられるか、tower の下で倒される危険があります。この圧力があなたを lane に縛りつけ、jungler を助けられなくなり、top 側の river の主導権を完全に譲ることになります。
相手が Slice and Dice を 2 回使うのに必要な空間を与えないよう、minion wave を turret の射程のすぐ外で freeze しておく必要があります。Radiant Blast は、相手がダッシュで前に出てきたときに slow をかけるためだけに温存し、Celestial Blessing は melee の射程からすぐに逃れるために使います。相手が自分の tower の近くで wave を freeze したら、前に出てはいけません。代わりに jungler を待つか、gold を諦めて生き延びてください。

この lane は、Olaf の Ragnarok があなたの唯一の信頼できる self-peel を完全に封じるかどうかで決まります。通常は、迫る脅威に Radiant Blast で slow をかけ、Celestial Blessing で速く逃げることに頼ります。しかし Olaf が ult を発動すると、その CC 無効により slow の blast は完全に役に立たなくなり、相手はあなたの防御を突っ切って走り、Undertow を繰り返し投げてあなたを追い詰めます。
Olaf はあなたを前に誘い出すため、積極的に minion wave を freeze します。Starfire Spellblade で minion を確保しようと前に出ると、相手は Undertow を当てに来ます。5 レベルに達すると tower dive の可能性が急上昇します。Ragnarok により、相手はあなたの turret の下でも防御的な slow 手段を無視できるため、生き延びるためだけに gold と経験値を諦めることになります。
この猛攻を生き延びるには、turret に張りついて、Celestial Blessing を攻撃的に使ってはいけません。距離を保って Undertow を誘ってください。外れたら、farm を取れる短い隙があります。相手が Ragnarok で仕掛けてきたら、すぐに Divine Judgment を使って Reckless Swing の true damage と Vicious Strikes の素早い連続攻撃を吸収し、短い無敵時間を使って tier-one の構造物の後ろに安全に下がってください。

Yasuo の Wind Wall が Radiant Blast の貫通と Divine Ascent で生み出される炎の波の両方を無効化するため、Yasuo はあなたの攻撃力を完全に封じます。blast による armor と魔法防御の低下がなく、passive の波も空中で消されるため、主要な DPS と zone の手段を失い、相手が engage してきてもやり返すことが全くできません。
自分の turret の下に釘付けにされ、wave を争えなくなります。Yasuo は minion を自由に操作でき、Sweeping Blade で距離を詰めつつ、Starfire Spellblade の poke を防ぎます。last hit を取ろうと前に出ると、相手は wave に Steel Tempest を溜め、あなたの tower の下で打ち上げから Last Breath に繋げる脅威を与え、gold を諦めさせます。
生き残るには、Yasuo に Sweeping Blade のダッシュ先となる簡単な的を与えないよう、常に minion のずっと後ろに立ってください。Celestial Blessing は、Steel Tempest の竜巻を避ける移動速度上昇のためだけに温存します。打ち上げで捕まってしまったら、相手の ult の衝撃とそれに続く armor penetration の攻撃を吸収するため、Last Breath の最後の瞬間まで Divine Judgment を遅らせてください。Wind Wall が使える間は、Radiant Blast を無駄にしてはいけません。
その他のマッチアップ
これらのチャンピオンは、マッチアップ自体を絶望的にするわけではないが、対面で優位に立ちやすいツールを持っている。射程が長かったり、攻撃を受け止める力が高かったり、エンゲージへの対応手段が豊富だったりする。アプローチを調整し、戦闘を受け入れるタイミングを慎重に選ぶ必要がある。

この lane は、あなたの ult と相手の silence のどちらが先かの勝負にかかっています。Garen の狙いは、Decisive Strike であなたを silence して Divine Judgment を使わせず、すぐに Demacian Justice で確実に execute することです。あなたの ult には詠唱の猶予があり、それが silence で完全に封じられるため、相手の基本スキルがあなたの主要な防御手段を直接無効化し、体力が低い状態での skirmish は非常に危険になります。
5 レベル前は、Garen は Perseverance で Starfire Spellblade と Radiant Blast の poke を平然と受け流します。お互いに ult を解放したあとは、体力が半分未満で lane の中間地点より先に進めません。相手の単純な突進で turret の下での受け身の姿勢を強いられ、相手は Judgment で自由に wave を処理して roam でき、あなたは minion の gold を失い続けます。
生き残るには、Garen が Decisive Strike を発動した瞬間に Radiant Blast で slow をかけ、すぐに Celestial Blessing を発動して silence の射程から逃げなければなりません。すでに silence されている状態で、反応として Divine Judgment を使ってはいけません。相手が距離を詰めてきた場合は、剣が当たる直前に先出しで使う必要があります。Garen が Courage を発動してあなたの反撃の poke を吸収してきたら、完全に下がり、Divine Ascent で遠くから安全に farm できる追加の射程を得るのを待ってください。

Gwen は A Thousand Cuts による安定した魔法ダメージのおかげで、あなたの序盤の強みを上回ります。Divine Ascent で遠距離フォームを解放しても、Hallowed Mist を展開することで、主要な攻撃手段である Starfire Spellblade を完全に無効化できます。この領域では相手があなたの遠距離の execute を受けなくなり、あなたは相手の melee 範囲に踏み込むしかなく、後半の DPS が上がる前に Snip Snip! で削り取られます。
5 レベル前は、Gwen は Skip 'n Slash で距離を詰め、あなたの last hit に圧力をかけます。Radiant Blast でやり返そうとしても、相手は slow から簡単にダッシュで抜けます。tower の下では、wave に Snip Snip! を溜めて Needlework であなたに dive してきます。mist のせいで安全に相手を poke で追い払えないため、常に優先権を譲ることになり、turret の下で受け身に farm することを強いられます。
生き残るには、Hallowed Mist が発動している間は Starfire Spellblade を発動してはいけません。代わりに前に歩いて mist を誘い出し、Celestial Blessing を使って下がり、Skip 'n Slash から逃げてください。相手の領域が消えるのを待ってから、振り返って戦います。相手が all-in を強いるために Needlework を発動してきたら、Divine Judgment を使って最後の高ダメージの針の連射を吸収し、burst を生き延びて、跳ね返ってくる wave を安全に farm してください。

Gragas は妨害の多いスキルセットがあなたの究極の防御に対抗するため、Kayle の scaling を封じるのが得意です。タイミングの良い Body Slam であなたは即座に行動不能になり、Divine Judgment を備える前に、Drunken Rage と Barrel Roll の AP burst をすべて叩き込まれます。相手の passive の Happy Hour も、序盤のレベルで Starfire Spellblade による小さな poke を完全に無効化します。
最初の wave から防御的な姿勢を強いられます。Gragas は Barrel Roll を使って wave を freeze または crash させる脅威を常に与え、あなたは Radiant Blast で極端な遠距離から farm することになります。前に出すぎると、Body Slam を使って重い trade を仕掛けてきます。相手が Explosive Cask を解放すると、あなたを前に押し出せるため、自分の turret の下にとどまることももはや安全ではありません。
生き残るには、Gragas があなたの wave に当たらずに直接 Body Slam を当てられないよう、常に自分の minion wave の後ろに立ってください。Barrel Roll の slow 領域から逃げるのに必要な移動速度を得るためだけに、Celestial Blessing を使える状態に保ってください。Divine Ascent が遠距離フォームに達するまでやり返そうとせず、相手が zone で追い払おうとするたびに、Radiant Blast で遠くから安全に farm することを優先してください。

K'Santé の CC は、turret の下という通常の安全地帯をすり抜けられるため、K'Santé がこの matchup のリズムを決めます。あなたが Divine Ascent で scaling する間、相手の Ntofo Strikes による打ち上げの準備で、あなたの背後に回れます。最大の脅威は All Out で、あなたを turret から物理的に引き離し、遠距離 DPS を確立する前に Divine Judgment を防御的に使わされます。
このやり取りで、wave の管理は完全に変わります。K'Santé に大きな wave を crash させるだけにはできません。相手は Path Maker で turret の射撃を吸収してから All Out であなたを引きずり出して dive しようとします。minion の列の主導権を失うと、避けるためだけに Celestial Blessing を防御的に使わされ、mana を消耗します。
生き残るには、turret の周りの壁との位置関係に注意してください。K'Santé と地形の間に立ってはいけません。All Out で叩きつけられてしまいます。Radiant Blast は、相手が Footwork で前にダッシュしてきたときに slow をかけるためだけに温存してください。打ち上げを当てられてしまったら、高ダメージの burst を防ぐため、相手の ult による displacement が終わるまで Divine Judgment を遅らせてください。

Graves は、New Destiny の素の範囲 push と、End of the Line の地形での即時跳ね返り burst を組み合わせて、序盤を支配します。Divine Ascent による遠距離攻撃を解放する前は、melee のため危険な領域に踏み込まざるを得ず、壁で爆発する相手の素早い弾に非常に無防備です。
最初の 4 レベルは turret の下に閉じ込められ、常に相手の条件で farm することになります。Graves は Smoke Screen を使って Starfire Spellblade での last hit のタイミングを乱し、体力を削ります。これによりマップの優先権を奪われ、相手は Quickdraw で安全に armor を溜め、tower plate を削ります。
End of the Line の即時爆発を防ぐため、壁から離れた lane の中央に厳密に位置取りしてください。Radiant Blast で遠くの minion を確保し、Graves が Quickdraw でダッシュしてきたら、すぐに Celestial Blessing を発動して Smoke Screen から逃げてください。dive の際は、Collateral Damage の burst を無効化するため、常に Divine Judgment を温存してください。

Leap Strike で Jax が一瞬で距離を詰められる上に、Counter Strike によってあなたの Starfire Spellblade と通常攻撃を完全に無効化されるため、Jax はあなたの序盤のダメージを完全に封じ込めます。Divine Ascent によるレベル依存のパワースパイクに到達する前は、Jax を罰するだけの純粋なダメージもレンジもありません。poke しようとするたびに、Jax の防御スピンがあなたのスキルをすべて防いでしまいます。
この matchup では、最初の wave からあなたが守勢に回ることになります。last-hit のために前に出ると、Jax は常に slow-push しながら all-in を狙ってきます。wave priority を争うことはできないため、タワー下で Radiant Blast と Starfire Spellblade を使ってファームすることが多くなります。序盤にあなたの体力が少しでも不利になると、Jax が Grandmaster-at-Arms のパッシブの魔法ダメージを解放した時点で、簡単にダイブされてしまいます。
生き残れるかどうかは、スペーシングと自制心にかかっています。Celestial Blessing は自分から先に使わないでください。Jax が Counter Strike を発動して Leap Strike でジャンプしてきた瞬間に逃げるために、移動速度アップを温存します。Jax がスキルを外したりスタンを無駄にしたりしたら、その短い隙に Radiant Blast と通常攻撃で反撃します。Divine Ascent による射程と wave を解放できるレベル 9 と 13 に到達することだけに集中し、Divine Judgment はダイブ中の Jax の burst を耐えるためだけに使ってください。

Heimerdinger の H-28G Evolution Turret の設置は序盤の lane を完全に支配します。Kayle には安全にタレットを処理できるだけの序盤の遠距離 DPS がないからです。あなたの Starfire Spellblade はレベル 5 より前では弱すぎて Heimerdinger の push に対抗できず、タワー下に追い込まれてしまいます。ただし、スケールすれば、あなたの Divine Judgment が Heimerdinger の burst の可能性を完全に封じます。特に、レイトゲームのチームファイトでは、UPGRADE!!! で強化されたロケットや巨大グレネードを無力化できます。
最初の 10 分間は、Heimerdinger の絶え間ない siege で minion を失い、あなたは自分のタワーに釘付けになります。Heimerdinger は Hextech Micro-Rockets であなたを poke し続け、last-hit しようとするあなたに早い段階での recall を強いて、plating を失わせます。この完全な priority の喪失により、あなたの jungler はトップ側のリバーを争えなくなります。ただし、ダイブされないように体力を十分に高く保てれば、Heimerdinger のテンポを遅らせることに成功します。
序盤に H-28G Evolution Turret を破壊しようとしてマナを無駄にしないでください。代わりに、Radiant Blast と Starfire Spellblade をタワー下で minion のゴールドを確保するためだけに使います。Heimerdinger がタワー下であなたをスタンさせようとしたときに CH-2 Electron Storm Grenade を避けられるよう、Celestial Blessing を用意しておきます。レイトゲームの小競り合いでは、Heimerdinger が UPGRADE!!! を発動するときのために Divine Judgment を温存し、Heimerdinger の ult のダメージを完全に吸収して、チームファイトを有利に傾けてください。

Fiora の序盤はメレーのターゲットを痛めつけるように設計されており、Kayle の最も弱い時期とまさに噛み合います。Divine Ascent で遠距離攻撃を得る前は、Fiora は Lunge を使い続けて Duelist's Dance の vital を突いてきます。射程がないため、Fiora を簡単に罰することも、Fiora の Bladework の射程に入らずに安全にファームすることもできません。この序盤の差が、射程が解放されるまで lane 全体を左右します。
Fiora は Lunge で trade を仕掛けてきて、あなたのスローを Riposte で受け流すため、序盤の wave control は譲るしかありません。序盤のレベルはタワーの近くにへばりつき、Starfire Spellblade や Radiant Blast で必死に minion を確保することになります。Fiora が自分のタワー付近で wave を freeze してきた場合、遠距離のスパイクに到達する前に経験値で大きく遅れてしまう危険があります。
Duelist's Dance の vital が Fiora に向いた位置に出現したら、すぐに後ろに下がってその位置をリセットしてください。Celestial Blessing は回復に使わず、Fiora の Bladework のスローから逃げるための移動速度に使います。Fiora が Grand Challenge を発動したら、最寄りの壁に寄って最後の vital を叩かれないようにし、追われているときは逃げようとするのではなく、Divine Judgment のタイミングを合わせて Fiora の高ダメージの vital 攻撃を吸収してください。

Volibear の Thundering Smash のスプリントで距離を詰められ、Sky Splitter と Frenzied Maul の致命的な trade で押さえ込まれるため、Volibear はこの lane を支配します。Kayle は弱いメレー状態では Volibear の burst に耐えられず、序盤に苦しみます。生き残れるかどうかは、Celestial Blessing の移動速度アップで Volibear のスプリントを無効化し、スタンを入れられる前に距離を保てるかどうかにかかっています。
Volibear のパッシブ The Relentless Storm は wave を常にあなたの方へ押し込みます。一見ありがたそうですが、実際には危険なダイブの機会を作ります。Volibear がレベル 5 になると Stormbringer であなたのタワーを無効化できるため、体力が低い状態での freeze は非常に危険になります。Thundering Smash の trade で体力を削られると、タワー下の大きな wave を諦めるか、フリーキルを与える危険を冒すかの二択を迫られます。
生き残るには、wave を管理して、タワーの射程のすぐ手前で freeze したままにし、Volibear が簡単にダイブできるゾーンの外に置く必要があります。Celestial Blessing を sustain のために使ってはいけません。Volibear が Thundering Smash を発動したときに反応するためだけに温存してください。後ろに下がりながら Radiant Blast で Volibear の接近を遅らせます。Volibear が Stormbringer でダイブしてきたら、Divine Judgment のタイミングを正確に合わせて、Volibear の ult の着地時の大ダメージを吸収してください。

この matchup は Mordekaiser が優位に立つ厳しいステータスチェックですが、あなたの ult が重要な命綱になります。Mordekaiser に Realm of Death へ引きずり込まれると、パッシブの Darkness Rise と孤立した状態での Obliterate で、あなたの体力はあっという間に溶けます。しかし、Divine Judgment を温存し、その無敵状態のタイミングを Realm of Death 内での Mordekaiser の高ダメージの Obliterate を吸収するように合わせれば、デュエルを持ちこたえて、簡単なキルを許さずに済みます。
Mordekaiser は wave を執拗に push してあなたをタワー下に押し込み、Death's Grasp を狙ってあなたを引き寄せ、致命的な trade に持ち込もうとします。長引く小競り合いは Mordekaiser の Darkness Rise を発動させてあなたの体力を削るため、序盤の wave control は失うものと割り切る必要があります。Celestial Blessing を発動していない状態で捕まり、Mordekaiser のスキルショットを避けられなければ、悪いタイミングでの recall を強いられるか、自分のタワー下でダイブされることになります。
Death's Grasp を当てにくくするため、minion wave の後ろで常に横に動き続けてください。カウンターエンゲージを受けて危険になるような場合は、Radiant Blast や Starfire Spellblade を攻撃的に使ってはいけません。引き寄せられたら、すぐに Celestial Blessing の移動速度を発動して、Darkness Rise の範囲から走り出てください。何より重要なのは、Realm of Death の中で Divine Judgment を早く使わないことです。孤立した Obliterate を受け止めるためだけに温存し、アリーナの境界に沿って円を描くように走ってください。

Knuckle Down と Facebreaker がレベル 5 前の Kayle の弱いメレー形態を罰するため、Sett は序盤を支配します。ただし、この matchup は ult のタイミングで決まります。Sett は all-in の際に The Show Stopper や、フルチャージの Haymaker であなたを burst で倒そうとしますが、Kayle には完璧な対抗手段があります。Sett が true damage や叩きつけを放つ正確な瞬間に Divine Judgment を使えば、Sett の攻撃の脅威を完全に無力化できます。
Sett は Facebreaker であなたを簡単に freeze して追い払えるため、序盤の wave control は譲るしかありません。Divine Ascent で射程を得る前に CS を争おうとすると、体力を一気に削られます。Sett がプルを無駄にしたら、短い隙が生まれ、Starfire Spellblade で安全に poke できます。それ以外のときは、序盤のフリーキルを与えないために、タワー下に押し込まれるのを受け入れてください。
Celestial Blessing を攻撃的に使ってはいけません。Sett が Knuckle Down を発動してあなたに走ってきたら、すぐに逃げるために移動速度アップを温存してください。戦闘中は、Radiant Blast で Sett の接近を遅らせて距離を保ちます。Sett の all-in 中に、慌てて早めに Divine Judgment を使ってはいけません。Sett の grit バーが満タンになるのを待ち、Sett が Haymaker を構えた瞬間か、The Show Stopper の空中にいる間に ult を使って、最大の burst を吸収してください。

Teemo はあなたの主なダメージの源を直接無力化します。Starfire Spellblade を使って trade や last-hit をしようとするたびに、Teemo は Blinding Dart で応じてきます。この blind は、あなたの通常攻撃と Divine Ascent のパッシブ wave を完全に無効化するため、すぐに反撃することは不可能になり、Teemo は短く burst 的な撃ち合いで、反撃ダメージを一切受けずに毎回勝つことになります。
この blind の相互作用によって、あなたは非常に守備的な姿勢を強いられます。Teemo は Toxic Shot で近づいてあなたを追い払い、あなたが反撃すれば Blinding Dart を使えるため、minion wave を直接争うことはできません。Starfire Spellblade でのファームは危険になり、離れた場所からの Radiant Blast に頼らざるを得なくなります。さらに、blind が切れた後に Teemo を追いかけると、隠された Noxious Trap に誘い込まれることがよくあります。
lane 全体が Teemo の blind の cooldown を中心に回ります。Teemo の Blinding Dart が使える間は、Starfire Spellblade を発動しないでください。代わりに、前に出て Blinding Dart を誘い、すぐに Celestial Blessing で離脱して Toxic Shot の毒ダメージを吸収します。Teemo の blind が cooldown に入ったら、反撃する短い隙があります。Teemo がダイブしてきたり、Guerrilla Warfare から出たところを捕まえようとしてきたら、Divine Judgment で Teemo の burst を防いでください。

Wukong はあなたの唯一の防御用スローを完全に無効化することで、この matchup を支配します。Wukong を引き離そうとしたり Radiant Blast で poke しようとしたりするたびに、Wukong は Warrior Trickster の分身を使って、簡単にそれを吸収または受け流せます。そのため、Wukong が続けて Nimbus Strike を使ってくるのに対して完全に無防備になります。Nimbus Strike は距離を詰め、Divine Ascent を溜める前にあなたを切り刻むのに必要な攻撃速度を Wukong に与えます。
Starfire Spellblade での trade は致命的な反撃を招くだけなので、最初の wave から守勢に回ることになります。Wukong は Golden Staff で短く強烈な trade を強いることができ、あなたの反撃を Stone Skin で受け流せるため、常にタワー下へ押し込まれます。Cyclone による Wukong の二連続ノックアップを防ぐ Divine Judgment のタイミングを外すと、ダイブされて大きな wave をいくつも失います。
Radiant Blast を自分から先に使ってはいけません。Wukong が Warrior Trickster を使った後で姿を現すまで温存してください。Wukong が Nimbus Strike で仕掛けてきたら、trade し返そうとせず、すぐに Celestial Blessing を使って下がります。Wukong が Cyclone を発動しても、最初の回転で慌てて Divine Judgment を使ってはいけません。2 回目の回転を待つか、Wukong が burst をすべて使い切った瞬間を狙い、タワーにへばりつきながら無敵の時間を最大限に活かしてください。

Urgot は Disdain であなたの間合いに飛び込んでくる脅威で、この lane を支配します。このダッシュが当たると、Urgot の Echoing Flames のショットガンの脚の中にあなたを引っくり返し、Purge で切り刻んできます。生き残れるかどうかは、この接近戦での引っくり返しを防げるかどうかにかかっています。Radiant Blast のスローを使って Urgot の前進する勢いを殺し、シールドでこちらに届く前に距離を保たなければなりません。
Urgot は Echoing Flames のパッシブを使って序盤の wave を積極的に push し、あなたをタワー下へ追い込みます。Urgot に近すぎる位置で Starfire Spellblade を使って minion を確保しようとすると、Corrosive Charge のスローを受ける危険があり、Urgot の致命的なダッシュを許すことになります。この絶え間ない脅威によって序盤のゴールドが制限され、守備的にプレイすることを強いられ、序盤のリバーでの小競り合いで jungler を助けることもできなくなります。
離れた minion を確保するために Radiant Blast を無駄にしてはいけません。このスペルは Urgot の engage に対処するためだけに温存してください。Urgot の Disdain のアニメーションが始まるのが見えたら、すぐに Radiant Blast を Urgot に直接撃って移動速度を落とし、続けて Celestial Blessing を発動して Urgot の進路から安全に外れます。Fear Beyond Death を当てられてしまった場合は、Divine Judgment のタイミングを完璧に合わせて、Urgot の ult の処刑ラインをブロックし、生き残ってください。

Tryndamere は Battle Fury による高いクリティカルと Spinning Slash のギャップクローズで、序盤の trade を支配します。Undying Rage を使えるようになると、タワー下へのダイブの脅威は非常に大きくなります。しかし、Kayle には完璧な対抗手段があります。Tryndamere が ult を使う正確なタイミングで自分に Divine Judgment を合わせると、高ダメージのクリティカルストライクを防げ、Tryndamere の主なキルの機会を無力化して、手ぶらで撤退させることができます。
Tryndamere は Battle Fury を溜めるために wave を執拗に push し、タワー下であなたをダイブしようとしてきます。押し込まれるのは受け入れ、Radiant Blast と Starfire Spellblade を使って安全な距離から minion を確保するしかありません。この lane は体力を維持できるかの勝負になります。体力を保っていれば、Tryndamere はあなたの Divine Judgment の中にダイブする危険を冒せず、Tryndamere の roam の可能性を封じて、あなたのトップタワーを守れます。
Tryndamere が Undying Rage を発動する前に Divine Judgment を無駄にしてはいけません。Tryndamere がダイブを仕掛けた瞬間に使い、最もダメージの高い攻撃を吸収する必要があります。Tryndamere が Spinning Slash で engage してきたら、すぐに Celestial Blessing を使って移動速度を合わせ、後ろに kite してください。Tryndamere が背を向けたり逃げようとしたりしたら、Radiant Blast でスローをかけますが、Tryndamere の fury が満タンなら、相手のジャングルまで追いかけてはいけません。
その他のマッチアップ
このマッチアップは何よりもまず実行力の勝負であり、両者ともに優位を取れる現実的な手段を持っている。重要なスキルを一つ避けられるか、エンゲージを正しく読めるか、あるいはたった一つの位置取りのミスが、勝敗を分けることもある。マッチアップを理解し、行動すべき瞬間を見極める力がとりわけ重要になる。

この matchup は純粋なスケール勝負で、Ornn の displacement コンボにどれだけきれいに反応できるかで決まります。Ornn が Volcanic Rupture の柱を使って Searing Charge のノックアップを狙う一方で、Kayle にはそれを阻止する完璧な手段があります。Celestial Blessing の移動速度アップがあれば、Ornn が空中に打ち上げる効果を発動させる前に、衝突ゾーンから楽に抜け出せます。
反応のタイミングを外すと、Bellows Breath の trade をフルで受けることになり、体力を削られて早い recall を強いられます。ただし、Searing Charge を誘って回避することに成功すれば、Ornn は非常に無防備になります。機動力を失った Ornn は、Starfire Spellblade と Radiant Blast で安全に罰することができ、タワー付近での wave の位置を完全に管理しながら、レイトゲームへの移行を確実にできます。
常に、地形や Volcanic Rupture で作られた柱から離れた位置に立ってください。Celestial Blessing を攻撃的に使ってはいけません。この回復は、Ornn が Searing Charge を構えるのが見えたときの防御的な反応としてだけ温存してください。Ornn が外したら、すぐに Radiant Blast で反撃してスローをかけ、通常攻撃と Starfire Spellblade で Divine Ascent のパッシブを溜めます。捕まってしまったら、すぐに Divine Judgment を使って Ornn の Brittle による追加ダメージを防いでください。

この matchup は、Shen の Spirit's Refuge を中心にした、純粋な忍耐力の勝負です。あなたの主なダメージは Divine Ascent で強化された通常攻撃から来るため、Shen の保護ゾーンはあなたの攻撃の脅威を完全に無力化します。Shen がバリアの中に立っている間は Starfire Spellblade の処刑ダメージを発動させられず、本来は主要な trade の手段となるはずのスキルが、無駄な cooldown になってしまいます。
Shen があなたの通常攻撃を防げることが、wave のテンポを決めます。Shen が Spirit's Refuge を持っていると、安全に前に出て wave を crash させられないため、Shen は簡単に freeze したり、自分のタワー下で Shadow Dash の脅威をちらつかせたりできます。Shen のゾーン中はあなたのダメージが止まるため、短い trade は Shen に大きく有利です。ただし、Shen がレベル 5 になって Stand United を使おうとするころには、序盤の taunt を生き延びていれば、Shen のタワーへのプレッシャーは大きく増します。
この処刑の駆け引きに勝つには、Starfire Spellblade で trade を仕掛けてはいけません。代わりに、Radiant Blast を当てて前に歩くことで、Shen の Spirit's Refuge を誘ってください。Shen がゾーンを展開したら、Celestial Blessing を使って後ろに kite しながら持続時間が切れるのを待ちます。バリアが消えた瞬間に、遠距離攻撃で engage します。Shen が Shadow Dash で逃げたり peel しようとしたりしたら、Divine Judgment で Twilight Assault のダメージを吸収し、trade をひっくり返してください。

両チャンピオンがレイトゲームのピークを目指す、純粋なスケール勝負です。Kayle の Divine Ascent は時間とともに比類のない DPS を発揮しますが、Vladimir の Sanguine Pool は Divine Judgment の爆発的なダメージに対する直接的なカウンターとして機能します。この相互作用が 2 人のデュエルを決定づけます。Vladimir は Hemoplague が継続ダメージを与えている間、Kayle の ult の保護時間の攻撃的な脅威を無効化できます。
序盤、Vladimir はあなたの poke に耐えるために Transfusion に頼り、あなたは Starfire Spellblade と Radiant Blast で安全な位置から minion を確保しなければなりません。どちらのチャンピオンも相手を素早く追い出せるだけの burst を持っていません。Vladimir が Tides of Blood を溜めてあなたの waveclear に並ぶため、wave は比較的中立のままです。本当のプレッシャーはレベルの節目が近づくにつれて高まり、どちらが先にスパイクして集まれるかの勝負になります。
trade 中は、Vladimir のリソースバーを見てください。Vladimir が強化された Transfusion を準備しているときは、Celestial Blessing を使って後ろに下がり、フリーな回復を許さないようにします。all-in の戦闘になったら、Vladimir の Sanguine Pool が使える状態で、ダメージ目的だけで Divine Judgment を使ってはいけません。代わりに、ult を防御的に使って、Hemoplague の遅れて来る爆発を吸収します。Vladimir がダメージを避けるために早めに pool に入ったら、再び姿を現した瞬間に、Divine Ascent を溜めた通常攻撃ですぐに罰してください。
その他のマッチアップ
これらのチャンピオンは、こちらの主要な強みに効果的に対応するのが難しく、より自由に対面を組み立てることができる。プレッシャーをかけて有利な交換を引き出す手段は複数あることが多い。相手が態勢を立て直す時間を与えるのではなく、この優位を活かして主導権を握ろう。

Sion が Kayle を脅かすには、フルチャージの Decimating Smash を当てるしかないため、Kayle はこの matchup を支配します。Sion がこの重い扇状の攻撃のチャネリングを始めたら、すぐに Celestial Blessing を発動して移動速度アップを得て、範囲から歩いて抜け出せます。これで Sion の主なダメージ源を完全に無力化でき、安全な距離から Starfire Spellblade で安全に反撃できます。
この相互作用によって、wave control は完全にあなたの有利に傾きます。Sion は Decimating Smash であなたを確実に押さえ込めないため、あなたのファームを争ったり、あなたをタワー下に追い込んだりできません。Sion はあなたの絶え間ない Starfire Spellblade の poke を耐えるために Soul Furnace を防御的に使わざるを得ず、マナがすぐに枯渇します。キルプレッシャーを実質的に受けることなく、遠距離形態に到達するまで、完全に自由なスケール期間を得られます。
これを完璧にこなすには、Sion があなたと creep の両方を Roar of the Slayer で攻撃できないように、minion wave の少し外側に立ってください。Celestial Blessing は必ず Sion の Decimating Smash に反応するために温存し、ただの回復のために無駄にしてはいけません。Sion が Unstoppable Onslaught でダイブや engage を仕掛けてきたら、Divine Judgment を使って最初の衝突ダメージを防ぎ、Sion が撤退しようとするところを Radiant Blast で切り刻んでください。

Singed は、あなたに真っ直ぐ走り寄って Fling で Poison Trail の中にひっくり返すことに完全に頼っています。この直線的な接近は、あなたの自己 peel で対処できます。Singed があなたに突進してこようとするたびに、Radiant Blast を当てれば Singed の勢いは即座に潰れます。このスローと Celestial Blessing の速度を組み合わせれば、Fling の射程から簡単に離れ続けられ、Singed の engage の試みは Starfire Spellblade にとっての無料のダメージになります。
Singed は大きなダメージを受けずにあなたに触れることができないため、ゴールドを失い続けるか、proxy に頼らざるを得ません。lane に留まれば、Singed の Poison Trail が自然にあなたのタワーの方へ wave を push するため、安全にスケールできます。wave を簡単に freeze でき、Starfire Spellblade でファームしながら Singed の CS を奪い、Singed がマップに影響を与える roam をするのを防げます。
Singed があなたを追い詰めると明確に決めるまで、常に Radiant Blast を温存してください。ただの poke のために無駄にしてはいけません。Singed が Mega Adhesive を落としてあなたの動きを妨げようとしたら、Fling の射程に入られる前に、すぐに Celestial Blessing を使って離れてください。Singed が Insanity Potion を発動してあなたのスローを無視するようになったら、タワーの方へ下がり、Singed がフラッシュであなたにタワー下で Fling を決めた場合にだけ Divine Judgment を使ってください。
その他のマッチアップ
これらのチャンピオンは、こちらのビルドやプレイスタイルを真正面から上回る構成を持ち、レーン戦のコントロールとファームを極めて難しくする。彼らのスキルはこちらの主要な強みを無効化し、いつも通りのプランを実行しようとした瞬間に手痛い反撃を受けさせてくる。こうしたマッチアップでは、ミスを最小限に抑え、正面からの対決以外で解決策を探すことが重要になる。
Irelia は Bladesurge で最初の wave から楽に Ionian Fervor をスタックしつつ高い機動力を保てるため、序盤は Kayle を完全に圧倒します。Kayle の Starfire Spellblade による序盤の弱いダメージでは、この DPS に対抗できません。Irelia が Flawless Duet を当てれば、簡単に距離を詰めて Kayle を拘束でき、Kayle が Divine Ascent のレンジ形態を解放する前に、Celestial Blessing による守りの kite をすり抜けます。
この matchup は最初の3つの wave で決まります。Irelia はあえて slow-push し、Ionian Fervor を完全にスタックしながら大きな minion の crash を作ります。この形で Irelia は純粋な物理ダメージで Kayle を Kayle 自身のタワーの下でダイブでき、Kayle は倒されるか大量の経験値を失うかの選択を迫られます。Kayle が Radiant Blast で安全な位置からファームすると、wave のコントロールを完全に明け渡し、freeze で締め出されます。
生き残るには、push を完全に明け渡す必要があります。最初の wave で Starfire Spellblade を使うために前に出ず、minion を crash させてください。体力を満タンに保ち、Radiant Blast を温存してタワーの下で迫ってくる wave を減らし、ダイブの脅威を下げてください。Celestial Blessing は Flawless Duet を避けるためだけに温存してください。Irelia がダイブを仕掛けてきたら、体力がすでになくなってから反応して使うのではなく、Bladesurge のリセットによる burst を防ぐタイミングで Divine Judgment を使ってください。

Katarina は Kayle の序盤の弱さを突きます。Divine Ascent のレンジの節目を解放する前は、ファームのために近接レンジまで前に出るか Starfire Spellblade を使うしかありません。これにより Katarina は安全に Bouncing Blade を設置し、Shunpo ですぐにブリンクして、反撃を受けることなくあなたの真上で Voracity の短剣を発動させられます。Kayle にはこうした素早い trade を咎められるだけの序盤のダメージがありません。
wave の力関係は大きく偏っています。序盤は wave を争えないため、Katarina が絶対的な lane priority を得ます。Katarina は wave をスタックし、あなたをタワーの下に追いやり、その自由を使って river で Voracity のリセットを狙って roam できます。Radiant Blast で Katarina の push に合わせようとすると、長い lane で Shunpo による簡単な all-in にさらされます。
プライドを捨てて、序盤の minion は譲ってください。Starfire Spellblade は最大レンジからのラストヒットのためだけに使い、minion を自分のタワーの近くで freeze させてください。Katarina があなたの wave の近くに Bouncing Blade の短剣を落としたら、短剣から大きく離れて Shunpo の仕込みを阻止してください。Celestial Blessing は素早く逃げるために温存し、Divine Judgment は Katarina の ult の Death Lotus を無効化するためだけに使ってください。
Jayce は、Kayle が Divine Ascent のレンジ形態を解放する前の近接の弱さを突きます。Transform Mercury Cannon で切り替えて、Lightning Field で強化したレンジ攻撃で嫌がらせをしてきます。ファームのために前に出ると、To the Skies! と Thundering Blow のコンボが、Radiant Blast で反応したり Divine Judgment で身を守ったりする前に体力を大きく削ります。
序盤の wave priority を明け渡すことになり、Jayce があなたのタワープレートを自由に削る間、あなたはタワーの下に閉じ込められます。Jayce の圧迫的なレンジの poke のせいで、生き延びるためだけに Celestial Blessing でマナを使い果たすことになり、recall のタイミングも崩れます。釘付けにされ、序盤は Divine Judgment もないため、jungler を助けに rotate できず、Jayce に絶対的な roam の自由を与えてしまいます。
序盤の minion を諦めることを受け入れてください。Starfire Spellblade は絶対に安全な位置から離れたラストヒットを取るためだけに使い、Jayce が To the Skies! で飛びかかってきたときにスローをかけるために Radiant Blast を温存してください。Celestial Blessing は攻撃的に使わず、移動速度上昇は Jayce のレンジの衝撃波を避けるために取っておいてください。生き延びて Divine Judgment を解放したら、この ult は Jayce が all-in に踏み込んだときのハンマー形態の burst を吸収するために温存してください。
Divine Ascent が最初の節目に達するまでは受け身の近接状態のため、Heimerdinger が H-28G Evolution Turret の巣を設置しても、あなたは対抗できません。序盤の waveclear がないため、Heimerdinger は自由にこのタレットを重ねて lane を完全に支配できます。Starfire Spellblade でタレットを壊そうとすると、Heimerdinger の Hextech Micro-Rockets と CH-2 Electron Storm Grenade の射程に直接入ってしまい、Heimerdinger の設置を崩そうとするあらゆる試みが咎められます。
この matchup はすぐに、あなたが自分のタワーの下に釘付けにされる包囲戦になります。Heimerdinger はタレットのゾーンを使って容赦なく wave を押し、あなたがラストヒットに苦労している間にタワープレートを削ります。遠くから安全にファームするためだけに Radiant Blast を使わざるを得ず、マナとマップへのプレッシャーを犠牲にします。priority が完全にないため、序盤の skirmish で jungler は mid lane からのサポートを受けられません。
体力を高く保つため、序盤にゴールドをある程度失うことを受け入れてください。Heimerdinger の H-28G Evolution Turret を倒すために HP を trade に使わないでください。Celestial Blessing の移動速度は、Heimerdinger の CH-2 Electron Storm Grenade と Hextech Micro-Rockets を避けるためだけに使ってください。Heimerdinger が UPGRADE!!! を発動して大きな burst を狙ってきたら、Divine Judgment を温存しておき、それで Heimerdinger の ult のダメージを完全に無効化して、Divine Ascent がついに反撃できるレンジを与えてくれるまで、包囲戦を生き延びてください。

Aurelion Sol は受け身の lane に対して強く、Kayle には序盤に Aurelion Sol を止められるだけの脅威がまったくありません。Breath of Light を中断したり、Astral Flight 中に Aurelion Sol を動かしたりできる強力な CC がないため、Aurelion Sol はあなたの minion wave に自由に Singularity を置けます。これにより Aurelion Sol は安全に Cosmic Creator のスタックを集められ、スケーリングが加速して、中盤の存在感があなたの Divine Ascent のパワースパイクをまったく寄せ付けなくなります。
あなたは常にタワーの下に釘付けにされることになります。Aurelion Sol は Singularity と Breath of Light を組み合わせて簡単に waveclear し、あなたはラストヒットを取るためだけに Radiant Blast と Starfire Spellblade でマナを消費させられます。mid の priority を完全に失うため、Aurelion Sol は Astral Flight で roam して jungler を助けたりサイドレーンをダイブしたりでき、あなたはタワーが落ちないようにするのに手一杯になります。
生き残るために、minion wave の外側に立ち、Aurelion Sol が lane の waveclear とあなたへの Singularity による poke を同時にできないようにしてください。Celestial Blessing は、Singularity のスローから抜け出したり、Falling Star が落ちてくるときに避けたりするために必要な急な移動速度上昇を得るためだけに温存してください。Aurelion Sol が Astral Flight で roam し始めても、river を通って追いかけようとせず、すぐに Starfire Spellblade で wave を押して Aurelion Sol のタワーを咎めてください。Divine Judgment は Aurelion Sol の高ダメージの execute のしきい値を生き延びるために使ってください。

Akshan の序盤のプレッシャーのせいで、Kayle は wave の近くに立てません。Akshan のパッシブ Dirty Fighting はすぐにシールドと二連撃のダメージを与え、Starfire Spellblade を使ったあなたの trade を完全に上回ります。さらに Avengerang は minion を貫通しながら同時にあなたを poke します。Divine Ascent でレンジ形態を解放する前は Akshan の push 力に対抗できないため、Akshan は最初の wave から lane のテンポを完全に握ります。
この waveclear の大きな差により、Akshan は簡単に大きな slow-push を作れます。巨大な wave をあなたのタワーに crash させ、あなたがラストヒットに苦労している間に体力を大きく削ってきます。この形はダイブに対して非常に脆く、Akshan は Heroic Swing で飛び込んであなたを仕留め、また飛び出していけます。序盤の priority がないため、Akshan は Going Rogue で抜け出してあなたの jungler を脅かすこともできます。
生き残るために、完璧なファームよりも安全を優先してください。最大レンジから Radiant Blast を使って安全にラストヒットを取り、迫ってくる wave が crash する前に減らしてください。Avengerang の戻りを避けたり、Akshan の進路をふさいで Heroic Swing の軌道を妨害するのに必要な移動速度を得たりするために、Celestial Blessing を準備しておいてください。レベル5になったら、Divine Judgment は Akshan の高ダメージの Comeuppance を吸収するか、タワー下へのダイブを無効化するためだけに温存してください。
Akali は Kayle の遅いスタートを締め付けることで強さを発揮し、Five Point Strike と Assassin's Mark を使って、Divine Ascent の段階を解放する前にあなたを wave から追い出します。Akali の致命的な脅威はレベル5でピークになります。Akali は Shuriken Flip を当ててダイブするチャンスを狙ってきますが、ult による処刑は駆け引きに依存します。Akali は、あなたに Divine Judgment を早すぎるタイミングで使わせるまでは、Perfect Execution の2回目のダッシュを安全に使えません。
この matchup では lane のコントロールがすぐに奪われます。最初の数 wave は譲るしかなく、Starfire Spellblade はタワーの下で倒れかけの minion を取るためだけに使います。Akali は Twilight Shroud を展開して、あなたを経験値レンジから完全に遠ざけます。trade のために前に出ると、Shuriken Flip が1回当たっただけで体力を大きく削られ、早い recall を強いられ、Akali に自由な roam で jungler を脅かされます。
生き残れるかどうかは、Akali の ult の処刑ラインに備えて Divine Judgment を温存できるかにかかっています。Akali が Perfect Execution の1回目でダッシュしてきても、焦って ult を使わないでください。代わりに Radiant Blast で Akali をスローし、Celestial Blessing でパッシブのリングから抜け出してください。Divine Judgment は、Akali が高ダメージの2回目のダッシュに踏み込んだときにだけ発動してください。Akali が Twilight Shroud に隠れたら、すぐタワーまで下がって Akali のエネルギーが回復するのを待ってください。

Karma は、特に Transcendent Embrace で強化された Inner Flame を使い、安全な距離から minion を一瞬で処理することで、序盤の mid lane を支配します。Kayle としては、序盤の Divine Ascent の段階ではこの速さに対抗できるだけの wave clear もダメージもありません。Karma に簡単に押さえ込まれている間、あなたは minion 1体のラストヒットを確保するためだけに Starfire Spellblade を使わざるを得ません。
この絶え間ない wave の圧縮により、あなたは laning phase の間ずっと自分のタワーの下に閉じ込められることになります。あなたがラストヒットに苦労している間、Karma の Inner Flame のスプラッシュダメージがあなたの体力をじわじわ削り、早い段階で Celestial Blessing を使わされてマナがすぐに尽きてしまいます。あなたはリバーで jungler を助けることができず、遠距離フォームに到達する前に自分のタワーのプレートを失います。
この猛攻を耐えるには、自分の minion wave から完全に離れて立ち、Karma に、poke するか Inner Flame で push するかを選ばせます。trade を試みるのではなく、wave が crash するときにそれを減らすために Radiant Blast を温存してください。Karma が Focused Resolve であなたを拘束しようと前進してきたら、すぐに Celestial Blessing を発動して、拘束の射程から抜けます。序盤にいくらかのゴールドを失うことは受け入れてください。目標は、死なずに安全にレベル5に到達し、Karma の dive に備えて Divine Judgment を温存することです。
Yone は、Soul Unbound の前方ダッシュと、あらかじめチャージした Mortal Steel の竜巻、または Yone の ult である Fate Sealed を組み合わせることで、Kayle が本来持つ間合いの優位をすり抜けます。この極端に長い射程からの initiate により、あなたには Celestial Blessing を使って kite する余地が残りません。Yone は spirit form の間にあなたを素早く burst で倒せるため、あなたは trade を有利に運ぶために Divine Judgment を使うのではなく、Yone の最初の猛攻を生き延びるためだけに、絶えず Divine Judgment を使わされます。
あなたは自分のタワーの下に閉じ込められ、安全ラインを越えると Yone の画面全体に届く engage を招くため、Starfire Spellblade で minion を確保するのに苦労します。Yone は短い skirmish の間に Spirit Cleave からシールドを得るため、Radiant Blast で trade を返そうとしても無効になります。あなたはゴールドを失い続け、mid の priority を完全に失い、あなたが体力ゲージを守っている間、jungler はあなたの援護がないまま絶えず侵入を受けることになります。
Yone の Mortal Steel の竜巻のチャージ中は、絶対に入ってはいけない危険区域として扱い、それが切れるまですぐに下がってください。Yone の最初のノックアップ中には決して Divine Judgment を使わず、Soul Unbound のマークが元の位置に戻される直前まで待って、遅れて来る処刑ダメージを軽減します。Yone が自分のタワーの近くで wave を freeze してきても、それを崩しに近づかず、代わりに Radiant Blast で遠くから farm し、少しのゴールドを失うことは受け入れて、XP を安全に確保し続けてください。
その他のマッチアップ
これらのチャンピオンは、マッチアップ自体を絶望的にするわけではないが、対面で優位に立ちやすいツールを持っている。射程が長かったり、攻撃を受け止める力が高かったり、エンゲージへの対応手段が豊富だったりする。アプローチを調整し、戦闘を受け入れるタイミングを慎重に選ぶ必要がある。

あなたの序盤は弱く Galio の waveclear に対抗できないため、Galio は難なく mid lane のペースを握ります。Galio は罰せられる心配なく、Winds of War と Colossal Smash で絶えず wave を shove できます。あなたをタワーの下まで押し込んだ後は、Galio は視界の外へ歩いて出て Hero's Entrance でサイドレーンに干渉できますが、あなたは Divine Ascent の射程が解放される前に farm しようと足止めされたままです。
自分のタワーの下でラストヒットを確保するためだけに、あなたは Radiant Blast と Starfire Spellblade でマナを消費せざるを得ません。priority が完全に欠けているため、jungler は序盤の中立の scuttler やオブジェクトを争う手段をすべて失います。Galio の roam を追いかけようとすると、リバーで Justice Punch と Shield of Durand の combo による待ち伏せを受ける危険があり、結果的にチームのマップコントロールを失います。
序盤は Galio のマップでの存在感に対抗できないことを受け入れてください。Galio が mid から姿を消したらすぐに、危険ピンを連打してサイドレーンに警告します。Starfire Spellblade で距離を取って安全に farm しながら、自分のスケーリングだけに集中してください。Galio がタワーの下で Justice Punch であなたに直接 engage を仕掛けてきたら、Celestial Blessing ですばやくノックアップを回避し、Galio が Shield of Durand で commit してきた場合に備えて、その burst を無効化するために Divine Judgment を温存します。

Divine Ascent が進化する前の Kayle の弱い序盤に対して、Fizz の Urchin Strike と Rending Wave は trade で大きく優位に立つため、Fizz は序盤のレベル帯を支配します。しかし、この matchup 全体は Divine Judgment にかかっています。Kayle の ult は、Chum the Waters と Playful による大きな burst を完全に無効化できます。そのため Fizz は、レベル6になる前に kill を取るため積極的にテンポ勝負を仕掛けるか、commit する前に Kayle の ult を誘い出すことに頼るしかなくなります。
レベル6になる前は、Fizz は絶えずあなたに dive を仕掛けるか、wave を freeze して経験値を与えないようにしようと脅かしてきます。あなたは遠くのラストヒットを確保するために Radiant Blast を、Fizz の Playful のスロウから逃れるために Celestial Blessing を使う必要があります。Fizz が序盤に kill を取れなかった場合、Fizz は wave の priority を手放して roam します。そのためあなたは、味方に MIA ピンを打つか、安全策のない状態でリバーを通って危険な追撃をするリスクを負うか、選ばざるを得なくなります。
序盤はゴールドより安全を優先し、Starfire Spellblade に頼ってタワーの射程内から安全に farm してください。Fizz が近づいてきても、Divine Judgment を先走って使わず、Chum the Waters のサメがあなたに食らいつこうとする瞬間、または Fizz が Playful の着地で commit してくる瞬間のために温存します。序盤に大きく体力を削られたら、wave の半分を犠牲にすることになっても、すぐに Celestial Blessing で回復してタワーまで下がり、Fizz にレベル6前の snowball を許さないようにしてください。

Corki のハイブリッドなダメージ構成があなたの防御をすり抜けるため、Corki は序盤の mid lane を支配します。Divine Ascent の遠距離の恩恵が解放される前は、Corki が積極的に push して、あなたを近接の射程の外へ追いやります。Gatling Gun であなたの固定耐性を削り、Phosphorus Bomb でラストヒットの試みを咎めることで、Corki は、Kayle が体力ゲージの半分を失わずには争えない威圧的なエリアを作り出します。
この matchup では、最初の wave からあなたは自分のタワーの下に押し込まれます。Corki の wave clear によって Corki は minion を簡単に crash でき、あなたは Starfire Spellblade で必死に farm するしかなくなります。前に出ようとするたびに Corki に体力を大きく削られ、早い段階でのリコールを強いられてゴールドを失います。mid lane の priority がないため、jungler はリバーのクラブや序盤の skirmish の主導権を失います。
生き延びるには、Gatling Gun の扇状の範囲の外にいながら、遠距離から Radiant Blast を使って minion を確保することを優先してください。Celestial Blessing は、ちょっとした回復に使うのではなく、Phosphorus Bomb を避けるためだけに温存します。Corki が Hextech Munitions で package を手に入れたら、継続ダメージを避けるため、すぐに 2本目のタワーへ向かうルートまで下がってください。レベル5に到達して遠距離の通常攻撃を手に入れれば、少しずつ流れを変えられますが、それまでは体力を守るためにゴールドを諦めてください。

Kassadin は Riftwalk を武器にして Divine Ascent による射程の優位をすり抜けることで、Kayle のスケーリングを上回ります。Null Sphere があなたをサイレンスさせるため、Kassadin は trade を仕掛け、Nether Blade と Force Pulse であなたの体力ゲージを大きく削り、あなたが Divine Judgment を使うことも反撃することもできないうちに blink で離れることができます。この機動力の差が、序盤の Starfire Spellblade による poke を完全に無効化し、あなたが本来の遠距離フォームに到達するよりもはるかに速く、Kassadin が致命的な burst の閾値に達する競争へとレーンを変えてしまいます。
レベル5になる前は Starfire Spellblade を使って minion を争えますが、Kassadin が Riftwalk を解放すると、レーンの力関係は劇的に変わります。Kassadin は絶えず wave を freeze し、あなたが Radiant Blast を使おうと前に出た瞬間に前方へ blink してくると脅かしてきます。そのためあなたは自分のタワーの下で守りの立ち回りを強いられ、priority と中盤のマッププレッシャーを犠牲にします。trade を返そうとしても Kassadin の Void Stone に守られ、リコールのタイミングは悪くなり、体力も大きく不利になります。
生き残れるかどうかは、Force Pulse による blink 後のスロウから逃れるために Celestial Blessing を使える状態に保てるかにかかっています。離脱するために Radiant Blast のスロウが必要なので、Kassadin がすでに Riftwalk で前方へ commit した後でなければ、Radiant Blast を使わないでください。Kassadin が自分のタワーの近くで wave を freeze していても近づかず、Kassadin が roam するのを待ってから Starfire Spellblade で安全に wave を shove します。Divine Judgment は、フルスタックの Riftwalk による engage のためだけに温存し、Null Sphere のサイレンスが当たる前に先回りして使って、最初の burst を吸収します。

この matchup は、Diana の序盤の強力なパワースパイクと、あなたの後半の成長の対決で決まります。レベル5になる前は、Crescent Strike の poke と、リセットされる Lunar Rush の組み合わせで、簡単にあなたを wave から追い払います。特に Pale Cascade のシールドがあなたの Starfire Spellblade による反撃を吸収するためです。生き残れるかどうかは、レベル5に到達して Divine Judgment を解放できるかにかかっています。それにより Diana の高ダメージな Moonfall の burst combo に対して完全に無敵になれます。
最初の4レベルの間、あなたは組織的にタワーの下へ押し込まれます。Diana の優れた wave clear のため、あなたは安全な距離から minion のゴールドを確保するためだけに Radiant Blast と Starfire Spellblade に頼らざるを得ません。序盤の mid lane の priority を失うことを受け入れるのは必須です。Diana と争っても体力ゲージを失うだけで、あなたが ult を解放する前に Diana に簡単な roam のタイミングを与え、マップにプレッシャーをかけられてしまいます。
最初の数 wave は、争いになっている minion よりも体力を維持することを優先してください。Celestial Blessing を使って、Crescent Strike の弧を描く軌道を避けるのに必要な移動速度を得ます。レベル5に到達したら、自分から trade を仕掛けず、代わりに指を Divine Judgment に置いておきます。Diana が Moonfall であなたを引き寄せたまさにその瞬間に、反応して使う必要があり、これで Diana の burst を無力化して、射程の優位でファイトの流れを自分に引き寄せられます。

このレーンは、Kai'Sa があなたを素早く burst で倒せるかどうかで決まります。あなたが minion wave から離れると、孤立したあなたに Icathian Rain が単体へ大ダメージを与え、あなたが Divine Judgment で反応するよりも先に Second Skin を発動させます。最終的には Divine Ascent が Kai'Sa のスケーリングを上回りますが、Kai'Sa の序盤の burst のテンポのせいで、孤立した状態での trade はどれもあなたにとって致命的になり、特に Kai'Sa に先に Void Seeker を当てられた場合は危険です。
Kai'Sa は絶えずあなたをタワーの下へ押し込み、Killer Instinct での dive の機会を作るか、Void Seeker で poke しようとしてきます。このプレッシャーのせいで、Starfire Spellblade で序盤のゴールドを安全に確保できません。wave のテンポの主導権を失うと、あなたは守りのために Celestial Blessing を使わざるを得なくなってマナを消耗し、Kai'Sa に roam や mid の priority 確保を自由にさせてしまいます。
この matchup を生き延びるには、Icathian Rain のミサイルを分散させるために、自分の minion wave の中に積極的に立つ必要があります。Kai'Sa が Supercharge を発動して initiate してきたら、すぐに Radiant Blast でスロウを与え、Celestial Blessing で位置を取り直してください。Kai'Sa にあなたを孤立させてはいけません。安全な位置から体力の低い minion を仕留められるよう Starfire Spellblade を準備しておき、minion でカバーできているときだけ、Kai'Sa の ult である Killer Instinct のシールドでぶつかってくる burst を防ぐために Divine Judgment を使います。

Ryze の Spell Flux があなたの minion wave の中を素早く広がり、Overload で起爆して楽に高速の waveclear ができるため、Ryze は序盤の laning phase を支配します。Kayle としては、レベル5前の近接状態ではこの push に全く対抗できません。あなたは絶えず押し込まれ、Ryze が安全にスケーリングしている間、自分のタワーの下で minion 1体ずつのラストヒットを確保するためだけに Starfire Spellblade に大きく頼ることになります。
この絶え間ないプレッシャーのせいで、タワーの下で farm しながら削られた体力を取り戻すために Celestial Blessing を使い、マナを使い果たすことになります。あなたが自分のタワーに釘付けにされているため、Ryze は Realm Warp でサイドレーンに干渉したり、jungler と一緒にリバーの視界を確保したりできます。序盤にこれらの rotation を争おうとすると、wave まるごと分のゴールドと経験値を失い、重要な Divine Ascent の節目が遅れます。
生き延びるには、Spell Flux があなたに跳ね返ってこないよう、自分の体力の低い minion から離れて位置取りする必要があります。Radiant Blast は、迫ってくる wave が crash する前に減らすために温存し、タワーの下に閉じ込められる時間を減らしてください。Ryze がフル combo のために Rune Prison であなたを拘束しようとしてきたら、すぐに Celestial Blessing を使って後退を速めます。skirmish を無理に起こすことより、レベルの節目に到達することを優先してください。

Swain は長引く消耗戦に強く、Ravenous Flock で魂を引き寄せ、Demonic Ascension で回復します。Kayle としては、序盤のスケーリングが遅いため、Swain の純粋な sustain に対抗するのは難しくなります。この matchup は、Swain の ult にどう対応するかですべてが決まります。Divine Judgment は Demonic Ascension の大きな burst フェーズを完璧に打ち消せますが、その前に Nevermove でルートされると、使えるまで生き延びられないことが確実になります。
序盤のレベルの間、あなたは自分のタワーの下に釘付けにされ、Death's Hand による Swain の優れた wave clear に苦しめられます。あなたがラストヒットを確保しようとしている間、Swain は絶えず Nevermove であなたを引き寄せようと狙ってきます。この絶え間ないプレッシャーが、jungler を助ける余裕を奪います。Swain の CC に 1回当たっただけでも早いリコールを強いられ、mid lane の priority を明け渡して、Swain にサイドレーンへ自由に干渉させてしまいます。
このレーンを生き延びるには、Nevermove を避けることに全力を注いでください。距離を保ち、Celestial Blessing の移動速度を使って、戻ってくる経路上の爪を横にかわします。Swain の CC が使える状態のときは、決して Radiant Blast を攻撃的に使わないでください。Swain が Demonic Ascension を発動しても、慌てて Divine Judgment をすぐ使ってはいけません。体力を吸い取るフェーズが終わりに近づき、Swain が二次的なノヴァの burst を放とうとするまで待つことで、トドメのダメージを完全に無効化できます。

Kennen は、Mark of the Storm の発動で絶えずスタンの脅威を与え、Thundering Shuriken と Electrical Surge であなたの体力を削ることで、序盤の laning phase を支配します。威圧的な遠距離の poke と、突然の Lightning Rush による engage があるものの、力関係は Kennen の ult を中心に完全に変わります。あなたの Divine Judgment は完璧な防壁となり、teamfight での Slicing Maelstrom の爆発的なダメージを完全に無効化します。
序盤のレベルの間、あなたは自分のタワーの下へ押し込まれ、Starfire Spellblade で安全に minion を倒すことになります。Kennen の wave clear のほうが優れており、前に出るとすぐにスタンの combo を招きます。この絶え間ないプレッシャーが roam の可能性を制限し、守りの立ち回りを強います。ただし、体力ゲージを高く保っておけば、Kennen があなたに dive したり、早いリコールを強いたりするのを防げます。
Thundering Shuriken を防ぐために自分の minion wave の後ろに立ち、Kennen が Lightning Rush を発動してあなたに突っ込んできたら、すぐに Celestial Blessing を使ってください。Divine Judgment は常に Kennen の Slicing Maelstrom による initiate のために温存します。Kennen に先にスタンを入れられて ult を始められた場合は、スタンから回復したらすぐにシールドを使って、残りのダメージのティックを軽減し、近くの味方を守ります。
Wind Wall が Radiant Blast と Starfire Spellblade の飛び道具の両方を完全に吸収するため、Yasuo はあなたの遠距離ツールを直接無力化します。Radiant Blast のスロウも Starfire Spellblade の処刑ダメージもなければ、Yasuo があなたの minion wave に Sweeping Blade を使って engage してくるのを止められません。その結果、Divine Ascent を積む前の段階では、Yasuo の近距離での Steel Tempest の trade に対して完全に無防備になります。
この相性では、あなたは自分のタワーの下で受け身の姿勢を強いられます。Starfire Spellblade で瀕死の minion を確保しようとするたびに、Yasuo はそれをブロックし、あなた自身の wave を滑走路のように使って dash で飛び込めます。序盤はゴールドを失い続け、Steel Tempest のノックアップから逃れるために Celestial Blessing を使うとマナがすぐに尽き、序盤のマップでの動きに使える priority はゼロになります。
Yasuo が風の障壁を使える状態のときは、Radiant Blast を撃たないでください。代わりに前へ歩いて Wind Wall を誘い、すぐにタワーの下へ下がります。Yasuo の防御用の障壁が長い cooldown に入れば、安全に farm できる時間ができます。Yasuo が竜巻を当てて Last Breath を発動させてきたら、すぐに自分に Divine Judgment を使って ult の衝撃を吸収し、その後 Yasuo のシールドが減衰していく間に、Celestial Blessing の移動速度を使って kite しながら下がります。

Orianna は、Command: Attack で絶えずボールの位置を動かし、すぐ続けて Command: Dissonance のスロウ付きパルスを放つことで、このレーンを支配します。Kayle はラストヒットのために前に出なければならないため、この zoning に常にさらされます。そのため、あなたはレーンを主導するのではなく絶えず対応させられ、Orianna の強力な魔法の poke を避ける、あるいは回復するためだけに、Celestial Blessing の移動速度の上昇と回復に大きく頼ることになります。
序盤、あなたはタワーの下に押し込まれ、wave の状態を争えないことに気づくでしょう。Starfire Spellblade や Radiant Blast で minion を減らそうとするたびに、Orianna の長射程の harass にさらされます。これにより体力が大きく不利になり、早いリコールを強いられてプレートのゴールドを失い、jungler が序盤の skirmish を争うのを助けることもできなくなります。最も重要な目標は、すべての minion を確保することよりも、体力ゲージを守ることです。
常に、Orianna のボールが今ある位置とは minion wave を挟んで反対側に位置取りしてください。Celestial Blessing は、ちょっとした回復のためにむやみに使うのではなく、飛んでくる Command: Attack の軌道を避けるためだけに温存します。Orianna が行き過ぎて、あなたのタワーの下で poke してきたら、Divine Judgment で Orianna の burst をいなして dive を返り討ちにします。経験値を取ることに集中し、ボールが位置を外しているときだけ、安全な遠距離のラストヒットのために Starfire Spellblade を使ってください。

Kayle に対する Viktor のレーン支配は、wave への接近を完全に拒否できることに由来します。ラストヒットのために Starfire Spellblade を使おうと前に出るたびに、Viktor はあなたの進路上または近接 minion の上に直接 Gravity Field を置けます。このエリア拒否と、Hextech Ray の長射程の脅威が組み合わさり、あなたは直接攻撃を諦め、安全な距離からゴールドを確保するために Radiant Blast に頼らざるを得なくなります。
Radiant Blast で farm せざるを得ないため、Viktor が楽に wave をコントロールしている間に、あなたのマナはあっという間に減っていきます。Viktor は Hextech Ray を使って絶えずあなたをタワーの下へ押し込み、あなたが反撃に苦労している間に体力ゲージを削り続けます。Siphon Power のシールドがあなたの序盤のダメージを吸収するため、効果的に trade できず、タワーを守るのに手一杯で、リバーで jungler を助けることもできません。
生き延びるには、自分の minion wave から離れて、横方向に位置取りする必要があります。そうすると Viktor は、Hextech Ray をあなたに向けるか wave に向けるかを選ばなければなりません。Radiant Blast が cooldown 中のときは前に出ないでください。代わりに、捕まってしまった場合は Celestial Blessing で Viktor のレーザーの二次爆発を避けます。Viktor が位置取りを誤って Gravity Field を無駄にした場合は、短い時間ですが、タワーへ下がる前に cannon minion に安全に Starfire Spellblade を使える隙があります。

Vex は、特にパッシブの Doom 'n Gloom がチャージされているとき、Looming Darkness と Mistral Bolt であなたの farm の試みを咎めることで、この matchup の序盤を支配します。Vex の主な脅威は、あなたに直接 dive してくることです。幸いなことに、全体の力関係はたった 1つのやり取りにかかっています。Vex が Shadow Surge で飛び込んできたときに Divine Judgment を使えば、Vex の burst ダメージを完全に吸収し、CC の combo も無視できます。
Vex は Looming Darkness と Personal Space を使って絶えずあなたをタワーの下へ押し込み、ゴールドを取らせないようにしてきます。あなたは体力ゲージを温存しながら安全な位置から farm するために、Starfire Spellblade と Radiant Blast に頼らざるを得ません。序盤に poke を受けすぎると、ult を解放する前に不利なリコールを強いられ、Vex に強力な ult を使った roam の自由な時間を与えてしまいます。
Vex のリソースバーをよく見てください。Doom 'n Gloom が発動しているときは、フィアーを避けるために下がります。Celestial Blessing を使って、Looming Darkness を避けるのに必要な移動速度を得ます。重要なのは、通常の poke を軽減するために Divine Judgment を使わないことです。Vex の Shadow Surge の弾が命中し、Vex がこちらへ飛んでくる瞬間のためだけに温存してください。そうすれば dive を完全に無力化し、Vex をあなたのタワーの下で無防備にできます。

Syndra は、Dark Sphere を置いて wave を shove したり、Scatter the Weak でスタンを狙ったりして、序盤の mid lane を支配します。Kayle は Divine Ascent の段階が解放される前は、この wave clear に対抗することも、効果的に trade を返すこともできません。このレーン全体は、Syndra が Kayle の体力を処刑の射程まで削って Unleashed Power を放てるかにかかっており、Kayle は Divine Judgment で即座に反応して、浮遊するスフィアの burst を無効化しなければなりません。
あなたはタワーの下に閉じ込められ、Force of Will と Dark Sphere の着弾エリアを絶えず避け続けることになります。追いつくためには Starfire Spellblade でのラストヒットが重要ですが、序盤のリバーでの skirmish の priority は失います。Syndra が wave を crash するたびに、Syndra はパッシブの Transcendent のシャードを安全に farm でき、あなたの Divine Judgment が使えないと見抜いた時点で、避けられない dive の脅威となります。
横に動いて Scatter the Weak を誘い、Syndra の基本スキルが cooldown 中の間に Radiant Blast で farm を確保してください。スフィアの射出を避けられるよう Celestial Blessing を準備しておきます。最も重要なのは、Divine Judgment を早く使いすぎないことです。Unleashed Power のアニメーションを見て、スフィアの嵐があなたに向かって飛んでくるときに ult を発動し、全ダメージを吸収します。そうすれば Syndra の主なキルの脅威を、無駄になった cooldown に変えられます。

Taliyah は、waveclear とマップ上の機動力を武器にして、この matchup を支配します。Threaded Volley で簡単にあなたをタワーの下へ押し込み、その後リバーの壁沿いに Rock Surfing を発動して fog of war の中へ消えます。Weaver's Wall を解放すると、マップ全域の skirmish に即座に合流できます。Kayle としては、序盤の Divine Ascent の段階では Taliyah の push に対抗できるほどの範囲ダメージがなく、あなたは mid lane に閉じ込められたままです。
laning phase の間ずっとプレッシャーを失い続け、自分のタワーの下で minion を確保するために、守りで Radiant Blast と Starfire Spellblade を使わざるを得ません。Taliyah はこの priority を利用して、深い位置の視界を確保したり、危険な roam を実行したりします。リバーを通って Taliyah を無警戒に追いかけるのは危険です。Taliyah は簡単に Unraveled Earth を設置し、Seismic Shove を使って、暗闇でフェイスチェックするあなたを捕まえ、あなたが孤立している間にマップ全体で snowball できるからです。
Taliyah の roam に直接対抗できないことを受け入れてください。代わりに、Taliyah が壁に触れた瞬間に MIA ピンを打ち、すぐに Celestial Blessing の速度上昇を使って安全に位置取りしながら、Radiant Blast でできるだけ速く wave を処理します。Taliyah が戻ってきてタワーの下であなたに dive してきたら、Divine Judgment を温存して爆発的な combo を防ぎます。レベルの節目を確実に確保することだけに集中してください。タワープレートを 1枚失うほうが、Taliyah に bot lane でダブルキルを与えるよりましです。

Zoe は、射程の優位を悪用し、Paddle Star! とパッシブの More Sparkles! を使って、Kayle が farm しようとするたびに体力を大きく削ることで、序盤のレーンを支配します。Divine Ascent が効き始める前の Kayle には序盤の射程がないため、Zoe は簡単に Sleepy Trouble Bubble の角度を狙えます。そのため Kayle は眠らされる恐怖を常に抱えながら戦うことになり、安全に wave に近づくことが完全に妨げられます。
Kayle は絶えず自分のタワーの下へ押し込まれ、Zoe が Portal Jump を使ってタワーの下まで poke してくる中でゴールドを失い続けます。Sleepy Trouble Bubble が 1発当たっただけで、Kayle はリコールするか、続く burst で死ぬ危険を負うかの選択を迫られ、リコールのタイミングが台無しになります。この極端なレーンプレッシャーのせいで Kayle は jungler を助けることができず、その間 Zoe は Spell Thief で盗んだサモナースペルを使って、他のレーンにプレッシャーをかけながら自由に roam できます。
Sleepy Trouble Bubble を防ぐため、常に minion wave の深い後ろに立ち、最大の距離から farm するためだけに Radiant Blast と Starfire Spellblade を使ってください。Zoe が実際に bubble を当ててきても、慌てて Celestial Blessing を使ってはいけません。代わりに、睡眠効果が発動するのを待ち、飛んでくる最大射程の Paddle Star! を吸収できるよう Divine Judgment のタイミングを正確に合わせます。ult が cooldown 中なら、CS を諦めて、Zoe の Portal Jump の射程の外に完全にとどまる必要があります。
この mid lane の matchup では、Teemo の Blinding Dart があなたのダメージを完全に止めます。あなたの序盤の laning は、minion の確保や poke のために Starfire Spellblade を使うことに大きく依存しているため、Teemo の blind はこれらの攻撃を完全に無効化します。あなたが blind されている間は通常攻撃が何も当たりませんが、Teemo は自由に Toxic Shot の毒を付与でき、どの trade も Kayle にとって大きな体力の不利になってしまいます。
このレーンの力関係は、あなたをタワーの下での非常に守りの強い姿勢へ追い込みます。Blinding Dart が 1発当たっただけで Teemo の遠距離 harass に対して完全に無防備になるため、Teemo の push に対抗しようと前に出ることはできません。minion を 1体ずつ確保するためだけに、Radiant Blast でマナを消費せざるを得ません。その間に Teemo はリバーのブッシュの周りに自由に Noxious Trap を設置でき、あなたは mid lane の skirmish に加勢することが完全にできなくなります。
生き残れるかどうかは、Blinding Dart の cooldown を突けるかにかかっています。このスキルが使える間は trade を試みず、誘い出すか、Teemo が minion に使うのを待ってください。Teemo が使ったら、すぐに Radiant Blast を当ててスロウを与え、続けて Starfire Spellblade で追撃します。Teemo が Move Quick を発動して距離を詰めてきたら、すぐに Celestial Blessing を使って毒の射程から逃れ、Divine Judgment は爆発するキノコの burst を防ぐためだけに温存します。

Twisted Fate は、Wild Cards で wave を shove し、Destiny でマップ全域のプレッシャーを即座に解放することで、あなたの序盤のレーンでの存在感を完全にすり抜けます。Kayle にはテレポートを妨害できるハード CC が一切ないため、Twisted Fate がマップを横断するプレイを実行するのを阻止できません。あなたが Divine Ascent をゆっくり成長させている間、サイドレーンは、Pick a Card のスタンで仕込まれた、ゴールドを帯びた突然の gank に耐えなければなりません。
あなたは守りの姿勢に追いやられ、タワーの下で minion を確保するためだけに Radiant Blast と Starfire Spellblade にマナを使わざるを得ません。Twisted Fate がテンポを握ります。Pick a Card の赤いカードで wave を処理し、すぐに fog of war の中へ消えます。これはサイドレーンに非常に大きな心理的プレッシャーを与え、Twisted Fate が単にリセットしているだけの時でも、サイドレーンは受け身でプレイせざるを得なくなります。
Twisted Fate がレベル5に到達するタイミングを常に把握しておいてください。Twisted Fate が Destiny を発動しても、歩いて追いかけようとせず、代わりにすぐに Celestial Blessing で移動速度を上げ、Radiant Blast で wave を shove し、Twisted Fate の不在を咎めるために Twisted Fate のタワーにダメージを与えます。Twisted Fate がレーンに残って trade してきたら、Stacked Deck で強化された青カードまたは金カードの combo による burst ダメージを Divine Judgment で防ぎ、積極的な dive を無駄になった cooldown に変えます。

Talon の Rake は楽に minion wave を処理しながら、あなたが争えば Blade's End を重ねる脅威を与えるため、Talon がこのレーンを支配します。wave が crash した後、Talon は Assassin's Path を使って通常のワードをすり抜け、即座に roam します。序盤の Divine Ascent には Talon の push に対抗できるだけの純粋な waveclear がないため、あなたは mid lane にとどまらざるを得ず、致命的な待ち伏せのリスクなしには Talon の危険な rotation を追えません。
序盤、あなたは自分のタワーの下に閉じ込められ、Starfire Spellblade でラストヒットを確保することになります。trade は非常に不利です。Talon が Rake の 2回の命中を両方当て、続けて Noxian Diplomacy を決めれば、その burst は致命的です。この絶え間ないプレッシャーのせいで、あなたは守りのリコールのタイミングを強いられ、Talon が壁の向こうへ消えるたびに、サイドレーンは極めて慎重にプレイしなければならず、自分たちのレーンの priority を犠牲にします。
距離を取った安全な farm を優先してください。迫ってくる wave がタワーに到達する前に Radiant Blast で減らし、Talon が jungle に消えた瞬間にすぐ MIA ピンを打ちます。Noxian Diplomacy の engage の射程から素早く逃れられるよう、Celestial Blessing を準備しておきます。Talon がレベル6に到達したら、ブッシュをフェイスチェックしないでください。代わりに、Talon が避けようもなくあなたに dive を仕掛けてくるときの Shadow Assault の爆発的な burst を吸収するために、Divine Judgment を温存します。
その他のマッチアップ
このマッチアップは何よりもまず実行力の勝負であり、両者ともに優位を取れる現実的な手段を持っている。重要なスキルを一つ避けられるか、エンゲージを正しく読めるか、あるいはたった一つの位置取りのミスが、勝敗を分けることもある。マッチアップを理解し、行動すべき瞬間を見極める力がとりわけ重要になる。

この matchup は、Lux が自分の minion wave の後ろから Light Binding であなたを捕まえて、フルの burst を放とうとすることを中心に回っています。あなたの序盤は弱いため、ルートされると Lux が Lucent Singularity と Final Spark を確実に当てられます。この致命的な連続攻撃のせいで、生き延びるためだけに Divine Judgment を守りで使い切らされ、teamfight での主力ツールを失って、Lux の poke に対して極めて無防備になります。
Lux は絶えず Lucent Singularity を使って wave を push し、あなたの体力を削り、タワーの下での farm をさせないようにしてきます。Starfire Spellblade でラストヒットしようと前に出すぎると、Lux に Light Binding を狙わせる隙を与えます。Lux の poke を回復するために Celestial Blessing を使わされるたびにマナを消耗し、mid の priority を争うことも jungler を助けることもできなくなります。
Light Binding の弾道を遮るために、Lux との間に自分の minion を少なくとも 2体挟み、Lux から斜めの位置に立ってください。Lux のルートが cooldown 中の場合を除き、速度のためだけに Celestial Blessing を使ってはいけません。捕まってしまったら、Final Spark の詠唱アニメーションのまさに最後の一瞬まで Divine Judgment を遅らせて、Lux の ult の大ダメージを吸収し、その後 Radiant Blast で反撃してスロウを与え、逃げます。

この matchup は、Glacial Path と Frozen Tomb による Lissandra の engage の脅威と、Kayle の ult による保護との対決です。jungle の gank の最中に Lissandra があなたを拘束しようとしても、タイミングよく使った Divine Judgment が Frozen Tomb の大きな burst ダメージを完全に吸収します。これで Lissandra の pick の可能性は無力化されますが、シールドのタイミングを誤ったり誘い出されたりすると、Ring of Frost による強力な CC によって、あなたは確実に倒されます。
Lissandra は絶えず Ice Shard を使って wave を shove し、タワーの下であなたを harass してきます。体力を大きく削られないよう、Starfire Spellblade で minion のラストヒットを確保しながら、体力のやり取りは慎重に行う必要があります。Lissandra は Glacial Path で簡単に dive を仕掛けられるため、体力を高く保つことは必須です。レベル5になるまでレーンは静かなままで、その後は両方の mid laner がマップを左右する強力な ult を持つため、レーンの状況は膠着します。
自分の minion wave から離れて位置取りし、Lissandra に、あなたを狙うか Ice Shard で push するかを選ばせます。Lissandra の jungler が近づいてきても、慌ててすぐに Celestial Blessing を使わず、その場で踏みとどまって、指を Divine Judgment の上に構えておきます。Lissandra が Glacial Path でテレポートしてきて Frozen Tomb を放った瞬間に、反応して ult を発動してください。その反応に失敗したら、すぐに Radiant Blast でスロウを与えて逃げます。

この matchup は、wave を生き延びる力と位置取りを純粋に試されるものです。Ziggs は Bouncing Bomb で安全な位置から絶えず wave を shove しながら、Short Fuse で強化した攻撃をあなたやあなたのタワーに向けます。あなたの序盤の waveclear は弱いため、Ziggs の push に対抗できず、爆発のスパムを避けながら、遠くから minion のラストヒットを確保するために Starfire Spellblade に頼らざるを得ません。
Ziggs は常にあなたを自分のタワーの下に釘付けにし、あなたがレーンを離れたり体力が下がりすぎたりすれば、Satchel Charge でそのタワーを破壊すると脅してきます。この絶え間ない包囲のため、wave を管理下に置くには体力を犠牲にしなければなりません。wave の処理に全神経を使うため、序盤のマッププレッシャーは皆無で、不利なリコールを 1回しただけでプレートや外側のタワー全体まで失いかねません。
これを生き延びるには、自分の minion wave から十分に離れて立ち、Ziggs に、あなたを狙うか push するかを選ばせます。Celestial Blessing を使って Mega Inferno Bomb を避け、削られたダメージを回復します。Ziggs が Hexplosive Minefield であなたの進路を塞いできても、その中を歩いて通らず、Radiant Blast でスロウを与えて時間を稼いでください。Divine Judgment は、ファイトを始めるために使うのではなく、Ziggs の ult の中心部の burst や dive を無効化するためだけに温存します。

このレーンは、賭けの大きい ult のやり取りを中心に回っています。Zed は Death Mark で Razor Shuriken と Shadow Slash の burst を増幅し、あなたが無防備なときに仕留めようとします。しかし、Kayle は ult で Zed に対するカウンターを持っています。マークの最後の爆発の直前に Divine Judgment を発動すれば、Zed が蓄積した burst をすべて完全に無効化し、Zed の主なキル手段を失った状態で、あなたの陣地の奥深くに無防備なまま取り残せます。
レベル5になる前は、Zed が Living Shadow を使って 2本の shuriken であなたを poke し、ペースを握ります。あなたは守りの立ち回りで、Starfire Spellblade と Radiant Blast で CS を確保する必要があります。ult が解放されると、Divine Judgment の脅威が Zed のタワー dive の可能性を止めます。Zed は自分のタワーを危険にさらさずに roam することが簡単にはできません。Zed が kill を見つけられなければ、Divine Ascent の波動が Zed の不在をすぐに咎めるからです。
Zed が Death Mark であなたの元へ降り立っても、慌てて Divine Judgment を使ってはいけません。代わりに後ろへ下がり、Celestial Blessing を使って、飛んでくる Razor Shuriken と Shadow Slash の分身を避け、マークのタイマーの最後の一瞬まで ult を遅らせます。タイミングを誤ったり、ult を早く無駄にしてしまったりしたら、すぐに自分のタワーの下へ下がり、Radiant Blast で Zed の追跡にスロウを与えて、シールドが再び使えるようになるまで、どんな trade も拒否してください。

この matchup は、地面指定のスキルでレーンを封じる Mel の能力と、あなたの反応的な機動力がぶつかる、純粋な micro-spacing の勝負です。Mel はあなたの移動経路を予測して zone control を当てることに頼っているため、Mel の対象エリアから抜け出すための主なツールは、Celestial Blessing による移動速度の上昇です。一方で、Starfire Spellblade のおかげで、minion を 1体ずつ確保するためだけに Mel の脅威の射程に踏み込む必要はありません。
すべての wave が、賭けの大きいダンスの勝負になります。Mel があなたの動きの予測に成功すれば、あなたは守りのために Divine Judgment を使わされるか、タワーの下で体力を失い続けることになり、Mel に自由な roam のタイミングを与えてしまいます。しかし、Mel の地面のハザードを安定して避け続けられるなら、Radiant Blast で wave を弱らせて Mel の push に簡単に対抗でき、Mel を mid lane に縛りつけて、マップ全体への影響力を無力化できます。
距離を詰めるためだけに Celestial Blessing を先走って使わないでください。Mel が地面指定のスキルのアニメーションを始めたのを見たときのためだけに、そのマナと速度を温存します。Mel の移動経路に対して垂直な角度で歩き、動き続けながら Starfire Spellblade の処刑ダメージで争いのあるラストヒットを確保してください。体力が低くなったら、自分のタワーと平行に動きながら、積極的な dive を強行するためではなく、Mel の ult の burst を耐え抜くために Divine Judgment を温存します。
この mid lane の matchup は、Malphite の Unstoppable Force とあなたの Divine Judgment のやり取りを中心にすべてが回っています。Malphite は Seismic Shard であなたを poke して、致命的な engage を仕込もうとします。しかし、あなたの ult は完璧なカウンターであり、Malphite の爆発的な ult とその後の burst を完全に無力化できます。間に合うように反応できれば、Malphite の主な勝ち筋を無効にでき、致命的な dive を Malphite にとっての行き過ぎた大失敗に変えられます。
レベル5になる前は、Malphite は Granite Shield で Starfire Spellblade の poke を吸収しながら farm を確保します。両者が ult を解放すると、レーンは緊張した膠着状態になります。Divine Judgment を持っていない状態では、安全に push できません。Malphite が combo を当てれば、Ground Slam で攻撃速度を台無しにされるからです。これにより mid の priority は無効化され、どちらかが ult を commit するまで、両者とも受け身でプレイせざるを得なくなります。
距離を保って Seismic Shard を誘い、Celestial Blessing を使って移動速度を取り戻し、体力を維持してください。Malphite が積極的に前進してきたら、指を Divine Judgment に準備しておきます。先走って使わず、Unstoppable Force の視覚的な予兆を待ってください。Malphite の ult を無事にブロックできたら、すぐに Radiant Blast で反撃して Malphite の耐性を削り、Malphite の cooldown が使えない間に Divine Ascent の波動で kite しながら倒します。
その他のマッチアップ
これらのチャンピオンは、こちらの主要な強みに効果的に対応するのが難しく、より自由に対面を組み立てることができる。プレッシャーをかけて有利な交換を引き出す手段は複数あることが多い。相手が態勢を立て直す時間を与えるのではなく、この優位を活かして主導権を握ろう。
Kayle の後半のスケーリングは本来 Vladimir を上回りますが、決定打になるのは ult のやり取りです。Vladimir が Hemoplague で commit してきたとき、Kayle は Divine Judgment で完璧に反応して、最後の遅延 burst ダメージを無効化できます。Vladimir は skirmish に勝つためにこの爆発的な回復とダメージのスパイクに頼っているため、ult の爆発を封じることで、Vladimir のキルプレッシャーを完全に止め、Kayle が最強の carry へと自由に成長できます。
mid lane では、Vladimir の序盤の Transfusion による sustain のせいで poke で追い出すのは難しいですが、Vladimir にはハード CC がないため、Kayle は Starfire Spellblade と Radiant Blast で安全に farm できます。Divine Judgment のせいで Hemoplague が失敗する危険を冒さずに、Vladimir がタワーの下の Kayle へ簡単に dive することはできないため、Kayle は自分のタワーの近くで wave を維持でき、マップでの存在感を失うことなく、遠距離の Divine Ascent フォームへ安全に移行できます。
序盤のレベルでは、Starfire Spellblade でのラストヒットに集中し、Vladimir のリソースバーが赤くなったときは、強化された Transfusion から逃れるために Celestial Blessing を使います。お互いにレベル5に到達したら、自分から trade を仕掛けず、代わりに Vladimir の Hemoplague を誘い出してください。感染が爆発する直前に、自分に Divine Judgment を使って遅延する爆発を丸ごと吸収し、その後 Vladimir の Sanguine Pool が長い cooldown に入っている間に、Radiant Blast で追い詰めます。

Veigar は、レーンを支配するために後半の burst と処刑の閾値にすべてを頼っています。しかし、Divine Judgment は絶対的な無敵を与え、Primordial Burst を完全に吸収して Veigar の最も cooldown の長いスキルを無駄にするため、Kayle はこの勝ち筋に直接カウンターできます。Veigar のダメージはこの ult の処刑に大きく後ろ寄せされているため、Kayle は、Veigar の主なキルの脅威がボタン 1つで完全に無力化されると分かった上で、積極的に Veigar をスケーリングで上回れます。
レベル5になる前は、Starfire Spellblade と Radiant Blast で安全に minion を確保することで、Veigar のパッシブによるスケーリングに対抗できます。ult を解放すると、Veigar は自分のタワーの下での solo kill の脅威をすべて失います。これでレーンのプレッシャーは完全にあなたの有利に傾き、大きな trade を強いたり、wave を素早く push して Veigar を抑え込んだり、あなたの minion でのパワーの蓄積を Veigar に楽にさせないようにしたりできます。
Event Horizon に閉じ込められても慌てないでください。中央に立って、Celestial Blessing で、降ってくる Dark Matter を避けるのに必要な移動速度を得るだけです。Divine Judgment は、Veigar の基本スキルに早い段階で使うのではなく、Veigar が Primordial Burst を放つまさにその瞬間のためだけに温存します。檻の縁でスタンを受けたら、すぐに ult を使って先回りして、飛んでくる処刑を防ぎます。

Kayle の ult である Divine Judgment が、Pyke の主なキルの脅威でありリセットの仕組みでもある Death from Below を直接無力化するため、Kayle はこの matchup を支配します。Pyke が体力の低い対象を処刑しようとしたとき、Divine Judgment は完全な無敵を与え、Pyke のリセットとゴールドの分配を完全に阻止します。ult の処刑がなければ、burst 中心の Pyke のキットは teamfight を決める力を失い、Divine Ascent による Kayle のスケーリングする DPS が主導権を握れます。
Pyke は、レベル5になる前に Bone Skewer と Phantom Undertow を当てて trade を強いる必要があり、追い詰められたプレイスタイルを強いられます。両者が ult を解放すると、Pyke の solo kill の脅威は消えます。Pyke は、あなたのタワーの下であなたを処刑できないため、roam のタイミングが大きく制限されます。あなたは Radiant Blast と Starfire Spellblade で安全に wave を処理でき、安全にスケーリングしながら、Pyke の roam の試みを、タワープレートへの大きなダメージで咎められます。
Pyke が Bone Skewer をチャージしても慌てず、Celestial Blessing で移動速度を上げて引き寄せを避けてください。最も大事なルールは、Divine Judgment を Death from Below の視覚的なインジケーターのためだけに温存することです。Pyke が Ghostwater Dive で roam しても、fog of war の中へ無警戒に追いかけてはいけません。代わりに、すぐに Radiant Blast と Starfire Spellblade で wave を shove して、Pyke に Pyke 自身のタワーの下でゴールドと経験値を失わせます。
その他のマッチアップ
これらのアイテムを購入すると、このチャンピオンの影響力を抑えられます。


| マッチアップ | 判定 | 有利度 | 勝率 | ピック率 |
|---|---|---|---|---|
| Malphite | ハードカウンター | +2 | 54.2% | 8.2% |
| Ambessa | ハードカウンター | +2 | 52.7% | 1.7% |
| Olaf | ハードカウンター | +2 | 52.0% | 1.0% |
| Yone | ハードカウンター | +2 | 50.4% | 5.9% |
| Riven | ハードカウンター | +2 | 50.3% | 1.7% |
| Jayce | ハードカウンター | +2 | 50.2% | 4.8% |
| Aatrox | ハードカウンター | +2 | 49.6% | 7.0% |
| Darius | ハードカウンター | +2 | 49.5% | 14.8% |
| Camille | ハードカウンター | +2 | 48.9% | 2.1% |
| Renekton | ハードカウンター | +2 | 48.7% | 3.1% |
| Irelia | ハードカウンター | +2 | 48.5% | 1.4% |
| Rumble | ハードカウンター | +2 | 48.1% | 1.9% |
| Nasus | ハードカウンター | +2 | 46.4% | 5.6% |
| Yasuo | ハードカウンター | +2 | 45.5% | 1.8% |
| Akali | ハードカウンター | +2 | — | — |
| Jarvan IV | ハードカウンター | +2 | — | — |
| Pantheon | ハードカウンター | +2 | — | — |
| Rengar | ハードカウンター | +2 | — | — |
| Teemo | 不利なマッチアップ | +1 | 53.4% | 4.9% |
| K'Santé | 不利なマッチアップ | +1 | 51.4% | 7.4% |
| Mordekaiser | 不利なマッチアップ | +1 | 51.3% | 11.5% |
| Nautilus | 不利なマッチアップ | +1 | 50.9% | 1.3% |
| Jax | 不利なマッチアップ | +1 | 50.6% | 3.6% |
| Gwen | 不利なマッチアップ | +1 | 50.5% | 3.4% |
| Fiora | 不利なマッチアップ | +1 | 50.4% | 3.7% |
| Sett | 不利なマッチアップ | +1 | 50.4% | 8.3% |
| Wukong | 不利なマッチアップ | +1 | 50.1% | 1.6% |
| Cho'Gath | 不利なマッチアップ | +1 | 50.1% | 9.0% |
| Gnar | 不利なマッチアップ | +1 | 50.0% | 3.3% |
| Urgot | 不利なマッチアップ | +1 | 48.9% | 3.8% |
| Garen | 不利なマッチアップ | +1 | 48.7% | 12.1% |
| Volibear | 不利なマッチアップ | +1 | 48.2% | 8.7% |
| Tryndamere | 不利なマッチアップ | +1 | 45.9% | 2.5% |
| Gragas | 不利なマッチアップ | +1 | — | — |
| Graves | 不利なマッチアップ | +1 | — | — |
| Heimerdinger | 不利なマッチアップ | +1 | — | — |
| Swain | 不利なマッチアップ | +1 | — | — |
| Shen | スキル次第のマッチアップ | ±0 | 54.9% | 2.9% |
| Vayne | スキル次第のマッチアップ | ±0 | 52.1% | 1.7% |
| Ornn | スキル次第のマッチアップ | ±0 | 51.1% | 1.9% |
| Kennen | スキル次第のマッチアップ | ±0 | 50.5% | 2.5% |
| Smolder | スキル次第のマッチアップ | ±0 | 50.4% | 1.4% |
| Poppy | スキル次第のマッチアップ | ±0 | 49.4% | 1.8% |
| Vladimir | スキル次第のマッチアップ | ±0 | 48.7% | 1.0% |
| Maokai | スキル次第のマッチアップ | ±0 | — | — |
| Ryze | スキル次第のマッチアップ | ±0 | — | — |
| Skarner | スキル次第のマッチアップ | ±0 | — | — |
| Warwick | スキル次第のマッチアップ | ±0 | — | — |
| Singed | 有利なマッチアップ | −1 | 51.5% | 1.3% |
| Sion | 有利なマッチアップ | −1 | 49.9% | 2.5% |
| Dr. Mundo | 有利なマッチアップ | −2 | 50.5% | 6.5% |
有利度:Wild Rift Coreの公式判定(−3〜+3)で、各行に記載されたチャンピオンの視点から見た値です。勝率とピック率:このロールにおける相手チャンピオン自身の数値 — Wild Rift CN · Challenger、Patch 7.3c。直接対決の勝率ではありません。
| マッチアップ | 判定 | 有利度 | 勝率 | ピック率 |
|---|---|---|---|---|
| Irelia | ハードカウンター | +3 | — | — |
| Brand | ハードカウンター | +2 | 52.6% | 10.8% |
| Aurelion Sol | ハードカウンター | +2 | 51.5% | 6.4% |
| Annie | ハードカウンター | +2 | 51.1% | 2.1% |
| Ahri | ハードカウンター | +2 | 50.7% | 4.4% |
| Jayce | ハードカウンター | +2 | 49.8% | 2.3% |
| Heimerdinger | ハードカウンター | +2 | 49.8% | 1.6% |
| Yone | ハードカウンター | +2 | 49.0% | 5.2% |
| Nasus | ハードカウンター | +2 | 48.3% | 1.1% |
| Katarina | ハードカウンター | +2 | 48.2% | 1.5% |
| Akali | ハードカウンター | +2 | 47.6% | 4.4% |
| Akshan | ハードカウンター | +2 | — | — |
| Karma | ハードカウンター | +2 | — | — |
| Pantheon | ハードカウンター | +2 | — | — |
| Teemo | 不利なマッチアップ | +1 | 52.8% | 2.3% |
| Hwei | 不利なマッチアップ | +1 | 52.4% | 6.5% |
| Zyra | 不利なマッチアップ | +1 | 52.4% | 3.3% |
| Kennen | 不利なマッチアップ | +1 | 51.9% | 1.6% |
| Syndra | 不利なマッチアップ | +1 | 51.8% | 6.4% |
| Taliyah | 不利なマッチアップ | +1 | 51.5% | 1.9% |
| Galio | 不利なマッチアップ | +1 | 51.3% | 11.4% |
| Orianna | 不利なマッチアップ | +1 | 50.8% | 4.6% |
| Ekko | 不利なマッチアップ | +1 | 50.8% | 5.2% |
| Kassadin | 不利なマッチアップ | +1 | 50.5% | 1.8% |
| Norra | 不利なマッチアップ | +1 | 50.4% | 1.3% |
| Aurora | 不利なマッチアップ | +1 | 50.4% | 4.0% |
| Twisted Fate | 不利なマッチアップ | +1 | 50.4% | 5.7% |
| Vel'Koz | 不利なマッチアップ | +1 | 50.2% | 3.4% |
| Viktor | 不利なマッチアップ | +1 | 50.1% | 3.1% |
| Vex | 不利なマッチアップ | +1 | 49.0% | 2.1% |
| Swain | 不利なマッチアップ | +1 | 48.9% | 2.6% |
| Fizz | 不利なマッチアップ | +1 | 48.1% | 2.2% |
| Yasuo | 不利なマッチアップ | +1 | 47.6% | 8.3% |
| Ryze | 不利なマッチアップ | +1 | 47.3% | 2.9% |
| Diana | 不利なマッチアップ | +1 | 47.2% | 1.0% |
| Corki | 不利なマッチアップ | +1 | — | — |
| Kai'Sa | 不利なマッチアップ | +1 | — | — |
| Rumble | 不利なマッチアップ | +1 | — | — |
| Talon | 不利なマッチアップ | +1 | — | — |
| Varus | 不利なマッチアップ | +1 | — | — |
| Zoe | 不利なマッチアップ | +1 | — | — |
| Morgana | スキル次第のマッチアップ | ±0 | 52.2% | 6.5% |
| Lissandra | スキル次第のマッチアップ | ±0 | 52.1% | 4.6% |
| Zed | スキル次第のマッチアップ | ±0 | 51.3% | 4.5% |
| Lux | スキル次第のマッチアップ | ±0 | 48.8% | 5.6% |
| Ziggs | スキル次第のマッチアップ | ±0 | 48.4% | 5.4% |
| Mel | スキル次第のマッチアップ | ±0 | 46.0% | 8.5% |
| Cho'Gath | スキル次第のマッチアップ | ±0 | — | — |
| Malphite | スキル次第のマッチアップ | ±0 | — | — |
| Zilean | スキル次第のマッチアップ | ±0 | — | — |
| Vladimir | 有利なマッチアップ | −1 | 51.5% | 4.3% |
| Veigar | 有利なマッチアップ | −1 | 49.4% | 7.7% |
| Pyke | 有利なマッチアップ | −1 | — | — |
| Seraphine | 有利なマッチアップ | −1 | — | — |
有利度:Wild Rift Coreの公式判定(−3〜+3)で、各行に記載されたチャンピオンの視点から見た値です。勝率とピック率:このロールにおける相手チャンピオン自身の数値 — Wild Rift CN · Challenger、Patch 7.3c。直接対決の勝率ではありません。
Kayleのカウンターを理解することは、レーンで誰が彼女に勝てるかを知るだけではありません。彼女のキットがなぜ脆弱なのかを理解することです。彼女は時間、距離、そして構造化された戦いに依存しています。これらを妨げるもの――序盤のプレッシャー、速いエンゲージ、即時のバースト――はすべて彼女を直接脅かします。カウンターとは、彼女に対して強いピックであるだけでなく、彼女がスパイクに到達したり、戦闘でDPSを発揮したりするのを妨げるチャンピオンのことです。
現在のメタでは、Kayleは激しい序盤のプレッシャーを作り出すチャンピオンに最も苦労します。RenektonやPantheonのようなピックは、彼女からスペースを奪い、最初から防御的なプレイを強います。さらに、多くの現代的な構成にはダイブやバーストが含まれており、Kayleが安全にダメージを与えることができる時間は大幅に短縮されます。
これらのチャンピオンは、Kayleの主な弱点である、存在しないような序盤のゲームを直接悪用します。彼らはレベル1から彼女を罰し、ファームから彼女を隔離し、彼女が勝てないトレードを強いることができます。彼らの絶え間ないプレッシャーは、彼女が安全にスパイクに到達するのを妨げ、一つのミスがレーンを制御不能なほどにスノーボールさせることができます。
チャンピオンの適応方法. 極端に守備的にプレイし、ファームを失うことを受け入れ、ビジョンまたはsupportに頼る。
これらのチャンピオンは、Kayleがレベル5以降でも罰を与えます。なぜなら、彼らは機動力によって彼女のレンジアドバンテージを無効にするからです。彼らは素早くエンゲージし、短いトレードを強要し、彼女が得意とする長引く戦闘を否定します。ターゲットに張り付く能力は、彼女のポジショニングをはるかに難しくします。
チャンピオンの適応方法. 慎重にカイトし、敵のクールダウンを考慮してプレイし、決して一人でオーバーエクステンドしない。
これらのチャンピオンは、Kayleのポジショニングミスにつけ込んで、速いオールインを強要します。レベル5以降でも、彼女はDPSやアルティメットを活用する前に彼女を倒すことができます。彼らの絶え間ない脅威は、レーンの安定を困難にします。
チャンピオンの適応方法. 彼らのエンゲージレンジを尊重し、常に距離を保つ。
RenektonはKayleが序盤に対抗できないテンポを作り出します。彼はゾーンを作り、トレードを強制し、素早くスノーボールします。このマッチアップは、Kayleが彼女のスパイクまで生き残れるかに完全に依存します。
スパイク前に彼女を罰し、短い戦闘を強制し、長引くエンゲージメントを避ける必要があります。目標は、彼女がスケールする前に彼女の影響力を制限することです。
いいえ、序盤は弱いですが、終盤は非常に強いです。そのウィンドウを悪用することが目標です。
彼女のレンジ、DPS、アルティメットは、タイミングの悪いエンゲージを生き残り、罰することを可能にします。