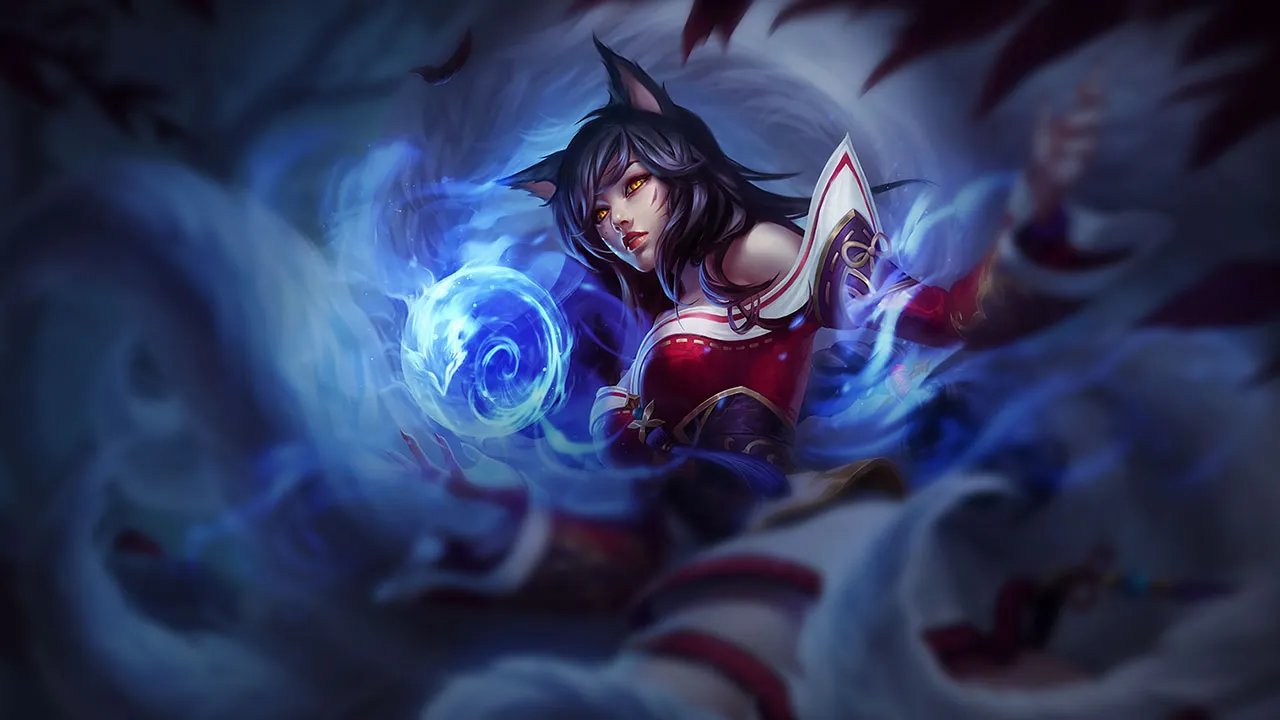
























カウンターアングル
Ahriは、単純なステータスではなく、彼女のピックロジックを崩すチャンピオンによって対策されます。彼女のキット全体は、Eを当ててバーストし、Rで離脱するという明確なシーケンスを中心に展開します。これを妨害するチャンピオン、つまり回避したり、より速くエンゲージしたり、バーストを生き延びたりするチャンピオンは、構造的な問題となります。彼女のカウンターを理解することは、戦闘中に彼女が機能することを妨げるのが誰かを理解することです。

機動力のあるMid LaneのmageであるAhriは、戦闘をコントロールするために自身のmobilityと正確なCharmに依存しています。素早いengage、即座のburst、または絶え間ないプレッシャーを持つ構成は、彼女のポジショニングの選択肢を制限します。スペースのない戦闘を強制されると、彼女の影響力は大幅に低下します。
これらのチャンピオンは、こちらのビルドやプレイスタイルを真正面から上回る構成を持ち、レーン戦のコントロールとファームを極めて難しくする。彼らのスキルはこちらの主要な強みを無効化し、いつも通りのプランを実行しようとした瞬間に手痛い反撃を受けさせてくる。こうしたマッチアップでは、ミスを最小限に抑え、正面からの対決以外で解決策を探すことが重要になる。

minion の wave の中での Irelia の比類ない機動力は、skillshot に頼るあなたのキットを完全に無力化します。Irelia は死にかけの minion で Bladesurge を絶えずリセットすることで、あなたの Charm を簡単に誘って空振りさせたり回避したりできます。あなたの CC が無駄になると、Irelia はすぐに Flawless Duet で追撃してあなたを stun させ、Ionian Fervor を最大スタックまで溜めて、あなたが離脱する前に体力を削り取ります。
この matchup では、自分のタワーの下で守りの farm を強いられます。突然の counter-engage を受ける危険を冒さずに Orb of Deception や Fox-Fire を確実に当てることはできないため、lane を競り合えません。wave を押そうとすると、Irelia があなたを追いかけられる lane が長くなってしまいます。Irelia が freeze すると、あなたはゴールドを完全に締め出され、jungler は完全に孤立します。
Charm は抑止力として必ず温存し、Irelia がダッシュできる体力の少ない minion を持っている間は、絶対に攻撃的に使わないでください。自分のタワーの射程のすぐ外で wave を freeze させ、Orb of Deception は押し寄せる wave を減らすためだけに使ってください。Irelia が Flawless Duet を当ててきたり、Vanguard's Edge で仕掛けてきたりしたら、すぐに Spirit Rush で Irelia の剣の壁から斜めに離れるようダッシュし、やり返そうとするより生存を優先してください。

ここでは、あなたのいつもの安全網は完全に損なわれています。Spirit Rush は普段なら位置取りの変更や脱出を可能にしますが、Lissandra の対象指定の Frozen Tomb はダッシュの最中でもあなたを即座に拘束します。そのため、前方への攻撃的なジャンプはすべて Lissandra にあなたをその場に固めさせる誘いになり、さらに Lissandra の Ring of Frost のせいで、拘束されている間は反撃することも、きれいに Charm を当てることもできません。
Lissandra がレベル 5 に達すると、wave を安全に競り合えなくなります。Lissandra は Ice Shard で楽に wave を押し込め、あなたはタワーの下に追いやられます。Orb of Deception で wave を減らそうと前に出ると、Lissandra は Glacial Path で一瞬で距離を詰め、Lissandra の ult による逃れようのない gank を仕掛けてきます。この絶え間ない pressure があなたの priority を無効化し、ゴールドを失うことになります。
solo kill を狙う意識は完全に捨ててください。Orb of Deception は、自分のタワーの下で最大射程から farm するために取っておきます。Lissandra が Glacial Path を攻撃的に使ったり roam したりしたら、川を通って Lissandra を直接追わず、マップの反対側で動ける場面を探してください。Charm は Lissandra の dive を抑止するためだけに温存し、Spirit Rush は Lissandra が Frozen Tomb を無駄打ちした後にだけ、脱出のために使ってください。

Vex のキットはあなたの高い機動力を直接 counter します。Spirit Rush のダッシュはすべて Vex のパッシブ Doom 'n Gloom を発動させ、あなたにマークを付けて Vex の fear を溜めさせます。ult で dive したり位置取りを変えたりしようとすると、Vex は Personal Space を使ってダッシュの途中を即座に中断させ、その fear を与えられるため、あなたはゼロ距離の Mistral Bolt と Looming Darkness のコンボに完全に無防備になります。
この matchup では、あなたの攻めの自由度が大きく制限されます。Spirit Rush で trade を仕掛けることはできません。仕掛けると、避けようのない即座の中断を招くからです。その結果、Vex が wave を自由に支配し、Looming Darkness と Mistral Bolt であなたをタワーの下に押し込みます。競り合おうと前に出ると体力の半分を失いかねず、lane を生き延びるには Essence Theft だけに頼るしかなくなります。
最も重要な目標は、Vex のパッシブのゲージを常に確認することです。Doom 'n Gloom が有効な間は Spirit Rush を絶対に使わないでください。代わりに、Vex に Mistral Bolt で waveclear に fear を無駄打ちさせるよう誘ってください。Vex のパッシブの表示が消えた瞬間が、Orb of Deception と Fox-Fire で trade できる短い隙です。Vex が Shadow Surge で仕掛けてきたら、Charm を温存しておいてダッシュの途中を中断させ、すぐに離脱して中立の位置まで戻ってください。
これらのチャンピオンは、マッチアップ自体を絶望的にするわけではないが、対面で優位に立ちやすいツールを持っている。射程が長かったり、攻撃を受け止める力が高かったり、エンゲージへの対応手段が豊富だったりする。アプローチを調整し、戦闘を受け入れるタイミングを慎重に選ぶ必要がある。

Orianna は Command: Attack で ball を絶えず動かし位置を変えることで序盤を支配し、あなたは Command: Dissonance を避けるために下がらされます。Clockwork Windup による Orianna の遠距離の通常攻撃が痛いため、簡単にはやり返せません。しかし、Orianna が ball を前に出しすぎると流れが変わります。Orianna をシールドする Command: Protect をすぐに使えない状況では、突然の Spirit Rush のダッシュに対して完全に無防備になります。
あなたは絶えず自分のタワーの方へ押しやられ、安全な距離から minion を確保するためだけに Orb of Deception を使わされます。位置取りのミスはすべて大きな体力の損失につながり、Orianna の poke を耐えるために Essence Theft による sustain に頼らざるを得ません。この絶え間ない pressure で roam が制限され、Orianna の ball の置き方を咎められる隙を見つけるまで lane に縛られます。
Orianna とその ball を結ぶ直線上には絶対に立たないでください。横に位置取りして、Orianna にあなたを狙うか wave を処理するかを選ばせてください。Orianna が Command: Attack をあなたの caster minion のはるか後ろに投げた瞬間に、すぐに Spirit Rush を前方に発動して Orianna の zone をすり抜けてください。ball が定位置から外れていると、Orianna は自分自身に対して素早く Command: Shockwave を使えず、きれいな Charm と Fox-Fire の burst を無防備に受けることになります。

Charm から Orb of Deception、Fox-Fire へと続くあなたの burst は、Demonic Ascension 中の Swain の大きな回復によって完全に無力化されます。Swain の ult による体力回復を貫くだけの純粋なダメージがないため、Swain に正面から all-in しようとすると必ず裏目に出ます。Swain の drain の範囲から逃れるためだけに Spirit Rush のチャージを守りのために使わされ、Swain の変身を生き延びるために、あなたの ult の攻撃的な pressure が無駄になります。
Swain は Death's Hand で lane に絶えず pressure をかけ、Nevermove で引き寄せを狙ってきます。捕まると、Swain は Ravenous Flock の sustain によって自動的に trade に勝ちます。つまり、Orb of Deception を使って wave の均衡を保つか押し込むことに重点を置く必要があります。wave の主導権を失うと、Swain は wave を crash させ、Vision of Empire でタワーの下のあなたを poke し、roam priority を簡単に確保します。
この matchup を生き延びるには、距離を取って minion を処理することを優先してください。Orb of Deception で Swain の push に合わせ、wave の後ろに安全に位置取りして Nevermove を遮ってください。Swain が Demonic Ascension を発動したら、すぐに Spirit Rush を後方に使って drain の tether を断ち切り、残りのチャージは Swain の悪魔の姿が終わるまで温存してください。Swain の ult が cooldown 中の場合を除き、Charm を攻撃的に使わないでください。代わりに、下がる間に Swain の前進を止めるために取っておいてください。

Yasuo の Wind Wall があなたの主な仕込みの手段である Charm と Orb of Deception を完全に無効化するため、Yasuo がこの lane のペースを握ります。あなたの burst はすべて、後続のダメージを増幅させるその 1 つの飛び道具を当てることに懸かっているので、Wind Wall によってあなたは非常に無防備になります。さらに、Yasuo のパッシブ Way of the Wanderer があなたの通常攻撃の poke を絶えず吸収し、Yasuo が engage の角度を見つける前に体力を大きく削るのが極めて難しくなります。
Yasuo は Steel Tempest と Sweeping Blade で楽に wave を処理できるため、あなたは守勢に回らされます。Charm をやみくもに撃つと、Yasuo はそれを防ぎ、minion を通ってダッシュし、あなたを打ち上げた後に Last Breath で致命的な trade を強いてきます。この絶え間ない脅威のため、マナを温存し、Orb of Deception は自分のタワーの下か近くでの farm にだけ使うことになります。
生き延びるには、trade を狙う前に、通常攻撃一発で Yasuo の Way of the Wanderer のシールドを割ってください。Yasuo の Wind Wall(cooldown がとても長い)を誘い出した後でなければ、Charm は使わないでください。代わりに Fox-Fire で移動速度を上げて、Steel Tempest の竜巻を回避してください。Yasuo が Sweeping Blade で前にダッシュしてきたら、Spirit Rush で横に位置取りを変えて直線状の脅威範囲から逃れ、Wind Wall が消えるまで距離を保ってください。

Shield of Durand が Galio に大きな魔法ダメージ軽減を与えるため、Galio はあなたの Charm と Orb of Deception の burst を丸ごと簡単に吸収でき、あなたの暗殺能力は自然と鈍ります。さらに、Galio の Justice Punch は優れた zoning 手段で、Spirit Rush で位置取りを変えたり追いかけたりしようとしたまさにその瞬間に、空中から叩き落とせます。そのため、正面から攻撃的に skirmish するのは、あなたにとって非常に不利です。
Galio に solo kill の脅威を簡単には与えられないため、Galio は Winds of War と Colossal Smash で自由に wave を処理し、あなたをタワーの下に押し込めます。この絶え間ない pressure によって roam できるタイミングが制限される一方、Galio は Hero's Entrance であなたが追いつけないほど速くサイドレーンに影響を及ぼせます。あなたが仕掛けた trade は、たいていパッシブが乗った近接攻撃のせいで、あなたの方が多く体力を失って終わります。
この lane を生き延びるには、消耗戦を戦わなければなりません。Orb of Deception を最大射程で使って wave を減らしつつ同時に Galio を poke し、Essence Theft で Galio が返してくる Winds of War を耐える sustain にしてください。Charm では絶対に仕掛けず、Galio が突進してきたときに Justice Punch を中断させるために守りとして温存してください。Spirit Rush で追うのは、Galio が Shield of Durand を完全に使い切って魔法ダメージに弱くなってからにしてください。

この matchup は、Taliyah の Unraveled Earth があなたの ult による機動力を直接無力化する点で決まります。Spirit Rush を発動して Taliyah の散らばった岩の領域を横切ると、即座に爆発が起きて stun と大ダメージを受けます。この相互作用であなたの安全網は完全に失われ、攻撃的なアウトプレイの主力手段が自分で自分にかける罠に変わる一方、Taliyah は離れた位置から Threaded Volley で安全にあなたを poke してきます。
laning は消耗戦になり、wave を簡単には競り合えません。Taliyah は Threaded Volley で絶えず wave を押し込み、あなたは Orb of Deception を poke ではなく waveclear のために守りで使わされます。Taliyah の mine の近くで Seismic Shove に捕まると、体力の半分を失います。この pressure で釘付けにされる間、Taliyah は Weaver's Wall を使って楽にサイドレーンへ roam できます。
生き延びるには、ダッシュを律する必要があります。Unraveled Earth が地面に出ている間は Spirit Rush を絶対に使わず、代わりに Taliyah の領域と並行に歩き、4 秒間の持続が切れるのを待ってください。Orb of Deception は、Rock Surfing で Taliyah が有利になる壁から離れた安全な角度から、Taliyah の push に合わせるためだけに使ってください。Taliyah が Seismic Shove を外したら、前に出て Charm を狙える短い隙があります。

この matchup は、Black Shield があなたの pick の可能性を完全に無効化する点で決まります。Charm で burst combo を仕込もうとするたびに、Morgana は見てから CC と最初の魔法ダメージを吸収できます。Charm によるダメージ増幅がなければ、Orb of Deception と Fox-Fire では Morgana の体力に脅威を与えられず、Morgana のパッシブ Soul Siphon によって、あなたが当てるどんな軽い poke も楽に sustain で耐えられてしまいます。
laning は退屈な消耗戦になります。Morgana は Tormented Shadow で絶えず wave を押し込み、あなたは Orb of Deception を poke ではなく waveclear のために守りで使わされます。Morgana の push に合わせようとして Dark Binding に捕まると、Morgana はあなたの足元に Tormented Shadow を置いて大ダメージを与えます。これで roam できるタイミングが制限され、mid lane に縛られて、Spirit Rush をマップでの立ち回りに活用できなくなります。
生き延びるには、仕掛ける前に Black Shield を誘い出す必要があります。Fox-Fire で移動速度を上げて積極的に位置取りし、engage するふりで圧をかけてください。Morgana がシールドを温存しているなら Charm は撃たず、Orb of Deception での farm に集中してください。Morgana が Dark Binding を外したら、Morgana に pressure をかけられる短い隙があります。Soul Shackles に捕まったら、stun が発動する前にすぐ Spirit Rush でダッシュして tether の範囲外へ出てください。

Syndra の守りの手段があなたの攻めの選択肢を完全に封じるため、この matchup のペースは Syndra が握ります。Spirit Rush で距離を詰めようとするたびに、Syndra は見てから Scatter the Weak を使ってあなたをダッシュの途中で弾き飛ばせます。この中断で勢いは完全に潰され、Charm を当てる最適な角度に入れなくなり、Dark Sphere と Unleashed Power の大きな burst を受ける危険にさらされます。
この相互作用であなたは守勢に回らされ、wave を競り合う力が制限されます。all-in の脅威を確実には与えられないので、Syndra は Dark Sphere で自由にあなたを poke しつつ、Force of Will で lane を押し込めます。体力を削られると、自分のタワーの下で不自然なタイミングの recall を強いられ、Syndra が Transcendent の shard を自由にスタックして序盤の mid priority を確保するのを許してしまいます。
生き延びるには、Syndra に向かってまっすぐダッシュしないでください。素早い stun を避けるため、Syndra の Dark Sphere の置き位置に対して斜めに位置取りしてください。Spirit Rush は、Syndra が wave を押したり harass したりするために Scatter the Weak を無駄打ちするまで、必ず温存してください。Syndra が律儀にノックバックを温存しているなら、戦いを無理に仕掛けず、Orb of Deception で最大射程から wave を処理し、mid で solo kill を無理に狙うよりも、機動力を使って jungler を助けてください。

Orb of Deception と Fox-Fire による魔法の poke は、Kassadin が Null Sphere を使って得る魔法シールドに絶えず吸収されます。Essence Theft はある程度の lane での sustain をもたらしますが、Kassadin のパッシブの scaling には太刀打ちできません。Kassadin が Riftwalk を習得すると、cooldown がゼロの blink があなたの Spirit Rush の機動力を完全に上回り、かつて安全だった距離が致命的な領域に変わり、Kassadin は Charm を簡単に回避します。
Null Sphere があなたの trade を受け流すため、Kassadin を lane から追い出すのは簡単ではありません。Force Pulse のチャージを得る前の Kassadin の弱い序盤の waveclear を突くために、Orb of Deception で Kassadin をタワーの下に押し込むことに集中する必要があります。wave を押さえ込めなければ、Kassadin はただで scaling します。やがて Kassadin の Riftwalk による roam pressure のせいで mid のタワーに張り付くしかなくなり、川での skirmish の priority をすべて失います。
Kassadin の Riftwalk が使える状態のときは Charm を撃たないでください。Kassadin は簡単に blink で飛び越えて、あなたを burst してきます。代わりに序盤の wave は slow-push し、Orb of Deception は Null Sphere が cooldown 中のときだけ Kassadin を咎めるために温存してください。Kassadin が自分のタワーの近くで wave を freeze してきたら、trade を狙うのをやめ、Fox-Fire で素早く minion を crash させて、Kassadin が scaling の山場に達する前に jungler と roam する機会を探してください。

Fizz の Playful があなたの主な守りの手段である Charm を完全に無効化するため、Fizz が大きな優位に立っています。あなたが仕掛けたり自分を peel したりしようとすると、腕のある Fizz は見てから三叉槍に飛び乗り、飛び道具を完全に回避します。Charm が cooldown に入ると、あなたは無防備になり、Fizz はあなたの真上に着地して、Urchin Strike と Rending Wave で致命的な trade を始められます。
この相互作用で、あなたは安全に前に出て poke できない、非常に消極的な laning phase を強いられます。Orb of Deception を不用意に撃つと、突然の engage に無防備になります。Fizz の burst を警戒しなければならないため、タワーの下に押しやられることが多く、priority を犠牲にし、Fizz が Chum the Waters を習得してサイドレーンを脅かす roam を自由に狙うのを許してしまいます。
生き延びられるかどうかは、Charm を抑止力として温存できるかに懸かっています。先に撃たないでください。Orb of Deception は、安全な最大射程での waveclear にだけ使ってください。Fizz が Urchin Strike であなたを狙ってきても、慌てて CC を使わず、Fizz が Playful を使って着地するのを待ってから反撃してください。Fizz が Chum the Waters で仕掛けてきたら、すぐに Spirit Rush で斜めにダッシュして射線を切り、爆発するノックアップを避けてください。

Charm で拘束しようとしても Sanguine Pool で返され、Vladimir はターゲット不可になってあなたの CC が無駄になるため、Vladimir はあなたの kill pressure を完全に無効化します。trade のダメージとして Orb of Deception や Fox-Fire を当てても、Vladimir は Transfusion であなたの体力を絶えず吸い取って自分の体力を回復し、消耗戦に勝ちます。
Vladimir を簡単には burst できないので、lane は過酷な wave 管理の試練になります。Orb of Deception でやみくもに押すと、Vladimir がタワーの下で安全に farm するのを助けてしまいます。一方、強化された Transfusion を持つ Vladimir との短い trade を取ると、体力が少しずつ削られ、悪いタイミングで recall を強いられ、Vladimir が大きな脅威へと scaling する間、あなたのタワーが無防備になります。
この matchup を生き延びるには、Charm は仕掛けに使わず、守りの抑止力として温存する必要があります。まず Orb of Deception と Fox-Fire で脅かして、Vladimir に Sanguine Pool を使わせてください。minion の wave を自分側の lane の近くに保ち、Vladimir が Transfusion を簡単に使える対象を与えないようにしてください。Vladimir が pool なしで前に出すぎたら、Spirit Rush で素早く位置を取り直して burst で倒してください。

Annie は Pyromania のパッシブを溜めておくことで、あなたの攻めの pressure を完全に無力化します。Spirit Rush で前にダッシュしようとした瞬間に、Annie は対象指定の Disintegrate か広範囲の Incinerate の stun で即座にあなたを拘束できます。この即時の CC によって、あなたは Annie の強烈な Summon: Tibbers の burst に完全に無防備となり、先手を取る engage の試みはすべて、機動力が役に立たない致命的な罠に変わります。
この脅威によってあなたは守勢に回らされ、攻撃的な Charm の立ち回りは危険すぎます。近距離で安全に wave を競り合えず、Annie は Incinerate でテンポを握りつつ、Molten Shield であなたの Orb of Deception の poke を吸収できます。stun された trade で体力を大きく削られると、悪いタイミングで recall を強いられ、plate を失い、Annie が熊を連れて先に roam するのを許してしまいます。
Annie のステータスバーから目を離さず、Pyromania のスタックを把握してください。Spirit Rush で仕掛けるのは、Annie のスタックが 0 か 1 のとき、または Annie が stun を無駄にして Disintegrate で minion をラストヒットした直後だけにしてください。Annie が stun をフルチャージで溜めているときは、Orb of Deception を使って最大射程から安全に farm してください。Molten Shield を発動したまま Annie が積極的に前進してきたら、すぐに Fox-Fire の加速で下がり、flash-stun の範囲の外にいてください。
その他のマッチアップ
このマッチアップは何よりもまず実行力の勝負であり、両者ともに優位を取れる現実的な手段を持っている。重要なスキルを一つ避けられるか、エンゲージを正しく読めるか、あるいはたった一つの位置取りのミスが、勝敗を分けることもある。マッチアップを理解し、行動すべき瞬間を見極める力がとりわけ重要になる。

この matchup は、Ahri の Spirit Rush が Aurora のつかみどころのない回避力と真っ向から釣り合う、高速の決闘です。どちらも skillshot を当てるために素早い位置取りに頼っているので、互いに相手を簡単には捉えられません。Aurora が Twofold Hex と Across the Veil の透明化で Spirit Abjuration を発動させようとする一方、Ahri は Orb of Deception で trade を返します。lane は完全に互角のままで、先に移動手段を誤用した側で決まります。
trade は短く、非常に展開が速いため、両方の midlaner が、きれいな wave priority を確保するのに絶えず苦労します。Aurora は The Weirding で wave を押し込みつつ後ろに下がり、Ahri は Orb of Deception で waveclear に合わせます。Aurora がパッシブの回復を発動させたら、Ahri は Essence Theft による sustain に頼るしかありません。体力が急速に上下するので、一度でもタイミングを誤った trade があると早い recall を強いられ、残った midlaner が自由にタワーに pressure をかけられます。
Aurora が Across the Veil を使える状態のときは、先に Charm を撃たないでください。代わりに Orb of Deception と Fox-Fire で wave を処理し、Twofold Hex を避けるため距離を保ってください。Aurora が透明化を使って前に跳んだら、その軌道を追い、Aurora が Across the Veil から出てくるちょうどその場所に Charm を撃ってください。Between Worlds に閉じ込められたら、Spirit Rush でゾーンの境界の内側を安全にダッシュし、アリーナが消えるまで Aurora の戻りのダメージを回避してください。

この matchup は、Yone の Soul Unbound のタイマーに完全に左右される、spacing を賭けた一発勝負の決闘です。Yone は Mortal Steel と霊体の状態を使って距離を詰め、あなたのレンジの優位をすり抜けますが、戻る地点は固定されたままです。lane 全体がこの tether を中心に回ります。Yone が元の体に戻る瞬間は完全に読めるので、Yone の本体のアンカーに向けて、確実な Charm を先行入力しておけます。
すべての trade は Yone の Mortal Steel の状態で決まります。Yone が 2 スタック溜めたら、wave priority を譲り、ノックアップを避けるため後ろに spacing を取ってください。Yone がこの竜巻を無駄打ちするか Soul Unbound での engage を外したら、すぐに主導権を握り、Orb of Deception と Fox-Fire で Yone をタワーの下に押し込むか、Yone の守りの Spirit Cleave のシールドがダメージを吸収する前に体力を大きく削ってください。
互角の局面では Charm をむやみに撃たず、Yone が Soul Unbound を発動する場面のために温存してください。Yone が霊体で仕掛けてきたら、後に残された本体を追ってください。その本体への射線が通る位置を取ってください。Yone の tether の表示円が縮んでいくところで、Yone の元の体に向けて直接 Charm を撃ってください。Yone が Fate Sealed であなたに dive してきたら、Spirit Rush で横に回避し、すぐに反撃してください。

この lane は、Zed の ult と Ahri の主な CC のタイミングを中心とした、純粋な腕比べの決闘になります。Zed が Death Mark を使うと、Zed は必ず Ahri の真後ろに現れます。この読みやすい出現位置のおかげで、Ahri は背後に向けて Charm を先行入力でき、Zed の burst の仕込みをすぐに中断して、Zed の攻撃的な dive を致命的なミスに変えられます。ただし、Zed は先にこの重要な cooldown を誘い出さなければなりません。
レベル 5 になる前は、Zed が farm に Living Shadow を使うたびに、Orb of Deception の射程の優位を活かして咎めてください。Zed が分身を無駄にすると脱出手段を失うので、積極的に動けます。ただし、Zed があなたの体力を大きく削った場合、Contempt for the Weak のせいでタワーの下のあなたは格好の的となり、悪いタイミングの recall を強いられて mid lane の priority を失います。
Zed が Living Shadow を使える状態のときは、Charm を無謀に撃たないでください。Zed は簡単にテレポートして回避できます。代わりに Orb of Deception と Fox-Fire で poke してください。Zed が Death Mark で仕掛けてきたら、Zed があなたの背後に再び現れるちょうどその瞬間を待って、後ろに向けて Charm を撃ってください。外した場合は、すぐに Spirit Rush でダッシュして離れ、Razor Shuriken と Shadow Slash を回避して、マークの爆発を生き延びてください。

この互角の matchup は、Akali のステルスをどう扱うかにすべてが懸かっています。Twilight Shroud は通常、Akali を直接ターゲットされる危険から守りますが、Five Point Strike で攻撃する際の短い可視状態に、あなたの Fox-Fire が即座に Akali をロックオンできます。この自動ターゲットは Akali の shroud の防御をすり抜け、本来 Akali の安全地帯のはずの場所を trade の機会に変えます。ただし、Akali が完全に隠れている間に Charm を無駄打ちしないことが条件です。
laning は緊張感のある膠着状態で、wave の管理が安全を左右します。Orb of Deception で押し込めば Akali はタワーの下に留まり、Shuriken Flip の角度が制限されます。ただし、harass しようと前に出ると、突然 Perfect Execution で engage されます。trade で一度でもミスをすると体力バーが大きく動くため、recall のタイミングは自然な wave の状態ではなく、burst を生き延びたのがどちらかで強制されることになり、序盤の roam の可能性は双方とも大きく制限されます。
Twilight Shroud に向けて Charm をやみくもに撃たないでください。代わりに Fox-Fire を発動して Twilight Shroud の縁の近くを歩き、Akali が攻撃するたびに炎が自動で Akali を捕捉するようにしてください。Shuriken Flip でマークされても、慌てないでください。Charm を温存し、Akali がフリップを再発動するときに、迫ってくるダッシュの軌道上にまっすぐ撃ってください。この重要な CC を外してしまった場合は、すぐに Spirit Rush を守りに使って離脱し、Akali の execution の猶予を生き延びてください。
その他のマッチアップ
これらのチャンピオンは、こちらの主要な強みに効果的に対応するのが難しく、より自由に対面を組み立てることができる。プレッシャーをかけて有利な交換を引き出す手段は複数あることが多い。相手が態勢を立て直す時間を与えるのではなく、この優位を活かして主導権を握ろう。

Ahri の Charm が Katarina の勝ち筋のすべてを真っ向から counter するため、この lane は Ahri が完全に支配します。Katarina は Shunpo で飛び込み Death Lotus をチャネリングしてチームを壊滅させることに頼っていますが、よく狙ったハート 1 発で Katarina の ult は詠唱の途中で即座に止まります。チャネリングによる大ダメージがなければ Katarina は非常に無防備になり、Voracity のリセットも発動できないまま、あなたの Orb of Deception と Fox-Fire に残りの体力を片付けられます。
この matchup の力関係では、Katarina はあなたの CC を恐れて非常に消極的に動くしかありません。Orb of Deception で安全に wave を押し込み、Katarina がタワーの下で Bouncing Blade での farm に苦労している間に poke できます。あなたには Spirit Rush の機動力があり、Katarina のマップ上のローテーションに合わせることも直接 dive することもできるため、Katarina は自分のタワーを離れる危険を冒せず、roam の可能性は大きく損なわれます。
鉄則は、Katarina がすでに Shunpo で dagger に飛んでいる場合を除き、Charm を先に撃たないことです。skirmish の間は、Death Lotus を中断させるために、このスキルを必ず温存してください。飛び道具を外した場合は、すぐに Spirit Rush を発動して Katarina の ult の範囲からダッシュで抜け出し、Essence Theft のスタックで体力を回復し、Katarina の dagger が消えてから再度 engage してください。

この lane は、Lux があなたを拘束できるかどうかにすべてが懸かっています。Lucent Singularity は厄介な poke になりますが、Lux は守りの手段を使い切った後にあなたの burst から逃げる機動力がありません。Spirit Rush が Lux の skillshot を完全に無効にするため、この matchup は大きくあなたに有利に傾きます。Lux が Light Binding を撃って外せば、Lux の安全網はすべて崩れ、あなたのフルの trade に対して無防備になります。
レベル 5 になる前は、Lux が Lucent Singularity で wave を押し込み、あなたをタワーの下に追いやろうとします。しかし、Essence Theft のおかげで体力は十分に保たれ、この序盤の pressure に耐えられます。Spirit Rush を習得すると、lane の力関係は逆転します。Lux は Light Binding を恐れて撃てずにいる非常に消極的な立ち回りを強いられ、あなたは wave priority を自由に握り、楽にローテーションできるようになります。
Lux の射程のすぐ外を斜めに動き続けて、Lux の Light Binding を誘い出してください。Lux の snare が cooldown に入った瞬間に、すぐ Spirit Rush を前方に使って距離を詰めてください。続けて確実な Charm と Orb of Deception を決め、Fox-Fire を発動して、Lux が Prismatic Barrier を再利用できる前に倒しきってください。Lux が下がりすぎている場合は、機動力を使って wave を処理し、roam してください。

Mel は予兆の大きい範囲スペルに強く頼っているため、Ahri の俊敏さに対して非常に脆くなります。レベル 5 になる前は Mel があなたを zoning しようとしますが、Spirit Rush を習得した瞬間に力関係は完全に逆転します。Mel の円形の地面指定の範囲から楽にダッシュで抜け出し、一瞬で距離を詰めて、遮られないきれいな Charm を当て、Fox-Fire と Orb of Deception で増幅した致命的な burst を叩き込めます。
ult が使える状態になると、この matchup の pressure によって Mel は極めて守備的に動かざるを得ません。Mel は範囲スペルで wave を押したがりますが、そうすると Mel はその場に縛られ、あなたは Orb of Deception で wave を処理しながら engage の機会を狙えます。Mel は、突然前方へ Spirit Rush される危険を冒さずに mid lane の priority を競り合えず、あなたは自由に roam したり、深い位置の vision を確保したりできます。
序盤のレベルでは、Orb of Deception で Mel の push に合わせ、Mel の長射程の poke による細かいダメージは Essence Theft で回復してください。レベル 5 になったら、遠距離から Charm で仕掛けないでください。代わりに、Mel が予兆のある詠唱モーションを始めるのを待ち、すぐに Spirit Rush を斜めに使って Mel 側の minion をすり抜け、ゼロ距離で Charm を放ってください。残りのダッシュは、Mel を追い詰めるか、Mel の jungler が counter-gank してきたときに離脱するために取っておいてください。

Veigar の主な守りの手段である Event Horizon が簡単にすり抜けられるため、Ahri は Veigar を圧倒します。Veigar はこの stun を当てて Dark Matter を仕込むか脱出することに頼っていますが、Ahri の高い機動力がそれを完全に無力化します。動き続けて正しく位置取りすれば、Ahri は cage が消えるのを待つか、Spirit Rush で外周に沿ってダッシュし、一瞬で距離を詰めて、Veigar が Phenomenal Evil Power を scaling させる前に burst で倒せます。
lane では、この力関係により Veigar は極めて守備的に動かざるを得ず、wave の主導権を譲ります。Orb of Deception で安全に minion を処理し、タワーの下の Veigar を harass できます。Charm を受ける危険を冒さずには Veigar が前に出られないので、序盤の priority はあなたが確保します。これにより素早く recall でき、サイドレーンに roam して、Veigar が自分のタワーの下で Baleful Strike での farm に縛られている間にマップ上で snowball できます。
trade するときは、Event Horizon にまっすぐダッシュで入らないでください。代わりに、前に歩いて Veigar に cage を使わせ、その後、後ろに歩いて境界の外にいてください。壁が現れたら、Spirit Rush を横方向に使って cage の側面に回り込み、すぐに Charm と Fox-Fire で追撃してください。Veigar が安全に徹しすぎるなら、Orb of Deception で wave を強く押し込み、すぐに roam して jungler を助けてください。Veigar は、あなたを追うか、パッシブをスタックするかの選択を迫られます。

Ahri がこの matchup を支配できるのは、Charm が Talon の主力の engage 手段を完全に封じるからです。Talon が Noxian Diplomacy で距離を詰めようとするたびに、タイミングよく放ったハートが空中で Talon の跳躍を止め、Talon は無防備になり、Blade's End のスタックも付与できなくなります。主力の gap-closer を無力化することで、あなたは Talon に burst combo を決めさせず、安全に disengage するか、trade を有利に運べます。
この状況により Talon は守りの立ち回りを強いられ、あなたは Orb of Deception で wave を相手の tower の下へ押し込み続けられます。Talon はあなたに安全に dash できないため、Assassin's Path を使って序盤にマップを rotate するための priority を失います。あなたが lane のペースを握り、Talon は tower に gold を奪われるか、wave を処理しようとして Fox-Fire から大きなダメージを受けるかの二択を迫られます。
Talon が前に出てきたときは、常に Charm を温存してください。Talon の Noxian Diplomacy が cooldown 中のとき以外は、積極的に撃ってはいけません。lane の中央付近に立って Orb of Deception で楽に wave を処理し、そのあとすぐに side lane を確認してください。Talon が Assassin's Path で壁を越えて逃げた場合は、闇雲にそのルートを追わないでください。代わりに Spirit Rush で川を安全に素早く渡り、Talon の Shadow Assault が味方を不意打ちする前に counter-gank しましょう。

Twisted Fate は、あなたを寄せつけないために Pick a Card に完全に頼っています。マナ回復や minion 処理のために青か赤のカードを選んだ瞬間、Twisted Fate は無防備になります。Spirit Rush で一気に距離を詰め、Wild Cards をすり抜けて、Charm を簡単に当てられます。ゴールドカードがない状態の Twisted Fate は機動力に欠け、あなたの burst の格好の標的です。
この状況により Twisted Fate は非常に守備的な立ち回りを強いられ、あなたの致命的な射程を避けるために wave control を譲ることになります。Orb of Deception で Twisted Fate より簡単に wave を押し込めて、相手を tower の下に押し下げられます。この pressure のせいで、Twisted Fate は Destiny を使って side lane に自由に干渉できません。tower から離れれば plate を失うか、倒されてしまうからです。あなたが recall のタイミングを決められ、先に安全に rotate してマップの priority を確保できます。
これを実行するには、Twisted Fate の頭上のカードを常に見てください。黄色以外のカードを選んだ瞬間に、Spirit Rush を前方へ発動します。すぐに Charm を投げてはいけません。Fox-Fire と移動速度を使って Twisted Fate の flash を誘ってから、crowd control を決めてください。Twisted Fate が tower の下で極端に安全に立ち回るなら、Orb of Deception で wave を crash させ、side lane へ roam するフェイントを入れて、相手を焦らせて Destiny を使わせ、そのミスにつけ込みましょう。
その他のマッチアップ
これらのアイテムを購入すると、このチャンピオンの影響力を抑えられます。



| マッチアップ | 判定 | 有利度 | 勝率 | ピック率 |
|---|---|---|---|---|
| Lissandra | ハードカウンター | +2 | 52.1% | 4.6% |
| Vex | ハードカウンター | +2 | 49.0% | 2.1% |
| Irelia | ハードカウンター | +2 | — | — |
| Zyra | 不利なマッチアップ | +1 | 52.4% | 3.3% |
| Morgana | 不利なマッチアップ | +1 | 52.2% | 6.5% |
| Syndra | 不利なマッチアップ | +1 | 51.8% | 6.4% |
| Vladimir | 不利なマッチアップ | +1 | 51.5% | 4.3% |
| Taliyah | 不利なマッチアップ | +1 | 51.5% | 1.9% |
| Galio | 不利なマッチアップ | +1 | 51.3% | 11.4% |
| Annie | 不利なマッチアップ | +1 | 51.1% | 2.1% |
| Orianna | 不利なマッチアップ | +1 | 50.8% | 4.6% |
| Kassadin | 不利なマッチアップ | +1 | 50.5% | 1.8% |
| Jayce | 不利なマッチアップ | +1 | 49.8% | 2.3% |
| Heimerdinger | 不利なマッチアップ | +1 | 49.8% | 1.6% |
| Swain | 不利なマッチアップ | +1 | 48.9% | 2.6% |
| Fizz | 不利なマッチアップ | +1 | 48.1% | 2.2% |
| Yasuo | 不利なマッチアップ | +1 | 47.6% | 8.3% |
| Malphite | 不利なマッチアップ | +1 | — | — |
| Zed | スキル次第のマッチアップ | ±0 | 51.3% | 4.5% |
| Norra | スキル次第のマッチアップ | ±0 | 50.4% | 1.3% |
| Aurora | スキル次第のマッチアップ | ±0 | 50.4% | 4.0% |
| Viktor | スキル次第のマッチアップ | ±0 | 50.1% | 3.1% |
| Yone | スキル次第のマッチアップ | ±0 | 49.0% | 5.2% |
| Akali | スキル次第のマッチアップ | ±0 | 47.6% | 4.4% |
| Ryze | スキル次第のマッチアップ | ±0 | 47.3% | 2.9% |
| Diana | スキル次第のマッチアップ | ±0 | 47.2% | 1.0% |
| Cho'Gath | スキル次第のマッチアップ | ±0 | — | — |
| Gragas | スキル次第のマッチアップ | ±0 | — | — |
| Lucian | スキル次第のマッチアップ | ±0 | — | — |
| Varus | スキル次第のマッチアップ | ±0 | — | — |
| Zoe | スキル次第のマッチアップ | ±0 | — | — |
| Brand | 有利なマッチアップ | −1 | 52.6% | 10.8% |
| Hwei | 有利なマッチアップ | −1 | 52.4% | 6.5% |
| Aurelion Sol | 有利なマッチアップ | −1 | 51.5% | 6.4% |
| Ekko | 有利なマッチアップ | −1 | 50.8% | 5.2% |
| Twisted Fate | 有利なマッチアップ | −1 | 50.4% | 5.7% |
| Veigar | 有利なマッチアップ | −1 | 49.4% | 7.7% |
| Lux | 有利なマッチアップ | −1 | 48.8% | 5.6% |
| Nasus | 有利なマッチアップ | −1 | 48.3% | 1.1% |
| Tristana | 有利なマッチアップ | −1 | 48.2% | 1.3% |
| Katarina | 有利なマッチアップ | −1 | 48.2% | 1.5% |
| Mel | 有利なマッチアップ | −1 | 46.0% | 8.5% |
| Akshan | 有利なマッチアップ | −1 | — | — |
| Pantheon | 有利なマッチアップ | −1 | — | — |
| Pyke | 有利なマッチアップ | −1 | — | — |
| Talon | 有利なマッチアップ | −1 | — | — |
| Ziggs | 有利なマッチアップ | −2 | 48.4% | 5.4% |
| Kayle | 有利なマッチアップ | −2 | — | — |
有利度:Wild Rift Coreの公式判定(−3〜+3)で、各行に記載されたチャンピオンの視点から見た値です。勝率とピック率:このロールにおける相手チャンピオン自身の数値 — Wild Rift CN · Challenger、Patch 7.3c。直接対決の勝率ではありません。
Ahriは、単純なステータスではなく、彼女のピックロジックを崩すチャンピオンによって対策されます。彼女のキット全体は、Eを当ててバーストし、Rで離脱するという明確なシーケンスを中心に展開します。これを妨害するチャンピオン、つまり回避したり、より速くエンゲージしたり、バーストを生き延びたりするチャンピオンは、構造的な問題となります。彼女のカウンターを理解することは、戦闘中に彼女が機能することを妨げるのが誰かを理解することです。
このパッチでは、Ahriのカウンターは、機動力と防御ツールの台頭によって強化されています。レベル5前に彼女を罰したり、チャームを回避したりするアサシンは、彼女の影響を大きく低下させます。彼女のバーストを吸収したり、 defensively Rを使わざるを得なくしたりするチャンピオンも、彼女を制限します。問題はただ死ぬことではなく、彼女のゲームプランを実行できないことです。
これらのチャンピオンは、Ahriのチャームへの依存を直接的に悪用します。彼らの機動力は、Eを回避したり、彼女がミスした場合にすぐに罰したりすることを可能にします。序盤では、彼女がRを持つ前にオールインを強制し、彼女の安全性を奪うことができます。midゲームであっても、Ahriがフルコンボを実行できないような素早いトレードを生み出します。その結果、彼女はプレイメイキングの役割を失います。
チャンピオンの適応方法. 序盤は守備的にプレイし、エンゲージのためにEを温存し、オールインの角度を避けるために視界を優先してください。
これらのチャンピオンは、長期戦ではなくインスタントバーストに依存しています。彼らはAhriが反応するよりも速くエンゲージするか、彼女がRを使用する前にポジショニングを罰します。これにより、彼女の長期戦をプレイしたり、再ポジショニングしたりする能力が制限されます。彼女が defensively Rを使用した場合、攻撃的なプレッシャーはすべて失われます。
チャンピオンの適応方法. 彼らのアルティメットのタイミングを尊重し、視界またはRが利用可能でない限り決して露出しないでください。
これらのチャンピオンは、時間とともに倒すのが難しくなります。Kassadinはピックの試みを簡単に回避できますが、Oriannaはスペースをコントロールし、過度の攻撃性を罰します。これらのマッチアップでは、Ahriは徐々にキルプレッシャーを失い、ユーティリティに移行する必要があります。序盤の有利なしでは、彼女はチームに依存するようになります。
チャンピオンの適応方法. 彼らがスケールする前に、ロームとピックを通じて序盤のテンポを強制してください。
Fizzは、Ahriのパターンを完全に無視するため、最も罰的なマッチアップの1つです。彼のEはチャームを回避し、彼のオールインは彼女が反応する前に発生する可能性があります。このマッチアップは忍耐がすべてです。プレイを強制すると敗北につながりますが、ミスを罰することで彼女は関連性を保ちます。
はい、直接レーンで勝つことは滅多にありません。彼女はロームやピックでマッチアップを離れることで勝ちます。カウンターに対しては、デュエルを強制するのではなく、損失を最小限に抑え、機会を待つことが目標です。
機動力と速いバーストを組み合わせたチャンピオンが最も厄介です。それらはチャームを避け、即座に罰を与え、彼女の時間ベースのゲームプレイを破壊します。
いいえ、明確な情報がない限り。カウンターに対してプレイを強制することはしばしば間違いです。全体的なゲームテンポをプレイし、他の場所で影響を与える方が良いです。
Eをエンゲージのために保持し、レーンでより安全にプレイし、ビジョンを使用して角度を否定します。あなたの目標は、彼らを殺すことではなく、彼らのスノーボールを遅らせることです。