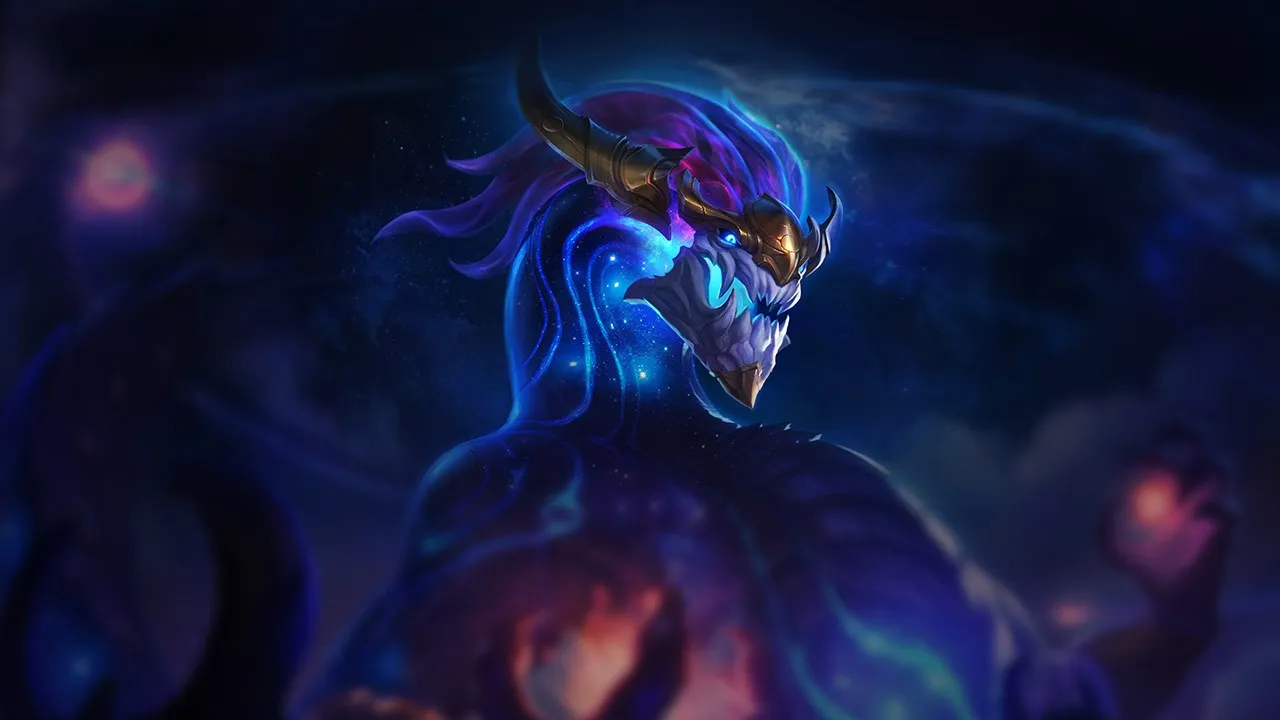
Aurelion Sol struggles against champions who can interrupt his roaming and deny his stack accumulation. Mobile assassins and dive compositions threaten him before he reaches peak power. His fragile early game is his primary vulnerability window.
★ MIDTier S
DMG
UTIL
TANK
DIFF
Win51.1%#37 · ↓3pt
Pick6.3%#8
Ban2.5%#50
Aurelion Sol Wild Rift Counters Guide
Hard Counters
12
These champions have a build and playstyle that directly overpower yours, which can make controlling the lane and farming extremely difficult. Their kit can neutralize your core strengths or punish you the moment you try to play your usual game plan. In these matchups, the goal is often to minimize mistakes and look for ways to win outside of direct confrontation.
InterruptMobilityKassadin completely shuts down your main damage source. Whenever you try to channel Breath of Light, he can immediately throw Null Sphere. The silence instantly interrupts your breath, leaving you completely vulnerable with no back-up damage. Furthermore, his Void Stone magic shield absorbs your poke, and once he gets Riftwalk, he can easily close the distance to burst you down while you are silenced.Kassadin build →See details
Kassadin
The interaction that decides it
Kassadin's Null Sphere silences you, which instantly cancels your Breath of Light channel and leaves you defenseless.
Why
Kassadin completely shuts down your main damage source. Whenever you try to channel Breath of Light, he can immediately throw Null Sphere. The silence instantly interrupts your breath, leaving you completely vulnerable with no back-up damage. Furthermore, his Void Stone magic shield absorbs your poke, and once he gets Riftwalk, he can easily close the distance to burst you down while you are silenced.
Lane impact
You cannot trade back effectively, forcing you to play a purely defensive laning phase. Attempting to freeze or contest the wave with Breath of Light results in getting silenced and heavily chunked by his Nether Blade and Force Pulse combo. This loss of priority means you will be stuck under tower, bleeding gold, while Kassadin gains free roam timers to impact the map with his high mobility.
How to play
Your goal is to survive and farm Stardust safely. Drop Singularity from a safe distance to clear minions without stepping into Null Sphere range. Never use Astral Flight aggressively; save it solely as an escape tool when he initiates with Riftwalk. If he freezes the wave near his tower, do not walk up to break it; instead, wait for the wave to crash or coordinate with your jungler to reset it.
MobilityCrowd controlIrelia represents an absolute nightmare for Aurelion Sol due to how your primary damage tool works. When you stand still to channel Breath of Light, you become a stationary target. This makes it trivial for Irelia to land Flawless Duet to stun you. Once stunned, your channel is broken, and she can instantly close the gap and execute you with relentless Bladesurge resets.Irelia build →See details
Irelia
The interaction that decides it
Irelia can easily stun you with Flawless Duet while you are channeling Breath of Light, then execute you with Bladesurge resets.
Why
Irelia represents an absolute nightmare for Aurelion Sol due to how your primary damage tool works. When you stand still to channel Breath of Light, you become a stationary target. This makes it trivial for Irelia to land Flawless Duet to stun you. Once stunned, your channel is broken, and she can instantly close the gap and execute you with relentless Bladesurge resets.
Lane impact
This threat forces you to play completely passive, conceding lane priority from the first wave. You cannot safely collect Cosmic Creator stacks using Breath of Light on minions because Irelia will jump on marked targets with Bladesurge. Every attempt to clear with Singularity will push the wave, exposing you to her Vanguard's Edge engage far from your turret.
How to play
To survive, you must establish a strict positioning rule: never use Breath of Light unless Irelia has already wasted Flawless Duet. Keep the minion wave permanently frozen just outside your turret range to prevent her Bladesurge dash chains. If she dives you with Vanguard's Edge, immediately use Astral Flight to fly backward toward your second turret, rather than trying to fight back with Falling Star, which she can easily reduce with Defiant Dance.
Early pressureMap pressureThe lane is heavily tilted in Akshan's favor due to how Breath of Light locks you in place. While you stand still to channel your starfire, Akshan can easily anchor Heroic Swing on a nearby wall to circle around you, unleashing a devastating burst of physical damage while bypassing your minions. Your lack of early mobility means you cannot escape his Dirty Fighting shield trades, making your primary trading tool a self-inflicted trap.Akshan build →See details
Akshan
The interaction that decides it
Aurelion Sol must stand still to channel Breath of Light, making him an easy target for a full Heroic Swing rotation.
Why
The lane is heavily tilted in Akshan's favor due to how Breath of Light locks you in place. While you stand still to channel your starfire, Akshan can easily anchor Heroic Swing on a nearby wall to circle around you, unleashing a devastating burst of physical damage while bypassing your minions. Your lack of early mobility means you cannot escape his Dirty Fighting shield trades, making your primary trading tool a self-inflicted trap.
Lane impact
Akshan will aggressively push the first waves with Avengerang to secure an early level advantage. If you attempt to thin the wave with Singularity, he will immediately capitalise on your positioning, using Heroic Swing to dive past your tower range or force a premature Astral Flight. This constant pressure denies you Cosmic Creator stacks, forces you into bad recall timings, and allows Akshan to roam freely with Going Rogue while you are trapped under turret.
How to play
To survive this onslaught, you must play defensively near your turret and completely abandon the idea of using Breath of Light on Akshan unless his Heroic Swing is on cooldown. Place Singularity directly on your caster minions to secure farm from a safe distance. If he attempts to dive you under turret, prepare Falling Star to interrupt his swing mid-air. Prioritise safety over gold early; your scaling with Cosmic Creator will eventually outvalue his single-target assassination potential once you reach teamfights.
AssassinDodgingThis lane is dictated by how easily Zed can neutralize your self-peel. When you attempt to drop Falling Star to stop his advance, he can immediately cast Death Mark to dodge the impact entirely. By reappearing directly behind you, he renders your channeled, directional Breath of Light completely useless, leaving you exposed to a devastating point-blank combination of Shadow Slash and Razor Shuriken enhanced by Contempt for the Weak.Zed build →See details
Zed
The interaction that decides it
Zed can use Death Mark to dodge your Falling Star and appear directly behind you, rendering your frontal Breath of Light useless.
Why
This lane is dictated by how easily Zed can neutralize your self-peel. When you attempt to drop Falling Star to stop his advance, he can immediately cast Death Mark to dodge the impact entirely. By reappearing directly behind you, he renders your channeled, directional Breath of Light completely useless, leaving you exposed to a devastating point-blank combination of Shadow Slash and Razor Shuriken enhanced by Contempt for the Weak.
Lane impact
Before level five, you can safely gather Cosmic Creator stacks from a distance using Singularity. However, once Zed unlocks Death Mark, the power dynamic shifts violently. You are forced to surrender lane priority and clear waves from extreme range. Stepping past the midway point of the lane invites an all-in that you cannot survive, and using Astral Flight aggressively becomes an invitation for Zed to easily intercept and execute you.
How to play
To survive this matchup, never initiate trades with Falling Star. You must hold this defensive tool until Zed commits his ultimate. When he targets you with Death Mark, prepare to aim Falling Star directly behind your own model the split-second he reappears. If he misses his shurikens, drop Singularity at your feet to hinder his movement and immediately use Astral Flight to retreat safely under your turret's protection.
InterruptBurstThis matchup is entirely dictated by how easily Syndra can disrupt your trading patterns. Your primary damage tool, Breath of Light, requires you to remain stationary or fly in a predictable line during Astral Flight. Syndra can effortlessly interrupt this channel from a safe distance by launching a Dark Sphere with Scatter the Weak. This immediate knockback and stun completely cancels your DPS while leaving you immobilized and exposed to her follow-up burst.Syndra build →See details
Syndra
The interaction that decides it
Syndra can easily interrupt your Breath of Light channel from a safe distance using Scatter the Weak.
Why
This matchup is entirely dictated by how easily Syndra can disrupt your trading patterns. Your primary damage tool, Breath of Light, requires you to remain stationary or fly in a predictable line during Astral Flight. Syndra can effortlessly interrupt this channel from a safe distance by launching a Dark Sphere with Scatter the Weak. This immediate knockback and stun completely cancels your DPS while leaving you immobilized and exposed to her follow-up burst.
Lane impact
You cannot safely contest the wave state or secure priority. Every time you attempt to clear minions using Singularity and Breath of Light, Syndra will punish your stationary posture with Force of Will and Dark Sphere. This forced passivity pushes you under your turret, bleeding tower plates and preventing you from assisting your jungler, while allowing Syndra to freely scale and upgrade her abilities through Transcendent.
How to play
To survive, prioritize farming from maximum distance solely using Singularity to gather Cosmic Creator stacks. Never channel Breath of Light unless Syndra has recently wasted Scatter the Weak; this cooldown is your only safe window to actively clear. If she holds her stun, remain patient under turret and accept losing some farm. Should she catch you with Unleashed Power, immediately use Astral Flight defensively toward your tower rather than trying to fight back.
MobilityCrowd controlStaying stationary while channeling Breath of Light makes you an incredibly easy target for Yone. He can effortlessly close the gap from safe distance using Soul Unbound. Once he is on top of you, he will immediately interrupt your channeled breath with the knock-up from his third Mortal Steel strike, completely neutralizing your primary damage source while keeping his own threat high.Yone build →See details
Yone
The interaction that decides it
Yone can easily close the distance with Soul Unbound and interrupt your Breath of Light using his third Mortal Steel strike.
Why
Staying stationary while channeling Breath of Light makes you an incredibly easy target for Yone. He can effortlessly close the gap from safe distance using Soul Unbound. Once he is on top of you, he will immediately interrupt your channeled breath with the knock-up from his third Mortal Steel strike, completely neutralizing your primary damage source while keeping his own threat high.
Lane impact
This dynamic forces you into a highly defensive posture where you cannot safely contest the minion wave. Every time you attempt to drop Singularity to clear, you risk stepping into his dash range. He will easily force you under your turret, chunking your health bar or burning your flash, which ultimately gives him free reign to roam or secure river priority.
How to play
To survive, you must track his wind stacks diligently; never channel your damage when his sword glows with his third Mortal Steel charge. Keep Astral Flight strictly as an escape tool to fly away the moment he triggers Soul Unbound. If he dives you under turret, drop Singularity directly on his original body's marker so he takes heavy damage and gets slowed when his spirit is forced to return there.
Zone controlInterruptThe core of this matchup lies in how Taliyah completely shuts down your mobility. The moment you activate Astral Flight to reposition or escape, any overlap with her Unraveled Earth minefield triggers an instant stun. This interaction strips away your main defensive tool and safety net, leaving your channeled Breath of Light extremely vulnerable to being interrupted by her Seismic Shove combo.Taliyah build →See details
Taliyah
The interaction that decides it
Taliyah's Unraveled Earth will stun you instantly if you attempt to use Astral Flight over her minefield.
Why
The core of this matchup lies in how Taliyah completely shuts down your mobility. The moment you activate Astral Flight to reposition or escape, any overlap with her Unraveled Earth minefield triggers an instant stun. This interaction strips away your main defensive tool and safety net, leaving your channeled Breath of Light extremely vulnerable to being interrupted by her Seismic Shove combo.
Lane impact
Because you cannot fly safely, you are forced to clear waves defensively from a distance. If you step up to drop Singularity on the wave, Taliyah can zone you with Threaded Volley or setup a deadly Seismic Shove into her mines. This denies you early Cosmic Creator stacks, giving her free rein to use Rock Surfing and Weaver's Wall to roam while you remain pinned under your tower.
How to play
To survive, treat Astral Flight purely as a late-reaction retreat tool, and never use it offensively or parallel to her position. Always keep yourself positioned away from terrain to limit her Rock Surfing approach angles. Place your Singularity defensively to slow her push from maximum range. If she misses Seismic Shove, you have a brief window to channel Breath of Light, but you must cancel it immediately if she lays down Unraveled Earth.
UntargetableDiveFizz's Playful completely negates your primary defensive tool and ultimate, Falling Star. If you attempt to stun him or zone him out when he dives you, he simply hops into his untargetable state, rendering your impact useless. Once he bypasses your ultimate and lands directly on top of you, his Urchin Strike and Rending Wave will quickly shred your health bar before you can even channel Breath of Light.Fizz build →See details
Fizz
The interaction that decides it
Fizz can use Playful / Trickster to become untargetable, easily dodging your Falling Star and landing on top of you.
Why
Fizz's Playful completely negates your primary defensive tool and ultimate, Falling Star. If you attempt to stun him or zone him out when he dives you, he simply hops into his untargetable state, rendering your impact useless. Once he bypasses your ultimate and lands directly on top of you, his Urchin Strike and Rending Wave will quickly shred your health bar before you can even channel Breath of Light.
Lane impact
This interaction turns the laning phase into a passive survival challenge. You cannot walk up to collect Cosmic Creator stacks on the wave because Fizz will punish you with Chum the Waters. He will freeze the minions or dive you under your own turret, forcing you to forfeit early priority and gold. This pressure prevents you from helping your jungler, giving Fizz free reign to roam.
How to play
To survive, you must never cast Falling Star or Singularity offensively; keep them locked until Fizz commits his Playful. If he initiates with Urchin Strike, drop Singularity directly on yourself and prepare Astral Flight to fly backward immediately towards your turret. Never try to trade back with Breath of Light while his untargetable jump is available. If he lands Chum the Waters, immediately fly away to safety before the shark erupts.
These champions have tools that generally give them the edge in a fight, without making the matchup unwinnable. They might have more range, a better ability to soak up your offense, or more ways to answer your engages. You'll need to adapt your approach and carefully pick your moments to accept a fight.
Crowd controlWave clearGalio represents a tough obstacle because his crowd control directly shuts down your primary trading and farming tool. Whenever you attempt to channel Breath of Light to secure Stardust or clear minions, Galio can easily interrupt you. A quick Justice Punch forward or a charged Shield of Durand instantly cancels your channel, leaving you vulnerable while your main source of damage is placed on cooldown.Galio build →See details
Galio
The interaction that decides it
Galio can interrupt Aurelion Sol's Breath of Light (Q) channel using Justice Punch (E) or Shield of Durand (W), disrupting his waveclear.
Why
Galio represents a tough obstacle because his crowd control directly shuts down your primary trading and farming tool. Whenever you attempt to channel Breath of Light to secure Stardust or clear minions, Galio can easily interrupt you. A quick Justice Punch forward or a charged Shield of Durand instantly cancels your channel, leaving you vulnerable while your main source of damage is placed on cooldown.
Lane impact
Because your waveclear is constantly threatened, Galio easily gains priority to push with Winds of War. If you get caught by his crowd control while trying to match his push, you will bleed health and lose the race to roam. This allows him to freely look for Hero's Entrance plays on the map, forcing you to constantly choose between securing your own stacks under turret or trying to follow his rotations.
How to play
To survive and scale, you must play outside the range of his Justice Punch. Use Singularity from a safe distance to slow the wave and pull minions together, forcing him to use his dash just to reach you. Never commit your Astral Flight aggressively; instead, reserve it to safely escape or to quickly relocate and match his roam once he commits his Hero's Entrance to a side lane.
PokePositioningOrianna dominates this matchup because her sphere allows her to zone you from a distance where you cannot safely channel. When you try to stack Stardust using Breath of Light, you must stand still, making you an easy target. She can easily reposition her ball with Command: Attack and immediately interrupt your channel from afar using Command: Shockwave, completely neutralizing your primary damage source while keeping herself entirely out of your reach.Orianna build →See details
Orianna
The interaction that decides it
Orianna can disrupt your stationary Breath of Light channel from safety using Command: Shockwave.
Why
Orianna dominates this matchup because her sphere allows her to zone you from a distance where you cannot safely channel. When you try to stack Stardust using Breath of Light, you must stand still, making you an easy target. She can easily reposition her ball with Command: Attack and immediately interrupt your channel from afar using Command: Shockwave, completely neutralizing your primary damage source while keeping herself entirely out of your reach.
Lane impact
During the early levels, Orianna dictates the wave state by placing her ball aggressively. If you attempt to secure minions using Singularity, she will punish you with Command: Attack and Command: Dissonance. You are forced to farm under tower, bleeding health whenever you try to match her push. This constant harass delays your Stardust scaling and forces early recalls, giving her free opportunities to pressure your mid turret.
How to play
To survive, you must anchor your positioning behind your caster minions, using Singularity solely to freeze or slow down incoming waves rather than to fight. Never activate Breath of Light while her Command: Shockwave is available unless she has already misplaced her ball. If she moves forward to zone you, use Astral Flight backward immediately to escape the radius of her Command: Dissonance, accepting that you must give up some farm to secure your scaling.
Crowd controlRyze's point-and-click Rune Prison is the ultimate counter to your Astral Flight. While you attempt to reposition or escape, his instant root immediately stops your flight mid-air, leaving you stationary and vulnerable to his Spell Flux and Overload burst. Because Ryze scales exceptionally well with Arcane Mastery, letting him disrupt your main defensive and mobility tool makes it hard to safely gather Stardust from Singularity.Ryze build →See details
Ryze
The interaction that decides it
Ryze can instantly interrupt your Astral Flight with a point-and-click Rune Prison root.
Why
Ryze's point-and-click Rune Prison is the ultimate counter to your Astral Flight. While you attempt to reposition or escape, his instant root immediately stops your flight mid-air, leaving you stationary and vulnerable to his Spell Flux and Overload burst. Because Ryze scales exceptionally well with Arcane Mastery, letting him disrupt your main defensive and mobility tool makes it hard to safely gather Stardust from Singularity.
Lane impact
This interaction severely limits your ability to trade or clear waves aggressively. You cannot use Astral Flight to fly over minions for a quick Breath of Light spray without risking an immediate grounding. If Ryze freezes the wave or uses Realm Warp to reposition, you are forced to play defensively near your tower, delaying your passive scaling and reducing your map pressure.
How to play
Never initiate trades with Astral Flight while Rune Prison is available. Instead, bait him into using his root by standing just outside its short range while using Singularity to farm. Once Rune Prison is on cooldown, you have a brief window to channel Breath of Light safely. If Ryze attempts to rotate with Realm Warp, prepare to drop Falling Star on his portal destination to instantly stun him upon arrival.
InterruptThe lane is dictated by Annie's passive, Pyromania. Because your primary source of damage relies on channeling Breath of Light, Annie can instantly shut down your DPS. Any of her offensive spells, especially a targeted Disintegrate or instant Incinerate, will consume her stun to cancel your channel immediately. This leaves you completely vulnerable and unable to return trade damage during your most vulnerable standing or flying windows.Annie build →See details
Annie
The interaction that decides it
Annie can easily interrupt Aurelion Sol's Breath of Light channel with any Pyromania-infused spell, shutting down his main source of damage.
Why
The lane is dictated by Annie's passive, Pyromania. Because your primary source of damage relies on channeling Breath of Light, Annie can instantly shut down your DPS. Any of her offensive spells, especially a targeted Disintegrate or instant Incinerate, will consume her stun to cancel your channel immediately. This leaves you completely vulnerable and unable to return trade damage during your most vulnerable standing or flying windows.
Lane impact
You cannot safely contest the wave or trade health directly. Attempting to clear minions with Breath of Light allows Annie to walk up and trigger Pyromania, forcing you back or setting up an easy Summon: Tibbers burst. This constant threat forces you under tower, delaying your Cosmic Creator stacking. Consequently, you lose early priority, giving Annie free windows to move into the river or secure recall timings while you struggle to clear.
How to play
To survive, monitor Annie’s passive indicator constantly. Never engage with Astral Flight while Pyromania is fully charged. Instead, drop Singularity from maximum range to safely farm and stack Cosmic Creator. The moment Annie wastes her stun—often using Disintegrate to secure a last-hit—immediately use your Breath of Light to hard-shove the remaining minions. Once the wave crashes, use Astral Flight to roam and assist other lanes before she can recharge her stun and follow you.
Crowd controlMap pressureLissandra dominates this lane because she completely neutralizes your main escape tool. Whenever you attempt to fly away or reposition using Astral Flight, she can instantly interrupt your momentum with the point-and-click stun of Frozen Tomb or catch you mid-flight with Ring of Frost. Because her crowd control is instantaneous, you can never safely channel Breath of Light or fly aggressively while her ultimate is available.Lissandra build →See details
Lissandra
The interaction that decides it
Lissandra can instantly halt your Astral Flight escape by locking you down with Frozen Tomb.
Why
Lissandra dominates this lane because she completely neutralizes your main escape tool. Whenever you attempt to fly away or reposition using Astral Flight, she can instantly interrupt your momentum with the point-and-click stun of Frozen Tomb or catch you mid-flight with Ring of Frost. Because her crowd control is instantaneous, you can never safely channel Breath of Light or fly aggressively while her ultimate is available.
Lane impact
This lockdown threat forces you to play defensively under your turret, sacrificing early wave control. Lissandra easily shatters minions with Ice Shard and can shove you in, using Glacial Path to roam while you slowly clear. If you try to match her push, she can easily setup a gank; being caught out of position means a guaranteed death if she links Frozen Tomb into Ring of Frost before you can react.
How to play
To survive, you must play strictly around her cooldown windows. Never cast Astral Flight proactively unless you have seen Lissandra waste Glacial Path or her ultimate, Frozen Tomb. Keep your distance and focus on collecting Stardust from a safe range using Singularity and quick bursts of Breath of Light. If she approaches aggressively with her claw, immediately retreat toward your tower rather than trying to trade back, as her crowd control sequence will always win short-range skirmishes.
Zone controlBurstThis matchup is dictated by how Veigar's Event Horizon completely nullifies your primary mobility. If you attempt to escape or reposition using Astral Flight, hitting the boundary of his cage immediately knocks you out of the air and stuns you. This leaves you completely vulnerable to a guaranteed Dark Matter and Primordial Burst combo, turning your main defensive tool into a deadly trap.Veigar build →See details
Veigar
The interaction that decides it
Veigar's Event Horizon completely stops your Astral Flight mid-air if you fly into the boundary wall.
Why
This matchup is dictated by how Veigar's Event Horizon completely nullifies your primary mobility. If you attempt to escape or reposition using Astral Flight, hitting the boundary of his cage immediately knocks you out of the air and stuns you. This leaves you completely vulnerable to a guaranteed Dark Matter and Primordial Burst combo, turning your main defensive tool into a deadly trap.
Lane impact
Because Event Horizon threatens to interrupt your flight, you cannot freely use Astral Flight to escape ganks or aggressively trade with Breath of Light. Veigar can easily zone you away from farming with Singularity by placing his cage around your gravity well. This limits your ability to safely stack Cosmic Creator, forcing you to play under your tower and concede mid priority during early river skirmishes.
How to play
To survive this lane, you must adopt a strict positioning rule: never use Astral Flight while Event Horizon is off cooldown. Instead, focus on farming from maximum range using Breath of Light and Singularity. If Veigar mispositions and misses his cage, you have a brief window to fly diagonally to avoid his linear Baleful Strike while gathering Cosmic Creator stacks. If trapped inside the cage, stand still, avoid the walls, and prepare to dodge Dark Matter manually.
MobilityDodgingAurora holds a massive advantage in skirmishes because your primary zone control, Singularity, is easily neutralized. The moment you drop the black hole to zone her or collect Stardust, she can activate Across the Veil to turn invisible, gain speed, and reposition completely out of the pull. This leaves you canalizing Breath of Light into empty space while she repositions to retaliate.Aurora build →See details
Aurora
The interaction that decides it
Aurora can use Across the Veil to turn invisible and reposition, easily dodging your Singularity pull.
Why
Aurora holds a massive advantage in skirmishes because your primary zone control, Singularity, is easily neutralized. The moment you drop the black hole to zone her or collect Stardust, she can activate Across the Veil to turn invisible, gain speed, and reposition completely out of the pull. This leaves you canalizing Breath of Light into empty space while she repositions to retaliate.
Lane impact
Because your wave-clear setup is compromised, she can constantly threaten you with Twofold Hex and The Weirding to force you off the wave. You cannot easily lock her down to trade back, meaning you must surrender early mid priority. If you overextend trying to stack Stardust, her Between Worlds can trap you under her terms, preventing any quick escape via Astral Flight.
How to play
To survive, you must play defensively near your turret, focusing solely on safe farming. Never initiate with Singularity; instead, hold it as a defensive tool for when she commits. If she uses Across the Veil aggressively, glide backward using Astral Flight immediately to break her line of sight. Save Falling Star strictly to interrupt her when she teleports along the borders of her Between Worlds field.
Crowd controlPokeYour main source of damage and Stardust, Breath of Light, forces you to stand completely still to channel. This self-root is a massive liability against Viktor, who can effortlessly drop Gravity Field directly on top of your static hitbox. If you try to trade back or clear waves with your channel, you instantly trigger his stun, leaving you vulnerable to a follow-up Hextech Ray and Arcane Storm.Viktor build →See details
Viktor
The interaction that decides it
Viktor can drop Gravity Field directly on top of you while you are locked in place channeling Breath of Light.
Why
Your main source of damage and Stardust, Breath of Light, forces you to stand completely still to channel. This self-root is a massive liability against Viktor, who can effortlessly drop Gravity Field directly on top of your static hitbox. If you try to trade back or clear waves with your channel, you instantly trigger his stun, leaving you vulnerable to a follow-up Hextech Ray and Arcane Storm.
Lane impact
This interaction severely restricts your wave management. You cannot freely use Singularity and Breath of Light to clear waves because Viktor will punish your immobility with Gravity Field and chunk you with Hextech Ray. Consequently, you are forced to farm defensively near your tower, conceding early lane priority and slowing down your passive scaling while Viktor safely stacks his Glorious Evolution and controls the mid lane.
How to play
Never initiate a channel of Breath of Light unless you see Viktor waste Gravity Field to zone or peel. When you need to gather Stardust, bait his Hextech Ray first by moving laterally, then use a quick Singularity to collect minions. If Viktor aggressively drops his zone on you, immediately cancel your channel and use Astral Flight to retreat safely before the stun triggers. Patience during his long cooldown windows is your only path to scaling.
ShieldsInterruptDiana's aggressive kit thrives on closing the gap with Crescent Strike and Lunar Rush, which presents a constant threat to your stationary channels. The defining danger is her Moonfall, which acts as a hard stop to your primary tools. It instantly cancels your Breath of Light channeling and drags you directly out of the sky during Astral Flight, turning your main escape tool into a deadly trap.Diana build →See details
Diana
The interaction that decides it
Diana can interrupt your Breath of Light channel and pull you out of Astral Flight using Moonfall.
Why
Diana's aggressive kit thrives on closing the gap with Crescent Strike and Lunar Rush, which presents a constant threat to your stationary channels. The defining danger is her Moonfall, which acts as a hard stop to your primary tools. It instantly cancels your Breath of Light channeling and drags you directly out of the sky during Astral Flight, turning your main escape tool into a deadly trap.
Lane impact
Because of this constant interruption threat, you cannot freely channel Breath of Light to thin out minion waves without putting your life bar at risk. Diana can easily zone you away from the wave, forcing you to rely solely on defensive Singularity placements to harvest Cosmic Creator stacks. One misstep allows her to force a deadly trade under your own turret, destroying your lane priority and farming rhythm.
How to play
To survive this matchup, adopt a strictly defensive stance and never cast Astral Flight offensively while Diana has Moonfall available. Use Singularity from maximum range to secure stacks and farm safely. If she manages to jump on you with Lunar Rush, immediately drop Falling Star on your own feet to stun her, then use your flight to escape only after her ultimate pull has been wasted.
BurstCC immunityThis matchup is heavily dictated by how Ekko bypasses your primary zone control. When you deploy Singularity to clear waves or deter aggression, Ekko can instantly ignore the pull and slow using Phase Dive. This blink allows him to cross the boundary effortlessly, closing the gap to strike you. Once on top of you, he easily triggers Z-Drive Resonance with Timewinder, trading heavily before you can ramp up Breath of Light.Ekko build →See details
Ekko
The interaction that decides it
Ekko can use Phase Dive to blink out of your Singularity and instantly close the gap to burst you down.
Why
This matchup is heavily dictated by how Ekko bypasses your primary zone control. When you deploy Singularity to clear waves or deter aggression, Ekko can instantly ignore the pull and slow using Phase Dive. This blink allows him to cross the boundary effortlessly, closing the gap to strike you. Once on top of you, he easily triggers Z-Drive Resonance with Timewinder, trading heavily before you can ramp up Breath of Light.
Lane impact
You cannot safely step up to channel Breath of Light, as standing still makes you an easy target for Parallel Convergence. Because Singularity cannot guarantee your safety, you must concede early wave priority to avoid getting chunked. If you use Astral Flight aggressively, Ekko can predict your flight path, deploy his shield, and intercept you with Chronobreak or Phase Dive, completely cutting off your escape routes.
How to play
To survive, adopt a strict defensive posture and keep the minion wave close to your turret. Never drop Singularity proactively to waveclear; instead, hold it until Ekko commits his Phase Dive forward, using it on your own feet to force him to retreat or take turret shots. If he dives you under tower, immediately drop Falling Star to stun him in place. Save Astral Flight exclusively as a reactive disengage to fly backward.
Crowd controlInterruptThe lane is defined by how Vex's passive, Doom 'n Gloom, completely shuts down your primary mobility. Whenever her red bar is full, any of her basic spells—Mistral Bolt, Personal Space, or Looming Darkness—will interrupt your Astral Flight mid-air with a fear. This immediate displacement cancel stops your escape or repositioning instantly, leaving you incredibly vulnerable to her follow-up burst.Vex build →See details
Vex
The interaction that decides it
Vex's Doom 'n Gloom passive allows her basic abilities to interrupt your Astral Flight with a fear.
Why
The lane is defined by how Vex's passive, Doom 'n Gloom, completely shuts down your primary mobility. Whenever her red bar is full, any of her basic spells—Mistral Bolt, Personal Space, or Looming Darkness—will interrupt your Astral Flight mid-air with a fear. This immediate displacement cancel stops your escape or repositioning instantly, leaving you incredibly vulnerable to her follow-up burst.
Lane impact
Because of this constant threat, you cannot freely use Astral Flight to clear waves or escape ganks. If you try to force a trade using Breath of Light while flying, Vex can easily interrupt you and counter-engage with Shadow Surge. This forces you to play defensively near your tower, slowing down your Cosmic Creator stack accumulation and giving Vex free reign to push and roam.
How to play
Your primary rule is to track Vex's Doom 'n Gloom bar constantly. Only activate Astral Flight after she wastes her empowered state on Mistral Bolt or Looming Darkness to clear minions. Keep Singularity centered on your own caster minions to pull the wave back safely without stepping forward. If she marks you with Shadow Surge, do not panic-fly; wait for her to arrive before using the stun from Falling Star to peel her off.
DodgingMap pressureThis matchup is dictated by how easily Katarina bypasses your zone control. Because Breath of Light forces you to face a single direction while channeling, Katarina can instantly react with Shunpo to blink behind you. This maneuver not only evades your primary damage stream but also allows her to step completely out of your Singularity radius, turning your static channel into an open invitation for her daggers.Katarina build →See details
Katarina
The interaction that decides it
Katarina can use Shunpo to blink behind you, easily escaping your Singularity and dodging your Breath of Light angle.
Why
This matchup is dictated by how easily Katarina bypasses your zone control. Because Breath of Light forces you to face a single direction while channeling, Katarina can instantly react with Shunpo to blink behind you. This maneuver not only evades your primary damage stream but also allows her to step completely out of your Singularity radius, turning your static channel into an open invitation for her daggers.
Lane impact
You cannot safely contest the wave near her tower, as pushing too far exposes you to a sudden Shunpo engage. This pressure forces you to play defensively under tower, granting her the freedom to clear with Bouncing Blade and roam. If you try to follow her rotations through the river without vision, her burst can catch you in transit before you can escape with Astral Flight.
How to play
To survive, never initiate trades with Singularity. Hold this zone and Breath of Light until she has already committed her Shunpo onto a dagger. If she unleashes Death Lotus, immediately use Astral Flight to fly backward to safety. When she disappears from the lane to roam, do not chase her blindly through unwarded paths; instead, ping your allies, gather Stardust safely, and push the wave hard to punish her absence.
AssassinBurstYour map influence relies entirely on using Astral Flight to bypass terrain, but Talon's Assassin's Path makes him the ultimate counter-roamer. He can easily match your flight trajectory by vaulting over the jungle walls. This turns your rotation into a death trap, as he can intercept you mid-way or ambush you at your destination with Shadow Assault before you can even land.Talon build →See details
Talon
The interaction that decides it
Talon can match your Astral Flight map rotations by jumping over walls with Assassin's Path to ambush you.
Why
Your map influence relies entirely on using Astral Flight to bypass terrain, but Talon's Assassin's Path makes him the ultimate counter-roamer. He can easily match your flight trajectory by vaulting over the jungle walls. This turns your rotation into a death trap, as he can intercept you mid-way or ambush you at your destination with Shadow Assault before you can even land.
Lane impact
Because Talon clears quickly with Rake, he will constantly disappear into the river. You cannot safely contest his movements with Astral Flight without risking a deadly face-check. This forces you to play defensively under your turret, using Singularity to hold the wave, while your side lanes suffer from his constant, unreactable pressure since you cannot safely match his rotations.
How to play
Never initiate an Astral Flight rotation unless Talon is visible elsewhere. Instead, drop Singularity on the wave from a safe distance and harvest Cosmic Creator stacks under tower. If Talon jumps you with Noxian Diplomacy, drop Falling Star directly on yourself to disrupt his Blade's End proc, then use your flight toward the safety of your tier-two turret rather than over side-walls where Assassin's Path allows him to hunt you down.
These matchups are above all duels of execution: both champions have credible ways to gain the upper hand. Dodging one key ability, anticipating an engage correctly, or a single positioning mistake can be enough to tip the duel one way or the other. Knowing the matchup and recognizing the right windows to act are especially important here.
DodgingPositioningThis matchup revolves entirely around your immobility during Breath of Light. Because you must stand still to channel your main source of damage, Brand has an incredibly easy time landing Sear to stun you, provided he has already applied Blaze via Pillar of Flame or Conflagration. This instantly interrupts your channel, leaving you completely vulnerable to his full burst trade.Brand build →See details
Brand
The interaction that decides it
Brand can easily land his Sear stun on you if you stand still to channel Breath of Light.
Why
This matchup revolves entirely around your immobility during Breath of Light. Because you must stand still to channel your main source of damage, Brand has an incredibly easy time landing Sear to stun you, provided he has already applied Blaze via Pillar of Flame or Conflagration. This instantly interrupts your channel, leaving you completely vulnerable to his full burst trade.
Lane impact
The lane oscillates between rapid wave clearing and punishing trades. If you mindlessly use Singularity and Breath of Light to stack Cosmic Creator, Brand will walk up to chunk you. Every time you get stunned, you lose significant health, forcing early recalls that cost you tower plating and delay your scaling. Missing his skillshots, however, gives you free reign to push him under tower.
How to play
Never activate Breath of Light while Brand has his Sear available unless you are safely flying sideways with Astral Flight. Bait out his Pillar of Flame first by stepping forward and immediately back. Once he misses or wastes Sear on a minion, immediately drop Singularity to trap him and channel your fire. If he initiates with Pyroclasm, immediately fly away with Astral Flight to prevent the fireballs from bouncing back to you.
ShieldsDodgingThis matchup is a pure battle of utility negation. Morgana relies on Black Shield to completely absorb your magic damage and, more importantly, negate the displacement pull of your Singularity and the stun from Falling Star. Without these crowd control tools to lock her down, your Breath of Light becomes incredibly difficult to channel safely, as she can easily retaliate with Dark Binding or Soul Shackles.Morgana build →See details
Morgana
The interaction that decides it
Morgana's Black Shield completely negates the pull of your Singularity and the stun of your Falling Star.
Why
This matchup is a pure battle of utility negation. Morgana relies on Black Shield to completely absorb your magic damage and, more importantly, negate the displacement pull of your Singularity and the stun from Falling Star. Without these crowd control tools to lock her down, your Breath of Light becomes incredibly difficult to channel safely, as she can easily retaliate with Dark Binding or Soul Shackles.
Lane impact
Wave control dictates the entire pace of this lane. Morgana uses Tormented Shadow to quickly dissolve minion waves, forcing you to match her push with Singularity. If you waste your zone on the wave, she can safely fish for Dark Binding. Because Black Shield prevents you from securing quick kills, this lane often devolves into a farming simulator where both of you struggle to pressure the opponent's tower.
How to play
To win this, never initiate with Falling Star. Instead, use Breath of Light to chip away at her Black Shield before committing your crowd control. Bait out her shield by positioning aggressively, then immediately disengage using Astral Flight. If she holds her shield, focus entirely on gathering Cosmic Creator stacks by dropping Singularity directly on the caster minions. When she steps up to cast Soul Shackles, fly away immediately.
Wave clearRangeThis matchup is a constant artillery duel where wave positioning dictates who gets poked down. While Aurelion Sol wants to channel *Breath of Light* to collect *Cosmic Creator* stacks on minion waves, Ziggs excels at punishing stationary targets. His *Bouncing Bomb* easily chips away at your health from afar, but the true threat is *Satchel Charge*, which can instantly interrupt your channeled flight or damage, leaving you vulnerable and misplaced in the lane.Ziggs build →See details
Ziggs
The interaction that decides it
Ziggs can disrupt your positioning and interrupt your channels from long range using Satchel Charge.
Why
This matchup is a constant artillery duel where wave positioning dictates who gets poked down. While Aurelion Sol wants to channel *Breath of Light* to collect *Cosmic Creator* stacks on minion waves, Ziggs excels at punishing stationary targets. His *Bouncing Bomb* easily chips away at your health from afar, but the true threat is *Satchel Charge*, which can instantly interrupt your channeled flight or damage, leaving you vulnerable and misplaced in the lane.
Lane impact
The laning phase becomes a high-stakes race for priority. If you let Ziggs shove you under turret, his *Short Fuse* and *Satchel Charge* will rapidly demolish your plating. However, stepping forward to contest the wave with *Singularity* exposes you to his *Hexplosive Minefield*. Every trade revolves around health versus mana efficiency; if you get forced to recall early, you lose critical stacking momentum while your mid turret crumbles.
How to play
To survive and scale, never use *Astral Flight* aggressively unless Ziggs has already wasted his *Satchel Charge*. Keep your distance by clearing waves from behind your caster minions using *Singularity*, forcing him to choose between targeting you or the wave with *Bouncing Bomb*. If he attempts to zone you with *Hexplosive Minefield*, immediately drop *Singularity* on the opposing wave to match his clear speed, preventing him from utilizing his passive on your turret.
CC immunityWave clearThis matchup revolves around a dangerous vulnerability during your main damage tool. Whenever you channel Breath of Light, you become a completely static target, making you incredibly easy prey for Lux's Light Binding. If she catches you with this root, she can immediately follow up with Lucent Singularity and Final Spark to delete your health bar. Your immobile state turns her skillshots from speculative pokes into guaranteed hits.Lux build →See details
Lux
The interaction that decides it
Lux can easily land Light Binding on you while you are stationary during your Breath of Light channel.
Why
This matchup revolves around a dangerous vulnerability during your main damage tool. Whenever you channel Breath of Light, you become a completely static target, making you incredibly easy prey for Lux's Light Binding. If she catches you with this root, she can immediately follow up with Lucent Singularity and Final Spark to delete your health bar. Your immobile state turns her skillshots from speculative pokes into guaranteed hits.
Lane impact
Because of this threat, you cannot freely clear waves with Breath of Light without risking a lethal trade. If you get rooted under her turret or in the middle of the lane, she will strip your health, forcing early recalls that delay your Cosmic Creator stacking. Consequently, you must often concede mid priority, allowing Lux to shove waves with Lucent Singularity and threaten your side lanes while you struggle to collect Stardust safely.
How to play
To survive, never tap Breath of Light unless Lux has just wasted Light Binding, or you are safely positioned behind at least two minions to block its trajectory. If she holds her root, focus on dropping Singularity to farm from afar and conserve your Astral Flight. Should she throw her cage and miss, immediately activate Astral Flight diagonally to reposition while blasting her, forcing her to rely on Prismatic Barrier to absorb your retaliation.
Crowd controlMap pressureThis matchup is a pure race of global influence where your flight paths collide with his teleports. The defining tension lies in your mobility; if you attempt to escape or reposition with Astral Flight, Twisted Fate can instantly knock you out of the sky by locking you down with a gold card from Pick a Card. This makes any aggressive flight highly punishable if his cards are ready.Twisted Fate build →See details
Twisted Fate
The interaction that decides it
Twisted Fate can instantly stop your Astral Flight escape by locking you down with a Gold Card from Pick a Card.
Why
This matchup is a pure race of global influence where your flight paths collide with his teleports. The defining tension lies in your mobility; if you attempt to escape or reposition with Astral Flight, Twisted Fate can instantly knock you out of the sky by locking you down with a gold card from Pick a Card. This makes any aggressive flight highly punishable if his cards are ready.
Lane impact
In lane, you must respect his wave clear from Wild Cards and bonus gold from charged Dice. Since he can match your push, the lane turns into a constant pressure battle. If he pulls a gold card, you are forced to retreat, losing priority to drop Singularity. This allows him to cast Destiny first, forcing you to chase his roams or punish his tower.
How to play
Never initiate Astral Flight while his Pick a Card is active or off cooldown. Instead, bait his card selection by tapping Breath of Light from safety. If he locks in a blue or red card to clear minions, that is your cue to drop Singularity on the wave and look for a roam. If he casts Destiny to help his side lanes, immediately channel Breath of Light to shove the wave and secure tower plates.
DiveZone controlYasuo is a skill matchup, not a hard counter. His Wind Wall cannot block Breath of Light or Singularity, since neither is a projectile, so your whole combo stays available. The danger is his mobility. Sweeping Blade through your minions closes the gap quickly, and a Steel Tempest knock-up into Last Breath can kill you before your Stardust has scaled.Yasuo build →See details
Yasuo
The interaction that decides it
Wind Wall cannot block Aurelion Sol's Breath of Light or Singularity, so Yasuo has to dash in through the wave with Sweeping Blade, and a Singularity on his landing spot wins the trade for Aurelion Sol.
Why
Yasuo is a skill matchup, not a hard counter. His Wind Wall cannot block Breath of Light or Singularity, since neither is a projectile, so your whole combo stays available. The danger is his mobility. Sweeping Blade through your minions closes the gap quickly, and a Steel Tempest knock-up into Last Breath can kill you before your Stardust has scaled.
Lane impact
The early levels are uncomfortable when he has minions to dash through, because you stand still while channelling Breath of Light. If you hold Singularity for his engage, the slow and pull keep him inside your beam and you win the trade. Once you have stacked Stardust, your range and damage outgrow his all-in, and Astral Flight lets you leave the lane to play the map.
How to play
Do not hold back your spells for fear of Wind Wall: it only stops your basic attacks. Keep Singularity for the moment he dashes in, then channel Breath of Light while he is slowed. Thin the wave he uses as a springboard and stay out of range of his tornado. If he commits with a charged knock-up, fly toward your turret with Astral Flight and come back when your spells are up.
These champions generally struggle to answer your main strengths, which lets you approach the matchup with more freedom. You often have several ways to pressure them and force trades that go in your favor. Use this advantage to dictate the pace rather than giving them time to get back into a comfortable position.
FarmingScalingSwain relies on marching forward during Demonic Ascension to drain your health, but his complete lack of mobility tools makes him the ultimate target for your zoning. The moment he activates his ultimate, dropping Singularity directly on his path traps him. He cannot escape the pull easily, allowing you to safely channel Breath of Light and harvest massive Stardust stacks off his slow-moving frame.Swain build →See details
Swain
The interaction that decides it
Swain lacks the mobility to escape your Singularity, allowing you to freely stack Stardust whenever he attempts to engage with Demonic Ascension.
Why
Swain relies on marching forward during Demonic Ascension to drain your health, but his complete lack of mobility tools makes him the ultimate target for your zoning. The moment he activates his ultimate, dropping Singularity directly on his path traps him. He cannot escape the pull easily, allowing you to safely channel Breath of Light and harvest massive Stardust stacks off his slow-moving frame.
Lane impact
This interaction shifts the minion dynamic entirely in your favor. Because Swain cannot aggressively step up without risking a massive health loss inside your zone, you dictate the wave flow. You can easily freeze the minion line near your tower or shove him under his turret using Singularity. This neutralizes his Vision of Empire roams and completely starves him of his Ravenous Flock passive stacks.
How to play
During the early levels, focus on safe farming while keeping a watchful eye on his Nevermove trajectory. Always hold Astral Flight to instantly disengage if he manages to land a root. Once he unlocks Demonic Ascension and tries to force a fight, place Singularity behind him to cut off his advance, then channel Breath of Light. If he ever flashes forward to force an engage, immediately fly backward to reset your spacing.
SustainScalingThis matchup is highly advantageous because Vladimir lacks any form of hard crowd control to interrupt your Breath of Light. While he relies on Transfusion to sustain and farm, he cannot stop you from channeling your main damage source directly onto him. This structural vulnerability completely neutralizes his early pressure, allowing you to harvest Cosmic Creator stacks rapidly while matching his scaling threat without any threat of being cancelled.Vladimir build →See details
Vladimir
The interaction that decides it
Vladimir has no hard crowd control to interrupt your Breath of Light, allowing you to freely channel it whenever he steps up to farm.
Why
This matchup is highly advantageous because Vladimir lacks any form of hard crowd control to interrupt your Breath of Light. While he relies on Transfusion to sustain and farm, he cannot stop you from channeling your main damage source directly onto him. This structural vulnerability completely neutralizes his early pressure, allowing you to harvest Cosmic Creator stacks rapidly while matching his scaling threat without any threat of being cancelled.
Lane impact
You dictate the wave's tempo from the first minute. By placing Singularity directly on the minion wave, you force Vladimir to choose between taking heavy damage from Breath of Light or burning Sanguine Pool, which costs him a massive portion of his current health. This pressure secures you permanent push priority, letting you crash waves at will, secure easy recall timings, and safely stack your passive.
How to play
Watch Vladimir's resource bar closely; when his Transfusion is fully charged and red, step back slightly to deny his empowered heal. Once that window passes, immediately drop Singularity on the wave to trap him, then fly forward with Astral Flight while channeling Breath of Light to punish his retreat. If he panics and uses Sanguine Pool, do not chase; wait for him to emerge, then finish the trade with your superior range.
FarmingScalingKayle's complete lack of early crowd control or burst threat removes any danger when you channel Breath of Light. Because her Divine Ascent keeps her weak and melee-range initially, she cannot contest your wave positioning. You can drop Singularity directly on the minions without fear of a Radiant Blast slow turning into a lethal chase, allowing you to accumulate Cosmic Creator stacks rapidly.Kayle build →See details
Kayle
The interaction that decides it
Kayle lacks any early crowd control or kill pressure, allowing you to safely stack Stardust with Singularity and outscale her mid-game impact.
Why
Kayle's complete lack of early crowd control or burst threat removes any danger when you channel Breath of Light. Because her Divine Ascent keeps her weak and melee-range initially, she cannot contest your wave positioning. You can drop Singularity directly on the minions without fear of a Radiant Blast slow turning into a lethal chase, allowing you to accumulate Cosmic Creator stacks rapidly.
Lane impact
This matchup turns the mid lane into a free-farming zone where you dictate the tempo. Kayle is forced to rely on Starfire Spellblade to secure individual last hits under her turret. By keeping the wave pushed with Singularity, you deny her any roaming potential and force her to burn mana on Celestial Blessing to sustain, securing your priority without sacrificing health.
How to play
Focus entirely on grouping the minion waves. Place Singularity on the caster minions as they arrive, then immediately melt them with Breath of Light to farm Stardust safely. If she steps forward to poke with Radiant Blast, do not panic; simply activate Astral Flight backward to reset your spacing. Never trade when her Divine Judgment is active; wait out its invulnerability before committing Falling Star.
Edge: Wild Rift Core canonical verdict (−3 to +3), shown from the point of view of the champion named in the row. Win rate and pick rate: the opponent's own rate in this role — Wild Rift CN · Challenger, Patch 7.3c. Not a head-to-head win rate.
How to counter this champion
Counter angle
Understanding Aurelion Sol’s counters isn’t just about identifying assassins. It’s about recognizing champions that disrupt his tempo and prevent his zones from forming. His kit relies on channels, positioning, and space control. Counters are those who interrupt, bypass, or ignore these zones. Conversely, champions forced into his zones become vulnerable. Matchup understanding should focus on tempo and map pressure rather than pure dueling.
Patch context
Aurelion Sol’s counters exploit two main weaknesses: his reliance on Q channeling and lack of instant mobility. Mobile assassins like Zed or Yone can bypass his zones and punish him directly. Others like Galio or Diana can engage through his control. In a meta favoring mobility and fast engages, these profiles significantly reduce his effectiveness.
Quick read
Weak against mobile assassins.
Vulnerable to channel interruptions.
Strong against immobile champions.
Counter archetypes
Burst assassins
These champions completely bypass Aurelion Sol’s game plan. They can engage quickly, interrupt his Q, and kill him before he sets up zone control. Their mobility also lets them avoid his E and constantly reposition, reducing his effectiveness.
How the champion adapts. Play defensively, prioritize vision and peel. Never channel Q without information.
Engage frontliners
These champions can initiate fights through his zones. Their durability allows them to absorb damage and force direct engagement, breaking the controlled pace Aurelion Sol relies on.
How the champion adapts. Use R for peel and repositioning, avoid frontline positioning.
Mobile mages
These champions can dodge his zones and maintain pressure. Their mobility makes it hard to sustain Q channeling and allows them to punish positioning mistakes.
Zed is a highly dangerous matchup as he can engage out of range and burst Aurelion Sol instantly. The key is avoiding trades and playing around his ultimate cooldown.
Common mistakes against him
Common mistakes against him
Underestimating enemy mobility.
Channeling Q too early.
Ignoring vision.
Misplacing E.
Forcing isolated fights.
Coach notes
You beat counters through macro, not duels.
Every second of Q channeling is a win.
FAQ
What is Aurelion Sol’s worst counter?
Assassins like Zed are especially difficult as they can ignore his zones and burst him instantly. This matchup requires a full playstyle adjustment, focusing on defense and relying more on teammates.
Can he win against his counters?
Yes, but not through duels. He must play around the map, avoid direct fights, and use control to influence objectives. Victory depends on avoiding unfavorable situations.
How to survive tough lanes?
By playing safe, maintaining distance, and prioritizing vision. The goal is to avoid dying and maintain priority to roam when possible.
Why do some matchups become easy?
Because some champions cannot avoid his zones or interrupt his channels. In these cases, he can impose his tempo and control fights.