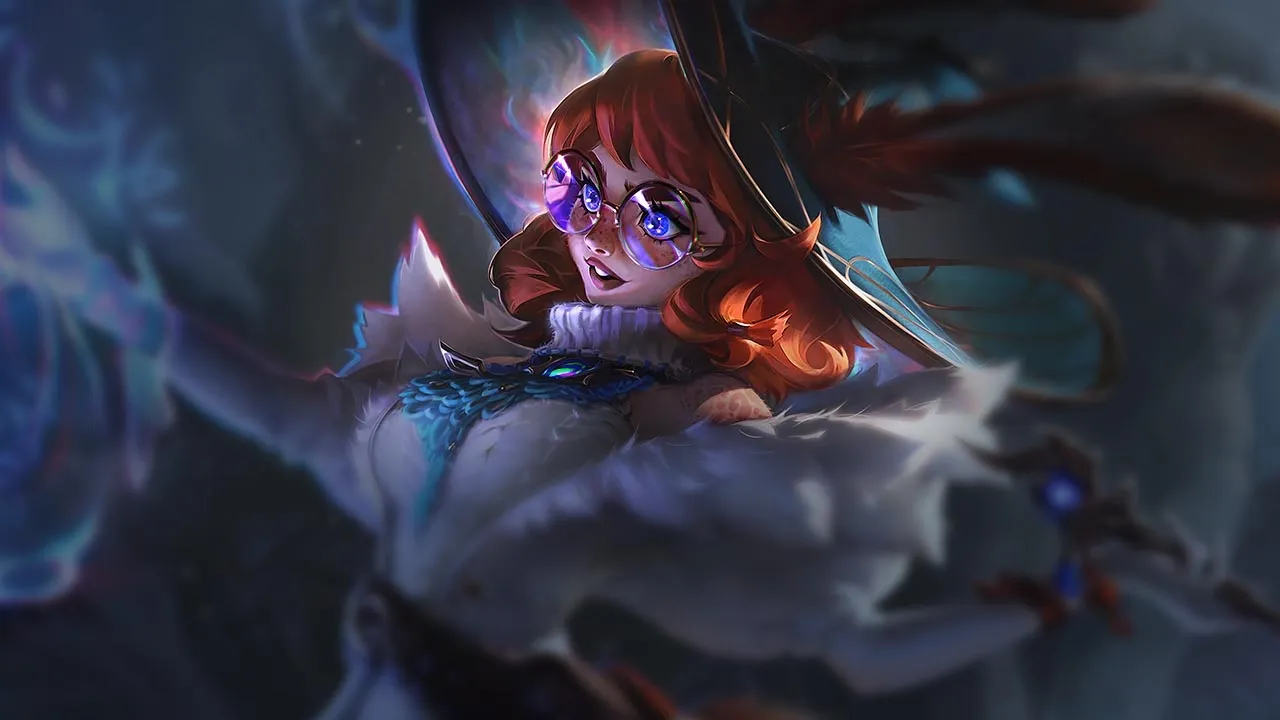
Aurora é vulnerável contra campeões que conseguem dar engage nela antes que ela se reposicione com seus dashes. CC instantâneo ou perfis de burst rápido limitam sua capacidade de manobra. Seus padrões de mobilidade tornam-se previsíveis contra composições bem coordenadas.
★ MIDTier S
DANO
UTIL
TANK
DIFF
Win50.3%#46 · ↓4pt
Pick4.2%#21
Ban3.4%#43
Guia de counters de Aurora Wild Rift
Hard Counters
4
Esses campeões têm uma build e um estilo de jogo que superam diretamente o seu, o que pode tornar o controle da lane e o farm extremamente difíceis. As habilidades deles podem neutralizar seus principais pontos fortes ou te punir assim que você tenta jogar do seu jeito de sempre. Nesses matchups, o objetivo costuma ser reduzir os erros e buscar soluções fora do confronto direto.
Anti-avançoControle de grupoToda vez que você tenta usar Across the Veil para trocar ou se reposicionar, você dispara o Doom 'n Gloom de Vex. Isso te marca com Gloom para dano extra e interrompe instantaneamente sua janela de furtividade com um Fear devastador. Esse contra-mecanismo direto neutraliza sua mobilidade, transformando seu salto defensivo em um amplificador de dano autoinfligido que alimenta as trocas de Mistral Bolt e Personal Space dela.Build de Vex →Ver detalhes
Vex
Por quê
Toda vez que você tenta usar Across the Veil para trocar ou se reposicionar, você dispara o Doom 'n Gloom de Vex. Isso te marca com Gloom para dano extra e interrompe instantaneamente sua janela de furtividade com um Fear devastador. Esse contra-mecanismo direto neutraliza sua mobilidade, transformando seu salto defensivo em um amplificador de dano autoinfligido que alimenta as trocas de Mistral Bolt e Personal Space dela.
Impacto na lane
Vex te controla por zoneamento sem esforço porque você não consegue se aproximar da wave com segurança para proc o Spirit Abjuration. Tentar limpar minions com Twofold Hex te deixa vulnerável ao Looming Darkness. Se ela congelar a lane, você fica totalmente travado; saltar para frente para quebrar o freeze leva a um consumo imediato de boa parte da sua vida, forçando recalls precoces e deixando suas side lanes abertas para os roams agressivos de Shadow Surge dela.
Como jogar
Você precisa monitorar rigorosamente a barra de recurso de Vex. Só use Twofold Hex e The Weirding para farmar do alcance máximo quando a barra da passiva dela estiver vermelha. Se ela errar o Looming Darkness, essa é sua breve janela para se adiantar, mas nunca ative o Across the Veil de forma ofensiva a menos que a carga de Fear dela esteja gasta. Se ela guardar a passiva indefinidamente, conceda a prioridade, deixe a wave estourar na torre e colete gold com segurança sob sua torre.
MobilidadeDano explosivoIrelia neutraliza completamente sua vantagem de alcance porque ela consegue resetar constantemente o Bladesurge em minions para saltar diretamente sobre você. Quando você tenta retaliar com seu combo de três golpes de Spirit Abjuration ou Twofold Hex, ela pode simplesmente canalizar o Defiant Dance para absorver seu burst principal. Isso te deixa vulnerável e sem poder de troca enquanto a passiva dela está totalmente estocada.Build de Irelia →Ver detalhes
Irelia
Por quê
Irelia neutraliza completamente sua vantagem de alcance porque ela consegue resetar constantemente o Bladesurge em minions para saltar diretamente sobre você. Quando você tenta retaliar com seu combo de três golpes de Spirit Abjuration ou Twofold Hex, ela pode simplesmente canalizar o Defiant Dance para absorver seu burst principal. Isso te deixa vulnerável e sem poder de troca enquanto a passiva dela está totalmente estocada.
Impacto na lane
Você não consegue contestar a wave perto do centro da lane. Se você empurrar, Irelia vai congelar e usar minions com pouca vida como trampolins para te alcançar. Você é forçada a abrir mão da prioridade inicial, o que significa que ficará presa sob a torre tentando limpar com Twofold Hex enquanto Irelia garante visão profunda ou rotaciona para ajudar o jungler dela antes que você consiga reagir.
Como jogar
Mantenha os minions perto da sua torre o tempo todo. Nunca use Twofold Hex na wave quando Irelia tiver marcas ativas. Se ela iniciar com Bladesurge, use imediatamente o The Weirding para desacelerá-la e se empurrar para trás, depois use o Across the Veil para soltar o aggro com segurança e se reposicionar. Se ela contornar isso e te prender com Vanguard's Edge, use o Between Worlds para saltar para o limite oposto e atrasar a ofensiva dela até sua torre conseguir alvejá-la.
Controle de grupoAnti-avançoLissandra representa um counter direto ao seu estilo de jogo evasivo. Enquanto sua sobrevivência depende da furtividade do Across the Veil e dos saltos entre limites do Between Worlds, o Frozen Tomb dela é um stun point-and-click inevitável que te congela no meio do dash ou dentro do seu reino. Além disso, se você se aproximar para disparar o Spirit Abjuration, ela pode te parar instantaneamente com o Ring of Frost antes que você consiga escapar.Build de Lissandra →Ver detalhes
Lissandra
Por quê
Lissandra representa um counter direto ao seu estilo de jogo evasivo. Enquanto sua sobrevivência depende da furtividade do Across the Veil e dos saltos entre limites do Between Worlds, o Frozen Tomb dela é um stun point-and-click inevitável que te congela no meio do dash ou dentro do seu reino. Além disso, se você se aproximar para disparar o Spirit Abjuration, ela pode te parar instantaneamente com o Ring of Frost antes que você consiga escapar.
Impacto na lane
Esse matchup te força a uma postura altamente defensiva. Lissandra empurra a wave facilmente usando Ice Shard, deixando você lutando sob a torre. Trocar se torna extremamente arriscado porque qualquer salto agressivo para frente com Across the Veil te torna um alvo fácil para um gank de jungler montado pelo combo de Glacial Path e Frozen Tomb dela, tornando suas ferramentas de fuga completamente inúteis.
Como jogar
Para sobreviver, você precisa jogar um jogo paciente de espera. Nunca use o Across the Veil ofensivamente a menos que o crowd control dela esteja em cooldown. Mantenha o The Weirding pronto para desacelerá-la e se empurrar para trás se ela avançar com Glacial Path. Se ela guardar o Frozen Tomb, foque apenas em farmar com Twofold Hex do alcance máximo, e espere por skirmishes em que ela seja forçada a usar a ultimate dela nos seus aliados antes de você entrar na luta.
EscalamentoEscudosKassadin é seu pior pesadelo no mid porque o kit inteiro dele é construído para neutralizar burst de AP. Toda vez que você tenta proc o Spirit Abjuration com Twofold Hex, a passiva Void Stone dele dispara um escudo mágico simplesmente por você conjurar nas proximidades, enquanto o Null Sphere dele te silencia e absorve seu dano. Essa camada defensiva dupla torna impossível consumir boa parte da vida dele, neutralizando completamente sua pressão de abate inicial.Build de Kassadin →Ver detalhes
Kassadin
Por quê
Kassadin é seu pior pesadelo no mid porque o kit inteiro dele é construído para neutralizar burst de AP. Toda vez que você tenta proc o Spirit Abjuration com Twofold Hex, a passiva Void Stone dele dispara um escudo mágico simplesmente por você conjurar nas proximidades, enquanto o Null Sphere dele te silencia e absorve seu dano. Essa camada defensiva dupla torna impossível consumir boa parte da vida dele, neutralizando completamente sua pressão de abate inicial.
Impacto na lane
Como você não consegue ameaçar Kassadin diretamente, você perde a capacidade de forçá-lo a sair da lane. Ele vai farmar facilmente sob a torre ou ignorar seu poke para acumular Force Pulse. Se você empurrar sem pensar com Twofold Hex, se expõe a ganks, especialmente depois que ele destravar o Riftwalk. Essa dinâmica passiva te força a uma lane de farm estagnada em que você não consegue garantir prioridade inicial para ajudar seu jungler.
Como jogar
Abandone qualquer esperança de abates solo e foque totalmente em congelar a wave de minions perto da sua torre. Mantenha o Across the Veil pronto como ferramenta defensiva para se desengajar imediatamente se ele avançar com Riftwalk. Quando Kassadin tentar fechar a distância, use o The Weirding para desacelerar a aproximação dele e recue. Use o Twofold Hex apenas para last hit a uma distância segura, negando a ele as conjurações de habilidade que ele precisa para carregar o Force Pulse.
Esses campeões têm ferramentas que geralmente dão a eles vantagem no confronto, sem tornar o matchup impossível de jogar. Eles podem ter mais alcance, mais capacidade de aguentar sua ofensiva ou mais formas de responder aos seus engajamentos. Você vai precisar adaptar sua abordagem e escolher com cuidado os momentos em que aceita a luta.
PosicionamentoControle de grupoSua segurança como Aurora depende fortemente da furtividade breve e do salto do Across the Veil. Porém, Ryze neutraliza completamente essa ferramenta defensiva com o Rune Prison. Como o Rune Prison é um enraizamento point-and-click, ele consegue te travar instantaneamente no lugar antes que você consiga desaparecer, deixando-a exposta a uma combinação devastadora de Spell Flux e Overload sem nenhuma forma de esquivar do dano mágico dele.Build de Ryze →Ver detalhes
Ryze
Por quê
Sua segurança como Aurora depende fortemente da furtividade breve e do salto do Across the Veil. Porém, Ryze neutraliza completamente essa ferramenta defensiva com o Rune Prison. Como o Rune Prison é um enraizamento point-and-click, ele consegue te travar instantaneamente no lugar antes que você consiga desaparecer, deixando-a exposta a uma combinação devastadora de Spell Flux e Overload sem nenhuma forma de esquivar do dano mágico dele.
Impacto na lane
Essa interação limita severamente seu poder de troca. Toda vez que você se adianta para disparar o Spirit Abjuration ou pokar com Twofold Hex, Ryze pode te punir instantaneamente. Você não consegue trocar agressivamente com Across the Veil porque ser enraizada perto da wave de minions dele significa tomar dano massivo dos saltos de Spell Flux. Consequentemente, você é forçada a abrir mão da prioridade inicial, farmar sob a torre e observar sua vida de perto para evitar ser divada.
Como jogar
Para sobreviver, você precisa monitorar constantemente o cooldown do Rune Prison. Só tente pokes curtos com Twofold Hex e The Weirding quando o enraizamento dele estiver em cooldown. Se Ryze se posicionar mal e gastar o Rune Prison em um minion ou errar uma troca, essa é sua deixa para ativar o Across the Veil e se reposicionar para retaliar. Se ele guardar o enraizamento, fique recuada, use o recuo do The Weirding para se desengajar e farme com segurança do alcance máximo.
Controle de grupoAnti-avançoEsse matchup é altamente desfavorável porque sua principal ferramenta defensiva, Across the Veil, não consegue te salvar do controle direcionado de Annie. Quando a passiva Pyromania dela está totalmente carregada, o Disintegrate dela se torna um stun point-and-click que ignora completamente sua breve invisibilidade. Como Disintegrate não é um skillshot, você não consegue superá-lo com sua mobilidade, ficando completamente exposta a um follow-up imediato de Incinerate ou Summon: Tibbers.Build de Annie →Ver detalhes
Annie
Por quê
Esse matchup é altamente desfavorável porque sua principal ferramenta defensiva, Across the Veil, não consegue te salvar do controle direcionado de Annie. Quando a passiva Pyromania dela está totalmente carregada, o Disintegrate dela se torna um stun point-and-click que ignora completamente sua breve invisibilidade. Como Disintegrate não é um skillshot, você não consegue superá-lo com sua mobilidade, ficando completamente exposta a um follow-up imediato de Incinerate ou Summon: Tibbers.
Impacto na lane
Você é forçada a uma fase de lane passiva em que trocar é incrivelmente arriscado. Você não consegue disparar o Spirit Abjuration com segurança porque se adiantar para acertar o Twofold Hex convida um stun de Disintegrate. Annie vai te zonear com conforto, usando o Molten Shield para absorver seu poke enquanto ameaça um all-in. Se ela congelar perto da torre dela, você não consegue se adiantar para quebrar o freeze sem arriscar um combo letal de Summon: Tibbers.
Como jogar
Para sobreviver, monitore constantemente o fogo giratório de Pyromania. Só inicie trocas curtas com Twofold Hex e The Weirding quando ela tiver zero ou um stack, ou imediatamente depois que ela usar Disintegrate para dar last hit em um minion. Se ela guardar o stun indefinidamente, use o The Weirding do alcance máximo para farmar com segurança. Se ela disparar o stun em você, solte imediatamente o Between Worlds para saltar para longe e atrasar o follow-up do Tibbers dela.
Controle de grupoAnti-avançoGalio é um tank anti-mago natural, projetado para neutralizar seu kit móvel de assassina de AP. O perigo principal está em como o Shield of Durand neutraliza completamente suas ferramentas escorregadias. Se você tentar ativar o Across the Veil para um reposicionamento furtivo rápido ou tentar quicar pelas bordas do Between Worlds, a provocação de área ampla dele cancela instantaneamente seu momentum, te arrastando para o alcance de melee devastador dele.Build de Galio →Ver detalhes
Galio
Por quê
Galio é um tank anti-mago natural, projetado para neutralizar seu kit móvel de assassina de AP. O perigo principal está em como o Shield of Durand neutraliza completamente suas ferramentas escorregadias. Se você tentar ativar o Across the Veil para um reposicionamento furtivo rápido ou tentar quicar pelas bordas do Between Worlds, a provocação de área ampla dele cancela instantaneamente seu momentum, te arrastando para o alcance de melee devastador dele.
Impacto na lane
Por causa dessa ameaça, você não consegue trocar livremente usando Twofold Hex sem arriscar um contra-engajamento. Se você se adiantar, Galio pode absorver seu poke com o escudo mágico passivo dele, limpar a wave instantaneamente usando Winds of War, e deslizar com Justice Punch. Isso te força a jogar defensivamente sob a torre, perdendo prioridade e te deixando incapaz de igualar a pressão global dele no mapa quando ele usa Hero's Entrance.
Como jogar
Para sobreviver, você precisa atrair as ferramentas defensivas dele antes de se comprometer. Nunca use o Across the Veil ofensivamente; mantenha-o estritamente como ferramenta de desengajamento para quando ele errar o Justice Punch. Quando você usar o Between Worlds, espere o Shield of Durand dele entrar em cooldown antes de começar a teleportar entre os limites. Se ele guardar a provocação, contente-se em farmar com segurança a distância usando Twofold Hex e desacelerando a aproximação dele com The Weirding.
SustentaçãoKiteEmbora o Spirit Abjuration ofereça um sustain decente, Swain supera você em trocas prolongadas. O perigo principal está na sua ultimate, Between Worlds. Essa zona, que normalmente te mantém segura, te prende dentro junto com ele, te colocando diretamente no alcance do Demonic Ascension dele. Dentro desse limite, Swain acerta facilmente explosões de dano máximo de Death's Hand e se sustenta infinitamente com sua vida, transformando sua principal ferramenta ofensiva em uma prisão autoimposta.Build de Swain →Ver detalhes
Swain
Por quê
Embora o Spirit Abjuration ofereça um sustain decente, Swain supera você em trocas prolongadas. O perigo principal está na sua ultimate, Between Worlds. Essa zona, que normalmente te mantém segura, te prende dentro junto com ele, te colocando diretamente no alcance do Demonic Ascension dele. Dentro desse limite, Swain acerta facilmente explosões de dano máximo de Death's Hand e se sustenta infinitamente com sua vida, transformando sua principal ferramenta ofensiva em uma prisão autoimposta.
Impacto na lane
Como Swain se cura constantemente com Ravenous Flock, seu poke de Twofold Hex raramente é efetivo. Você não consegue estourar waves facilmente porque se adiantar convida um puxão de Nevermove, seguido de um slow de Vision of Empire. Isso te força a jogar defensivamente sob a torre, perdendo prioridade. Se você tentar forçar um skirmish, a vida superior dele significa que você precisa recuar, dando a ele liberdade total para ajudar o jungler dele enquanto você luta para limpar a wave.
Como jogar
Nunca use o Between Worlds a menos que o Demonic Ascension de Swain já esteja em cooldown, ou que você possa usar o Across the Veil imediatamente para se reposicionar além do limite. Durante a fase de lane, mova-se constantemente de forma perpendicular ao posicionamento dele para atrair e esquivar do Nevermove. Se você for atingida, use imediatamente o The Weirding para desacelerar o avanço dele e se empurrar para trás, impedindo-o de chegar perto o suficiente para um follow-up devastador de Death's Hand. Mantenha as trocas breves para negar a ele os stacks da passiva.
Imunidade a CCPosicionamentoEsse matchup é dominado por como Morgana usa o Black Shield para neutralizar completamente sua principal ameaça. Quando você usa o Between Worlds, ela pode simplesmente se escudar ou escudar o alvo dela, anulando o knockback e o slow do limite da jaula. Como sua ultimate depende de prendê-la dentro da arena para você quicar com segurança, a capacidade dela de atravessar suas paredes direto arruína sua pressão de abate e te deixa vulnerável.Build de Morgana →Ver detalhes
Morgana
Por quê
Esse matchup é dominado por como Morgana usa o Black Shield para neutralizar completamente sua principal ameaça. Quando você usa o Between Worlds, ela pode simplesmente se escudar ou escudar o alvo dela, anulando o knockback e o slow do limite da jaula. Como sua ultimate depende de prendê-la dentro da arena para você quicar com segurança, a capacidade dela de atravessar suas paredes direto arruína sua pressão de abate e te deixa vulnerável.
Impacto na lane
Durante a fase de lane, Morgana vai empurrar a wave constantemente com Tormented Shadow, te forçando a usar o Twofold Hex para igualar a limpeza dela em vez de pokar. Se você for atingida pelo Dark Binding tentando trocar, a poça dela causa dano massivo, forçando um recall precoce. Como sua ultimate não consegue prendê-la de forma confiável, você não consegue garantir abates solo com facilidade, dando a ela liberdade total para farmar com segurança.
Como jogar
Para sobreviver e encontrar aberturas, você precisa atrair o Black Shield antes de se comprometer com sua ultimate. Use a velocidade de movimento do Across the Veil para atrair o Dark Binding dela, ou salte para o lado para esquivar. Se ela entrar em pânico e se escudar, você tem uma janela de quinze segundos em que o Between Worlds se torna letal. Se ela guardar o escudo, foque em usar o The Weirding para se desengajar e limpar waves com segurança a distância em vez de forçar lutas.
EscaramuçasPosicionamentoYone tem uma vantagem clara porque o *Soul Unbound* contorna completamente o confinamento do *Between Worlds*. Quando você tenta prendê-lo, ele pode simplesmente voltar ao corpo físico dele, ignorando totalmente os limites da sua ultimate. Além disso, o *Soul Unbound* dele concede mobilidade explosiva para frente, ignorando sua vantagem de alcance, tornando difícil disparar o *Spirit Abjuration* com segurança sem se expor aos golpes rápidos de dano duplo dele.Build de Yone →Ver detalhes
Yone
Por quê
Yone tem uma vantagem clara porque o *Soul Unbound* contorna completamente o confinamento do *Between Worlds*. Quando você tenta prendê-lo, ele pode simplesmente voltar ao corpo físico dele, ignorando totalmente os limites da sua ultimate. Além disso, o *Soul Unbound* dele concede mobilidade explosiva para frente, ignorando sua vantagem de alcance, tornando difícil disparar o *Spirit Abjuration* com segurança sem se expor aos golpes rápidos de dano duplo dele.
Impacto na lane
Essa interação tira sua pressão de abate pós-nível cinco, transformando sua ultimate em uma ferramenta de zoneamento em vez de uma armadilha letal. Sempre que Yone prepara o *Mortal Steel* para o dash com knock-up dele, você é forçada a jogar defensivamente. Ele pode iniciar trocas agressivamente com *Soul Unbound*, desgastar sua vida usando o *Spirit Cleave* para escudos, e te forçar a gastar o *Across the Veil* prematuramente só para sobreviver ao burst dele.
Como jogar
Para sobreviver a essa lane, nunca use o *Between Worlds* enquanto Yone tiver o *Soul Unbound* disponível; espere ele voltar ao corpo antes de prendê-lo. Mantenha distância e use o *The Weirding* para desacelerar os dashes para frente dele, combinado com o *Across the Veil* para se reposicionar com segurança e soltar a trava de alvo dele. Foque em farmar, usando o *Twofold Hex* para limpar waves a distância, e só troque quando a projeção espiritual dele estiver no longo cooldown.
AssassinoInalvejávelEsse matchup é dominado pela facilidade com que Fizz invalida suas principais ferramentas. Sempre que você usa o Twofold Hex, ele pode imediatamente usar o Playful para ficar intargetável, esquivando completamente do dano crucial do recast. Além disso, se você o prender dentro do Between Worlds, ele pode simplesmente saltar sobre o limite ou esperar a duração da zona acabar usando essa mesma habilidade, te deixando vulnerável com sua ultimate completamente desperdiçada.Build de Fizz →Ver detalhes
Fizz
Por quê
Esse matchup é dominado pela facilidade com que Fizz invalida suas principais ferramentas. Sempre que você usa o Twofold Hex, ele pode imediatamente usar o Playful para ficar intargetável, esquivando completamente do dano crucial do recast. Além disso, se você o prender dentro do Between Worlds, ele pode simplesmente saltar sobre o limite ou esperar a duração da zona acabar usando essa mesma habilidade, te deixando vulnerável com sua ultimate completamente desperdiçada.
Impacto na lane
Você é forçada a uma postura defensiva em que trocar agressivamente é altamente arriscado. Como você não consegue acertar o Twofold Hex de forma confiável, Fizz ganha controle de lane com facilidade e pode congelar a wave para montar engajamentos mortais. Se você se superextender, ele vai te prender com Chum the Waters, fechar a distância com Urchin Strike e te finalizar com Rending Wave enquanto você luta para retaliar com segurança.
Como jogar
Para sobreviver, você precisa jogar em torno do cooldown longo do Playful. Atraia essa habilidade hostilizando-o com ataques básicos e depois use o Across the Veil para recuar com segurança do contra-engajamento dele. Guarde o Twofold Hex até ele gastar o salto dele. Se ele iniciar com Chum the Waters, use rapidamente o The Weirding para desacelerar a aproximação dele e ganhar distância, guardando o Between Worlds apenas para momentos em que você tem certeza absoluta de que a principal ferramenta de esquiva dele está indisponível.
Anti-avançoPressão no mapaA dificuldade central desse matchup está em como o Unraveled Earth neutraliza sua mobilidade. Sempre que você tenta se reposicionar com o Across the Veil ou se teleportar pela zona da sua ultimate durante o Between Worlds, você vai disparar o campo minado de Taliyah. Essa interação transforma seus dashes defensivos e ofensivos vitais em gatilhos autodestrutivos, te deixando severamente danificada e vulnerável às rotações de habilidade subsequentes dela.Build de Taliyah →Ver detalhes
Taliyah
Por quê
A dificuldade central desse matchup está em como o Unraveled Earth neutraliza sua mobilidade. Sempre que você tenta se reposicionar com o Across the Veil ou se teleportar pela zona da sua ultimate durante o Between Worlds, você vai disparar o campo minado de Taliyah. Essa interação transforma seus dashes defensivos e ofensivos vitais em gatilhos autodestrutivos, te deixando severamente danificada e vulnerável às rotações de habilidade subsequentes dela.
Impacto na lane
Taliyah dita o estado da wave porque sua ameaça de engajamento é fortemente suprimida. Ela pode limpar minions livremente com Threaded Volley enquanto te mantém a distância. Se você perder vida tentando disparar o Spirit Abjuration, vai perder a prioridade do mid. Isso permite que ela rotacione facilmente para as side lanes usando Rock Surfing e Weaver's Wall enquanto você fica presa sob sua torre.
Como jogar
Foque em farmar a uma distância segura usando Twofold Hex e evite dashes para frente. Você precisa guardar o Across the Veil estritamente para fins defensivos, usando-o apenas depois do Unraveled Earth expirar ou se ela se posicionar mal. Utilize o pequeno auto-knockback do The Weirding para se desengajar sem ativar as armadilhas no chão dela. Só ative o Between Worlds se você puder garantir que não será forçada a saltar diretamente no campo de pedras ativo dela.
Esses confrontos são, acima de tudo, duelos de execução: os dois campeões têm formas reais de levar vantagem. Uma habilidade importante esquivada, um engajamento bem antecipado ou um erro de posicionamento podem ser suficientes para decidir o duelo. Conhecer o matchup e reconhecer as janelas de ação certas faz toda a diferença.
MobilidadeFurtividadeAurora e Akshan disputam um duelo de posicionamento de alto risco, onde qualquer erro é punido. O matchup central gira em torno de Heroic Swing de Akshan. Se Akshan avançar com o swing, Aurora pode lançar imediatamente Across the Veil para entrar em uma breve invisibilidade, forçando-o a perder o alvo e os disparos cruciais de Heroic Swing. Isso neutraliza completamente o burst principal dele, permitindo que Aurora retalie com Twofold Hex e Spirit Abjuration.Build de Akshan →Ver detalhes
Akshan
Por quê
Aurora e Akshan disputam um duelo de posicionamento de alto risco, onde qualquer erro é punido. O matchup central gira em torno de Heroic Swing de Akshan. Se Akshan avançar com o swing, Aurora pode lançar imediatamente Across the Veil para entrar em uma breve invisibilidade, forçando-o a perder o alvo e os disparos cruciais de Heroic Swing. Isso neutraliza completamente o burst principal dele, permitindo que Aurora retalie com Twofold Hex e Spirit Abjuration.
Impacto na lane
A ameaça de Heroic Swing impede que Aurora empurre a wave às cegas com Twofold Hex, já que Akshan pode puni-la se Across the Veil estiver em cooldown. As trocas são explosivas e frequentes; um único acerto de Avengerang seguido de um swing pode forçar um recall precoce. Por outro lado, se Aurora conseguir baitar o swing com sucesso, ela garante prioridade total para empurrar a lane e roam.
Como jogar
Nunca inicie trocas com Across the Veil. Guarde-a especificamente para counterar o Heroic Swing de Akshan. Posicione-se perto dos seus próprios minions para bloquear a trajetória de extensão de Avengerang, e use The Weirding para desacelerar a aproximação dele se tentar flanquear com Going Rogue. Se ele se comprometer com um swing, use Across the Veil para quebrar o bloqueio de alvo dele, e então solte instantaneamente Between Worlds para prendê-lo em pleno voo e eliminá-lo com burst.
EscaramuçasMecânicaEsse matchup é um puro duelo de movimento, onde o stealth de Aurora colide com o CC de Ahri. O resultado da lane depende inteiramente de como Ahri usa Charm. Ela vai guardá-la ativamente para interceptar você no meio do dash de Across the Veil, ou cronometrá-la com precisão para acertar você no instante em que sua breve invisibilidade termina. Se ela acertar isso, sua configuração de troca com Spirit Abjuration entra em colapso completo.Build de Ahri →Ver detalhes
Ahri
Por quê
Esse matchup é um puro duelo de movimento, onde o stealth de Aurora colide com o CC de Ahri. O resultado da lane depende inteiramente de como Ahri usa Charm. Ela vai guardá-la ativamente para interceptar você no meio do dash de Across the Veil, ou cronometrá-la com precisão para acertar você no instante em que sua breve invisibilidade termina. Se ela acertar isso, sua configuração de troca com Spirit Abjuration entra em colapso completo.
Impacto na lane
O controle de wave se transforma em um impasse tenso. Ahri usa Orb of Deception para empurrar e se curar com Essence Theft, enquanto você precisa igualá-la com Twofold Hex. Nenhum dos dois pode se comprometer com segurança a um dive total, porque Between Worlds e Spirit Rush oferecem segurança demais. Uma única Charm errada ou um Across the Veil mal cronometrado muda imediatamente a pressão da lane, forçando quem perdeu a ficar sob a torre ou voltar à base.
Como jogar
Para vencer, nunca inicie trocas com Across the Veil enquanto Ahri tiver Charm disponível. Em vez disso, use a ameaça de Twofold Hex para fazê-la gastar a habilidade. Se ela errar, ative imediatamente Between Worlds para prendê-la, usando os teleportes da borda para desviar do dano de retorno de Orb of Deception. Se você for enfeitiçado, use The Weirding imediatamente ao se recuperar para desacelerar a perseguição de Spirit Rush dela e se retirar com segurança.
DesengajarDano explosivoEsse duelo de midlane gira em torno de uma troca de burst afiada, onde o timing é tudo. Enquanto você quer saltar para frente usando Across the Veil para encurtar a distância e acionar Spirit Abjuration, Syndra possui a ferramenta perfeita para negar sua agressão. O Scatter the Weak dela pode empurrar você para trás instantaneamente no meio do salto, neutralizando completamente sua abordagem furtiva e deixando você vulnerável a um rápido Dark Sphere seguido de Force of Will.Build de Syndra →Ver detalhes
Syndra
Por quê
Esse duelo de midlane gira em torno de uma troca de burst afiada, onde o timing é tudo. Enquanto você quer saltar para frente usando Across the Veil para encurtar a distância e acionar Spirit Abjuration, Syndra possui a ferramenta perfeita para negar sua agressão. O Scatter the Weak dela pode empurrar você para trás instantaneamente no meio do salto, neutralizando completamente sua abordagem furtiva e deixando você vulnerável a um rápido Dark Sphere seguido de Force of Will.
Impacto na lane
Por causa dessa ameaça, você não pode saltar livremente para trocar vida. A lane se transforma em um jogo tenso de posicionamento, onde você precisa usar Twofold Hex para garantir minions a distância. Se você gastar sua mobilidade, Syndra vai retaliar imediatamente com Unleashed Power, forçando você a recuar antes do tempo e perder waves cruciais. Isso neutraliza sua capacidade de roam e pressionar outras lanes, prendendo os dois em uma batalha constante pela prioridade do mid.
Como jogar
Para vencer aqui, baite o Scatter the Weak antes de se comprometer. Avance de forma agressiva sem usar Across the Veil, usando The Weirding para desacelerá-la e forçar uma reação de pânico. Depois que ela gastar o knockback, ative imediatamente Across the Veil para encurtar a distância, acione Spirit Abjuration e prenda-a dentro de Between Worlds. Se ela guardar o stun, foque totalmente em farmar com Twofold Hex e espere ela se posicionar mal enquanto tenta acertar Force of Will.
PosicionamentoPokeEsse matchup é uma pura disputa de posicionamento, onde Orianna busca zonear você com o posicionamento da bola dela. O equilíbrio da lane depende de como você reage a Command: Attack. Como a ameaça de Orianna depende inteiramente de onde a bola dela cai, usar a velocidade de movimento repentina e a invisibilidade de Across the Veil para baitar e desviar do cast inicial dela permite que você contorne a zona dela e retalie.Build de Orianna →Ver detalhes
Orianna
Por quê
Esse matchup é uma pura disputa de posicionamento, onde Orianna busca zonear você com o posicionamento da bola dela. O equilíbrio da lane depende de como você reage a Command: Attack. Como a ameaça de Orianna depende inteiramente de onde a bola dela cai, usar a velocidade de movimento repentina e a invisibilidade de Across the Veil para baitar e desviar do cast inicial dela permite que você contorne a zona dela e retalie.
Impacto na lane
Desviar com sucesso da bola dela determina quem controla a wave. Se Orianna errar o Command: Attack, ela perde sua ferramenta principal para limpar minions ou dar poke em você, permitindo que você empurre com Twofold Hex e garanta prioridade. Porém, se ela acertar os combos dela, vai congelar a wave, te desgastar com os auto-attacks aprimorados de Clockwork Windup, e forçar um recall ruim que prejudica a presença do seu time no river.
Como jogar
Avance de forma agressiva até o alcance dela para baitar o Command: Attack, e então reaja imediatamente com Across the Veil para esquivar dele. Com a bola dela fora de posição, dê um quick-cast em Twofold Hex e ative Spirit Abjuration para uma troca rápida de burst antes que ela consiga recolher a bola com Command: Protect. Se você for pego por Command: Shockwave, use imediatamente The Weirding para desacelerá-la e desengajar, preservando sua vida em vez de se comprometer forçadamente.
AssassinoEscaramuçasEsse matchup é uma dança altamente volátil de deslocamento e reposicionamento. Enquanto Ekko depende de Phase Dive para encurtar a distância e acionar Z-Drive Resonance, sua mobilidade está no mesmo nível da dele. O ponto de virada principal depende de Between Worlds. Ao prender Ekko dentro da sua fronteira dimensional, você limita severamente por onde o clone de Chronobreak dele pode seguir, eliminando o fator incerto da fuga da ultimate dele e permitindo que você bloqueie a rota de escape temporal dele.Build de Ekko →Ver detalhes
Ekko
Por quê
Esse matchup é uma dança altamente volátil de deslocamento e reposicionamento. Enquanto Ekko depende de Phase Dive para encurtar a distância e acionar Z-Drive Resonance, sua mobilidade está no mesmo nível da dele. O ponto de virada principal depende de Between Worlds. Ao prender Ekko dentro da sua fronteira dimensional, você limita severamente por onde o clone de Chronobreak dele pode seguir, eliminando o fator incerto da fuga da ultimate dele e permitindo que você bloqueie a rota de escape temporal dele.
Impacto na lane
Antes do nível cinco, a lane é um jogo constante de bait. Ekko vai tentar limpar waves com Timewinder enquanto busca stuns oportunistas com Parallel Convergence. Você precisa usar Twofold Hex para desgastá-lo sempre que ele se aproximar para acertar os minions corpo a corpo. Se ele se comprometer com Phase Dive, um The Weirding rápido desengaja a troca instantaneamente. A lane é decidida por quem gerencia melhor a barra de vida antes do spike da ultimate.
Como jogar
Nunca lance Between Worlds no vácuo; espere Ekko usar Phase Dive de forma ofensiva. Depois que ele se comprometer, prenda-o. Fique atento à sombra holográfica que segue atrás dele. Se ele tentar escapar ou virar a luta com Chronobreak, lance Twofold Hex diretamente no caminho do clone dele dentro da sua arena. Se você errar a armadilha e ele te stunar com Parallel Convergence, use imediatamente Across the Veil para entrar em stealth e se reposicionar.
AssassinoPressão no mapaEsse matchup é um duelo de stealth de alto risco. Talon depende de executar seu burst completo combinando Rake e Noxian Diplomacy para acionar Blade's End. Porém, no momento em que ele solta Shadow Assault, você pode lançar imediatamente Across the Veil. Ficar invisível quebra o bloqueio de alvo dele, inutilizando o burst principal que estava vindo, enquanto você se reposiciona em segurança para fora do alcance das lâminas dele.Build de Talon →Ver detalhes
Talon
Por quê
Esse matchup é um duelo de stealth de alto risco. Talon depende de executar seu burst completo combinando Rake e Noxian Diplomacy para acionar Blade's End. Porém, no momento em que ele solta Shadow Assault, você pode lançar imediatamente Across the Veil. Ficar invisível quebra o bloqueio de alvo dele, inutilizando o burst principal que estava vindo, enquanto você se reposiciona em segurança para fora do alcance das lâminas dele.
Impacto na lane
A lane rapidamente se transforma em uma corrida de waveclear e pressão no mapa. Talon vai constantemente buscar empurrar com Rake e saltar muros usando Assassin's Path para aterrorizar suas side lanes. Você precisa igualar essa pressão empurrando de volta com Twofold Hex. Se você deixá-lo roamar livremente, ele vai snowballar, mas mantê-lo preso na wave neutraliza todo o kit dele.
Como jogar
Nunca use Across the Veil de forma agressiva ou para limpar minions. Você precisa guardar essa utilidade estritamente para quando Talon saltar em você ou ativar Shadow Assault. Se ele tentar roamar pelo river, corte o caminho dele com The Weirding para reduzir o momentum, e então use Between Worlds para prendê-lo em um espaço confinado onde o salto de muros dele é inútil.
AssassinoFurtividadeEsse matchup é um jogo de xadrez de mecânicas evasivas, onde o burst de Zed depende fortemente da ultimate dele. Quando Zed se compromete com Death Mark, Aurora tem a ferramenta defensiva perfeita em Across the Veil. Ao entrar em stealth imediatamente depois que ele reaparece, ela nega a visibilidade de alvo necessária para ele acertar Razor Shuriken e Shadow Slash, neutralizando a amplificação de dano antes que a marca detone.Build de Zed →Ver detalhes
Zed
Por quê
Esse matchup é um jogo de xadrez de mecânicas evasivas, onde o burst de Zed depende fortemente da ultimate dele. Quando Zed se compromete com Death Mark, Aurora tem a ferramenta defensiva perfeita em Across the Veil. Ao entrar em stealth imediatamente depois que ele reaparece, ela nega a visibilidade de alvo necessária para ele acertar Razor Shuriken e Shadow Slash, neutralizando a amplificação de dano antes que a marca detone.
Impacto na lane
Antes do nível cinco, Aurora tem uma vantagem de alcance, usando Twofold Hex e The Weirding para dar poke em Zed enquanto ele tenta farmar com Razor Shuriken. Porém, uma vez que as duas ultimates estejam disponíveis, a lane congela completamente em termos de agressão direta. Zed não pode dive com segurança usando Living Shadow, porque se ele usar as sombras dele de forma agressiva, Aurora pode prendê-lo dentro de Between Worlds ou desengajar com segurança, transformando a lane em uma batalha para baitar cooldowns de alto valor.
Como jogar
Nunca lance Across the Veil proativamente para trocar. Se Zed iniciar com Living Shadow para dar poke, use The Weirding para desacelerá-lo e recue. Quando ele se comprometer com Death Mark, espere o breve atraso da reaparição dele, e então acione imediatamente Across the Veil para saltar para longe e ficar invisível. Se ele tentar seguir seu contorno, lance imediatamente Between Worlds para saltar até a borda oposta, desperdiçando completamente a janela da ultimate dele antes de voltar com Twofold Hex para um abate de contra-ataque.
MobilidadePosicionamentoEsse matchup é um puro duelo de stealth e evasão. Quando Akali solta a Twilight Shroud dela para se reposicionar e buscar uma troca, você pode responder imediatamente com Across the Veil para entrar na sua própria breve invisibilidade e quebrar o bloqueio de alvo dela. Isso anula a vantagem defensiva natural dela, transformando os confrontos entre vocês em uma corrida mecânica tensa para ver quem acerta Twofold Hex ou Shuriken Flip primeiro.Build de Akali →Ver detalhes
Akali
Por quê
Esse matchup é um puro duelo de stealth e evasão. Quando Akali solta a Twilight Shroud dela para se reposicionar e buscar uma troca, você pode responder imediatamente com Across the Veil para entrar na sua própria breve invisibilidade e quebrar o bloqueio de alvo dela. Isso anula a vantagem defensiva natural dela, transformando os confrontos entre vocês em uma corrida mecânica tensa para ver quem acerta Twofold Hex ou Shuriken Flip primeiro.
Impacto na lane
As trocas são incrivelmente explosivas, mas breves. Como os dois têm ferramentas para desengajar, nenhum consegue forçar facilmente um dive que encerre a lane sem uma vantagem grande de vida. As waves de minions funcionam como escudos; ficar atrás delas impede Akali de acertar Shuriken Flip, permitindo que você dê poke com Twofold Hex. O controle da lane oscila constantemente dependendo de quem gasta primeiro sua ferramenta defensiva de mobilidade.
Como jogar
Nunca inicie uma troca com Across the Veil; guarde-a estritamente como reação à Twilight Shroud dela ou para desviar de Perfect Execution. Use The Weirding para desacelerar Akali e recuar se ela avançar com Shuriken Flip. Se você errar Twofold Hex, recue imediatamente para os seus minions caster para evitar que ela explore seu cooldown. Quando ela ativar a ultimate dela, prenda-a dentro de Between Worlds para restringir o enorme alcance de dash dela.
Bloqueio de projéteisEscaramuçasEsse matchup é um puro duelo de skill, centrado no Wind Wall de Yasuo e no seu Twofold Hex. Como Twofold Hex age como um projétil duplo, tanto no trajeto inicial quanto no de retorno, um único Wind Wall pode negar toda a sua sequência de troca. Sem acertar as duas partes dessa habilidade, você não consegue acionar Spirit Abjuration de forma confiável para curar ou causar dano de burst, ficando altamente vulnerável à retaliação física dele.Build de Yasuo →Ver detalhes
Yasuo
Por quê
Esse matchup é um puro duelo de skill, centrado no Wind Wall de Yasuo e no seu Twofold Hex. Como Twofold Hex age como um projétil duplo, tanto no trajeto inicial quanto no de retorno, um único Wind Wall pode negar toda a sua sequência de troca. Sem acertar as duas partes dessa habilidade, você não consegue acionar Spirit Abjuration de forma confiável para curar ou causar dano de burst, ficando altamente vulnerável à retaliação física dele.
Impacto na lane
O ritmo da lane muda drasticamente dependendo do longo cooldown de Wind Wall. Quando Yasuo o tem disponível, ele pode te zonear da wave de minions, usando Sweeping Blade para dash através dos minions e dar poke com Steel Tempest sem temer seu contra-harass. Se você gastar Twofold Hex contra a barreira dele, você perde o controle do empuxo da lane, permitindo que ele empilhe Steel Tempest e busque um knock-up para configurar Last Breath.
Como jogar
Para contornar a defesa dele, nunca jogue Twofold Hex diretamente nele quando Wind Wall estiver disponível. Em vez disso, baite o escudo dele com ataques básicos para estourar primeiro o Way of the Wanderer. Use Across the Veil para se reposicionar lateralmente, ou lance The Weirding para desacelerar o avanço dele e forçar uma barreira prematura. Depois que Wind Wall cair, prenda-o imediatamente em Between Worlds e solte seu combo completo, usando os teleportes da fronteira para desviar dos tornados de Steel Tempest que estiverem vindo.
Esses campeões geralmente têm dificuldade para responder às suas principais forças, o que te dá mais liberdade para abordar o confronto. Você costuma ter várias formas de pressioná-los e forçar trocas a seu favor. Aproveite essa vantagem para impor seu ritmo, em vez de dar tempo para eles se estabilizarem.
MobilidadeEsquivaAurelion Sol depende fortemente de te imobilizar com Singularity para garantir o dano do Breath of Light canalizado dele. Como Aurora pode lançar Across the Veil para saltar, ficar invisível e se reposicionar rapidamente, ela escapa sem esforço da atração gravitacional dele. Essa interação de mobilidade nega completamente a principal ferramenta de zoneamento dele, deixando-o vulnerável a trocas rápidas e unilaterais contra as quais ele não consegue retaliar facilmente.Build de Aurelion Sol →Ver detalhes
Aurelion Sol
Por quê
Aurelion Sol depende fortemente de te imobilizar com Singularity para garantir o dano do Breath of Light canalizado dele. Como Aurora pode lançar Across the Veil para saltar, ficar invisível e se reposicionar rapidamente, ela escapa sem esforço da atração gravitacional dele. Essa interação de mobilidade nega completamente a principal ferramenta de zoneamento dele, deixando-o vulnerável a trocas rápidas e unilaterais contra as quais ele não consegue retaliar facilmente.
Impacto na lane
Essa vantagem de mobilidade força Aurelion Sol a uma postura defensiva, já que ele não pode usar Singularity com segurança para empilhar o Cosmic Creator dele nas waves. Toda vez que ele tenta limpar a wave, você pode avançar agressivamente pela zona dele, trocando com Twofold Hex e The Weirding. Ele será empurrado para debaixo da torre, sangrando pressão e permitindo que você garanta prioridade antecipada para os confrontos.
Como jogar
Mantenha uma regra estrita: nunca gaste Across the Veil até ver o indicador visual de Singularity. Fique na diagonal em relação à wave de minions para forçá-lo a escolher entre farmar ou te focar. Depois que ele lançar o vórtice dele, ative sua invisibilidade para saltar para fora, e então retalie instantaneamente. Lance Between Worlds para prendê-lo no lugar, seguindo com Twofold Hex e The Weirding para acionar Spirit Abjuration antes que o Astral Flight dele consiga levá-lo para longe.
EscalamentoAurora dita o ritmo desse matchup porque Spirit Abjuration iguala a cura passiva de Vladimir, enquanto Twofold Hex oferece um waveclear superior. Porém, você não pode simplesmente eliminá-lo com burst usando a ultimate; um Vladimir habilidoso vai sempre usar Sanguine Pool para escapar pela fronteira de Between Worlds, evitando completamente o lockdown e o dano inicial. Isso transforma a lane em uma batalha de desgaste, onde a pressão bruta de wave supera o scaling dele.Build de Vladimir →Ver detalhes
Vladimir
Por quê
Aurora dita o ritmo desse matchup porque Spirit Abjuration iguala a cura passiva de Vladimir, enquanto Twofold Hex oferece um waveclear superior. Porém, você não pode simplesmente eliminá-lo com burst usando a ultimate; um Vladimir habilidoso vai sempre usar Sanguine Pool para escapar pela fronteira de Between Worlds, evitando completamente o lockdown e o dano inicial. Isso transforma a lane em uma batalha de desgaste, onde a pressão bruta de wave supera o scaling dele.
Impacto na lane
Como Vladimir depende de Transfusion para se sustentar, manter os minions crashados sob a torre dele o força a escolher entre garantir last hits com o dreno de alvo único ou usar Tides of Blood, que custa vida a ele. Empurrá-lo constantemente limita as oportunidades dele de trocar com você. Essa pressão impede que ele gere uma vantagem, permitindo que você desgaste a torre dele enquanto ele luta para acompanhar sua velocidade.
Como jogar
Force a defesa dele desde cedo, dando poke continuamente com Twofold Hex e acionando Spirit Abjuration. Nunca inicie com Between Worlds. Em vez disso, harasse-o até ele ser forçado a lançar Sanguine Pool em pânico só para sobreviver às suas habilidades básicas. Depois que ele emergir da poça, ele fica extremamente vulnerável; esse é seu sinal para soltar imediatamente Between Worlds e prendê-lo, usando Across the Veil para se mover em volta dele com segurança enquanto o finaliza.
Dano explosivoAurora tem uma vantagem clara porque a mobilidade dela perturba completamente o zoneamento estático de Veigar. Enquanto Veigar depende fortemente de te prender dentro de Event Horizon para garantir acertos com Dark Matter e Baleful Strike, seu kit oferece uma evasão superior. O salto de Across the Veil te dá a ferramenta perfeita para se reposicionar com segurança dentro das fronteiras dele, permitindo que você contorne completamente a ameaça de stun enquanto mantém a pressão ofensiva.Build de Veigar →Ver detalhes
Veigar
Por quê
Aurora tem uma vantagem clara porque a mobilidade dela perturba completamente o zoneamento estático de Veigar. Enquanto Veigar depende fortemente de te prender dentro de Event Horizon para garantir acertos com Dark Matter e Baleful Strike, seu kit oferece uma evasão superior. O salto de Across the Veil te dá a ferramenta perfeita para se reposicionar com segurança dentro das fronteiras dele, permitindo que você contorne completamente a ameaça de stun enquanto mantém a pressão ofensiva.
Impacto na lane
Na lane, essa dinâmica força Veigar a uma postura defensiva. Toda vez que ele usa Baleful Strike para empilhar a passiva dele nos minions, você pode avançar agressivamente. Como você consegue desviar facilmente de Dark Matter com movimento básico, Veigar é forçado a gastar Event Horizon defensivamente. Isso drena a mana dele rapidamente, te dá prioridade permanente de wave, e permite que você desgaste a vida dele com procs de Twofold Hex.
Como jogar
Para executar isso com perfeição, nunca lance Across the Veil de forma agressiva antes de Veigar usar a jaula dele. Quando ele soltar Event Horizon, mantenha a calma e fique perto do centro do anel para evitar o stun. Use o salto de Across the Veil para ajustar seu posicionamento dentro da zona segura, e então retalie com Twofold Hex e The Weirding. Se ele errar completamente a jaula, prenda-o imediatamente com Between Worlds para um abate fácil.
Pressão no mapaPicksTwisted Fate depende inteiramente de igualar ou criar vantagens numéricas com Destiny, mas seu kit neutraliza completamente a presença global dele. No momento em que ele começa a canalizar a ultimate dele ou tenta escapar, lançar Between Worlds o prende dentro da fronteira, cancelando o teleporte dele de imediato. Sem a fuga pelo mapa inteiro, ele é forçado a uma situação de combate direto, onde suas trocas de Twofold Hex e Spirit Abjuration vão facilmente dominá-lo.Build de Twisted Fate →Ver detalhes
Twisted Fate
Por quê
Twisted Fate depende inteiramente de igualar ou criar vantagens numéricas com Destiny, mas seu kit neutraliza completamente a presença global dele. No momento em que ele começa a canalizar a ultimate dele ou tenta escapar, lançar Between Worlds o prende dentro da fronteira, cancelando o teleporte dele de imediato. Sem a fuga pelo mapa inteiro, ele é forçado a uma situação de combate direto, onde suas trocas de Twofold Hex e Spirit Abjuration vão facilmente dominá-lo.
Impacto na lane
Essa dinâmica força Twisted Fate a uma postura defensiva sob a torre dele, já que ele não pode se aproximar com segurança para limpar waves com Wild Cards sem arriscar um engage letal. O ouro passivo dele de Dice carregado se torna irrelevante, porque ele fica trancado na lane, incapaz de encontrar janelas de roam. Você dita a pressão de wave, forçando-o a escolher entre perder waves para a torre ou sofrer dano devastador sempre que tentar passar do meio da lane.
Como jogar
Fique atento constantemente ao ciclo de Pick a Card dele; quando ele travar uma carta azul ou vermelha, troque agressivamente usando Twofold Hex. Guarde sempre Between Worlds especificamente para o momento em que os olhos dele brilharem ao lançar Destiny, ou quando ele estiver exposto demais e tentar fugir. Se ele conseguir travar uma carta amarela, use Across the Veil para largar o alvo de auto-attack dele e atrasar o stun, permitindo que você se reposicione e vire a luta instantaneamente.
EsquivaDano explosivoEssa lane é altamente favorável porque toda a ameaça de Brand depende de acertar Pillar of Flame para configurar o dano da passiva dele. Usando Across the Veil, você pode saltar reativamente para fora do círculo de alvo no chão dele, inutilizando a principal ferramenta de dano dele. Sem essa configuração, Brand não consegue facilmente acertar Sear para te stunar, ficando completamente exposto a um contra-burst rápido de Twofold Hex.Build de Brand →Ver detalhes
Brand
Por quê
Essa lane é altamente favorável porque toda a ameaça de Brand depende de acertar Pillar of Flame para configurar o dano da passiva dele. Usando Across the Veil, você pode saltar reativamente para fora do círculo de alvo no chão dele, inutilizando a principal ferramenta de dano dele. Sem essa configuração, Brand não consegue facilmente acertar Sear para te stunar, ficando completamente exposto a um contra-burst rápido de Twofold Hex.
Impacto na lane
Sua vantagem de mobilidade paralisa completamente o waveclear de Brand. Toda vez que ele se aproxima da wave de minions para lançar Pillar of Flame, ele corre o risco de ser counterado. Essa pressão constante o força a escolher entre perder farm sob a torre dele ou sofrer trocas pesadas. Depois que você desbloquear Between Worlds, a falta de mobilidade dele faz dele um alvo incrivelmente fácil para um dive ou um abate solo limpo.
Como jogar
Avance de forma agressiva para baitar o Pillar of Flame dele. No momento em que você ver a animação de cast dele, ative Across the Veil para desviar para o lado, e então encurte a distância instantaneamente com Twofold Hex. Siga com The Weirding para desacelerá-lo, acionando Spirit Abjuration para um burst rápido e cura. Se você for acidentalmente atingido pelo fogo dele, recue imediatamente por trás dos seus minions para bloquear o Sear dele e evitar qualquer stun subsequente.
MobilidadeDano explosivoAurora dita completamente o ritmo desse matchup porque o kit à distância dela pune sem esforço o farm corpo a corpo de Katarina. O fator decisivo é como The Weirding neutraliza a principal ameaça de abate de Katarina. Quando Katarina salta com Shunpo e canaliza Death Lotus, o knockback sobre a própria Aurora e a redução de velocidade instantânea de The Weirding a tiram com segurança do raio da ultimate, ao mesmo tempo em que perturbam o posicionamento preciso de Katarina, deixando-a encurralada sem um reset de Voracity.Build de Katarina →Ver detalhes
Katarina
Por quê
Aurora dita completamente o ritmo desse matchup porque o kit à distância dela pune sem esforço o farm corpo a corpo de Katarina. O fator decisivo é como The Weirding neutraliza a principal ameaça de abate de Katarina. Quando Katarina salta com Shunpo e canaliza Death Lotus, o knockback sobre a própria Aurora e a redução de velocidade instantânea de The Weirding a tiram com segurança do raio da ultimate, ao mesmo tempo em que perturbam o posicionamento preciso de Katarina, deixando-a encurralada sem um reset de Voracity.
Impacto na lane
Durante a fase de lane, Katarina fica constantemente com fome de ouro. Toda vez que ela usa Bouncing Blade para farmar, você consegue prever o alvo de Shunpo dela e acertar uma troca garantida de Twofold Hex. Como ela não consegue coletar as adagas dela com segurança sem acionar a cura e o dano do seu Spirit Abjuration, você vai garantir facilmente a prioridade do mid. Isso impede que ela roame para as side lanes enquanto você crasha waves e pressiona a torre dela.
Como jogar
Para garantir essa vantagem, nunca use The Weirding de forma agressiva para limpar waves; guarde-a sempre como ferramenta defensiva para quando Katarina tentar engajar. Quando ela soltar uma adaga com Preparation, posicione-se longe dela. Se ela se comprometer com a ultimate, lance imediatamente The Weirding para desengajar, e então siga com Twofold Hex e Between Worlds para prendê-la. Se ela jogar de forma passiva, use Across the Veil para dar poke nela com segurança sob a própria torre dela.
MergulhoMobilidadeMel depende fortemente do alcance dela para te zonear, mas os skillshots dela se tornam inúteis assim que você encurta a distância. Usando Across the Veil, você ganha uma breve janela de invisibilidade e velocidade para contornar completamente as ferramentas de zoneamento frontal dela. Isso permite que você acerte Twofold Hex e acione Spirit Abjuration nela antes que ela consiga desengajar com segurança, transformando a vantagem de alcance dela em um ponto fraco.Build de Mel →Ver detalhes
Mel
Por quê
Mel depende fortemente do alcance dela para te zonear, mas os skillshots dela se tornam inúteis assim que você encurta a distância. Usando Across the Veil, você ganha uma breve janela de invisibilidade e velocidade para contornar completamente as ferramentas de zoneamento frontal dela. Isso permite que você acerte Twofold Hex e acione Spirit Abjuration nela antes que ela consiga desengajar com segurança, transformando a vantagem de alcance dela em um ponto fraco.
Impacto na lane
Como Mel teme seu gap-close repentino, ela precisa jogar recuada, permitindo que você controle o ritmo da wave. Você pode slow-push as waves em direção à torre dela, forçando-a a gastar mana limpando minions sob pressão. Essa ameaça constante de um engage com Across the Veil mantém Mel presa à torre dela, impedindo-a de rotacionar para ajudar o jungler dela ou garantir scuttle crabs.
Como jogar
Mantenha a wave de minions no seu lado da lane inicialmente para aumentar a distância que Mel precisa andar. Quando ela se aproximar para garantir um last hit, ative Across the Veil para contornar as habilidades defensivas dela, e então use imediatamente Twofold Hex e The Weirding para desacelerá-la e travar a troca. Se Mel reagir rápido e recuar sob a torre, use Between Worlds para prendê-la dentro da arena, usando os teleportes da borda para desviar dos contra-ataques dela enquanto a finaliza.
EsquivaDano explosivoAurora domina esse matchup porque Lux depende inteiramente de acertar a raiz de longo alcance dela para configurar o burst. Usando Across the Veil, Aurora pode reagir instantaneamente à animação de cast de Light Binding, saltando por cima ou escapando do projétil com invisibilidade temporária. Sem a raiz, Lux não consegue garantir o dano de Lucent Singularity ou Final Spark, deixando-a completamente exposta à troca de Aurora.Build de Lux →Ver detalhes
Lux
Por quê
Aurora domina esse matchup porque Lux depende inteiramente de acertar a raiz de longo alcance dela para configurar o burst. Usando Across the Veil, Aurora pode reagir instantaneamente à animação de cast de Light Binding, saltando por cima ou escapando do projétil com invisibilidade temporária. Sem a raiz, Lux não consegue garantir o dano de Lucent Singularity ou Final Spark, deixando-a completamente exposta à troca de Aurora.
Impacto na lane
Como Lux está constantemente ameaçada pela mobilidade de Aurora, ela não pode se aproximar para dar poke agressivamente com Lucent Singularity sem arriscar um contra-engage mortal. Esse medo força Lux a jogar extremamente recuada, cedendo o controle das waves de minions. Aurora pode empurrar waves com facilidade, garantir recalls rápidos, ou prender Lux sob a torre dela, onde Between Worlds pode ser usado para dive ou para forçar a Prismatic Barrier defensiva de Lux.
Como jogar
Posicione-se um pouco de lado em relação à sua wave de minions para forçar Lux a escolher entre focar em você ou na wave com Lucent Singularity. Continue avançando de forma agressiva para baitar o Light Binding dela. No momento em que você ver o cajado dela se levantar para a raiz, ative Across the Veil para frente ou para o lado para desviar, e então retalie imediatamente com Twofold Hex e The Weirding para acionar Spirit Abjuration e tirar um pedaço enorme da vida dela. Se ela se escudar com Prismatic Barrier, espere o retorno acabar antes de se comprometer com sua ultimate, Between Worlds.
All-inAlcanceEnquanto Ziggs se destaca em estagnar lanes com Bouncing Bomb e Hexplosive Minefield, ele é incrivelmente vulnerável a dive direto. Depois que você desbloquear Between Worlds, a falta de mobilidade forte dele se torna uma falha fatal. A única fuga dele, Satchel Charge, é muito lenta e previsível para ajudá-lo a contornar as fronteiras da sua arena. Isso permite que você o prenda com facilidade e solte seu combo completo de burst.Build de Ziggs →Ver detalhes
Ziggs
Por quê
Enquanto Ziggs se destaca em estagnar lanes com Bouncing Bomb e Hexplosive Minefield, ele é incrivelmente vulnerável a dive direto. Depois que você desbloquear Between Worlds, a falta de mobilidade forte dele se torna uma falha fatal. A única fuga dele, Satchel Charge, é muito lenta e previsível para ajudá-lo a contornar as fronteiras da sua arena. Isso permite que você o prenda com facilidade e solte seu combo completo de burst.
Impacto na lane
Antes do nível cinco, você precisa aguentar os ataques aprimorados de Short Fuse dele e o waveclear. Porém, o momentum muda completamente no momento em que você consegue sua ultimate. Ziggs não pode mais passar com segurança da linha do river dele para pressionar sua torre com Satchel Charge. Ele é forçado a jogar extremamente recuado, cedendo a prioridade de lane e permitindo que você roame livremente enquanto ele fica sob a torre.
Como jogar
Desvie do poke inicial dele se movendo lateralmente, usando Across the Veil para encurtar a distância com segurança se ele se expor demais com Bouncing Bomb. Espere ele gastar Satchel Charge ofensivamente antes de se comprometer com sua ultimate. Se ele jogar de forma excessivamente segura sob a torre dele, use Twofold Hex para limpar a wave rapidamente, e então finja um roam para o river para baitá-lo a se aproximar, voltando imediatamente para prendê-lo em Between Worlds.
Vantagem: veredito canônico do Wild Rift Core (−3 a +3), do ponto de vista do campeão citado na linha. Taxa de vitória e taxa de escolha: as do próprio adversário nessa função — Wild Rift CN · Challenger, Patch 7.3b. Não é uma taxa de vitória do confronto direto.
Como counterar este campeão
Ângulo de counter
Os contra-ataques contra a Aurora não se resumem apenas a estatísticas, mas envolvem interações muito específicas com seu conjunto de habilidades. Qualquer coisa que limite sua capacidade de desaparecer, se reposicionar ou escolher o momento certo para entrar na luta se torna um grande problema. Ela depende muito das janelas de oportunidade e dos ângulos de ataque. Os campeões que reduzem essas opções ou a punem imediatamente após a entrada na luta são aqueles que realmente a neutralizam.
Contexto do patch
A Aurora tem dificuldades contra perfis que quebram seu ritmo. Assassinos rápidos a castigam antes que ela consiga se preparar, enquanto tanques que limitam a mobilidade reduzem seu impacto nas lutas em equipe. O ponto em comum entre seus adversários é simples: eles a impedem de jogar no seu próprio ritmo. Quando forçada a reagir em vez de iniciar a luta, seu valor cai significativamente.
Leitura rápida
Passível de punição durante os períodos de recarga.
Fraco contra CC direcionado.
Depende muito dos ângulos de posicionamento.
Arquétipos de counter
Assassinos velozes
Esses campeões atacam a Aurora antes que ela consiga preparar seu ataque concentrado. A capacidade deles de iniciar o combate rapidamente e acompanhar seus movimentos reduz a eficácia de sua invisibilidade. Eles diminuem suas oportunidades de iniciar o combate e a forçam a adotar um estilo de jogo defensivo, limitando seu impacto geral.
Como o campeão deve se adaptar. Espere os tempos de recarga passarem e aproveite a “Stasis”.
Antimobilidade
Esses perfis prejudicam diretamente os movimentos de Aurora. Toda tentativa de ataque se torna arriscada, já que ela é imediatamente controlada ou exposta. Isso destrói completamente seu estilo de jogo baseado na invisibilidade.
Como o campeão deve se adaptar. Jogue mais devagar e espere pelos erros.
Linha de frente com tanques
Campeões capazes de resistir ao seu dano explosivo reduzem sua capacidade de eliminar um alvo com um único golpe. Se Aurora não conseguir eliminar rapidamente um alvo, ela perde sua função principal e fica vulnerável após se comprometer com o ataque.
Zed força Aurora a jogar de forma reativa. A capacidade dele de atacar com mais rapidez e evitar o controle de área dela com sombras torna os confrontos diretos arriscados. Aurora precisa diminuir o ritmo e esperar pelos erros, em vez de forçar confrontos diretos.
Erros comuns contra ele
Erros comuns contra ele
Envolver-se sem ter uma visão.
Subestimar o CC alvo.
Forçar trocas contra assassinos.
Erros no momento certo de usar as habilidades com tempo de recarga.
Não está adaptando a configuração defensiva.
Notas do coach
A vitória vem com paciência, não com velocidade.
Leia as regras da luta antes de entrar.
FAQ
Por que o Aurora perde para o Zed?
Zed impõe um ritmo mais acelerado do que Aurora. Ele consegue atacar rapidamente antes que ela se posicione e evitar as zonas dela com manobras de desvio, forçando-a a assumir um papel defensivo.
Como jogar contra o Vex?
Vex castiga diretamente as investidas. Evite confrontos diretos e espere que os tempos de recarga dela terminem antes de atacar.
O Aurora consegue enfrentar tanques?
Sim, mas ela deve evitar atacar a linha de frente. O papel dela continua sendo atacar os personagens mais frágeis.
Qual é o maior ponto fraco dela?
Os campeões que limitam a mobilidade dela e antecipam suas jogadas, como Vex ou Galio, são os mais problemáticos.