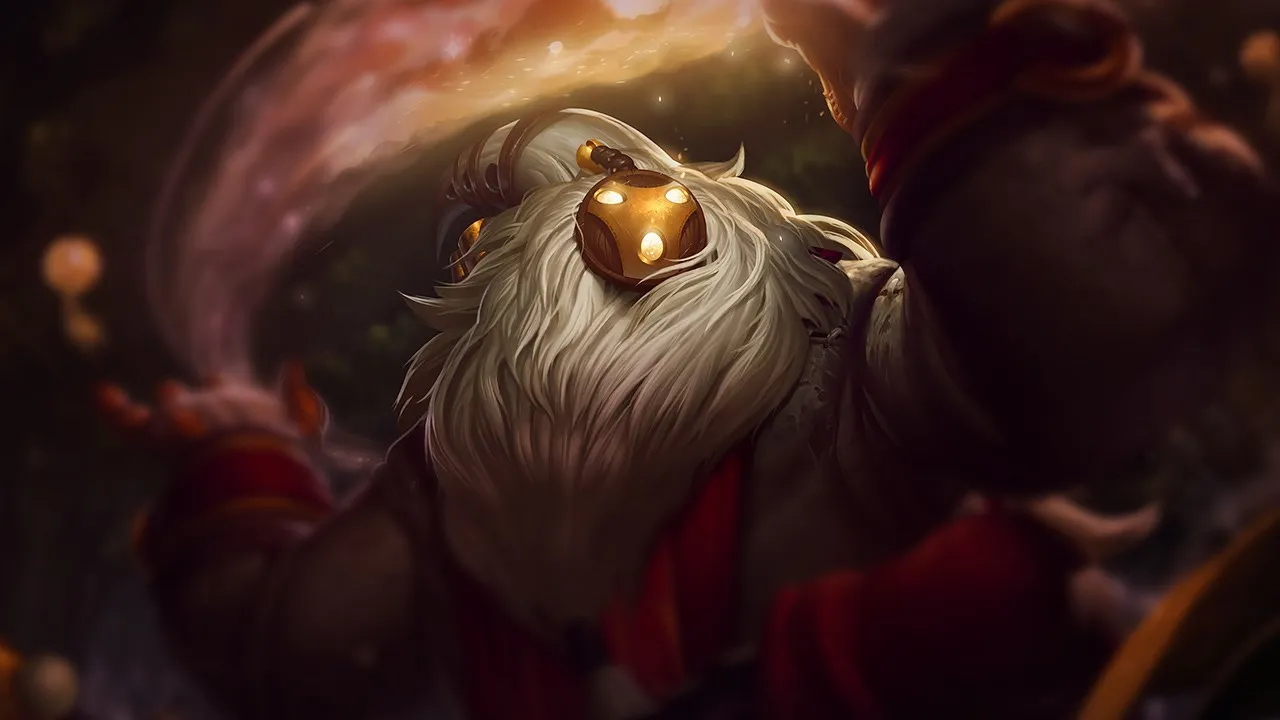
Bard ist anfällig gegen aggressive engage-Kompositionen, die ihm keine Zeit zum roamen lassen. Sein geringer sofortiger peel macht ihn verwundbar, wenn er nicht in der Nähe seines ADC ist. Pick- oder konstante all-in-Champions bestrafen seine Abwesenheit auf der Lane.
★ SUPPORTTier S+
SCHADEN
UTIL
TANK
DIFF
Bard Wild Rift Counter-Guide
Hard Counters
2
Diese Champions haben ein Build und einen Spielstil, der deinen direkt überlegen ist, was die Kontrolle der Lane und das Farmen extrem schwierig machen kann. Ihr Kit kann deine Kernstärken neutralisieren oder dich bestrafen, sobald du versuchst, deinen gewohnten Spielplan umzusetzen. In diesen Matchups geht es oft darum, Fehler zu minimieren und nach Wegen zu suchen, außerhalb der direkten Konfrontation zu gewinnen.
SkalierungPokeSenna's massive Basic Attack range allows her to easily harvest souls from you whenever you step up. If you try to trade back using Cosmic Binding, she simply negates your poke by casting Piercing Darkness through the minion wave to heal herself and her ally. This constant sustain and range advantage means she scales rapidly while punishing your shorter-range presence.Senna Build →Details ansehen
Senna
Warum
Senna's massive Basic Attack range allows her to easily harvest souls from you whenever you step up. If you try to trade back using Cosmic Binding, she simply negates your poke by casting Piercing Darkness through the minion wave to heal herself and her ally. This constant sustain and range advantage means she scales rapidly while punishing your shorter-range presence.
Lane-Einfluss
This matchup completely ruins your lane control. Because Senna constantly chips away at your health, you are forced to spend mana on Caretaker’s Shrine rather than playing aggressively. This endless pressure pushes your wave under turret, making it extremely dangerous for you to roam and collect chimes for Traveler’s Call, which in turn stalls your own scaling and map presence.
Wie man spielt
Do not walk up to trade unless Senna misses Last Embrace. Place your Caretaker’s Shrine far behind your turret so your carry can safely heal without being poked. Only use Cosmic Binding reactively when she tries to step forward to harvest a soul. If she attempts to escape a gank using Curse of the Black Mist, aim Tempered Fate to lock her down before she gains camouflage, allowing your team to close the gap.
MassenkontrolleKartendruckBard's core loop of roaming for Traveler's Call chimes directly enables Blitzcrank's lethal kill-lane threat. The moment Bard steps away, Blitzcrank uses Overdrive to close the gap and lock down the isolated marksman with Rocket Grab and Power Fist. This creates a structural conflict: Bard must either abandon his scaling mechanic or leave his partner exposed to a sudden, fatal hook under or near the turret.Blitzcrank Build →Details ansehen
Blitzcrank
Warum
Bard's core loop of roaming for Traveler's Call chimes directly enables Blitzcrank's lethal kill-lane threat. The moment Bard steps away, Blitzcrank uses Overdrive to close the gap and lock down the isolated marksman with Rocket Grab and Power Fist. This creates a structural conflict: Bard must either abandon his scaling mechanic or leave his partner exposed to a sudden, fatal hook under or near the turret.
Lane-Einfluss
This dynamic paralyzes your lane pressure. You cannot safely deploy Caretaker's Shrine to sustain if you are constantly forced to hug your ADC to block Rocket Grab angles. If Blitzcrank gains wave control, he can freeze near his tower, forcing your ADC into a dangerous zone where any step forward results in a deadly Power Fist knock-up, while your Magical Journey escapes are useless if you get hooked first.
Wie man spielt
To survive, you must limit your Traveler's Call roaming exclusively to when the wave is fully crashed under the enemy tower or when Blitzcrank misses Rocket Grab. Always position yourself slightly ahead of your ADC, keeping minion block active, holding Cosmic Binding to stun Blitzcrank against a wall if he charges forward with Overdrive. If your ADC is hooked, use Tempered Fate on the enemy ADC to prevent them from following up on the crowd control, rather than using it on Blitzcrank himself.
Diese Champions haben Werkzeuge, die ihnen im Kampf meist einen Vorteil verschaffen, ohne das Matchup unspielbar zu machen. Sie haben vielleicht mehr Reichweite, können deine Offensive besser abfangen oder haben mehr Möglichkeiten, auf deine Engages zu reagieren. Du musst deine Herangehensweise anpassen und sorgfältig die Momente wählen, in denen du den Kampf annimmst.
MassenkontrolleRückzugThresh holds the lane's threat because one hit from Death Sentence forces you or your carry into The Box. However, Thresh's reliance on Dark Passage to taxi his jungler or save his ADC is his biggest vulnerability. When an ally clicks the lantern, they path directly to Thresh. Lining up Cosmic Binding right as they collide creates an instant, inescapable double stun, turning his primary escape into a death trap.Thresh Build →Details ansehen
Thresh
Warum
Thresh holds the lane's threat because one hit from Death Sentence forces you or your carry into The Box. However, Thresh's reliance on Dark Passage to taxi his jungler or save his ADC is his biggest vulnerability. When an ally clicks the lantern, they path directly to Thresh. Lining up Cosmic Binding right as they collide creates an instant, inescapable double stun, turning his primary escape into a death trap.
Lane-Einfluss
Because Thresh can fish for hooks, you cannot blindly wander to collect chimes from Traveler’s Call without sacrificing lane pressure. If you are pulled, Flay will disrupt your escape, leaving you vulnerable under your own turret. This threat forces you to play defensively near your Caretaker’s Shrine, meaning you will often lose priority and have to concede early brush control to avoid deadly blind hooks.
Wie man spielt
Position yourself constantly behind minions to block Death Sentence, and always keep one Caretaker’s Shrine fully charged behind your ADC. Never waste Cosmic Binding proactively; hold it specifically for the moment Thresh throws Dark Passage or tries to engage. If he manages to trap you with The Box, cast Tempered Fate directly on his ADC to stall their damage, then use Magical Journey through the nearest wall to slip away safely.
All-inRückzugNautilus dominates the lane space because Dredge Line and Staggering Blow easily punish your fragile health pool. However, the matchup pivots entirely around Depth Charge. When Nautilus targets your ally with this ultimate, you can cast Tempered Fate on his backline. By freezing his follow-up damage dealers in stasis, you neutralize his dive and render his ultimate-led engage useless.Nautilus Build →Details ansehen
Nautilus
Warum
Nautilus dominates the lane space because Dredge Line and Staggering Blow easily punish your fragile health pool. However, the matchup pivots entirely around Depth Charge. When Nautilus targets your ally with this ultimate, you can cast Tempered Fate on his backline. By freezing his follow-up damage dealers in stasis, you neutralize his dive and render his ultimate-led engage useless.
Lane-Einfluss
You will constantly be pushed under tower because trading into Titan's Wrath shield is highly inefficient. Stepping up to collect Traveler’s Call chimes exposes you to a Dredge Line that will force a summoner spell or a bad recall. This pressure restricts your map rotations, meaning you cannot roam freely without risking your ADC dying to a dive initiated by Riptide slow and crowd control.
Wie man spielt
Stand consistently behind your minion wave to block Dredge Line, and place Caretaker’s Shrine far behind your tower to give your ADC a safe retreat path. Never use Tempered Fate aggressively. Instead, hold it specifically for the moment Nautilus casts Depth Charge. The second you see the depth charge tracking, aim your ultimate at the enemy follow-up. If Nautilus bypasses your wave, use Cosmic Binding on him and the nearest wall to stun him.
CC-ImmunitätPokeMorgana shuts down your aggressive playmaking because her Black Shield completely absorbs the magic damage and negates the stun from your Cosmic Binding. Whenever you attempt to line up a stun against the wall, she can reactively shield her ally, leaving you completely vulnerable. This constant threat of negation forces you to play defensively, as you cannot force favorable trades while her defensive cooldown is available.Morgana Build →Details ansehen
Morgana
Warum
Morgana shuts down your aggressive playmaking because her Black Shield completely absorbs the magic damage and negates the stun from your Cosmic Binding. Whenever you attempt to line up a stun against the wall, she can reactively shield her ally, leaving you completely vulnerable. This constant threat of negation forces you to play defensively, as you cannot force favorable trades while her defensive cooldown is available.
Lane-Einfluss
You cannot step forward to harass with Traveler’s Call without risking a lethal Dark Binding into Tormented Shadow combo. Using Magical Journey to engage is suicidal, as Morgana can easily root you or your carry the moment you exit the portal. Consequently, you are pushed under turret, forced to rely on Caretaker’s Shrine to sustain through her poke while her shield prevents any retaliation.
Wie man spielt
To win this mental game, walk up threateningly to bait her Black Shield without actually casting Cosmic Binding. Once her shield is on its long cooldown, you have a brief window to strike. When utilizing Tempered Fate, target the ally she did not shield, or freeze them both to reset the fight. Never travel through a Magical Journey if her Dark Binding is ready, and keep your Caretaker’s Shrine fully charged behind your minion line.
SkalierungPicksSona outscales you heavily because Aria of Perseverance and Hymn of Valor provide continuous teamwide sustain and combat stats that your Caretaker's Shrine cannot match in extended fights. However, her reliance on channeling Crescendo to win teamfights makes her vulnerable. Your ultimate, Tempered Fate, is the ultimate equalizer, capable of freezing her mid-animation or catching her out before her scaling makes her team unkillable.Sona Build →Details ansehen
Sona
Warum
Sona outscales you heavily because Aria of Perseverance and Hymn of Valor provide continuous teamwide sustain and combat stats that your Caretaker's Shrine cannot match in extended fights. However, her reliance on channeling Crescendo to win teamfights makes her vulnerable. Your ultimate, Tempered Fate, is the ultimate equalizer, capable of freezing her mid-animation or catching her out before her scaling makes her team unkillable.
Lane-Einfluss
Early on, Sona will use Power Chord and Hymn of Valor to poke you down, neutralizing your short trades. If you let her freely scale, her lane sustain makes her tower pressure immense. The match is decided by how well you abuse her weak durability before she unlocks Crescendo. Missing your stun with Cosmic Binding or failing to roam during her weak early levels gives her a free path to outscaling.
Wie man spielt
To survive and win, you must play around Sona's cooldowns. Keep Cosmic Binding ready to punish her whenever she steps forward to trigger her Power Chord. When teamfights begin, do not throw Tempered Fate randomly; track her positioning and hold it specifically to freeze her the moment she positions to cast Crescendo. If she plays extremely safe, use Magical Journey to roam with your jungler and impact other lanes before her scaling gap becomes insurmountable.
PokeSchildeYour primary tool to make plays, Cosmic Binding, is completely neutralized by Zyra's Garden of Thorns. When she reacts to your aggression by using Rampant Growth combined with Deadly Spines or Grasping Roots, the resulting plants act as physical shields. Because these summoned units block the missile path, you cannot secure stuns on Zyra or her marksman, turning your offensive attempts into wasted mana.Zyra Build →Details ansehen
Zyra
Warum
Your primary tool to make plays, Cosmic Binding, is completely neutralized by Zyra's Garden of Thorns. When she reacts to your aggression by using Rampant Growth combined with Deadly Spines or Grasping Roots, the resulting plants act as physical shields. Because these summoned units block the missile path, you cannot secure stuns on Zyra or her marksman, turning your offensive attempts into wasted mana.
Lane-Einfluss
Because you cannot rely on Cosmic Binding to peel or engage, Zyra establishes dominant zone control. If you step forward to collect chimes for Traveler’s Call, her plants poke you down relentlessly. This constant chip damage forces you to spawn Caretaker’s Shrine constantly, draining your mana. Consequently, your lane is pushed under tower, delaying your roam windows and forcing your ADC to concede early minion waves.
Wie man spielt
To survive this lane, you must hold Cosmic Binding until Zyra has already spawned her plants elsewhere. Position yourself parallel to your minions, using them as buffers against her Grasping Roots. If she wastes Rampant Growth charges, that is your cue to look for an angle. When you are pushed out, use Magical Journey from behind your tower to safely collect nearby chimes, rather than walking through her deadly garden.
PokeBurstLux's high-range zoning through Lucent Singularity constantly threatens your health pool, forcing you into defensive positions. If you attempt to step up to collect chimes or poke with Traveler's Call enhanced autos, you expose yourself to her Light Binding. Because Cosmic Binding requires precise angles near walls or minions, Lux can easily stay behind her wave, shielding any return damage with Prismatic Barrier while whittling you down.Lux Build →Details ansehen
Lux
Warum
Lux's high-range zoning through Lucent Singularity constantly threatens your health pool, forcing you into defensive positions. If you attempt to step up to collect chimes or poke with Traveler's Call enhanced autos, you expose yourself to her Light Binding. Because Cosmic Binding requires precise angles near walls or minions, Lux can easily stay behind her wave, shielding any return damage with Prismatic Barrier while whittling you down.
Lane-Einfluss
You are constantly pushed under tower because Lux's explosive Lucent Singularity clears waves and chips your health simultaneously. This limits your roam windows, as leaving your ADC alone under this pressure is suicidal. Your health pool will constantly deplete, forcing early bases unless you actively mitigate the poke. If you get caught by Light Binding, her Final Spark combo will easily burst you from full health before you can react with Tempered Fate.
Wie man spielt
To survive, prioritize placing Caretaker's Shrine behind your caster minions to let them fully charge; use their speed boost and healing to recover from Lucent Singularity damage. Never stand directly behind low-health minions where a sneaky Light Binding can pass through. If Lux misses her binding, look for a quick Cosmic Binding stun, but do not chase deeply. If dived, use Tempered Fate on Lux to stall her Final Spark while using Magical Journey to escape through the side walls.
PokeSchildeKarma dominates the early laning phase because her Inner Flame inflicts heavy, unavoidable area-of-effect damage whenever you try to collect Traveler's Call chimes near the wave. This relentless ranged pressure, amplified by her Mantra, constantly chips away at your health bar. To survive, you are forced to spend your mana on placing Caretaker's Shrine behind your tower rather than looking for offensive Cosmic Binding angles.Karma Build →Details ansehen
Karma
Warum
Karma dominates the early laning phase because her Inner Flame inflicts heavy, unavoidable area-of-effect damage whenever you try to collect Traveler's Call chimes near the wave. This relentless ranged pressure, amplified by her Mantra, constantly chips away at your health bar. To survive, you are forced to spend your mana on placing Caretaker's Shrine behind your tower rather than looking for offensive Cosmic Binding angles.
Lane-Einfluss
This constant harassment forces you into an extremely passive defensive posture. Because Karma easily secures wave priority with her splash damage, you will find your minion wave shoved under turret. This restricts your ability to use Magical Journey to roam for chimes, as leaving your marksman alone under this sort of siege is fatal. Every trade is heavily skewed, making you rely entirely on the gradual healing of fully charged Caretaker's Shrine packs.
Wie man spielt
To stay afloat, pre-emptively drop three Caretaker's Shrine health packs behind your turret before the heavy trading begins, letting them charge fully. Stand far behind your own minions to prevent Karma from splashing her Inner Flame onto you when she targets the wave. If she overextends to trigger Focused Resolve, use that predictable straight-line pathing to lock her against a wall or her own minions with Cosmic Binding, turning her aggression into a counter-engage.
EngageRückzugMaokai completely neutralizes your defensive tools because Twisted Advance grants him untargetability. When you try to peel him off with Cosmic Binding, a skilled Maokai will activate his root to bypass your projectile entirely and close the gap. Once he lands, Bramble Smash knocks you back into his team, leaving you unable to escape his follow-up crowd control.Maokai Build →Details ansehen
Maokai
Warum
Maokai completely neutralizes your defensive tools because Twisted Advance grants him untargetability. When you try to peel him off with Cosmic Binding, a skilled Maokai will activate his root to bypass your projectile entirely and close the gap. Once he lands, Bramble Smash knocks you back into his team, leaving you unable to escape his follow-up crowd control.
Lane-Einfluss
This interaction forces you to play extremely safe, giving up brush control because of his Sapling Toss. You cannot step up to harass with Traveler’s Call without risking a sudden lockup. If Maokai freezes the wave near his tower, any attempt to collect chimes or place a Caretaker’s Shrine leaves you vulnerable to a long-range Twisted Advance or a wide Nature's Grasp that secures an easy kill.
Wie man spielt
To survive, never cast Cosmic Binding reactively when Maokai walks at you; instead, hold it until after he completes Twisted Advance, aiming it at the wall behind you to stun him post-dash. Place your Caretaker’s Shrine deep behind your turret to secure a safe retreat path. If he traps you with Nature's Grasp, use Tempered Fate on his incoming marksman rather than Maokai himself, buying time for your Magical Journey escape.
Diese Matchups sind vor allem Duelle der Ausführung: Beide Champions haben glaubwürdige Wege, die Oberhand zu gewinnen. Eine wichtige ausgewichene Fähigkeit, ein richtig antizipierter Engage oder ein einziger Positionierungsfehler können reichen, um das Duell zu entscheiden. Das Matchup zu kennen und die richtigen Fenster zum Handeln zu erkennen, ist hier besonders wichtig.
KartendruckThis matchup is a pure race of global influence. While your Magical Journey allows you to bypass terrain to surprise other lanes, Galio can immediately answer any aggressive move with Hero's Entrance. This interaction nullifies your numerical advantage instantly, turning your proactive gank into a deadly counter-engage where his Shield of Durand can taunt your entire diving party.Galio Build →Details ansehen
Galio
Warum
This matchup is a pure race of global influence. While your Magical Journey allows you to bypass terrain to surprise other lanes, Galio can immediately answer any aggressive move with Hero's Entrance. This interaction nullifies your numerical advantage instantly, turning your proactive gank into a deadly counter-engage where his Shield of Durand can taunt your entire diving party.
Lane-Einfluss
In the duo lane, you hold a ranged advantage to poke Galio with Traveler's Call enhanced attacks. However, you cannot roam mindlessly. If you leave the lane, Galio clears waves instantly using Winds of War and Colossal Smash, establishing priority. This allows him to position himself safely in the fog of war, ready to drop on whichever lane you decide to gank.
Wie man spielt
To win this tempo race, you must bait Hero's Entrance before fully committing your allies. If you see him channeling his ultimate to save a target, prepare Tempered Fate to freeze the landing zone, neutralizing his impact. In lane, hold Cosmic Binding exclusively to interrupt his Justice Punch dash or to stun him against a wall when he charges Shield of Durand, preventing him from locking down your marksman.
KartendruckSchutzThis matchup is defined by Lulu's defensive nature. While she provides excellent peel with Help, Pix! and Wild Growth, she lacks the hard, proactive engage required to quickly dive an isolated carry under turret. This passive playstyle gives you the perfect window to trigger Traveler’s Call and collect chimes across the map, knowing your marksman is relatively safe from sudden, aggressive dives during your brief absences.Lulu Build →Details ansehen
Lulu
Warum
This matchup is defined by Lulu's defensive nature. While she provides excellent peel with Help, Pix! and Wild Growth, she lacks the hard, proactive engage required to quickly dive an isolated carry under turret. This passive playstyle gives you the perfect window to trigger Traveler’s Call and collect chimes across the map, knowing your marksman is relatively safe from sudden, aggressive dives during your brief absences.
Lane-Einfluss
Laning revolves around trade mitigation. Lulu will try to poke you down using Glitterlance and Pix, Faerie Companion whenever you step up. However, placing Caretaker’s Shrine behind your turret ensures your ADC sustains through her moderate pressure while you are away. Your roamings will force Lulu's lane to push, but their lack of structural damage means your turret health remains safe while you impact other lanes.
Wie man spielt
Always charge three Caretaker’s Shrine packs under your tower before roaming. If you catch Lulu using Whimsy defensively to speed up her partner, immediately look for an aggressive Cosmic Binding stun, as she loses her primary tool to neutralize your engage. When returning to lane, use Magical Journey through the jungle walls to catch her off-guard, and hold Tempered Fate to isolate her carry right after she commits Wild Growth.
All-inRückzugThe lane revolves entirely around Leona's engage versus Bard's counter-disengage. When Leona launches forward with Zenith Blade, her linear path makes her incredibly vulnerable to a well-timed Cosmic Binding. Because she lands directly on top of her target, you can easily stun her against nearby terrain or her approaching marksman, neutralizing her Shield of Daybreak threat before she can lock anyone down.Leona Build →Details ansehen
Leona
Warum
The lane revolves entirely around Leona's engage versus Bard's counter-disengage. When Leona launches forward with Zenith Blade, her linear path makes her incredibly vulnerable to a well-timed Cosmic Binding. Because she lands directly on top of her target, you can easily stun her against nearby terrain or her approaching marksman, neutralizing her Shield of Daybreak threat before she can lock anyone down.
Lane-Einfluss
Whichever support misuses their primary tool loses complete control of the bush line. If Leona misses Zenith Blade, she becomes a walking target, allowing you to poke her down with Traveler’s Call empowered attacks. However, if you waste Cosmic Binding, your ADC has to retreat immediately, conceding wave priority and allowing Leona to zone you away from your Caretaker’s Shrine packs under the turret.
Wie man spielt
Never throw Cosmic Binding proactively unless Leona's Zenith Blade is on cooldown. Stand near walls to bait her engage, but always keep an angle clear to land your stun immediately when she pulls herself to you. If she locks down your marksman instead, target her ADC with Tempered Fate to stop their follow-up damage, then drop a Caretaker’s Shrine behind your partner to help them safely retreat.
RegenerationKonter-EngageThis matchup is a constant trade war where positioning dictates survival. Nami relies on the bouncing heals of Ebb and Flow to dominate short trades, while Bard matches this pressure with Cosmic Binding stuns. The lane remains perfectly even because Bard can completely neutralize Nami’s massive Tidal Wave engages, either by escaping through Magical Journey or using Tempered Fate to freeze Nami's allies mid-initiation.Nami Build →Details ansehen
Nami
Warum
This matchup is a constant trade war where positioning dictates survival. Nami relies on the bouncing heals of Ebb and Flow to dominate short trades, while Bard matches this pressure with Cosmic Binding stuns. The lane remains perfectly even because Bard can completely neutralize Nami’s massive Tidal Wave engages, either by escaping through Magical Journey or using Tempered Fate to freeze Nami's allies mid-initiation.
Lane-Einfluss
Both of you constantly fight for bush control to land your respective skillshots. While Nami uses Tidecaller's Blessing to help her ADC push waves and poke, you must counteract this sustained damage by preparing Caretaker’s Shrine relics behind your tower. Missing a Cosmic Binding or stepping into an Aqua Prison instantly swings the lane pressure, forcing early recalls and letting Nami's lane partner crash waves to secure plate gold.
Wie man spielt
To win this positioning battle, stand parallel to your ADC to split Nami's Ebb and Flow targets, preventing her from getting double bounces. Never use Magical Journey aggressively if Nami has Tidal Wave available; instead, hug walls so you can immediately open a portal to escape her wave. If she initiates from afar, hold Tempered Fate to freeze her incoming follow-up attackers rather than trying to hit Nami herself, effectively wasting her engage window.
MobilitätRückzugThis matchup is a high-speed duel of reflexes centered on Rakan's dash and your crowd control. The entire lane hinges on Grand Entrance. Because Rakan must commit to his landing spot, his predictable trajectory allows you to cast Cosmic Binding preemptively. By targeting his landing location, you can easily stun him against the very ally he tries to knock up or a nearby wall, turning his aggressive jump into a self-inflicted trap.Rakan Build →Details ansehen
Rakan
Warum
This matchup is a high-speed duel of reflexes centered on Rakan's dash and your crowd control. The entire lane hinges on Grand Entrance. Because Rakan must commit to his landing spot, his predictable trajectory allows you to cast Cosmic Binding preemptively. By targeting his landing location, you can easily stun him against the very ally he tries to knock up or a nearby wall, turning his aggressive jump into a self-inflicted trap.
Lane-Einfluss
Missed spells dictate the lane's pressure. If Rakan wastes Grand Entrance, his threat vanishes, allowing you to pressure him with Meep-infused attacks from Traveler's Call. Conversely, if your Cosmic Binding misses, Rakan will instantly force trades, shielding his partner with Battle Dance to negate your poke. Health pools swing wildly based on these quick skirmishes, making passive farming impossible as both supports constantly fish for baiting opportunities.
Wie man spielt
Never throw Cosmic Binding blindly; hold it specifically to react to Rakan's forward dash. Stand near terrain to tempt his jump, then aim your projectile directly at your ally's feet the moment Rakan begins his Grand Entrance animation. If he coordinates The Quickness to charm you before you can react, immediately cast Tempered Fate on his backline to isolate him, or escape through a wall using Magical Journey to reset the engagement.
RegenerationRückzugThis skill matchup revolves around Milio's ability to negate your crowd control. While a well-placed Cosmic Binding can stun Milio or his carry, Milio can instantly wipe this stun away using Breath of Life. However, his ultimate is completely useless against the golden stasis of Tempered Fate. Because Tempered Fate bypasses his cleanse entirely, you possess the ultimate tool to freeze him or his allies, leaving them vulnerable right as the stasis ends.Milio Build →Details ansehen
Milio
Warum
This skill matchup revolves around Milio's ability to negate your crowd control. While a well-placed Cosmic Binding can stun Milio or his carry, Milio can instantly wipe this stun away using Breath of Life. However, his ultimate is completely useless against the golden stasis of Tempered Fate. Because Tempered Fate bypasses his cleanse entirely, you possess the ultimate tool to freeze him or his allies, leaving them vulnerable right as the stasis ends.
Lane-Einfluss
Laning dissolves into a battle of attrition where your Caretaker’s Shrine competes with Milio's Cozy Campfire and Warm Hugs to keep marksmen healthy. If you blindly throw Cosmic Binding, Milio will shield the damage and out-sustain you. You cannot force quick kills under tower; instead, you must chip away at their resources, forcing Milio to exhaust his mana on heals before you look for a deep portal play.
Wie man spielt
To win this, bait out Warm Hugs with basic attacks empowered by Traveler’s Call before committing your mana. Never initiate a hard engage with Cosmic Binding when Milio's Breath of Life is available. Instead, launch Tempered Fate directly onto Milio to lock him out of the fight first. Once he is frozen in stasis, line up your Cosmic Binding on his landing spot, ensuring an inescapable stun the moment he emerges.
Diese Champions tun sich meist schwer, auf deine Hauptstärken zu reagieren, was dir mehr Freiheit im Matchup gibt. Du hast oft mehrere Möglichkeiten, sie unter Druck zu setzen und Trades zu deinen Gunsten zu erzwingen. Nutze diesen Vorteil, um das Tempo zu bestimmen, statt ihnen Zeit zu geben, wieder in eine komfortable Position zu kommen.
RegenerationPicksBard bypasses Soraka's legendary healing by temporarily deleting her from the fight. Because her entire defensive power relies on spamming Astral Infusion or dropping a clutch global Wish to save low-health targets, landing Tempered Fate directly on Soraka shuts down her baseline utility. While she is trapped in stasis, her allies are completely stripped of their safety net, leaving them vulnerable to being focused down.Soraka Build →Details ansehen
Soraka
Warum
Bard bypasses Soraka's legendary healing by temporarily deleting her from the fight. Because her entire defensive power relies on spamming Astral Infusion or dropping a clutch global Wish to save low-health targets, landing Tempered Fate directly on Soraka shuts down her baseline utility. While she is trapped in stasis, her allies are completely stripped of their safety net, leaving them vulnerable to being focused down.
Lane-Einfluss
Soraka wants to slowly wear you down with Starcall while keeping her carry perpetually healthy. However, because you can easily sustain through short trades with Caretaker’s Shrine, she cannot force you out of lane. This allows you to collect chimes from Traveler’s Call without losing tower pressure, and once you both reach level five, the threat of your ultimate forces her to play incredibly far back, conceding control of the brush.
Wie man spielt
During skirmishes, never waste Cosmic Binding on Soraka if she is standing near her Equinox zone, as she will silence you. Instead, bait out her silence, then immediately launch Tempered Fate directly onto her. While she is frozen, quickly reposition to line up a Cosmic Binding stun against a wall on her carry. If you miss your ultimate, retreat through a Magical Journey immediately to reset rather than fighting her sustained healing.
PokePicksSeraphine relies on long casting animations and setup to impact teamfights, particularly with her ultimate. Bard's Tempered Fate completely neutralizes this by putting her in stasis mid-cast, canceling the extension of Encore or freezing her before she can chain her Stage Presence-empowered Beat Drop. Since her defensive utility from Surround Sound has a massive cooldown, interrupting her rhythm leaves her incredibly vulnerable to your team's follow-up.Seraphine Build →Details ansehen
Seraphine
Warum
Seraphine relies on long casting animations and setup to impact teamfights, particularly with her ultimate. Bard's Tempered Fate completely neutralizes this by putting her in stasis mid-cast, canceling the extension of Encore or freezing her before she can chain her Stage Presence-empowered Beat Drop. Since her defensive utility from Surround Sound has a massive cooldown, interrupting her rhythm leaves her incredibly vulnerable to your team's follow-up.
Lane-Einfluss
During the laning phase, Seraphine will try to shove the wave using High Note and poke you down. However, her aggressive pushing makes her incredibly susceptible to ganks. If she mispositions to land a Stage Presence passive attack, you can easily punish her with Cosmic Binding against the minion wave or walls. Once she wastes Surround Sound to absorb trades, you gain a massive window of vulnerability where her lack of mobility can be exploited.
Wie man spielt
To win this matchup, hold Tempered Fate specifically for when Seraphine begins her Encore animation or when she groups with her allies to cast Surround Sound. Position yourself near the side walls to threaten a Cosmic Binding stun whenever she steps up to poke. If she plays too safely, use Magical Journey to flank her from the jungle, catching her from behind before she can react with Beat Drop.
SchildePicksThis matchup favors Bard because Braum's signature defensive tool, Unbreakable, is completely bypassed by Bard's ultimate. While Braum can easily block the projectile of Cosmic Binding to protect his carry, he has no answer for Tempered Fate. Because Tempered Fate is a lobbed area-of-effect stasis, it ignores the directional shield entirely, disabling both Braum and his partner and leaving them vulnerable to a guaranteed follow-up stun.Braum Build →Details ansehen
Braum
Warum
This matchup favors Bard because Braum's signature defensive tool, Unbreakable, is completely bypassed by Bard's ultimate. While Braum can easily block the projectile of Cosmic Binding to protect his carry, he has no answer for Tempered Fate. Because Tempered Fate is a lobbed area-of-effect stasis, it ignores the directional shield entirely, disabling both Braum and his partner and leaving them vulnerable to a guaranteed follow-up stun.
Lane-Einfluss
In lane, this dynamic neuters Braum’s ability to safely peel or execute aggressive leaps with Stand Behind Me. Your continuous pressure with Meep-empowered attacks from Traveler’s Call forces Braum to play defensively, burning his mana on Unbreakable. Once you unlock Tempered Fate, the threat of a tower dive or a sudden engage behind his shield prevents the enemy duo from safely holding the minion wave near their turret, giving you total priority.
Wie man spielt
To execute this perfectly, position yourself diagonally to the minion wave to bait Braum into raising Unbreakable. The moment he deploys his shield to block your poke, immediately cast Tempered Fate directly on the carry standing behind him. As the stasis is about to end, line up your Cosmic Binding so it passes through the frozen carry and hits Braum or a nearby wall, ensuring a devastating stun. Use Magical Journey to escape if his passive Concussive Blows gets stacked on you.
EngageNicht anvisierbarThis matchup swings entirely in your favor once both supports reach level 5. Malphite's entire threat revolves around his explosive engage with Unstoppable Force. However, because Tempered Fate has a cast range that allows you to stand safely behind, you can reactively throw your golden stasis directly onto your targeted allies. This completely absorbs his ultimate's knockup and damage, leaving Malphite deep in your territory with no escape.Malphite Build →Details ansehen
Malphite
Warum
This matchup swings entirely in your favor once both supports reach level 5. Malphite's entire threat revolves around his explosive engage with Unstoppable Force. However, because Tempered Fate has a cast range that allows you to stand safely behind, you can reactively throw your golden stasis directly onto your targeted allies. This completely absorbs his ultimate's knockup and damage, leaving Malphite deep in your territory with no escape.
Lane-Einfluss
Before the ultimate milestone, you easily dominate the wave state. Malphite's melee nature makes him highly vulnerable to your ranged Traveler's Call attacks and Cosmic Binding stuns when he steps up to share minions. Once ultimates are unlocked, his presence under your tower is completely neutralized. He cannot threaten a dive because any attempt to use his signature engage results in an immediate stasis that traps him under tower fire.
Wie man spielt
Position yourself well behind your marksman, forcing Malphite to choose between ultimate targets rather than hitting both of you. Keep Tempered Fate strictly off cooldown to react to his Unstoppable Force; never use it to initiate unless you know his ultimate is down. If he tries to poke with Seismic Shard, place a Caretaker's Shrine behind your carry to neutralize the health trade. Before committing to a Cosmic Binding stun, always pop his Granite Shield with a simple Meep-empowered basic attack first.
KartendruckFrüher DruckYuumi relies entirely on You and Me! to attach to her marksman, meaning her lane presence is extremely passive. Since she cannot threaten a hard engage, you can comfortably leave the lane to gather chimes with Traveler's Call. While you collect these, your carry is perfectly safe because Yuumi's only poking tool is Prowling Projectile, which lacks the burst or crowd control to punish a solo target.Yuumi Build →Details ansehen
Yuumi
Warum
Yuumi relies entirely on You and Me! to attach to her marksman, meaning her lane presence is extremely passive. Since she cannot threaten a hard engage, you can comfortably leave the lane to gather chimes with Traveler's Call. While you collect these, your carry is perfectly safe because Yuumi's only poking tool is Prowling Projectile, which lacks the burst or crowd control to punish a solo target.
Lane-Einfluss
This dynamic completely removes the typical risk of leaving your partner alone. You can drop a couple of Caretaker's Shrine packs under your tower, then disappear into the jungle. Your ally won't get dived because the enemy lane cannot tank tower shots or lock them down without Final Chapter. This allows you to secure deep vision while Yuumi remains glued to her partner, wasting her scaling potential.
Wie man spielt
Watch the wave state and wait until it bounces back toward your side before you utilize Magical Journey to rotate. Before you leave, charge three Caretaker's Shrine nodes behind your shooter. If Yuumi detaches to trigger Bop 'n' Block, immediately look to interrupt her with Cosmic Binding to lock her out of her host. If a fight breaks out while you are returning, use Tempered Fate to freeze the enemy carry, separating them from Yuumi's healing.
KartendruckBard holds a massive advantage because Tempered Fate directly shuts down Death from Below. By placing low-health allies in stasis as Pyke leaps to execute them, you completely waste his ultimate and deny his gold-sharing reset. Furthermore, Pyke's predictable positioning when charging Bone Skewer or dashing with Phantom Undertow makes him an easy target for Cosmic Binding stuns against nearby terrain.Pyke Build →Details ansehen
Pyke
Warum
Bard holds a massive advantage because Tempered Fate directly shuts down Death from Below. By placing low-health allies in stasis as Pyke leaps to execute them, you completely waste his ultimate and deny his gold-sharing reset. Furthermore, Pyke's predictable positioning when charging Bone Skewer or dashing with Phantom Undertow makes him an easy target for Cosmic Binding stuns against nearby terrain.
Lane-Einfluss
Pyke's inability to secure executions halts his snowball potential, leaving him gold-starved in the bot lane. Because Pyke must respect the threat of Tempered Fate, he cannot play aggressively under your turret. Meanwhile, you can freely poke him down with Traveler's Call enhanced basic attacks, forcing him to waste Ghostwater Dive defensively to trigger Gift of the Drowned Ones instead of roaming the map.
Wie man spielt
Never cast Tempered Fate proactively in skirmishes; hold it exclusively for the distinct X-shaped indicator of Death from Below to save your carry and ruin Pyke's teamfight reset. When Pyke attempts to channel Bone Skewer, stand near a wall and prepare Cosmic Binding to stun him the moment he releases it. If he slips away using Ghostwater Dive, immediately use Magical Journey to follow his roam or return safely to your lane.
Vorteil: kanonisches Urteil von Wild Rift Core (−3 bis +3), aus Sicht des in der Zeile genannten Champions. Siegrate und Pickrate: die eigenen Werte des Gegners in dieser Rolle — Wild Rift CN · Challenger, Patch 7.3b. Keine Siegrate im direkten Duell.
Wie man diesen Champion kontert
Konter-Winkel
Bard-Konter sind nicht nur auf Lane-Matchups beschränkt, sondern zielen darauf ab, seinen globalen Einfluss zu begrenzen. Bard wird problematisch, wenn er frei roamen und mit seinem Ultimate Picks kreieren kann. Champions, die sein Roaming einschränken, seine Kontrolle negieren oder seine Abwesenheit in der Lane bestrafen, sind am effektivsten. Bard zu schlagen, bedeutet nicht nur, die Lane zu gewinnen – es geht darum, seinen Einfluss auf der Karte zu reduzieren.
Patch-Kontext
In dieser Meta haben Supports, die das Lane-Tempo kontrollieren oder Engages negieren, einen Vorteil gegenüber Bard. Sein Kit hängt von Gelegenheiten ab: Ohne Zugang zu Wänden, Sicht oder gegen Disengage-Tools verliert er viel von seinem Wert. Champions, die Lane-Druck aufrechterhalten und gleichzeitig ihren ADC schützen, reduzieren seinen Einfluss erheblich.
Schnell gelesen
Seine Roams zu bestrafen ist der Schlüssel.
Disengage-Tools reduzieren seinen Einfluss.
Vision Control schränkt seine Plays ein.
Konter-Archetypen
Disengage Supports
Diese Supports verhindern, dass Bard seine Engages umwandelt. Sein Q und Ultimate erfordern schnelles Follow-up, aber Disengage-Tools brechen diese Dynamik. Sie zwingen Bard in einen passiveren Spielstil und reduzieren seinen Kampfeinfluss. In der Lane schützen sie auch effektiv ihren ADC vor seinen kurzen Trades.
Wie sich der Champion anpasst. Warte auf Positionsfehler und spiele um den Nebel herum, anstatt frontale Engages zu erzwingen.
Anti-Engage Control Supports
Diese Champions bestrafen Bards Engage-Versuche direkt. Sie können seine Plays blockieren oder umdrehen, was seine Initiierung riskant macht. In der Lane gewinnen sie oft längere Trades, zwingen Bard in ein defensives Spiel und schränken seine Roaming-Möglichkeiten ein.
Wie sich der Champion anpasst. Konzentriere dich mehr auf Vision und Timing als auf direkte Engages.
Lane Pressure Poke Supports
Diese Champions zwingen Bard, in der Lane zu bleiben, indem sie ihn bestrafen, wann immer er sich vorwärts bewegt. Ihr ständiger Poke macht Trades riskant und schränkt seine Fähigkeit ein, die Lane ohne Konsequenzen zu verlassen. Sie nutzen auch seinen Mangel an sofortiger Heilung aus.
Morgana neutralisiert einen Großteil von Bards Kit. Ihre Kontrollwerkzeuge verhindern saubere Engages und zwingen Bard, sich auf Timing statt auf Initiative zu verlassen. Das verwandelt das Matchup in ein Geduldsspiel statt in eine Playmaking-Gelegenheit.
Häufige Fehler gegen ihn
Häufige Fehler gegen ihn
Seine Roams ignorieren.
Kämpfen in der Nähe von Wänden.
Sein Ultimate nicht antizipieren.
Mangelnde Vision.
Sein Pick-Potenzial unterschätzen.
Coach-Notizen
Bard verliert an Wert, wenn du das Tempo kontrollierst.
Seine Abwesenheit zu bestrafen ist der Schlüssel.
FAQ
Wie bestraft man Bard effektiv?
Der beste Weg, Bard zu bestrafen, ist, seine Roams auszunutzen. Sobald er die Lane verlässt, solltest du den gegnerischen ADC unter Druck setzen oder Ressourcen sichern. Je mehr du schnelle Reaktionen erzwingst, desto weniger kann Bard seinen Makro-Stil spielen.
Warum ist Bard schwer zu kontern?
Weil er nicht nur die Lane spielt. Selbst wenn er die Lane verliert, kann er anderswo Vorteile schaffen. Ihn zu kontern erfordert Koordination und Map Awareness, nicht nur ein gutes Matchup.
Solltest du seinen Roams folgen?
Nicht immer. Manchmal ist es besser, seine Abwesenheit zu bestrafen, anstatt ihm zu folgen. Die Entscheidung hängt vom Timing und der Wave-Position ab. Blind zu folgen kann die Sache verschlimmern.
Wie spielt man gegen seine Ultimate?
Winkel antizipieren und unnötiges Gruppieren vermeiden. Nach der Stasis auseinandergehen, um Follow-up zu limitieren. Sein Timing zu verstehen ist der Schlüssel, um Fallen zu vermeiden.