septiembre de 2026 · Patch 7.2d
Support · SUPPORT

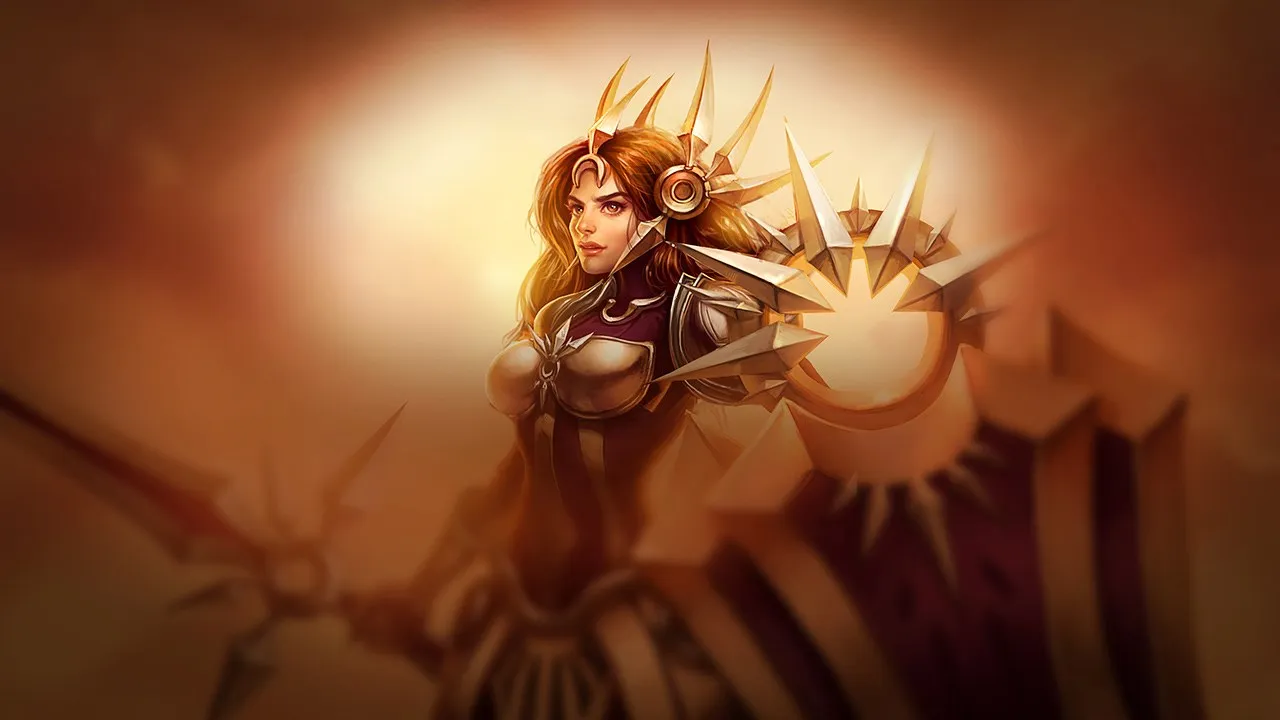
Guía de counters de Leona Wild Rift

Leona queda expuesta contra composiciones de disengage o poke que evitan que conecte sus engages. Los campeones que pueden ignore su presencia una vez que se ha lanzado reducen su utilidad. Los supports con shield o heal pueden absorber sus combos y neutralizar sus all-ins.

★ SUPPORT Tier S
DAÑO
UTIL
TANK
DIFF
Win 51.1% #34 · ↓2pt
Pick 9.2% #5
Ban 6.0% #40

Guía de counters de Leona Wild Rift ★ Counter Sheet

Tabla de emparejamientos
Emparejamiento Veredicto Ventaja Tasa de victorias Tasa de selección
Morgana Contras Difíciles +2 51.6% 6.2%
Braum Contras Difíciles +2 51.4% 4.1%
Sett Contras Difíciles +2 50.4% 2.1%
Alistar Contras Difíciles +2 50.1% 4.7%
Poppy Contras Difíciles +2
Brand Desfavorables +1 53.1% 2.6%
Galio Desfavorables +1 52.6% 2.8%
Ornn Desfavorables +1 51.3% 1.4%
Pyke Desfavorables +1 51.2% 5.0%
Thresh Desfavorables +1 50.3% 13.4%
Zyra Desfavorables +1 50.3% 4.7%
Zilean Desfavorables +1 49.7% 1.3%
Milio Desfavorables +1 49.7% 5.7%
Janna Desfavorables +1 48.8% 1.4%
Bard Matchups de Habilidad ±0 52.0% 1.2%
Maokai Matchups de Habilidad ±0 51.4% 5.1%
Rell Matchups de Habilidad ±0 51.3% 3.5%
Malphite Matchups de Habilidad ±0 50.4% 7.7%
Rakan Matchups de Habilidad ±0 50.0% 3.0%
Nautilus Matchups de Habilidad ±0 48.5% 10.9%
Swain Matchups de Habilidad ±0 47.8% 3.4%
Norra Matchups de Habilidad ±0
Sona Favorables −1 53.3% 6.3%
Senna Favorables −1 52.1% 5.0%
Karma Favorables −1 52.0% 6.8%
Soraka Favorables −1 50.9% 5.8%
Nami Favorables −1 50.4% 6.3%
Lux Favorables −1 50.1% 7.7%
Seraphine Favorables −1 50.0% 6.2%
Lulu Favorables −1 48.5% 11.4%
Veigar Favorables −1 47.5% 2.9%
Vel'Koz Favorables −2 51.8% 1.7%
Blitzcrank Favorables −2 49.0% 7.3%
Yuumi Favorables −2 46.1% 10.9%
Ashe Favorables −2

Edge: Wild Rift Core canonical verdict (−3 to +3), shown from the point of view of the champion named in the row. Win rate and pick rate: the opponent's own rate in this role — Wild Rift CN · Challenger, Patch 7.2d. Not a head-to-head win rate.

Contras Difíciles

5

Estos campeones tienen una build y un estilo de juego que superan directamente al tuyo, lo que puede hacer que controlar la línea y farmear sea extremadamente difícil. Sus habilidades pueden neutralizar tus principales fortalezas o castigarte en cuanto intentas jugar tu plan habitual. En estos matchups, el objetivo suele ser minimizar errores y buscar soluciones fuera del enfrentamiento directo.

Alistar

Alistar+2

tank clashpeel heavy Alistar completely shuts down your main initiation tool. Every time you cast Zenith Blade to dive onto the enemy marksman, Alistar can react instantly with Headbutt. He will knock you far away before you can follow up with Shield of Daybreak, isolating you from your target. This makes your Sunlight passive useless, as your ally cannot follow up, leaving you exposed and wasting your Eclipse defensive stats. Ver detalles
Alistar

Por qué

Alistar completely shuts down your main initiation tool. Every time you cast Zenith Blade to dive onto the enemy marksman, Alistar can react instantly with Headbutt. He will knock you far away before you can follow up with Shield of Daybreak, isolating you from your target. This makes your Sunlight passive useless, as your ally cannot follow up, leaving you exposed and wasting your Eclipse defensive stats.

Impacto en la línea

Because your standard engage is neutralized, you lose all lane pressure. You cannot safely contest the minion waves, and trying to force trades results in Alistar using Pulverize to counter-engage on your ADC. This forces you to play passively near your turret. You will bleed gold, lose priority for river vision, and cannot easily assist in early skirmishes because Alistar dictates the pace.

Cómo jugar

To survive, you must play defensively and bait Alistar into wasting his abilities. Never use Zenith Blade unless you see him use Headbutt on your ADC or to secure a minion. If he mispositions and wastes this cooldown, you have a brief window to engage. Alternatively, wait for your ultimate, Solar Flare, to initiate from a distance, or focus your crowd control on Alistar himself if he attempts to dive your carry under your tower.

Ficha completa →
Braum

Braum+2

counter engagepeel priority Initiating with Zenith Blade is highly risky because Braum can instantly counter your dive. When you dash in, Braum uses Stand Behind Me to shield his carry, placing himself directly in your path. He then easily stacks Concussive Blows on you with Winter's Bite and basic attacks, turning your aggressive play into a stun trap where you get focused down. Ver detalles
Braum

Por qué

Initiating with Zenith Blade is highly risky because Braum can instantly counter your dive. When you dash in, Braum uses Stand Behind Me to shield his carry, placing himself directly in your path. He then easily stacks Concussive Blows on you with Winter's Bite and basic attacks, turning your aggressive play into a stun trap where you get focused down.

Impacto en la línea

This dynamic completely paralyzes your lane pressure. Because your primary engage is neutralized, you must concede wave control, allowing Braum to push you under tower. Attempting to force fights results in terrible trades; Braum uses Unbreakable to block your partner's follow-up damage while Concussive Blows leaves you stunned and vulnerable, stripping away your dragon priority.

Cómo jugar

To survive, stand defensively behind your minions to block Winter's Bite. Never initiate with Zenith Blade unless Braum has already wasted Stand Behind Me. Instead, play reactively; hold Shield of Daybreak to stun him if he jumps forward, and activate Eclipse to absorb the retaliatory burst. If he initiates with Glacial Fissure, focus entirely on peeling for your carry rather than attempting to dive the enemy backline.

Ficha completa →
Morgana

Morgana+2

spell shieldcc denial Morgana completely neutralizes your engage potential. Whenever you try to lock down her or her ADC with Zenith Blade or Shield of Daybreak, she can reactively cast Black Shield to absorb the magic damage and completely negate your crowd control. Since your kit relies heavily on these consecutive stuns to trigger Sunlight, her spell shield leaves you stranded in the middle of their minion wave without any follow-up. Ver detalles
Morgana

Por qué

Morgana completely neutralizes your engage potential. Whenever you try to lock down her or her ADC with Zenith Blade or Shield of Daybreak, she can reactively cast Black Shield to absorb the magic damage and completely negate your crowd control. Since your kit relies heavily on these consecutive stuns to trigger Sunlight, her spell shield leaves you stranded in the middle of their minion wave without any follow-up.

Impacto en la línea

This interaction forces you into a passive state where you cannot safely step forward. If you attempt a raw engage, a quick Dark Binding will stop you mid-dash or pin you down, followed by Tormented Shadow to burn your health. You lose all bush control, allowing Morgana to freely poke you down and push the wave under your tower, which slowly chips away at your tower's health while starving your ADC.

Cómo jugar

To survive, you must bait out Black Shield before committing. Walk up aggressively to threaten with Shield of Daybreak without casting Zenith Blade, forcing her to waste her shield. Once Black Shield is on its long cooldown, you have a brief window to strike. If she holds it, wait for your level five; casting Solar Flare from maximum range can force a panic shield on one target, allowing you to instantly redirect your Zenith Blade onto the other unprotected enemy.

Ficha completa →

Otros emparejamientos

Desfavorables

9

Estos campeones tienen herramientas que generalmente les dan ventaja en el enfrentamiento, sin llegar a hacer el matchup injugable. Pueden tener más alcance, mejor capacidad para aguantar tu ofensiva o más formas de responder a tus engagements. Tendrás que adaptar tu enfoque y elegir con cuidado los momentos en los que aceptas el combate.

Janna

Janna+1

disengagepeel focusengage denial This matchup is defined by Janna's ability to completely shut down your primary initiation tool. Whenever you cast Zenith Blade, a reactive Janna can instantly release Howling Gale to knock you out of the air mid-flight. This precise interruption prevents you from reaching her or her AD carry, meaning you can never land the follow-up stun from Shield of Daybreak, leaving you stranded and vulnerable. Ver detalles
Janna

Por qué

This matchup is defined by Janna's ability to completely shut down your primary initiation tool. Whenever you cast Zenith Blade, a reactive Janna can instantly release Howling Gale to knock you out of the air mid-flight. This precise interruption prevents you from reaching her or her AD carry, meaning you can never land the follow-up stun from Shield of Daybreak, leaving you stranded and vulnerable.

Impacto en la línea

Because your main engage is so easily countered, you lose the threat of your bush pressure. Janna will freely poke you down with Zephyr and protect her marksman with Eye of the Storm whenever you try to walk up. If you force reckless fights, you will find yourself chunked out, losing tower priority and forcing early recalls that bleed gold and experience.

Cómo jugar

To survive and make plays, you must play a game of chicken with her tornado. Instead of leading with Zenith Blade, walk forward to threaten with Shield of Daybreak or activate Eclipse to absorb poke. Once you see her waste Howling Gale, you have a brief window to strike. After reaching level five, launch Solar Flare directly on Janna to stun her from afar, preventing her from casting Monsoon or countering your subsequent dive.

Ficha completa →
Galio

Galio+1

tankcounter engage This matchup is dictated by Galio's ability to completely shut down your aggressive dives. Whenever you attempt to engage by landing Zenith Blade on either target, Galio can immediately channel Shield of Durand. The massive area-of-effect taunt interrupts your ADC's follow-up before they can proc your Sunlight marks, leaving you isolated deep in their range while absorbing Winds of War and Colossal Smash damage. Ver detalles
Galio

Por qué

This matchup is dictated by Galio's ability to completely shut down your aggressive dives. Whenever you attempt to engage by landing Zenith Blade on either target, Galio can immediately channel Shield of Durand. The massive area-of-effect taunt interrupts your ADC's follow-up before they can proc your Sunlight marks, leaving you isolated deep in their range while absorbing Winds of War and Colossal Smash damage.

Impacto en la línea

Because of this counter-engage threat, you cannot freely fish for standard lane-phase trades. Doing so results in chunked health bars and lost lane priority, forcing you under tower where Galio can poke with Winds of War. If you fall behind, Galio will safely secure roaming windows, using Hero's Entrance to impact the map while you are stuck trying to clear waves under tower with weak pushing power.

Cómo jugar

Pivot your playstyle entirely toward protecting your ADC. Instead of diving forward with Zenith Blade, stand close to your carry and wait for Galio to initiate with Justice Punch. The moment he dashes, intercept him using Shield of Daybreak to lock him down, and activate Eclipse to absorb his burst. Save Solar Flare to disrupt his Hero's Entrance channel if he attempts to escape or rotate to a skirmish.

Ficha completa →
Thresh

Thresh+1

disengage disruptionspacing This matchup is heavily dictated by how your Zenith Blade interacts with Thresh's Flay. Because Zenith Blade has a predictable, linear dash, a skilled Thresh can easily react and sweep you out of the air mid-flight. This completely cancels your primary engage tool, leaving you stranded in the minion wave without triggering your Shield of Daybreak stun, while his Damnation armor scaling makes him progressively harder to burst down. Ver detalles
Thresh

Por qué

This matchup is heavily dictated by how your Zenith Blade interacts with Thresh's Flay. Because Zenith Blade has a predictable, linear dash, a skilled Thresh can easily react and sweep you out of the air mid-flight. This completely cancels your primary engage tool, leaving you stranded in the minion wave without triggering your Shield of Daybreak stun, while his Damnation armor scaling makes him progressively harder to burst down.

Impacto en la línea

Since you cannot freely press Zenith Blade, you lose early lane priority and wave control. If you attempt a raw engage and get interrupted, Thresh immediately retaliates with Death Sentence to lock down your carry, or uses Dark Passage to easily rescue his own AD carry from any bad trade. This pressure forces you to play defensively under your own tower, sacrificing early gold and map presence.

Cómo jugar

To bypass this disruption, you must change your engage pattern. Never lead with Zenith Blade unless you have seen Thresh waste Flay on minions or to push. Instead, wait for level five and initiate from distance with Solar Flare. If the center stun lands, you can follow up with your full crowd control chain before he can react. Alternatively, stand parallel to your carry to block incoming Death Sentence hooks with your active Eclipse armor.

Ficha completa →
Pyke

Pyke+1

mobility clashroam matching Pyke holds the upper hand because your primary engage tool, Zenith Blade, is easily countered. The moment you pull yourself in, he can disengage instantly with Phantom Undertow, leaving you deep in enemy territory while his trail stuns you. Furthermore, any trade damage you manage to inflict with Eclipse is quickly negated by his Gift of the Drowned Ones once he slips into bushes using Ghostwater Dive. Ver detalles
Pyke

Por qué

Pyke holds the upper hand because your primary engage tool, Zenith Blade, is easily countered. The moment you pull yourself in, he can disengage instantly with Phantom Undertow, leaving you deep in enemy territory while his trail stuns you. Furthermore, any trade damage you manage to inflict with Eclipse is quickly negated by his Gift of the Drowned Ones once he slips into bushes using Ghostwater Dive.

Impacto en la línea

This mechanical safety net transforms the bot lane into a map-wide race. Because you cannot reliably lock Pyke down, you cannot force him to stay in lane. He will use Bone Skewer to create pressure, then quickly disappear with Ghostwater Dive to roam. If you stay anchored to your tower, his map-wide pressure will overwhelm your midlane, forcing you to constantly decide between protecting your ADC or mirroring his movements.

Cómo jugar

To win this, stop chasing the phantom. Save Zenith Blade and Shield of Daybreak strictly for his ADC, who lacks Pyke's slippery mobility. If Pyke activates Ghostwater Dive to roam, do not sit idle; immediately track his path and follow him to match his map pressure. When he attempts to execute with Death from Below, use Solar Flare to interrupt his jump or stun him right as he lands, denying his gold reset.

Ficha completa →
Milio

Milio+1

disengage disruptioncleanse peel Milio holds all the tools to shut down your aggression. Whenever you launch forward with Zenith Blade, a reactive Milio can knock you back mid-flight using Ultra Mega Fire Kick, preventing you from applying Shield of Daybreak. Even if you land a perfect Solar Flare from afar, his Breath of Life instantly cleanses the stun and heals his marksman, completely neutralizing your primary initiation tools. Ver detalles
Milio

Por qué

Milio holds all the tools to shut down your aggression. Whenever you launch forward with Zenith Blade, a reactive Milio can knock you back mid-flight using Ultra Mega Fire Kick, preventing you from applying Shield of Daybreak. Even if you land a perfect Solar Flare from afar, his Breath of Life instantly cleanses the stun and heals his marksman, completely neutralizing your primary initiation tools.

Impacto en la línea

This matchup forces you into a passive defensive posture. Because Milio can deny your dash, attempting to force trades often leaves you stranded in the minion wave with your Eclipse wasted. His lane partner will easily poke you down using the extra range from Cozy Campfire and burn damage from Fired Up!, slowly chipping away your health and forcing early recalls that cost your team dragon priority.

Cómo jugar

To survive, you must play a game of patience. Never use Zenith Blade while Milio has his Ultra Mega Fire Kick ready; instead, walk up aggressively to bait his kick, then initiate once it is on cooldown. If you must use Solar Flare, target Milio directly rather than his carry, forcing him to use Breath of Life selfishly. When your engage fails, immediately activate Eclipse and retreat toward your tower to absorb the counter-attack.

Ficha completa →
Zyra

Zyra+1

zone controlplant block Zyra completely disrupts your engage tools by cluttering your path with her plants. Whenever you try to step up, she can spawn a seed with Rampant Growth directly in front of her, meaning your Zenith Blade or straight-line movement gets body-blocked by spitting thorns. Worse, if you do manage to launch yourself, a well-timed Grasping Roots will root you mid-air, leaving you stranded far from her while Garden of Thorns plants shred your health. Ver detalles
Zyra

Por qué

Zyra completely disrupts your engage tools by cluttering your path with her plants. Whenever you try to step up, she can spawn a seed with Rampant Growth directly in front of her, meaning your Zenith Blade or straight-line movement gets body-blocked by spitting thorns. Worse, if you do manage to launch yourself, a well-timed Grasping Roots will root you mid-air, leaving you stranded far from her while Garden of Thorns plants shred your health.

Impacto en la línea

This constant threat of blockage forces you into a passive posture behind your minion wave, conceding early bush control. If you get caught by Grasping Roots while trying to step up, Zyra's plants will chunk your health pool, forcing an early recall and leaving your marksman vulnerable under tower. Because you cannot easily threaten an engage, Zyra freely pushes the waves, locking you down while her Stranglethorns scales to dominate dragon skirmishes.

Cómo jugar

To survive, you must play a game of baiting. Position yourself slightly parallel to your minion wave to draw out her Grasping Roots without getting hit. Once her root is on cooldown, you have a brief window to move forward. If she tries to block you with Rampant Growth plants, immediately activate Eclipse to mitigate their spit damage, and only use Zenith Blade when you have a clear angle that bypasses her spawned seedlings. If you miss, immediately retreat to prevent Stranglethorns from locking you down permanently.

Ficha completa →

Otros emparejamientos

Matchups de Habilidad

8

Estos enfrentamientos son sobre todo duelos de ejecución: ambos campeones tienen formas reales de tomar la ventaja. Esquivar una habilidad clave, anticipar bien un engagement o un simple error de posicionamiento puede inclinar el duelo hacia un lado. Conocer el matchup y reconocer las ventanas de acción correctas es especialmente importante aquí.

Nautilus

Nautilus±0

tank clashcounter engage This matchup is a pure test of reaction and execution. Nautilus seeks to lock you down using Dredge Line followed by a Staggering Blow root. However, because Leona can activate Eclipse during his hook's travel time, you can completely absorb his initial burst. This leaves Nautilus vulnerable with his defensive Titan's Wrath shield wasted, while your team retains the tools to strike back. Ver detalles
Nautilus

Por qué

This matchup is a pure test of reaction and execution. Nautilus seeks to lock you down using Dredge Line followed by a Staggering Blow root. However, because Leona can activate Eclipse during his hook's travel time, you can completely absorb his initial burst. This leaves Nautilus vulnerable with his defensive Titan's Wrath shield wasted, while your team retains the tools to strike back.

Impacto en la línea

The threat of Dredge Line forces you to stand parallel to your marksman, preventing Nautilus from isolating either of you. Whenever he hooks you, the trade swings in your favor because you easily survive the initiation, allowing you to bypass Nautilus entirely. The lane becomes a tense standoff where neither support can blindly dive forward without risking a devastating counter-engage.

Cómo jugar

Position yourself slightly ahead of your carry to bait Nautilus into targeting you. The moment his Dredge Line connects, immediately trigger Eclipse to mitigate his incoming Riptide and Staggering Blow damage. Once the root expires, ignore Nautilus entirely; use Zenith Blade and Shield of Daybreak to dive onto his ADC. If Nautilus targets your carry instead, immediately drop Solar Flare on the enemy marksman to disrupt their follow-up.

Ficha completa →
Bard

Bard±0

all indisengage This matchup is dictated by how you manage your dive against Bard's primary crowd control. Whenever you launch forward with Zenith Blade, your linear path makes you highly predictable. Bard can easily buffer Cosmic Binding to pin you against the terrain or your approaching marksman. If he lands this stun, your Shield of Daybreak is delayed, leaving you exposed and unable to lockdown your target while your ADC is also incapacitated. Ver detalles
Bard

Por qué

This matchup is dictated by how you manage your dive against Bard's primary crowd control. Whenever you launch forward with Zenith Blade, your linear path makes you highly predictable. Bard can easily buffer Cosmic Binding to pin you against the terrain or your approaching marksman. If he lands this stun, your Shield of Daybreak is delayed, leaving you exposed and unable to lockdown your target while your ADC is also incapacitated.

Impacto en la línea

This constant threat neutralizes your usual aggressive posture, forcing a highly reactive lane. You cannot mindlessly trigger trades because a missed Zenith Blade invites heavy poke from Bard's Traveler's Call-empowered attacks. Furthermore, any slow, grinding trades favor the wandering caretaker, who can easily sustain his partner using Caretaker's Shrine. Consequently, lane pressure remains entirely neutral unless one support wastes their crucial crowd control.

Cómo jugar

To win this execution battle, never initiate with Zenith Blade while Cosmic Binding is active unless you are positioned far from walls and your ADC. Instead, bait his projectile by walking forward with Shield of Daybreak active, or wait for him to leave lane to collect chimes. If he roams using Magical Journey, immediately force an all-in on his isolated marksman. When fighting, lead with Solar Flare from out of vision to stun Bard before he can react with Tempered Fate.

Ficha completa →
Rell

Rell±0

tank clashengage interrupt This lane is a pure execution test of reaction time. Rell wants to jump in to engage, but Leona can completely shut this down. By timing Shield of Daybreak perfectly, Leona can stun Rell mid-air during her jump, canceling her crowd control and leaving her stranded. If Leona misses this timing, Rell's engage will hit, allowing her to lock down your ADC. Ver detalles
Rell

Por qué

This lane is a pure execution test of reaction time. Rell wants to jump in to engage, but Leona can completely shut this down. By timing Shield of Daybreak perfectly, Leona can stun Rell mid-air during her jump, canceling her crowd control and leaving her stranded. If Leona misses this timing, Rell's engage will hit, allowing her to lock down your ADC.

Impacto en la línea

This interaction dictates the entire pacing of the bot lane. When Rell's jump is interrupted, she is stuck in her heavy dismounted form, making her an easy target for Zenith Blade counters. However, if she successfully lands her jump, your ADC takes heavy damage, forcing you to use Solar Flare defensively rather than to start your own fights. Every trade is decided by who flinches first.

Cómo jugar

Stand slightly ahead of your ADC, keeping your finger hovering over Shield of Daybreak. Do not waste your stun on Rell's ADC unless Rell has already used her jump. If she leaps forward, activate the stun immediately and auto-attack her mid-flight. If you miss this crucial window and your ADC gets caught, immediately activate Eclipse to absorb the incoming burst, and use Solar Flare on the enemy ADC to prevent them from following up on Rell's crowd control.

Ficha completa →
Rakan

Rakan±0

mobility clashengage interrupt This matchup is a pure battle of reflexes revolving around Rakan's primary engage. When Rakan attempts to initiate with Grand Entrance, Leona has a narrow window to shut it down. By priming Shield of Daybreak and striking him mid-dash, you cancel his knock-up entirely. However, if he baits this out, his Battle Dance allows him to escape safely while leaving you exposed without your primary crowd control. Ver detalles
Rakan

Por qué

This matchup is a pure battle of reflexes revolving around Rakan's primary engage. When Rakan attempts to initiate with Grand Entrance, Leona has a narrow window to shut it down. By priming Shield of Daybreak and striking him mid-dash, you cancel his knock-up entirely. However, if he baits this out, his Battle Dance allows him to escape safely while leaving you exposed without your primary crowd control.

Impacto en la línea

Neither support can blindly force fights here. Rakan's threat of Grand Entrance prevents your ADC from stepping up, while your threat of Shield of Daybreak keeps him from diving. This creates a tense posturing where waves crash naturally. If you miss your stun, Rakan's pair will trade heavily while you retreat. Conversely, stopping his jump exposes him to your team's Sunlight procs under heavy fire.

Cómo jugar

Stand slightly ahead of your carry, holding Shield of Daybreak specifically for Rakan’s forward trajectory rather than chasing him with Zenith Blade. If he activates The Quickness, do not panic-cast Solar Flare; instead, wait for him to commit to his inevitable Grand Entrance target before dropping your ultimate directly on that spot. Should you miss the timing and get knocked up, immediately activate Eclipse to mitigate the incoming burst trade while your carry falls back.

Ficha completa →
Maokai

Maokai±0

tank clashuntargetable dodge This matchup revolves around the clash between Leona's Zenith Blade and Maokai's Twisted Advance. If you initiate with Zenith Blade, Maokai can activate Twisted Advance on your ally or you during your dash. Because he becomes untargetable during Twisted Advance, he completely negates your root, repositioning himself to peel your target or counter-engage on your vulnerable carry with Bramble Smash. Ver detalles
Maokai

Por qué

This matchup revolves around the clash between Leona's Zenith Blade and Maokai's Twisted Advance. If you initiate with Zenith Blade, Maokai can activate Twisted Advance on your ally or you during your dash. Because he becomes untargetable during Twisted Advance, he completely negates your root, repositioning himself to peel your target or counter-engage on your vulnerable carry with Bramble Smash.

Impacto en la línea

Neither support can blindly fish for engages without risking a devastating counter-attack. When Maokai uses Sapling Toss to control the bushes, you cannot easily step up to threaten with Shield of Daybreak. This turns the lane into a tense standoff where the wave bounces back and forth, and any early health leads depend entirely on who baits out the other's defensive tools first.

Cómo jugar

To win this, you must hold Zenith Blade and bait Maokai into initiating. Walk up aggressively with Shield of Daybreak active to force his Twisted Advance. Once he commits and lands, use Eclipse to absorb his Bramble Smash follow-up, then immediately lock him down. If you must engage, wait until he uses Sap Magic to heal or when you see his Twisted Advance is on cooldown, giving you a clean window to land Solar Flare.

Ficha completa →

Otros emparejamientos

Favorables

13

Estos campeones suelen tener problemas para responder a tus principales fortalezas, lo que te permite afrontar el enfrentamiento con más libertad. Normalmente tienes varias formas de presionarlos y forzar intercambios a tu favor. Aprovecha esta ventaja para imponer tu ritmo en lugar de darles tiempo para volver a una posición cómoda.

Karma

Karma−1

engageall in You hold the upper hand because your Zenith Blade completely bypasses Karma's attempts to zone you with Inner Flame. Once you land this gap-closer, Karma is forced to waste her Transcendent Embrace to empower Inspire, using her primary movement speed and shield tool defensively to save her marksman. This trade heavily favors you, as she loses all offensive pressure the moment you tether onto them. Ver detalles
Karma

Por qué

You hold the upper hand because your Zenith Blade completely bypasses Karma's attempts to zone you with Inner Flame. Once you land this gap-closer, Karma is forced to waste her Transcendent Embrace to empower Inspire, using her primary movement speed and shield tool defensively to save her marksman. This trade heavily favors you, as she loses all offensive pressure the moment you tether onto them.

Impacto en la línea

This threat of a sudden engagement completely dictates the wave's positioning. Karma cannot safely step up to poke with Inner Flame without risking a lethal Zenith Blade response. Consequently, you can freeze the wave near your tower or build massive slow pushes. This pressure denies her the ability to secure easy recall timings, forcing her backline to bleed gold under constant threat of a Solar Flare follow-up.

Cómo jugar

Stand parallel to your own minions, matching Karma's horizontal movements to ensure a clear line of sight for your Zenith Blade. Hold your Shield of Daybreak until after she attempts to anchor you with Focused Resolve, ensuring you stun her before her root triggers. If you miss your initial engage, immediately activate Eclipse to absorb her Inner Flame retaliation while retreating to a defensive stance.

Ficha completa →
Lulu

Lulu−1

peel denialcooldown punish Leona holds a distinct advantage because Lulu relies entirely on Whimsy to interrupt your engage. If you lock down Lulu directly with Zenith Blade, she is forced to cast Help, Pix! on herself rather than her marksman, neutralizing her defensive synergy. This redirection of her shields, combined with your Sunlight marks triggered by your ally, allows you to easily burst her down before she can stabilize the lane with Wild Growth. Ver detalles
Lulu

Por qué

Leona holds a distinct advantage because Lulu relies entirely on Whimsy to interrupt your engage. If you lock down Lulu directly with Zenith Blade, she is forced to cast Help, Pix! on herself rather than her marksman, neutralizing her defensive synergy. This redirection of her shields, combined with your Sunlight marks triggered by your ally, allows you to easily burst her down before she can stabilize the lane with Wild Growth.

Impacto en la línea

This matchup dynamic completely alters how the bushes are contested. Lulu cannot safely step forward to poke with Glitterlance or Pix, Faerie Companion without risking a fatal trade. Consequently, you gain absolute control over the lane's physical space, forcing her to play from behind her minions. This pressure translates into free health advantages, allowing your duo to crash waves at will and threaten dives under their tower.

Cómo jugar

To execute this perfectly, aggressively walk forward with Eclipse activated to bait out Lulu's Whimsy. If she panics and wastes this polymorph on you, immediately follow up with Zenith Blade on her ADC. Alternatively, if she holds it, launch your Zenith Blade directly onto Lulu herself. Should she counter your jump with Wild Growth, immediately chain Solar Flare and Shield of Daybreak to lock her down before she can escape or shield her ally.

Ficha completa →
Seraphine

Seraphine−1

kill pressurepoke punish This matchup heavily favors Leona due to Seraphine's fragility and predictable poke patterns. Whenever Seraphine steps forward to harass with High Note or Beat Drop, she exposes herself to an immediate Zenith Blade response. Because Leona can lock her down instantly with Shield of Daybreak, Seraphine is frequently burst down and eliminated before she can even activate the protective shield and movement speed from Surround Sound. Ver detalles
Seraphine

Por qué

This matchup heavily favors Leona due to Seraphine's fragility and predictable poke patterns. Whenever Seraphine steps forward to harass with High Note or Beat Drop, she exposes herself to an immediate Zenith Blade response. Because Leona can lock her down instantly with Shield of Daybreak, Seraphine is frequently burst down and eliminated before she can even activate the protective shield and movement speed from Surround Sound.

Impacto en la línea

Seraphine's constant threat of being engaged upon completely paralyzes her ability to control the minion waves. She is forced to play exceptionally far back, relinquishing brush control to you. Any attempt from her to step up results in massive health trades or a straight kill. This constant pressure pushes her back to her tower, securing you easy recall timings and allowing you to roam freely to assist your jungler.

Cómo jugar

To execute this perfectly, occupy the lane brushes to deny vision and force Seraphine to walk up blindly. The moment she starts her casting animation for High Note, immediately fire Zenith Blade to catch her while she is stationary. Activate Eclipse mid-flight to absorb any retaliatory damage, then stun her with Shield of Daybreak. If she attempts to counter-engage with Encore, preemptively drop Solar Flare directly on her to cancel her momentum.

Ficha completa →
Nami

Nami−1

kill pressurecounter engage Nami relies heavily on her Aqua Prison to interrupt incoming engage, but Leona completely bypasses this defense. Once you land Zenith Blade directly onto Nami, the travel time puts you in immediate melee range to instantly chain Shield of Daybreak. This rapid lockdown prevents Nami from casting her bubble or escaping with her Surging Tides passive, leaving her fragile health pool completely exposed to your burst. Ver detalles
Nami

Por qué

Nami relies heavily on her Aqua Prison to interrupt incoming engage, but Leona completely bypasses this defense. Once you land Zenith Blade directly onto Nami, the travel time puts you in immediate melee range to instantly chain Shield of Daybreak. This rapid lockdown prevents Nami from casting her bubble or escaping with her Surging Tides passive, leaving her fragile health pool completely exposed to your burst.

Impacto en la línea

This threat forces Nami to play defensively, limiting her ability to step up and poke with Ebb and Flow or empower her carry with Tidecaller's Blessing. You can control the lane brushes easily, creating immense zone pressure. Consequently, the enemy duo is forced to concede wave control, allowing your lane to stack waves and safely dive or secure deep vision while Nami struggles to sustain under her tower.

Cómo jugar

Establish yourself inside the lane brushes to hide your pathing. Hold Zenith Blade to make Nami move predictably, then strike the moment she steps forward to attempt an Ebb and Flow bounce. Always activate Eclipse mid-air to absorb any delayed counter-poke. If Nami attempts a defensive Tidal Wave, counter her instantly by dropping Solar Flare directly on her head to extend the crowd control chain.

Ficha completa →
Soraka

Soraka−1

kill pressuresustain denial This matchup heavily favors Leona because Soraka relies on Astral Infusion to keep her carry alive while staying safe. If Leona targets the enemy marksman, Soraka simply heals them from behind. However, bypassing the carry to hit Soraka directly with Zenith Blade completely neutralizes this defense. Because Soraka cannot cast Astral Infusion on herself, her fragile health pool becomes an easy target for Sunlight-amplified burst. Ver detalles
Soraka

Por qué

This matchup heavily favors Leona because Soraka relies on Astral Infusion to keep her carry alive while staying safe. If Leona targets the enemy marksman, Soraka simply heals them from behind. However, bypassing the carry to hit Soraka directly with Zenith Blade completely neutralizes this defense. Because Soraka cannot cast Astral Infusion on herself, her fragile health pool becomes an easy target for Sunlight-amplified burst.

Impacto en la línea

The threat of Zenith Blade forces Soraka to play extremely defensively, conceding lane control. If she steps up to poke with Starcall, she risks immediate death. This constant threat allows Leona to dominate the minion waves easily. Any attempt by Soraka to salvage trades using Wish or Equinox is usually too slow to stop Leona's initial burst, resulting in early kills or forced recalls that bleed tower plates.

Cómo jugar

Position aggressively in the lane bushes to force Soraka to either waste Starcall for vision or stay entirely out of experience range. Hold Zenith Blade until she steps forward, then bypass the carry and strike her directly. Follow up instantly with Shield of Daybreak and Eclipse to burst her down. If she drops Equinox under you, do not retreat; let your ally consume your Sunlight marks to finish her before the root activates.

Ficha completa →
Sona

Sona−1

kill pressurescaling gap Sona lacks early defensive stats and relies heavily on Aria of Perseverance to recover from trades. However, before she can gather enough mana and levels to sustain her lane partner, Leona can easily bypass her poking tools like Hymn of Valor. Landing a single Zenith Blade allows you to lock her down instantly with Shield of Daybreak, triggering Sunlight marks that your ADC can easily detonate for an immediate kill. Ver detalles
Sona

Por qué

Sona lacks early defensive stats and relies heavily on Aria of Perseverance to recover from trades. However, before she can gather enough mana and levels to sustain her lane partner, Leona can easily bypass her poking tools like Hymn of Valor. Landing a single Zenith Blade allows you to lock her down instantly with Shield of Daybreak, triggering Sunlight marks that your ADC can easily detonate for an immediate kill.

Impacto en la línea

This matchup creates immense pressure from level two onward. Sona is forced to play extremely far back, severely limiting her ability to poke with Hymn of Valor or stack her passive. If she steps up to assist her marksman, any aggressive forward movement exposes her to a lethal dive. You will control the brush easily, dictating when waves crash and forcing early recalls that ruin her scaling curve.

Cómo jugar

Actively occupy the lane bushes to hide your trajectory. The moment she steps up to cast Hymn of Valor, launch Zenith Blade directly at her, immediately activating Eclipse to mitigate any retaliatory damage while you apply Shield of Daybreak. If she plays excessively safe behind her minions, hold your ground near her tower and wait for your Solar Flare to stun her from range, preventing her from ever casting her defensive Crescendo.

Ficha completa →
Lux

Lux−1

kill pressurepoke punish This matchup heavily favors you because Lux lacks the mobility to escape your lock-down once her primary defensive tool is gone. While she attempts to poke you down with Lucent Singularity, her only way to stop your engage is Light Binding. The moment she fires and misses this projectile, her safety net vanishes, leaving her completely exposed to your Zenith Blade gap-close and subsequent burst. Ver detalles
Lux

Por qué

This matchup heavily favors you because Lux lacks the mobility to escape your lock-down once her primary defensive tool is gone. While she attempts to poke you down with Lucent Singularity, her only way to stop your engage is Light Binding. The moment she fires and misses this projectile, her safety net vanishes, leaving her completely exposed to your Zenith Blade gap-close and subsequent burst.

Impacto en la línea

Lux will try to push the wave and poke using Lucent Singularity to keep you under your turret. However, the threat of your all-in forces her to play incredibly far back, weakening her pressure. If she steps forward to pop her Illumination passive or shield her ally with Prismatic Barrier, she risks instant death. This dynamic secures you control over the lane bushes and prevents her from safely harassing your carry.

Cómo jugar

Actively bait her snare by positioning just outside your minion wave, moving unpredictably to force an early Light Binding. The microsecond that projectile misses, react instantly by launching Zenith Blade directly onto Lux. Immediately trigger Eclipse to mitigate any incoming trade damage, then stun her with Shield of Daybreak to maximize your Sunlight marks for your ally. If she plays too safe, wait for level five and lock her down from afar using Solar Flare.

Ficha completa →
Blitzcrank

Blitzcrank−2

tank matchuphook punish This matchup heavily favors you because Blitzcrank's primary playmaking tool, Rocket Grab, actually does your job for you. Instead of needing to land Zenith Blade to close the distance, being pulled delivers you directly into the enemy duo. You can instantly activate Eclipse to absorb their burst and use Shield of Daybreak to lock down their carry while your ally procs Sunlight marks. Ver detalles
Blitzcrank

Por qué

This matchup heavily favors you because Blitzcrank's primary playmaking tool, Rocket Grab, actually does your job for you. Instead of needing to land Zenith Blade to close the distance, being pulled delivers you directly into the enemy duo. You can instantly activate Eclipse to absorb their burst and use Shield of Daybreak to lock down their carry while your ally procs Sunlight marks.

Impacto en la línea

This dynamic completely neutralizes the threat of his hook, allowing your duo to easily control the wave position. Blitzcrank cannot safely fish for pulls near your tower because grabbing you triggers an immediate, devastating counter-engage. This fear forces him to play passively behind his minions, sacrificing bush control and letting you zone his carry away from gold while reserving Solar Flare to punish any desperate engage.

Cómo jugar

Position yourself aggressively in front of your marksman, actively daring Blitzcrank to throw his hook. If he targets your ally, use Zenith Blade to intercept the trajectory or immediately dive his carry to trade kills. Keep Shield of Daybreak ready specifically for his carry rather than wasting it on Blitzcrank after he pulls you. If his Mana Barrier activates during an all-in, don't overcommit your remaining cooldowns; instead, let Sunlight finish the job while you walk away.

Ficha completa →
Senna

Senna−1

kill pressurescaling denial Senna's passive soul-harvesting mechanic forces her into predictable, static animations when she tries to collect Mist. This vulnerability is Leona's primary window. By firing Zenith Blade the moment Senna pauses to strike a soul or cast Piercing Darkness, you bypass her ranged advantage. Following up with Shield of Daybreak and Eclipse detonates Sunlight marks, instantly melting her fragile health pool before she can activate Curse of the Black Mist to escape. Ver detalles
Senna

Por qué

Senna's passive soul-harvesting mechanic forces her into predictable, static animations when she tries to collect Mist. This vulnerability is Leona's primary window. By firing Zenith Blade the moment Senna pauses to strike a soul or cast Piercing Darkness, you bypass her ranged advantage. Following up with Shield of Daybreak and Eclipse detonates Sunlight marks, instantly melting her fragile health pool before she can activate Curse of the Black Mist to escape.

Impacto en la línea

This threat completely stifles Senna’s early game scaling. She cannot safely step up to harvest souls or poke with Piercing Darkness without risking a lethal engage. Consequently, her lane partner is left without reliable support pressure, allowing your duo to control the wave, crash it for easy recall timings, and safely rush level five to unlock Solar Flare, sealing your lane dominance before Senna can acquire significant range.

Cómo jugar

Position aggressively in the lane bushes to hide your Zenith Blade animation and deny Senna’s vision. Watch the souls dropping from dying minions; as soon as Senna moves toward one, launch your Zenith Blade. If she misses Last Embrace or wastes Piercing Darkness on the wave, immediately force the all-in. Should you miss your engage, activate Eclipse and back off defensively to absorb any retaliatory poke while your cooldowns recover.

Ficha completa →
Yuumi

Yuumi−2

kill pressurepassive punish This matchup is highly favorable because Yuumi's host is extremely vulnerable to your crowd control. By landing Zenith Blade followed by Shield of Daybreak, you completely lock down the anchor while your ADC triggers Sunlight marks for massive burst. Additionally, if Yuumi ever detaches to trigger Bop 'n' Block, she becomes an incredibly easy target for a quick stun, preventing her from re-attaching with You and Me!. Ver detalles
Yuumi

Por qué

This matchup is highly favorable because Yuumi's host is extremely vulnerable to your crowd control. By landing Zenith Blade followed by Shield of Daybreak, you completely lock down the anchor while your ADC triggers Sunlight marks for massive burst. Additionally, if Yuumi ever detaches to trigger Bop 'n' Block, she becomes an incredibly easy target for a quick stun, preventing her from re-attaching with You and Me!.

Impacto en la línea

Because Yuumi offers no physical presence, you command absolute bush control. This constant threat of an all-in forces the enemy duo to play defensively, conceding wave control. Your Eclipse ensures you take minimal damage from Prowling Projectile poke, allowing you to sustain high health. Once you hit level five, the threat of Solar Flare prevents them from walking up, creating massive lane pressure and easy dive opportunities.

Cómo jugar

Position aggressively in the lane bushes to deny vision and keep the enemy carry terrified of your Zenith Blade. Watch Yuumi's movement closely; the moment she detaches to auto-attack for her Bop 'n' Block shield, immediately lock her down with Shield of Daybreak before she can cast You and Me!. If she stays attached, wait for her Zoomies to go on cooldown, then unleash your full Solar Flare combo on her host for an easy, unhealable burst kill.

Ficha completa →

Otros emparejamientos

Items to Counter Leona

Buy these items to reduce this champion's effectiveness in your games.

Mercury's Treads
Mercury's Treads
Quicksilver Enchant
Quicksilver Enchant
Stasis Enchant
Stasis Enchant
Locket Enchant
Locket Enchant

Cómo contrarrestar a este campeón

Ángulo de contra

Los counters de Leona no consisten solo en sobrevivir a su engage, sino en romper su secuencia antes de que sea letal. Ella depende de una cadena precisa: acertar la E, seguir con la Q, aplicar Luz solar y permitir el seguimiento del equipo. Sus counters son campeones que interrumpen este ciclo, ya sea bloqueando la entrada o anulando el seguimiento. El problema para Leona no es entrar, sino no lograr la baja. Entender sus counters significa entender cómo se desmantela su engage, no solo cómo se absorbe.

Contexto del parche

En el meta actual, Leona es especialmente vulnerable a las herramientas de disengage y control de zonas. Campeones como Morgana o Janna no le ganan por daño, sino anulando por completo su impacto. Esto obliga a Leona a jugar con más paciencia y a buscar ángulos más complejos. Además, los supports que pueden aplicar buffs o reposicionar a su ADC reducen enormemente el valor de su pasiva Luz solar, ya que el objetivo se vuelve más difícil de alcanzar o de deletear con burst.

Lectura rápida

  • Los campeones que bloquean o anulan su engage son sus mayores amenazas.
  • Leona sufre cuando no puede asegurar la baja tras su all-in.
  • El disengage y los escudos reducen enormemente su impacto.

Arquetipos de contra

Anti-engage directo

Estos campeones evitan que Leona ejecute su combo. Morgana bloquea por completo su engage con Black Shield, anulando el control de masas. Janna puede empujarla hacia atrás o interrumpir su entrada. En ambos casos, Leona no puede encadenar su CC correctamente, rompiendo su función principal. Termina expuesta sin generar valor, devolviendo la presión al equipo enemigo.

Cómo se adapta el campeón. Busca engages fuera de visión o en objetivos que no sean el ADC protegido. Fuerza cooldowns defensivos antes de comprometerte.

Disengage y reposicionamiento

Estos champions pueden no bloquear completamente la entrada de Leona, pero reducen enormemente su impacto tras el engage. Lulu puede usar su polymorph o escudo, mientras que Nami aporta control y sustain. Esto frena o cancela el burst inicial, lo cual es crítico ya que Leona depende de kills rápidas. Si el primer ciclo de daño falla, Leona pierde la mayor parte de su presión.

Cómo se adapta el campeón. Espera a que cometan errores o a que los enemigos fallen el timing de sus hechizos antes de hacer engage.

Frontline duradera

Una frontline duradera puede absorber el engage de Leona sin sufrir una presión significativa. Alistar puede incluso hacer counter-engage con su propio CC. En estos matchups, a Leona le cuesta encontrar objetivos valiosos, ya que hacer engage a un tank no genera ninguna ventaja. Esto ralentiza el tempo que ella intenta imponer.

Cómo se adapta el campeón. Evita la frontline y busca ángulos sobre los carries.

Emparejamientos prioritarios

Morgana

Morgana convierte el matchup en una batalla de timing más que de mecánica. Su Black Shield niega directamente el kit principal de Leona. Si Leona hace engage sobre el escudo, pierde toda la presión. Si Morgana lo usa demasiado pronto, Leona puede esperar y volver a hacer engage. El matchup se convierte en una cuestión de paciencia y trackeo de cooldowns, donde precipitarse se castiga constantemente.

Janna

Janna no solo bloquea el engage de Leona, sino que lo vuelve en su contra. Cada intento puede ser interrumpido o empujado hacia atrás, desincronizando a Leona de su equipo. Esto obliga a Leona a depender de flanks o de errores enemigos, ya que los engages frontales se vuelven demasiado predecibles e ineficaces.

Errores comunes en su contra

Errores comunes en su contra

  • Hacer engage a objetivos protegidos por escudos o cleanses.

  • Forzar peleas sin comprobar los cooldowns enemigos.

  • Centrarse en la frontline en lugar de buscar objetivos clave.
  • Ignorar los ángulos de visión para sorprender al enemigo.
  • No adaptar el timing del engage según el matchup.

Notas del coach

  • Un counter de Leona no te impide hacer engage, te obliga a hacer un mejor engage.
  • La clave contra sus counters es la paciencia, no la agresión pura.

FAQ

¿Por qué Morgana es tan difícil para Leona?

Morgana anula directamente el kit principal de Leona con su escudo. Incluso si Leona acierta su engage, el CC no se aplica. El matchup se convierte en una batalla de timing: o bien Leona baitea el escudo, o bien pierde toda la presión.

¿Cómo se juega contra el disengage?

Evita los engages frontales y busca flanks o ángulos inesperados. El objetivo es forzar las herramientas de disengage antes del engage real. De lo contrario, tu entrada siempre será neutralizada.

¿Puede Leona jugar contra Lulu o Nami?

Sí, pero el matchup depende en gran medida del timing. Si estos supports usan sus hechizos demasiado pronto, Leona puede hacer engage después. De lo contrario, reducen enormemente su impacto. La clave es esperar a la ventana de oportunidad adecuada en lugar de forzar jugadas.

¿Por qué pierdo contra Alistar?

Alistar puede absorber y hacer counter a tu engage. Hacerle engage a él no genera ninguna ventaja. Debes evitar centrarte en él y buscar ángulos sobre los carries, o perderás tempo.