septiembre de 2026 · Patch 7.2d
Support · SUPPORT

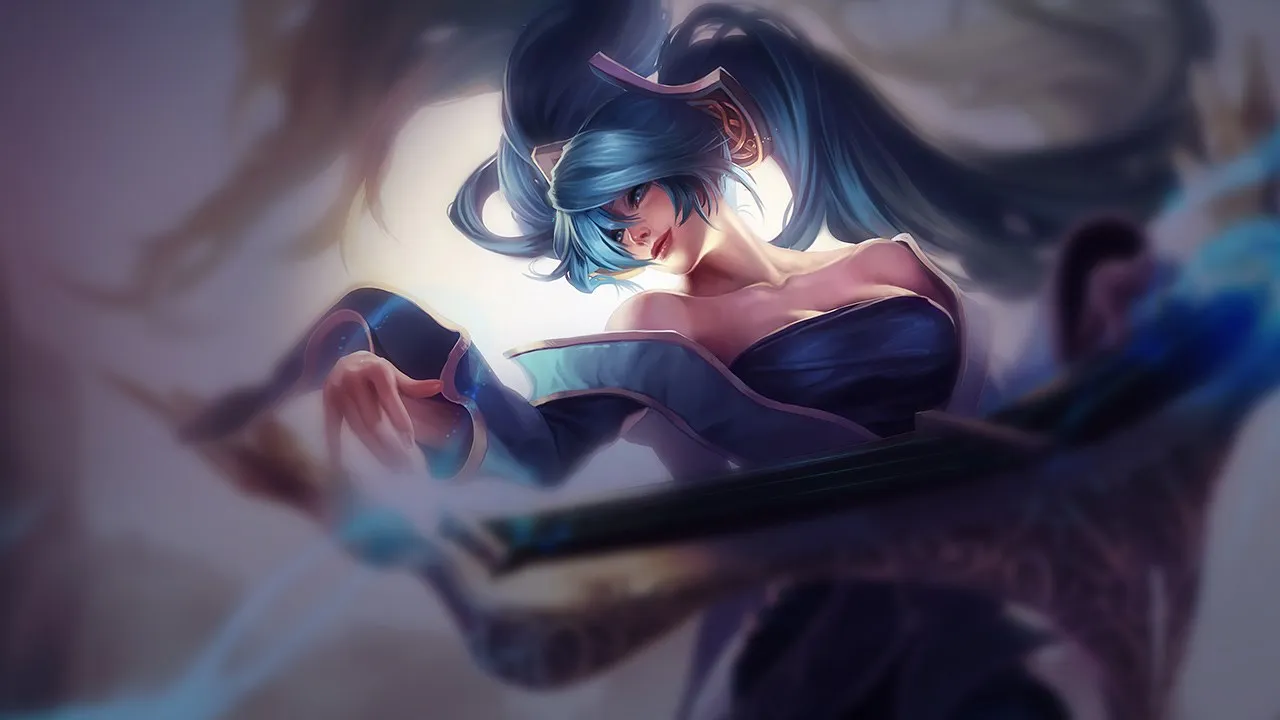
Guía de counters de Sona Wild Rift

Sona es extremadamente frágil y vulnerable contra composiciones de pick o dive que la eligen como primer objetivo. Su falta de mobility la convierte en un blanco fácil para los assassins. Las composiciones de engage instantáneo la neutralizan antes de que pueda curar o contraatacar.

★ SUPPORT Tier A
DAÑO
UTIL
TANK
DIFF
Win 53.3% #18 · ↓0pt
Pick 6.3% #11
Ban 2.0% #67

Guía de counters de Sona Wild Rift ★ Counter Sheet

Tabla de emparejamientos
Emparejamiento Veredicto Ventaja Tasa de victorias Tasa de selección
Brand Contras Difíciles +2 53.1% 2.6%
Blitzcrank Contras Difíciles +2 49.0% 7.3%
Vel'Koz Desfavorables +1 51.8% 1.7%
Rell Desfavorables +1 51.3% 3.5%
Pyke Desfavorables +1 51.2% 5.0%
Leona Desfavorables +1 51.1% 9.2%
Thresh Desfavorables +1 50.3% 13.4%
Zyra Desfavorables +1 50.3% 4.7%
Alistar Desfavorables +1 50.1% 4.7%
Rakan Desfavorables +1 50.0% 3.0%
Nautilus Desfavorables +1 48.5% 10.9%
Swain Desfavorables +1 47.8% 3.4%
Norra Desfavorables +1
Senna Matchups de Habilidad ±0 52.1% 5.0%
Zilean Matchups de Habilidad ±0 49.7% 1.3%
Veigar Matchups de Habilidad ±0 47.5% 2.9%
Galio Favorables −1 52.6% 2.8%
Bard Favorables −1 52.0% 1.2%
Karma Favorables −1 52.0% 6.8%
Morgana Favorables −1 51.6% 6.2%
Braum Favorables −1 51.4% 4.1%
Maokai Favorables −1 51.4% 5.1%
Soraka Favorables −1 50.9% 5.8%
Nami Favorables −1 50.4% 6.3%
Malphite Favorables −1 50.4% 7.7%
Lux Favorables −1 50.1% 7.7%
Seraphine Favorables −1 50.0% 6.2%
Milio Favorables −1 49.7% 5.7%
Janna Favorables −1 48.8% 1.4%
Lulu Favorables −2 48.5% 11.4%
Yuumi Favorables −2 46.1% 10.9%

Edge: Wild Rift Core canonical verdict (−3 to +3), shown from the point of view of the champion named in the row. Win rate and pick rate: the opponent's own rate in this role — Wild Rift CN · Challenger, Patch 7.2d. Not a head-to-head win rate.

Contras Difíciles

2

Estos campeones tienen una build y un estilo de juego que superan directamente al tuyo, lo que puede hacer que controlar la línea y farmear sea extremadamente difícil. Sus habilidades pueden neutralizar tus principales fortalezas o castigarte en cuanto intentas jugar tu plan habitual. En estos matchups, el objetivo suele ser minimizar errores y buscar soluciones fuera del enfrentamiento directo.

Blitzcrank

Blitzcrank+2

squishy targetkill pressure Sona is exceptionally vulnerable in this lane because she possesses no built-in dashes or early crowd control to escape or disengage. This makes her the ultimate target for Blitzcrank. If he lands Rocket Grab, he can instantly follow up with Power Fist to knock you up before you can react with Aria of Perseverance or Song of Celerity. Without Crescendo available pre-level 5, any positioning error means instant death. Ver detalles
Blitzcrank

Por qué

Sona is exceptionally vulnerable in this lane because she possesses no built-in dashes or early crowd control to escape or disengage. This makes her the ultimate target for Blitzcrank. If he lands Rocket Grab, he can instantly follow up with Power Fist to knock you up before you can react with Aria of Perseverance or Song of Celerity. Without Crescendo available pre-level 5, any positioning error means instant death.

Impacto en la línea

This threat completely paralyzes Sona's early laning phase. You cannot step up to poke with Hymn of Valor without exposing yourself to a brush-camping hook. Consequently, the enemy duo easily secures wave priority, pushing you under tower where dodging Rocket Grab becomes even harder due to confined space. Your AD carry will constantly lose farm, and you will be forced into early, unfavorable recalls under heavy tower pressure.

Cómo jugar

To survive, you must treat the minion wave as your physical shield, never stepping out of its cover while Rocket Grab is off cooldown. The moment you see Blitzcrank activate Overdrive to run at you, immediately cast Song of Celerity to match his speed and retreat. If you do get hooked, immediately queue up your Aria of Perseverance version of Power Chord on their carry to reduce their burst damage while trying to walk away.

Ficha completa →

Otros emparejamientos

Desfavorables

11

Estos campeones tienen herramientas que generalmente les dan ventaja en el enfrentamiento, sin llegar a hacer el matchup injugable. Pueden tener más alcance, mejor capacidad para aguantar tu ofensiva o más formas de responder a tus engagements. Tendrás que adaptar tu enfoque y elegir con cuidado los momentos en los que aceptas el combate.

Pyke

Pyke+1

early kill pressurescaling threat Sona's fragile health pool makes her incredibly vulnerable during the early levels. If Pyke lands Bone Skewer, the forced displacement combined with Phantom Undertow's follow-up stun will reliably burst Sona down before she can react. Even with Aria of Perseverance, Sona lacks the defensive stats to survive this physical damage onslaught, meaning any positioning error results in an immediate death. Ver detalles
Pyke

Por qué

Sona's fragile health pool makes her incredibly vulnerable during the early levels. If Pyke lands Bone Skewer, the forced displacement combined with Phantom Undertow's follow-up stun will reliably burst Sona down before she can react. Even with Aria of Perseverance, Sona lacks the defensive stats to survive this physical damage onslaught, meaning any positioning error results in an immediate death.

Impacto en la línea

This threat forces Sona to play extremely defensively, conceding early lane pressure and bush control. Sona cannot safely walk up to poke with Hymn of Valor, as stepping past her minion wave exposes her to Bone Skewer. Consequently, your ADC will often be shoved under turret, facing dive pressure once Pyke unlocks Death from Below, while Pyke freely roams the map using Ghostwater Dive.

Cómo jugar

To survive, you must constantly position behind your minion wave to block Bone Skewer. Keep the bushes warded to track Ghostwater Dive. Never use Song of Celerity aggressively; save its movement speed boost to dodge incoming hooks. If Pyke misses Bone Skewer, you have a brief fifteen-second window to harass him with Hymn of Valor. Once he reaches level five, prepare to use Crescendo to interrupt his Phantom Undertow dash.

Ficha completa →
Nautilus

Nautilus+1

squishy targetearly pressure Sona struggles in this matchup because her lack of innate mobility makes her incredibly vulnerable to Nautilus's Dredge Line. Every attempt to poke with Hymn of Valor exposes you to his hook. If he lands it, the follow-up crowd control from Staggering Blow and Riptide guarantees a quick death before Aria of Perseverance can mitigate the incoming burst damage. Ver detalles
Nautilus

Por qué

Sona struggles in this matchup because her lack of innate mobility makes her incredibly vulnerable to Nautilus's Dredge Line. Every attempt to poke with Hymn of Valor exposes you to his hook. If he lands it, the follow-up crowd control from Staggering Blow and Riptide guarantees a quick death before Aria of Perseverance can mitigate the incoming burst damage.

Impacto en la línea

This constant threat of engage completely paralyzes your lane presence, forcing you to play far behind your minion wave. You cannot step up to charge Power Chord safely, which cedes bush control entirely to Nautilus. Consequently, the enemy duo can easily slow-push waves to dive you with Depth Charge or freely roam to secure map pressure while you are stuck under turret.

Cómo jugar

To survive, you must treat your minion wave as an absolute shield and never step into open space when Dredge Line is off cooldown. If Nautilus steps forward aggressively, immediately activate Song of Celerity to boost your movement speed and bait his hook. Should he bypass your frontline with Depth Charge, save Crescendo to counter-engage his ADC, and quickly apply the damage-reducing Power Chord from Aria of Perseverance.

Ficha completa →
Rakan

Rakan+1

kill pressurescaling threat Rakan's explosive engage relies on catching you off-guard with Grand Entrance, a task made easy by your complete lack of defensive dashes. If he lands this knock-up, his ADC can instantly burst you down. However, if Rakan misses or hesitates, your Aria of Perseverance completely nullifies any poke he attempts with Gleaming Quill. The lane is a constant test of whether he can successfully pin you down. Ver detalles
Rakan

Por qué

Rakan's explosive engage relies on catching you off-guard with Grand Entrance, a task made easy by your complete lack of defensive dashes. If he lands this knock-up, his ADC can instantly burst you down. However, if Rakan misses or hesitates, your Aria of Perseverance completely nullifies any poke he attempts with Gleaming Quill. The lane is a constant test of whether he can successfully pin you down.

Impacto en la línea

You cannot safely contest the brush because getting caught by Grand Entrance means death or burning critical summoner spells. Consequently, Rakan can easily zone you and secure bush control. This forces a defensive wave state near your tower. However, if you survive his initial dive attempt, your constant healing from Aria of Perseverance allows your ADC to win long-term health trades and slowly push him out of the lane.

Cómo jugar

Maintain maximum distance and never step parallel to your ADC to prevent Rakan from hitting both of you with Grand Entrance. Always keep Song of Celerity ready; the moment he starts his dash animation, activate it to sidestep the impact zone. If he does manage to close the gap, immediately cycle your Power Chord using Aria of Perseverance to reduce his target's damage output while preparing Crescendo to lock him down under your tower.

Ficha completa →
Zyra

Zyra+1

disengagedodge skillshots Zyra controls the lane territory by turning seeds from Garden of Thorns into aggressive spitters using Deadly Spines and Grasping Roots. Sona's lack of mobility makes her incredibly vulnerable to being locked down by Grasping Roots and bursted. Sona's saving grace is Hymn of Valor, which allows her to safely hit and clear these plants from a distance without stepping forward into Zyra's maximum threat range. Ver detalles
Zyra

Por qué

Zyra controls the lane territory by turning seeds from Garden of Thorns into aggressive spitters using Deadly Spines and Grasping Roots. Sona's lack of mobility makes her incredibly vulnerable to being locked down by Grasping Roots and bursted. Sona's saving grace is Hymn of Valor, which allows her to safely hit and clear these plants from a distance without stepping forward into Zyra's maximum threat range.

Impacto en la línea

Zyra's plants constantly push the wave, forcing you under turret while chipping away at your health bar. You will find yourself forced to repeatedly cast Aria of Perseverance to survive the poke, quickly draining your mana. Since stepping up to use a Power Chord auto-attack invites an immediate Grasping Roots counter-attack, you must accept losing early priority and focus on defending your tower under constant botanical siege.

Cómo jugar

Make it an absolute rule to keep friendly minions between yourself and Zyra to block Grasping Roots. Use the auto-targeting of Hymn of Valor to safely strike her plants and collect passive stacks from afar. Save Song of Celerity exclusively to dodge her Deadly Spines or the delayed knockup of Stranglethorns. If she manages to root your carry, immediately activate Aria of Perseverance followed by Crescendo to disrupt Zyra's follow-up burst.

Ficha completa →
Alistar

Alistar+1

kill lanescaling gap Your fragile health pool makes you the ultimate target for Alistar. The moment you step up to poke with Hymn of Valor, you enter the danger zone where his Headbutt-Pulverize combo can instantly lock you down. Because Sona lacks any natural escape tools, getting caught by this sudden displacement and knock-up means giving over an easy kill, forcing you to respect his initiation range constantly. Ver detalles
Alistar

Por qué

Your fragile health pool makes you the ultimate target for Alistar. The moment you step up to poke with Hymn of Valor, you enter the danger zone where his Headbutt-Pulverize combo can instantly lock you down. Because Sona lacks any natural escape tools, getting caught by this sudden displacement and knock-up means giving over an easy kill, forcing you to respect his initiation range constantly.

Impacto en la línea

This threat forces you to play exceptionally far behind your minion wave, completely yielding control of the lane brushes to Alistar. Your poke becomes non-existent, allowing his Triumphant Roar to easily negate any minor damage you land. Consequently, your carry faces heavy pressure, and once Alistar reaches level five, his Unbreakable Will makes diving you under tower highly likely if you are chunked.

Cómo jugar

To survive, never step past your caster minions unless Alistar has wasted his Headbutt. Keep your distance and focus on healing with Aria of Perseverance rather than forcing Hymn of Valor harass. If he does manage to engage on your carry, immediately use Song of Celerity to reposition and prepare a defensive Power Chord from Aria of Perseverance to shrink his follow-up damage. Save Crescendo strictly to counter-engage when he tries to dive under your turret.

Ficha completa →
Thresh

Thresh+1

hook avoidancescaling advantage Thresh dominates the early lane pressure because a single successful Death Sentence bypasses all of Sona's sustain from Aria of Perseverance. Sona's fragile health pool makes her an easy target for his follow-up Flay. To survive and scale, Sona must constantly anticipate the hook, using the sudden movement speed from Song of Celerity to sidestep his crowd control before he can pull himself in. Ver detalles
Thresh

Por qué

Thresh dominates the early lane pressure because a single successful Death Sentence bypasses all of Sona's sustain from Aria of Perseverance. Sona's fragile health pool makes her an easy target for his follow-up Flay. To survive and scale, Sona must constantly anticipate the hook, using the sudden movement speed from Song of Celerity to sidestep his crowd control before he can pull himself in.

Impacto en la línea

This threat forces Sona to play defensively behind her minions, limiting her ability to safely poke with Hymn of Valor. Thresh can easily zone you away from gold, using Dark Passage to set up deadly ganks or rescue his partner. If you step up too far, he will trap you inside The Box, leaving you with no room to maneuver or protect your carry.

Cómo jugar

Never activate Song of Celerity mindlessly for simple movement; save its mana and cooldown exclusively for when Thresh winds up his Death Sentence. Always position diagonally to him behind your minion wave. If he misses his hook, you have a brief window to step forward, poke with Hymn of Valor, and charge your Power Chord. If caught, immediately use Crescendo to interrupt his follow-up Flay and buy time.

Ficha completa →
Leona

Leona+1

kill pressurescaling gap This matchup is dictated by Leona's window of opportunity before your sustain scales up. Early on, your Aria of Perseverance provides negligible healing and shielding compared to the burst damage Leona facilitates. If she connects a Zenith Blade into Shield of Daybreak, her Sunlight passive amplifies her ally's follow-up, easily melting your fragile health pool before you can reach the safety of your late-game auras. Ver detalles
Leona

Por qué

This matchup is dictated by Leona's window of opportunity before your sustain scales up. Early on, your Aria of Perseverance provides negligible healing and shielding compared to the burst damage Leona facilitates. If she connects a Zenith Blade into Shield of Daybreak, her Sunlight passive amplifies her ally's follow-up, easily melting your fragile health pool before you can reach the safety of your late-game auras.

Impacto en la línea

You are forced to concede early wave control, as stepping up to poke with Hymn of Valor puts you in direct range of her engage. Every missed dodge on Zenith Blade results in a forced recall or death, handing Leona complete dominance over the wave and turret plating. This pressure delays your level-up spikes and prevents you from safely stacking your passive Power Chord safely.

Cómo jugar

To survive, constantly monitor Leona's positioning and maintain maximum distance, using the extra movement speed from Song of Celerity to bait and dodge her Zenith Blade. If she does manage to close the gap, immediately cycle your spells to prime a Power Chord green chord (diminuendo from Aria of Perseverance) on her follow-up damage dealer to negate their burst. Once you have Crescendo, save it strictly to interrupt her follow-up or lock her down under your tower.

Ficha completa →

Otros emparejamientos

Matchups de Habilidad

3

Estos enfrentamientos son sobre todo duelos de ejecución: ambos campeones tienen formas reales de tomar la ventaja. Esquivar una habilidad clave, anticipar bien un engagement o un simple error de posicionamiento puede inclinar el duelo hacia un lado. Conocer el matchup y reconocer las ventanas de acción correctas es especialmente importante aquí.

Senna

Senna±0

sustain battlelate game This matchup is a pure scaling race. Senna attempts to farm Mist stacks using her Basic Attack and Piercing Darkness poke, but your Aria of Perseverance completely neutralizes this chip damage. Because neither of you can easily force a kill through the other's sustain, the lane remains passive. The true test of skill shifts entirely to how you use Crescendo to lock down targets compared to her global Dawning Shadow shield. Ver detalles
Senna

Por qué

This matchup is a pure scaling race. Senna attempts to farm Mist stacks using her Basic Attack and Piercing Darkness poke, but your Aria of Perseverance completely neutralizes this chip damage. Because neither of you can easily force a kill through the other's sustain, the lane remains passive. The true test of skill shifts entirely to how you use Crescendo to lock down targets compared to her global Dawning Shadow shield.

Impacto en la línea

You will experience a low-intensity laning phase where waves slowly bounce back and forth. Trading with Hymn of Valor is safe, but Senna will instantly heal her carry with Piercing Darkness, just as you will match her pressure with Aria of Perseverance. Because both sides sustain through minor skirmishes, recalls are clean, towers rarely fall early, and the lane is decided by who impacts the map first once ultimates are unlocked.

Cómo jugar

Focus entirely on conserving mana for Aria of Perseverance rather than fishing for aggressive Hymn of Valor poke. Position behind your minions to make her Last Embrace projectile useless. Once you both reach your power spikes, do not try to match her global Dawning Shadow with a rotation; instead, look for a decisive, multi-target Crescendo engage on her or her carry to shut down her scaling momentum before she outranges you.

Ficha completa →
Zilean

Zilean±0

scaling matchuputility clash This matchup is a pure race of execution and timing, centered on Zilean using Temporal Mirage to force fights with double Time Bomb stuns. Sona can shut down his aggressive speed boosts directly. She neutralizes his pick potential by using Song of Celerity to outrun his chase or casting Crescendo to freeze his acceleration in its tracks, balancing the lane's pressure. Ver detalles
Zilean

Por qué

This matchup is a pure race of execution and timing, centered on Zilean using Temporal Mirage to force fights with double Time Bomb stuns. Sona can shut down his aggressive speed boosts directly. She neutralizes his pick potential by using Song of Celerity to outrun his chase or casting Crescendo to freeze his acceleration in its tracks, balancing the lane's pressure.

Impacto en la línea

Zilean constantly seeks to zone you with Time Bomb, forcing you to sustain through the poke using Aria of Perseverance. When Zilean uses Temporal Mirage to aggressively position for a double-bomb stun, your immediate speed boost or stun response prevents a complete collapse. Neither side can easily force a recall or dive, turning the lane into a neutral stalemate where lane priority depends entirely on ultimate cooldowns.

Cómo jugar

Always hold Song of Celerity to reactively mirror Zilean's Temporal Mirage; do not waste your movement speed aura for casual poke. When he speeds up to engage, activate your aura to pull your carry back safely. If he overcommits, use Crescendo to lock him down before he can cast Chronoshift on his target. If his ultimate does land, immediately swap targets or stall the fight with Aria of Perseverance to waste his revival window.

Ficha completa →

Otros emparejamientos

Favorables

15

Estos campeones suelen tener problemas para responder a tus principales fortalezas, lo que te permite afrontar el enfrentamiento con más libertad. Normalmente tienes varias formas de presionarlos y forzar intercambios a tu favor. Aprovecha esta ventaja para imponer tu ritmo en lugar de darles tiempo para volver a una posición cómoda.

Galio

Galio−1

sustainscaling Sona naturally outscales Galio's threat because his melee-gated engage is highly predictable. Galio's only way to shut down your scaling is a flash-engage or surprise charge using Shield of Durand. However, because Sona possesses Crescendo, you can immediately halt his forward momentum mid-dash during Justice Punch or interrupt his taunt channel, turning his aggressive dive into a death trap for his duo. Ver detalles
Galio

Por qué

Sona naturally outscales Galio's threat because his melee-gated engage is highly predictable. Galio's only way to shut down your scaling is a flash-engage or surprise charge using Shield of Durand. However, because Sona possesses Crescendo, you can immediately halt his forward momentum mid-dash during Justice Punch or interrupt his taunt channel, turning his aggressive dive into a death trap for his duo.

Impacto en la línea

Sona dictating the pace means Galio is forced to take heavy poke from Hymn of Valor whenever he steps up to trigger Colossal Smash on the wave. Since Galio cannot easily trade back without committing his Justice Punch, you easily establish health supremacy. His inability to find a clean Shield of Durand setup neutralizes his kill threat, leaving him stuck under tower while you safely scale.

Cómo jugar

Keep a safe distance behind your minions to block Justice Punch, forcing Galio to walk up manually to charge Shield of Durand. The moment he tries this, activate Song of Celerity to kite backwards while peppering him with Hymn of Valor. If he commits his Flash, immediately cast Crescendo to lock him down under your own minion wave, using the power chord from Aria of Perseverance to mitigate his Winds of War.

Ficha completa →
Bard

Bard−1

scalingcatch potential Sona naturally outscales Bard because her constant team-wide buffs from Aria of Perseverance and Hymn of Valor offer far superior late-game value compared to Bard's single-target Caretaker’s Shrine. However, this scaling advantage is gated by Bard's ability to shut her down using Tempered Fate. If Bard lands his ultimate to freeze Sona, he can completely interrupt her Crescendo or isolate her before her scaling-driven sustain can save her allies. Ver detalles
Bard

Por qué

Sona naturally outscales Bard because her constant team-wide buffs from Aria of Perseverance and Hymn of Valor offer far superior late-game value compared to Bard's single-target Caretaker’s Shrine. However, this scaling advantage is gated by Bard's ability to shut her down using Tempered Fate. If Bard lands his ultimate to freeze Sona, he can completely interrupt her Crescendo or isolate her before her scaling-driven sustain can save her allies.

Impacto en la línea

During the laning phase, Bard will frequently leave his ADC to collect chimes for Traveler’s Call. You must punish these roams by playing aggressively with Hymn of Valor to force his partner off the wave. Although Bard's Caretaker’s Shrine provides some sustain, your consistent shielding ensures you win prolonged trades. Keep the wave pushed to punish his roams, but watch out for Magical Journey ganks from behind.

Cómo jugar

To secure your scaling advantage, never stand near walls to deny Bard easy stuns from Cosmic Binding. When teamfights erupt, do not lead the engage. Hold Crescendo and wait for Bard to cast Tempered Fate first. If you see the golden circle of his ultimate, immediately activate Song of Celerity to escape the radius. Only unleash your own ultimate once the stasis resolves to counter-engage and save your teammates.

Ficha completa →
Braum

Braum−1

sustain poketeamfight Sona naturally dominates this matchup through her superior scaling. While Braum can completely block Crescendo using Unbreakable, his kit lacks the sustain to survive your constant poke. Every Hymn of Valor and Aria of Perseverance trade slowly drains his health pool. Unless he triggers Concussive Blows early, Sona's healing and Power Chord utility will inevitably outvalue his defensive shield as the game progresses. Ver detalles
Braum

Por qué

Sona naturally dominates this matchup through her superior scaling. While Braum can completely block Crescendo using Unbreakable, his kit lacks the sustain to survive your constant poke. Every Hymn of Valor and Aria of Perseverance trade slowly drains his health pool. Unless he triggers Concussive Blows early, Sona's healing and Power Chord utility will inevitably outvalue his defensive shield as the game progresses.

Impacto en la línea

You dictate the lane's pace by keeping Braum at a distance. Since he relies on Winter's Bite to initiate, dodging it with Song of Celerity leaves him helpless. This allows you to safely poke with Hymn of Valor, slowly forcing Braum and his carry under their tower. Without early kills, Braum cannot match your scaling, turning the lane into a war of attrition that you easily win.

Cómo jugar

Never blindly cast Crescendo while Braum has Unbreakable ready; instead, wait for him to waste it on your Hymn of Valor before unleashing your ultimate. Use Song of Celerity to bait out and sidestep Winter's Bite. If he tries to jump forward with Stand Behind Me, immediately hit his carry with a Power Chord enhanced by Aria of Perseverance to reduce their damage, then safely retreat.

Ficha completa →
Morgana

Morgana−1

pokescaling Morgana relies on slowly chipping away at your health using Tormented Shadow. However, your Aria of Perseverance completely neutralizes this damage with its combined heal and shield, turning her primary zoning tool into wasted mana. Because Morgana cannot easily break through your defensive aura without landing a risky Dark Binding, you safely bypass her early-game pressure and effortlessly scale toward your overwhelming late-game teamfighting power. Ver detalles
Morgana

Por qué

Morgana relies on slowly chipping away at your health using Tormented Shadow. However, your Aria of Perseverance completely neutralizes this damage with its combined heal and shield, turning her primary zoning tool into wasted mana. Because Morgana cannot easily break through your defensive aura without landing a risky Dark Binding, you safely bypass her early-game pressure and effortlessly scale toward your overwhelming late-game teamfighting power.

Impacto en la línea

This matchup turns the lane into a slow, controlled push where you dictate the wave's position. Since Tormented Shadow inevitably damages the minions when Morgana tries to poke, she will constantly push the wave toward your tower. You can easily hold the minions just outside your turret range using Aria of Perseverance to sustain through the incoming damage, denying her any real tower pressure while securing safe farm.

Cómo jugar

Always stand behind your minion wave to block her Dark Binding trajectory while maintaining maximum range. Keep Song of Celerity ready to dodge her unexpected skillshots or to quickly escape if she attempts to flash-engage with Soul Shackles. If your ADC gets caught by her root, do not panic; immediately cast Aria of Perseverance to absorb the burst from Tormented Shadow and use your Power Chord to weaken her follow-up.

Ficha completa →
Maokai

Maokai−1

all inpoke survival Sona naturally outscales Maokai as the match progresses, creating a massive utility gap. Maokai's primary win condition is locking you down early with Twisted Advance. However, because you fight from range, you can constantly chip his health with Hymn of Valor before he can engage. Any minor poke he attempts with Sapling Toss is immediately erased by your Aria of Perseverance, rendering his lane presence obsolete. Ver detalles
Maokai

Por qué

Sona naturally outscales Maokai as the match progresses, creating a massive utility gap. Maokai's primary win condition is locking you down early with Twisted Advance. However, because you fight from range, you can constantly chip his health with Hymn of Valor before he can engage. Any minor poke he attempts with Sapling Toss is immediately erased by your Aria of Perseverance, rendering his lane presence obsolete.

Impacto en la línea

This matchup translates into total lane dominance where you dictate the wave state. Because Maokai cannot safely step up to use Bramble Smash without taking heavy damage, his ADC is forced under turret. Your relentless health trades force early recalls, giving your duo free plates. Once you unlock Crescendo, Maokai's engage threats are completely neutralized, securing your transition into an unstoppable teamfight powerhouse.

Cómo jugar

Maintain a safe distance just outside the reach of Twisted Advance, forcing Maokai to walk forward predictably if he wants to engage. Only step up to poke with Hymn of Valor when he hesitates, and immediately fall back. If he throws Sapling Toss into the lane brushes, reposition to the opposite side of the lane. Should he commit with Nature's Grasp, immediately counter with Crescendo to lock him down and protect your carry.

Ficha completa →
Lulu

Lulu−2

sustain waroutscaled Sona's ability to nullify Lulu's early aggression dictates this matchup. While Lulu relies on Glitterlance and Help, Pix! to chip away at your carry's health, your Aria of Perseverance completely neutralizes this poke. Because Lulu lacks a natural hard-engage to punish you, her early lane pressure is wasted, allowing you to comfortably scale into a late-game powerhouse where your team-wide auras easily outclass her single-target utility. Ver detalles
Lulu

Por qué

Sona's ability to nullify Lulu's early aggression dictates this matchup. While Lulu relies on Glitterlance and Help, Pix! to chip away at your carry's health, your Aria of Perseverance completely neutralizes this poke. Because Lulu lacks a natural hard-engage to punish you, her early lane pressure is wasted, allowing you to comfortably scale into a late-game powerhouse where your team-wide auras easily outclass her single-target utility.

Impacto en la línea

In lane, this dynamic translates to a war of attrition that Lulu cannot win. When Lulu uses Help, Pix! aggressively to poke, she leaves herself or her ADC without a shield. This creates a massive window where you can trade back with Hymn of Valor and Power Chord. Lulu is forced to play defensively, losing wave control and failing to secure the early tower pressure her kit normally demands, letting you farm safely.

Cómo jugar

To exploit this, always monitor Lulu's cooldowns, specifically Whimsy. If she uses it on her ally for attack speed, she cannot polymorph you, which is your green light to walk up and poke. Keep your distance to avoid double-hit Glitterlance angles. If Lulu uses Wild Growth to turn a fight, do not panic; immediately counter with Crescendo to lock down her giant target, then use Song of Celerity to kite back until her ultimate's health buff expires.

Ficha completa →
Nami

Nami−1

sustainteamfight Sona naturally outscales Nami as the game progresses because her teamfight utility becomes unmatched. While Nami relies on the single-target bounces of Ebb and Flow, your ability to constantly cycle Aria of Perseverance provides superior, non-stop area shielding. Nami is forced to use Tidal Wave proactively to disrupt your positioning, as she cannot match your raw output once you reach your mid-game power spikes. Ver detalles
Nami

Por qué

Sona naturally outscales Nami as the game progresses because her teamfight utility becomes unmatched. While Nami relies on the single-target bounces of Ebb and Flow, your ability to constantly cycle Aria of Perseverance provides superior, non-stop area shielding. Nami is forced to use Tidal Wave proactively to disrupt your positioning, as she cannot match your raw output once you reach your mid-game power spikes.

Impacto en la línea

Early trades revolve around matching Nami's aggressive Ebb and Flow bounces. By using Hymn of Valor to poke from safety and mitigating her return damage with Aria of Perseverance, you prevent Nami from gaining lane control. Your inevitable scaling advantage forces Nami to take risky positions to land Aqua Prison, often leaving her vulnerable to ganks and draining her mana pool while you steadily build your lead.

Cómo jugar

To secure your advantage, track Nami's ultimate. Never clump with your carries, forcing her to choose between targeting you or your frontline with Tidal Wave. If she unleashes the wave, activate Song of Celerity immediately to help your allies dodge the slow. Once her ultimate is spent, aggressively cycle Aria of Perseverance and use Crescendo to lock down her exposed allies, turning her failed engagement into an easy teamfight victory.

Ficha completa →
Yuumi

Yuumi−2

aura valuesustain battle This matchup tilts heavily in your favor as the game goes on due to how Yuumi's attachment mechanics work. When Yuumi uses You and Me! to latch onto her marksman, she loses the ability to block incoming skillshots. This makes her host an incredibly easy target for your Crescendo. You can consistently stun both Yuumi and her host simultaneously, completely neutralizing their defensive tools like Zoomies during crucial teamfights. Ver detalles
Yuumi

Por qué

This matchup tilts heavily in your favor as the game goes on due to how Yuumi's attachment mechanics work. When Yuumi uses You and Me! to latch onto her marksman, she loses the ability to block incoming skillshots. This makes her host an incredibly easy target for your Crescendo. You can consistently stun both Yuumi and her host simultaneously, completely neutralizing their defensive tools like Zoomies during crucial teamfights.

Impacto en la línea

During the laning phase, you hold the initiative. Every time Yuumi attempts to poke with Prowling Projectile, you can instantly mitigate the damage using Aria of Perseverance. Meanwhile, your Hymn of Valor pressure forces her to stay attached, preventing her from safely stepping out to trigger Bop 'n' Block. This mana starvation limits their sustain, letting your duo dictate the wave's tempo and push them under turret.

Cómo jugar

To secure this advantage, never waste Crescendo on solo targets; save it specifically for when Yuumi is attached to a priority target entering a skirmish. Actively watch for her to cast Final Chapter, then interrupt her team's offensive momentum with your ultimate. In lane, use the extra movement speed from Song of Celerity to dodge her Prowling Projectile, then immediately punish her host with a Hymn of Valor empowered Power Chord attack.

Ficha completa →

Otros emparejamientos

Items to Counter Sona

Buy these items to reduce this champion's effectiveness in your games.

Putrificateur techno-chimique
Rappel mortel
Rappel mortel
Morellonomicon
Morellonomicon
Sandales de Mercure
Sandales de Mercure
Voile de la Banshee / Voile de la nuit

Cómo contrarrestar a este campeón

Ángulo de contra

Hacer counter a Sona no consiste solo en comprar anti-healing. La verdadera clave es romper el tiempo que necesita para preparar sus auras. Sona quiere jugar detrás de su oleada, hacer poke con la Q, cargar Power Chord y luego llegar agrupada a los objetivos con Crescendo disponible. Los mejores counters son, por tanto, campeones que la obligan a decidir antes de que sus ciclos resulten rentables: hooks inmediatos, hard engage, all-ins tras un solo error de spacing o presión en lane que la obligue a gastar maná para sobrevivir en lugar de controlar el espacio. Si Sona llega al mid game sin quedarse atrás, se vuelve mucho más difícil de castigar, porque cada pelea agrupada aumenta el valor de sus curaciones, buffs y encantamientos.

Contexto del parche

Sona pierde principalmente cuando la partida no le da tiempo a desarrollar todo su patrón de juego. Los supports de engage castigan su falta de movilidad, los hooks suelen ignorar su intento de hacer poke detrás de una mala oleada, y los supports de sustain o poke pueden neutralizar su lane antes de que sus objetos tomen el control. El plan correcto contra ella es, por tanto, doble: obligarla a respetar cada arbusto en el early game, y luego evitar caminar agrupados en línea recta hacia su Crescendo durante el mid game. Muchos equipos ganan la lane contra Sona pero pierden más tarde porque disputan el dragón demasiado juntos, exactamente donde su ultimate y sus auras tienen más impacto.

Lectura rápida

  • La mejor ventana para castigar a Sona es antes del nivel 5 y antes de Harmonic Echo.
  • No juegues los objetivos agrupados: Crescendo castiga duramente las entradas estrechas en el río.
  • Obligar a Sona a gastar maná de forma defensiva reduce su capacidad para hacer poke, curar y mantener la lane limpia.

Arquetipos de contra

Hooks y cazadas inmediatas

Sona necesita dar pequeños pasos hacia adelante para usar la Q, preparar Power Chord y mantener a su ADC dentro del rango de su aura. Los hooks castigan exactamente esos pequeños pasos hacia adelante: un error de spacing puede cancelar todo su plan de scaling. Blitzcrank, Thresh o Pyke no necesitan ganar cada trade; solo necesitan crear la amenaza suficiente para que Sona ya no pueda hacer poke libremente. Cuando se echa demasiado atrás, su ADC pierde presión en lane, y cuando se adelanta demasiado, puede morir incluso antes de usar Crescendo.

Cómo se adapta el campeón. Sona debe jugar detrás de los súbditos, aceptar perder algunas oportunidades de poke con la Q y colocar wards en los ángulos laterales antes de tocar la oleada. Su objetivo no es ganar al support de hooks en lane, sino sobrevivir al early game sin conceder la cazada que acelere la partida enemiga.

Hard engage y all-in frontal

Leona, Nautilus y Rakan obligan a Sona a responder muy rápido, lo que ataca su debilidad principal: quiere preparar la pelea, no absorberla al instante. Antes del nivel 5, no tiene Crescendo para frenar la entrada. Incluso después, si es golpeada primero o se ve obligada a usar su ultimate solo para sobrevivir, su equipo pierde la herramienta de control que debía asegurar el objetivo. Estos matchups son peligrosos porque cada colocación de ward, vuelta a lane y oleada pusheada se convierte en una posible pelea instantánea.

Cómo se adapta el campeón. Sona debería guardar el Exhaust para el engage principal, posicionarse incluso más atrás que su ADC si es necesario y evitar disputar una oleada mientras el crowd control enemigo esté disponible. Después del nivel 5, Crescendo debería usarse a menudo para responder al engage en lugar de buscar una iniciación ambiciosa.

Sustain y neutralización de la lane

Estos supports no siempre destruyen a Sona directamente, pero reducen su capacidad para crear una ventaja real mediante poke. Si Soraka, Nami, Lulu o Seraphine absorben los trades cortos y mantienen a su dúo sano, Sona no puede ganar la lane simplemente lanzando su Q repetidamente. El matchup se convierte en una carrera de valor hacia el mid game: quién protege mejor a su carry, quién tiene la mejor herramienta para asegurar objectives y quién obliga al otro a gastar hechizos demasiado pronto. Para Sona, esto es menos letal que un hook, pero mucho más sutil: puede sentir que escala libremente sin generar ninguna ventaja real.

Cómo se adapta el campeón. Sona debe buscar calidad antes que cantidad: el Power Chord adecuado, el timing de objeto correcto y el Crescendo preciso alrededor de un objective. Si solo spamea habilidades para igualar el sustain enemigo, corre el riesgo de quedarse sin mana sin conseguir una presión útil.

Emparejamientos prioritarios

Leona

Leona es uno de los matchups más decisivos para Sona porque pone a prueba de inmediato su disciplina de spacing. Si Sona se adelanta para usar su Q sin respetar Zenith Blade, la lane puede desmoronarse antes de que sus objetos importen. La respuesta no es jugar con miedo, sino jugar limpio: mantenerse detrás de la oleada, guardar Exhaust para el engage completo, aceptar perder algunos trades y conservar Crescendo para dar la vuelta al engage cuando Leona se comprometa demasiado.

Blitzcrank

Blitzcrank limita enormemente la libertad natural de Sona. Ella quiere entrar y salir de rango para hacer poke, pero cada paso lateral puede convertirse en un ángulo para Rocket Grab. Por lo tanto, el matchup depende principalmente de la posición de la oleada y de los arbustos: si Sona mantiene súbditos entre ella y Blitzcrank, puede sobrevivir y escalar; si la lane está despejada o falta visión, casi debe dejar de jugar hacia adelante hasta que se use el grab.

Errores comunes en su contra

Errores comunes en su contra

  • Permitirle llegar a nivel 5 sin presión y luego quejarse de Crescendo en el primer dragón.
  • Forzar un objective a través de un pasillo estrecho mientras Crescendo está disponible y el equipo está agrupado.
  • Usar todo el control de masas en su ADC sin impedir que Sona cure, otorgue velocidad y responda con su ultimate.
  • Ganar la lane contra Sona pero no lograr acelerar la partida antes de que consiga sus objetos de aura.
  • Comprar anti-healing y pensar que es suficiente, mientras sus buffs, control de masas y el tempo de sus encantamientos siguen activos.

Notas del coach

  • Contra Sona, el mejor castigo suele ocurrir antes de la pelea: eliminar la visión, abrir la oleada, controlar el arbusto y luego hacer engage en cuanto se adelante para usar su Q.
  • Si no puedes matar a Sona al principio, al menos oblígala a gastar mana de forma defensiva. Una Sona sin mana antes de un objective pierde gran parte de su amenaza.

FAQ

¿Qué tipo de support hace counter mejor a Sona?

Los supports que la castigan antes de que pueda activar sus auras son los más peligrosos. Hooks como Blitzcrank, Thresh o Pyke pueden convertir un error de spacing en una muerte. Los supports de hard engage como Leona, Nautilus o Rakan la obligan a responder al instante, cuando ella prefiere preparar la pelea. Los supports de sustain también pueden neutralizarla, pero no la vencen de forma tan directa: principalmente evitan que su poke genere una ventaja real.

¿Es suficiente el anti-healing para vencer a Sona?

No. El anti-healing reduce una parte importante de su valor, pero Sona no gana solo gracias a las curaciones. También aporta buffs, velocidad de movimiento, poke, encantamientos y Crescendo. Si compras anti-healing pero seguís agrupándoos frente a su ultimate, ella todavía puede decidir la pelea. El anti-healing debe respaldar un plan real: castigarla al principio, controlar las entradas a los objectives y evitar que juegue varios ciclos de habilidades.

¿Cómo se deben jugar los objectives contra Sona?

Debes evitar darle la pelea que busca: cinco campeones agrupados en un cuello de botella mientras Crescendo está disponible. Contra Sona, es mejor entrar desde múltiples ángulos, presionar su visión antes de que aparezca el objective, amenazar su posicionamiento y esperar a que use una habilidad clave antes de comprometerse. Si debes hacer engage de frente, asegúrate de que tu equipo no esté alineado en cono ante ella, o su ultimate puede dar la vuelta a un objective incluso yendo por detrás.

¿Por qué Sona a veces parece débil en lane pero fuerte más adelante?

Su poder no se concentra en una sola habilidad de lane. Al principio es frágil, depende del mana y es vulnerable a los engages rápidos. Más adelante, sus habilidades se combinan con sus objetos, sus auras afectan a varios aliados y Crescendo amenaza las zonas de objectives. Una Sona que no ha regalado muertes puede parecer inofensiva durante diez minutos y luego volverse extremadamente difícil de superar una vez que las peleas se vuelven agrupadas y prolongadas.


































