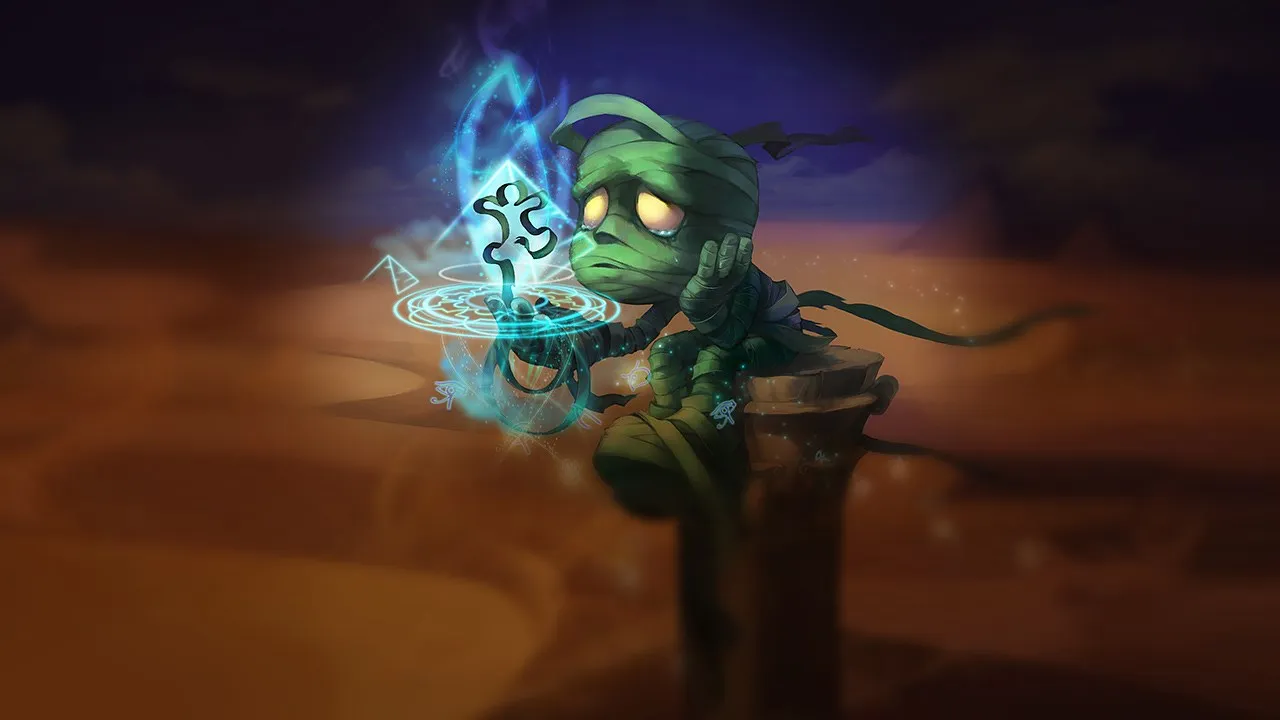
Amumu, un tank jungler, depende en gran medida del engage y del control de masas en área. Las composiciones con un fuerte disengage, poke constante o alta movilidad pueden reducir su efectividad. Si su iniciación falla, su equipo suele perder la ventaja en la pelea.
★ JUNGLETier S
DAÑO
UTIL
TANK
DIFF
Win55.8%#5 · ↓0pt
Pick2.7%#23
Ban0.1%#135
Guía de counters de Amumu Wild Rift
Contras Difíciles
4
Estos campeones tienen una build y un estilo de juego que superan directamente al tuyo, lo que puede hacer que controlar la línea y farmear sea extremadamente difícil. Sus habilidades pueden neutralizar tus principales fortalezas o castigarte en cuanto intentas jugar tu plan habitual. En estos matchups, el objetivo suele ser minimizar errores y buscar soluciones fuera del enfrentamiento directo.
Inmunidad a CCSupervivenciaOlaf es tu peor pesadilla por cómo interactúa su ultimate con tu kit. Todo tu potencial de lockdown depende de acertar un Bandage Toss decisivo o de cambiar las peleas con Curse of the Sad Mummy. Sin embargo, en el momento en que Olaf activa Ragnarok, se vuelve completamente inmune a todo crowd control, lo que significa que puede ignorar tus stuns al instante y perseguirte sin miedo.Build de Olaf →Ver detalles
Olaf
Por qué
Olaf es tu peor pesadilla por cómo interactúa su ultimate con tu kit. Todo tu potencial de lockdown depende de acertar un Bandage Toss decisivo o de cambiar las peleas con Curse of the Sad Mummy. Sin embargo, en el momento en que Olaf activa Ragnarok, se vuelve completamente inmune a todo crowd control, lo que significa que puede ignorar tus stuns al instante y perseguirte sin miedo.
Impacto en la línea
Esta interacción te quita la iniciativa en la jungla tanto al inicio como a mitad de partida. Olaf invadirá tus campamentos de forma agresiva, sabiendo que no puedes defenderte. Si te atrapa, su Undertow te ralentiza mientras Vicious Strikes y Berserker Rage le permiten superar con su sustain cualquier daño de tu Despair y Tantrum, obligándote a ceder por completo los objetivos neutrales.
Cómo jugar
Para sobrevivir, debes rastrear sus movimientos constantemente y hacer tu ruta lejos de él. Nunca inicies una pelea contra Olaf con Bandage Toss a menos que sepas que su ultimate no está disponible. En cambio, guarda tus cargas de Bandage Toss para engancharte a monstruos de la jungla por encima de las paredes y escapar. Si activa Ragnarok, retrocede de inmediato y usa Tantrum para mitigar su daño físico mientras esperas a que termine su duración imparable.
TanquesEscaramuzasGwen es tu peor pesadilla en el río. Cuando intentas inmovilizarla con Bandage Toss, activa Hallowed Mist, volviéndose inmune a tu stun desde la distancia. Una vez que cierra la distancia con Skip 'n Slash, su Snip Snip! destroza tu enorme reserva de vida, eludiendo tu defensa pasiva de Tantrum. Tu aura llorona de Despair simplemente no puede igualar su enorme daño porcentual a la vida.Build de Gwen →Ver detalles
Gwen
Por qué
Gwen es tu peor pesadilla en el río. Cuando intentas inmovilizarla con Bandage Toss, activa Hallowed Mist, volviéndose inmune a tu stun desde la distancia. Una vez que cierra la distancia con Skip 'n Slash, su Snip Snip! destroza tu enorme reserva de vida, eludiendo tu defensa pasiva de Tantrum. Tu aura llorona de Despair simplemente no puede igualar su enorme daño porcentual a la vida.
Impacto en la línea
Este matchup arruina por completo tu control de la jungla al inicio y tus disputas de objetivos. No puedes asegurar Scuttle Crabs ni dragones directamente porque Gwen forzará escaramuzas en las que te destroza con facilidad. Entrar al río se vuelve un riesgo enorme, ya que puede esquivar tu Bandage Toss y hacerte counter-jungle con impunidad. Esto te obliga a ceder campamentos, retrasando tu pico de poder de Curse of the Sad Mummy.
Cómo jugar
Para sobrevivir, debes cambiar cómo usas Bandage Toss. Nunca lo lances desde el rango máximo mientras su Hallowed Mist esté disponible; en cambio, entra directamente en la zona de su niebla antes de lanzar tu stun, o espera a que desperdicie Skip 'n Slash. En las teamfights, no inicies contra Gwen. Guarda Curse of the Sad Mummy para cuando se lance con un dash a tu backline, atrapándola dentro de tu Despair para que tus aliados puedan destrozarla con burst.
KiteoPeleas en equipoLillia prospera manteniéndote a distancia. Su velocidad de movimiento pasiva de Blooming Blows le da la agilidad para esquivar sin esfuerzo tu Bandage Toss. Sin acertar ese skillshot, no puedes pegarte a ella. Te hará kite cómodamente por la jungla, abusando de su rango para activar Dream-Laden Bough y desgastarte mientras se mantiene completamente fuera de tu aura de Despair.Build de Lillia →Ver detalles
Lillia
Por qué
Lillia prospera manteniéndote a distancia. Su velocidad de movimiento pasiva de Blooming Blows le da la agilidad para esquivar sin esfuerzo tu Bandage Toss. Sin acertar ese skillshot, no puedes pegarte a ella. Te hará kite cómodamente por la jungla, abusando de su rango para activar Dream-Laden Bough y desgastarte mientras se mantiene completamente fuera de tu aura de Despair.
Impacto en la línea
Este matchup te deja cediendo constantemente los Scuttle Crabs y las escaramuzas tempranas. Lillia puede invadir fácilmente tus campamentos, usando Swirlseed para localizarte y ralentizarte. Si te atrapa, Watch Out! Eep! inflige daño mágico mientras tú luchas por responder. Esto te obliga a un patrón de farmeo defensivo, privando a tus laners de presión de gank temprana porque siempre estás con poca vida o atascado defendiendo tus propios campamentos.
Cómo jugar
Deja de lanzar Bandage Toss en zonas abiertas donde su velocidad de Blooming Blows está completamente acumulada. En cambio, guarda la habilidad hasta que se comprometa con la animación de Watch Out! Eep!, que la bloquea brevemente en el sitio. Al disputar objetivos, fuerza las peleas en cuellos de botella estrechos de la jungla donde no pueda esquivar con facilidad. Si te lanza Lilting Lullaby, intenta lanzar antes Curse of the Sad Mummy para inmovilizarla antes de quedarte dormido.
Estos campeones tienen herramientas que generalmente les dan ventaja en el enfrentamiento, sin llegar a hacer el matchup injugable. Pueden tener más alcance, mejor capacidad para aguantar tu ofensiva o más formas de responder a tus engagements. Tendrás que adaptar tu enfoque y elegir con cuidado los momentos en los que aceptas el combate.
Presión tempranaTanquesVolibear domina las escaramuzas tempranas porque su Frenzied Maul le da una curación inmensa y daño de mordisco durante peleas prolongadas. Aunque Amumu depende del daño mágico constante de Despair y Tantrum para limpiar y pelear, carece del burst inmediato para ejecutar al oso. Una vez que Volibear te marca con su primer mordisco, sus curas posteriores superan por completo tu daño inicial, haciendo que los duelos directos en el río sean un suicidio matemático.Build de Volibear →Ver detalles
Volibear
Por qué
Volibear domina las escaramuzas tempranas porque su Frenzied Maul le da una curación inmensa y daño de mordisco durante peleas prolongadas. Aunque Amumu depende del daño mágico constante de Despair y Tantrum para limpiar y pelear, carece del burst inmediato para ejecutar al oso. Una vez que Volibear te marca con su primer mordisco, sus curas posteriores superan por completo tu daño inicial, haciendo que los duelos directos en el río sean un suicidio matemático.
Impacto en la línea
Esta dinámica del matchup te obliga a ceder el control de los primeros Scuttle Crabs. Si Volibear te atrapa en el río, su combo de Thundering Smash y Sky Splitter te inmovilizará y lo protegerá con un escudo, llevando a tu muerte o a un Flash forzado. No puedes disputar directamente los campamentos neutrales, lo que ralentiza el tempo de tu limpieza de jungla y retrasa tu acceso a los cruciales picos de poder para las teamfights.
Cómo jugar
Para sobrevivir, haz tu ruta hacia el lado opuesto del mapa respecto a Volibear en el nivel uno para garantizar un farmeo seguro. Si invade tu jungla, no intentes defender tus campamentos; en cambio, usa Bandage Toss sobre un monstruo lejano de la jungla para escapar a través de las paredes. Guarda tu Curse of the Sad Mummy exclusivamente para teamfights coordinadas cerca de objetivos, donde tu crowd control superior puede neutralizarlo antes de que active Stormbringer.
ContraengancheVisiónEl matchup en la jungla depende de un juego reactivo de gallina. Si inicias con Bandage Toss, Nocturne lo bloquea fácilmente con Shroud of Darkness, anulando al instante tu crowd control. Mientras estás aturdido por tu propio engage fallido, te encadenará con Unspeakable Horror, forzando un miedo que apaga el daño de tu Despair y Tantrum y te deja completamente vulnerable.Build de Nocturne →Ver detalles
Nocturne
Por qué
El matchup en la jungla depende de un juego reactivo de gallina. Si inicias con Bandage Toss, Nocturne lo bloquea fácilmente con Shroud of Darkness, anulando al instante tu crowd control. Mientras estás aturdido por tu propio engage fallido, te encadenará con Unspeakable Horror, forzando un miedo que apaga el daño de tu Despair y Tantrum y te deja completamente vulnerable.
Impacto en la línea
En la jungla, esta interacción hace que los duelos tempranos por Scuttle Crab y el counter-jungle directo sean increíblemente arriesgados para ti. Si Nocturne invade, no puedes responder sin perder tu principal herramienta de escape. Una vez que llega al nivel cinco, su Paranoia le permite eludir tu visión y hacerte counter-gank al instante, convirtiendo tus intentos proactivos de gank con Curse of the Sad Mummy en trampas mortales.
Cómo jugar
Nunca debes abrir con Bandage Toss. Acércate con Despair activado y usa Tantrum para forzarlo a lanzar Shroud of Darkness por pánico. Lanza tu vendaje solo una vez que su escudo de hechizos haya caído. Si te sorprende con Paranoia, lanza de inmediato Curse of the Sad Mummy para romper su tempo antes de que se active Unspeakable Horror, y luego usa Bandage Toss de forma defensiva para engancharte a un monstruo cercano de la jungla.
Presión tempranaEscaladoPantheon domina los duelos tempranos en la jungla porque su Aegis Assault puede absorber por completo tu Bandage Toss y el burst de Despair. Sin embargo, este matchup no es del todo unilateral. La reducción pasiva de daño físico plano de tu Tantrum contrarresta directamente los golpes múltiples de disparo rápido de su Shield Vault potenciado por Mortal Will y los golpes físicos de Comet Spear, manteniéndote sorprendentemente sano durante las escaramuzas.Build de Pantheon →Ver detalles
Pantheon
Por qué
Pantheon domina los duelos tempranos en la jungla porque su Aegis Assault puede absorber por completo tu Bandage Toss y el burst de Despair. Sin embargo, este matchup no es del todo unilateral. La reducción pasiva de daño físico plano de tu Tantrum contrarresta directamente los golpes múltiples de disparo rápido de su Shield Vault potenciado por Mortal Will y los golpes físicos de Comet Spear, manteniéndote sorprendentemente sano durante las escaramuzas.
Impacto en la línea
Las limpiezas tempranas y agresivas de Pantheon ponen una presión inmensa sobre tus campamentos. Si te encuentra en tu jungla, su iniciación con Shield Vault te deja vulnerable a una ejecución fatal de Comet Spear. Este multiplicador de fuerza significa que debes rastrear constantemente su campamento inicial e imitar su ruta para evitar enfrentamientos directos 1v1, centrándote en cambio en asegurar los objetivos opuestos y mantener a tus lanes alertas antes de que aparezca volando con Grand Starfall.
Cómo jugar
Nunca inicies con Bandage Toss cuando Pantheon tenga listo su Aegis Assault; en cambio, acércate con Despair activo y espera a que desperdicie su escudo defensivo. Si se lanza sobre ti con un Shield Vault potenciado, deja que tu pasiva Tantrum absorba sus rápidos golpes físicos mientras te reposicionas. Rastrea su ruta por la jungla colocando wards profundos en su campamento de raptors al inicio, lo que te permite hacerle counter-gank de inmediato después de que aterrice su Grand Starfall.
Presión tempranaSustentoWarwick domina el duelo en la jungla porque Jaws of the Beast le permite ignorar el desplazamiento de Bandage Toss mientras se cura con Eternal Hunger. Además, su Infinite Duress puede suprimirte al instante, inmovilizándote antes de que puedas siquiera reaccionar con Curse of the Sad Mummy y neutralizando por completo tu principal herramienta de teamfight.Build de Warwick →Ver detalles
Warwick
Por qué
Warwick domina el duelo en la jungla porque Jaws of the Beast le permite ignorar el desplazamiento de Bandage Toss mientras se cura con Eternal Hunger. Además, su Infinite Duress puede suprimirte al instante, inmovilizándote antes de que puedas siquiera reaccionar con Curse of the Sad Mummy y neutralizando por completo tu principal herramienta de teamfight.
Impacto en la línea
No puedes disputar directamente los campamentos neutrales ni los Scuttle Crabs. Si te quedas con poca vida durante tu limpieza, Blood Hunt lo alerta, lo que lleva a un counter-jungle letal en el que no puedes defenderte. Si te atrapa, Primal Howl reduce el daño de tu Tantrum y Despair mientras te fuerza a retirarte, sacrificando tu presión temprana en el mapa.
Cómo jugar
Nunca busques duelos 1v1 en el río; rastrea su buff inicial y haz tu ruta hacia el lado opuesto para limpiar con seguridad. Durante las escaramuzas, guarda Curse of the Sad Mummy hasta que Warwick se comprometa con Infinite Duress sobre un compañero, lo que te permite interrumpir su supresión al instante. Si se lanza sobre ti, usa Bandage Toss sobre un monstruo de la jungla para escapar en lugar de pelear a través de Primal Howl.
KiteoDaño explosivoLa capacidad de Kindred de anular por completo la muerte con Lamb's Respite hace que tu principal herramienta de teamfight, Curse of the Sad Mummy, resulte increíblemente poco gratificante. Aunque quieres inmovilizarlos y destrozarlos con Cursed Touch y Despair, ellos pueden simplemente soltar la zona de su ultimate para sobrevivir a tu burst. Además, su movilidad con Dance of Arrows hace que acertar Bandage Toss sea muy poco fiable en escaramuzas abiertas en la jungla.Build de Kindred →Ver detalles
Kindred
Por qué
La capacidad de Kindred de anular por completo la muerte con Lamb's Respite hace que tu principal herramienta de teamfight, Curse of the Sad Mummy, resulte increíblemente poco gratificante. Aunque quieres inmovilizarlos y destrozarlos con Cursed Touch y Despair, ellos pueden simplemente soltar la zona de su ultimate para sobrevivir a tu burst. Además, su movilidad con Dance of Arrows hace que acertar Bandage Toss sea muy poco fiable en escaramuzas abiertas en la jungla.
Impacto en la línea
En la jungla, Kindred invadirá de forma agresiva para recoger acumulaciones de Mark of the Kindred, sabiendo que te cuesta duelear contra ellos al inicio. Si intentas disputar campamentos, te harán kite con Wolf's Frenzy y te ejecutarán con Mounting Dread. Esto te obliga a una ruta de farmeo defensiva, cediendo la prioridad temprana de los Scuttle Crabs y dejando a tus lanes vulnerables a sus ganks a distancia de alto tempo.
Cómo jugar
Nunca inicies peleas con Curse of the Sad Mummy si Kindred tiene disponible Lamb's Respite, a menos que puedas encadenar Bandage Toss para inmovilizarlos antes de que puedan lanzarla. En cambio, juega de frente hacia atrás, usando Tantrum para absorber daño físico mientras mantienes Despair activo. Fuérzalos a soltar su ultimate de forma defensiva para salvar a un aliado, y luego arrastra de inmediato la pelea fuera de su zona de curación para rematarlos una vez que el círculo expire.
Presión tempranaProtecciónXin Zhao altera por completo tu identidad en las peleas de equipo. Aunque tu Bandage Toss hacia Curse of the Sad Mummy es una herramienta de engage de primer nivel, su Crescent Guard funciona como un counter directo. Al apartar y bloquear todo el daño de tus aliados a distancia que están fuera de su arena, te deja aislado. Incluso si aplicas Cursed Touch y lo quemas con Despair, tu equipo no puede aprovechar tu CC para seguir la jugada.Build de Xin Zhao →Ver detalles
Xin Zhao
Por qué
Xin Zhao altera por completo tu identidad en las peleas de equipo. Aunque tu Bandage Toss hacia Curse of the Sad Mummy es una herramienta de engage de primer nivel, su Crescent Guard funciona como un counter directo. Al apartar y bloquear todo el daño de tus aliados a distancia que están fuera de su arena, te deja aislado. Incluso si aplicas Cursed Touch y lo quemas con Despair, tu equipo no puede aprovechar tu CC para seguir la jugada.
Impacto en la línea
En la jungla, esta interacción hace que las escaramuzas tempranas cerca de los Scuttle Crabs o de objetivos neutrales sean increíblemente arriesgadas. Xin Zhao te buscará de forma agresiva con Audacious Charge y Wind Becomes Lightning, sabiendo que no puedes vencerlo en un duelo. Si intentas defenderte, su Determination lo cura a través del daño de tu Tantrum. Esta amenaza constante te obliga a ceder el control del río al inicio, lo que pone presión sobre tus laners, que no cuentan con tu apoyo.
Cómo jugar
Para sobrevivir, tienes que seguir su campamento inicial e imitar su ruta para evitarlo por completo en la fase temprana. Nunca inicies con Bandage Toss si tus aliados a distancia están demasiado lejos para entrar en el círculo de su Crescent Guard. En su lugar, usa Despair y Tantrum para limpiar tus campamentos rápido, con la idea de hacer un counter-gank en el lado opuesto del mapa. Usa Curse of the Sad Mummy solo después de que él haya gastado su ultimate o cuando tus aliados cuerpo a cuerpo puedan entrar contigo dentro de su anillo.
Presión tempranaPicksKha'Zix aprovecha tu limpieza lenta al inicio para invadir tus campamentos. Como a menudo estás solo en el río o en la jungla, su Taste Their Fear activa el bonus de aislamiento y te quita vida de golpe. Tu daño sostenido de Despair y la reducción de daño físico de Tantrum no pueden igualar ese burst, sobre todo cuando Unseen Threat te ralentiza una y otra vez durante su emboscada.Build de Kha'Zix →Ver detalles
Kha'Zix
Por qué
Kha'Zix aprovecha tu limpieza lenta al inicio para invadir tus campamentos. Como a menudo estás solo en el río o en la jungla, su Taste Their Fear activa el bonus de aislamiento y te quita vida de golpe. Tu daño sostenido de Despair y la reducción de daño físico de Tantrum no pueden igualar ese burst, sobre todo cuando Unseen Threat te ralentiza una y otra vez durante su emboscada.
Impacto en la línea
Este matchup te obliga a una ruta defensiva y muy predecible. Cada vez que empiezas un campamento como los Raptors o los Krugs, la amenaza de una invasión inmediata te impide usar Bandage Toss de forma ofensiva para acelerar tu limpieza. Si Kha'Zix te encuentra con poca vida, un solo golpe de aislamiento le asegura la kill, te roba los campamentos y retrasa tus picos de poder con Curse of the Sad Mummy.
Cómo jugar
Para sobrevivir, limpia siempre los campamentos junto con los monstruos pequeños para negarle el daño por aislamiento; no mates primero a los Raptors pequeños. Guarda una carga de Bandage Toss para escapar por encima de las paredes en lugar de usarla para ir más rápido en los campamentos. Si salta sobre ti con Leap, retírate de inmediato hacia tu laner más cercano para que tu pasiva Cursed Touch y Curse of the Sad Mummy sirvan para inmovilizarlo con ayuda del equipo.
Estos enfrentamientos son sobre todo duelos de ejecución: ambos campeones tienen formas reales de tomar la ventaja. Esquivar una habilidad clave, anticipar bien un engagement o un simple error de posicionamiento puede inclinar el duelo hacia un lado. Conocer el matchup y reconocer las ventanas de acción correctas es especialmente importante aquí.
VisiónPeleas en equipoEste matchup de jungla es un choque explosivo de ultimates que deciden las peleas de equipo, donde la visión determina al ganador. Amumu tiene la herramienta directa para frenar la principal herramienta de skirmish de Fiddlesticks, Bountiful Harvest, usando Bandage Toss para aturdirlo y cancelar el canalizado. Sin embargo, si Fiddlesticks logra eludir tu visión y canaliza Crowstorm desde la niebla de guerra, su enorme daño en área superará con facilidad a Curse of the Sad Mummy.Build de Fiddlesticks →Ver detalles
Fiddlesticks
Por qué
Este matchup de jungla es un choque explosivo de ultimates que deciden las peleas de equipo, donde la visión determina al ganador. Amumu tiene la herramienta directa para frenar la principal herramienta de skirmish de Fiddlesticks, Bountiful Harvest, usando Bandage Toss para aturdirlo y cancelar el canalizado. Sin embargo, si Fiddlesticks logra eludir tu visión y canaliza Crowstorm desde la niebla de guerra, su enorme daño en área superará con facilidad a Curse of the Sad Mummy.
Impacto en la línea
La velocidad de limpieza de la jungla y las disputas de objetivos se convierten en una partida de ajedrez de alto riesgo alrededor de los arbustos. Fiddlesticks usa A Harmless Scarecrow para negarte la visión y asegurar ángulos de flanqueo seguros para su ultimate. Esto te obliga a gastar tus primeros recursos en asegurar los Scuttle Crabs y en wards profundas, en lugar de forzar ganks. Si no lo localizas, sus ganks repentinos con Crowstorm eliminarán por completo a tus laners antes de que puedas responder con Curse of the Sad Mummy.
Cómo jugar
Nunca inicies una pelea de equipo a ciegas con Curse of the Sad Mummy si no sabes dónde está Fiddlesticks. En su lugar, prioriza destruir sus espantapájaros de A Harmless Scarecrow y colocar wards profundas en los cuadrantes de su jungla. Durante las escaramuzas, guarda al menos una carga de Bandage Toss específicamente para interrumpir su Bountiful Harvest cuando intente absorber vida de tu equipo. Si te sorprende con Crowstorm, usa de inmediato Curse of the Sad Mummy para inmovilizarlo y reducir al mínimo su potencial para destrozar a tu equipo.
Control de masasPeleas en equipoEl duelo entre estos dos junglers depende por completo de cómo interrumpas la cadena de resets de Viego. Mientras Viego se apoya en Sovereign's Domination para curarse y encadenar hechizos durante las escaramuzas, tu kit está diseñado para detenerlo en plena animación. El matchup está igualado porque, si esquiva tu Bandage Toss, puede destrozarte con Blade of the Ruined King; sin embargo, tu potencial de lockdown hace que cualquier pelea de equipo sea extremadamente peligrosa para él si intenta transformarse.Build de Viego →Ver detalles
Viego
Por qué
El duelo entre estos dos junglers depende por completo de cómo interrumpas la cadena de resets de Viego. Mientras Viego se apoya en Sovereign's Domination para curarse y encadenar hechizos durante las escaramuzas, tu kit está diseñado para detenerlo en plena animación. El matchup está igualado porque, si esquiva tu Bandage Toss, puede destrozarte con Blade of the Ruined King; sin embargo, tu potencial de lockdown hace que cualquier pelea de equipo sea extremadamente peligrosa para él si intenta transformarse.
Impacto en la línea
Este matchup convierte las peleas de equipo y las escaramuzas por objetivos en enfrentamientos de alto riesgo. Viego usará Harrowed Path para rodear los pits y buscar stuns con Spectral Maw, con la esperanza de conseguir una kill rápida. Tu presencia lo obliga a jugar con mucha cautela y a retrasar su entrada en las peleas, porque sabe que si lo atrapan durante Sovereign's Domination significa la muerte inmediata. Si gastas tu CC demasiado pronto, barrerá a todo tu equipo.
Cómo jugar
Para ganar este juego mental, tienes que guardar Curse of the Sad Mummy específicamente para el momento en que Viego canalice Sovereign's Domination sobre un aliado caído. Durante las peleas, no lances tu ultimate contra su frontline; en su lugar, quédate cerca de tus compañeros vulnerables y vigila las almas en el suelo. Cuando Viego entre con Heartbreaker o intente una posesión, activa de inmediato Curse of the Sad Mummy para dejarlo clavado en el sitio y que tu equipo pueda hacerle burst antes de que gane invulnerabilidad.
Control de masasPeleas en equipoEste duelo de jungla gira en torno a neutralizar la enorme curación de Aatrox en las escaramuzas. Aatrox depende de acertar los sweetspots de The Darkin Blade y de usar Umbral Dash para obtener vampirismo físico continuo, pero tu ultimate, Curse of the Sad Mummy, es la mejor contramedida. Inmovilizarlo por completo le impide atacar o reposicionarse, con lo que anula la curación pasiva de su Umbral Dash y deja su barra de vida expuesta a tu Despair y al aumento de daño mágico de Cursed Touch.Build de Aatrox →Ver detalles
Aatrox
Por qué
Este duelo de jungla gira en torno a neutralizar la enorme curación de Aatrox en las escaramuzas. Aatrox depende de acertar los sweetspots de The Darkin Blade y de usar Umbral Dash para obtener vampirismo físico continuo, pero tu ultimate, Curse of the Sad Mummy, es la mejor contramedida. Inmovilizarlo por completo le impide atacar o reposicionarse, con lo que anula la curación pasiva de su Umbral Dash y deja su barra de vida expuesta a tu Despair y al aumento de daño mágico de Cursed Touch.
Impacto en la línea
En las escaramuzas tempranas, quien inicia primero suele perder la ventaja. Si Aatrox te atrapa con Infernal Chains, tendrás que gastar Bandage Toss a la defensiva o recibir un daño crítico. Sin embargo, cuando se disputan los primeros Scuttle Crabs o los monstruos épicos, tu capacidad de negarle el sustain con una cadena de CC bien sincronizada decide quién controla el río, y con ello qué equipo consigue la prioridad temprana y la presión en todo el mapa.
Cómo jugar
Colócate ligeramente fuera del barrido de sus dos primeros golpes de The Darkin Blade para provocar su avance. Guarda tu Curse of the Sad Mummy específicamente para cuando Aatrox active World Ender e intente entrar con Umbral Dash. En cuanto se comprometa, inmovilízalo al instante. Si fallas el primer Bandage Toss, retírate de inmediato hacia tus campamentos de la jungla para dejar que su ultimate se agote antes de volver a hacer engage con Despair.
Peleas en equipoInmunidad a CCEste matchup se define por cómo choca tu CC con las reacciones defensivas de Ambessa. Su Repudiation funciona como un counter directo a tu Bandage Toss: absorbe el daño y bloquea por completo el stun. Sin embargo, su dependencia de los dashes rápidos de Drakehound's Step para moverse entre las escaramuzas queda totalmente anulada por Curse of the Sad Mummy, que ofrece un lockdown masivo en área, ineludible, que ella no puede bloquear ni esquivar una vez iniciado.Build de Ambessa →Ver detalles
Ambessa
Por qué
Este matchup se define por cómo choca tu CC con las reacciones defensivas de Ambessa. Su Repudiation funciona como un counter directo a tu Bandage Toss: absorbe el daño y bloquea por completo el stun. Sin embargo, su dependencia de los dashes rápidos de Drakehound's Step para moverse entre las escaramuzas queda totalmente anulada por Curse of the Sad Mummy, que ofrece un lockdown masivo en área, ineludible, que ella no puede bloquear ni esquivar una vez iniciado.
Impacto en la línea
En la jungla, esta tensión determina cómo disputas los campamentos neutrales y las escaramuzas del río. Si inicias a ciegas con Bandage Toss, Ambessa lo absorberá, activará Drakehound's Step para cerrar la distancia y te destrozará con Cunning Sweep. Esto hace que las disputas tempranas por los crabs sean muy volátiles. Sin embargo, una vez que se desbloquean las ultimates, tu presencia en las peleas de equipo se dispara y obliga a Ambessa a jugar de forma pasiva o a arriesgarse a quedar inmovilizada al instante antes de poder ejecutar Public Execution.
Cómo jugar
Para tener éxito, nunca abras un gank o una escaramuza con Bandage Toss si Ambessa tiene Repudiation disponible. En su lugar, acércate con Despair y Tantrum activos, obligándola a gastar su escudo o a recibir daño continuo. Guarda tus cargas de Bandage hasta que ella gaste su dash. Cuando estalle una pelea de equipo, espera a que se lance sobre tu backline con Lacerate y activa de inmediato Curse of the Sad Mummy para congelarla en el sitio e impedir que consiga resets con Public Execution.
EscaramuzasPeleas en equipoEste matchup de jungla es una batalla de escalado y de control de escaramuzas. Kayn depende de Shadow Step para atravesar el terreno y salir de situaciones comprometidas, mientras recoge orbes para The Darkin Scythe. Sin embargo, Amumu puede anular por completo esta movilidad. Un Bandage Toss bien sincronizado puede interceptar a Kayn justo cuando sale de una pared, inmovilizándolo antes de que pueda reaccionar con Reaping Slash o Umbral Trespass.Build de Kayn →Ver detalles
Kayn
Por qué
Este matchup de jungla es una batalla de escalado y de control de escaramuzas. Kayn depende de Shadow Step para atravesar el terreno y salir de situaciones comprometidas, mientras recoge orbes para The Darkin Scythe. Sin embargo, Amumu puede anular por completo esta movilidad. Un Bandage Toss bien sincronizado puede interceptar a Kayn justo cuando sale de una pared, inmovilizándolo antes de que pueda reaccionar con Reaping Slash o Umbral Trespass.
Impacto en la línea
La capacidad de Kayn de hacer gank desde ángulos inesperados te obliga a mantener visión profunda. Cuando se disputan campamentos neutrales, tu presencia limita su libertad. Al impedir sus escapes por las paredes, le niegas las escaramuzas seguras que necesita para desbloquear The Darkin Scythe. Retrasar su transformación debilita directamente su presión en el mapa durante la fase media y permite que tu equipo asegure los primeros dragones sin temer sus robos con Smite.
Cómo jugar
Nunca lances tu Bandage Toss a ciegas hacia la niebla de guerra. Cuando Kayn use Shadow Step para huir a través de una pared, espera cerca de su punto de salida previsto y lanza tu bandage justo cuando aparezca su modelo. Una vez anclado, activa de inmediato Despair y Tantrum para derretir su vida. Si intenta darle la vuelta a la pelea con Umbral Trespass, prepara tu Curse of the Sad Mummy para inmovilizarlo en cuanto reaparezca.
EscaramuzasArmaduraEste matchup depende de cómo interactúan los perdigones de New Destiny de Graves con tu Tantrum. Como Graves dispara varios perdigones físicos por ataque básico, la reducción de daño plana de Tantrum se aplica a cada perdigón y neutraliza con fuerza el daño de sus ataques básicos. Sin embargo, si logra hacer kite contigo con Quickdraw y te estorba la visión con Smoke Screen, puede anular con facilidad tu engage y desgastar tu vida desde una posición segura.Build de Graves →Ver detalles
Graves
Por qué
Este matchup depende de cómo interactúan los perdigones de New Destiny de Graves con tu Tantrum. Como Graves dispara varios perdigones físicos por ataque básico, la reducción de daño plana de Tantrum se aplica a cada perdigón y neutraliza con fuerza el daño de sus ataques básicos. Sin embargo, si logra hacer kite contigo con Quickdraw y te estorba la visión con Smoke Screen, puede anular con facilidad tu engage y desgastar tu vida desde una posición segura.
Impacto en la línea
Las escaramuzas en la jungla son muy volátiles y dependen por completo del entorno. Si Graves te atrapa cerca de una pared, su End of the Line rebota al instante y iguala el daño de tu Despair. Aunque New Destiny le da una ventaja al limpiar al inicio, el cooldown de tu Tantrum se activa constantemente cuando sus perdigones te impactan. Esto te permite igualar su velocidad de limpieza y defender con comodidad tus campamentos frente a su counter-jungling agresivo.
Cómo jugar
Para ganar este duelo, nunca lances Bandage Toss a ciegas mientras Graves tenga Quickdraw disponible para esquivarlo. Oblígalo a acercarse y pelea lejos del terreno para que su End of the Line no explote al instante. Si lanza Smoke Screen, sal de la nube de inmediato antes de intentar devolver el golpe. Una vez que gaste su dash hacia delante, inmovilízalo con Curse of the Sad Mummy para asegurarte de que tu Despair y Cursed Touch derritan su armadura acumulada.
Peleas en equipoMovilidadHecarim depende de la velocidad que acumulan Devastating Charge y Warpath para iniciar escaramuzas de gran impacto. El Bandage Toss de Amumu es la respuesta perfecta: una interrupción con skillshot que puede alcanzar a Hecarim en pleno sprint. Detener su carga le quita de golpe el impulso y el daño adicional, y convierte su dive agresivo en una posición vulnerable en la que Despair y Tantrum pueden derretirlo.Build de Hecarim →Ver detalles
Hecarim
Por qué
Hecarim depende de la velocidad que acumulan Devastating Charge y Warpath para iniciar escaramuzas de gran impacto. El Bandage Toss de Amumu es la respuesta perfecta: una interrupción con skillshot que puede alcanzar a Hecarim en pleno sprint. Detener su carga le quita de golpe el impulso y el daño adicional, y convierte su dive agresivo en una posición vulnerable en la que Despair y Tantrum pueden derretirlo.
Impacto en la línea
Esta dinámica determina la seguridad de tus lanes y de las escaramuzas del río. Cuando Hecarim intenta hacer gank o asegurar los Scuttle Crabs, tu presencia decide el resultado. Si sigues su ruta de cerca, puedes neutralizar por completo sus intentos de flanqueo. Sin embargo, si fallas Bandage Toss durante su Devastating Charge, él te elude por completo y deja que su Rampage y Spirit of Dread arrasen a tus compañeros antes de que puedas lanzar Curse of the Sad Mummy.
Cómo jugar
Durante las escaramuzas, nunca inicies con Bandage Toss. En su lugar, colócate como escudo entre Hecarim y tu carry, con el cursor listo para interceptar su Devastating Charge. Si Hecarim se compromete primero con Onslaught of Shadows para eludirte, espera a que pase el efecto de miedo y luego inmovilízalo de inmediato con Curse of the Sad Mummy y Despair, impidiendo que se cure con Spirit of Dread mientras tu equipo se lanza sobre él.
Control de zonaPeleas en equipoEste matchup de jungla es un choque directo entre asegurar objetivos y escalar en las peleas de equipo. Nunu & Willump dominan las primeras tomas de monstruos épicos porque Consume funciona como un segundo Smite enorme, lo que hace muy arriesgados los pits disputados para ti. Sin embargo, a medida que avanza la partida, tu Curse of the Sad Mummy eclipsa por completo su presencia en las peleas de equipo, inmovilizando a equipos enteros mientras Despair derrite a su frontline de mucha vida.Build de Nunu & Willump →Ver detalles
Nunu & Willump
Por qué
Este matchup de jungla es un choque directo entre asegurar objetivos y escalar en las peleas de equipo. Nunu & Willump dominan las primeras tomas de monstruos épicos porque Consume funciona como un segundo Smite enorme, lo que hace muy arriesgados los pits disputados para ti. Sin embargo, a medida que avanza la partida, tu Curse of the Sad Mummy eclipsa por completo su presencia en las peleas de equipo, inmovilizando a equipos enteros mientras Despair derrite a su frontline de mucha vida.
Impacto en la línea
No puedes disputar con facilidad un Dragon o un Rift Herald en un duelo directo de Smite si Nunu tiene la vida suficiente para usar Consume. Esta dinámica te obliga a seguir de cerca su ruta. Si usa Biggest Snowball Ever! para hacer gank a una lane lateral, debes castigarlo de inmediato limpiando sus campamentos del lado opuesto o intercambiando por el objetivo opuesto del mapa, evitando una pelea épica cara a cara.
Cómo jugar
Al disputar los objetivos neutrales importantes, no intentes ganarle el Smite a su Consume. En su lugar, concentra tu CC en el propio Nunu. Guarda Bandage Toss para interrumpir su canalizado de Absolute Zero o para inmovilizarlo antes de que llegue al monstruo épico con poca vida. Inicia con Curse of the Sad Mummy cuando su equipo se agrupe para asegurarlo, y usa Tantrum para mitigar su daño físico cuando contraataquen.
DesenganchePeleas en equipoEste matchup de jungla depende por completo de cómo responda Gragas a tus iniciaciones. Mientras tú quieres encontrar un stun a varios enemigos usando Bandage Toss para cerrar la distancia, Gragas puede desbaratar al instante toda tu presencia en la pelea de equipo. En el momento en que activas Curse of the Sad Mummy, puede lanzar Explosive Cask para apartarte de tus aliados, separándote del daño de seguimiento que tu Cursed Touch amplifica.Build de Gragas →Ver detalles
Gragas
Por qué
Este matchup de jungla depende por completo de cómo responda Gragas a tus iniciaciones. Mientras tú quieres encontrar un stun a varios enemigos usando Bandage Toss para cerrar la distancia, Gragas puede desbaratar al instante toda tu presencia en la pelea de equipo. En el momento en que activas Curse of the Sad Mummy, puede lanzar Explosive Cask para apartarte de tus aliados, separándote del daño de seguimiento que tu Cursed Touch amplifica.
Impacto en la línea
En las escaramuzas tempranas alrededor del río, Gragas usa Barrel Roll y Drunken Rage para mitigar el daño de tu Tantrum mientras disputa campamentos. Si haces engage a ciegas con Bandage Toss, puede responder con Body Slam para inmovilizarte. Esta amenaza mutua convierte las peleas por objetivos en un enfrentamiento tenso en el que ninguno de los dos junglers puede gastar su ultimate con seguridad sin arriesgarse a un contra-disengage total que arruine la pelea.
Cómo jugar
Para ganar este juego mental, nunca lideres la entrada con Bandage Toss si Gragas tiene Explosive Cask listo. En su lugar, acércate con Despair activo para provocar su Body Slam. Una vez que gaste su herramienta de movimiento, flanquea a su backline desde un punto ciego. Si logra apartarte con su barril, busca de inmediato volver a hacer engage con tu segunda carga de Bandage Toss para pegarte a sus carries frágiles antes de que escapen.
Presión tempranaEscaladoEste duelo de jungla es una carrera contra el reloj. Lee Sin usa Flurry y Sonic Wave para dominar las escaramuzas tempranas e intentar invadir tus campamentos. Aunque su Dragon's Rage puede anular tu Curse of the Sad Mummy al patearte lejos antes de que tu equipo pueda seguir tu Bandage Toss, tu escalado en la fase final es muy superior. Si sobrevives a su presión inicial, tu Despair y Cursed Touch derretirán a todos en las peleas de equipo.Build de Lee Sin →Ver detalles
Lee Sin
Por qué
Este duelo de jungla es una carrera contra el reloj. Lee Sin usa Flurry y Sonic Wave para dominar las escaramuzas tempranas e intentar invadir tus campamentos. Aunque su Dragon's Rage puede anular tu Curse of the Sad Mummy al patearte lejos antes de que tu equipo pueda seguir tu Bandage Toss, tu escalado en la fase final es muy superior. Si sobrevives a su presión inicial, tu Despair y Cursed Touch derretirán a todos en las peleas de equipo.
Impacto en la línea
Tu ruta temprana está dictada por completo por el seguimiento del buff inicial de Lee Sin. Si acierta Sonic Wave en tu jungla, su Flurry le da la velocidad de ataque para asegurar una kill antes de que puedas acumular Tantrum. Debes ceder los primeros Scuttle Crabs si tus laners no tienen prioridad, ya que un duelo en nivel tres lo favorece a él. Sin embargo, obligarlo a usar Safeguard a la defensiva en lugar de hacer jugadas por todo el mapa es una gran victoria para tus lanes.
Cómo jugar
Nunca inicies con Bandage Toss si Lee Sin tiene Dragon's Rage disponible, ya que te pateará de inmediato hacia su equipo o lejos de tus objetivos. En su lugar, acércate con Despair activo y obliga a que sea él quien haga el primer movimiento. Sigue sus campamentos de jungla para predecir sus ganks y contrarrestarlos asegurando objetivos al otro lado del mapa. Guarda tu Curse of the Sad Mummy hasta que gaste su dash de Safeguard, para asegurarte de que no pueda escapar del radio de tu ultimate.
Estos campeones suelen tener problemas para responder a tus principales fortalezas, lo que te permite afrontar el enfrentamiento con más libertad. Normalmente tienes varias formas de presionarlos y forzar intercambios a tu favor. Aprovecha esta ventaja para imponer tu ritmo en lugar de darles tiempo para volver a una posición cómoda.
Peleas en equipoContraengancheTienes la ventaja porque Vi depende mucho de cargar Vault Breaker para iniciar o escapar, algo que puedes interrumpir con facilidad con Bandage Toss. Además, su ultimate Cease and Desist la hace imparable durante el dash, pero en el instante en que aterriza es muy vulnerable. Puedes dejar preparado Curse of the Sad Mummy para inmovilizarla al instante, haciendo inútil su burst inicial.Build de Vi →Ver detalles
Vi
Por qué
Tienes la ventaja porque Vi depende mucho de cargar Vault Breaker para iniciar o escapar, algo que puedes interrumpir con facilidad con Bandage Toss. Además, su ultimate Cease and Desist la hace imparable durante el dash, pero en el instante en que aterriza es muy vulnerable. Puedes dejar preparado Curse of the Sad Mummy para inmovilizarla al instante, haciendo inútil su burst inicial.
Impacto en la línea
En las escaramuzas del río o durante los counter-ganks, este matchup impide que Vi juegue de forma agresiva. No puede ejecutar con seguridad sus combos de gank porque tú puedes frenar su dive de forma reactiva. Si intenta igualar tu velocidad de limpieza, Despair y Tantrum te permiten recorrer los campamentos más rápido, dándote la prioridad para preparar objetivos mientras ella se ve obligada a guardar su dash.
Cómo jugar
Al disputar campamentos u objetivos, nunca lances Bandage Toss a ciegas. En su lugar, acércate con Despair activo y espera a que ella prepare Vault Breaker; luego interrúmpela en pleno dash. Si va a por tu carry con Cease and Desist, colócate justo al lado de su objetivo. En el instante en que termine su animación imparable, lanza Curse of the Sad Mummy para inutilizarla antes de que pueda activar Denting Blows.
Control de masasPeleas en equipoEste matchup es muy favorable para Amumu porque tu CC neutraliza por completo la red de seguridad de Ekko. Ekko depende de Chronobreak para sobrevivir a dives profundos y a daño burst, pero tu capacidad de encadenar Bandage Toss con Curse of the Sad Mummy le impide llegar a pulsar su ultimate. Al mantenerlo inmovilizado de forma continua, haces que su principal herramienta de escape y curación sea totalmente inútil y lo dejas frágil.Build de Ekko →Ver detalles
Ekko
Por qué
Este matchup es muy favorable para Amumu porque tu CC neutraliza por completo la red de seguridad de Ekko. Ekko depende de Chronobreak para sobrevivir a dives profundos y a daño burst, pero tu capacidad de encadenar Bandage Toss con Curse of the Sad Mummy le impide llegar a pulsar su ultimate. Al mantenerlo inmovilizado de forma continua, haces que su principal herramienta de escape y curación sea totalmente inútil y lo dejas frágil.
Impacto en la línea
En la jungla, esta interacción le quita a Ekko su típico poder de escaramuza agresiva. No puede usar Phase Dive con seguridad para iniciar peleas o robar campamentos, sabiendo que un solo Bandage Toss lo llevará a la muerte antes de que pueda rebobinar. Esto te permite asegurar los Scuttle Crabs y disputar objetivos neutrales con total confianza, obligando a Ekko a un estilo de farmeo pasivo.
Cómo jugar
Para ejecutarlo a la perfección, nunca inicies con todo tu CC a la vez cuando Ekko tenga la vida completa. Espera a que se comprometa con Phase Dive y entonces golpéalo con Bandage Toss. Activa Curse of the Sad Mummy solo cuando su vida baje hasta el punto en que quiera usar Chronobreak. Si intenta aturdirte con Parallel Convergence, usa tu bandage para sacarte de su zona.
Control de zonaPeleas en equipoShyvana depende mucho de Dragon's Descent para entrar a la fuerza en las peleas, pero este dive predecible es la preparación perfecta para tu Curse of the Sad Mummy. En el momento en que salta hacia delante, puedes inmovilizarla al instante en el aire o al aterrizar. Esta reacción neutraliza su amenaza en forma de dragón mientras Despair destroza su barra de vida, y convierte su principal herramienta de engage en su propia perdición.Build de Shyvana →Ver detalles
Shyvana
Por qué
Shyvana depende mucho de Dragon's Descent para entrar a la fuerza en las peleas, pero este dive predecible es la preparación perfecta para tu Curse of the Sad Mummy. En el momento en que salta hacia delante, puedes inmovilizarla al instante en el aire o al aterrizar. Esta reacción neutraliza su amenaza en forma de dragón mientras Despair destroza su barra de vida, y convierte su principal herramienta de engage en su propia perdición.
Impacto en la línea
Este matchup se convierte en una feroz carrera por limpiar campamentos y monstruos neutrales. Shyvana necesita desesperadamente farmear monstruos grandes para acumular Fury of the Dragonborn, así que intentará hacer power-farm constantemente. Como puedes interrumpirla con facilidad con Bandage Toss y superarla en daño en campamentos prolongados con Tantrum, puedes marcar el ritmo de las peleas por monstruos épicos y obligarla a escaramuzas tempranas desfavorables.
Cómo jugar
Nunca inicies con tu ultimate cuando Shyvana tenga Fury completa. En su lugar, provoca su engage y guarda Curse of the Sad Mummy estrictamente para contrarrestar Dragon's Descent. Al disputar objetivos neutrales, colócate entre ella y el pit. Usa Bandage Toss para interceptarla antes de que pueda asegurar el Smite. Si intenta escapar con Burnout, recuerda que el cooldown de tu Tantrum se reduce con sus golpes rápidos de Twin Bite, lo que te permite ganar el duelo.
Peleas en equipoEscaladoAmumu desmantela de forma natural a Rammus en las escaramuzas directas de jungla, porque Rammus depende mucho de acumular armadura para aumentar su daño con Rolling Armordillo y de reflejar ataques con Defensive Ball Curl. Sin embargo, tu Despair inflige daño mágico continuo basado en un porcentaje de vida que ignora por completo sus defensas de armadura apilada. Combinado con Cursed Touch, que amplifica todo el daño mágico que recibe Rammus, conviertes su defensa basada en estadísticas en una debilidad.Build de Rammus →Ver detalles
Rammus
Por qué
Amumu desmantela de forma natural a Rammus en las escaramuzas directas de jungla, porque Rammus depende mucho de acumular armadura para aumentar su daño con Rolling Armordillo y de reflejar ataques con Defensive Ball Curl. Sin embargo, tu Despair inflige daño mágico continuo basado en un porcentaje de vida que ignora por completo sus defensas de armadura apilada. Combinado con Cursed Touch, que amplifica todo el daño mágico que recibe Rammus, conviertes su defensa basada en estadísticas en una debilidad.
Impacto en la línea
Este matchup inclina por completo el control de la jungla a tu favor. Rammus no puede duelear contigo con seguridad cerca de los campamentos, así que puedes asegurar objetivos de forma agresiva y disputar sus monstruos neutrales. Cuando intenta cruzar el río a toda velocidad con Powerball para hacer gank a tus lanes, tu velocidad de limpieza superior te permite hacer un counter-gank inmediato o quitarle sus campamentos, dejándolo con menos nivel e incapaz de igualar tu amenaza en las peleas de equipo.
Cómo jugar
Durante las escaramuzas, no te asustes si usa Frenzying Taunt sobre ti; simplemente mantén Despair activo para derretir su vida mientras te ves obligado a atacarlo. Guarda tu Bandage Toss para cancelar su carga de Powerball cuando intente escapar o hacer engage sobre tus aliados. En las peleas de equipo importantes, espera a que se comprometa con Soaring Slam y sigue de inmediato con Curse of the Sad Mummy para inmovilizar a su backline antes de que pueda seguir su iniciativa.
ProtecciónVisiónAmumu domina este matchup porque su abundante CC neutraliza por completo la amenaza de asesinato de Evelynn. Mientras ella intenta acechar a tus aliados con Demon Shade, tu capacidad de inmovilizar objetivos con Bandage Toss la deja increíblemente vulnerable. Si marca a alguien con Allure, puedes interceptarla de forma reactiva en pleno acercamiento y activar Cursed Touch para amplificar el daño de tu equipo antes de que pueda escapar con Last Caress.Build de Evelynn →Ver detalles
Evelynn
Por qué
Amumu domina este matchup porque su abundante CC neutraliza por completo la amenaza de asesinato de Evelynn. Mientras ella intenta acechar a tus aliados con Demon Shade, tu capacidad de inmovilizar objetivos con Bandage Toss la deja increíblemente vulnerable. Si marca a alguien con Allure, puedes interceptarla de forma reactiva en pleno acercamiento y activar Cursed Touch para amplificar el daño de tu equipo antes de que pueda escapar con Last Caress.
Impacto en la línea
Esta dinámica le quita a Evelynn su terror en todo el mapa y la obliga a un estilo de farmeo pasivo. Sus ganks se vuelven predecibles porque no puede eludir tus preparativos defensivos sin ser atrapada. Durante las escaramuzas se ve forzada a jugar muy atrás, lo que significa que tus laners pueden empujar de forma agresiva sabiendo que cualquier intento de ella de hacer engage con Whiplash recibirá un contra-engage inmediato de Curse of the Sad Mummy.
Cómo jugar
Prioriza comprar Control Wards en cada recall y colócalas en los arbustos del río con mucho tránsito para exponer constantemente su Demon Shade. Cuando veas el corazón de Allure formándose sobre un aliado, colócate de inmediato entre ellos y su trayectoria prevista. Guarda tu Bandage Toss hasta que ella se revele para atacar. Una vez inmovilizada, activa Despair y spamea Tantrum para destrozar su vida, obligándola a gastar Last Caress a la defensiva en lugar de para conseguir una kill.
Control de masasCounter duroAmumu domina este duelo de jungla porque Master Yi depende por completo de Alpha Strike para esquivar el CC mientras corta con Wuju Style. Como tu Bandage Toss y Curse of the Sad Mummy ofrecen lockdowns consecutivos e inevitables una vez que reaparece, su evasión se convierte en su trampa. Al combinar este CC con el daño continuo por porcentaje de vida de Despair, destrozas fácilmente su build de asesino frágil.Build de Master Yi →Ver detalles
Master Yi
Por qué
Amumu domina este duelo de jungla porque Master Yi depende por completo de Alpha Strike para esquivar el CC mientras corta con Wuju Style. Como tu Bandage Toss y Curse of the Sad Mummy ofrecen lockdowns consecutivos e inevitables una vez que reaparece, su evasión se convierte en su trampa. Al combinar este CC con el daño continuo por porcentaje de vida de Despair, destrozas fácilmente su build de asesino frágil.
Impacto en la línea
Esta interacción impide que Master Yi invada con seguridad tus campamentos o dispute los Rift Scuttlers. En las escaramuzas, el miedo a tu Curse of the Sad Mummy lo obliga a jugar de forma pasiva y retrasa su entrada en las peleas de equipo. Esto da total libertad a tus lanes, ya que cualquier intento suyo de hacer dive sobre tus aliados con Highlander puede ser frenado y castigado al instante por tu CC.
Cómo jugar
Al enfrentarte a Master Yi, nunca inicies con Bandage Toss ni lances Curse of the Sad Mummy por pánico mientras su Alpha Strike esté disponible. Mantén Despair activado para infligir daño constante y espera a que reaparezca de su estado no seleccionable. En el instante en que aterrice, inmovilízalo de inmediato con tu ultimate. Si intenta mitigar el daño entrante con Meditate, interrumpe su canalizado con un lanzamiento preciso de bandage.
Control de masasEscaladoAmumu destaca aquí porque el DPS de Jax depende de acumular Relentless Assault para atacar rápido con sus ataques básicos. La pasiva Tantrum de Amumu reduce de forma plana el daño físico de cada golpe, lo que hace que el estilo de ataques rápidos de Jax sea matemáticamente débil contra ti. Además, cuando Jax te ataca rápido, reduce una y otra vez el cooldown de tu Tantrum, lo que te permite spamear tu daño en área como respuesta mientras Cursed Touch amplifica todo el daño mágico.Build de Jax →Ver detalles
Jax
Por qué
Amumu destaca aquí porque el DPS de Jax depende de acumular Relentless Assault para atacar rápido con sus ataques básicos. La pasiva Tantrum de Amumu reduce de forma plana el daño físico de cada golpe, lo que hace que el estilo de ataques rápidos de Jax sea matemáticamente débil contra ti. Además, cuando Jax te ataca rápido, reduce una y otra vez el cooldown de tu Tantrum, lo que te permite spamear tu daño en área como respuesta mientras Cursed Touch amplifica todo el daño mágico.
Impacto en la línea
En la jungla, esta interacción te hace increíblemente seguro durante las escaramuzas directas por los campamentos. Jax no puede disputar fácilmente tus campamentos ni sacarte de tu jungla, porque su Empower y los resets de ataque básico solo aceleran tu spam de Tantrum. Esto te permite asegurar los Scuttle Crabs con facilidad y presionar con seguridad su jungla, sabiendo que un duelo 1v1 en el río favorece mucho tu escalado defensivo.
Cómo jugar
Al enfrentarte a Jax, no lances Bandage Toss de inmediato. Espera a que use Counter Strike para bloquear tus ataques básicos. Como su evasión no bloquea el daño de hechizo de Despair ni de Tantrum, mantenlos activos. Cuando su stun termine y se cierre su ventana defensiva, lanza Bandage Toss para inmovilizarlo y luego libera Curse of the Sad Mummy si sus compañeros llegan para ayudarlo a escapar con Leap Strike.
Ventaja: veredicto canónico de Wild Rift Core (−3 a +3), desde el punto de vista del campeón nombrado en la fila. Tasa de victorias y de selección: las del propio rival en este rol — Wild Rift CN · Challenger, Patch 7.3b. No es la tasa de victorias del enfrentamiento directo.
Cómo contrarrestar a este campeón
Ángulo de contra
Los counters de Amumu no son solo campeones que le ganan en duelo, sino aquellos que interrumpen su timing y su capacidad para hacer un engage limpio. El problema no es morir rápido, sino no lograr imponer su tempo. Los junglers agresivos y los campeones que evitan o castigan su engage convierten su partida en una supervivencia constante.
Contexto del parche
En el parche actual, Amumu sufre contra junglers que invaden y fuerzan peleas antes del nivel 5. Su falta de movilidad y daño temprano lo hace vulnerable. Además, las composiciones bien posicionadas a distancia o las herramientas defensivas reducen enormemente el impacto de su ultimate.
Lectura rápida
Sufre contra invades tempranos.
Fácil de castigar sin Flash.
Muy dependiente de las teamfights.
Arquetipos de contra
Junglers agresivos en el early game
Estos campeones explotan directamente la debilidad de Amumu: su early game. Invaden su jungle, fuerzan peleas cuando le faltan recursos y retrasan su nivel 5. Una vez por detrás, Amumu pierde su timing y pasa a depender de remontadas difíciles.
Cómo se adapta el campeón. Juega seguro, evita los duelos, asegura los campamentos y pide ayuda a las lanes.
Asesinos móviles
Esquivan fácilmente su engage y castigan los errores de posicionamiento. A Amumu le cuesta atraparlos y se convierte en un objetivo lento en peleas dispersas.
Lee Sin representa el peor tipo de matchup: presión constante en early, invades y control del tempo. Si Amumu pierde campamentos al principio o retrasa su nivel 5, toda la partida se vuelve difícil.
Errores comunes en su contra
Errores comunes en su contra
Forzar peleas contra junglers más fuertes en early.
Ignorar la visión de la jungle.
Hacer engage sin Flash.
Subestimar el daño enemigo en early.
Pelear antes del power spike de nivel 5.
Notas del coach
Si sobrevives al early, puedes remontar.
Tu objetivo es alcanzar tu power spike, no ganar el early.
FAQ
¿Cuál es su peor tipo de counter?
Los junglers agresivos de early son los más difíciles porque rompen su timing antes del nivel 5. Sin ultimate, Amumu tiene poco impacto en las peleas.
¿Puede jugar contra asesinos?
Sí, pero debe adaptarse. No debe intentar hacerles engage directamente, sino esperar a las peleas agrupadas.
¿Cómo evitar los invades?
La visión, un pathing inteligente y la comunicación con las lanes son clave para asegurar tu early game.
¿Puede recuperarse tras un mal early?
Sí, si alcanza el nivel 5 y sus objetos clave, puede volver a tener impacto en las teamfights.