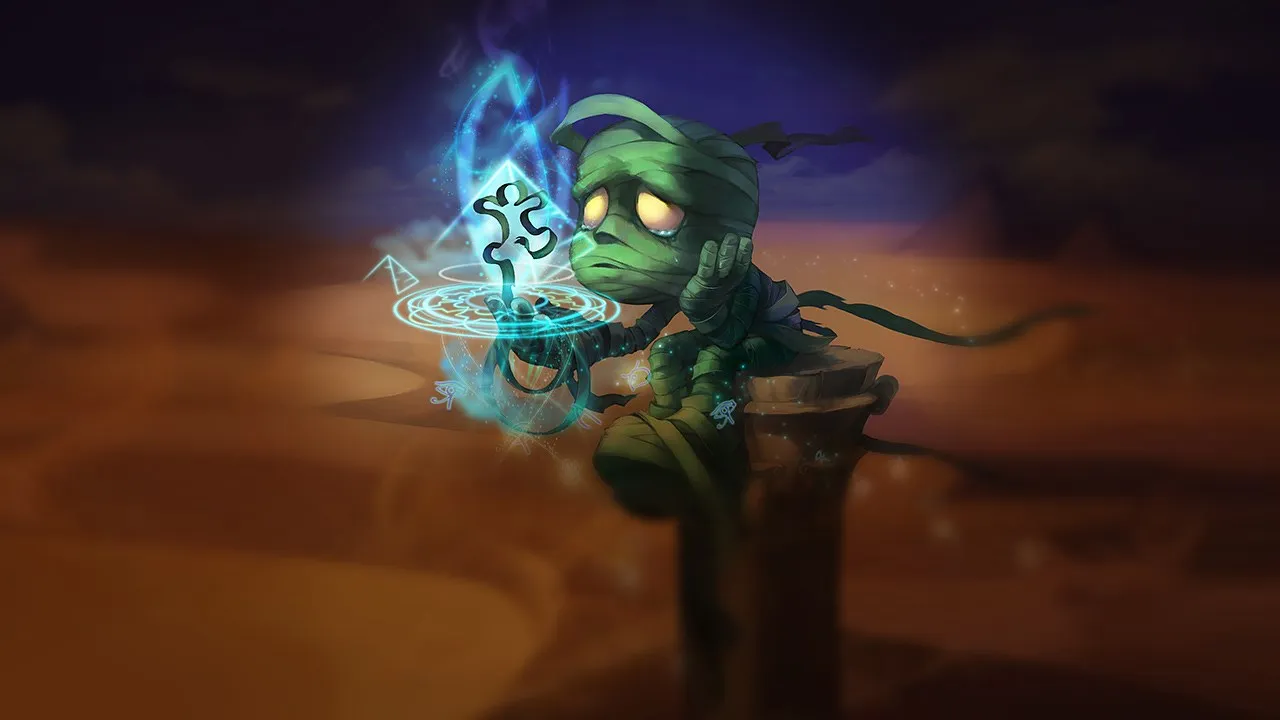
Amumu, a tank jungler, relies heavily on engage and large area crowd control. Compositions with strong disengage, constant poke, or high mobility can reduce his effectiveness. If his initiation fails, his team often loses the fight advantage.
★ JUNGLETier S
DMG
UTIL
TANK
DIFF
Win56.4%#4 · ↓0pt
Pick2.8%#22
Ban0.1%#134
Amumu Wild Rift Counters Guide
Hard Counters
4
These champions have a build and playstyle that directly overpower yours, which can make controlling the lane and farming extremely difficult. Their kit can neutralize your core strengths or punish you the moment you try to play your usual game plan. In these matchups, the goal is often to minimize mistakes and look for ways to win outside of direct confrontation.
CC immunitySurvivalOlaf is your ultimate nightmare because of how his ultimate interacts with your kit. Your entire lockdown potential relies on landing a clutch Bandage Toss or turning fights with Curse of the Sad Mummy. However, the moment Olaf activates Ragnarok, he becomes completely immune to all crowd control, meaning he can shrug off your stuns instantly and run you down without fear.Olaf build →See details
Olaf
The interaction that decides it
Olaf's Ragnarok makes him completely immune to Amumu's Bandage Toss and Curse of the Sad Mummy, allowing him to run Amumu down freely.
Why
Olaf is your ultimate nightmare because of how his ultimate interacts with your kit. Your entire lockdown potential relies on landing a clutch Bandage Toss or turning fights with Curse of the Sad Mummy. However, the moment Olaf activates Ragnarok, he becomes completely immune to all crowd control, meaning he can shrug off your stuns instantly and run you down without fear.
Lane impact
This interaction strips away your early and mid-game agency in the jungle. Olaf will aggressively invade your camps, knowing you cannot fight back. If he catches you, his Undertow slows you down while Vicious Strikes and Berserker Rage let him out-sustain any damage from your Despair and Tantrum, forcing you to concede neutral objectives entirely.
How to play
To survive, you must track his movements constantly and path away from him. Never initiate a fight on Olaf with Bandage Toss unless you know his ultimate is down. Instead, save your charges of Bandage Toss to hook onto jungle monsters over walls to escape. If he activates Ragnarok, immediately retreat and use Tantrum to mitigate his physical damage while waiting out his unstoppable duration.
TanksSkirmishesGwen is your worst nightmare in the river. When you try to lock her down with Bandage Toss, she activates Hallowed Mist, making herself immune to your stun from a distance. Once she closes the gap using Skip 'n Slash, her Snip Snip! shreds your high health pool, bypassing your passive defense from Tantrum. Your crying Despair aura simply cannot match her massive percentage-health damage.Gwen build →See details
Gwen
The interaction that decides it
Gwen's Hallowed Mist makes her untargetable to Amumu's Bandage Toss from range, while her Snip Snip! shreds his high health pool.
Why
Gwen is your worst nightmare in the river. When you try to lock her down with Bandage Toss, she activates Hallowed Mist, making herself immune to your stun from a distance. Once she closes the gap using Skip 'n Slash, her Snip Snip! shreds your high health pool, bypassing your passive defense from Tantrum. Your crying Despair aura simply cannot match her massive percentage-health damage.
Lane impact
This matchup completely ruins your early jungle control and objective contests. You cannot secure Scuttle Crabs or drakes directly because Gwen will force skirmishes where she easily shreds you. Entering the river becomes a massive risk, as she can dodge your Bandage Toss and counter-jungle you with impunity. This forces you to concede camps, delaying your Curse of the Sad Mummy power spike.
How to play
To survive, you must change how you use Bandage Toss. Never throw it from max range while her Hallowed Mist is available; instead, walk directly into her mist zone before casting your stun, or wait for her to waste Skip 'n Slash. In teamfights, do not initiate on Gwen. Save Curse of the Sad Mummy for when she dashes into your backline, trapping her inside your Despair so allies can burst her down.
KitingTeamfightsLillia thrives on keeping you at arm's length. Her passive movement speed from Blooming Blows gives her the agility to effortlessly sidestep your Bandage Toss. Without landing that skillshot, you cannot stick to her. She will comfortably kite you around the jungle, abusing her range to trigger Dream-Laden Bough and wear you down while staying completely out of your Despair aura.Lillia build →See details
Lillia
The interaction that decides it
Lillia's high movement speed from Blooming Blows allows her to easily dodge Bandage Toss and kite Amumu.
Why
Lillia thrives on keeping you at arm's length. Her passive movement speed from Blooming Blows gives her the agility to effortlessly sidestep your Bandage Toss. Without landing that skillshot, you cannot stick to her. She will comfortably kite you around the jungle, abusing her range to trigger Dream-Laden Bough and wear you down while staying completely out of your Despair aura.
Lane impact
This matchup leaves you constantly conceding the Scuttle Crabs and early skirmishes. Lillia can easily invade your camps, utilizing Swirlseed to scout you out and slow you down. If she catches you, Watch Out! Eep! deals magic damage while you struggle to retaliate. This forces you into a defensive farming pattern, robbing your laners of early gank pressure because you are constantly too low or stuck defending your own camps.
How to play
Stop throwing Bandage Toss in open areas where her Blooming Blows speed is fully stacked. Instead, hold the ability until she commits to her Watch Out! Eep! animation, which briefly locks her in place. When contesting objectives, force fights in tight jungle choke points where she cannot easily dodge. If she triggers Lilting Lullaby on you, try to pre-emptively cast Curse of the Sad Mummy to lock her down before you fall asleep.
These champions have tools that generally give them the edge in a fight, without making the matchup unwinnable. They might have more range, a better ability to soak up your offense, or more ways to answer your engages. You'll need to adapt your approach and carefully pick your moments to accept a fight.
Early pressureTanksVolibear dominates early skirmishes because his Frenzied Maul provides immense healing and biting damage during sustained fights. While Amumu relies on consistent magic damage from Despair and Tantrum to clear and fight, he lacks the immediate burst to execute the bear. Once Volibear marks you with his first bite, his subsequent heals completely outpace your early damage output, making direct river duels mathematical suicide.Volibear build →See details
Volibear
The interaction that decides it
Volibear's Frenzied Maul allows him to win sustained duels against Amumu, meaning Amumu must avoid early 1v1s in the river.
Why
Volibear dominates early skirmishes because his Frenzied Maul provides immense healing and biting damage during sustained fights. While Amumu relies on consistent magic damage from Despair and Tantrum to clear and fight, he lacks the immediate burst to execute the bear. Once Volibear marks you with his first bite, his subsequent heals completely outpace your early damage output, making direct river duels mathematical suicide.
Lane impact
This matchup dynamic forces you to yield control of the early Scuttle Crabs. If Volibear catches you in the river, his Thundering Smash and Sky Splitter combo will lock you down and shield him, leading to your death or a forced Flash. You cannot contest neutral camps directly, which slows your jungle clearing tempo and delays your access to crucial teamfighting power spikes.
How to play
To survive, path to the opposite side of the map from Volibear at level one to guarantee a safe farm. If he invades your jungle, do not try to defend your camps; instead, use Bandage Toss on a distant jungle monster to escape through walls. Hold your Curse of the Sad Mummy exclusively for coordinated teamfights near objectives, where your superior crowd control can neutralize him before he can activate Stormbringer.
Counter-engageVisionThe jungle matchup hinges on a reactive game of chicken. If you initiate with Bandage Toss, Nocturne easily blocks it with Shroud of Darkness, instantly nullifying your crowd control. While you are stunned by your own failed engage, he will tether you with Unspeakable Horror, forcing a fear that shuts down your Despair and Tantrum damage, leaving you completely vulnerable.Nocturne build →See details
Nocturne
The interaction that decides it
Nocturne's Shroud of Darkness can block Amumu's Bandage Toss, allowing Nocturne to fear him with Unspeakable Horror.
Why
The jungle matchup hinges on a reactive game of chicken. If you initiate with Bandage Toss, Nocturne easily blocks it with Shroud of Darkness, instantly nullifying your crowd control. While you are stunned by your own failed engage, he will tether you with Unspeakable Horror, forcing a fear that shuts down your Despair and Tantrum damage, leaving you completely vulnerable.
Lane impact
In the jungle, this interaction makes early scuttle duels and direct counter-jungling incredibly risky for you. If Nocturne invades, you cannot fight back without losing your primary escape tool. Once he reaches level five, his Paranoia allows him to bypass your vision and counter-gank you instantly, turning your proactive gank attempts with Curse of the Sad Mummy into deadly traps.
How to play
You must never lead with Bandage Toss. Walk up with Despair activated and use Tantrum to force him to panic-cast Shroud of Darkness. Only throw your bandage once his spell shield is down. If he catches you off guard with Paranoia, immediately drop Curse of the Sad Mummy to break his tempo before Unspeakable Horror triggers, then use your Bandage Toss defensively to grapple to a nearby jungle monster.
Early pressureScalingPantheon dominates the early jungle duels because his Aegis Assault can completely absorb your Bandage Toss and Despair burst. However, this matchup isn't entirely one-sided. The passive flat physical damage reduction from your Tantrum directly counters the rapid-fire multi-hits of his Mortal Will empowered Shield Vault and physical strikes from Comet Spear, keeping you surprisingly healthy during skirmishes.Pantheon build →See details
Pantheon
The interaction that decides it
Pantheon's Aegis Assault can block Amumu's initial burst, but Amumu's Tantrum passive reduces the physical damage from Pantheon's rapid-fire attacks.
Why
Pantheon dominates the early jungle duels because his Aegis Assault can completely absorb your Bandage Toss and Despair burst. However, this matchup isn't entirely one-sided. The passive flat physical damage reduction from your Tantrum directly counters the rapid-fire multi-hits of his Mortal Will empowered Shield Vault and physical strikes from Comet Spear, keeping you surprisingly healthy during skirmishes.
Lane impact
Pantheon's aggressive early clears put immense pressure on your camps. If he finds you in your jungle, his Shield Vault initiation leaves you vulnerable to a fatal Comet Spear execute. This force-multiplier means you must constantly track his starting camp and mirror his pathing to avoid direct 1v1 confrontations, focusing instead on securing opposite objectives and keeping your lanes alerted before he flies in with Grand Starfall.
How to play
Never initiate with Bandage Toss when Pantheon has his Aegis Assault ready; instead, walk up with Despair active and wait for him to waste his defensive shield. If he jumps on you with an empowered Shield Vault, let your Tantrum passive absorb his rapid physical strikes while you reposition. Track his jungle route by placing deep wards at his raptor camp early, allowing you to counter-gank immediately after his Grand Starfall lands.
Early pressureSustainWarwick dominates the jungle duel because Jaws of the Beast allows him to ignore the displacement of Bandage Toss while healing through Eternal Hunger. Furthermore, his Infinite Duress can suppress you instantly, locking you down before you can even react with Curse of the Sad Mummy, completely neutralizing your primary teamfight tool.Warwick build →See details
Warwick
The interaction that decides it
Warwick's Jaws of the Beast makes him immune to displacement, and his Infinite Duress can suppress Amumu before Amumu can cast Curse of the Sad Mummy.
Why
Warwick dominates the jungle duel because Jaws of the Beast allows him to ignore the displacement of Bandage Toss while healing through Eternal Hunger. Furthermore, his Infinite Duress can suppress you instantly, locking you down before you can even react with Curse of the Sad Mummy, completely neutralizing your primary teamfight tool.
Lane impact
You cannot contest neutral camps or Scuttle Crabs directly. If you drop low during your clear, Blood Hunt alerts him, leading to lethal counter-jungling where you cannot fight back. If he catches you, Primal Howl reduces your Tantrum and Despair damage while forcing a retreat, sacrificing your early map pressure.
How to play
Never seek 1v1 duels in the river; track his starting buff and path to the opposite side to clear safely. During skirmishes, hold Curse of the Sad Mummy until Warwick commits Infinite Duress on a teammate, allowing you to interrupt his suppression instantly. If he jumps on you, use Bandage Toss on a jungle monster to escape instead of fighting through Primal Howl.
KitingBurstKindred's ability to completely nullify death with Lamb's Respite makes your primary teamfight tool, Curse of the Sad Mummy, feel incredibly unrewarding. While you want to lock them down and shred them with Cursed Touch and Despair, they can simply drop their ultimate zone to survive your burst. Additionally, their mobility via Dance of Arrows makes landing Bandage Toss highly unreliable in open jungle skirmishes.Kindred build →See details
Kindred
The interaction that decides it
Kindred's Lamb's Respite can completely negate the burst damage from Amumu's Curse of the Sad Mummy combo.
Why
Kindred's ability to completely nullify death with Lamb's Respite makes your primary teamfight tool, Curse of the Sad Mummy, feel incredibly unrewarding. While you want to lock them down and shred them with Cursed Touch and Despair, they can simply drop their ultimate zone to survive your burst. Additionally, their mobility via Dance of Arrows makes landing Bandage Toss highly unreliable in open jungle skirmishes.
Lane impact
In the jungle, Kindred will aggressively invade to collect Mark of the Kindred stacks, knowing you struggle to duel them early. If you try to contest camps, they will kite you using Wolf's Frenzy and execute you with Mounting Dread. This forces you into a defensive farming route, giving up early priority on Scuttle Crabs and leaving your lanes vulnerable to their high-tempo ranged ganks.
How to play
Never initiate fights with Curse of the Sad Mummy if Kindred has Lamb's Respite available, unless you can chain Bandage Toss to lock them down before they can cast it. Instead, play front-to-back, using Tantrum to soak physical damage while keeping Despair active. Force them to drop their ultimate defensively to save an ally, then immediately drag the fight outside of their healing zone to finish them off once the circle expires.
Early pressurePeelXin Zhao heavily disrupts your team-fighting identity. While your Bandage Toss into Curse of the Sad Mummy is a premier engage tool, his Crescent Guard acts as a hard counter. By sweeping away and blocking all damage from your ranged allies standing outside his arena, he isolates you. Even if you apply Cursed Touch and burn him with Despair, your team cannot follow up on your crowd control.Xin Zhao build →See details
Xin Zhao
The interaction that decides it
Xin Zhao's Crescent Guard can block the damage and follow-up from Amumu's ranged allies after Amumu engages.
Why
Xin Zhao heavily disrupts your team-fighting identity. While your Bandage Toss into Curse of the Sad Mummy is a premier engage tool, his Crescent Guard acts as a hard counter. By sweeping away and blocking all damage from your ranged allies standing outside his arena, he isolates you. Even if you apply Cursed Touch and burn him with Despair, your team cannot follow up on your crowd control.
Lane impact
In the jungle, this interaction makes early skirmishes near scuttle crabs or neutral objectives incredibly risky. Xin Zhao will aggressively seek you out with Audacious Charge and Wind Becomes Lightning, knowing you cannot duel him. If you try to fight back, his Determination heals him through your Tantrum damage. This constant threat forces you to concede early river control, putting pressure on your laners who lack your backup.
How to play
To survive, you must track his starting camp and mirror his pathing to avoid him entirely in the early game. Never initiate with Bandage Toss if your ranged allies are too far to step inside his eventual Crescent Guard circle. Instead, use Despair and Tantrum to clear your camps quickly, aiming to counter-gank on the opposite side of the map. Only commit Curse of the Sad Mummy after he has already used his ultimate or when your melee allies can dive inside his ring with you.
Early pressurePicksKha'Zix exploits your slow early clears to invade your camps. Since you are often alone in the river or jungle, his Taste Their Fear triggers its isolation bonus, chunking your health bar instantly. Your sustained damage from Despair and physical damage reduction from Tantrum cannot match this burst, especially when Unseen Threat repeatedly slows you down during his ambush.Kha'Zix build →See details
Kha'Zix
The interaction that decides it
Kha'Zix's Taste Their Fear deals massive damage to Amumu if he is caught isolated in his own jungle.
Why
Kha'Zix exploits your slow early clears to invade your camps. Since you are often alone in the river or jungle, his Taste Their Fear triggers its isolation bonus, chunking your health bar instantly. Your sustained damage from Despair and physical damage reduction from Tantrum cannot match this burst, especially when Unseen Threat repeatedly slows you down during his ambush.
Lane impact
This matchup forces you into defensive, highly predictable pathing. Every time you start a camp like the Raptors or Krugs, the threat of an immediate invade prevents you from using Bandage Toss offensively to speed up your clear. If Kha'Zix catches you with low health, a single isolation strike secures a kill, stealing your camps and delaying your crucial Curse of the Sad Mummy spikes.
How to play
To survive, always clear camps alongside small monsters to deny him isolation damage; do not kill the small Raptors first. Keep a charge of Bandage Toss ready to escape over walls to safety rather than using it for camp speed. If he jumps on you with Leap, immediately retreat toward your nearest laner so your passive Cursed Touch and Curse of the Sad Mummy can be used to lock him down with team assistance.
These matchups are above all duels of execution: both champions have credible ways to gain the upper hand. Dodging one key ability, anticipating an engage correctly, or a single positioning mistake can be enough to tip the duel one way or the other. Knowing the matchup and recognizing the right windows to act are especially important here.
VisionTeamfightsThis jungle matchup is an explosive clash of teamfight-defining ultimates where vision dictates the victor. Amumu holds the direct tool to shut down Fiddlesticks's primary skirmishing tool, Bountiful Harvest, by using Bandage Toss to stun and cancel the channel. However, if Fiddlesticks manages to bypass your vision and channel Crowstorm from the fog of war, his massive area-of-effect damage will easily overwhelm Curse of the Sad Mummy.Fiddlesticks build →See details
Fiddlesticks
The interaction that decides it
Amumu's Bandage Toss can interrupt Fiddlesticks's Bountiful Harvest channel, but Fiddlesticks's Crowstorm can devastate Amumu's team if vision is not maintained.
Why
This jungle matchup is an explosive clash of teamfight-defining ultimates where vision dictates the victor. Amumu holds the direct tool to shut down Fiddlesticks's primary skirmishing tool, Bountiful Harvest, by using Bandage Toss to stun and cancel the channel. However, if Fiddlesticks manages to bypass your vision and channel Crowstorm from the fog of war, his massive area-of-effect damage will easily overwhelm Curse of the Sad Mummy.
Lane impact
Jungle clear speeds and objective contests become a high-stakes chess match around bushes. Fiddlesticks relies on A Harmless Scarecrow to deny your vision and secure safe flanking angles for his ultimate. This forces you to spend your early resources securing scuttle crabs and deep wards rather than forcing ganks. If you fail to track him, his sudden Crowstorm ganks will completely wipe your laners before you can respond with Curse of the Sad Mummy.
How to play
Never initiate a teamfight blindly with Curse of the Sad Mummy if Fiddlesticks is unaccounted for. Instead, prioritize clearing his A Harmless Scarecrow effigies and placing deep wards in his jungle quadrants. During skirmishes, save at least one charge of Bandage Toss specifically to interrupt his Bountiful Harvest when he tries to drain-tank your team. If he surprises you with Crowstorm, immediately use Curse of the Sad Mummy to lock him down and minimize his team-shredding potential.
Crowd controlTeamfightsThe duel between these two junglers hinges entirely on how you disrupt Viego's reset chain. While Viego relies on Sovereign's Domination to heal and chain-cast his way through skirmishes, your kit is designed to halt him mid-animation. The match remains even because if he dodges your Bandage Toss, he can shred you with Blade of the Ruined King; however, your lock-down potential makes any teamfight extremely dangerous for him if he tries to transform.Viego build →See details
Viego
The interaction that decides it
Amumu must save Curse of the Sad Mummy to lock down Viego the moment he attempts to possess a soul via Sovereign's Domination.
Why
The duel between these two junglers hinges entirely on how you disrupt Viego's reset chain. While Viego relies on Sovereign's Domination to heal and chain-cast his way through skirmishes, your kit is designed to halt him mid-animation. The match remains even because if he dodges your Bandage Toss, he can shred you with Blade of the Ruined King; however, your lock-down potential makes any teamfight extremely dangerous for him if he tries to transform.
Lane impact
This matchup turns teamfights and skirmishes over objectives into high-stakes standoffs. Viego will use Harrowed Path to sneak around the pits and fish for stuns with Spectral Maw, hoping to secure a quick kill. Your presence forces him to play extremely cautiously, delaying his entry into fights because he knows that getting caught during Sovereign's Domination means instant death. If you waste your crowd control early, he will sweep your entire team.
How to play
To win this mental game, you must hold Curse of the Sad Mummy specifically for the moment Viego channels Sovereign's Domination over a fallen ally. During fights, do not throw your ultimate at his frontline; instead, stay near your vulnerable teammates and track the souls on the ground. When Viego dashes in with Heartbreaker or attempts a possession, immediately trigger Curse of the Sad Mummy to lock him in place, allowing your team to burst him down before he gains invulnerability.
Crowd controlTeamfightsThis jungle duel revolves around neutralizing Aatrox's massive skirmish healing. While Aatrox relies on landing The Darkin Blade sweetspots and utilizing Umbral Dash for continuous physical vamp, your ultimate, Curse of the Sad Mummy, is the ultimate countermeasure. Locking him down completely prevents him from attacking or repositioning, effectively shutting off his Umbral Dash passive healing and leaving his health pool vulnerable to your Despair and Cursed Touch magic damage amp.Aatrox build →See details
Aatrox
The interaction that decides it
Amumu's Curse of the Sad Mummy can lock you down and prevent you from healing via Umbral Dash passive.
Why
This jungle duel revolves around neutralizing Aatrox's massive skirmish healing. While Aatrox relies on landing The Darkin Blade sweetspots and utilizing Umbral Dash for continuous physical vamp, your ultimate, Curse of the Sad Mummy, is the ultimate countermeasure. Locking him down completely prevents him from attacking or repositioning, effectively shutting off his Umbral Dash passive healing and leaving his health pool vulnerable to your Despair and Cursed Touch magic damage amp.
Lane impact
In early skirmishes, whoever initiates first often loses the upper hand. If Aatrox catches you with Infernal Chains, you will be forced to burn Bandage Toss defensively or face critical damage. However, when contesting early Scuttle Crabs or Epic Monsters, your ability to deny his sustain with a perfectly timed crowd control chain determines who controls the river, dictating which team secures early priority and map-wide pressure.
How to play
Position yourself slightly outside the sweep of his first two The Darkin Blade strikes to bait his forward movement. Hold your Curse of the Sad Mummy specifically for when Aatrox activates World Ender and attempts to dash in with Umbral Dash. Once he commits, lock him down instantly. If you miss your initial Bandage Toss, disengage immediately into your jungle camps to let his ultimate expire before re-engaging with Despair.
TeamfightsCC immunityThis matchup is defined by how your crowd control collides with Ambessa's defensive reactions. Her Repudiation acts as a direct counter to your Bandage Toss, absorbing the damage and completely blocking the stun. However, her reliance on quick dashes from Drakehound's Step to dance around skirmishes is entirely shut down by Curse of the Sad Mummy, which provides an unavoidable, massive area lock that she cannot block or escape once initiated.Ambessa build →See details
Ambessa
The interaction that decides it
While Ambessa can block one instance of Bandage Toss with Repudiation, she cannot escape the massive area lockdown of Curse of the Sad Mummy.
Why
This matchup is defined by how your crowd control collides with Ambessa's defensive reactions. Her Repudiation acts as a direct counter to your Bandage Toss, absorbing the damage and completely blocking the stun. However, her reliance on quick dashes from Drakehound's Step to dance around skirmishes is entirely shut down by Curse of the Sad Mummy, which provides an unavoidable, massive area lock that she cannot block or escape once initiated.
Lane impact
In the jungle, this tension dictates how you contest neutral camps and river skirmishes. If you blindly initiate with Bandage Toss, Ambessa will absorb it, trigger Drakehound's Step to gap-close, and shred you with Cunning Sweep. This makes early crab contests highly volatile. However, once ultimate abilities are unlocked, your teamfight presence skyrockets, forcing Ambessa to play passively or risk getting instantly locked down before she can execute Public Execution.
How to play
To succeed, never lead a gank or skirmish with Bandage Toss if Ambessa has Repudiation available. Instead, walk up with Despair and Tantrum active, forcing her to either waste her shield or take continuous burn damage. Hold your bandage charges until she commits her dash. When teamfights erupt, wait for her to dive your backline with Lacerate, then immediately trigger Curse of the Sad Mummy to freeze her in place, preventing her from securing resets with Public Execution.
SkirmishesTeamfightsThis jungle matchup is a battle of scaling and skirmish control. Kayn relies on Shadow Step to traverse terrain and escape sticky situations, while gathering orbs for The Darkin Scythe. However, Amumu can completely shut down this mobility. A well-timed Bandage Toss can intercept Kayn the exact moment he emerges from a wall, pinning him down before he can react with Reaping Slash or Umbral Trespass.Kayn build →See details
Kayn
The interaction that decides it
Amumu's Bandage Toss can catch Kayn as he emerges from walls with Shadow Step, preventing him from easily escaping.
Why
This jungle matchup is a battle of scaling and skirmish control. Kayn relies on Shadow Step to traverse terrain and escape sticky situations, while gathering orbs for The Darkin Scythe. However, Amumu can completely shut down this mobility. A well-timed Bandage Toss can intercept Kayn the exact moment he emerges from a wall, pinning him down before he can react with Reaping Slash or Umbral Trespass.
Lane impact
Kayn's ability to gank from unexpected angles forces you to keep deep vision. When skirmishing over neutral camps, your presence limits his freedom. By stopping his wall escapes, you deny him the safe skirmishes he needs to unlock The Darkin Scythe. Delaying his transformation directly weakens his mid-game map pressure, allowing your team to secure early dragons without fearing his smite steals.
How to play
Never throw your Bandage Toss blindly into the fog of war. When Kayn uses Shadow Step to flee through a wall, wait near his predicted exit point and launch your bandage right as his model emerges. Once anchored, immediately activate Despair and Tantrum to melt his health. If he tries to turn the fight with Umbral Trespass, prepare your Curse of the Sad Mummy to lock him down the instant he reappears.
SkirmishesArmorThis matchup hinges on how Graves's New Destiny pellets interact with your Tantrum. Because Graves fires multiple physical pellets per basic attack, the flat damage reduction from Tantrum applies to each pellet, severely neutralizing his basic attack damage. However, if he successfully kites you with Quickdraw and impairs your vision with Smoke Screen, he can easily negate your engage and chip away at your health from safety.Graves build →See details
Graves
The interaction that decides it
Amumu's Tantrum flat physical damage reduction is highly effective against Graves's multi-pellet New Destiny basic attacks.
Why
This matchup hinges on how Graves's New Destiny pellets interact with your Tantrum. Because Graves fires multiple physical pellets per basic attack, the flat damage reduction from Tantrum applies to each pellet, severely neutralizing his basic attack damage. However, if he successfully kites you with Quickdraw and impairs your vision with Smoke Screen, he can easily negate your engage and chip away at your health from safety.
Lane impact
Jungle skirmishes are extremely volatile and depend entirely on your environment. If Graves traps you near terrain, his End of the Line rebounds instantly, matching your Despair damage. While New Destiny gives him an early clearing edge, your Tantrum cooldown triggers constantly when his pellets hit you. This allows you to match his clear speed and comfortably defend your camps against his aggressive counter-jungling.
How to play
To win this duel, never throw Bandage Toss blindly while Graves has Quickdraw available to dodge it. Force him to walk up, and fight him away from terrain so his End of the Line cannot explode instantly. If he drops Smoke Screen, immediately walk out of the cloud before trying to retaliate. Once he commits his dash forward, lock him down with Curse of the Sad Mummy to ensure your Despair and Cursed Touch melt his stacked armor.
TeamfightsMobilityHecarim relies on the speed build-up of Devastating Charge and Warpath to initiate skirmishes with massive impact. Amumu's Bandage Toss is the perfect answer, acting as a skill-shot interrupt that can catch Hecarim mid-sprint. Stopping his charge instantly strips away his momentum and bonus damage, turning his aggressive dive into a vulnerable position where Despair and Tantrum can melt him.Hecarim build →See details
Hecarim
The interaction that decides it
Amumu can use Bandage Toss to stop Hecarim's Devastating Charge mid-run, neutralizing his engage momentum.
Why
Hecarim relies on the speed build-up of Devastating Charge and Warpath to initiate skirmishes with massive impact. Amumu's Bandage Toss is the perfect answer, acting as a skill-shot interrupt that can catch Hecarim mid-sprint. Stopping his charge instantly strips away his momentum and bonus damage, turning his aggressive dive into a vulnerable position where Despair and Tantrum can melt him.
Lane impact
This dynamic dictates the safety of your lanes and river skirmishes. When Hecarim attempts to gank or secure Scuttle Crabs, your presence determines the outcome. If you shadow his pathing, you can completely neutralize his flank attempts. However, failing to land Bandage Toss during his Devastating Charge allows him to bypass you entirely, letting his Rampage and Spirit of Dread run over your teammates before you can cast Curse of the Sad Mummy.
How to play
During skirmishes, never initiate with Bandage Toss. Instead, position yourself as a shield between Hecarim and your carry, keeping your cursor ready to intercept his Devastating Charge. If Hecarim commits with Onslaught of Shadows first to bypass you, wait out the fear effect, then immediately lock him down with Curse of the Sad Mummy and Despair, preventing him from healing with Spirit of Dread while your team collapses on him.
Zone controlTeamfightsThis jungle matchup is a direct contest between objective secure and teamfight scaling. Nunu & Willump dominate early epic monster takes because Consume acts as a second, massive Smite, making contested pits highly risky for you. However, as the game goes late, your Curse of the Sad Mummy completely eclipses their teamfight presence, locking down entire teams while Despair melts their high-health frontline.Nunu & Willump build →See details
Nunu & Willump
The interaction that decides it
Nunu's Consume gives him superior objective securing power, but Amumu's Curse of the Sad Mummy is far superior in late-game teamfights.
Why
This jungle matchup is a direct contest between objective secure and teamfight scaling. Nunu & Willump dominate early epic monster takes because Consume acts as a second, massive Smite, making contested pits highly risky for you. However, as the game goes late, your Curse of the Sad Mummy completely eclipses their teamfight presence, locking down entire teams while Despair melts their high-health frontline.
Lane impact
You cannot easily contest a Dragon or Rift Herald in a direct smite battle if Nunu is healthy enough to use Consume. This dynamic forces you to track his pathing closely. If he uses Biggest Snowball Ever! to gank a side lane, you must instantly punish by clearing his opposite camps or trading the map's opposite objective, avoiding a head-to-head epic fight.
How to play
When contesting major neutral objectives, do not try to out-smite his Consume. Instead, focus your crowd control on Nunu himself. Save Bandage Toss to interrupt his Absolute Zero channel, or to lock him down before he can reach the low-health epic monster. Initiate with Curse of the Sad Mummy when his team groups up to secure, using Tantrum to mitigate their physical damage when they retaliate.
DisengageTeamfightsThis jungle matchup hinges entirely on how Gragas responds to your initiations. While you want to find a multi-man stun using Bandage Toss to gapclose, Gragas can instantly disrupt your entire teamfight presence. The moment you activate Curse of the Sad Mummy, he can throw Explosive Cask to blast you away from your allies, separating you from the follow-up damage your Cursed Touch amplifies.Gragas build →See details
Gragas
The interaction that decides it
Gragas can use Explosive Cask to knock Amumu away from his team, ruining his Curse of the Sad Mummy setup.
Why
This jungle matchup hinges entirely on how Gragas responds to your initiations. While you want to find a multi-man stun using Bandage Toss to gapclose, Gragas can instantly disrupt your entire teamfight presence. The moment you activate Curse of the Sad Mummy, he can throw Explosive Cask to blast you away from your allies, separating you from the follow-up damage your Cursed Touch amplifies.
Lane impact
In early skirmishes around the river, Gragas uses Barrel Roll and Drunken Rage to mitigate your Tantrum damage while contesting camps. If you engage blindly with Bandage Toss, he can counter-engage with Body Slam to lock you down. This mutual threat turns objective fights into a tense stand-off where neither jungler can safely commit their ultimate without risking a complete counter-disengage that ruins the fight.
How to play
To win this mental game, never lead the charge with Bandage Toss if Gragas has Explosive Cask ready. Instead, walk up with Despair active to bait out his Body Slam. Once he commits his movement tool, flank his backline from a blind spot. If he manages to knock you away with his barrel, immediately look to re-engage with your second charge of Bandage Toss to stick to his squishy carries before they can escape.
Early pressureScalingThis jungle duel is a race against the clock. Lee Sin uses Flurry and Sonic Wave to dominate early skirmishes, trying to invade your camps. While his Dragon's Rage can deny your Curse of the Sad Mummy by kicking you away before your team can follow up on Bandage Toss, your late-game scaling is vastly superior. If you survive his early pressure, your Despair and Cursed Touch will melt everyone in teamfights.Lee Sin build →See details
Lee Sin
The interaction that decides it
Lee Sin's Dragon's Rage can kick Amumu away to prevent his engage, but Amumu outscales him heavily in late-game teamfights.
Why
This jungle duel is a race against the clock. Lee Sin uses Flurry and Sonic Wave to dominate early skirmishes, trying to invade your camps. While his Dragon's Rage can deny your Curse of the Sad Mummy by kicking you away before your team can follow up on Bandage Toss, your late-game scaling is vastly superior. If you survive his early pressure, your Despair and Cursed Touch will melt everyone in teamfights.
Lane impact
Your early pathing is entirely dictated by tracking Lee Sin's starting buff. If he lands Sonic Wave in your jungle, his Flurry gives him the attack speed to secure a kill before you can stack Tantrum. You must concede early Scuttle Crabs if your laners lack priority, as a duel at level three favors him. However, forcing him to use Safeguard defensively instead of making plays across the map is a major victory for your lanes.
How to play
Never initiate with Bandage Toss if Lee Sin has Dragon's Rage available, as he will immediately kick you into his team or away from your targets. Instead, walk up with Despair active and force him to make the first move. Track his jungle camps to predict his ganks, countering them by securing cross-map objectives. Hold your Curse of the Sad Mummy until he commits his Safeguard dash, ensuring he cannot escape your ultimate’s radius.
These champions generally struggle to answer your main strengths, which lets you approach the matchup with more freedom. You often have several ways to pressure them and force trades that go in your favor. Use this advantage to dictate the pace rather than giving them time to get back into a comfortable position.
TeamfightsCounter-engageYou hold the upper hand because Vi relies heavily on charging Vault Breaker to initiate or escape, which you can easily disrupt with Bandage Toss. Furthermore, her ultimate Cease and Desist makes her unstoppable during the dash, but the exact moment she lands, she is highly vulnerable. You can instantly buffer Curse of the Sad Mummy to lock her down, rendering her initial burst useless.Vi build →See details
Vi
The interaction that decides it
Amumu can interrupt Vi's Vault Breaker or lock her down with Curse of the Sad Mummy immediately after she lands Cease and Desist.
Why
You hold the upper hand because Vi relies heavily on charging Vault Breaker to initiate or escape, which you can easily disrupt with Bandage Toss. Furthermore, her ultimate Cease and Desist makes her unstoppable during the dash, but the exact moment she lands, she is highly vulnerable. You can instantly buffer Curse of the Sad Mummy to lock her down, rendering her initial burst useless.
Lane impact
In skirmishes around the river or during counter-ganks, this matchup prevents Vi from playing aggressively. She cannot safely execute her gank combos because you can reactively shut down her dive. If she tries to match your clear speed, Despair and Tantrum allow you to sweep through camps faster, giving you the priority to setup objectives while forcing her to hold her dash.
How to play
When contesting camps or objectives, never throw Bandage Toss blindly. Instead, walk up with Despair active and wait for her to wind up Vault Breaker, then interrupt her mid-dash. If she targets your carry with Cease and Desist, position yourself right next to her target. The millisecond she finishes her unstoppable animation, unleash Curse of the Sad Mummy to disable her before she can proc Denting Blows.
Crowd controlTeamfightsThis matchup is highly favorable for Amumu because your crowd control completely neutralizes Ekko's safety net. Ekko relies on Chronobreak to survive deep dives and burst damage, but your ability to chain Bandage Toss into Curse of the Sad Mummy prevents him from ever pressing his ultimate. By keeping him locked down continuously, you render his main escape and healing tool entirely useless, leaving him fragile.Ekko build →See details
Ekko
The interaction that decides it
Amumu can chain Bandage Toss and Curse of the Sad Mummy to lock Ekko down, preventing him from activating Chronobreak.
Why
This matchup is highly favorable for Amumu because your crowd control completely neutralizes Ekko's safety net. Ekko relies on Chronobreak to survive deep dives and burst damage, but your ability to chain Bandage Toss into Curse of the Sad Mummy prevents him from ever pressing his ultimate. By keeping him locked down continuously, you render his main escape and healing tool entirely useless, leaving him fragile.
Lane impact
In the jungle, this interaction strips Ekko of his typical aggressive skirmishing power. He cannot safely use Phase Dive to initiate fights or steal camps, knowing that a single Bandage Toss will lead to his death before he can rewind. This allows you to secure Scuttle Crabs and contest neutral objectives with absolute confidence, forcing Ekko into a passive farming style.
How to play
To execute this perfectly, never initiate with all your crowd control at once when Ekko is at full health. Wait for him to commit with Phase Dive, then hit him with Bandage Toss. Only activate Curse of the Sad Mummy when his health drops to the point where he wants to use Chronobreak. If he attempts to stun you with Parallel Convergence, use your bandage to pull yourself out of his zone.
Zone controlTeamfightsShyvana relies heavily on Dragon's Descent to force her way into fights, but this predictable dive acts as a perfect setup for your Curse of the Sad Mummy. The moment she leaps forward, you can instantly lock her down in mid-air or upon landing. This reaction neutralizes her dragon-form threat while Despair shreds through her health pool, turning her primary engagement tool into her own downfall.Shyvana build →See details
Shyvana
The interaction that decides it
Shyvana relies on Dragon's Descent to engage, which makes her a perfect target for Amumu's Curse of the Sad Mummy.
Why
Shyvana relies heavily on Dragon's Descent to force her way into fights, but this predictable dive acts as a perfect setup for your Curse of the Sad Mummy. The moment she leaps forward, you can instantly lock her down in mid-air or upon landing. This reaction neutralizes her dragon-form threat while Despair shreds through her health pool, turning her primary engagement tool into her own downfall.
Lane impact
This matchup turns into a fierce race for camp clears and neutral monsters. Shyvana desperately needs to farm large monsters to stack Fury of the Dragonborn, meaning she will constantly try to power-farm. Because you easily disrupt her with Bandage Toss and out-damage her in prolonged camps with Tantrum, you can dictate the pace of Epic Monster fights and force her into unfavorable early skirmishes.
How to play
Never initiate with your ultimate when Shyvana has full Fury. Instead, bait her engage and hold Curse of the Sad Mummy strictly to counter Dragon's Descent. When contesting neutral objectives, position yourself between her and the pit. Use Bandage Toss to intercept her before she can secure the smite. If she tries to escape using Burnout, remember that your Tantrum cooldown reduces with her rapid Twin Bite strikes, letting you win the duel.
TeamfightsScalingAmumu naturally dismantles Rammus in direct jungle skirmishes because Rammus relies heavily on building armor to boost his damage through Rolling Armordillo and reflect attacks with Defensive Ball Curl. However, your Despair deals continuous percent-health magic damage that completely bypasses his armor-stacking defenses. Combined with Cursed Touch which amplifies all magic damage Rammus takes, you turn his defensive stat-checking into a liability.Rammus build →See details
Rammus
The interaction that decides it
Amumu's Despair deals percentage max HP magic damage, which bypasses Rammus's high armor from Defensive Ball Curl.
Why
Amumu naturally dismantles Rammus in direct jungle skirmishes because Rammus relies heavily on building armor to boost his damage through Rolling Armordillo and reflect attacks with Defensive Ball Curl. However, your Despair deals continuous percent-health magic damage that completely bypasses his armor-stacking defenses. Combined with Cursed Touch which amplifies all magic damage Rammus takes, you turn his defensive stat-checking into a liability.
Lane impact
This matchup shifts jungle control entirely in your favor. Rammus cannot safely duel you near camps, meaning you can aggressively secure objectives and contest his neutral monsters. When he tries to speed through the river with Powerball to gank your lanes, your superior clear speed allows you to either counter-gank immediately or strip away his camps, leaving him under-leveled and unable to match your teamfight threat.
How to play
When skirmishing, do not panic if he uses Frenzying Taunt on you; simply keep Despair active to melt his health pool while you are forced to attack him. Save your Bandage Toss to cancel his Powerball charge when he tries to escape or engage on your allies. During major teamfights, wait for him to commit with Soaring Slam, then immediately follow up with Curse of the Sad Mummy to lock down his backline before they can follow his lead.
PeelVisionAmumu dominates this matchup because his heavy crowd control completely neutralizes Evelynn's assassination threat. While she attempts to stalk your allies using Demon Shade, your ability to lockdown targets with Bandage Toss makes her incredibly vulnerable. If she marks someone with Allure, you can reactively intercept her mid-approach, triggering Cursed Touch to amplify your team's damage before she can ever escape with Last Caress.Evelynn build →See details
Evelynn
The interaction that decides it
Amumu can buy Control Wards to spot Evelynn's Demon Shade and intercept her with Bandage Toss before she can charm a teammate with Allure.
Why
Amumu dominates this matchup because his heavy crowd control completely neutralizes Evelynn's assassination threat. While she attempts to stalk your allies using Demon Shade, your ability to lockdown targets with Bandage Toss makes her incredibly vulnerable. If she marks someone with Allure, you can reactively intercept her mid-approach, triggering Cursed Touch to amplify your team's damage before she can ever escape with Last Caress.
Lane impact
This dynamic strips Evelynn of her map-wide terror, forcing her into a passive farming style. Her ganking lanes become predictable because she cannot bypass your defensive setups without being caught. During skirmishes, she is forced to play extremely far back, meaning your laners can push aggressively knowing that any attempt she makes to engage with Whiplash will result in an immediate Curse of the Sad Mummy counter-engage.
How to play
Prioritize purchasing Control Wards on every single recall and place them in high-traffic river brushes to constantly expose her Demon Shade. When you see her Allure heart forming over an ally, immediately position yourself between them and her projected path. Hold your Bandage Toss until she reveals herself to strike. Once she is bound, activate Despair and spam Tantrum to shred her health pool, forcing her to burn Last Caress defensively rather than for a kill.
Crowd controlHard counterAmumu dominates this jungle duel because Master Yi relies entirely on Alpha Strike to dodge crowd control while slicing with Wuju Style. Since your Bandage Toss and Curse of the Sad Mummy provide consecutive, unavoidable lockdowns once he reappears, his evasion becomes his trap. By pairing this crowd control with the continuous percentage-health burn of Despair, you easily shred his squishy assassin build.Master Yi build →See details
Master Yi
The interaction that decides it
Amumu must wait for Master Yi to exit Alpha Strike before using Bandage Toss or Curse of the Sad Mummy to lock him down.
Why
Amumu dominates this jungle duel because Master Yi relies entirely on Alpha Strike to dodge crowd control while slicing with Wuju Style. Since your Bandage Toss and Curse of the Sad Mummy provide consecutive, unavoidable lockdowns once he reappears, his evasion becomes his trap. By pairing this crowd control with the continuous percentage-health burn of Despair, you easily shred his squishy assassin build.
Lane impact
This interaction prevents Master Yi from safely invading your camps or contesting Rift Scuttlers. In skirmishes, his fear of your Curse of the Sad Mummy forces him to play passively, delaying his entry into teamfights. This gives your lanes absolute freedom, as any attempt he makes to dive your allies with Highlander can be instantly shut down and punished by your crowd control.
How to play
When fighting Master Yi, never initiate with Bandage Toss or panic-cast Curse of the Sad Mummy while his Alpha Strike is available. Keep Despair toggled on to deal constant damage, and wait for him to reappear from his untargetable state. The exact moment he lands, immediately lock him down with your ultimate. If he tries to mitigate the incoming damage with Meditate, interrupt his channel with a precise bandage throw.
Crowd controlScalingAmumu excels here because Jax's DPS relies on stacking Relentless Assault for rapid basic attacks. Amumu's Tantrum passive flatly reduces the physical damage of every single strike, rendering Jax's fast-hitting style mathematically weak against you. Furthermore, when Jax attacks you quickly, he repeatedly lowers the cooldown of your Tantrum, allowing you to spam your area-of-effect damage in return while Cursed Touch amplifies all magic damage.Jax build →See details
Jax
The interaction that decides it
Amumu's Tantrum flat physical damage reduction is highly effective against Jax's rapid basic attacks from Relentless Assault.
Why
Amumu excels here because Jax's DPS relies on stacking Relentless Assault for rapid basic attacks. Amumu's Tantrum passive flatly reduces the physical damage of every single strike, rendering Jax's fast-hitting style mathematically weak against you. Furthermore, when Jax attacks you quickly, he repeatedly lowers the cooldown of your Tantrum, allowing you to spam your area-of-effect damage in return while Cursed Touch amplifies all magic damage.
Lane impact
In the jungle, this interaction makes you incredibly safe during direct skirmishes over camps. Jax cannot easily contest your camps or force you out of your jungle, because his Empower and basic attack resets only accelerate your Tantrum spam. This allows you to secure scuttle crabs easily and safely pressure his jungle, knowing that a 1v1 duel in the river heavily favors your defensive scaling.
How to play
When fighting Jax, do not throw Bandage Toss immediately. Wait for him to use Counter Strike to block your basic attacks. Since his evasion does not block the spell damage from Despair or Tantrum, keep those active. Once his stun ends and his defensive window closes, fire Bandage Toss to lock him down, then unleash Curse of the Sad Mummy if his teammates arrive to help him escape with Leap Strike.
Edge: Wild Rift Core canonical verdict (−3 to +3), shown from the point of view of the champion named in the row. Win rate and pick rate: the opponent's own rate in this role — Wild Rift CN · Challenger, Patch 7.3c. Not a head-to-head win rate.
How to counter this champion
Counter angle
Amumu’s counters are not just champions who beat him in duels, but those who disrupt his timing and ability to engage cleanly. The issue isn’t dying fast, but failing to impose his tempo. Aggressive junglers and champions who avoid or punish his engage turn his game into constant survival.
Patch context
In the current patch, Amumu struggles against junglers who invade and force fights before level 5. His lack of mobility and early damage makes him vulnerable. Additionally, well-spaced compositions or defensive tools greatly reduce his ultimate’s impact.
Quick read
Struggles against early invades.
Punishable without Flash.
Highly dependent on teamfights.
Counter archetypes
Early aggressive junglers
These champions directly exploit Amumu’s weakness: his early game. They invade his jungle, force fights when he lacks resources, and delay his level 5. Once behind, Amumu loses his timing and becomes reliant on difficult comebacks.
Lee Sin represents the worst type of matchup: constant early pressure, invades, and tempo control. If Amumu loses early camps or delays level 5, the entire game becomes difficult.
Common mistakes against him
Common mistakes against him
Forcing fights against stronger early junglers.
Ignoring jungle vision.
Engaging without Flash.
Underestimating early enemy damage.
Fighting before level 5 spike.
Coach notes
If you survive early, you can come back.
Your goal is to reach your spike, not win early.
FAQ
What is his worst type of counter?
Early aggressive junglers are the hardest because they break his timing before level 5. Without ultimate, Amumu has little fight impact.
Can he play against assassins?
Yes, but he must adapt. He shouldn’t try to engage them directly but wait for grouped fights.
How to avoid invades?
Vision, smart pathing, and lane communication are key to securing your early game.
Can he recover after a bad early?
Yes, if he reaches level 5 and key items, he can become impactful again in teamfights.