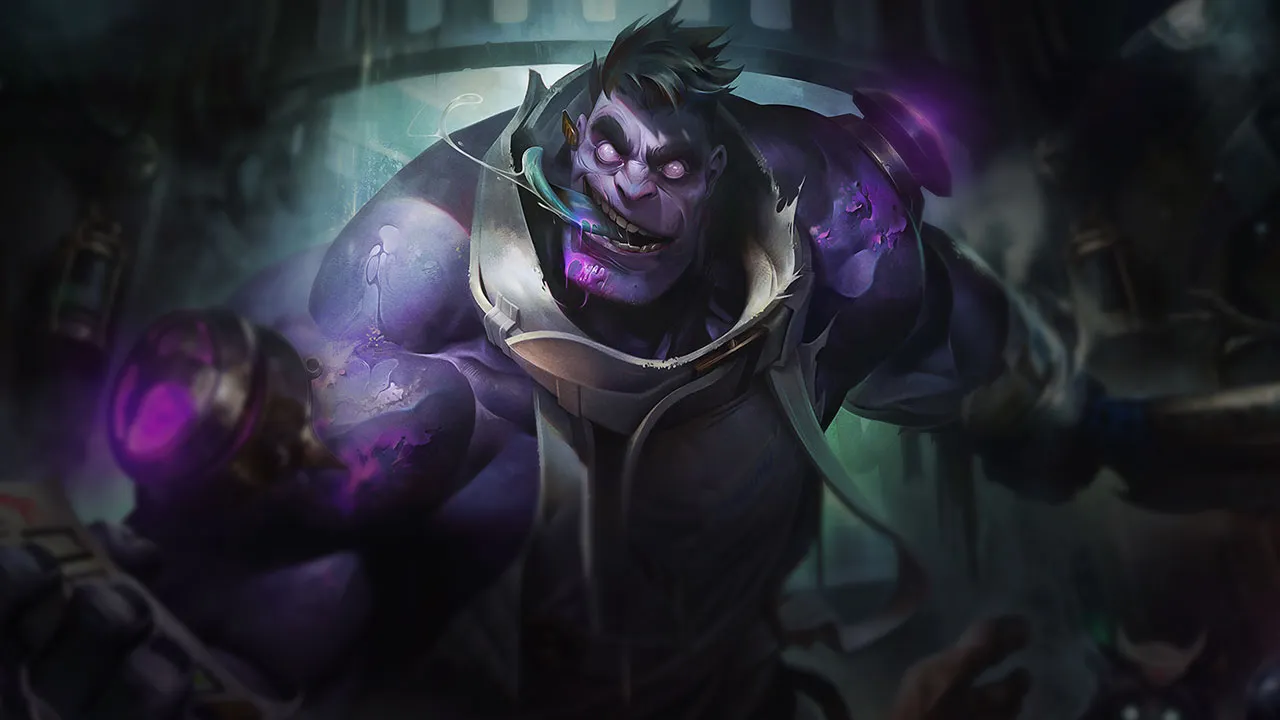
Dr. Mundo struggles against compositions that deal sustained damage or apply strong healing reduction. Continuous poke, kite strategies, and percent-health damage reduce his durability. His reliance on heavy regeneration defines his main structural weakness.
★ TOP · JUNGLETier A
DMG
UTIL
TANK
DIFF
Win50.1%#58 · ↓9pt
Pick6.4%#10
Ban2.3%#55
Dr. Mundo Wild Rift Counters Guide
Hard Counters
6
These champions have a build and playstyle that directly overpower yours, which can make controlling the lane and farming extremely difficult. Their kit can neutralize your core strengths or punish you the moment you try to play your usual game plan. In these matchups, the goal is often to minimize mistakes and look for ways to win outside of direct confrontation.
True damageDr. Mundo's identity relies on massive health pools and health regeneration, but Vayne completely nullifies this defense. Every third attack from her triggers Silver Bolts, converting your massive HP pool from Maximum Dosage into a liability through maximum health true damage. Because you have no gap closer, her passive Night Hunter and Tumble allow her to effortlessly space you, while Condemn easily blocks any direct approach.Vayne build →See details
Vayne
The interaction that decides it
Vayne's Silver Bolts deal true damage based on maximum health, making Mundo's entire tank build completely obsolete.
Why
Dr. Mundo's identity relies on massive health pools and health regeneration, but Vayne completely nullifies this defense. Every third attack from her triggers Silver Bolts, converting your massive HP pool from Maximum Dosage into a liability through maximum health true damage. Because you have no gap closer, her passive Night Hunter and Tumble allow her to effortlessly space you, while Condemn easily blocks any direct approach.
Lane impact
You are entirely locked out of the minion wave from level one. Trying to secure last hits with basic attacks results in Vayne chunking your health bar, forcing you to farm exclusively from afar. You will be pushed under your turret constantly, losing plates and bleed gold. This massive pressure prevents you from assisting your jungler, keeping you trapped while Vayne scales unchecked.
How to play
To survive, you must use Infected Bonesaw solely to secure minions from absolute safety, abandoning any hope of trading. Never walk up to use Blunt Force Trauma on the wave unless Vayne is actively hitting your tower. Save Heart Zapper to absorb her initial poke when she forces you off-XP range. If she mispositions near a wall, let Goes Where He Pleases absorb her Condemn stun, giving you a tiny window to retreat with Maximum Dosage.
True damageGwen is your absolute worst nightmare because her passive A Thousand Cuts converts your massive health pool into her own damage and healing. When she stacks her snips and unleashes Snip Snip!, she shreds your high-HP bar with a mix of percent-health magic and true damage. Even activating Maximum Dosage to survive just feeds her more healing, bypassing Dr. Mundo's natural defensive scaling entirely.Gwen build →See details
Gwen
The interaction that decides it
Gwen's Snip Snip! and passive A Thousand Cuts deal massive percent-health magic and true damage that melts Mundo regardless of his magic resistance.
Why
Gwen is your absolute worst nightmare because her passive A Thousand Cuts converts your massive health pool into her own damage and healing. When she stacks her snips and unleashes Snip Snip!, she shreds your high-HP bar with a mix of percent-health magic and true damage. Even activating Maximum Dosage to survive just feeds her more healing, bypassing Dr. Mundo's natural defensive scaling entirely.
Lane impact
You cannot contest the wave or trade directly. Gwen can freely dash forward with Skip 'n Slash to poke you under tower, using Hallowed Mist to ignore your retaliatory Infected Bonesaw throws. This constant pressure forces you into early, unfavorable recalls, leaving your tower vulnerable to heavy plates damage. You will be stuck clearing waves defensively, unable to assist your team or contest early neutral objectives.
How to play
Shift your build away from pure health and rush magic resistance immediately to blunt her basic attacks. Use Infected Bonesaw exclusively to secure farm from maximum range, never to poke. Save Blunt Force Trauma to quickly clear waves under your turret before she can dive you. If she commits with Needlework, do not try to fight back; immediately activate Heart Zapper to absorb the initial burst, pop Maximum Dosage for the movement speed, and retreat to safety.
True damageUntargetableThis matchup is a brutal stat check where Dr. Mundo's natural bulk becomes his own undoing. When Mordekaiser activates Realm of Death, he steals a massive portion of your defensive stats. Because the healing power of Maximum Dosage relies on having high resistances to make each point of health count, losing those raw stats to his duel zone leaves you incredibly squishy, completely neutralizing your ultimate's regeneration.Mordekaiser build →See details
Mordekaiser
The interaction that decides it
Mordekaiser's Realm of Death isolates Mundo and steals his core tank stats, rendering his Maximum Dosage regeneration far less effective.
Why
This matchup is a brutal stat check where Dr. Mundo's natural bulk becomes his own undoing. When Mordekaiser activates Realm of Death, he steals a massive portion of your defensive stats. Because the healing power of Maximum Dosage relies on having high resistances to make each point of health count, losing those raw stats to his duel zone leaves you incredibly squishy, completely neutralizing your ultimate's regeneration.
Lane impact
From the moment Mordekaiser unlocks his ultimate, you lose all lane pressure and must play defensively under tower. Trades are impossible because his Darkness Rise aura triggers easily off his Death's Grasp pull, while his Indestructible shield absorbs any poke from your Infected Bonesaw. You are forced to bleed gold, ceding early priority and leaving your jungler without top-side support.
How to play
To survive, you must rush heavy magic resistance items immediately, deviating from your standard physical defense build. In lane, use Infected Bonesaw strictly to secure minions from a safe distance, and never step up unless your passive Goes Where He Pleases is active to block his Death's Grasp. If he traps you in Realm of Death, focus solely on running in circles using the movement speed from Maximum Dosage to stall out the timer rather than trying to fight back.
True damageCC immunityOlaf's Ragnarok completely neutralizes your primary self-peel, Infected Bonesaw, by ignoring its slow. Without this crowd control to keep him at bay, Olaf can easily close the distance. Once in melee range, his Berserker Rage and Vicious Strikes out-sustain your natural regeneration, while Reckless Swing bypasses your high magic resistance and armor with raw true damage, rendering your defensive stats ineffective.Olaf build →See details
Olaf
The interaction that decides it
Olaf's Ragnarok renders him immune to the slow from Infected Bonesaw, allowing him to run Mundo down and shred him with Reckless Swing's true damage.
Why
Olaf's Ragnarok completely neutralizes your primary self-peel, Infected Bonesaw, by ignoring its slow. Without this crowd control to keep him at bay, Olaf can easily close the distance. Once in melee range, his Berserker Rage and Vicious Strikes out-sustain your natural regeneration, while Reckless Swing bypasses your high magic resistance and armor with raw true damage, rendering your defensive stats ineffective.
Lane impact
This interaction forces you into an extremely defensive posture from the very first waves. You cannot contest wave control because Olaf can fish for slows with Undertow, and if he lands one, he will run you down. Any attempt to trade with Blunt Force Trauma or sustain with Heart Zapper will be met with true damage that ignores your health pool, forcing early recalls and letting Olaf freely crash waves and threaten your tower.
How to play
To survive this onslaught, you must shift your build path immediately toward health-stacking items to cushion the true damage from Reckless Swing, rather than rushing pure armor. Use Infected Bonesaw exclusively to farm from maximum range, never to poke. If Olaf activates Ragnarok, do not attempt to fight back or heal with Heart Zapper; instead, immediately pop Maximum Dosage for the movement speed boost to run back to your turret, using your ultimate defensively to survive his ultimate's duration.
True damageFiora is your ultimate statistical nightmare in the baron lane. Your entire identity revolves around building massive health pools and regenerating with Maximum Dosage, but her passive Duelist's Dance and ultimate Grand Challenge completely bypass your defenses by dealing percentage-maximum-health true damage. She uses Lunge to strike your vitals effortlessly, converting your tankiness into her healing, while her Riposte can easily nullify the slow from your Infected Bonesaw.Fiora build →See details
Fiora
The interaction that decides it
Fiora's Grand Challenge deals massive percent-max-health true damage, completely bypassing Mundo's armor and health stacking.
Why
Fiora is your ultimate statistical nightmare in the baron lane. Your entire identity revolves around building massive health pools and regenerating with Maximum Dosage, but her passive Duelist's Dance and ultimate Grand Challenge completely bypass your defenses by dealing percentage-maximum-health true damage. She uses Lunge to strike your vitals effortlessly, converting your tankiness into her healing, while her Riposte can easily nullify the slow from your Infected Bonesaw.
Lane impact
You cannot contest the wave or take extended trades. Every time you step up to use Blunt Force Trauma on a minion, Fiora can Lunge to proc a vital, winning the trade instantly. Once she unlocks Grand Challenge, staying under your tower is no longer safe; she can dive you, proc all four vitals to heal through your Heart Zapper damage, and force you into frequent, costly recalls that bleed gold and plates.
How to play
To survive, hug the terrain. When Duelist's Dance spawns a vital facing her, walk backward out of vision range to reset it to a safer side, or hug a wall to physically block her from hitting it during Grand Challenge. Farm exclusively from a distance using Infected Bonesaw. If she dives with her ultimate, activate Heart Zapper early to absorb the initial burst, and delay Maximum Dosage until she commits her Riposte.
These champions have tools that generally give them the edge in a fight, without making the matchup unwinnable. They might have more range, a better ability to soak up your offense, or more ways to answer your engages. You'll need to adapt your approach and carefully pick your moments to accept a fight.
ShieldsSustainAatrox completely disrupts your passive recovery loop. His The Darkin Blade has three distinct knockup zones, and a simple Q1 sweetspot is enough to instantly pop Goes Where He Pleases. Once your passive canister drops, you are forced into an unfavorable mini-game: try to retrieve it to recover health and cooldown while risking a full follow-up combo of Infernal Chains and subsequent Q2/Q3 sweetspots, or abandon it and play defenceless.Aatrox build →See details
Aatrox
The interaction that decides it
Aatrox can easily pop Dr. Mundo's Goes Where He Pleases passive with a Q1 sweetspot, leaving him vulnerable to the rest of his combo.
Why
Aatrox completely disrupts your passive recovery loop. His The Darkin Blade has three distinct knockup zones, and a simple Q1 sweetspot is enough to instantly pop Goes Where He Pleases. Once your passive canister drops, you are forced into an unfavorable mini-game: try to retrieve it to recover health and cooldown while risking a full follow-up combo of Infernal Chains and subsequent Q2/Q3 sweetspots, or abandon it and play defenceless.
Lane impact
This interaction turns the wave state into a constant test of patience. Because Aatrox sustains heavily using Deathbringer Stance and Umbral Dash, you cannot win a pure war of attrition if you keep taking sweetspots. Missing your passive canister means losing valuable health regeneration, forcing you to farm passively from a distance with Infected Bonesaw. If he freezes near his tower, you risk being chased down by World Ender.
How to play
To survive, use your Infected Bonesaw exclusively for secure last-hits when The Darkin Blade is available. When he misses his Q1 or wastes it on the wave, you have a brief window to step up and use Blunt Force Trauma to push or poke. If he lands Infernal Chains while your Goes Where He Pleases is down, immediately activate Heart Zapper to absorb the burst and run outward perpendicular to the pull direction. Save Maximum Dosage to counteract his ultimate's chase potential rather than trying to turn the fight.
TanksExecuteThis matchup revolves around a dangerous game of chicken. Your passive healing from Maximum Dosage is completely negated by Garen's Demacian Justice, which deals true damage based on your missing health. If you try to delay your ultimate to maximize the bonus attack damage from Blunt Force Trauma, Garen will simply execute you instantly, bypassing your entire regeneration engine before it can even kick in.Garen build →See details
Garen
The interaction that decides it
Garen's Demacian Justice bypasses Mundo's high health regeneration by executing him instantly when he drops low to bait with Blunt Force Trauma.
Why
This matchup revolves around a dangerous game of chicken. Your passive healing from Maximum Dosage is completely negated by Garen's Demacian Justice, which deals true damage based on your missing health. If you try to delay your ultimate to maximize the bonus attack damage from Blunt Force Trauma, Garen will simply execute you instantly, bypassing your entire regeneration engine before it can even kick in.
Lane impact
Because you cannot safely bait at low health, Garen dominates short trades. He will use Decisive Strike to cleanse the slow from your Infected Bonesaw, silence you, and spin with Judgment. This forces you to play defensively under tower, farming from afar. You will lose priority, allowing Garen to easily trigger Perseverance and sustain back any poke you manage to land, slowly draining your tower's plates.
How to play
To survive, you must secure minions from a safe distance using Infected Bonesaw. Never trade when Garen has Courage active; instead, bait his defensive shield and wait for its cooldown window to close before retaliating. Most importantly, activate Maximum Dosage early in skirmishes. Do not wait for the low-health damage bonus from Blunt Force Trauma because keeping your health bar high is your only shield against Demacian Justice. If he freezes the wave, use Heart Zapper to break it quickly and retreat.
CC immunityFarmingDarius dominates this lane by turning your passive against you. When he pulls you with Apprehend, it instantly pops Goes Where He Pleases. Because he is already in melee range, he can easily step on your dropped canister before you can reach it, permanently denying your vital health return. Without that healing, his Hemorrhage stacks quickly overwhelm your natural health regeneration.Darius build →See details
Darius
The interaction that decides it
Pop Dr. Mundo's Goes Where He Pleases spell shield with Apprehend, then step on the canister to deny him the health return.
Why
Darius dominates this lane by turning your passive against you. When he pulls you with Apprehend, it instantly pops Goes Where He Pleases. Because he is already in melee range, he can easily step on your dropped canister before you can reach it, permanently denying your vital health return. Without that healing, his Hemorrhage stacks quickly overwhelm your natural health regeneration.
Lane impact
You are forced into defensive farming under your turret, using Infected Bonesaw to secure last hits. If you step up to use Blunt Force Trauma, you risk entering his grab range. A single misplaced step allows Darius to freeze the wave, chunk your health bar, and set up an execution with Noxian Guillotine once you are forced to stay low on health under pressure.
How to play
To survive, maintain a safe distance and bait out Apprehend before attempting to contest minions. If Darius grabs you and stomps your canister, immediately activate Heart Zapper to mitigate the burst, then throw Infected Bonesaw point-blank to slow his pursuit. When low, pop Maximum Dosage early; do not wait for your health to drop into his Noxian Guillotine execution threshold, as his Hemorrhage stacks will quickly bypass your late-reaction healing.
DuelingPokeYone completely neutralizes your ranged poke because he can easily dodge Infected Bonesaw using the swift movement of Soul Unbound. Once he closes the gap, his Spirit Cleave shreds through your massive health pool with its percent-health damage while shielding him from your retaliation. This mechanical advantage means you cannot win direct trades, especially as his scaling outpaces your defensive growth.Yone build →See details
Yone
The interaction that decides it
Yone can easily dodge Infected Bonesaw with Soul Unbound and shred Mundo's health pool with Spirit Cleave's percent-health damage.
Why
Yone completely neutralizes your ranged poke because he can easily dodge Infected Bonesaw using the swift movement of Soul Unbound. Once he closes the gap, his Spirit Cleave shreds through your massive health pool with its percent-health damage while shielding him from your retaliation. This mechanical advantage means you cannot win direct trades, especially as his scaling outpaces your defensive growth.
Lane impact
Because you cannot contest his wave clear without risking a deadly trade, Yone will dictate the wave's tempo. If you let the minions crash repeatedly, he will poke you under turret with Mortal Steel and Spirit Cleave. Failing to maintain the wave just outside your turret range allows him to freeze, starving you of gold and setting up easy dives once he unlocks Fate Sealed.
How to play
Focus entirely on safe farming by using Infected Bonesaw to secure lasthits from maximum range. Never throw your cleaver when Yone has Soul Unbound ready; instead, hold it to farm or to slow him if he dashes forward. If he activates his spirit form, immediately step back and activate Heart Zapper to mitigate incoming damage, then use the explosive finish to clear adjacent minions. Reserve Maximum Dosage strictly to survive his Fate Sealed all-in under your tower.
SustainShieldsVolibear systematically neutralizes your health-regen advantage. While your passive Goes Where He Pleases easily absorbs the stun from his Thundering Smash, you cannot out-sustain him in long skirmishes. This is because his Frenzied Maul inflicts massive execution damage and heals him based on his missing health. When you rely on Maximum Dosage to turn a fight, his repeated Frenzied Maul bites match your recovery, turning your signature healing into a trap.Volibear build →See details
Volibear
The interaction that decides it
Volibear's Frenzied Maul deals increased damage and heals him based on his missing health, matching Mundo's sustain in extended trades.
Why
Volibear systematically neutralizes your health-regen advantage. While your passive Goes Where He Pleases easily absorbs the stun from his Thundering Smash, you cannot out-sustain him in long skirmishes. This is because his Frenzied Maul inflicts massive execution damage and heals him based on his missing health. When you rely on Maximum Dosage to turn a fight, his repeated Frenzied Maul bites match your recovery, turning your signature healing into a trap.
Lane impact
This healing parity forces you into a defensive farming pattern. Volibear's passive The Relentless Storm naturally pushes waves, while his Sky Splitter zones you away from dying minions. If you attempt to retaliate with Blunt Force Trauma, he shields the damage and bites back. Consequently, you will spend the laning phase pushed under tower, constantly threatened by a dive once he unlocks his disabling Stormbringer.
How to play
To survive, break his trade loop by never letting him bite you twice. Use Infected Bonesaw exclusively to secure distant farm and slow his approach. If he forces an engage with Thundering Smash, let Goes Where He Pleases absorb the crowd control, activate Heart Zapper to mitigate his initial burst, and immediately retreat. Never stay within melee range once you are marked; wait for the mark of Frenzied Maul to expire before approaching again.
PokeTrue damageGnar's Rage Gene keeps him in Mini form most of the time, where his Hyper passive shreds Dr. Mundo's high-HP pool with percent-health magic damage while boosting his own movement speed. Combined with Boomerang Throw's slow, Gnar can easily kite you, neutralizing your melee threat and making Goes Where He Pleases less useful since he doesn't need hard crowd control to keep you at bay.Gnar build →See details
Gnar
The interaction that decides it
Gnar's Hyper passive deals percent-health magic damage and grants movement speed, allowing him to easily kite Mundo in Mini form.
Why
Gnar's Rage Gene keeps him in Mini form most of the time, where his Hyper passive shreds Dr. Mundo's high-HP pool with percent-health magic damage while boosting his own movement speed. Combined with Boomerang Throw's slow, Gnar can easily kite you, neutralizing your melee threat and making Goes Where He Pleases less useful since he doesn't need hard crowd control to keep you at bay.
Lane impact
You are forced to play defensively near your tower, using Infected Bonesaw to secure far minions. Walking up to use Blunt Force Trauma allows Gnar to easily trigger Hyper and use Hop to escape any retaliation. This constant harass chips away at your health, forcing early recalls, rendering Maximum Dosage less effective as a survival tool, and completely giving up early priority in the top lane.
How to play
Stay safely outside Gnar's auto-attack range when his Rage Gene is building up. Only look to contest waves when he transforms into Mega Gnar, as his slower animations make him much easier to hit with Infected Bonesaw. If he misses a Boomerang Throw, use that short window to secure minions with Blunt Force Trauma. If caught, activate Heart Zapper to absorb the burst, then retreat to collect your Goes Where He Pleases canister.
CC immunityK'Sante turns your high-HP pool into a liability once he unlocks All Out. This ultimate converts his resistances into raw offensive power and amplifies Dauntless Instinct to shred you with true damage. Crucially, All Out's displacement ignores the crowd-control immunity of your Goes Where He Pleases passive by forcibly repositioning you over walls regardless, turning your main defensive tool into a wasted cooldown while you are dismantled.K'Santé build →See details
K'Santé
The interaction that decides it
K'Sante's All Out converts his defensive stats into offensive power, allowing him to shred Mundo with true damage while ignoring Mundo's passive CC block.
Why
K'Sante turns your high-HP pool into a liability once he unlocks All Out. This ultimate converts his resistances into raw offensive power and amplifies Dauntless Instinct to shred you with true damage. Crucially, All Out's displacement ignores the crowd-control immunity of your Goes Where He Pleases passive by forcibly repositioning you over walls regardless, turning your main defensive tool into a wasted cooldown while you are dismantled.
Lane impact
This interaction forces you into a defensive tempo game. Early on, you can contest waves using Infected Bonesaw to farm from afar, but K'Santé's Footwork and Path Maker make trading directly dangerous. Once he reaches level five, stepping past the river midpoint is lethal; a single bad trade allows him to kidnap you under his tower, destroying your recall timings and starving you of gold.
How to play
To survive, you must anchor yourself strictly to the lane's center or your own tower. Never hug the alcove or walls when his ultimate is up. Keep Infected Bonesaw active to poke and slow his advances, and always save Maximum Dosage for the immediate aftermath of his All Out activation, using the sudden health surge and movement speed to disengage rather than fight his amplified true damage.
ShieldsCC immunitySett turns your massive health pool into a weapon against your team. While your passive Goes Where He Pleases blocks the initial stun of his Facebreaker, his ultimate The Show Stopper scales directly off your maximum health. When you activate Maximum Dosage, you unknowingly increase the colossal area-of-effect damage Sett deals to your backline when he slams you into them during teamfights.Sett build →See details
Sett
The interaction that decides it
Sett's Facebreaker is blocked by Goes Where He Pleases, but his The Show Stopper uses Mundo's massive bonus health pool to obliterate Mundo's backline.
Why
Sett turns your massive health pool into a weapon against your team. While your passive Goes Where He Pleases blocks the initial stun of his Facebreaker, his ultimate The Show Stopper scales directly off your maximum health. When you activate Maximum Dosage, you unknowingly increase the colossal area-of-effect damage Sett deals to your backline when he slams you into them during teamfights.
Lane impact
In lane, Sett will constantly zone you with Knuckle Down to force short, explosive trades. If you step up to last-hit with Blunt Force Trauma, he will retaliate with Haymaker to absorb your damage and burst you back. You are forced to play defensively, farming from a safe distance with Infected Bonesaw and letting the wave crash under your tower, sacrificing early map pressure.
How to play
To survive, maintain a safe distance and farm exclusively with Infected Bonesaw. Do not activate Heart Zapper unless Sett has already wasted his Haymaker shield. Most importantly, when teamfights break out, position yourself perpendicular or behind Sett rather than between him and your carries. By avoiding a straight-line path, you prevent him from landing a devastating The Show Stopper directly onto your squishy backline.
ExecuteCC immunityUrgot holds a dangerous advantage because his Fear Beyond Death execute threshold completely bypasses the health-regeneration ramp of your Maximum Dosage. While Goes Where He Pleases successfully blocks his initial flip from Disdain, Urgot's high physical burst can quickly melt your health pool. If he drops you below his execution limit, your ultimate's healing cannot save you from being ground up.Urgot build →See details
Urgot
The interaction that decides it
Urgot's Disdain is blocked by Goes Where He Pleases, but his Fear Beyond Death execute bypasses Mundo's Maximum Dosage healing if Mundo drops below the threshold.
Why
Urgot holds a dangerous advantage because his Fear Beyond Death execute threshold completely bypasses the health-regeneration ramp of your Maximum Dosage. While Goes Where He Pleases successfully blocks his initial flip from Disdain, Urgot's high physical burst can quickly melt your health pool. If he drops you below his execution limit, your ultimate's healing cannot save you from being ground up.
Lane impact
You cannot safely contest Urgot when his passive legs are charged, forcing you to farm from a distance. Every time Goes Where He Pleases is on cooldown, you must surrender wave control and retreat under tower, as a single landing of Disdain followed by Purge will trigger his execute. This pressure delays your scaling and forces early, disadvantageous recalls.
How to play
Stay behind your minion wave to block Corrosive Charge and use Infected Bonesaw to secure cs from maximum range. Never activate Maximum Dosage at the last second; pop it early, around forty percent health, to stay well above the Fear Beyond Death threshold. If your passive canister falls near Urgot, abandon it immediately, as he will use Disdain to punish your predictable pathing.
DuelingTryndamere directly counters your low-health dueling power. When you drop low, *Blunt Force Trauma* grants you massive bonus AD for retaliation, but *Undying Rage* allows him to completely ignore this burst. While you try to regenerate with *Maximum Dosage*, he can comfortably match your DPS with crit-heavy basic attacks, rendering your natural low-HP survivability and baiting potential useless in direct, extended face-offs.Tryndamere build →See details
Tryndamere
The interaction that decides it
Tryndamere's Undying Rage allows him to survive Mundo's high-AD low-health retaliation from Blunt Force Trauma and out-DPS him in extended duels.
Why
Tryndamere directly counters your low-health dueling power. When you drop low, *Blunt Force Trauma* grants you massive bonus AD for retaliation, but *Undying Rage* allows him to completely ignore this burst. While you try to regenerate with *Maximum Dosage*, he can comfortably match your DPS with crit-heavy basic attacks, rendering your natural low-HP survivability and baiting potential useless in direct, extended face-offs.
Lane impact
You cannot contest the wave early once he builds *Battle Fury*. Tryndamere will use *Spinning Slash* to initiate short trades, forcing you under turret. If you try to farm with basic attacks, *Mocking Shout* will sap your AD, making last-hitting difficult. This constantly forces you to farm from range, giving up lane priority and letting him chip away at your plating.
How to play
Maximize *Infected Bonesaw* to secure minions from absolute safety, keeping the wave near your turret. When he dashes in with *Spinning Slash*, immediately activate *Heart Zapper* to absorb the initial burst and pop it for the heal. Face him directly when retreating to deny the slow from *Mocking Shout*. If he commits with *Undying Rage*, use the movement speed from *Maximum Dosage* to disengage immediately, waiting out his five-second immortality before trying to fight back.
ScalingSlowsThis matchup hinges on a painful mechanical interaction: Nasus's Wither bypasses your Goes Where He Pleases entirely because it is a slow, not an immobilization. Since your passive offers zero protection against this crippling debuff, Nasus can easily close the distance. Once he accumulates enough stacks on Siphoning Strike, he will relentlessly run you down, rendering your natural health regeneration and defensive tools obsolete in extended duels.Nasus build →See details
Nasus
The interaction that decides it
Nasus's Wither is not blocked by Goes Where He Pleases since it is a slow, allowing Nasus to easily run Mundo down once he stacks Siphoning Strike.
Why
This matchup hinges on a painful mechanical interaction: Nasus's Wither bypasses your Goes Where He Pleases entirely because it is a slow, not an immobilization. Since your passive offers zero protection against this crippling debuff, Nasus can easily close the distance. Once he accumulates enough stacks on Siphoning Strike, he will relentlessly run you down, rendering your natural health regeneration and defensive tools obsolete in extended duels.
Lane impact
You cannot match Nasus in a straight 1v1 trade once he gets rolling. If you let the wave bounce toward his tower, he will freeze it, stack Siphoning Strike safely, and zone you out. Any attempt to break his freeze invites a Wither that leaves you defenseless far from safety. This forces you to concede priority, slowing down your progression and leaving your jungler without top-side support during early skirmishes.
How to play
To survive, focus entirely on pulling the wave toward your turret. Use Infected Bonesaw from long range to secure last hits and poke Nasus when he steps up to stack. Keep Blunt Force Trauma ready to quickly clear minions under your own tower. If Nasus activates Fury of the Sands and casts Wither, do not fight; immediately use Heart Zapper for the burst of speed and trigger Maximum Dosage to escape his zone of Spirit Fire.
These matchups are above all duels of execution: both champions have credible ways to gain the upper hand. Dodging one key ability, anticipating an engage correctly, or a single positioning mistake can be enough to tip the duel one way or the other. Knowing the matchup and recognizing the right windows to act are especially important here.
CC immunityThis matchup is a pure duel of cooldowns centered on Jax's defensive capabilities. When Jax initiates with Counter Strike to dodge your basic attacks and stun you, your passive Goes Where He Pleases absorbs the stun entirely. This leaves Jax completely vulnerable with his main defensive tool offline, creating a critical window where you can safely retaliate with Blunt Force Trauma and chunk his health bar before his dodge returns.Jax build →See details
Jax
The interaction that decides it
Jax's Counter Strike stun is blocked by Goes Where He Pleases, giving Mundo a window to retaliate with Blunt Force Trauma while Jax's main defensive tool is down.
Why
This matchup is a pure duel of cooldowns centered on Jax's defensive capabilities. When Jax initiates with Counter Strike to dodge your basic attacks and stun you, your passive Goes Where He Pleases absorbs the stun entirely. This leaves Jax completely vulnerable with his main defensive tool offline, creating a critical window where you can safely retaliate with Blunt Force Trauma and chunk his health bar before his dodge returns.
Lane impact
The lane's tempo fluctuates rapidly depending on who controls the wave when these abilities clash. If Jax wastes his dodge, he must retreat, giving you free reign to push the wave with Blunt Force Trauma or land Infected Bonesaw slow. However, if your passive is down when he engages, he will easily win short trades and force you under tower, threatening a dive or a costly recall.
How to play
Always monitor your passive's indicator before stepping up. If Goes Where He Pleases is active, bait Jax's Counter Strike by walking into his range, pick up your canister immediately to restore health, and activate Heart Zapper to absorb his initial burst. Once his dodge ends, immediately hit him with Blunt Force Trauma and chase with Infected Bonesaw. If your passive is on cooldown, play defensively, farming solely with long-range cleavers until it recovers.
True damageCC immunityThis matchup hinges entirely on how Ornn's Bellows Breath interacts with your passive Goes Where He Pleases. When Ornn engulfs you in fire, he applies Brittle. His subsequent basic attack triggers a knockback that instantly pops your canister and inflicts massive percent-health damage. This interaction bypasses your natural tankiness, turning every short trade into a race of positioning to either dodge the breath or secure your canister.Ornn build →See details
Ornn
The interaction that decides it
Ornn's Bellows Breath applies Brittle, allowing his next basic attack to knock Mundo back and pop Goes Where He Pleases while dealing heavy percent-health damage.
Why
This matchup hinges entirely on how Ornn's Bellows Breath interacts with your passive Goes Where He Pleases. When Ornn engulfs you in fire, he applies Brittle. His subsequent basic attack triggers a knockback that instantly pops your canister and inflicts massive percent-health damage. This interaction bypasses your natural tankiness, turning every short trade into a race of positioning to either dodge the breath or secure your canister.
Lane impact
When Ornn successfully pops Goes Where He Pleases with his Brittle-empowered attack, you are forced onto the defensive to retrieve your canister. This immediate loss of health and pressure allows Ornn to dictate wave states using Volcanic Rupture. If he denies your passive recovery, he gains free recall windows or sets up dives with Searing Charge, forcing you to farm under tower with Infected Bonesaw.
How to play
To win this tempo race, you must bait out Bellows Breath while keeping a diagonal angle. If Ornn activates his fire breath, immediately walk backward or sideways to deny him the follow-up basic attack, preserving Goes Where He Pleases. If your passive is down, respect his Volcanic Rupture and Searing Charge combo; stay away from walls and use Infected Bonesaw to last-hit safely. Activate Heart Zapper only when you cannot escape the full brunt of his trade to recoup some health.
Map pressureCC immunityThis matchup is a strategic stalemate determined by a precise exchange of defensive tools. Your passive, Goes Where He Pleases, completely nullifies Shen's primary engage, Shadow Dash, protecting you from deadly taunts. However, when you attempt to retaliate, Shen can deploy Spirit's Refuge to entirely block the high-damage headbutt from your Blunt Force Trauma. This leaves both of you struggling to land decisive blows during direct trades.Shen build →See details
Shen
The interaction that decides it
Shen's Shadow Dash taunt is blocked by Goes Where He Pleases, but Shen can block Mundo's Blunt Force Trauma enhanced attacks using Spirit's Refuge.
Why
This matchup is a strategic stalemate determined by a precise exchange of defensive tools. Your passive, Goes Where He Pleases, completely nullifies Shen's primary engage, Shadow Dash, protecting you from deadly taunts. However, when you attempt to retaliate, Shen can deploy Spirit's Refuge to entirely block the high-damage headbutt from your Blunt Force Trauma. This leaves both of you struggling to land decisive blows during direct trades.
Lane impact
Since neither tank can easily execute the other, the lane devolves into a pure battle for minion priority. When Shen channels Stand United to aid his team across the map, you must immediately punish him by shoving the wave. If your wave control is weak, Shen roams freely without losing his tower, whereas keeping him pinned under turret forces him to choose between saving a teammate or losing plates to your Blunt Force Trauma.
How to play
To win this tempo race, consistently harass him from a distance using Infected Bonesaw. Never activate Blunt Force Trauma while Shen's Spirit's Refuge zone is active; instead, bait out his protective field first, or wait for it to collapse before striking. If his passive Ki Barrier shield is up, delay your trades. When you see him preparing Stand United, immediately utilize Heart Zapper and Blunt Force Trauma to clear the wave and secure plates.
SustainScalingSince Vladimir lacks any hard crowd control, your passive Goes Where He Pleases is completely useless here, never giving you those healing canisters. Instead, this matchup becomes a direct, uninterrupted battle of attrition between your Infected Bonesaw and his Transfusion. Because both of you can constantly regenerate health without needing to base, the lane is decided entirely by who manages their health costs and healing cycles better.Vladimir build →See details
Vladimir
The interaction that decides it
Neither champion has hard crowd control to trigger Goes Where He Pleases, turning the lane into a pure sustain battle between Transfusion and Infected Bonesaw.
Why
Since Vladimir lacks any hard crowd control, your passive Goes Where He Pleases is completely useless here, never giving you those healing canisters. Instead, this matchup becomes a direct, uninterrupted battle of attrition between your Infected Bonesaw and his Transfusion. Because both of you can constantly regenerate health without needing to base, the lane is decided entirely by who manages their health costs and healing cycles better.
Lane impact
Trades are constant but rarely lethal early. Vladimir tries to poke you down with his third, empowered Transfusion while using Sanguine Pool to dodge your counter-attacks. Because you both have immense staying power, neither of you can easily force a recall. The lane stays locked in a stalemate where minion waves are cleared slowly using Blunt Force Trauma and Tides of Blood until one player mismanages their health pool.
How to play
To break this endless loop, you must alter your build path early to rush anti-healing and magic resistance rather than your usual health-stacking items, as his Crimson Pact scales off his own health anyway. Back off immediately when his resource bar turns red, indicating his empowered Transfusion is ready. Once it decays, step up to throw Infected Bonesaw or clear the wave with Blunt Force Trauma. If he dives you under tower, activate Maximum Dosage early to bait his Hemoplague explosion.
These champions generally struggle to answer your main strengths, which lets you approach the matchup with more freedom. You often have several ways to pressure them and force trades that go in your favor. Use this advantage to dictate the pace rather than giving them time to get back into a comfortable position.
SustainCC immunitySion's infinite health stacking from Soul Furnace plays directly into your hands. Because Infected Bonesaw inflicts high current-health magic damage, the chunkier Sion becomes, the more punishing your cleavers feel. Additionally, his main crowd control from Decimating Smash is entirely neutralized by Goes Where He Pleases, leaving him unable to lock you down while you melt his massive health bar.Sion build →See details
Sion
The interaction that decides it
Mundo's Infected Bonesaw deals current-health magic damage, which naturally shreds Sion's massive health pool accumulated from Soul Furnace.
Why
Sion's infinite health stacking from Soul Furnace plays directly into your hands. Because Infected Bonesaw inflicts high current-health magic damage, the chunkier Sion becomes, the more punishing your cleavers feel. Additionally, his main crowd control from Decimating Smash is entirely neutralized by Goes Where He Pleases, leaving him unable to lock you down while you melt his massive health bar.
Lane impact
This matchup dynamic prevents Sion from ever establishing lane dominance. He cannot safely charge Decimating Smash without standing still, making him an easy target for your Infected Bonesaw. You can easily match his wave clear by flinging dead minions with Blunt Force Trauma. Sion is forced to play defensively, as his trading patterns fail to outpace your health recovery.
How to play
Position yourself just beside your minion wave to maintain a clear line of sight for Infected Bonesaw while avoiding his Roar of the Slayer. When Sion charges Decimating Smash, stand your ground; let Goes Where He Pleases absorb the impact, quickly retrieve your canister, and retaliate with Blunt Force Trauma. Actively use Heart Zapper during extended trades to recover health, and pop Maximum Dosage only after he commits his Unstoppable Onslaught.
PokeCC immunityThis matchup swings heavily in your favor because Jayce's primary tool for self-peel, Thundering Blow, is entirely neutralized by your passive, Goes Where He Pleases. When Jayce switches to hammer form to knock you away, your passive absorbs the displacement. This leaves him completely defenseless when you activate Maximum Dosage to run him down, turning his melee range transition into a death trap.Jayce build →See details
Jayce
The interaction that decides it
Jayce's Thundering Blow knockback is negated by Goes Where He Pleases, preventing him from disengaging when Mundo runs him down with Maximum Dosage.
Why
This matchup swings heavily in your favor because Jayce's primary tool for self-peel, Thundering Blow, is entirely neutralized by your passive, Goes Where He Pleases. When Jayce switches to hammer form to knock you away, your passive absorbs the displacement. This leaves him completely defenseless when you activate Maximum Dosage to run him down, turning his melee range transition into a death trap.
Lane impact
Jayce's range advantage is neutralized by holding the minion wave close to your turret. By keeping the wave frozen on your side, you deny him the long lane space he needs to poke you. If he overextends to break this freeze, he is entirely vulnerable. He must choose between losing farm or stepping up into a deadly chase where his hammer knockback cannot save him.
How to play
Focus on farming with Infected Bonesaw and Blunt Force Trauma to secure lasthits safely while preserving your passive container. Do not engage actively until you have Maximum Dosage ready. Once you decide to fight, run directly at him to force him to waste Thundering Blow on your Goes Where He Pleases shield, then immediately activate Heart Zapper to absorb his remaining burst and finish him.
Early pressureCC immunityThis matchup swings heavily in your favor because Goes Where He Pleases completely nullifies Renekton's entire trade patterns. Whenever he dashes in to lock you down, your passive absorbs the stun of Ruthless Predator, leaving him vulnerable in your minion wave. Without that instant stun, he cannot execute his quick burst-and-escape combo, allowing you to easily out-sustain him over prolonged skirmishes.Renekton build →See details
Renekton
The interaction that decides it
Renekton's Ruthless Predator stun is absorbed by Goes Where He Pleases, stripping Renekton of his primary trade setup and letting Mundo out-sustain him.
Why
This matchup swings heavily in your favor because Goes Where He Pleases completely nullifies Renekton's entire trade patterns. Whenever he dashes in to lock you down, your passive absorbs the stun of Ruthless Predator, leaving him vulnerable in your minion wave. Without that instant stun, he cannot execute his quick burst-and-escape combo, allowing you to easily out-sustain him over prolonged skirmishes.
Lane impact
Renekton is forced to play passively because his primary tool for lane dominance is neutralized. You can confidently hold the minion wave near your turret or slow push without fear of being frozen out. Every time he attempts a trade, his long cooldowns on Slice and Dice and Ruthless Predator leave him completely exposed to your counter-attacks, turning the lane into a battle of attrition he cannot win.
How to play
Keep your passive canister safe; if Goes Where He Pleases is popped, play back until it returns. When it is active, bait his dash by standing near low-health minions, then punish his failed stun with Infected Bonesaw to slow him down. If he activates Dominus, do not panic-ultimate immediately; instead, activate Heart Zapper to absorb his initial burst, and use Blunt Force Trauma to chunk him down as he tries to retreat.
PokeCrowd controlTeemo relies heavily on Blinding Dart to shut down physical attackers, but this projectile has absolutely no effect on your Infected Bonesaw. Because your cleaver deals magic damage from a safe distance, you can completely bypass his blind mechanic. Additionally, the poison from Toxic Shot is easily neutralized by the passive health regeneration of Goes Where He Pleases, making this ranged matchup surprisingly easy for you to control.Teemo build →See details
Teemo
The interaction that decides it
Teemo's Blinding Dart does not affect the damage of Infected Bonesaw, allowing Mundo to easily poke Teemo down from a safe distance.
Why
Teemo relies heavily on Blinding Dart to shut down physical attackers, but this projectile has absolutely no effect on your Infected Bonesaw. Because your cleaver deals magic damage from a safe distance, you can completely bypass his blind mechanic. Additionally, the poison from Toxic Shot is easily neutralized by the passive health regeneration of Goes Where He Pleases, making this ranged matchup surprisingly easy for you to control.
Lane impact
This interaction turns a pairing that is usually oppressive for melee champions into a slow bleed for the swift scout. By constantly landing Infected Bonesaw, you push Teemo behind his minion wave, preventing him from utilizing Guerrilla Warfare to harass you. You dictate the wave tempo, protect your turret plates from his ranged pressure, and force him into awkward recall timings before you dive him with Maximum Dosage.
How to play
To exploit this edge, shift your early purchases toward magic resistance to neutralize Noxious Trap and Toxic Shot. Use the brushes to break line of sight, throwing Infected Bonesaw whenever he tries to farm. Hold Blunt Force Trauma to execute minions and launch them at him if he runs with Move Quick. If you miss too many cleavers, activate Heart Zapper to safely clear under your turret.
PokeCC immunityMalphite relies on Unstoppable Force to set up kills or ganks, but Goes Where He Pleases entirely negates this ultimate, leaving him unable to lock you down. Meanwhile, Malphite's magic damage from Seismic Shard is easily healed back through Infected Bonesaw and Maximum Dosage, turning this lane into a war of attrition where Malphite runs out of mana long before you run out of health.Malphite build →See details
Malphite
The interaction that decides it
Malphite's Unstoppable Force is completely negated by Goes Where He Pleases, leaving him with no way to lock down or burst Mundo.
Why
Malphite relies on Unstoppable Force to set up kills or ganks, but Goes Where He Pleases entirely negates this ultimate, leaving him unable to lock you down. Meanwhile, Malphite's magic damage from Seismic Shard is easily healed back through Infected Bonesaw and Maximum Dosage, turning this lane into a war of attrition where Malphite runs out of mana long before you run out of health.
Lane impact
You have total freedom to dictate wave states. Since Ground Slam cannot slow your skill-based farming, you can constantly shove Malphite under his tower using Blunt Force Trauma. He cannot punish your aggression or freeze the wave because any attempt to engage with Unstoppable Force fails, allowing you to chip away at his Granite Shield and secure easy plates while he struggles to last-hit under tower.
How to play
Constantly throw Infected Bonesaw to crack his Granite Shield and prevent it from regenerating. When pushing the wave, align low-health minions to launch them with Blunt Force Trauma directly into his face. If he steps up to trade with Thunderclap, activate Heart Zapper to absorb his burst and immediately walk over your canister from Goes Where He Pleases to stay topped off. Save Maximum Dosage for his desperate, bait-style gank attempts, walking away freely.
These champions have a build and playstyle that directly overpower yours, which can make controlling the lane and farming extremely difficult. Their kit can neutralize your core strengths or punish you the moment you try to play your usual game plan. In these matchups, the goal is often to minimize mistakes and look for ways to win outside of direct confrontation.
TanksScalingYour main defensive tool as a jungle tank, the health-scaling regeneration of Maximum Dosage, is completely invalidated by Master Yi. When he activates Wuju Style, his true damage bypasses your massive health bar and armor. Furthermore, your primary self-peel and spacing tool, the slow from Infected Bonesaw, is completely useless once he activates Highlander, allowing him to run you down without any counterplay.Master Yi build →See details
Master Yi
The interaction that decides it
Master Yi's Highlander makes him immune to the slow from Infected Bonesaw, while Wuju Style's true damage shreds Mundo's health pool.
Why
Your main defensive tool as a jungle tank, the health-scaling regeneration of Maximum Dosage, is completely invalidated by Master Yi. When he activates Wuju Style, his true damage bypasses your massive health bar and armor. Furthermore, your primary self-peel and spacing tool, the slow from Infected Bonesaw, is completely useless once he activates Highlander, allowing him to run you down without any counterplay.
Lane impact
Because you cannot duel him, Master Yi dictates the jungle tempo. You cannot contest crabs or epic monsters directly if he is nearby. An early skirmish where he gets resets via Highlander will snowball the match. You will find yourself forced to concede your jungle camps or rely on your lanes to bail you out when he invades, as you cannot peel him off with Infected Bonesaw.
How to play
Avoid any 1v1 encounters after Master Yi hits level five. If he invades and triggers Highlander, do not waste your Infected Bonesaw trying to slow him; instead, use Blunt Force Trauma to quickly clear a monster to escape, or trigger Heart Zapper to store damage before popping Maximum Dosage to run away. Only engage him when his Wuju Style is on cooldown, or when he commits Alpha Strike on an ally, leaving him vulnerable to your team's hard crowd control.
DuelingTrue damageOlaf is a nightmare in the jungle because his Reckless Swing deals flat true damage, completely ignoring your tanky stats. Compounding this, his Berserker Rage accelerates his attack speed as his health drops, which directly counters your goal of wearing him down. Even if you try to disengage, his Undertow axes provide relentless slows, meaning you cannot comfortably trade hits in isolated skirmishes.Olaf build →See details
Olaf
The interaction that decides it
Olaf's Reckless Swing deals flat true damage that bypasses Mundo's defenses, while his passive Berserker Rage ensures he wins any low-health duel.
Why
Olaf is a nightmare in the jungle because his Reckless Swing deals flat true damage, completely ignoring your tanky stats. Compounding this, his Berserker Rage accelerates his attack speed as his health drops, which directly counters your goal of wearing him down. Even if you try to disengage, his Undertow axes provide relentless slows, meaning you cannot comfortably trade hits in isolated skirmishes.
Lane impact
This matchup ruins your early jungle freedom and objective pressure. Since Olaf wins any direct duel, you cannot contest Scuttle Crabs or secure neutral objectives if he is nearby. You will often have to forfeit your own camps if he decides to invade your territory. This forces you into defensive pathing, which ultimately delays your scaling and leaves your laners vulnerable.
How to play
To survive, use Infected Bonesaw from a distance to scout bushes and clear camps safely without getting trapped. If Olaf initiates with Undertow, do not activate Heart Zapper to fight back; instead, save your health and pop Maximum Dosage strictly to escape over walls or gain enough movement speed to run away. If he invades, immediately cross the river to steal his opposite camps.
KitingExecuteKindred completely neutralizes your offensive threat because *Lamb's Respite* creates a death-defying zone that nullifies the execute potential of your *Blunt Force Trauma* and the heavy current-health damage of *Infected Bonesaw*. Since you rely on whittling targets down and finishing them when they are low, this ultimate completely halts your kill pressure. Additionally, Kindred's ranged attacks and *Dance of Arrows* let them easily kite you, bypassing *Goes Where He Pleases* entirely.Kindred build →See details
Kindred
The interaction that decides it
Kindred's Lamb's Respite completely denies Mundo's execute potential from Blunt Force Trauma and high-damage Qs during critical teamfights.
Why
Kindred completely neutralizes your offensive threat because *Lamb's Respite* creates a death-defying zone that nullifies the execute potential of your *Blunt Force Trauma* and the heavy current-health damage of *Infected Bonesaw*. Since you rely on whittling targets down and finishing them when they are low, this ultimate completely halts your kill pressure. Additionally, Kindred's ranged attacks and *Dance of Arrows* let them easily kite you, bypassing *Goes Where He Pleases* entirely.
Lane impact
In the jungle, Kindred will aggressively hunt your camps to secure marks from *Mark of the Kindred*. When you clash in the river, you cannot lock them down; their constant dashes from *Dance of Arrows* inside *Wolf's Frenzy* keep you at a distance. If you try to secure objectives, Kindred can simply out-secure you by dropping *Lamb's Respite* to protect their team, leaving you unable to burst anyone down with *Heart Zapper*.
How to play
To survive this matchup, you must adjust your positioning during teamfights to act as a meat shield rather than a diver. Do not waste *Blunt Force Trauma* or *Infected Bonesaw* when an enemy is near death inside *Lamb's Respite*; instead, position yourself at the edge of their zone and hold these cooldowns. The moment their ultimate expires, use the bonus movement speed from *Maximum Dosage* to chase down Kindred or use *Heart Zapper* to absorb the delayed burst from *Mounting Dread*.
TanksScalingGwen is your ultimate mechanical nightmare in the jungle. Her passive, A Thousand Cuts, converts your massive health pool into her own healing and damage by dealing percentage health magic damage with every strike. Even when you activate Maximum Dosage for a massive health surge, she cuts through it effortlessly. When combined with the rapid true damage from Snip Snip!, your natural tankiness becomes a liability rather than a strength.Gwen build →See details
Gwen
The interaction that decides it
Gwen's passive A Thousand Cuts deals percentage health magic damage, allowing her to easily shred Mundo in any stage of the game.
Why
Gwen is your ultimate mechanical nightmare in the jungle. Her passive, A Thousand Cuts, converts your massive health pool into her own healing and damage by dealing percentage health magic damage with every strike. Even when you activate Maximum Dosage for a massive health surge, she cuts through it effortlessly. When combined with the rapid true damage from Snip Snip!, your natural tankiness becomes a liability rather than a strength.
Lane impact
This interaction completely dictates the pace of the jungle. You cannot contest her at early Scuttle crabs or epic monsters, as any extended duel results in your swift demise. Gwen can freely invade your camps using Skip 'n Slash to position herself, forcing you to concede territory. Your slower clear means she will secure priority, leaving your laners vulnerable to her ganks while you are stuck trying to catch up.
How to play
To survive, you must play away from her pathing. Use Infected Bonesaw from maximum range to secure contested camps safely, and clear quickly with Blunt Force Trauma. Never engage her when her Needlework is active, as the multiple slows and damage spikes will melt you instantly. If she invades your red side, immediately cross map to take her opposite camps or secure the opposite objective. Your goal is to secure team utility, not to duel her.
KitingTanksLillia is a nightmare matchup in the jungle because her Dream-Laden Bough deals percentage maximum health magic damage, directly countering your massive health pool. Furthermore, the passive movement speed she gains from Blooming Blows makes her incredibly swift, allowing her to easily dodge your Infected Bonesaw. You cannot lock her down or trade effectively when she can constantly dance around your cleaver throws.Lillia build →See details
Lillia
The interaction that decides it
Lillia's passive Dream-Laden Bough deals max health damage that melts Mundo, while her high movement speed makes it impossible for him to land Infected Bonesaw.
Why
Lillia is a nightmare matchup in the jungle because her Dream-Laden Bough deals percentage maximum health magic damage, directly countering your massive health pool. Furthermore, the passive movement speed she gains from Blooming Blows makes her incredibly swift, allowing her to easily dodge your Infected Bonesaw. You cannot lock her down or trade effectively when she can constantly dance around your cleaver throws.
Lane impact
This dynamic completely strips away your early jungle pressure. Since you cannot reliably hit Infected Bonesaw, Lillia can easily contest your camps or counter-gank you with Swirlseed and Watch Out! Eep!. If she catches you in the river, she will kite you indefinitely, forcing you to back early, which leaves your lanes completely vulnerable to her high-tempo ganks.
How to play
Your survival hinges on keeping your distance and tracking her Blooming Blows stacks. Never engage when she has max speed; instead, hold Infected Bonesaw until she commits her dash with Watch Out! Eep!, which briefly locks her in place. If she hits you with Swirlseed and prepares Lilting Lullaby, immediately fall back toward a wall so your passive, Goes Where He Pleases, can drop its canister safely.
These champions have tools that generally give them the edge in a fight, without making the matchup unwinnable. They might have more range, a better ability to soak up your offense, or more ways to answer your engages. You'll need to adapt your approach and carefully pick your moments to accept a fight.
KitingSkirmishesThis matchup is dictated by Graves' ability to neutralize your direct approach. While you rely on landing Infected Bonesaw to close the gap, Graves easily nullifies this with Quickdraw to slide out of the trajectory. Worse, if you manage to get close, his Smoke Screen completely blinds you, breaking your target acquisition and slowing your advance, meaning you cannot reliably land Blunt Force Trauma or stick to him.Graves build →See details
Graves
The interaction that decides it
Graves can easily kite Mundo using Quickdraw while reducing his vision and movement with Smoke Screen.
Why
This matchup is dictated by Graves' ability to neutralize your direct approach. While you rely on landing Infected Bonesaw to close the gap, Graves easily nullifies this with Quickdraw to slide out of the trajectory. Worse, if you manage to get close, his Smoke Screen completely blinds you, breaking your target acquisition and slowing your advance, meaning you cannot reliably land Blunt Force Trauma or stick to him.
Lane impact
In the jungle, this prevents you from contesting camps or skirmishing actively early on. Graves will aggressively counter-jungle you, knowing that his New Destiny clears fast and keeps him healthy. If he catches you in your jungle, his End of the Line can instantly rebound off your camp walls for massive burst. You will often be forced to give up early Scuttle Crabs, delaying your gold acceleration.
How to play
To survive, track his position and path to the opposite side of the map. When you do cross paths, never lead with Infected Bonesaw; instead, walk towards him to force out Quickdraw first. If he drops Smoke Screen, immediately use the movement speed from Maximum Dosage to retreat laterally out of the fog rather than chasing blindly. Save Heart Zapper to heal back his burst from Collateral Damage if he attempts to execute you.
SkirmishesSustainKayn's transformation via The Darkin Scythe creates a massive scaling gap that turns Mundo's high health pool against him. Once Kayn unlocks his red form, the percentage-health damage on Reaping Slash shreds your tankiness, while his passive healing easily outpaces the regeneration from Maximum Dosage and Heart Zapper in prolonged skirmishes.Kayn build →See details
Kayn
The interaction that decides it
Red Kayn's passive healing and percentage health damage on Reaping Slash allow him to easily shred and outsustain Mundo in extended fights.
Why
Kayn's transformation via The Darkin Scythe creates a massive scaling gap that turns Mundo's high health pool against him. Once Kayn unlocks his red form, the percentage-health damage on Reaping Slash shreds your tankiness, while his passive healing easily outpaces the regeneration from Maximum Dosage and Heart Zapper in prolonged skirmishes.
Lane impact
In the early jungle rotations, you can contest camps using Infected Bonesaw to slow his clear and secure crabs. However, the moment Kayn gains his red form, the power dynamic shifts completely. You can no longer contest neutral objectives or defend your own jungle camps in direct duels, as he will use Shadow Step to initiate favorable fights and heal off your massive health pool.
How to play
Shift your build focus immediately from pure health to anti-healing and armor to mitigate his healing. During skirmishes, save Heart Zapper's detonation for the exact moment Kayn exits you after Umbral Trespass to recover the burst damage he inflicts. If he invades your camps with Shadow Step, use the high damage of Blunt Force Trauma to quickly secure the monsters and retreat before a prolonged fight can begin.
DuelingSustainYour passive Goes Where He Pleases easily nullifies the suppression from Warwick's Infinite Duress, giving you a false sense of safety. However, this matchup is a war of attrition you cannot win early. Even if you block his ultimate, Warwick's constant healing from Jaws of the Beast combined with his passive Eternal Hunger means he will outsustain your Heart Zapper and Infected Bonesaw in any drawn-out duel.Warwick build →See details
Warwick
The interaction that decides it
While Mundo's passive blocks the suppress of Infinite Duress, Warwick's continuous healing from Jaws of the Beast allows him to win extended duels.
Why
Your passive Goes Where He Pleases easily nullifies the suppression from Warwick's Infinite Duress, giving you a false sense of safety. However, this matchup is a war of attrition you cannot win early. Even if you block his ultimate, Warwick's constant healing from Jaws of the Beast combined with his passive Eternal Hunger means he will outsustain your Heart Zapper and Infected Bonesaw in any drawn-out duel.
Lane impact
In the jungle, this dynamic prevents you from contesting scuttle crabs or invading early. If you try to fight Warwick over neutral camps, his Blood Hunt will track your health costs from Infected Bonesaw, letting him hunt you down with massive attack speed. You cannot match his skirmish pressure, forcing you to focus on safe clearing while your lanes suffer from his superior early ganking power.
How to play
To survive, use Infected Bonesaw from maximum range to secure camps and poke Warwick without entering his melee range. Never trigger Heart Zapper early unless you are sure you can hit the detonation to heal. If he jumps on you with Jaws of the Beast, do not commit to a duel; instead, activate Maximum Dosage for the movement speed burst to disengage toward your turrets. If he corners you, use your passive's canister pickup to refresh your health and escape rather than fighting back.
DuelingTanksYour entire identity as Dr. Mundo relies on stacking health to fuel Blunt Force Trauma and survive with Maximum Dosage. However, Viego’s passive on Blade of the Ruined King directly punishes this strategy by dealing bonus damage based on your current health. Even if Goes Where He Pleases absorbs his Spectral Maw stun, his basic attacks will shred through your massive health pool faster than you can regenerate it.Viego build →See details
Viego
The interaction that decides it
Viego's Blade of the Ruined King passive deals current health damage, making Mundo's high health pool a liability in 1v1s.
Why
Your entire identity as Dr. Mundo relies on stacking health to fuel Blunt Force Trauma and survive with Maximum Dosage. However, Viego’s passive on Blade of the Ruined King directly punishes this strategy by dealing bonus damage based on your current health. Even if Goes Where He Pleases absorbs his Spectral Maw stun, his basic attacks will shred through your massive health pool faster than you can regenerate it.
Lane impact
Because you cannot win a pure stat-check duel, you must concede early river crabs and avoid isolated skirmishes in the jungle. When Viego uses Harrowed Path to approach, you cannot stand your ground. If you try to contest objectives directly, his Heartbreaker can execute you easily because his attacks bring your health down to critical levels incredibly fast, turning you into a reset tool for Sovereign's Domination.
How to play
To survive this matchup, you must shift your build path away from raw health items early on, prioritizing armor and healing reduction to weaken his auto-attacks. During skirmishes, keep your distance and use Infected Bonesaw to poke and slow Viego rather than engaging in close combat. Never trigger Maximum Dosage too late, as Heartbreaker will execute you before the regeneration kicks in. If he misses Spectral Maw, disengage immediately.
DuelingScalingYour passive, Goes Where He Pleases, acts as a reliable shield by absorbing the stun from Jax's Counter Strike. However, this safety net only delays the inevitable. Once Jax stacks Relentless Assault and starts weaving in Empower resets alongside his passive Grandmaster-at-Arms magic damage, his hybrid DPS completely outpaces your health pool. You cannot match his scaling, making duel attempts increasingly suicidal as the game goes on.Jax build →See details
Jax
The interaction that decides it
While Mundo's passive blocks the stun from Counter Strike, Jax's sustained hybrid damage and scaling make him impossible for Mundo to duel late-game.
Why
Your passive, Goes Where He Pleases, acts as a reliable shield by absorbing the stun from Jax's Counter Strike. However, this safety net only delays the inevitable. Once Jax stacks Relentless Assault and starts weaving in Empower resets alongside his passive Grandmaster-at-Arms magic damage, his hybrid DPS completely outpaces your health pool. You cannot match his scaling, making duel attempts increasingly suicidal as the game goes on.
Lane impact
In the jungle, Jax will aggressively contest objectives once he secures his ultimate. While you can clear camps quickly with Blunt Force Trauma and sustain using Infected Bonesaw, you cannot safely fight him over Scuttle Crabs or Epic Monsters in isolated skirmishes. If he jumps on you with Leap Strike, you are forced to retreat, conceding river pressure and leaving your laners vulnerable to his potent ganks.
How to play
Focus on out-farming Jax early on by maximizing the splash damage from Blunt Force Trauma. During skirmishes, save Infected Bonesaw exclusively to slow Jax down after he uses Leap Strike, preventing him from sticking to you or your backline. Activate Heart Zapper and Maximum Dosage to absorb his initial burst, but always disengage before his Relentless Assault stacks peak. If cornered in your jungle, pop Maximum Dosage defensively to run away rather than committing to a lost duel.
MobilityTeamfightsWhile Goes Where He Pleases easily shrugs off Jarvan IV's classic knockup combo, it offers zero protection against the physical wall of Cataclysm. As Dr. Mundo, your lack of any natural dash means that once you are trapped inside that arena, you are completely at his mercy. You cannot jump out, leaving you exceptionally vulnerable to being isolated and bursted down by his allies.Jarvan IV build →See details
Jarvan IV
The interaction that decides it
Jarvan IV's Cataclysm traps the dashless Mundo inside its impassable terrain, forcing him to flash or take heavy focus fire.
Why
While Goes Where He Pleases easily shrugs off Jarvan IV's classic knockup combo, it offers zero protection against the physical wall of Cataclysm. As Dr. Mundo, your lack of any natural dash means that once you are trapped inside that arena, you are completely at his mercy. You cannot jump out, leaving you exceptionally vulnerable to being isolated and bursted down by his allies.
Lane impact
During jungle skirmishes and river contests, this interaction severely limits your freedom of movement. You cannot safely contest objectives like the Rift Herald or drakes if Jarvan IV has his ultimate ready, as he can instantly isolate you from your team. This threat forces you to play defensively, conceding early river priority and making aggressive counter-jungling highly risky since you risk getting pinned down without an escape route.
How to play
To survive, adopt a strict positioning rule: never enter tight river chokepoints without vision. Keep your distance and poke with Infected Bonesaw to force him to use Cataclysm defensively. If he traps you, do not panic; activate Heart Zapper immediately to absorb the initial burst damage, then trigger Maximum Dosage to regenerate through the focus fire. Always save your Flash specifically for escaping his ultimate's impassable walls when your health drops too low.
These matchups are above all duels of execution: both champions have credible ways to gain the upper hand. Dodging one key ability, anticipating an engage correctly, or a single positioning mistake can be enough to tip the duel one way or the other. Knowing the matchup and recognizing the right windows to act are especially important here.
FarmingScalingSince neither champion possesses hard crowd control in their base kits to stop the other, this match becomes a direct PvE farming duel. Shyvana uses Burnout and Twin Bite to clear camps rapidly and stack Fury of the Dragonborn, while Dr. Mundo matches her speed using Blunt Force Trauma and Infected Bonesaw. It is a straight race to reach peak item spikes without direct disruption.Shyvana build →See details
Shyvana
The interaction that decides it
Neither jungler has hard CC to interrupt the other, turning the matchup into a pure farming race where Shyvana prioritizes dragons while Mundo scales for teamfights.
Why
Since neither champion possesses hard crowd control in their base kits to stop the other, this match becomes a direct PvE farming duel. Shyvana uses Burnout and Twin Bite to clear camps rapidly and stack Fury of the Dragonborn, while Dr. Mundo matches her speed using Blunt Force Trauma and Infected Bonesaw. It is a straight race to reach peak item spikes without direct disruption.
Lane impact
This farming speed directly shapes map pressure. Shyvana will constantly look to secure early Elemental Drakes to power up her Dragon's Descent and stack her passive. If you ignore her, she will melt objectives with Flame Breath. However, Dr. Mundo's safety with Heart Zapper and Maximum Dosage means you can counter-jungle her aggressively, turning the map into a split-map farm fest where neutral objectives are traded.
How to play
Do not try to force early ganks that waste your tempo. Instead, track her Fury and keep lanes warded to spot her heading to Drakes. When Shyvana commits her Dragon's Descent onto an objective, do not contest blindly if you lack numbers; instead, use Infected Bonesaw to steal her opposite jungle camps or secure the Rift Herald. In late-game teamfights, use Maximum Dosage and Blunt Force Trauma to out-tank her damage while blocking her pathing.
SkirmishesCounter-engageThis jungle matchup is a battle of spell negation. Vi relies entirely on landing Vault Breaker or her ultimate Cease and Desist to initiate fights and apply her lockdown. Your passive Goes Where He Pleases completely absorbs this initial crowd control, leaving her stranded in melee range. However, if she triggers your canister, her passive Denting Blows will quickly shred your armor and maximum health during extended duels.Vi build →See details
Vi
The interaction that decides it
Mundo's passive Goes Where He Pleases completely blocks Vi's Vault Breaker or Cease and Desist, denying her primary engage tool.
Why
This jungle matchup is a battle of spell negation. Vi relies entirely on landing Vault Breaker or her ultimate Cease and Desist to initiate fights and apply her lockdown. Your passive Goes Where He Pleases completely absorbs this initial crowd control, leaving her stranded in melee range. However, if she triggers your canister, her passive Denting Blows will quickly shred your armor and maximum health during extended duels.
Lane impact
In the river and during skirmishes, your immunity dictates who holds pressure. When Vi cannot rely on a sudden Vault Breaker from the fog of war, her gank potential drops drastically. She is forced to wait for your passive to be down before contesting Scuttle Crabs. If you block her ultimate Cease and Desist during a counter-gank, her entire burst combo fails, letting you turn the fight around with Infected Bonesaw slows.
How to play
Monitor your passive status constantly; never contest neutral objectives if Goes Where He Pleases is on cooldown. When Vi charges Vault Breaker, stand in front of your squishy allies to intercept it safely. If she triggers your passive, rush to collect the canister immediately to restore health and lower the cooldown. Activate Heart Zapper during her Relentless Force flurry to recoup the burst damage, then pop Maximum Dosage to run her down once her mobility is exhausted.
TeamfightsMobilityThis jungle matchup centers on a direct clash of sustain and displacement immunity. When Hecarim charges, Goes Where He Pleases completely absorbs the knockback of Devastating Charge, stripping away his primary initiation power. However, you cannot easily burst him down; Hecarim counteracts your tankiness with Spirit of Dread, draining massive health in close-quarters skirmishes to match your own natural recovery.Hecarim build →See details
Hecarim
The interaction that decides it
Mundo's passive blocks the knockback from Devastating Charge, but Hecarim's sustained healing from Spirit of Dread keeps him competitive in teamfights.
Why
This jungle matchup centers on a direct clash of sustain and displacement immunity. When Hecarim charges, Goes Where He Pleases completely absorbs the knockback of Devastating Charge, stripping away his primary initiation power. However, you cannot easily burst him down; Hecarim counteracts your tankiness with Spirit of Dread, draining massive health in close-quarters skirmishes to match your own natural recovery.
Lane impact
Because both champions clear camps incredibly fast, this matchup quickly escalates into a map-wide skirmishing race. Hecarim relies on Devastating Charge to secure early ganks, but your ability to ignore this displacement makes you a formidable counter-ganker. If you clash in the river, your Infected Bonesaw slows him down, neutralizing his passive damage scaling, though his Spirit of Dread keeps him healthy enough to contest objectives.
How to play
To win the skirmishes, actively body-block Hecarim's Devastating Charge for your allies when Goes Where He Pleases is active, wasting his main tool. Keep your distance with Infected Bonesaw to decay his movement speed and weaken his passive damage. If he commits with Onslaught of Shadows and activates Spirit of Dread, disengage temporarily to let his healing zone expire before triggering Maximum Dosage and Blunt Force Trauma to crush him.
DuelingSustainThis jungle matchup is a battle of attrition dictated by how you manage your health pools. Your passive, Goes Where He Pleases, completely negates Volibear's Thundering Smash, denying his primary ganking and dueling tool. However, you cannot easily burst him down because his Frenzied Maul provides continuous healing that mirrors your own innate recovery, turning skirmishes into drawn-out duels where neither side can quickly execute the other.Volibear build →See details
Volibear
The interaction that decides it
Mundo blocks Volibear's Thundering Smash stun, but Volibear's Frenzied Maul allows him to match Mundo's sustain in extended fights.
Why
This jungle matchup is a battle of attrition dictated by how you manage your health pools. Your passive, Goes Where He Pleases, completely negates Volibear's Thundering Smash, denying his primary ganking and dueling tool. However, you cannot easily burst him down because his Frenzied Maul provides continuous healing that mirrors your own innate recovery, turning skirmishes into drawn-out duels where neither side can quickly execute the other.
Lane impact
Because both champions possess incredible staying power, neutral objective contests and jungle skirmishes become incredibly long. Volibear will try to force extended trades in the river, relying on Frenzied Maul to outlast your Infected Bonesaw poke. If he manages to mark you and bite a second time, he wins the trade. This constant health-bar ping-pong delays map movements and makes quick, decisive ganks difficult for both.
How to play
To tip the scale, watch Volibear's Frenzied Maul indicator. If he marks you with his first bite, immediately disengage using the slow from Infected Bonesaw to let the mark expire before he can bite again. Only commit to a full duel with Heart Zapper when his healing bite is on cooldown. If he triggers your Goes Where He Pleases with Thundering Smash, prioritize stepping on your canister to recover health and cut your passive's cooldown.
TeamfightsSustainThis matchup hinges on a critical mechanical limitation: Dr. Mundo possesses no hard crowd control to interrupt Fiddlesticks' Bountiful Harvest. While you can chunk his health pool with Infected Bonesaw and Blunt Force Trauma, Fiddlesticks will easily drain-tank through your damage. Your Goes Where He Pleases successfully negates his Terrify, but without a way to stop his channel, you cannot secure solo kills against his massive healing.Fiddlesticks build →See details
Fiddlesticks
The interaction that decides it
Mundo's lack of hard CC means he cannot interrupt Fiddlesticks' Bountiful Harvest, allowing Fiddlesticks to drain-tank through Mundo's damage.
Why
This matchup hinges on a critical mechanical limitation: Dr. Mundo possesses no hard crowd control to interrupt Fiddlesticks' Bountiful Harvest. While you can chunk his health pool with Infected Bonesaw and Blunt Force Trauma, Fiddlesticks will easily drain-tank through your damage. Your Goes Where He Pleases successfully negates his Terrify, but without a way to stop his channel, you cannot secure solo kills against his massive healing.
Lane impact
In the jungle, this direct stalemate shifts the focus entirely onto objective speed and map presence. Since neither of you can easily execute the other in a direct duel, your clears become a race to secure map pressure. Fiddlesticks will look to ambush your team with Crowstorm, whereas you must leverage the sustained healing of Heart Zapper and Maximum Dosage to secure drakes and heralds before he can channel his ultimate.
How to play
When contesting objectives, never engage Fiddlesticks directly while his Bountiful Harvest is available; instead, focus on zoning him out of bushes to deny Crowstorm setups. Use Infected Bonesaw to check unlit brush where A Harmless Scarecrow might lurk. If an objective fight breaks out, save Maximum Dosage to absorb his initial burst, and position yourself to body-block his path, forcing him to waste his drain on you rather than your carries.
DuelingEarly pressureThis jungle duel is a pure test of raw power where your survivability hinges on a single passive. Xin Zhao relies heavily on his early dueling power, trying to force fights with Audacious Charge and knock you up with the third hit of Three Talon Strike. However, Goes Where He Pleases completely negates this crucial knockup. Since he cannot easily disrupt your damage flow, the encounter remains a balanced contest of raw health pools.Xin Zhao build →See details
Xin Zhao
The interaction that decides it
Mundo's passive blocks the knockup from the third strike of Three Talon Strike, allowing Mundo to safely disengage or turn the fight.
Why
This jungle duel is a pure test of raw power where your survivability hinges on a single passive. Xin Zhao relies heavily on his early dueling power, trying to force fights with Audacious Charge and knock you up with the third hit of Three Talon Strike. However, Goes Where He Pleases completely negates this crucial knockup. Since he cannot easily disrupt your damage flow, the encounter remains a balanced contest of raw health pools.
Lane impact
Because neither jungler can easily execute the other, early skirmishes over Scuttle Crabs or neutral objectives become extended slugfests. Xin Zhao cannot snowball off invading you if you save your passive canister, meaning both of you will often exit jungle clashes with low health, forcing frequent recalls instead of immediate map pressure. This stalemate prevents either of you from easily diving lanes, turning the early game into a farming race.
How to play
When Xin Zhao jumps on you with Audacious Charge, do not panic. Keep tracking his basic attacks; as soon as his Three Talon Strike triggers your Goes Where He Pleases, immediately walk over his position to collect your chemical canister. This heal, combined with Heart Zapper to absorb his burst, gives you the health advantage. If he lands Wind Becomes Lightning first and marks you, use Infected Bonesaw to slow him and disengage towards safety.
FarmingThis jungle match is a pure race of map tempo. Your passive, Goes Where He Pleases, is your ultimate shield against Nunu's primary ganking tool, completely absorbing the massive knockup from Biggest Snowball Ever!. However, while you can shrug off his ganks, Nunu dominates epic monster contested areas because his Consume guarantees a burst of true damage that easily out-smites your Infected Bonesaw and Smite combination.Nunu & Willump build →See details
Nunu & Willump
The interaction that decides it
Mundo's passive blocks the knockup from Biggest Snowball Ever!, but Nunu's Consume ensures superior epic monster secure.
Why
This jungle match is a pure race of map tempo. Your passive, Goes Where He Pleases, is your ultimate shield against Nunu's primary ganking tool, completely absorbing the massive knockup from Biggest Snowball Ever!. However, while you can shrug off his ganks, Nunu dominates epic monster contested areas because his Consume guarantees a burst of true damage that easily out-smites your Infected Bonesaw and Smite combination.
Lane impact
Because you can walk through his snowball ganks, Nunu cannot easily invade you or lock you down in 1v1 river skirmishes. However, this creates a high-pressure objective race. Nunu will rush Baron or Dragon early, using Consume to secure them instantly. If you let him start these epic monsters unnoticed, you cannot contest the final hit, forcing you to trade map sides or pressure lanes elsewhere instead of flipping objectives.
How to play
To win this tempo battle, you must use Infected Bonesaw to constantly scout river brushes and prevent Nunu from starting sneak objectives. If an objective fight starts, do not try to out-smite Consume. Instead, run directly at Nunu to trigger Heart Zapper and activate Blunt Force Trauma, using your massive health pool to zone him away from the pit. If he channels Absolute Zero, pop Maximum Dosage to out-regenerate the burst and keep chasing him down.
These champions generally struggle to answer your main strengths, which lets you approach the matchup with more freedom. You often have several ways to pressure them and force trades that go in your favor. Use this advantage to dictate the pace rather than giving them time to get back into a comfortable position.
ScalingCounter-engagePantheon thrives on snowballing the early game with aggressive ganks, but his primary tool for locking you down, Shield Vault, is completely negated by Goes Where He Pleases. By absorbing his stun, you deny him the burst setup from Mortal Will and Comet Spear. As the match progresses, your natural scaling turns you into an unkillable juggernaut, widening the power gap as his assassin burst falls off against your massive health pool.Pantheon build →See details
Pantheon
The interaction that decides it
Pantheon's early gank pressure is neutralized when he attempts to initiate with Shield Vault, which is absorbed by Mundo's passive.
Why
Pantheon thrives on snowballing the early game with aggressive ganks, but his primary tool for locking you down, Shield Vault, is completely negated by Goes Where He Pleases. By absorbing his stun, you deny him the burst setup from Mortal Will and Comet Spear. As the match progresses, your natural scaling turns you into an unkillable juggernaut, widening the power gap as his assassin burst falls off against your massive health pool.
Lane impact
Because Pantheon cannot easily lock you down in the river, his early jungle invasions and scuttle crab contests lose their threat. While he tries to force high-risk ganks with Grand Starfall, you can safely power-farm your camps, securing a massive gold lead. Any attempt he makes to counter-gank you backfires, as your health regeneration makes you impossible to burst down before your team collapses.
How to play
Focus on speed-clearing your jungle to reach your ultimate, Maximum Dosage, as quickly as possible. When contesting objectives, position yourself at the front to bait Pantheon's Shield Vault, ensuring your passive is up to absorb it. If he uses Aegis Assault to block your damage, immediately walk behind him or throw Infected Bonesaw to slow him down as his shield expires, then activate Heart Zapper and Blunt Force Trauma to run him down.
Counter-engageTanksYour entire jungle matchup hinges on a single, massive interaction: Skarner relies heavily on his ultimate, Impale, to drag targets out of position, but your passive, Goes Where He Pleases, completely absorbs this suppression. Because his main tool to secure picks and initiate teamfights is entirely neutralized by your innate crowd-control immunity, Skarner loses his primary win condition and cannot shut you down during skirmishes.Skarner build →See details
Skarner
The interaction that decides it
Skarner's ultimate Impale is completely negated by Mundo's passive, stripping Skarner of his main pick potential.
Why
Your entire jungle matchup hinges on a single, massive interaction: Skarner relies heavily on his ultimate, Impale, to drag targets out of position, but your passive, Goes Where He Pleases, completely absorbs this suppression. Because his main tool to secure picks and initiate teamfights is entirely neutralized by your innate crowd-control immunity, Skarner loses his primary win condition and cannot shut you down during skirmishes.
Lane impact
This negation fundamentally alters objective fights and river skirmishes. Skarner cannot safely peel you off his epic monsters or lock you down for his laners. Because you can ignore his Ixtal's Impact and Impale, you can freely invade his camps and walk deep into his territory. He is forced to hold his ultimate or waste it on your teammates, granting your lanes massive pressure.
How to play
Position yourself as a human shield directly between Skarner and your squishy carries during neutral objective contests. Keep Goes Where He Pleases active by avoiding his Shattered Earth / Upheaval projectiles, ensuring your passive is ready to absorb his Impale. If you accidentally lose your canister, immediately back off to recover it or use Heart Zapper to absorb his incoming Shattered Earth / Upheaval and Seismic Bastion burst while waiting for your passive to return.
Counter-engageTanksEvelynn relies entirely on the charm from Allure to shred your magic resistance and lock you down for her high-burst combo. Because Goes Where He Pleases automatically blocks this crowd control effect, her entire assassination attempt falls flat. Without that initial crowd control, she cannot safely execute her full rotation, leaving you free to absorb her initial damage and retaliate while she lacks the tools to burst your massive health bar.Evelynn build →See details
Evelynn
The interaction that decides it
Evelynn's gank threat is heavily neutralized because her Allure charm is blocked by Goes Where He Pleases, leaving her unable to burst Mundo.
Why
Evelynn relies entirely on the charm from Allure to shred your magic resistance and lock you down for her high-burst combo. Because Goes Where He Pleases automatically blocks this crowd control effect, her entire assassination attempt falls flat. Without that initial crowd control, she cannot safely execute her full rotation, leaving you free to absorb her initial damage and retaliate while she lacks the tools to burst your massive health bar.
Lane impact
This interaction completely shifts the jungle dynamic in your favor, allowing you to invade her camps without fear of being caught. When she attempts to gank your laners, you can confidently counter-gank, knowing her primary crowd control is useless against you. This denies her the early snowballs she desperately needs, forcing her to play defensively and giving your lanes total freedom from her stealth pressure.
How to play
To exploit this, aggressively itemize into raw magic resistance and health early, knowing she cannot bypass your passive defenses. When hunting her in her jungle, track her mark and intentionally step forward to trigger Allure with Goes Where He Pleases. Once her charm is wasted, immediately slow her with Infected Bonesaw and activate Heart Zapper to stay glued to her, forcing her to waste Last Caress defensively to escape your relentless chase.
Counter-engagePeelThis jungle matchup hinges entirely on how Goes Where He Pleases completely neutralizes Gragas's primary tool for disengagement, Explosive Cask. When Gragas attempts to blow you away with his ultimate to peel for his team or save himself, your passive absorbs the entire displacement. This allows you to shrug off his key crowd control and run him down while he is left vulnerable without his signature peel.Gragas build →See details
Gragas
The interaction that decides it
Mundo's passive blocks the displacement from Explosive Cask, allowing Mundo to walk straight through Gragas's peel.
Why
This jungle matchup hinges entirely on how Goes Where He Pleases completely neutralizes Gragas's primary tool for disengagement, Explosive Cask. When Gragas attempts to blow you away with his ultimate to peel for his team or save himself, your passive absorbs the entire displacement. This allows you to shrug off his key crowd control and run him down while he is left vulnerable without his signature peel.
Lane impact
In active skirmishes around the river or during counter-ganks, this interaction strips Gragas of his safety net. He cannot easily secure objectives or push you out of the pit because your immune state denies his Explosive Cask steals. You can constantly invade his territory, force direct duels, and pressure his lanes, knowing he cannot safely disengage from your close-range chase once his Body Slam is matched.
How to play
To execute this flawlessly, position yourself directly between Gragas and his escape route during ganks. Keep your Goes Where He Pleases shield active before engaging; if he tries to pop it early with Body Slam, dodge it or let it trigger, but ensure you have the health pool to run through his Explosive Cask. If your passive is down, play slightly back, poking with Infected Bonesaw until your immunity is restored before committing to a deep dive.
Counter-engageScalingLee Sin relies entirely on creating picks and isolating targets, but your passive, Goes Where He Pleases, completely neutralizes his primary playmaker tool, Dragon's Rage. When he attempts his signature Safeguard kick to displace you into his team, your passive absorbs the knockback. Because he cannot displace you and wastes his ultimate, you easily run him down with Infected Bonesaw slows.Lee Sin build →See details
Lee Sin
The interaction that decides it
Lee Sin's signature playmaker tool, Dragon's Rage, is entirely absorbed by Mundo's passive, preventing him from kicking Mundo into his team.
Why
Lee Sin relies entirely on creating picks and isolating targets, but your passive, Goes Where He Pleases, completely neutralizes his primary playmaker tool, Dragon's Rage. When he attempts his signature Safeguard kick to displace you into his team, your passive absorbs the knockback. Because he cannot displace you and wastes his ultimate, you easily run him down with Infected Bonesaw slows.
Lane impact
This interaction shifts objective skirmishes heavily in your favor. Lee Sin cannot contest neutral monsters safely because he cannot peel you away. If he tries to steal or secure an objective, your presence blocks his exit path. During jungle skirmishes, his inability to kick you away means you can constantly stick to him, forcing him to use Safeguard defensively rather than aggressively to find angles.
How to play
Actively bait his engage by standing between him and your vulnerable teammates. Keep your passive, Goes Where He Pleases, active before contesting objectives. If he lands Sonic Wave on you, do not panic; let him dash in, absorb his Dragon's Rage, and immediately activate Heart Zapper and Blunt Force Trauma to trade back. If your passive is down, play slightly back until you can pick up your canister to restore your crowd control immunity.
ScalingTanksEkko relies on executing a quick burst loop using Phase Dive and Timewinder to trigger his Z-Drive Resonance. However, this magic damage pattern completely flatlines against your massive natural health pool. Furthermore, your passive Goes Where He Pleases completely nullifies his only hard crowd control from Parallel Convergence, leaving him with no way to lock you down before you run him over.Ekko build →See details
Ekko
The interaction that decides it
Ekko's burst-heavy AP pattern is ineffective against Mundo's massive health pool and Magic Resist itemization.
Why
Ekko relies on executing a quick burst loop using Phase Dive and Timewinder to trigger his Z-Drive Resonance. However, this magic damage pattern completely flatlines against your massive natural health pool. Furthermore, your passive Goes Where He Pleases completely nullifies his only hard crowd control from Parallel Convergence, leaving him with no way to lock you down before you run him over.
Lane impact
In the jungle, this power dynamic allows you to aggressively invade his camps and contest both Scuttle Crabs without fear. Ekko cannot match your clear speed once you have Blunt Force Trauma, and any direct duel in the river turns into a slow, inevitable defeat for him. You force him to surrender his jungle priority, protecting your laners from his signature early-game skirmishes.
How to play
Prioritize rushing early Magic Resist items to completely shut down his scaling. During skirmishes, land your Infected Bonesaw to prevent him from dancing around you, and save Maximum Dosage for the moment he commits his full rotation. If he tries to escape or turn the fight with Chronobreak, simply walk out of his shadow's radius while keeping your Heart Zapper active to heal back any delayed damage.
Counter-engageTanksThis jungle matchup is heavily skewed in your favor because Maokai relies entirely on heavy crowd control to dictate skirmishes. His primary engage tools, Twisted Advance and Nature's Grasp, are completely countered by your passive, Goes Where He Pleases. Instead of being locked down, you absorb his initial root, drop your canister to regenerate, and immediately turn the fight into a one-sided chase using Infected Bonesaw.Maokai build →See details
Maokai
The interaction that decides it
Maokai's heavy crowd control kit is severely hindered by Mundo's passive, allowing Mundo to freely run down Maokai's backline.
Why
This jungle matchup is heavily skewed in your favor because Maokai relies entirely on heavy crowd control to dictate skirmishes. His primary engage tools, Twisted Advance and Nature's Grasp, are completely countered by your passive, Goes Where He Pleases. Instead of being locked down, you absorb his initial root, drop your canister to regenerate, and immediately turn the fight into a one-sided chase using Infected Bonesaw.
Lane impact
During early river skirmishes and objective contests, Maokai is powerless to stop your advances. He cannot peel you off his allies, meaning you can ignore his Bramble Smash and walk directly into his backline. This lack of defensive threat allows you to invade his camps aggressively and force fights around Scuttle Crabs, knowing you will always win the war of attrition in extended skirmishes.
How to play
When initiating a skirmish, walk confidently at Maokai to bait out his Twisted Advance. Once Goes Where He Pleases blocks the root, quickly pick up your canister to reset its cooldown. Immediately activate Heart Zapper to absorb his retaliatory Bramble Smash, and retaliate with Blunt Force Trauma. Save Infected Bonesaw for when his allies attempt to flee, and pop Maximum Dosage to run down their backline with impunity.
SkirmishesCounter-engageThis matchup heavily favors you because Goes Where He Pleases entirely nullifies Nocturne's primary dueling tool, Unspeakable Horror. When he attempts to tether and fear you, your passive absorbs the crowd control, leaving him with only basic attacks. Without that hard crowd control to stop your pursuit, Nocturne cannot out-skirmish your sustained damage, transforming a dangerous assassin into an easy target during river duels.Nocturne build →See details
Nocturne
The interaction that decides it
Mundo's passive blocks the fear from Unspeakable Horror, stripping Nocturne of his primary crowd control during duels.
Why
This matchup heavily favors you because Goes Where He Pleases entirely nullifies Nocturne's primary dueling tool, Unspeakable Horror. When he attempts to tether and fear you, your passive absorbs the crowd control, leaving him with only basic attacks. Without that hard crowd control to stop your pursuit, Nocturne cannot out-skirmish your sustained damage, transforming a dangerous assassin into an easy target during river duels.
Lane impact
You dictate the pace of the jungle. You can aggressively invade his camps or contest Scuttle Crabs without fear of being isolated and killed. When Nocturne triggers Paranoia to dive your laners, you can confidently counter-gank or invade his opposite jungle side. His inability to lock you down means you can constantly pressure him in his own territory, forcing him to farm defensively rather than hunting.
How to play
Always track the status of Goes Where He Pleases before picking a fight; if your passive is down, play safer until it returns. When engaging, do not immediately throw Infected Bonesaw if Nocturne has Shroud of Darkness active, as he will block it and gain attack speed. Instead, run him down with Heart Zapper and Blunt Force Trauma, forcing his shield out, then secure the kill with your slowed cleaver and Maximum Dosage.
TanksMagic damageYou completely shut down Rammus because his primary crowd control, Frenzying Taunt, is instantly absorbed by your passive Goes Where He Pleases. While Rammus builds massive armor to boost his damage through Rolling Armordillo, your Infected Bonesaw deals heavy magic damage based on his current health, completely bypassing his defensive scaling. Even when he activates Defensive Ball Curl, your magic damage shreds him while your passive keeps you immune to his engage.Rammus build →See details
Rammus
The interaction that decides it
Rammus's Frenzying Taunt is completely negated by Mundo's passive, and Mundo's magic damage from Infected Bonesaw bypasses Rammus's high armor.
Why
You completely shut down Rammus because his primary crowd control, Frenzying Taunt, is instantly absorbed by your passive Goes Where He Pleases. While Rammus builds massive armor to boost his damage through Rolling Armordillo, your Infected Bonesaw deals heavy magic damage based on his current health, completely bypassing his defensive scaling. Even when he activates Defensive Ball Curl, your magic damage shreds him while your passive keeps you immune to his engage.
Lane impact
This interaction allows you to aggressively invade Rammus's jungle and force skirmishes in the river over Scuttle Crabs. Rammus cannot contest you alone because he lacks the damage to threaten you without his crowd control. When he tries to escape with Powerball, you can block his path or slow him down using Infected Bonesaw, keeping him trapped in the jungle and preventing him from finding ganks.
How to play
When fighting Rammus, wait for him to activate Defensive Ball Curl before you pop Heart Zapper. This ensures you heal back the reflected damage he deals to you. Always walk to collect the chemical canister dropped by Goes Where He Pleases to reset your passive cooldown. If he attempts to escape using Powerball, throw Infected Bonesaw to stop his momentum, then close the distance with Blunt Force Trauma to execute him before he reaches safety.
Counter-engageTanksMordekaiser relies on trapping high-priority targets, but Dr. Mundo's passive, Goes Where He Pleases, completely blocks Realm of Death. Instead of dragging you into his arena, Mordekaiser merely pops your canister, leaving him with a wasted ultimate while you regenerate health. This interaction denies his entire teamfight utility, as he cannot isolate you or bypass you to reach your backline without wasting his primary tool.Mordekaiser build →See details
Mordekaiser
The interaction that decides it
Mordekaiser's Realm of Death is completely negated by Mundo's passive, wasting his ultimate and leaving him vulnerable in teamfights.
Why
Mordekaiser relies on trapping high-priority targets, but Dr. Mundo's passive, Goes Where He Pleases, completely blocks Realm of Death. Instead of dragging you into his arena, Mordekaiser merely pops your canister, leaving him with a wasted ultimate while you regenerate health. This interaction denies his entire teamfight utility, as he cannot isolate you or bypass you to reach your backline without wasting his primary tool.
Lane impact
In the jungle, this interaction shifts the power of skirmishes entirely to your side. Since Mordekaiser cannot banish you during neutral objective contests, you can safely frontline. Your Infected Bonesaw lets you poke him down from range, while his inability to trap you prevents him from securing easy Smite fights. He is forced to hold his ultimate or use it on less optimal targets, ruining his team's zoning strategy.
How to play
Always keep Goes Where He Pleases active when contesting objectives or entering river skirmishes. If Mordekaiser attempts to pull you with Death's Grasp, step into it intentionally to bait his team's follow-up, then pick up your canister immediately to reset the cooldown. Once he wastes Realm of Death on your passive, activate Maximum Dosage and Heart Zapper to run him down, using Blunt Force Trauma to punish his lack of mobility.
Edge: Wild Rift Core canonical verdict (−3 to +3), shown from the point of view of the champion named in the row. Win rate and pick rate: the opponent's own rate in this role — Wild Rift CN · Challenger, Patch 7.3c. Not a head-to-head win rate.
Edge: Wild Rift Core canonical verdict (−3 to +3), shown from the point of view of the champion named in the row. Win rate and pick rate: the opponent's own rate in this role — Wild Rift CN · Challenger, Patch 7.3c. Not a head-to-head win rate.
How to counter this champion
Counter angle
Mundo’s counters are not just about damage, but about breaking his regeneration cycle. Champions that apply constant pressure, anti-heal, and punish him before his spikes are highly problematic. Understanding why matchups are difficult helps adjust playstyle, as Mundo can survive many situations if he avoids forcing plays.
Patch context
The meta favors champions who can punish early or apply constant pressure. Mundo struggles against these profiles because he lacks immediate answers. He depends on items to stabilize. Opponents who understand this timing can create a decisive advantage before he becomes relevant.
Quick read
Struggles against constant early pressure.
Very vulnerable to burst + anti-heal.
Can survive if tempo is slowed.
Counter archetypes
Early duelists
These champions dominate extended early trades and can force Mundo out of lane before his spikes. Their constant pressure prevents him from controlling tempo. They exploit his main weakness: a fragile early game dependent on spacing.
Vayne is a structural counter because she ignores Mundo’s tankiness. Her %HP damage and kiting make fights unwinnable if positioned well. The issue is not just lane, but the inability to threaten her in teamfights.
Common mistakes against him
Common mistakes against him
Forcing early trades.
Ignoring anti-heal.
Mismanaging ultimate timing.
Underestimating duelists.
Poor fight positioning.
Coach notes
Your goal is not to win lane, but to survive.
If you reach mid game without falling behind, you are already useful.
FAQ
Why is Vayne so strong against Mundo?
Vayne ignores tank logic with %HP damage and mobility. Mundo cannot catch her easily or mitigate her damage effectively. Even if he survives, he cannot threaten her, making him ineffective in teamfights.