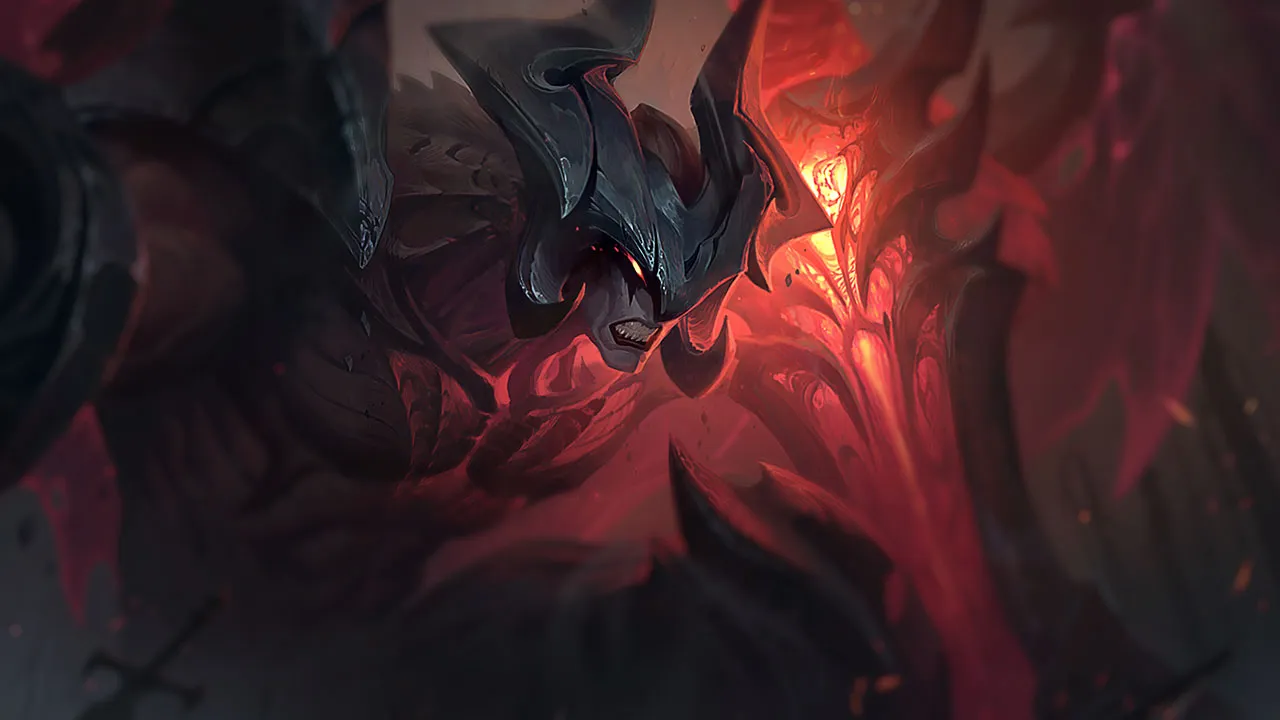
Aatrox, a Baron Lane bruiser, relies on extended fights to benefit from his self-healing and area damage. Compositions built around burst, constant kite, or repeated crowd control heavily limit his presence. If he cannot keep enemies inside his ability zones, his effectiveness quickly drops.
★ TOP · JUNGLETier S+
DMG
UTIL
TANK
DIFF
Win49.1%#72 · ↓3pt
Pick7.1%#9
Ban7.3%#29
Aatrox Wild Rift Counters Guide
Hard Counters
4
These champions have a build and playstyle that directly overpower yours, which can make controlling the lane and farming extremely difficult. Their kit can neutralize your core strengths or punish you the moment you try to play your usual game plan. In these matchups, the goal is often to minimize mistakes and look for ways to win outside of direct confrontation.
Hard counterMobilityWave clearIrelia completely neutralizes your threat profile by using the minion wave as a launchpad. Whenever she targets low-health minions with Bladesurge, she gains instant mobility to slip right behind you. This makes landing the sweetspots of The Darkin Blade virtually impossible. Simultaneously, these rapid resets quickly fully stack her Ionian Fervor, allowing her to shred you with enhanced auto-attacks before you can even complete your combo.Irelia build →See details
Irelia
The interaction that decides it
Irelia can use Bladesurge on low-health minions to instantly dash behind Aatrox, easily dodging his Q sweetspots while stacking Ionian Fervor.
Why
Irelia completely neutralizes your threat profile by using the minion wave as a launchpad. Whenever she targets low-health minions with Bladesurge, she gains instant mobility to slip right behind you. This makes landing the sweetspots of The Darkin Blade virtually impossible. Simultaneously, these rapid resets quickly fully stack her Ionian Fervor, allowing her to shred you with enhanced auto-attacks before you can even complete your combo.
Lane impact
Because of this threat, you can never safely contest the wave when your own minions are low. If you step up to farm, Irelia will initiate a devastating trade, forcing you back to your turret with a massive health deficit. This constant pressure ruins your recall timings, forces you to give up priority, and can lead to a massive gold gap if she freezes the lane near her tower.
How to play
To survive, keep the minion wave on your side of the lane and only use The Darkin Blade when she is locked in her Defiant Dance or when there are no low-health friendly minions for her to jump to. Hold Umbral Dash defensively to disengage immediately if she lands Flawless Duet. If she freezes the lane, walk away and let the wave bounce instead of forcing unsafe trades.
Hard counterShieldsMobilityFiora's kit directly neutralizes your main damage source. The biggest threat is her Riposte, which she can easily reactively cast during your highly telegraphed third strike of The Darkin Blade. Because of this, she doesn't just block your knockup; she stuns you in return. Coupled with her Lunge to easily dodge your sweetspots and pop Duelist's Dance vitals, she dictates the pace of every trade.Fiora build →See details
Fiora
The interaction that decides it
Fiora can react to Aatrox's highly telegraphed Q3 with Riposte to stun him and turn the trade completely in her favor.
Why
Fiora's kit directly neutralizes your main damage source. The biggest threat is her Riposte, which she can easily reactively cast during your highly telegraphed third strike of The Darkin Blade. Because of this, she doesn't just block your knockup; she stuns you in return. Coupled with her Lunge to easily dodge your sweetspots and pop Duelist's Dance vitals, she dictates the pace of every trade.
Lane impact
This interaction forces you into a highly defensive posture right from level one. You cannot safely contest the wave or crash it without risking a massive counter-engage. Every time Fiora freezes the wave or threatens you under tower, you are forced to give up gold. If you waste your knockups, she will run you down with Bladework and Grand Challenge, leaving you zero room to help your jungler.
How to play
To survive, you must bait out Riposte without committing to the final strike of The Darkin Blade. Cast your first two Qs, then use Umbral Dash laterally to reposition and delay your third strike, or simply let it expire. Keep Fiora at bay with Infernal Chains only when her Lunge is on cooldown. If she exposes a vital facing her, hug the terrain to deny her Duelist's Dance procs and prevent her from triggering the healing zone of Grand Challenge.
These champions have tools that generally give them the edge in a fight, without making the matchup unwinnable. They might have more range, a better ability to soak up your offense, or more ways to answer your engages. You'll need to adapt your approach and carefully pick your moments to accept a fight.
ScalingMobilityCooldownsJax's Leap Strike directly counters your spacing. By jumping inside the sweetspots of your first two casts of The Darkin Blade, he forces a close-quarters brawl where you cannot land your knockups. In this range, Jax can activate Counter Strike to completely dodge your passive, Deathbringer Stance, denying your burst and healing, while easily stacking up Relentless Assault on your face.Jax build →See details
Jax
The interaction that decides it
Jax can use Leap Strike to jump inside the minimum range of Aatrox's Q1 and Q2, forcing a close-range trade where Counter Strike blocks Deathbringer Stance.
Why
Jax's Leap Strike directly counters your spacing. By jumping inside the sweetspots of your first two casts of The Darkin Blade, he forces a close-quarters brawl where you cannot land your knockups. In this range, Jax can activate Counter Strike to completely dodge your passive, Deathbringer Stance, denying your burst and healing, while easily stacking up Relentless Assault on your face.
Lane impact
This interaction makes wave control incredibly stressful. If you throw out The Darkin Blade to poke or clear, Jax will instantly Leap Strike onto you, turning your cooldown into his engage window. You are forced to cede lane priority and farm near your turret. As Jax gains levels, his Grandmaster-at-Arms passive magic damage outscales your sustain, making any extended trading pattern lethal for you.
How to play
To survive, you must play around Jax's cooldowns. Never initiate trades with The Darkin Blade; instead, bait his Leap Strike. When he jumps, immediately cast Infernal Chains at your feet and use Umbral Dash backwards to disengage. This prevents him from landing the stun of Counter Strike. Once his defensive spin ends, you have a brief ten-second window to punish him with your full combo and Deathbringer Stance before his jump is back.
Zone controlScalingMobilityGwen's Hallowed Mist completely neutralizes your ranged threat, allowing her to ignore the pull of Infernal Chains and the outer sweetspots of The Darkin Blade. While untargetable inside her zone, she freely charges her Snip Snip! stacks on minions. This creates an uphill battle where your key poke and crowd control are negated from a distance, allowing her scaling advantage to grow safely.Gwen build →See details
Gwen
The interaction that decides it
Gwen can deploy Hallowed Mist to ignore Aatrox's Infernal Chains and Q sweetspots from a distance while she prepares her Snip Snip! stacks.
Why
Gwen's Hallowed Mist completely neutralizes your ranged threat, allowing her to ignore the pull of Infernal Chains and the outer sweetspots of The Darkin Blade. While untargetable inside her zone, she freely charges her Snip Snip! stacks on minions. This creates an uphill battle where your key poke and crowd control are negated from a distance, allowing her scaling advantage to grow safely.
Lane impact
You cannot easily freeze the wave or force heavy trades. If you attempt to poke, Gwen uses Skip 'n Slash to adjust her position or deploys her mist to farm safely. Over time, her passive A Thousand Cuts makes prolonged trades near your tower incredibly risky. If she catches you with Needlework while your Umbral Dash is on cooldown, she can easily run you down and force an early recall.
How to play
To survive this matchup, never initiate with Infernal Chains while her mist is active. Instead, bait her Hallowed Mist by walking forward as if to strike with The Darkin Blade, then immediately back off. Once her protective zone vanishes, you have a brief window to fight. Save Umbral Dash exclusively to escape her Snip Snip! center-true damage or to dodge the slows from Needlework when she triggers her ultimate.
MobilityProjectile blockPositioningThis matchup is highly challenging because Yasuo possesses the perfect tools to dismantle your combo. While his Sweeping Blade allows him to constantly dash through minions to easily dodge the sweetspots of your The Darkin Blade, his Wind Wall represents the ultimate counter-interaction. By placing his barrier, he completely deletes your Infernal Chains mid-air, stripping away your only reliable setup to drag him back and guarantee heavy damage.Yasuo build →See details
Yasuo
The interaction that decides it
Yasuo can use Wind Wall to completely block Aatrox's Infernal Chains, removing Aatrox's primary tool for locking him down.
Why
This matchup is highly challenging because Yasuo possesses the perfect tools to dismantle your combo. While his Sweeping Blade allows him to constantly dash through minions to easily dodge the sweetspots of your The Darkin Blade, his Wind Wall represents the ultimate counter-interaction. By placing his barrier, he completely deletes your Infernal Chains mid-air, stripping away your only reliable setup to drag him back and guarantee heavy damage.
Lane impact
Because you cannot lock him down, pushing the wave is extremely dangerous. An extended lane gives Yasuo endless targets for Sweeping Blade, allowing him to stack Steel Tempest safely, pop your Deathbringer Stance shield with his passive Way of the Wanderer, and setup an easy Last Breath. If you lose control of the wave state, you will find yourself constantly zoned, unable to trade without being outmaneuvered under his wind barrier.
How to play
To survive and win trades, keep the minion wave frozen just outside your turret range, denying him space to dash. Pop his Way of the Wanderer shield with a quick basic attack or the edge of The Darkin Blade before committing. Never throw your Infernal Chains while his Wind Wall is available; instead, bait it out by walking up. If he initiates with Sweeping Blade, use your Umbral Dash backward to reposition your sweetspots and safely disengage.
MobilityPositioningScalingThis matchup hinges on Yone's ability to completely neutralize your primary damage tool. When he activates Soul Unbound, the massive movement speed bonus allows him to effortlessly sidestep the sweetspots of your The Darkin Blade. Furthermore, this extra mobility lets him walk straight out of your Infernal Chains before the pull triggers, leaving you vulnerable to his Mortal Steel strikes without any way to retaliate effectively.Yone build →See details
Yone
The interaction that decides it
Yone can use the movement speed from Soul Unbound to easily dodge Aatrox's Infernal Chains and Q sweetspots.
Why
This matchup hinges on Yone's ability to completely neutralize your primary damage tool. When he activates Soul Unbound, the massive movement speed bonus allows him to effortlessly sidestep the sweetspots of your The Darkin Blade. Furthermore, this extra mobility lets him walk straight out of your Infernal Chains before the pull triggers, leaving you vulnerable to his Mortal Steel strikes without any way to retaliate effectively.
Lane impact
Because Yone can dodge your sweetspots so easily, you lose the ability to pressure the minion wave safely. He can freely stack Mortal Steel to threaten his third-cast tornado, forcing you to retreat. If you attempt to fight back, his Spirit Cleave shield absorbs your un-empowered swings. This forces you into a defensive posture under your turret, bleed gold, and lose priority during crucial early skirmishes.
How to play
To survive, you must play around the cooldown of Soul Unbound. Never initiate trades with your full combo while he has this tool ready. Instead, bait his spirit form out and use Umbral Dash backwards to minimize damage, or time your Infernal Chains to hit his physical body right as he is forced to snap back. Once he returns to his anchor, you have a twenty-second window to unleash World Ender and aggressively punish his lack of escape.
PokeDisengagePositioningJayce dictates this matchup by abusing his range advantage. He constantly pokes you down from afar, and any attempt to retaliate is instantly shut down. The moment you try to close the distance using your Umbral Dash to land The Darkin Blade, Jayce simply switches forms and uses Thundering Blow to knock you back, completely resetting the fight and leaving you vulnerable to his ranged follow-up.Jayce build →See details
Jayce
The interaction that decides it
Jayce can use Thundering Blow to knock Aatrox away if Aatrox attempts to close the distance with Umbral Dash.
Why
Jayce dictates this matchup by abusing his range advantage. He constantly pokes you down from afar, and any attempt to retaliate is instantly shut down. The moment you try to close the distance using your Umbral Dash to land The Darkin Blade, Jayce simply switches forms and uses Thundering Blow to knock you back, completely resetting the fight and leaving you vulnerable to his ranged follow-up.
Lane impact
This knockback interaction forces you into a defensive posture, making it extremely difficult to contest the wave early on. You are constantly shoved under your turret, losing priority and bleeding health trying to farm. Because you cannot reliably land Infernal Chains without being pushed away, your trade potential is non-existent, which translates into zero pressure on his tower and allows Jayce to freely roam.
How to play
To survive, you must bait out Thundering Blow before committing. Position yourself safely near the brush to drop minion aggro and farm primarily with the tip of The Darkin Blade. Never use Umbral Dash forward unless he has already wasted his knockback in hammer form. If he jumps on you with To the Skies!, use Infernal Chains to pull him in after he tries to disengage, allowing you to activate World Ender and turn the trade.
MobilityPositioningDodgingThis matchup is dictated by how easily Ambessa negates your main damage source. Her Drakehound's Step gives her a short dash after every cast, allowing her to effortlessly slip out of your The Darkin Blade sweetspots. Whenever you attempt to set up a trade with your first two Q-casts, she can reactively trigger Cunning Sweep or Lacerate to reposition, dodging your knockups while simultaneously priming her own empowered strikes.Ambessa build →See details
Ambessa
The interaction that decides it
Ambessa's Drakehound's Step allows her to dash out of Aatrox's Q sweetspots every time she casts an ability.
Why
This matchup is dictated by how easily Ambessa negates your main damage source. Her Drakehound's Step gives her a short dash after every cast, allowing her to effortlessly slip out of your The Darkin Blade sweetspots. Whenever you attempt to set up a trade with your first two Q-casts, she can reactively trigger Cunning Sweep or Lacerate to reposition, dodging your knockups while simultaneously priming her own empowered strikes.
Lane impact
Consequently, you cannot easily contest the wave. Missing a single sweetspot allows Ambessa to aggressively dash forward, using Repudiation to absorb your retaliation and block the pull from Infernal Chains. This constant threat of counter-engagement forces you to farm defensively near your turret, as dropping into her kill range makes you an easy target for her Public Execution dive.
How to play
To survive, adopt a bait-and-punish playstyle. Never initiate trades with your first Q-cast; instead, use Deathbringer Stance to secure minions and sustain. Hold Infernal Chains until she has exhausted her Drakehound's Step dashes. If she initiates with Cunning Sweep, use Umbral Dash laterally to escape her path. Only activate World Ender when her Repudiation shield is on cooldown, allowing you to chain your full combo without your control effects being blocked.
Anti-dashPeelPositioningThis matchup hinges entirely on how Poppy uses her Steadfast Presence. Every time you attempt to reposition The Darkin Blade mid-cast using Umbral Dash, her active barrier will shut you down, grounding you and dealing damage. Because your primary damage and healing rely on hitting those precise outer edges, her basic ability effectively deactivates your main trading tool, turning your aggressive dashes into self-inflicted stuns.Poppy build →See details
Poppy
The interaction that decides it
Poppy's Steadfast Presence active blocks Aatrox's Umbral Dash, preventing him from adjusting his Q sweetspots mid-cast.
Why
This matchup hinges entirely on how Poppy uses her Steadfast Presence. Every time you attempt to reposition The Darkin Blade mid-cast using Umbral Dash, her active barrier will shut you down, grounding you and dealing damage. Because your primary damage and healing rely on hitting those precise outer edges, her basic ability effectively deactivates your main trading tool, turning your aggressive dashes into self-inflicted stuns.
Lane impact
Laning becomes a tense waiting game where you cannot initiate trades. If you mindlessly throw out The Darkin Blade, Poppy can easily step inside your dead zones, knowing you cannot use Umbral Dash to adjust. This restricts your wave control, as pushing too deep exposes you to being pinned against walls. You are forced to farm defensively, sacrificing early lane priority and pressure.
How to play
To survive, you must bait out Steadfast Presence without using your dash. Cast the first two strikes of The Darkin Blade raw, or fish for a pull with Infernal Chains. Only activate Umbral Dash once her golden aura fades. If she holds her barrier, rely on your passive Deathbringer Stance for short, safe pokes. When you activate World Ender, use the raw movement speed to run her down instead of dashing directly into her defense.
CC immunityAll-inSustainOlaf completely shuts down your combo flow because Ragnarok grants him total crowd control immunity. This means the knockups on your sweetspots from The Darkin Blade and the displacement pull from Infernal Chains are completely useless. Without these tools to keep him at bay and land your sweetspots, Olaf simply runs you down, out-healing your Deathbringer Stance through his own Vicious Strikes.Olaf build →See details
Olaf
The interaction that decides it
Olaf's Ragnarok completely negates the knockups from The Darkin Blade and the pull from Infernal Chains, forcing Aatrox to run rather than fight.
Why
Olaf completely shuts down your combo flow because Ragnarok grants him total crowd control immunity. This means the knockups on your sweetspots from The Darkin Blade and the displacement pull from Infernal Chains are completely useless. Without these tools to keep him at bay and land your sweetspots, Olaf simply runs you down, out-healing your Deathbringer Stance through his own Vicious Strikes.
Lane impact
Before level five, you can poke him, but missing a single The Darkin Blade allows him to land Undertow and chase you down with Reckless Swing. Once Olaf gets his ultimate, trading becomes extremely risky. He will freeze the wave or force slow pushes, knowing that if you step up too far, he can activate Ragnarok to ignore your defensive tools and run you under your own tower.
How to play
To survive, you must hold Umbral Dash specifically to escape over walls or back to your turret when he activates Ragnarok. Never engage with your full combo if his ultimate is ready; instead, bait his Undertow and wait for him to waste mana. If Olaf activates his ultimate and dives you, use World Ender immediately for the bonus movement speed to kite him backwards, refusing to trade auto-attacks until his CC immunity expires.
These matchups are above all duels of execution: both champions have credible ways to gain the upper hand. Dodging one key ability, anticipating an engage correctly, or a single positioning mistake can be enough to tip the duel one way or the other. Knowing the matchup and recognizing the right windows to act are especially important here.
SustainPositioningAll-inThis matchup is a constant battle of recovery where your Deathbringer Stance and Umbral Dash passive compete directly against Volibear's Frenzied Maul healing. The entire lane hinges on distance. If you fail to space the sweetspots of The Darkin Blade, the bear will activate Thundering Smash to close the gap, stun you, and easily mark you for a devastating second bite.Volibear build →See details
Volibear
The interaction that decides it
Aatrox must space his Q sweetspots to prevent Volibear from reaching him with Thundering Smash and applying Frenzied Maul.
Why
This matchup is a constant battle of recovery where your Deathbringer Stance and Umbral Dash passive compete directly against Volibear's Frenzied Maul healing. The entire lane hinges on distance. If you fail to space the sweetspots of The Darkin Blade, the bear will activate Thundering Smash to close the gap, stun you, and easily mark you for a devastating second bite.
Lane impact
Because both of you possess immense sustain, short trades rarely stick unless someone gets zoned off the minions. Pushing Volibear under his turret can be dangerous because Stormbringer disables your tower during dives, but keeping the wave frozen near your side forces him to overextend. A single mistake in wave placement allows Volibear to drop Sky Splitter to shield himself while crashing the waves.
How to play
Never initiate with Umbral Dash forward; instead, save this dash to disengage or reposition laterally when Volibear charges with Thundering Smash. Use Infernal Chains defensively to pull him back if he tries to run you down. If he successfully shields himself with Sky Splitter, back off immediately and wait for the shield to decay before resuming your The Darkin Blade chain. If you get chunked, play safely around your Deathbringer Stance cooldown to recover.
MobilityTradingPositioningThis matchup is a pure duel of mobility and spacing. Renekton wants to use the double dash of Slice and Dice to slip inside the sweetspots of your The Darkin Blade, avoiding your knockups while delivering his burst. However, if you can bait out his dashes, he becomes highly vulnerable. The moment Slice and Dice is on cooldown, your Infernal Chains becomes inescapable, allowing you to land your full combo.Renekton build →See details
Renekton
The interaction that decides it
Renekton uses Slice and Dice to dash inside Aatrox's Q sweetspots, but Aatrox can punish him with Infernal Chains once his dashes are on cooldown.
Why
This matchup is a pure duel of mobility and spacing. Renekton wants to use the double dash of Slice and Dice to slip inside the sweetspots of your The Darkin Blade, avoiding your knockups while delivering his burst. However, if you can bait out his dashes, he becomes highly vulnerable. The moment Slice and Dice is on cooldown, your Infernal Chains becomes inescapable, allowing you to land your full combo.
Lane impact
Laning phase is a tense dance where wave state dictates trade opportunities. When Renekton has high Fury from Reign of Anger, he will look to crash waves and force short trades. You cannot contest the wave blindly when his dashes are up. Missed sweetspots mean he controls the lane priority, but pulling him back with Infernal Chains completely flips the pressure.
How to play
To win, never start a trade by casting Infernal Chains. Instead, hold it until Renekton commits his first Slice and Dice forward. Use Umbral Dash to reposition your first two strikes of The Darkin Blade backward, keeping him at bay. If he uses his second dash to engage, immediately drop Infernal Chains on him; without mobility, he cannot escape the pull, guaranteeing your third sweetspot and a massive heal from Deathbringer Stance.
MobilityInterruptPositioningThis high-mobility matchup hinges on your ability to shut down Camille's primary engagement tool. The lane's entire dynamic revolves around her Hookshot; as she launches herself off the wall, a perfectly timed knockup from The Darkin Blade sweetspot will interrupt her mid-air. Failing this timing allows her to trigger Adaptive Defenses and trade back with Precision Protocol.Camille build →See details
Camille
The interaction that decides it
Aatrox can interrupt Camille's Hookshot mid-air by timing his The Darkin Blade knockup sweetspots perfectly.
Why
This high-mobility matchup hinges on your ability to shut down Camille's primary engagement tool. The lane's entire dynamic revolves around her Hookshot; as she launches herself off the wall, a perfectly timed knockup from The Darkin Blade sweetspot will interrupt her mid-air. Failing this timing allows her to trigger Adaptive Defenses and trade back with Precision Protocol.
Lane impact
Successfully interrupting her Hookshot completely dictates the lane's pressure. It leaves Camille stranded in the wave without her main escape, allowing you to easily pull her back with Infernal Chains. Conversely, if she evades your critical strikes using The Hextech Ultimatum or safely pokes you down with Tactical Sweep, she will force you under turret.
How to play
Maintain a healthy distance from walls to maximize your reaction time against her grapple. Always hold your second strike of The Darkin Blade and couple it with Umbral Dash to reposition your sweetspot right as she launches. If she whiffs her Hookshot or you successfully interrupt it, immediately activate World Ender to force an all-in while her mobility is down.
PositioningKitingSustainThis lane is a knife-edge spacing duel. Darius relies on landing the outer edge of Decimate to heal and stack Hemorrhage alongside Crippling Strike. Aatrox keeps him at bay with The Darkin Blade. The entire matchup hinges on a single movement: Aatrox using Umbral Dash backwards to escape Darius's Decimate inner circle and prevent Hemorrhage stacks, turning a deadly trade into a favorable disengage.Darius build →See details
Darius
The interaction that decides it
Aatrox must use Umbral Dash backwards to escape Darius's Decimate inner circle and prevent Hemorrhage stacks.
Why
This lane is a knife-edge spacing duel. Darius relies on landing the outer edge of Decimate to heal and stack Hemorrhage alongside Crippling Strike. Aatrox keeps him at bay with The Darkin Blade. The entire matchup hinges on a single movement: Aatrox using Umbral Dash backwards to escape Darius's Decimate inner circle and prevent Hemorrhage stacks, turning a deadly trade into a favorable disengage.
Lane impact
Missed dashes mean Darius pulls you with Apprehend, leading to a lethal Noxian Guillotine. When Aatrox successfully spaces the Decimate, he maintains wave control, allowing him to slow-push and harass with The Darkin Blade. However, failing a single trade forces an early recall, giving Darius free reign to freeze the lane, crash massive waves, and threaten tower dives.
How to play
Never initiate trades with Umbral Dash; keep it strictly to react when Darius winds up Decimate. If he misses his pull, Apprehend, you have a solid window to pressure him with The Darkin Blade and Infernal Chains. Should Darius get too close, immediately activate Deathbringer Stance for the extra range and healing, then drop Infernal Chains to pull him back while retreating.
All-inShieldsPositioningThis matchup is a pure duel of spacing where Mordekaiser tries to pull you in to trigger Darkness Rise and stat-check you with isolated Obliterate strikes. The entire dynamic hinges on Death's Grasp. If Mordekaiser misses this hook because you reactively dodge it using Umbral Dash, he loses the ability to force a close-quarters brawl, allowing you to safely poke him down from sweetspot range.Mordekaiser build →See details
Mordekaiser
The interaction that decides it
Aatrox can use Umbral Dash to dodge Mordekaiser's Death's Grasp, preventing him from forcing a close-quarters brawl.
Why
This matchup is a pure duel of spacing where Mordekaiser tries to pull you in to trigger Darkness Rise and stat-check you with isolated Obliterate strikes. The entire dynamic hinges on Death's Grasp. If Mordekaiser misses this hook because you reactively dodge it using Umbral Dash, he loses the ability to force a close-quarters brawl, allowing you to safely poke him down from sweetspot range.
Lane impact
Every wave is a tense dance of baiting. If you get pulled by Death's Grasp, Mordekaiser will easily stack Darkness Rise and block your retaliation using Indestructible. However, when you successfully dodge his pull, the lane pressure swings entirely. You can lock him in Infernal Chains and land full The Darkin Blade sequences, forcing him to play defensively under tower or burn his shield early.
How to play
Never use Umbral Dash aggressively unless Mordekaiser has already wasted Death's Grasp. Keep your dash ready to slide sideways or backwards the moment you see his hand sweep. If he misses, immediately retaliate with The Darkin Blade sweetspots. If he activates Indestructible to absorb your damage, disengage using Infernal Chains and wait out his shield before using Deathbringer Stance to heal back any chip damage he managed to land.
MechanicsMobilityPositioningThis matchup is a pure test of spacing and reaction times. Riven relies on the rapid dashes of Broken Wings and the shield from Valor to weave inside and outside of your The Darkin Blade sweetspots, neutralizing your main damage source. However, her high-mobility dance relies entirely on these short cooldowns; if she expends them and gets caught by Infernal Chains, she cannot escape the pull, leaving her completely exposed to a massive counter-offensive.Riven build →See details
Riven
The interaction that decides it
Riven can use Valor and Broken Wings to dance around Aatrox's Q sweetspots, but she is highly vulnerable if caught by Infernal Chains without dashes.
Why
This matchup is a pure test of spacing and reaction times. Riven relies on the rapid dashes of Broken Wings and the shield from Valor to weave inside and outside of your The Darkin Blade sweetspots, neutralizing your main damage source. However, her high-mobility dance relies entirely on these short cooldowns; if she expends them and gets caught by Infernal Chains, she cannot escape the pull, leaving her completely exposed to a massive counter-offensive.
Lane impact
Every trade in this lane is explosive and swings momentum immediately. If Riven successfully baits your first two The Darkin Blade strikes, she will initiate short, punishing trades with Ki Burst and retreat before you can retaliate. Conversely, pulling her back with Infernal Chains locks her in place, allowing you to crash the wave, force her under turret, and establish a massive health lead that secures early lane priority.
How to play
To win this duel, never cast Infernal Chains until you see Riven commit Valor or at least two hops of Broken Wings. Hold your Umbral Dash defensively to reposition your second and third The Darkin Blade strikes reactively rather than trying to predict her dashes. If she activates Blade of the Exile to all-in you, immediately trigger World Ender, use your enhanced movement speed to kite backward, and wait out her ultimate's duration before turning the fight.
CC immunitySurvivalAll-inThe lane is a precise spacing duel centered on Aatrox's The Darkin Blade versus K'Santé's defensive mobility. While Aatrox wants to poke with his outer sweetspots, K'Santé can negate the critical knockup of the third The Darkin Blade strike using the crowd control immunity of Path Maker. By channeling this stance, K'Santé absorbs the damage and immediately dashes in to retaliate, turning Aatrox's main damage window into a dangerous counter-engage opportunity.K'Santé build →See details
K'Santé
The interaction that decides it
K'Santé can channel Path Maker to shrug off Aatrox's Q3 knockup and immediately close the distance for a counter-engage.
Why
The lane is a precise spacing duel centered on Aatrox's The Darkin Blade versus K'Santé's defensive mobility. While Aatrox wants to poke with his outer sweetspots, K'Santé can negate the critical knockup of the third The Darkin Blade strike using the crowd control immunity of Path Maker. By channeling this stance, K'Santé absorbs the damage and immediately dashes in to retaliate, turning Aatrox's main damage window into a dangerous counter-engage opportunity.
Lane impact
This interaction shapes every trade near the minion waves. You cannot blindly shove because a mistimed The Darkin Blade allows K'Santé to lock you down near his tower. If he parries your third strike, he can pull you in with All Out over the walls. Trades are short and tense; missing your Infernal Chains means giving up priority, as K'Santé will use Footwork to dodge and force extended fights where his passive thrives.
How to play
To win this, you must bait out Path Maker before committing your full combo. Use Umbral Dash laterally to reposition your first two strikes of The Darkin Blade and force him to react. If he begins channeling his defensive charge, delay your third strike or disengage. Keep your Deathbringer Stance ready for quick slap-and-run trades when he steps up to stack Ntofo Strikes. If he activates All Out, immediately respond with World Ender to match his raw stat boost and kite his melee range.
KitingAll-inSustainThis matchup revolves around surviving Tryndamere's five-second invulnerability window. While Aatrox excels at mid-range spacing with *The Darkin Blade*, Tryndamere uses *Spinning Slash* to force close-quarters combat powered by *Battle Fury* critical strikes. The lane is an even contest of mobility where your ability to run down or escape him hinges entirely on matching *World Ender*'s speed against his ultimate.Tryndamere build →See details
Tryndamere
The interaction that decides it
Aatrox must use the bonus movement speed from World Ender and Umbral Dash to kite Tryndamere while Undying Rage is active.
Why
This matchup revolves around surviving Tryndamere's five-second invulnerability window. While Aatrox excels at mid-range spacing with *The Darkin Blade*, Tryndamere uses *Spinning Slash* to force close-quarters combat powered by *Battle Fury* critical strikes. The lane is an even contest of mobility where your ability to run down or escape him hinges entirely on matching *World Ender*'s speed against his ultimate.
Lane impact
Tryndamere's constant sustain from *Bloodlust* makes poking him out of lane highly inefficient, meaning slow-pushing waves is your primary goal. Once you crash a large wave, you must immediately seek roam timings across the map. Staying glued to the turret against his split-push eventually favors his scaling, so your impact is measured by how quickly you can influence mid-lane or objectives before he threatens your tower.
How to play
When Tryndamere triggers *Undying Rage*, do not commit to finishing him. Instantly activate *World Ender* for the movement speed boost and use *Umbral Dash* backward to maintain distance. Combine this with *Infernal Chains* to pull him back if he tries to catch up with *Spinning Slash*. If he manages to slow you with *Mocking Shout*, turn to face him briefly to negate the slow, then resume kiting until his ultimate expires.
These champions generally struggle to answer your main strengths, which lets you approach the matchup with more freedom. You often have several ways to pressure them and force trades that go in your favor. Use this advantage to dictate the pace rather than giving them time to get back into a comfortable position.
PositioningTradingSustainThis matchup favors you because you can completely shut down Garen's trade pattern. Whenever he activates Decisive Strike to charge at you, you can space the sweetspots of your The Darkin Blade to knock him back and cancel his advance. Because Garen lacks a dash, he must run directly at you, making him an easy target for your Infernal Chains. This constant harassment prevents his Perseverance from ever activating.Garen build →See details
Garen
The interaction that decides it
Aatrox can interrupt Garen's Decisive Strike charge by spacing his The Darkin Blade sweetspots to knock him back.
Why
This matchup favors you because you can completely shut down Garen's trade pattern. Whenever he activates Decisive Strike to charge at you, you can space the sweetspots of your The Darkin Blade to knock him back and cancel his advance. Because Garen lacks a dash, he must run directly at you, making him an easy target for your Infernal Chains. This constant harassment prevents his Perseverance from ever activating.
Lane impact
You dictate the wave's tempo from level one. Garen is forced to use Judgment on the minion wave to keep up, which pushes the line toward you and leaves him defenseless. If he wastes Courage trying to mitigate your poke, you can immediately lock him down with Infernal Chains and force a heavy trade. You will consistently hold a health advantage, forcing him under tower or to take bad recalls.
How to play
Always hold your Umbral Dash to reposition the first two strikes of The Darkin Blade precisely when Garen runs forward with Decisive Strike. Do not fully commit with your third strike if his Courage shield is active; wait out those brief seconds before unleashing your full combo. If you miss your sweetspots and get silenced, immediately walk back, then turn the fight around with World Ender once the silence expires to heal back up with Deathbringer Stance.
PositioningKitingDodgingAatrox dominates this matchup because he can completely negate Sett's primary defensive and offensive tool, *Haymaker*. When Sett builds up his Grit and unleashes his massive shield and true damage blast, Aatrox can instantly react with *Umbral Dash*. By sliding laterally out of the central sweetspot of *Haymaker*, you avoid the devastating true damage while continuing to land your own *The Darkin Blade* strikes from a safe range.Sett build →See details
Sett
The interaction that decides it
Aatrox can use Umbral Dash to slide out of the center true-damage zone of Sett's Haymaker during its windup.
Why
Aatrox dominates this matchup because he can completely negate Sett's primary defensive and offensive tool, *Haymaker*. When Sett builds up his Grit and unleashes his massive shield and true damage blast, Aatrox can instantly react with *Umbral Dash*. By sliding laterally out of the central sweetspot of *Haymaker*, you avoid the devastating true damage while continuing to land your own *The Darkin Blade* strikes from a safe range.
Lane impact
This interaction completely shifts the trading dynamic in your favor. Sett relies on *Facebreaker* to pull you in and guarantee a full Grit *Haymaker*. Because you can dodge his central blast, Sett's high-damage trades backfire, leaving him with a decaying shield and zero mobility. You can easily freeze the wave near your turret, forcing Sett to walk up into *Infernal Chains* where you can safely chip him down without fearing his *Pit Grit* health regeneration.
How to play
To execute this flawlessly, never waste *Umbral Dash* offensively when Sett has his Grit bar nearly full. Keep your distance, poke him with the first two strikes of *The Darkin Blade*, and bait out his *Facebreaker*. The moment you see him charge up *Haymaker*, slide sideways with *Umbral Dash* to escape the center line. If he tries to lock you down with *The Show Stopper*, activate *World Ender* immediately to match his aggression with massive healing and extra attack damage.
SustainPokeTeamfightsMalphite relies on chipping away your health with Seismic Shard, but his limited mana pool cannot compete with your endless recovery. The passive physical vamp from Umbral Dash allows you to heal back all of his magical damage simply by landing your strikes. Because Seismic Shard has a high cost and low base damage early on, Aatrox easily wins this war of attrition without needing to rely on fruit or recalls.Malphite build →See details
Malphite
The interaction that decides it
Aatrox's physical vamp from Umbral Dash easily out-sustains Malphite's Seismic Shard poke during the laning phase.
Why
Malphite relies on chipping away your health with Seismic Shard, but his limited mana pool cannot compete with your endless recovery. The passive physical vamp from Umbral Dash allows you to heal back all of his magical damage simply by landing your strikes. Because Seismic Shard has a high cost and low base damage early on, Aatrox easily wins this war of attrition without needing to rely on fruit or recalls.
Lane impact
This absolute sustain advantage translates into complete dominance over wave states. You can slow push massive waves into his turret because Malphite cannot step up to contest without taking devastating trades. While he struggles to last-hit under tower under pressure, you can freely bounce the wave or lock it near your side, forcing him to overextend or lose precious gold while his Granite Shield remains constantly broken.
How to play
To execute this perfectly, pop his Granite Shield with a simple auto-attack or the tip of The Darkin Blade before committing to a full trade. Always save your Umbral Dash to reposition your Q sweetspots or to slide out of his slow zone after he hits you with Seismic Shard. Once he is low on mana, freeze the wave near your turret and zone him out. If he attempts to escape with Unstoppable Force or turn on you, activate World Ender to chase him down.
Early pressureScalingWave clearYour entire advantage stems from Nasus's reliance on static farming. To stack Siphoning Strike, Nasus must commit to predictable last-hit animations. Because The Darkin Blade has precise sweetspots, you can easily knock him up and chunk his health bar every time he steps up to a dying minion. This constant interruption completely neutralizes the passive sustain he gets from Soul Eater, keeping him permanently vulnerable under his own turret.Nasus build →See details
Nasus
The interaction that decides it
Aatrox can easily interrupt Nasus's Siphoning Strike last-hits under tower by poking him with The Darkin Blade sweetspots.
Why
Your entire advantage stems from Nasus's reliance on static farming. To stack Siphoning Strike, Nasus must commit to predictable last-hit animations. Because The Darkin Blade has precise sweetspots, you can easily knock him up and chunk his health bar every time he steps up to a dying minion. This constant interruption completely neutralizes the passive sustain he gets from Soul Eater, keeping him permanently vulnerable under his own turret.
Lane impact
By slow-pushing large minion waves directly into his tower, you force Nasus into a miserable defensive position. Instead of safely farming, he is subjected to constant poke under his turret, bleeding gold and Siphoning Strike stacks. This massive pressure prevents him from ever matching your map presence, allowing you to secure rift heralds or invade the enemy jungle while he remains glued to his lane trying to recover.
How to play
Start by slow-building your minion waves. When Nasus prepares to strike a minion with Siphoning Strike, cast The Darkin Blade first strike to interrupt his timing. Save your Umbral Dash to adjust your sweetspot angle or to safely retreat if he retaliates with Wither. If he tries to escape your poke range, drag him back with Infernal Chains. Should he activate Fury of the Sands, simply disengage and wait out his transformation before re-engaging with World Ender.
AssassinPokeAll-inTeemo's main defensive tool, Blinding Dart, is completely useless against your primary damage source. Since Blinding Dart only neutralizes basic attacks, it cannot mitigate the heavy physical damage from the sweetspots of The Darkin Blade. If you catch the swift yordle with Infernal Chains, his lack of hard escape tools means he cannot avoid the subsequent pull and your full burst combo.Teemo build →See details
Teemo
The interaction that decides it
Teemo's Blinding Dart does not affect Aatrox's Q damage, allowing Aatrox to easily burst him down once Infernal Chains pulls him in.
Why
Teemo's main defensive tool, Blinding Dart, is completely useless against your primary damage source. Since Blinding Dart only neutralizes basic attacks, it cannot mitigate the heavy physical damage from the sweetspots of The Darkin Blade. If you catch the swift yordle with Infernal Chains, his lack of hard escape tools means he cannot avoid the subsequent pull and your full burst combo.
Lane impact
Early on, Teemo will attempt to harass you with Toxic Shot while abusing Guerrilla Warfare in the brushes. However, because his blind fails to stop your spell damage, he cannot safely stand his ground to deny your farm. Once you have access to your full basic kit, the constant threat of your all-in completely strips away his ranged lane dominance, forcing him to play defensively under his turret.
How to play
Let the wave push toward you slightly to create chasing space. Wait for Teemo to exhaust his Move Quick, then use Umbral Dash to adjust your first cast of The Darkin Blade and land the sweetspot, instantly following up with Infernal Chains. If he blinds you, ignore basic attacks entirely and focus solely on landing your remaining sweetspots. Activate World Ender to overpower his Noxious Trap slows and secure the kill.
CC immunityInterruptSustainWhile Ornn can timed *Bellows Breath* to shrug off the knockups from *The Darkin Blade*, he cannot stop your relentless healing. Since *Bellows Breath* makes him unstoppable but doesn't reduce your incoming sustain, your passive *Deathbringer Stance* and the physical vamp from *Umbral Dash* will consistently repair any damage he inflicts. He simply lacks the DPS to outpace your constant health regeneration in a drawn-out duel.Ornn build →See details
Ornn
The interaction that decides it
Ornn can use Bellows Breath to become Unstoppable and ignore Aatrox's Q knockups, but he remains vulnerable to Aatrox's sustained physical vamp.
Why
While Ornn can timed *Bellows Breath* to shrug off the knockups from *The Darkin Blade*, he cannot stop your relentless healing. Since *Bellows Breath* makes him unstoppable but doesn't reduce your incoming sustain, your passive *Deathbringer Stance* and the physical vamp from *Umbral Dash* will consistently repair any damage he inflicts. He simply lacks the DPS to outpace your constant health regeneration in a drawn-out duel.
Lane impact
You dictate the wave's positioning because Ornn cannot safely contest your sustain without burning major mana. Whenever he misses *Volcanic Rupture* or wastes *Searing Charge* into a wall, a massive window opens. You can drag him into long trades using *Infernal Chains*, forcing him under his turret with low health. This denies him the safety needed to utilize *Living Forge*, rendering his passive crafting advantage useless in lane.
How to play
To secure this advantage, do not commit all three strikes of *The Darkin Blade* immediately if his *Bellows Breath* is available. Instead, bait his fire breath with your first strike, then reposition laterally with *Umbral Dash* to avoid the Brittle application. Once his fire stops, pull him back with *Infernal Chains* and unleash your full combo. If he attempts to escape using *Searing Charge*, interrupt his dash trajectory with your remaining sweetspots to seal the kill.
ShieldsPositioningTradingThis lane leans heavily in your favor because Pantheon's primary defensive tool, Aegis Assault, is completely bypassed by your mobility. When he raises his shield to block your damage, a quick Umbral Dash combined with The Darkin Blade allows you to reposition your sweetspots directly behind him. Since his directional shield only blocks frontal damage, you can easily shred through his health bar while he is locked in his defensive animation.Pantheon build →See details
Pantheon
The interaction that decides it
Aatrox can use Umbral Dash to reposition his Q sweetspots behind Pantheon during Aegis Assault to bypass the damage block.
Why
This lane leans heavily in your favor because Pantheon's primary defensive tool, Aegis Assault, is completely bypassed by your mobility. When he raises his shield to block your damage, a quick Umbral Dash combined with The Darkin Blade allows you to reposition your sweetspots directly behind him. Since his directional shield only blocks frontal damage, you can easily shred through his health bar while he is locked in his defensive animation.
Lane impact
In practice, this dynamic cripples Pantheon's aggressive trading. If he engages with Shield Vault, he places himself in perfect range for your Infernal Chains pull. Knowing you can bypass his shield prevents him from zoning you. You will easily secure wave control, forcing him to choose between losing gold under tower or attempting a desperate Grand Starfall roam that costs him plates.
How to play
Never waste Umbral Dash proactively; always save it to counter his Aegis Assault. When Pantheon initiates with Shield Vault, immediately chain The Darkin Blade strikes, and use your dash to slide behind his shield the moment he raises it. Keep Deathbringer Stance ready to offset his Comet Spear poke. If you miss your repositioning, activate World Ender to sustain through his burst and run him down as his cooldowns expire.
SustainDodgingEarly pressureAatrox dominates this matchup because his relentless healing from Deathbringer Stance and Umbral Dash outpaces Vladimir's Transfusion over prolonged trades. While Vladimir can dissolve into Sanguine Pool to escape the pull of your Infernal Chains, doing so burns his only defensive tool. Because Sanguine Pool's cooldown is nearly double that of your own abilities, he is left completely defenseless against your next two rotations of The Darkin Blade.Vladimir build →See details
Vladimir
The interaction that decides it
Vladimir can use Sanguine Pool to dodge Aatrox's Infernal Chains pull, but its extremely long cooldown leaves him vulnerable to subsequent Q rotations.
Why
Aatrox dominates this matchup because his relentless healing from Deathbringer Stance and Umbral Dash outpaces Vladimir's Transfusion over prolonged trades. While Vladimir can dissolve into Sanguine Pool to escape the pull of your Infernal Chains, doing so burns his only defensive tool. Because Sanguine Pool's cooldown is nearly double that of your own abilities, he is left completely defenseless against your next two rotations of The Darkin Blade.
Lane impact
This dynamic turns the lane into a constant zone of threat. You can easily control the wave minion flow because Vladimir cannot contest your push without risking an engage. Every time you force him to pool, he must retreat to his tower, giving up gold and experience. This pressure forces him into defensive Hemoplague usage just to survive, stripping away his mid-game teamfight threat before he can scale.
How to play
Start trades by angling the first strike of The Darkin Blade to force him sideways, then throw Infernal Chains directly at him. The moment he sinks into Sanguine Pool, immediately stop attacking and hold your remaining Q strikes. Once he resurfaces, use Umbral Dash forward to land the final sweetspots. If he plays too safely after pooling, freeze the minions near your turret to starve him of Transfusion targets.
ShieldsSustainDr. Mundo relies on Goes Where He Pleases to shrug off crowd control, but your The Darkin Blade gives you multiple chances to break it. Landing a first-strike sweetspot instantly pops his canister at little cost to you. Without his passive shield, Dr. Mundo cannot escape the pull of Infernal Chains, leaving him completely exposed to your full combo and the heavy passive healing of Umbral Dash.Dr. Mundo build →See details
Dr. Mundo
The interaction that decides it
Aatrox can easily pop Dr. Mundo's Goes Where He Pleases passive with a Q1 sweetspot, leaving him vulnerable to the rest of his combo.
Why
Dr. Mundo relies on Goes Where He Pleases to shrug off crowd control, but your The Darkin Blade gives you multiple chances to break it. Landing a first-strike sweetspot instantly pops his canister at little cost to you. Without his passive shield, Dr. Mundo cannot escape the pull of Infernal Chains, leaving him completely exposed to your full combo and the heavy passive healing of Umbral Dash.
Lane impact
You dictate the pace of every trade because Dr. Mundo must play defensively behind his minions, relying on Infected Bonesaw to secure last hits. By constantly threatening him with The Darkin Blade, you force him to sacrifice health just to farm. His attempts to trade back with Heart Zapper or Blunt Force Trauma fail to match your sustain, allowing you to establish a permanent freeze or dive him under tower once his HP drops.
How to play
Start trades by landing the edge of The Darkin Blade to pop Goes Where He Pleases, then immediately use Umbral Dash to step on his dropped canister before he can heal. Only cast Infernal Chains after his passive bar is greyed out, guaranteeing the pull. If he activates Maximum Dosage, disengage with your movement speed from World Ender and wait out his ultimate's duration before re-engaging with Deathbringer Stance to finish him off.
PositioningInterruptAatrox dominates this matchup because Sion's primary tool for waveclear and damage, Decimating Smash, requires him to stand still and channel. Any of your three The Darkin Blade sweetspot knockups instantly cancels his charge, putting it on a full cooldown and leaving him completely vulnerable. Since Sion has low mobility outside his ultimate, he cannot easily dodge your sweetspots while preparing his own attack.Sion build →See details
Sion
The interaction that decides it
Aatrox can interrupt Sion's Decimating Smash charge at any time using any of his three The Darkin Blade sweetspot knockups.
Why
Aatrox dominates this matchup because Sion's primary tool for waveclear and damage, Decimating Smash, requires him to stand still and channel. Any of your three The Darkin Blade sweetspot knockups instantly cancels his charge, putting it on a full cooldown and leaving him completely vulnerable. Since Sion has low mobility outside his ultimate, he cannot easily dodge your sweetspots while preparing his own attack.
Lane impact
This interaction completely strips Sion of his lane priority. Every time he tries to charge Decimating Smash to clear the wave or trade, you can step up and interrupt him. This denies his wave control, forcing him to farm under tower where you can harass him with The Darkin Blade and Infernal Chains. He cannot easily pop his Soul Furnace shield for damage because you can break it or pull him out of range.
How to play
When Sion starts charging Decimating Smash, do not panic or run away. Instead, walk forward or use Umbral Dash to position your The Darkin Blade sweetspot directly on him to cancel his channel. If he tries to escape or slow you with Roar of the Slayer, use Infernal Chains to pull him back. Save your World Ender for when he attempts to flee with Unstoppable Onslaught or to match his raw health scaling in extended fights, ensuring you always keep a sweetspot ready.
These champions have a build and playstyle that directly overpower yours, which can make controlling the lane and farming extremely difficult. Their kit can neutralize your core strengths or punish you the moment you try to play your usual game plan. In these matchups, the goal is often to minimize mistakes and look for ways to win outside of direct confrontation.
KitingBurstKindred completely neutralizes your engage tools by using the mobility of Dance of Arrows. Whenever you attempt to lock them down with Infernal Chains, they can instantly dash out of the pull zone while maintaining their distance. This allows them to easily avoid the sweetspots of The Darkin Blade. Because you cannot reliably land your knockups, Kindred can freely kite you with physical damage from a safe range.Kindred build →See details
Kindred
The interaction that decides it
Kindred uses Dance of Arrows to easily dash out of Infernal Chains while kiting you from range.
Why
Kindred completely neutralizes your engage tools by using the mobility of Dance of Arrows. Whenever you attempt to lock them down with Infernal Chains, they can instantly dash out of the pull zone while maintaining their distance. This allows them to easily avoid the sweetspots of The Darkin Blade. Because you cannot reliably land your knockups, Kindred can freely kite you with physical damage from a safe range.
Lane impact
This mobility gap makes jungle skirmishes incredibly dangerous for you. Kindred will aggressively invade your camps to hunt for Mark of the Kindred, knowing you cannot chase them down. If you contest these marks, they will activate Wolf's Frenzy to reduce their dash cooldown and apply Mounting Dread, forcing you to retreat with low health or burn World Ender defensively just to survive their relentless ranged assault.
How to play
To survive this matchup, never initiate with Infernal Chains. Instead, force Kindred to use Dance of Arrows first by positioning yourself near terrain where you can threaten them with a short The Darkin Blade coupled with Umbral Dash. Only cast your chains once their dash is on cooldown. If they deploy Lamb's Respite, stop trying to burst them; instead, time your third strike of The Darkin Blade to knock them up and push them out of the healing zone right as the effect expires.
UntargetableTrue damageGwen completely counters Aatrox in the jungle due to her Hallowed Mist. When you attempt to space her using the first two casts of The Darkin Blade, she deploys her mist to render herself completely untargetable from outside its zone. Because your initial Q strikes rely on medium-range sweetspots, they deal zero damage and fail to knock her up, leaving you vulnerable as she scales uncontrollably.Gwen build →See details
Gwen
The interaction that decides it
Gwen's Hallowed Mist completely negates your first two The Darkin Blade casts if she positions it correctly.
Why
Gwen completely counters Aatrox in the jungle due to her Hallowed Mist. When you attempt to space her using the first two casts of The Darkin Blade, she deploys her mist to render herself completely untargetable from outside its zone. Because your initial Q strikes rely on medium-range sweetspots, they deal zero damage and fail to knock her up, leaving you vulnerable as she scales uncontrollably.
Lane impact
This interaction destroys your ability to contest Scuttle Crabs or invade her jungle camps. Since you cannot lock her down inside her zone, she wins every duel. If your initial combo fails, she retaliates instantly using Snip Snip! and Needlework, driving you out of your own jungle. This forces you to concede early objective priority, leaving your laners exposed to her high-scaling ganks.
How to play
To survive, you must adjust your positioning during skirmishes. Never cast your initial The Darkin Blade strikes at maximum range while her Hallowed Mist is active. Instead, walk directly toward her to bait out Skip 'n Slash, then use Umbral Dash to close the distance and fight inside her circle. If you fail to enter her mist, retreat immediately and throw Infernal Chains to slow her pursuit until her zone dissipates.
CC immunityDuelingOlaf directly counters your entire kit because activating Ragnarok makes him immune to the knockups of The Darkin Blade and the pull of Infernal Chains. Without these crowd controls, you cannot land your sweetspots reliably, which drastically reduces the damage of your The Darkin Blade and the healing from Umbral Dash or Deathbringer Stance. His Berserker Rage and Vicious Strikes then easily out-sustain your raw damage in close-quarters combat.Olaf build →See details
Olaf
The interaction that decides it
Olaf's Ragnarok makes him completely immune to the knockups of The Darkin Blade and the pull of Infernal Chains.
Why
Olaf directly counters your entire kit because activating Ragnarok makes him immune to the knockups of The Darkin Blade and the pull of Infernal Chains. Without these crowd controls, you cannot land your sweetspots reliably, which drastically reduces the damage of your The Darkin Blade and the healing from Umbral Dash or Deathbringer Stance. His Berserker Rage and Vicious Strikes then easily out-sustain your raw damage in close-quarters combat.
Lane impact
In the jungle, this interaction makes early skirmishes incredibly dangerous. Olaf can aggressively invade your camps or contest Scuttle Crabs, knowing he can shrug off your crowd control. If he catches you with Undertow slows, you cannot peel him off with Infernal Chains. This pressure forces you to forfeit early neutral objectives and play defensively, delaying your World Ender spikes and forcing your lanes to play without active jungle priority.
How to play
When pathing, track his ultimate closely. If Olaf activates Ragnarok, immediately use Umbral Dash over a wall or backward to disengage, saving Infernal Chains until his immunity fades. Do not attempt to stand and fight with World Ender while his ultimate is active; instead, wait out those six seconds of crowd control immunity. If he traps you in a choke point, prioritize landing basic attacks to cycle your Deathbringer Stance for survival rather than trying to hit impossible sweetspots.
UntargetableDuelingMaster Yi naturally outscales you and hard-counters your mechanical pattern. The moment you cast the third strike of The Darkin Blade or try to pull him with Infernal Chains, his Alpha Strike grants him untargetability, completely neutralizing your crowd control. Since your healing from Umbral Dash and Deathbringer Stance relies on landing sweetspots, his evasion halts your sustain while he shreds you with Wuju Style.Master Yi build →See details
Master Yi
The interaction that decides it
Master Yi uses Alpha Strike to dodge your third The Darkin Blade cast and avoid the pull of Infernal Chains.
Why
Master Yi naturally outscales you and hard-counters your mechanical pattern. The moment you cast the third strike of The Darkin Blade or try to pull him with Infernal Chains, his Alpha Strike grants him untargetability, completely neutralizing your crowd control. Since your healing from Umbral Dash and Deathbringer Stance relies on landing sweetspots, his evasion halts your sustain while he shreds you with Wuju Style.
Lane impact
In the jungle, this structural disadvantage severely limits your skirmishing power. You cannot contest objectives or duel him directly. If Master Yi invades your camps, you are forced to concede territory because a direct fight during his Highlander means he will run you down, ignoring the slow from Infernal Chains and easily dodging your critical strikes to secure free kills.
How to play
Never initiate with Infernal Chains or use your third The Darkin Blade strike while his Alpha Strike is available. Bait his jump with your first two strikes, using Umbral Dash defensively to create distance. Once he materializes from Alpha Strike, immediately drop Infernal Chains on him. If he triggers Highlander, use the mobility of World Ender to retreat rather than fighting.
SustainDuelingWarwick completely neutralizes your crowd control during duels. When you attempt to space with Umbral Dash to land the sweetspot of The Darkin Blade, Warwick can simply hold Jaws of the Beast to latch onto you. This bypasses your knockup entirely, keeping him in melee range where his Eternal Hunger and Primal Howl easily out-sustain your healing.Warwick build →See details
Warwick
The interaction that decides it
Warwick can hold Jaws of the Beast to follow your Umbral Dash and immune the knockup from The Darkin Blade.
Why
Warwick completely neutralizes your crowd control during duels. When you attempt to space with Umbral Dash to land the sweetspot of The Darkin Blade, Warwick can simply hold Jaws of the Beast to latch onto you. This bypasses your knockup entirely, keeping him in melee range where his Eternal Hunger and Primal Howl easily out-sustain your healing.
Lane impact
This interaction strips away your early skirmishing power in the river. Since Warwick wins extended duels by ignoring your displacement, you cannot contest Scuttle Crabs or secure early neutral objectives directly against him. If he invades your jungle, your camp clearing is severely delayed because you must concede territory, forcing your laners to play defensively without active jungle pressure.
How to play
To survive this matchup, you must alter your build path immediately, prioritizing early healing reduction components over raw damage to counter Eternal Hunger. During skirmishes, never initiate with The Darkin Blade while his Jaws of the Beast is active. Wait for him to lock onto a teammate or use his bite before attempting your knockups. If he catches you alone, use Infernal Chains to slow his pursuit and disengage with World Ender rather than fighting.
KitingMobilityIn the jungle, you will struggle immensely because of Lillia's hyper-mobility. Every time she hits a camp or you with her abilities, she stacks Blooming Blows, gaining massive movement speed. This extra velocity makes it incredibly easy for her to effortlessly dance in and out of your The Darkin Blade sweetspots, rendering your main damage source and knockups completely useless.Lillia build →See details
Lillia
The interaction that decides it
Lillia's passive movement speed from Blooming Blows allows her to effortlessly dance around your The Darkin Blade sweetspots.
Why
In the jungle, you will struggle immensely because of Lillia's hyper-mobility. Every time she hits a camp or you with her abilities, she stacks Blooming Blows, gaining massive movement speed. This extra velocity makes it incredibly easy for her to effortlessly dance in and out of your The Darkin Blade sweetspots, rendering your main damage source and knockups completely useless.
Lane impact
Because you cannot lock her down, Lillia easily secures Scuttle Crabs and rotates faster to skirmishes. In neutral objective fights, her ability to lob Swirlseed from safety can slow you down, setting up a multi-man Lilting Lullaby. You will constantly find yourself outpaced in your own camps, unable to challenge her deep invades because you cannot land Infernal Chains on a target moving that fast.
How to play
Never initiate with The Darkin Blade when she has full stacks. Instead, wait in brush to ambush her, or hold your Umbral Dash exclusively to reposition your sweetspots after she commits her Watch Out! Eep! dash. If she catches you in the open river with high momentum, do not chase. Use Infernal Chains defensively to force her to path sideways, and activate World Ender only to escape her sleep wake-up damage or to match her rotation to a collapsing teammate.
These champions have tools that generally give them the edge in a fight, without making the matchup unwinnable. They might have more range, a better ability to soak up your offense, or more ways to answer your engages. You'll need to adapt your approach and carefully pick your moments to accept a fight.
SkirmishesCrowd controlVi's jungle dueling relies heavily on landing Vault Breaker to immediately shred your armor and gain attack speed via Denting Blows. As Aatrox, your primary defense is interrupting her mid-dash charge using the knockup from a precise The Darkin Blade sweetspot. If you fail this micro-interaction, she easily triggers Blast Shield and melts you, but stopping her dash completely ruins her burst rotation.Vi build →See details
Vi
The interaction that decides it
Interrupting her Vault Breaker with a well-timed The Darkin Blade sweetspot prevents her from applying Denting Blows quickly.
Why
Vi's jungle dueling relies heavily on landing Vault Breaker to immediately shred your armor and gain attack speed via Denting Blows. As Aatrox, your primary defense is interrupting her mid-dash charge using the knockup from a precise The Darkin Blade sweetspot. If you fail this micro-interaction, she easily triggers Blast Shield and melts you, but stopping her dash completely ruins her burst rotation.
Lane impact
In the jungle, this interaction dictates who controls river skirmishes and objective pressure. When Vi has Vault Breaker ready, you cannot contest her directly without backup, as her Cease and Desist offers an unstoppable follow-up. If she misses or you cancel her dash, the power dynamic shifts instantly, allowing you to lock her down with Infernal Chains and safely secure camp priority.
How to play
When you spot Vi charging Vault Breaker, hold your first cast of The Darkin Blade. Wait for her to release the dash, then react with Umbral Dash to adjust your angle and land the sweetspot directly in her path. If she bypasses your knockup with Cease and Desist, immediately trigger World Ender to match her mobility, use Deathbringer Stance to heal through her initial burst, and drag her back using Infernal Chains.
Early pressureMap pressurePantheon dominates the early jungle skirmishes because his Aegis Assault perfectly counters your primary damage source. When you commit to your third cast of The Darkin Blade, he can simply raise his shield to absorb the entire impact. Combined with his point-and-click stun from Shield Vault and the raw burst of Comet Spear, he can easily win quick trades before your Deathbringer Stance or Umbral Dash can recover your health.Pantheon build →See details
Pantheon
The interaction that decides it
Aegis Assault can block the entire damage of your third The Darkin Blade cast if you do not position behind him.
Why
Pantheon dominates the early jungle skirmishes because his Aegis Assault perfectly counters your primary damage source. When you commit to your third cast of The Darkin Blade, he can simply raise his shield to absorb the entire impact. Combined with his point-and-click stun from Shield Vault and the raw burst of Comet Spear, he can easily win quick trades before your Deathbringer Stance or Umbral Dash can recover your health.
Lane impact
This dynamic makes early river skirmishes extremely dangerous for you. Contesting the Rift Scuttler directly often results in a quick death if Pantheon catches you with a fully charged Mortal Will. You cannot safely invade his camps, and his semi-global pressure with Grand Starfall means any aggressive gank you attempt can instantly turn into a deadly counter-gank where his burst outpaces your slow healing.
How to play
To survive and win these duels, you must manipulate his shield direction. When casting your third The Darkin Blade, use the active part of Umbral Dash to slide directly behind Pantheon while he channels Aegis Assault. This bypasses his frontal damage reduction entirely. Always hold your Infernal Chains until after he commits his Shield Vault, forcing him to walk through the slow zone or burn his defense early. If he holds his shield, delay your final strike to waste his cooldown.
MobilitySkirmishesKayn's ability to navigate skirmishes hinges on dodging your heaviest burst. While you can land the initial strikes of The Darkin Blade, a competent Kayn will systematically hold Umbral Trespass to infest you the moment you cast your third, most devastating strike. This completely negates your primary damage and knockup, wasting your Deathbringer Stance window and letting him reset the fight's momentum.Kayn build →See details
Kayn
The interaction that decides it
Kayn can use Umbral Trespass to completely dodge your third The Darkin Blade strike and reset the fight's momentum.
Why
Kayn's ability to navigate skirmishes hinges on dodging your heaviest burst. While you can land the initial strikes of The Darkin Blade, a competent Kayn will systematically hold Umbral Trespass to infest you the moment you cast your third, most devastating strike. This completely negates your primary damage and knockup, wasting your Deathbringer Stance window and letting him reset the fight's momentum.
Lane impact
Because Kayn clears camps incredibly fast and can bypass traditional wards using Shadow Step, he easily dictates the early tempo. You cannot contest him blindly in the river; if he initiates a duel, his mobility allows him to stall your World Ender. Missing your sweetspots because of his Reaping Slash dashes means losing pressure on epic monsters.
How to play
To win this tempo race, you must adapt your positioning during skirmishes. Never commit your third cast of The Darkin Blade unless Kayn has already used Reaping Slash to dodge or is locked down. If he activates Umbral Trespass, immediately reposition yourself using Umbral Dash towards a wall. This ensures that when he exits, you can instantly pull him with Infernal Chains.
ShieldsVisionNocturne controls the pace of jungle duels because his Shroud of Darkness completely negates your primary crowd control. If he blocks the pull of your Infernal Chains or a decisive sweetspot from The Darkin Blade, he gains massive attack speed to shred you. With Unspeakable Horror ticking down during the duel, losing your combo rhythm means you cannot heal through Umbral Dash passive before getting feared.Nocturne build →See details
Nocturne
The interaction that decides it
Nocturne can block your Infernal Chains pull or a critical Q sweetspot with Shroud of Darkness.
Why
Nocturne controls the pace of jungle duels because his Shroud of Darkness completely negates your primary crowd control. If he blocks the pull of your Infernal Chains or a decisive sweetspot from The Darkin Blade, he gains massive attack speed to shred you. With Unspeakable Horror ticking down during the duel, losing your combo rhythm means you cannot heal through Umbral Dash passive before getting feared.
Lane impact
This matchup makes contesting Scuttle Crabs and securing neutral objectives highly risky. If you initiate a skirmish and Nocturne blocks your engage, his high DPS from Duskbringer will force you out of your jungle. Furthermore, his Paranoia limits your ganking freedom; any aggressive Umbral Dash forward can be instantly punished by his long-range semi-global ultimate, turning your offensive plays into deadly counter-ganks.
How to play
To survive, never lead with Infernal Chains. Instead, use the first strike of The Darkin Blade to bait out Shroud of Darkness, or delay your swing to make him waste the shield. When he triggers Unspeakable Horror, immediately use Umbral Dash backward to break the tether before the fear activates. If caught without World Ender, do not try to fight his raw attack speed; prioritize escaping over trading back.
ArmorCrowd controlThis jungle matchup is dictated by how Rammus punishes your physical damage output. The moment he activates Defensive Ball Curl, attacking him becomes suicidal. By locking you down with Frenzying Taunt, he forces you to auto-attack his spiked shell, triggering Deathbringer Stance against yourself. This crowd control completely interrupts the flow of your The Darkin Blade combos, leaving you unable to heal through physical damage.Rammus build →See details
Rammus
The interaction that decides it
Rammus uses Frenzying Taunt to force you to auto-attack him while Defensive Ball Curl is active, dealing massive damage back to you.
Why
This jungle matchup is dictated by how Rammus punishes your physical damage output. The moment he activates Defensive Ball Curl, attacking him becomes suicidal. By locking you down with Frenzying Taunt, he forces you to auto-attack his spiked shell, triggering Deathbringer Stance against yourself. This crowd control completely interrupts the flow of your The Darkin Blade combos, leaving you unable to heal through physical damage.
Lane impact
Rammus neutralizes your early skirmishing power in the river. While you clear camps faster, his high mobility from Powerball allows him to counter-gank your lanes effectively. In any 2v2 fight, his ability to force you into attacking his Defensive Ball Curl means you cannot easily secure crucial early takedowns to trigger your World Ender resets, granting his laners free pressure across the map.
How to play
You must shift your build path toward armor-penetrating options early rather than raw attack damage. During skirmishes, never initiate with Umbral Dash; instead, hold it to escape his incoming Powerball. If he successfully lands Frenzying Taunt, do not panic. Once the taunt ends and Defensive Ball Curl expires, use Infernal Chains to drag him back and safely land The Darkin Blade sweetspots to recover your health.
KitingSkirmishesGraves systematically dismantles your skirmishing power because his Quickdraw is the perfect counter to your combo. Whenever you land Infernal Chains, he can simply dash out of the pull zone while simultaneously dodging the sweetspots of The Darkin Blade. This dodge also stacks armor on him, directly neutralizing the physical damage of your Deathbringer Stance and reducing the healing you receive from Umbral Dash.Graves build →See details
Graves
The interaction that decides it
Graves uses Quickdraw to slide out of Infernal Chains and dodge your Q sweetspots while stacking armor.
Why
Graves systematically dismantles your skirmishing power because his Quickdraw is the perfect counter to your combo. Whenever you land Infernal Chains, he can simply dash out of the pull zone while simultaneously dodging the sweetspots of The Darkin Blade. This dodge also stacks armor on him, directly neutralizing the physical damage of your Deathbringer Stance and reducing the healing you receive from Umbral Dash.
Lane impact
This mechanical advantage allows Graves to invade your jungle with impunity and contest camps early. You cannot comfortably contest Scuttle Crabs or defend your buffs in direct duels, as he will bait The Darkin Blade and force you out of your own jungle. If you fall behind in gold, his ranged pressure and End of the Line burst will completely lock you out of neutral objectives during the mid-game.
How to play
To survive this matchup, never initiate with Infernal Chains. Instead, force Graves to use Quickdraw defensively by aiming your first strike of The Darkin Blade directly at him. Only commit your Umbral Dash to adjust your sweetspots after he has spent his dash. If he blinds you with Smoke Screen, immediately back away using the bonus movement speed from World Ender rather than blindly swinging your sword and losing your passive sustain.
DuelingMap pressureTryndamere's kit directly neutralizes your crucial teamfight engine. During skirmishes, you rely on World Ender takedowns to extend your form and boost your healing. However, Undying Rage allows him to absorb your entire combo while staying at one health, completely blocking your reset. Meanwhile, his passive Battle Fury combined with Bloodlust healing lets him match your Deathbringer Stance sustain during prolonged jungle duels.Tryndamere build →See details
Tryndamere
The interaction that decides it
Tryndamere's Undying Rage prevents you from getting World Ender takedown extensions during close skirmishes.
Why
Tryndamere's kit directly neutralizes your crucial teamfight engine. During skirmishes, you rely on World Ender takedowns to extend your form and boost your healing. However, Undying Rage allows him to absorb your entire combo while staying at one health, completely blocking your reset. Meanwhile, his passive Battle Fury combined with Bloodlust healing lets him match your Deathbringer Stance sustain during prolonged jungle duels.
Lane impact
Because you cannot easily burst him down, objective contests become highly risky. Tryndamere can spin over walls with Spinning Slash and initiate fights while ignoring your The Darkin Blade knockups using his ultimate. This forces you to play defensively in your own jungle, as a failed duel means he will out-sustain you with Bloodlust and steal your camps, putting your entire team behind on map pressure.
How to play
Never commit your World Ender early in skirmishes against him. Instead, use Infernal Chains to tether him when he dives with Spinning Slash, and execute your The Darkin Blade strikes to kite backward. If he activates Undying Rage, immediately use Umbral Dash defensively to buy time. Only re-engage with your passive Deathbringer Stance once his five-second invulnerability expires, ensuring you secure the kill and the healing reset.
ShieldsSkirmishesJax represents a massive threat in the river because Counter Strike completely nullifies your Deathbringer Stance. When he dodges that crucial empowered attack, you lose both your initial burst and the vital healing needed to survive his sustained damage. While you try to land The Darkin Blade, Jax can easily jump on you with Leap Strike and shred you once your passive is wasted.Jax build →See details
Jax
The interaction that decides it
Jax's Counter Strike blocks your Deathbringer Stance auto-attack, denying you critical burst and healing.
Why
Jax represents a massive threat in the river because Counter Strike completely nullifies your Deathbringer Stance. When he dodges that crucial empowered attack, you lose both your initial burst and the vital healing needed to survive his sustained damage. While you try to land The Darkin Blade, Jax can easily jump on you with Leap Strike and shred you once your passive is wasted.
Lane impact
This interaction dictates how you contest objectives and crab spawns. You cannot safely invade Jax or force isolated skirmishes because a smart Jax will hold his Evasion to bait your passive. If you get caught in the river without a backup plan, his Grandmaster-at-Arms passive combined with Empower will melt your health bar, forcing you to use Umbral Dash defensively and forfeit camps.
How to play
To survive this matchup, you must bait Counter Strike before committing. Start skirmishes with the outer edge of The Darkin Blade to chip his health. If Jax jumps in with Leap Strike and spins his lantern, immediately cast Infernal Chains and use Umbral Dash backward to disengage. Only trigger your Deathbringer Stance and activate World Ender once his defensive window ends, allowing you to turn the fight and heal back up.
MobilitySkirmishesHecarim's superior movement speed from Warpath allows him to dictate the pace of jungle skirmishes. The core danger lies in Devastating Charge; its knockback is the perfect counter to your combo. When you attempt to chain your strikes, a well-timed charge from Hecarim pushes you completely out of range, ruining the sweetspot alignments of The Darkin Blade and leaving you unable to heal or deal damage.Hecarim build →See details
Hecarim
The interaction that decides it
Hecarim's Devastating Charge can push you out of your own Q sweetspot ranges during a duel.
Why
Hecarim's superior movement speed from Warpath allows him to dictate the pace of jungle skirmishes. The core danger lies in Devastating Charge; its knockback is the perfect counter to your combo. When you attempt to chain your strikes, a well-timed charge from Hecarim pushes you completely out of range, ruining the sweetspot alignments of The Darkin Blade and leaving you unable to heal or deal damage.
Lane impact
In the jungle, this mobility imbalance means you struggle to contest the Scuttle Crabs or secure early river priority. If Hecarim finds you in the river, his low cooldown Rampage combined with Spirit of Dread will out-sustain you if he successfully disrupts your knockups. A failed duel because of a displaced sweetspot forces you to concede your camps or arrive late to counter-gank, putting your lanes behind.
How to play
To survive these duels, never initiate with your full combo. Hold Infernal Chains until Hecarim commits his Devastating Charge. Use Umbral Dash defensively to reposition immediately after he pushes you, allowing you to realign the sweetspots of The Darkin Blade. Activate World Ender only when you can guarantee a static fight, and rely on Deathbringer Stance to heal up if he tries to run you down with his superior speed.
Early pressureDisengageThis jungle duel heavily favors Lee Sin due to his superior mobility. Using Safeguard and Sonic Wave, he easily dances around your The Darkin Blade sweetspots. The ultimate dealbreaker is his Dragon's Rage; the moment you activate World Ender to turn a fight, he will kick you away, forcing you to watch your ultimate's duration bleed out while you are helplessly displaced.Lee Sin build →See details
Lee Sin
The interaction that decides it
Lee Sin can use Dragon's Rage to kick you away during your World Ender, wasting your ultimate's duration.
Why
This jungle duel heavily favors Lee Sin due to his superior mobility. Using Safeguard and Sonic Wave, he easily dances around your The Darkin Blade sweetspots. The ultimate dealbreaker is his Dragon's Rage; the moment you activate World Ender to turn a fight, he will kick you away, forcing you to watch your ultimate's duration bleed out while you are helplessly displaced.
Lane impact
This interaction forces you to play defensively during early river skirmishes and objective contests. If you try to secure a neutral monster, the looming threat of his Dragon's Rage prevents you from fully committing. A single kick displaces you from the fight, rendering your physical vamp useless and giving him free rein to pressure your laners while you struggle to catch up.
How to play
To survive this matchup, you must meticulously track the cooldown of Dragon's Rage. Never trigger World Ender proactively while his kick is up. Instead, wait for him to target a teammate, or position your back against thick terrain to minimize the knockback distance. When engaging, land Infernal Chains first to force him to burn Safeguard defensively before you commit your precious The Darkin Blade charges.
MechanicsCrowd controlWukong holds a massive advantage in the jungle skirmishes because Warrior Trickster completely neutralizes your primary combo. Whenever you attempt to set up your damage with Infernal Chains, he can deploy his clone to absorb the chain or block the sweetspots of The Darkin Blade. This interaction denies your healing from Deathbringer Stance and Umbral Dash, leaving you vulnerable to his armor-shredding Golden Staff and rapid physical burst.Wukong build →See details
Wukong
The interaction that decides it
Wukong can use Warrior Trickster to leave a clone that absorbs your Infernal Chains and Q sweetspots.
Why
Wukong holds a massive advantage in the jungle skirmishes because Warrior Trickster completely neutralizes your primary combo. Whenever you attempt to set up your damage with Infernal Chains, he can deploy his clone to absorb the chain or block the sweetspots of The Darkin Blade. This interaction denies your healing from Deathbringer Stance and Umbral Dash, leaving you vulnerable to his armor-shredding Golden Staff and rapid physical burst.
Lane impact
In the jungle, this interaction makes direct duels over Scuttle Crabs extremely hazardous. If Wukong baits your The Darkin Blade with his clone, he immediately counter-engages with Nimbus Strike and Golden Staff, winning the trade effortlessly. You lose the priority needed to contest early neutral camps, forcing you to concede pressure in your own jungle, which delays your World Ender power spike and leaves your laners exposed to his gank setups.
How to play
To survive this matchup, never initiate with Infernal Chains. Instead, utilize your basic attacks and Deathbringer Stance to clear, and hold The Darkin Blade until he commits Warrior Trickster. If he jumps on you with Nimbus Strike, use Umbral Dash backwards to disengage his Cyclone ultimate. If you misplay and hit his clone with your main cooldowns, immediately retreat using World Ender's movement speed bonus rather than attempting to fight through his Stone Skin armor.
PicksStealthInvading or dueling Kha'Zix is highly unfavorable because Void Assault completely disrupts your combat flow. The moment you swing The Darkin Blade, his stealth forces you to lose target lock and allows him to effortlessly reposition outside your sweetspots. Since you often clear alone, he easily triggers the isolation bonus of Taste Their Fear, bursting you down before you can heal with Deathbringer Stance.Kha'Zix build →See details
Kha'Zix
The interaction that decides it
Kha'Zix uses Void Assault stealth to drop target lock and reposition away from your Q sweetspots.
Why
Invading or dueling Kha'Zix is highly unfavorable because Void Assault completely disrupts your combat flow. The moment you swing The Darkin Blade, his stealth forces you to lose target lock and allows him to effortlessly reposition outside your sweetspots. Since you often clear alone, he easily triggers the isolation bonus of Taste Their Fear, bursting you down before you can heal with Deathbringer Stance.
Lane impact
This constant threat of isolation heavily restricts your pathing and jungle clearing. You cannot safely contest neutral camps without knowing his position, as Leap allows him to jump you over walls. When fighting in the river, his Void Spike slow forces you to burn Umbral Dash defensively, meaning you lose the pressure needed to contest objectives and are forced to play reactively near your lanes.
How to play
To survive his burst, always fight while standing directly inside your jungle camps to prevent Taste Their Fear from dealing isolated damage. Retain Infernal Chains and do not commit your full combo until he either uses Leap or emerges from his Void Assault stealth. If he jumps you unexpectedly, activate World Ender immediately to gain the movement speed required to retreat toward your teammates rather than fighting an uphill battle.
Early pressureDuelingXin Zhao dominates early skirmishes because his Crescent Guard completely nullifies the damage of your first two The Darkin Blade swings if you try to space him from outside his defensive arena. While you want to keep him at a distance with your sweetspots, his Audacious Charge allows him to force his way inside your deadzone, triggering Three Talon Strike to knock you up before your third strike can land.Xin Zhao build →See details
Xin Zhao
The interaction that decides it
Xin Zhao's Crescent Guard blocks the damage of your first two The Darkin Blade casts if you are outside his arena.
Why
Xin Zhao dominates early skirmishes because his Crescent Guard completely nullifies the damage of your first two The Darkin Blade swings if you try to space him from outside his defensive arena. While you want to keep him at a distance with your sweetspots, his Audacious Charge allows him to force his way inside your deadzone, triggering Three Talon Strike to knock you up before your third strike can land.
Lane impact
This interaction makes early jungle duels around the river highly dangerous for you. If Xin Zhao catches you in the river, his Wind Becomes Lightning slows you down, enabling an easy engage where you cannot trade back effectively. You are forced to cede early Crab control and play defensively, as a single death to his aggressive invades translates into him snowballing the entire map through relentless ganks.
How to play
To survive his invades, you must alter your spacing. When he activates Crescent Guard, do not waste your first two The Darkin Blade casts from afar. Instead, wait for his Audacious Charge, then immediately cast Infernal Chains to tether him. Use Umbral Dash repositioning to either slide inside his ultimate circle to land your sweetspots, or dash backward to stall out his defensive zone before fighting back with World Ender activated.
These matchups are above all duels of execution: both champions have credible ways to gain the upper hand. Dodging one key ability, anticipating an engage correctly, or a single positioning mistake can be enough to tip the duel one way or the other. Knowing the matchup and recognizing the right windows to act are especially important here.
SkirmishesMechanicsThis jungle duel hinges entirely on how you sequence your crowd control against his high mobility. While your Infernal Chains should theoretically set up devastating sweetspots for The Darkin Blade, Ekko can consistently negate this by using Phase Dive to blink out of the impact zone before the pull triggers. This interaction forces a constant dance around his dash cooldown, turning every skirmish into a test of timing.Ekko build →See details
Ekko
The interaction that decides it
Ekko uses Phase Dive to blink out of your Infernal Chains zone before the pull triggers.
Why
This jungle duel hinges entirely on how you sequence your crowd control against his high mobility. While your Infernal Chains should theoretically set up devastating sweetspots for The Darkin Blade, Ekko can consistently negate this by using Phase Dive to blink out of the impact zone before the pull triggers. This interaction forces a constant dance around his dash cooldown, turning every skirmish into a test of timing.
Lane impact
Because Ekko can easily escape your primary displacement, direct 1v1 duels in the river often stall out. You cannot reliably burst him before he retreats or resets with Chronobreak. This stalemate means secure priority around neutral objectives is hard to force alone, as his safety allows him to poke with Timewinder and threaten steals with Phase Dive without fearing an immediate, fatal lockdown from your combo.
How to play
Never lead your ganks or skirmishes with Infernal Chains. Instead, initiate with the first strikes of The Darkin Blade, using Umbral Dash to adjust your sweetspots and force Ekko to panic-cast Phase Dive defensively. Once his blink is on cooldown, immediately throw Infernal Chains to lock him down. If he successfully triggers Z-Drive Resonance and runs, back off; wait for your cooldowns to cycle before re-engaging his slippery kit.
Zone controlEarly pressureBefore reaching level five, Shyvana is exceptionally vulnerable because she lacks any innate mobility or escape tools. During this early window, you can abuse her predictable pathing to land your entire "The Darkin Blade" combo without threat of retaliation. She cannot dodge the sweetspots easily when caught by "Infernal Chains". However, once she unlocks "Dragon's Descent", the dynamic shifts dramatically as her massive stat scaling and unstoppable leap neutralize your combo potential.Shyvana build →See details
Shyvana
The interaction that decides it
Aatrox can easily land full The Darkin Blade combos on Shyvana before she unlocks Dragon's Descent at level 5.
Why
Before reaching level five, Shyvana is exceptionally vulnerable because she lacks any innate mobility or escape tools. During this early window, you can abuse her predictable pathing to land your entire "The Darkin Blade" combo without threat of retaliation. She cannot dodge the sweetspots easily when caught by "Infernal Chains". However, once she unlocks "Dragon's Descent", the dynamic shifts dramatically as her massive stat scaling and unstoppable leap neutralize your combo potential.
Lane impact
This disparity shapes a tense race against the clock in the jungle. Your early clearing speed must be optimized to invade her camps or force skirmishes before she secures her ultimate. If you fail to disrupt her early farm, her rapid stacking of "Fury of the Dragonborn" allows her to outscale your mid-game utility. A successful early duel delays her transformation, giving your lanes breathing room before her dragon form pressure begins.
How to play
Actively track her starting camp and plan an aggressive path to confront her at the scuttle crab or her second buff. When fighting, lead with "Infernal Chains" to force her "Burnout" movement speed, then use "Umbral Dash" to adjust your "The Darkin Blade" sweetspots. If she reaches level five and initiates with "Dragon's Descent", do not panic-cast "World Ender" immediately; wait out her initial burst before activating your form to turn the fight with sustained healing.
SkirmishesMechanicsThis jungle duel hinges entirely on kinetic spacing and ultimate timing. While Aatrox wants to chain The Darkin Blade sweetspots to trigger Deathbringer Stance and passive healing, Viego possesses the perfect tool to disrupt this rhythm. By casting Heartbreaker, Viego can leap over your crucial third knockup, entirely dodging the damage while closing the gap to shred you with Blade of the Ruined King strikes.Viego build →See details
Viego
The interaction that decides it
Viego can use Heartbreaker to dodge a crucial Q sweetspot while closing the distance to burst you down.
Why
This jungle duel hinges entirely on kinetic spacing and ultimate timing. While Aatrox wants to chain The Darkin Blade sweetspots to trigger Deathbringer Stance and passive healing, Viego possesses the perfect tool to disrupt this rhythm. By casting Heartbreaker, Viego can leap over your crucial third knockup, entirely dodging the damage while closing the gap to shred you with Blade of the Ruined King strikes.
Lane impact
Skirmishes around objectives or during early river skirmishes turn into intense psychological warfare. Missing a sweetspot because Viego slipped through with Harrowed Path or Spectral Maw strips away your Umbral Dash physical vamp. This failure to sustain allows Viego to quickly execute you, triggering Sovereign's Domination to turn the ensuing teamfight around and seize complete control of the neutral objectives.
How to play
To win this clash, never cast your final The Darkin Blade preemptively. Hold it until Viego commits Spectral Maw or attempts to dodge with Heartbreaker. If he charges his stun, use Umbral Dash laterally to evade. When caught in his Harrowed Path, drop Infernal Chains to force him to burn his movement. If you miss your primary Q sweetspots, immediately back off using the bonus movement speed of World Ender instead of trading basic attacks.
Crowd controlTeamfightsThe jungle duel between Aatrox and Amumu is a delicate balance of engagement. While Aatrox relies on landing The Darkin Blade sweetspots and using the healing from Umbral Dash passive to sustain through fights, Amumu threatens to shut down this sustain completely. If Amumu catches Aatrox with Curse of the Sad Mummy, the resulting immobilization prevents Aatrox from basic attacking or casting, cutting off his crucial lifesteal mid-skirmish.Amumu build →See details
Amumu
The interaction that decides it
Amumu's Curse of the Sad Mummy can lock you down and prevent you from healing via Umbral Dash passive.
Why
The jungle duel between Aatrox and Amumu is a delicate balance of engagement. While Aatrox relies on landing The Darkin Blade sweetspots and using the healing from Umbral Dash passive to sustain through fights, Amumu threatens to shut down this sustain completely. If Amumu catches Aatrox with Curse of the Sad Mummy, the resulting immobilization prevents Aatrox from basic attacking or casting, cutting off his crucial lifesteal mid-skirmish.
Lane impact
In the jungle, this tension dictates how you contest objectives and scuttle crabs. When Amumu clears with Despair and Tantrum, you can bully him early, but his double-charge Bandage Toss makes any counter-jungling risky. If you get caught in the river without space, his team-wide lockup during Curse of the Sad Mummy turns even fights into disasters, leaving you unable to trigger Deathbringer Stance or reset World Ender.
How to play
To win this jungle matchup, you must track Amumu's ultimate and use Umbral Dash defensively to bait out his Bandage Toss. Never group too tightly with your teammates during river skirmishes; force Amumu to choose between locking you down or your backline. If he initiates with Curse of the Sad Mummy, immediately activate World Ender beforehand to absorb the burst with increased movement speed, then retaliate with The Darkin Blade once the crowd control ends.
These champions generally struggle to answer your main strengths, which lets you approach the matchup with more freedom. You often have several ways to pressure them and force trades that go in your favor. Use this advantage to dictate the pace rather than giving them time to get back into a comfortable position.
InterruptVisionThis matchup swings heavily in your favor because you hold a hard stop to Fiddlesticks' primary tool. Whenever the scarecrow begins to drain you with Bountiful Harvest, any of your sweetspot strikes from The Darkin Blade will immediately interrupt his channel. This completely denies his healing and massive damage, leaving him incredibly vulnerable as his key combat ability goes on a long cooldown.Fiddlesticks build →See details
Fiddlesticks
The interaction that decides it
The knockup from any of your The Darkin Blade casts immediately cancels Fiddlesticks' Bountiful Harvest channel.
Why
This matchup swings heavily in your favor because you hold a hard stop to Fiddlesticks' primary tool. Whenever the scarecrow begins to drain you with Bountiful Harvest, any of your sweetspot strikes from The Darkin Blade will immediately interrupt his channel. This completely denies his healing and massive damage, leaving him incredibly vulnerable as his key combat ability goes on a long cooldown.
Lane impact
In the jungle, this interaction turns Fiddlesticks' camps into a dangerous zone for him. You can aggressively invade his territory, knowing that if you catch him clearing with Bountiful Harvest, a quick knockup secures an easy kill. He cannot contest scuttle crabs or neutral objectives directly because your threat of interrupting his drain forces him to play defensively, ruining his early clearing tempo and map pressure.
How to play
Do not throw away The Darkin Blade blindly. When you engage, lead with Infernal Chains to slow him and pull him back, then wait for him to panic and activate Bountiful Harvest. The second his draining channel animation starts, unleash your first or second The Darkin Blade sweetspot, using Umbral Dash if needed to adjust your range. If he attempts to escape using Terrify, immediately pop World Ender to close the distance and run him down with your increased movement speed.
Edge: Wild Rift Core canonical verdict (−3 to +3), shown from the point of view of the champion named in the row. Win rate and pick rate: the opponent's own rate in this role — Wild Rift CN · Challenger, Patch 7.3c. Not a head-to-head win rate.
Edge: Wild Rift Core canonical verdict (−3 to +3), shown from the point of view of the champion named in the row. Win rate and pick rate: the opponent's own rate in this role — Wild Rift CN · Challenger, Patch 7.3c. Not a head-to-head win rate.
How to counter this champion
Counter angle
Countering Aatrox is not just about picking a theoretically favorable champion. The real plan against him is to break his reading of the fight, remove the tempo of his cycles and force him to engage on targets he will never reach cleanly. The profiles that bother him most are not simply the ones with higher damage, but the ones that control distance, change the angle of the fight or reduce the value of his sustain without overexposing themselves. That is why he can feel unplayable in some matchups even when his numbers remain acceptable: his kit depends more than it seems on the fight staying stable.
Patch context
His counters are especially relevant in this patch because many current drafts have easy access to either kiting, anti-heal or clean fight resets. Even when Aatrox remains statistically playable, he suffers more from collective discipline than other bruisers who can stick to targets more reliably. The picks that trouble him do not always win through pure burst, but through denying him profitable combat. The more the patch rewards clean entries and fast defensive responses, the more these counters gain value against him.
Quick read
Do not try to burst him randomly; first force him to lose the tempo of his initial cycle.
Always keep a mobility or spacing answer for his Q3 or his ultimate entry.
Anti-heal gains much more value if you can also break the continuity of the fight.
Counter archetypes
Clean 1v1 duelists
These profiles punish Aatrox because they do not give him a clean, front-facing fight to read. They can either dodge his strongest moments or force exchanges where every timing error costs him immediately. They push him into precision on angle, spacing and commitment timing, which greatly reduces his comfort both in lane and later in side lane.
How the champion adapts. He should shorten his trading ambition, play more around the wave and accept buying time instead of forcing the duel at any cost.
Ranged carries that kite without overcommitting
They do not need to beat Aatrox in one explosive trade. Their strength comes from constantly shifting combat distance and making every entry more expensive. Even when Aatrox finds an angle, they can often delay the moment he actually reaches a rewarding target. That breaks his identity as a constant threat and forces him to overplay his timings.
How the champion adapts. He must play with more patience, look for side angles and depend more on allied setup than on personal initiative.
Fighters that break duel rhythm
These champions reduce Aatrox's value because they do not stay in a simple front-facing sequence. They can change the tempo of the trade, exit a sweet spot or force Aatrox to use spells before he has a truly fixed target. The result is the same: Aatrox does not get the continuous fight he needs.
How the champion adapts. He should avoid long trades without cooldown advantage, play around the wave and wait for the opponent to spend mobility before committing.
Fiora matters a lot into Aatrox because she almost never gives him a comfortable exchange when she reads his timings correctly. The matchup is not only about damage, but about how she can threaten his sequence and force hesitation. As soon as Aatrox hesitates on his entry, he loses a large part of his natural pressure.
Vayne is the classic example of a counter that never gives Aatrox the fight he wants. She can kite back, reposition, punish any overly linear entry and get immediate value from anti-heal. Even if Aatrox looks threatening visually, she often forces him into a structurally bad fight.
Common mistakes against him
Common mistakes against him
Respecting him too late, only after he has already started his cycle.
Using mobility or dash too early instead of saving it for the moment that truly matters.
Buying anti-heal but still giving him long, readable fights.
Focusing him frontally without first breaking his entry angle.
Letting an objective fight happen in a corridor where he controls all the space.
Coach notes
The real counter to Aatrox is not reduced healing alone; it is reduced healing plus a fight he cannot stabilize.
If he gets to play out his sequence, you are fighting Aatrox. If he has to guess, you are already fighting much better.
FAQ
Who counters Aatrox in Wild Rift?
The best counters are mainly profiles that break his tempo rather than champions looking for a simple damage race. Clean duelists, some ranged picks with disciplined kiting and fighters able to change trade rhythm all cause him regular problems. The common thread is not raw numbers, but the ability to deny him a profitable sequence.
Is anti-heal enough to beat Aatrox?
No, not by itself. Anti-heal reduces his margin, but it does not replace proper fight management. If you buy healing reduction and still stand in his zone during a long exchange, Aatrox can still create a lot of value. Anti-heal becomes truly powerful when combined with spacing, kiting or the ability to break his entry.
Why does Aatrox sometimes feel impossible to kill?
Because he becomes extremely rewarding when you give him exactly the type of fight he wants: a readable entry, a nearby target and several seconds to repeat his cycles. In that context his sustain looks overwhelming. But that feeling often comes more from poor enemy response quality than from a structural impossibility to kill him.
Should you play aggressively or patiently against Aatrox?
The right answer is often a mix of both. You should be aggressive on his missed windows, but patient during the seconds where he is trying to force you into his rhythm. Trying to burst him too early can actually help him. The best plan is often to break his first sequence and punish once he no longer has the same angle.