September 2026 · Patch 7.2d
Bruiser · TOP · JUNGLE

Panduan counter Aatrox Wild Rift

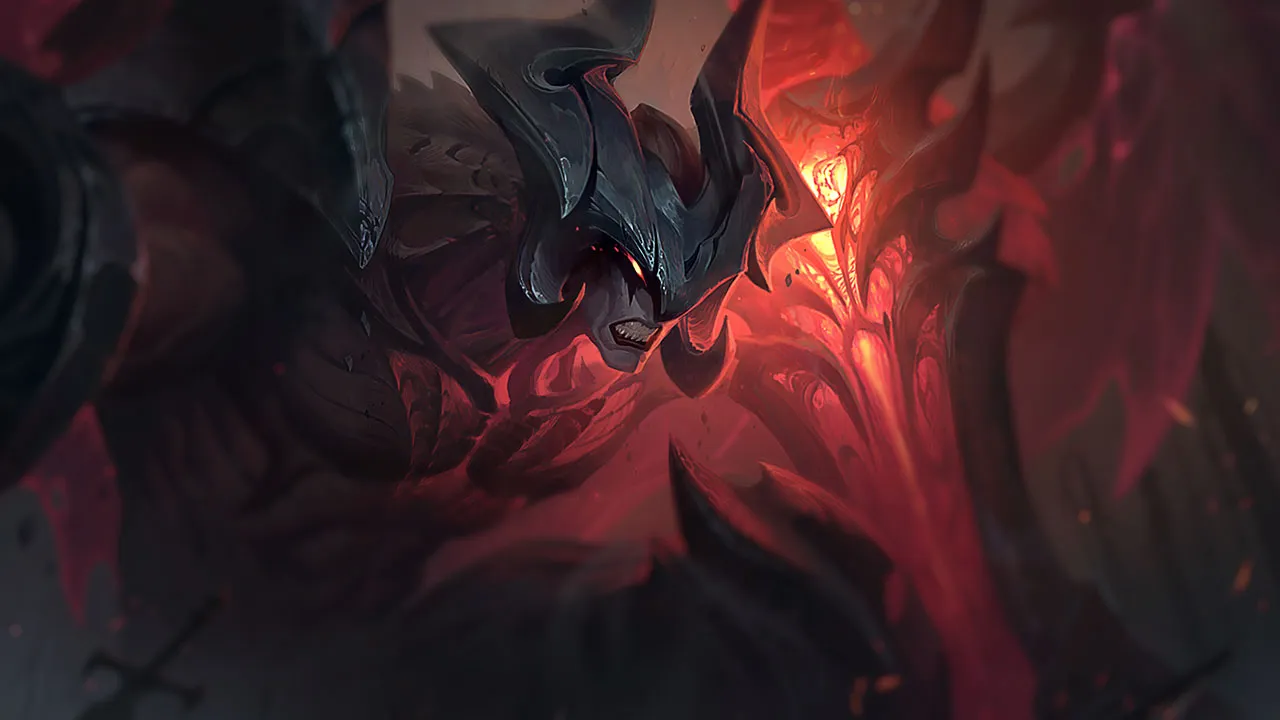
Aatrox, seorang Baron Lane bruiser, sangat bergantung pada pertarungan panjang untuk memanfaatkan self-healing dan damage area miliknya. Komposisi yang berfokus pada burst, kite terus-menerus, atau crowd control berulang sangat membatasi kehadirannya. Jika dia tidak bisa menahan musuh di dalam zona skill-nya, efektivitasnya akan turun drastis.

★ TOP · JUNGLE Tier S+
DMG
UTIL
TANK
DIFF
Win 50.0% #56 · ↑8pt
Pick 6.1% #8
Ban 6.9% #33

Panduan counter Aatrox Wild Rift ★ Counter Sheet

Papan matchup
Matchup Vonis Keunggulan Win rate Pick rate
Irelia Hard Counters +2 52.1% 2.0%
Vayne Hard Counters +2 52.0% 2.0%
Fiora Hard Counters +2 47.8% 5.0%
Kalista Hard Counters +2
Wukong Tidak Menguntungkan +1 52.5% 2.1%
Gwen Tidak Menguntungkan +1 52.3% 3.3%
Olaf Tidak Menguntungkan +1 52.3% 1.2%
Yone Tidak Menguntungkan +1 51.7% 6.8%
Jax Tidak Menguntungkan +1 51.7% 3.7%
Smolder Tidak Menguntungkan +1 51.5% 1.6%
Ambessa Tidak Menguntungkan +1 50.1% 1.9%
Poppy Tidak Menguntungkan +1 49.8% 2.3%
Kennen Tidak Menguntungkan +1 48.8% 1.3%
Jayce Tidak Menguntungkan +1 47.5% 2.6%
Yasuo Tidak Menguntungkan +1 47.1% 2.9%
Akali Tidak Menguntungkan +1
Heimerdinger Tidak Menguntungkan +1
Warwick Tidak Menguntungkan +1
Volibear Skill Matchups ±0 50.8% 6.8%
Mordekaiser Skill Matchups ±0 50.5% 12.5%
Gnar Skill Matchups ±0 50.4% 3.5%
Camille Skill Matchups ±0 50.0% 3.4%
Darius Skill Matchups ±0 49.9% 15.7%
Riven Skill Matchups ±0 49.7% 1.2%
Renekton Skill Matchups ±0 49.0% 4.2%
K'Santé Skill Matchups ±0 48.8% 6.0%
Tryndamere Skill Matchups ±0 47.9% 2.0%
Aurora Skill Matchups ±0
Gragas Skill Matchups ±0
Rengar Skill Matchups ±0
Ryze Skill Matchups ±0
Singed Menguntungkan −1 53.4% 1.5%
Malphite Menguntungkan −1 52.2% 5.5%
Shen Menguntungkan −1 51.9% 1.5%
Teemo Menguntungkan −1 51.2% 3.2%
Ornn Menguntungkan −1 50.8% 1.9%
Garen Menguntungkan −1 50.4% 14.9%
Urgot Menguntungkan −1 50.1% 3.8%
Sett Menguntungkan −1 50.0% 11.2%
Dr. Mundo Menguntungkan −1 49.3% 5.8%
Nasus Menguntungkan −1 49.1% 5.9%
Rumble Menguntungkan −1 48.4% 2.2%
Skarner Menguntungkan −1 47.9% 1.4%
Vladimir Menguntungkan −1 45.5% 1.2%
Maokai Menguntungkan −1
Pantheon Menguntungkan −1
Swain Menguntungkan −1
Cho'Gath Menguntungkan −2 50.7% 12.6%
Kayle Menguntungkan −2 50.3% 1.8%
Sion Menguntungkan −2 49.4% 4.1%
Nautilus Menguntungkan −2

Edge: Wild Rift Core canonical verdict (−3 to +3), shown from the point of view of the champion named in the row. Win rate and pick rate: the opponent's own rate in this role — Wild Rift CN · Challenger, Patch 7.2d. Not a head-to-head win rate.

Hard Counters

4

Champion ini punya build dan gaya bermain yang langsung mengungguli milikmu, sehingga mengontrol lane dan farming jadi sangat sulit. Kemampuan mereka bisa menetralkan kekuatan utamamu atau menghukummu begitu kamu mencoba menjalankan rencana permainan biasa. Di matchup seperti ini, tujuannya biasanya adalah meminimalkan kesalahan dan mencari cara menang di luar konfrontasi langsung.

Irelia

Irelia+2

hard countermobilitywave management Irelia completely neutralizes your threat profile by using the minion wave as a launchpad. Whenever she targets low-health minions with Bladesurge, she gains instant mobility to slip right behind you. This makes landing the sweetspots of The Darkin Blade virtually impossible. Simultaneously, these rapid resets quickly fully stack her Ionian Fervor, allowing her to shred you with enhanced auto-attacks before you can even complete your combo. Lihat detail
Irelia

Kenapa

Irelia completely neutralizes your threat profile by using the minion wave as a launchpad. Whenever she targets low-health minions with Bladesurge, she gains instant mobility to slip right behind you. This makes landing the sweetspots of The Darkin Blade virtually impossible. Simultaneously, these rapid resets quickly fully stack her Ionian Fervor, allowing her to shred you with enhanced auto-attacks before you can even complete your combo.

Dampak di lane

Because of this threat, you can never safely contest the wave when your own minions are low. If you step up to farm, Irelia will initiate a devastating trade, forcing you back to your turret with a massive health deficit. This constant pressure ruins your recall timings, forces you to give up priority, and can lead to a massive gold gap if she freezes the lane near her tower.

Cara bermain

To survive, keep the minion wave on your side of the lane and only use The Darkin Blade when she is locked in her Defiant Dance or when there are no low-health friendly minions for her to jump to. Hold Umbral Dash defensively to disengage immediately if she lands Flawless Duet. If she freezes the lane, walk away and let the wave bounce instead of forcing unsafe trades.

Profil lengkap →
Fiora

Fiora+2

hard counterparrymobility Fiora's kit directly neutralizes your main damage source. The biggest threat is her Riposte, which she can easily reactively cast during your highly telegraphed third strike of The Darkin Blade. Because of this, she doesn't just block your knockup; she stuns you in return. Coupled with her Lunge to easily dodge your sweetspots and pop Duelist's Dance vitals, she dictates the pace of every trade. Lihat detail
Fiora

Kenapa

Fiora's kit directly neutralizes your main damage source. The biggest threat is her Riposte, which she can easily reactively cast during your highly telegraphed third strike of The Darkin Blade. Because of this, she doesn't just block your knockup; she stuns you in return. Coupled with her Lunge to easily dodge your sweetspots and pop Duelist's Dance vitals, she dictates the pace of every trade.

Dampak di lane

This interaction forces you into a highly defensive posture right from level one. You cannot safely contest the wave or crash it without risking a massive counter-engage. Every time Fiora freezes the wave or threatens you under tower, you are forced to give up gold. If you waste your knockups, she will run you down with Bladework and Grand Challenge, leaving you zero room to help your jungler.

Cara bermain

To survive, you must bait out Riposte without committing to the final strike of The Darkin Blade. Cast your first two Qs, then use Umbral Dash laterally to reposition and delay your third strike, or simply let it expire. Keep Fiora at bay with Infernal Chains only when her Lunge is on cooldown. If she exposes a vital facing her, hug the terrain to deny her Duelist's Dance procs and prevent her from triggering the healing zone of Grand Challenge.

Profil lengkap →

Matchup lainnya

Tidak Menguntungkan

14

Champion ini punya tool yang umumnya memberi mereka keunggulan dalam pertarungan, tanpa membuat matchup-nya benar-benar mustahil. Mereka mungkin punya jarak lebih jauh, lebih tahan terhadap seranganmu, atau lebih banyak cara merespons engage-mu. Kamu perlu menyesuaikan pendekatan dan memilih dengan cermat kapan menerima pertarungan.

Jax

Jax+1

scalingmobilitycooldown punish Jax's Leap Strike directly counters your spacing. By jumping inside the sweetspots of your first two casts of The Darkin Blade, he forces a close-quarters brawl where you cannot land your knockups. In this range, Jax can activate Counter Strike to completely dodge your passive, Deathbringer Stance, denying your burst and healing, while easily stacking up Relentless Assault on your face. Lihat detail
Jax

Kenapa

Jax's Leap Strike directly counters your spacing. By jumping inside the sweetspots of your first two casts of The Darkin Blade, he forces a close-quarters brawl where you cannot land your knockups. In this range, Jax can activate Counter Strike to completely dodge your passive, Deathbringer Stance, denying your burst and healing, while easily stacking up Relentless Assault on your face.

Dampak di lane

This interaction makes wave control incredibly stressful. If you throw out The Darkin Blade to poke or clear, Jax will instantly Leap Strike onto you, turning your cooldown into his engage window. You are forced to cede lane priority and farm near your turret. As Jax gains levels, his Grandmaster-at-Arms passive magic damage outscales your sustain, making any extended trading pattern lethal for you.

Cara bermain

To survive, you must play around Jax's cooldowns. Never initiate trades with The Darkin Blade; instead, bait his Leap Strike. When he jumps, immediately cast Infernal Chains at your feet and use Umbral Dash backwards to disengage. This prevents him from landing the stun of Counter Strike. Once his defensive spin ends, you have a brief ten-second window to punish him with your full combo and Deathbringer Stance before his jump is back.

Profil lengkap →
Gwen

Gwen+1

immune zonescalingmobility Gwen's Hallowed Mist completely neutralizes your ranged threat, allowing her to ignore the pull of Infernal Chains and the outer sweetspots of The Darkin Blade. While untargetable inside her zone, she freely charges her Snip Snip! stacks on minions. This creates an uphill battle where your key poke and crowd control are negated from a distance, allowing her scaling advantage to grow safely. Lihat detail
Gwen

Kenapa

Gwen's Hallowed Mist completely neutralizes your ranged threat, allowing her to ignore the pull of Infernal Chains and the outer sweetspots of The Darkin Blade. While untargetable inside her zone, she freely charges her Snip Snip! stacks on minions. This creates an uphill battle where your key poke and crowd control are negated from a distance, allowing her scaling advantage to grow safely.

Dampak di lane

You cannot easily freeze the wave or force heavy trades. If you attempt to poke, Gwen uses Skip 'n Slash to adjust her position or deploys her mist to farm safely. Over time, her passive A Thousand Cuts makes prolonged trades near your tower incredibly risky. If she catches you with Needlework while your Umbral Dash is on cooldown, she can easily run you down and force an early recall.

Cara bermain

To survive this matchup, never initiate with Infernal Chains while her mist is active. Instead, bait her Hallowed Mist by walking forward as if to strike with The Darkin Blade, then immediately back off. Once her protective zone vanishes, you have a brief window to fight. Save Umbral Dash exclusively to escape her Snip Snip! center-true damage or to dodge the slows from Needlework when she triggers her ultimate.

Profil lengkap →
Yasuo

Yasuo+1

mobilityprojectile blockspacing This matchup is highly challenging because Yasuo possesses the perfect tools to dismantle your combo. While his Sweeping Blade allows him to constantly dash through minions to easily dodge the sweetspots of your The Darkin Blade, his Wind Wall represents the ultimate counter-interaction. By placing his barrier, he completely deletes your Infernal Chains mid-air, stripping away your only reliable setup to drag him back and guarantee heavy damage. Lihat detail
Yasuo

Kenapa

This matchup is highly challenging because Yasuo possesses the perfect tools to dismantle your combo. While his Sweeping Blade allows him to constantly dash through minions to easily dodge the sweetspots of your The Darkin Blade, his Wind Wall represents the ultimate counter-interaction. By placing his barrier, he completely deletes your Infernal Chains mid-air, stripping away your only reliable setup to drag him back and guarantee heavy damage.

Dampak di lane

Because you cannot lock him down, pushing the wave is extremely dangerous. An extended lane gives Yasuo endless targets for Sweeping Blade, allowing him to stack Steel Tempest safely, pop your Deathbringer Stance shield with his passive Way of the Wanderer, and setup an easy Last Breath. If you lose control of the wave state, you will find yourself constantly zoned, unable to trade without being outmaneuvered under his wind barrier.

Cara bermain

To survive and win trades, keep the minion wave frozen just outside your turret range, denying him space to dash. Pop his Way of the Wanderer shield with a quick basic attack or the edge of The Darkin Blade before committing. Never throw your Infernal Chains while his Wind Wall is available; instead, bait it out by walking up. If he initiates with Sweeping Blade, use your Umbral Dash backward to reposition your sweetspots and safely disengage.

Profil lengkap →
Yone

Yone+1

mobilityspacingscaling gap This matchup hinges on Yone's ability to completely neutralize your primary damage tool. When he activates Soul Unbound, the massive movement speed bonus allows him to effortlessly sidestep the sweetspots of your The Darkin Blade. Furthermore, this extra mobility lets him walk straight out of your Infernal Chains before the pull triggers, leaving you vulnerable to his Mortal Steel strikes without any way to retaliate effectively. Lihat detail
Yone

Kenapa

This matchup hinges on Yone's ability to completely neutralize your primary damage tool. When he activates Soul Unbound, the massive movement speed bonus allows him to effortlessly sidestep the sweetspots of your The Darkin Blade. Furthermore, this extra mobility lets him walk straight out of your Infernal Chains before the pull triggers, leaving you vulnerable to his Mortal Steel strikes without any way to retaliate effectively.

Dampak di lane

Because Yone can dodge your sweetspots so easily, you lose the ability to pressure the minion wave safely. He can freely stack Mortal Steel to threaten his third-cast tornado, forcing you to retreat. If you attempt to fight back, his Spirit Cleave shield absorbs your un-empowered swings. This forces you into a defensive posture under your turret, bleed gold, and lose priority during crucial early skirmishes.

Cara bermain

To survive, you must play around the cooldown of Soul Unbound. Never initiate trades with your full combo while he has this tool ready. Instead, bait his spirit form out and use Umbral Dash backwards to minimize damage, or time your Infernal Chains to hit his physical body right as he is forced to snap back. Once he returns to his anchor, you have a twenty-second window to unleash World Ender and aggressively punish his lack of escape.

Profil lengkap →
Jayce

Jayce+1

pokedisengagespacing Jayce dictates this matchup by abusing his range advantage. He constantly pokes you down from afar, and any attempt to retaliate is instantly shut down. The moment you try to close the distance using your Umbral Dash to land The Darkin Blade, Jayce simply switches forms and uses Thundering Blow to knock you back, completely resetting the fight and leaving you vulnerable to his ranged follow-up. Lihat detail
Jayce

Kenapa

Jayce dictates this matchup by abusing his range advantage. He constantly pokes you down from afar, and any attempt to retaliate is instantly shut down. The moment you try to close the distance using your Umbral Dash to land The Darkin Blade, Jayce simply switches forms and uses Thundering Blow to knock you back, completely resetting the fight and leaving you vulnerable to his ranged follow-up.

Dampak di lane

This knockback interaction forces you into a defensive posture, making it extremely difficult to contest the wave early on. You are constantly shoved under your turret, losing priority and bleeding health trying to farm. Because you cannot reliably land Infernal Chains without being pushed away, your trade potential is non-existent, which translates into zero pressure on his tower and allows Jayce to freely roam.

Cara bermain

To survive, you must bait out Thundering Blow before committing. Position yourself safely near the brush to drop minion aggro and farm primarily with the tip of The Darkin Blade. Never use Umbral Dash forward unless he has already wasted his knockback in hammer form. If he jumps on you with To the Skies!, use Infernal Chains to pull him in after he tries to disengage, allowing you to activate World Ender and turn the trade.

Profil lengkap →
Ambessa

Ambessa+1

mobilityspacingdodge This matchup is dictated by how easily Ambessa negates your main damage source. Her Drakehound's Step gives her a short dash after every cast, allowing her to effortlessly slip out of your The Darkin Blade sweetspots. Whenever you attempt to set up a trade with your first two Q-casts, she can reactively trigger Cunning Sweep or Lacerate to reposition, dodging your knockups while simultaneously priming her own empowered strikes. Lihat detail
Ambessa

Kenapa

This matchup is dictated by how easily Ambessa negates your main damage source. Her Drakehound's Step gives her a short dash after every cast, allowing her to effortlessly slip out of your The Darkin Blade sweetspots. Whenever you attempt to set up a trade with your first two Q-casts, she can reactively trigger Cunning Sweep or Lacerate to reposition, dodging your knockups while simultaneously priming her own empowered strikes.

Dampak di lane

Consequently, you cannot easily contest the wave. Missing a single sweetspot allows Ambessa to aggressively dash forward, using Repudiation to absorb your retaliation and block the pull from Infernal Chains. This constant threat of counter-engagement forces you to farm defensively near your turret, as dropping into her kill range makes you an easy target for her Public Execution dive.

Cara bermain

To survive, adopt a bait-and-punish playstyle. Never initiate trades with your first Q-cast; instead, use Deathbringer Stance to secure minions and sustain. Hold Infernal Chains until she has exhausted her Drakehound's Step dashes. If she initiates with Cunning Sweep, use Umbral Dash laterally to escape her path. Only activate World Ender when her Repudiation shield is on cooldown, allowing you to chain your full combo without your control effects being blocked.

Profil lengkap →
Poppy

Poppy+1

dash blockpeelspacing This matchup hinges entirely on how Poppy uses her Steadfast Presence. Every time you attempt to reposition The Darkin Blade mid-cast using Umbral Dash, her active barrier will shut you down, grounding you and dealing damage. Because your primary damage and healing rely on hitting those precise outer edges, her basic ability effectively deactivates your main trading tool, turning your aggressive dashes into self-inflicted stuns. Lihat detail
Poppy

Kenapa

This matchup hinges entirely on how Poppy uses her Steadfast Presence. Every time you attempt to reposition The Darkin Blade mid-cast using Umbral Dash, her active barrier will shut you down, grounding you and dealing damage. Because your primary damage and healing rely on hitting those precise outer edges, her basic ability effectively deactivates your main trading tool, turning your aggressive dashes into self-inflicted stuns.

Dampak di lane

Laning becomes a tense waiting game where you cannot initiate trades. If you mindlessly throw out The Darkin Blade, Poppy can easily step inside your dead zones, knowing you cannot use Umbral Dash to adjust. This restricts your wave control, as pushing too deep exposes you to being pinned against walls. You are forced to farm defensively, sacrificing early lane priority and pressure.

Cara bermain

To survive, you must bait out Steadfast Presence without using your dash. Cast the first two strikes of The Darkin Blade raw, or fish for a pull with Infernal Chains. Only activate Umbral Dash once her golden aura fades. If she holds her barrier, rely on your passive Deathbringer Stance for short, safe pokes. When you activate World Ender, use the raw movement speed to run her down instead of dashing directly into her defense.

Profil lengkap →
Olaf

Olaf+1

cc immunityall insustain Olaf completely shuts down your combo flow because Ragnarok grants him total crowd control immunity. This means the knockups on your sweetspots from The Darkin Blade and the displacement pull from Infernal Chains are completely useless. Without these tools to keep him at bay and land your sweetspots, Olaf simply runs you down, out-healing your Deathbringer Stance through his own Vicious Strikes. Lihat detail
Olaf

Kenapa

Olaf completely shuts down your combo flow because Ragnarok grants him total crowd control immunity. This means the knockups on your sweetspots from The Darkin Blade and the displacement pull from Infernal Chains are completely useless. Without these tools to keep him at bay and land your sweetspots, Olaf simply runs you down, out-healing your Deathbringer Stance through his own Vicious Strikes.

Dampak di lane

Before level five, you can poke him, but missing a single The Darkin Blade allows him to land Undertow and chase you down with Reckless Swing. Once Olaf gets his ultimate, trading becomes extremely risky. He will freeze the wave or force slow pushes, knowing that if you step up too far, he can activate Ragnarok to ignore your defensive tools and run you under your own tower.

Cara bermain

To survive, you must hold Umbral Dash specifically to escape over walls or back to your turret when he activates Ragnarok. Never engage with your full combo if his ultimate is ready; instead, bait his Undertow and wait for him to waste mana. If Olaf activates his ultimate and dives you, use World Ender immediately for the bonus movement speed to kite him backwards, refusing to trade auto-attacks until his CC immunity expires.

Profil lengkap →

Matchup lainnya

Skill Matchups

13

Matchup ini terutama soal duel eksekusi: kedua champion punya cara nyata untuk unggul. Satu skill penting yang di-dodge, engage yang diantisipasi dengan tepat, atau satu kesalahan positioning saja bisa menentukan siapa yang menang. Memahami matchup dan mengenali momen yang tepat untuk bertindak sangat penting di sini.

Volibear

Volibear±0

sustainspacingall in This matchup is a constant battle of recovery where your Deathbringer Stance and Umbral Dash passive compete directly against Volibear's Frenzied Maul healing. The entire lane hinges on distance. If you fail to space the sweetspots of The Darkin Blade, the bear will activate Thundering Smash to close the gap, stun you, and easily mark you for a devastating second bite. Lihat detail
Volibear

Kenapa

This matchup is a constant battle of recovery where your Deathbringer Stance and Umbral Dash passive compete directly against Volibear's Frenzied Maul healing. The entire lane hinges on distance. If you fail to space the sweetspots of The Darkin Blade, the bear will activate Thundering Smash to close the gap, stun you, and easily mark you for a devastating second bite.

Dampak di lane

Because both of you possess immense sustain, short trades rarely stick unless someone gets zoned off the minions. Pushing Volibear under his turret can be dangerous because Stormbringer disables your tower during dives, but keeping the wave frozen near your side forces him to overextend. A single mistake in wave placement allows Volibear to drop Sky Splitter to shield himself while crashing the waves.

Cara bermain

Never initiate with Umbral Dash forward; instead, save this dash to disengage or reposition laterally when Volibear charges with Thundering Smash. Use Infernal Chains defensively to pull him back if he tries to run you down. If he successfully shields himself with Sky Splitter, back off immediately and wait for the shield to decay before resuming your The Darkin Blade chain. If you get chunked, play safely around your Deathbringer Stance cooldown to recover.

Profil lengkap →
Renekton

Renekton±0

mobilityburst tradespacing This matchup is a pure duel of mobility and spacing. Renekton wants to use the double dash of Slice and Dice to slip inside the sweetspots of your The Darkin Blade, avoiding your knockups while delivering his burst. However, if you can bait out his dashes, he becomes highly vulnerable. The moment Slice and Dice is on cooldown, your Infernal Chains becomes inescapable, allowing you to land your full combo. Lihat detail
Renekton

Kenapa

This matchup is a pure duel of mobility and spacing. Renekton wants to use the double dash of Slice and Dice to slip inside the sweetspots of your The Darkin Blade, avoiding your knockups while delivering his burst. However, if you can bait out his dashes, he becomes highly vulnerable. The moment Slice and Dice is on cooldown, your Infernal Chains becomes inescapable, allowing you to land your full combo.

Dampak di lane

Laning phase is a tense dance where wave state dictates trade opportunities. When Renekton has high Fury from Reign of Anger, he will look to crash waves and force short trades. You cannot contest the wave blindly when his dashes are up. Missed sweetspots mean he controls the lane priority, but pulling him back with Infernal Chains completely flips the pressure.

Cara bermain

To win, never start a trade by casting Infernal Chains. Instead, hold it until Renekton commits his first Slice and Dice forward. Use Umbral Dash to reposition your first two strikes of The Darkin Blade backward, keeping him at bay. If he uses his second dash to engage, immediately drop Infernal Chains on him; without mobility, he cannot escape the pull, guaranteeing your third sweetspot and a massive heal from Deathbringer Stance.

Profil lengkap →
Camille

Camille±0

mobilityinterruptspacing This high-mobility matchup hinges on your ability to shut down Camille's primary engagement tool. The lane's entire dynamic revolves around her Hookshot; as she launches herself off the wall, a perfectly timed knockup from The Darkin Blade sweetspot will interrupt her mid-air. Failing this timing allows her to trigger Adaptive Defenses and trade back with Precision Protocol. Lihat detail
Camille

Kenapa

This high-mobility matchup hinges on your ability to shut down Camille's primary engagement tool. The lane's entire dynamic revolves around her Hookshot; as she launches herself off the wall, a perfectly timed knockup from The Darkin Blade sweetspot will interrupt her mid-air. Failing this timing allows her to trigger Adaptive Defenses and trade back with Precision Protocol.

Dampak di lane

Successfully interrupting her Hookshot completely dictates the lane's pressure. It leaves Camille stranded in the wave without her main escape, allowing you to easily pull her back with Infernal Chains. Conversely, if she evades your critical strikes using The Hextech Ultimatum or safely pokes you down with Tactical Sweep, she will force you under turret.

Cara bermain

Maintain a healthy distance from walls to maximize your reaction time against her grapple. Always hold your second strike of The Darkin Blade and couple it with Umbral Dash to reposition your sweetspot right as she launches. If she whiffs her Hookshot or you successfully interrupt it, immediately activate World Ender to force an all-in while her mobility is down.

Profil lengkap →
Darius

Darius±0

spacingkitinghealing cut This lane is a knife-edge spacing duel. Darius relies on landing the outer edge of Decimate to heal and stack Hemorrhage alongside Crippling Strike. Aatrox keeps him at bay with The Darkin Blade. The entire matchup hinges on a single movement: Aatrox using Umbral Dash backwards to escape Darius's Decimate inner circle and prevent Hemorrhage stacks, turning a deadly trade into a favorable disengage. Lihat detail
Darius

Kenapa

This lane is a knife-edge spacing duel. Darius relies on landing the outer edge of Decimate to heal and stack Hemorrhage alongside Crippling Strike. Aatrox keeps him at bay with The Darkin Blade. The entire matchup hinges on a single movement: Aatrox using Umbral Dash backwards to escape Darius's Decimate inner circle and prevent Hemorrhage stacks, turning a deadly trade into a favorable disengage.

Dampak di lane

Missed dashes mean Darius pulls you with Apprehend, leading to a lethal Noxian Guillotine. When Aatrox successfully spaces the Decimate, he maintains wave control, allowing him to slow-push and harass with The Darkin Blade. However, failing a single trade forces an early recall, giving Darius free reign to freeze the lane, crash massive waves, and threaten tower dives.

Cara bermain

Never initiate trades with Umbral Dash; keep it strictly to react when Darius winds up Decimate. If he misses his pull, Apprehend, you have a solid window to pressure him with The Darkin Blade and Infernal Chains. Should Darius get too close, immediately activate Deathbringer Stance for the extra range and healing, then drop Infernal Chains to pull him back while retreating.

Profil lengkap →
Mordekaiser

Mordekaiser±0

all inshield bypassspacing This matchup is a pure duel of spacing where Mordekaiser tries to pull you in to trigger Darkness Rise and stat-check you with isolated Obliterate strikes. The entire dynamic hinges on Death's Grasp. If Mordekaiser misses this hook because you reactively dodge it using Umbral Dash, he loses the ability to force a close-quarters brawl, allowing you to safely poke him down from sweetspot range. Lihat detail
Mordekaiser

Kenapa

This matchup is a pure duel of spacing where Mordekaiser tries to pull you in to trigger Darkness Rise and stat-check you with isolated Obliterate strikes. The entire dynamic hinges on Death's Grasp. If Mordekaiser misses this hook because you reactively dodge it using Umbral Dash, he loses the ability to force a close-quarters brawl, allowing you to safely poke him down from sweetspot range.

Dampak di lane

Every wave is a tense dance of baiting. If you get pulled by Death's Grasp, Mordekaiser will easily stack Darkness Rise and block your retaliation using Indestructible. However, when you successfully dodge his pull, the lane pressure swings entirely. You can lock him in Infernal Chains and land full The Darkin Blade sequences, forcing him to play defensively under tower or burn his shield early.

Cara bermain

Never use Umbral Dash aggressively unless Mordekaiser has already wasted Death's Grasp. Keep your dash ready to slide sideways or backwards the moment you see his hand sweep. If he misses, immediately retaliate with The Darkin Blade sweetspots. If he activates Indestructible to absorb your damage, disengage using Infernal Chains and wait out his shield before using Deathbringer Stance to heal back any chip damage he managed to land.

Profil lengkap →
Riven

Riven±0

skill matchupmobilityspacing This matchup is a pure test of spacing and reaction times. Riven relies on the rapid dashes of Broken Wings and the shield from Valor to weave inside and outside of your The Darkin Blade sweetspots, neutralizing your main damage source. However, her high-mobility dance relies entirely on these short cooldowns; if she expends them and gets caught by Infernal Chains, she cannot escape the pull, leaving her completely exposed to a massive counter-offensive. Lihat detail
Riven

Kenapa

This matchup is a pure test of spacing and reaction times. Riven relies on the rapid dashes of Broken Wings and the shield from Valor to weave inside and outside of your The Darkin Blade sweetspots, neutralizing your main damage source. However, her high-mobility dance relies entirely on these short cooldowns; if she expends them and gets caught by Infernal Chains, she cannot escape the pull, leaving her completely exposed to a massive counter-offensive.

Dampak di lane

Every trade in this lane is explosive and swings momentum immediately. If Riven successfully baits your first two The Darkin Blade strikes, she will initiate short, punishing trades with Ki Burst and retreat before you can retaliate. Conversely, pulling her back with Infernal Chains locks her in place, allowing you to crash the wave, force her under turret, and establish a massive health lead that secures early lane priority.

Cara bermain

To win this duel, never cast Infernal Chains until you see Riven commit Valor or at least two hops of Broken Wings. Hold your Umbral Dash defensively to reposition your second and third The Darkin Blade strikes reactively rather than trying to predict her dashes. If she activates Blade of the Exile to all-in you, immediately trigger World Ender, use your enhanced movement speed to kite backward, and wait out her ultimate's duration before turning the fight.

Profil lengkap →
K'Santé

K'Santé±0

cc immunitydamage reductionall in The lane is a precise spacing duel centered on Aatrox's The Darkin Blade versus K'Santé's defensive mobility. While Aatrox wants to poke with his outer sweetspots, K'Santé can negate the critical knockup of the third The Darkin Blade strike using the crowd control immunity of Path Maker. By channeling this stance, K'Santé absorbs the damage and immediately dashes in to retaliate, turning Aatrox's main damage window into a dangerous counter-engage opportunity. Lihat detail
K'Santé

Kenapa

The lane is a precise spacing duel centered on Aatrox's The Darkin Blade versus K'Santé's defensive mobility. While Aatrox wants to poke with his outer sweetspots, K'Santé can negate the critical knockup of the third The Darkin Blade strike using the crowd control immunity of Path Maker. By channeling this stance, K'Santé absorbs the damage and immediately dashes in to retaliate, turning Aatrox's main damage window into a dangerous counter-engage opportunity.

Dampak di lane

This interaction shapes every trade near the minion waves. You cannot blindly shove because a mistimed The Darkin Blade allows K'Santé to lock you down near his tower. If he parries your third strike, he can pull you in with All Out over the walls. Trades are short and tense; missing your Infernal Chains means giving up priority, as K'Santé will use Footwork to dodge and force extended fights where his passive thrives.

Cara bermain

To win this, you must bait out Path Maker before committing your full combo. Use Umbral Dash laterally to reposition your first two strikes of The Darkin Blade and force him to react. If he begins channeling his defensive charge, delay your third strike or disengage. Keep your Deathbringer Stance ready for quick slap-and-run trades when he steps up to stack Ntofo Strikes. If he activates All Out, immediately respond with World Ender to match his raw stat boost and kite his melee range.

Profil lengkap →
Tryndamere

Tryndamere±0

kitingall insustain This matchup revolves around surviving Tryndamere's five-second invulnerability window. While Aatrox excels at mid-range spacing with *The Darkin Blade*, Tryndamere uses *Spinning Slash* to force close-quarters combat powered by *Battle Fury* critical strikes. The lane is an even contest of mobility where your ability to run down or escape him hinges entirely on matching *World Ender*'s speed against his ultimate. Lihat detail
Tryndamere

Kenapa

This matchup revolves around surviving Tryndamere's five-second invulnerability window. While Aatrox excels at mid-range spacing with *The Darkin Blade*, Tryndamere uses *Spinning Slash* to force close-quarters combat powered by *Battle Fury* critical strikes. The lane is an even contest of mobility where your ability to run down or escape him hinges entirely on matching *World Ender*'s speed against his ultimate.

Dampak di lane

Tryndamere's constant sustain from *Bloodlust* makes poking him out of lane highly inefficient, meaning slow-pushing waves is your primary goal. Once you crash a large wave, you must immediately seek roam timings across the map. Staying glued to the turret against his split-push eventually favors his scaling, so your impact is measured by how quickly you can influence mid-lane or objectives before he threatens your tower.

Cara bermain

When Tryndamere triggers *Undying Rage*, do not commit to finishing him. Instantly activate *World Ender* for the movement speed boost and use *Umbral Dash* backward to maintain distance. Combine this with *Infernal Chains* to pull him back if he tries to catch up with *Spinning Slash*. If he manages to slow you with *Mocking Shout*, turn to face him briefly to negate the slow, then resume kiting until his ultimate expires.

Profil lengkap →

Matchup lainnya

Menguntungkan

20

Champion ini biasanya kesulitan merespons kekuatan utamamu, sehingga kamu bisa menghadapi pertarungan dengan lebih leluasa. Kamu sering punya banyak cara untuk menekan mereka dan memaksa trade yang menguntungkan. Manfaatkan keunggulan ini untuk mendikte tempo, bukan memberi mereka waktu untuk kembali nyaman.

Garen

Garen−1

spacingshort tradessustain This matchup favors you because you can completely shut down Garen's trade pattern. Whenever he activates Decisive Strike to charge at you, you can space the sweetspots of your The Darkin Blade to knock him back and cancel his advance. Because Garen lacks a dash, he must run directly at you, making him an easy target for your Infernal Chains. This constant harassment prevents his Perseverance from ever activating. Lihat detail
Garen

Kenapa

This matchup favors you because you can completely shut down Garen's trade pattern. Whenever he activates Decisive Strike to charge at you, you can space the sweetspots of your The Darkin Blade to knock him back and cancel his advance. Because Garen lacks a dash, he must run directly at you, making him an easy target for your Infernal Chains. This constant harassment prevents his Perseverance from ever activating.

Dampak di lane

You dictate the wave's tempo from level one. Garen is forced to use Judgment on the minion wave to keep up, which pushes the line toward you and leaves him defenseless. If he wastes Courage trying to mitigate your poke, you can immediately lock him down with Infernal Chains and force a heavy trade. You will consistently hold a health advantage, forcing him under tower or to take bad recalls.

Cara bermain

Always hold your Umbral Dash to reposition the first two strikes of The Darkin Blade precisely when Garen runs forward with Decisive Strike. Do not fully commit with your third strike if his Courage shield is active; wait out those brief seconds before unleashing your full combo. If you miss your sweetspots and get silenced, immediately walk back, then turn the fight around with World Ender once the silence expires to heal back up with Deathbringer Stance.

Profil lengkap →
Sett

Sett−1

spacingkitingdodge Aatrox dominates this matchup because he can completely negate Sett's primary defensive and offensive tool, *Haymaker*. When Sett builds up his Grit and unleashes his massive shield and true damage blast, Aatrox can instantly react with *Umbral Dash*. By sliding laterally out of the central sweetspot of *Haymaker*, you avoid the devastating true damage while continuing to land your own *The Darkin Blade* strikes from a safe range. Lihat detail
Sett

Kenapa

Aatrox dominates this matchup because he can completely negate Sett's primary defensive and offensive tool, *Haymaker*. When Sett builds up his Grit and unleashes his massive shield and true damage blast, Aatrox can instantly react with *Umbral Dash*. By sliding laterally out of the central sweetspot of *Haymaker*, you avoid the devastating true damage while continuing to land your own *The Darkin Blade* strikes from a safe range.

Dampak di lane

This interaction completely shifts the trading dynamic in your favor. Sett relies on *Facebreaker* to pull you in and guarantee a full Grit *Haymaker*. Because you can dodge his central blast, Sett's high-damage trades backfire, leaving him with a decaying shield and zero mobility. You can easily freeze the wave near your turret, forcing Sett to walk up into *Infernal Chains* where you can safely chip him down without fearing his *Pit Grit* health regeneration.

Cara bermain

To execute this flawlessly, never waste *Umbral Dash* offensively when Sett has his Grit bar nearly full. Keep your distance, poke him with the first two strikes of *The Darkin Blade*, and bait out his *Facebreaker*. The moment you see him charge up *Haymaker*, slide sideways with *Umbral Dash* to escape the center line. If he tries to lock you down with *The Show Stopper*, activate *World Ender* immediately to match his aggression with massive healing and extra attack damage.

Profil lengkap →
Malphite

Malphite−1

sustainpoketeamfight impact Malphite relies on chipping away your health with Seismic Shard, but his limited mana pool cannot compete with your endless recovery. The passive physical vamp from Umbral Dash allows you to heal back all of his magical damage simply by landing your strikes. Because Seismic Shard has a high cost and low base damage early on, Aatrox easily wins this war of attrition without needing to rely on fruit or recalls. Lihat detail
Malphite

Kenapa

Malphite relies on chipping away your health with Seismic Shard, but his limited mana pool cannot compete with your endless recovery. The passive physical vamp from Umbral Dash allows you to heal back all of his magical damage simply by landing your strikes. Because Seismic Shard has a high cost and low base damage early on, Aatrox easily wins this war of attrition without needing to rely on fruit or recalls.

Dampak di lane

This absolute sustain advantage translates into complete dominance over wave states. You can slow push massive waves into his turret because Malphite cannot step up to contest without taking devastating trades. While he struggles to last-hit under tower under pressure, you can freely bounce the wave or lock it near your side, forcing him to overextend or lose precious gold while his Granite Shield remains constantly broken.

Cara bermain

To execute this perfectly, pop his Granite Shield with a simple auto-attack or the tip of The Darkin Blade before committing to a full trade. Always save your Umbral Dash to reposition your Q sweetspots or to slide out of his slow zone after he hits you with Seismic Shard. Once he is low on mana, freeze the wave near your turret and zone him out. If he attempts to escape with Unstoppable Force or turn on you, activate World Ender to chase him down.

Profil lengkap →
Nasus

Nasus−1

early bullyscaling gapfreeze Your entire advantage stems from Nasus's reliance on static farming. To stack Siphoning Strike, Nasus must commit to predictable last-hit animations. Because The Darkin Blade has precise sweetspots, you can easily knock him up and chunk his health bar every time he steps up to a dying minion. This constant interruption completely neutralizes the passive sustain he gets from Soul Eater, keeping him permanently vulnerable under his own turret. Lihat detail
Nasus

Kenapa

Your entire advantage stems from Nasus's reliance on static farming. To stack Siphoning Strike, Nasus must commit to predictable last-hit animations. Because The Darkin Blade has precise sweetspots, you can easily knock him up and chunk his health bar every time he steps up to a dying minion. This constant interruption completely neutralizes the passive sustain he gets from Soul Eater, keeping him permanently vulnerable under his own turret.

Dampak di lane

By slow-pushing large minion waves directly into his tower, you force Nasus into a miserable defensive position. Instead of safely farming, he is subjected to constant poke under his turret, bleeding gold and Siphoning Strike stacks. This massive pressure prevents him from ever matching your map presence, allowing you to secure rift heralds or invade the enemy jungle while he remains glued to his lane trying to recover.

Cara bermain

Start by slow-building your minion waves. When Nasus prepares to strike a minion with Siphoning Strike, cast The Darkin Blade first strike to interrupt his timing. Save your Umbral Dash to adjust your sweetspot angle or to safely retreat if he retaliates with Wither. If he tries to escape your poke range, drag him back with Infernal Chains. Should he activate Fury of the Sands, simply disengage and wait out his transformation before re-engaging with World Ender.

Profil lengkap →
Teemo

Teemo−1

squishy targetpokeall in Teemo's main defensive tool, Blinding Dart, is completely useless against your primary damage source. Since Blinding Dart only neutralizes basic attacks, it cannot mitigate the heavy physical damage from the sweetspots of The Darkin Blade. If you catch the swift yordle with Infernal Chains, his lack of hard escape tools means he cannot avoid the subsequent pull and your full burst combo. Lihat detail
Teemo

Kenapa

Teemo's main defensive tool, Blinding Dart, is completely useless against your primary damage source. Since Blinding Dart only neutralizes basic attacks, it cannot mitigate the heavy physical damage from the sweetspots of The Darkin Blade. If you catch the swift yordle with Infernal Chains, his lack of hard escape tools means he cannot avoid the subsequent pull and your full burst combo.

Dampak di lane

Early on, Teemo will attempt to harass you with Toxic Shot while abusing Guerrilla Warfare in the brushes. However, because his blind fails to stop your spell damage, he cannot safely stand his ground to deny your farm. Once you have access to your full basic kit, the constant threat of your all-in completely strips away his ranged lane dominance, forcing him to play defensively under his turret.

Cara bermain

Let the wave push toward you slightly to create chasing space. Wait for Teemo to exhaust his Move Quick, then use Umbral Dash to adjust your first cast of The Darkin Blade and land the sweetspot, instantly following up with Infernal Chains. If he blinds you, ignore basic attacks entirely and focus solely on landing your remaining sweetspots. Activate World Ender to overpower his Noxious Trap slows and secure the kill.

Profil lengkap →
Ornn

Ornn−1

unstoppableinterruptsustain While Ornn can timed *Bellows Breath* to shrug off the knockups from *The Darkin Blade*, he cannot stop your relentless healing. Since *Bellows Breath* makes him unstoppable but doesn't reduce your incoming sustain, your passive *Deathbringer Stance* and the physical vamp from *Umbral Dash* will consistently repair any damage he inflicts. He simply lacks the DPS to outpace your constant health regeneration in a drawn-out duel. Lihat detail
Ornn

Kenapa

While Ornn can timed *Bellows Breath* to shrug off the knockups from *The Darkin Blade*, he cannot stop your relentless healing. Since *Bellows Breath* makes him unstoppable but doesn't reduce your incoming sustain, your passive *Deathbringer Stance* and the physical vamp from *Umbral Dash* will consistently repair any damage he inflicts. He simply lacks the DPS to outpace your constant health regeneration in a drawn-out duel.

Dampak di lane

You dictate the wave's positioning because Ornn cannot safely contest your sustain without burning major mana. Whenever he misses *Volcanic Rupture* or wastes *Searing Charge* into a wall, a massive window opens. You can drag him into long trades using *Infernal Chains*, forcing him under his turret with low health. This denies him the safety needed to utilize *Living Forge*, rendering his passive crafting advantage useless in lane.

Cara bermain

To secure this advantage, do not commit all three strikes of *The Darkin Blade* immediately if his *Bellows Breath* is available. Instead, bait his fire breath with your first strike, then reposition laterally with *Umbral Dash* to avoid the Brittle application. Once his fire stops, pull him back with *Infernal Chains* and unleash your full combo. If he attempts to escape using *Searing Charge*, interrupt his dash trajectory with your remaining sweetspots to seal the kill.

Profil lengkap →
Pantheon

Pantheon−1

shield bypassspacingburst trade This lane leans heavily in your favor because Pantheon's primary defensive tool, Aegis Assault, is completely bypassed by your mobility. When he raises his shield to block your damage, a quick Umbral Dash combined with The Darkin Blade allows you to reposition your sweetspots directly behind him. Since his directional shield only blocks frontal damage, you can easily shred through his health bar while he is locked in his defensive animation. Lihat detail
Pantheon

Kenapa

This lane leans heavily in your favor because Pantheon's primary defensive tool, Aegis Assault, is completely bypassed by your mobility. When he raises his shield to block your damage, a quick Umbral Dash combined with The Darkin Blade allows you to reposition your sweetspots directly behind him. Since his directional shield only blocks frontal damage, you can easily shred through his health bar while he is locked in his defensive animation.

Dampak di lane

In practice, this dynamic cripples Pantheon's aggressive trading. If he engages with Shield Vault, he places himself in perfect range for your Infernal Chains pull. Knowing you can bypass his shield prevents him from zoning you. You will easily secure wave control, forcing him to choose between losing gold under tower or attempting a desperate Grand Starfall roam that costs him plates.

Cara bermain

Never waste Umbral Dash proactively; always save it to counter his Aegis Assault. When Pantheon initiates with Shield Vault, immediately chain The Darkin Blade strikes, and use your dash to slide behind his shield the moment he raises it. Keep Deathbringer Stance ready to offset his Comet Spear poke. If you miss your repositioning, activate World Ender to sustain through his burst and run him down as his cooldowns expire.

Profil lengkap →
Vladimir

Vladimir−1

sustainpool dodgeearly bully Aatrox dominates this matchup because his relentless healing from Deathbringer Stance and Umbral Dash outpaces Vladimir's Transfusion over prolonged trades. While Vladimir can dissolve into Sanguine Pool to escape the pull of your Infernal Chains, doing so burns his only defensive tool. Because Sanguine Pool's cooldown is nearly double that of your own abilities, he is left completely defenseless against your next two rotations of The Darkin Blade. Lihat detail
Vladimir

Kenapa

Aatrox dominates this matchup because his relentless healing from Deathbringer Stance and Umbral Dash outpaces Vladimir's Transfusion over prolonged trades. While Vladimir can dissolve into Sanguine Pool to escape the pull of your Infernal Chains, doing so burns his only defensive tool. Because Sanguine Pool's cooldown is nearly double that of your own abilities, he is left completely defenseless against your next two rotations of The Darkin Blade.

Dampak di lane

This dynamic turns the lane into a constant zone of threat. You can easily control the wave minion flow because Vladimir cannot contest your push without risking an engage. Every time you force him to pool, he must retreat to his tower, giving up gold and experience. This pressure forces him into defensive Hemoplague usage just to survive, stripping away his mid-game teamfight threat before he can scale.

Cara bermain

Start trades by angling the first strike of The Darkin Blade to force him sideways, then throw Infernal Chains directly at him. The moment he sinks into Sanguine Pool, immediately stop attacking and hold your remaining Q strikes. Once he resurfaces, use Umbral Dash forward to land the final sweetspots. If he plays too safely after pooling, freeze the minions near your turret to starve him of Transfusion targets.

Profil lengkap →
Dr. Mundo

Dr. Mundo−1

cc shieldsustaineasy lane Dr. Mundo relies on Goes Where He Pleases to shrug off crowd control, but your The Darkin Blade gives you multiple chances to break it. Landing a first-strike sweetspot instantly pops his canister at little cost to you. Without his passive shield, Dr. Mundo cannot escape the pull of Infernal Chains, leaving him completely exposed to your full combo and the heavy passive healing of Umbral Dash. Lihat detail
Dr. Mundo

Kenapa

Dr. Mundo relies on Goes Where He Pleases to shrug off crowd control, but your The Darkin Blade gives you multiple chances to break it. Landing a first-strike sweetspot instantly pops his canister at little cost to you. Without his passive shield, Dr. Mundo cannot escape the pull of Infernal Chains, leaving him completely exposed to your full combo and the heavy passive healing of Umbral Dash.

Dampak di lane

You dictate the pace of every trade because Dr. Mundo must play defensively behind his minions, relying on Infected Bonesaw to secure last hits. By constantly threatening him with The Darkin Blade, you force him to sacrifice health just to farm. His attempts to trade back with Heart Zapper or Blunt Force Trauma fail to match your sustain, allowing you to establish a permanent freeze or dive him under tower once his HP drops.

Cara bermain

Start trades by landing the edge of The Darkin Blade to pop Goes Where He Pleases, then immediately use Umbral Dash to step on his dropped canister before he can heal. Only cast Infernal Chains after his passive bar is greyed out, guaranteeing the pull. If he activates Maximum Dosage, disengage with your movement speed from World Ender and wait out his ultimate's duration before re-engaging with Deathbringer Stance to finish him off.

Profil lengkap →
Sion

Sion−2

easy lanespacinginterrupt Aatrox dominates this matchup because Sion's primary tool for waveclear and damage, Decimating Smash, requires him to stand still and channel. Any of your three The Darkin Blade sweetspot knockups instantly cancels his charge, putting it on a full cooldown and leaving him completely vulnerable. Since Sion has low mobility outside his ultimate, he cannot easily dodge your sweetspots while preparing his own attack. Lihat detail
Sion

Kenapa

Aatrox dominates this matchup because Sion's primary tool for waveclear and damage, Decimating Smash, requires him to stand still and channel. Any of your three The Darkin Blade sweetspot knockups instantly cancels his charge, putting it on a full cooldown and leaving him completely vulnerable. Since Sion has low mobility outside his ultimate, he cannot easily dodge your sweetspots while preparing his own attack.

Dampak di lane

This interaction completely strips Sion of his lane priority. Every time he tries to charge Decimating Smash to clear the wave or trade, you can step up and interrupt him. This denies his wave control, forcing him to farm under tower where you can harass him with The Darkin Blade and Infernal Chains. He cannot easily pop his Soul Furnace shield for damage because you can break it or pull him out of range.

Cara bermain

When Sion starts charging Decimating Smash, do not panic or run away. Instead, walk forward or use Umbral Dash to position your The Darkin Blade sweetspot directly on him to cancel his channel. If he tries to escape or slow you with Roar of the Slayer, use Infernal Chains to pull him back. Save your World Ender for when he attempts to flee with Unstoppable Onslaught or to match his raw health scaling in extended fights, ensuring you always keep a sweetspot ready.

Profil lengkap →

Matchup lainnya

Items to Counter Aatrox

Buy these items to reduce this champion's effectiveness in your games.

Mortal Reminder
Mortal Reminder
Morellonomicon
Morellonomicon
Plated Steelcaps
Plated Steelcaps
Thornmail
Thornmail Renvoi + anti-heal quand il dive en R.
Quicksilver Enchant
Quicksilver Enchant

Cara counter champion ini

Sudut counter

Melawan Aatrox bukan hanya soal memilih champion yang secara teori menguntungkan. Rencana sebenarnya melawannya adalah menghancurkan cara dia membaca pertarungan, menghilangkan tempo siklusnya, dan memaksanya untuk menyerang target yang tidak akan pernah bisa dia jangkau dengan bersih. Profil yang paling mengganggunya bukanlah sekadar yang memiliki damage lebih tinggi, tetapi yang mengontrol jarak, mengubah sudut pertarungan, atau mengurangi nilai sustain-nya tanpa terlalu mengekspos diri. Itulah mengapa dia bisa terasa tidak bisa dimainkan dalam beberapa matchup bahkan ketika angkanya tetap dapat diterima: kit-nya lebih bergantung daripada yang terlihat pada pertarungan yang stabil.

Konteks Patch

Counter-nya sangat relevan di patch ini karena banyak draft saat ini memiliki akses mudah ke kiting, anti-heal, atau reset pertarungan yang bersih. Bahkan ketika Aatrox tetap dapat dimainkan secara statistik, dia lebih menderita akibat disiplin kolektif daripada bruiser lain yang dapat menempel pada target dengan lebih andal. Pilihan yang mengganggunya tidak selalu menang melalui burst murni, tetapi melalui penolakan pertarungan yang menguntungkan baginya. Semakin patch menghargai masuknya pertarungan yang bersih dan respons defensif yang cepat, semakin berharga counter ini melawannya.

Baca cepat

  • Jangan mencoba burst dia secara acak; pertama-tama paksa dia kehilangan tempo siklus awalnya.
  • Selalu siapkan jawaban mobilitas atau jarak untuk Q3-nya atau serangan ultimate-nya.
  • Anti-heal mendapatkan nilai lebih besar jika Anda juga dapat mengganggu kelangsungan pertarungan.

Arketipe counter

Duelist 1v1 yang bersih

Profil-profil ini menghukum Aatrox karena mereka tidak memberinya pertarungan bersih dan menghadap depan untuk dibaca. Mereka dapat menghindari momen terkuatnya atau memaksakan pertukaran di mana setiap kesalahan waktu langsung merugikannya. Mereka mendorongnya untuk presisi dalam sudut, jarak, dan waktu komitmen, yang sangat mengurangi kenyamanannya baik di lane maupun di side lane.

Bagaimana champion beradaptasi. Dia harus mempersingkat ambisi trading-nya, bermain lebih di sekitar wave, dan menerima membeli waktu daripada memaksakan duel dengan segala cara.

Carry jarak jauh yang melakukan kiting tanpa terlalu berkomitmen

Mereka tidak perlu mengalahkan Aatrox dalam satu trade eksplosif. Kekuatan mereka berasal dari terus-menerus mengubah jarak tempur dan membuat setiap masuk pertarungan menjadi lebih mahal. Bahkan ketika Aatrox menemukan sudut, mereka sering kali dapat menunda saat dia benar-benar mencapai target yang menguntungkan. Itu menghancurkan identitasnya sebagai ancaman konstan dan memaksanya untuk terlalu memainkan timing-nya.

Bagaimana champion beradaptasi. Dia harus bermain dengan lebih sabar, mencari sudut samping, dan lebih bergantung pada setup tim daripada inisiatif pribadi.

Fighter yang mengganggu ritme duel

Champion-champion ini mengurangi nilai Aatrox karena mereka tidak bertahan dalam urutan menghadap depan yang sederhana. Mereka dapat mengubah tempo trade, keluar dari posisi yang menguntungkan, atau memaksa Aatrox untuk menggunakan skill sebelum dia memiliki target yang benar-benar tetap. Hasilnya sama: Aatrox tidak mendapatkan pertarungan berkelanjutan yang dia butuhkan.

Bagaimana champion beradaptasi. Dia harus menghindari trade panjang tanpa keunggulan cooldown, bermain di sekitar wave, dan menunggu lawan menghabiskan mobilitas sebelum berkomitmen.

Prioritas matchup

Fiora

Fiora sangat berarti melawan Aatrox karena dia hampir tidak pernah memberinya pertukaran yang nyaman ketika dia membaca timing-nya dengan benar. Matchup ini bukan hanya soal damage, tetapi tentang bagaimana dia dapat mengancam urutan serangannya dan memaksakan keraguan. Segera setelah Aatrox ragu untuk masuk pertarungan, dia kehilangan sebagian besar tekanan alaminya.


Vayne

Vayne adalah contoh klasik dari counter yang tidak pernah memberikan pertarungan yang diinginkan Aatrox. Dia bisa kiting mundur, reposition, menghukum setiap masuk pertarungan yang terlalu linear, dan mendapatkan nilai instan dari anti-heal. Bahkan jika Aatrox terlihat mengancam secara visual, dia sering kali memaksanya ke dalam pertarungan yang secara struktural buruk.

Kesalahan umum melawannya

Kesalahan umum melawannya

  • Terlambat menghormatinya, hanya setelah dia memulai siklusnya.
  • Menggunakan mobilitas atau dash terlalu dini alih-alih menyimpannya untuk saat yang benar-benar penting.
  • Membeli anti-heal tetapi masih memberinya pertarungan yang panjang dan mudah dibaca.
  • Memfokuskan serangan padanya secara frontal tanpa terlebih dahulu menghancurkan sudut masuknya.
  • Membiarkan pertarungan objektif terjadi di koridor di mana dia mengontrol semua ruang.

Catatan Pelatih

  • Counter sejati untuk Aatrox bukanlah pengurangan heal semata; melainkan pengurangan heal ditambah pertarungan yang tidak bisa dia stabilkan.
  • Jika dia bisa memainkan urutannya, kamu melawan Aatrox. Jika dia harus menebak, kamu sudah bertarung jauh lebih baik.

FAQ

Siapa yang meng-counter Aatrox di Wild Rift?

Counter terbaik utamanya adalah profil yang mengganggu temponya daripada champion yang mencari adu damage sederhana. Duelist yang bersih, beberapa pick jarak jauh dengan kiting yang disiplin, dan fighter yang mampu mengubah ritme trade semuanya memberinya masalah rutin. Benang merahnya bukanlah angka mentah, tetapi kemampuan untuk menolak urutan yang menguntungkannya.

Apakah anti-heal cukup untuk mengalahkan Aatrox?

Tidak, tidak sendirian. Anti-heal mengurangi marginnya, tetapi tidak menggantikan manajemen pertarungan yang tepat. Jika kamu membeli pengurangan heal dan masih berdiri di zonanya selama pertukaran yang panjang, Aatrox masih bisa menciptakan banyak nilai. Anti-heal menjadi sangat kuat ketika dikombinasikan dengan spacing, kiting, atau kemampuan untuk memecah masuknya.

Mengapa Aatrox terkadang terasa mustahil untuk dibunuh?

Karena dia menjadi sangat menguntungkan ketika kamu memberinya jenis pertarungan yang dia inginkan: masuk yang bisa dibaca, target yang dekat, dan beberapa detik untuk mengulang siklusnya. Dalam konteks itu, sustain-nya terlihat luar biasa. Tetapi perasaan itu seringkali lebih datang dari kualitas respons musuh yang buruk daripada dari ketidakmungkinan struktural untuk membunuhnya.

Haruskah kamu bermain agresif atau sabar melawan Aatrox?

Jawaban yang tepat seringkali merupakan campuran keduanya. Kamu harus agresif pada jendela kesempatannya yang terlewat, tetapi sabar selama detik-detik di mana dia mencoba memaksamu ke dalam ritmenya. Mencoba burst dia terlalu dini sebenarnya bisa membantunya. Rencana terbaik seringkali adalah memecah urutan pertamanya dan menghukumnya begitu dia tidak lagi memiliki sudut yang sama.















































































