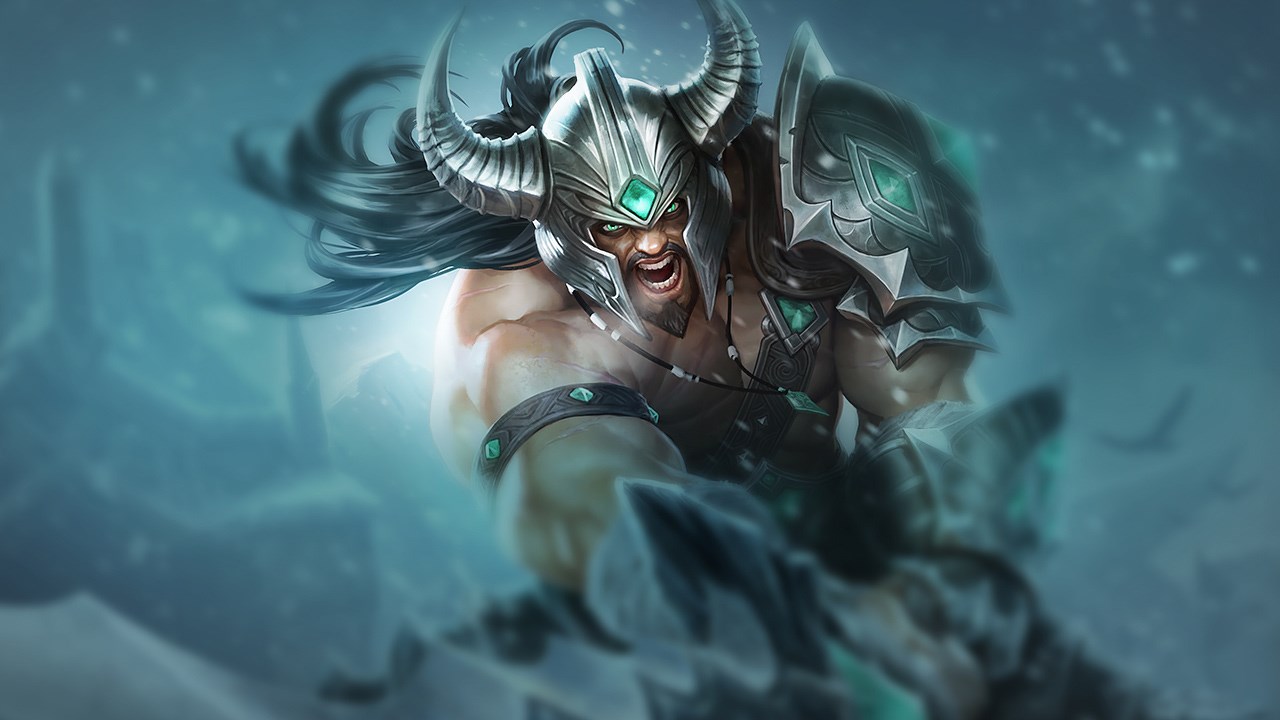
Tryndamere Counters
Why
Malphite breaks Tryndamere’s identity because he removes what makes your kit threatening: AD crit DPS. He naturally stacks armor, reduces attack speed, and forces extended fights… while never letting you actually punch through. Where you want to snowball duels and side lanes, he becomes a wall. The worst part is your all-in isn’t checkmate: even if you stick, you spend ult time hitting armor while he stalls, then he knocks you away or controls you as your R ends. This isn’t just hard in numbers; it’s hard in logic, because your kit struggles to create a reliable kill condition on him without a huge lead.
Lane impact
In lane you often play a frustrating game: you push, you trade, you don’t progress. Malphite can hold wave, poke, and deny profitable extended trades. From level 5, his ult can also break aggression plans: one overconfident entry becomes enemy engage or a gank setup. Even if you survive via R, you lose tempo and prio. Midgame, if you side lane, he can answer by simply not dying and keeping TP/roam for objectives. Your split then loses real advantage creation.
How to play
Positioning: treat lane as a patience matchup. Don’t look for constant duels; look for wave windows (slow push, crash) to reset, take vision, and avoid ganks. Key timing: your kill plan usually depends on a major item spike or a gank. Without it, play economy and don’t burn ult just to “test.” Decision-making: if Malphite neutralizes your 1v1, shift win condition to map: rotate early to Herald/river, force fights where you can reach a squishier backline, and use split only when you know he can’t simply hold you safely.
Why
Kennen creates Tryndamere’s worst scenario: you run, he backs off, and you eat poke while hunting for a window. Your kit revolves around autos and contact; Kennen denies contact through range, kiting, and stuns that punish every entry attempt. Even your ult doesn’t solve it: it buys time, but Kennen converts that time into control. Instead of a kill guarantee, R becomes a period where you try not to get chain-CC’d. Kennen doesn’t aim to out-duel you; he aims to deny you the game — structurally hard.
Lane impact
In lane you often lose prio: you want to farm, he chips you. Play too far up and you expose yourself to ganks because backing off under slow/stun isn’t always possible. At level 5, his ult turns extended trades into danger: you engage, he R’s, you either leave and lose the trade or stay and get controlled. Midgame, Kennen loves grouped objective fights while you prefer side lanes. He forces the game into his shape while you’re still trying to exist.
How to play
Positioning: keep wave closer to your tower and avoid pointless extensions. Every far CS can be expensive without river vision. Key timing: punish cooldowns. When his mobility/escape is down or he missed a stun window, you can threaten a real all-in. Otherwise, play economy. Decision-making: if lane is unplayable, aim to reach midgame with items and useful TP/roam. Use split to drag Kennen away from objectives, and avoid 5v5s where he has a perfect ult onto your team.
Why
Quinn makes lane toxic for Tryndamere because she controls you at range and has direct answers to your plan: if you approach, she knocks you back/blinds you and denies your DPS. You can have rage, you can have crit… but if you can’t hit, it doesn’t matter. Even when you survive, she converts advantage differently: push + roam. Where you want to split and scale, she steals tempo by creating map plays. This is hard by oppression: she denies your game while enforcing hers.
Lane impact
In lane you can lose a lot of CS if you refuse a defensive phase. One bad wave state becomes hell: you’re far from tower, she pokes, and you can’t take clean trades. At level 5, map pressure rises: Quinn rotates fast, so even with a stable lane you must manage information (pings/vision) to prevent your team collapsing. Midgame, she can keep breaking your side lane through kite and mobility, reducing split impact if you lack a real tower-taking plan.
How to play
Positioning: accept defensive early posture. Goal is preserving HP and avoiding being zoned into losing two waves in a row. Key timing: punish positioning mistakes and moments when her reposition/peel tool is down. Without that answer, Quinn becomes far more vulnerable to your all-in. Decision-making: versus Quinn, split must be objective-first. Push to take tower or force response, not to chase endless duels. If she roams, ping hard, shove wave, and take plates rather than following late.
Why
Jax presents a very concrete issue: a button that says “you don’t auto.” Since Tryndamere relies heavily on autos, Counter Strike is direct identity denial. You can have a huge crit; if you miss uptime during his E, you lose the trade and often tempo. On top of that, his dueling scaling and ability to hold side lane make your split plan less comfortable. You want to be the 1v1 king; Jax contests that throne early. So the difficulty comes from auto denial and the fact the duel rarely stays clean for you if you engage poorly.
Lane impact
In lane, every trade is a cooldown test. Engage while his E is up and you get stunned, lose a big chunk, and often must recall. At level 5, all-ins become more dangerous because Jax can stall your ult with stun + reposition, then finish as your R ends. Midgame, side laning without vision lets him force fights on his terms and deny your tower pressure space.
How to play
Positioning: treat his E as a forbidden zone. Your trade should be conditioned on E down or on an angle where you can back off without eating free stun. Key timing: bait his E. If you make him spend E on a small trade, the next window is much more playable — that’s where you can take a real exchange or all-in. Decision-making: if duel is too risky, play wave and tempo. Crash, reset, take vision, and split only when you know where jungler/mid are. The classic throw is forcing 1v1 without info and donating a kill that breaks your side plan.
Why
Pantheon is difficult because he combines early burst with reliable CC. Tryndamere can survive with ult, but Pantheon doesn’t need to kill you during R: he can force an early ult, stall you, then finish when invulnerability ends. It’s also a mental trap: you feel like you’re winning with sustain and rage, then you get stunned at the wrong time and lose the entire trade off one action. He also pressures the map: even without killing you, he can roam and create advantages elsewhere, stealing the time you need to scale in side lane.
Lane impact
In lane his trades are short and brutal: in, chunk, out. If you answer with an all-in without a real window, you end up chasing without converting. At level 5, punishment spikes: one good stun and you’re forced to ult just to live. Then you lose wave priority and give room to the enemy jungler. Midgame, Pantheon can stop dueling and play the map. If you sit in lane without punishing roams, your team can burn while you’re still farming.
How to play
Positioning: respect stun range. Don’t give free access when you lack wave control or vision — that’s where he turns trade into kill. Key timing: his cooldowns + your level 5. The goal is not being the one who ults first for no gain. If you must ult, convert it into wave reset or clean recall, not pointless chase. Decision-making: when Pantheon roams, punish immediately: shove and take plates, or rotate on a clear timing. The losing pattern is letting him impact the map while you play passive lane; you lose split win condition through global deficit.
Why
Fiora doesn’t need to burst you. She wins clean, extended, surgical duels: true damage vitals + parry on your timing. Tryndamere loves all-ins with stickiness; Fiora loves when you stick because she can dance and convert every second into advantage. Parry isn’t only about stunning you; it breaks your rhythm. All-in without plan and you can lose an exchange you thought was won simply because she neutralized a key moment. So it’s unfavorable by design: she’s built to beat champions who rely on prolonged duels.
Lane impact
In lane, once Fiora has levels, she punishes extended trades. You might win a small trade, but staying gives her vitals and sustain. At level 5, your ult doesn’t guarantee the kill: she can stall, kite, then return to finish. One mis-rotation costs a lot. Midgame, she forces you into side answers. Answer too much and you lose objective presence; answer poorly and she takes towers. This matchup demands macro read, not just mechanics.
How to play
Positioning: refuse the endless duel. Prefer short trades where you hit, back off, and keep HP high. Key timing: track her parry. If she spends it on a small exchange, the next window is more playable. If she holds it, your all-in stays riskier. Decision-making: versus Fiora, winning often comes from objective fights rather than stubborn 1v1. Push lane, make her show, then use that time to take Herald/dragon or create a 5v4 elsewhere.
Why
Darius turns your all-in into a trap: the longer you stay, the more he stacks, and the closer he gets to ult execute. Tryndamere wants to endure through sustain and ult; Darius wants you to remain inside his threat zone. What makes it nasty is pull: it breaks your reposition resets and drags you back when you wanted to leave. You can survive yet still lose all tempo. Not impossible, but naturally unfavorable because your extended-duel pattern feeds his kit.
Lane impact
In lane, one bad trade can cost you an entire wave: you get pulled, chunked, forced back, and he freezes. At level 5, think in execution timing: ult too late and you die; too early and you lose your tool and can’t contest wave. Midgame, if Darius is ahead, he punishes side lanes. You may be unable to split without donating a kill, ruining your side-pressure identity.
How to play
Positioning: strict spacing. Don’t give free pull access. Use wave and angles so you can retreat without getting grabbed. Key timing: play around pull and your item spikes. When pull is down, you can take a more solid exchange; when pull is up, trade short or not at all. Decision-making: if lane gets too volatile, shift to farm + rotate. Tryndamere can win by taking towers elsewhere; he doesn’t need to prove a 1v1 against a fed Darius.
Why
Renekton hits you at your weakest point: early game. He has short, brutal trades with stun and doesn’t need long chases to win. Tryndamere needs time to stabilize levels and items. He can also break you mentally: you expect to sustain, then he returns with fury, repeats a trade, and you end up under HP thresholds without ever getting a clean all-in window. Not an absolute hard counter like Malphite, but unfavorable as long as lane phase dictates tempo.
Lane impact
In lane he can deny wave and force you to farm back. If you get tilted and engage without rage/window, he stuns and punishes. At level 5, his ult gives even more margin to take trades and survive your all-in. He can force your ult without dying, then reset and return with prio. Midgame, if Renekton is ahead, he can match you side and win around 1-2 items, delaying your split plan until later.
How to play
Positioning: play the wave. Goal is not giving free mid-lane trades. The closer you can farm to tower, the better. Key timing: your item spikes. Before your first major spike, avoid coinflips. Once you can actually hold the duel, you can look for more credible all-ins. Decision-making: if you lose prio, don’t force. Accept reset, ping jungler when Renekton overextends, and look for tempo recovery through wave crash + Herald rotation.
Why
Riven makes the duel uncomfortable because she can choose trade length. If you want all-in, she can kite with shields and mobility; if you want short trade, she can burst and leave. She can also CC you right when you try to convert ult into a kill. Tryndamere likes simple fights: auto, sustain, ult, finish. Riven makes it non-linear with micro-windows and cancels, reducing your value even with stats. Not unplayable, but unfavorable if you don’t respect her cooldown timings.
Lane impact
In lane, if she dictates tempo, she can push you back and break your rage. Without rage, your trade threat drops. At level 5, she can sometimes play around your ult: burst, back off, then return to finish. That forces discipline on your R timing. Midgame, Riven loves flanks and picks. Side laning without vision lets her surprise you, force ult, then disappear. You lose tower pressure rights for a long window.
How to play
Positioning: avoid angles where she can chain CC near minions and river. The safer you play, the fewer free burst options she has. Key timing: track her cooldowns (mobility/shield). When she has everything, trade short or farm. After she spends tools, you can take longer, steadier exchanges. Decision-making: don’t chase everywhere. Look for windows where she has no exit, or play map: shove, take vision, force objective. Versus Riven, ego all-ins without info often get punished.
Why
Teemo is unfavorable because he stops you from doing the one thing you want: auto-attacking. Blind isn’t a small control — it cancels your DPS window, therefore cancels your all-in. He also forces a management lane: constant poke, poison, and mushrooms that punish rotations. Tryndamere loves fast side paths; Teemo puts mines on the road. Not always a hard stomp, but structurally annoying: you invest a lot to get little.
Lane impact
In lane, too much poke removes your aggression rights. Teemo can zone, cost CS, and force recalls. At level 5, shrooms change your timings: river chase becomes dangerous, and split without sweeper becomes an HP coinflip. Midgame, your side plan slows down: you must clear shrooms, lose time, and arrive late to objectives.
How to play
Positioning: accept a more defensive lane phase, and manage wave to limit poke exposure (near-tower freeze, controlled slow push). Key timing: invest in vision control. Sweeper/warding are not optional here — they’re required for your split to exist. Decision-making: don’t turn lane into a chase. If Teemo kites you, stop running. Take the wave, take the tower when possible, and rotate through safe paths. Your goal is reducing shroom value through discipline, not playing angry.
Why
Camille is a skill matchup because it’s all about precise timings: she has burst windows (Q2 true damage) and can force duels with ult, while you play endurance and surviving the critical moment. You often win on read: ult too early and she stalls then finishes; ult too late and her burst kills you. If you don’t anticipate entry, she takes clean trades you simply eat. Not doomed, but it requires strict discipline on cooldowns and wave state.
Lane impact
In lane, Camille can take short trades and exit. If you respond with all-in without rage/window, you chase and lose wave. At level 5, her ult creates a point of no return: you can’t just leave. That makes your R management even more important. Midgame is macro: she can side lane and threaten objectives. Split without vision and she can force a duel at a bad time, costing global tempo.
How to play
Positioning: don’t allow free trade range. If she wants to enter, make her do it on a wave that favors you or on an angle you can punish. Key timing: track Q2 and ult. If her major timing is down, you can play more aggressively. Otherwise, accept a slower rhythm and farm. Decision-making: don’t chase. Take the right windows: crash, reset, vision, then split with information. Versus Camille, side without vision often becomes a forced duel you didn’t choose.
Why
Irelia becomes a skill matchup because wave state decides almost everything. With many low HP minions, she gets dashes, sustain, and stickiness that can break your trade pattern. With a thin wave, she loses options and your duel becomes steadier. Tryndamere can win if you pick timings, but Irelia can flip fights with resets if you let her fight inside a wave. So it’s not “better kit”, it’s “who controls the duel environment.”
Lane impact
In lane, letting her play on a big wave enables outplays. Forcing fights without stepping stones makes her life harder. At level 5, all-ins can be explosive: she can force commits, you can stall with R. The difference is deciding when to stay versus when to exit. Midgame, she can threaten backline in fights while you’re a side champion. If she takes initiative, you might lose fights without ever splitting properly.
How to play
Positioning: play the wave before playing the champion. Thin low HP minions to limit dash chains, and avoid fighting inside big waves. Key timing: punish failed commits. If she dashes without clean resets or spends tools on wave, the next window is more favorable. Decision-making: don’t turn every exchange into a full duel. If wave state is bad, back off, reset, return on a healthier wave. Versus Irelia, wave discipline is a win multiplier.
Why
Garen is a skill matchup because he tests one precise thing: your ult timing and your read on his burst. His silence can break your plan if you wait too long, and his clean trades into regen resets make lane very stable. You can out-DPS him on windows, but you can also waste ult if you all-in during a trade where he never truly committed. This is a patience and wave-management matchup more than a pure ego duel.
Lane impact
In lane, he can cancel your aggression: silence, disengage, regen. If you don’t convert into wave/plates, it feels like hitting air. At level 5, he becomes far more punishing when you’re low HP: his execute forces proactive R, not reactive. Midgame, Garen is a solid side holder. He won’t always kill you, but he can waste your time — sometimes worse for Tryndamere.
How to play
Positioning: trade on windows after he used tools, and avoid silence situations that block your R. Key timing: track HP thresholds. Versus Garen, waiting for the last pixel is a common mistake. Play anticipation rather than reaction. Decision-making: if you can’t kill him, win differently: shove, take tower when he resets, and force objective fights. A Garen holding you side without dying bleeds your tempo; you must convert tempo into structures.
Why
Yasuo is often favorable for Tryndamere because the duel ultimately becomes about duration. Yasuo can outplay moments, but if you survive his early burst, your sustain and ult let you stay in the fight longer than he can. He also relies heavily on wave for dashes. When you control wave and don’t give him a minion carpet, his kiting becomes less stable and you can run him down. The key is denying the perfect entry; avoid the CC-into-burst scenario and the 1v1 gradually tilts your way.
Lane impact
In lane, you can punish overly ambitious trades, especially if he spends dashes to poke and ends up without an exit. At level 5, you can stall all-ins: if Yasuo commits and you time R well, he often lacks resources to finish. Midgame, Yasuo wants grouped setups; you can force him to answer side lanes and reduce his ability to find easy combos.
How to play
Positioning: play wave to limit his dashes. Fewer minions means more vulnerability to your chase. Key timing: respect his spike moments, then use ult proactively. The goal is surviving his window, not answering every auto. Decision-making: once ahead, convert into tower pressure. Yasuo hates defending side without creating 5v5s. Make him come to you, then take the other side of the map.
Why
Sion is generally favorable because his plan is slow and telegraphed, while yours is constant pressure. He’s tanky, but he struggles to force lethal trades if you manage his spells. Tryndamere chooses when to enter and exit. What makes it comfortable is you can hold him in side lane and convert into structures. Sion likes grouped engages; you can force him into repeated tower defense. You still must respect his CC, but overall you have more win condition options than he does.
Lane impact
In lane, you can farm and trade on your terms. If he misses a spell, you punish and back off without overexposing. At level 5, your ult lets you keep hitting through windows where he lacks burst to finish you, making the duel more stable. Midgame, split pressure is your best weapon: Sion can hold waves, but he loses tempo if he must defend constantly while your team plays objectives elsewhere.
How to play
Positioning: play around his spells. Don’t give free knock-up/slow angles that prevent disengage. Key timing: after he uses control tools, you can take longer trades and threaten tower. While tools are up, keep trades short. Decision-making: don’t get pulled into his 5v5 plan if split is already profitable. Push, take structure, force response, and use gained time for Herald/vision/rotation.
Why
Nasus is often favorable because Tryndamere punishes his main weakness: early levels. Nasus wants to stack, survive, then reach a point where he slows and beats you. You can force him into a poor lane early by pressuring wave and tower. Not an auto-win, but the window is clear: let him free farm and he becomes a problem; punish early and you delay him massively. The matchup often becomes “who sets the pace,” and Tryndamere is great at setting early side-lane pace.
Lane impact
In lane, you can take prio and deny comfortable stacks. Every contested CS delays his plan. At level 5, you can threaten dives/plates with jungle info and proper wave setup. Even without kills, early tower changes the map. Midgame, if Nasus was delayed, your split becomes dangerous: he must respond, but may lack stats to hold you without losing structures.
How to play
Positioning: play aggressive but smart. You want to punish him, not get ganked. So vision + wave management are non-negotiable. Key timing: early item spikes and wave crashes. On a good crash, take plates, reset, or set deep vision. Decision-making: once Nasus approaches comfort point, stop frontally dueling under slow. Use the map instead: split opposite an objective, force multiple responses, and create situations where his team pays for his slow scaling.