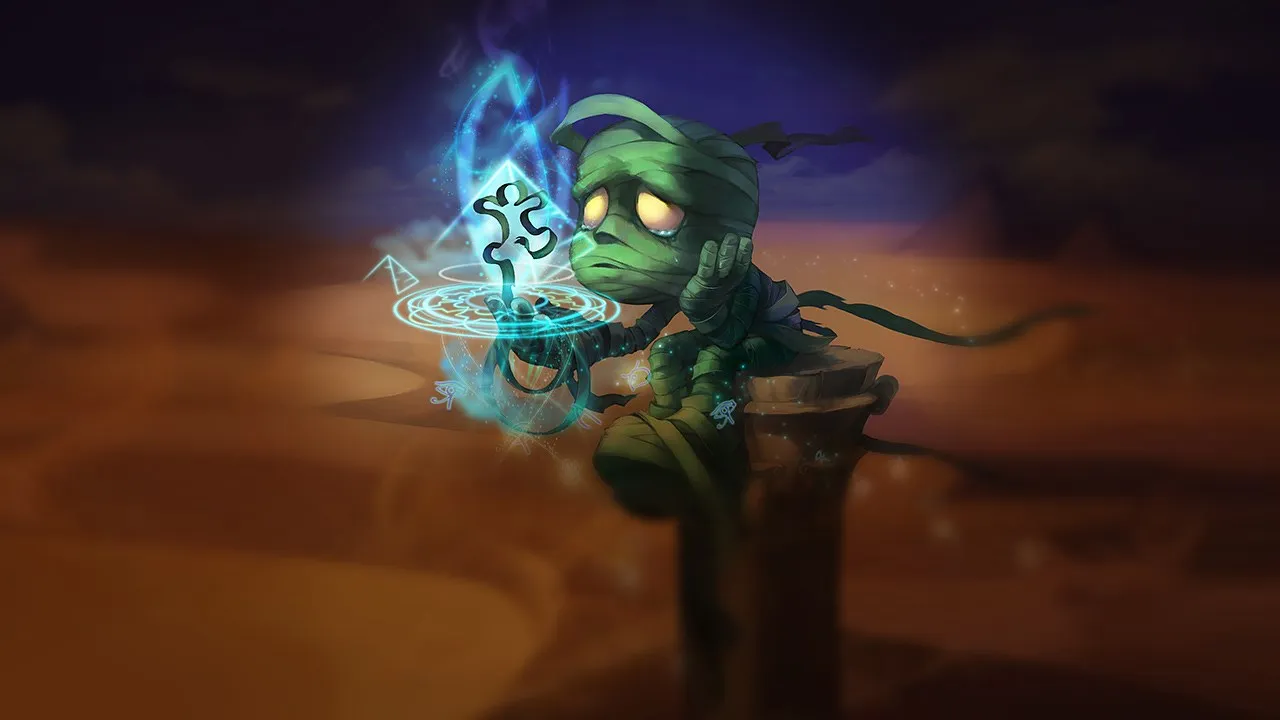
Amumu, um tank Jungler, depende muito de engage e controle de grupo em área. Composições com forte disengage, poke constante ou alta mobilidade podem reduzir sua eficácia. Se sua iniciação falhar, sua equipe frequentemente perde a vantagem na luta.
★ JUNGLETier S
DANO
UTIL
TANK
DIFF
Win55.4%#5 · ↓0pt
Pick2.7%#22
Ban0.1%#135
Guia de counters de Amumu Wild Rift
Hard Counters
4
Esses campeões têm uma build e um estilo de jogo que superam diretamente o seu, o que pode tornar o controle da lane e o farm extremamente difíceis. As habilidades deles podem neutralizar seus principais pontos fortes ou te punir assim que você tenta jogar do seu jeito de sempre. Nesses matchups, o objetivo costuma ser reduzir os erros e buscar soluções fora do confronto direto.
Imunidade a CCSobrevivênciaOlaf é seu pior pesadelo por causa de como a ultimate dele interage com seu kit. Todo o seu potencial de lockdown depende de acertar um Bandage Toss decisivo ou virar lutas com Curse of the Sad Mummy. Porém, no momento em que Olaf ativa Ragnarok, ele se torna completamente imune a todo CC, o que significa que ele consegue ignorar seus stuns instantaneamente e te caçar sem medo.Build de Olaf →Ver detalhes
Olaf
Por quê
Olaf é seu pior pesadelo por causa de como a ultimate dele interage com seu kit. Todo o seu potencial de lockdown depende de acertar um Bandage Toss decisivo ou virar lutas com Curse of the Sad Mummy. Porém, no momento em que Olaf ativa Ragnarok, ele se torna completamente imune a todo CC, o que significa que ele consegue ignorar seus stuns instantaneamente e te caçar sem medo.
Impacto na lane
Essa interação retira sua autonomia no início e no meio de jogo na jungle. Olaf vai invadir seus camps agressivamente, sabendo que você não consegue retaliar. Se ele te pegar, o Undertow dele reduz sua velocidade enquanto Vicious Strikes e Berserker Rage dão a ele sustain para superar qualquer dano do seu Despair e Tantrum, forçando você a ceder objetivos neutros completamente.
Como jogar
Para sobreviver, você precisa monitorar os movimentos dele constantemente e fazer seu pathing para longe dele. Nunca inicie uma luta contra Olaf com Bandage Toss a menos que você saiba que a ultimate dele está em cooldown. Em vez disso, guarde suas cargas de Bandage Toss para se agarrar em monstros da jungle através de paredes para escapar. Se ele ativar Ragnarok, recue imediatamente e use Tantrum para mitigar o dano físico dele enquanto espera a duração de imunidade dele passar.
TanquesEscaramuçasGwen é seu pior pesadelo no rio. Quando você tenta travá-la com Bandage Toss, ela ativa Hallowed Mist, ficando imune ao seu stun mesmo a distância. Assim que ela fecha a distância usando Skip 'n Slash, o Snip Snip! dela destrói sua vida alta, contornando sua defesa passiva de Tantrum. Sua aura chorosa de Despair simplesmente não consegue competir com o dano massivo em porcentagem de vida dela.Build de Gwen →Ver detalhes
Gwen
Por quê
Gwen é seu pior pesadelo no rio. Quando você tenta travá-la com Bandage Toss, ela ativa Hallowed Mist, ficando imune ao seu stun mesmo a distância. Assim que ela fecha a distância usando Skip 'n Slash, o Snip Snip! dela destrói sua vida alta, contornando sua defesa passiva de Tantrum. Sua aura chorosa de Despair simplesmente não consegue competir com o dano massivo em porcentagem de vida dela.
Impacto na lane
Esse matchup arruína completamente seu controle de jungle no início do jogo e as disputas por objetivos. Você não consegue garantir Scuttle Crabs ou dragões diretamente porque Gwen vai forçar skirmishes onde ela te destrói facilmente. Entrar no rio se torna um risco enorme, já que ela consegue desviar do seu Bandage Toss e fazer counter-jungle em você impunemente. Isso força você a ceder camps, atrasando o power spike do seu Curse of the Sad Mummy.
Como jogar
Para sobreviver, você precisa mudar como usa o Bandage Toss. Nunca o jogue do alcance máximo enquanto o Hallowed Mist dela estiver disponível; em vez disso, ande direto para dentro da zona de névoa dela antes de lançar seu stun, ou espere ela desperdiçar o Skip 'n Slash. Em teamfights, não inicie em Gwen. Guarde Curse of the Sad Mummy para quando ela avançar com dash para seu backline, prendendo-a dentro do seu Despair para que os aliados possam dar burst nela.
KiteLutas em equipeLillia prospera mantendo você à distância. A velocidade de movimento passiva do Blooming Blows dela dá a ela a agilidade para desviar do seu Bandage Toss sem esforço. Sem acertar esse skillshot, você não consegue ficar colado nela. Ela vai te kitar confortavelmente pela jungle, abusando do alcance dela para ativar Dream-Laden Bough e te desgastar enquanto fica completamente fora da sua aura de Despair.Build de Lillia →Ver detalhes
Lillia
Por quê
Lillia prospera mantendo você à distância. A velocidade de movimento passiva do Blooming Blows dela dá a ela a agilidade para desviar do seu Bandage Toss sem esforço. Sem acertar esse skillshot, você não consegue ficar colado nela. Ela vai te kitar confortavelmente pela jungle, abusando do alcance dela para ativar Dream-Laden Bough e te desgastar enquanto fica completamente fora da sua aura de Despair.
Impacto na lane
Esse matchup te deixa cedendo constantemente os Scuttle Crabs e as skirmishes iniciais. Lillia consegue invadir seus camps facilmente, usando Swirlseed para te escanear e reduzir sua velocidade. Se ela te pegar, Watch Out! Eep! causa dano mágico enquanto você luta para retaliar. Isso força você a um padrão defensivo de farm, roubando dos seus laners a pressão de gank no início do jogo porque você está constantemente com pouca vida ou presa defendendo seus próprios camps.
Como jogar
Pare de jogar Bandage Toss em áreas abertas onde a velocidade de Blooming Blows dela está totalmente acumulada. Em vez disso, guarde a habilidade até que ela se comprometa com a animação de Watch Out! Eep!, que a trava brevemente no lugar. Ao contestar objetivos, force lutas em gargalos estreitos da jungle onde ela não consegue desviar facilmente. Se ela ativar Lilting Lullaby em você, tente lançar Curse of the Sad Mummy preventivamente para travá-la antes que você durma.
Esses campeões têm ferramentas que geralmente dão a eles vantagem no confronto, sem tornar o matchup impossível de jogar. Eles podem ter mais alcance, mais capacidade de aguentar sua ofensiva ou mais formas de responder aos seus engajamentos. Você vai precisar adaptar sua abordagem e escolher com cuidado os momentos em que aceita a luta.
Pressão no inícioTanquesVolibear domina as skirmishes iniciais porque o Frenzied Maul dele fornece cura imensa e dano de mordida durante lutas prolongadas. Enquanto Amumu depende de dano mágico consistente de Despair e Tantrum para limpar e lutar, ele não tem o burst imediato para executar o urso. No momento em que Volibear te marca com a primeira mordida dele, as curas subsequentes dele superam completamente sua produção de dano no início do jogo, tornando duelos diretos no rio um suicídio matemático.Build de Volibear →Ver detalhes
Volibear
Por quê
Volibear domina as skirmishes iniciais porque o Frenzied Maul dele fornece cura imensa e dano de mordida durante lutas prolongadas. Enquanto Amumu depende de dano mágico consistente de Despair e Tantrum para limpar e lutar, ele não tem o burst imediato para executar o urso. No momento em que Volibear te marca com a primeira mordida dele, as curas subsequentes dele superam completamente sua produção de dano no início do jogo, tornando duelos diretos no rio um suicídio matemático.
Impacto na lane
A dinâmica desse matchup te força a ceder o controle dos Scuttle Crabs iniciais. Se Volibear te pegar no rio, o combo de Thundering Smash e Sky Splitter dele vai te travar e escudá-lo, levando à sua morte ou a um Flash forçado. Você não consegue contestar camps neutros diretamente, o que reduz seu ritmo de clear na jungle e atrasa seu acesso a power spikes cruciais para teamfights.
Como jogar
Para sobreviver, faça seu pathing para o lado oposto do mapa em relação a Volibear no nível um para garantir um farm seguro. Se ele invadir sua jungle, não tente defender seus camps; em vez disso, use Bandage Toss em um monstro distante da jungle para escapar através de paredes. Guarde seu Curse of the Sad Mummy exclusivamente para teamfights coordenadas perto de objetivos, onde seu CC superior pode neutralizá-lo antes que ele consiga ativar Stormbringer.
Contra-iniciaçãoVisãoO matchup na jungle depende de um jogo reativo de quem recua primeiro. Se você iniciar com Bandage Toss, Nocturne bloqueia facilmente com Shroud of Darkness, anulando seu CC instantaneamente. Enquanto você fica atordoado pelo seu próprio engage fracassado, ele vai te prender com Unspeakable Horror, forçando um medo que desativa o dano do seu Despair e Tantrum, deixando você completamente vulnerável.Build de Nocturne →Ver detalhes
Nocturne
Por quê
O matchup na jungle depende de um jogo reativo de quem recua primeiro. Se você iniciar com Bandage Toss, Nocturne bloqueia facilmente com Shroud of Darkness, anulando seu CC instantaneamente. Enquanto você fica atordoado pelo seu próprio engage fracassado, ele vai te prender com Unspeakable Horror, forçando um medo que desativa o dano do seu Despair e Tantrum, deixando você completamente vulnerável.
Impacto na lane
Na jungle, essa interação torna os duelos iniciais por scuttle e o counter-jungle direto incrivelmente arriscados para você. Se Nocturne invadir, você não consegue retaliar sem perder sua principal ferramenta de escape. Assim que ele alcançar o nível cinco, o Paranoia dele permite que ele contorne sua visão e faça counter-gank em você instantaneamente, transformando suas tentativas proativas de gank com Curse of the Sad Mummy em armadilhas mortais.
Como jogar
Você nunca deve abrir com Bandage Toss. Avance com Despair ativado e use Tantrum para forçá-lo a lançar Shroud of Darkness em pânico. Só jogue sua bandage depois que o escudo de habilidade dele estiver em cooldown. Se ele te pegar desprevenido com Paranoia, solte Curse of the Sad Mummy imediatamente para quebrar o tempo dele antes que Unspeakable Horror seja ativado, depois use seu Bandage Toss defensivamente para se prender em um monstro da jungle próximo.
Pressão no inícioEscalamentoPantheon domina os duelos iniciais na jungle porque o Aegis Assault dele consegue absorver completamente o burst do seu Bandage Toss e Despair. Porém, esse matchup não é totalmente unilateral. A redução de dano físico fixo passiva do seu Tantrum neutraliza diretamente os múltiplos golpes rápidos do Shield Vault potencializado pelo Mortal Will dele e os golpes físicos de Comet Spear, mantendo você surpreendentemente saudável durante as skirmishes.Build de Pantheon →Ver detalhes
Pantheon
Por quê
Pantheon domina os duelos iniciais na jungle porque o Aegis Assault dele consegue absorver completamente o burst do seu Bandage Toss e Despair. Porém, esse matchup não é totalmente unilateral. A redução de dano físico fixo passiva do seu Tantrum neutraliza diretamente os múltiplos golpes rápidos do Shield Vault potencializado pelo Mortal Will dele e os golpes físicos de Comet Spear, mantendo você surpreendentemente saudável durante as skirmishes.
Impacto na lane
Os clears agressivos e iniciais de Pantheon colocam pressão imensa sobre seus camps. Se ele te encontrar na sua jungle, a iniciação com Shield Vault dele te deixa vulnerável a uma execução fatal de Comet Spear. Esse multiplicador de força significa que você precisa monitorar constantemente o camp inicial dele e espelhar o pathing dele para evitar confrontos diretos de 1v1, focando em vez disso em garantir objetivos do lado oposto e manter suas lanes alertas antes que ele voe até lá com Grand Starfall.
Como jogar
Nunca inicie com Bandage Toss quando Pantheon estiver com o Aegis Assault pronto; em vez disso, avance com Despair ativo e espere ele desperdiçar o escudo defensivo dele. Se ele saltar em você com um Shield Vault potencializado, deixe a passiva do seu Tantrum absorver os golpes físicos rápidos dele enquanto você se reposiciona. Monitore a rota de jungle dele colocando wards profundas no camp dos raptors dele desde o início, permitindo que você faça counter-gank imediatamente depois que o Grand Starfall dele acertar.
Pressão no inícioSustentaçãoWarwick domina o duelo na jungle porque Jaws of the Beast permite que ele ignore o deslocamento de Bandage Toss enquanto se cura através de Eternal Hunger. Além disso, o Infinite Duress dele consegue suprimir você instantaneamente, travando você antes que você consiga até reagir com Curse of the Sad Mummy, neutralizando completamente sua principal ferramenta de teamfight.Build de Warwick →Ver detalhes
Warwick
Por quê
Warwick domina o duelo na jungle porque Jaws of the Beast permite que ele ignore o deslocamento de Bandage Toss enquanto se cura através de Eternal Hunger. Além disso, o Infinite Duress dele consegue suprimir você instantaneamente, travando você antes que você consiga até reagir com Curse of the Sad Mummy, neutralizando completamente sua principal ferramenta de teamfight.
Impacto na lane
Você não consegue contestar camps neutros ou Scuttle Crabs diretamente. Se sua vida ficar baixa durante o clear, Blood Hunt o alerta, levando a um counter-jungle letal onde você não consegue retaliar. Se ele te pegar, Primal Howl reduz o dano do seu Tantrum e Despair enquanto força uma retirada, sacrificando sua pressão inicial no mapa.
Como jogar
Nunca procure duelos 1v1 no rio; monitore o buff inicial dele e faça seu pathing para o lado oposto para fazer o clear com segurança. Durante skirmishes, guarde Curse of the Sad Mummy até que Warwick se comprometa com Infinite Duress em um aliado seu, permitindo que você interrompa a supressão dele instantaneamente. Se ele saltar em você, use Bandage Toss em um monstro da jungle para escapar em vez de lutar contra o Primal Howl.
KiteDano explosivoA capacidade de Kindred de anular completamente a morte com Lamb's Respite faz sua principal ferramenta de teamfight, Curse of the Sad Mummy, parecer incrivelmente pouco recompensadora. Enquanto você quer travar eles e destruí-los com Cursed Touch e Despair, eles simplesmente podem soltar a zona da ultimate deles para sobreviver ao seu burst. Além disso, a mobilidade deles via Dance of Arrows torna acertar o Bandage Toss altamente inconsistente em skirmishes abertas na jungle.Build de Kindred →Ver detalhes
Kindred
Por quê
A capacidade de Kindred de anular completamente a morte com Lamb's Respite faz sua principal ferramenta de teamfight, Curse of the Sad Mummy, parecer incrivelmente pouco recompensadora. Enquanto você quer travar eles e destruí-los com Cursed Touch e Despair, eles simplesmente podem soltar a zona da ultimate deles para sobreviver ao seu burst. Além disso, a mobilidade deles via Dance of Arrows torna acertar o Bandage Toss altamente inconsistente em skirmishes abertas na jungle.
Impacto na lane
Na jungle, Kindred vai invadir agressivamente para coletar stacks de Mark of the Kindred, sabendo que você tem dificuldade para duelar com eles no início. Se você tentar contestar camps, eles vão te kitar usando Wolf's Frenzy e te executar com Mounting Dread. Isso te força a uma rota defensiva de farm, cedendo a prioridade inicial nos Scuttle Crabs e deixando suas lanes vulneráveis aos ganks à distância de alto ritmo deles.
Como jogar
Nunca inicie lutas com Curse of the Sad Mummy se Kindred tiver Lamb's Respite disponível, a menos que você consiga encadear Bandage Toss para travá-los antes que eles consigam lançá-lo. Em vez disso, jogue de frente para trás, usando Tantrum para absorver dano físico enquanto mantém Despair ativo. Force-os a soltar a ultimate deles defensivamente para salvar um aliado, depois arraste a luta para fora da zona de cura deles imediatamente para finalizá-los assim que o círculo expirar.
Pressão no inícioProteçãoXin Zhao perturba fortemente sua identidade de teamfight. Embora seu Bandage Toss seguido de Curse of the Sad Mummy seja uma ferramenta de engajamento de primeira linha, o Crescent Guard dele age como um counter forte. Ao varrer e bloquear todo o dano dos seus aliados à distância que estão fora da arena dele, ele te isola. Mesmo que você aplique Cursed Touch e o queime com Despair, seu time não consegue dar seguimento ao seu CC.Build de Xin Zhao →Ver detalhes
Xin Zhao
Por quê
Xin Zhao perturba fortemente sua identidade de teamfight. Embora seu Bandage Toss seguido de Curse of the Sad Mummy seja uma ferramenta de engajamento de primeira linha, o Crescent Guard dele age como um counter forte. Ao varrer e bloquear todo o dano dos seus aliados à distância que estão fora da arena dele, ele te isola. Mesmo que você aplique Cursed Touch e o queime com Despair, seu time não consegue dar seguimento ao seu CC.
Impacto na lane
Na jungle, essa interação torna as skirmishes iniciais perto dos scuttle crabs ou objetivos neutros incrivelmente arriscadas. Xin Zhao vai te procurar agressivamente com Audacious Charge e Wind Becomes Lightning, sabendo que você não consegue duelar com ele. Se você tentar retaliar, o Determination dele cura através do dano do seu Tantrum. Essa ameaça constante força você a ceder o controle inicial do rio, colocando pressão sobre seus laners que ficam sem seu apoio.
Como jogar
Para sobreviver, você precisa monitorar o camp inicial dele e espelhar o pathing dele para evitá-lo completamente no início do jogo. Nunca inicie com Bandage Toss se seus aliados à distância estiverem muito longe para entrar dentro do eventual círculo de Crescent Guard dele. Em vez disso, use Despair e Tantrum para limpar seus camps rapidamente, visando fazer counter-gank do lado oposto do mapa. Só se comprometa com Curse of the Sad Mummy depois que ele já tiver usado a ultimate dele ou quando seus aliados de corpo a corpo puderem mergulhar dentro do círculo dele junto com você.
Pressão no inícioPicksKha'Zix explora seus clears lentos no início para invadir seus camps. Como você frequentemente está sozinho no rio ou na jungle, o Taste Their Fear dele ativa o bônus de isolamento, desgastando sua vida instantaneamente. Seu dano sustentado de Despair e a redução de dano físico de Tantrum não conseguem competir com esse burst, especialmente quando Unseen Threat reduz sua velocidade repetidamente durante a emboscada dele.Build de Kha'Zix →Ver detalhes
Kha'Zix
Por quê
Kha'Zix explora seus clears lentos no início para invadir seus camps. Como você frequentemente está sozinho no rio ou na jungle, o Taste Their Fear dele ativa o bônus de isolamento, desgastando sua vida instantaneamente. Seu dano sustentado de Despair e a redução de dano físico de Tantrum não conseguem competir com esse burst, especialmente quando Unseen Threat reduz sua velocidade repetidamente durante a emboscada dele.
Impacto na lane
Esse matchup te força a um pathing defensivo e altamente previsível. Toda vez que você começa um camp como os Raptors ou Krugs, a ameaça de uma invasão imediata te impede de usar Bandage Toss ofensivamente para acelerar seu clear. Se Kha'Zix te pegar com pouca vida, um único golpe de isolamento garante um abate, roubando seus camps e atrasando os power spikes cruciais do seu Curse of the Sad Mummy.
Como jogar
Para sobreviver, sempre faça o clear dos camps junto com os monstros pequenos para negar o dano de isolamento dele; não mate os Raptors pequenos primeiro. Mantenha uma carga de Bandage Toss pronta para escapar por paredes em segurança em vez de usá-la para acelerar o clear. Se ele saltar em você com Leap, recue imediatamente em direção ao seu laner mais próximo para que sua passiva Cursed Touch e o Curse of the Sad Mummy possam ser usados para travá-lo com a ajuda do time.
Esses confrontos são, acima de tudo, duelos de execução: os dois campeões têm formas reais de levar vantagem. Uma habilidade importante esquivada, um engajamento bem antecipado ou um erro de posicionamento podem ser suficientes para decidir o duelo. Conhecer o matchup e reconhecer as janelas de ação certas faz toda a diferença.
VisãoLutas em equipeEste matchup de jungle é um confronto explosivo de ultimates que definem teamfights, onde a visão dita o vencedor. Amumu tem a ferramenta direta para neutralizar a principal ferramenta de skirmish de Fiddlesticks, Bountiful Harvest, usando Bandage Toss para atordoar e cancelar a canalização. No entanto, se Fiddlesticks conseguir contornar sua visão e canalizar Crowstorm a partir do fog of war, o dano massivo em área dele vai facilmente sobrepujar Curse of the Sad Mummy.Build de Fiddlesticks →Ver detalhes
Fiddlesticks
Por quê
Este matchup de jungle é um confronto explosivo de ultimates que definem teamfights, onde a visão dita o vencedor. Amumu tem a ferramenta direta para neutralizar a principal ferramenta de skirmish de Fiddlesticks, Bountiful Harvest, usando Bandage Toss para atordoar e cancelar a canalização. No entanto, se Fiddlesticks conseguir contornar sua visão e canalizar Crowstorm a partir do fog of war, o dano massivo em área dele vai facilmente sobrepujar Curse of the Sad Mummy.
Impacto na lane
A velocidade de clear na jungle e as disputas de objetivos se tornam um jogo de xadrez de alto risco em torno dos bushes. Fiddlesticks depende de A Harmless Scarecrow para negar sua visão e garantir ângulos seguros de flanco para a ultimate dele. Isso te força a gastar seus recursos iniciais garantindo scuttle crabs e wards profundos em vez de forçar ganks. Se você falhar em rastreá-lo, os ganks repentinos de Crowstorm vão varrer completamente seus laners antes que você possa responder com Curse of the Sad Mummy.
Como jogar
Nunca inicie uma teamfight às cegas com Curse of the Sad Mummy se a posição de Fiddlesticks for desconhecida. Em vez disso, priorize destruir as efígies de A Harmless Scarecrow dele e colocar wards profundos nos quadrantes da jungle dele. Durante skirmishes, guarde pelo menos uma carga de Bandage Toss especificamente para interromper o Bountiful Harvest dele quando ele tentar drenar sua equipe. Se ele te surpreender com Crowstorm, use imediatamente Curse of the Sad Mummy para travá-lo e minimizar o potencial dele de destruir sua equipe.
Controle de grupoLutas em equipeO duelo entre esses dois junglers depende inteiramente de como você interrompe a cadeia de resets de Viego. Enquanto Viego depende de Sovereign's Domination para curar e encadear habilidades durante skirmishes, seu kit é desenhado para pará-lo no meio da animação. O confronto permanece equilibrado porque, se ele esquivar do seu Bandage Toss, ele pode te despedaçar com Blade of the Ruined King; porém, seu potencial de lockdown torna qualquer teamfight extremamente perigosa para ele se ele tentar se transformar.Build de Viego →Ver detalhes
Viego
Por quê
O duelo entre esses dois junglers depende inteiramente de como você interrompe a cadeia de resets de Viego. Enquanto Viego depende de Sovereign's Domination para curar e encadear habilidades durante skirmishes, seu kit é desenhado para pará-lo no meio da animação. O confronto permanece equilibrado porque, se ele esquivar do seu Bandage Toss, ele pode te despedaçar com Blade of the Ruined King; porém, seu potencial de lockdown torna qualquer teamfight extremamente perigosa para ele se ele tentar se transformar.
Impacto na lane
Este matchup transforma teamfights e skirmishes por objetivos em impasses de alto risco. Viego vai usar Harrowed Path para se infiltrar em torno dos pits e pescar stuns com Spectral Maw, esperando garantir um abate rápido. Sua presença o força a jogar de forma extremamente cautelosa, retardando a entrada dele nas lutas, porque ele sabe que ser pego durante Sovereign's Domination significa morte instantânea. Se você desperdiçar seu crowd control cedo, ele vai varrer toda a sua equipe.
Como jogar
Para ganhar esse jogo mental, você precisa guardar Curse of the Sad Mummy especificamente para o momento em que Viego canalizar Sovereign's Domination sobre um aliado caído. Durante as lutas, não jogue sua ultimate na frontline dele; em vez disso, fique perto dos seus companheiros vulneráveis e acompanhe as almas no chão. Quando Viego avançar com Heartbreaker ou tentar uma possessão, ative imediatamente Curse of the Sad Mummy para travá-lo no lugar, permitindo que sua equipe o exploda antes que ele ganhe invulnerabilidade.
Controle de grupoLutas em equipeEste duelo de jungle gira em torno de neutralizar a cura massiva de skirmish de Aatrox. Enquanto Aatrox depende de acertar os sweetspots de The Darkin Blade e usar Umbral Dash para vamp físico contínuo, sua ultimate, Curse of the Sad Mummy, é a contramedida definitiva. Travá-lo completamente impede que ele ataque ou se reposicione, efetivamente desligando a cura passiva de Umbral Dash dele e deixando sua barra de vida vulnerável ao amplificador de dano mágico de Despair e Cursed Touch.Build de Aatrox →Ver detalhes
Aatrox
Por quê
Este duelo de jungle gira em torno de neutralizar a cura massiva de skirmish de Aatrox. Enquanto Aatrox depende de acertar os sweetspots de The Darkin Blade e usar Umbral Dash para vamp físico contínuo, sua ultimate, Curse of the Sad Mummy, é a contramedida definitiva. Travá-lo completamente impede que ele ataque ou se reposicione, efetivamente desligando a cura passiva de Umbral Dash dele e deixando sua barra de vida vulnerável ao amplificador de dano mágico de Despair e Cursed Touch.
Impacto na lane
Em skirmishes iniciais, quem inicia primeiro muitas vezes perde a vantagem. Se Aatrox te pegar com Infernal Chains, você será forçado a gastar Bandage Toss defensivamente ou sofrer dano crítico. Porém, ao disputar Scuttle Crabs ou Monstros Épicos iniciais, sua capacidade de negar o sustain dele com uma cadeia de crowd control perfeitamente cronometrada determina quem controla o rio, ditando qual equipe garante prioridade inicial e pressão no mapa.
Como jogar
Posicione-se levemente fora do alcance dos dois primeiros golpes de The Darkin Blade para atrair o avanço dele. Guarde seu Curse of the Sad Mummy especificamente para quando Aatrox ativar World Ender e tentar avançar com Umbral Dash. Assim que ele se comprometer, trave-o instantaneamente. Se você errar seu Bandage Toss inicial, desengaje imediatamente para seus camps da jungle para deixar a ultimate dele expirar antes de reengajar com Despair.
Lutas em equipeImunidade a CCEste matchup é definido por como seu crowd control colide com as reações defensivas de Ambessa. O Repudiation dela age como um counter direto ao seu Bandage Toss, absorvendo o dano e bloqueando completamente o stun. Porém, a dependência dela de dashes rápidos de Drakehound's Step para dançar em torno de skirmishes é totalmente neutralizada por Curse of the Sad Mummy, que fornece um travamento em área massivo e inevitável que ela não pode bloquear ou escapar depois de iniciado.Build de Ambessa →Ver detalhes
Ambessa
Por quê
Este matchup é definido por como seu crowd control colide com as reações defensivas de Ambessa. O Repudiation dela age como um counter direto ao seu Bandage Toss, absorvendo o dano e bloqueando completamente o stun. Porém, a dependência dela de dashes rápidos de Drakehound's Step para dançar em torno de skirmishes é totalmente neutralizada por Curse of the Sad Mummy, que fornece um travamento em área massivo e inevitável que ela não pode bloquear ou escapar depois de iniciado.
Impacto na lane
Na jungle, essa tensão dita como você disputa camps neutros e skirmishes no rio. Se você iniciar às cegas com Bandage Toss, Ambessa vai absorvê-lo, acionar Drakehound's Step para fechar a distância, e te despedaçar com Cunning Sweep. Isso torna as disputas iniciais de crab altamente voláteis. Porém, uma vez que as ultimates sejam desbloqueadas, sua presença em teamfight dispara, forçando Ambessa a jogar de forma passiva ou arriscar ser travada instantaneamente antes que ela possa executar Public Execution.
Como jogar
Para ter sucesso, nunca inicie um gank ou skirmish com Bandage Toss se Ambessa tiver Repudiation disponível. Em vez disso, avance com Despair e Tantrum ativos, forçando-a a desperdiçar o escudo ou sofrer dano contínuo de queimadura. Guarde suas cargas de bandage até que ela use o dash. Quando as teamfights começarem, espere ela mergulhar na sua backline com Lacerate, então ative imediatamente Curse of the Sad Mummy para congelá-la no lugar, impedindo-a de garantir resets com Public Execution.
EscaramuçasLutas em equipeEste matchup de jungle é uma batalha de scaling e controle de skirmish. Kayn depende de Shadow Step para atravessar o terreno e escapar de situações complicadas, enquanto coleta orbs para The Darkin Scythe. Porém, Amumu pode neutralizar completamente essa mobilidade. Um Bandage Toss bem cronometrado pode interceptar Kayn no exato momento em que ele emerge de uma parede, prendendo-o antes que ele possa reagir com Reaping Slash ou Umbral Trespass.Build de Kayn →Ver detalhes
Kayn
Por quê
Este matchup de jungle é uma batalha de scaling e controle de skirmish. Kayn depende de Shadow Step para atravessar o terreno e escapar de situações complicadas, enquanto coleta orbs para The Darkin Scythe. Porém, Amumu pode neutralizar completamente essa mobilidade. Um Bandage Toss bem cronometrado pode interceptar Kayn no exato momento em que ele emerge de uma parede, prendendo-o antes que ele possa reagir com Reaping Slash ou Umbral Trespass.
Impacto na lane
A capacidade de Kayn de dar gank de ângulos inesperados te força a manter visão profunda. Ao disputar skirmishes por camps neutros, sua presença limita a liberdade dele. Ao impedir suas fugas por paredes, você nega a ele os skirmishes seguros que ele precisa para desbloquear The Darkin Scythe. Retardar a transformação dele enfraquece diretamente a pressão no mapa dele no mid-game, permitindo que sua equipe garanta dragões iniciais sem temer os smite steals dele.
Como jogar
Nunca jogue seu Bandage Toss às cegas no fog of war. Quando Kayn usar Shadow Step para fugir por uma parede, espere perto do ponto de saída previsto e lance sua bandage no exato momento em que o modelo dele emergir. Uma vez ancorado, ative imediatamente Despair e Tantrum para derreter a vida dele. Se ele tentar virar a luta com Umbral Trespass, prepare seu Curse of the Sad Mummy para travá-lo no instante em que ele reaparecer.
EscaramuçasArmaduraEste matchup depende de como os pellets de New Destiny de Graves interagem com seu Tantrum. Como Graves dispara múltiplos pellets físicos por ataque básico, a redução fixa de dano de Tantrum se aplica a cada pellet, neutralizando severamente o dano de ataque básico dele. Porém, se ele conseguir te kitar com Quickdraw e prejudicar sua visão com Smoke Screen, ele pode facilmente anular seu engage e desgastar sua vida com segurança.Build de Graves →Ver detalhes
Graves
Por quê
Este matchup depende de como os pellets de New Destiny de Graves interagem com seu Tantrum. Como Graves dispara múltiplos pellets físicos por ataque básico, a redução fixa de dano de Tantrum se aplica a cada pellet, neutralizando severamente o dano de ataque básico dele. Porém, se ele conseguir te kitar com Quickdraw e prejudicar sua visão com Smoke Screen, ele pode facilmente anular seu engage e desgastar sua vida com segurança.
Impacto na lane
Skirmishes na jungle são extremamente voláteis e dependem inteiramente do ambiente. Se Graves te prender perto de terreno, o End of the Line dele ricocheteia instantaneamente, equiparando o dano do seu Despair. Enquanto New Destiny dá a ele uma vantagem inicial de clear, o cooldown do seu Tantrum é acionado constantemente quando os pellets dele te acertam. Isso permite que você equipare a velocidade de clear dele e defenda seus camps confortavelmente contra o counter-jungle agressivo dele.
Como jogar
Para ganhar esse duelo, nunca jogue Bandage Toss às cegas enquanto Graves tiver Quickdraw disponível para esquivar. Force-o a avançar, e lute com ele longe de terreno para que o End of the Line dele não possa explodir instantaneamente. Se ele soltar Smoke Screen, saia imediatamente da nuvem antes de tentar retaliar. Assim que ele avançar com o dash, trave-o com Curse of the Sad Mummy para garantir que seu Despair e Cursed Touch derretam a armadura acumulada dele.
Lutas em equipeMobilidadeHecarim depende do acúmulo de velocidade de Devastating Charge e Warpath para iniciar skirmishes com impacto massivo. O Bandage Toss de Amumu é a resposta perfeita, agindo como uma interrupção skill-shot que pode pegar Hecarim no meio da corrida. Parar o charge dele instantaneamente remove seu momentum e dano bônus, transformando o dive agressivo dele em uma posição vulnerável onde Despair e Tantrum podem derretê-lo.Build de Hecarim →Ver detalhes
Hecarim
Por quê
Hecarim depende do acúmulo de velocidade de Devastating Charge e Warpath para iniciar skirmishes com impacto massivo. O Bandage Toss de Amumu é a resposta perfeita, agindo como uma interrupção skill-shot que pode pegar Hecarim no meio da corrida. Parar o charge dele instantaneamente remove seu momentum e dano bônus, transformando o dive agressivo dele em uma posição vulnerável onde Despair e Tantrum podem derretê-lo.
Impacto na lane
Essa dinâmica dita a segurança das suas lanes e dos skirmishes no rio. Quando Hecarim tenta dar gank ou garantir Scuttle Crabs, sua presença determina o resultado. Se você seguir o trajeto dele, pode neutralizar completamente as tentativas de flanco dele. Porém, falhar em acertar Bandage Toss durante o Devastating Charge dele permite que ele te contorne completamente, deixando Rampage e Spirit of Dread dele arrasarem seus companheiros antes que você possa lançar Curse of the Sad Mummy.
Como jogar
Durante skirmishes, nunca inicie com Bandage Toss. Em vez disso, posicione-se como um escudo entre Hecarim e seu carry, mantendo o cursor pronto para interceptar o Devastating Charge dele. Se Hecarim usar Onslaught of Shadows primeiro para te contornar, espere o efeito de medo passar, então trave-o imediatamente com Curse of the Sad Mummy e Despair, impedindo-o de curar com Spirit of Dread enquanto sua equipe colapsa sobre ele.
Controle de áreaLutas em equipeEste matchup de jungle é uma disputa direta entre garantir objetivos e scaling de teamfight. Nunu & Willump dominam a tomada inicial de monstros épicos porque Consume age como um segundo Smite, massivo, tornando pits disputados altamente arriscados para você. Porém, conforme o jogo avança para o late game, seu Curse of the Sad Mummy eclipsa completamente a presença deles em teamfight, travando equipes inteiras enquanto Despair derrete a frontline de alta vida deles.Build de Nunu & Willump →Ver detalhes
Nunu & Willump
Por quê
Este matchup de jungle é uma disputa direta entre garantir objetivos e scaling de teamfight. Nunu & Willump dominam a tomada inicial de monstros épicos porque Consume age como um segundo Smite, massivo, tornando pits disputados altamente arriscados para você. Porém, conforme o jogo avança para o late game, seu Curse of the Sad Mummy eclipsa completamente a presença deles em teamfight, travando equipes inteiras enquanto Despair derrete a frontline de alta vida deles.
Impacto na lane
Você não pode disputar facilmente um Dragão ou Rift Herald em uma batalha direta de smite se Nunu tiver vida suficiente para usar Consume. Essa dinâmica te força a rastrear o trajeto dele de perto. Se ele usar Biggest Snowball Ever! para dar gank em uma lane lateral, você deve punir instantaneamente limpando os camps opostos dele ou trocando pelo objetivo oposto do mapa, evitando uma luta épica direta.
Como jogar
Ao disputar grandes objetivos neutros, não tente ganhar no smite contra o Consume dele. Em vez disso, concentre seu crowd control no próprio Nunu. Guarde Bandage Toss para interromper a canalização de Absolute Zero dele, ou para travá-lo antes que ele alcance o monstro épico com pouca vida. Inicie com Curse of the Sad Mummy quando a equipe dele se agrupar para garantir o objetivo, usando Tantrum para mitigar o dano físico deles quando retaliarem.
DesengajarLutas em equipeEste matchup de jungle depende inteiramente de como Gragas responde às suas iniciações. Enquanto você quer achar um stun em vários inimigos usando Bandage Toss para fechar a distância, Gragas pode interromper instantaneamente toda a sua presença em teamfight. No momento em que você ativar Curse of the Sad Mummy, ele pode jogar Explosive Cask para te arremessar longe dos seus aliados, separando você do dano de follow-up que seu Cursed Touch amplifica.Build de Gragas →Ver detalhes
Gragas
Por quê
Este matchup de jungle depende inteiramente de como Gragas responde às suas iniciações. Enquanto você quer achar um stun em vários inimigos usando Bandage Toss para fechar a distância, Gragas pode interromper instantaneamente toda a sua presença em teamfight. No momento em que você ativar Curse of the Sad Mummy, ele pode jogar Explosive Cask para te arremessar longe dos seus aliados, separando você do dano de follow-up que seu Cursed Touch amplifica.
Impacto na lane
Em skirmishes iniciais pelo rio, Gragas usa Barrel Roll e Drunken Rage para mitigar o dano do seu Tantrum enquanto disputa camps. Se você engajar às cegas com Bandage Toss, ele pode contra-engajar com Body Slam para te travar. Essa ameaça mútua transforma lutas por objetivos em um impasse tenso, onde nenhum dos dois junglers pode usar sua ultimate com segurança sem arriscar um contra-desengaje completo que arruína a luta.
Como jogar
Para ganhar esse jogo mental, nunca lidere o ataque com Bandage Toss se Gragas tiver Explosive Cask disponível. Em vez disso, avance com Despair ativo para atrair o Body Slam dele. Assim que ele usar sua ferramenta de movimento, flanqueie a backline dele por um ponto cego. Se ele conseguir te arremessar longe com o barril, procure reengajar imediatamente com sua segunda carga de Bandage Toss para se colar nos carries frágeis dele antes que eles possam escapar.
Pressão no inícioEscalamentoEste duelo de jungle é uma corrida contra o tempo. Lee Sin usa Flurry e Sonic Wave para dominar skirmishes iniciais, tentando invadir seus camps. Enquanto o Dragon's Rage dele pode negar seu Curse of the Sad Mummy chutando você para longe antes que sua equipe possa dar follow-up no Bandage Toss, seu scaling de late game é vastamente superior. Se você sobreviver à pressão inicial dele, seu Despair e Cursed Touch vão derreter todo mundo em teamfights.Build de Lee Sin →Ver detalhes
Lee Sin
Por quê
Este duelo de jungle é uma corrida contra o tempo. Lee Sin usa Flurry e Sonic Wave para dominar skirmishes iniciais, tentando invadir seus camps. Enquanto o Dragon's Rage dele pode negar seu Curse of the Sad Mummy chutando você para longe antes que sua equipe possa dar follow-up no Bandage Toss, seu scaling de late game é vastamente superior. Se você sobreviver à pressão inicial dele, seu Despair e Cursed Touch vão derreter todo mundo em teamfights.
Impacto na lane
Seu trajeto inicial é inteiramente ditado por rastrear o buff inicial de Lee Sin. Se ele acertar Sonic Wave na sua jungle, o Flurry dele dá a ele a velocidade de ataque para garantir um abate antes que você possa acumular Tantrum. Você deve ceder os Scuttle Crabs iniciais se seus laners não tiverem prioridade, já que um duelo no nível três favorece ele. Porém, forçá-lo a usar Safeguard defensivamente em vez de fazer jogadas pelo mapa é uma grande vitória para suas lanes.
Como jogar
Nunca inicie com Bandage Toss se Lee Sin tiver Dragon's Rage disponível, já que ele vai imediatamente te chutar para dentro da equipe dele ou longe dos seus alvos. Em vez disso, avance com Despair ativo e force-o a fazer o primeiro movimento. Rastreie os camps da jungle dele para prever os ganks, contra-atacando ao garantir objetivos no lado oposto do mapa. Guarde seu Curse of the Sad Mummy até que ele use o dash de Safeguard, garantindo que ele não possa escapar do raio da sua ultimate.
Esses campeões geralmente têm dificuldade para responder às suas principais forças, o que te dá mais liberdade para abordar o confronto. Você costuma ter várias formas de pressioná-los e forçar trocas a seu favor. Aproveite essa vantagem para impor seu ritmo, em vez de dar tempo para eles se estabilizarem.
Lutas em equipeContra-iniciaçãoVocê tem a vantagem porque Vi depende muito de carregar Vault Breaker para iniciar ou escapar, o que você pode interromper facilmente com Bandage Toss. Além disso, a ultimate dela, Cease and Desist, torna-a impossível de interromper durante o dash, mas no exato momento em que ela aterrissa, ela fica altamente vulnerável. Você pode bufferizar instantaneamente Curse of the Sad Mummy para travá-la, tornando o burst inicial dela inútil.Build de Vi →Ver detalhes
Vi
Por quê
Você tem a vantagem porque Vi depende muito de carregar Vault Breaker para iniciar ou escapar, o que você pode interromper facilmente com Bandage Toss. Além disso, a ultimate dela, Cease and Desist, torna-a impossível de interromper durante o dash, mas no exato momento em que ela aterrissa, ela fica altamente vulnerável. Você pode bufferizar instantaneamente Curse of the Sad Mummy para travá-la, tornando o burst inicial dela inútil.
Impacto na lane
Em skirmishes pelo rio ou durante contra-ganks, este matchup impede Vi de jogar agressivamente. Ela não pode executar seus combos de gank com segurança porque você pode neutralizar o dive dela de forma reativa. Se ela tentar igualar sua velocidade de clear, Despair e Tantrum te permitem varrer os camps mais rápido, dando a você a prioridade para preparar objetivos enquanto a força a guardar o dash.
Como jogar
Ao disputar camps ou objetivos, nunca jogue Bandage Toss às cegas. Em vez disso, avance com Despair ativo e espere ela carregar Vault Breaker, então interrompa-a no meio do dash. Se ela mirar seu carry com Cease and Desist, posicione-se bem ao lado do alvo dela. No milissegundo em que ela terminar a animação impossível de interromper, solte Curse of the Sad Mummy para desabilitá-la antes que ela possa acionar Denting Blows.
Controle de grupoLutas em equipeEste matchup é altamente favorável para Amumu porque seu crowd control neutraliza completamente a rede de segurança de Ekko. Ekko depende de Chronobreak para sobreviver a dives profundos e dano burst, mas sua capacidade de encadear Bandage Toss em Curse of the Sad Mummy impede que ele chegue a ativar sua ultimate. Ao mantê-lo travado continuamente, você torna sua principal ferramenta de escape e cura completamente inútil, deixando-o frágil.Build de Ekko →Ver detalhes
Ekko
Por quê
Este matchup é altamente favorável para Amumu porque seu crowd control neutraliza completamente a rede de segurança de Ekko. Ekko depende de Chronobreak para sobreviver a dives profundos e dano burst, mas sua capacidade de encadear Bandage Toss em Curse of the Sad Mummy impede que ele chegue a ativar sua ultimate. Ao mantê-lo travado continuamente, você torna sua principal ferramenta de escape e cura completamente inútil, deixando-o frágil.
Impacto na lane
Na jungle, essa interação tira de Ekko seu poder típico de skirmish agressivo. Ele não pode usar Phase Dive com segurança para iniciar lutas ou roubar camps, sabendo que um único Bandage Toss vai levá-lo à morte antes que ele possa voltar no tempo. Isso permite que você garanta Scuttle Crabs e dispute objetivos neutros com total confiança, forçando Ekko a um estilo de farm passivo.
Como jogar
Para executar isso perfeitamente, nunca inicie com todo o seu crowd control de uma vez quando Ekko estiver com vida cheia. Espere ele se comprometer com Phase Dive, então acerte-o com Bandage Toss. Só ative Curse of the Sad Mummy quando a vida dele cair ao ponto em que ele queira usar Chronobreak. Se ele tentar te atordoar com Parallel Convergence, use sua bandage para se puxar para fora da zona dele.
Controle de áreaLutas em equipeShyvana depende muito de Dragon's Descent para forçar entrada nas lutas, mas esse dive previsível age como a configuração perfeita para seu Curse of the Sad Mummy. No momento em que ela saltar para frente, você pode travá-la instantaneamente no ar ou ao aterrissar. Essa reação neutraliza a ameaça da forma de dragão dela enquanto Despair despedaça sua barra de vida, transformando a principal ferramenta de engajamento dela na sua própria ruína.Build de Shyvana →Ver detalhes
Shyvana
Por quê
Shyvana depende muito de Dragon's Descent para forçar entrada nas lutas, mas esse dive previsível age como a configuração perfeita para seu Curse of the Sad Mummy. No momento em que ela saltar para frente, você pode travá-la instantaneamente no ar ou ao aterrissar. Essa reação neutraliza a ameaça da forma de dragão dela enquanto Despair despedaça sua barra de vida, transformando a principal ferramenta de engajamento dela na sua própria ruína.
Impacto na lane
Este matchup se transforma em uma corrida feroz por clears de camp e monstros neutros. Shyvana precisa desesperadamente farmar monstros grandes para acumular Fury of the Dragonborn, o que significa que ela vai constantemente tentar power-farmar. Como você a interrompe facilmente com Bandage Toss e causa mais dano que ela em camps prolongados com Tantrum, você pode ditar o ritmo das lutas por Monstros Épicos e forçá-la a skirmishes iniciais desfavoráveis.
Como jogar
Nunca inicie com sua ultimate quando Shyvana estiver com Fury cheia. Em vez disso, provoque o engage dela e guarde Curse of the Sad Mummy estritamente para counterar Dragon's Descent. Ao disputar objetivos neutros, posicione-se entre ela e o pit. Use Bandage Toss para interceptá-la antes que ela garanta o smite. Se ela tentar escapar usando Burnout, lembre-se de que o cooldown do seu Tantrum reduz com os golpes rápidos de Twin Bite dela, permitindo que você ganhe o duelo.
Lutas em equipeEscalamentoAmumu naturalmente desmonta Rammus em skirmishes diretos na jungle porque Rammus depende muito de acumular armadura para aumentar seu dano através de Rolling Armordillo e refletir ataques com Defensive Ball Curl. Porém, seu Despair causa dano mágico contínuo baseado em porcentagem de vida que contorna completamente as defesas de armadura acumulada dele. Combinado com Cursed Touch, que amplifica todo o dano mágico que Rammus recebe, você transforma o stat-check defensivo dele em uma desvantagem.Build de Rammus →Ver detalhes
Rammus
Por quê
Amumu naturalmente desmonta Rammus em skirmishes diretos na jungle porque Rammus depende muito de acumular armadura para aumentar seu dano através de Rolling Armordillo e refletir ataques com Defensive Ball Curl. Porém, seu Despair causa dano mágico contínuo baseado em porcentagem de vida que contorna completamente as defesas de armadura acumulada dele. Combinado com Cursed Touch, que amplifica todo o dano mágico que Rammus recebe, você transforma o stat-check defensivo dele em uma desvantagem.
Impacto na lane
Este matchup muda o controle da jungle inteiramente a seu favor. Rammus não pode duelar com você com segurança perto dos camps, o que significa que você pode garantir objetivos agressivamente e disputar os monstros neutros dele. Quando ele tentar acelerar pelo rio com Powerball para dar gank nas suas lanes, sua velocidade de clear superior permite que você contra-ataque imediatamente ou roube os camps dele, deixando-o com nível baixo e incapaz de igualar sua ameaça em teamfight.
Como jogar
Ao entrar em skirmish, não entre em pânico se ele usar Frenzying Taunt em você; simplesmente mantenha Despair ativo para derreter a vida dele enquanto você é forçado a atacá-lo. Guarde seu Bandage Toss para cancelar o carregamento de Powerball dele quando ele tentar escapar ou engajar seus aliados. Durante grandes teamfights, espere ele se comprometer com Soaring Slam, então dê follow-up imediatamente com Curse of the Sad Mummy para travar a backline dele antes que eles possam seguir o exemplo dele.
ProteçãoVisãoAmumu domina este matchup porque seu crowd control pesado neutraliza completamente a ameaça de assassinato de Evelynn. Enquanto ela tenta perseguir seus aliados usando Demon Shade, sua capacidade de travar alvos com Bandage Toss a torna incrivelmente vulnerável. Se ela marcar alguém com Allure, você pode interceptá-la reativamente no meio da aproximação, acionando Cursed Touch para amplificar o dano da sua equipe antes que ela consiga escapar com Last Caress.Build de Evelynn →Ver detalhes
Evelynn
Por quê
Amumu domina este matchup porque seu crowd control pesado neutraliza completamente a ameaça de assassinato de Evelynn. Enquanto ela tenta perseguir seus aliados usando Demon Shade, sua capacidade de travar alvos com Bandage Toss a torna incrivelmente vulnerável. Se ela marcar alguém com Allure, você pode interceptá-la reativamente no meio da aproximação, acionando Cursed Touch para amplificar o dano da sua equipe antes que ela consiga escapar com Last Caress.
Impacto na lane
Essa dinâmica retira de Evelynn seu terror pelo mapa, forçando-a a um estilo de farm passivo. As lanes que ela ataca se tornam previsíveis porque ela não consegue contornar suas configurações defensivas sem ser pega. Durante skirmishes, ela é forçada a jogar extremamente recuada, o que significa que seus laners podem empurrar agressivamente sabendo que qualquer tentativa dela de engajar com Whiplash resultará em um contra-engajamento imediato com Curse of the Sad Mummy.
Como jogar
Priorize comprar Control Wards em todo recall e coloque-as em bushes de alto tráfego no rio para expor constantemente o Demon Shade dela. Quando você vir o coração de Allure se formando sobre um aliado, posicione-se imediatamente entre eles e o caminho projetado dela. Guarde seu Bandage Toss até que ela se revele para atacar. Uma vez que ela esteja amarrada, ative Despair e espame Tantrum para despedaçar a vida dela, forçando-a a gastar Last Caress defensivamente em vez de para um abate.
Controle de grupoCounter forteAmumu domina este duelo de jungle porque Master Yi depende inteiramente de Alpha Strike para esquivar de crowd control enquanto corta com Wuju Style. Como seu Bandage Toss e Curse of the Sad Mummy fornecem travamentos consecutivos e inevitáveis uma vez que ele reaparece, a evasão dele se torna sua própria armadilha. Ao combinar esse crowd control com a queimadura contínua de porcentagem de vida de Despair, você despedaça facilmente a build frágil de assassino dele.Build de Master Yi →Ver detalhes
Master Yi
Por quê
Amumu domina este duelo de jungle porque Master Yi depende inteiramente de Alpha Strike para esquivar de crowd control enquanto corta com Wuju Style. Como seu Bandage Toss e Curse of the Sad Mummy fornecem travamentos consecutivos e inevitáveis uma vez que ele reaparece, a evasão dele se torna sua própria armadilha. Ao combinar esse crowd control com a queimadura contínua de porcentagem de vida de Despair, você despedaça facilmente a build frágil de assassino dele.
Impacto na lane
Essa interação impede Master Yi de invadir seus camps com segurança ou disputar Rift Scuttlers. Em skirmishes, o medo dele do seu Curse of the Sad Mummy o força a jogar de forma passiva, retardando a entrada dele em teamfights. Isso dá às suas lanes liberdade absoluta, já que qualquer tentativa dele de mergulhar nos seus aliados com Highlander pode ser instantaneamente neutralizada e punida pelo seu crowd control.
Como jogar
Ao lutar contra Master Yi, nunca inicie com Bandage Toss ou lance Curse of the Sad Mummy em pânico enquanto o Alpha Strike dele estiver disponível. Mantenha Despair ativo para causar dano constante, e espere ele reaparecer do estado inalvejável. No exato momento em que ele aterrissar, trave-o imediatamente com sua ultimate. Se ele tentar mitigar o dano recebido com Meditate, interrompa a canalização dele com um lançamento preciso de bandage.
Controle de grupoEscalamentoAmumu se destaca aqui porque o DPS de Jax depende de acumular Relentless Assault para ataques básicos rápidos. A passiva de Tantrum de Amumu reduz de forma fixa o dano físico de cada golpe, tornando o estilo de ataque rápido de Jax matematicamente fraco contra você. Além disso, quando Jax te ataca rapidamente, ele reduz repetidamente o cooldown do seu Tantrum, permitindo que você espame seu dano de área em troca enquanto Cursed Touch amplifica todo o dano mágico.Build de Jax →Ver detalhes
Jax
Por quê
Amumu se destaca aqui porque o DPS de Jax depende de acumular Relentless Assault para ataques básicos rápidos. A passiva de Tantrum de Amumu reduz de forma fixa o dano físico de cada golpe, tornando o estilo de ataque rápido de Jax matematicamente fraco contra você. Além disso, quando Jax te ataca rapidamente, ele reduz repetidamente o cooldown do seu Tantrum, permitindo que você espame seu dano de área em troca enquanto Cursed Touch amplifica todo o dano mágico.
Impacto na lane
Na jungle, essa interação te torna incrivelmente seguro durante skirmishes diretos pelos camps. Jax não pode disputar facilmente seus camps ou te forçar a sair da sua jungle, porque o Empower dele e os resets de ataque básico só aceleram o spam do seu Tantrum. Isso permite que você garanta scuttle crabs facilmente e pressione a jungle dele com segurança, sabendo que um duelo 1x1 no rio favorece fortemente seu scaling defensivo.
Como jogar
Ao lutar contra Jax, não jogue Bandage Toss imediatamente. Espere ele usar Counter Strike para bloquear seus ataques básicos. Como a evasão dele não bloqueia o dano de habilidade de Despair ou Tantrum, mantenha-os ativos. Assim que o stun dele terminar e a janela defensiva se encerrar, lance Bandage Toss para travá-lo, então solte Curse of the Sad Mummy se os companheiros dele chegarem para ajudá-lo a escapar com Leap Strike.
Vantagem: veredito canônico do Wild Rift Core (−3 a +3), do ponto de vista do campeão citado na linha. Taxa de vitória e taxa de escolha: as do próprio adversário nessa função — Wild Rift CN · Challenger, Patch 7.3b. Não é uma taxa de vitória do confronto direto.
Como counterar este campeão
Ângulo de counter
Os adversários do Amumu não são apenas os campeões que o derrotam em duelos, mas aqueles que atrapalham seu ritmo e sua capacidade de iniciar o combate de forma limpa. O problema não é morrer rápido, mas sim não conseguir impor seu ritmo. Junglers agressivos e campeões que evitam ou punem suas tentativas de iniciar o combate transformam seu jogo em uma luta constante pela sobrevivência.
Contexto do patch
Na versão atual, o Amumu tem dificuldades contra junglers que invadem a selva e forçam confrontos antes do nível 5. Sua falta de mobilidade e de dano no início da partida o tornam vulnerável. Além disso, formações bem espaçadas ou ferramentas defensivas reduzem significativamente o impacto de sua habilidade definitiva.
Leitura rápida
Lutas contra invasões precoces.
Inadmissível sem o Flash.
Depende muito das lutas em equipe.
Arquétipos de counter
Junglers agressivos no início do jogo
Esses campeões exploram diretamente o ponto fraco do Amumu: sua fase inicial do jogo. Eles invadem o jungle, forçam confrontos quando ele está com poucos recursos e atrasam sua chegada ao nível 5. Uma vez em desvantagem, o Amumu perde o ritmo e passa a depender de reviravoltas difíceis.
Como o campeão deve se adaptar. Jogue com cautela, evite duelos, proteja os acampamentos e peça a rota support.
Assassinos móveis
Eles se esquivam facilmente de suas tentativas de ataque e aproveitam os erros de posicionamento do adversário. O Amumu tem dificuldade para alcançá-los e acaba se tornando um alvo lento em combates dispersos.
Como o campeão deve se adaptar. Fique atento aos erros e jogue em conjunto com a equipe, da defesa ao ataque.
Lutadores resistentes
Eles sobrevivem ao ataque inicial dele e conseguem virar o jogo. O Amumu não consegue derrotá-los rapidamente e fica preso em combates prolongados e desfavoráveis.
Lee Sin representa o pior tipo de confronto: pressão constante no início, invasões e controle de ritmo. Se Amumu perder os acampamentos iniciais ou demorar para chegar ao nível 5, toda a partida se torna difícil.
Erros comuns contra ele
Erros comuns contra ele
Forçar confrontos contra junglers iniciais mais fortes.
Ignorando a visão jungle.
Interativo sem Flash.
Subestimar o dano inicial do inimigo.
Lutando antes do pico do nível 5.
Notas do coach
Se você sobreviver à fase inicial, poderá voltar.
Seu objetivo é atingir seu pico, não vencer logo no início.
FAQ
Qual é o pior tipo de contra-ataque dele?
Os junglers agressivos logo no início são os mais difíceis, pois atrapalham o ritmo dele antes do nível 5. Sem a habilidade definitiva, o Amumu tem pouco impacto nas lutas.
Ele consegue jogar contra assassinos?
Sim, mas ele precisa se adaptar. Ele não deve tentar enfrentá-los diretamente, mas sim esperar por combates em grupo.
Como evitar invasões?
Visão, planejamento inteligente de rotas e comunicação na rota são fundamentais para garantir o sucesso no início da partida.
Será que ele consegue se recuperar depois de um início ruim?
Sim, se ele chegar ao nível 5 e conseguir os itens essenciais, poderá voltar a ter um impacto significativo nas lutas em equipe.