agosto de 2026 · Patch 7.2d
Tank · TOP

Guia de counters de Gnar Wild Rift

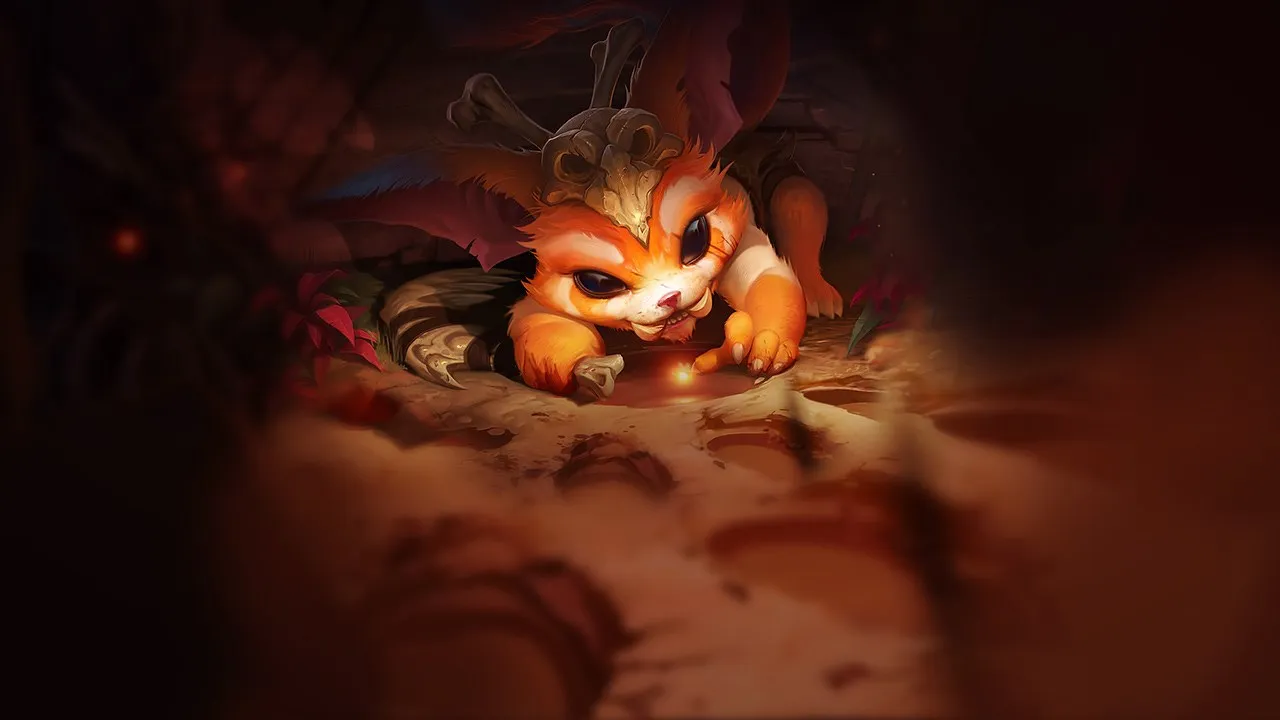
Gnar fica vulnerável quando os oponentes aproveitam as janelas entre suas formas. Composições capazes de punir sua mini form com burst ou poke constante reduzem sua eficácia. O timing ruim de transformação limita severamente seu impacto em teamfights.

★ TOP Tier S
DANO
UTIL
TANK
DIFF
Win 50.2% #56 · ↓9pt
Pick 3.5% #19
Ban 0.6% #96

Guia de counters de Gnar Wild Rift ★ Counter Sheet

Hard Counters

4

Esses campeões têm uma build e um estilo de jogo que superam diretamente o seu, o que pode tornar o controle da lane e o farm extremamente difíceis. As habilidades deles podem neutralizar seus principais pontos fortes ou te punir assim que você tenta jogar do seu jeito de sempre. Nesses matchups, o objetivo costuma ser reduzir os erros e buscar soluções fora do confronto direto.

Irelia

Irelia

mobilityspacing Mini Gnar naturally wants to abuse his range, but Irelia completely bypasses this by executing low-health minions with Bladesurge to close the distance instantly. Once she slides onto you, she quickly builds Ionian Fervor stacks and uses Flawless Duet to stun you. Your fragile Mini form cannot survive this sudden burst, especially if she resets her dash to follow your Hop. Ver detalhes
Irelia

Por quê

Mini Gnar naturally wants to abuse his range, but Irelia completely bypasses this by executing low-health minions with Bladesurge to close the distance instantly. Once she slides onto you, she quickly builds Ionian Fervor stacks and uses Flawless Duet to stun you. Your fragile Mini form cannot survive this sudden burst, especially if she resets her dash to follow your Hop.

Impacto na lane

You cannot safely contest the minion waves. Whenever your own minions get low, standing near them invites disaster since she will chain Bladesurge directly to you. This forces you to forfeit gold and let the wave crash under your turret. Trading with Boomerang Throw is highly risky, and attempting to proc Hyper is easily mitigated by her Defiant Dance damage reduction.

Como jogar

Position yourself away from your dying minions so she cannot use them as a bridge. Always hold Hop as a defensive tool, deploying it only after she commits her first Bladesurge. Avoid any aggressive trades unless your Rage Gene is nearly full. Transforming into Mega Gnar provides the crucial health pool to survive her initial burst, allowing you to dodge Flawless Duet and retaliate by slamming her into a wall with Boulder Toss.

Ficha completa →
Nasus

Nasus

slow_resistlane_pressure The matchup is heavily tilted against you because of Nasus's Wither. As Mini Gnar, your safety relies on kiting with Boomerang Throw and triggering the movement speed bonus from Hyper. Once Nasus targets you with Wither, your attack speed and movement speed are crippled. This makes it impossible to proc Hyper to escape, leaving you completely vulnerable to his Siphoning Strike chunks. Ver detalhes
Nasus

Por quê

The matchup is heavily tilted against you because of Nasus's Wither. As Mini Gnar, your safety relies on kiting with Boomerang Throw and triggering the movement speed bonus from Hyper. Once Nasus targets you with Wither, your attack speed and movement speed are crippled. This makes it impossible to proc Hyper to escape, leaving you completely vulnerable to his Siphoning Strike chunks.

Impacto na lane

Nasus's passive Soul Eater allows him to shrug off your early poke, while his scaling guarantees he will eventually outmatch you. If you push the wave carelessly, Nasus can freeze it near his turret and run you down the long lane using Wither. This forces you to play extremely defensively, conceding priority and letting him stack Siphoning Strike freely under his tower.

Como jogar

To survive, you must keep the minion wave frozen on your side of the map to deny Nasus the space to run you down. Never use Hop offensively; you must save this jump to create distance immediately when he casts Wither. If he activates Fury of the Sands, do not commit to a fight. Instead, wait for your rage bar to fill and use Mega Gnar's Boulder Toss to stun him against terrain and disengage safely.

Ficha completa →
Olaf

Olaf

cc_immunitykiting Gnar relies on spacing using Boomerang Throw slows in Mini form and locking down threats with Boulder Toss or Hyper stuns in Mega form. However, Olaf completely bypasses this defensive loop with Ragnarok. When active, its crowd control immunity renders all of Gnar’s slows and stuns entirely useless. Olaf can simply run you down with Undertow axes, ignoring your entire kit's self-peel. Ver detalhes
Olaf

Por quê

Gnar relies on spacing using Boomerang Throw slows in Mini form and locking down threats with Boulder Toss or Hyper stuns in Mega form. However, Olaf completely bypasses this defensive loop with Ragnarok. When active, its crowd control immunity renders all of Gnar’s slows and stuns entirely useless. Olaf can simply run you down with Undertow axes, ignoring your entire kit's self-peel.

Impacto na lane

This matchup forces you into an extremely defensive posture once both players reach level five. You cannot safely contest the wave beyond your tower's protection because Olaf can initiate an unstoppable chase at any moment. Trading with Hyper procs becomes too risky, as a single missed Boomerang Throw or an aggressive forward Hop allows Olaf to pop his ultimate and execute you, leading to severe farm deficits.

Como jogar

To survive, you must hoard Hop purely as an escape tool, never using it to harass or farm. Position yourself constantly near terrain so you can bounce over walls if Olaf charges. When he activates Ragnarok, do not attempt to fight back or use Boulder Toss to stun him; instead, immediately retreat toward your turret and focus entirely on dodging Undertow axes while his ultimate's duration expires.

Ficha completa →
Vayne

Vayne

ranged_dueldisengage Gnar struggles heavily because Vayne completely neutralizes his Mega form's threat. Whenever you attempt to close the distance to set up *Boulder Toss* against a wall, Vayne can instantly cast *Condemn* to knock you back and ruin the engage. Furthermore, in Mini form, her *Tumble* easily dodges your *Boomerang Throw*, while her *Silver Bolts* deal true damage that bypasses all your built-in tankiness. Ver detalhes
Vayne

Por quê

Gnar struggles heavily because Vayne completely neutralizes his Mega form's threat. Whenever you attempt to close the distance to set up *Boulder Toss* against a wall, Vayne can instantly cast *Condemn* to knock you back and ruin the engage. Furthermore, in Mini form, her *Tumble* easily dodges your *Boomerang Throw*, while her *Silver Bolts* deal true damage that bypasses all your built-in tankiness.

Impacto na lane

You will be relentlessly shoved under your turret, bleeding gold as Vayne denies you farm with her superior range. Trading is impossible; if you try to proc *Hyper* speed, she responds with *Tumble* and *Silver Bolts* procs. This constant harassment forces early recalls, giving Vayne free plates and complete top-side priority, leaving your jungler without any help.

Como jogar

Survive by hugging the opposite side of the lane, never standing between Vayne and a wall to avoid her own *Condemn* stun. Retain *Hop* exclusively as a defensive tool to escape her *Night Hunter* chase rather than using it to engage. Only look for a fight when Vayne wastes her knockback, or wait until teamfights where you can flank her from the fog of war when her focus is elsewhere.

Ficha completa →

Desfavoráveis

16

Esses campeões têm ferramentas que geralmente dão a eles vantagem no confronto, sem tornar o matchup impossível de jogar. Eles podem ter mais alcance, mais capacidade de aguentar sua ofensiva ou mais formas de responder aos seus engajamentos. Você vai precisar adaptar sua abordagem e escolher com cuidado os momentos em que aceita a luta.

Ambessa

Ambessa

gap_closerage_management Ambessa excels at shutting down your ranged advantage as Mini Gnar. Every time she casts Cunning Sweep or Lacerate, her Drakehound's Step passive grants her swift dashes that instantly close the distance. This mobility easily bypasses your spacing, allowing her to burst you down before your Rage Gene can transform you. You cannot rely on slow-poking because her mobility outpaces your kiting tools. Ver detalhes
Ambessa

Por quê

Ambessa excels at shutting down your ranged advantage as Mini Gnar. Every time she casts Cunning Sweep or Lacerate, her Drakehound's Step passive grants her swift dashes that instantly close the distance. This mobility easily bypasses your spacing, allowing her to burst you down before your Rage Gene can transform you. You cannot rely on slow-poking because her mobility outpaces your kiting tools.

Impacto na lane

Because Ambessa can dash forward at any moment, walking up to last-hit waves with Mini Gnar is incredibly risky. If you burn Hop defensively, she will immediately zone you out of gold and experience range. This pressure forces you to play under your turret, where she can safely chip away at your health with the outer edge of Cunning Sweep or dive you once she unlocks Public Execution.

Como jogar

To survive, never use Hop aggressively; save it strictly to escape her Cunning Sweep slam transition. Only trade when your rage meter is around 80%, allowing you to quickly trigger Rage Gene. Once transformed, bait out her Repudiation shield before committing to Boulder Toss, ensuring your crowd control isn't blocked. If she catches you in Mini form near her turret, retreat immediately and farm safely using only Boomerang Throw.

Ficha completa →
Yone

Yone

spacingtethering Mini Gnar struggles because Yone's raw gap-close completely nullifies your main safety tool. Normally, you rely on *Hop* to bounce away from melee threats, but Yone can activate *Soul Unbound* to gain ramp-up movement speed and relentlessly pursue you over the distance of your leap. Combined with the dash and knock-up from *Mortal Steel*, Yone easily closes the gap, forcing lethal trades before you can transform. Ver detalhes
Yone

Por quê

Mini Gnar struggles because Yone's raw gap-close completely nullifies your main safety tool. Normally, you rely on *Hop* to bounce away from melee threats, but Yone can activate *Soul Unbound* to gain ramp-up movement speed and relentlessly pursue you over the distance of your leap. Combined with the dash and knock-up from *Mortal Steel*, Yone easily closes the gap, forcing lethal trades before you can transform.

Impacto na lane

This threat forces you into a highly defensive posture, conceding early wave control. You cannot safely poke Yone with *Boomerang Throw* or trigger *Hyper* without risking a devastating counter-engage. If Yone freezes the wave near his tower, you are in extreme danger; he can chase you down the entire length of the lane using *Soul Unbound*, ruining your recall timings and starving your rage bar.

Como jogar

To survive, you must use *Boomerang Throw* to farm from maximum distance and absolutely hold *Hop* until Yone has already committed his *Soul Unbound*. If he advances with his third stack of *Mortal Steel*, stay well behind your caster minions to deny him an easy knock-up. Should he catch you in Mini form, bait his dash near walls so you can immediately transform via *Rage Gene* and slam him with *Boulder Toss*.

Ficha completa →
Fiora

Fiora

parry_timingspacing Fiora's Riposte completely neutralizes Gnar's most impactful crowd control in Mega form. While Mini Gnar can poke with Boomerang Throw and trigger Hyper for movement speed, any attempt to engage or disengage with Boulder Toss or the stun from Mega's Hyper is highly predictable. If Fiora parries these slow-animation crowd controls, her Riposte stuns you instead, immediately turning a massive Mega Gnar advantage into a lethal counter-engage. Ver detalhes
Fiora

Por quê

Fiora's Riposte completely neutralizes Gnar's most impactful crowd control in Mega form. While Mini Gnar can poke with Boomerang Throw and trigger Hyper for movement speed, any attempt to engage or disengage with Boulder Toss or the stun from Mega's Hyper is highly predictable. If Fiora parries these slow-animation crowd controls, her Riposte stuns you instead, immediately turning a massive Mega Gnar advantage into a lethal counter-engage.

Impacto na lane

You cannot freely abuse your range advantage because Fiora can close the gap instantly using Lunge to strike vitals from Duelist's Dance. This constant pressure limits your ability to safely farm and build up Rage Gene. When your rage bar caps, instead of being a threat, your Mega form becomes a liability because Fiora will bait your slow Boulder Toss, stun you, and activate Grand Challenge to melt your health bar under your own tower.

Como jogar

To survive, you must hold Hop to jump away whenever she targets a vital with Lunge. During your Mega transformation, never cast Boulder Toss or Hyper immediately; instead, walk at her to bait out Riposte. If she holds her parry, simply use basic attacks. Should she waste Riposte, you have a brief window to safely use Boomerang Throw to slow her and disengage. If she successfully triggers Grand Challenge, hug a wall to deny her the final vital.

Ficha completa →
Jax

Jax

disengagespacing Jax dominates this matchup because Leap Strike combined with Counter Strike completely nullifies Mini Gnar's ranged advantage. If Jax lands the stun from Counter Strike, his Relentless Assault and Empower will quickly shred your health. Your survival hinges entirely on using Hop the exact moment Jax activates Leap Strike, allowing you to bounce away before the evasion window ends and the stun triggers. Ver detalhes
Jax

Por quê

Jax dominates this matchup because Leap Strike combined with Counter Strike completely nullifies Mini Gnar's ranged advantage. If Jax lands the stun from Counter Strike, his Relentless Assault and Empower will quickly shred your health. Your survival hinges entirely on using Hop the exact moment Jax activates Leap Strike, allowing you to bounce away before the evasion window ends and the stun triggers.

Impacto na lane

Due to this constant threat, you cannot safely harass Jax with Boomerang Throw. If your Hop is on cooldown, you must retreat behind your minions, giving up wave control entirely. Jax will slow-push to dive you or roam, forcing you to bleed gold under your turret. Any bad trade results in an emergency recall, letting Jax secure easy plates and stack Relentless Assault against your tower.

Como jogar

Never use Hop offensively while Jax's Counter Strike is available. When farming, position yourself near your own dying minions to guarantee a bounce target for Hop if he initiates. If Jax misses Leap Strike or wastes Counter Strike, immediately punish him with Boomerang Throw and Hyper procs while his primary tools are down. If you get caught, quickly transition to Mega Gnar if possible to shove him away with Boulder Toss.

Ficha completa →
Camille

Camille

all_inmobility_clash Camille's Hookshot completely neutralizes Mini Gnar's natural range advantage by forcing immediate engagements. If you waste Hop, she will instantly dive you, using Adaptive Defenses to absorb your counter-harass. Conversely, when your Rage Gene triggers Mega Gnar, the dynamic flips entirely. She cannot safely use Hookshot or The Hextech Ultimatum into your massive crowd control from Boulder Toss and Hyper. Ver detalhes
Camille

Por quê

Camille's Hookshot completely neutralizes Mini Gnar's natural range advantage by forcing immediate engagements. If you waste Hop, she will instantly dive you, using Adaptive Defenses to absorb your counter-harass. Conversely, when your Rage Gene triggers Mega Gnar, the dynamic flips entirely. She cannot safely use Hookshot or The Hextech Ultimatum into your massive crowd control from Boulder Toss and Hyper.

Impacto na lane

You cannot safely freeze or slow-push in Mini Gnar form without risking a sudden Hookshot engage that chunks your health bar. Camille dictates the wave's positioning early, using Tactical Sweep to poke and heal. This forces you to play defensively under tower, waiting for your rage bar to fill. Your only windows to contest the wave and secure recall timings occur right before your transformation.

Como jogar

Never use Hop offensively unless Camille's Hookshot is on its long cooldown. Stand away from walls when in Mini Gnar to give yourself more time to react to her grapple, but position near terrain when your Rage Gene is almost full to set up a devastating Boulder Toss stun. If she traps you with The Hextech Ultimatum, delay your crowd control until her Adaptive Defenses shield expires, then crush her.

Ficha completa →
Teemo

Teemo

blindrage_management Teemo dominates the early poke war because his Blinding Dart completely neutralizes Mini Gnar's primary damage source. When you attempt to trade with basic attacks to proc Hyper, Teemo's blind makes your attacks miss, preventing you from getting that third stack for bonus damage and movement speed. Meanwhile, his Toxic Shot continuously chips away at your health bar from a safe range. Ver detalhes
Teemo

Por quê

Teemo dominates the early poke war because his Blinding Dart completely neutralizes Mini Gnar's primary damage source. When you attempt to trade with basic attacks to proc Hyper, Teemo's blind makes your attacks miss, preventing you from getting that third stack for bonus damage and movement speed. Meanwhile, his Toxic Shot continuously chips away at your health bar from a safe range.

Impacto na lane

This interaction forces you to play defensively under your turret, sacrificing early wave control. Attempting to contest farm results in severe damage from Toxic Shot, forcing early recalls and leaving your tower vulnerable. If you cannot manage your rage to match his aggression, Teemo easily sets up Noxious Trap minefields around the lane, preventing you from safely using Hop to escape or engage.

Como jogar

Your path to victory lies in surviving the early levels and timing your Mega Gnar transformation. Use Boomerang Throw to farm from safety and slowly build your rage. Never use Hop forward while Teemo's Blinding Dart is available. Once he wastes his blind, or when your Rage Gene is about to trigger, use the double bounce of Hop to close the gap, transform, and immediately slam him into a wall with Boulder Toss.

Ficha completa →
Malphite

Malphite

sustaingank_setup Malphite directly neutralizes your main defense in Mini form. Whenever you try to trigger the movement speed from Hyper to kite or disengage, his Seismic Shard steals that velocity. This speed transfer not only cancels out your mobility but also slows you down enough for him to easily gap-close and setup a devastating Unstoppable Force cascade when you are most fragile. Ver detalhes
Malphite

Por quê

Malphite directly neutralizes your main defense in Mini form. Whenever you try to trigger the movement speed from Hyper to kite or disengage, his Seismic Shard steals that velocity. This speed transfer not only cancels out your mobility but also slows you down enough for him to easily gap-close and setup a devastating Unstoppable Force cascade when you are most fragile.

Impacto na lane

This interaction turns the early laning phase into a grueling war of attrition where you are constantly poked down. Because Malphite can cycle Seismic Shard while absorbing your retaliatory damage with Granite Shield, you cannot safely establish wave priority. You will often find yourself shoved under turret, struggling to manage your Rage Gene safely while constantly fearing a sudden dive once you drop low.

Como jogar

To survive, alter your build path immediately to prioritize early magic resistance and health rather than pure offensive power. In lane, focus on farming safely from a distance using Boomerang Throw. Never use Hop aggressively; save this crucial jump to escape backward the moment you see Seismic Shard coming, or to buffer the knockup of Unstoppable Force if your reaction time allows. If your health drops below half, concede the wave and retreat.

Ficha completa →
Poppy

Poppy

dash_blockwall_positioning This matchup is dictated by how Poppy completely shuts down your safety net. As Mini Gnar, your primary defensive tool is Hop, but Poppy's active dash-blocking barrier stops this jump mid-air, grounding you instantly. Without the mobility of Hop, you are left highly vulnerable to her pinning you against walls, turning what should be a safe ranged poke lane into a highly dangerous zone where your Rage Gene transitions are difficult to time safely. Ver detalhes
Poppy

Por quê

This matchup is dictated by how Poppy completely shuts down your safety net. As Mini Gnar, your primary defensive tool is Hop, but Poppy's active dash-blocking barrier stops this jump mid-air, grounding you instantly. Without the mobility of Hop, you are left highly vulnerable to her pinning you against walls, turning what should be a safe ranged poke lane into a highly dangerous zone where your Rage Gene transitions are difficult to time safely.

Impacto na lane

Because you cannot reliably use Hop to escape, you must concede early wave control. If you push too far, Poppy can easily position to slam you into the alcove or tower walls. Trading becomes highly risky; popping Hyper requires three attacks, but overextending for that third hit allows her to activate her barrier and run you down. Consequently, you will often find yourself farming under tower, bleeding gold and losing early priority.

Como jogar

To survive, you must adopt a strict positioning rule: stay in the middle of the lane, far from all walls, and never initiate with Hop. Keep this jump purely as a reaction, and only cast it after Poppy has wasted her dash-blocking barrier. Use Boomerang Throw to farm from a safe distance and slowly build your Rage Gene. When preparing to transform, ensure you are close to your own tower so you can safely transition into Mega Gnar without getting caught in transition.

Ficha completa →
Jayce

Jayce

spacingburst_defense Jayce dominates the early poke war because his ranged stance matches your Mini Gnar form, but his burst potential is far superior. The danger peaks when you use Hop aggressively; without this escape tool, Jayce can immediately switch to hammer form and use To the Skies! to gap-close and unleash his full melee burst. Your fragile Mini form cannot survive this trade without your safety tool. Ver detalhes
Jayce

Por quê

Jayce dominates the early poke war because his ranged stance matches your Mini Gnar form, but his burst potential is far superior. The danger peaks when you use Hop aggressively; without this escape tool, Jayce can immediately switch to hammer form and use To the Skies! to gap-close and unleash his full melee burst. Your fragile Mini form cannot survive this trade without your safety tool.

Impacto na lane

This threat forces you into a defensive posture, yielding early wave control. You must concede priority, letting Jayce push while you farm with Boomerang Throw. If you get chunked early, you will be dived or forced into a terrible recall that costs plates. The lane dynamic revolves around surviving his ranged pressure until your Rage Gene triggers, allowing Mega Gnar to threaten a counter-all-in near your tower.

Como jogar

Never cast Hop forward unless Jayce has just wasted To the Skies! or is completely out of mana. Keep this ability strictly for disengaging his hammer-form leaps. Focus on stacking your Rage Gene safely. Once you transition into Mega Gnar, look to bait him near walls to land a devastating Boulder Toss, turning his aggressive leaps into a deadly stun. If he plays too safely, use your temporary tankiness to secure a clean wave crash.

Ficha completa →
Yasuo

Yasuo

projectile_blockmobility Yasuo's Wind Wall is the absolute bane of Mini Gnar. If he throws Boomerang Throw to poke or farm, Wind Wall completely deletes the projectile. This doesn't just stop the damage; it prevents Gnar from catching the boomerang, forcing the maximum cooldown on his main tool. Without this ability, Gnar cannot safely stack Hyper, leaving him vulnerable to Yasuo's Sweeping Blade engages. Ver detalhes
Yasuo

Por quê

Yasuo's Wind Wall is the absolute bane of Mini Gnar. If he throws Boomerang Throw to poke or farm, Wind Wall completely deletes the projectile. This doesn't just stop the damage; it prevents Gnar from catching the boomerang, forcing the maximum cooldown on his main tool. Without this ability, Gnar cannot safely stack Hyper, leaving him vulnerable to Yasuo's Sweeping Blade engages.

Impacto na lane

This interaction completely shifts how you manage the wave. Because Yasuo can dash through your minions with Sweeping Blade, you cannot safely stand near your own wave when your boomerang is on cooldown. If he blocks Boomerang Throw, he will immediately freeze the wave or force a heavy trade. You are constantly pushed under tower, struggling to build your Rage Gene safely without taking massive damage from Steel Tempest.

Como jogar

To survive, bait his Wind Wall using auto-attacks to pop his Way of the Wanderer shield first. Never throw Boomerang Throw unless he has already wasted his wall or you are angling it away from his direct line of sight. If he dashes forward with Sweeping Blade, immediately use Hop backward to reposition. Save your Mega Gnar form for tower defense; a well-timed Boulder Toss can stun him against your own turret if he gets greedy with Steel Tempest.

Ficha completa →
Riven

Riven

mobilitydisengage This lane is a constant struggle against Riven's high mobility. Whenever you attempt to poke with Boomerang Throw, she can absorb the damage entirely using the shield from Valor. This dash simultaneously closes the distance, allowing her to easily follow up with Ki Burst to stun you. Once you are caught, her Broken Wings combo chunks your Mini Gnar health bar before you can trigger Hyper. Ver detalhes
Riven

Por quê

This lane is a constant struggle against Riven's high mobility. Whenever you attempt to poke with Boomerang Throw, she can absorb the damage entirely using the shield from Valor. This dash simultaneously closes the distance, allowing her to easily follow up with Ki Burst to stun you. Once you are caught, her Broken Wings combo chunks your Mini Gnar health bar before you can trigger Hyper.

Impacto na lane

Because of this threat, you cannot freely contest the minion wave while in Mini form. Riven will deny you farm by positioning aggressively, forcing you to farm from extreme range. If she successfully baits out your Hop, she gains total wave control and can dive you with Blade of the Exile, limiting your ability to assist your team across the map.

Como jogar

To survive, you must hold your Hop exclusively to react to her third strike of Broken Wings, ensuring you bounce away safely. Only throw your Boomerang Throw when her Valor is on cooldown, or use it to bait her shield before immediately retreating. If she engages when your rage is nearly full, transform into Mega and use Boulder Toss to slam her against the terrain.

Ficha completa →
Wukong

Wukong

decoyengage_check Wukong holds a massive advantage in direct trades because his Warrior Trickster perfectly counters Gnar's primary threat window. When Gnar transforms into Mega Gnar to lock down the monkey, Wukong can reactively deploy his clone to absorb Boulder Toss or escape the Hyper smash. This leaves Gnar vulnerable in his slow Mega form, unable to retaliate while Wukong shreds him with Nimbus Strike and Golden Staff. Ver detalhes
Wukong

Por quê

Wukong holds a massive advantage in direct trades because his Warrior Trickster perfectly counters Gnar's primary threat window. When Gnar transforms into Mega Gnar to lock down the monkey, Wukong can reactively deploy his clone to absorb Boulder Toss or escape the Hyper smash. This leaves Gnar vulnerable in his slow Mega form, unable to retaliate while Wukong shreds him with Nimbus Strike and Golden Staff.

Impacto na lane

This interaction dictates a passive laning phase where you cannot safely crash waves or contest neutral territory without high rage. Wukong will constantly seek to zone you by threatening Nimbus Strike. If you waste Hop to escape his initial jump, he can easily chase you down with Cyclone. Every trade you take in Mini Gnar risks putting you in lethal range of his physical burst.

Como jogar

To survive, you must play around Wukong's defensive cooldown. Never cast Boulder Toss the moment you transform; instead, bait his decoy by walking up or using Boomerang Throw. Only unleash your heavy crowd control once the decoy from Warrior Trickster has vanished. If he engages with Nimbus Strike while you are in Mini Gnar, immediately use Hop to bounce away off your own minions to deny his Golden Staff follow-up.

Ficha completa →
Pantheon

Pantheon

point_and_clickburst_defense The danger in this matchup lies in how Pantheon completely neutralizes Mega Gnar’s primary threat. When you transform and attempt to turn the tide with Boulder Toss, Pantheon can instantly activate Aegis Assault facing you. This directional shield blocks all the damage of your ultimate and the inevitable stun follow-up from Hyper, leaving you vulnerable in melee range once your rage subsides. Ver detalhes
Pantheon

Por quê

The danger in this matchup lies in how Pantheon completely neutralizes Mega Gnar’s primary threat. When you transform and attempt to turn the tide with Boulder Toss, Pantheon can instantly activate Aegis Assault facing you. This directional shield blocks all the damage of your ultimate and the inevitable stun follow-up from Hyper, leaving you vulnerable in melee range once your rage subsides.

Impacto na lane

Pantheon dictates the wave's positioning early on because his Mortal Will-infused Comet Spear outranges Mini Gnar's basic attacks. If you jump forward with Hop to trade, he punishes you instantly with Shield Vault into a full burst. You are forced to play defensively near your turret, sacrificing early priority and bleeding health whenever you try to secure minions, delaying your Mega form's offensive impact.

Como jogar

To survive, you must bait out Aegis Assault before committing your ultimate. Use Boomerang Throw to poke from safety and trigger Hyper's movement speed boost to dodge his Comet Spear. When in Mega form, walk up menacingly to bait his shield instead of immediately casting Boulder Toss. If he holds Aegis Assault, hold your ultimate too, using your basic attacks and Hop to reposition behind him before unleashing your crowd control.

Ficha completa →

Outros matchups

Skill Matchups

14

Esses confrontos são, acima de tudo, duelos de execução: os dois campeões têm formas reais de levar vantagem. Uma habilidade importante esquivada, um engajamento bem antecipado ou um erro de posicionamento podem ser suficientes para decidir o duelo. Conhecer o matchup e reconhecer as janelas de ação certas faz toda a diferença.

Mordekaiser

Mordekaiser

dodgingkiting This matchup is a pure test of spacing determined by how you manage Gnar's dual forms against Mordekaiser's pull. While Mini Gnar can easily harass with Boomerang Throw and trigger Hyper for movement speed, you are constantly vulnerable to Death's Grasp. Getting pulled into Mordekaiser's melee range allows him to activate Darkness Rise and smash you with Obliterate, forcing a deadly 1v1 inside his Realm of Death. Ver detalhes
Mordekaiser

Por quê

This matchup is a pure test of spacing determined by how you manage Gnar's dual forms against Mordekaiser's pull. While Mini Gnar can easily harass with Boomerang Throw and trigger Hyper for movement speed, you are constantly vulnerable to Death's Grasp. Getting pulled into Mordekaiser's melee range allows him to activate Darkness Rise and smash you with Obliterate, forcing a deadly 1v1 inside his Realm of Death.

Impacto na lane

Because Gnar's survivability hinges on keeping his distance, wave positioning is crucial. If Mordekaiser freezes the lane near his tower, you cannot safely poke with Boomerang Throw without risking a lethal pull. A single misstep that forces you to blow Hop defensively leaves you entirely defenseless against a dive when his Realm of Death is active, completely halting your Rage Gene control.

Como jogar

To win, you must never use Hop offensively unless Mordekaiser has already missed Death's Grasp. Keep your distance and focus on dodging Obliterate sideways. If he traps you in Realm of Death, do not panic; immediately use the movement speed from a Hyper proc or bounce away with Hop to run down his ultimate's timer. If you trigger Rage Gene, bait his Indestructible shield before committing to Boulder Toss.

Ficha completa →
Darius

Darius

kite_vs_catchrage_bar This lane is a pure test of spacing and cooldown management. Mini Gnar relies on Boomerang Throw and the movement speed from Hyper to poke Darius from safety. However, Darius can completely negate this range advantage with Apprehend. If Darius catches you in your fragile Mini form while Hop is on cooldown, his Crippling Strike will slow you enough to easily stack Hemorrhage and execute you with Noxian Guillotine. Ver detalhes
Darius

Por quê

This lane is a pure test of spacing and cooldown management. Mini Gnar relies on Boomerang Throw and the movement speed from Hyper to poke Darius from safety. However, Darius can completely negate this range advantage with Apprehend. If Darius catches you in your fragile Mini form while Hop is on cooldown, his Crippling Strike will slow you enough to easily stack Hemorrhage and execute you with Noxian Guillotine.

Impacto na lane

Wave positioning dictates who dictates the tempo. Pushing too far from your turret invites Darius to zone you out, as he can block your escape by holding Apprehend. This forces you to play defensively, sacrificing early gold. The dynamic shifts dramatically based on Rage Gene. Darius must respect your Mega form's crowd control, meaning your transformation windows are your only safe opportunities to contest the minion wave and secure priority.

Como jogar

Never use Hop aggressively unless you know Apprehend is down. Keep your distance and use Boomerang Throw to farm or slow Darius if he rushes at you with Decimate. When your Rage Gene is nearly full, use Hop to bounce forward, transform into Mega Gnar, and burst him with Hyper and Boulder Toss against a wall. If he manages to stack Hemorrhage to four, disengage immediately and let the bleed decay before re-engaging.

Ficha completa →
Gwen

Gwen

kitingsidelane This even matchup hinges entirely on how Gwen deploys Hallowed Mist to neutralize your ranged threat. While Mini Gnar wants to poke from safety with Boomerang Throw and trigger Hyper passive stacks, Gwen can drop her zone to negate your projectiles entirely. Because Gwen scales significantly better into the late game, failing to punish her early due to a wasted Boomerang Throw allows her to bypass your spacing advantage. Ver detalhes
Gwen

Por quê

This even matchup hinges entirely on how Gwen deploys Hallowed Mist to neutralize your ranged threat. While Mini Gnar wants to poke from safety with Boomerang Throw and trigger Hyper passive stacks, Gwen can drop her zone to negate your projectiles entirely. Because Gwen scales significantly better into the late game, failing to punish her early due to a wasted Boomerang Throw allows her to bypass your spacing advantage.

Impacto na lane

During the laning phase, every trade is a test of spacing. If Gwen blocks your Boomerang Throw with Hallowed Mist, she can immediately dash forward with Skip 'n Slash to force a melee skirmish. This shuts down your ability to slow her, letting her stack Snip Snip! on the wave and chunk your health pool. Losing this health pressure means you cannot crash waves or safely build your Rage Gene.

Como jogar

Never initiate trades with Boomerang Throw when Gwen has her Hallowed Mist available. Instead, walk up to bait her Skip 'n Slash, then immediately use Hop to disengage or reposition. Once her mist dissipates, you have a crucial window to kite her with Hyper movespeed. If she catches you in Mega form, focus on chaining Boulder Toss to slam her against the terrain before she can slide away.

Ficha completa →
Renekton

Renekton

spacingburst_defense This matchup is a pure test of mobility tracking. Renekton is entirely dependent on Slice and Dice to close the distance and lock you down with Ruthless Predator. As Mini Gnar, your primary defense is conserving Hop to bounce away the moment he dashes. Failing to react in time allows him to unleash his fury-empowered burst, leaving you with no room for counterplay. Ver detalhes
Renekton

Por quê

This matchup is a pure test of mobility tracking. Renekton is entirely dependent on Slice and Dice to close the distance and lock you down with Ruthless Predator. As Mini Gnar, your primary defense is conserving Hop to bounce away the moment he dashes. Failing to react in time allows him to unleash his fury-empowered burst, leaving you with no room for counterplay.

Impacto na lane

The lane's pressure shifts dramatically based on these movement spells. Wasting Hop on an aggressive jump gives Renekton total wave control, letting him freeze or setup a dive using Dominus. Conversely, baiting his double dash without getting caught leaves him extremely vulnerable, allowing you to freely chip his health with Boomerang Throw and trigger Hyper movement speed boosts as he retreats.

Como jogar

Keep a strict rule: never use Hop forward unless you know his Slice and Dice is on its long cooldown. Position yourself near your own minions to guarantee a double bounce safety route if he tries to aggressive-dash. If he manages to catch you without your jump, use the slow from Boomerang Throw to disengage, and focus on building your Rage Gene meter quickly to gain the tankiness needed to survive his burst.

Ficha completa →
Maokai

Maokai

untargetabilitygank_setup This skill matchup revolves around Gnar's poke versus Maokai's point-and-click engage. While Mini Gnar wants to harass from range, Maokai can reactively cast Twisted Advance to become untargetable, completely dodging Boomerang Throw. This not only negates Gnar's primary slow and kiting tool but also locks him down instantly, leaving Gnar highly vulnerable to incoming enemy jungler ganks. Ver detalhes
Maokai

Por quê

This skill matchup revolves around Gnar's poke versus Maokai's point-and-click engage. While Mini Gnar wants to harass from range, Maokai can reactively cast Twisted Advance to become untargetable, completely dodging Boomerang Throw. This not only negates Gnar's primary slow and kiting tool but also locks him down instantly, leaving Gnar highly vulnerable to incoming enemy jungler ganks.

Impacto na lane

Because of this interaction, Gnar cannot mindlessly push the wave. Shoving Maokai under tower with Boomerang Throw invites him to freeze and use Twisted Advance to set up a deadly gank. Trades are dictated by wave position; if Gnar loses control and the wave sits on Maokai's side, Gnar's health bar will suffer from Sapling Toss zone control and relentless Bramble Smash trade-backs.

Como jogar

To survive, you must hold Boomerang Throw until Maokai either wastes Twisted Advance or is forced to farm. Keep the minion wave closer to your side of the map to deny Maokai the long lane chase. If Maokai does jump on you, immediately use Hop to bounce away before the root fully lands, or activate Hyper to gain the movement speed needed to disengage. In Mega form, save Boulder Toss to disrupt his follow-up.

Ficha completa →
K'Santé

K'Santé

cc_negationall_in This matchup is a strict spacing test defined by how you manage your forms against K'Santé's defensive tools. While Mini Gnar can safely poke with Boomerang Throw, the entire dynamic shifts when you trigger Rage Gene. Mega Gnar relies heavily on crashing enemies into walls with Boulder Toss, but K'Santé can perfectly counter this by timing Path Maker to become unstoppable, completely absorbing your ultimate's displacement and stun. Ver detalhes
K'Santé

Por quê

This matchup is a strict spacing test defined by how you manage your forms against K'Santé's defensive tools. While Mini Gnar can safely poke with Boomerang Throw, the entire dynamic shifts when you trigger Rage Gene. Mega Gnar relies heavily on crashing enemies into walls with Boulder Toss, but K'Santé can perfectly counter this by timing Path Maker to become unstoppable, completely absorbing your ultimate's displacement and stun.

Impacto na lane

K'Santé will constantly threaten you with the third cast of Ntofo Strikes to force out your Hop. If you jump too early, he can use Footwork to close the distance and drag you away with All Out. During Mega Gnar windows, failing to land Boulder Toss because of his unstoppable charge completely ruins your pressure, leaving you squishy and immobile once your rage subsides.

Como jogar

Maintain a strict spacing boundary in Mini Gnar, using Boomerang Throw to farm and apply Hyper marks without stepping into his Footwork range. When transitioning into Mega Gnar, never lead your trade with Boulder Toss. Instead, walk up to threaten him, baiting out his Path Maker first. Once his unstoppable duration ends, you can safely unleash your ultimate or lock him down with Hyper's area stun.

Ficha completa →

Outros matchups

Favoráveis

12

Esses campeões geralmente têm dificuldade para responder às suas principais forças, o que te dá mais liberdade para abordar o confronto. Você costuma ter várias formas de pressioná-los e forçar trocas a seu favor. Aproveite essa vantagem para impor seu ritmo, em vez de dar tempo para eles se estabilizarem.

Volibear

Volibear

kitingdisengage Gnar dominates because Volibear must run in a straight line to trade. When Volibear activates Thundering Smash to close the distance, a well-timed Boomerang Throw immediately neutralizes his speed boost with a heavy slow. This leaves the demi-god stranded, unable to reach melee range to land Frenzied Maul or trigger his stun, while Mini Gnar easily procs Hyper for bonus magic damage and movement speed. Ver detalhes
Volibear

Por quê

Gnar dominates because Volibear must run in a straight line to trade. When Volibear activates Thundering Smash to close the distance, a well-timed Boomerang Throw immediately neutralizes his speed boost with a heavy slow. This leaves the demi-god stranded, unable to reach melee range to land Frenzied Maul or trigger his stun, while Mini Gnar easily procs Hyper for bonus magic damage and movement speed.

Impacto na lane

Because Volibear cannot easily touch you, you dictate the minion waves. You can slowly slow-push waves toward his turret, forcing him to use Sky Splitter to farm under tower rather than poke you. If he steps up to break your freeze, you can safely whittle his health bar down. He is forced into defensive recalls, which allows you to secure easy plates or transform into Mega Gnar to threaten a dive with Boulder Toss.

Como jogar

Always hold Boomerang Throw specifically for when Volibear starts sprinting with Thundering Smash. Never throw it randomly to farm. Position yourself just behind your caster minions, and if he attempts an aggressive flank, use Hop backwards to guarantee safety, landing a bounce to maintain your distance. Once he wastes his sprint, aggressively chase him down with Hyper procs. If you accidentally get caught in Sky Splitter, immediately disengage rather than trying to trade through his shield.

Ficha completa →
Garen

Garen

slow_cleansespacing Gnar dominates this matchup by poking Garen from range in Mini form. However, Garen can instantly neutralize your primary kite tool, Boomerang Throw, by activating Decisive Strike to cleanse the slow. If Garen triggers this speed boost while your Hop is on cooldown, he can easily close the distance, silence you, and spin through your health bar with Judgment. Ver detalhes
Garen

Por quê

Gnar dominates this matchup by poking Garen from range in Mini form. However, Garen can instantly neutralize your primary kite tool, Boomerang Throw, by activating Decisive Strike to cleanse the slow. If Garen triggers this speed boost while your Hop is on cooldown, he can easily close the distance, silence you, and spin through your health bar with Judgment.

Impacto na lane

Because you hold the range advantage, Garen is forced to play defensively, relying on Perseverance to sustain. If you let him heal passively, you lose your pressure. Denying his regen with constant basic attacks forces him under tower. However, pushing too deep without Hop available makes you extremely vulnerable to a lethal Demacian Justice execution if he flashes on you.

Como jogar

Never cast Boomerang Throw when Garen is already running at you with Decisive Strike active; wait for him to waste the cleanse first. Always hold Hop as your emergency escape. If Garen approaches, use your range to trigger Hyper for the movement speed boost instead of jumping. Only use Mega Gnar's crowd control, like Boulder Toss against a wall, once Garen's Courage shield and tenacity buff have expired.

Ficha completa →
Dr. Mundo

Dr. Mundo

kite_and_pokepercent_health_shred Dr. Mundo relies on walking up to targets to deal damage, but Gnar completely shuts this down in Mini form. Every time you trigger the three-hit passive of Hyper, you deal percentage-health magic damage that shreds Mundo's high health pool while gaining a massive movement speed boost. This bonus mobility makes it incredibly easy to dodge Infected Bonesaw and keep him at arm's length indefinitely. Ver detalhes
Dr. Mundo

Por quê

Dr. Mundo relies on walking up to targets to deal damage, but Gnar completely shuts this down in Mini form. Every time you trigger the three-hit passive of Hyper, you deal percentage-health magic damage that shreds Mundo's high health pool while gaining a massive movement speed boost. This bonus mobility makes it incredibly easy to dodge Infected Bonesaw and keep him at arm's length indefinitely.

Impacto na lane

Because Mundo cannot easily close the gap without being heavily punished, you dictate the wave's tempo. You can slow-push waves at will, using Boomerang Throw to poke him under his tower. He is forced to use Infected Bonesaw just to secure last hits rather than trading with you. This constant harassment depletes his health, forcing premature activations of Maximum Dosage or sending him back to base early, giving you free plates.

Como jogar

Always position yourself behind your own minions to block his Infected Bonesaw while keeping a clear line of sight to auto-attack him. Save Hop strictly as an escape tool for when he activates Maximum Dosage and tries to run you down with Heart Zapper. If you accidentally get hit by a cleaver, immediately back off and use Boomerang Throw to slow him down, resetting your spacing until his slow wears off.

Ficha completa →
Sett

Sett

kitingspacing Gnar dominates this matchup because his ranged form naturally suffocates Sett's melee threat. Whenever Sett attempts to close the gap using the movement speed from Knuckle Down, Gnar can reactively use Hop to bounce away. This completely neutralizes Sett's primary engage tool, Facebreaker, and allows Gnar to safely reposition out of the devastating center line of Haymaker if Sett tries to retaliate with grit-powered shields. Ver detalhes
Sett

Por quê

Gnar dominates this matchup because his ranged form naturally suffocates Sett's melee threat. Whenever Sett attempts to close the gap using the movement speed from Knuckle Down, Gnar can reactively use Hop to bounce away. This completely neutralizes Sett's primary engage tool, Facebreaker, and allows Gnar to safely reposition out of the devastating center line of Haymaker if Sett tries to retaliate with grit-powered shields.

Impacto na lane

Sett is forced to bleed health for every minion, allowing Gnar to slow-push waves and crash them under the tower at will. Because Sett cannot easily land The Show Stopper without getting close, Gnar enjoys free tower plate harassment. Sett's jungle help is neutralized because Gnar can easily escape ganks using the double bounce of Hop, leaving Sett perpetually low on health and trapped under his own turret.

Como jogar

Never initiate a trade using Hop; keep this ability strictly as a counter to Sett's Facebreaker. Constantly chip away at him with Boomerang Throw and trigger Hyper for the movement speed boost to dance just outside his grab range. If Sett manages to catch you with his ultimate, The Show Stopper, immediately transform into Mega Gnar to absorb the burst with your increased health pool, then retaliate by slamming him into a wall with Boulder Toss.

Ficha completa →
Tryndamere

Tryndamere

kitingdisengage Gnar holds a massive advantage because Tryndamere relies entirely on closing the gap with Spinning Slash to stack Battle Fury and trade. As Mini Gnar, your basic attacks and Boomerang Throw constantly harass him from a distance. If he attempts to dash onto you, Hop serves as the perfect reactive tool to completely neutralize his engage, leaving him stranded and vulnerable while you kite him down. Ver detalhes
Tryndamere

Por quê

Gnar holds a massive advantage because Tryndamere relies entirely on closing the gap with Spinning Slash to stack Battle Fury and trade. As Mini Gnar, your basic attacks and Boomerang Throw constantly harass him from a distance. If he attempts to dash onto you, Hop serves as the perfect reactive tool to completely neutralize his engage, leaving him stranded and vulnerable while you kite him down.

Impacto na lane

This dynamic forces Tryndamere into a defensive position where he must use Bloodlust to heal rather than maintaining high fury. You can easily slow-push waves, poke him under his turret, and deny him from freely hitting minions to stack his critical chance. If he gets desperate and activates Undying Rage, you can simply disengage and wait out his five-second invulnerability window while keeping him trapped under your pressure.

Como jogar

Never initiate a trade using Hop offensively unless you are guaranteed a Mega Gnar transformation that will lock him down with Boulder Toss and Hyper. Always hold Hop to react specifically to his Spinning Slash. If he spins forward, bounce away immediately. Once his dash is on cooldown, step forward to apply three stacks of Hyper to trigger the movement speed burst, allowing you to easily outrun his Mocking Shout slow.

Ficha completa →
Ornn

Ornn

kitingshred Gnar dominates this matchup because his natural range in Mini form constantly threatens Ornn's melee-locked laning. The core safety valve is Gnar's Hop. Whenever Ornn attempts to set up his knockup combo by spawning a pillar with Volcanic Rupture and rushing it with Searing Charge, Gnar can simply Hop away. This completely nullifies Ornn's primary engage tool and prevents him from applying the devastating Bellows Breath brittle stacks. Ver detalhes
Ornn

Por quê

Gnar dominates this matchup because his natural range in Mini form constantly threatens Ornn's melee-locked laning. The core safety valve is Gnar's Hop. Whenever Ornn attempts to set up his knockup combo by spawning a pillar with Volcanic Rupture and rushing it with Searing Charge, Gnar can simply Hop away. This completely nullifies Ornn's primary engage tool and prevents him from applying the devastating Bellows Breath brittle stacks.

Impacto na lane

This absolute safety allows you to dictate the wave state effortlessly. Since Ornn cannot threat an engage without risking a counter-poke, you can maintain a slow-pushing wave that crashes into his turret. This forces Ornn to farm under fire, limiting his opportunities to craft items via Living Forge. You will steadily chip down his health and tower plates, transforming this lane into a constant pressure cooker that keeps Ornn isolated.

Como jogar

To execute this, never use Hop aggressively unless Ornn's Searing Charge is on cooldown. Stand away from walls and his Volcanic Rupture pillars to give yourself reaction time. When he commits to his charge, use Hop to bounce off him or a nearby minion, then immediately retaliate. Punish his missed engage by chasing him down with Boomerang Throw and triggering Hyper movement speed to melt his armor. If you misplay and get knocked up, immediately transform into Mega Gnar to absorb the burst.

Ficha completa →
Sion

Sion

kitingshred Gnar dominates this matchup because Mini Gnar completely neutralizes Sion's primary threat. When Sion charges Decimating Smash, you can easily kite out of the zone using the passive movement speed from Hyper or jump away entirely with Hop. Meanwhile, the three-hit percentage health damage from Hyper melts through Sion's high health pool built from Soul Furnace, making his tankiness a liability rather than an asset. Ver detalhes
Sion

Por quê

Gnar dominates this matchup because Mini Gnar completely neutralizes Sion's primary threat. When Sion charges Decimating Smash, you can easily kite out of the zone using the passive movement speed from Hyper or jump away entirely with Hop. Meanwhile, the three-hit percentage health damage from Hyper melts through Sion's high health pool built from Soul Furnace, making his tankiness a liability rather than an asset.

Impacto na lane

This dynamic allows you to relentlessly deny Sion farm and freeze the wave near your turret. Sion cannot safely walk up to charge Decimating Smash or pop Soul Furnace for waveclear without taking massive punish. You will constantly hold lane priority, chipping away at his tower while his only option is to try to farm from afar using Roar of the Slayer, which drains his mana quickly.

Como jogar

Keep your distance and never stand directly behind your own minions to avoid getting poked by Roar of the Slayer. When Sion begins charging Decimating Smash, don't panic; use your basic attacks to trigger Hyper and walk out of the indicator. Save Hop strictly as a safety net for when he attempts an aggressive Unstoppable Onslaught or if you get caught in a bad spot. Once he misses his slam, turn aggressive and chase him down with Boomerang Throw.

Ficha completa →

Outros matchups

Items to Counter Gnar

Buy these items to reduce this champion's effectiveness in your games.

Plated Steelcaps
Plated Steelcaps
Frozen Heart
Frozen Heart
Dead Man's Plate
Dead Man's Plate
Thornmail
Thornmail
Quicksilver Enchant
Quicksilver Enchant

Como counterar este campeão

Ângulo de counter

As estratégias contra o Gnar não se resumem apenas a estatísticas ou trocas de dano — elas exploram a fraqueza de sua forma Mini e impedem sua transformação para Mega. Ao contrário de outros campeões, ele não perde necessariamente as trocas de dano, mas perde o controle do ritmo da partida. As melhores estratégias de contra-ataque ou forçam confrontos rápidos antes que ele acumule Fúria, ou ignoram seus ataques à distância e o punem quando ele fica exposto. Entender as estratégias de contra-ataque contra o Gnar é simples: elas não o derrotam ao longo do tempo, mas sim no momento certo.

Contexto do patch

No meta atual, o Gnar é especialmente vulnerável a campeões que exercem pressão constante e não lhe dão tempo para preparar o Mega. Duelistas como o Fiora ou o Camille punem erros de posicionamento, enquanto lutadores agressivos como o Renekton ou o Darius podem forçar confrontos decisivos antes da transformação. Isso é amplificado pela dependência do Gnar em relação ao posicionamento e ao acesso às paredes, fatores que adversários disciplinados podem controlar.

Leitura rápida

  • É fundamental derrotar o Mini Gnar.
  • Forçar lutas antes de Mega diminui o impacto dele.
  • Evitar as paredes limita bastante o potencial dele.

Arquétipos de counter

Duelistas de pressão constante

Esses campeões exploram diretamente a fragilidade do Mini Gnar. Sua capacidade de fechar distâncias e forçar trocas rápidas impede que o Gnar ataque com segurança. Eles não precisam vencer no longo prazo — eles punem cada erro de posicionamento. Sua mobilidade também lhes permite evitar as jogadas do Mega, reduzindo o impacto do Gnar mesmo quando ele está pronto para entrar na luta.

Como o campeão deve se adaptar. Jogue de forma bastante defensiva no Mini, evite trocas prolongadas e controle a onda para reduzir as oportunidades de all-in.

Lutadores rápidos e agressivos

Esses campeões não esperam que o Gnar jogue do jeito dele. Eles forçam confrontos imediatos sempre que ele está no modo Mini, impedindo que ele gerencie a Raiva adequadamente. Seu dano explosivo e seu controle os tornam especialmente perigosos nos momentos em que o Gnar não consegue acessar o Mega. Cada erro de timing se transforma em uma oportunidade de abate.

Como o campeão deve se adaptar. Respeite os tempos deles, nunca fique exposto na Mini e evite avançar sem ter visão.

Punidores escalonados

Esses campeões só se tornam problemáticos não logo no início, mas quando já conseguem lidar com trocas prolongadas. O Jax, por exemplo, consegue ignorar alguns ataques de provocação e esperar por uma oportunidade para entrar na luta. Quando a luta começa, o Gnar tem dificuldade para se afastar sem o Mega. Isso cria uma pressão constante sobre o seu timing.

Como o campeão deve se adaptar. Acelere o início da partida e evite combates prolongados sem o Mega.

Matchups prioritários

Camille

Camille é um dos confrontos mais difíceis para Gnar, pois ela ignora completamente o padrão de ataques de curta distância dele. Seu gancho permite que ela diminua a distância instantaneamente, neutralizando a vantagem do Mini Gnar. Assim que ela entra no combate, Gnar já precisa estar na posição de Mega ou aceitar perder a troca. O verdadeiro problema é que o Camille controla o ritmo, enquanto o Gnar reage.

Fiora

Fiora não tem como objetivo vencer rapidamente, mas sim punir cada erro. Ela obriga Gnar a manter um posicionamento perfeito, já que um único deslize pode resultar na perda de uma troca. Seu conjunto de habilidades também permite que ela contorne o controle de Gnar sobre Mega, reduzindo o impacto dele nas lutas em equipe caso ela se posicione bem.

Erros comuns contra ele

Erros comuns contra ele

  • Subestimando sua fase “Mini”.
  • Forçar lutas quando Mega estiver pronto.
  • Lutar perto de paredes sem ter visão.
  • Ignorando sua barra de Raiva.
  • Fazer ganks sem o momento certo.

Notas do coach

  • Verifique o nível de Raiva dele antes de atacar, e não os pontos de vida.
  • Se você controla as paredes, você controla o Gnar.

FAQ

Quando o Gnar fica mais vulnerável?

O Gnar fica mais vulnerável logo após voltar ao Mini ou quando não tem Raiva suficiente para se transformar. Essas janelas duram vários segundos e são ideais para forçar trocas de dano ou jogadas de tudo ou nada. Atacar nessas ocasiões impede qualquer resposta eficaz.

Como você evita a habilidade definitiva dele?

A melhor maneira de evitar a habilidade definitiva dele é evitar lutar perto de paredes e ficar de olho na transformação dele. Se você entrar em combate quando ele estiver na forma “Mini” ou longe das paredes, o impacto dele fica limitado. O posicionamento é muito mais importante do que a reação mecânica.

Por que alguns campeões dominam o Gnar?

Eles dominam não porque sejam, em geral, mais fortes, mas porque forçam interações quando o Gnar está enfraquecido. Isso quebra o ritmo de transformação dele e reduz seu impacto geral.

É recomendável jogar de forma agressiva contra o Gnar?

Sim, mas apenas nos momentos certos. A agressão constante pode ser perigosa se você atacar durante o Mega. É preciso alternar entre paciência e punição rápida quando ele estiver vulnerável.




















































