S
2026年9月 · Patch 7.2d
Mage · MID · SUPPORT

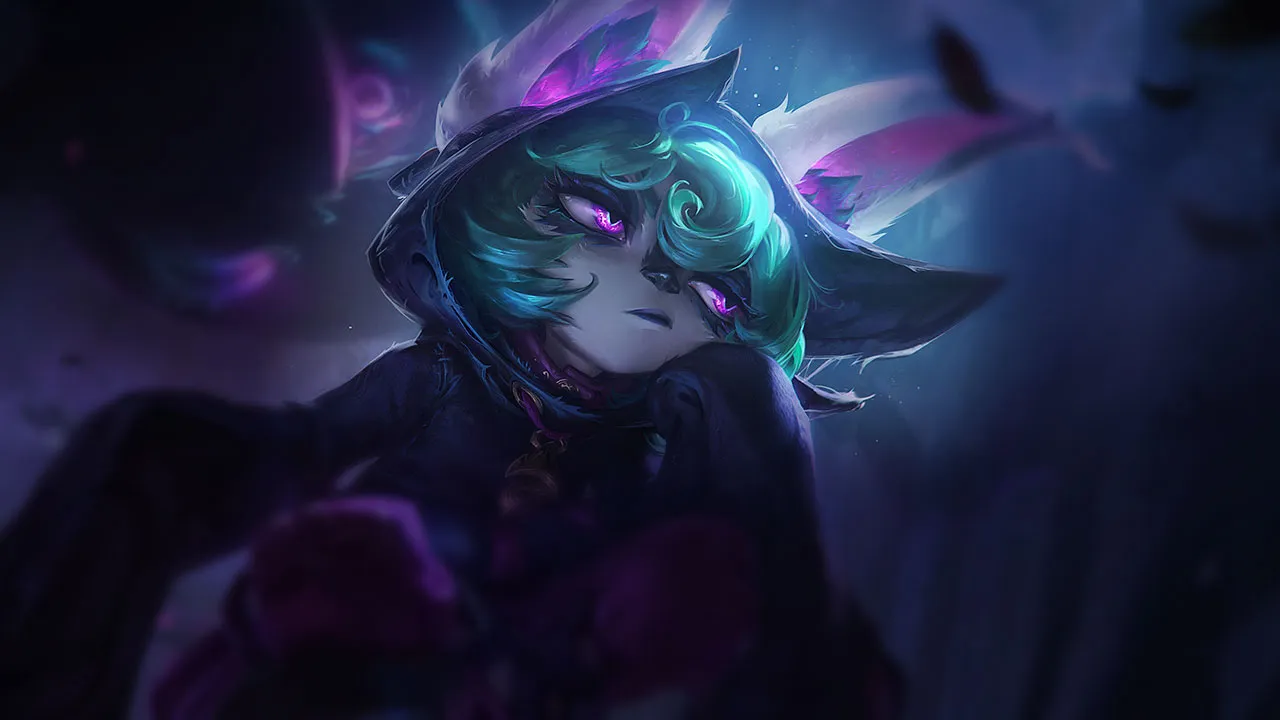
Vex Wild Rift カウンターガイド

Vexは、自身のパッシブであるfearメカニクスに耐え、直接戦闘を強制してくるダッシュを持たない構成に対して脆弱です。瞬間的なburstプロファイルは、彼女がgloomを蓄積する前に無力化します。長距離のpoke構成は、彼女の序盤のリソースを枯渇させます。

★ MID · SUPPORT Tier S
ダメージ
UTIL
TANK
DIFF
Win 48.6% #72 · ↓15pt
Pick 2.2% #28
Ban 0.6% #100

Vex Wild Rift カウンターガイド ★ カウンターシート

マッチアップ一覧
マッチアップ 判定 有利度 勝率 ピック率
Syndra 不利なマッチアップ +1 53.3% 13.3%
Swain 不利なマッチアップ +1 52.8% 4.6%
Brand 不利なマッチアップ +1 52.0% 9.4%
Morgana 不利なマッチアップ +1 51.2% 6.1%
Orianna 不利なマッチアップ +1 50.8% 4.9%
Norra 不利なマッチアップ +1 50.5% 1.5%
Vladimir 不利なマッチアップ +1 49.4% 4.9%
Ryze 不利なマッチアップ +1 48.8% 2.9%
Lux 不利なマッチアップ +1 48.7% 5.6%
Ziggs 不利なマッチアップ +1 48.2% 5.9%
Karma 不利なマッチアップ +1
Varus 不利なマッチアップ +1
Zilean 不利なマッチアップ +1
Annie スキル次第のマッチアップ ±0 49.3% 2.2%
Zed スキル次第のマッチアップ ±0 48.9% 3.8%
Malphite スキル次第のマッチアップ ±0
Twisted Fate 有利なマッチアップ −1 52.5% 6.8%
Taliyah 有利なマッチアップ −1 51.9% 2.8%
Yone 有利なマッチアップ −1 51.8% 5.3%
Galio 有利なマッチアップ −1 51.1% 11.3%
Teemo 有利なマッチアップ −1 50.8% 1.6%
Heimerdinger 有利なマッチアップ −1 50.6% 1.3%
Aurelion Sol 有利なマッチアップ −1 50.2% 6.8%
Kassadin 有利なマッチアップ −1 50.1% 1.5%
Zoe 有利なマッチアップ −1 48.6% 1.0%
Jayce 有利なマッチアップ −1 47.7% 1.3%
Mel 有利なマッチアップ −1 46.3% 7.9%
Corki 有利なマッチアップ −1
Gragas 有利なマッチアップ −1
Kayle 有利なマッチアップ −1
Akshan 有利なマッチアップ −2 51.5% 1.1%
Ahri 有利なマッチアップ −2 51.5% 5.1%
Ekko 有利なマッチアップ −2 50.5% 2.9%
Aurora 有利なマッチアップ −2 49.8% 3.8%
Kennen 有利なマッチアップ −2 49.6% 1.5%
Yasuo 有利なマッチアップ −2 48.9% 10.8%
Lissandra 有利なマッチアップ −2 48.8% 4.1%
Diana 有利なマッチアップ −2 48.7% 1.4%
Fizz 有利なマッチアップ −2 48.6% 2.0%
Katarina 有利なマッチアップ −2 48.6% 1.7%
Akali 有利なマッチアップ −2 45.0% 2.5%
Irelia 有利なマッチアップ −2
Kai'Sa 有利なマッチアップ −2
Lucian 有利なマッチアップ −2
Pantheon 有利なマッチアップ −2
Pyke 有利なマッチアップ −2
Talon 有利なマッチアップ −2
Tristana 有利なマッチアップ −2

Edge: Wild Rift Core canonical verdict (−3 to +3), shown from the point of view of the champion named in the row. Win rate and pick rate: the opponent's own rate in this role — Wild Rift CN · Challenger, Patch 7.2d. Not a head-to-head win rate.

不利なマッチアップ

13

これらのチャンピオンは、マッチアップ自体を絶望的にするわけではないが、対面で優位に立ちやすいツールを持っている。射程が長かったり、攻撃を受け止める力が高かったり、エンゲージへの対応手段が豊富だったりする。アプローチを調整し、戦闘を受け入れるタイミングを慎重に選ぶ必要がある。

その他のマッチアップ

スキル次第のマッチアップ

3

このマッチアップは何よりもまず実行力の勝負であり、両者ともに優位を取れる現実的な手段を持っている。重要なスキルを一つ避けられるか、エンゲージを正しく読めるか、あるいはたった一つの位置取りのミスが、勝敗を分けることもある。マッチアップを理解し、行動すべき瞬間を見極める力がとりわけ重要になる。

Annie

Annie±0

shield tradeseven matchup This matchup is a pure battle of wave clear because Annie has zero dashes in her kit, meaning she will never naturally trigger your Doom 'n Gloom mark. Without these passive marks, you lose your main burst source. Since Annie can easily last-hit and conserve mana using Disintegrate, you cannot easily force her out of lane, turning this into a neutral wave-clear battle where both mages farm safely. Annieのビルド → 詳細を見る
Annie

理由

This matchup is a pure battle of wave clear because Annie has zero dashes in her kit, meaning she will never naturally trigger your Doom 'n Gloom mark. Without these passive marks, you lose your main burst source. Since Annie can easily last-hit and conserve mana using Disintegrate, you cannot easily force her out of lane, turning this into a neutral wave-clear battle where both mages farm safely.

レーン戦への影響

The lane becomes a constant push-and-pull. If you exhaust your Mistral Bolt on minions, Annie will look to pressure you with her Pyromania stun charged. Neither of you can easily secure solo kills without a massive mistake. Instead, you are both racing to shove the wave to secure roam timers, meaning whoever manages their mana pool better while clearing the waves secures the map priority.

立ち回り方

To break this stalemate, target Annie with Looming Darkness precisely when she steps up to execute a minion with Disintegrate. This forces a Gloom mark you can detonate with Mistral Bolt. Always hold onto Personal Space when her Pyromania is fully charged to mitigate her Incinerate burst. Never commit with Shadow Surge unless you see her stun charge is down or her Molten Shield has just expired.

チャンピオン詳細 → Annieのビルド →
Zed

Zed±0

burst tradetiming This skill matchup hinges entirely on the interactions between Zed's Death Mark and your Doom passive. Zed relies on his ultimate to burst you down, but his reappearance point behind you is predictable. By holding your Doom charge, you can buffer Personal Space to instantly fear him the millisecond he lands. This completely interrupts his follow-up Razor Shuriken and Shadow Slash combo, neutralizing his lethal threat. Zedのビルド → 詳細を見る
Zed

理由

This skill matchup hinges entirely on the interactions between Zed's Death Mark and your Doom passive. Zed relies on his ultimate to burst you down, but his reappearance point behind you is predictable. By holding your Doom charge, you can buffer Personal Space to instantly fear him the millisecond he lands. This completely interrupts his follow-up Razor Shuriken and Shadow Slash combo, neutralizing his lethal threat.

レーン戦への影響

Before level five, Zed's safety relies on Living Shadow cooldown windows. Whenever he uses it offensively to poke with Razor Shuriken, you have a long window to punish him with Looming Darkness and Mistral Bolt. However, if you waste your Doom passive on wave clear, you forfeit all lane pressure. Zed will immediately zone you, forcing you to farm under turret or risk giving up a kill.

立ち回り方

Maintain your Doom meter active whenever Zed has Death Mark available. Do not deplete it with Mistral Bolt to clear waves. Stand close to your turret to shorten his chase potential. When he launches his ultimate, remain calm and hover your finger over Personal Space, tapping it right as he materializes behind you. If you accidentally waste your passive, play exceptionally safe and use Looming Darkness from maximum range until your fear recharges.

チャンピオン詳細 → Zedのビルド →
Malphite

Malphite±0

cc disruptioneven lane This matchup is a pure test of reactions around Malphite's ultimate. Because Unstoppable Force makes him completely immune to crowd control, your passive Doom 'n Gloom fear is useless at stopping his dive mid-air. However, you can negate his entire burst threat by matching his impact with Personal Space. The shield amount perfectly counters his Seismic Shard poke and ultimate damage, leaving him vulnerable after his initial burst. Malphiteのビルド → 詳細を見る
Malphite

理由

This matchup is a pure test of reactions around Malphite's ultimate. Because Unstoppable Force makes him completely immune to crowd control, your passive Doom 'n Gloom fear is useless at stopping his dive mid-air. However, you can negate his entire burst threat by matching his impact with Personal Space. The shield amount perfectly counters his Seismic Shard poke and ultimate damage, leaving him vulnerable after his initial burst.

レーン戦への影響

Before level five, you hold the advantage, using Looming Darkness and Mistral Bolt to chip away at his Granite Shield. Once ultimates are unlocked, the lane slows to a crawl. Malphite cannot safely commit his Unstoppable Force while your Personal Space is available, and you cannot safely dive with Shadow Surge without risking an immediate knock-up response under his tower, turning trades into a waiting game.

立ち回り方

To win this execution battle, never waste Personal Space for simple wave clearance. Keep this shield ready for the exact moment Malphite casts Unstoppable Force. When he flies toward you, activate it to absorb the blast, then immediately apply Doom 'n Gloom using Mistral Bolt or Looming Darkness to fear him away once his unstoppable state ends. If you miss this timing, immediately retreat toward your tower to avoid his Thunderclap and Ground Slam follow-up.

チャンピオン詳細 → Malphiteのビルド →

有利なマッチアップ

32

これらのチャンピオンは、こちらの主要な強みに効果的に対応するのが難しく、より自由に対面を組み立てることができる。プレッシャーをかけて有利な交換を引き出す手段は複数あることが多い。相手が態勢を立て直す時間を与えるのではなく、この優位を活かして主導権を握ろう。

Aurora

Aurora−2

anti dashfear Aurora relies heavily on the jump from Across the Veil to position herself and trigger Spirit Abjuration. However, this hop counts as a dash, meaning Doom 'n Gloom constantly marks her with Gloom. Whenever Aurora tries to leap to initiate or escape, your passive instantly readies, allowing you to fear her out of her brief stealth and punish her with heavy bonus damage. Auroraのビルド → 詳細を見る
Aurora

理由

Aurora relies heavily on the jump from Across the Veil to position herself and trigger Spirit Abjuration. However, this hop counts as a dash, meaning Doom 'n Gloom constantly marks her with Gloom. Whenever Aurora tries to leap to initiate or escape, your passive instantly readies, allowing you to fear her out of her brief stealth and punish her with heavy bonus damage.

レーン戦への影響

Because Aurora cannot safely use her mobility, she is forced to farm from afar using Twofold Hex. This grants you complete control over the wave. You can easily push her under tower with Mistral Bolt or zone her out of gold range. Any attempt from her to trade with Across the Veil results in a massive health deficit, completely neutralizing her early assassin roaming potential.

立ち回り方

Never waste your Doom 'n Gloom fear on random waves; keep it charged when Aurora steps forward. If she initiates with Across the Veil, instantly activate Personal Space to absorb her Twofold Hex damage while fearing her in place, then follow up with Mistral Bolt. Should she try to escape into Between Worlds, wait out her boundary hops, use Looming Darkness to slow her down, and lock her down with Shadow Surge.

チャンピオン詳細 → Auroraのビルド →
Ahri

Ahri−2

anti dashfear Ahri relies entirely on her mobility to execute her burst, but your passive Doom 'n Gloom turns her agility into her downfall. Every time she uses Spirit Rush, she instantly receives a Gloom mark. This allows you to reactively cast Personal Space when she dashes in, interrupting her mid-flight with a fear and completely shutting down her attempt to land Charm or Orb of Deception. Ahriのビルド → 詳細を見る
Ahri

理由

Ahri relies entirely on her mobility to execute her burst, but your passive Doom 'n Gloom turns her agility into her downfall. Every time she uses Spirit Rush, she instantly receives a Gloom mark. This allows you to reactively cast Personal Space when she dashes in, interrupting her mid-flight with a fear and completely shutting down her attempt to land Charm or Orb of Deception.

レーン戦への影響

Because Ahri cannot safely use Spirit Rush to aggressively trade, she is forced to play passively and rely solely on Orb of Deception to farm from a distance. You command the center of the lane, easily pushing her under turret. Her roaming potential is heavily stifled because she cannot secure priority without taking massive damage from your Looming Darkness and Mistral Bolt combos.

立ち回り方

Always hold your Doom 'n Gloom bar full when Ahri has Spirit Rush available, standing just behind your caster minions to bait her forward. If she tries to dash in to angle her Charm, immediately press Personal Space to fear her, then follow up with Looming Darkness and Mistral Bolt. If she plays safe, poke her down with Mistral Bolt whenever she steps up to guide her Orb of Deception through the wave.

チャンピオン詳細 → Ahriのビルド →
Akshan

Akshan−2

anti mobilityspacing Akshan relies heavily on Heroic Swing to dictate trades and escape. However, because this swing is a dash, it immediately triggers your Doom 'n Gloom passive. If your fear is charged, casting Personal Space or Mistral Bolt mid-swing will instantly interrupt his flight. By stopping his hook-shot in its tracks, you completely shut down his mobility and leave him defenceless. Akshanのビルド → 詳細を見る
Akshan

理由

Akshan relies heavily on Heroic Swing to dictate trades and escape. However, because this swing is a dash, it immediately triggers your Doom 'n Gloom passive. If your fear is charged, casting Personal Space or Mistral Bolt mid-swing will instantly interrupt his flight. By stopping his hook-shot in its tracks, you completely shut down his mobility and leave him defenceless.

レーン戦への影響

This interaction completely paralyzes Akshan's lane presence. He cannot use Heroic Swing to aggressively clear minions or burst you down, forcing him to rely solely on Avengerang for farm. Whenever he attempts to trade, your shield from Personal Space absorbs his Dirty Fighting double-tap, allowing you to easily win short trades and force him under tower where his Going Rogue roam potential is neutralized.

立ち回り方

Always hold your Doom 'n Gloom bar full when Akshan steps up. Walk aggressively towards his potential anchor walls to bait Heroic Swing. If he bites, react instantly with Personal Space to cancel his dash, then follow up with Looming Darkness and Mistral Bolt for a massive chunk of damage. If he retreats to channel Comeuppance, cast Shadow Surge directly through his ultimate line to gap-close and burst him down before his bullets can fire.

チャンピオン詳細 → Akshanのビルド →
Diana

Diana−2

hard ccanti dash Diana relies entirely on landing Crescent Strike to reset Lunar Rush and dive you. However, your Doom 'n Gloom passive completely shuts down this aggressive loop. Whenever Diana attempts to dash onto you with Lunar Rush, your next basic ability will fear her mid-air, instantly canceling her follow-up Pale Cascade or Moonfall burst. Dianaのビルド → 詳細を見る
Diana

理由

Diana relies entirely on landing Crescent Strike to reset Lunar Rush and dive you. However, your Doom 'n Gloom passive completely shuts down this aggressive loop. Whenever Diana attempts to dash onto you with Lunar Rush, your next basic ability will fear her mid-air, instantly canceling her follow-up Pale Cascade or Moonfall burst.

レーン戦への影響

Because Diana cannot safely engage while your fear is charged, you command absolute control over the minion wave. You can easily poke her with Looming Darkness and Mistral Bolt whenever she steps up to melee the minions. She is forced to play defensively, burning mana on Pale Cascade just to survive your harass.

立ち回り方

The golden rule is to always maintain your Doom 'n Gloom bar near full capacity. If Diana throws out Crescent Strike, don't panic and hold Personal Space. If she takes the bait and casts Lunar Rush, trigger Personal Space to instantly fear her, then retaliate with a guaranteed Mistral Bolt and Shadow Surge combo.

チャンピオン詳細 → Dianaのビルド →
Akali

Akali−2

cc avoidancespacing Akali relies entirely on high-mobility bursts to threaten you, which directly plays into your hands. Because she must use Shuriken Flip or Perfect Execution to close the distance, she constantly triggers your Doom 'n Gloom passive. This interaction immediately interrupts her mid-dash with a fear, canceling her offensive momentum while marking her for massive bonus damage. She cannot complete her assassination sequence without feeding your burst potential. Akaliのビルド → 詳細を見る
Akali

理由

Akali relies entirely on high-mobility bursts to threaten you, which directly plays into your hands. Because she must use Shuriken Flip or Perfect Execution to close the distance, she constantly triggers your Doom 'n Gloom passive. This interaction immediately interrupts her mid-dash with a fear, canceling her offensive momentum while marking her for massive bonus damage. She cannot complete her assassination sequence without feeding your burst potential.

レーン戦への影響

This dynamic completely paralyzes Akali's early lane pressure. Since she cannot safely use Shuriken Flip to trade, you can aggressively push the wave with Mistral Bolt while keeping her trapped under her turret. Even if she tries to hide inside Twilight Shroud to farm or escape, your broad Looming Darkness zone forces her out or reveals her position, denying her natural safety and forcing premature recalls.

立ち回り方

Position yourself deliberately just behind your caster minions, forcing Akali to step up into your auto-attack range to farm. Always hold onto Personal Space when your Doom 'n Gloom bar is full; never waste it on the wave. If Akali commits with Shuriken Flip or her ultimate Perfect Execution, press Personal Space to instantly trigger the fear mid-air, then follow up with Looming Darkness and Mistral Bolt to easily secure the kill.

チャンピオン詳細 → Akaliのビルド →
Fizz

Fizz−2

anti dashfear lock Fizz relies entirely on mobility to trade, but your Doom 'n Gloom completely shuts him down. Every time he uses Urchin Strike to dash in or tries to escape with Playful, he triggers your Gloom marks. By saving your fear-charged basic abilities, you can instantly interrupt his engage, leaving him vulnerable to a quick Mistral Bolt and Personal Space burst before he can react. Fizzのビルド → 詳細を見る
Fizz

理由

Fizz relies entirely on mobility to trade, but your Doom 'n Gloom completely shuts him down. Every time he uses Urchin Strike to dash in or tries to escape with Playful, he triggers your Gloom marks. By saving your fear-charged basic abilities, you can instantly interrupt his engage, leaving him vulnerable to a quick Mistral Bolt and Personal Space burst before he can react.

レーン戦への影響

This matchup forces Fizz to play incredibly passively, bleeding gold under his turret while you safely command the wave with Looming Darkness. Because he cannot trade without taking massive damage, you establish permanent mid priority. This free reign allows you to sync your recalls perfectly or use Shadow Surge to dive the side lanes, heavily punishing his lack of early map pressure.

立ち回り方

Never waste your Doom 'n Gloom fear bar on random wave clear. Stand near your caster minions and hold your charged passive; this zone of control prevents Fizz from farming with Rending Wave. If he grows desperate and uses Playful to clear, immediately throw Looming Darkness where he lands. Once you force him back, immediately look at the minimap to launch Shadow Surge into the side lanes, converting your mid-lane dominance into global map pressure.

チャンピオン詳細 → Fizzのビルド →
Ekko

Ekko−2

fearanti mobility Ekko relies entirely on Phase Dive to close the gap and proc Z-Drive Resonance. Since this blink-dash trigger is highly predictable, it constantly feeds your Doom 'n Gloom passive. Having your fear charged means his offensive jump is immediately shut down mid-air. Even when your crowd control is down, his mobility marks him, allowing Personal Space or Mistral Bolt to easily detonate the mark for heavy trade damage. Ekkoのビルド → 詳細を見る
Ekko

理由

Ekko relies entirely on Phase Dive to close the gap and proc Z-Drive Resonance. Since this blink-dash trigger is highly predictable, it constantly feeds your Doom 'n Gloom passive. Having your fear charged means his offensive jump is immediately shut down mid-air. Even when your crowd control is down, his mobility marks him, allowing Personal Space or Mistral Bolt to easily detonate the mark for heavy trade damage.

レーン戦への影響

This mechanical shutdown completely strips Ekko of his lane priority. Since he cannot safely trade with Phase Dive, he is forced to use Timewinder solely to farm from a distance, ruining his wave control and mana pool. You can easily crash waves, chip his tower, and force him into terrible recall timings. He cannot pressure you under your turret, and his roams are severely delayed.

立ち回り方

Always hold your Doom 'n Gloom fear bar when Ekko steps up. Do not waste your passive charge on Looming Darkness for simple waveclear; instead, stand near your low-health minions to bait his Phase Dive. The moment he dashes, activate Personal Space to instantly trigger the fear and shield his initial burst, then follow up with a guaranteed Mistral Bolt. If he retreats with Chronobreak, use Shadow Surge immediately to catch his landing position.

チャンピオン詳細 → Ekkoのビルド →
Katarina

Katarina−2

anti mobilityhard cc Katarina is entirely shut down by your passive, Doom 'n Gloom. Every time she attempts to engage or reposition using Shunpo, she triggers a Gloom mark and puts herself in danger. By holding your charged fear, any attempt she makes to jump onto her daggers can be instantly interrupted with Personal Space, leaving her defenseless and unable to channel Death Lotus or escape. Katarinaのビルド → 詳細を見る
Katarina

理由

Katarina is entirely shut down by your passive, Doom 'n Gloom. Every time she attempts to engage or reposition using Shunpo, she triggers a Gloom mark and puts herself in danger. By holding your charged fear, any attempt she makes to jump onto her daggers can be instantly interrupted with Personal Space, leaving her defenseless and unable to channel Death Lotus or escape.

レーン戦への影響

This interaction forces Katarina to play extremely passively, limiting her to farming from a distance with Bouncing Blade. You easily secure wave priority and can crash large waves at will. Since she cannot contest you directly in lane, she will desperately look for roams to find kills. Because you control the lane tempo, you can match her roams or rotate first, neutralising her map pressure entirely.

立ち回り方

Never waste your Doom 'n Gloom bar on mindless waveclear. Keep your fear fully charged and position aggressively near her daggers from Preparation or Bouncing Blade. The moment she uses Shunpo near you, immediately press Personal Space to trigger the instant fear, then follow up with Looming Darkness and Mistral Bolt. When she inevitably abandons the lane to roam, use Shadow Surge to follow her across the river and turn her skirmishes into double kills.

チャンピオン詳細 → Katarinaのビルド →
Kai'Sa

Kai'Sa−2

fearcounter engage Kai'Sa relies on Killer Instinct to close the distance and trigger her burst, but this playstyle directly feeds your passive. When she attempts to fly in, Doom 'n Gloom is your ultimate weapon. The fear instantly interrupts her dash upon arrival, leaving her isolated and unable to land a clean Icathian Rain. Her main tool for repositioning and assassination becomes her own downfall. Kai'Saのビルド → 詳細を見る
Kai'Sa

理由

Kai'Sa relies on Killer Instinct to close the distance and trigger her burst, but this playstyle directly feeds your passive. When she attempts to fly in, Doom 'n Gloom is your ultimate weapon. The fear instantly interrupts her dash upon arrival, leaving her isolated and unable to land a clean Icathian Rain. Her main tool for repositioning and assassination becomes her own downfall.

レーン戦への影響

This matchup strips Kai'Sa of her aggressive potential, forcing her to play defensively. She cannot step up to clear waves with Icathian Rain without exposing herself to Looming Darkness. Because she must farm from safety using Void Seeker, you dictate the wave's tempo. She cannot match your roam potential, as she is terrified of using Killer Instinct to follow you into the river.

立ち回り方

Keep a close eye on her Void Seeker; if it hits you, she will look to engage. Never waste Doom 'n Gloom when you are marked. Instead, hold your passive and bait her. When she activates Killer Instinct to dive you, react with Personal Space. This grants you a shield, triggers the fear, and stops her in her tracks. Follow up immediately with Looming Darkness and Mistral Bolt to secure an easy kill.

チャンピオン詳細 → Kai'Saのビルド →
Irelia

Irelia−2

anti engagedefensive play You completely shut down Irelia's mobility because her entire gameplay revolves around dashing with Bladesurge. When your Doom 'n Gloom passive is fully charged, any attempt by her to dash onto minions or directly at you will trigger an instant fear mid-flight. This immediately cancels her jump, leaving her stranded in the middle of your wave and perfectly set up for your full burst combo. Ireliaのビルド → 詳細を見る
Irelia

理由

You completely shut down Irelia's mobility because her entire gameplay revolves around dashing with Bladesurge. When your Doom 'n Gloom passive is fully charged, any attempt by her to dash onto minions or directly at you will trigger an instant fear mid-flight. This immediately cancels her jump, leaving her stranded in the middle of your wave and perfectly set up for your full burst combo.

レーン戦への影響

This dynamic forces Irelia to play with extreme caution, preventing her from freely stacking Ionian Fervor on the minion wave. As long as you hold your fear, she cannot contest your wave control or initiate trades. You can easily zone her off gold, poke her down safely with Looming Darkness, and secure a massive gold advantage while keeping her pinned under her own turret.

立ち回り方

The golden rule is to hold your red bar active. Avoid mindlessly clearing waves with Mistral Bolt when Irelia is looking to engage. Instead, zone her by simply standing near low-health minions. If she misses Flawless Duet, immediately punish her. If she manages to jump on you, cast Personal Space to gain a shield and trigger the fear point-blank. Force her to waste Defiant Dance defensively, then finish her off with Shadow Surge.

チャンピオン詳細 → Ireliaのビルド →
Lissandra

Lissandra−2

anti dashcc interrupt Lissandra relies entirely on Glacial Path to initiate trades or escape, but this claw-dash is her undoing against you. The moment she reactivates it, your passive Doom 'n Gloom marks her with Gloom. This allows you to instantly interrupt her engage mid-flight with a feared Personal Space, completely shutting down her Ring of Frost follow-up while triggering massive bonus damage. Lissandraのビルド → 詳細を見る
Lissandra

理由

Lissandra relies entirely on Glacial Path to initiate trades or escape, but this claw-dash is her undoing against you. The moment she reactivates it, your passive Doom 'n Gloom marks her with Gloom. This allows you to instantly interrupt her engage mid-flight with a feared Personal Space, completely shutting down her Ring of Frost follow-up while triggering massive bonus damage.

レーン戦への影響

This interaction strips Lissandra of her main wave-clear and roaming tool. She cannot use Glacial Path to shove without risking a devastating trade from your Mistral Bolt. Consequently, you dictate the lane's pace, forcing her to farm under turret where her Ice Shard is mana-inefficient, preventing her from finding the creative flanks she needs to impact other lanes.

立ち回り方

Never waste your Doom 'n Gloom fear bar when Lissandra has her Glacial Path available. Hold your charged passive and stand near your minions; if she throws the claw, walk toward its destination to greet her reactivation with Personal Space. If she tries to self-cast Frozen Tomb to survive your burst, delay your Shadow Surge second cast until her stasis ends to guarantee the execution.

チャンピオン詳細 → Lissandraのビルド →
Kennen

Kennen−2

anti dashfear cc Vex completely shuts down Kennen's mobility because his primary engage and gap-closer, Lightning Rush, is a dash. When Kennen activates it to close the distance or clear the wave, your passive Doom 'n Gloom instantly marks him with Gloom. This lets you trigger a fear with your next basic ability, completely halting his lightning form and ruining his Slicing Maelstrom setup. Kennenのビルド → 詳細を見る
Kennen

理由

Vex completely shuts down Kennen's mobility because his primary engage and gap-closer, Lightning Rush, is a dash. When Kennen activates it to close the distance or clear the wave, your passive Doom 'n Gloom instantly marks him with Gloom. This lets you trigger a fear with your next basic ability, completely halting his lightning form and ruining his Slicing Maelstrom setup.

レーン戦への影響

This dynamic forces Kennen to play incredibly defensively, stripping away his ability to push the lane aggressively with Lightning Rush. If he tries to trade using Thundering Shuriken or Electrical Surge, you can easily out-range him and trade back with Mistral Bolt. Because he cannot safely dive you or clear waves without risking a deadly fear, you maintain constant mid priority, allowing you to secure roaming opportunities before he can react.

立ち回り方

Keep your Doom 'n Gloom bar fully charged whenever Kennen steps forward. If he activates Lightning Rush to engage, immediately cast Personal Space to fear him in place and absorb any incoming damage, then follow up with Looming Darkness to lock down the trade. If you miss your fear, back away until Doom 'n Gloom is active again. Never waste Shadow Surge while his ultimate, Slicing Maelstrom, is ready unless you are certain your burst will execute him instantly.

チャンピオン詳細 → Kennenのビルド →
Pyke

Pyke−2

anti dashfear cc Pyke relies entirely on diving forward to set up his CC, but his Phantom Undertow dash triggers your Doom 'n Gloom passive instantly. Because he must wait for his phantom to catch up to stun you, you have a massive window to react. Hitting him with Personal Space or Mistral Bolt while he is mid-dash interrupts his momentum, applying a fear that totally ruins his engage pattern. Pykeのビルド → 詳細を見る
Pyke

理由

Pyke relies entirely on diving forward to set up his CC, but his Phantom Undertow dash triggers your Doom 'n Gloom passive instantly. Because he must wait for his phantom to catch up to stun you, you have a massive window to react. Hitting him with Personal Space or Mistral Bolt while he is mid-dash interrupts his momentum, applying a fear that totally ruins his engage pattern.

レーン戦への影響

Since Pyke cannot safely use Phantom Undertow to clear waves or trade without getting feared, he is forced to play passively under his turret. You can constantly shove with Looming Darkness and Mistral Bolt, denying his roam potential. If he attempts a desperate Bone Skewer pull from the fog, your passive shield from Personal Space denies his burst, keeping you healthy and locking him in mid lane.

立ち回り方

Always hold your Doom 'n Gloom charge when Pyke goes invisible with Ghostwater Dive. Do not waste your fear on random wave clearing if you lose sight of him. Stand behind your minions to block his Bone Skewer hook. When he commits forward with Phantom Undertow, immediately trigger Personal Space to fear him mid-air, then follow up with Shadow Surge to burst him down before he can regenerate health with Gift of the Drowned Ones.

チャンピオン詳細 → Pykeのビルド →
Yasuo

Yasuo−2

anti dashshield management Yasuo relies entirely on mobility, but his constant dashing with Sweeping Blade plays directly into your passive, Doom 'n Gloom. Every single slide through your minions marks him with Gloom, giving you free bonus damage. When he attempts to gap-close onto you, holding a Doom charge turns your Personal Space into an instantaneous, uninterruptible fear that completely neutralizes his aggressive trading tool. Yasuoのビルド → 詳細を見る
Yasuo

理由

Yasuo relies entirely on mobility, but his constant dashing with Sweeping Blade plays directly into your passive, Doom 'n Gloom. Every single slide through your minions marks him with Gloom, giving you free bonus damage. When he attempts to gap-close onto you, holding a Doom charge turns your Personal Space into an instantaneous, uninterruptible fear that completely neutralizes his aggressive trading tool.

レーン戦への影響

This dynamic strips Yasuo of his lane dominance, forcing him to respect your minion wave. He cannot freely use Sweeping Blade to farm or trade without taking massive Gloom-proc damage. You can easily pop his Way of the Wanderer shield with basic attacks, then force him to waste Wind Wall defensively. This pressure keeps him pinned under his tower, bleeding health and losing roam priority.

立ち回り方

Pop his Way of the Wanderer shield with a ranged basic attack before committing your spells. Never throw Looming Darkness or Mistral Bolt directly into his Wind Wall; instead, bait this defensive barrier out or wait for it to expire. Always keep your Doom charge ready when he has two stacks of Steel Tempest. If he tries to dash in to land his tornado, press Personal Space to fear him mid-dash, preventing Last Breath entirely.

チャンピオン詳細 → Yasuoのビルド →
Talon

Talon−2

fear interruptshield block Talon's entire assassination threat relies on Noxian Diplomacy to close the gap or Assassin's Path to flank. Because both of these abilities are dashes, they instantly trigger your Doom 'n Gloom passive. This constant marking means you can effortlessly interrupt his engage mid-air with a feared Personal Space, completely neutralizing his burst while leaving him exposed to a quick Mistral Bolt follow-up. Talonのビルド → 詳細を見る
Talon

理由

Talon's entire assassination threat relies on Noxian Diplomacy to close the gap or Assassin's Path to flank. Because both of these abilities are dashes, they instantly trigger your Doom 'n Gloom passive. This constant marking means you can effortlessly interrupt his engage mid-air with a feared Personal Space, completely neutralizing his burst while leaving him exposed to a quick Mistral Bolt follow-up.

レーン戦への影響

Since Talon cannot safely trade with Noxian Diplomacy, he is forced to rely on Rake to farm from afar, which inevitably pushes the minion wave toward you. This gives you complete control over the lane's tempo. You can easily match his push and lock him under his turret, preventing him from utilizing Assassin's Path to roam and snowball other lanes.

立ち回り方

Always hold your Doom charge when Talon steps forward; never waste your fear to clear minions when his Noxian Diplomacy is off cooldown. If he disappears into the river, use Looming Darkness paired with Mistral Bolt to shove the wave instantly. When chasing his roams, wait for him to commit to a wall with Assassin's Path, then snipe him with Shadow Surge while his movement path is completely predictable.

チャンピオン詳細 → Talonのビルド →

その他のマッチアップ

Vex対策アイテム

これらのアイテムを購入すると、このチャンピオンの影響力を抑えられます。

Stasis Enchant
Stasis Enchant
Crown of the Shattered Queen
Morellonomicon
Morellonomicon
Verdant Barrier
Verdant Barrier

このチャンピオンへの対策

カウンターアングル

Vexへのカウンターとは、彼女の惩罚ウィンドウを奪う方法を見ることだ。彼女は自分のレンジに入ってきてダッシュしてくる相手を好むが、レーンが距離を取ることを強要してきたり、本番の戦闘前にDoomを釣られたり、Rの再キャストが不可能になったりすると苦戦する。したがって、難しいマッチアップは単にダメージが高いだけでなく、彼女が恐怖を押し付ける前にリズムをコントロールしてくる相手なのだ。Vexに対しては、彼女を防御的な反応に追い込むことがしばしば目標となる。Vexとしては、逆にDoomを適切なタイミングまで温存し、無駄なトレードを拒否し、彼女の最初のクラウドコントロールが本当にプレイを決めるような角度を選ぶべきだ。

パッチの文脈

Vexへのカウンターは通常3つの方法で機能する。彼女よりレンジが長く、ターゲットを脅かす代わりにスペルをウェーブに使うことを強要する者たち。彼女の最初のバーストを生き延び、再キャストを遅らせ、コミットした後の機動力不足を惩罚する者たち。最後に、midの優先度をよりうまくコントロールし、Vexがピックに必要な視界を設定するのを妨げることで難しくなるマッチアップもある。これらの状況で彼女を正しくプレイするには、すべてのトレードで勝とうとするのではなく、Doom、ウェーブの状態、視界が揃う時を特定する必要がある。

クイックリード

  • 長距離チャンピオンはDoomの価値を下げる。なぜならVexは、惩罚する前にしばしば防御しなければならないからだ。
  • 最初のコンボを生き延びられるチャンピオンは、彼女のR再キャストをより危険なものにする。
  • 機動力のあるマッチアップに対しては、連打するのではなく、彼らの本当の突入のために恐怖を温存することが鍵だ。

カウンターの原型

砲兵と距離コントロール

このプロフィールはVexに問題を引き起こす。なぜなら、彼女が自然なレンジでプレイすることを妨げるからだ。Ziggs、Orianna、またはSyndraはウェーブを争い、彼女より先に攻撃し、彼女に健康を失うか防御的にスペルを使うかの選択を強いることができる。Vexが優先度を失うと、彼女は視界から消える頻度が減り、RとEの角度がはるかに予測可能になる。そうなると、マッチアップはバーストよりもアクセスが重要になる。

チャンピオンの適応方法. Vexは短いウィンドウを通してプレイすることを受け入れなければならない。彼女は健康を維持し、レーンの真ん中での長引くトレードを避け、ウェーブを確保した後やポジショニングミスを惩罚した後に角度を探す必要がある。レンジで負けているレーンからオールインを強要すると、彼女のR再キャストは惩罚されやすくなる。

スケーラーとアンチバーストチャンピオン

これらのマッチアップは、必ずしもVexを最初の1分から倒すわけではないが、彼女がウィンドウを活かせなければ、彼女のゲーム後半への影響を減らすことができる。Kassadinは時間とともに制御が難しくなり、Veigarは彼のケージで直接的な突入を惩罚し、Twisted FateはVexが望むデュエルを受け入れずにマップに影響を与えることができる。危険なのは、変換なしにゲームが進むのを許すことだ。Vexはマップの状態を変えるためにピックを必要とする。

チャンピオンの適応方法. 受動的な忍耐よりもテンポをプレイしなければならない。きれいにクリアし、動きを追跡し、視界を準備し、明白なローテーションを惩罚することが、繰り返しのデュエルを探すことよりも重要だ。もし彼女がターゲットを倒すためだけにRを保存し、事前にプレッシャーをかけなければ、これらのチャンピオンはあまりにも多くの時間を稼ぐ。

Doomを釣ることができる機動力のある近接チャンピオン

Vexは理論上多くの機動力のあるチャンピオンに対して強いが、相手がDoomを早すぎるタイミングで強要すると、これらのマッチアップは危険になる。Yasuo、Fizz、Zed、Yone、Akali、またはKatarinaは、複数の突入タイミング、リセット、無敵、または戻り角度を通して脅かすことができる。もしVexが二次的な動きに恐怖を使うなら、本当のオールインに対する答えなしに残される可能性がある。したがって、マッチアップはチャンピオン名よりもDoomのタイミング精度に依存する。

チャンピオンの適応方法. メインの突入がコミットされるまで、敵に誘発されたトレードを拒否しなければならない。正しい反射は、ターゲットが本当に接触する必要がある瞬間のために恐怖を温存することだ。小さなトレードに勝つためだけにDoomを使うと、30秒後に死のウィンドウが開く可能性がある。

優先度の高いマッチアップ

Ziggs

Ziggsは、彼がVexのコア条件であるアクセスを攻撃するため、説明する優先度の高いマッチアップだ。彼は遠距離からクリアし、Doomを準備する前に彼女の体力を削り、Vexにウェーブプレッシャーの下でプレイすることを強いることができる。このマッチアップでは、直接的なキルを狙うのはしばしば間違いだ。Vexは代わりに、クリアした後に消えるのに十分な体力を維持し、フォグオブウォーを使い、悪いZiggsのポジションを短いアクションに変えるべきだ。もし彼女がレンジを受け入れて視界に残れば、彼女の惩罚のアイデンティティを失う。

Yasuo

Yasuoは、彼がVexのパラドックスをうまく例示しているため、集中的な治療に値する。彼は無規律にダッシュすれば彼女にひどく惩罚されるが、Doomを無駄にしたり、彼の複数の動きを過小評価したりすれば彼女は負ける可能性がある。このマッチアップは、彼が前に出たときにすぐに恐怖をキャストすることではない。YasuoがVexまたは彼女のチームに到達するために本当にウェーブを越える必要がある時を特定しなければならない。その突入のためにDoomを温存することは彼の攻撃性を罠に変える。早すぎる使用は、彼にとって戦いをプレイ可能にする。

対面時のよくある間違い

対面時のよくある間違い

  • 戦闘が本当にコミットされる動きを待つ代わりに、最初の敵のダッシュにDoomを使用すること。

  • 長距離に対してレーンの真ん中に立ち、Vexがプレイしたくない消耗戦を受け入れること。
  • 近くのピール、ステイシス、またはクラウドコントロールツールを確認せずに、保護されたターゲットにRをキャストすること。
  • 有利なマッチアップだと信じて、本当のオールインの前に恐怖を無駄にすること。
  • フォーミング・オブ・ウォー(視界)を確保せずに集団で守りすぎると、Vexのタイミングがすべて読まれやすくなります。

コーチングノート

  • レンジでカウンターされる相手に対しては、体力バーの価値は小さなラストヒット1回分よりも大きいです。十分な体力とドゥーム(Ult)が準備できた状態で目標に到達できれば、まだ反撃のチャンスはあります。
  • 機動力のあるアサシンに対しては、恐れさせることだけを考えるのではなく、相手がプレイを続けるために絶対に必要とするダッシュがどれかを考えること。それが重要な瞬間です。

FAQ

なぜVexは長距離チャンピオンに苦戦するのでしょうか?

なぜなら、彼女の主な脅威は、E、Q、ドゥーム(Ult)が実際に罰を与えられるゾーンにアクセスする必要があるからです。長距離チャンピオンは、彼女がそのゾーンを作り出す前に、ウェーブとVexを攻撃できます。彼女はその後、間違いを誘発するのではなく、防御のためにスペルを使用します。この問題を軽減するには、直接的なデュエルを繰り返し探すのではなく、クリア後のウィンドウ、サイドアングル、フォーミング・オブ・ウォー(視界)をプレイする必要があります。

アサシンはVexにとって本当に有利なマッチアップなのでしょうか?

多くの場合、はい。ただし、Vexがドゥーム(Ult)のタイミングを尊重している場合に限ります。セットアップなしで直接突入してくるアサシンは、簡単な恐怖(Fear)を与えます。優れたアサシンは、恐怖(Fear)を誘い出し、VexがEを使用するのを待つか、2段階のトレードを強制しようとします。決定的なエントリーのためにVexがコントロールを保持している限り、マッチアップは有利なままです。小さなアドバンテージのためにパッシブを使い果たしてキルできない場合、それは危険になります。

Vexがmidの優先度を失った場合、どのようにプレイすべきですか?

Vexが優先度を失った場合、レーンをコントロールしているかのように無理にプレイするのをやめる必要があります。最初の目標は、次の動きに対応できる十分な体力を維持することです。その後、相手がレーンを離れるとき、視界なしで前に出るとき、またはウェーブに重要なスペルを使用するときを特定する必要があります。Vexはすべてのウェーブを支配する必要はありません。彼女が必要なのは、ドゥーム(Ult)と視界によって彼女のバーストが無視できないクリーンなウィンドウ1つです。

Vexに対して犯される最大のミスは何ですか?

Vexに対して犯される最大のミスは、ドゥーム(Ult)を追跡せずに彼女のゾーンに入ることです。多くのプレイヤーはQやRを回避することだけを考えますが、本当の脅威はしばしばコンボの残りを確実に成功させる恐怖(Fear)から来ます。彼女に対してプレイする場合、彼女のパッシブに注意し、実際のエンゲージの前にそれを使用させ、その後、彼女がそのコントロールを失ったウィンドウをプレイする必要があります。この規律なしでは、理論的に良いマッチアップでさえ、即死につながる可能性があります。
















































