S
2026年9月 · Patch 7.2d
Tank · SUPPORT

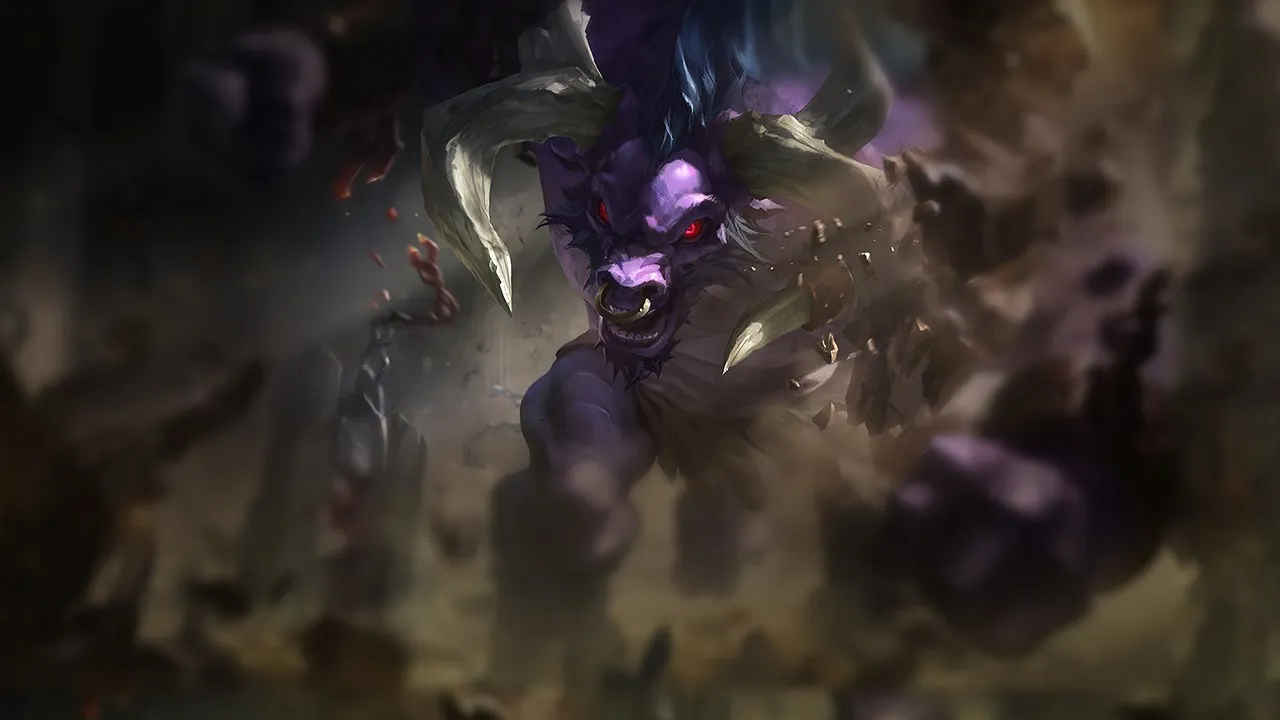
Alistar Wild Rift カウンターガイド

tank supportであるAlistarは、engageと敵ターゲットへの接近に大きく依存しています。kite、長射程のpoke、またはディスエンゲージ手段を持つ構成は、彼の存在感を大きく低下させます。効果的に集団戦を開始できない場合、彼の活躍は制限されます。

★ SUPPORT Tier S
ダメージ
UTIL
TANK
DIFF
Win 49.7% #52 · ↑2pt
Pick 4.4% #20
Ban 0.7% #95

Alistar Wild Rift カウンターガイド ★ カウンターシート

マッチアップ一覧
マッチアップ 判定 有利度 勝率 ピック率
Morgana ハードカウンター +3 51.5% 6.3%
Janna ハードカウンター +3 50.4% 1.5%
Senna ハードカウンター +2 51.5% 5.0%
Zyra ハードカウンター +2 51.4% 4.8%
Milio ハードカウンター +2 49.3% 5.5%
Poppy ハードカウンター +2
Galio 不利なマッチアップ +1 52.0% 2.8%
Zilean 不利なマッチアップ +1 52.0% 1.3%
Vel'Koz 不利なマッチアップ +1 51.8% 1.7%
Karma 不利なマッチアップ +1 51.4% 6.8%
Brand 不利なマッチアップ +1 51.3% 2.5%
Maokai 不利なマッチアップ +1 51.1% 5.0%
Sett 不利なマッチアップ +1 50.3% 2.1%
Thresh 不利なマッチアップ +1 50.1% 13.6%
Lulu 不利なマッチアップ +1 48.5% 11.2%
Norra 不利なマッチアップ +1
Braum スキル次第のマッチアップ ±0 52.1% 4.1%
Soraka スキル次第のマッチアップ ±0 51.3% 5.8%
Ornn スキル次第のマッチアップ ±0 50.7% 1.4%
Bard スキル次第のマッチアップ ±0 50.1% 1.2%
Nami スキル次第のマッチアップ ±0 49.7% 6.5%
Lux スキル次第のマッチアップ ±0 49.7% 8.0%
Veigar スキル次第のマッチアップ ±0 47.7% 2.9%
Sona 有利なマッチアップ −1 52.8% 6.6%
Rell 有利なマッチアップ −1 51.2% 3.3%
Rakan 有利なマッチアップ −1 50.5% 3.1%
Pyke 有利なマッチアップ −1 50.4% 5.7%
Malphite 有利なマッチアップ −1 50.3% 7.6%
Seraphine 有利なマッチアップ −1 50.3% 6.5%
Nautilus 有利なマッチアップ −1 48.9% 10.7%
Swain 有利なマッチアップ −1 48.2% 3.1%
Leona 有利なマッチアップ −2 51.0% 8.9%
Blitzcrank 有利なマッチアップ −2 49.4% 7.2%
Yuumi 有利なマッチアップ −2 46.9% 10.7%

Edge: Wild Rift Core canonical verdict (−3 to +3), shown from the point of view of the champion named in the row. Win rate and pick rate: the opponent's own rate in this role — Wild Rift CN · Challenger, Patch 7.2d. Not a head-to-head win rate.

ハードカウンター

6

これらのチャンピオンは、こちらのビルドやプレイスタイルを真正面から上回る構成を持ち、レーン戦のコントロールとファームを極めて難しくする。彼らのスキルはこちらの主要な強みを無効化し、いつも通りのプランを実行しようとした瞬間に手痛い反撃を受けさせてくる。こうしたマッチアップでは、ミスを最小限に抑え、正面からの対決以外で解決策を探すことが重要になる。

Zyra

Zyra+2

poke lanedisengage Zyra completely shuts down Alistar's proactive play. Whenever you try to walk forward to set up a Headbutt into Pulverize combo, Zyra can easily react with Grasping Roots to root you in place while her Garden of Thorns plants chew through your health. Even if you manage to dive in, her Stranglethorns creates a massive zone that knocks you up and completely ruins your team's follow-up. Zyraのビルド → 詳細を見る
Zyra

理由

Zyra completely shuts down Alistar's proactive play. Whenever you try to walk forward to set up a Headbutt into Pulverize combo, Zyra can easily react with Grasping Roots to root you in place while her Garden of Thorns plants chew through your health. Even if you manage to dive in, her Stranglethorns creates a massive zone that knocks you up and completely ruins your team's follow-up.

レーン戦への影響

This constant threat forces you to play defensively under your own turret. Zyra's Deadly Spines combined with Rampant Growth seeds constantly pushes the wave and chips away your health, making positive trades impossible. You're forced into early, unfavorable recalls, which deprives your marksman of protection and allows Zyra to secure deep river vision, leaving your mid laner vulnerable to unchecked rotations.

立ち回り方

To survive, never walk in a straight line toward Zyra; instead, position behind your minion wave to force her to choose between pushing or poking. Hold your Unbreakable Will specifically to cleanse the root from Grasping Roots or the knock-up from Stranglethorns if you get caught. If the lane becomes unplayable, stop trying to engage on her and look to flash-engage on the enemy ADC only when her plants are dormant.

チャンピオン詳細 → Zyraのビルド →
Senna

Senna+2

poke lanescaling gap Senna completely shuts down your engage potential by exploiting your melee nature. Her long-range basic attacks combined with Piercing Darkness constantly chip away at your health bar from safety. Whenever you attempt to close the distance to setup a Headbutt or Pulverize, she can easily react with Last Embrace, rooting you mid-stride and leaving you completely exposed to her relentless poke and soul harvesting. Sennaのビルド → 詳細を見る
Senna

理由

Senna completely shuts down your engage potential by exploiting your melee nature. Her long-range basic attacks combined with Piercing Darkness constantly chip away at your health bar from safety. Whenever you attempt to close the distance to setup a Headbutt or Pulverize, she can easily react with Last Embrace, rooting you mid-stride and leaving you completely exposed to her relentless poke and soul harvesting.

レーン戦への影響

This constant harassment forces you to play defensively under your own turret, bleeding health and priority. Your passive Triumphant Roar cannot sustain through her non-stop poke, leading to early, forced recalls that ruin your ADC's wave control. Because you are pinned down and vulnerable, your jungler loses all support in the bot-side river, giving up scuttle crabs and early neutral objectives without any contest.

立ち回り方

To survive, abandon any lane presence and hug the alcove or bush to break her line of sight, denying her free souls. Never walk straight at her; instead, wait for her to waste Last Embrace before attempting an engage with Headbutt and Pulverize. If you do get caught by her root while trying to peel, activate Unbreakable Will immediately to cleanse the crowd control and absorb the incoming burst instead of dying.

チャンピオン詳細 → Sennaのビルド →
Janna

Janna+3

disengagepeel heavy Janna completely shuts down your offensive threat because her Howling Gale acts as a reactive wall that cancels your Headbutt mid-flight, preventing you from ever landing Pulverize. Even if you manage to flank or catch her or her carry off-guard, she can instantly cast Monsoon to blow you away, completely neutralizing your dive and wasting your Trample charges. Jannaのビルド → 詳細を見る
Janna

理由

Janna completely shuts down your offensive threat because her Howling Gale acts as a reactive wall that cancels your Headbutt mid-flight, preventing you from ever landing Pulverize. Even if you manage to flank or catch her or her carry off-guard, she can instantly cast Monsoon to blow you away, completely neutralizing your dive and wasting your Trample charges.

レーン戦への影響

You are forced into a defensive posture, bleeding pressure under tower. Janna uses Zephyr to poke you down safely while her carry enjoys the AD boost from Eye of the Storm to push the wave. You cannot retaliate without taking massive damage, meaning your Triumphant Roar heals are constantly on cooldown just trying to keep you healthy, while your carry loses gold under turret.

立ち回り方

Never initiate with Headbutt while Janna has her Howling Gale ready. You must bait this tornado out first by walking aggressively, then immediately backing off. If she wastes it, you have a brief window to engage. If you get caught by her slow, use Unbreakable Will to cleanse it only if you can safely disengage. Otherwise, play passively, protect your carry with bodyblocks, and wait for your jungler to setup a gank where she cannot cover both angles.

チャンピオン詳細 → Jannaのビルド →
Morgana

Morgana+3

disengagespell shield Morgana is your ultimate counter because her Black Shield denies your entire kit. When you try to engage with your Headbutt and Pulverize combo, she can easily react by shielding your target. This absorbs the crowd control completely, leaving you standing helplessly next to her carry, unable to trigger Trample and exposed to her immediate Dark Binding counter-engage. Morganaのビルド → 詳細を見る
Morgana

理由

Morgana is your ultimate counter because her Black Shield denies your entire kit. When you try to engage with your Headbutt and Pulverize combo, she can easily react by shielding your target. This absorbs the crowd control completely, leaving you standing helplessly next to her carry, unable to trigger Trample and exposed to her immediate Dark Binding counter-engage.

レーン戦への影響

You lose all lane presence and are forced to play passively near your turret. Any aggressive forward movement is punished by Tormented Shadow pools, and if you get hit by Dark Binding, you will lose half your health bar before Triumphant Roar can heal you. You cannot contest the minion waves, forcing your marksman to farm under pressure while Morgana and her ally poke you down.

立ち回り方

Never initiate with your Headbutt and Pulverize combo while her defensive shield is available. Instead, walk up threateningly to bait her into wasting Black Shield early. Once that shield is on its long cooldown, you have a brief window to play aggressively. If she catches you with Soul Shackles or Dark Binding, immediately activate Unbreakable Will to cleanse the crowd control and escape back to safety rather than trying to fight back.

チャンピオン詳細 → Morganaのビルド →
Milio

Milio+2

disengagesustain war Milio is your absolute nightmare because he has two direct answers to your primary engage. Every time you attempt a Headbutt combo, a skilled Milio will interrupt your dash mid-air with Ultra Mega Fire Kick. Even if you manage to flank and land a multi-man Pulverize, his ultimate Breath of Life instantly cleanses the knockup and heals his team, completely neutralizing your playmaking potential. Milioのビルド → 詳細を見る
Milio

理由

Milio is your absolute nightmare because he has two direct answers to your primary engage. Every time you attempt a Headbutt combo, a skilled Milio will interrupt your dash mid-air with Ultra Mega Fire Kick. Even if you manage to flank and land a multi-man Pulverize, his ultimate Breath of Life instantly cleanses the knockup and heals his team, completely neutralizing your playmaking potential.

レーン戦への影響

This shutdown potential forces you into a passive state where you cannot safely contest the wave. Milio uses Cozy Campfire to safely poke you from afar while keeping his marksman healthy. Because your Headbutt is constantly threatened, you cannot threaten trades, allowing the enemy to slow push and stack waves under your tower. You will absorb heavy poke, bleeding health and losing tower plates without any real retaliation.

立ち回り方

To survive, you must play around Milio's spell rotations. Only trigger Headbutt immediately after he wastes Ultra Mega Fire Kick to poke or clear. Alternatively, bait his Warm Hugs shields first, then fake an engage to force out his defensive tools. If he holds his spells, stand behind your minions to let Triumphant Roar sustain you through the poke, and use Unbreakable Will solely to survive their tower dives rather than trying to force aggressive plays.

チャンピオン詳細 → Milioのビルド →

その他のマッチアップ

不利なマッチアップ

10

これらのチャンピオンは、マッチアップ自体を絶望的にするわけではないが、対面で優位に立ちやすいツールを持っている。射程が長かったり、攻撃を受け止める力が高かったり、エンゲージへの対応手段が豊富だったりする。アプローチを調整し、戦闘を受け入れるタイミングを慎重に選ぶ必要がある。

Lulu

Lulu+1

peel heavydisengage Lulu completely shuts down your engage potential by holding her crucial crowd control. When you attempt to initiate with Headbutt, she can reactively cast Whimsy to turn you into a harmless critter mid-dash, or immediately after you land Pulverize. This prevents you from charging up and landing the crucial stun from Trample, leaving you exposed in the middle of their minion wave without any follow-up. Luluのビルド → 詳細を見る
Lulu

理由

Lulu completely shuts down your engage potential by holding her crucial crowd control. When you attempt to initiate with Headbutt, she can reactively cast Whimsy to turn you into a harmless critter mid-dash, or immediately after you land Pulverize. This prevents you from charging up and landing the crucial stun from Trample, leaving you exposed in the middle of their minion wave without any follow-up.

レーン戦への影響

Because your primary engage is so easily neutralized, Lulu and her carry will constantly poke you down with Glitterlance and Pix, Faerie Companion. Every failed engage results in massive health loss, forcing you to rely on passive healing from Triumphant Roar. You will be pushed under your turret, struggling to protect your partner while Lulu uses Help, Pix! to safely win every short trade.

立ち回り方

To survive, you must bait out Whimsy before committing. Stand near your caster minions to threaten a flash-Pulverize rather than a predictable Headbutt approach. If Lulu wastes her polymorph on her ally for attack speed, that is your three-second green light to engage. If you get caught mid-dash, immediately activate Unbreakable Will to cleanse the polymorph, allowing you to quickly stack Trample and salvage the fight.

チャンピオン詳細 → Luluのビルド →
Galio

Galio+1

tankdisengage Engaging with your Headbutt-Pulverize combo is highly risky because Galio thrives on counter-engaging. The moment you fly in with Headbutt, he can immediately channel Shield of Durand. This zone taunt completely neutralizes your ADC's follow-up damage while exposing them to Winds of War. Your Trample stun takes too long to ramp up compared to his instant defensive response, turning your aggressive plays into self-traps. Galioのビルド → 詳細を見る
Galio

理由

Engaging with your Headbutt-Pulverize combo is highly risky because Galio thrives on counter-engaging. The moment you fly in with Headbutt, he can immediately channel Shield of Durand. This zone taunt completely neutralizes your ADC's follow-up damage while exposing them to Winds of War. Your Trample stun takes too long to ramp up compared to his instant defensive response, turning your aggressive plays into self-traps.

レーン戦への影響

You are forced to play defensively under your turret, as proactive trades usually result in losing half your carry's health bar. Galio easily secures wave priority by pairing Colossal Smash with Winds of War. If you get shoved in, he can freely step back to unleash Hero's Entrance toward mid lane, while your lack of wave clear keeps you stuck, unable to match his global map pressure.

立ち回り方

Pivot your strategy entirely toward protecting your carry. Instead of engaging, save Headbutt to knock Galio away the instant he winds up Justice Punch. If he manages to land his taunt, immediately activate Unbreakable Will to cleanse the control, then use Pulverize to disrupt his channel or protect your partner from Winds of War. Let Triumphant Roar sustain you through his passive poke, and never headbutt into him unless his defensive shield is down.

チャンピオン詳細 → Galioのビルド →
Thresh

Thresh+1

disengagehook lane The entire matchup hinges on Thresh's ability to react to your engage. A competent Thresh will consistently use Flay to knock you out of your Headbutt dash before you can activate Pulverize. This mechanical denial leaves you stranded in the minion wave, stripped of your primary crowd control, and highly vulnerable to a counter-hook from Death Sentence while your cooldowns recover. Threshのビルド → 詳細を見る
Thresh

理由

The entire matchup hinges on Thresh's ability to react to your engage. A competent Thresh will consistently use Flay to knock you out of your Headbutt dash before you can activate Pulverize. This mechanical denial leaves you stranded in the minion wave, stripped of your primary crowd control, and highly vulnerable to a counter-hook from Death Sentence while your cooldowns recover.

レーン戦への影響

Because your main engage is neutralized, you lose the threat of a sudden engage, allowing Thresh to position aggressively and collect souls from Damnation. Your ADC will be forced under turret as Thresh's ranged basic attacks poke you down. If you attempt a desperate Headbutt that gets cancelled, Thresh will lock you down with The Box, resulting in massive health loss or a forced recall.

立ち回り方

To survive, you must play a patient baiting game. Never initiate with Headbutt unless you see Thresh waste Flay to clear waves or peel. When Flay is on cooldown, you have a brief fifteen-second window to strike. Alternatively, bypass his reaction time entirely by using Flash directly into Pulverize, then using Headbutt to push the target back into your tower, while keeping Unbreakable Will ready to cleanse his subsequent Death Sentence.

チャンピオン詳細 → Threshのビルド →
Karma

Karma+1

poke lanespacing This matchup is dictated by Karma's oppressive ranged pressure. In the early game, her Inner Flame relentlessly chips away at your health, forcing you to play defensively. Whenever you attempt to close the distance for a Headbutt and Pulverize combo, she nullifies your threat by casting Inspire. This shield's movement speed burst allows her and her ally to effortlessly dance outside your initiation range while kiting you backward. Karmaのビルド → 詳細を見る
Karma

理由

This matchup is dictated by Karma's oppressive ranged pressure. In the early game, her Inner Flame relentlessly chips away at your health, forcing you to play defensively. Whenever you attempt to close the distance for a Headbutt and Pulverize combo, she nullifies your threat by casting Inspire. This shield's movement speed burst allows her and her ally to effortlessly dance outside your initiation range while kiting you backward.

レーン戦への影響

You will constantly find yourself pushed under your turret, struggling for wave control. Because Karma can safely poke with Inner Flame, you cannot easily step up to trigger Triumphant Roar without losing half your health. If you get caught by Focused Resolve while trying to secure minions, you will face heavy damage. This constant pressure limits your map rotations and forces you to concede early dragon priority.

立ち回り方

To survive, use the lane bushes to hide your model and avoid the splash damage from Inner Flame. Do not blindly initiate. Instead, bait out her Inspire by walking forward threateningly, then step back. Once her shield is on cooldown, or if she wastes her Mantra on a missed poke, you have a brief window to strike. If you do get locked down by Focused Resolve, activate Unbreakable Will instantly to break the root and escape.

チャンピオン詳細 → Karmaのビルド →
Maokai

Maokai+1

tank clashdisengage Maokai counters your primary engage tool. Whenever you attempt to initiate with Headbutt, a reactive Maokai can use Bramble Smash to knock you back mid-charge, completely cancelling your Pulverize follow-up. Furthermore, if you do manage to trigger short trades, Maokai relies on Sap Magic to constantly heal up, rendering your high-cooldown Triumphant Roar sustain insufficient to win this battle of attrition. Maokaiのビルド → 詳細を見る
Maokai

理由

Maokai counters your primary engage tool. Whenever you attempt to initiate with Headbutt, a reactive Maokai can use Bramble Smash to knock you back mid-charge, completely cancelling your Pulverize follow-up. Furthermore, if you do manage to trigger short trades, Maokai relies on Sap Magic to constantly heal up, rendering your high-cooldown Triumphant Roar sustain insufficient to win this battle of attrition.

レーン戦への影響

This interaction forces you into a passive role where your threat level is neutralized. Maokai can freely control the brushes with Sapling Toss, slowly chipping away at your health bar and pushing your ADC off the wave. You cannot easily engage to contest this pressure, because entering his range risks getting locked down by Twisted Advance and swept into Nature's Grasp, leaving you bleeding health and forcing disadvantageous recalls.

立ち回り方

To survive, stand parallel to your ADC outside of brush vision to bait out Sapling Toss without taking damage. Never initiate with Headbutt unless you see Maokai waste Bramble Smash on the wave. If Maokai initiates on your carry with Twisted Advance, do not chase him; instead, use Headbutt to peel the enemy marksman away, then activate Trample to stun Maokai, letting Triumphant Roar slowly stabilize your health under your tower.

チャンピオン詳細 → Maokaiのビルド →

その他のマッチアップ

スキル次第のマッチアップ

7

このマッチアップは何よりもまず実行力の勝負であり、両者ともに優位を取れる現実的な手段を持っている。重要なスキルを一つ避けられるか、エンゲージを正しく読めるか、あるいはたった一つの位置取りのミスが、勝敗を分けることもある。マッチアップを理解し、行動すべき瞬間を見極める力がとりわけ重要になる。

Soraka

Soraka±0

kill lanesustain war This even matchup hinges entirely on how you play around Soraka's silence. When you initiate with Headbutt into Pulverize, she can instantly drop Equinox directly beneath you. This silence shuts down your ability to charge up and activate the Trample stun, leaving you stranded in the minion wave while she heals up her marksman using Astral Infusion. Sorakaのビルド → 詳細を見る
Soraka

理由

This even matchup hinges entirely on how you play around Soraka's silence. When you initiate with Headbutt into Pulverize, she can instantly drop Equinox directly beneath you. This silence shuts down your ability to charge up and activate the Trample stun, leaving you stranded in the minion wave while she heals up her marksman using Astral Infusion.

レーン戦への影響

Because Astral Infusion and Wish constantly negate your burst damage, short skirmishes favor her if you cannot lock her down. Missing an engage or getting silenced mid-combo means you will be poked out by Starcall while your Triumphant Roar struggles to match her raw healing output. You must force fights only when her defensive zone is unavailable, otherwise her lane sustain slowly chokes you out.

立ち回り方

Walk up aggressively to threaten Headbutt without casting it, baiting her to waste Equinox preemptively. Once her silence is on cooldown, you have a fifteen-second window to execute your full crowd control rotation. If you get caught inside her zone, immediately trigger Unbreakable Will to cleanse the silence, allowing you to secure the Trample stun on Soraka herself before she can run away.

チャンピオン詳細 → Sorakaのビルド →
Nami

Nami±0

poke lanekill lane This lane is a constant balance between your engage potential and Nami's defensive disruption. The core danger lies in how she responds to your forward dive. If you commit with *Headbutt* and *Pulverize*, Nami will bypass you entirely to launch *Aqua Prison* directly at your follow-up shooter. This splits the focus, leaving you deep in enemy territory while your partner is bubbled. Namiのビルド → 詳細を見る
Nami

理由

This lane is a constant balance between your engage potential and Nami's defensive disruption. The core danger lies in how she responds to your forward dive. If you commit with *Headbutt* and *Pulverize*, Nami will bypass you entirely to launch *Aqua Prison* directly at your follow-up shooter. This splits the focus, leaving you deep in enemy territory while your partner is bubbled.

レーン戦への影響

Because *Triumphant Roar* offers slower passive healing compared to the immediate bounce of *Ebb and Flow*, you cannot afford bad trades. A split-focus fight caused by a mistimed dive forces your partner to retreat, granting Nami's lane massive wave control. Missed engages translate directly to being shoved under turret, where Nami can freely poke with *Tidecaller's Blessing* empowered attacks.

立ち回り方

To win this matchup, stand slightly parallel to your ADC to bait Nami's skillshots without letting her hit both of you. Never use *Headbutt* unless *Aqua Prison* has just missed, or you can immediately follow up with *Trample* to chain-cc her. If she holds her bubble, use *Headbutt* defensively to knock her away when she steps up to poke with *Ebb and Flow*.

チャンピオン詳細 → Namiのビルド →
Braum

Braum±0

tank clashpeel heavy This matchup is a pure test of positioning. While Braum can raise Unbreakable to absorb incoming projectiles, it does nothing to stop your Pulverize knockup from below. However, you cannot afford to overcommit. Linger too long in melee range, and his Concussive Blows passive will stack rapidly via his basic attacks and Winter's Bite, leading to a stun that completely swings the trade. Braumのビルド → 詳細を見る
Braum

理由

This matchup is a pure test of positioning. While Braum can raise Unbreakable to absorb incoming projectiles, it does nothing to stop your Pulverize knockup from below. However, you cannot afford to overcommit. Linger too long in melee range, and his Concussive Blows passive will stack rapidly via his basic attacks and Winter's Bite, leading to a stun that completely swings the trade.

レーン戦への影響

Because of this interaction, the lane dynamic remains slow and tense. You cannot easily dive or engage past their wave without risking a devastating counter-engage under tower. If Braum uses Stand Behind Me to reposition, he can easily setup Glacial Fissure to split you from your ADC. Trade health only when you can safely trigger Triumphant Roar to sustain, otherwise, any failed initiation leaves you vulnerable to a heavy slow.

立ち回り方

To win this deadlock, play around the threat of your combo while staying near your own minions to block his Winter's Bite. Use Headbutt to push Braum away from your carry if he tries to stack Concussive Blows. Never commit with Trample unless his shield is down and you have immediate backup. If you do get caught in a stun, immediately activate Unbreakable Will to cleanse the crowd control and reduce incoming damage before retreating safely.

チャンピオン詳細 → Braumのビルド →
Lux

Lux±0

poke lanekill lane This matchup is a tense battle of spacing centered entirely on Lux's Light Binding. If you attempt to engage with your Headbutt-Pulverize combo while she has this root available, she can stop you mid-flight, leaving you stranded and vulnerable to Lucent Singularity and Illumination procs. However, the moment she wastes her Light Binding, she loses her only defensive tool, making her an easy target for your displacement. Luxのビルド → 詳細を見る
Lux

理由

This matchup is a tense battle of spacing centered entirely on Lux's Light Binding. If you attempt to engage with your Headbutt-Pulverize combo while she has this root available, she can stop you mid-flight, leaving you stranded and vulnerable to Lucent Singularity and Illumination procs. However, the moment she wastes her Light Binding, she loses her only defensive tool, making her an easy target for your displacement.

レーン戦への影響

Lux will constantly use Lucent Singularity to shove the wave and chip your health, trying to force you under tower where headbutt angles are restricted. If you take too much poke early, you lose the health required to execute a dive or roam, locking you in lane. A single missed root from her completely shifts the pressure, turning her tower-sieging advantage into an immediate double kill for your marksman.

立ち回り方

Stand parallel to your minion wave to force her to choose between shoving or targeting you. Never walk straight at her; instead, bait her Light Binding by making sudden diagonal movements. If she misses, immediately trigger Headbutt into Pulverize. Should you get rooted beforehand, immediately activate Unbreakable Will to cleanse the crowd control, then use Trample to stun her or her carry as you retreat, preventing them from capitalizing on your mistake.

チャンピオン詳細 → Luxのビルド →

その他のマッチアップ

有利なマッチアップ

11

これらのチャンピオンは、こちらの主要な強みに効果的に対応するのが難しく、より自由に対面を組み立てることができる。プレッシャーをかけて有利な交換を引き出す手段は複数あることが多い。相手が態勢を立て直す時間を与えるのではなく、この優位を活かして主導権を握ろう。

Sona

Sona−1

kill lanescaling gap Sona is exceptionally squishy, making her highly vulnerable to your primary initiation. Once you lock onto her with Headbutt, she has no escape tools to avoid the subsequent Pulverize. Her low base health pool means that landing this combo, followed by the stun from Trample, almost guarantees a kill or forces her Summoner spells, as her Aria of Perseverance cannot mitigate such rapid burst. Sonaのビルド → 詳細を見る
Sona

理由

Sona is exceptionally squishy, making her highly vulnerable to your primary initiation. Once you lock onto her with Headbutt, she has no escape tools to avoid the subsequent Pulverize. Her low base health pool means that landing this combo, followed by the stun from Trample, almost guarantees a kill or forces her Summoner spells, as her Aria of Perseverance cannot mitigate such rapid burst.

レーン戦への影響

This threat forces Sona to play extremely defensively, neutralizing her usual poke with Hymn of Valor. She must stay far behind her minions, which yields complete wave control to your duo. You can easily zone her out of experience range. This pressure peaks at level three when your full kit is unlocked, allowing you to dive or freeze the wave to starve her of gold.

立ち回り方

Position yourself aggressively in the lane brushes to deny Sona vision and force her further back. Do not waste Headbutt on her ADC; instead, wait for Sona to step forward to trigger her Power Chord or cast Hymn of Valor. The moment she enters your range, execute your Headbutt and Pulverize combo immediately. If she plays too safely, use Unbreakable Will to tank the tower and dive her under her own turret.

チャンピオン詳細 → Sonaのビルド →
Nautilus

Nautilus−1

tank clashpeel heavy Alistar completely shut downs Nautilus's primary engage tool. Because you can safely absorb the hook of Dredge Line meant for your marksman, you dictate the pace of every skirmish. After taking the hook, a quick Headbutt pushes Nautilus away before he can root your ally with Staggering Blow or slow them with Riptide, completely neutralizing their offensive pressure and leaving Nautilus stranded in a bad position. Nautilusのビルド → 詳細を見る
Nautilus

理由

Alistar completely shut downs Nautilus's primary engage tool. Because you can safely absorb the hook of Dredge Line meant for your marksman, you dictate the pace of every skirmish. After taking the hook, a quick Headbutt pushes Nautilus away before he can root your ally with Staggering Blow or slow them with Riptide, completely neutralizing their offensive pressure and leaving Nautilus stranded in a bad position.

レーン戦への影響

Your presence forces Nautilus to play passively behind his minions, as throwing a hook risks pulling a massive tank directly into his face. This gives your duo absolute lane priority, allowing you to secure early level advantages. Since Nautilus cannot easily trigger Titan's Wrath for efficient trades without getting punished by Pulverize, his lane health deteriorates quickly, forcing him into bad recall timings and giving up tower plates.

立ち回り方

Position yourself constantly between Nautilus and your carry, mirroring his lateral movements to bodyblock Dredge Line. When he hooks you, do not panic; immediately use Headbutt to push him backward toward his own tower, preventing him from applying Staggering Blow. If they commit further with Depth Charge, activate Unbreakable Will to instantly cleanse the crowd control, then retaliate with Pulverize and Trample to turn their failed engage into a double kill.

チャンピオン詳細 → Nautilusのビルド →
Rakan

Rakan−1

peel heavymobility clash Alistar completely dictates the pace of this lane because his defensive kit perfectly neutralizes Rakan's mobility. When Rakan attempts to initiate with Grand Entrance, a well-timed Pulverize knocks him up mid-dash, canceling the crowd control entirely. Furthermore, if Rakan tries to retreat or reposition using Battle Dance, you can instantly Headbutt him away from his intended partner, leaving him stranded and highly vulnerable. Rakanのビルド → 詳細を見る
Rakan

理由

Alistar completely dictates the pace of this lane because his defensive kit perfectly neutralizes Rakan's mobility. When Rakan attempts to initiate with Grand Entrance, a well-timed Pulverize knocks him up mid-dash, canceling the crowd control entirely. Furthermore, if Rakan tries to retreat or reposition using Battle Dance, you can instantly Headbutt him away from his intended partner, leaving him stranded and highly vulnerable.

レーン戦への影響

This interaction forces Rakan into a passive, reactive role where he cannot safely fish for aggressive knock-ups. His inability to reliably land Grand Entrance prevents his duo from dictating trade patterns, giving your carry free rein over wave positioning. Any chip damage Rakan attempts with Gleaming Quill is easily neutralized by Triumphant Roar, allowing you to slow-push waves and safely threaten dives under the enemy turret.

立ち回り方

Position yourself slightly behind your carry, acting as a human shield ready to react. Never waste Pulverize proactively; always hold it specifically to interrupt Grand Entrance when Rakan dashes in. If he triggers his ultimate, The Quickness, wait for the charm to hit you, immediately cleanse it using Unbreakable Will, and then Headbutt him away from your team. If you miss your timing, retreat until your cooldowns recover.

チャンピオン詳細 → Rakanのビルド →
Rell

Rell−1

tank clashpeel heavy Alistar dictates the pace of this matchup because his Pulverize acts as a hard counter to Rell's primary engage. Whenever she attempts to leap forward with her crash down, a well-timed Pulverize knocks her up mid-air, completely canceling her crowd control and leaving her stranded. This interaction instantly neutralizes her threat, turning her aggressive dives into self-inflicted traps. Rellのビルド → 詳細を見る
Rell

理由

Alistar dictates the pace of this matchup because his Pulverize acts as a hard counter to Rell's primary engage. Whenever she attempts to leap forward with her crash down, a well-timed Pulverize knocks her up mid-air, completely canceling her crowd control and leaving her stranded. This interaction instantly neutralizes her threat, turning her aggressive dives into self-inflicted traps.

レーン戦への影響

Because of this aerial denial, Rell cannot freely contest the minion wave or force health trades. Every time her crash down is interrupted and put on cooldown, she is stuck in her slower, unmounted form, giving your duo a massive window of vulnerability to exploit. This pressure prevents her from securing early bushes or establishing priority.

立ち回り方

To execute this lane perfectly, stand near your marksman and hold Pulverize exclusively to interrupt her jump. Do not use Headbutt to engage unless her crash down is already on cooldown. If she manages to land an engage on your ally, immediately use Headbutt to displace her or activate Trample to stun her, then rely on Triumphant Roar to sustain through the trade.

チャンピオン詳細 → Rellのビルド →
Pyke

Pyke−1

kill lanepeel heavy This matchup swings heavily in your favor because you hold the ultimate tool to shut down Pyke's main engage. Whenever Pyke attempts to dash forward with Phantom Undertow to stun your marksman, a well-timed Pulverize completely halts his movement mid-air. This denies his crowd control entirely, leaving him extremely vulnerable and exposed in the middle of your minion wave with no easy way to escape. Pykeのビルド → 詳細を見る
Pyke

理由

This matchup swings heavily in your favor because you hold the ultimate tool to shut down Pyke's main engage. Whenever Pyke attempts to dash forward with Phantom Undertow to stun your marksman, a well-timed Pulverize completely halts his movement mid-air. This denies his crowd control entirely, leaving him extremely vulnerable and exposed in the middle of your minion wave with no easy way to escape.

レーン戦への影響

Pyke's threat is neutralized in even-numbered skirmishes. Since you can deny his stun, he cannot safely fish for pulls with Bone Skewer without risking a deadly counter-engage. Every time Pyke misses his hook or fails a dash, his massive cooldown windows allow you to walk up, trigger Trample, and force him to burn Ghostwater Dive defensively. This keeps him low on health and unable to secure execution thresholds for Death from Below.

立ち回り方

Position yourself slightly offset from your carry to bait Pyke's aggression. Never waste Pulverize to poke; keep it ready solely to intercept Phantom Undertow. If Pyke does manage to hook your ally with Bone Skewer, do not panic. Headbutt him away instantly to break his follow-up chain. If you are targeted by Death from Below while low, activate Unbreakable Will to cleanse any lingering slow and mitigate incoming damage, surviving his execute window.

チャンピオン詳細 → Pykeのビルド →
Seraphine

Seraphine−1

kill laneteamfight This matchup swings heavily in your favor once ultimates are unlocked. When Seraphine attempts to turn a fight with her massive Encore wave, Unbreakable Will allows you to immediately shrug off the charm. This completely neutralizes her primary counter-engage tool, leaving her fragile frame exposed to an immediate follow-up. Since her Beat Drop relies on existing CC to stun, your instant cleanse completely breaks her crowd control chain. Seraphineのビルド → 詳細を見る
Seraphine

理由

This matchup swings heavily in your favor once ultimates are unlocked. When Seraphine attempts to turn a fight with her massive Encore wave, Unbreakable Will allows you to immediately shrug off the charm. This completely neutralizes her primary counter-engage tool, leaving her fragile frame exposed to an immediate follow-up. Since her Beat Drop relies on existing CC to stun, your instant cleanse completely breaks her crowd control chain.

レーン戦への影響

Before level five, Seraphine will try to poke you down using High Note and Stage Presence. However, once you both have ultimates, she cannot safely step forward to harass. The threat of your engage forces her to play extremely safe, giving your duo total control over the minion wave. You can easily crash waves to dive her under tower, as her Surround Sound shield cannot save her from your burst.

立ち回り方

Bait out her Beat Drop by walking aggressively, then immediately punish her with a Headbutt into Pulverize combo while her crowd control is down. During major skirmishes, do not flash engage instantly if she has her ultimate ready. Instead, walk up to absorb Encore deliberately, activate Unbreakable Will to cleanse it instantly, and then use Trample to lock her down. If she plays too far back, use your dive potential to force her under her own turret.

チャンピオン詳細 → Seraphineのビルド →
Leona

Leona−2

tank clashpeel heavy Alistar completely counters Leona's primary engagement tool. When Leona lands Zenith Blade on your marksman, she relies on following up with Shield of Daybreak to lock them down. Because Headbutt is near-instant, you can knock her away mid-dash or immediately upon arrival, preventing her stun entirely and wasting her primary engage window. Leonaのビルド → 詳細を見る
Leona

理由

Alistar completely counters Leona's primary engagement tool. When Leona lands Zenith Blade on your marksman, she relies on following up with Shield of Daybreak to lock them down. Because Headbutt is near-instant, you can knock her away mid-dash or immediately upon arrival, preventing her stun entirely and wasting her primary engage window.

レーン戦への影響

This interaction strips Leona of her lane dominance. Since she cannot execute her standard dive, your marksman can farm safely without fearing her lock-on. Whenever Leona misses or gets her Zenith Blade negated, she is forced to play defensively, wasting Eclipse to survive your counter-engage with Pulverize and Trample, shifting the health lead permanently in your favor.

立ち回り方

Position yourself slightly behind or parallel to your ADC to always be in range for a reactive Headbutt. Never initiate with your combo unless Leona's Zenith Blade is down. Hold your displacement to peel her off. If she targets you instead, let her commit, then use Unbreakable Will to instantly cleanse her stun chain before knocking her into your turret or towards your marksman with Trample.

チャンピオン詳細 → Leonaのビルド →
Yuumi

Yuumi−2

kill laneroaming Yuumi's attachment via You and Me! makes her entirely unable to block your Headbutt into Pulverize combo on her host. When you knock up her carry, you effectively disable both champions simultaneously without facing any bodyblocking. Additionally, if she attempts to counter-engage with Final Chapter, Alistar can instantly purge the root using Unbreakable Will, completely neutralizing their defensive tools during your all-in burst. Yuumiのビルド → 詳細を見る
Yuumi

理由

Yuumi's attachment via You and Me! makes her entirely unable to block your Headbutt into Pulverize combo on her host. When you knock up her carry, you effectively disable both champions simultaneously without facing any bodyblocking. Additionally, if she attempts to counter-engage with Final Chapter, Alistar can instantly purge the root using Unbreakable Will, completely neutralizing their defensive tools during your all-in burst.

レーン戦への影響

This matchup completely removes any threat of counter-engage, allowing you to dictate when trades happen. While Yuumi relies on Zoomies to sustain her marksman, your Triumphant Roar keeps your health high during short trades. Once you push the wave, you gain absolute freedom to roam. Yuumi is forced to stay attached to her partner under tower, leaving her team completely outnumbered during map-wide skirmishes.

立ち回り方

Watch for Yuumi detaching to trigger Bop 'n' Block; if she does, instantly interrupt her with Headbutt to lock her out of You and Me!. If she remains safely attached, execute your Headbutt and Pulverize combo directly on her host whenever they step up to last-hit. When the enemy lane plays too passively, do not force dives under their turret. Instead, run straight to mid lane or secure neutral objectives, exploiting Yuumi's inability to rotate alone.

チャンピオン詳細 → Yuumiのビルド →
Blitzcrank

Blitzcrank−2

tank clashhook lane This matchup heavily favors you because Blitzcrank's primary threat, Rocket Grab, acts as a free delivery system for your engage. When he pulls you in, he saves you from needing Headbutt to close the distance. You can instantly follow up with Pulverize on his nearby carry, turning his pick attempt into a devastating counter-engage. Your Triumphant Roar then passive-heals any poke, while his Mana Barrier cannot save his ADC. Blitzcrankのビルド → 詳細を見る
Blitzcrank

理由

This matchup heavily favors you because Blitzcrank's primary threat, Rocket Grab, acts as a free delivery system for your engage. When he pulls you in, he saves you from needing Headbutt to close the distance. You can instantly follow up with Pulverize on his nearby carry, turning his pick attempt into a devastating counter-engage. Your Triumphant Roar then passive-heals any poke, while his Mana Barrier cannot save his ADC.

レーン戦への影響

Blitzcrank is completely neutralized in lane pressure. Because he dreads pulling a tank, he is forced to hold Rocket Grab, giving you total bush control. You can stand aggressively in front of your minion wave, acting as a physical shield for your ADC. This positioning denies Blitzcrank any zone control, keeping his Overdrive and Power Fist completely useless during the early laning phase.

立ち回り方

Actively bodyblock Rocket Grab by positioning yourself directly between Blitzcrank and your marksman. When grabbed, do not panic-cast Headbutt. Instead, walk slightly toward their ADC, activate Trample, and slam them with Pulverize. Use Headbutt only to peel their ADC away if they try to follow up, or to shove the enemy carry under your tower if Blitzcrank pulls you close to your own turret.

チャンピオン詳細 → Blitzcrankのビルド →

その他のマッチアップ

Alistar対策アイテム

これらのアイテムを購入すると、このチャンピオンの影響力を抑えられます。

Ignite
Ignite
Executioner's Calling
Oblivion Orb
Oblivion Orb
Mortal Reminder
Mortal Reminder
Chempunk Chainsword
Chempunk Chainsword Option bruiser anti-heal.

このチャンピオンへの対策

カウンターアングル

Alistarのカウンターは、単に「彼をカイトしてくるチャンピオン」というだけではありません。真に彼を苦しめるのは、彼の突撃そのもののロジックを破壊するような相手です。例えば、彼の突撃の着地点をキャンセルしたり、接触前に突撃の角度を読んだり、彼が望まないテンポでの戦闘を強いる相手です。Alistarは、クリーンな最初の瞬間にかかっている部分が大きいため、あまりにも遠すぎる位置から開始させられたり、W→Qの連携を読まれたり、ヘッドバットを防御的に使わざるを得なくなったりすると、その価値は急速に低下します。相手によっては、彼を倒す必要はなく、ただ彼の突撃を不快にさせたり、コストを高くさせたりするだけでカウンターになります。逆に、敵が彼に接近する必要がある場合、即座の対応策を持たない場合、またはレーンで隙を見せる場合、Alistarは再びその懲罰力を発揮します。したがって、彼のマッチアップは、単純なタンク対ポークの計算ではなく、ウィンドウ(好機)の戦いとして読むべきです。

パッチの文脈

現在のパッチでは、Alistarの最良のカウンターは、主に彼の最初の確実性を破壊するものです。彼の突撃の角度が予測可能になると、彼のキットは突然重く、自由度がはるかに低く感じられます。エンゲージを拒否したり、接触をリセットしたり、Alistarが脅しのために近づいてきた瞬間に価値を得るサポートは、彼が自然なテンポでプレイするのを妨げます。対照的に、よりスタティックなレーンや、接触に脆弱なレーンは、彼が自身のトレード構造を押し付けることを可能にします。本当の疑問は「誰が彼に勝つか?」だけでなく、「誰が彼を存在感をクリーンなアクションに変えるのを止めるか?」です。

クイックリード

  • 彼の最も厳しいマッチアップは、単にダメージが多い相手ではなく、最初のエンゲージを拒否したり、汚したりする相手です。
  • Alistarがヘッドバットを早期に防御的に使用せざるを得ない場合、彼のレーンは即座にプレッシャーを失います。
  • 接触に脆弱なレーンに対しては、一歩余計に踏み込んだり、不適切なワードが彼のコンボを晒したりした瞬間に、彼はコントロールを取り戻します。

カウンターの原型

直接的なエンゲージ拒否

このカウンタータイプは、Alistarのアイデンティティの中核を攻撃します。問題は、彼がエンゲージをクリーンにできなくなるだけでなく、エンゲージの明確さそのものが失われることです。彼の突撃が、最初の接触の直後に押し戻されたり、ブロックされたり、無力化されたりすると、彼は非常に少ないリターンに対して多くのコストを費やすことになります。これらのマッチアップは、彼に多くの動きを予兆させたり、フラッシュをより頻繁に投資させたり、価値を取り戻すために敵のより大きなミスを待たせたりすることを強います。レーンでもチームファイトでも、彼は自身のイニシアチブよりも敵のポジショニングに依存するようになり、これはテンポを設定したいsupportにとっては常に悪いことです。

チャンピオンの適応方法. 正面からのコンボばかりを狙うのではなく、視界の陰を利用したり、再エンゲージのタイミングを計ったり、キャリーを守ったりすることでプレイしましょう。直接的な突撃が読まれやすい場合は、最初のボタン(スキル)を無理に押すのではなく、スペースを維持してカウンターミスを懲罰することで戦闘に勝利しましょう。

遠距離での削り合いと遅いレーンテンポ

これらの相手はAlistarを悩ませます。なぜなら、本格的なオールインが始まる前に、一歩踏み出すことすべてが高価になるからです。必ずしも派手な方法で彼のコンボを破壊するわけではありませんが、彼をより少ない体力、より少ないウェーブコントロール、または視界周りの自由度の低下した状態でウィンドウ(好機)に追い込みます。Alistarがターゲットに到達する前にポークやハラスゾーンを横切る必要がある場合、彼のレーンはより予測可能で読みやすくなります。その後、マッチアップは消耗戦に変わります。彼が早すぎるエンゲージをするか、敵が彼らの望むペースを冷静に確立するかのどちらかです。

チャンピオンの適応方法. 時には、より忍耐強いレーンを受け入れましょう。体力をより良く守り、茂みをより積極的に使い、敵がウェーブ、視界、または不適切なローテーションのために前に出る必要がある瞬間まで、本当のエンゲージを温存しましょう。

接触のミラーリングまたは強力なカウンターイニシエーション

これらのマッチアップは、必ずしもAlistarのキットをキャンセルすることによって彼に勝つわけではありませんが、最初のインパクトの独占を彼から奪うことによって勝ります。敵も非常に強力な接触ポイントを強制できる場合、Alistarは自然なイニシエーターとしての利点の一部を失います。戦闘は「誰がエンゲージするか」ではなく、「誰がより良いタイミングで、より良いターゲットに、より良いsupportを伴ってエンゲージするか」というものになります。Alistarが早すぎると、敵により強力なカウンターシーケンスを晒してしまう可能性があります。これらは、彼のテンポ感覚がメカニカルな勇気よりも鋭くなければならないマッチアップです。

チャンピオンの適応方法. より速くエンゲージできると証明しようとしないでください。相手を悪いゾーンにエンゲージさせるか、最初の波ではなく2番目の波を壊すためにキットの一部を温存しましょう。

優先度の高いマッチアップ

Janna

JannaはAlistarにとってフラストレーションが溜まります。なぜなら、彼女はしばしば彼のエンゲージを不完全な交換に変えてしまうからです。本当の問題は、彼女が彼を押し返すことだけでなく、真の接触が起こる前に彼の計画を明らかにさせてしまうことです。Alistarが遠すぎる位置から開始した場合、彼女はリズムを崩す時間があります。彼女がツールをうまく保持している場合、彼は平均的な結果のために過剰に投資する必要があります。したがって、このマッチアップは、力任せよりも忍耐が報われます。目に見える角度を無理に作ることで勝つのではなく、彼女に完璧な拒否のタイミングを与えずに距離を縮めることで勝利します。

Senna

Sennaは、それほど直接的ではありませんが、非常に現実的な方法でAlistarを悩ませます。彼女はレーンを消耗戦、スペーシング、そして小さな負けのステップの連続に変えます。Alistarが接触前に長い距離を歩く必要がある場合、彼女はその道のりのすべての部分に対して彼に代償を払わせます。これにより、クリーンなトレードのマージンが減り、彼はより少ない体力や実際のポジショナルアドバンテージなしでのエンゲージを強いられる可能性があります。したがって、このマッチアップは、衝動よりも準備によって勝たれます。リソースを維持し、後退の角度を切り、Sennaがポーク、通常攻撃、または視界のために一歩踏み出しすぎる正確な瞬間を懲罰する必要があります。

対面時のよくある間違い

対面時のよくある間違い

  • 一部の相手は単にタイミングコントロールで彼に勝つのに、すべてのAlistarカウンターを単なるポークレーンとして見ること。
  • 彼のエンゲージを最大化するために、まさに彼の突撃を待っているサポートに対して、同じ角度を無理に仕掛けること。
  • Alistarにとって悪いトレードが、しばしば数秒間の脅威も失わせることを忘れること。
  • タンクであることと、すでに不利なマッチアップに無警戒に突入する許可を混同すること。
  • カウンターに合わせてロールを変えられないと、エンゲージよりピールで有利に進められるマッチアップもあるのに苦労します。

コーチングノート

  • 直接的なエントリーが拒否されるマッチアップでは、相手があなたの方へ歩いてこなければならないシーケンスを探しましょう。Alistarは、自分で全距離を移動する必要がなくなると、しばしば主導権を取り戻します。
  • レーンだけでカウンターを判断しないでください。チャンピオンによっては、オブジェクトファイトを開始したいときに問題を引き起こすことが多く、これはボットレーンでの悪いトレード1回よりも重要になることがよくあります。

FAQ

なぜAlistarはアンチエンゲージサポートにこれほど苦労するのでしょうか?

それは、彼らの効率を下げるだけでなく、彼のコア機能を曖昧にするからです。Alistarは、最初の接触で即座に構造を作り出すことを望んでいます:孤立したターゲット、得られたスペース、保護されたキャリー、または信頼できるダイブ。アンチエンゲージサポートは、その明確さを損ないます。彼らはAlistarに、より早く意図を明らかにするか、より少ない価値のために多くを投資するか、行動する前にずっと大きなミスを待つことを強います。それは彼をプレイ不可能にするわけではありませんが、はるかに多くの規律をもって良いエントリーを生み出す必要があることを意味します。

ポークに対して、Alistarは積極的にプレイすべきですか、それとも忍耐強くプレイすべきですか?

正しい答えはしばしば「適切なタイミングで積極的に、それ以外は忍耐強く」です。ポークに対して準備なしに積極的にプレイすることは、通常、早すぎるタイミングで自分を露呈し、インする前に体力を失うことを意味します。しかし、あまりにも受動的にプレイすると、レーン全体を失うことになります。リソースを節約し、ブッシュをうまく使い、敵が追加のワードやオートアタックのためにステップアップするのを待ち、そして実際の距離が短くなったときにエンゲージする必要があります。Alistarは長いアプローチを嫌い、短いウィンドウをクリーンに罰することを愛します。

タンクエンゲージのマッチアップは、常にAlistarにとってスキルマッチアップですか?

必ずしもそうではありません。両方のサポートが接触を望む場合でも、誰がテンポをコントロールするか、誰がより良いフォローアップを持っているか、そして誰が戦闘の2回目の波に対応できるかによって、マッチアップは大きく変動する可能性があります。一部のエンゲージミラーは、紙の上ではバランスが取れているように見えますが、Alistarが常に先に行く必要がある場合や、自身のものよりも強力なカウンターイニシエーションを開いた場合、不利になります。これらは単なるメカニカルなデュエルではありません。それらは主にターゲット選択、タイミング、そしてチーム構造の戦いです。

Alistarのカウンターマッチアップをエンゲージまたはピールでプレイするかどうかをどのように判断しますか?

1つの簡単な質問を自分に問いかけてください:あなたのエントリーは、敵の脅威を放置した場合よりも多くの価値を生み出しますか?もしそうなら、クリーンなエンゲージを探すことができます。そうでなければ、コンボを保持し、相手のタイミングを崩し、キャリーを保護し、彼らの最初の試みの後にファイトをスイングするのが最善です。多くのAlistarプレイヤーは、原則としてエンゲージしたがるためにゲームを失いますが、真の勝利シーケンスは、まず敵のミスを吸収し、その後、より短く、よりクリーンな再エンゲージでファイトをひっくり返すことです。